The Caesar salad just turned 100 years old!

For my family, a Caesar salad is the only salad to serve on special occasions. But it all starts with a little history…

If someone told me that the classic Caesar salad was invented in Tijuana, Mexico, I’d say they were crazy. But that’s one bizarre truth in the creation of one of the world’s most iconic salads.

Famous restaurateur, Caesar Cardini, ran a restaurant in San Diego back in the early 1900’s. But when Prohibition hit the states, he opened another location in Mexico…Tijuana, to be exact, luring many of the day’s Hollywood stars across the border. They could gamble in Mexico, and they could feast on food and alcohol at Cardini’s.

The story goes that one July 4th, they were running out of food, and thinking quickly, Cardini created a salad at the spur of the moment, using only the ingredients he could find in the kitchen. Having the chef assemble the salad tableside meant it came with a grand performance, and word quickly spread of the incredible “Caesar salad.” (Cardini named it after himself.) Cardini’s is still at its original Tijuana location, and they serve thousands of Caesar salads, with a flamboyant tableside show, to tourists.

Though Cardini didn’t believe anchovies should be in his salad (they say Worcestershire was used instead), anchovies were eventually added when his brother, Alex, tweaked the recipe years later. (The Worcestershire was removed.)

It needs to be said that raw egg yolks are used in Caesar salad, and if you’re not comfortable using them because of salmonella concerns, you shouldn’t. Sometimes coddled eggs (slightly boiled) are used. Some stores, though not many, sell pasteurized eggs in the shell. I haven’t had a chance to use them–or even find them. And now you can get liquid eggs, whole eggs that have been pasteurized and come in a carton. The problem is that you only need the yolks, and you can’t separate them from the whites. (Nonetheless, I gave it a shot and it wasn’t half bad. But far from the perfection of using real yolks. See the bottom of this blog.)
For many, including myself, it ain’t a Caesar without raw egg, so I’m willing to take my chances.

This Caesar recipe remains the best I’ve ever had.


The ingredients.


The first really important ingredient to get is a wooden bowl. No other bowl will do. We have an old wooden bowl at home with almost mystical properties that is used for nothing but our Caesar salad, and I have to say that it makes all the difference in the world.


The mystical wooden bowl. Years of Caesar salads have given it a special seasoning.


Once you have the bowl, what matters most is the freshest, best quality ingredients you can find: farm-fresh eggs, not supermarket ones…Parmigiano Reggiano, not generic Parmesan. The best quality extra virgin olive oil. Fresh lemon juice. Freshly cracked black pepper. High-quality anchovies. And organic Romaine lettuce. (Organic bibb or leaf lettuces make great substitutes.)

After that, it’s all about the love.


The process begins…

4 raw egg yolks
8 oz. good quality extra virgin olive oil
2 tablespoons Dijon mustard
fresh garlic (optional…see below)
1 1/2 teaspoons black pepper
4 anchovies
the juice of 1 lemon
4 oz. grated Parmigiano Reggiano cheese
2 large heads organic Romaine lettuce, washed, stems removed, torn by hand

Place the egg yolks in the wooden bowl and whisk them until well mixed.

While whisking the yolks, pour the olive oil in the bowl VERY SLOWLY, whisking all the time, never stopping. Keep pouring the olive oil slowly until you’ve whisked all of it into the eggs and you get a beautiful emulsion.

Keep whisking and add the Dijon mustard, then the black pepper. You might need someone to hold the bowl for you as you whisk. Or…place a wet kitchen towel under the bowl to stabilize it.

In a separate small bowl, mash the anchovies with a fork–even better, use a mortar and pestle, if you have one. Don’t leave any chunks. Slowly add the mashed anchovies to the wooden bowl, mixing them in with the whisk to combine the ingredients. You want them to dissolve completely in the dressing.

Once the dressing has reached its desired consistency, add the lemon juice and whisk some more.

When it’s all mixed together, dip a finger in the dressing and give it a taste. Does it need more lemon juice to cut the oil? Slice a second lemon and add a little. Taste again. Enough black pepper? There should be enough salt from the anchovies and the cheese is still to come.

If you think you’ve “got it,” sprinkle in the Parmigiano Reggiano, whisking slowly. Then add the Romaine leaves to the salad bowl and toss gently to coat the lettuce.

When serving, top each salad serving with a little more cheese. Extra anchovies are optional.


If you’re saying “where’s the garlic?” …you’re right. Every good Caesar needs some. This recipe would use about 1 teaspoon of fresh, finely chopped garlic, added after the mustard. If I’m cooking alone, I always add the garlic. But we have people in our household that are allergic to garlic, so when family is here, we leave it out. The flavors of the dressing are so deliciously intense, you’ll be surprised how good it is without it!


Recently, I came across a recipe that is not a traditional Caesar, but is close enough for rock ‘n’ roll. It has several ingredients that a true Caesar wouldn’t include, like bacon and hard-boiled eggs, but there’s no denying it’s absolutely delicious, especially when you toast the croutons in the bacon fat!


1 large head of Romaine lettuce
1/2 lb. bacon, cubed
1 clove garlic, minced
2 anchovies
2 hard-boiled egg yolks
Juice of half a lemon
1 teaspoon capers
1 teaspoon Dijon mustard
1/4 cup (or more) freshly grated Parmigiano Reggiano
Olive oil
Bread for croutons

Since the bread is the only non-gluten-free ingredient in the salad, if you want it to be gluten-free, just use GF bread, or skip it altogether. Chop the bread for croutons into small cubes. Set it aside.

Fry up half a pound of bacon, leaving the fat in the pan. Make sure the bacon is crispy. Chop it up and place it in a bowl on paper towels. Set it aside.


Spread the bread cubes in a single layer on a sheet pan in a convection oven and bake it at a low temperature, 150° or so, until it’s brown and toasted, tossing the cubes around every 10 minutes. Remove it from the oven and set it aside.


Take the pan with the bacon fat and heat it. Add the garlic. Fry the garlic for a few seconds, then add the croutons and toss them around until they’re cooked and the bacon fat has been absorbed. Remove the pan from the heat and place the croutons in a separate bowl.

Chop up the lettuce and place it in a large bowl. Set it aside.

Chop up the two hard-boiled egg yolks and placed them in a large wooden bowl, big enough for the salad. Add the juice of half a lemon, the Dijon mustard, and the capers.

Using a fork, squish the anchovy fillets on a cutting board into a paste and add them to the bowl.

Whisk everything together for a minute, then slowly add the olive oil in a tiny stream as you continue whisking, until you get the consistency of the dressing that you like. Season with salt and pepper. Add the grated Parmigiano Reggiano. Whisk again.


Add lettuce to the dressing and toss with tongs. Then add the croutons and bacon bits to the salad and toss one last time.


Not a true Caesar, but delicious…and because hard-boiled egg yolks are used, there are no salmonella concerns.

The inspiration for this incredibly easy to make cocktail is the famous Capital Grille Stoli Doli. I think I’ve done it one better with my Velvet Elvis.


A Stoli Doli is simply Stoli vodka that has been infused with fresh pineapple. If you sit at the bar at the Capital Grille, you won’t be able to miss the very large jar of freshly-cut pineapple pieces swimming in vodka. They literally pour it “from the tap,” and serve it straight up, like a martini, or on the rocks. It’s delicious, and I’ve certainly had my share of them.

I decided to make my own at home one day, to serve to my friends at an upcoming party. But to my disappointment, I didn’t have any Stoli vodka in the house. (An embarrassment to most Lithuanians.) But…I found a bottle of Stoli Vanilla, and it was a real game-changer! I used that instead of regular Stoli and I came up with a sweeter, smoother drink that is now legendary among my friends.


VELVET ELVIS

2 ripe, sweet pineapples, peeled, cored, and sliced
1.75ml Stoli Vanilla

Find a gallon-sized glass jar with a lid. Peel, core and slice the pineapples and drop the pieces in the jar. Pour the vodka in, mix well, and seal the jar. Keep it at room temperature for 7–10 days, giving it a gentle shake every day.

After 7–10 days (don’t worry…a little longer won’t hurt anything), strain it, squeezing the pineapple pieces to get every bit of liquid out. Discard the pineapple pieces. (As much as you might think they would be fun to munch, they’ve given up all their flavor to the cocktail, and taste terrible!)

Keep the Velvet Elvis refrigerated. Serve with rocks (or 1 big rock!), or shaken and poured into a martini glass.


As a martini, or on the rocks!

I grow several varieties of squash and pumpkins in my garden every year, so I’ve got an overload of blossoms. They’re delicious sweet or savory.

In my savory version, the blossoms are stuffed with ricotta cheese, lightly battered, fried and served with a delicious tomato sauce.

The sweet version is directly below.

At home, we went for a sweeter version for breakfast, using pancake mix as the base, experimenting with two fillings: raspberry preserves or strawberry cream cheese.

I simply followed the directions on the box of pancake mix, using fat-free milk instead of whole milk and a little less of the dry ingredients to make the batter thinner than I would use for regular pancakes. I use King Arthur Gluten-Free Pancake Mix, which requires adding an egg and melted butter to make a smooth, slightly sweet batter. I set that aside and let it rest for a few minutes.

Next, it’s off to the garden to snip a handful of squash blossoms. I prefer the ones that are open. They’re easier to stuff, but it’s also easier to spot the little critters that like to make themselves comfortable inside. I carefully snip the blossoms off the plant, then give them a light shake, which is enough to convince the bugs inside to fly out. It’s pretty cool to find a happy bee inside every blossom that I snip.


Other than making sure all foreign particles (and insects) have been removed from the blossoms, and pulling out the stamen, no other preparation is needed. I snip the stems right up to the blossom, and they’re ready to be stuffed.


Blossoms stuffed with strawberry cream cheese and the fantastic raspberry preserves from Briermere Farms on the North Fork of Long Island!


I heat a few inches of grapeseed oil (or any other high smoke point oil) in a pan to 325 degrees, then start the process: I stuff the blossoms, closing the flower petals around the stuffing, then carefully dip them in the pancake batter, and release them gently into the oil, flipping them as they fry, until they’re golden in color.


I drain them on paper towels, dust them with powdered sugar, and they’re ready to be enjoyed.


For the savory version, I make my own batter.

1 cup all-purpose flour
1 teaspoon baking powder
1 teaspoon salt
1/2 cup low-fat milk
2 large eggs
1 teaspoon olive oil
water, as needed

Combine the flour, baking powder, and salt in a bowl. In another bowl, whisk together the milk, eggs and olive oil.
Add the dry ingredients to the wet, and mix well. If the batter is too thick, add water until it’s smooth and looser than pancake batter. If it’s too thick, it’ll get clumpy. You want it to be thin–just enough to coat the blossoms well, without too much batter on each one.


Fresh out of the garden!


For the stuffing…

1 cup ricotta cheese
1/2 cup shredded mozzarella
pinch of salt
pinch of oregano

In a bowl, mix the stuffing ingredients well.

Add a small spoonful of the stuffing into the cleaned and prepared squash blossoms. Dip them in the batter to coat, then gently place them in a pan or deep fryer with grapeseed oil, or other high smoke point oil at 325 degrees.


Stuffed and ready to dip in the batter. (I eat the baby squashes attached as well!)


Fry them until they’re golden, placing them on a metal rack to cool and to let the oil drip off.


I prefer a deep fryer over a pan of oil.


Season with salt while they’re hot!

They’re delicious by themselves or with a little marinara sauce on the side.

ZOOKEENEE BREAD

Posted: July 7, 2024 in Uncategorized

I’m pretty good at keeping the zucchinis in my garden harvested on a regular basis, so they don’t get too big. But once in a while, I miss one, and it gets to be huge. That’s when it’s time to make zucchini bread.


I was recently told that zucchinis are green…summer squash is yellow.  I use the word “zucchini” interchangeably, but technically, the variety I grow is, in, fact, a zucchini…or both, depending how you look at it!


Whatever you call it, use it! And make some delicious bread!

I slice the zucchini lengthwise, and remove the center section with all the seeds, because I don’t want that in my bread. Then I grate the rest. This recipe needs about 2 1/2 cups of grated zucchini, about 16 ounces.

When it comes to baking, I use my small kitchen scale to make most of the crucial measurements, because accuracy counts. It’s much more accurate than going by volume. But this recipe has both measurements, so you can try either method.

Substituting gluten-free flour for the basic all-purpose flour, will make this recipe gluten-free. I like to use the all-purpose GF flour by Cup4Cup.

And I like using olive oil as my vegetable oil, because I love the flavor and its health benefits. But feel free to use whatever vegetable oil you like.


2 cups (227g) all-purpose flour
1 teaspoon baking powder
1 teaspoon baking soda
1 teaspoon Kosher salt
1/2 teaspoon cinnamon, optional
1 cup (213g) light brown sugar
1/2 cup (100g) granulated sugar
scant 3/4 cup vegetable oil
1 teaspoon vanilla extract
2 eggs, lightly beaten
2 1/2 cups grated zucchini (about 16 oz.)

Preheat the oven to 350°.

Grease an 8 x 8“ or 5″ x 10″ loaf pan with some of the vegetable oil. Then line it with parchment paper…it makes it easier to remove later.

In a bowl, mix together the first five ingredients.

In a separate bowl, combine the remaining ingredients except the zucchini.

Add the grated zucchini to the bowl with the flour mixture and toss it around to coat.


Add the dry mixture to the wet mixture and stir until it’s combined.


Pour it into the pan. 


Bake until a toothpick comes out clean, about 45 to 60 minutes…but it could be even longer. Every oven is different, and different zucchini can have different moisture levels, so you may need to cook yours longer, depending on your situation. Even with all the high-tech thermometers I have, I find the good old-fashioned toothpick method works best.


Remove the baking pan from the oven and let it cool for 15 minutes. Then turn it over on a wire rack, removing the pan, and let the zucchini bread cool completely to room temperature before slicing.

This bread is so good, I just might let the zucchini overgrow more often!

It seems like the popularity of shishito peppers has exploded overnight. Once a rare treat that I could only get on the menu at one of my favorite Boston restaurants, Toro, now they’re everywhere: farmers markets, bistro and pub menus, and of course…my own garden!

Shishito peppers are mostly mild…but you can get hold of a spicy one every 10 peppers or so…kind of a Russian pepper roulette!

Shishitos straight from the garden!

Shishitos are incredibly easy to grow…just like any other pepper. They love a full day’s worth of sun, and lots of fertilizer. If you have success growing tomatoes, shishitos should be on your list. Plus, they’re really quite prolific: it’s not uncommon to find a couple dozen peppers growing on each plant!

Shishitos are also easy to prepare, and take just minutes. Ideally, if you’ve already got a charcoal grill going, you’re almost there. Simply place the shishitos in a bowl and drizzle in a little olive oil. Toss the peppers to coat, and place them directly on the ashed-over coals of the fire. Work quickly turning them over with tongs. You want them to blister, but you don’t want them to burn! They’ll pop, deflate, and get soft. That’s when they’re ready. Simply place them on a serving plate, and sprinkle some really good sea salt (I like Fleur de Sel) over them while they’re still hot.

If you don’t have the time for a charcoal grill, you can still prepare delicious shishitos by placing them in a pan. Sprinkle in a little olive oil, and toss them around to coat them. Turn the burner on high, and cook the shishitos until they’re blistered, but not burned. Cook them on all sides, carefully flipping them over with tongs. Like on the charcoal, they will pop, deflate and get soft. Transfer them to a serving plate and sprinkle immediately with salt.

To enjoy shishitos, you simply grab them by the stem and bite!

I find little or no difference between the stove in my kitchen and an outdoor gas grill…so I don’t own one. I can make a perfectly delicious steak by searing it in a cast iron pan on the stovetop, then finishing it in a hot oven. So, for me, if the real reason for outdoor grilling is flavor, nothing can replace a hardwood charcoal grill.

Besides the quality and source of my beef, wood and smoke are what make the difference between a good steak and a great steak.

beef brisket

I know the #1 argument for going with gas over hardwood charcoal is time. “It takes too long to start a charcoal grill.” That’s completely untrue. It takes no more time to light a charcoal fire than it does to start up a gas grill.

Of course, it starts with the grill itself. The classic Weber is still an awesome choice. For larger cooking needs, I also have a Primo ceramic grill.

Then I get a bag of hardwood charcoal. I’m not talking charcoal briquets, like Kingsford, that have a ton of additives in them. And I’m definitely not talking about Match Light. I’m talking pure hardwood charcoal, easily found in supermarkets and home stores.

Next: a charcoal chimney. It’s a metal tube with a handle and a grate at the bottom. I crumble a couple of sheets of newspaper into the bottom, pour charcoal into the top, light it, and I have hot coals in 10 minutes without lighter fluid.

And I NEVER use lighter fluid! Why spend good money on a great steak only to make it taste like gasoline?

The variety of wood chips available for smoking is another flavor factor when it comes to grilling with charcoal. My personal favorite is hickory, especially when I’m cooking pork or chicken. But apple, cherry, oak, mesquite: they all impart their own unique flavors. And they’re all available in most home stores where you find all the other barbecue gear.

Although I have an electric smoker for those low-and-slow jobs, like a big ol’ brisket or pork shoulder, I don’t need it when grilling a steak. I simply soak some wood chips in water for about a 1/2 hour before grilling (I’ve found that hot water speeds the process up), drain the water, and then sprinkle the moist chips on the hot coals in my grill. I throw the meat on the grill, close the lid (opening the vents, of course) and off we go.

So now, in 10 minutes, I’ve got a grill that’s ready to cook a steak with…about the same time as gas.

If you say: “I don’t cook with charcoal because it’s so messy!” …I honestly don’t know if you and I can be friends.

Because I’m using a small amount of hardwood charcoal for the average dinner, I don’t have to clean out my grill every time I use it. After a while, yes, some ashes pile up in the bottom of my grill and I have to dump them. But because they’re pure wood ashes, I can dump mine into my strawberry or raspberry patch. They love the stuff.

You still have to clean a gas grill after a while, and it always runs out of propane halfway through cooking when you have guests over for dinner. So where’s the convenience in that?

Charcoal grills give you everything you could ask for: low maintenance, ease of use–no propane tanks, valves and igniters–real wood flavor, not lava rocks, and the thrill of cooking meat over a real fire, bonding with the caveman in you. Grab a beer–or even better: a bourbon on the rocks–and start grilling!

I had a pound of leftover lobster meat (I know, I know…how could you ever have leftover lobster?!) So I wrapped it tightly and kept it frozen. When I had a craving for crab cakes, I figured I’d try my recipe out with lobster instead. Wow…so good, I sprained my arm patting myself on the back!


lobstercake2


1 lb. cooked lobster meat (thawed, if frozen)
1 cup mayonnaise (I like Hellman’s)
1/4 cup Dijon mustard (I like Maille)
1 to 2 teaspoons Old Bay seasoning
3/4 cup saltine crackers or oyster crackers
Olive oil

In a bowl, combine the mayo, mustard and the Old Bay Seasoning.

Chop the lobster into small pieces and add it to the mayo/mustard mix.

Pulse the crackers in a food processor until it resembles oatmeal. Add that to the bowl and gently combine the ingredients.

Form small patties. I use either a small beef slider mold or the lid from a small mouth Mason jar. I won’t kid you: it gets messy, but it’s worth it! Place the patties on a sheet pan lined with parchment or Reynold’s non-stick aluminum foil.

Place the sheet pan in the freezer for about 15 minutes to stiffen up the patties.

Heat some olive oil in a pan over medium-high heat. Cook the patties on both sides, flipping carefully, until golden brown. Since the lobster meat is already cooked, you don’t want to overcook them!


lobstercake1

If you’re trying to think of something new and interesting to bring to the July 4th celebration, this is it. It was a huge hit when I brought it to a neighborhood party a while ago.

Imagine the best of a deviled egg and a BBQ chicken sandwich, and you’ve got this appetizer that rocks in more ways than one….and you can make it ahead of time.

I boil the eggs and make the cole slaw the day before, then keep them in the fridge. Even the chicken can be cooked the day before and then warmed through before assembling right before you need it. Be sure to make a lot of them…they’ll go faster than the hard-boiled eggs in “Cool Hand Luke!”

This recipe is gluten-free, as long as you use GF soy sauce.


_DSC6511

For the chicken and BBQ sauce:
3 cups ketchup
1 tablespoon apple cider vinegar
2 tablespoons soy sauce
1 teaspoon hot sauce (I use Frank’s Red Hot)
1/4 cup + 2 tablespoons brown sugar
1 lb. boneless skinless chicken breasts
For the cole slaw:
2 tablespoons mayonnaise
1 tablespoon rice wine vinegar
1/2 teaspoon sugar
2 cups finely shredded cabbage
For the deviled eggs:
6 hard-boiled eggs
1/4 cup mayonnaise
1 tablespoon mustard (I use Gulden’s)

Pre-heat the oven to 250 degrees.

Combine the ketchup, apple cider vinegar, soy sauce, hot sauce, and brown sugar in a oven-proof pot with a lid. Mix well, then add the chicken breasts, making sure they’re immersed in the sauce. Cook low and slow in the oven for about 2 hours.

When the chicken is cooked through, shred the meat with 2 forks. Set it aside, but keep it warm.

Combine all the cole slaw ingredients in a bowl, mixing well, and place them in the fridge.

For perfectly hard-boiled eggs, place the eggs in a pot of cold water, and turn the heat on high. Just before the water starts to boil, put a lid on the pot and turn the heat off. Let the eggs sit in the hot water for 15 minutes. Once cooked, keep the eggs in the fridge.

Slice the eggs in half and place the yolks in a bowl with the mayonnaise and mustard. Mix well and keep in the fridge.

To assemble, take a teaspoon of the mayo/mustard/yolk mixture and place it in the cavity of one of the egg halves. Place another teaspoon of the shredded chicken on top (I like it warm, to counter the cold of the mayo and cole slaw), drizzling a little of the BBQ sauce that you cooked the chicken with on the meat. Then place a teaspoon of the cole slaw on top of the chicken.

Serve immediately!

I came up with this crunchy appetizer years ago, when I needed a tasty bite for one of our summer parties. I wanted something fresh that highlighted the veggies of the season, so when I spotted these baby bell peppers in the supermarket, I got the idea. 


image

Baby bell peppers
6 ears fresh corn, removed from the cob…or organic frozen corn
1/2 Vidalia onion, peeled, quartered, grilled, chopped
1 cup mayonnaise
1 teaspoon hot pepper sauce (I use Frank’s Red Hot)
6 oz. feta cheese or Queso Fresco, crumbled
Juice of 1 lime
Pinch of white pepper
1 tablespoon fresh parsley, finely chopped


image

Cut the corn kernels from the ears, and sauté them very briefly in a little olive oil. Place them in a bowl and let them cool.

Peel and quarter the Vidalia onion, and throw it on a hot grill with a little olive oil to get some nice grill marks on it, leaving the onion still crispy, not soft. If you’re cooking indoors, throw the quartered onion in a hot pan with a little olive oil, and cook it until you get some brown marks on it. Remove it, let cool, then place it in a food processor and pulse it until the onion is chopped into small bits, just smaller than the corn kernels. Add the onions to the corn.

In a separate small bowl, combine the mayonnaise and the Frank’s Red Hot. Pour in the crumbled cheese and mix well. Pour this into the corn and onion bowl and mix well.

Add the lime juice, white pepper and parsley to the bowl and mix well again.

Cut the baby bell peppers in half lengthwise, and remove the seeds and membrane. Stuff the peppers with the corn mixture and garnish with cilantro or parsley.

If you’re preparing this ahead of time, refrigerate the stuffed peppers until you’re ready to eat, but allow some time for them to warm up to a cool, not cold, temperature.

I recently discovered a new version of chimichurri, one where I use basil instead of parsley, and I don’t know if I’ll go back to the old chimi ever again!

Chimichurri is a garlicky, herby green sauce usually used with grilled meats. This pesto-like condiment originated in Argentina and is also commonly used in Nicaragua and Uruguay. Though some recipes include cilantro, many people insist the original is made only with parsley. This time,  I decided to substitute basil for the parsley.

I’ve used this new “chimi” on salads, I’ve cooked shishito peppers with it, and recently, I had great success roasting chicken with it. To make the chimi…


1 large handful of fresh basil leaves, about 4 cups, loosely packed
1/4 cup water
1 medium onion, chopped
3 cloves garlic, minced
3–4 tablespoons fresh oregano, leaves only (or 1 tablespoon dry)
1 tablespoon paprika
1 teaspoon crushed bay leaf
1 tablespoon coarse sea salt
1 teaspoon freshly ground black pepper
pinch red pepper flakes
1/4 cup white wine vinegar
1/2 cup extra virgin olive oil

Place all the basil and the water in a food processor and begin to chop, pulsing for a second at a time. When the basil is in small pieces, stop pulsing and add the remaining ingredients, except the vinegar and olive oil. Start the processor on a full run now, and slowly pour in the vinegar, then the olive oil. Try not to make it too smooth…leave some tasty bits. Allow it to rest for at least 30 minutes, but overnight in a sealed container in the fridge is best.


I had a 4-pack of chicken thighs and a 4-pack of drumsticks in my freezer, so that’s what I used for this dish. But it’s just as easy to use a spatchcocked (a butterflied chicken where the backbone is removed so it lays flat) whole chicken, or any parts you prefer.


8 pieces of chicken
a bunch of tomatoes, cut into small chunks
3 to 4 oz. of feta cheese


Pre-heat the oven to 350.


Place the thawed chicken pieces in a baking pan, and rub them really well with a generous amount of the chimi. Get it under the skin where you can, not just the outside. (Just remember that you’re handling raw chicken, so the moment you touch the chimi with raw chicken hands, you’ve contaminated the batch! Use a separate bowl with part of the chimi, so you don’t ruin the rest.)

Let the chicken marinate in the chimi at room temp for a few hours, or in the fridge overnight.


Grab a bunch of tomatoes, cut them up, removing some of the seeds (but not really worrying about it either way) and mix a little chimi in the tomatoes. Place the tomatoes on the bottom of the roasting pan, and place the chicken pieces on top, so the chicken skin will crisp up while it cooks.


Sprinkle the cubes of feta cheese all around and place the roasting pan in the oven, baking for about 45 minutes.


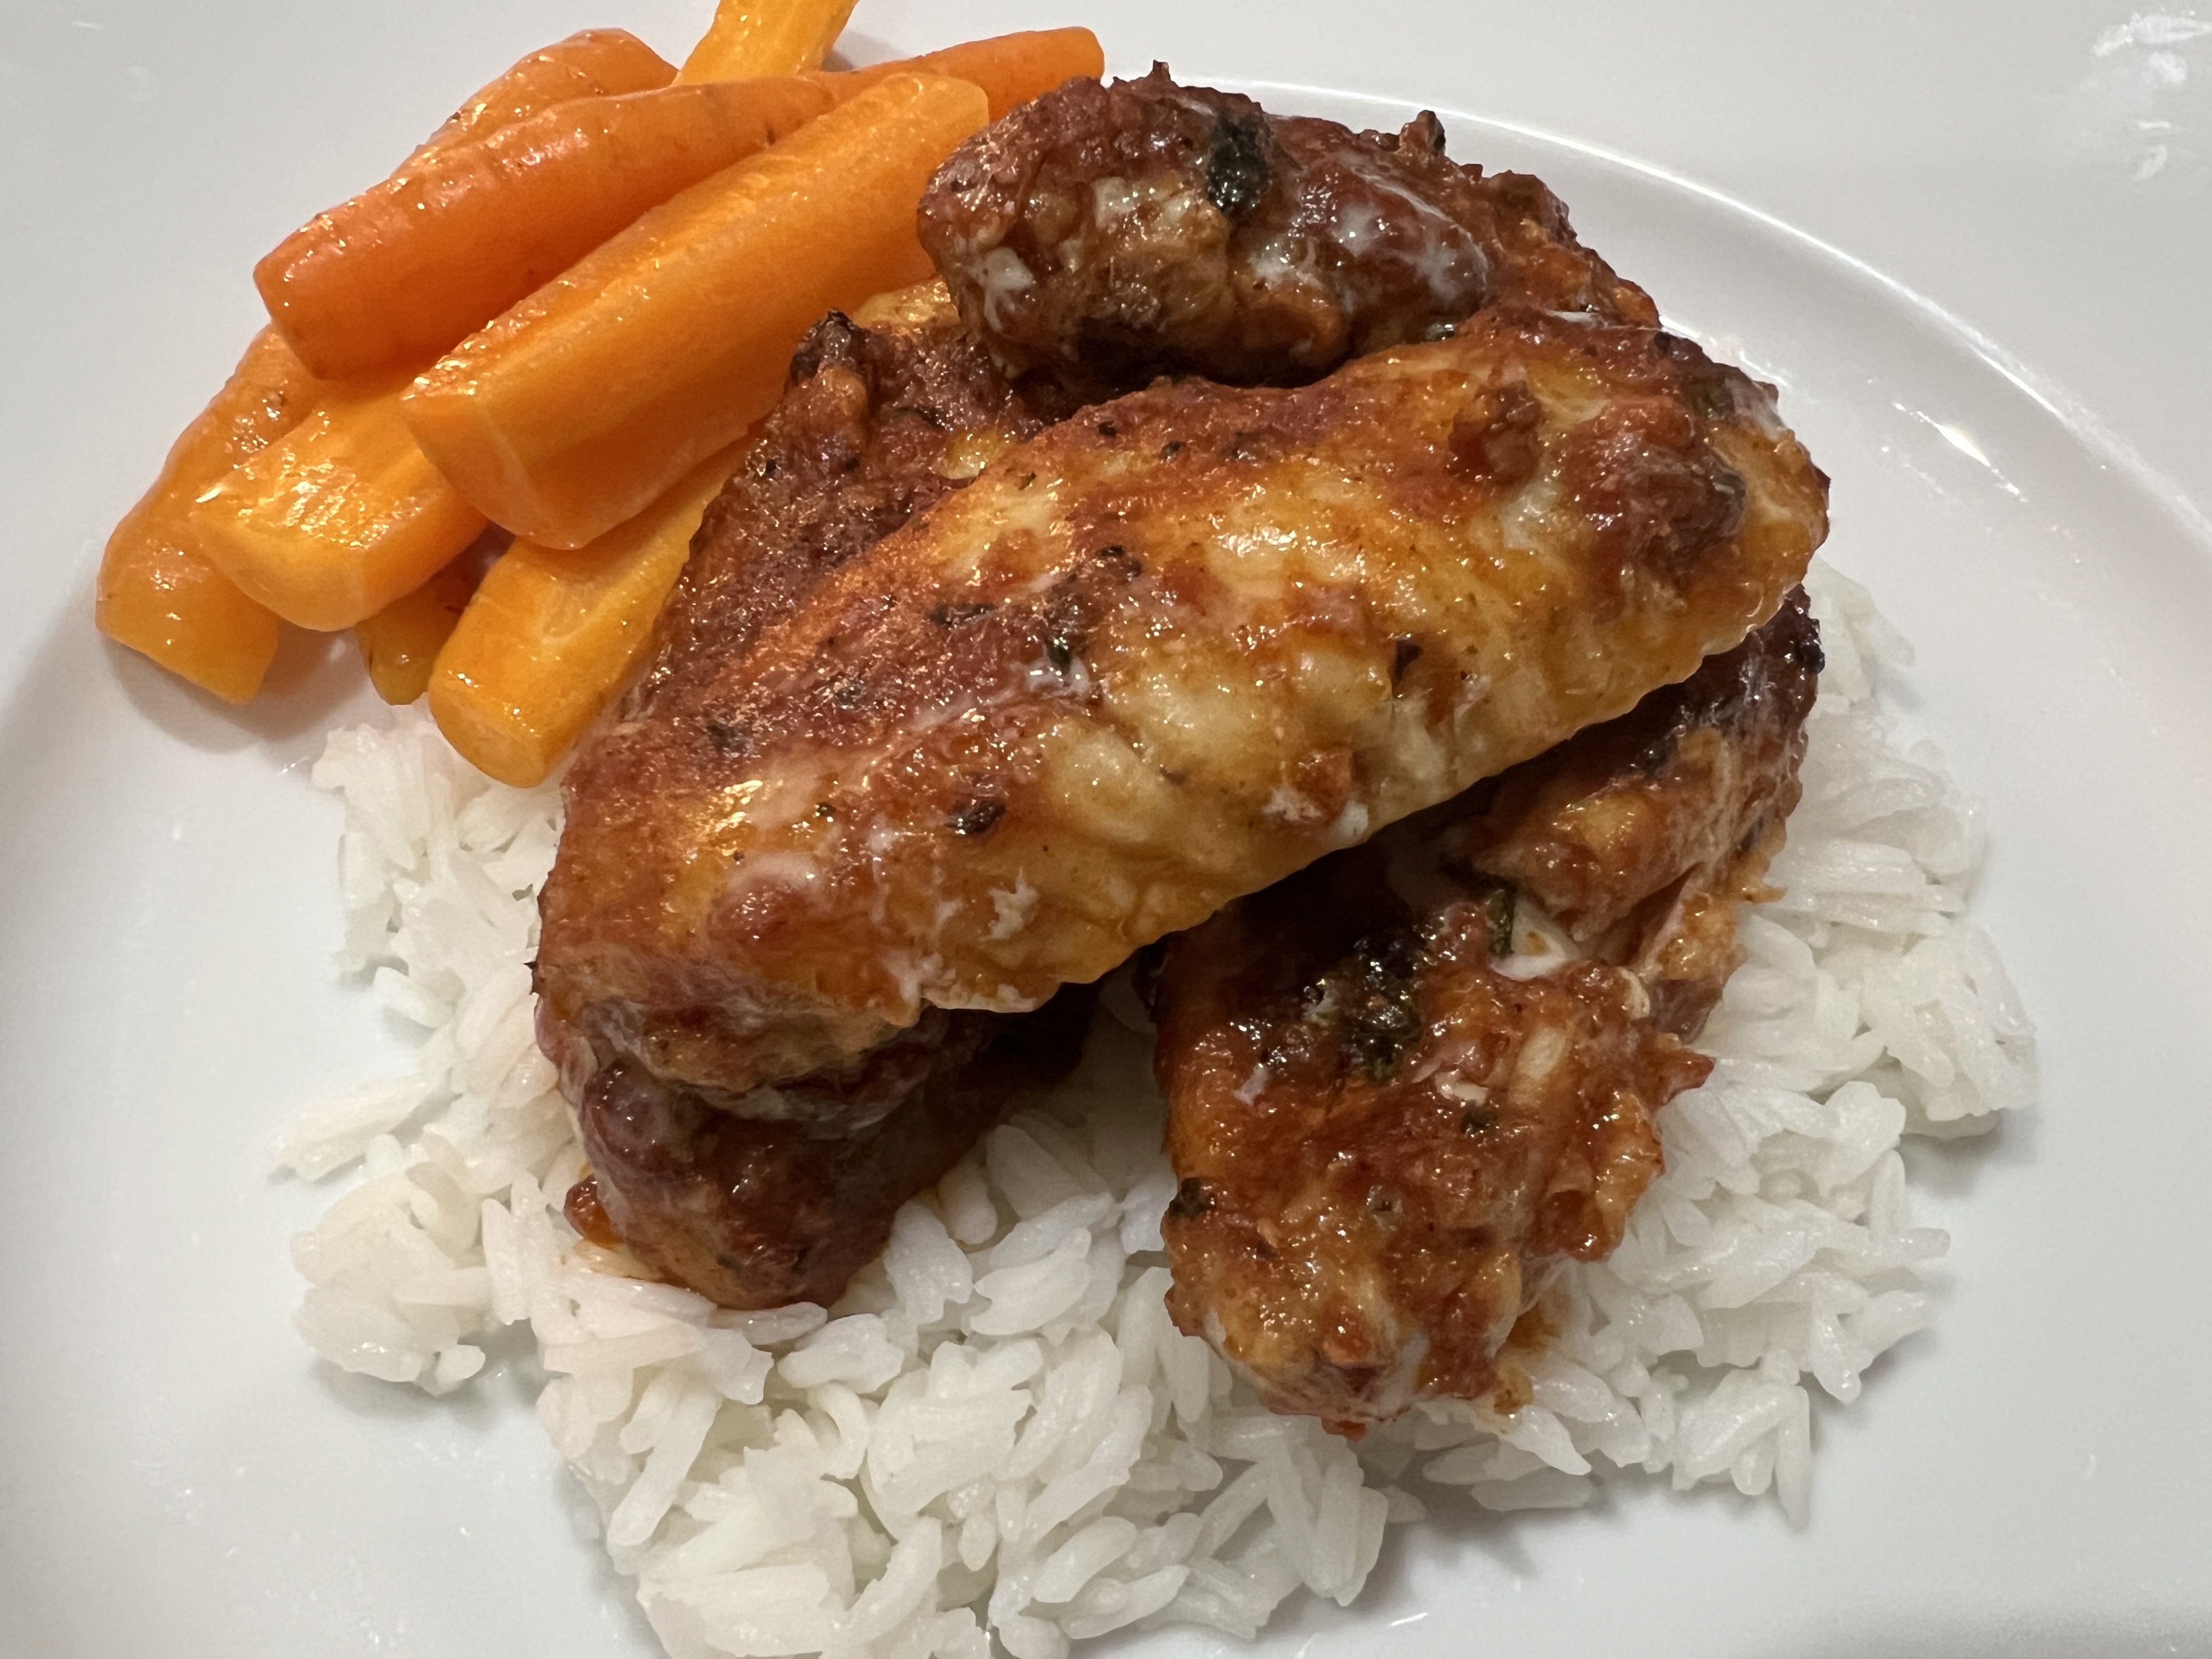
Serve over pasta, potatoes, or as I did, over rice. I simply boiled some jasmine rice, adding a 1/2 teaspoon of Italian seasoning in the rice water before cooking. No salt, no oil.