I don’t have the patience to boil Mason jars and lids and all that. But I love me my pickles, especially when this year’s garden cranked out cucumbers in record numbers!
This is such an easy way to make great pickles, it’s almost unbelievable…and no water is needed! The salt extracts just enough moisture, like when curing meat, to make it work. This method works great if you want fresh pickles to eat immediately, but if you want to keep them for longer periods of time, you’ll have to go back to the old tried-and-true methods.
Fortunately for me, I devour these pickles as soon as they’re ready!
I originally used a plastic bag for this, but a plastic container also works well. Use what you have.
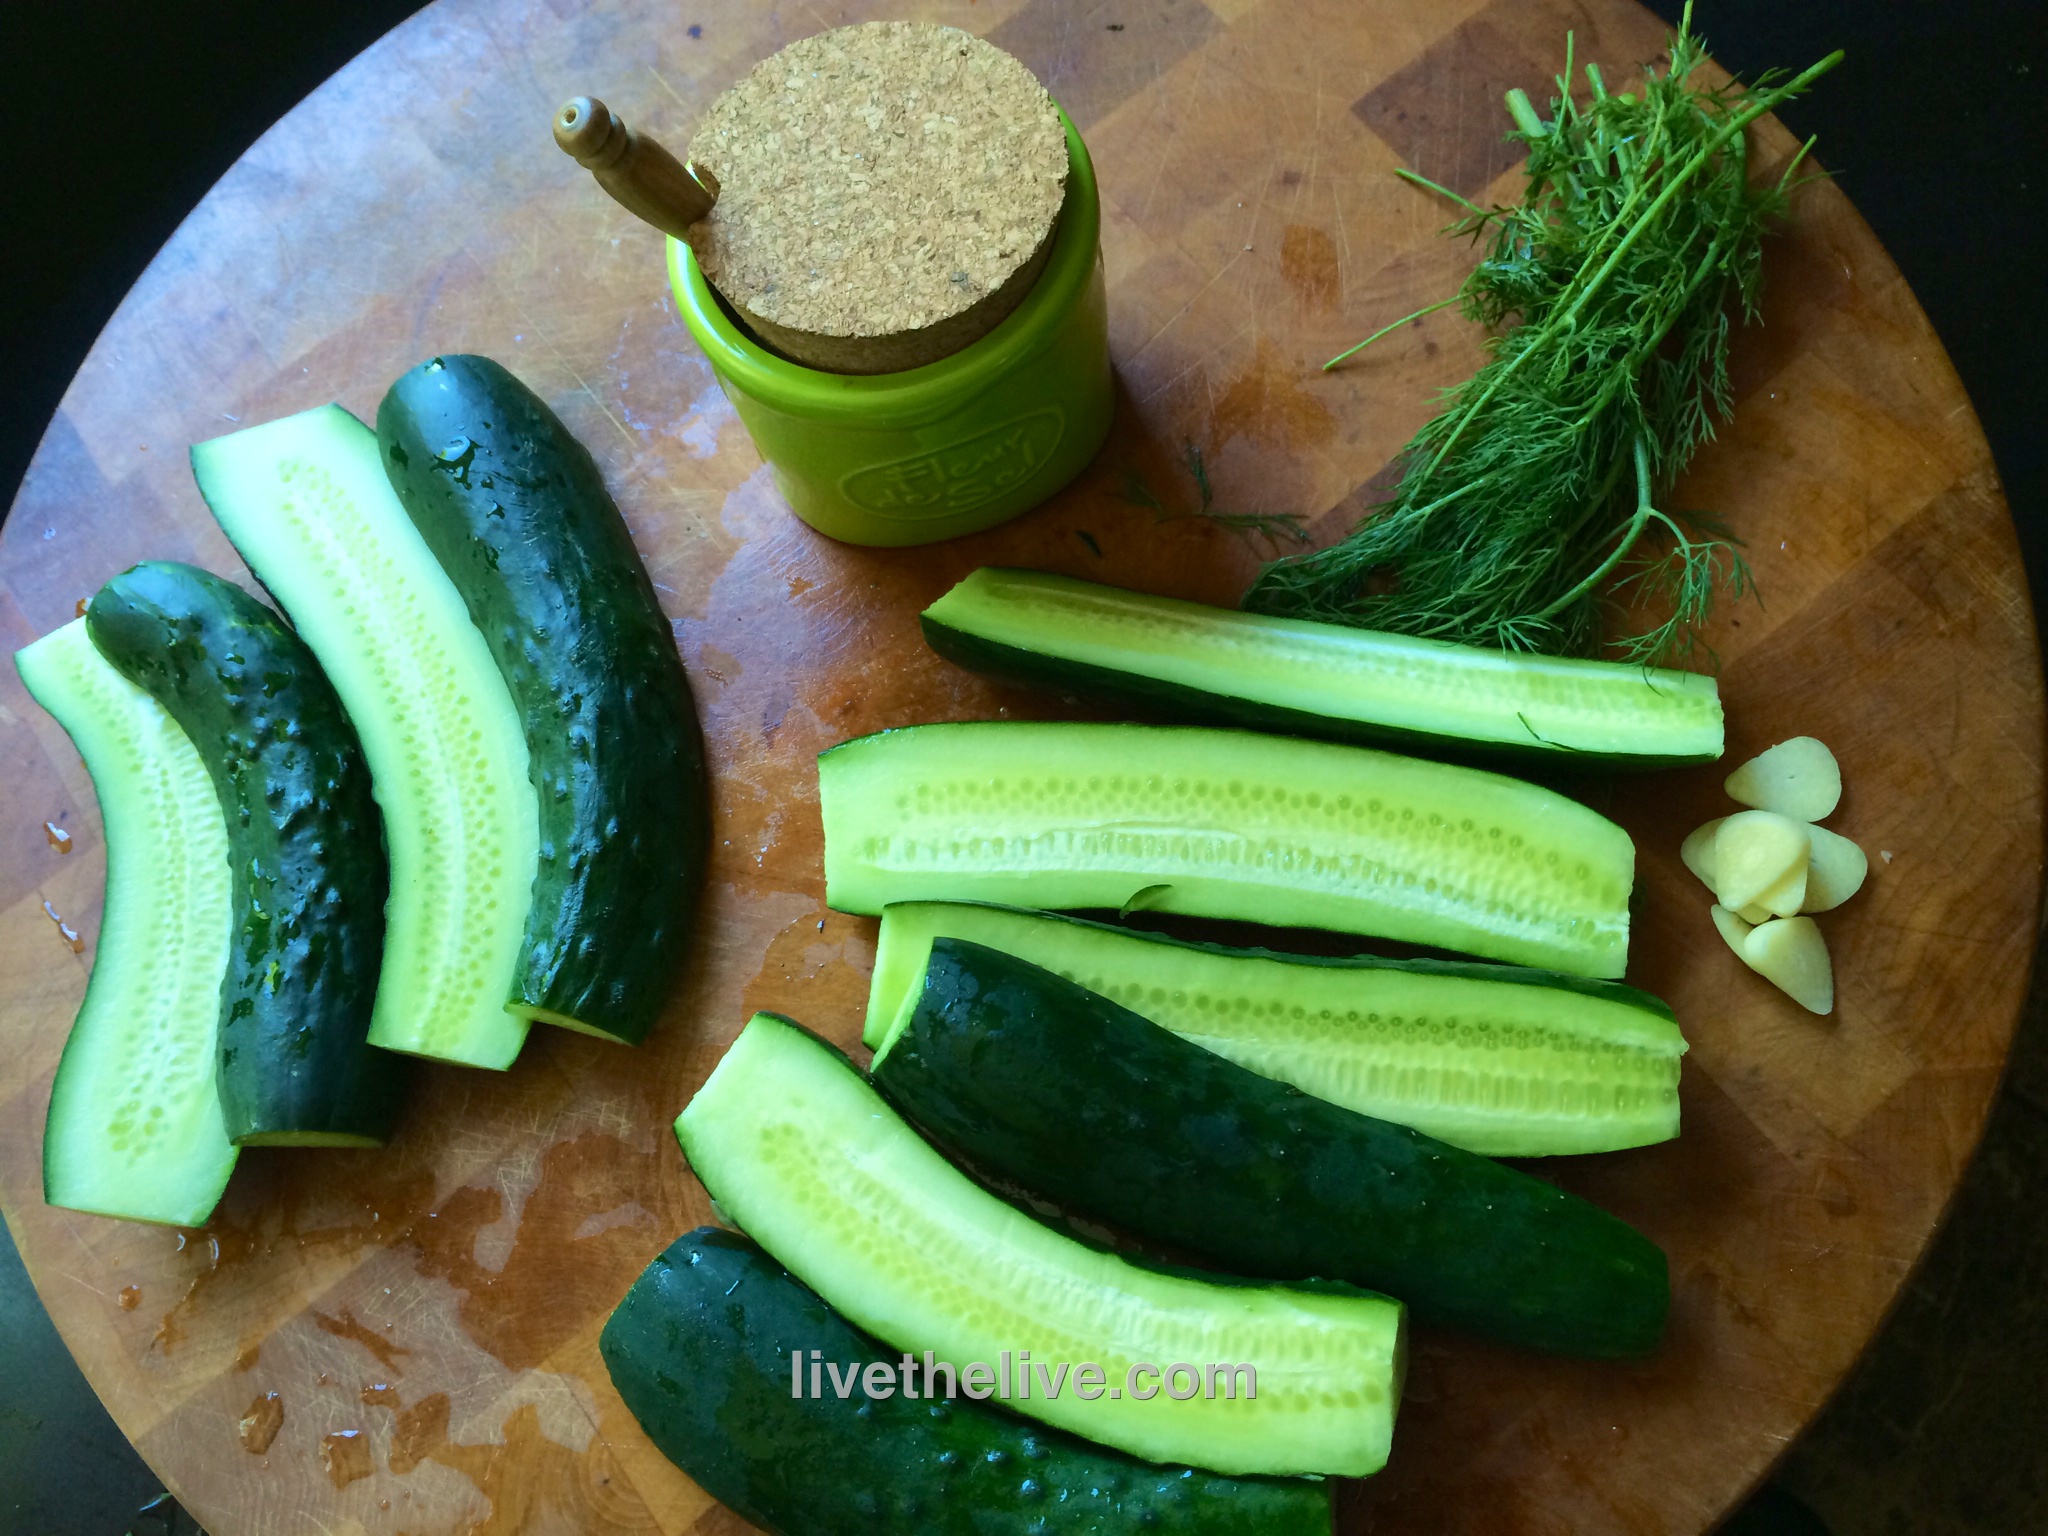
fresh cucumbers sea salt or Kosher salt a handful of fresh dill a couple of cloves of garlic, thinly sliced
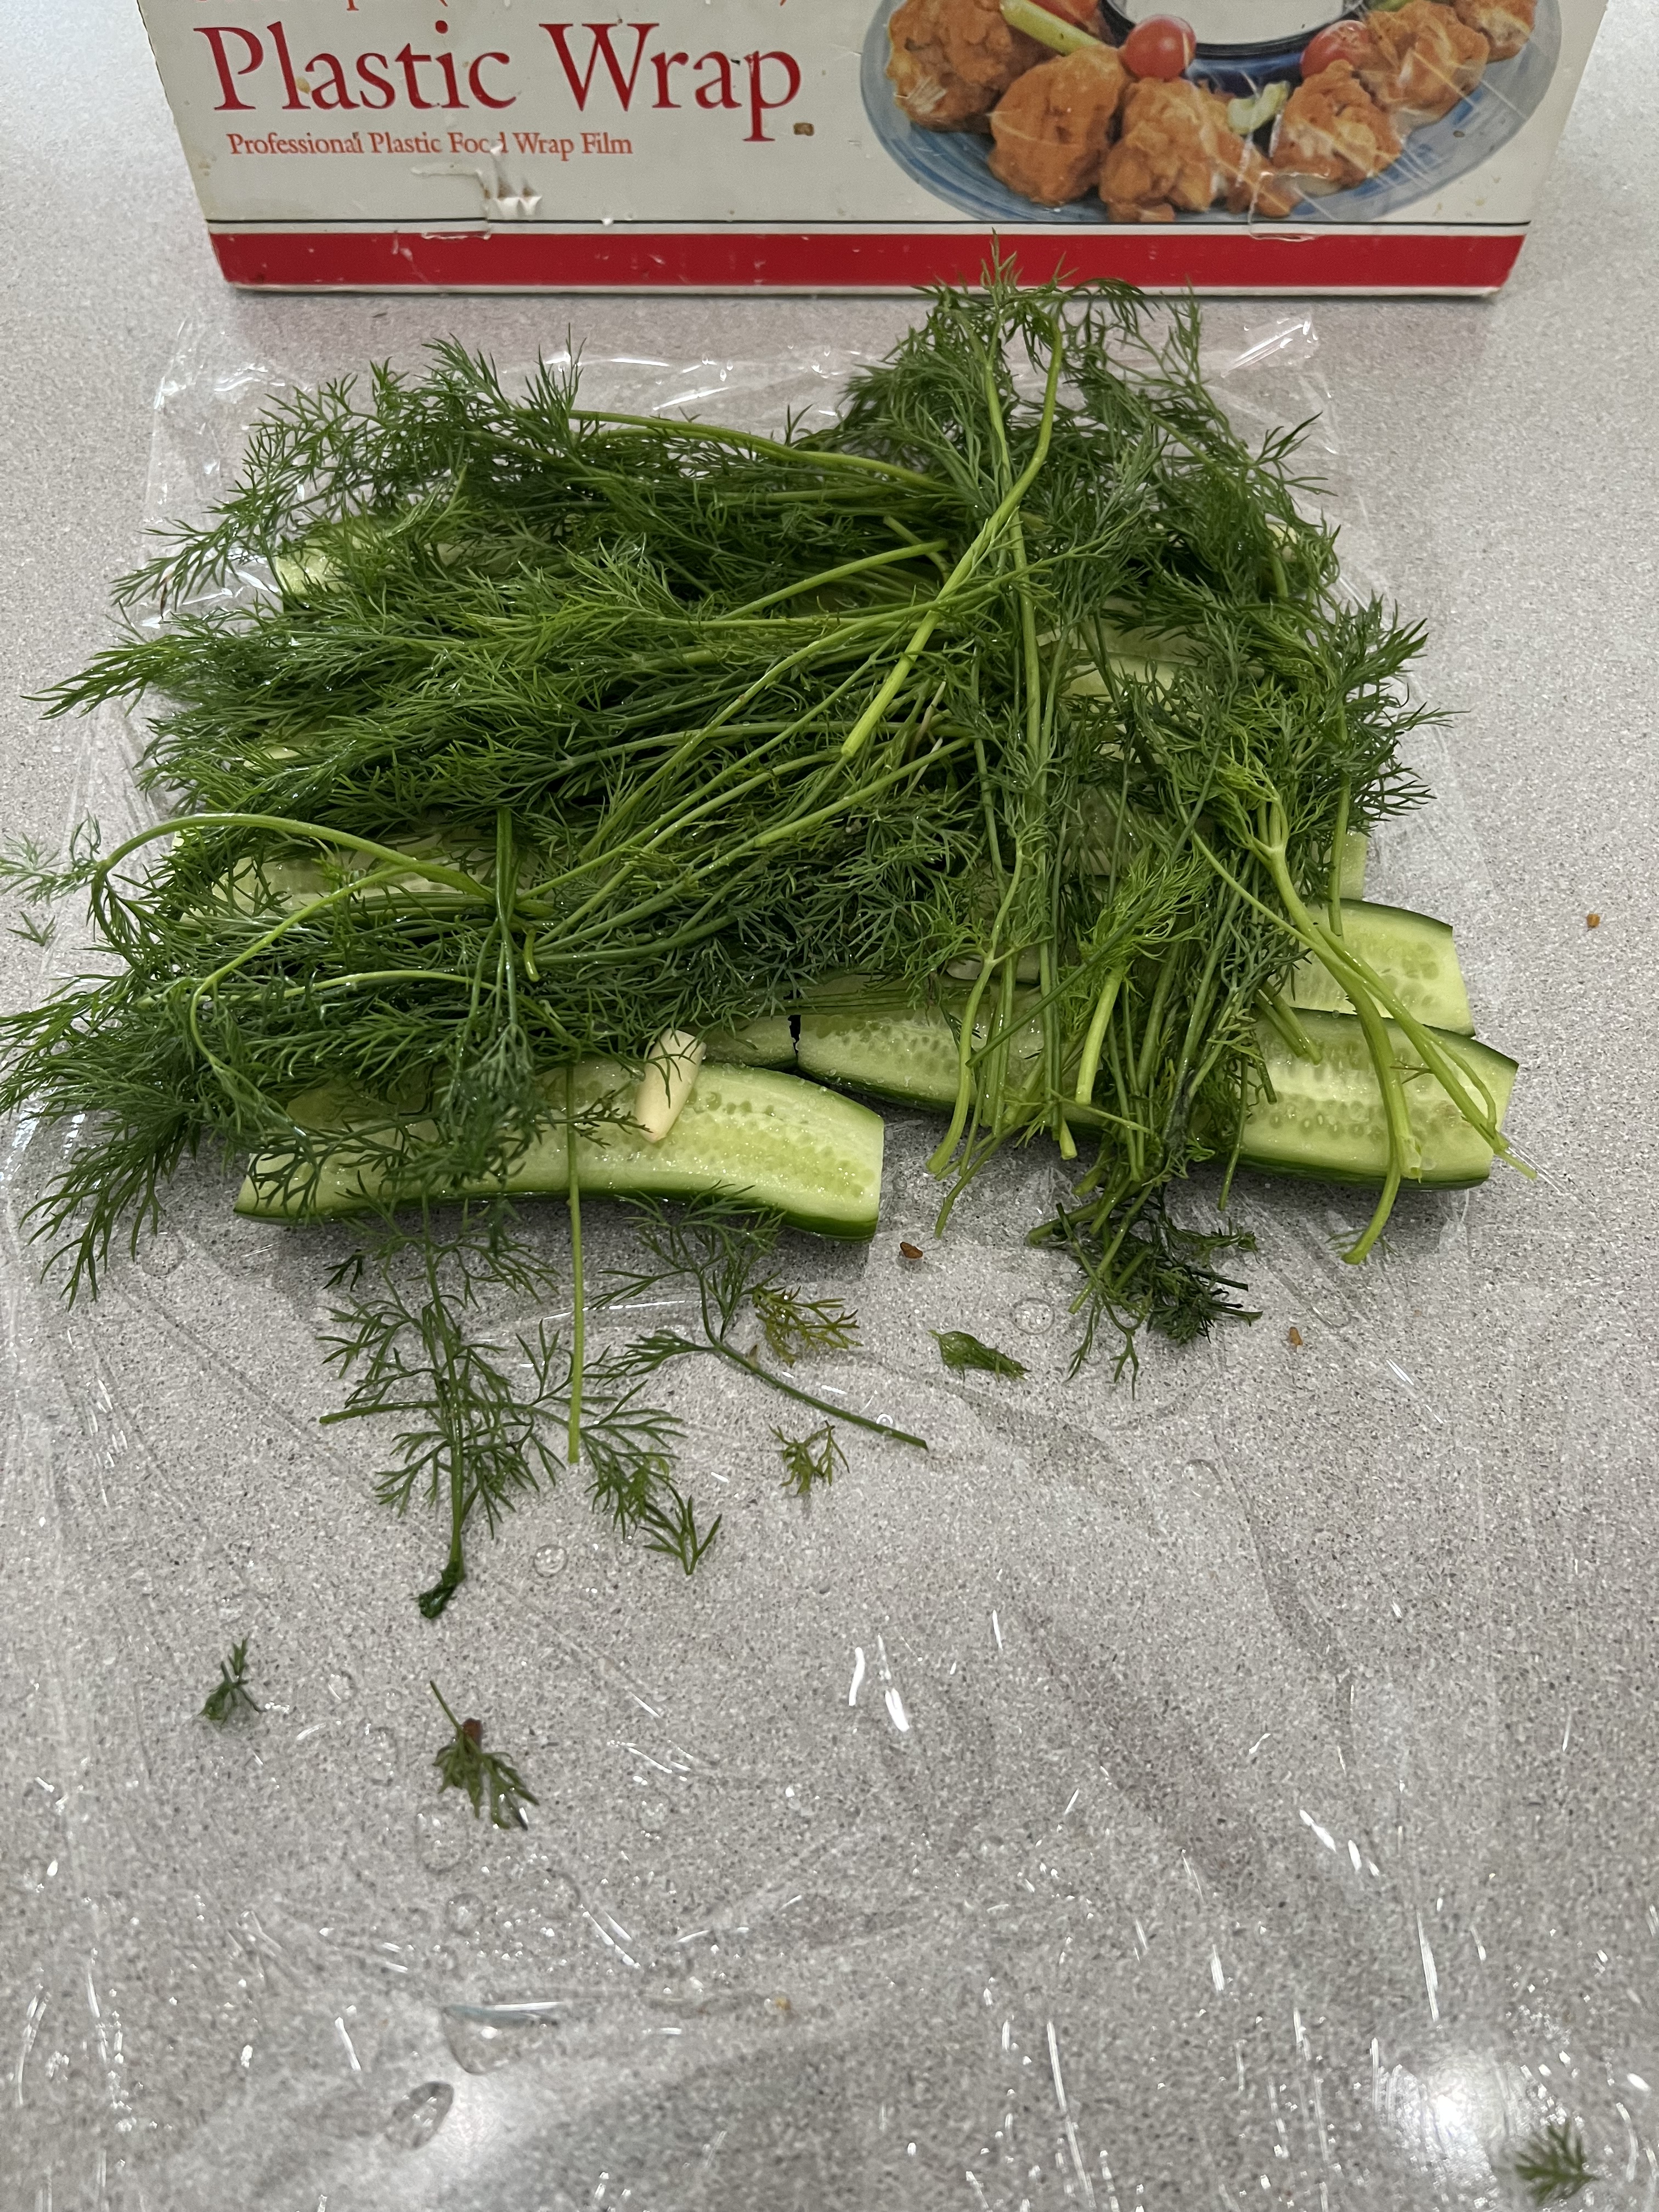
Cut the ends off the cucumbers and then slice them lengthwise, in half or in quarters. Lay them neatly next to each other in one layer in a container, or on a piece of plastic wrap, skin-side down. Sprinkle the salt over the cucumbers. Sprinkle some of the chopped garlic on top. Then, tear off some fresh dill and lay it to cover the pickles.
If using a container, you should be able to get a second row of pickles on top of the first, again sprinkling with the salt, garlic, and topping with dill.
Placing the lid on the container, squeeze out as much air out of the container as you can.
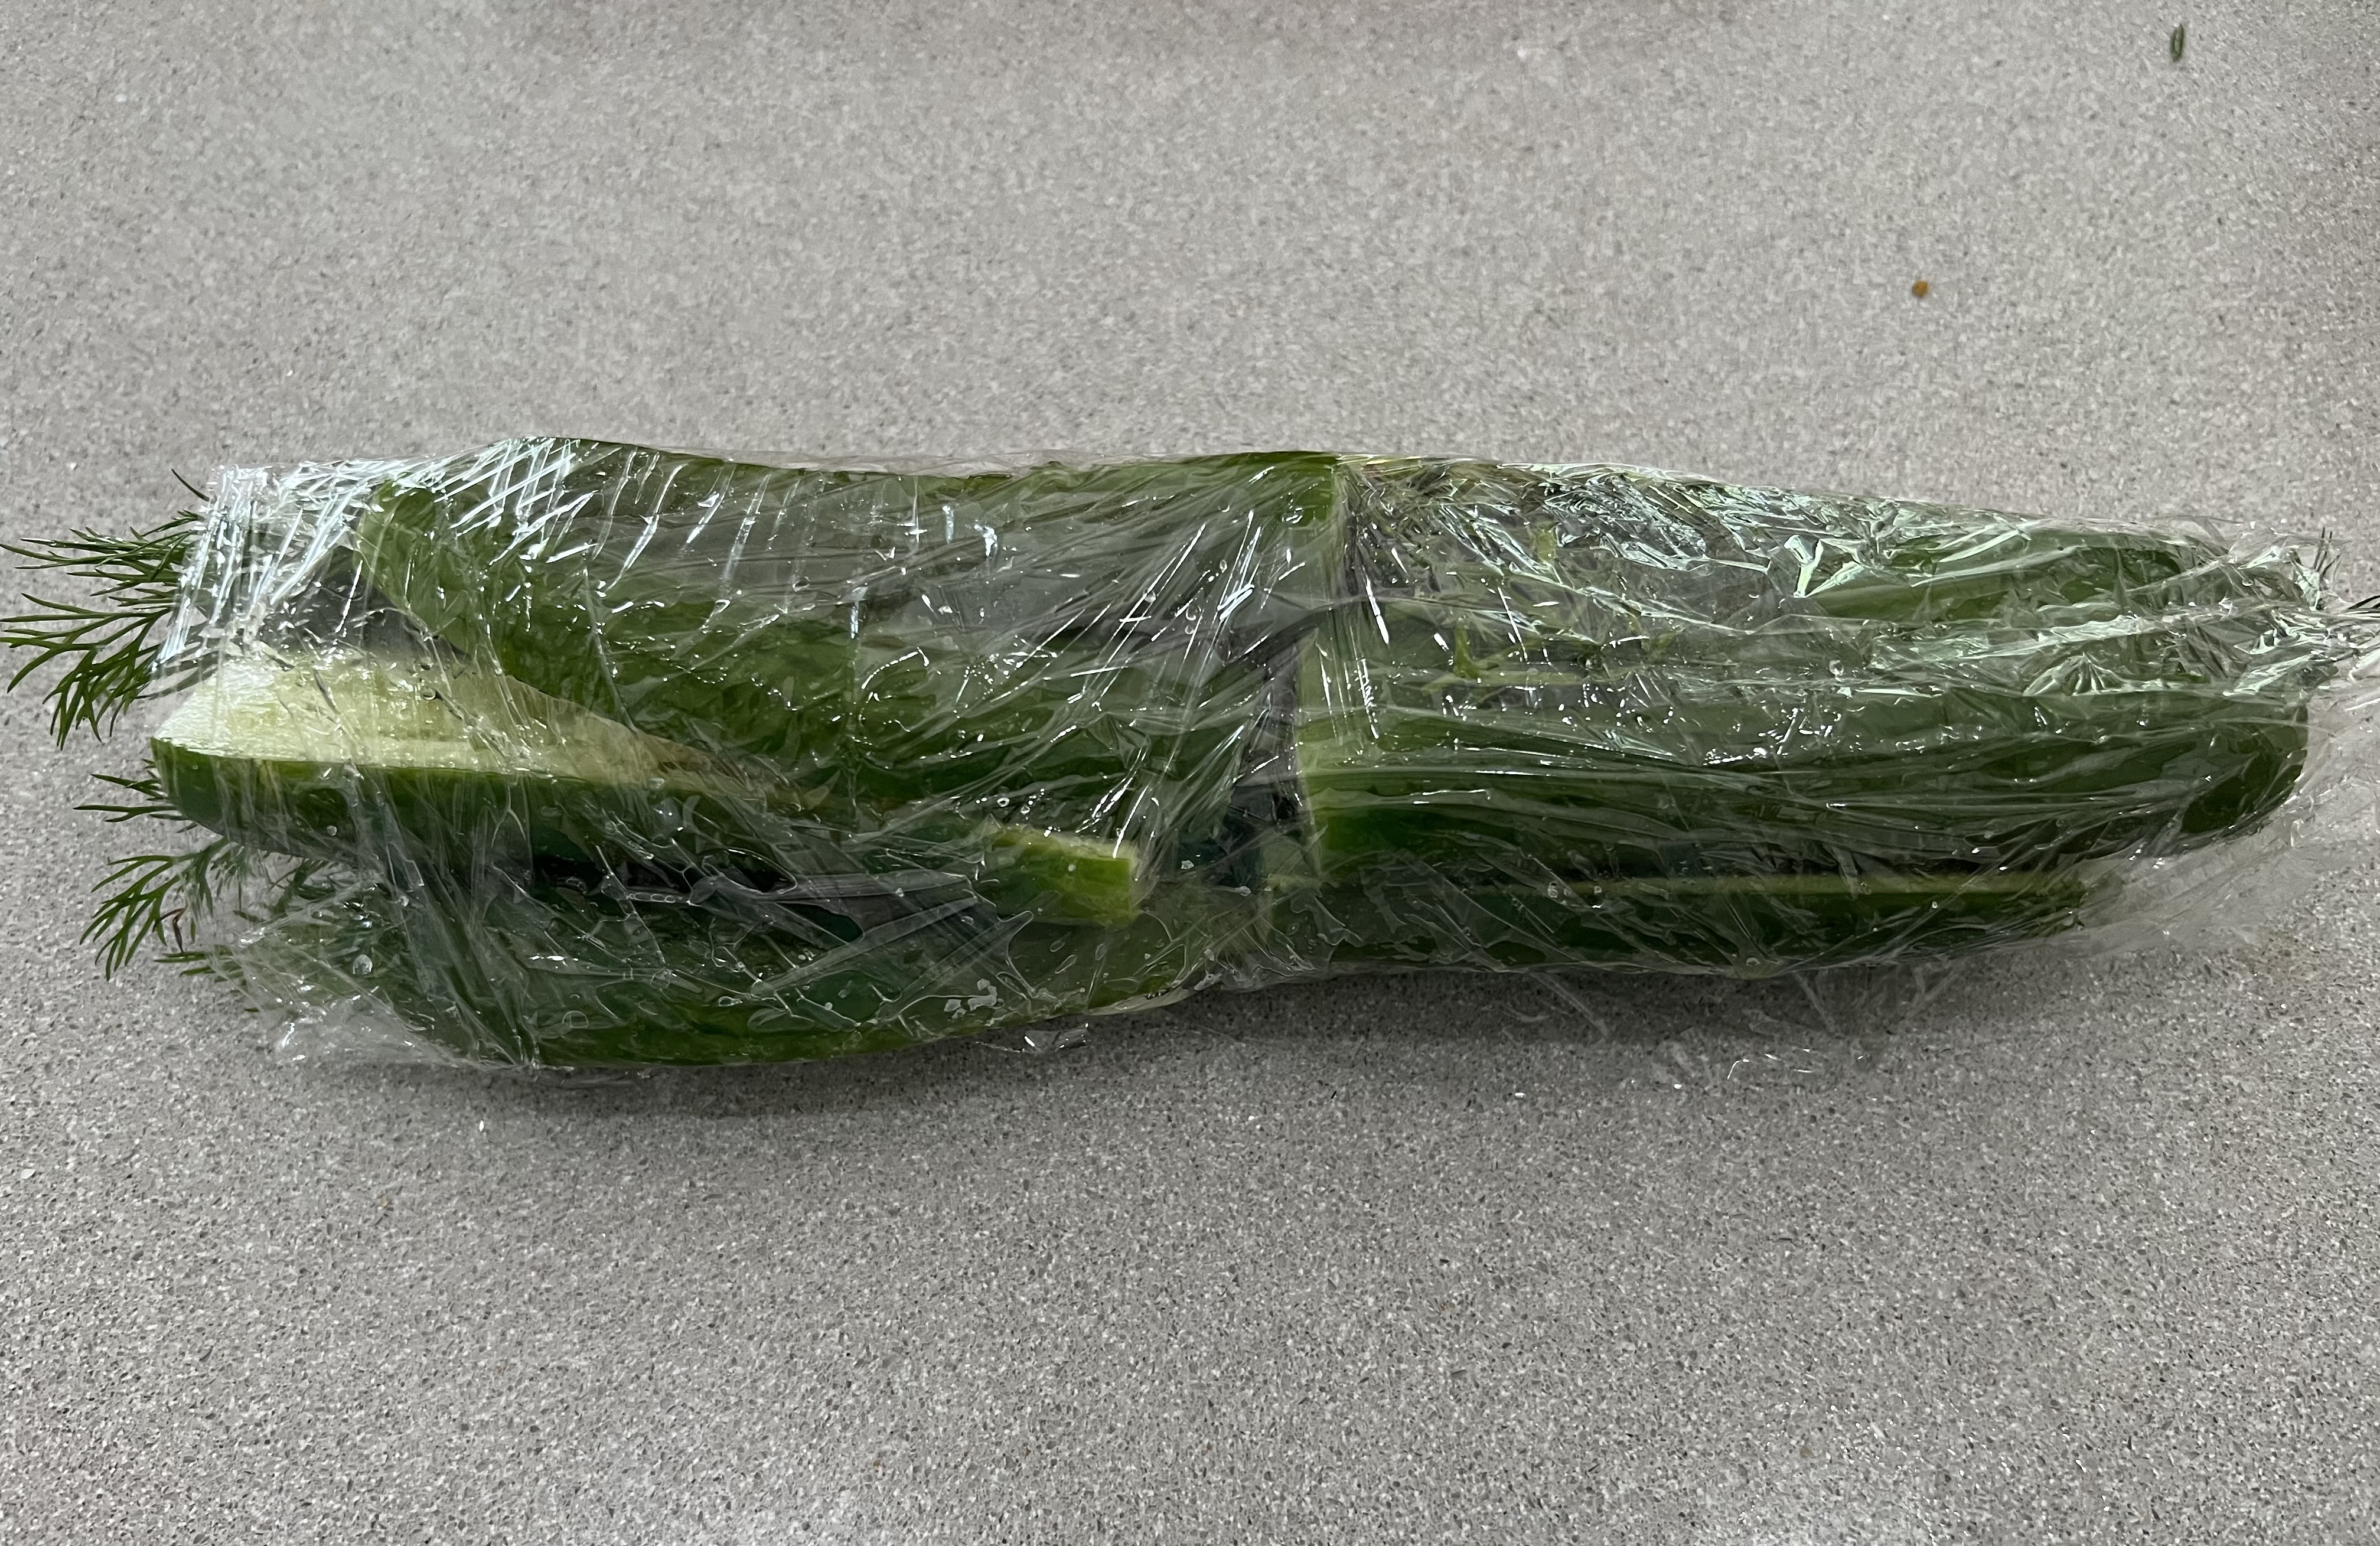
If using plastic wrap, roll it up tightly and place it inside a Ziploc bag, and seal it.
Put the container or bag in the fridge overnight. Making sure the lid is tightly sealed on the container, flip it over every few hours. (I always put a plate underneath it when it’s upside down in case it leaks a little.)
The plastic wrapped pickles don’t need to be flipped.
The pickles will be ready to eat the next day, but they’re even better after 48 hours.
Now’s the time to head to your local farm stand and pick up a bag of gorgeous plum tomatoes, before the season is gone! And this is what you do with them…
These are not sun-dried tomatoes. They’re better, because fresh plum tomatoes are still moist after roasting, with a bit of that magic tomato liquid in every cup! A great, simple platter to offer at parties.
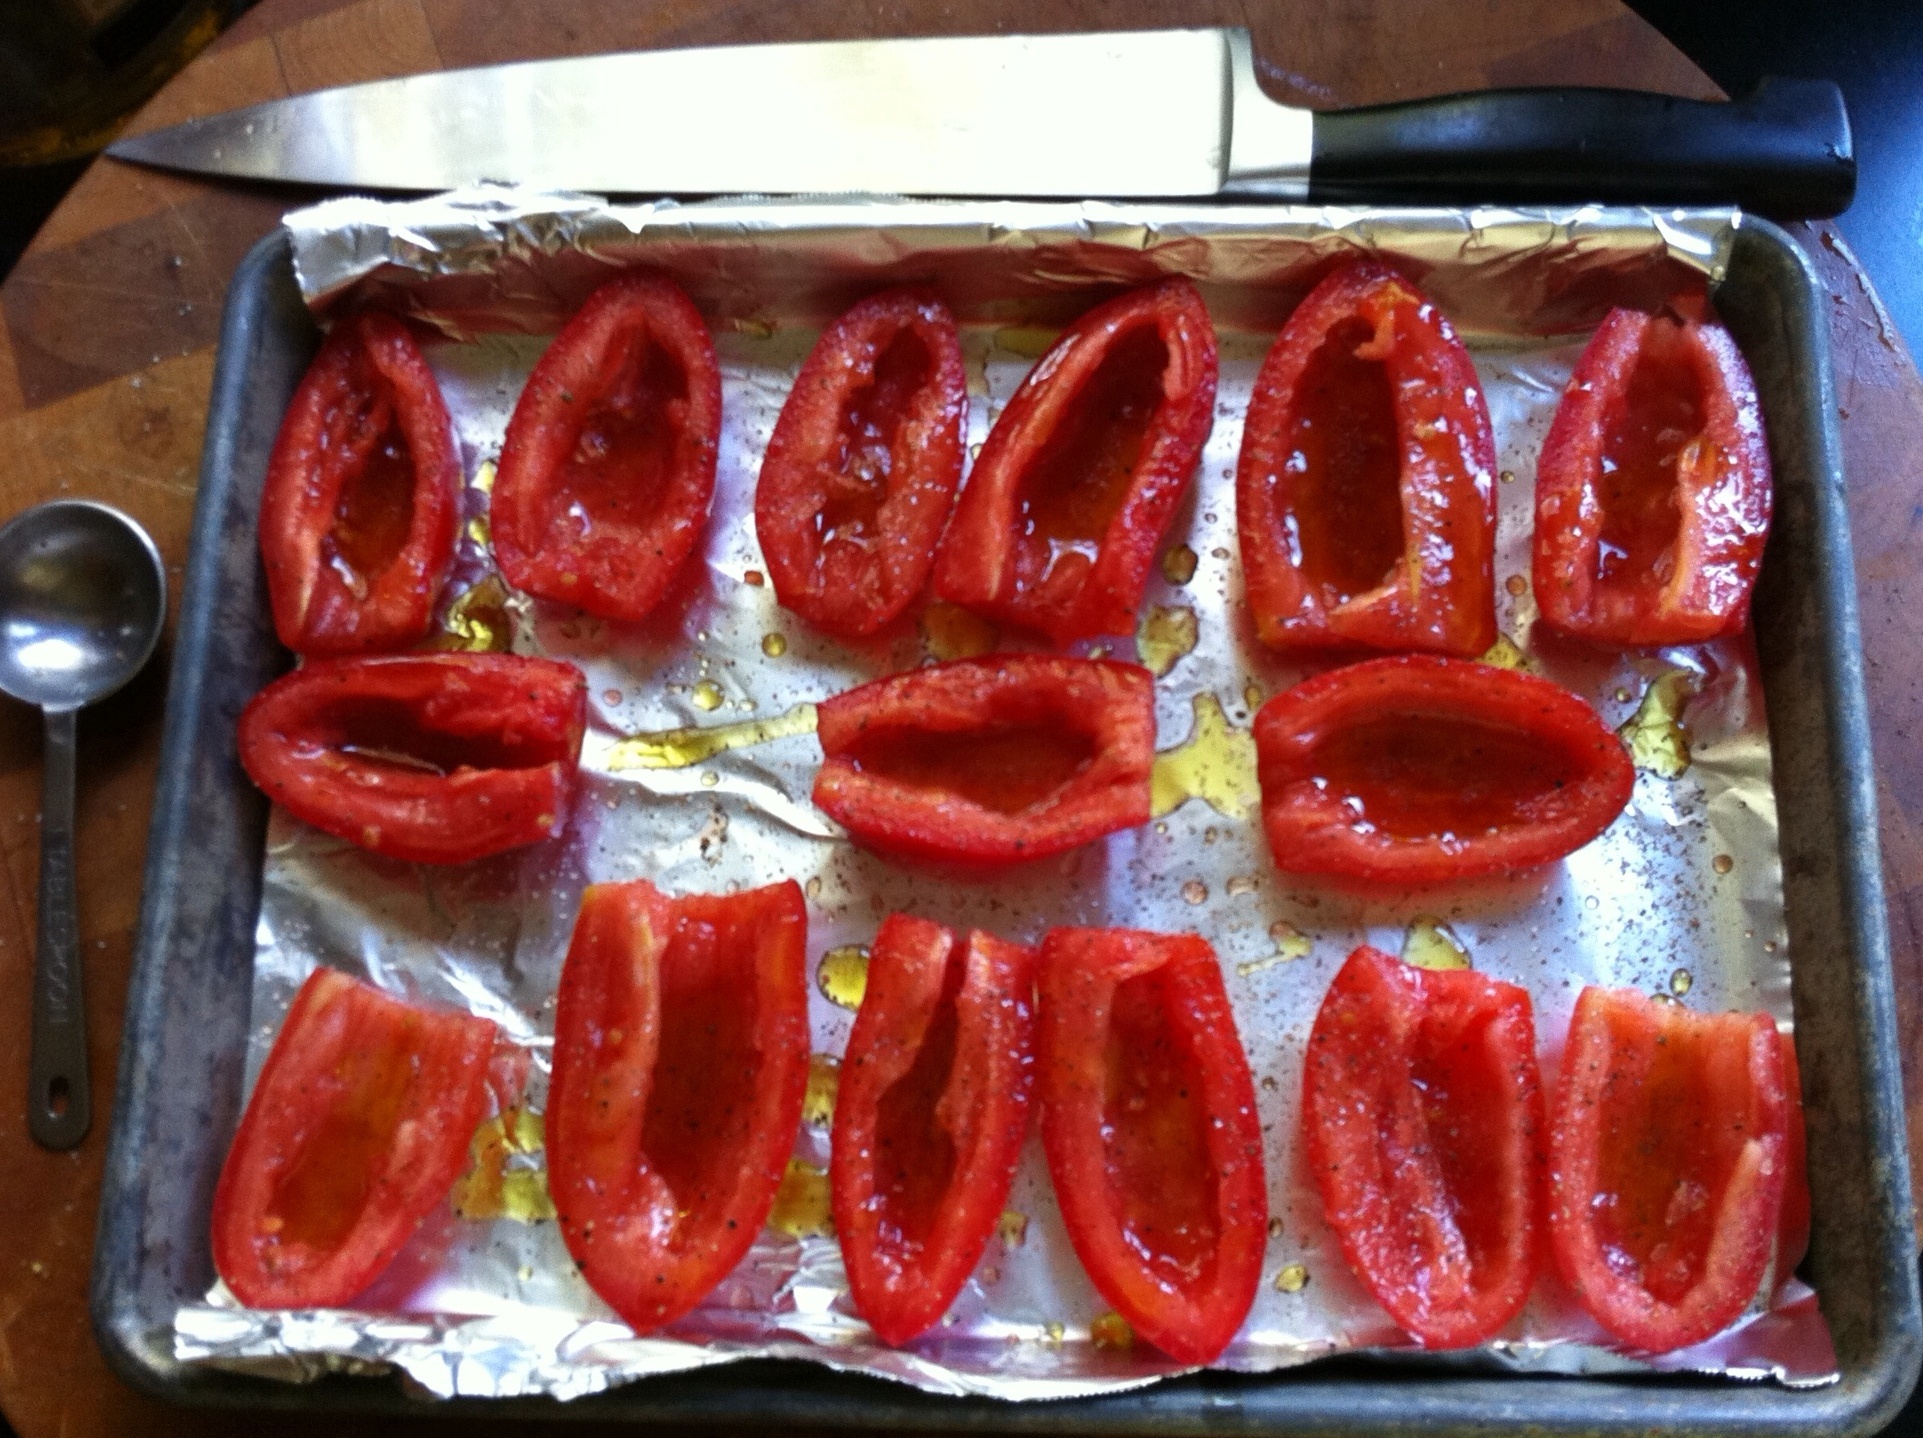
Tomatoes before.
12 to 18 halved, seeded plum tomatoes
1/4 cup extra virgin olive oil
2 tablespoons organic cane sugar
Freshly ground pepper
Fleur de Sel or sea salt
Pre-heat the oven to 250.
Line a baking sheet with foil and rub it lightly with olive oil.
Arrange halved and seeded tomatoes on it in a single layer, cut side up. Drizzle evenly with 1/4 cup olive oil, sprinkle with 2 tablespoons sugar, and season with pepper to taste.
Bake the tomatoes until they are still juicy but slightly wrinkled, about 3 hours. Transfer them to a platter and let them cool slightly.
Just before serving, sprinkle the tomatoes with Fleur de Sel, and garnish if you like, with chopped parsley leaves, mint leaves, or basil. (Bacon bits sound pretty good, too!)
The definition of a consomme is: “a clear soup made with concentrated stock.” I might add “mind-blowing” to that sentence, especially with this recipe. The key to success– and this is crucial–is to use absolutely garden-fresh, in-season ingredients. If you try this with greenhouse or supermarket tomatoes, you’re just wasting your time.
4 1/2 lbs. of fresh garden tomatoes (my favorite is the heirloom: Brandywine)
1 large bunch of fresh basil, leaves and stems
1 2-inch piece of fresh horseradish, peeled
1 clove of garlic, peeled
1 tablespoon white wine vinegar (I use Alessi)
2 oz. vodka (I use Tito’s)
sea salt and pepper
Remove the core of the tomatoes, but leave everything else, including seeds and skin.
Put all the tomatoes, basil, horseradish, garlic, vinegar and vodka in a blender or food processor. You might need to do this in batches if your equipment can’t handle it all.
Process until you get a kind of slush.
Line a mixing bowl with a double layer of cheesecloth and pour the tomato slush mixture into it. Gather up the corners of the cheesecloth carefully, and tie them securely so you can lift the bundle up by the knot. Hang the bundle from a hook over a clean bowl in the fridge so that it catches the liquid that drips out, and leave the whole thing in there overnight. The liquid that drips out will be clear.
Cheesecloth bundle dripping overnight in the fridge.
To serve, chill bowls (or in this case: the sipping glasses) in the fridge. When you’re ready to serve, ladle out the consomme and garnish each with a tiny basil leaf. A drop of excellent quality olive oil is optional.
Synthetic cheesecloth apparatus. The real thing works better.
I tried using a synthetic cheesecloth for this recipe, and I found that it doesn’t filter out enough of the solids to make a clear consomme. You could use it along with real cheesecloth, just to use the stand, or just hang it all in real cheesecloth, as described in this recipe.
Sometimes, a cool adult beverage is just what you need after a long day of yard work. The cucumber plants in my garden have started producing, so it’s time to make this refreshing cocktail!
4 fresh cucumbers, peeled and seeded
Small ice cubes
1 cup loosely packed fresh mint leaves
2 teaspoons granulated organic cane sugar
3 tablespoons fresh lime juice
4 oz. vodka (I like Tito’s)
1 oz. orange liqueur (I like Cointreau)
Peel and seed the cucumbers. Coarsely chop them and then purée them in a food processor until smooth. Strain them through a fine sieve, pressing the solids to extract as much liquid as possible. Or, if you have one, use a juicer. Set the extracted cucumber juice aside.
To a large glass pitcher, add the mint leaves, sugar and lime juice. Muddle the ingredients so that the mint leaves release their oils. Add 3/4 cup (at least) of the cucumber juice. Add the vodka and Cointreau. Muddle again briefly.
Fill tall drinking glasses with ice cubes. Strain the cocktail into the glasses. Garnish with a cucumber spear or peel…or mint.
If you grow your own cucumbers and mint in your garden, this cocktail tastes even better…a fine reward for a job well done!
When it’s done right, gazpacho is one of the most delicious summer soups you’ll ever have. The secret, of course, is using super-fresh veggies. That’s why I crave it at the first sign of a vine-ripened tomato in my garden or a local farm stand. When my tomato plants have dozens of ripening fruits on them every day, I eat some in salads…I make tomato sauce with others…but the reddest and ripest become gazpacho!
I never make this out of season, and I’m always wary of restaurants that do! Very often, they’ll try to hide the taste of older veggies by adding too much salt or lots of spice.
The consistency of gazpacho is a personal preference. I like mine a bit chewy…not chunky like salsa, but not watery like soup…somewhere in between the two is perfection.
All the work is pretty much in the slicing, peeling and chopping…so I do it carefully.
1 large Vidalia onion, peeled and roughly chopped
1 carrot, peeled and roughly chopped
5 large tomatoes, peeled, seeded, and roughly chopped
2 medium cucumbers, peeled, seeded, and roughly chopped
6 sprigs of flat-leaf parsley
1/2 cup olives, drained (I like kalamatas)
1/2 cup good quality extra virgin olive oil
Juice of 1/2 a large lemon
3 tablespoons white vinegar
Sea salt and freshly cracked black pepper
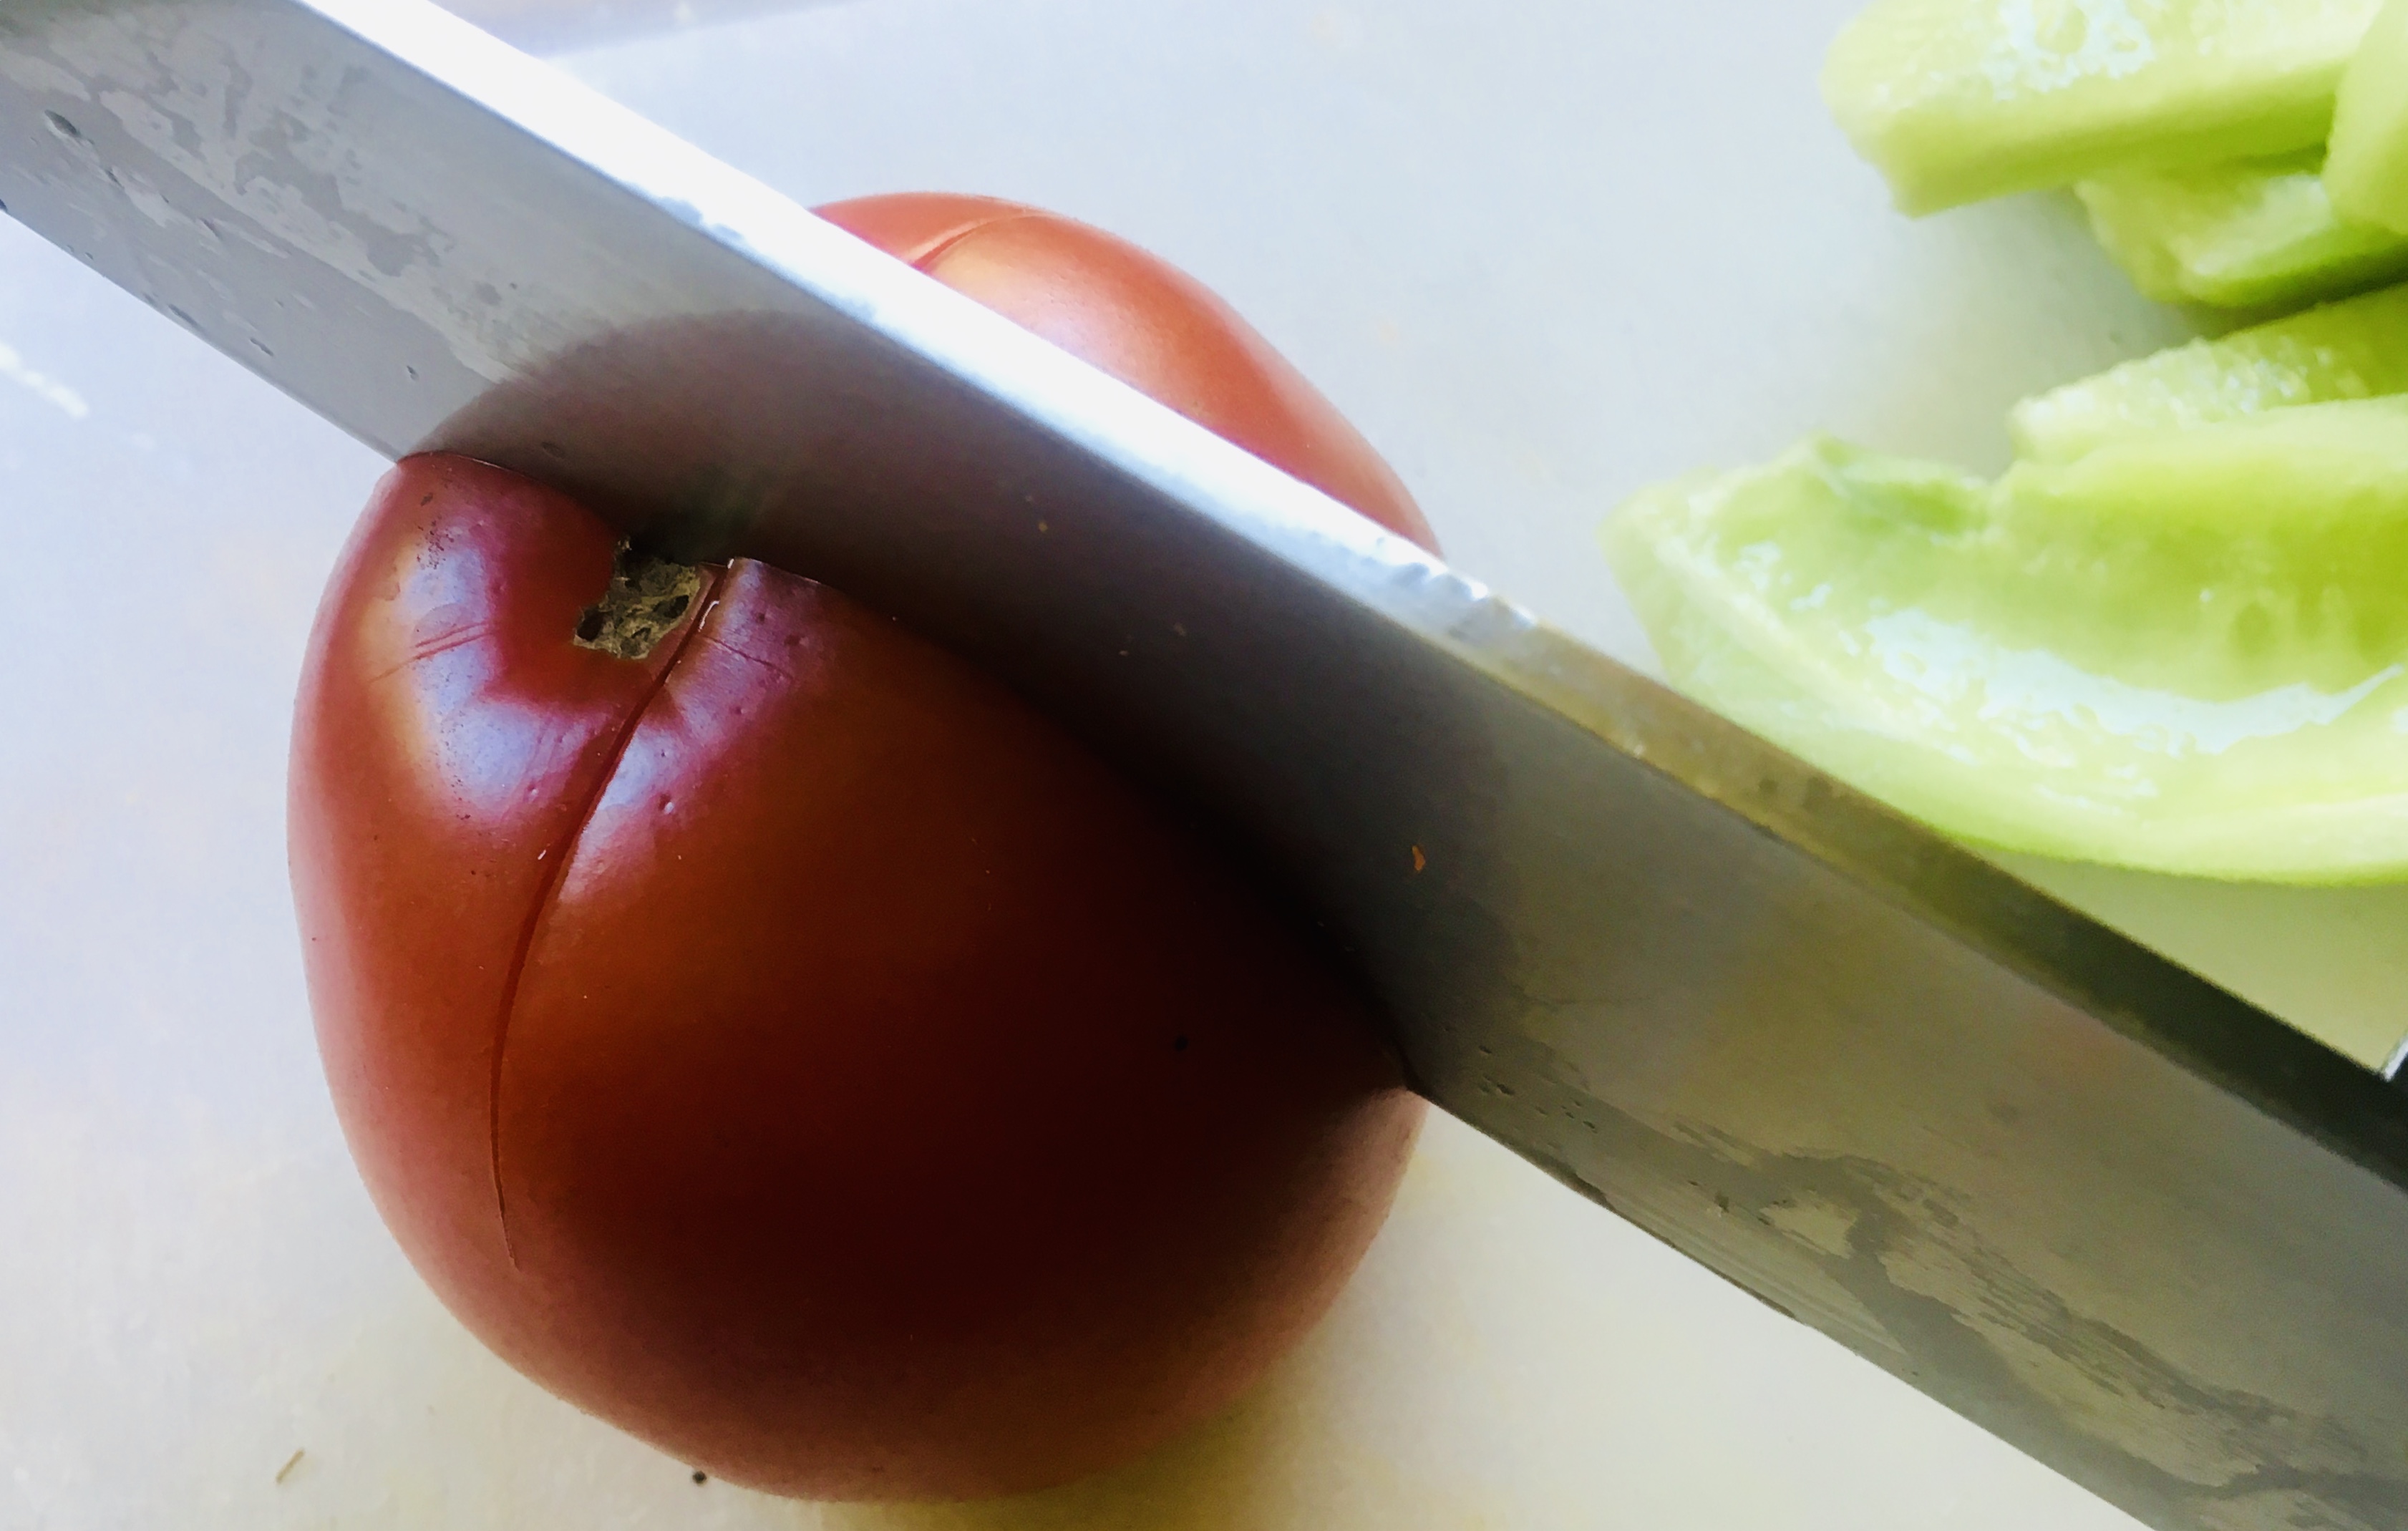
An easy way to peel tomatoes is to turn them upside down and make an X with a knife, puncturing the skin. Drop the tomatoes in boiling water for about 30 seconds, and the skin will start peeling away from the meat. Scoop the tomatoes out of the water, and immediately drop them into a bowl of ice water, letting them cool for 5 minutes. The skin will peel right off. Cut the tomatoes in half and (over the sink!) gently press your thumbs into the seed compartments, popping them out. Give the tomato a little shake to remove any last seeds, and it’s ready to be chopped.
Make an X, then drop the tomatoes in boiling water for 30 seconds.
While the tomatoes are cooling, you can peel and chop the other veggies.
Peel and roughly chop the onion and carrot, and place them in a food processor. Let it run for about 10 seconds.
Add the peeled and seeded tomatoes, the peeled and seeded cucumbers, and the sprigs of parsley and continue processing.
Add the olives, olive oil, lemon juice, vinegar, sea salt and black pepper.
Process until the veggies are finely chopped, and you’ve got a soup. Store it in the fridge for at least one hour to chill before serving.
Garnish with a sprig of parsley and a sprinkle of Fleur de Sel or other tasty finishing salt.
The heat of the summer always has me craving a cold beet soup my Mom made…
It’s interesting that an Eastern European country that is as far north as Newfoundland has one of the most refreshing cold summer soups of any country in Europe. It’s a cold beet soup called Šaltibarščiai (pronounced shul-tih barsh-chay) and it’s classic Lithuanian cooking at its best.
No summer was complete without my Mom’s Šaltibarščiai on the table, and my Dad always insisted on eating it with boiled potatoes on the side.
There are many different variations of this soup. For example, many Lithuanians today use keffir instead of buttermilk. My Mom always insisted buttermilk tastes better, and I have to agree.
1 quart buttermilk
4 hard-boiled eggs, peeled and chopped
3 cucumbers, peeled, seeded and chopped
8 beets, cooked, peeled and chopped
1 tablespoon finely chopped fresh dill
1 scallion, finely chopped, greens only
salt
a pile of boiled potatoes (optional)
Pour the buttermilk into a large bowl. If it’s very thick, you can dilute it a bit with fresh water.
Peel and chop the eggs and toss them in the bowl. Peel, seed and chop the cukes…then into the bowl.
I love Love Beets, hermetically sealed cooked and peeled beets, ready to use, available in most supermarkets. (In the old days, my Mom would simply use canned beets.) I open a couple of packs of LoveBeets, pouring the beet juice into the bowl. I chop the beets and add them as well.
Grab some fresh dill and chop it finely. Add it to the bowl. Finely chop the greens of one or two scallions and sprinkle some salt on them. Rub the salt into the scallions, mashing them a bit, softening them. Then add them to the bowl.
Stir everything together, put a lid on the bowl, and let it chill in the fridge for a few hours.
Remove it from the fridge, stir, and season with more salt if needed before serving.
Does anyone remember Art Ginsburg, also known as Mr. Food? His syndicated segments appeared on the news for almost 10 years. I met him back in 1993, and he was quite the self-promoter…but a really nice guy. Art passed away many years ago, but I still have his old cookbooks, and his simple but perfect pesto recipe has been my guide for decades.
We eat a ton of pesto at home. Most of the time, it’s simply mixed with pasta. But we stir it into tomato sauce and smear it on grilled chicken or beef as well.
Basil is the main ingredient in classic Italian pesto, and it’s growing rapidly under the summer sun in my garden right now. And that’s key to great pesto: when Mother Nature says the basil’s ready, be sure you have all the other ingredients and get to work!
Basil, ready to be picked.
Besides the fact that it simply tastes bad, the problem with store-bought pesto is that it’s expensive. Although homemade pesto isn’t cheap, you can still save a lot of money by making it yourself.
Some of my tips for saving money: buy good quality ingredients in bulk. My go-to olive oil is one from Tunisia called Terra Delyssa. It delicious, and can be found in large, affordable bottles at most supermarkets. I have one rule of thumb with olive oil: always buy a bottle from one source–one country. Don’t go for the blends.
There’s been a rash of articles about already-grated parmesan cheese that is 50% cellulose (wood) fiber. Stay away from that junk and buy yourself a nice chunk of the real deal: Parmigiano-Reggiano. Grate it yourself and taste the difference!
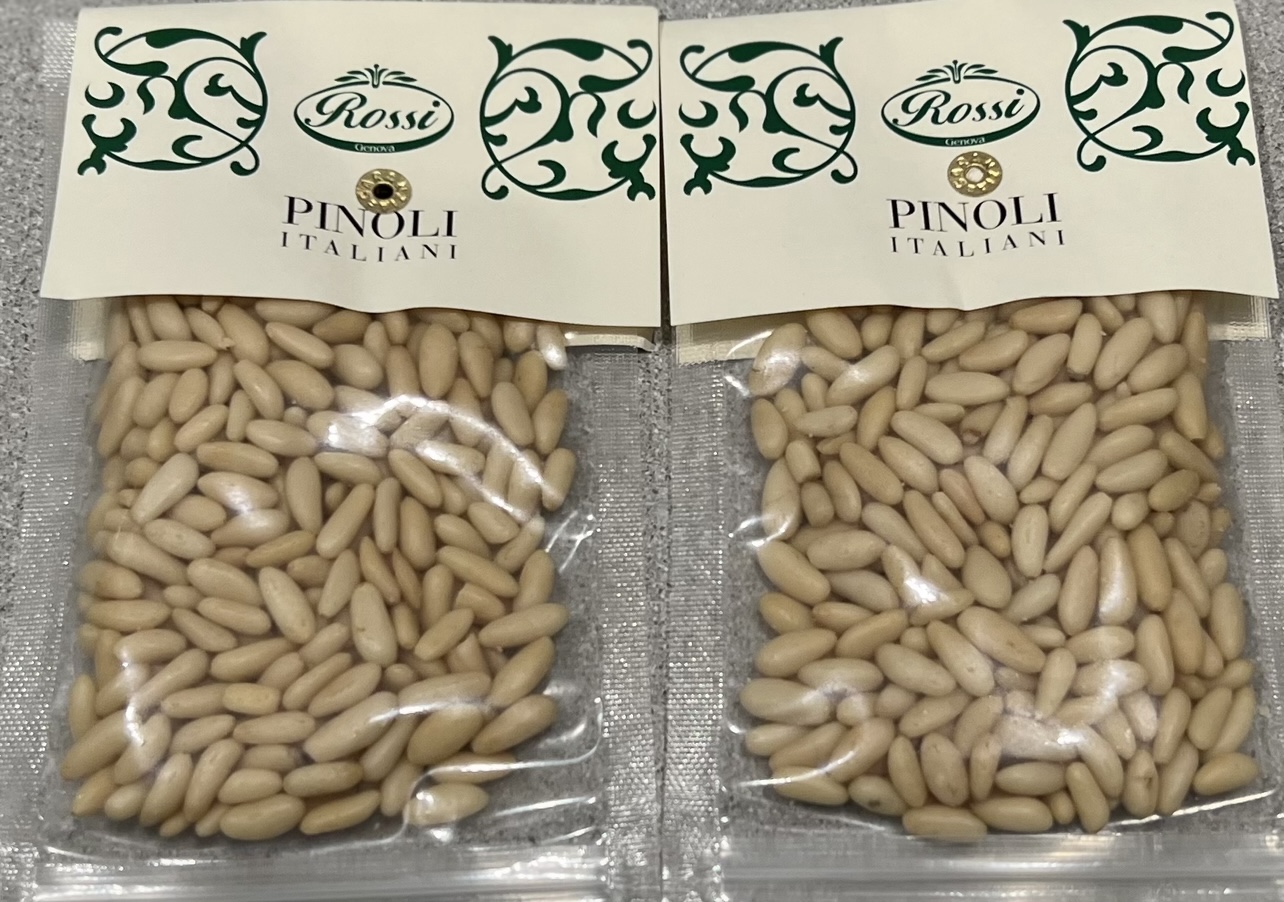
The most expensive (and questionable) ingredient in basic pesto is pine nuts. If you look on the back of the package (and you always should!) you’ll see that most pine nuts come from China. I don’t buy any food products from China…period. So sourcing “safe” pine nuts can be difficult. The Italian or Turkish pine nuts can be extremely expensive. Some from Siberia less so, but still questionable, in my mind. Sadly, it’s gotten to the point where I really had to start looking for an alternative to pine nuts.
They say they’re grown in New Mexico. I found them last year, but can’t find them anymore.
One of the reasons you want real pine nuts and not some look-alike from China is something called “pine mouth” or “pine nut mouth.” A small percentage of people experience a reaction after eating pine nuts that makes their mouth taste like metal–imagine putting a handful of pennies in your mouth–and the taste stays in their mouths for a couple of weeks, ruining their taste buds for the foods they love. (Eventually, it wears off.) Some scientists say you get “pine mouth” by eating counterfeit pine nuts–varieties like those from China that are not the same species. Others say that you can get the reaction even from real pine nuts. Research on this continues, but all the more reason not to buy any foods from China and other questionable countries.
Real Italian pine nuts. Notice the elongated shape, versus a rounder one for inferior nuts. But at $15+ per ounce, they’re crazy expensive!
There are alternatives to pine nuts, and you’ll find many pesto recipes that substitute with almonds or pistachios. I think those nuts change the taste of the pesto, plus they have a skin that leaves a gritty residue, which I don’t like. So I don’t use them. Macadamia nuts are a good substitute. They’re less expensive than pine nuts and usually come from Hawaii. But after much experimentation, I’ve found that the best and cheapest substitute for pine nuts is walnuts. They’re available everywhere, and none of my family or friends have noticed a change of the pesto’s flavor.
So here’s my sure-fire pesto recipe. I make massive amounts of it, store it in plastic storage containers with a tightly sealing screw-top lid, and put them in the deep freeze. They last all year, and thaw out easily.
2 cups fresh basil, packed down a little
1 cup grated Parmesan cheese (preferably Parmigiano-Reggiano)
1/2 cup real Italian pine nuts (or walnuts)
1 cup extra virgin olive oil
2 garlic cloves, crushed
1 teaspoon Kosher salt
When measuring the basil, I pick dry leaves from the garden and place them in a measuring cup, lightly packing them until I get 2 cups. (More is better than less!) Then I remove them from the measuring cup and wash them, tossing them in a salad spinner to dry. Then they go into the food processor. (If you wash them before measuring, they will pack much more tightly, and you won’t get the correct amount.)
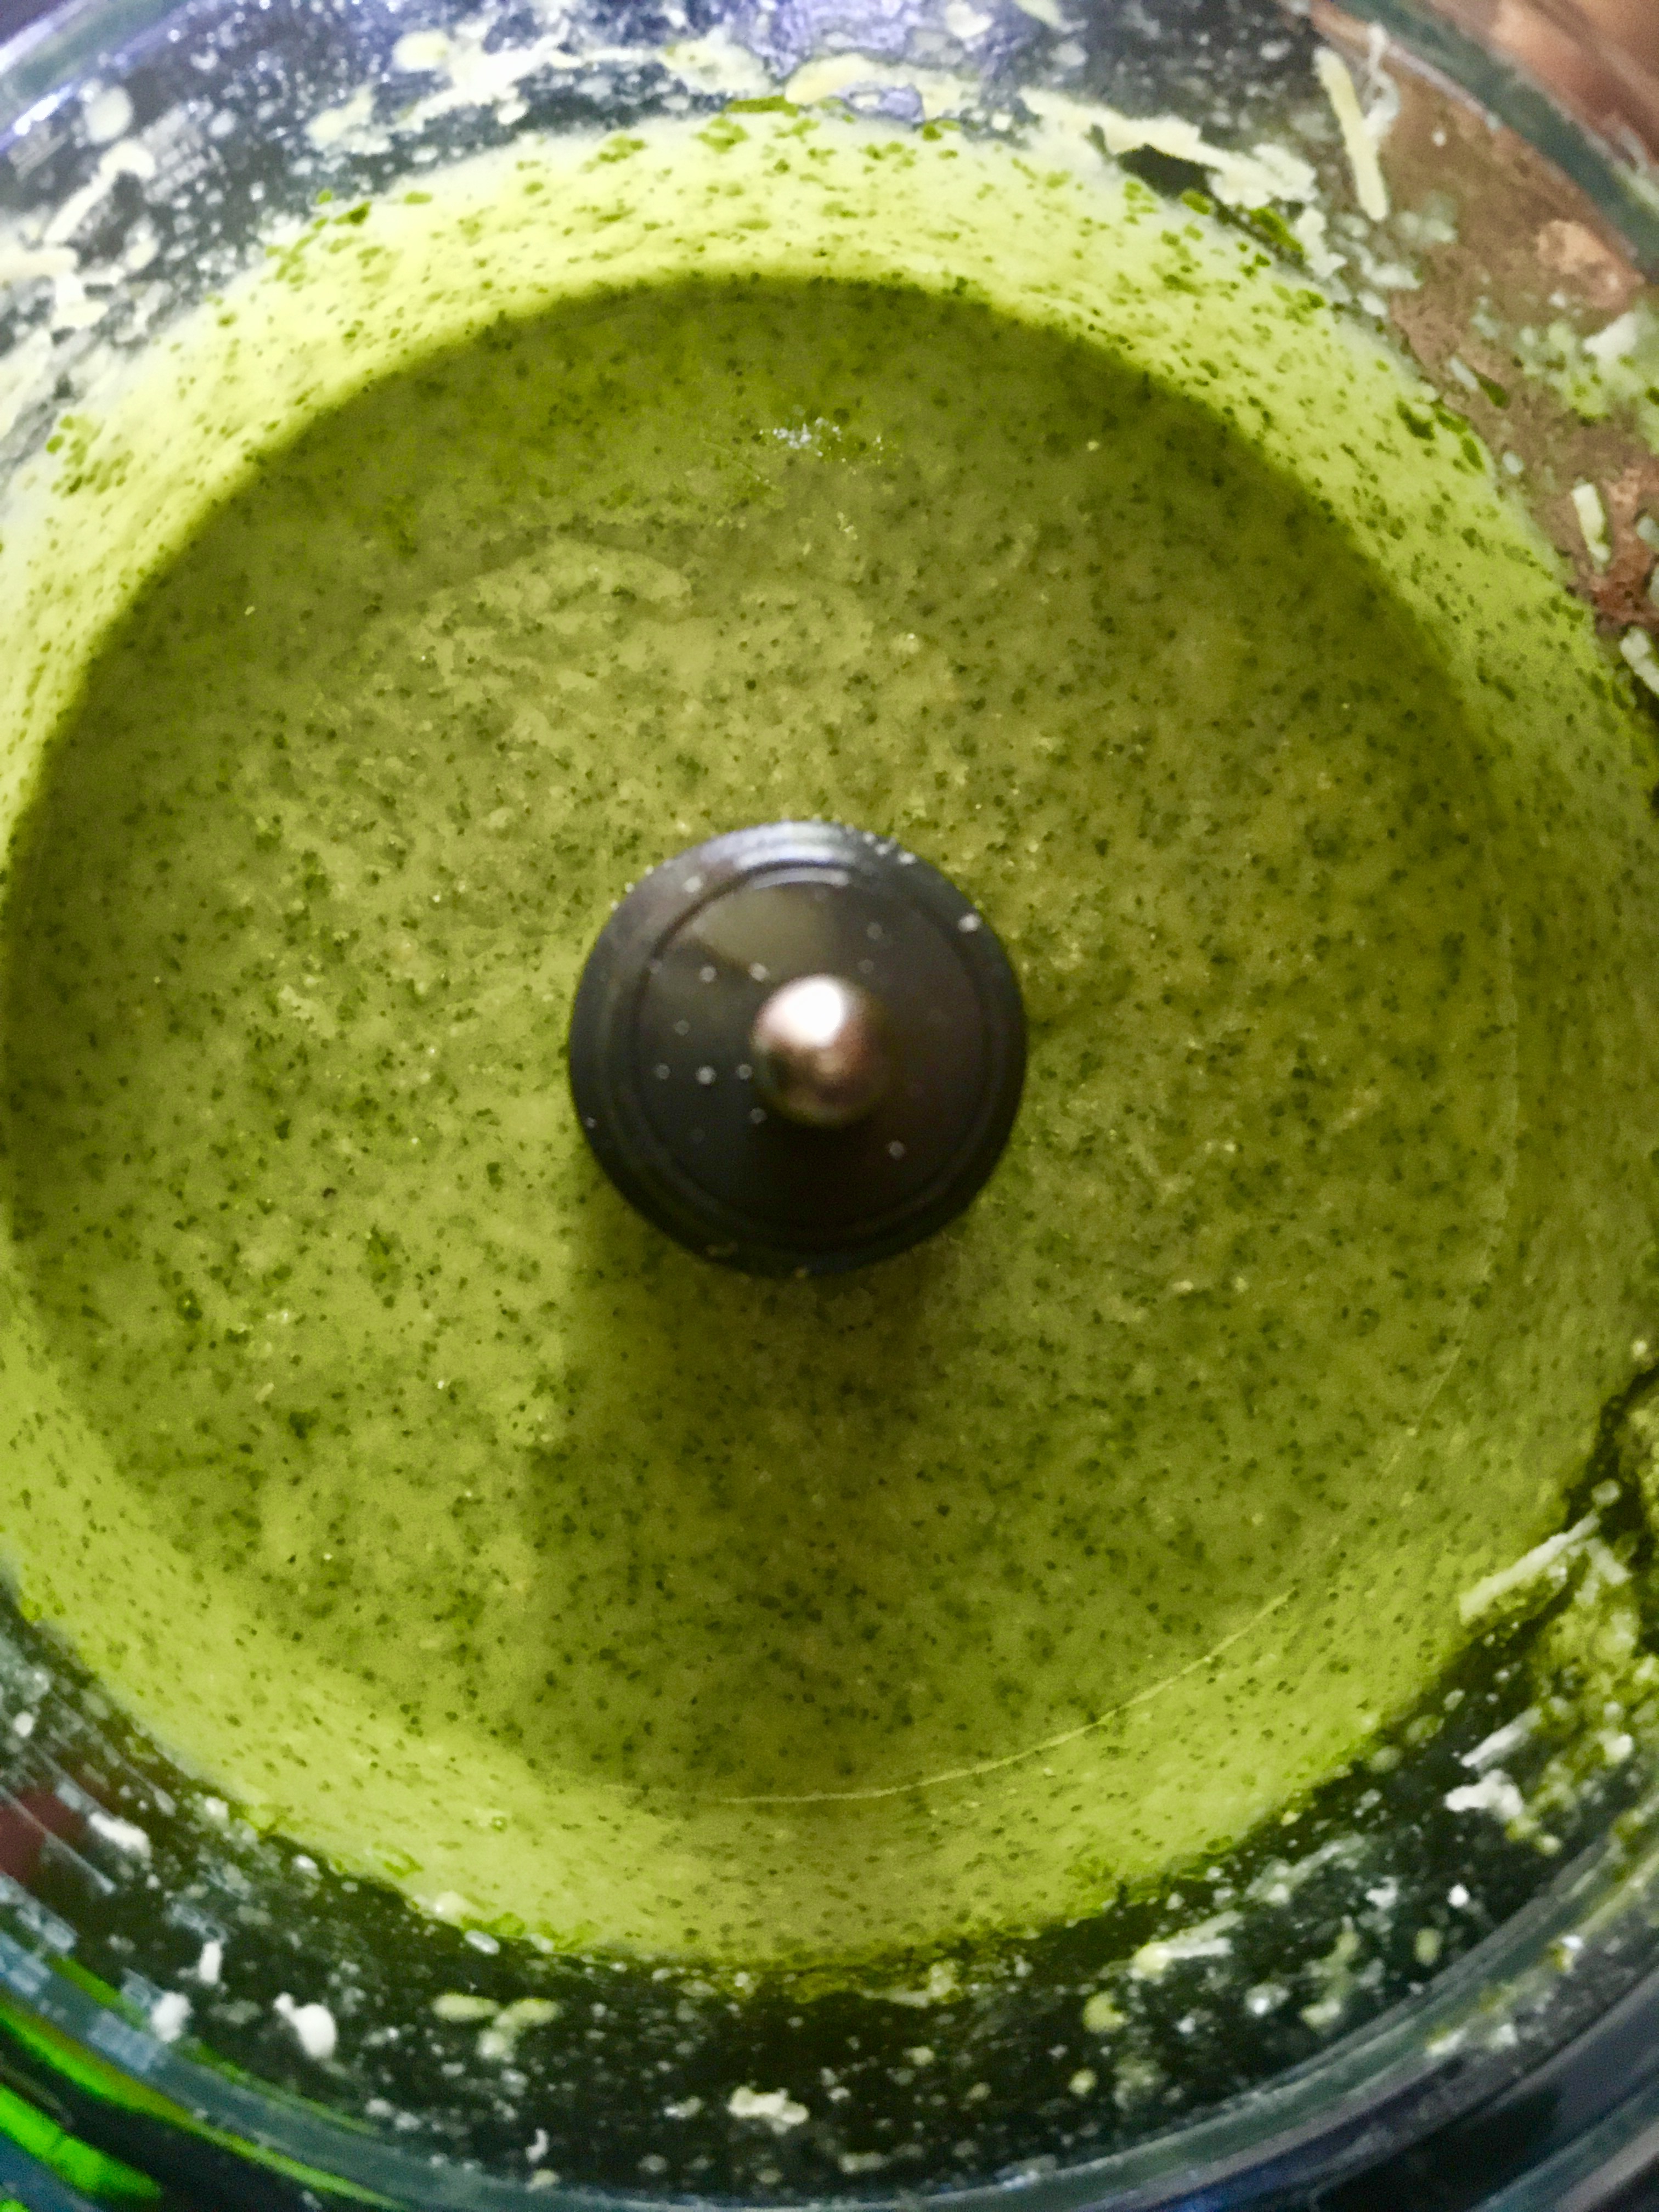
Add the other ingredients in the food processor with the basil and let it rip!
The color and fragrance of freshly-made pesto is hard to beat! For me, a bowl of pasta with pesto is real comfort food.
It’s especially great when asparagus is in season, growing in my garden, like right now.
This is a great side dish with any main course like a big slab of meat, and has special meaning to me because my cousin first introduced me to asparagus with this recipe when I was just a kid. She passed away many years ago, but I think of her every time I make this simple but delicious dish.
You can use almost any grated “parmesan” cheese, but nothing beats real Parmigiano Reggiano that you freshly grate yourself. Whatever you use, please, just don’t use the junk that comes in a can.
1 lb. fresh asparagus spears
1 tablespoon unsalted butter
2 tablespoons extra virgin olive oil
3/4 cup grated Parmigiano Reggiano cheese
sea salt and freshly cracked black pepper
The easy way to trim an asparagus spear is to grab the thicker end between two fingers and bend it. It will snap at the point where the tough part ends and the softer, edible part begins. I toss the bottoms into my compost pile.
I heat the butter and oil together in a pan and then add the asparagus spears, cooking over medium heat for about 5 minutes, until al dente. (You don’t want them mushy.)
While the asparagus is still in the pan, I sprinkle the Parmigiano Reggiano on top, letting it melt a bit. I season with sea salt (I prefer Fleur de Sel) and freshly cracked black pepper.
This is a story about my Mom’s dad, my grandfather. Born in Lithuania, he came here during WWII. He was a short man, barely 5’5″ tall, but he was the strongest man I ever knew. As a kid, I watched him crush walnuts, and even hazelnuts, in his bare hands. He would go out into the water at Rockaway Beach, and the waves would hit him head-on, but never knock him down. He had little or no formal education, but he could fix or build anything, from concrete driveways to dog houses. And no matter what chore he took on, he wore a white shirt and tie with a vest while he did it. He never became a US citizen because he had a hard time with the English language, but he maintained his legal alien status, and spoke enough English to work in the kitchens of several high-end restaurants in Queens, NY.
My maternal grandfather, Vaclovas Lukosevicius. A helluva name and a helluva guy. Now I know where I got my receding hairline!
I smoked my first cigarette with him when I was 12, and we had a good talk about it after my face returned to a lighter shade of blue-green. We would walk to his favorite bar on Jamaica Avenue in Richmond Hill, the Triangle Hofbrau (it’s still there) and they let me sit at the bar, snacking on pretzels with a 7-Up while he enjoyed a beer. My Mom was an only child, so I was the only grandson, and nobody made me feel more special than he did.
One of my grandfather’s passions was horseradish…homegrown, homemade horseradish.
It’s been 50 years since I watched my grandfather dig the long, dirty, gnarled horseradish roots out of his garden with a sharp spade, lunging at the ground with all of his strength to cut through the thick fibers of the plant.
After harvesting a large piece, he would wash the dirt from it and then peel it, leaving behind a beautifully smooth white root.
He had a large bowl set under a grater, and he would hand grate the horseradish root with incredible speed. But no matter how fast he went, the potent vapors released by the root would make their way to his eyes, and he was forced to stop several times to wipe the tears away with his old handkerchief and regain his composure before returning to grate the root again.
Onions were child’s play compared to horseradish, and I understood why he did all the preparation just outside of the kitchen door of his Queens, NY home.
Once grated, he would add some water, vinegar, and salt, and his prepared horseradish was complete. He’d store it in tightly sealed glass jars in the fridge, and when it was time to sample the goods, he would carefully open a jar, poke his knife in, and spread the prepared horseradish over beef, beets, twice-smoked bacon, or anything else he desired. I’d watch his face slowly turn red, small beads of perspiration developing on his forehead, and he’d turn and smile at me and tell me in Lithuanian: “Labai skanu!” (Very tasty!)
At the age of 10, I couldn’t figure out what he saw in horseradish, but it didn’t take long before I was hooked myself, as it was a staple at every family dinner table.
Opting for the stuff that came in a jar in the supermarket, I never made my own prepared horseradish until almost 50 years later.
I’ve had a huge horseradish plant growing in my garden for years, and I just never got around to doing anything with it. But one night, as I was preparing my cocktail sauce recipe and I realized that I was out of prepared horseradish, it became clear that the time of reckoning had arrived. It was time, in the finest tradition of my grandfather, to make my own prepared horseradish.
Freshly harvested horseradish roots
I went out to the yard with a sharp shovel and lunged at the horseradish plant, splitting a few roots off of the main crown. I pulled them out of the ground, detached the long leaves, and headed back to the kitchen. Today’s kitchen technology gave me a distinct advantage over my grandfather, and after washing and peeling the root, I chopped it into smaller pieces and tossed them into a food processor. No hand grating necessary! The processor pulverized the root in no time, and I added water, vinegar and salt as my grandfather did, being very careful not to stick my face too close to the opening of the processor where the vapors were their most powerful. A small taste on my tongue just about had my eyeballs shoot out of my head, and I muttered silently to myself: “Labai skanu!”
My grandfather would be proud.
Horseradish is a member of the Brassicaceae family, which includes mustard, cabbage, wasabi, and broccoli. The horseradish root itself hardly has any aroma. But when you crush it, enzymes from the broken plant cells produce mustard oil, which irritates the mucous membranes of the sinuses and eyes. To keep the horseradish from losing its pungency and freshness, vinegar must be added immediately.
Prepared Horseradish
6 oz. fresh horseradish root, peeled 6 tablespoons water 3 tablespoons white vinegar 3 pinches of salt
Chop the horseradish root into small pieces and add water, vinegar and salt. Process until proper consistency is reached. Careful! Use proper ventilation or the vapors will blow your eyeballs and sinuses out!
I don’t have the patience to boil Mason jars and lids and all that crap. But I love me my pickles, especially when this year’s garden is cranking out cucumbers in record numbers!
This is such an easy way to make great pickles, it’s almost unbelievable…and no water is needed! The salt extracts just enough moisture, like when curing meat, to make it work. This method works great if you want fresh pickles to eat immediately, but if you want to keep them for longer periods of time, you’ll have to go back to the old tried-and-true methods.
Fortunately for me, I devour these pickles as soon as they’re ready!
I originally used a plastic bag for this, but I found that using a plastic container keeps the pickles aligned better and it’s less messy.
fresh cucumbers sea salt a handful of fresh dill a couple of cloves of garlic, thinly sliced
Get a resealable plastic container.
Cut the ends off the cucumbers and then slice them lengthwise, in half or in quarters. Lay them neatly next to each other in one layer in the container, skin-side down. Sprinkle the sea salt over the cucumbers. Sprinkle some of the chopped garlic on top. Then, tear off some fresh dill and lay it to cover the pickles.
You should be able to get a second row of pickles on top of the first, again sprinkling with the salt, garlic, and topping with dill.
Placing the lid on the container, squeeze out as much air out of the container as you can.
Put the container in the fridge overnight. Making sure the lid is tightly sealed on the container, flip it over every few hours. (I always put a plate underneath it when it’s upside down in case it leaks a little.)
The pickles will be ready to eat the next day, but they’re even better after 48 hours.
The old method of using a Ziploc bag works as well, especially if you don’t have enough cucumbers to fill a container. I also put a few small onions in there, which will no doubt wind up in a future martini!