For me, the only way to eat tuna is raw, and not just sushi or sashimi. I’m not a fan of what most restaurants do: serving tuna seared on the outside and rare on the inside. You can tell the quality of the tuna just isn’t there. It usually needs to be drowned in soy sauce to have any taste at all.
So getting my tuna fix often means I’ve got to prepare something at home.
If you’re paranoid about parasites, tuna is probably the safest fish to eat raw. I buy my tuna wild-caught and frozen from reputable sources. Occasionally, I’m lucky enough to buy it fresh from the fisherman, but that is a rare treat.
Technically, fish needs to be frozen at a temperature of -4°F (-20°C) or below for 7 days, for parasites to be killed. In the United States, this is required by law of all fish served at sushi restaurants, with tuna being the only exception.
Most marinades or ceviches use lemon or lime. I enjoy the freshness of grapefruit, and it really works here. This recipe was literally created by opening my fridge and pantry, and grabbing whatever looked good.
1 lb. excellent quality raw tuna
juice of 1 grapefruit
1 teaspoon grapefruit zest
2 teaspoons low-salt soy sauce
1/2 teaspoon wasabi powder
1/2 teaspoon hot pepper sauce (I use Frank’s Red Hot)
1/2 teaspoon black pepper
1/2 teaspoon sesame oil
1/4 teaspoon sea salt (I use Fleur de Sel)
1 tablespoon chopped scallions, green part only
sesame seeds (optional)
cubed avocado or plain guacamole
If I’m starting with frozen tuna, I allow it to thaw just enough so I can cut it into small cubes easily. I place the cut tuna on paper towels to soak up excess moisture, and keep it in the fridge.
In a bowl, I combine all the other ingredients, except the sesame seeds and avocado. I add the tuna to the bowl, and mix everything carefully, putting it back in the fridge to marinate for an hour.
When I’m ready to serve, I place the tuna on a plate. (If it’s very runny, I use a slotted spoon.) I top it with a sprinkling of sesame seeds and serve with fresh cubed avocado, or even plain guacamole.
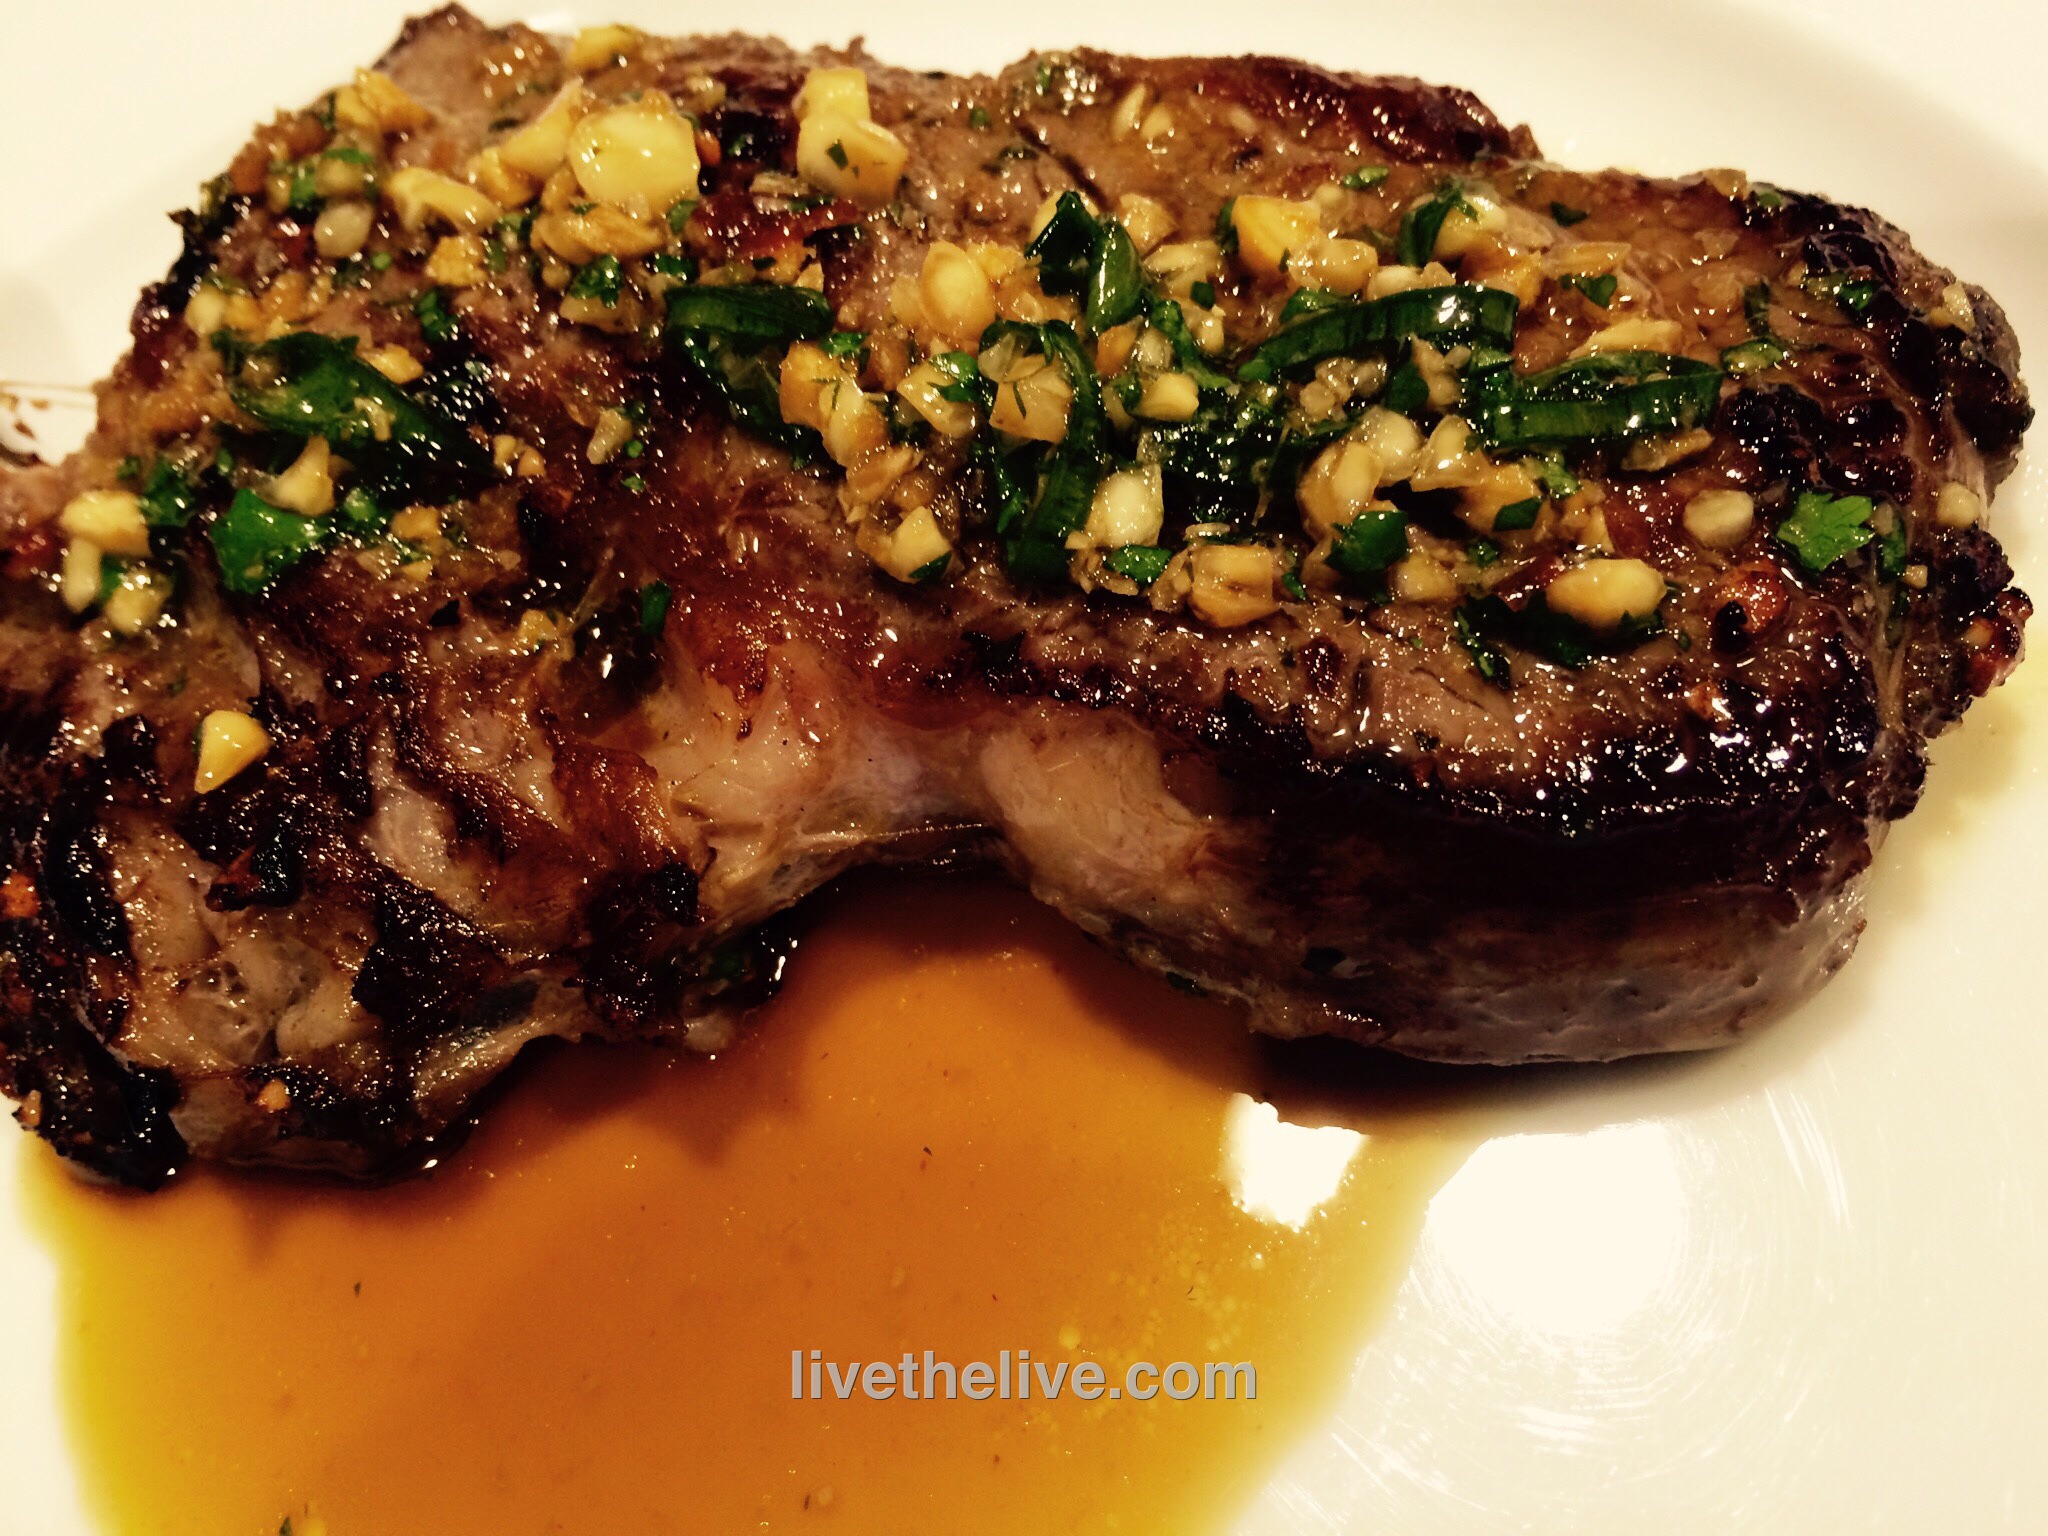
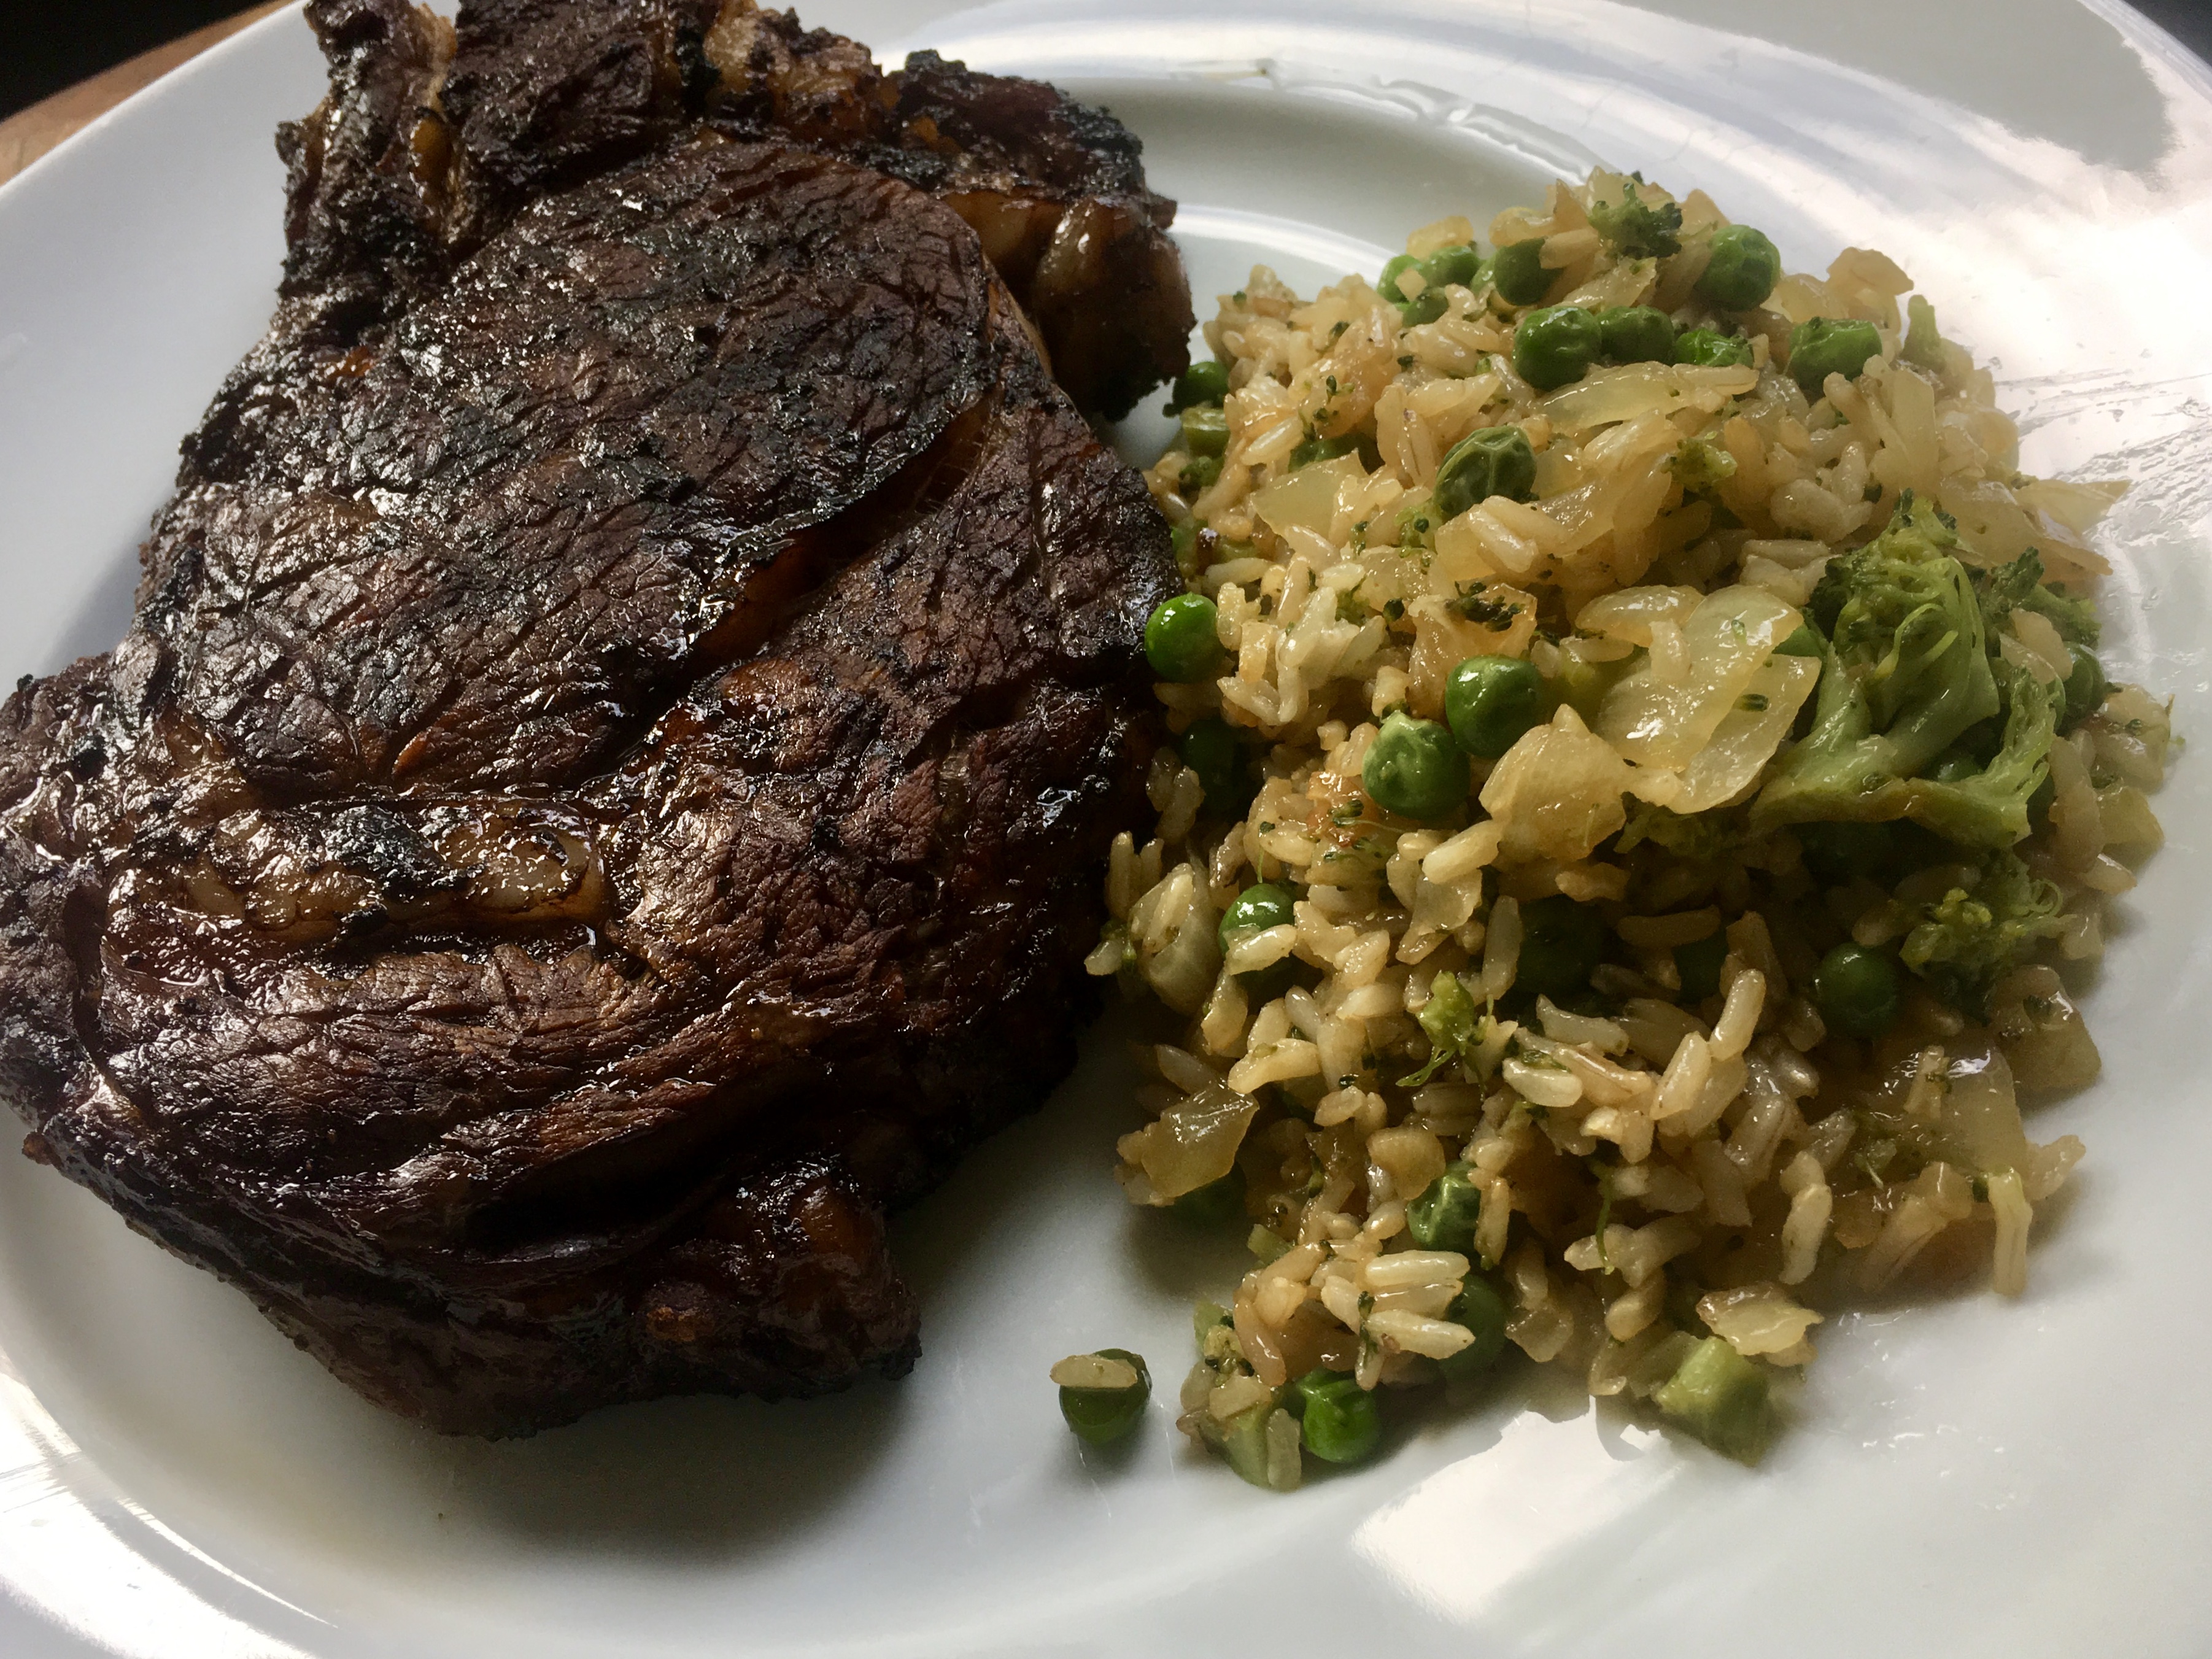
This is a really delicious grilled steak full of wonderful Thai flavors. You do need to marinate it overnight, so keep that in mind. The overnight marinating is key to the intense and unbelievable flavor of the beef.
The original recipe called for skirt steak, but I didn’t have any in my freezer. I did have a fat ribeye, though, so once I thawed it, I sliced it lengthwise to get two large, thin steaks which would easily suck up the marinade I was going to make. And the ribeye was nicely marbled, so it stayed juicy and tender. Beef flap or flank steak are cuts is that would work well with this recipe.
2 lbs. beef ribeye (or skirt steak or beef flap)
1/4 cup chicken stock (homemade is best)
In a bowl, whisk together the sesame oil, soy sauce, ginger, garlic, cilantro, peanuts, scallions, sugar, lime juice and chile oil. Transfer half of it to a shallow dish.
Add the steak to the dish and turn the meat to coat it well. Cover and refrigerate the beef overnight. Refrigerate the other half of the marinade in a separate container.
The next day, light a grill. While it’s warming up, get out a sauce pan and pour the chicken stock in along with the reserved marinade. Heat it to combine it well, but not letting it reach a boil. Remove it from the heat and let it come to room temperature. This will be the dipping sauce for the beef.
About 30 minutes before cooking, take the marinated steak out of the fridge and let it come to room temperature. Season it with salt and pepper, and grill it over high heat until it’s medium-rare, about 5 minutes.
If it’s too cold to light a grill, or if you just want to use the oven, heat a cast iron pan on the stovetop, add a few drops of avocado oil or pork fat, and sear the beef on both sides before placing it in a pre-heated 375° oven to finish cooking.
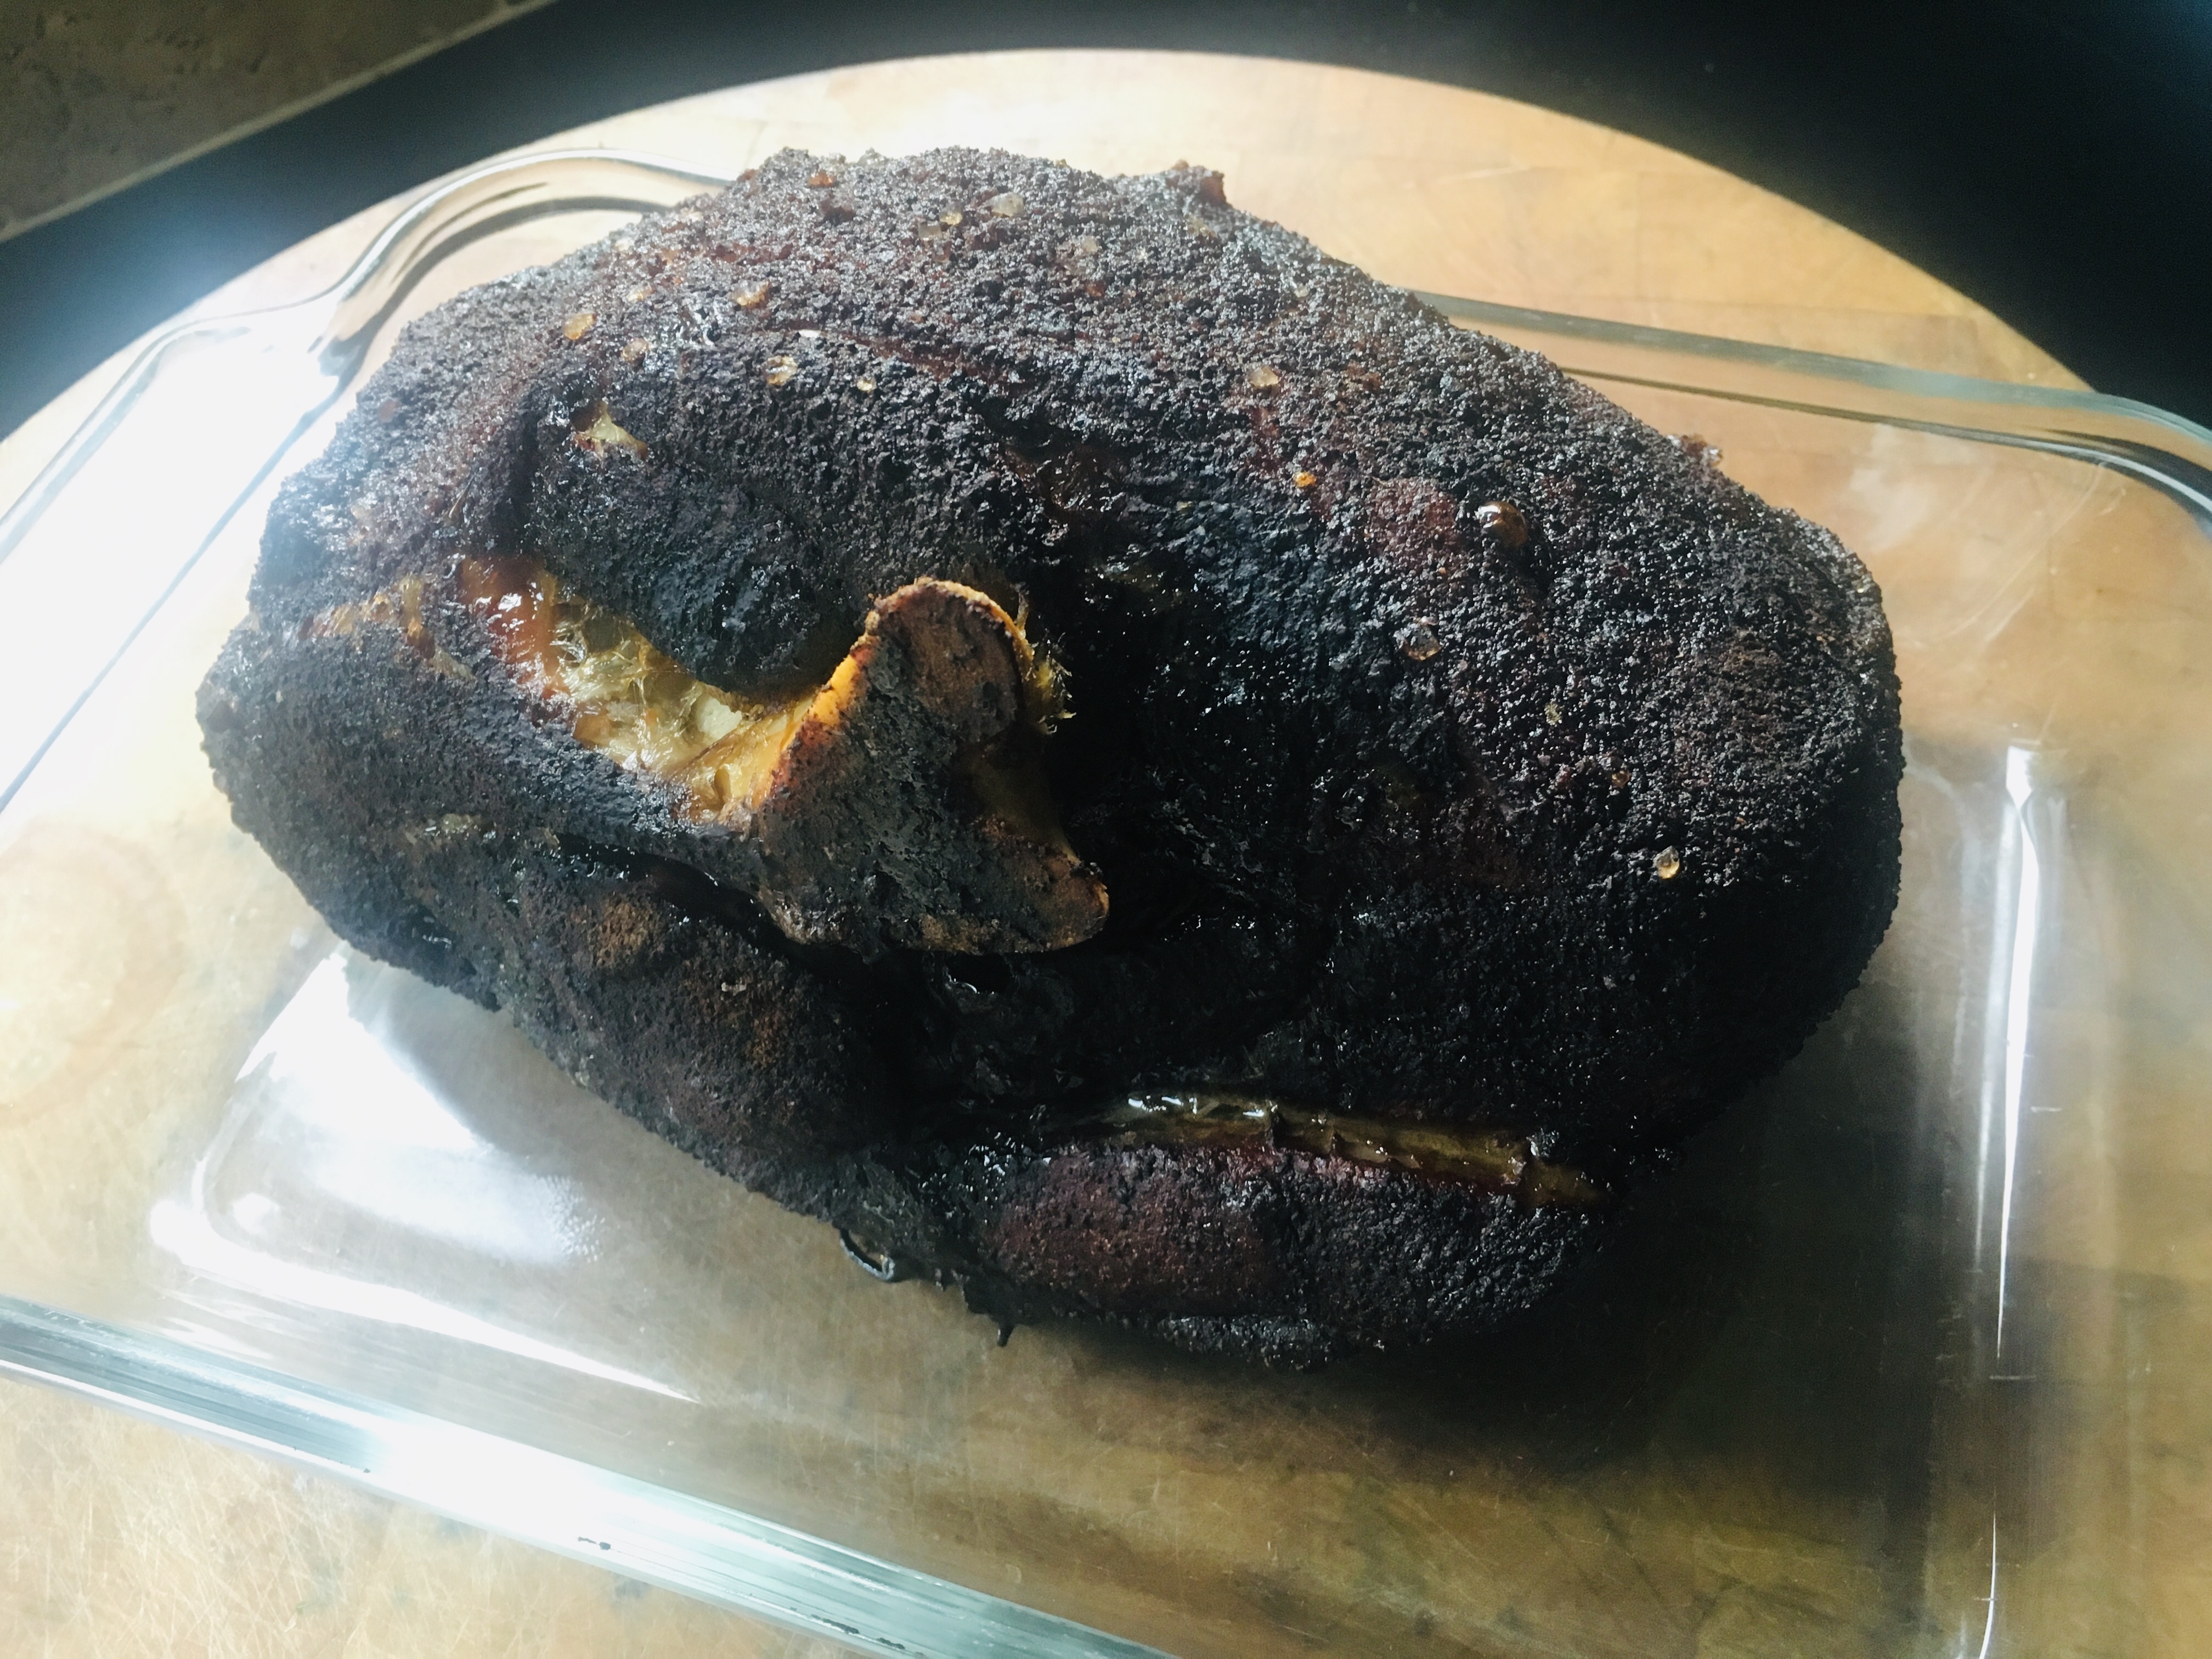
As I’ve mentioned previously, I love the Kona-crusted NY strip at the Capital Grille, so much so that it inspired me to make a coffee rub of my own. I’ve been using it on steaks and burgers for years. But recently, I used it on a slow-smoked pork shoulder for the first time, and it was fantastic!
I used a smaller pork shoulder, about 6 lbs., and smoked it for about 12 hours. Obviously, if you use a larger hunka meat, you’ll need more time. I prefer a bone-in shoulder over boneless. I think it gives greater flavor.
Rubbed and ready to smoke!
My coffee rub is easy to make, and I usually make a lot of it at once, since it stores well.
3 tablespoons brown sugar 1 tablespoon Kosher salt 1 tablespoon ground coffee (use your favorite) 1 teaspoon granulated garlic 1 teaspoon granulated onion 1 teaspoon unsweetened cocoa powder
I mix all the ingredients well, then rub generously on the pork shoulder before placing it a 250-degree smoker for about 12 hours. I use an electric smoker, which allows me to set the temperature and forget it, with the exception of occasionally adding hickory chips. I love just a hint of smokiness…I don’t want the rub to be overpowered by the smoke.
Perfectly smoked, with the bone easily sliding out of the shoulder.
The brown sugar in the coffee rub creates a beautiful crust on the meat, which goes really well with the pork and the barbecue sauce I make.
The barbecue sauce uses much-needed vinegar. It cuts through the rich fattiness of the pork, and is absolutely delicious.
2 cups ketchup
3/4 cup water
6 tablespoons cider vinegar
6 tablespoons white vinegar
6 tablespoons brown sugar
3 tablespoons Worcestershire sauce
1 tablespoon chili powder
2 teaspoons salt
2 teaspoons black pepper
1 1/2 teaspoons cumin
Mix all the ingredients in a saucepan and simmer until the flavors have blended, about 20 minutes. Remove from heat and cool to room temp. If you store it in an airtight container in the fridge, it’ll stay good for a few months.
A beautifully smoked pork shoulder, amazing barbecue sauce…what more do you need for an amazing pulled pork sandwich except a toasted brioche bun and perhaps some of my world-famous home fries on the side?
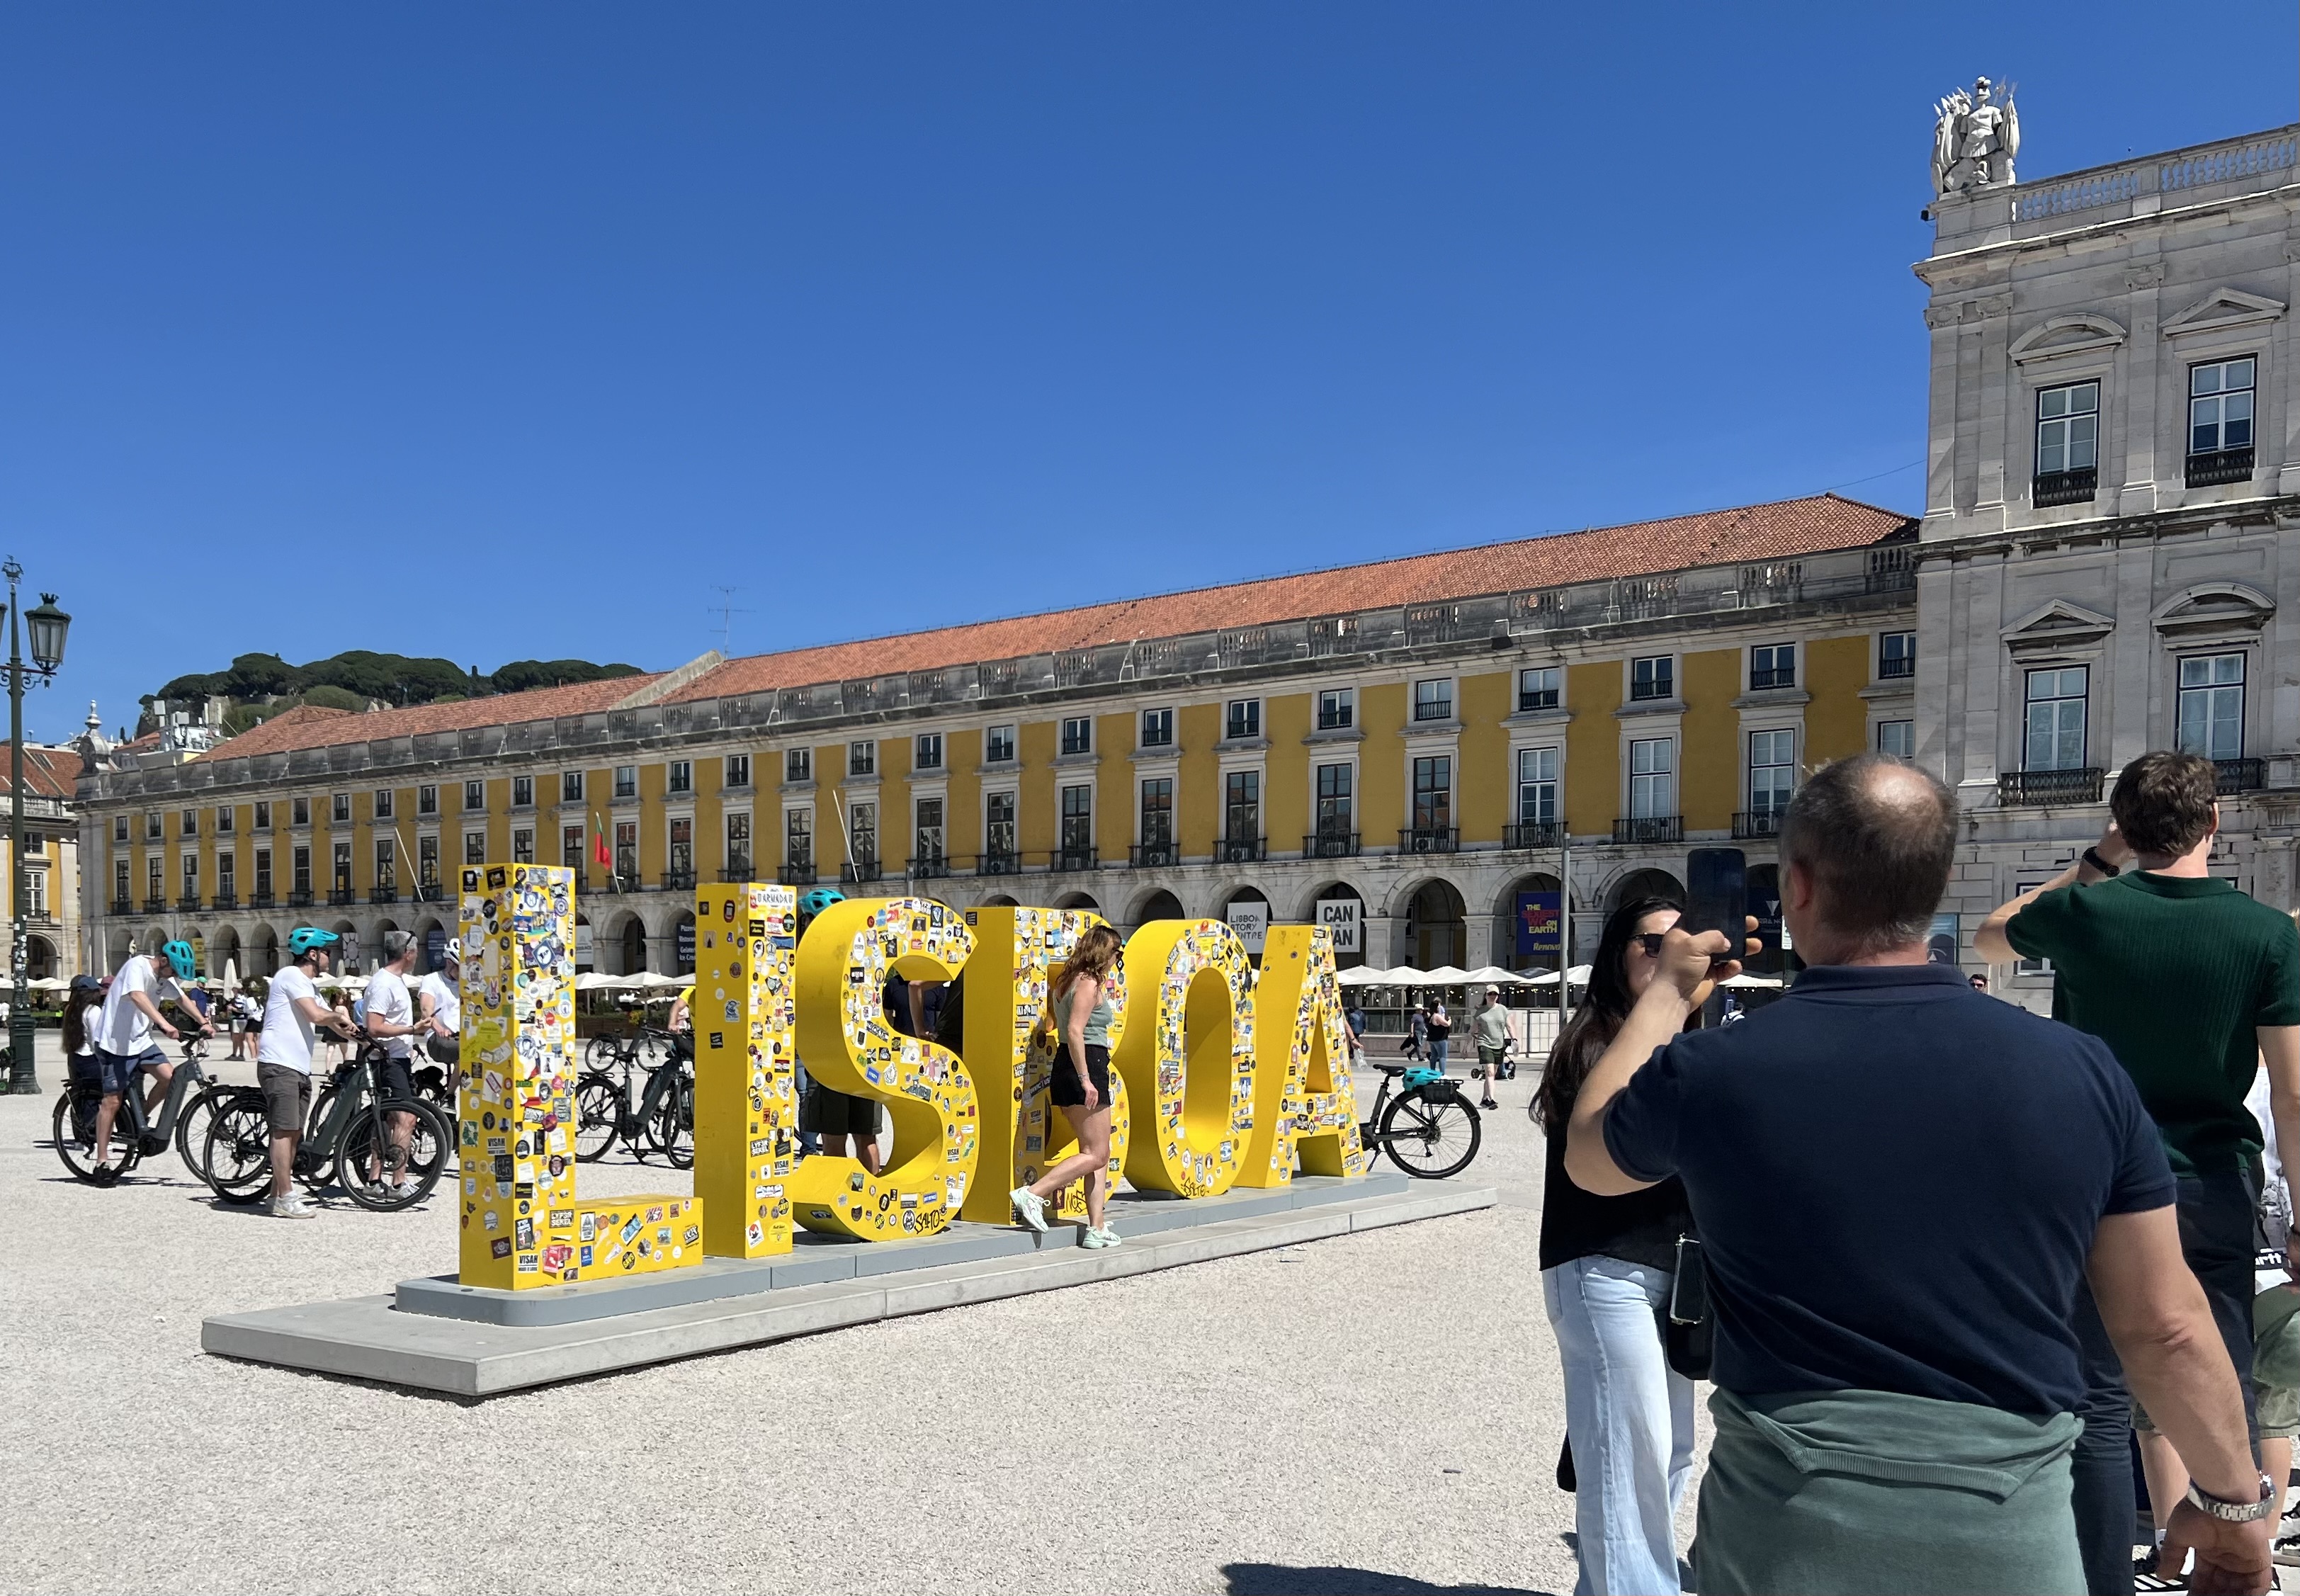
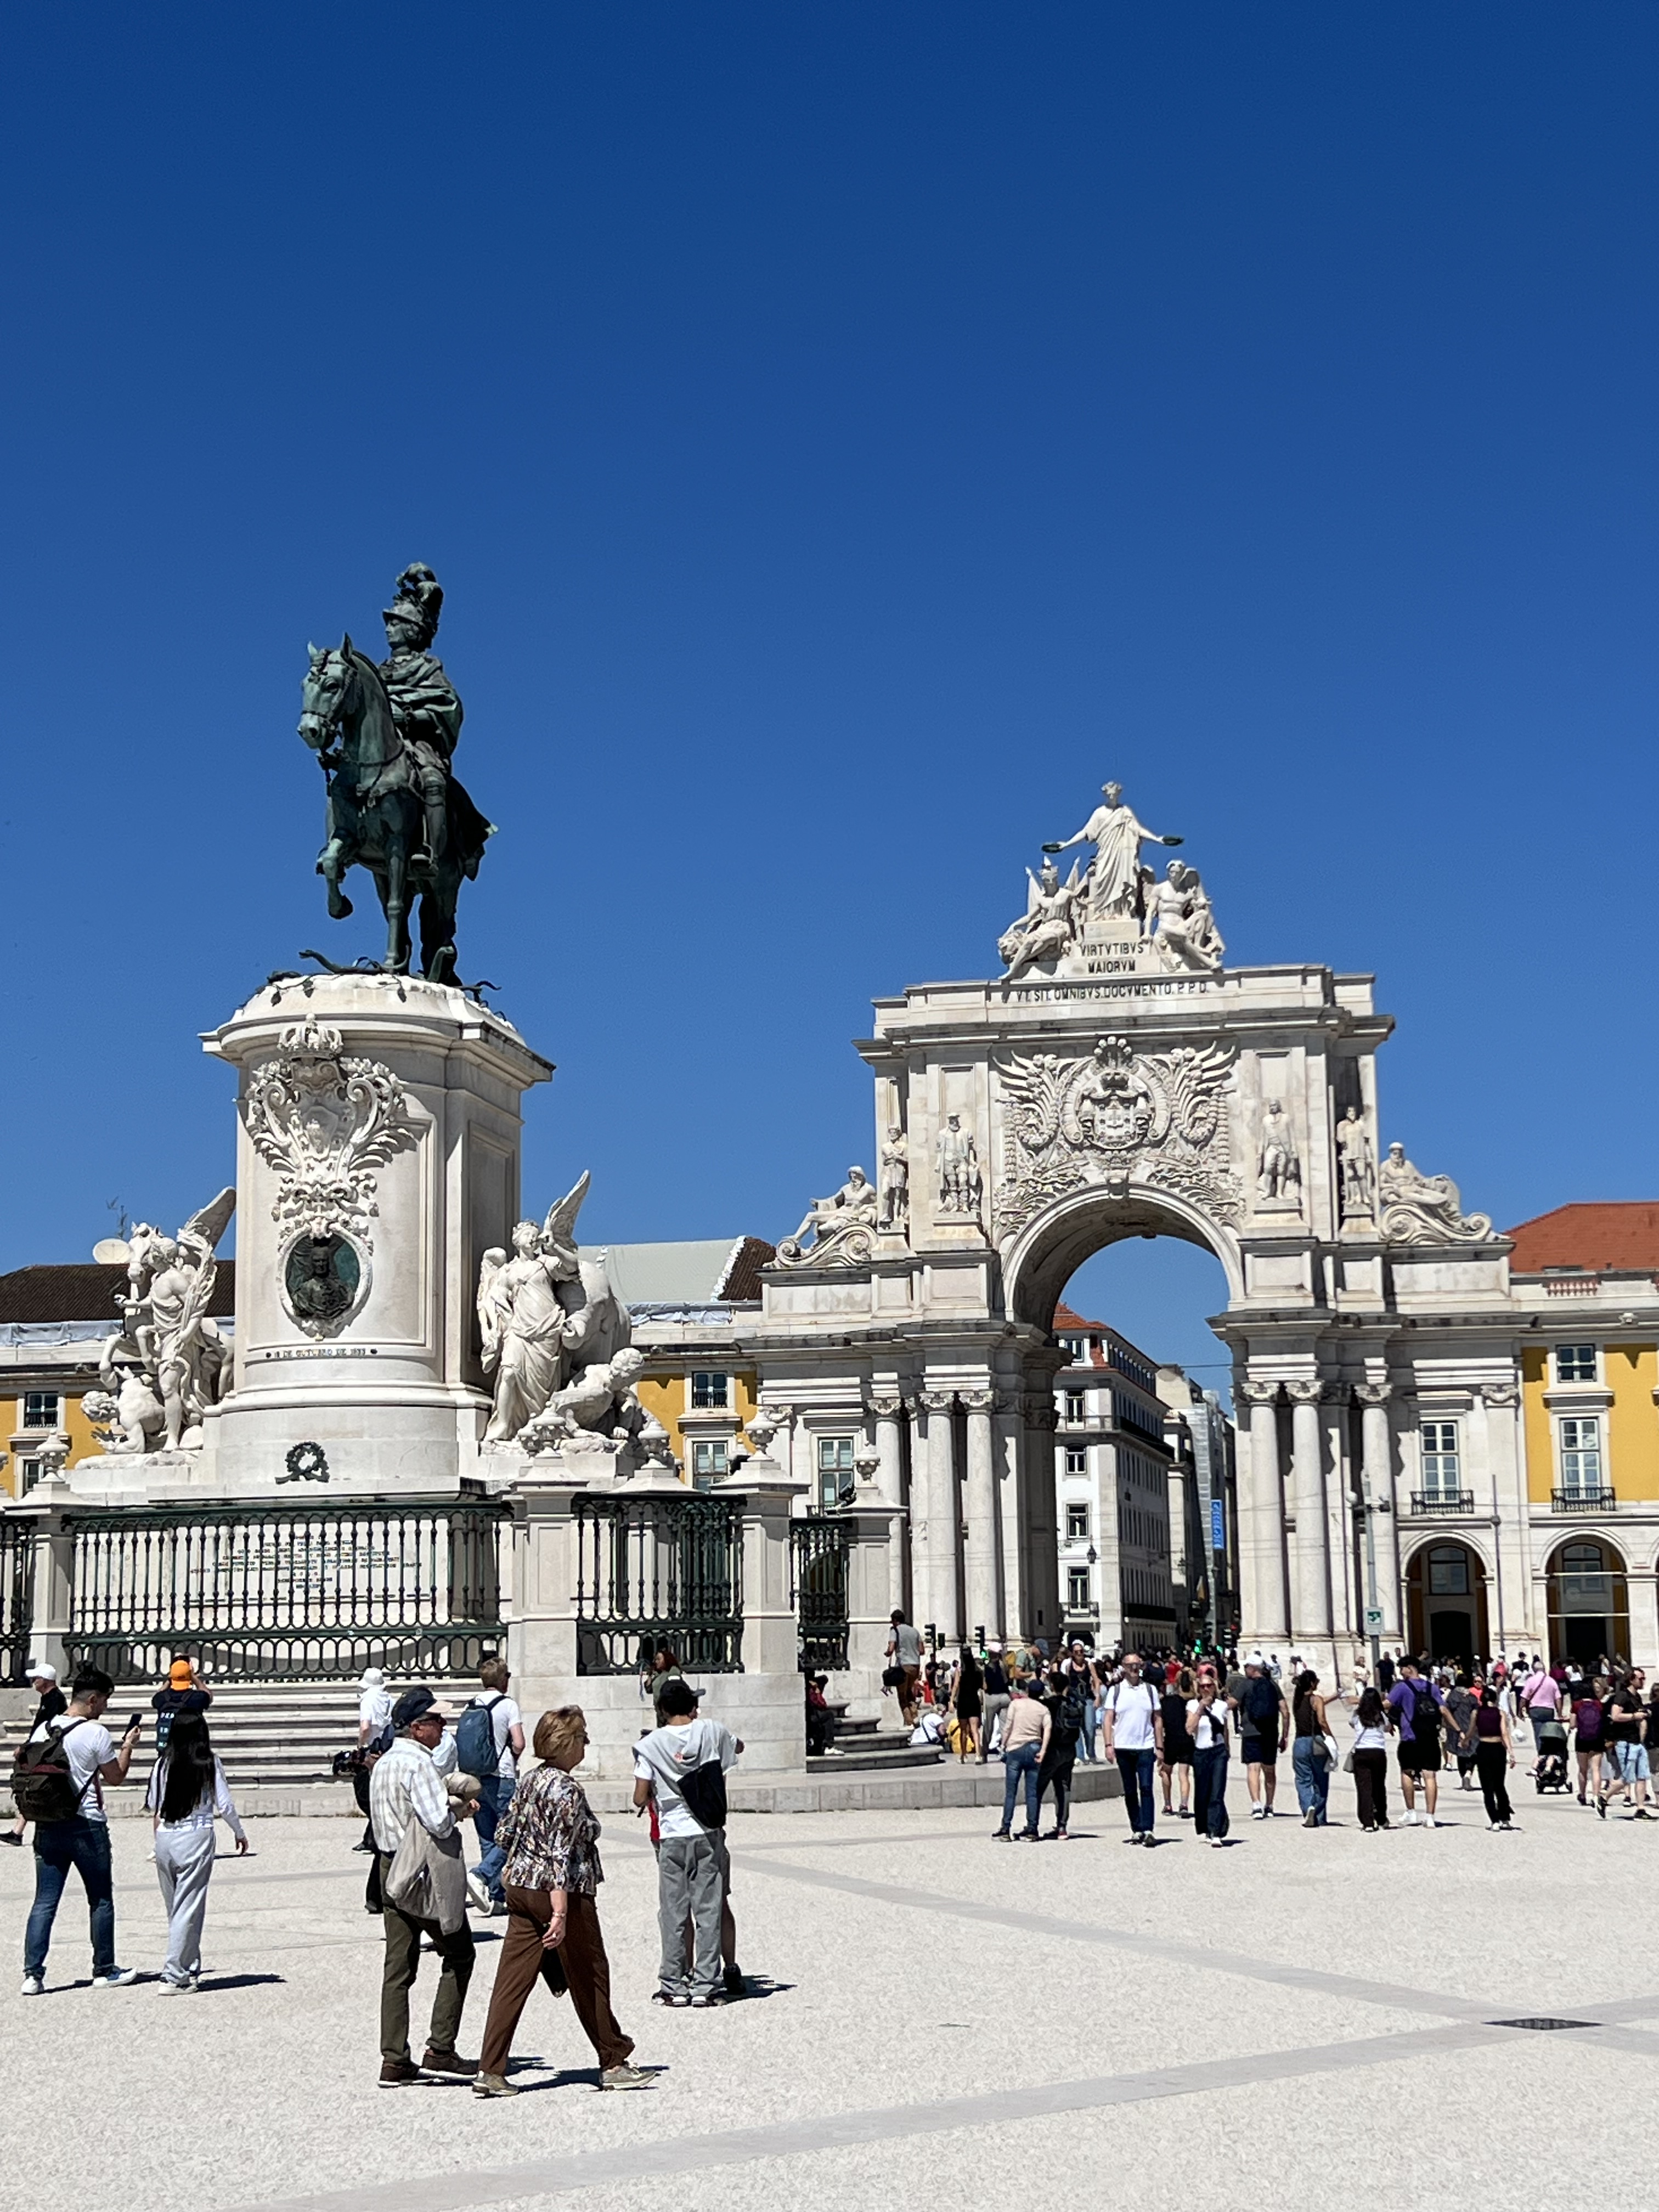
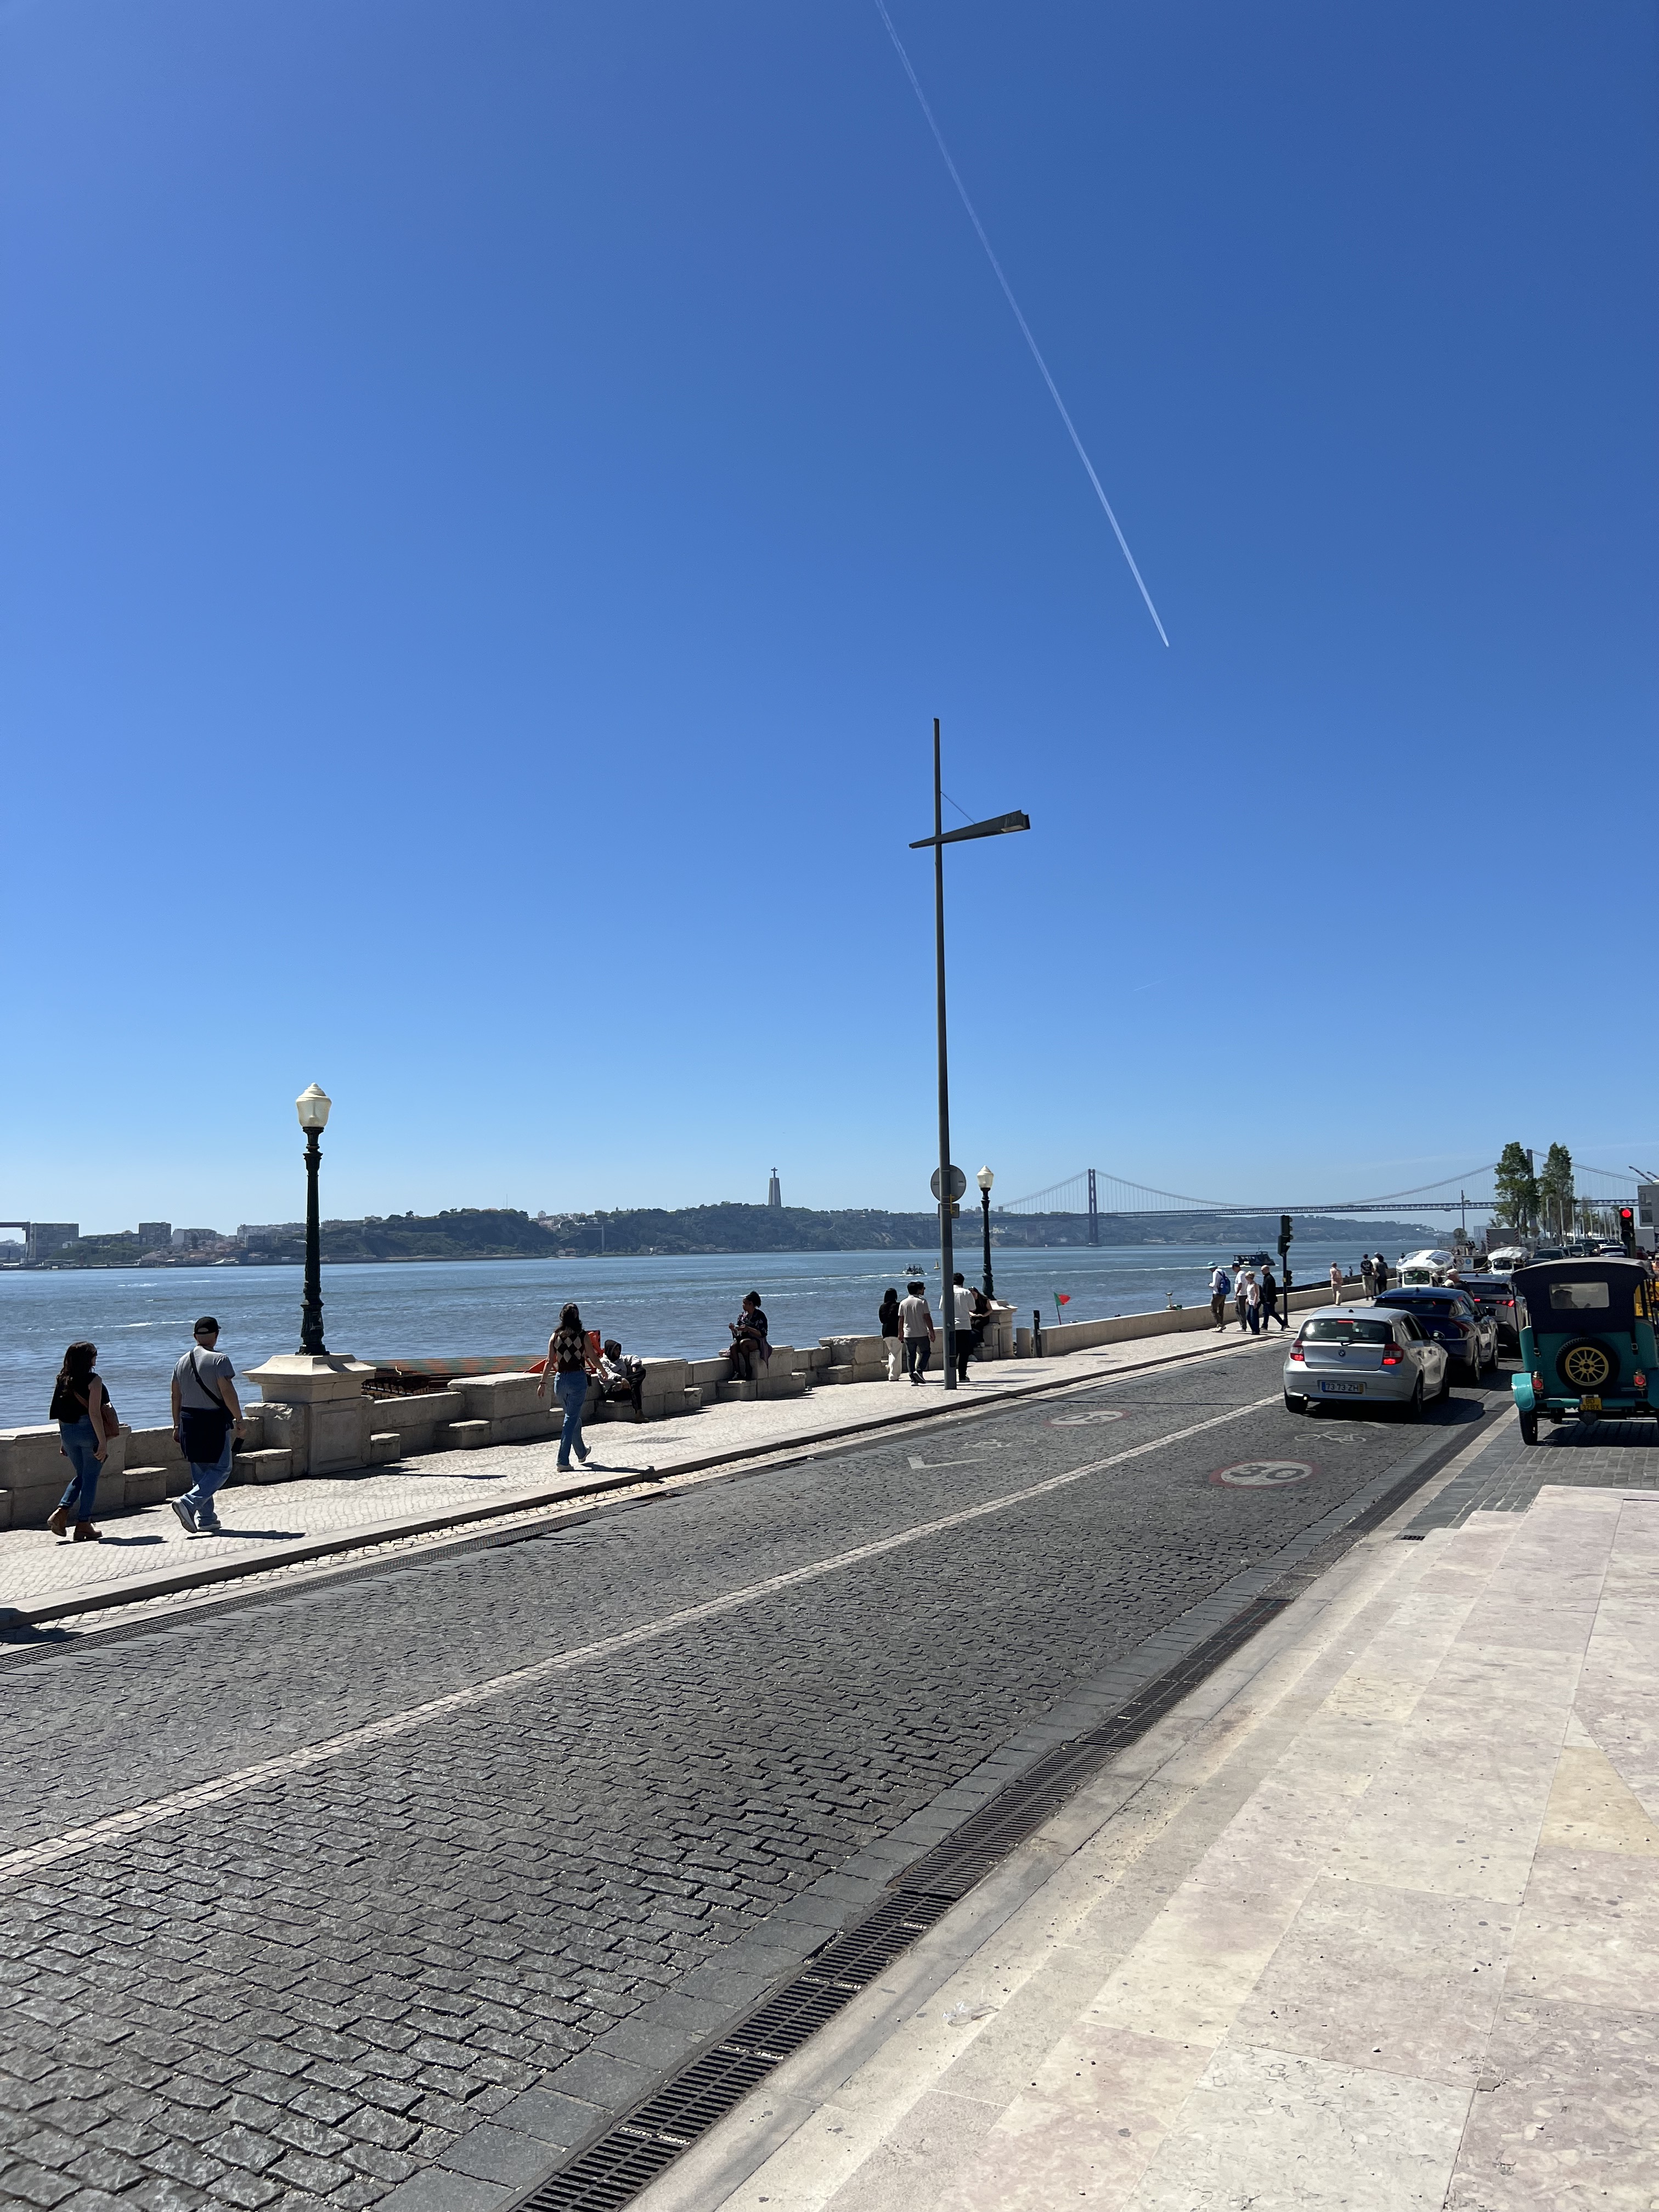
I spent my last full day in Portugal just walking up and down the streets of Lisbon. It was Easter weekend, and the streets were full of people enjoying a beautiful, sunny day. I was told that schools in Portugal and Spain take two-week vacations around Easter, and many people from Portugal go to Spain while folks from Spain visit Portugal, since it’s only a few hours by car. And I found that to be very true, since I could understand overheard conversations a lot better that weekend! (My Spanish is much better than my Portuguese!)
The waterfront in Lisbon was full of travelers!
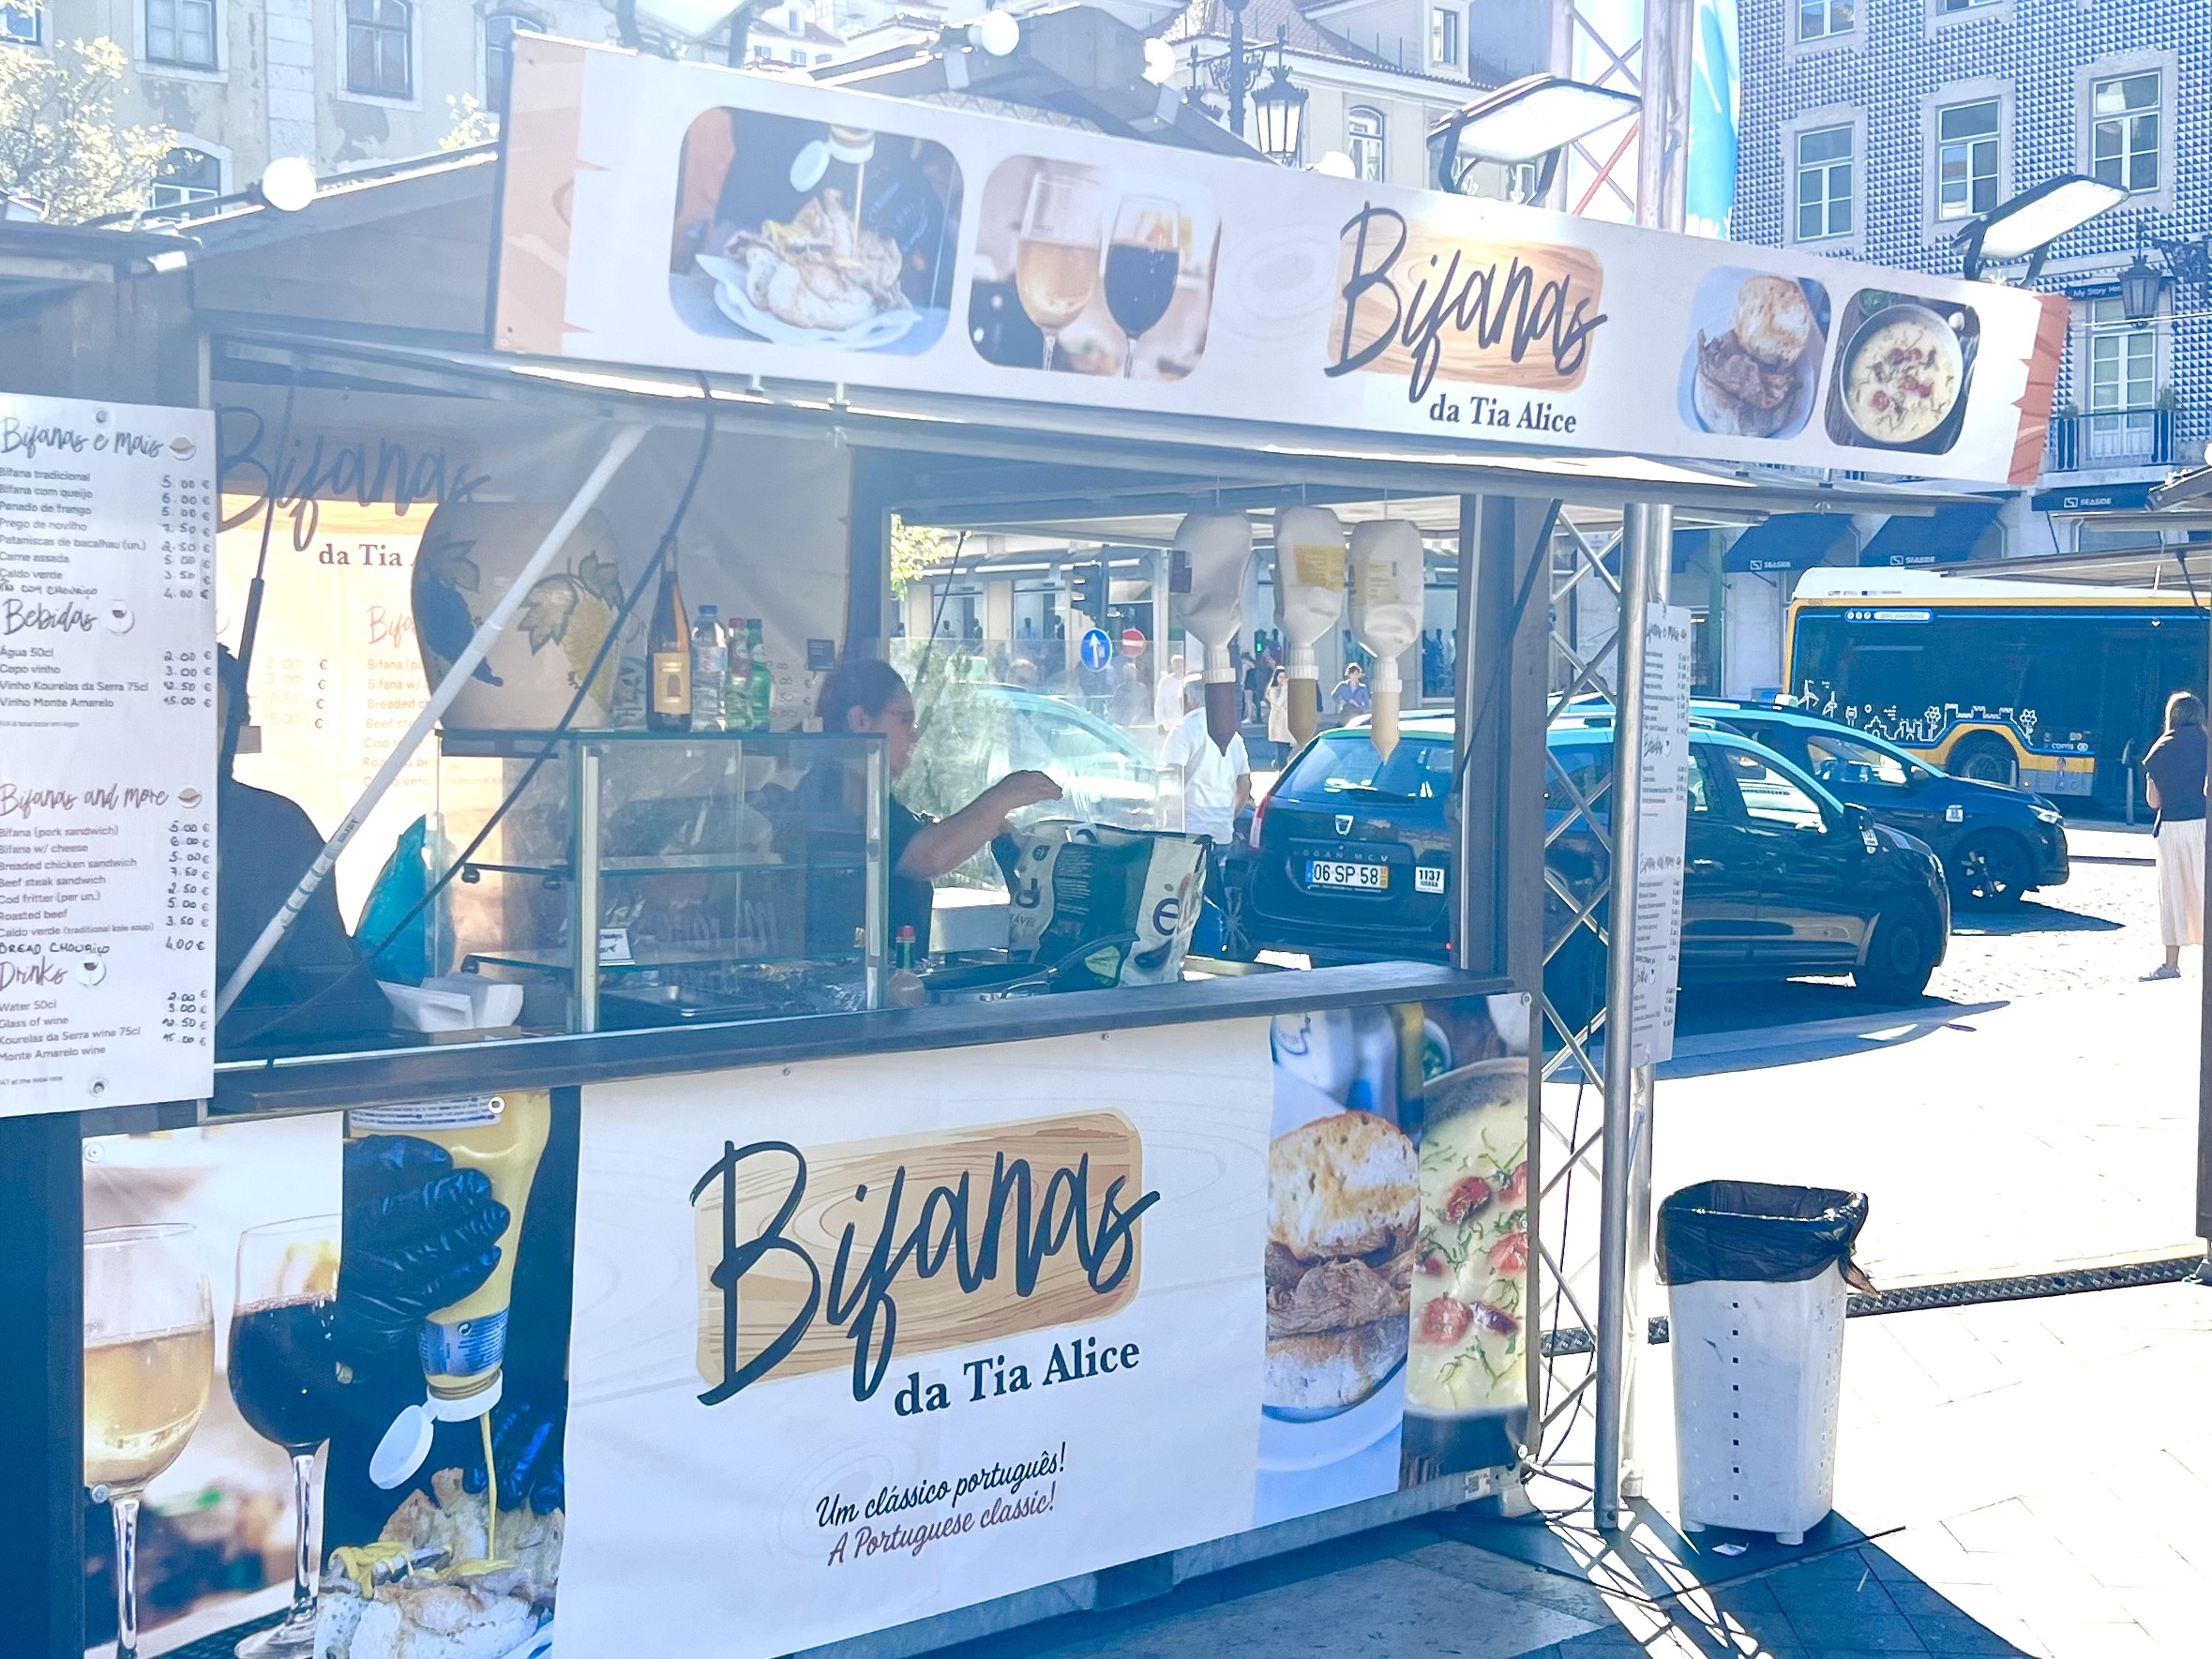
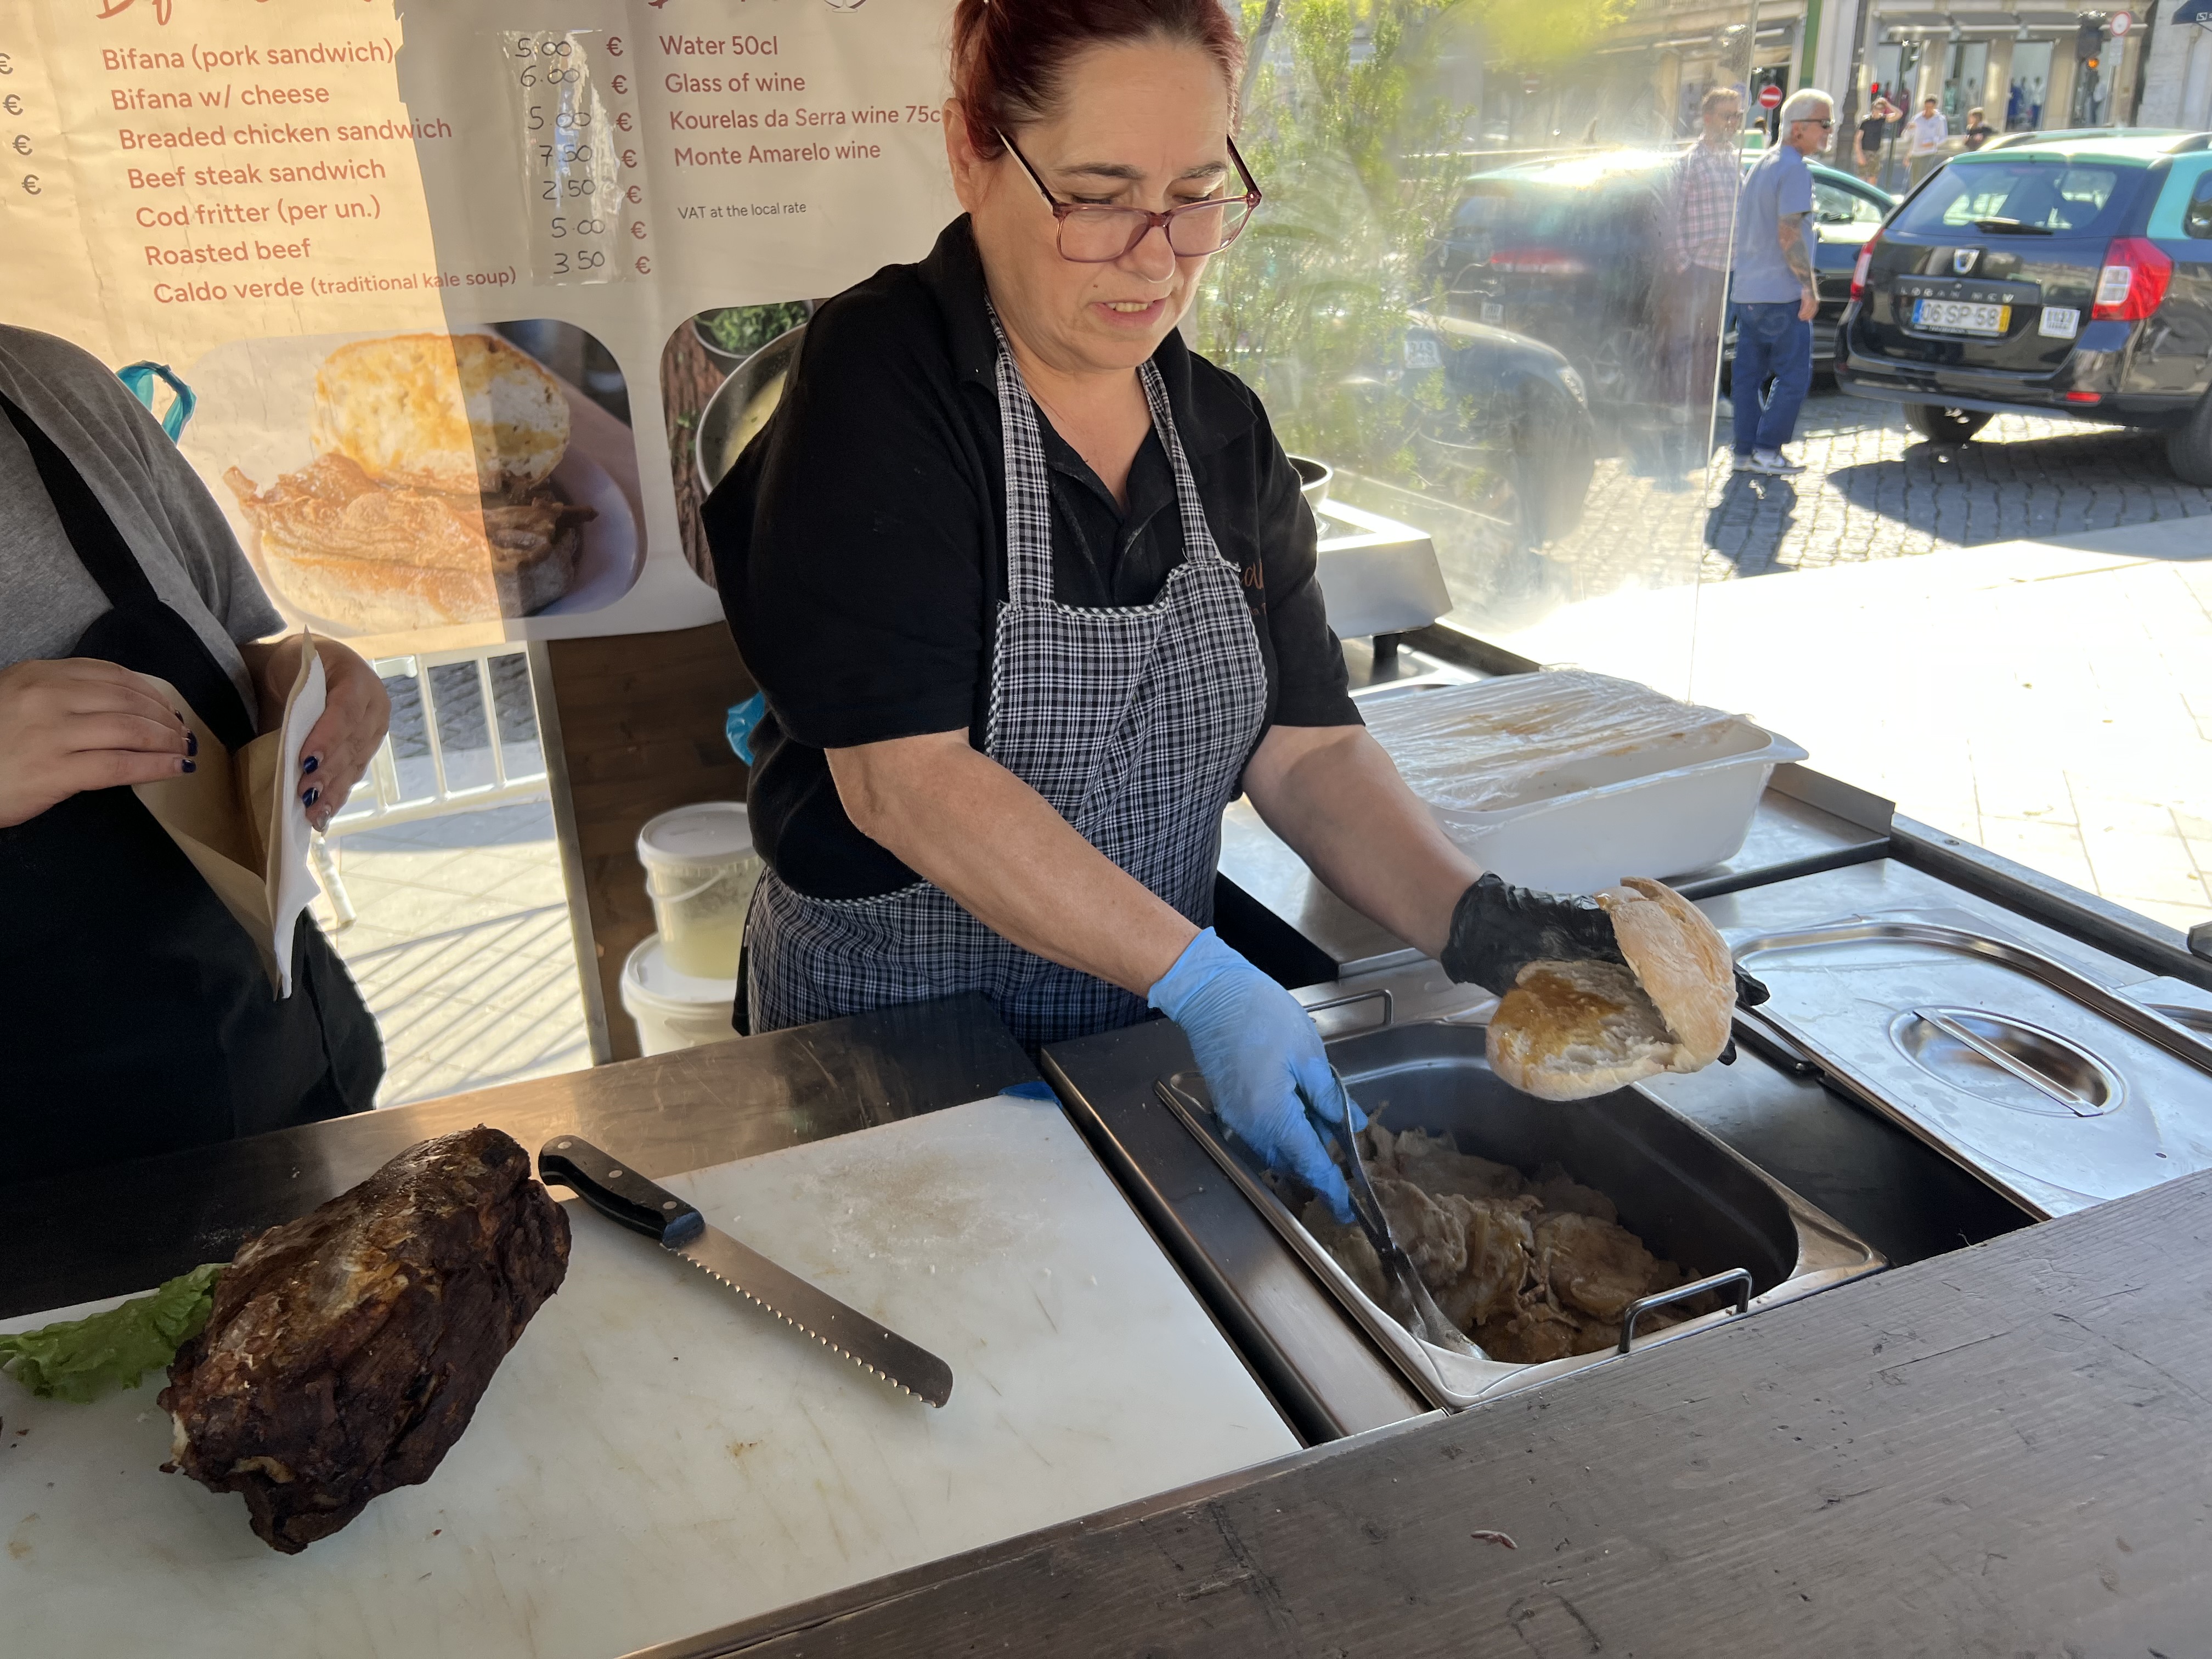
A small Easter marketplace opened up over the weekend, and it was my opportunity to try the famous pork sandwich called bifana. I had actually tracked down a bifana shop in town, but they were closed for the holiday. So finding this stand was a bit of luck. And it was delicious!
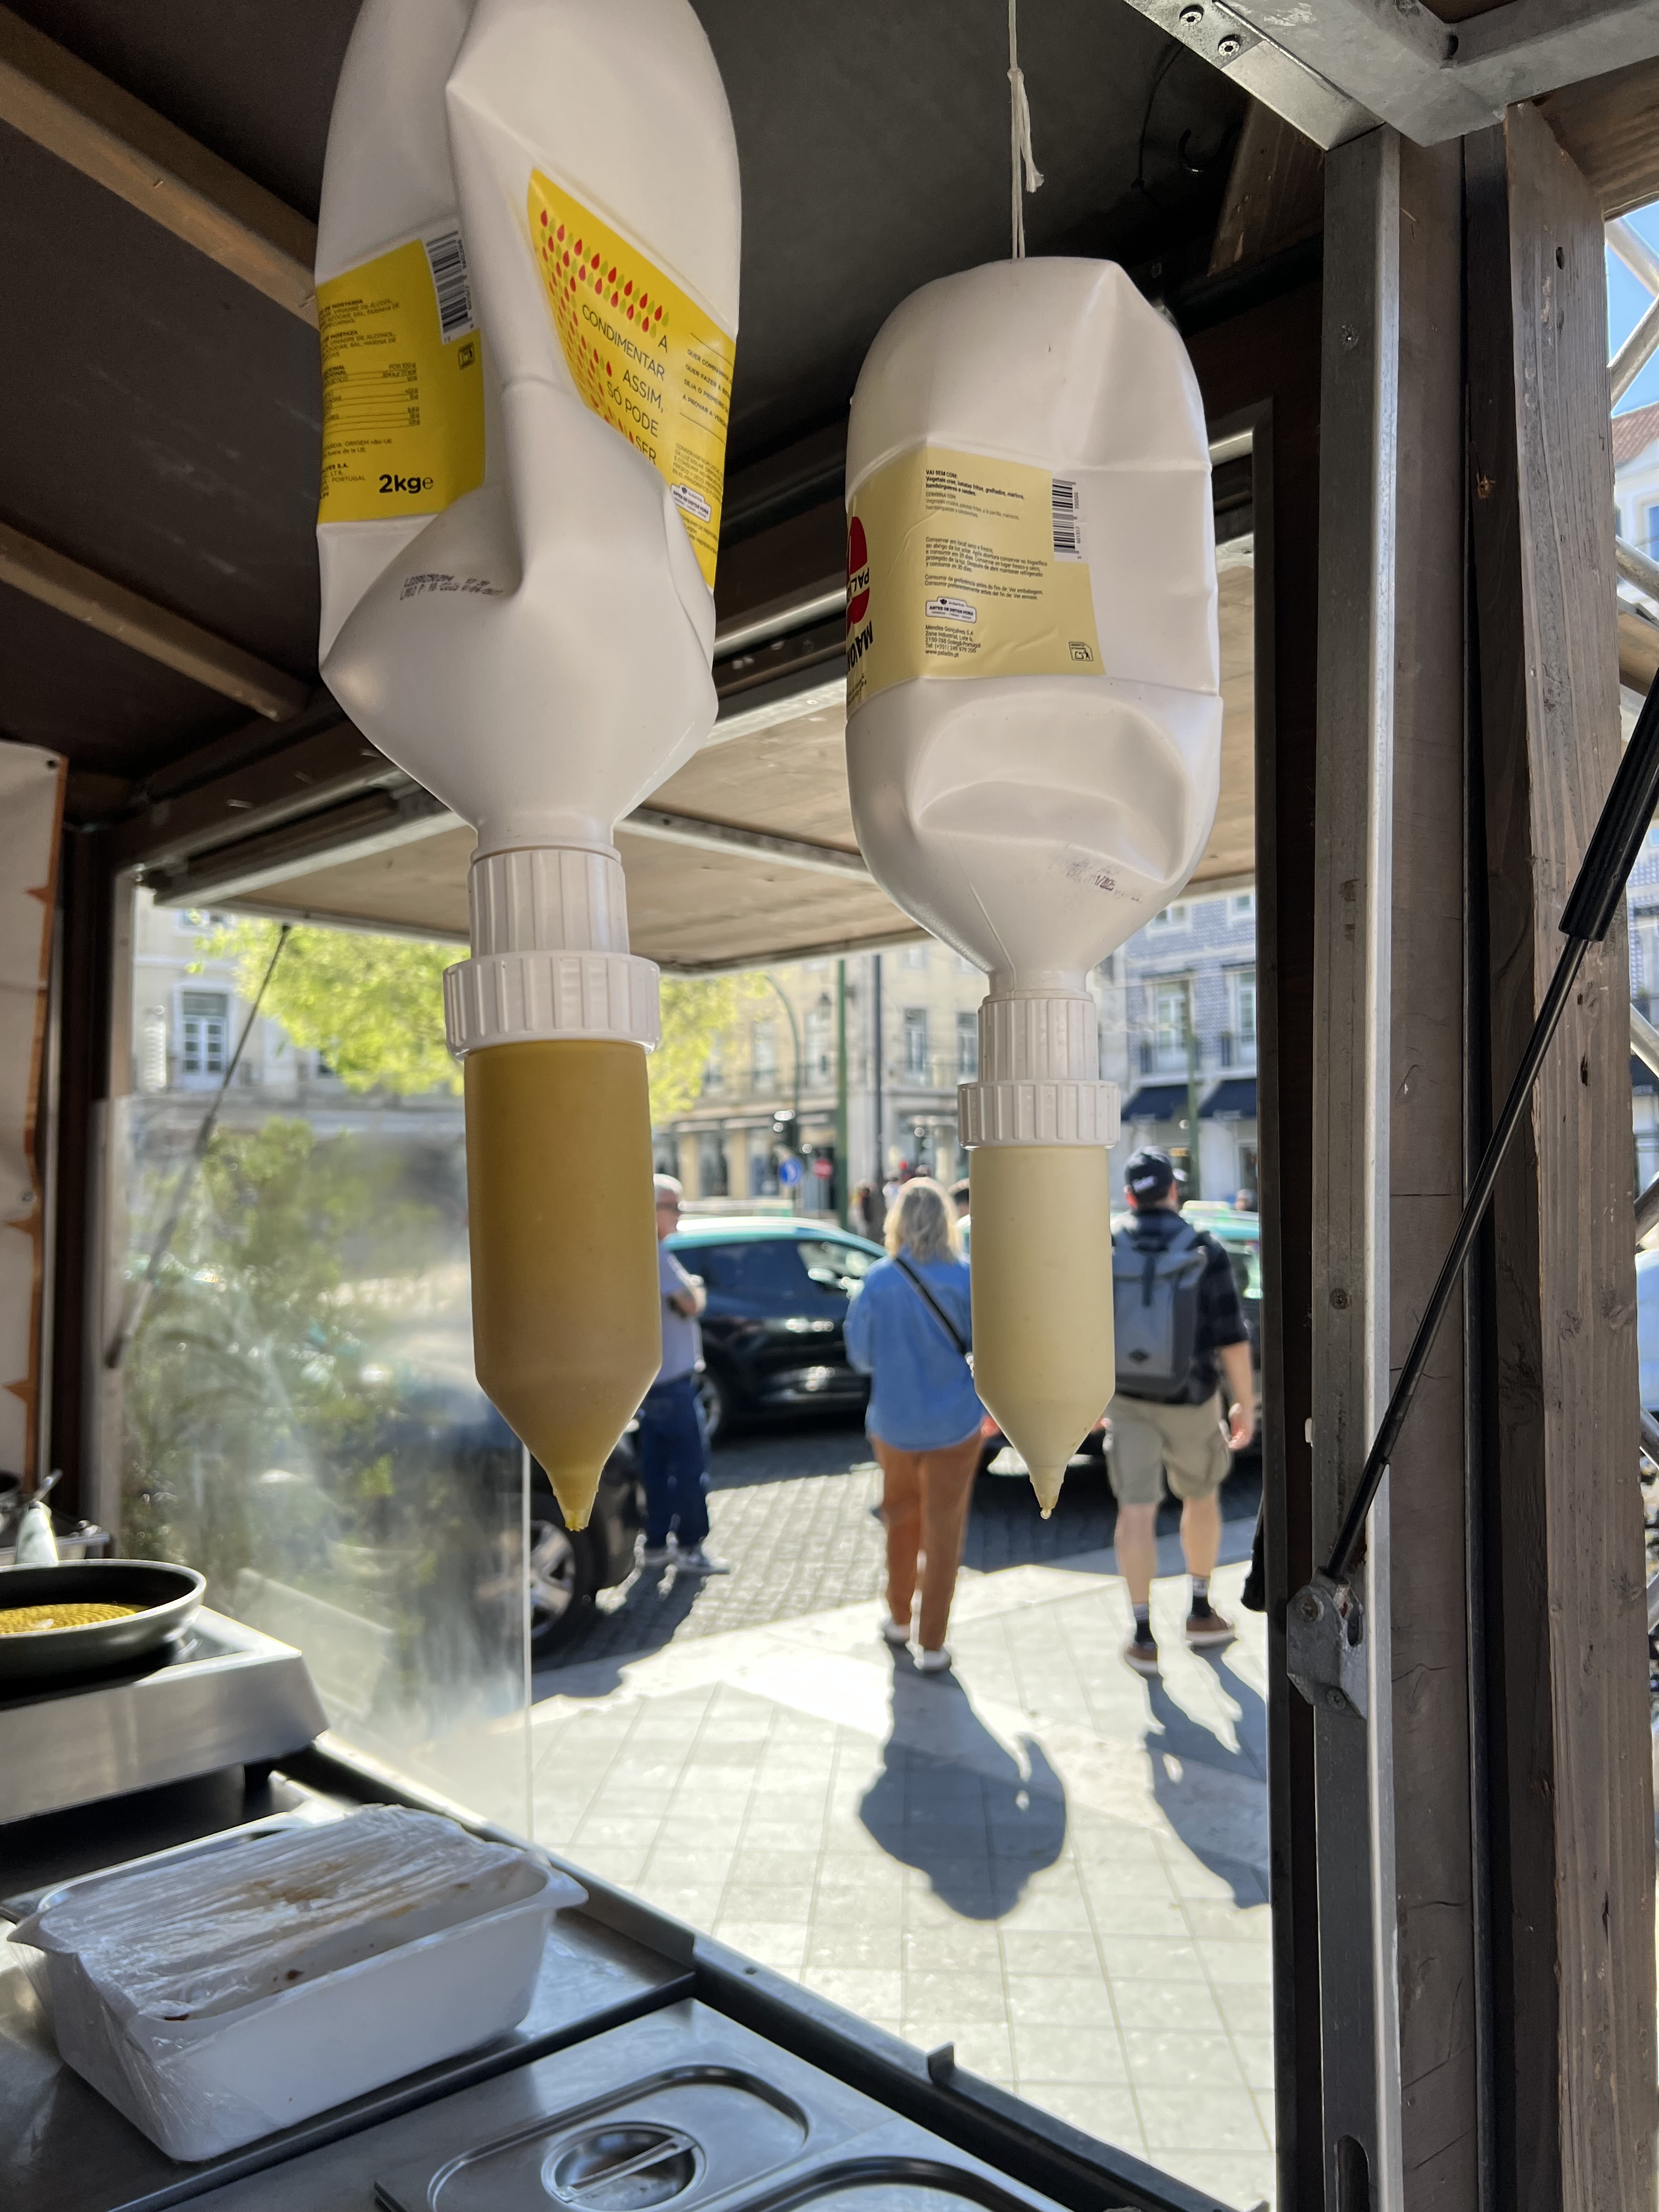
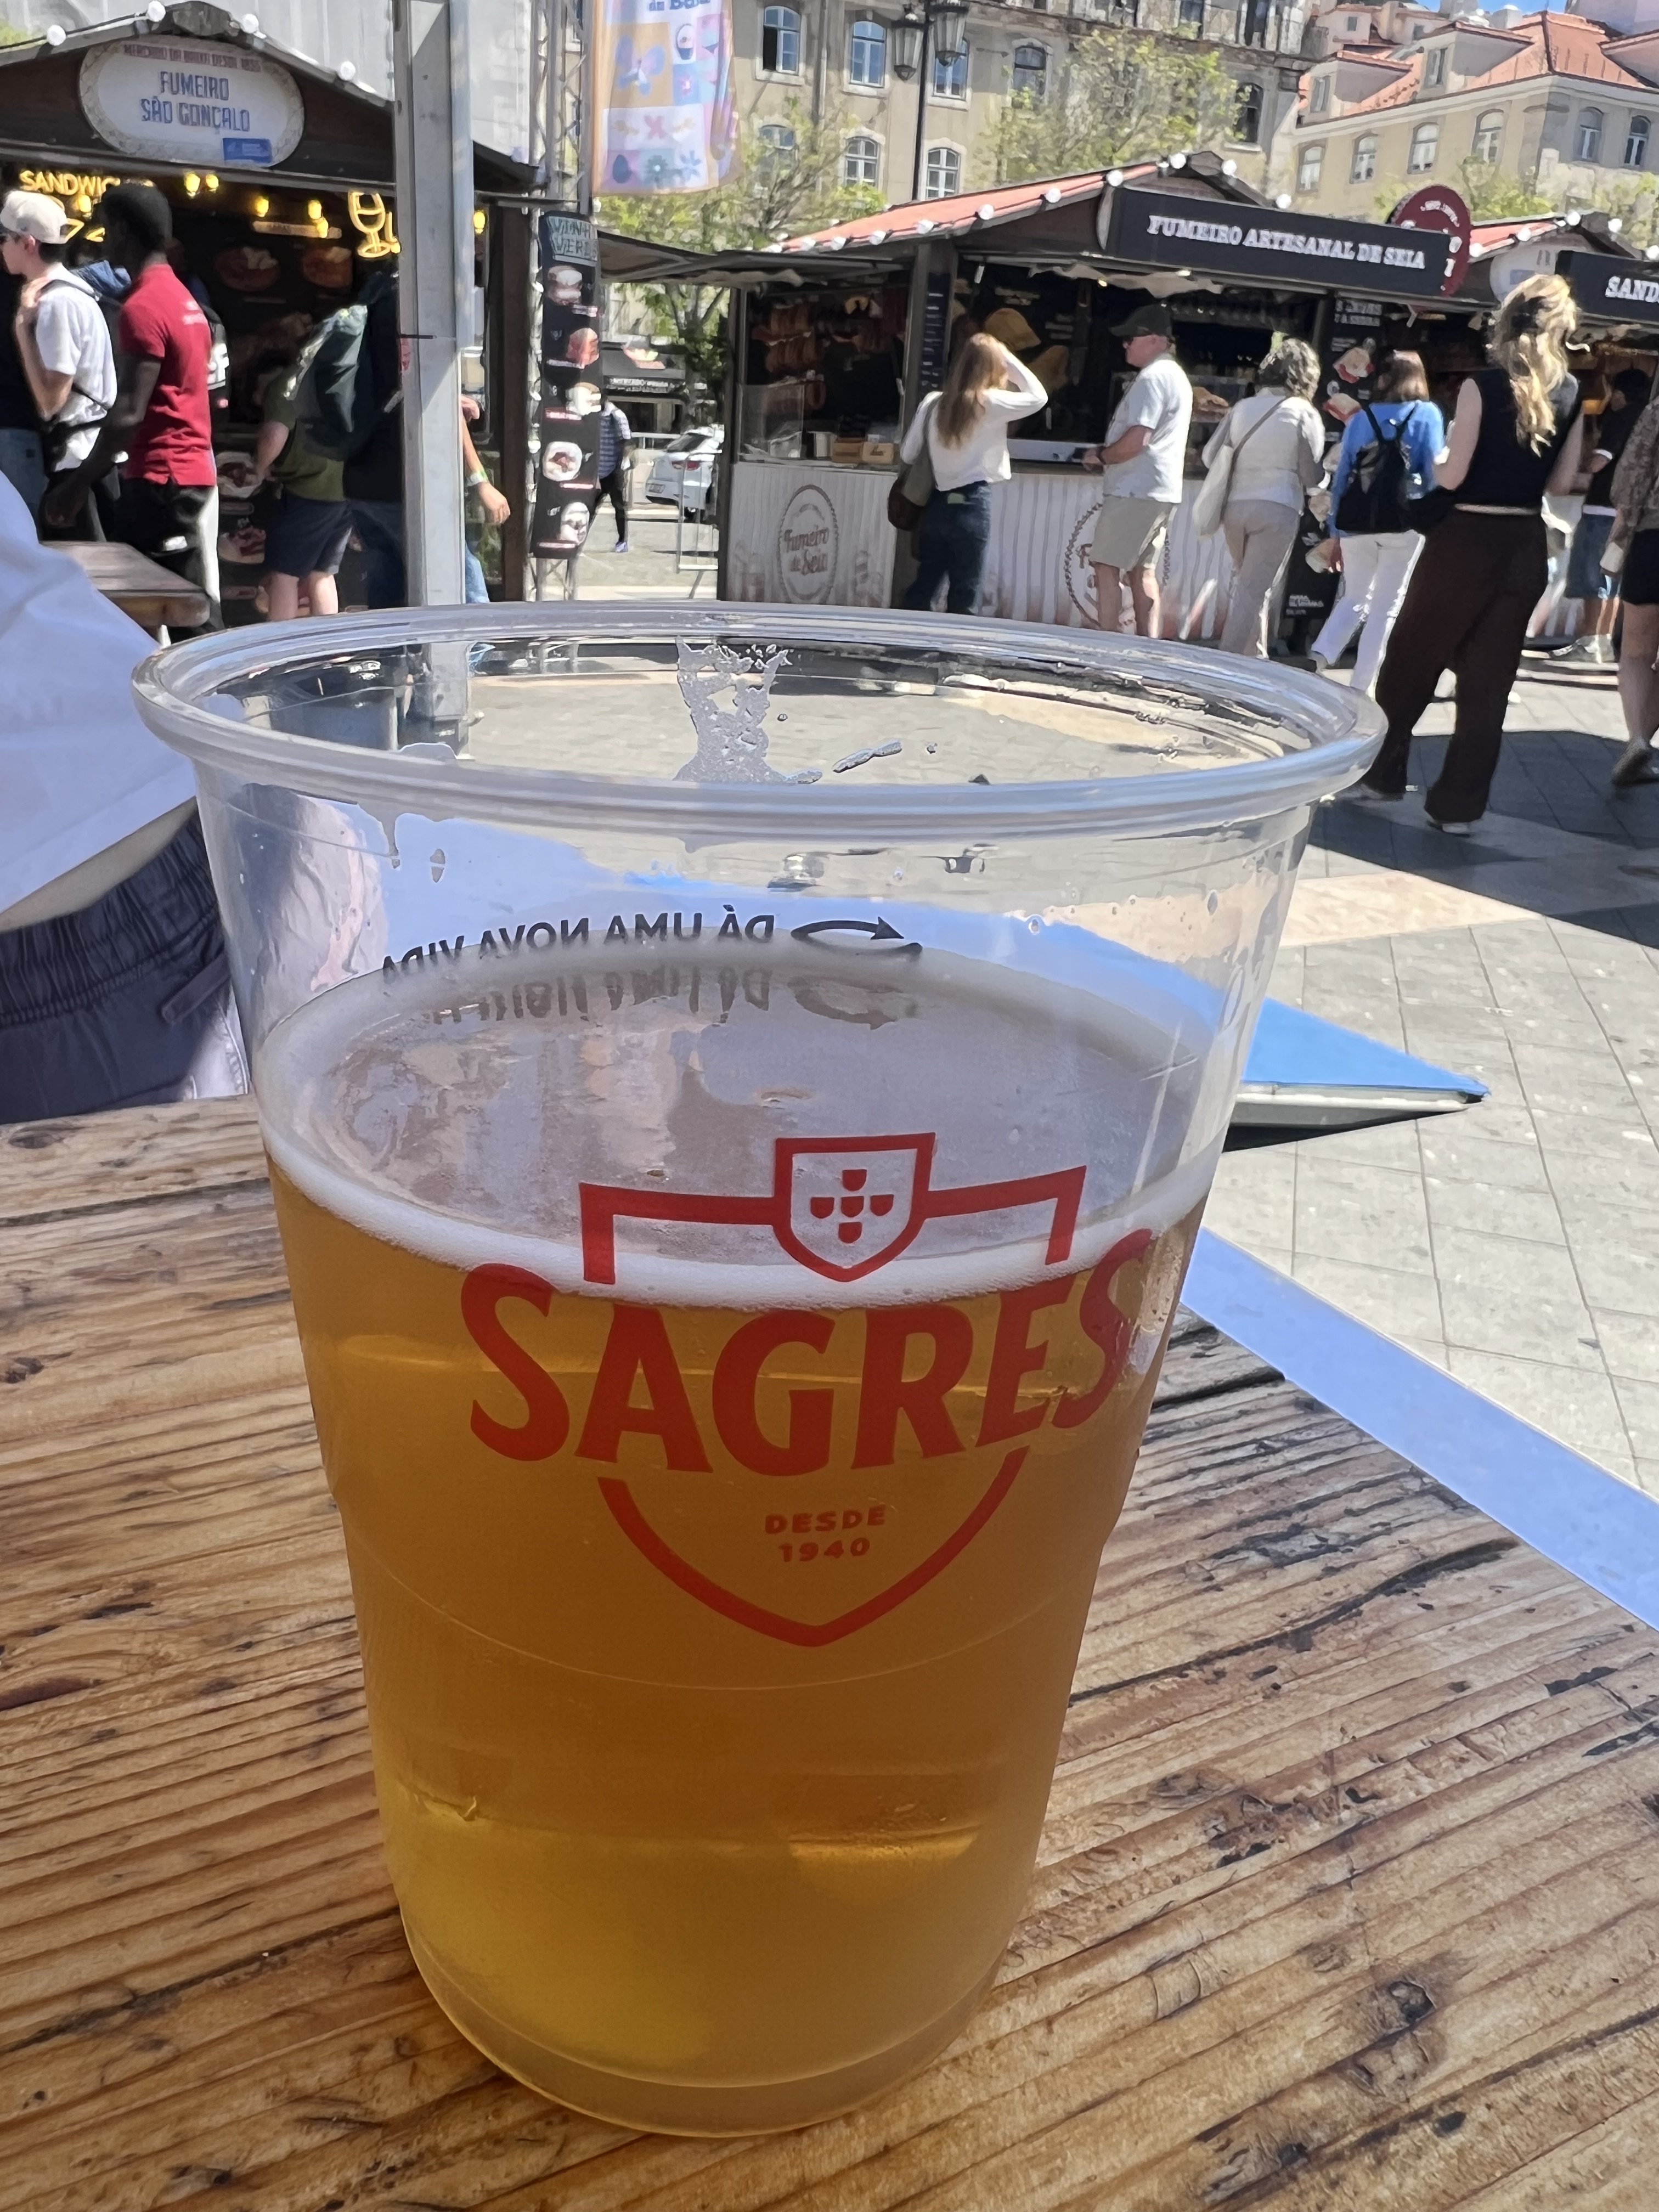
The ladies workjing here were very sweet and happy to share their food with hungry customers like me!An interesting way to serve condiments!A beer is always a good choice on a hot day!
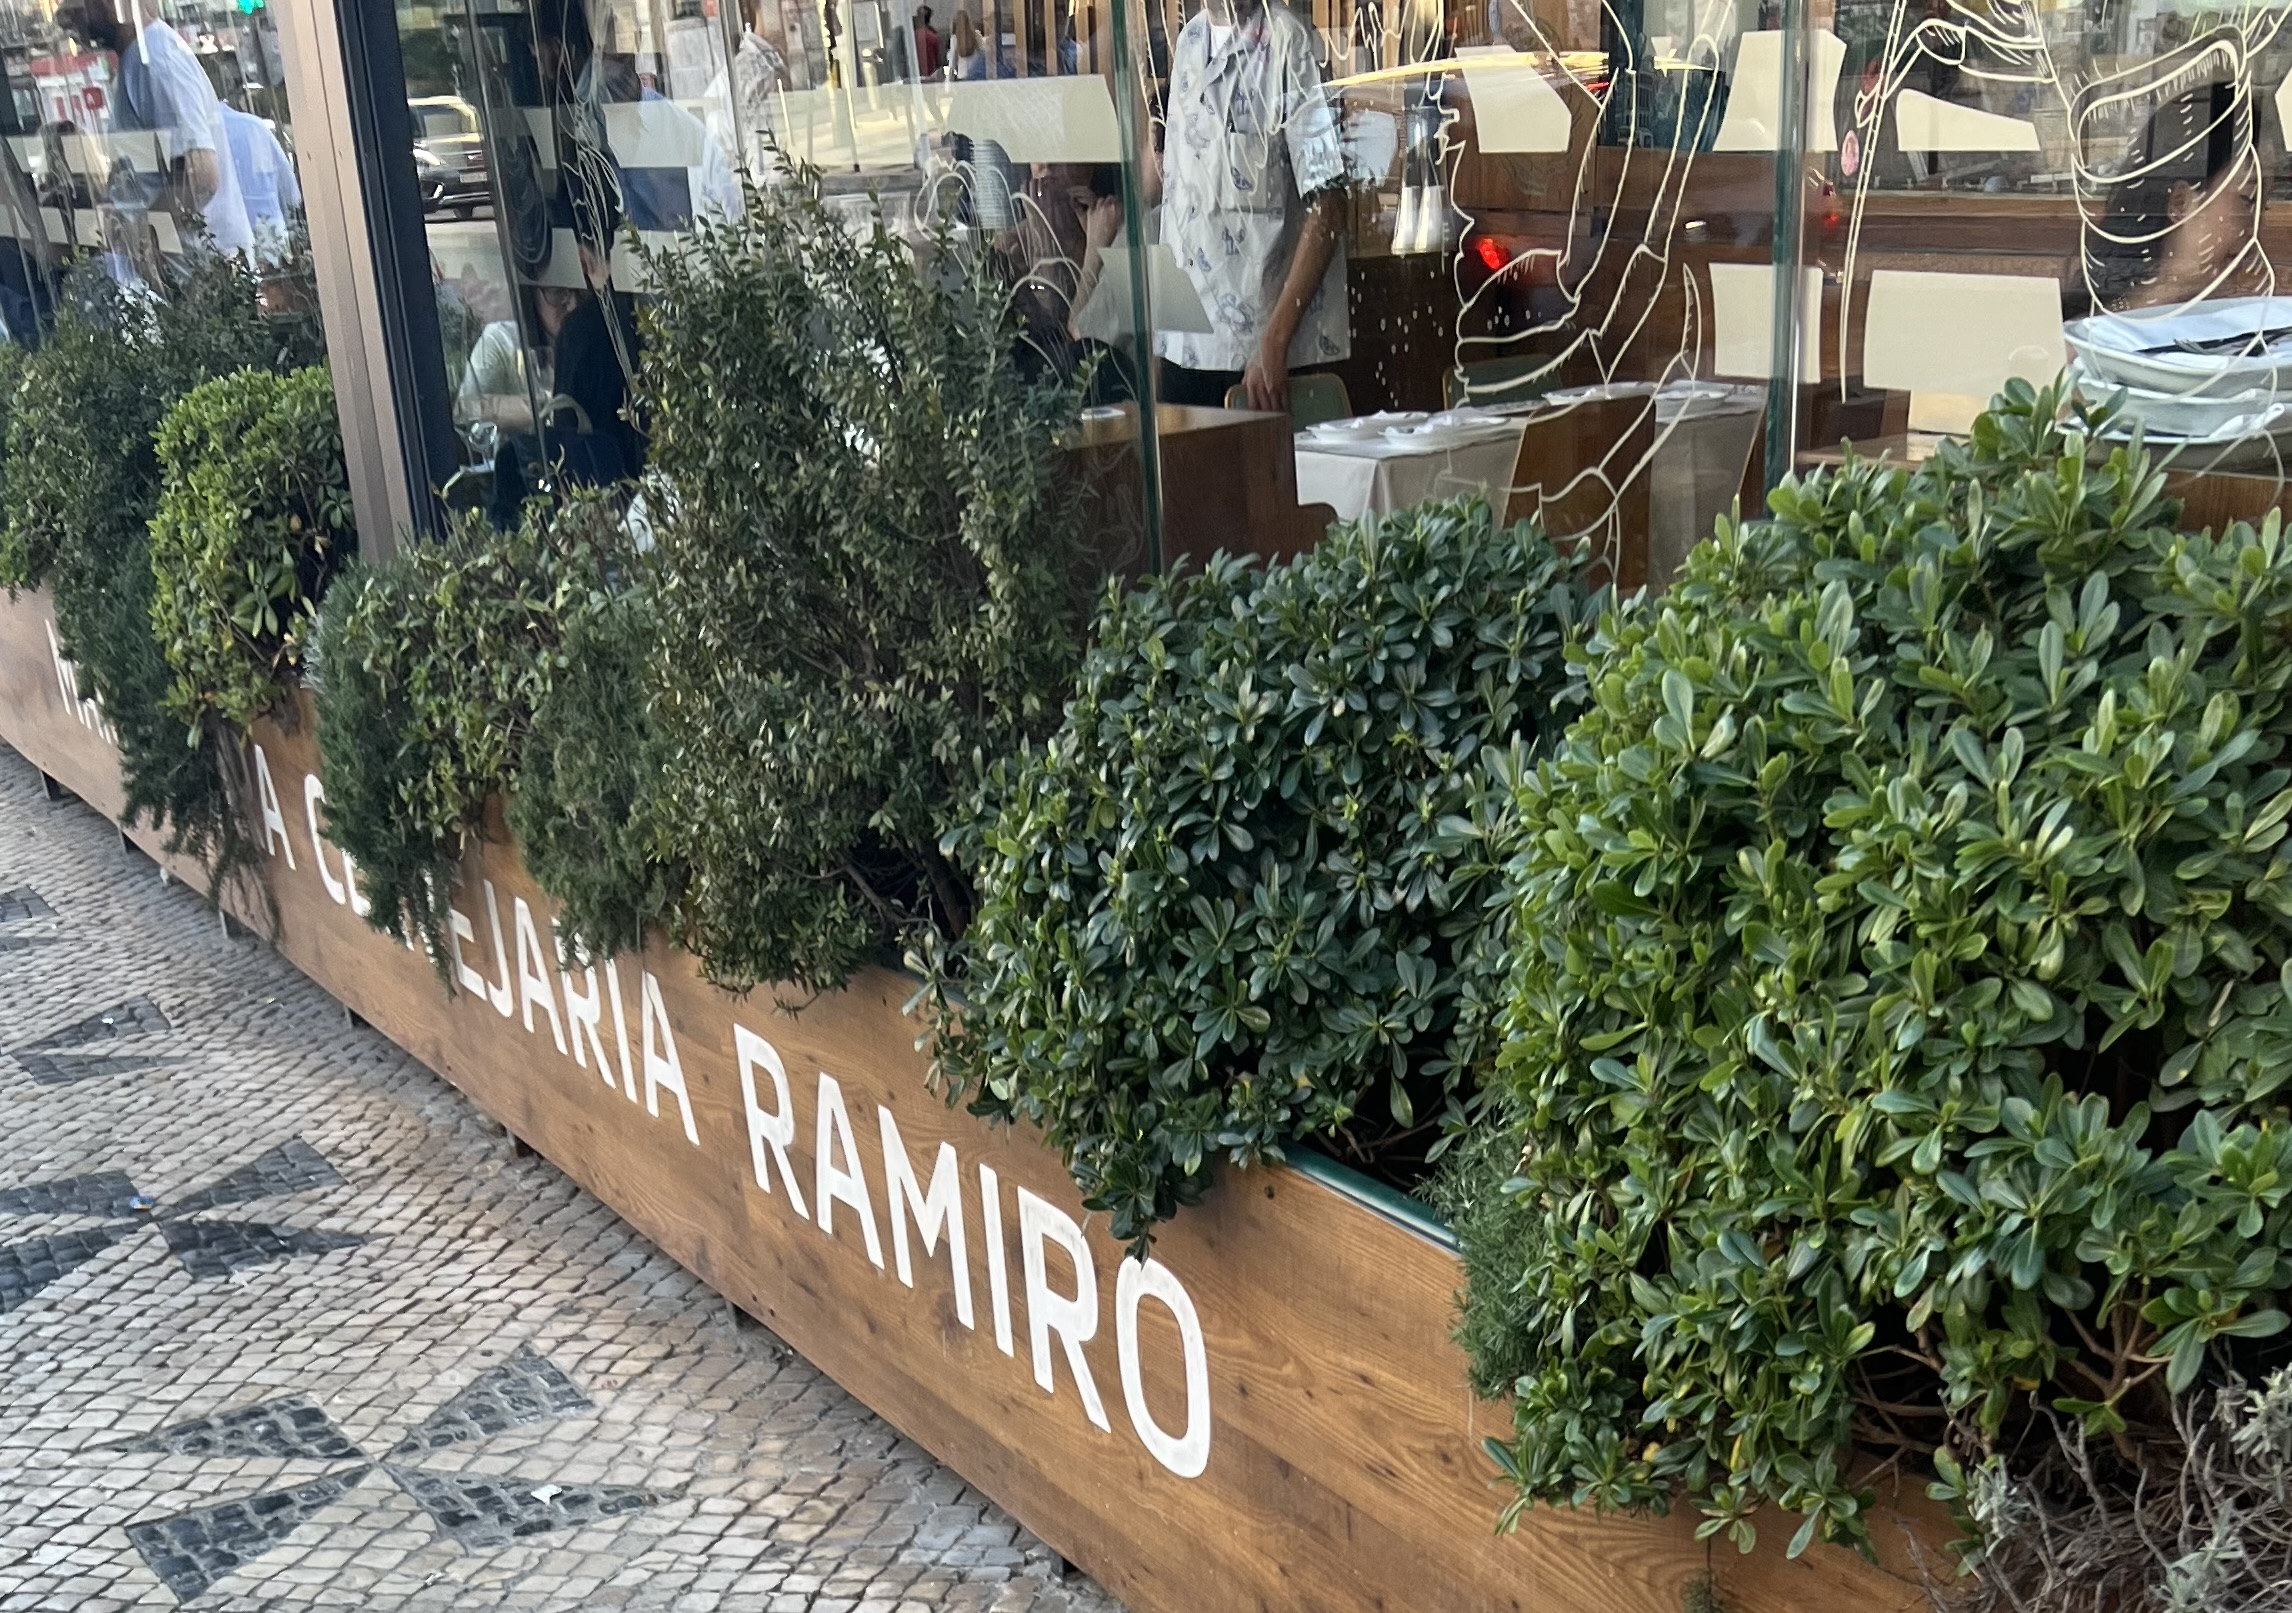
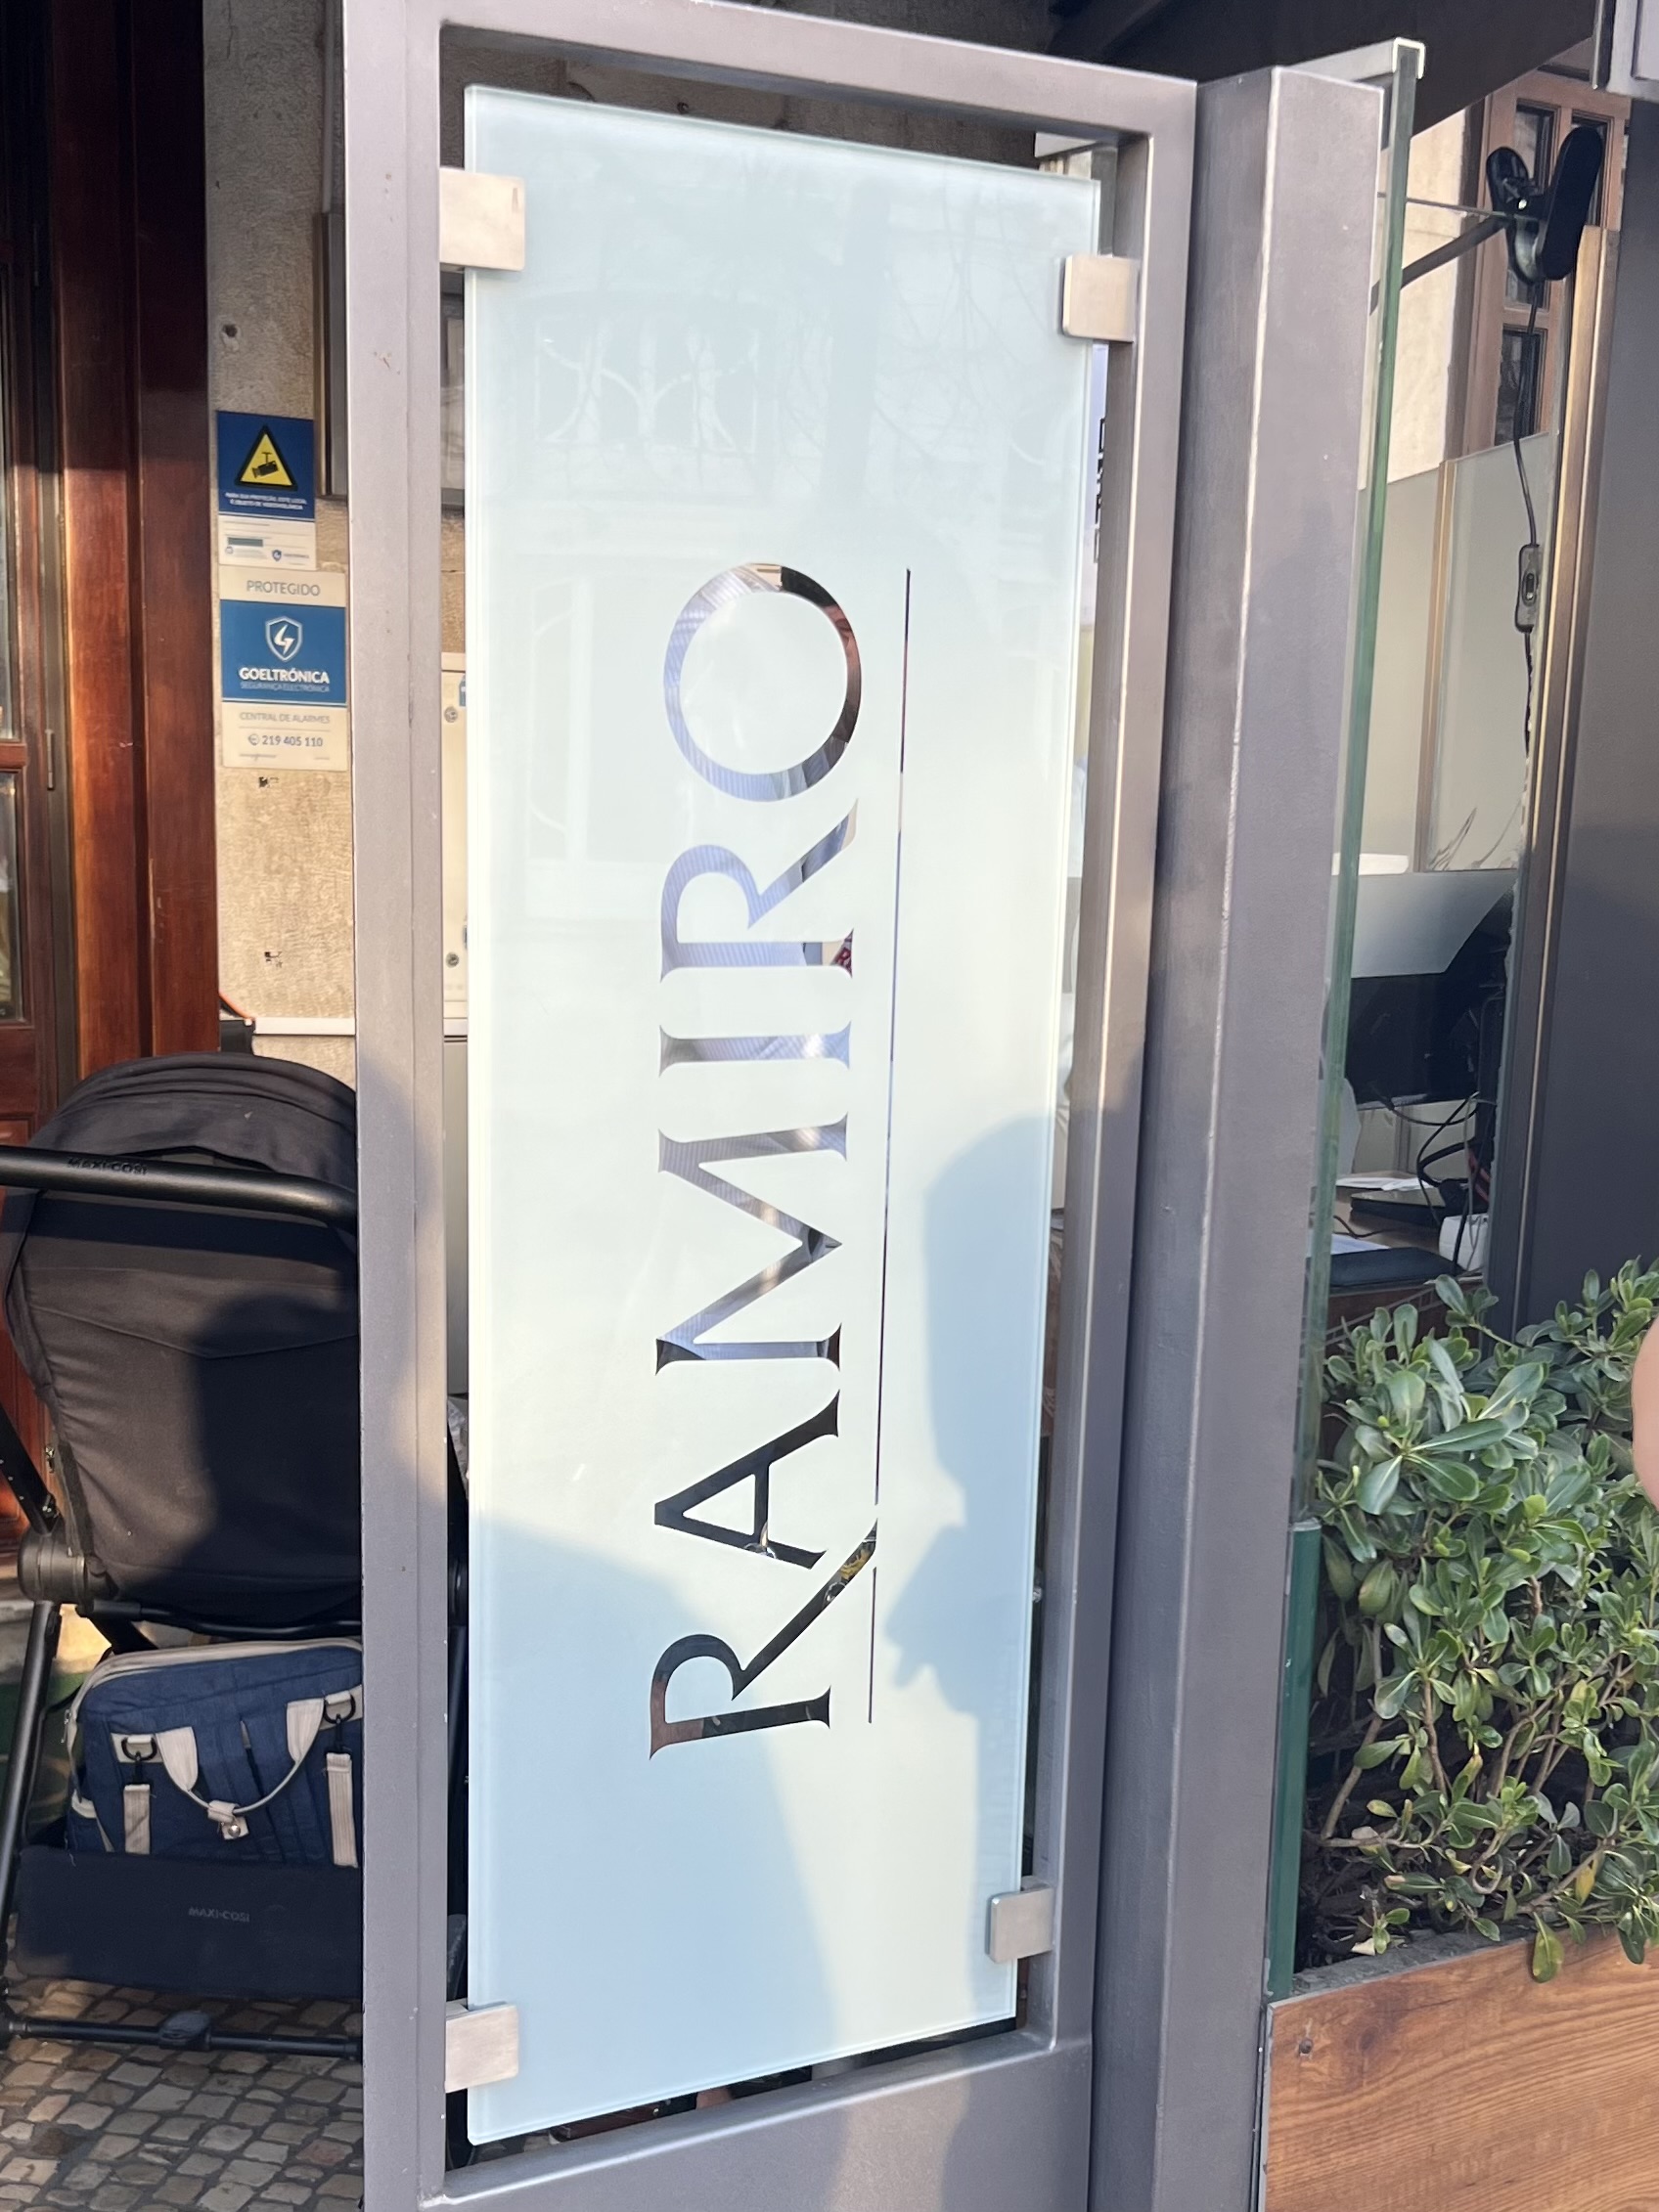
My last meal in Portugal had to be special. And so, I chose a restaurant that was visited by Anthony Bourdain many years ago on “No Reservations.” The only time he went to Portugal, from what I understand.
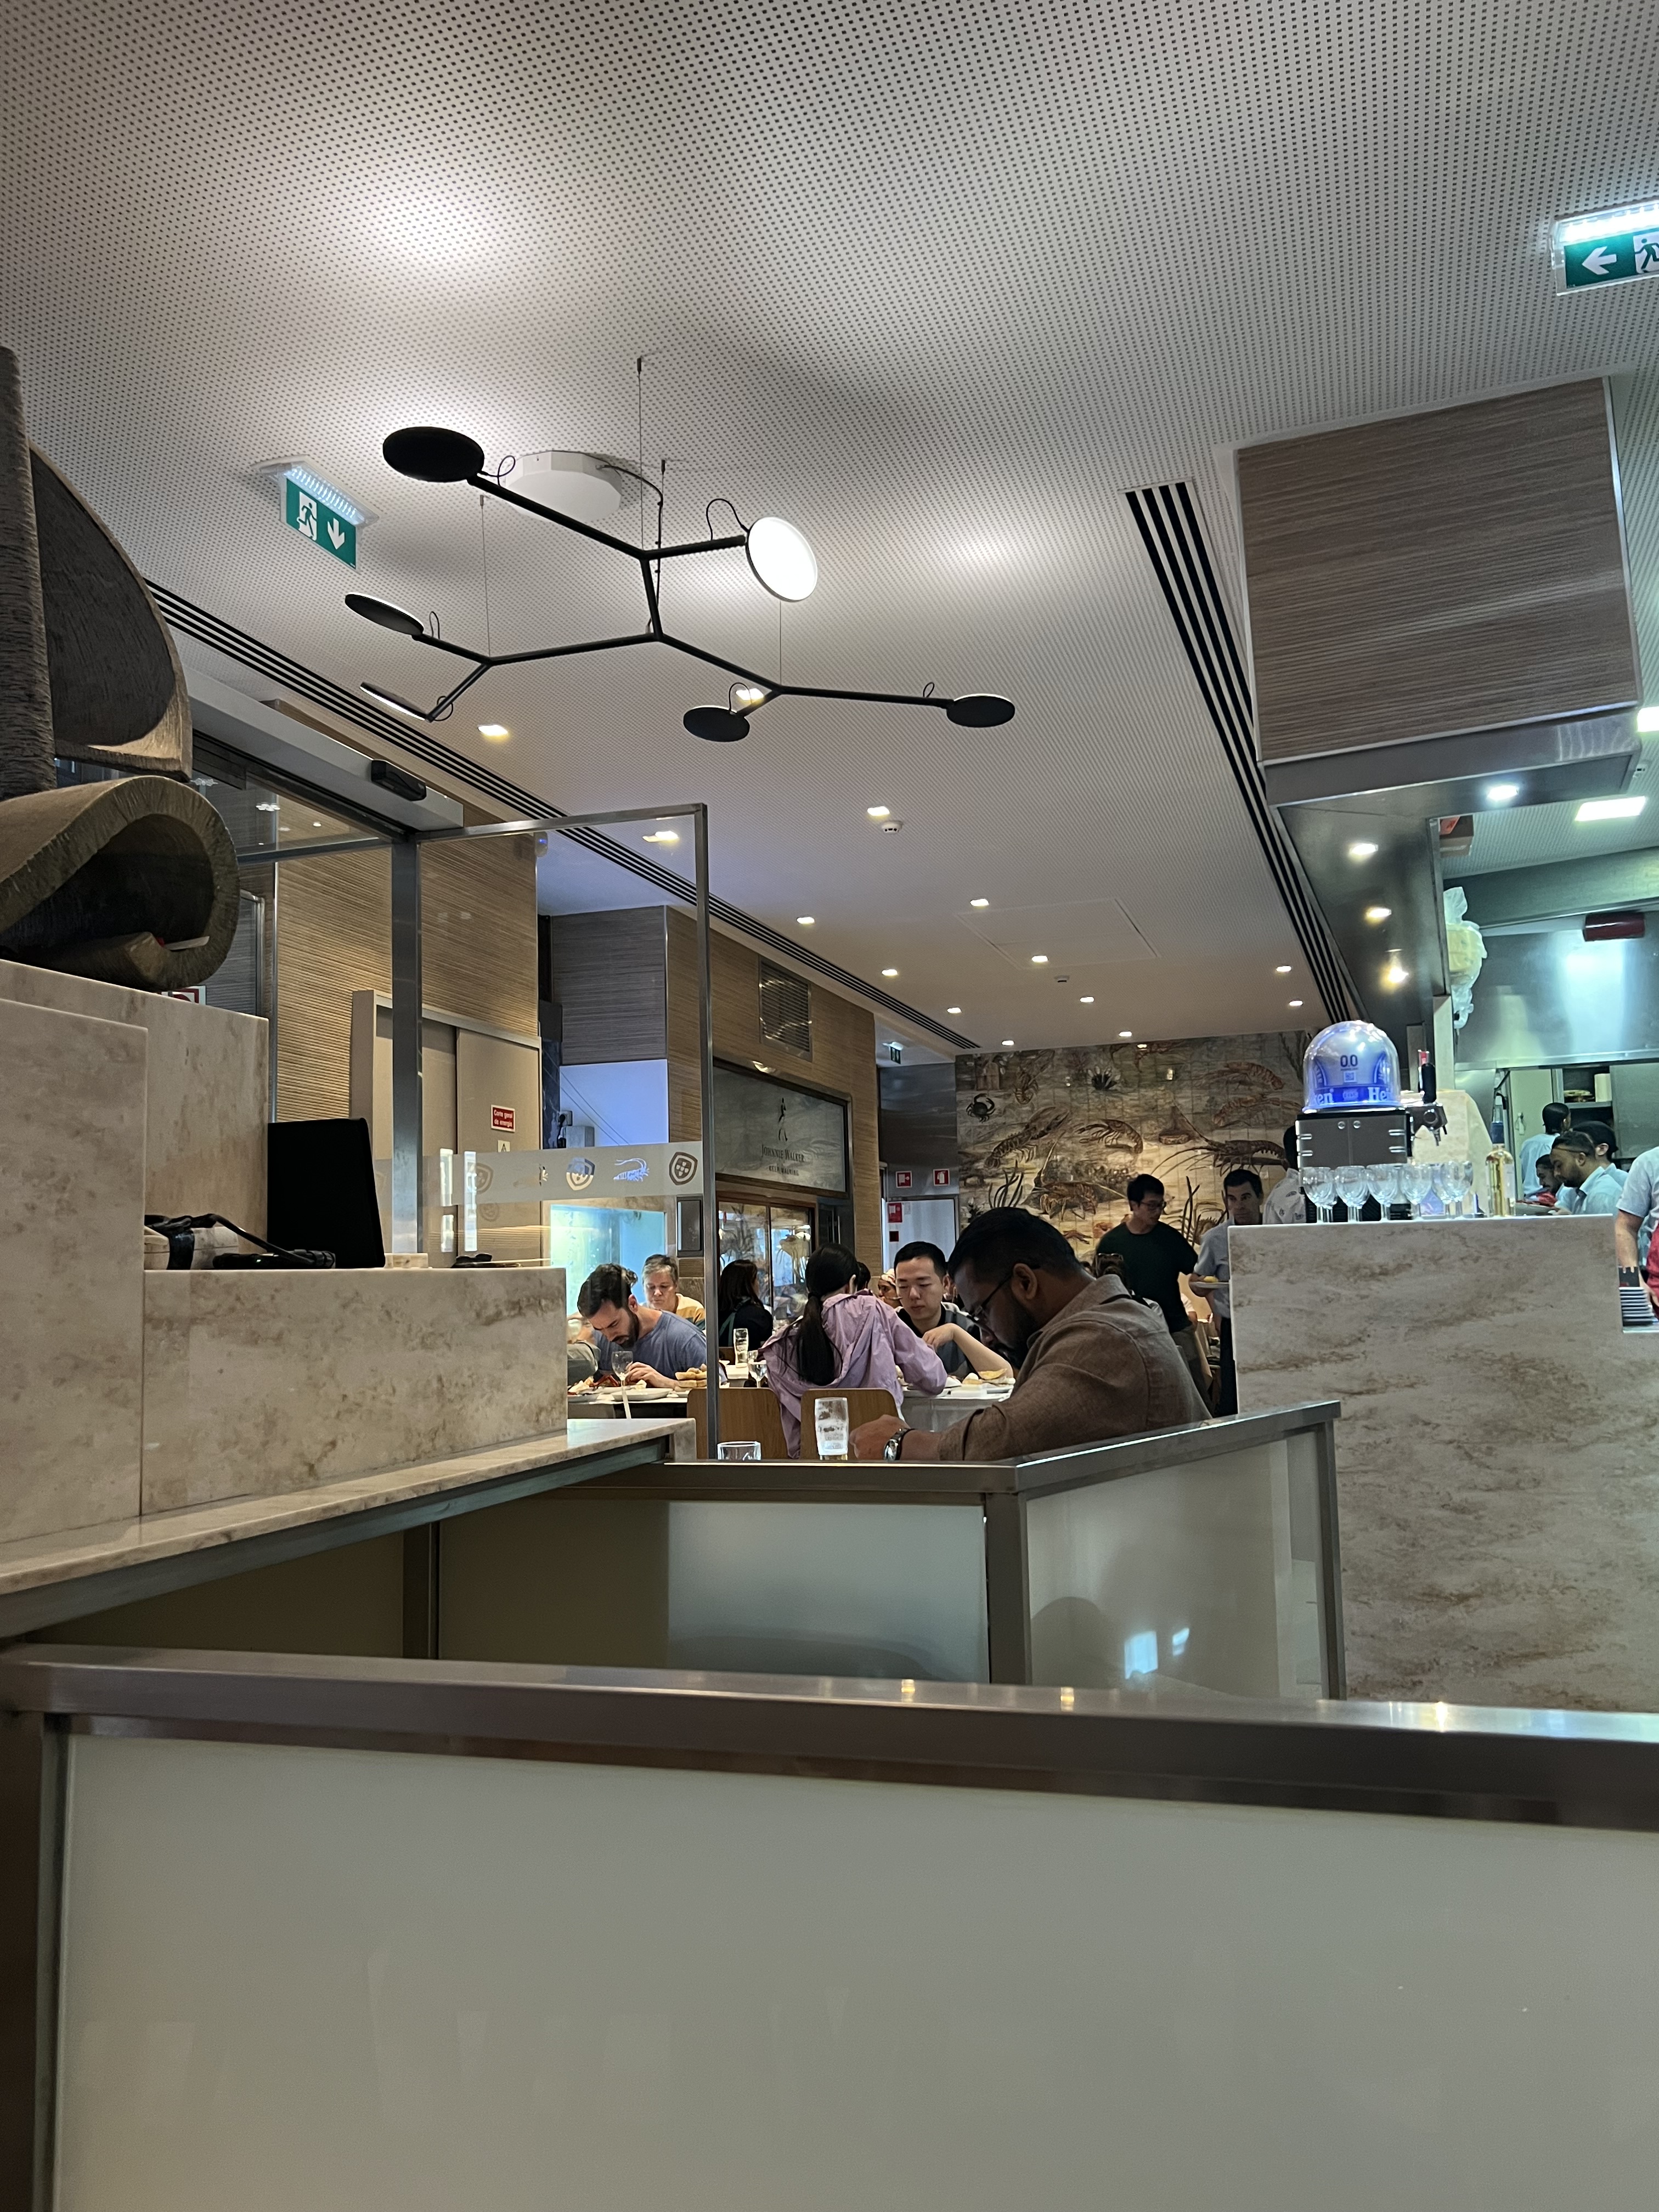
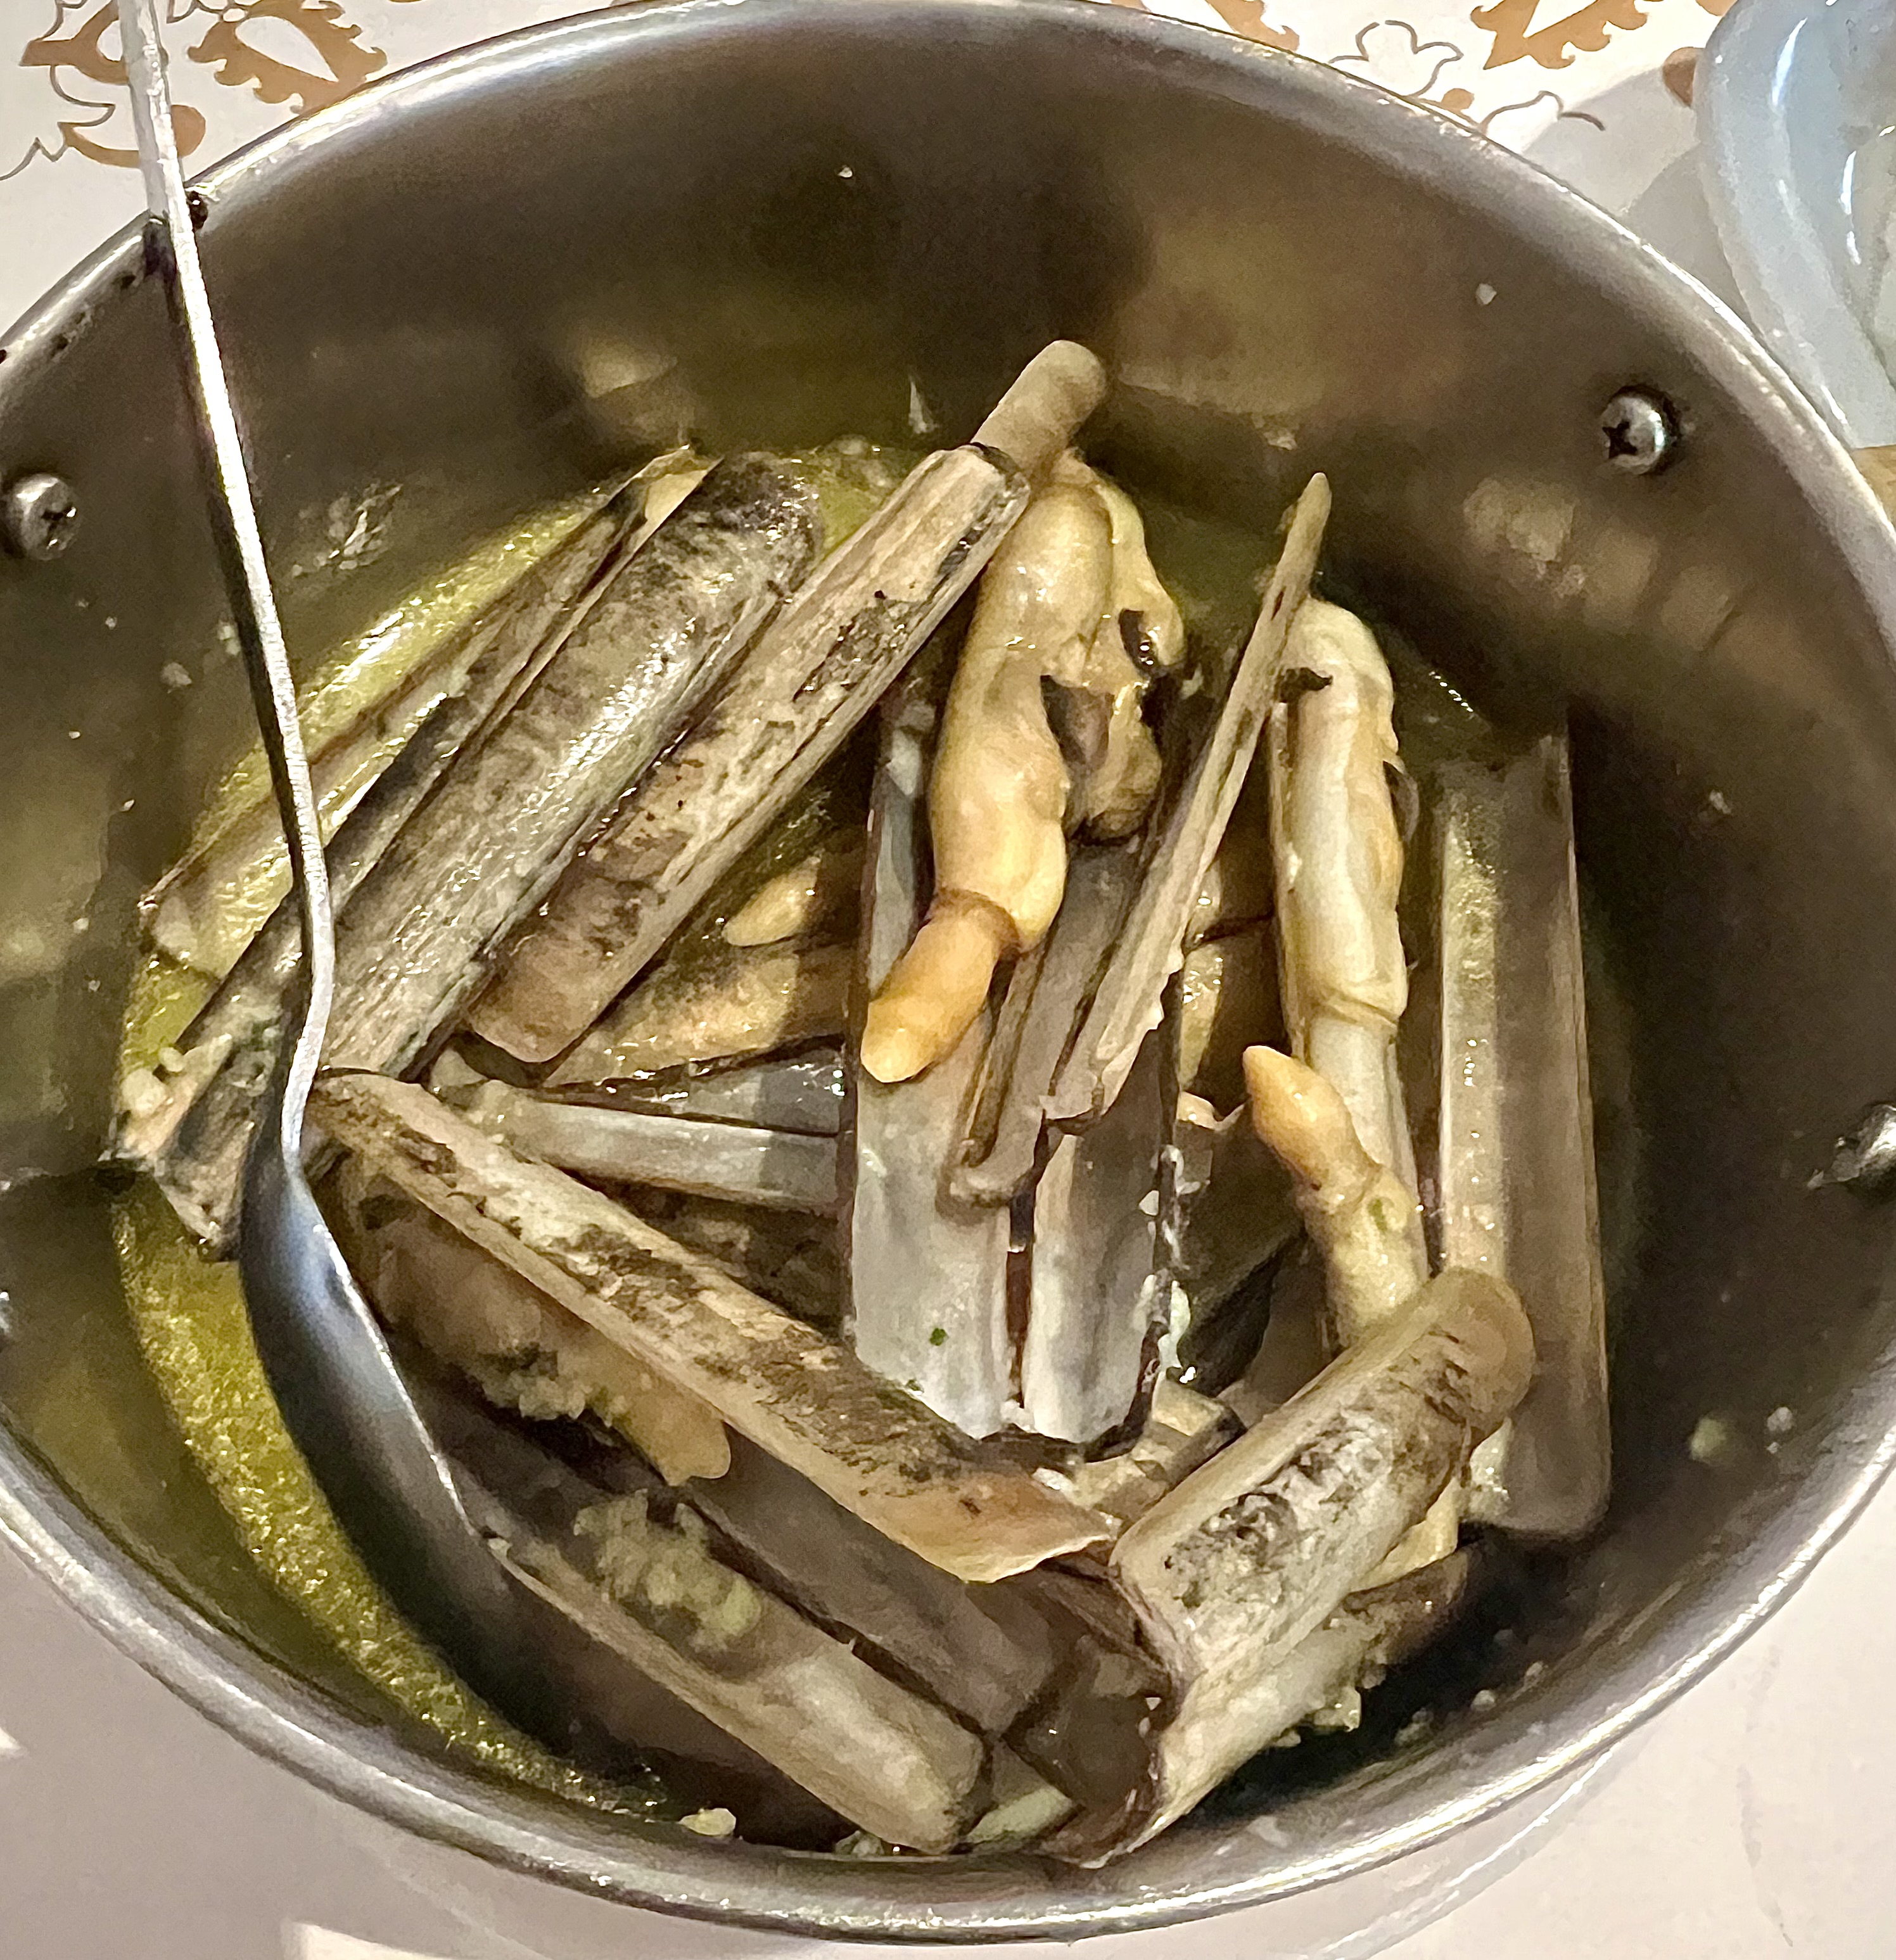
Cervejaria Ramiro has been around for many years, but Bourdain brought it worldwide fame, and if you don’t get yourself a reservation, you don’t get in!
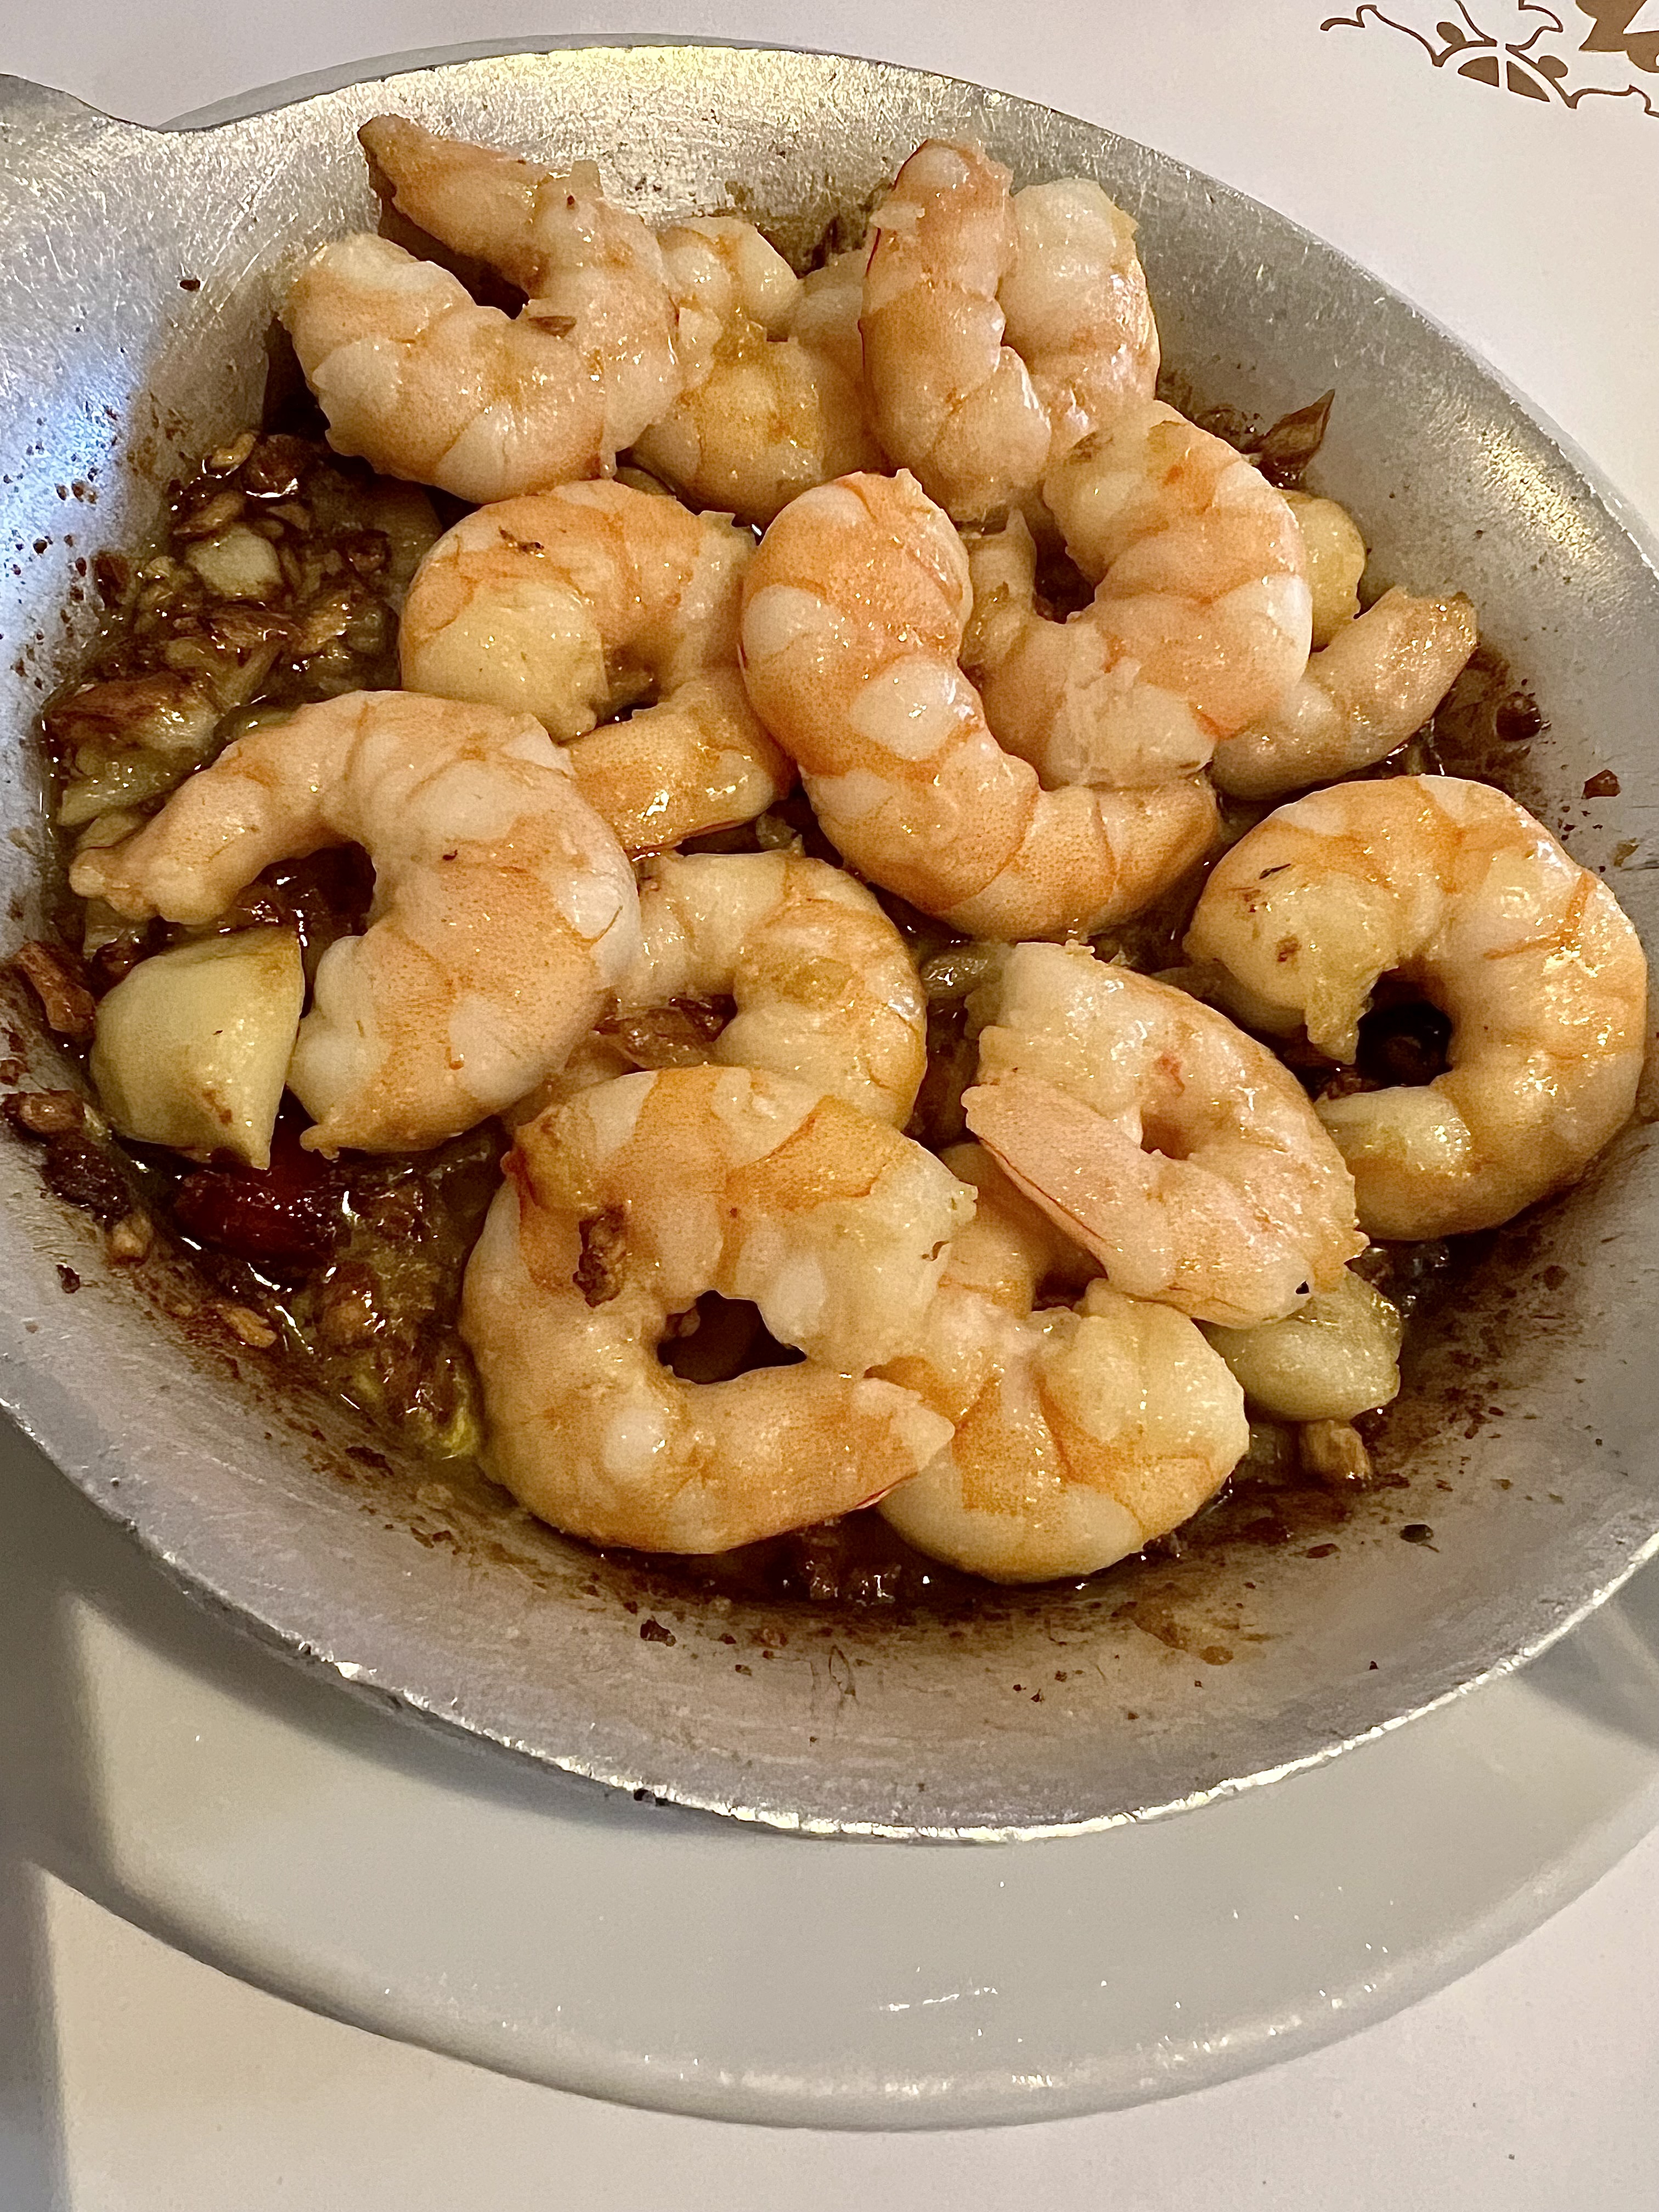
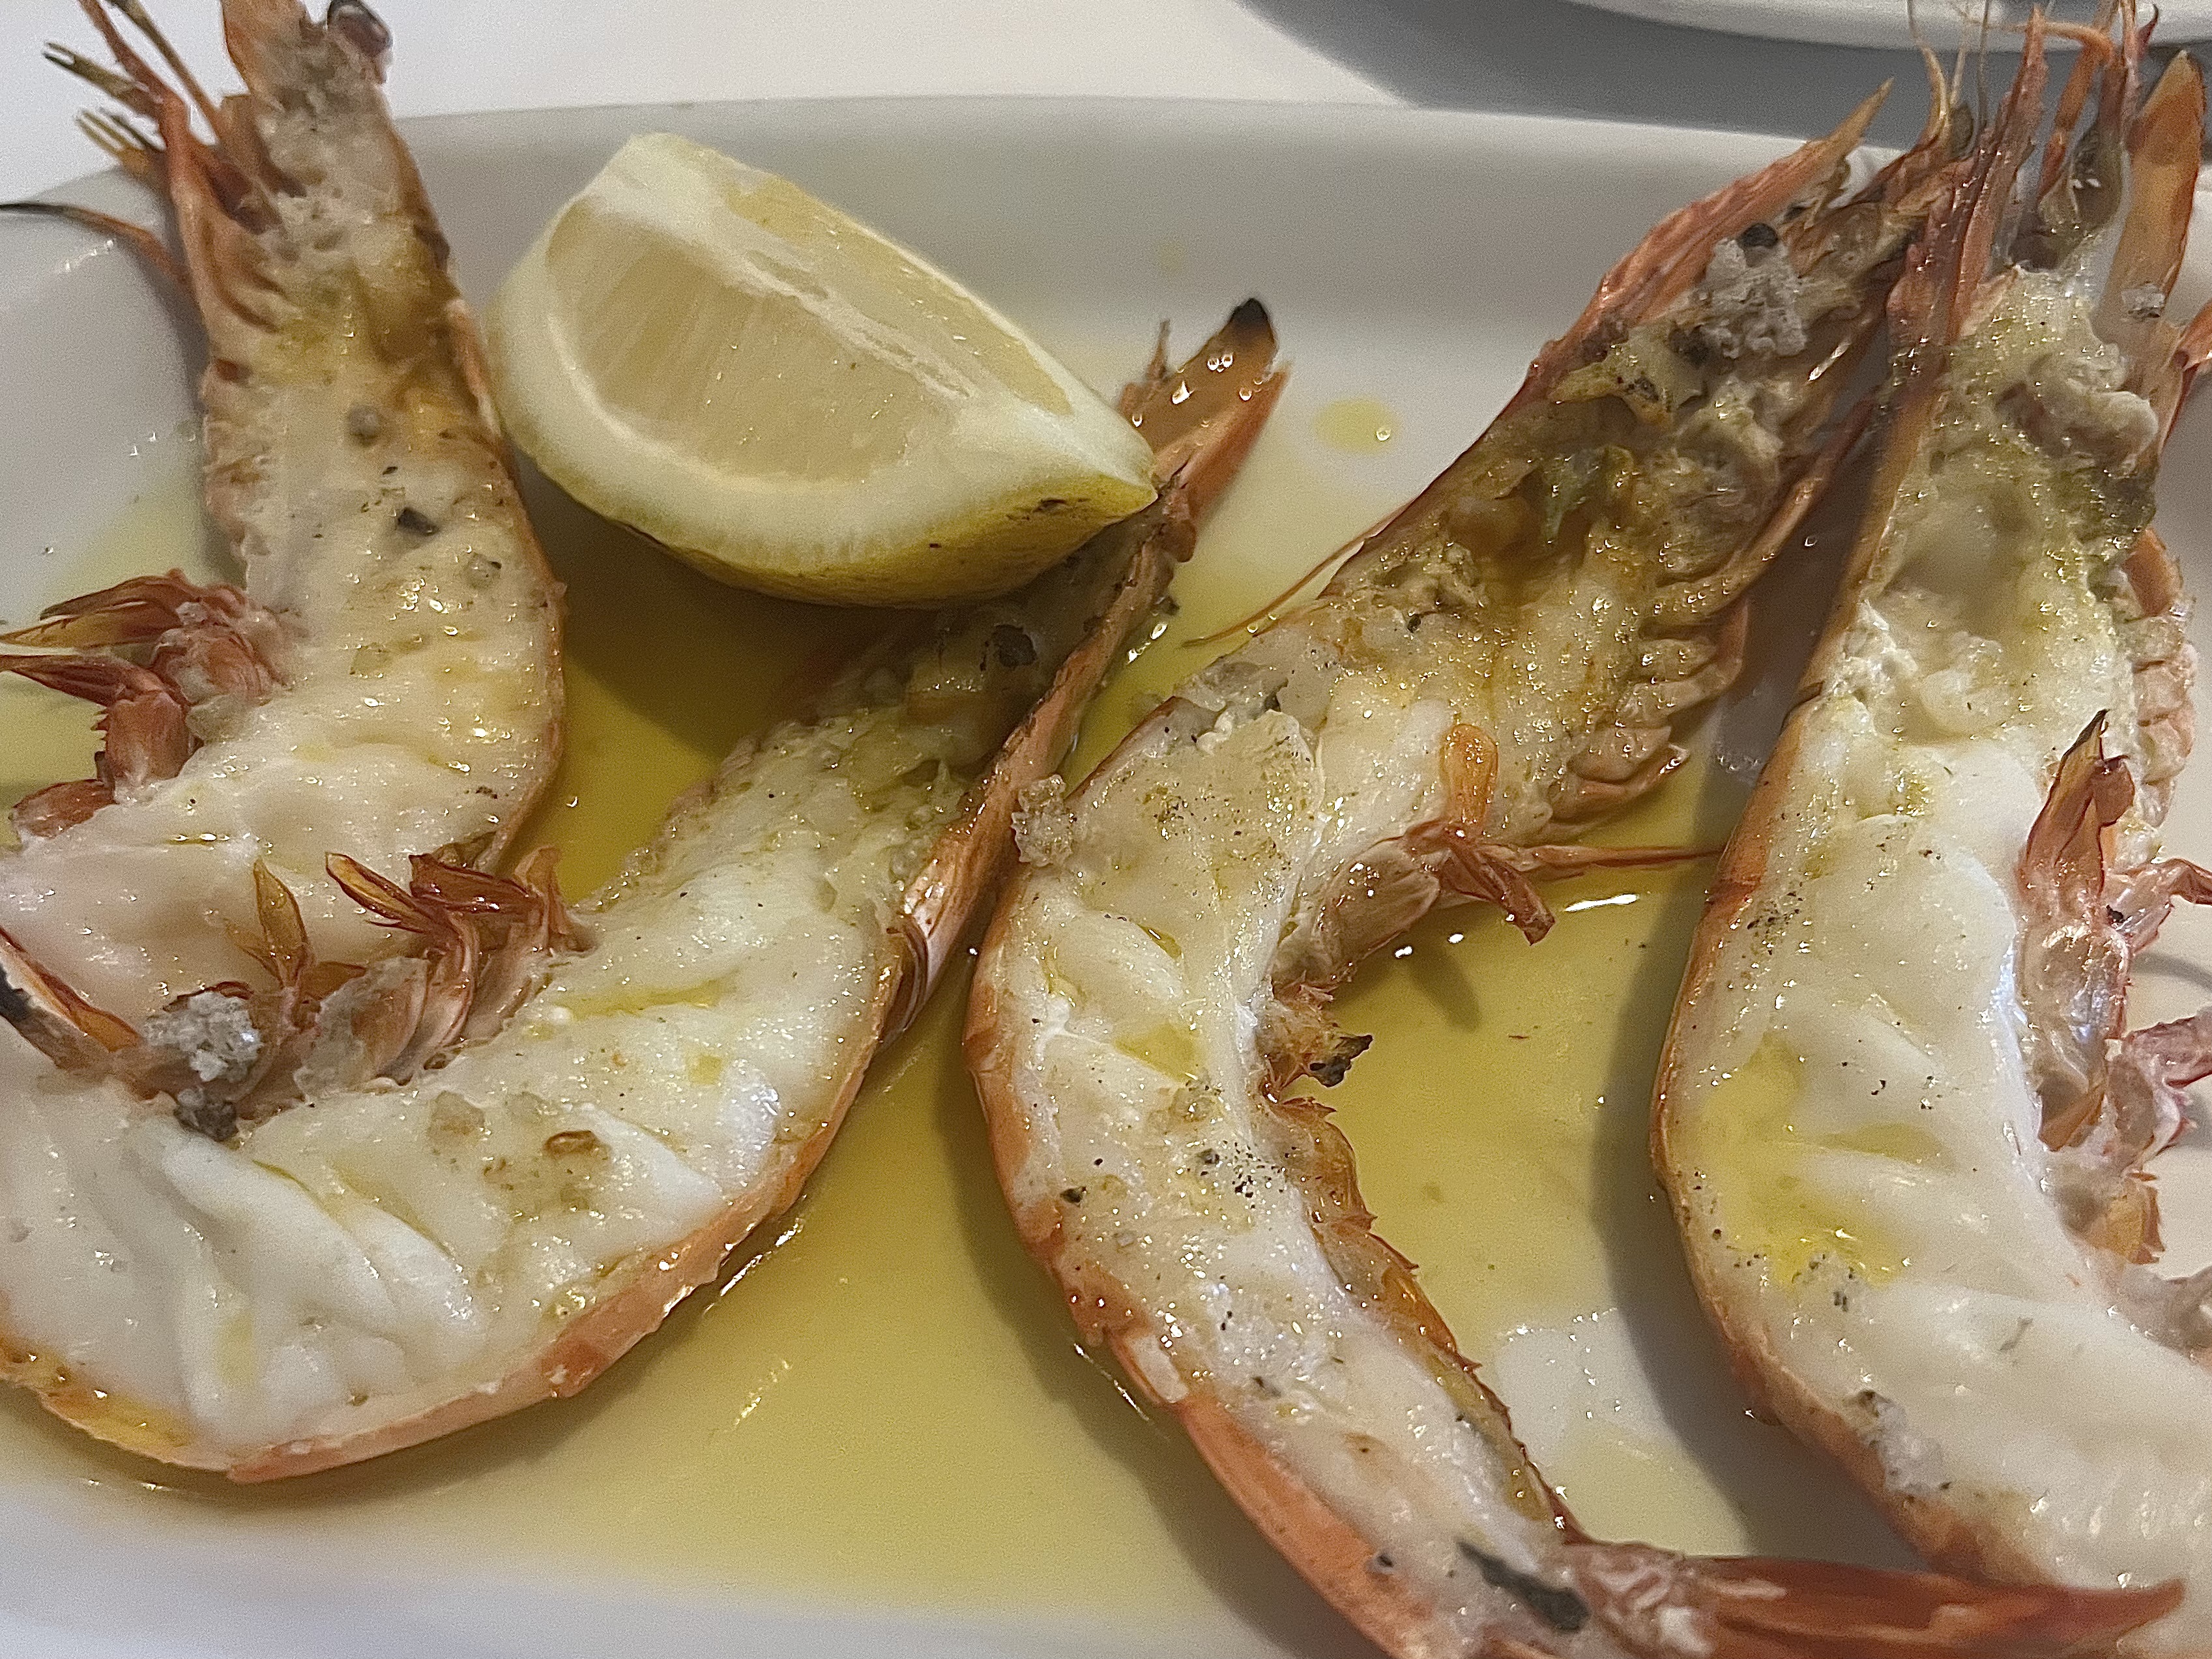
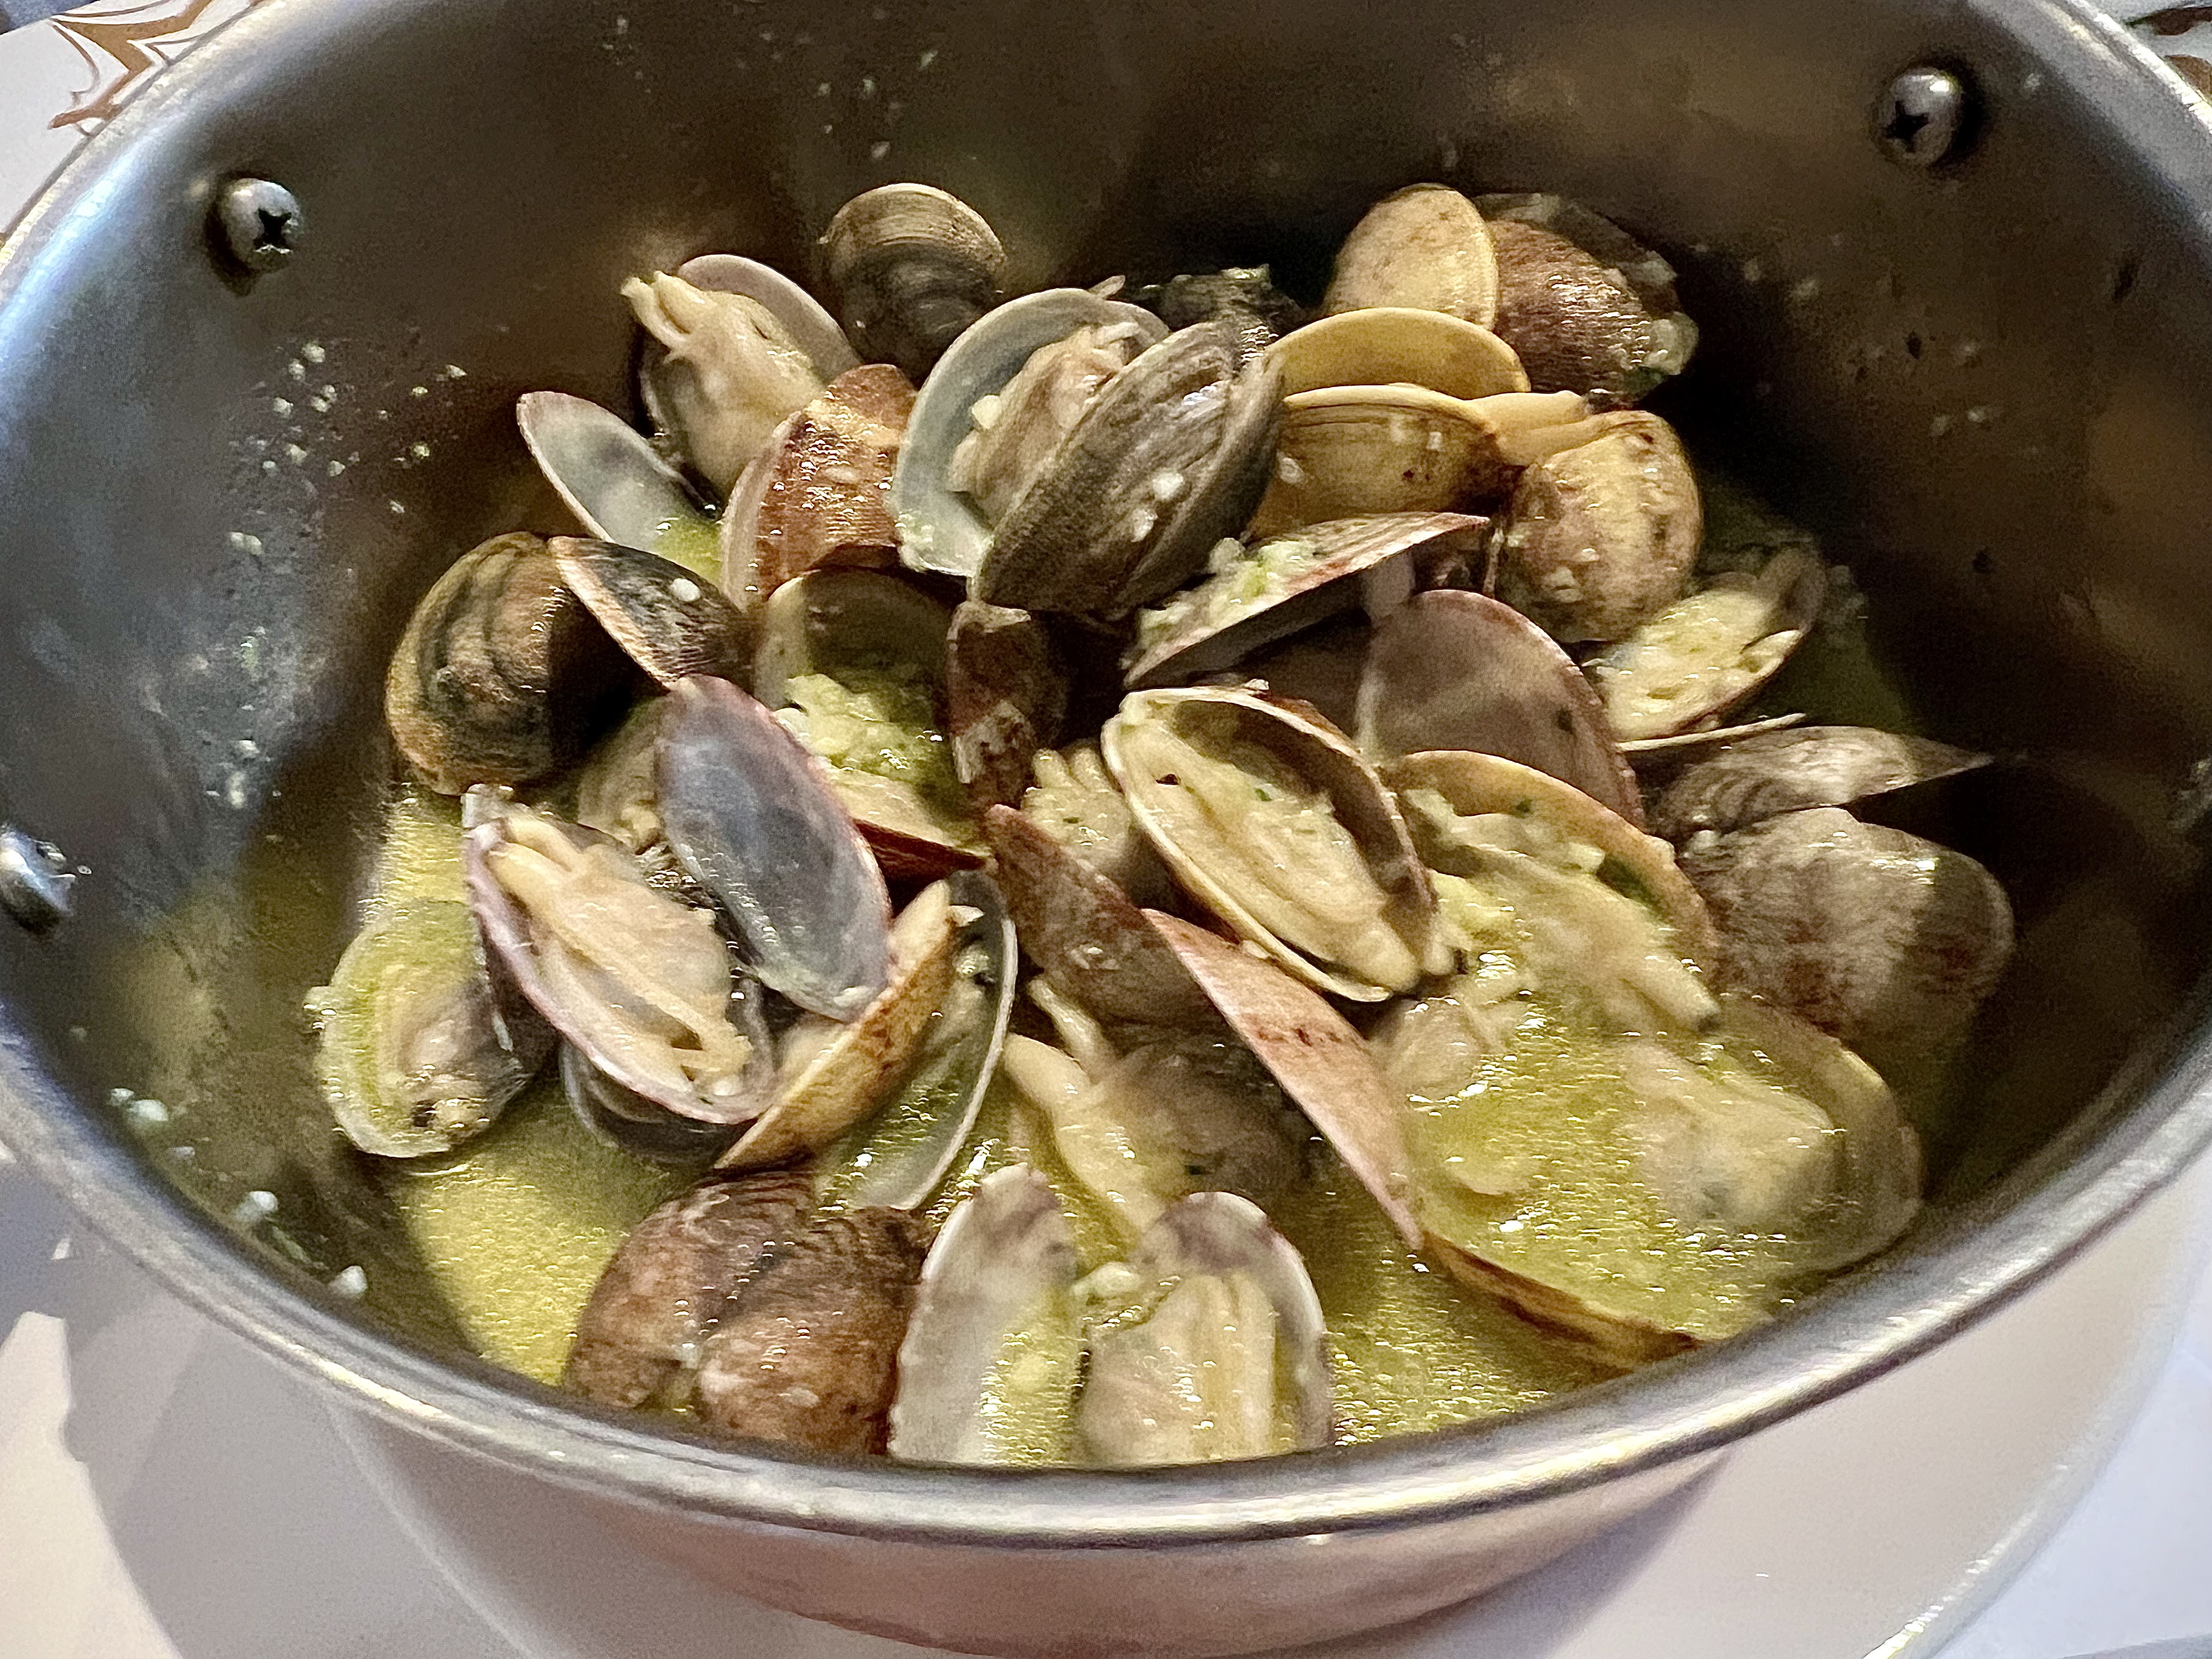
Amazing seafood served at a frenetic pace. Fast, but you never feel rushed. And the servers are real characters. It’s just an awesome, fun time eating fantastic seafood!
The garlic was heavy here!
I met Anthony Bourdain once. I was lucky enough to introduce him onstage at the Providence Performing Arts Center, back when he did his speaking tours. We had a good 30 minutes to hang out together backstage, and what did we talk about? Nickelodeon! Both his daughter and mine were the same age, and we were dads that sat and watched “Spongebob” and “Dora” with our kids. It was a wonderful “dad” conversation I’ll never forget–as far from foodie talk as it could be.
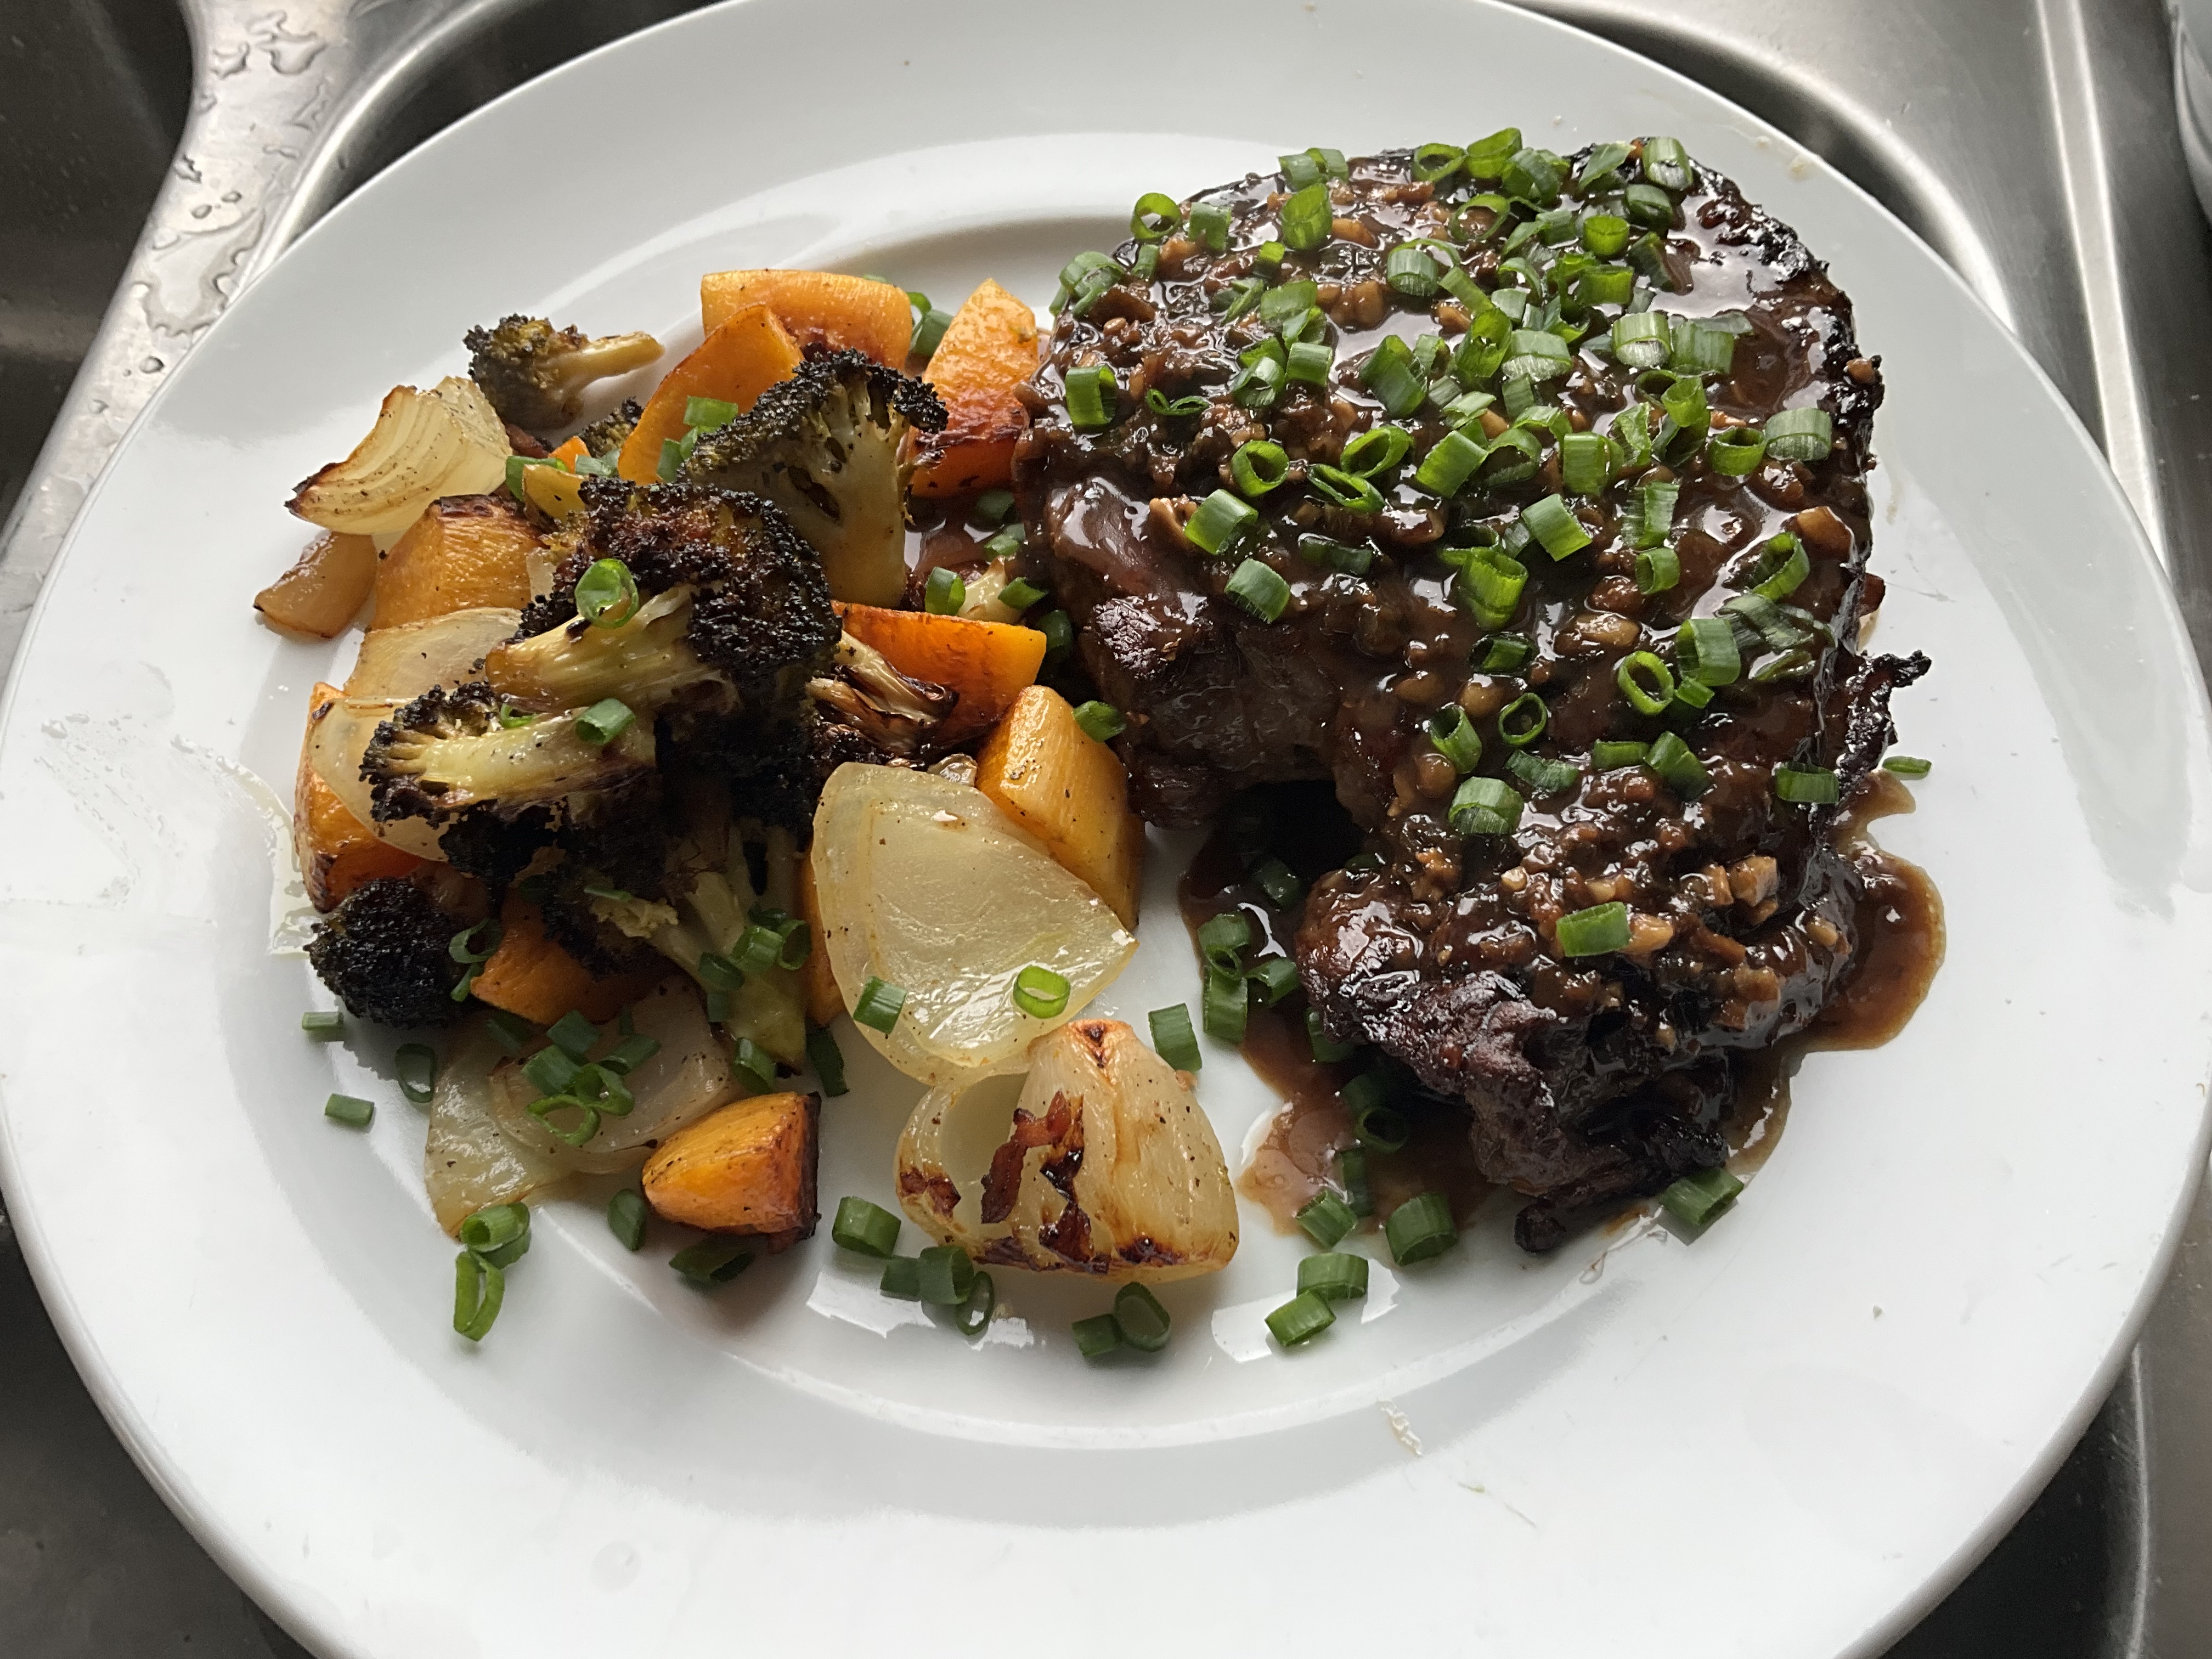
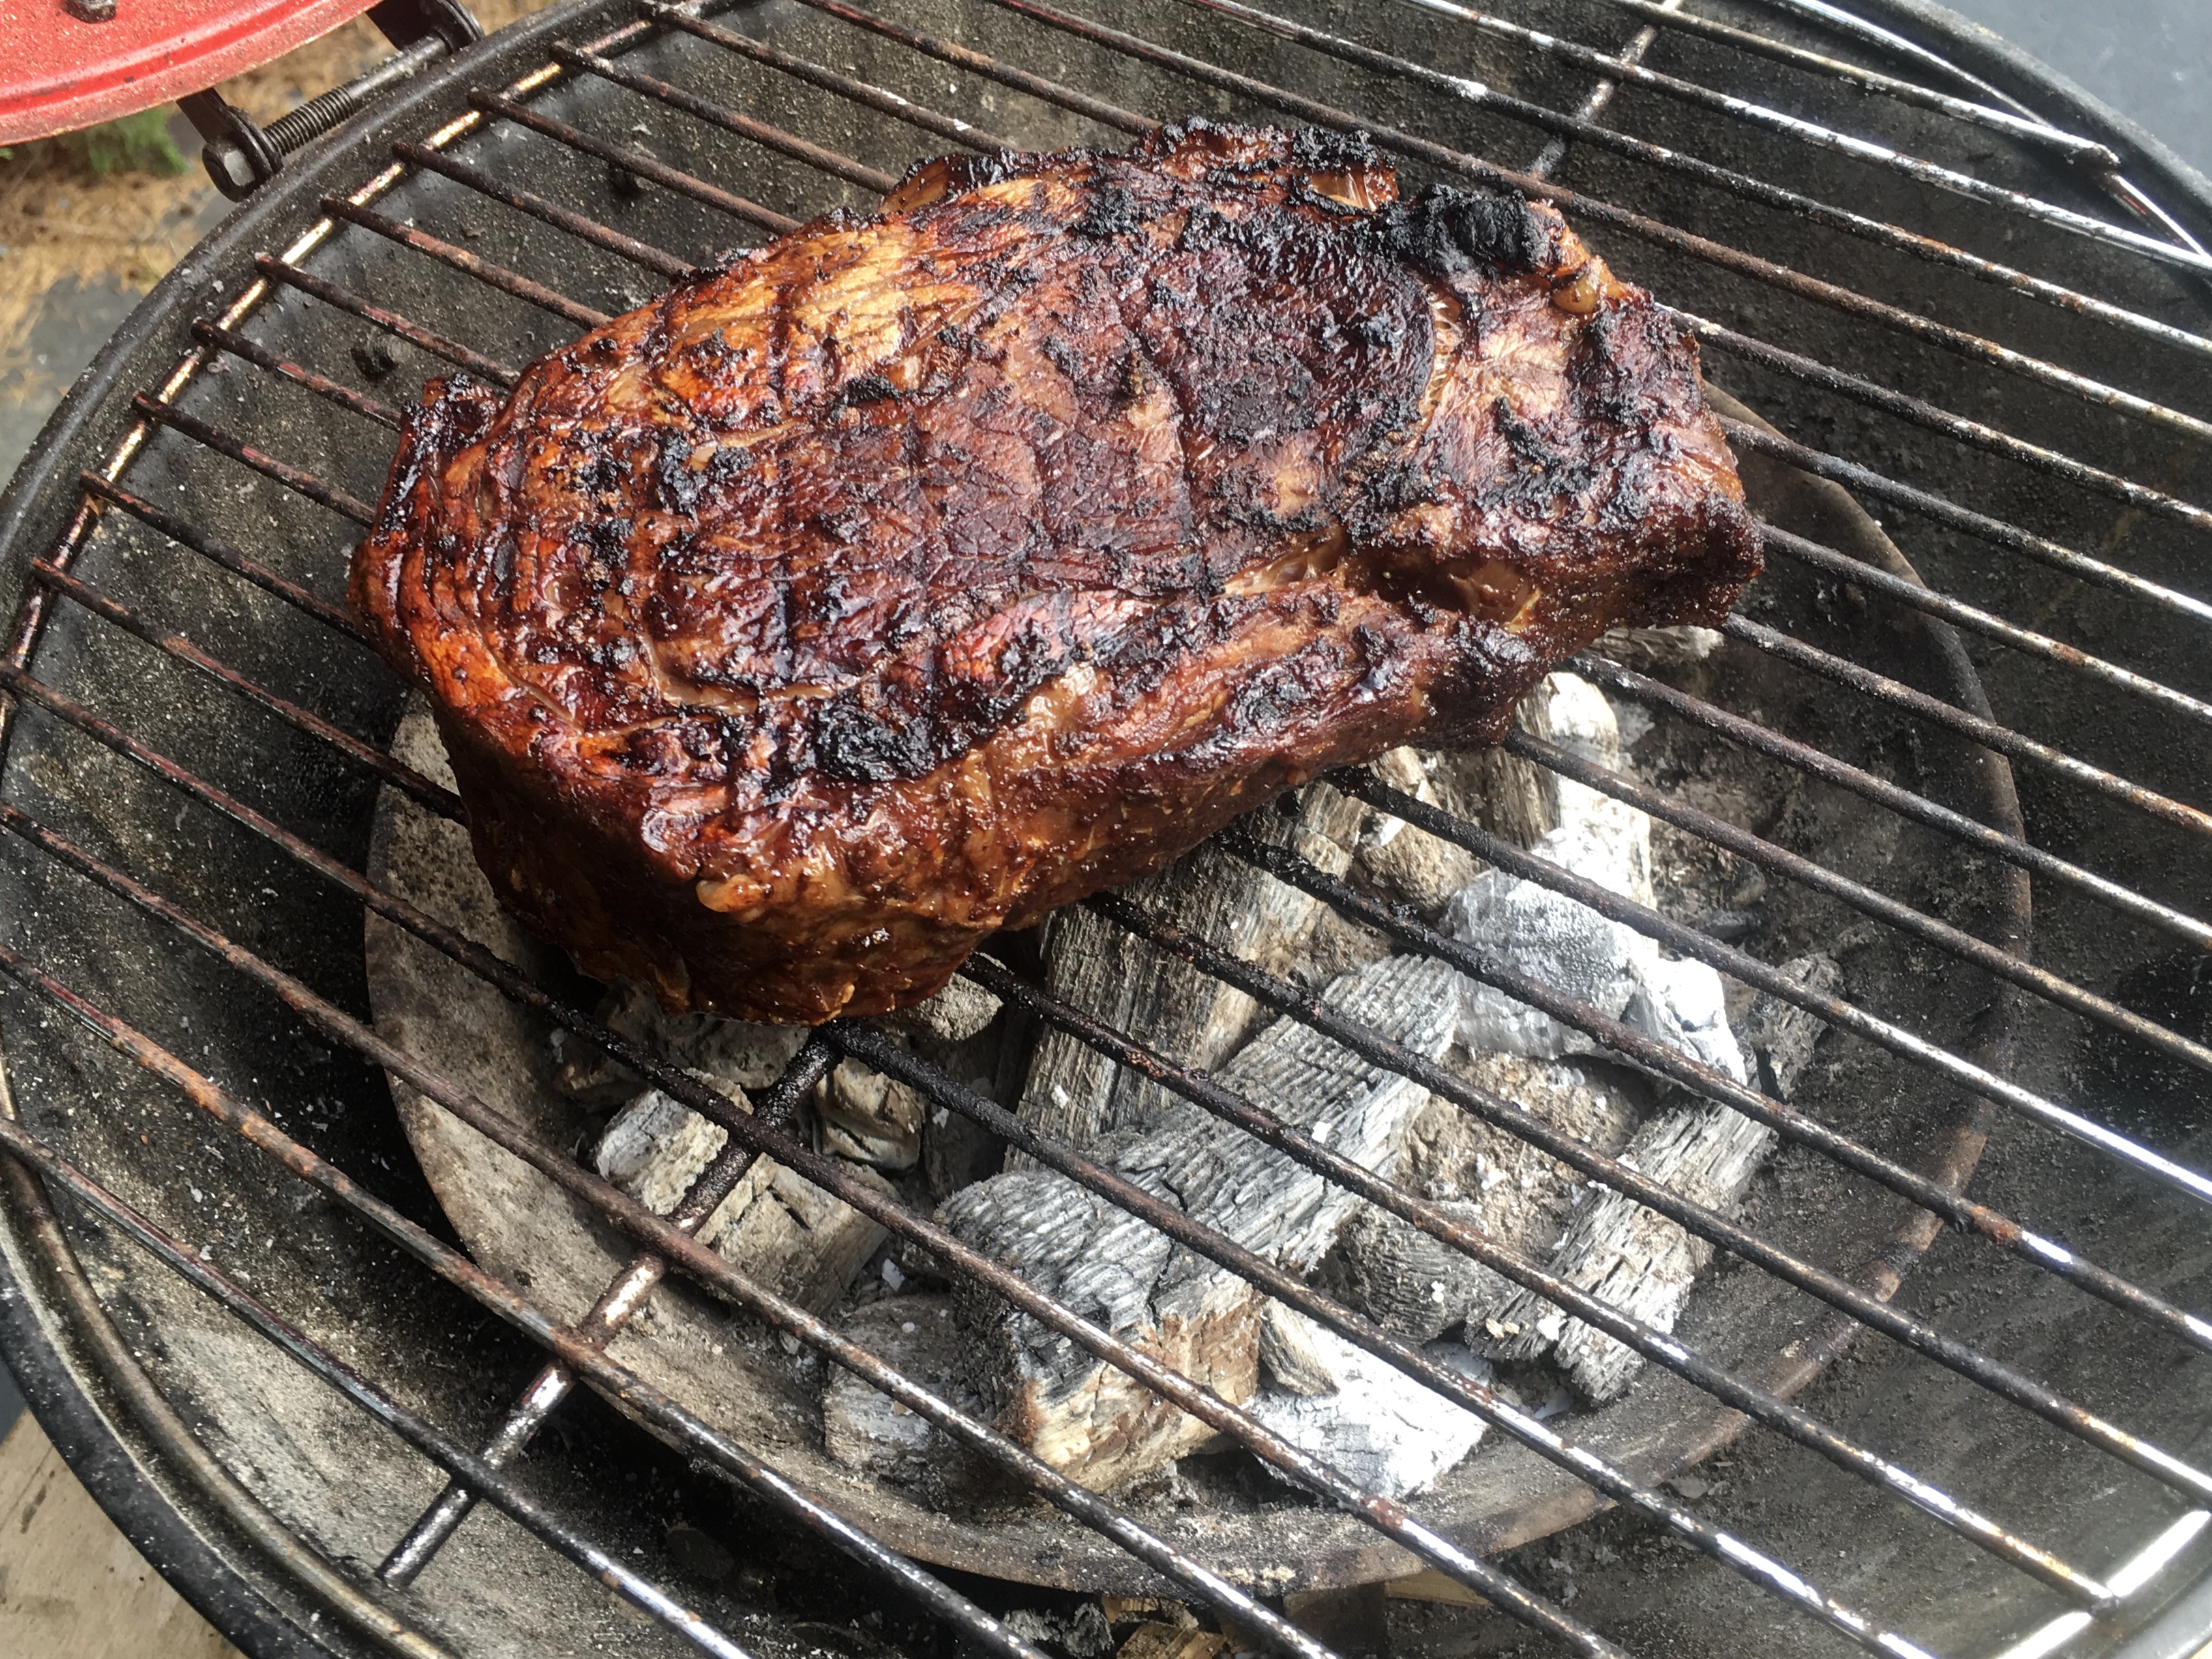
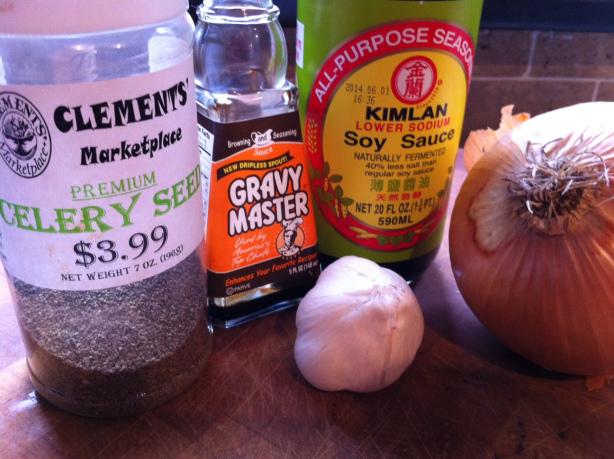
Out on the North Fork of Long Island, there’s a steak restaurant called the Elbow Room. It’s nothing fancy…old school cooking. But they’re famous for their steaks because of a super-secret marinade. Ages ago, I spotted a newspaper article that claimed they found out what that secret marinade was, and they published it. Whether this really is the official Elbow Room marinade or not, I have to say it’s pretty darn tasty and it makes for a delicious steak on the grill.
My biggest concern with the marinade was the salt factor, since it uses soy sauce. But the ribeye I had was almost an inch-and-a-half thick, which meant that it could sit in the marinade for a long time…my ribeye sat in it for 8 hours. If you choose to use a thinner cut of meat, you might need to reduce your marinating time.
The recipe uses a product called Gravy Master, available in most supermarkets. Look for it in the section where you find gravies and instant potatoes.
1 cup soy sauce
1/4 cup Gravy Master
2 large Vidalia onions
2 cloves of garlic
2 teaspoons celery seed
1/2 teaspoon black pepper
Combine the onions and garlic in a large food processor and purée. Add the remaining ingredients and run the processor until it’s smooth and sort of resembles root beer.
Marinate the beef in the marinade overnight, or for as long as possible. The thicker the cut of meat, the longer you can marinate it.
Looks delicious, but it hasn’t been cooked yet! Straight out of the marinade.
Light the grill. I prefer pure hardwood charcoal because that’s where the flavor is. If I’m just cooking one steak, I get my camping grill out. It lights quickly and easily, and it doesn’t waste a whole lotta charcoal.
Always use a charcoal chimney, never lighter fluid…unless you like the taste of petroleum products in your food.
Pure hardwood charcoal gives you a hot fire. I like to sear the beef really well on both sides, then move the steak to a cooler spot on the grill and close the cover. I’ll let the beef cook until it gets to a perfect medium-rare.
If you try this marinade on burgers–and it’s great on burgers–simply brush the burgers with the marinade as you place them on the grill. Go easy or you’ll get a very salty burger.
Marinated grilled ribeye with a side of fried rice…an easy combination of veggies and rice leftovers I had in the fridge with a dash of soy sauce.
Sintra and Cascais are two very popular destinations just outside of Lisbon proper, and it was highly recommended to me that I sign up with a tour, rather than try to drive the narrow, winding roads by myself. I wisely took the tour.
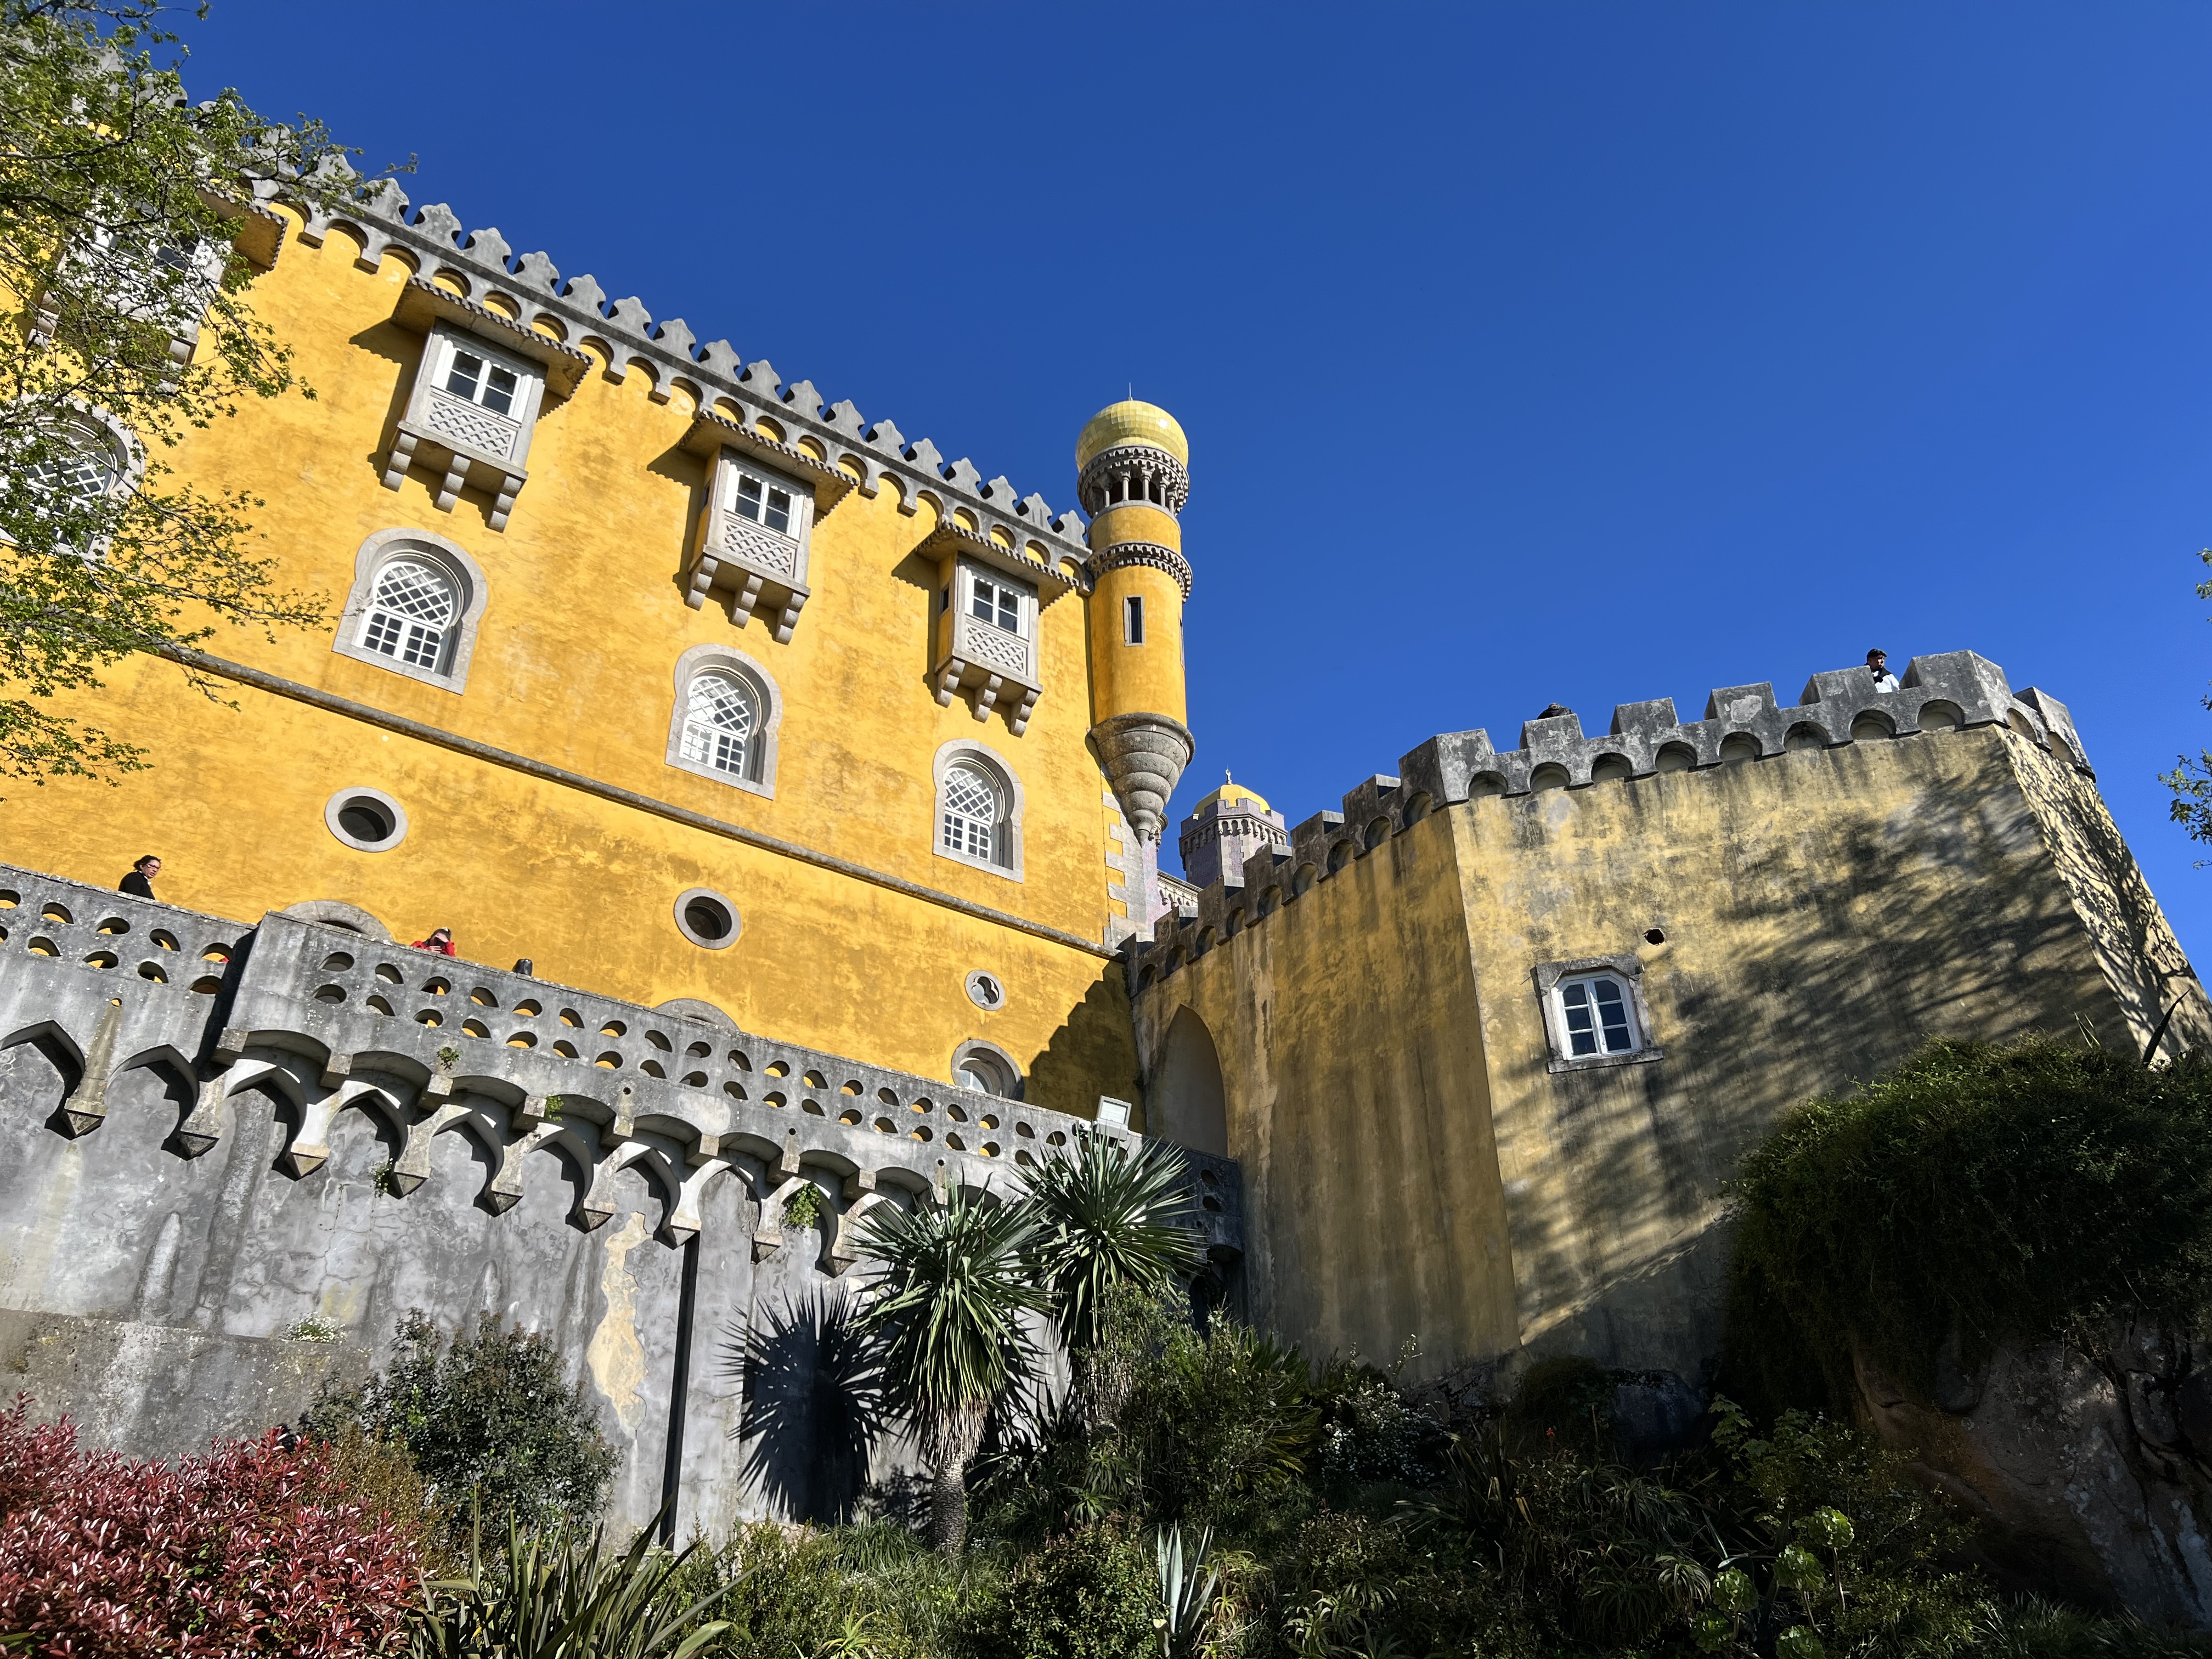
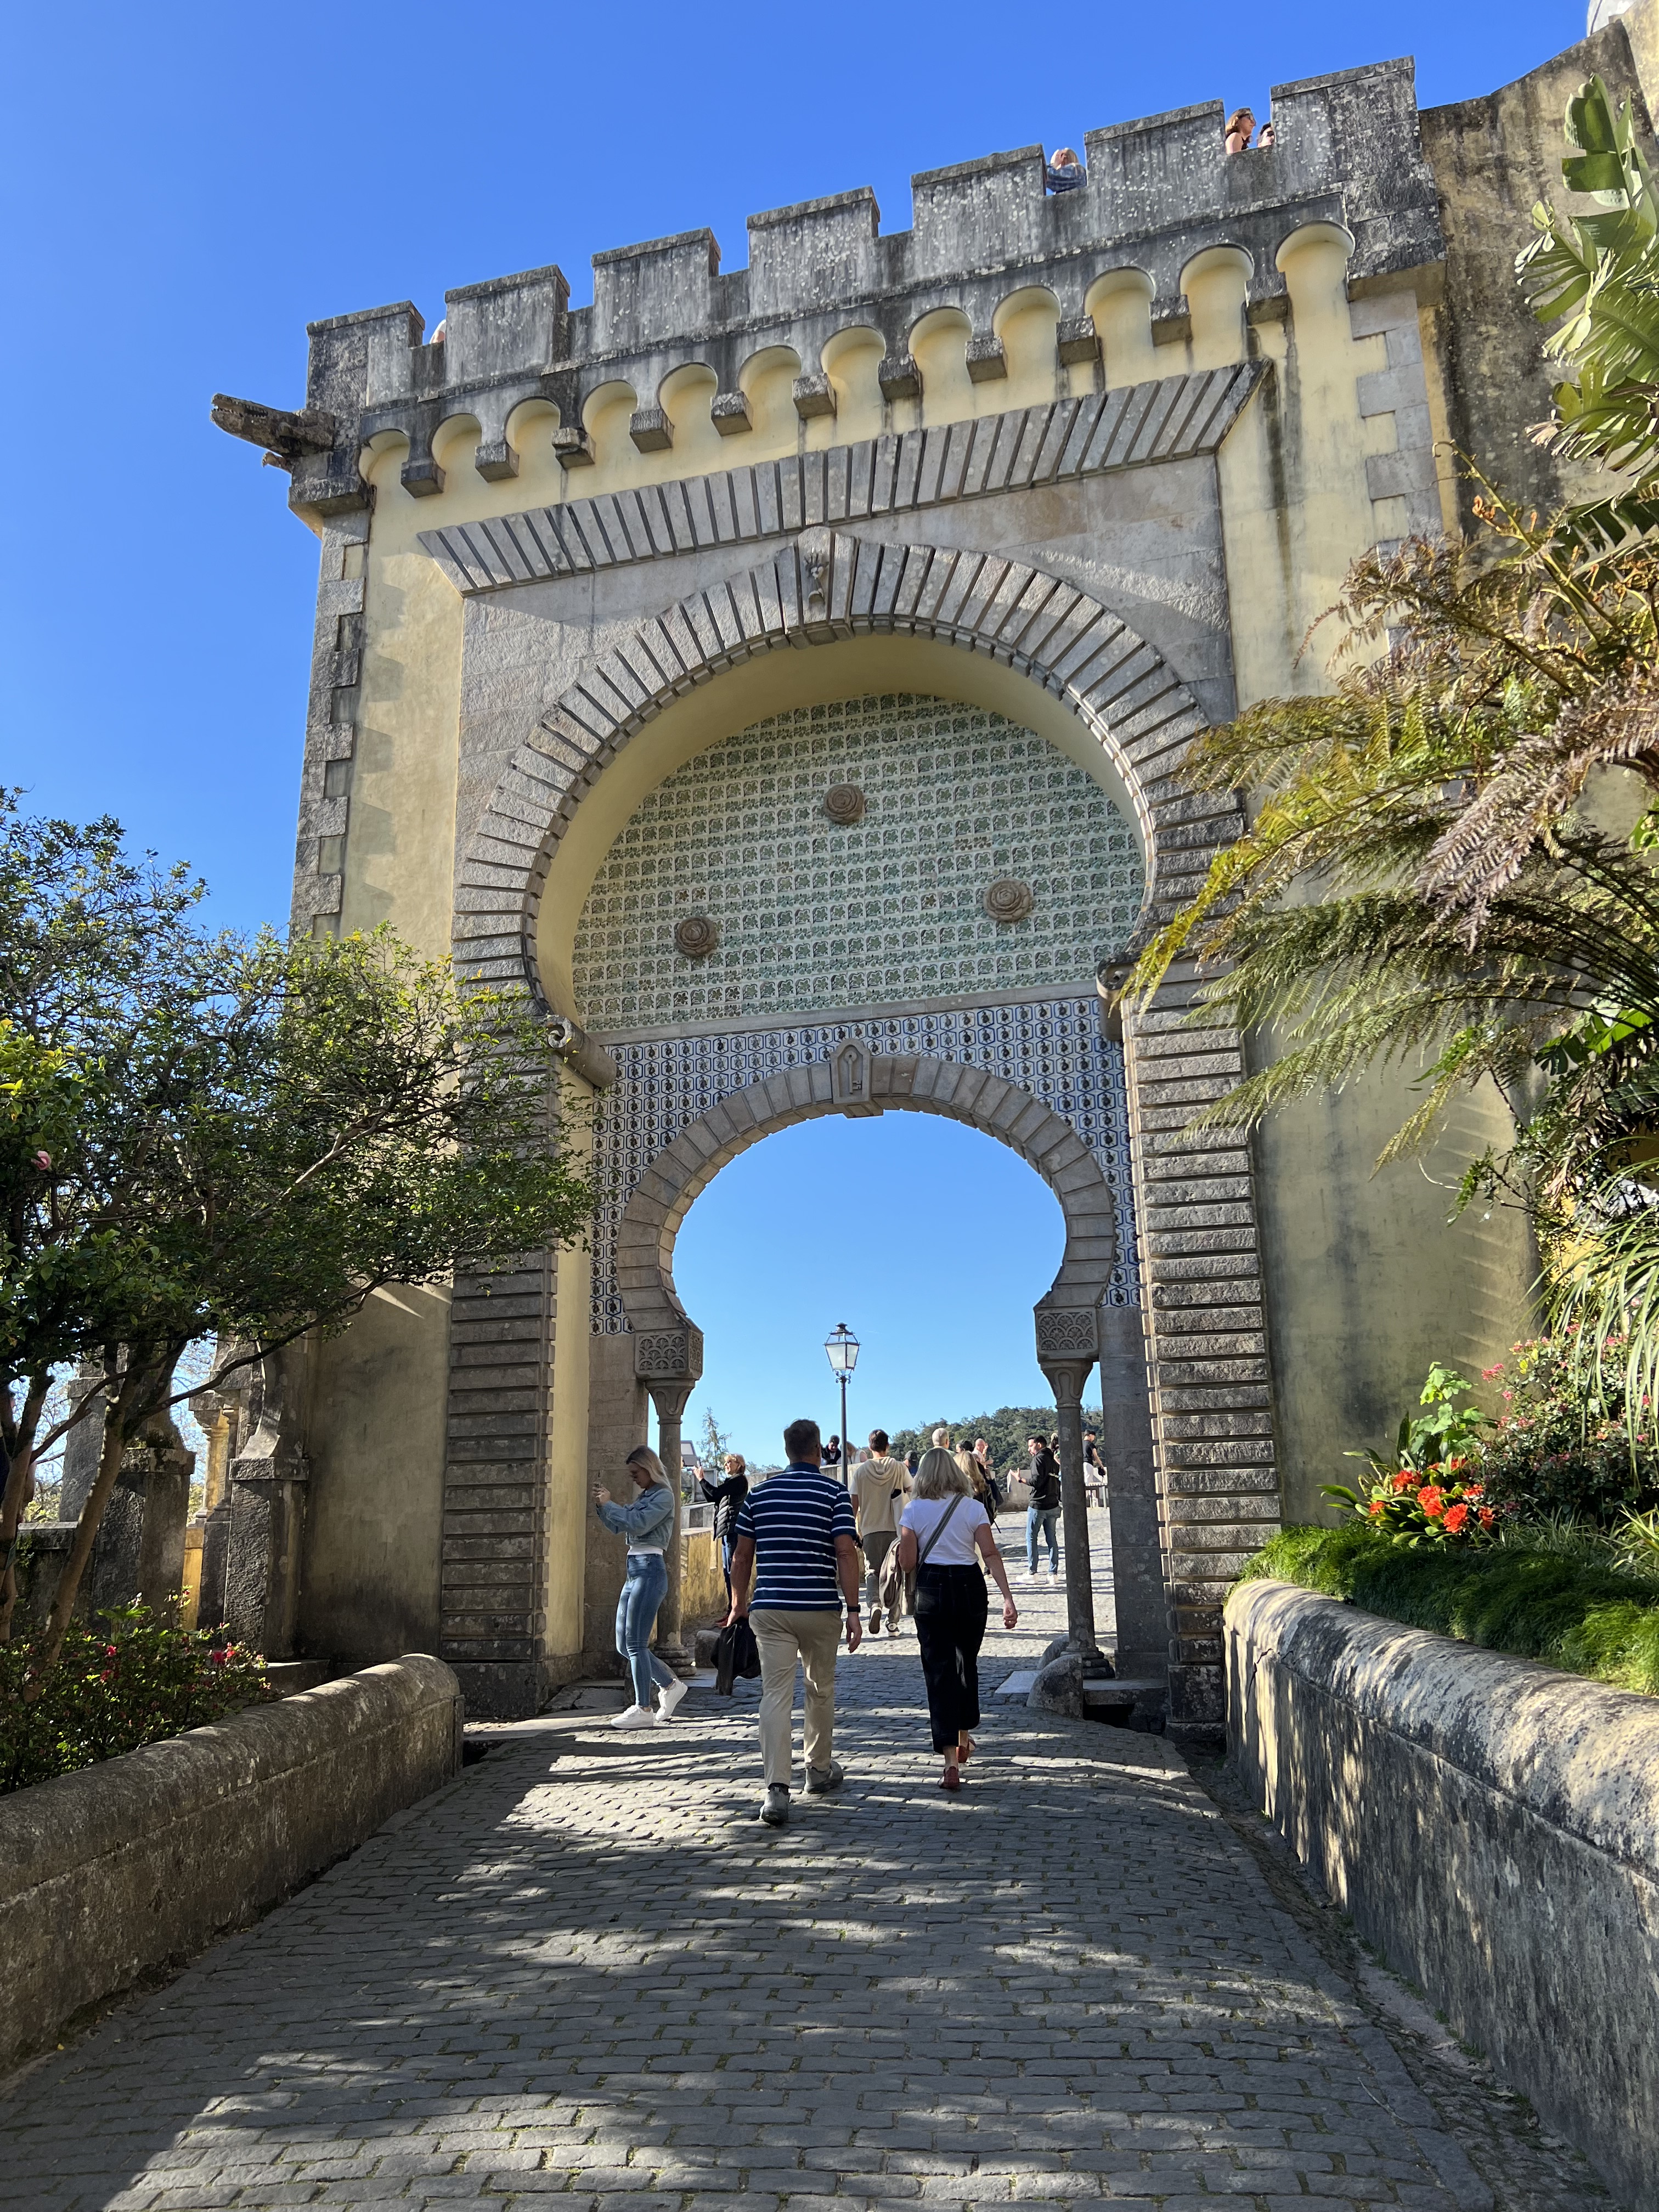
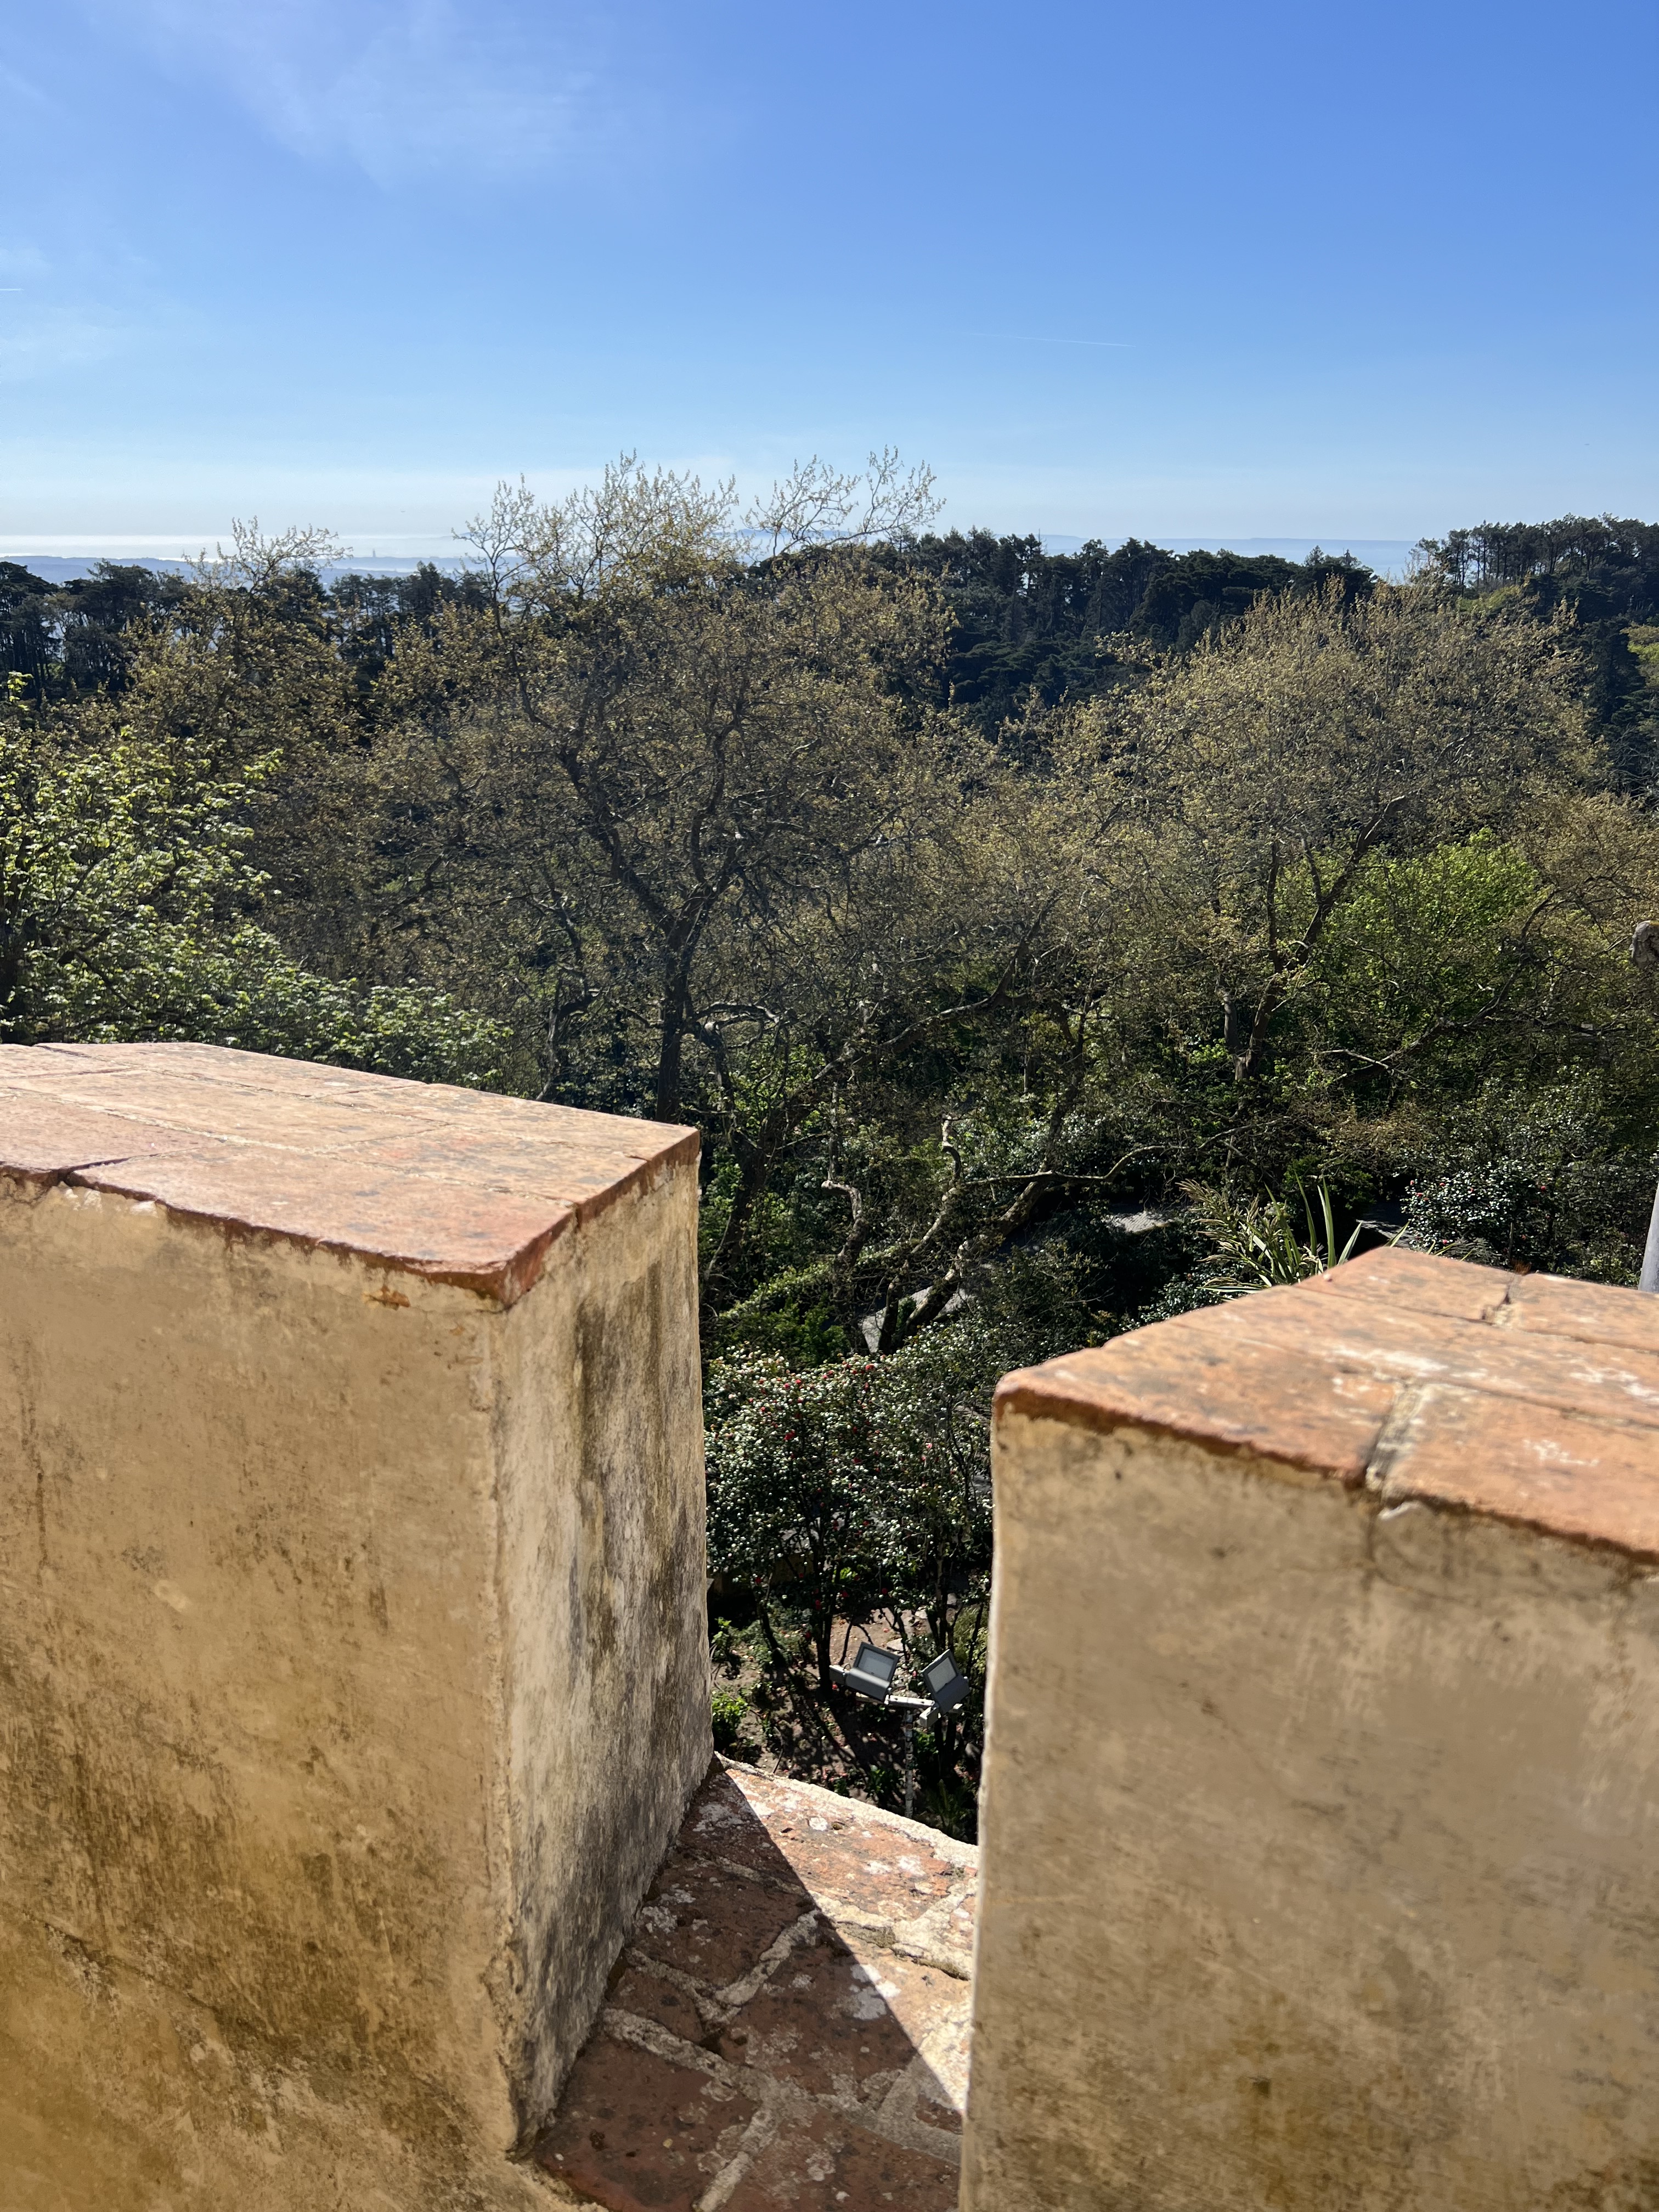
Not only was the tour informative and relaxing, but tickets to the always-popular, always-crowded Pena National Palace in Sintra, were included. It was a van of no more than 8 people, and our knowledgeable driver knew the roads really well.
The Pena National Palace is a UNESCO World Heritage Site, and it was built by King Ferdinand II as a royal summer residence in the 19th century. But there are so many more details to the story. I’ll leave it to you to Google it if you’re interested.
The walk uphill to the palace was quite steep, but the views we saw when we finally got there made it all worthwhile.
If you’re going to check the palace out, I highly recommend going off-season. It gets very, very crowded, with very long waits in line.
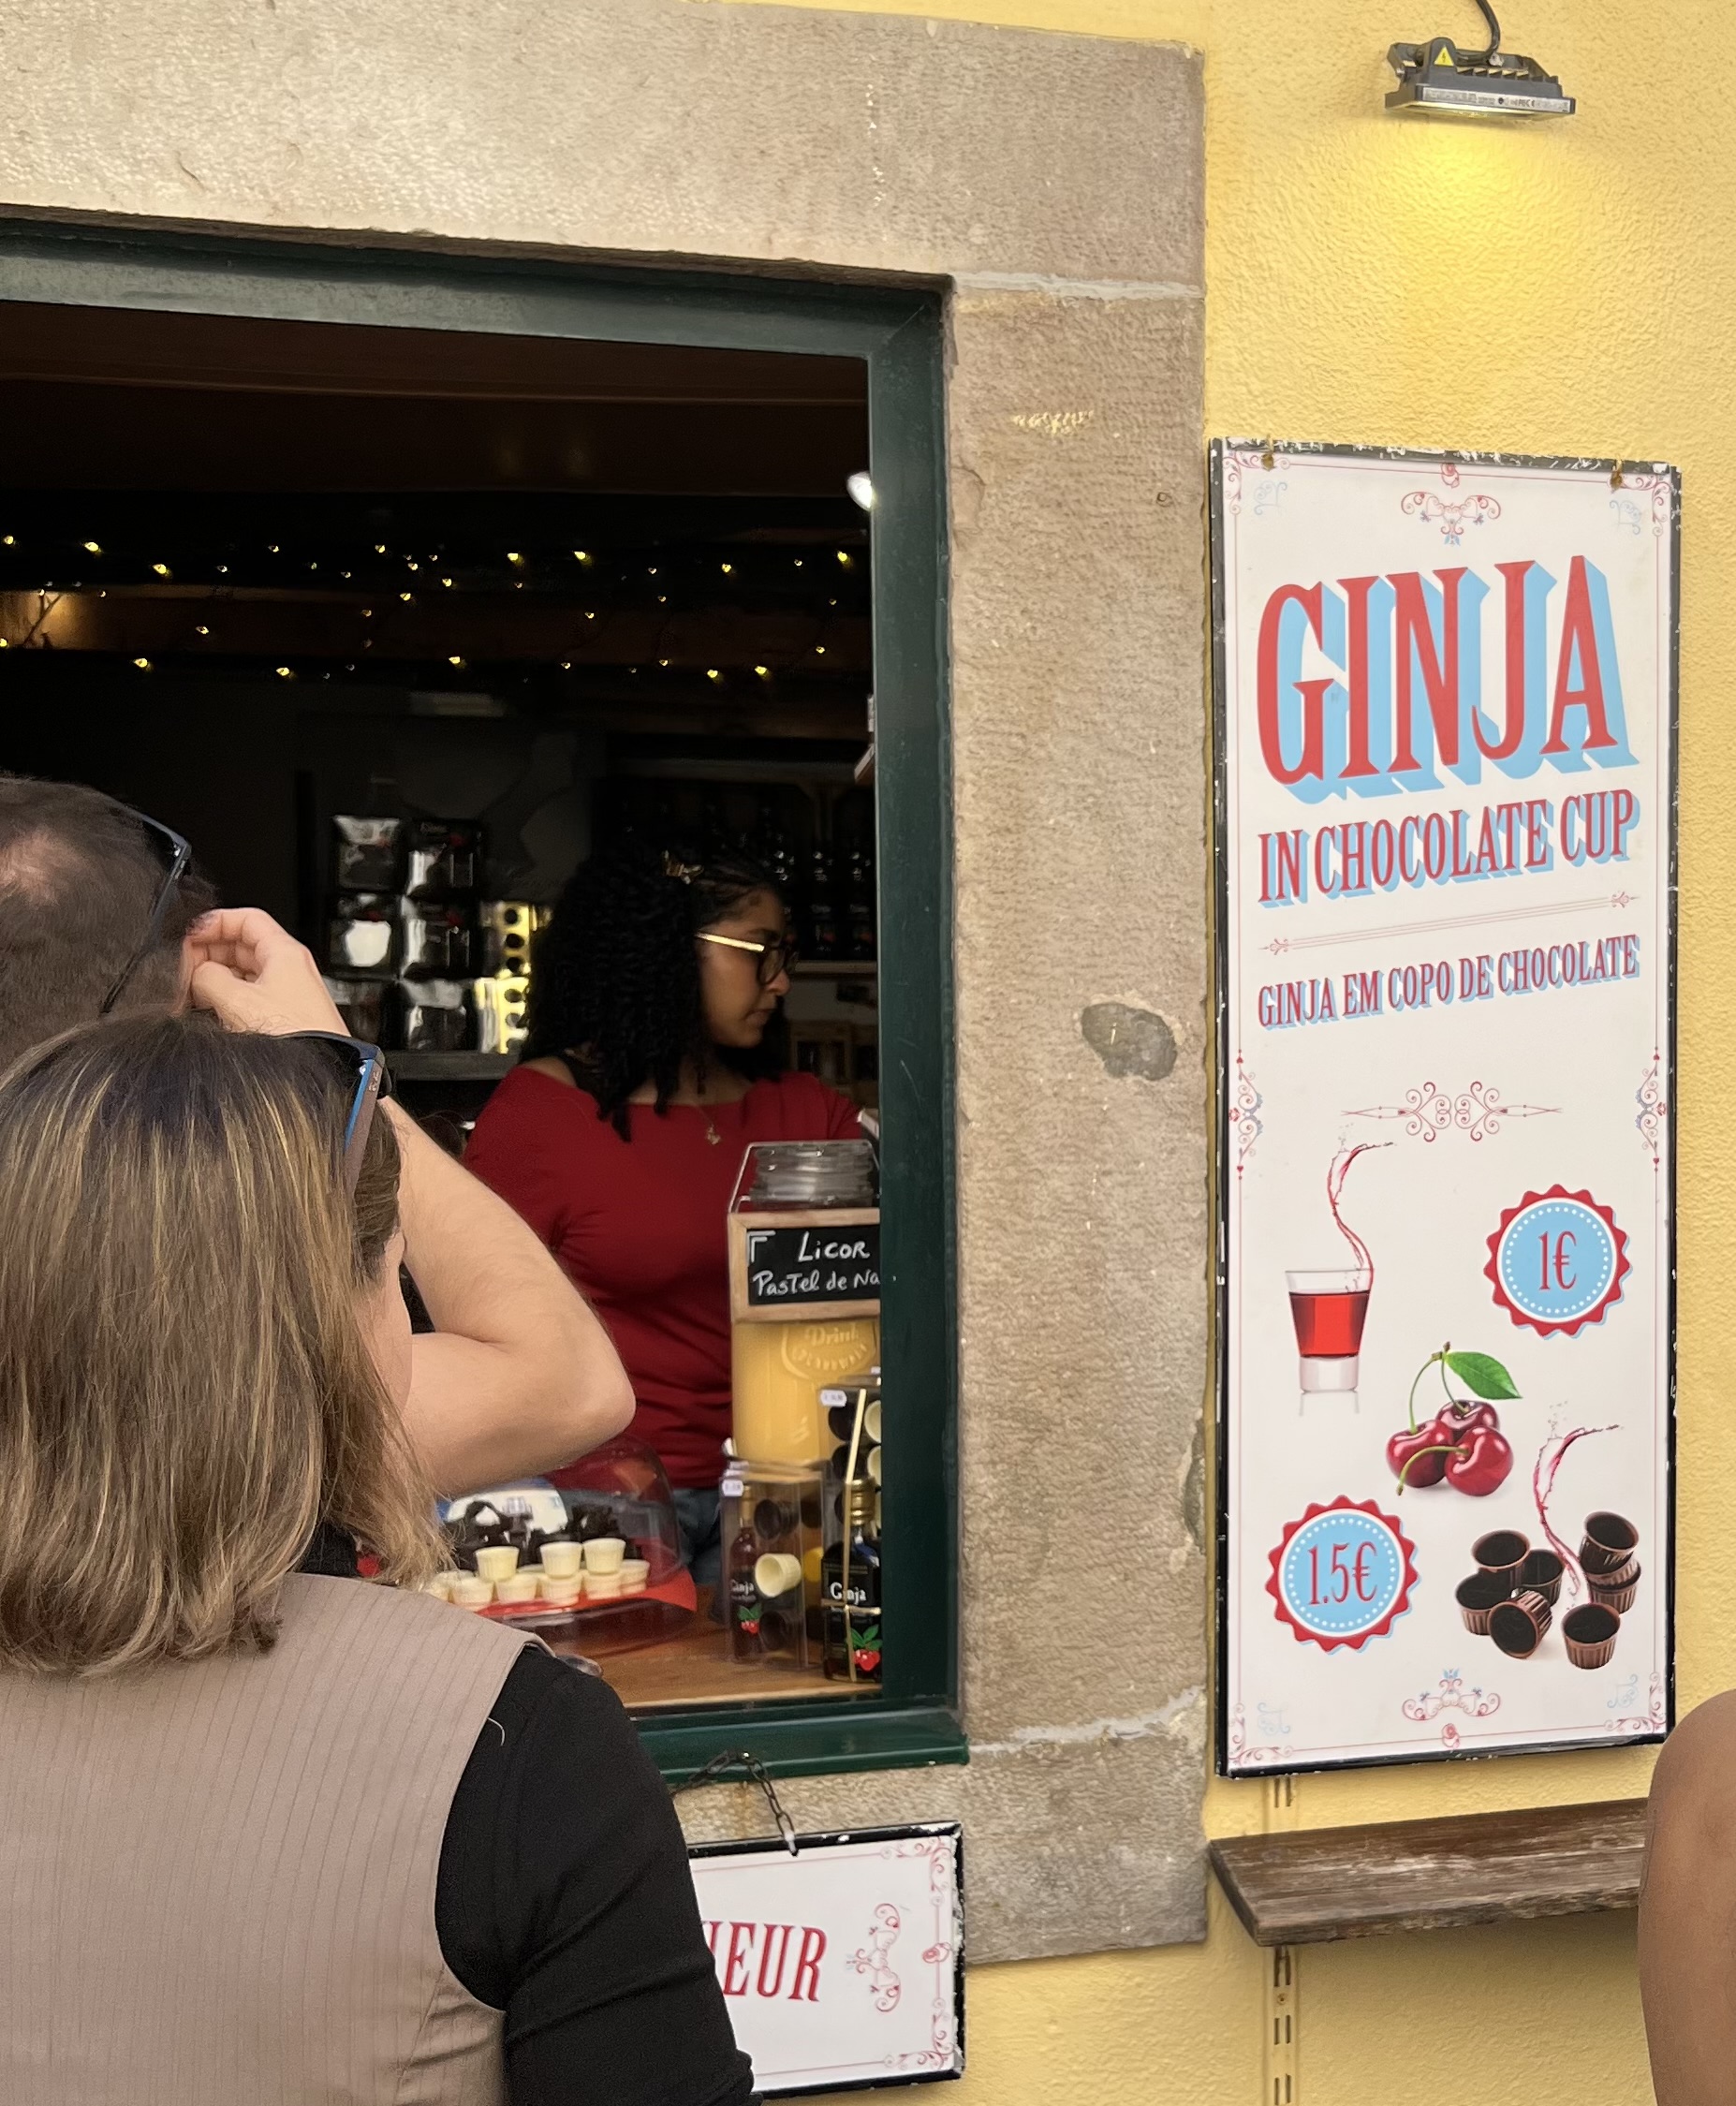
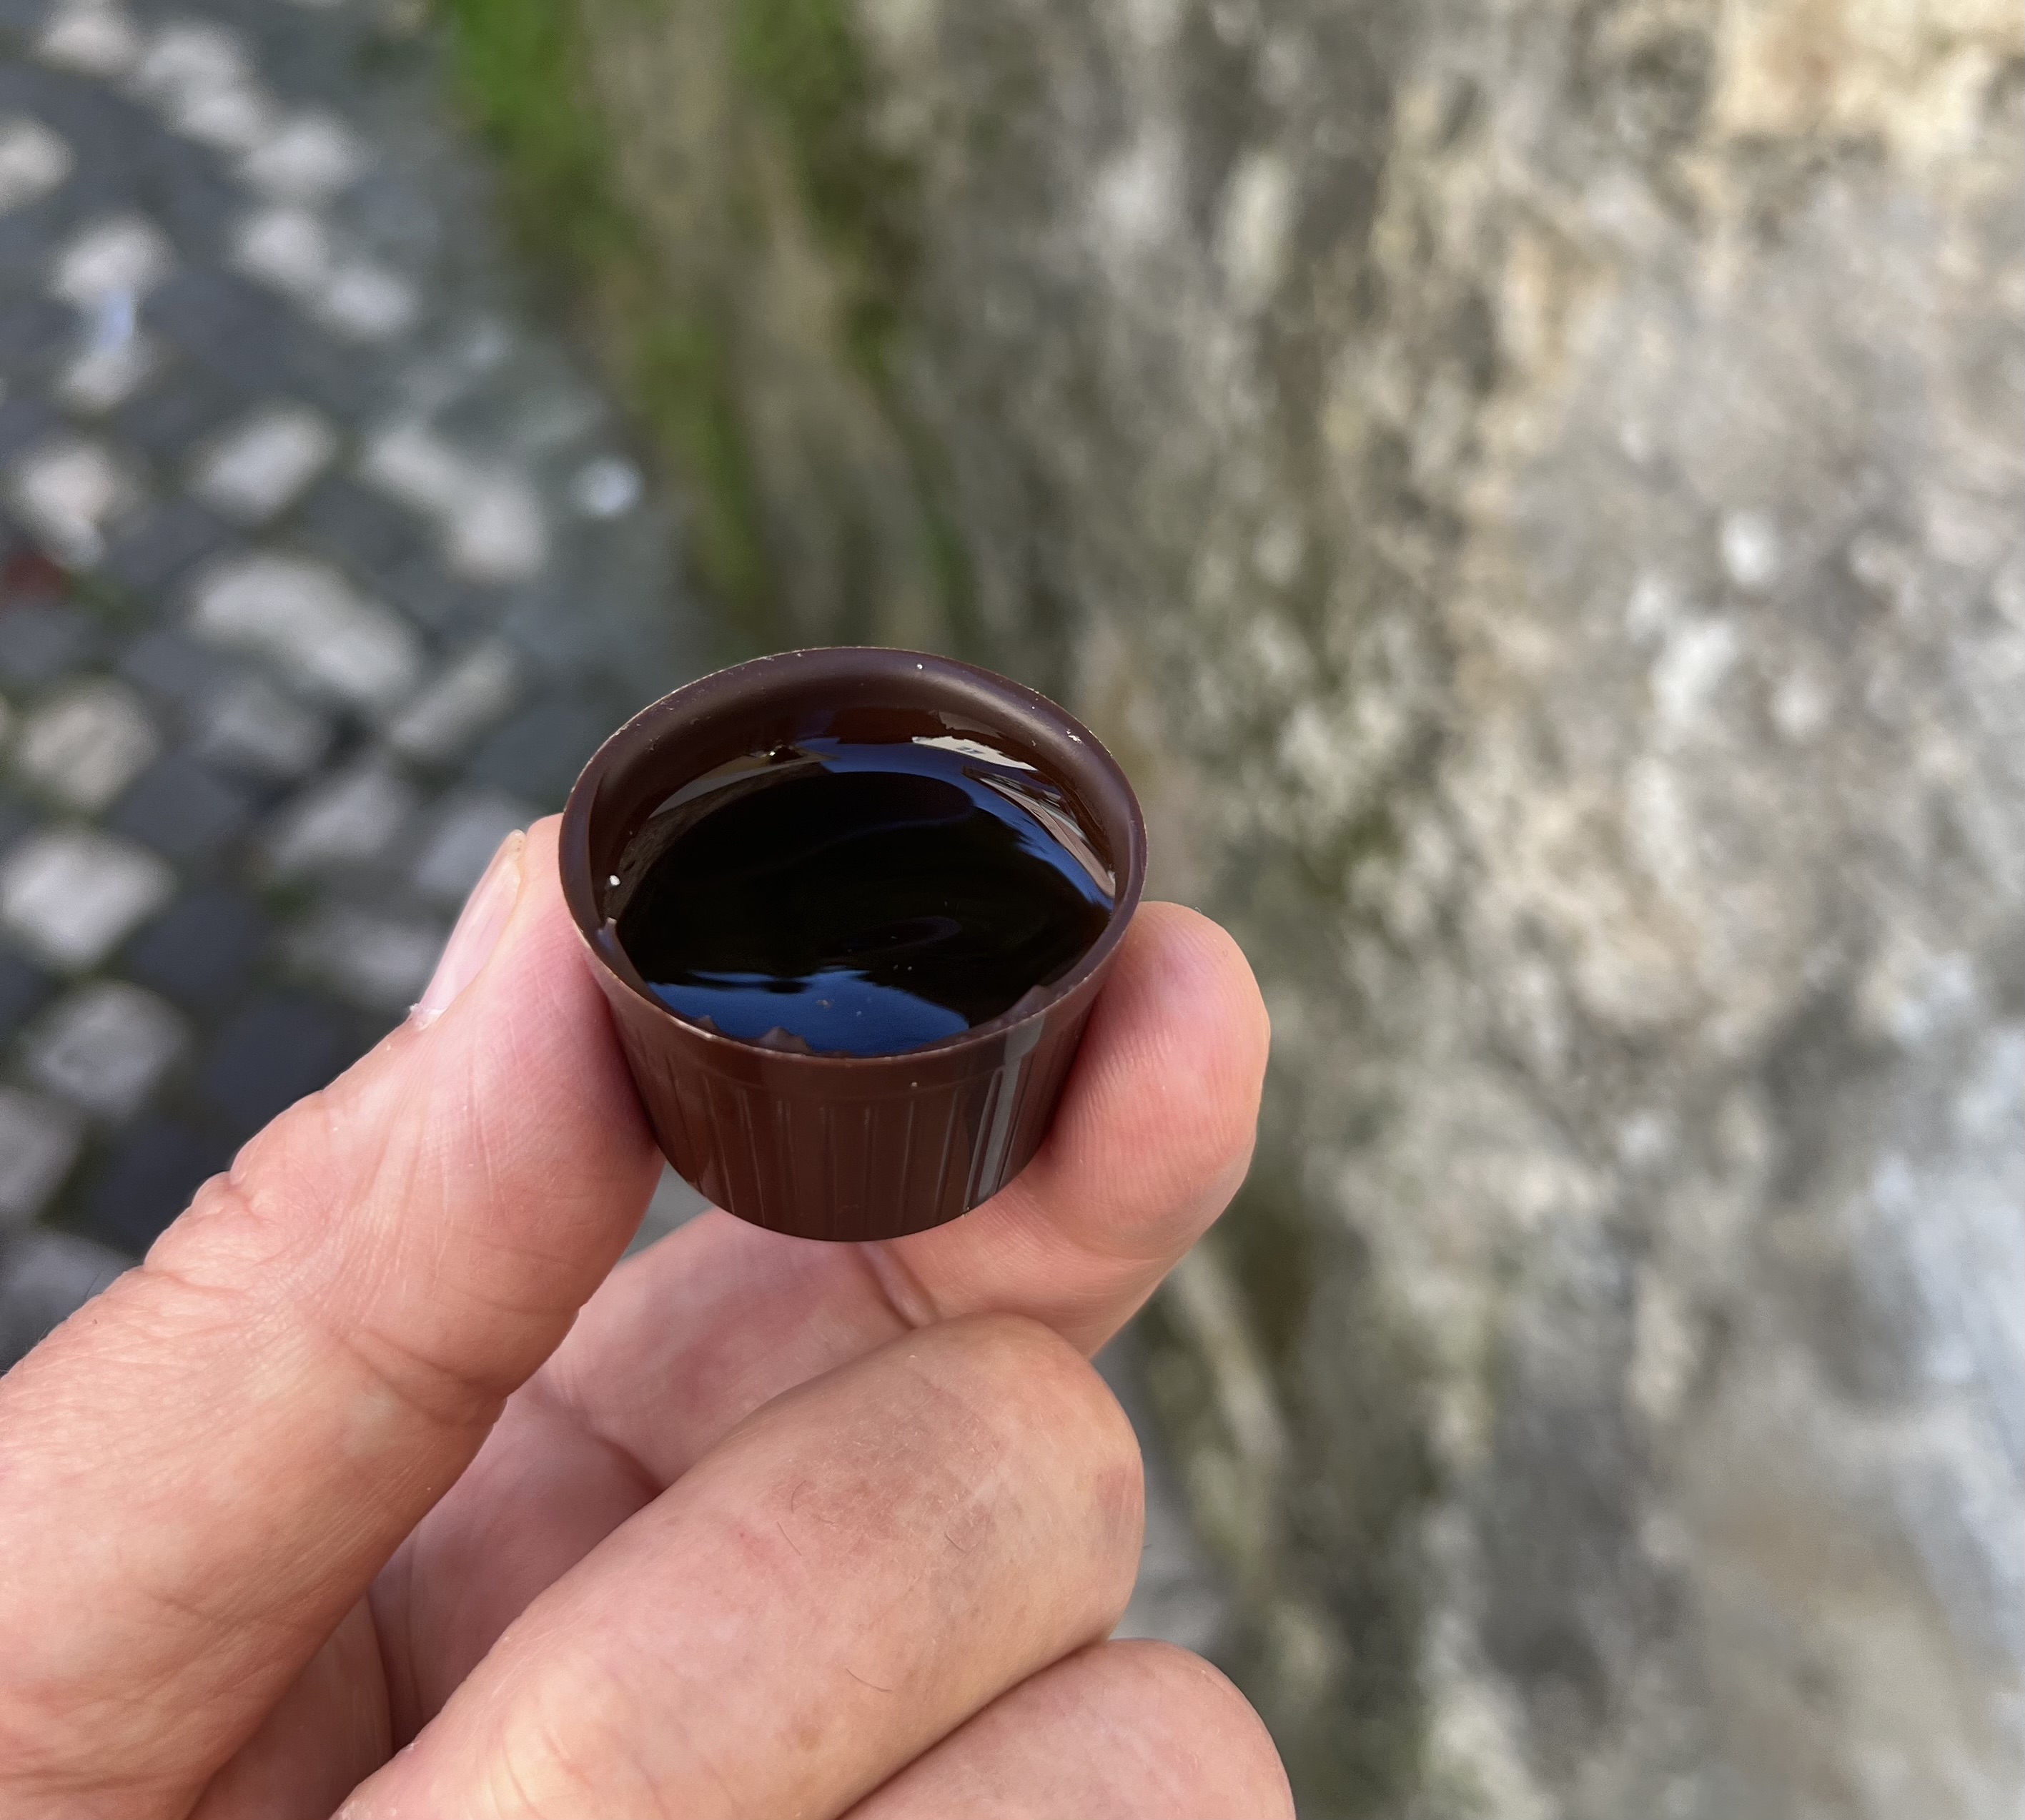
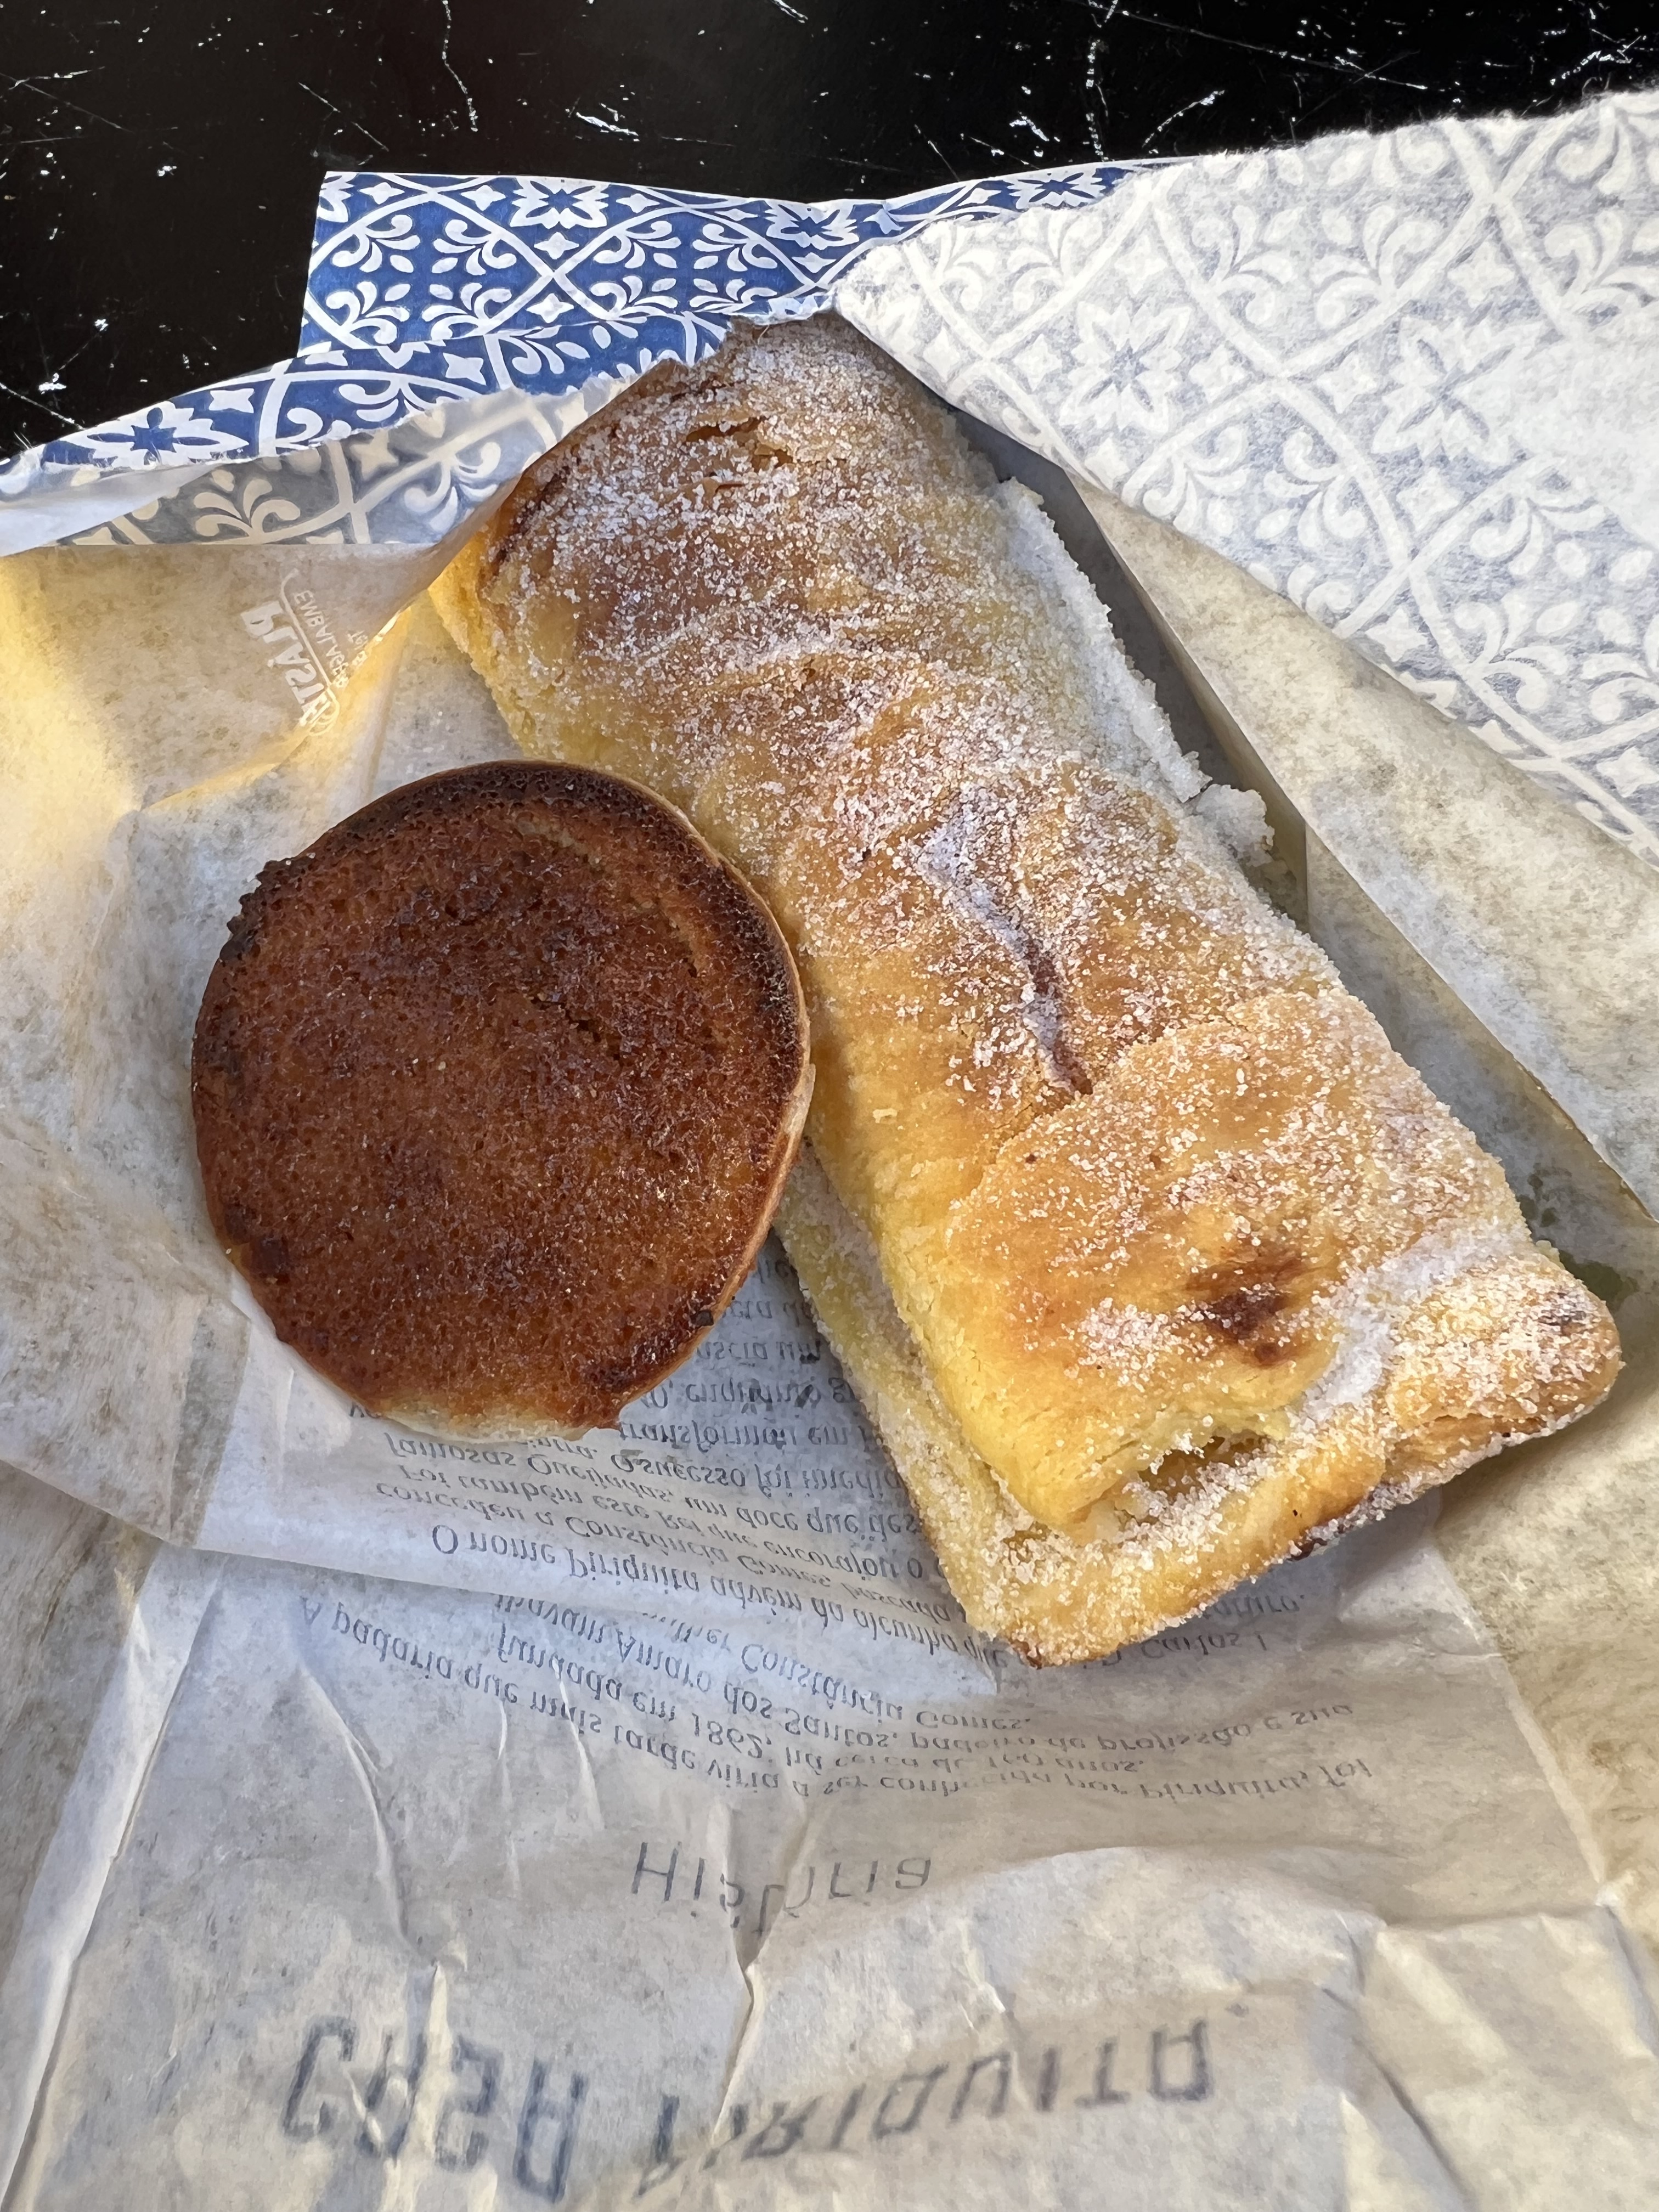
After the palace tour, we made a quick walk through the town of Sintra, stopping for some of their famous pastries and a wonderful drink called Ginja, a cherry liqueur served in a small chocolate cup.
Sweets of Sintra, from the famous Casa Piriquita bakery.
On our way to Cascais, we stopped at Cabo da Roca, the most western point in continental Europe.
We headed back to Lisbon along the coast, driving through Cascais, which is basically the Portuguese Riviera. Suddenly, there are waterfront mansions, Ferraris zooming past the tour van, and lots of beautiful people wearing expensive clothes and shopping in expensive shops. You almost feel like you’ve been transported to another country…
We made a stop in Cascais to have lunch and walk along the perfectly manicured waterfront. Only when I returned to my hotel did I realize I didn’t take any pictures in Cascais. The glitz and glam was fun to see, but it’s not what I came to Portugal for.
Leaving Algarve, the southern region of Portugal, I was going to take a longer, more scenic route back north to Lisbon along the western shore. But I was getting tired of driving, having already put about 900 miles behind me, and I had almost 200 more to go via the most direct route, which would take about 3 hours. I decided to go direct, rather than add even more hours to my journey via the scenic route.
Fascinating to see so many stork nests on the transmission towers near the highway.
Once in the city of Lisbon, I just needed to navigate my little rental car to my home for the next 3 nights: the Altis Avenida Hotel. Once there, the valet would whisk my car away and I wouldn’t need it again until it was time for me to return the car to the airport a few days later.
The hotel was wonderful, with a room on the 6th floor, giving me a great view of the city.
So many interesting places were just a walk away from my central location, and I explored a lot on foot, despite the fact that there were some serious hills challenging my bad knees!
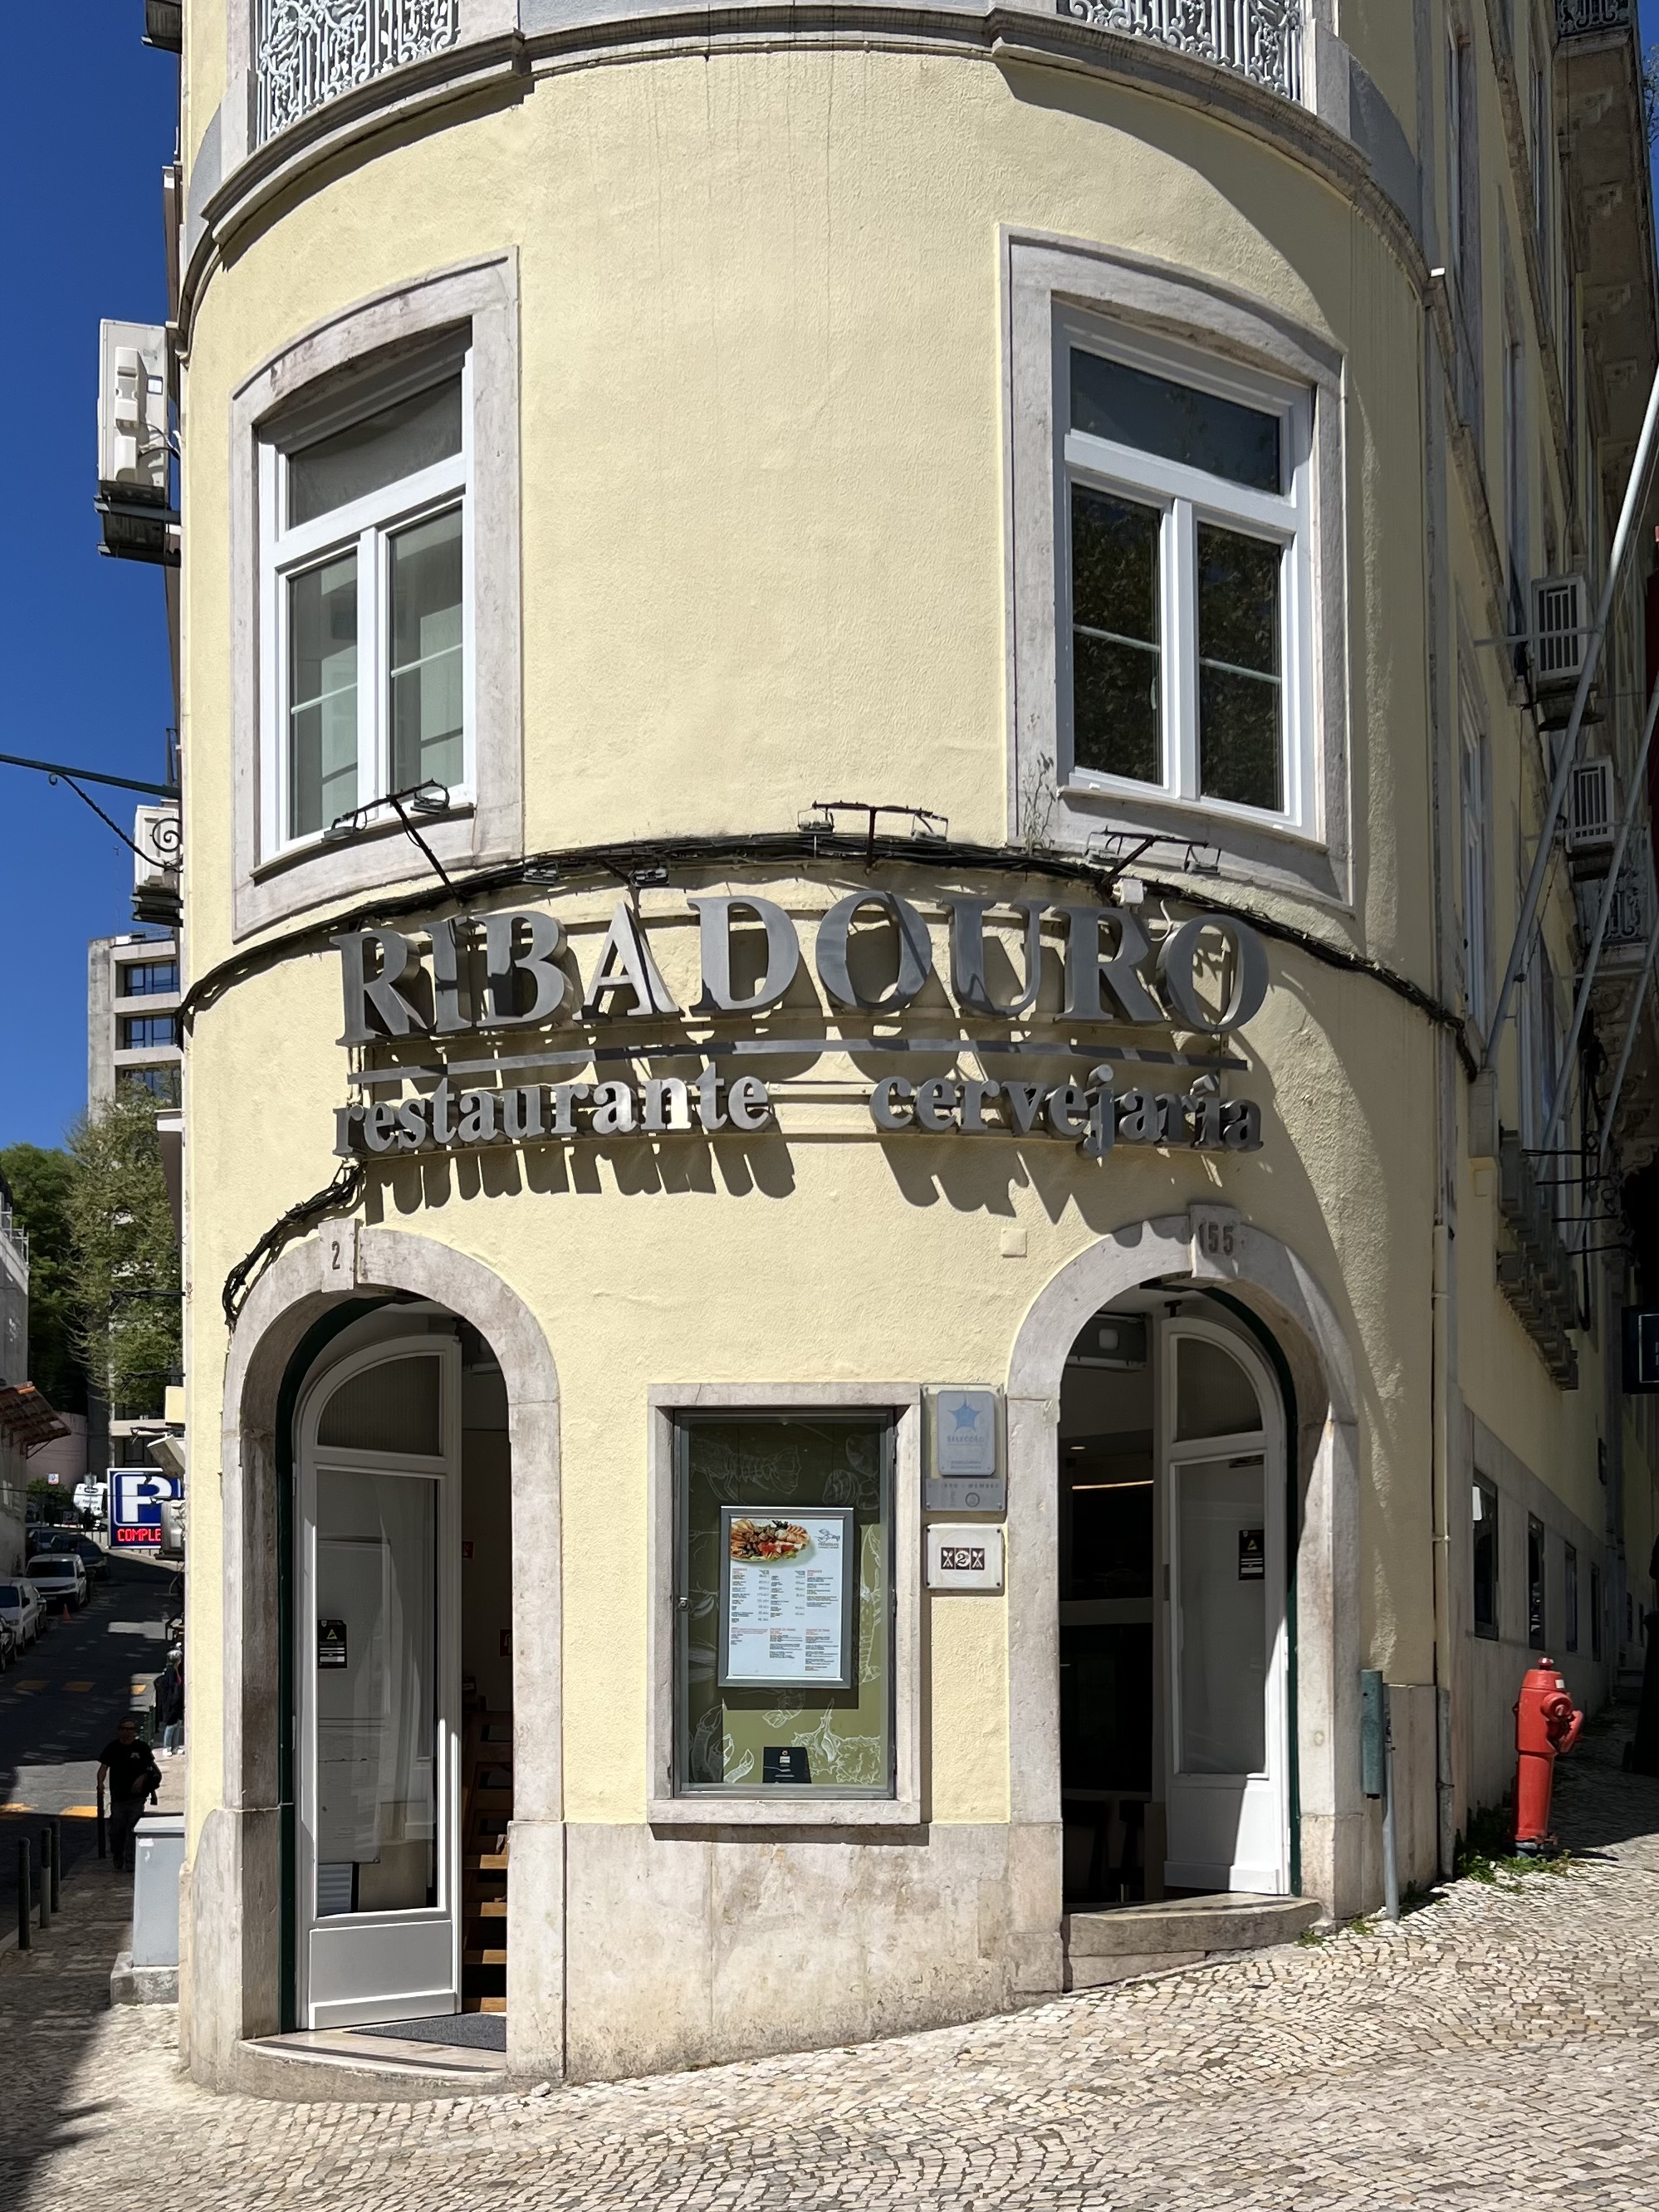
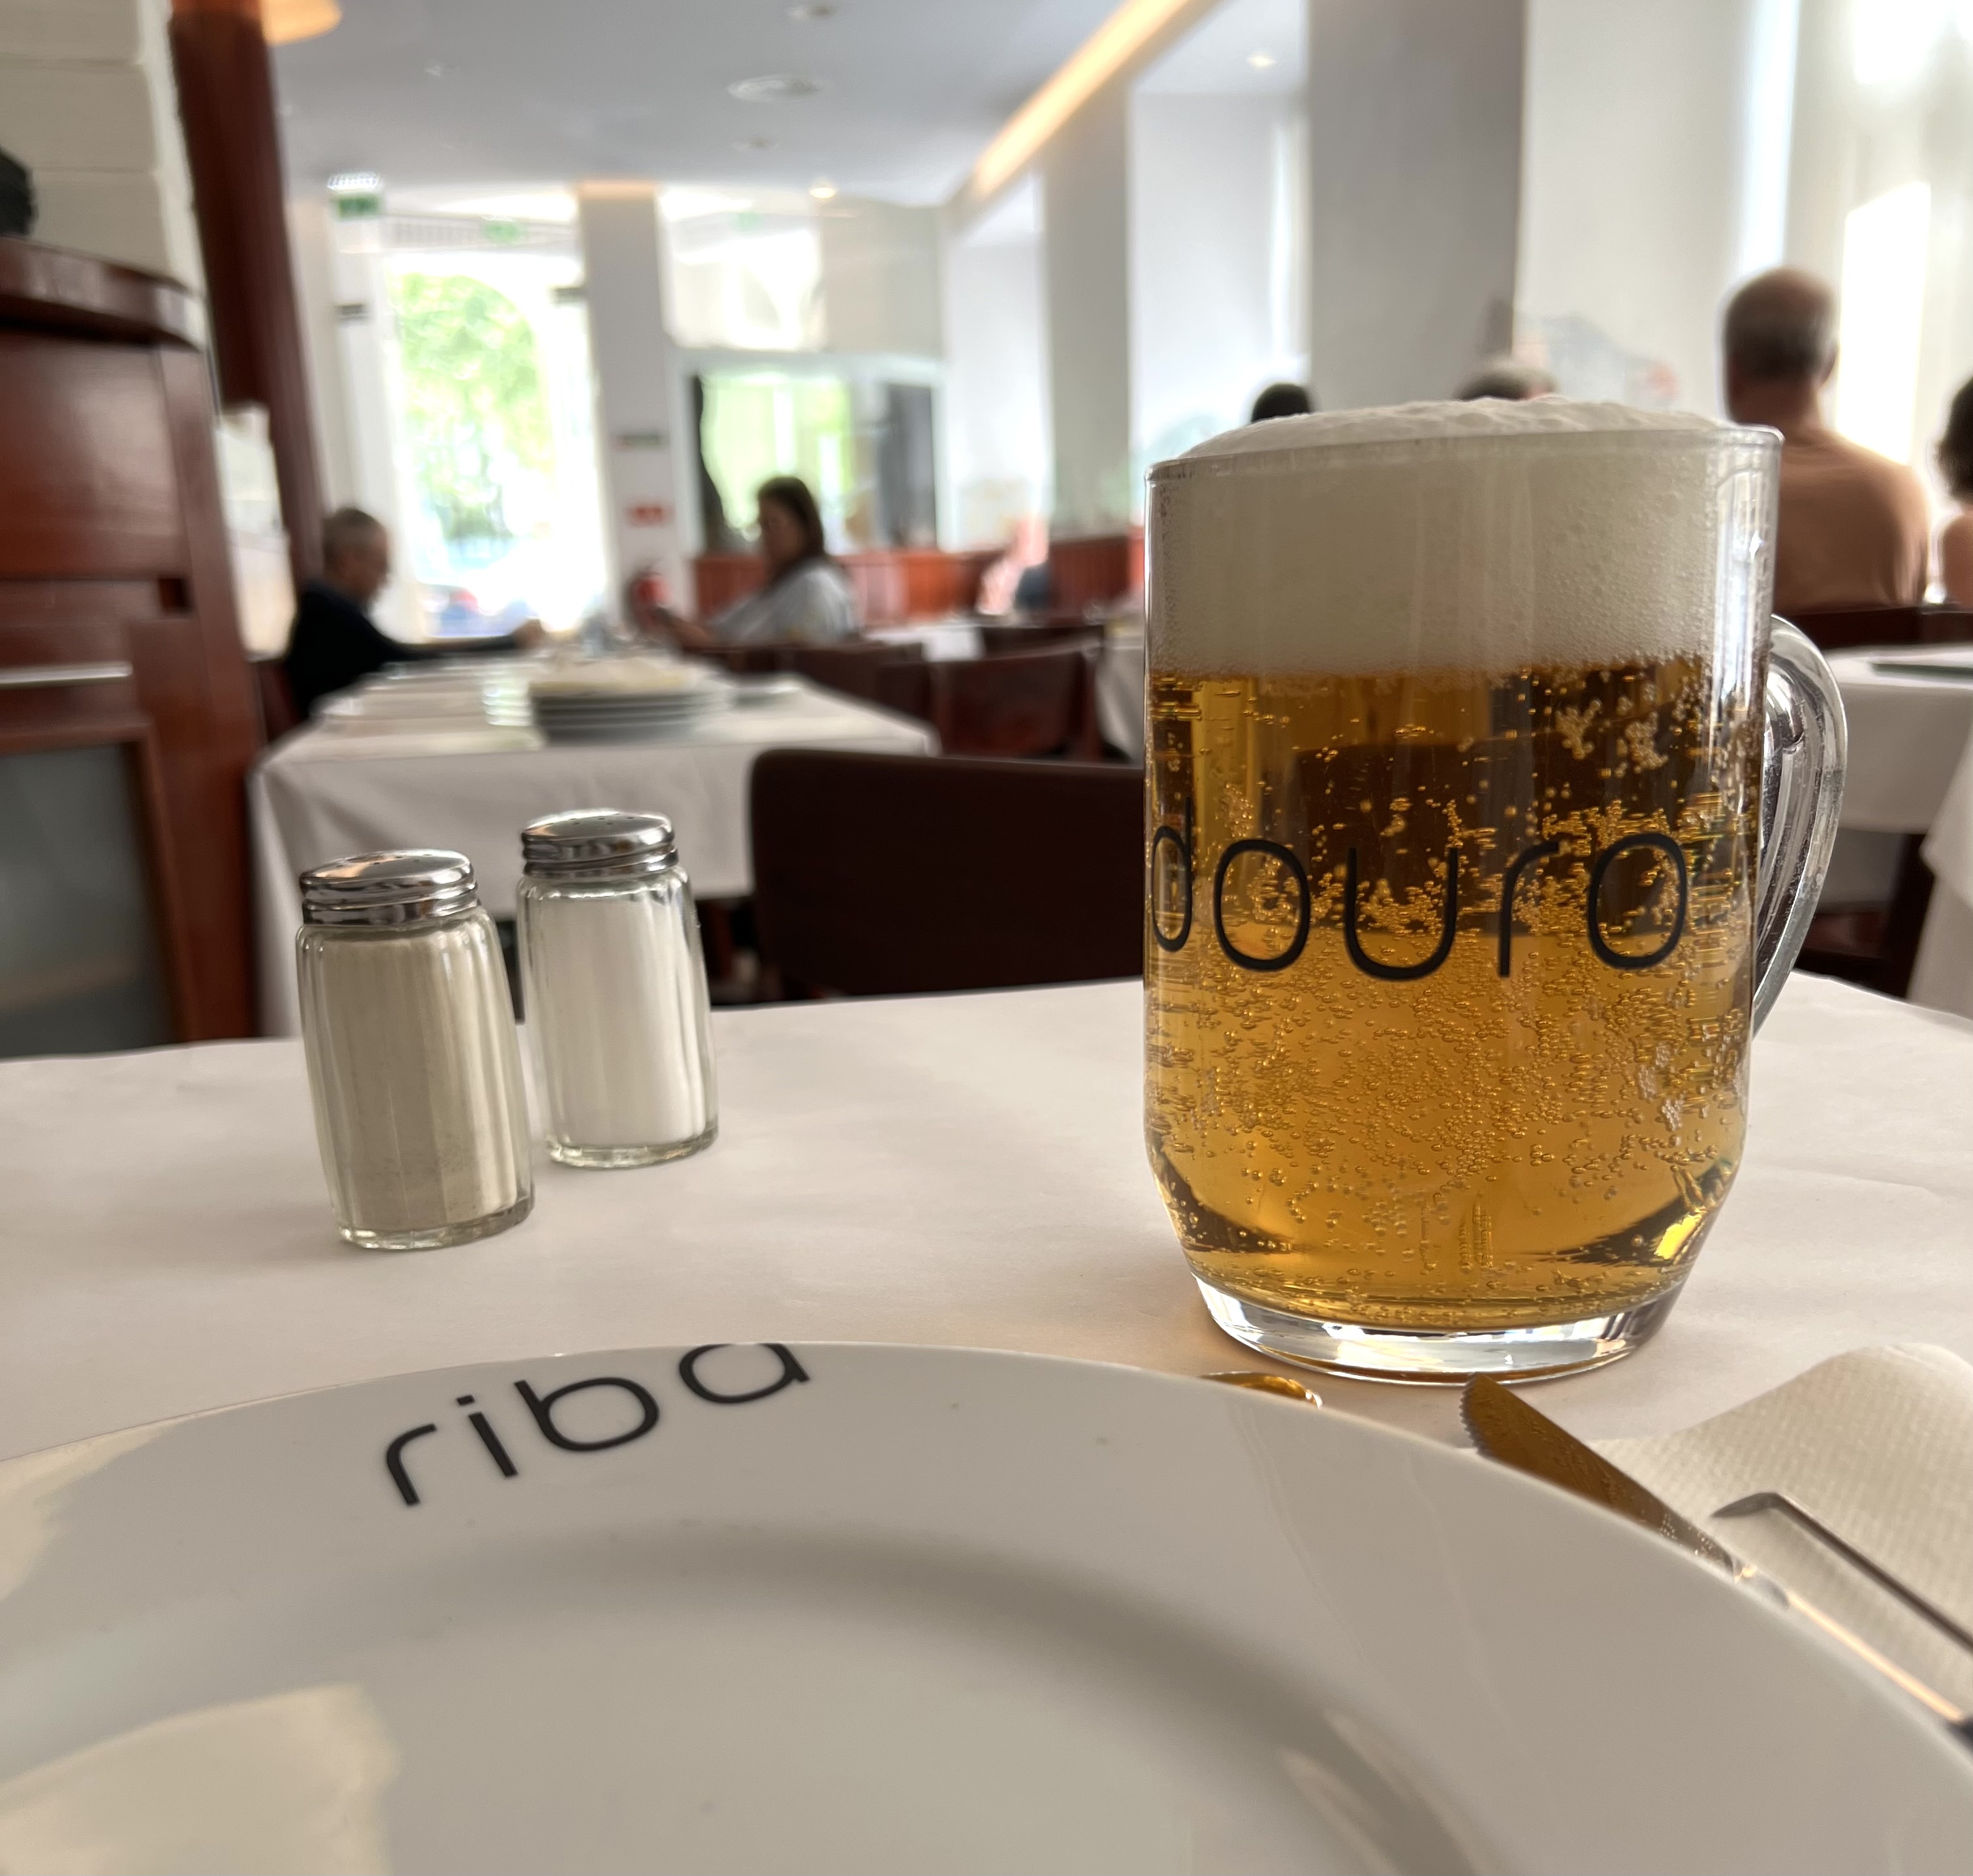
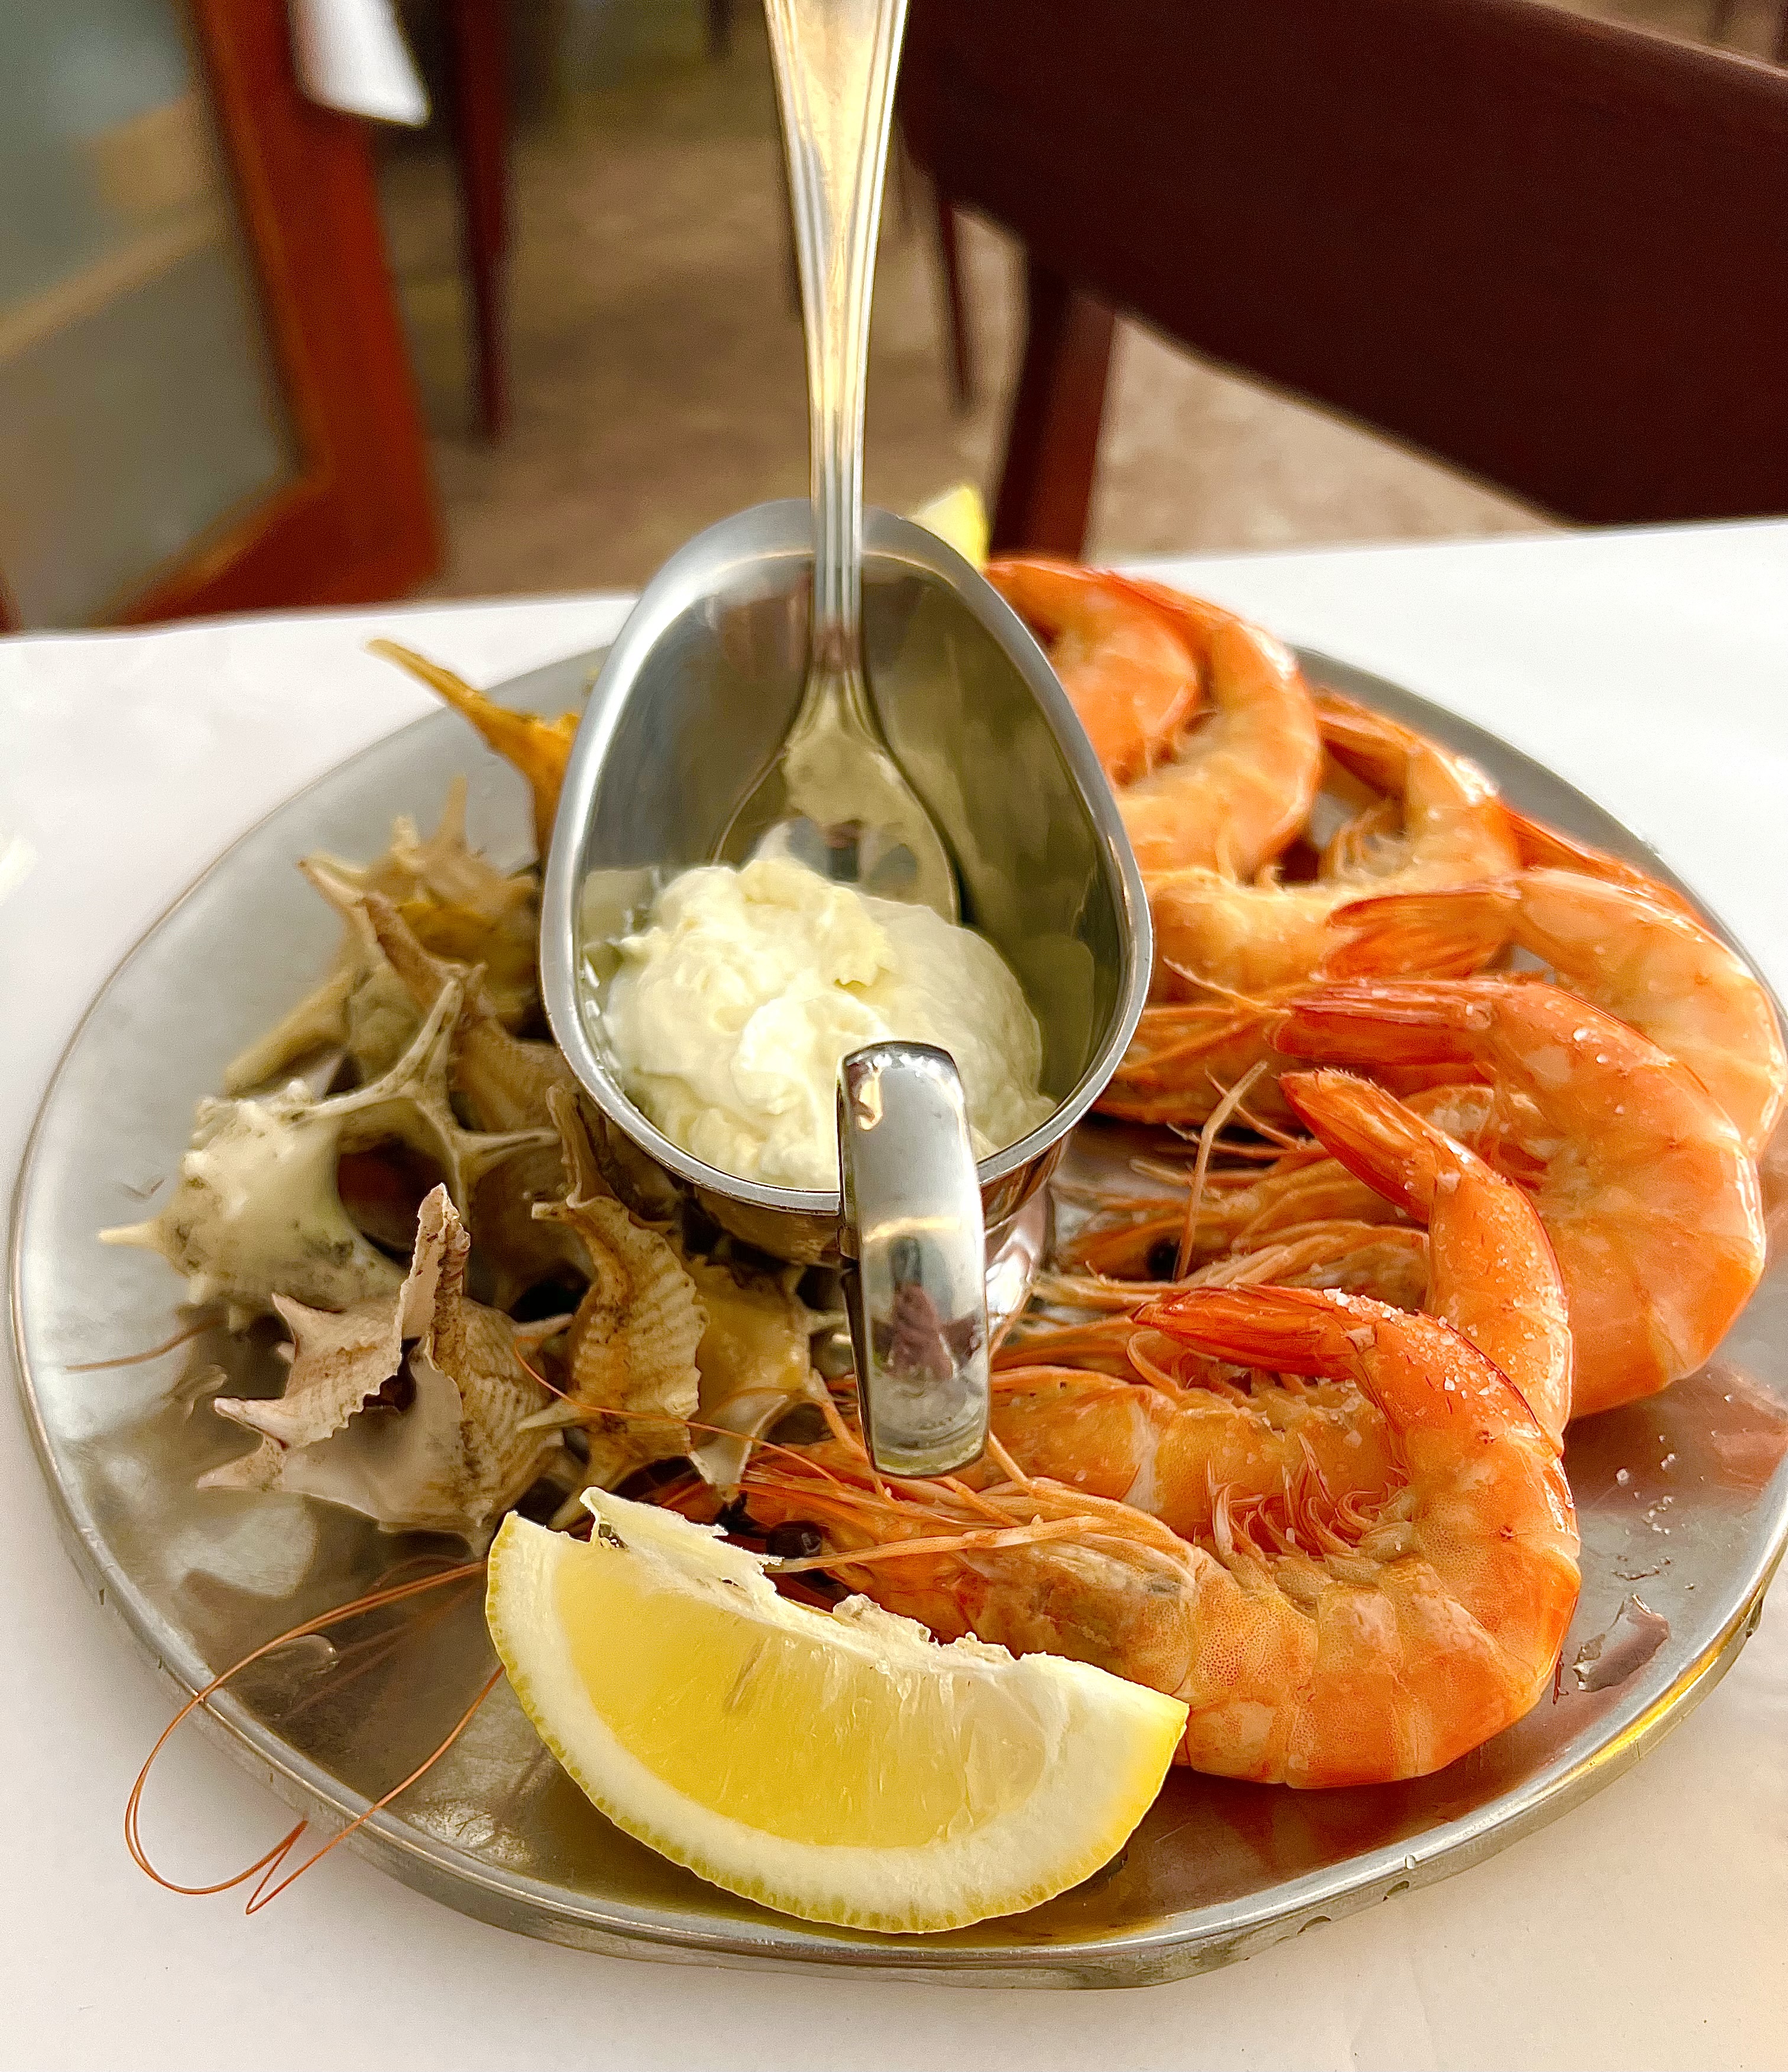
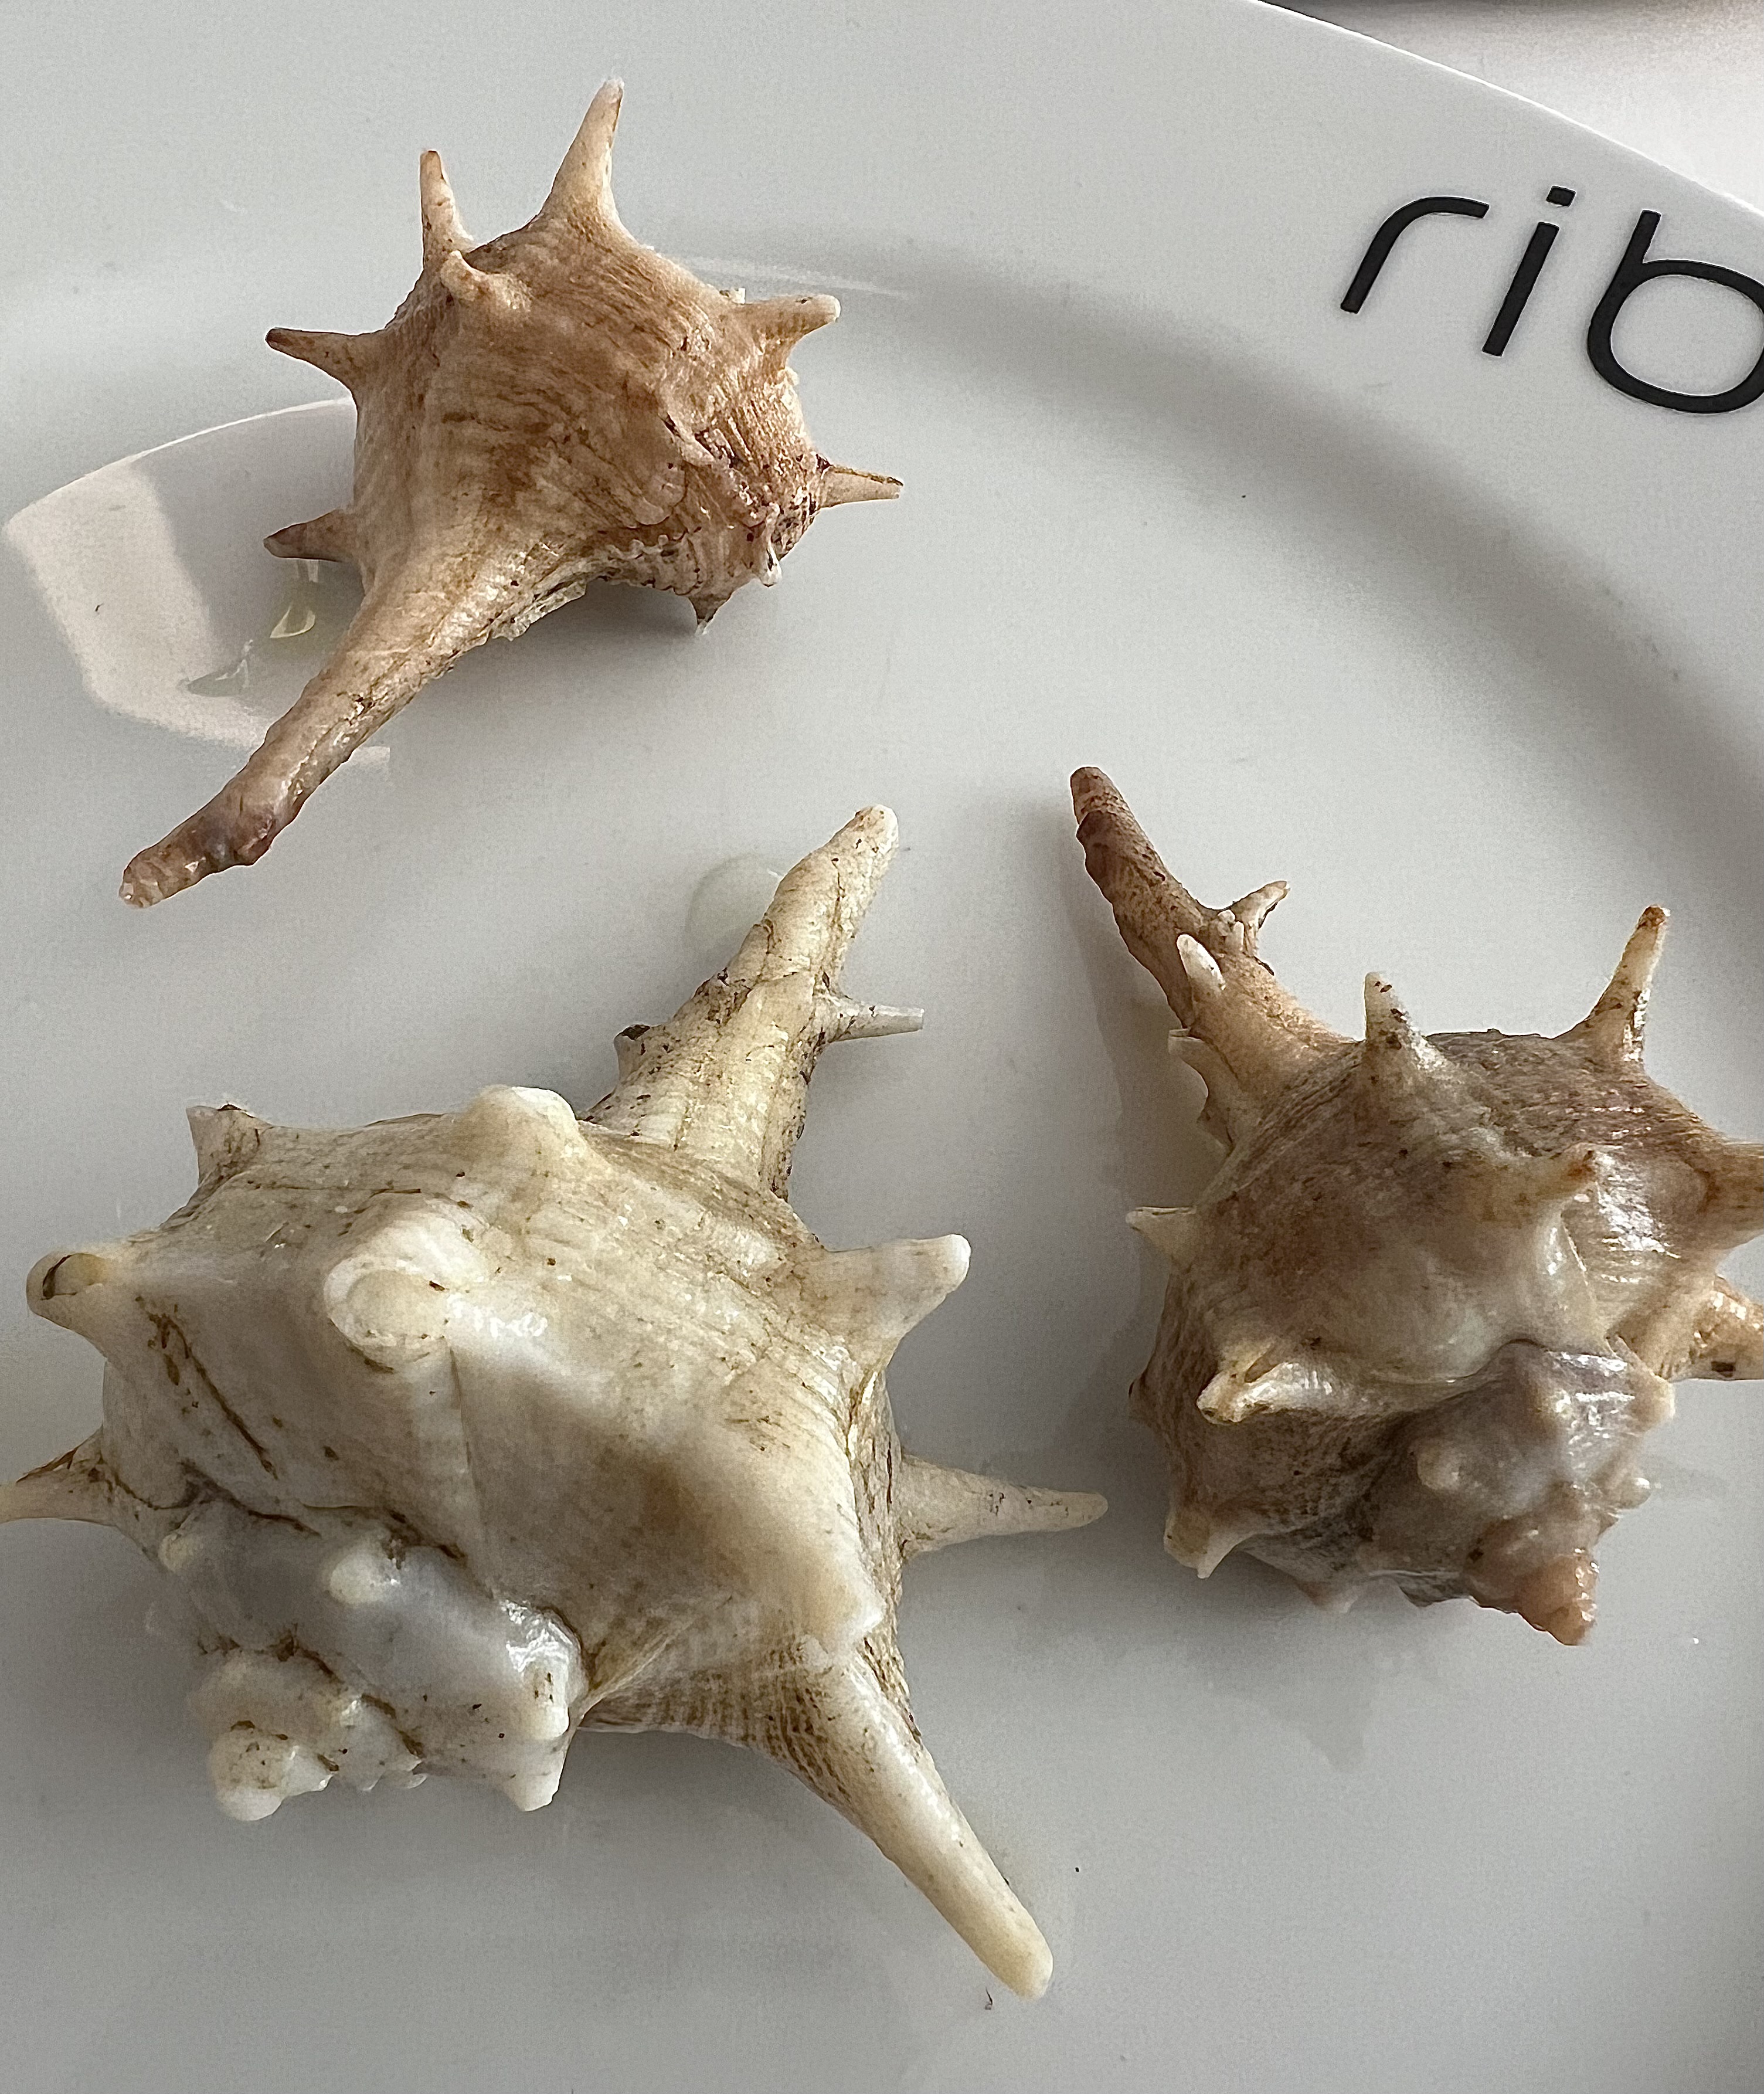
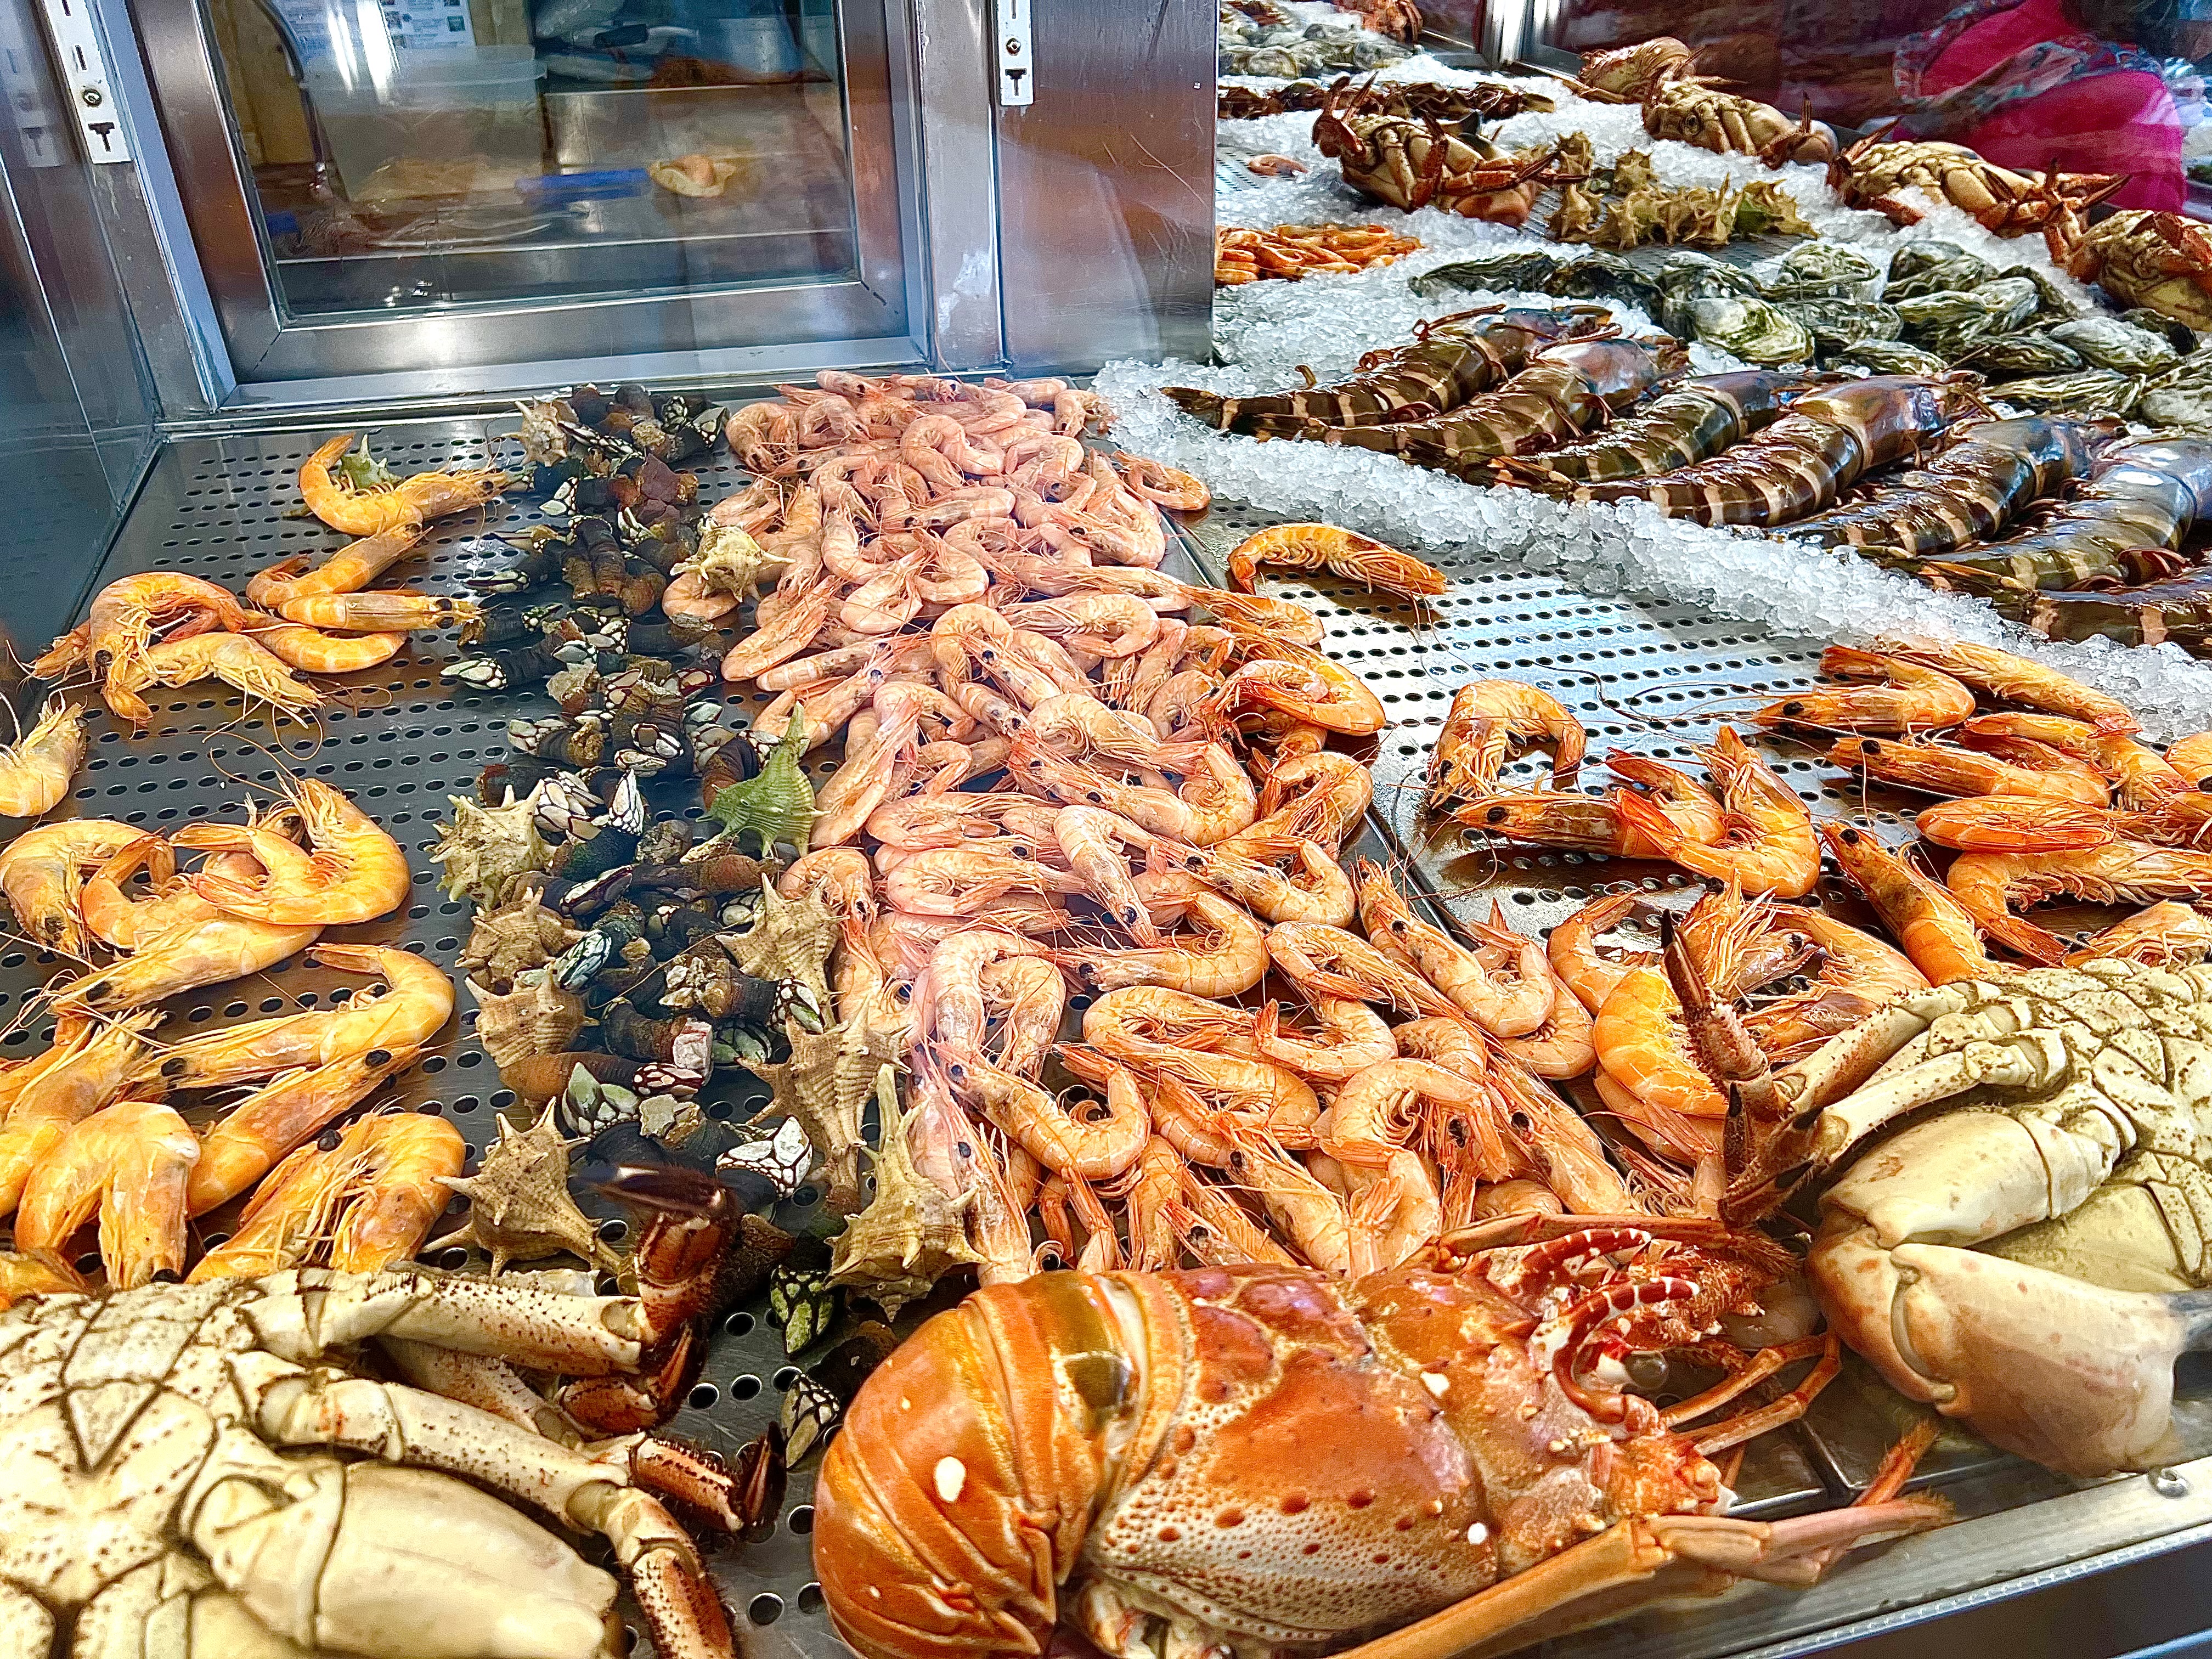
I was craving fresh seafood, and the hotel concierge told me of a place that was just a few blocks away: Ribadouro RestauranteCervejaria. It totally hit the spot.
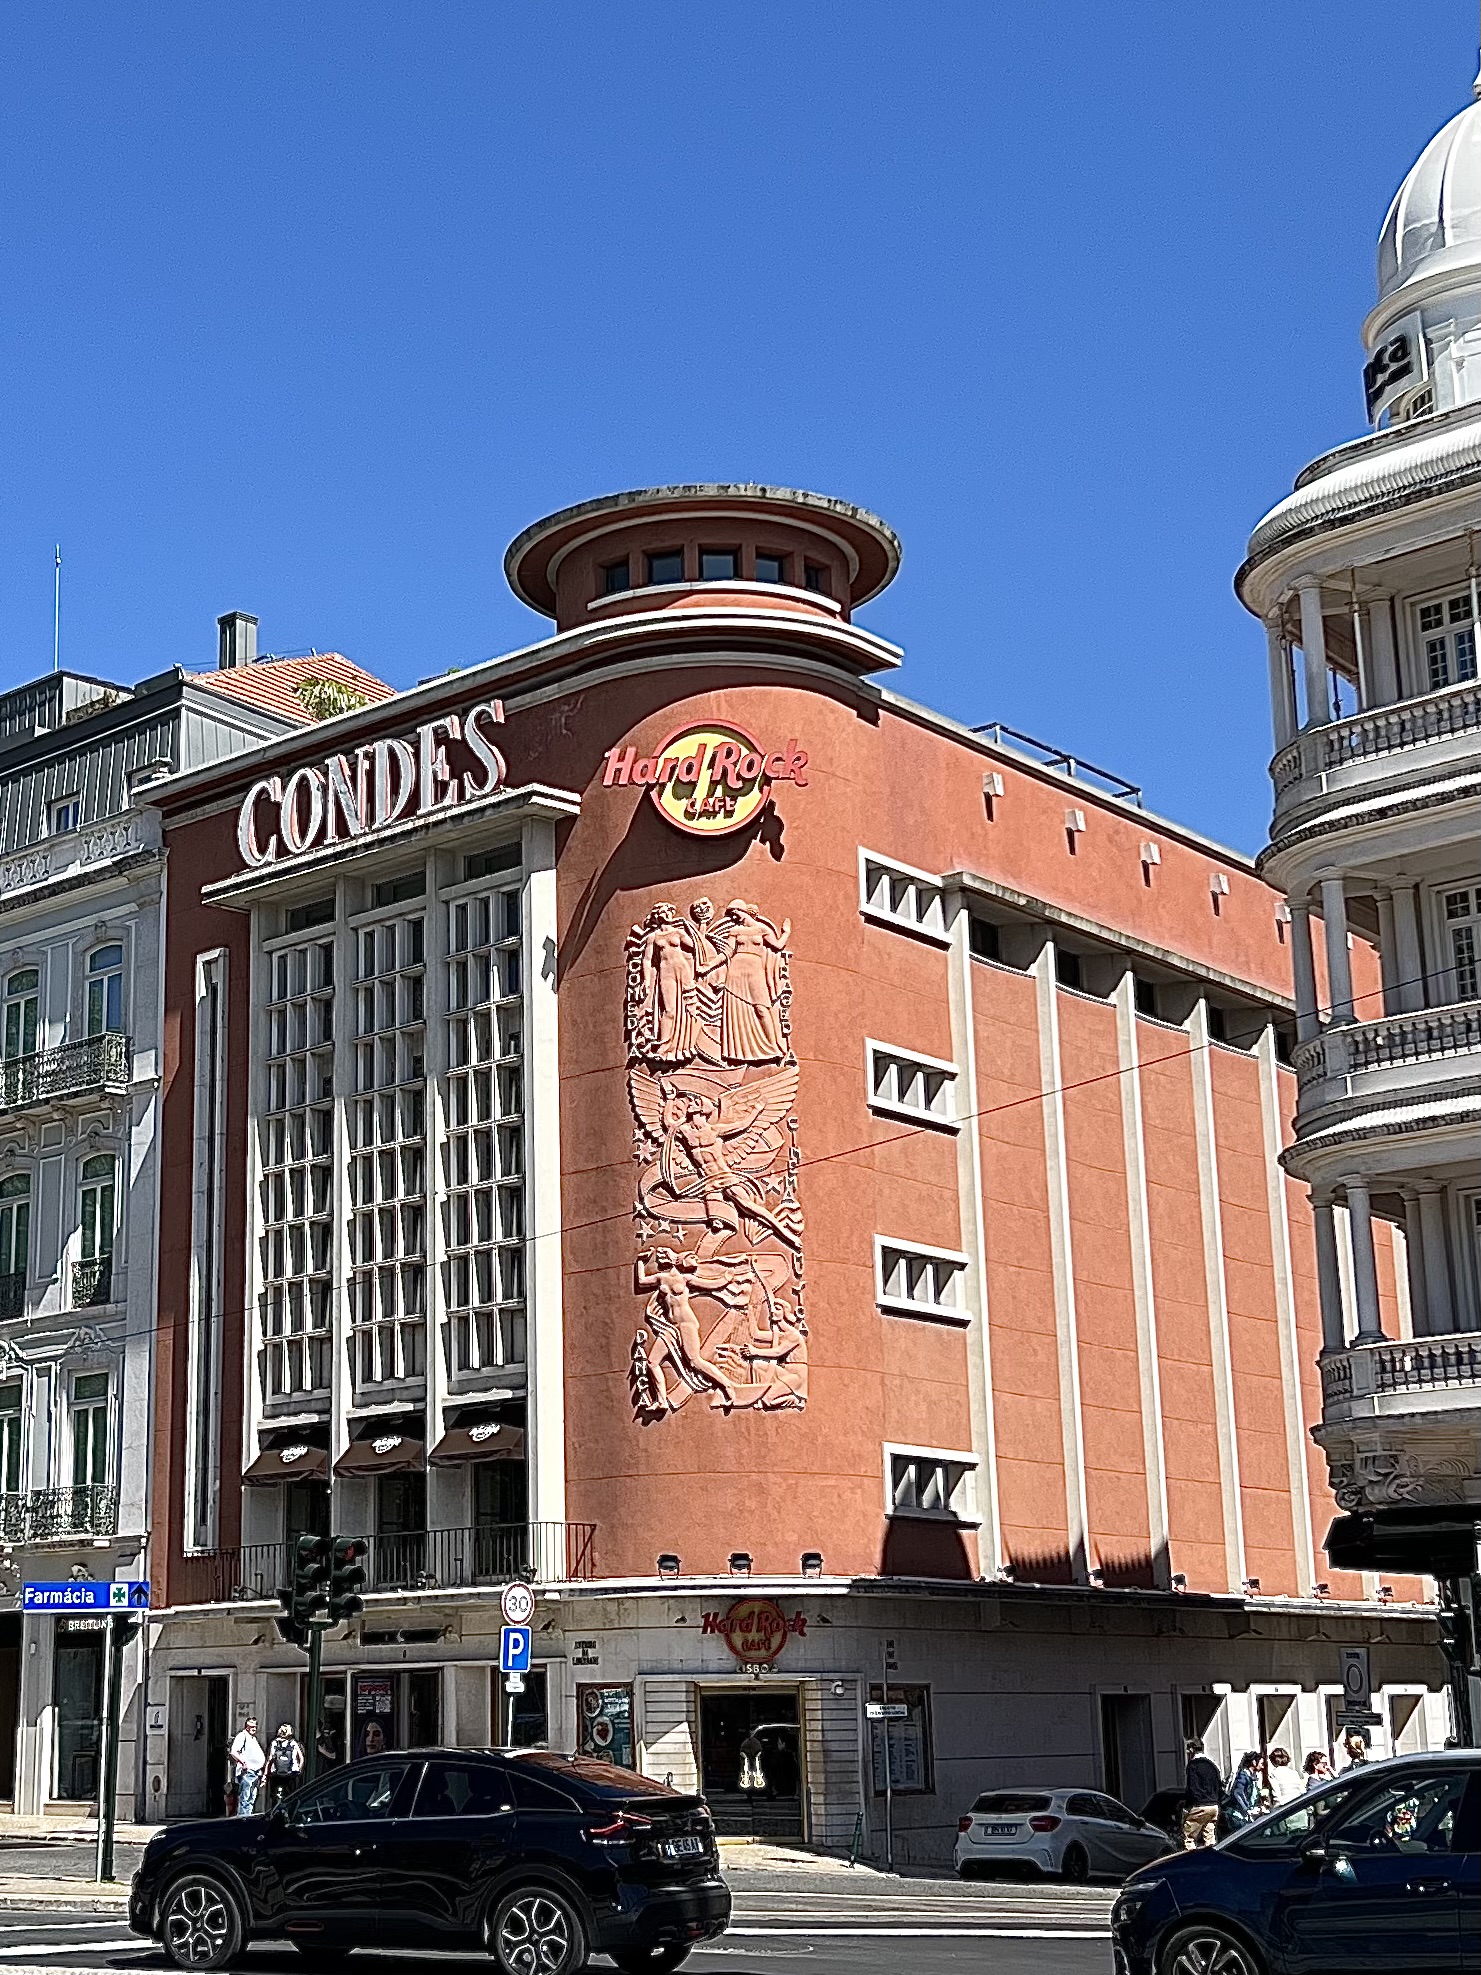
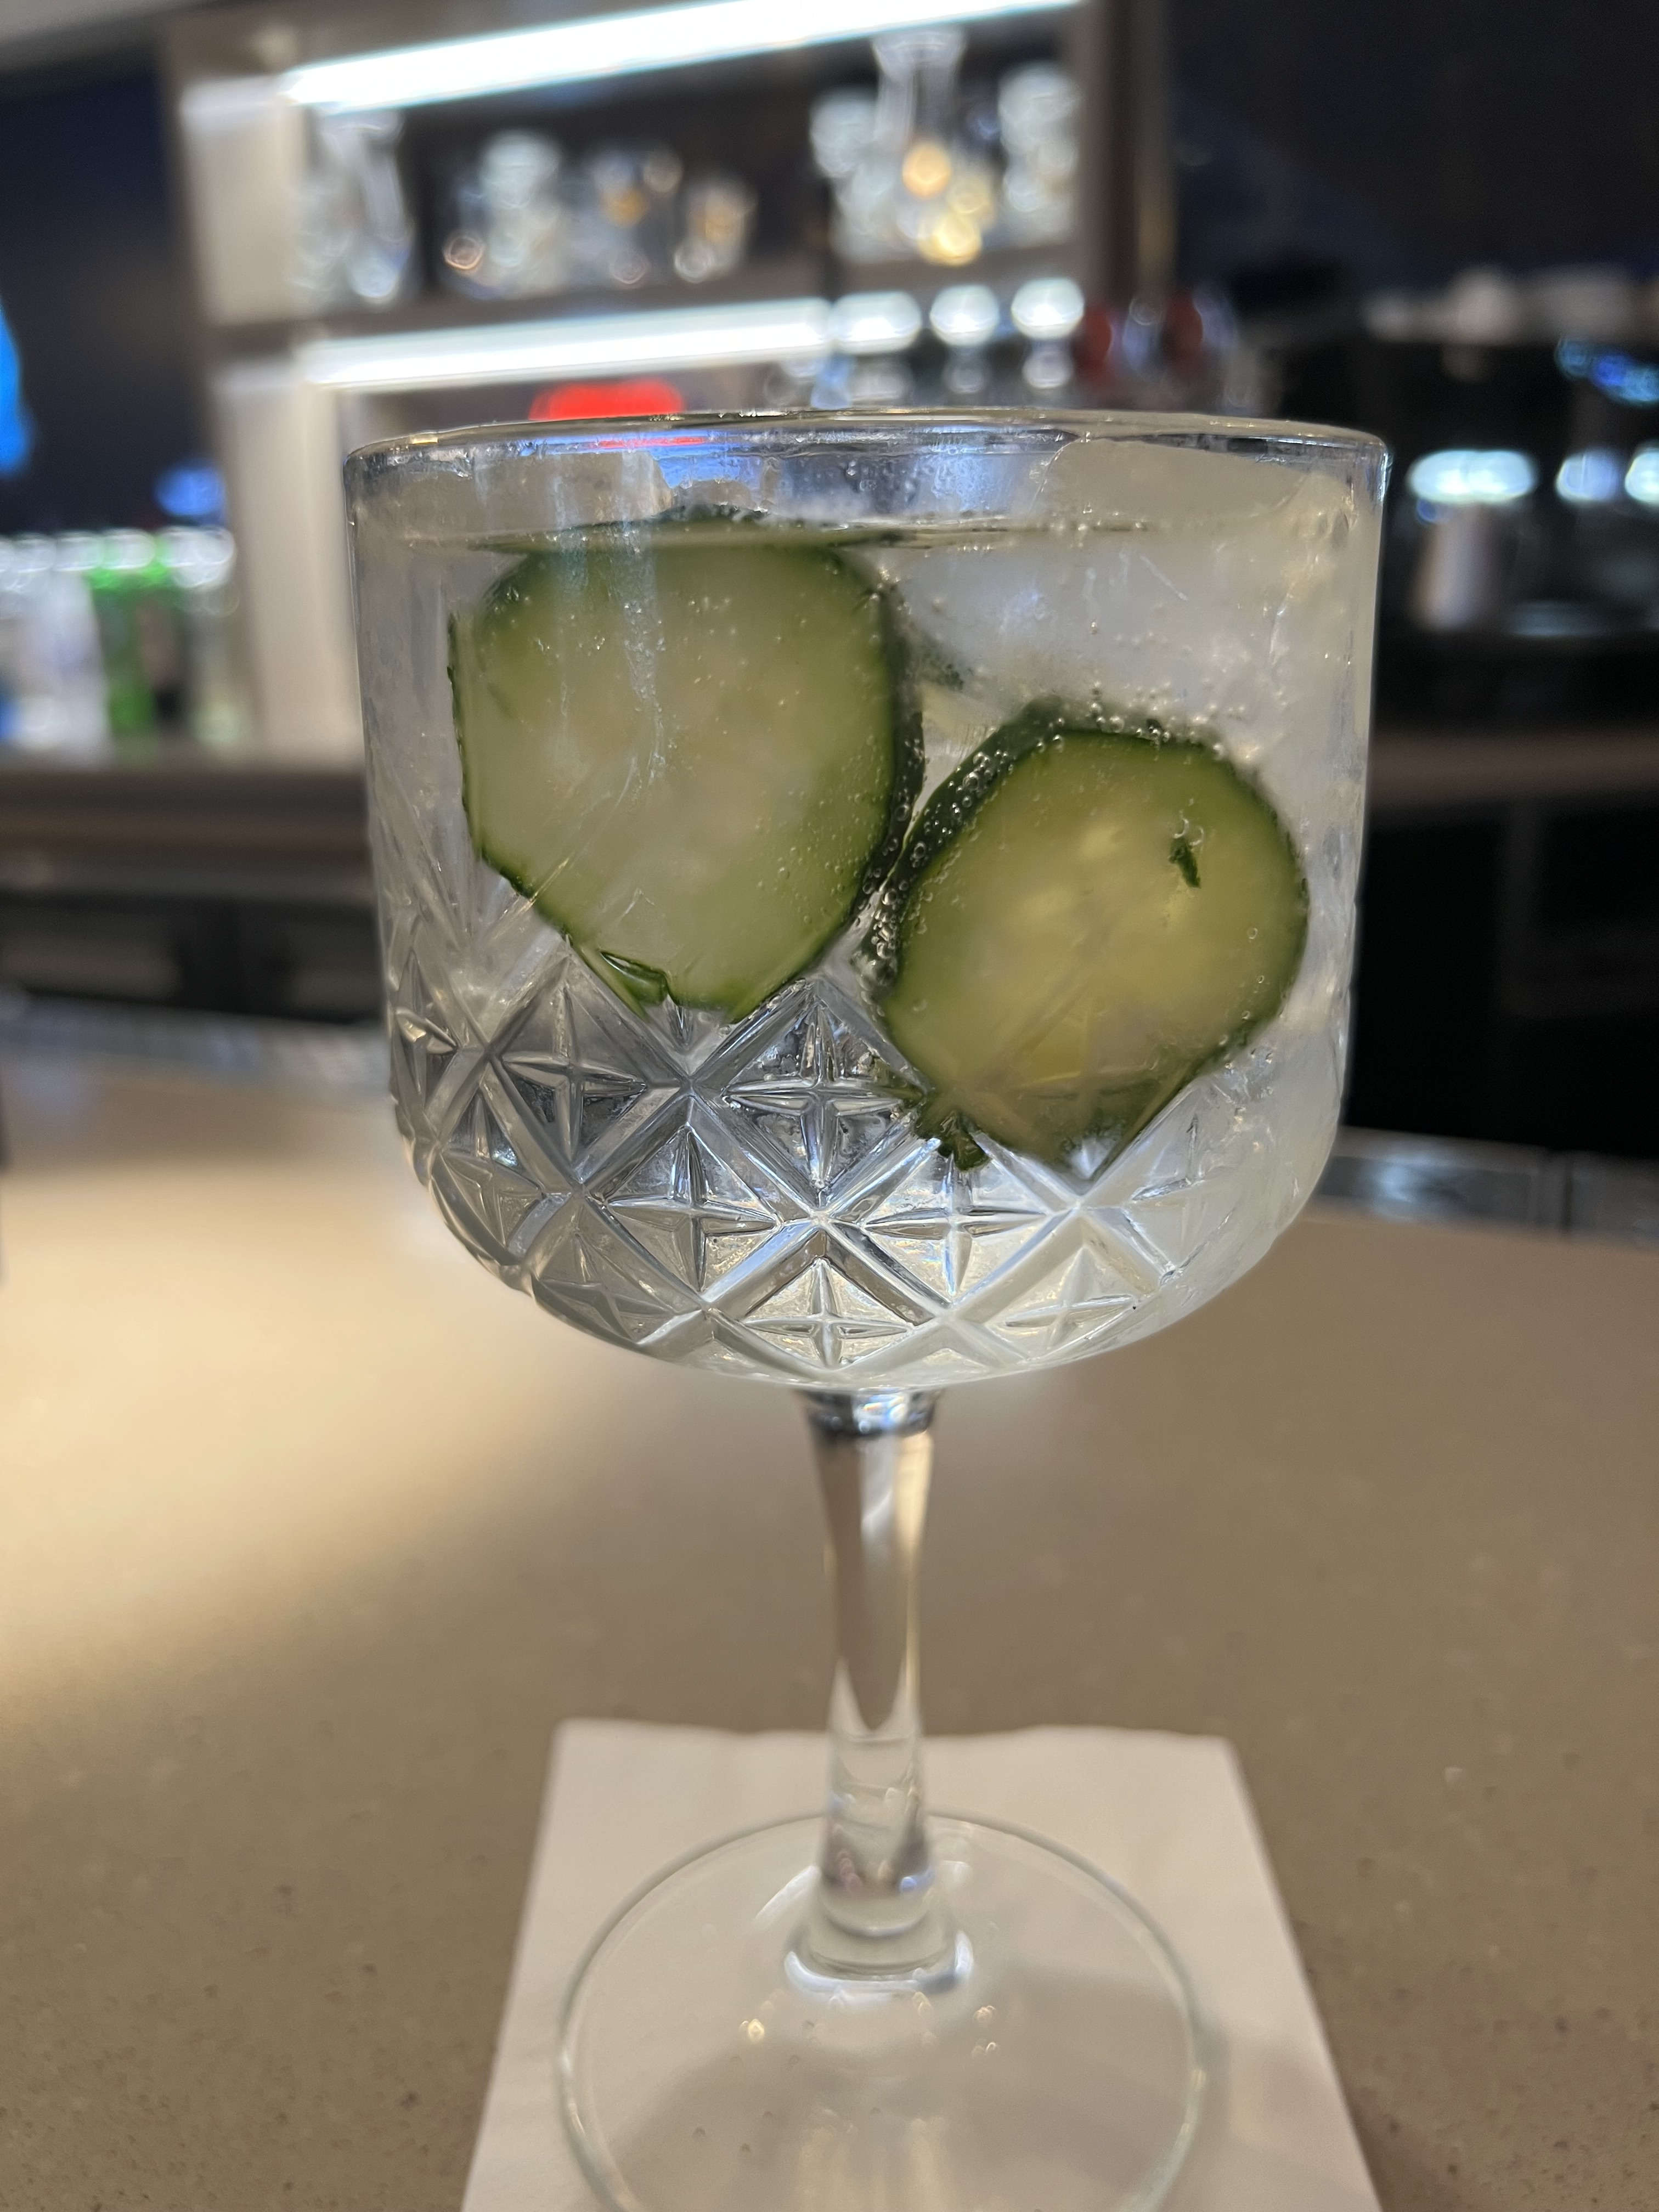
Welks and shrimp for lunch, with a beer to wash it down. Perfect on a warm, sunny day!The selection of seafood was incredible!My hotel was just a block away from the Hard Rock Cafe, a great stop for a refreshing gin and tonic…or two…
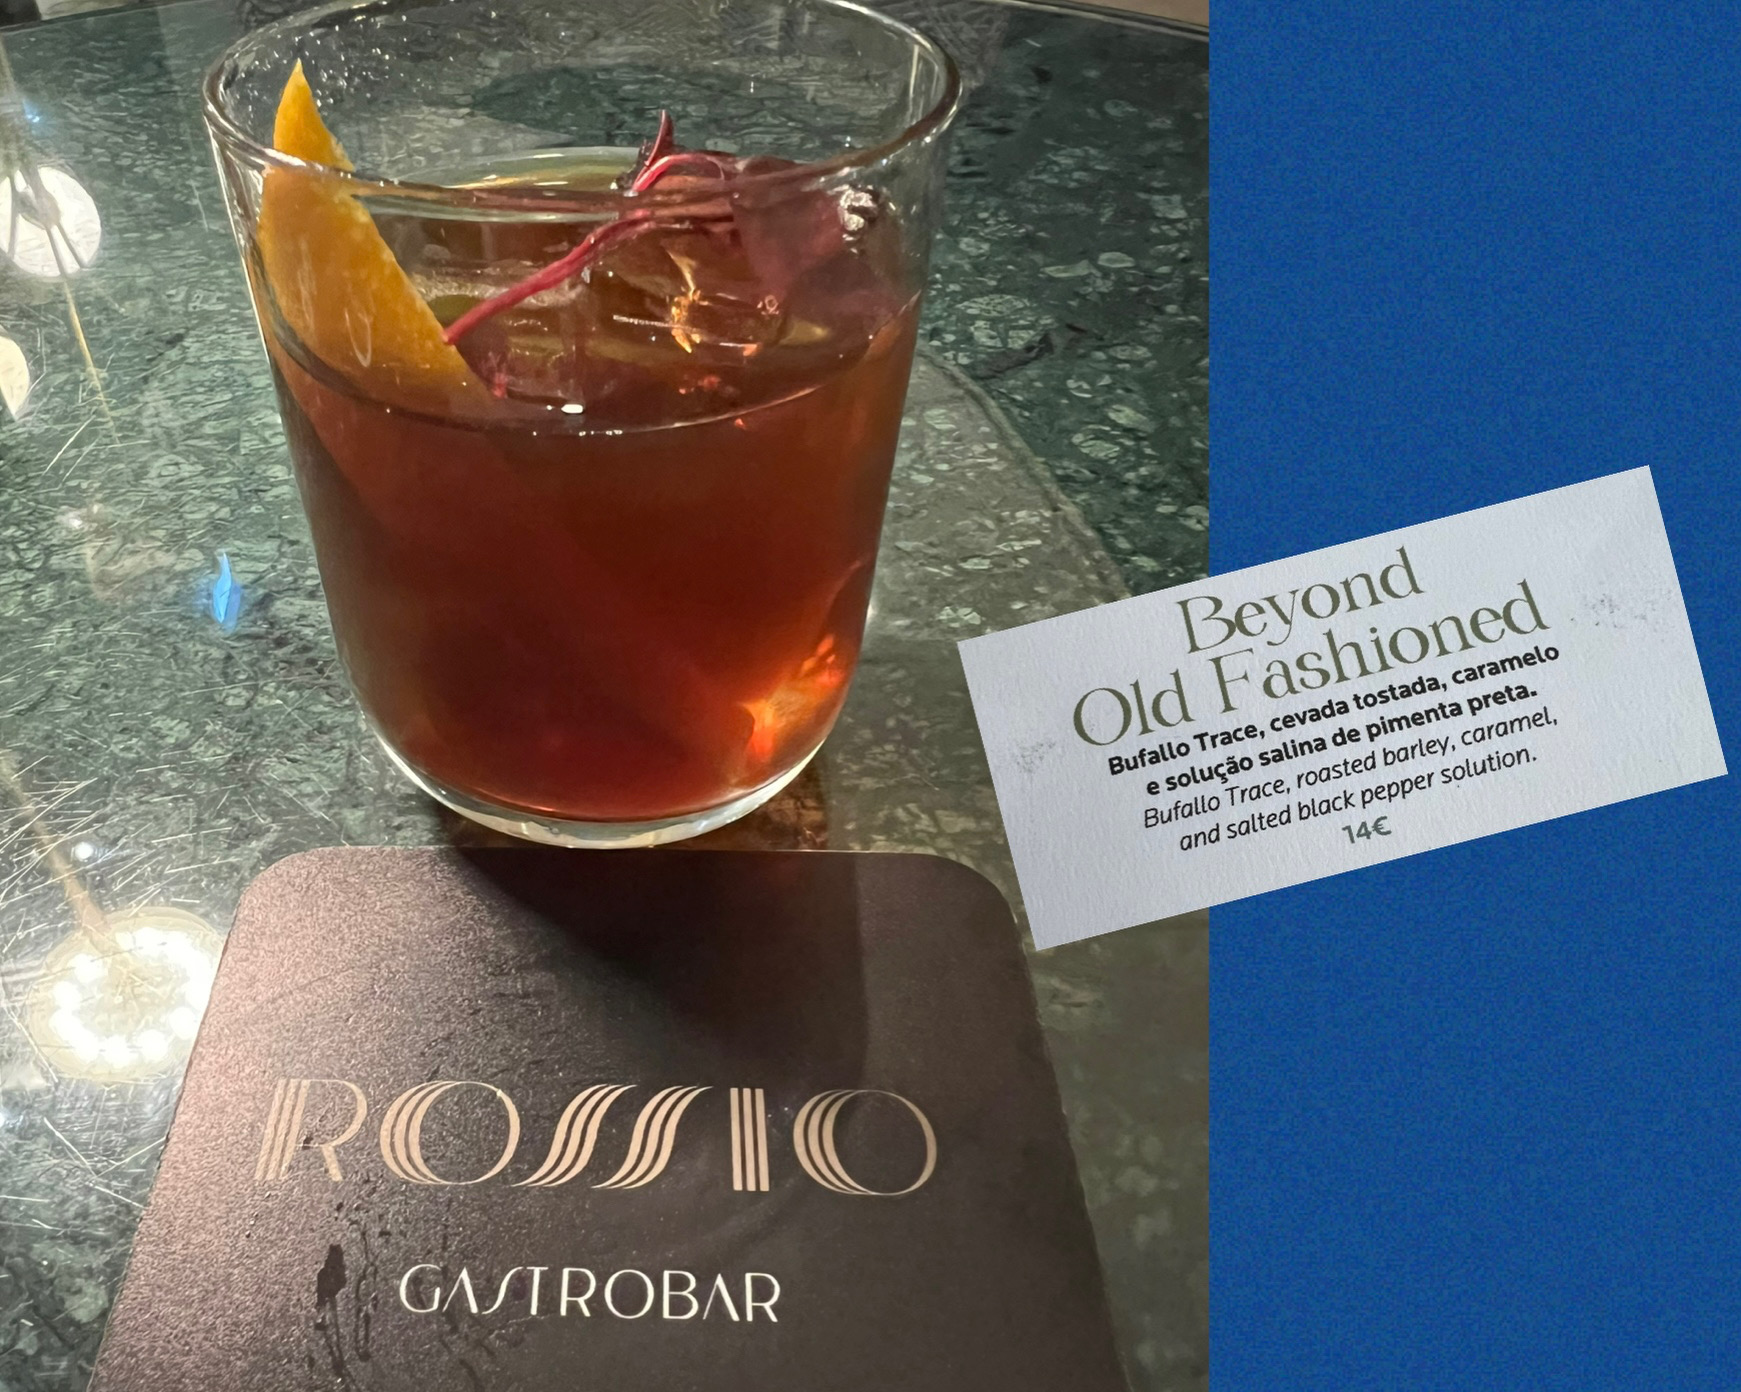
This was a wonderful cocktail that I came back for several times. As it turned out, my choice for dinner and drinks my first night was on the top floor of the hotel, at the Rossio Gastrobar. Great drinks and wonderful food…it got pretty crowded at night. The views of Lisbon from the open-air rooftop were amazing, with lively music, lots of couples, and even blankets and a dozen fire pits to keep guests warm on cooler nights. It became my last stop at the end of every day in Lisbon, and why not? My room was just an elevator ride away.
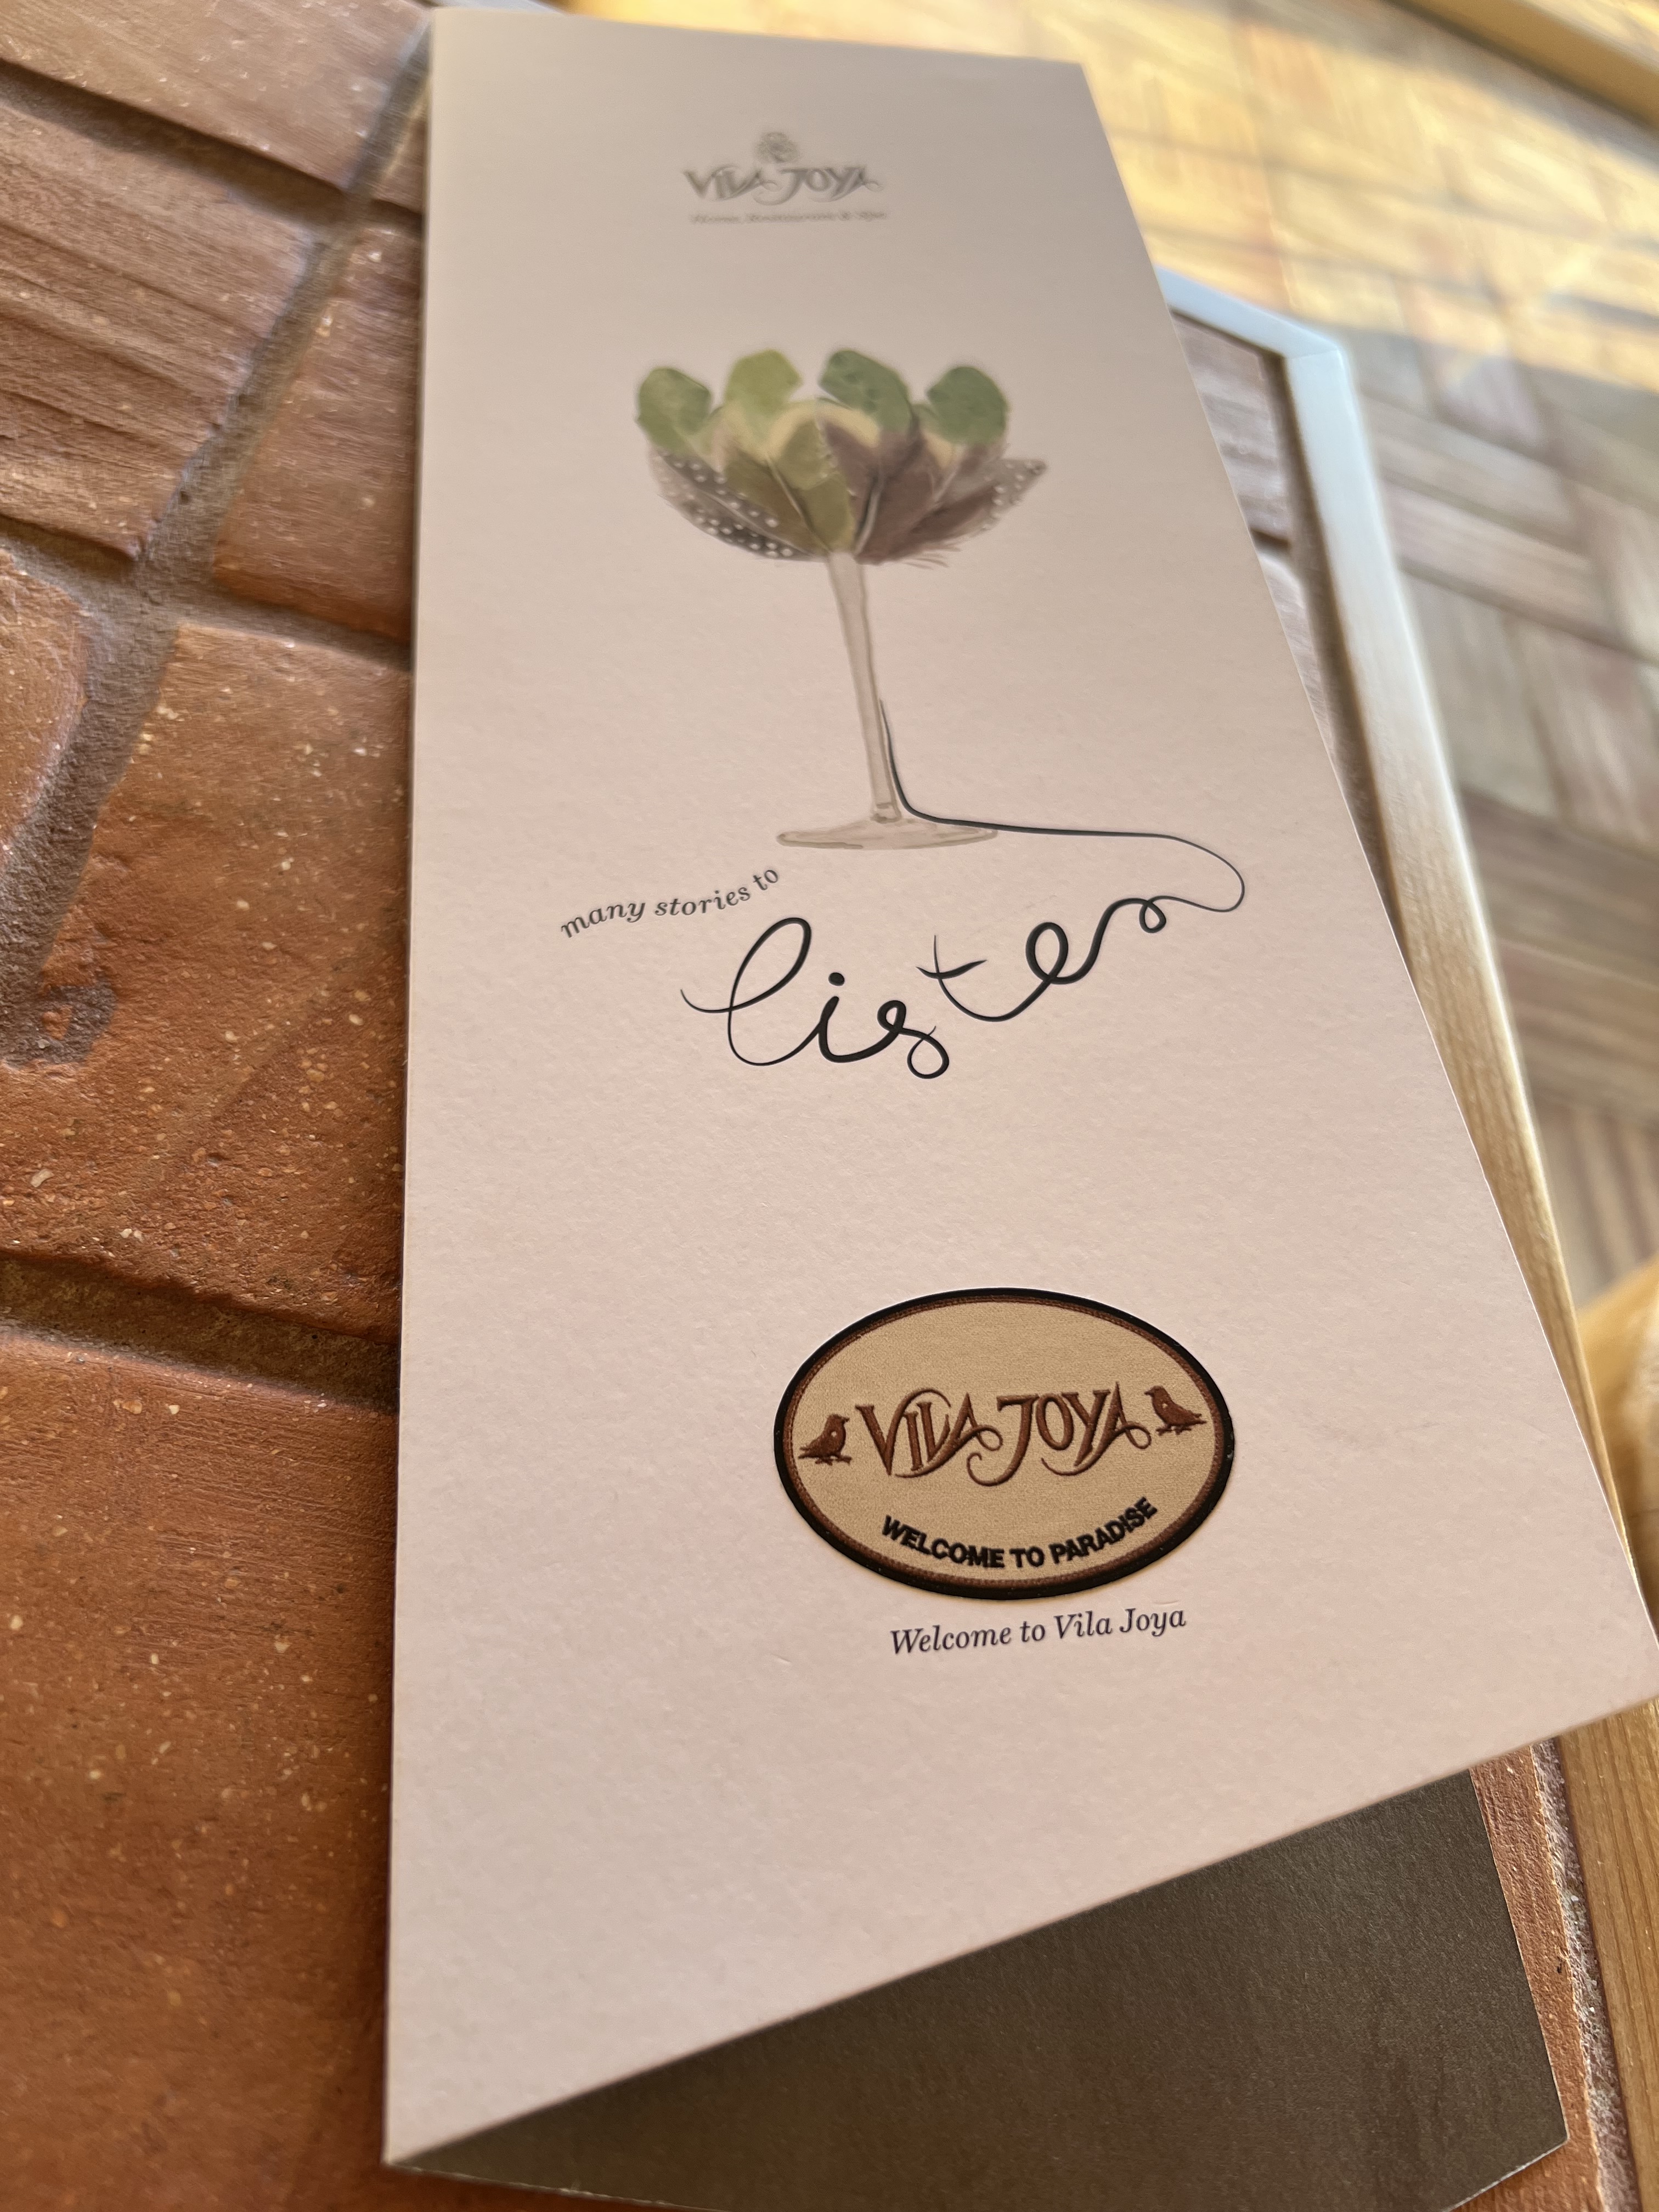
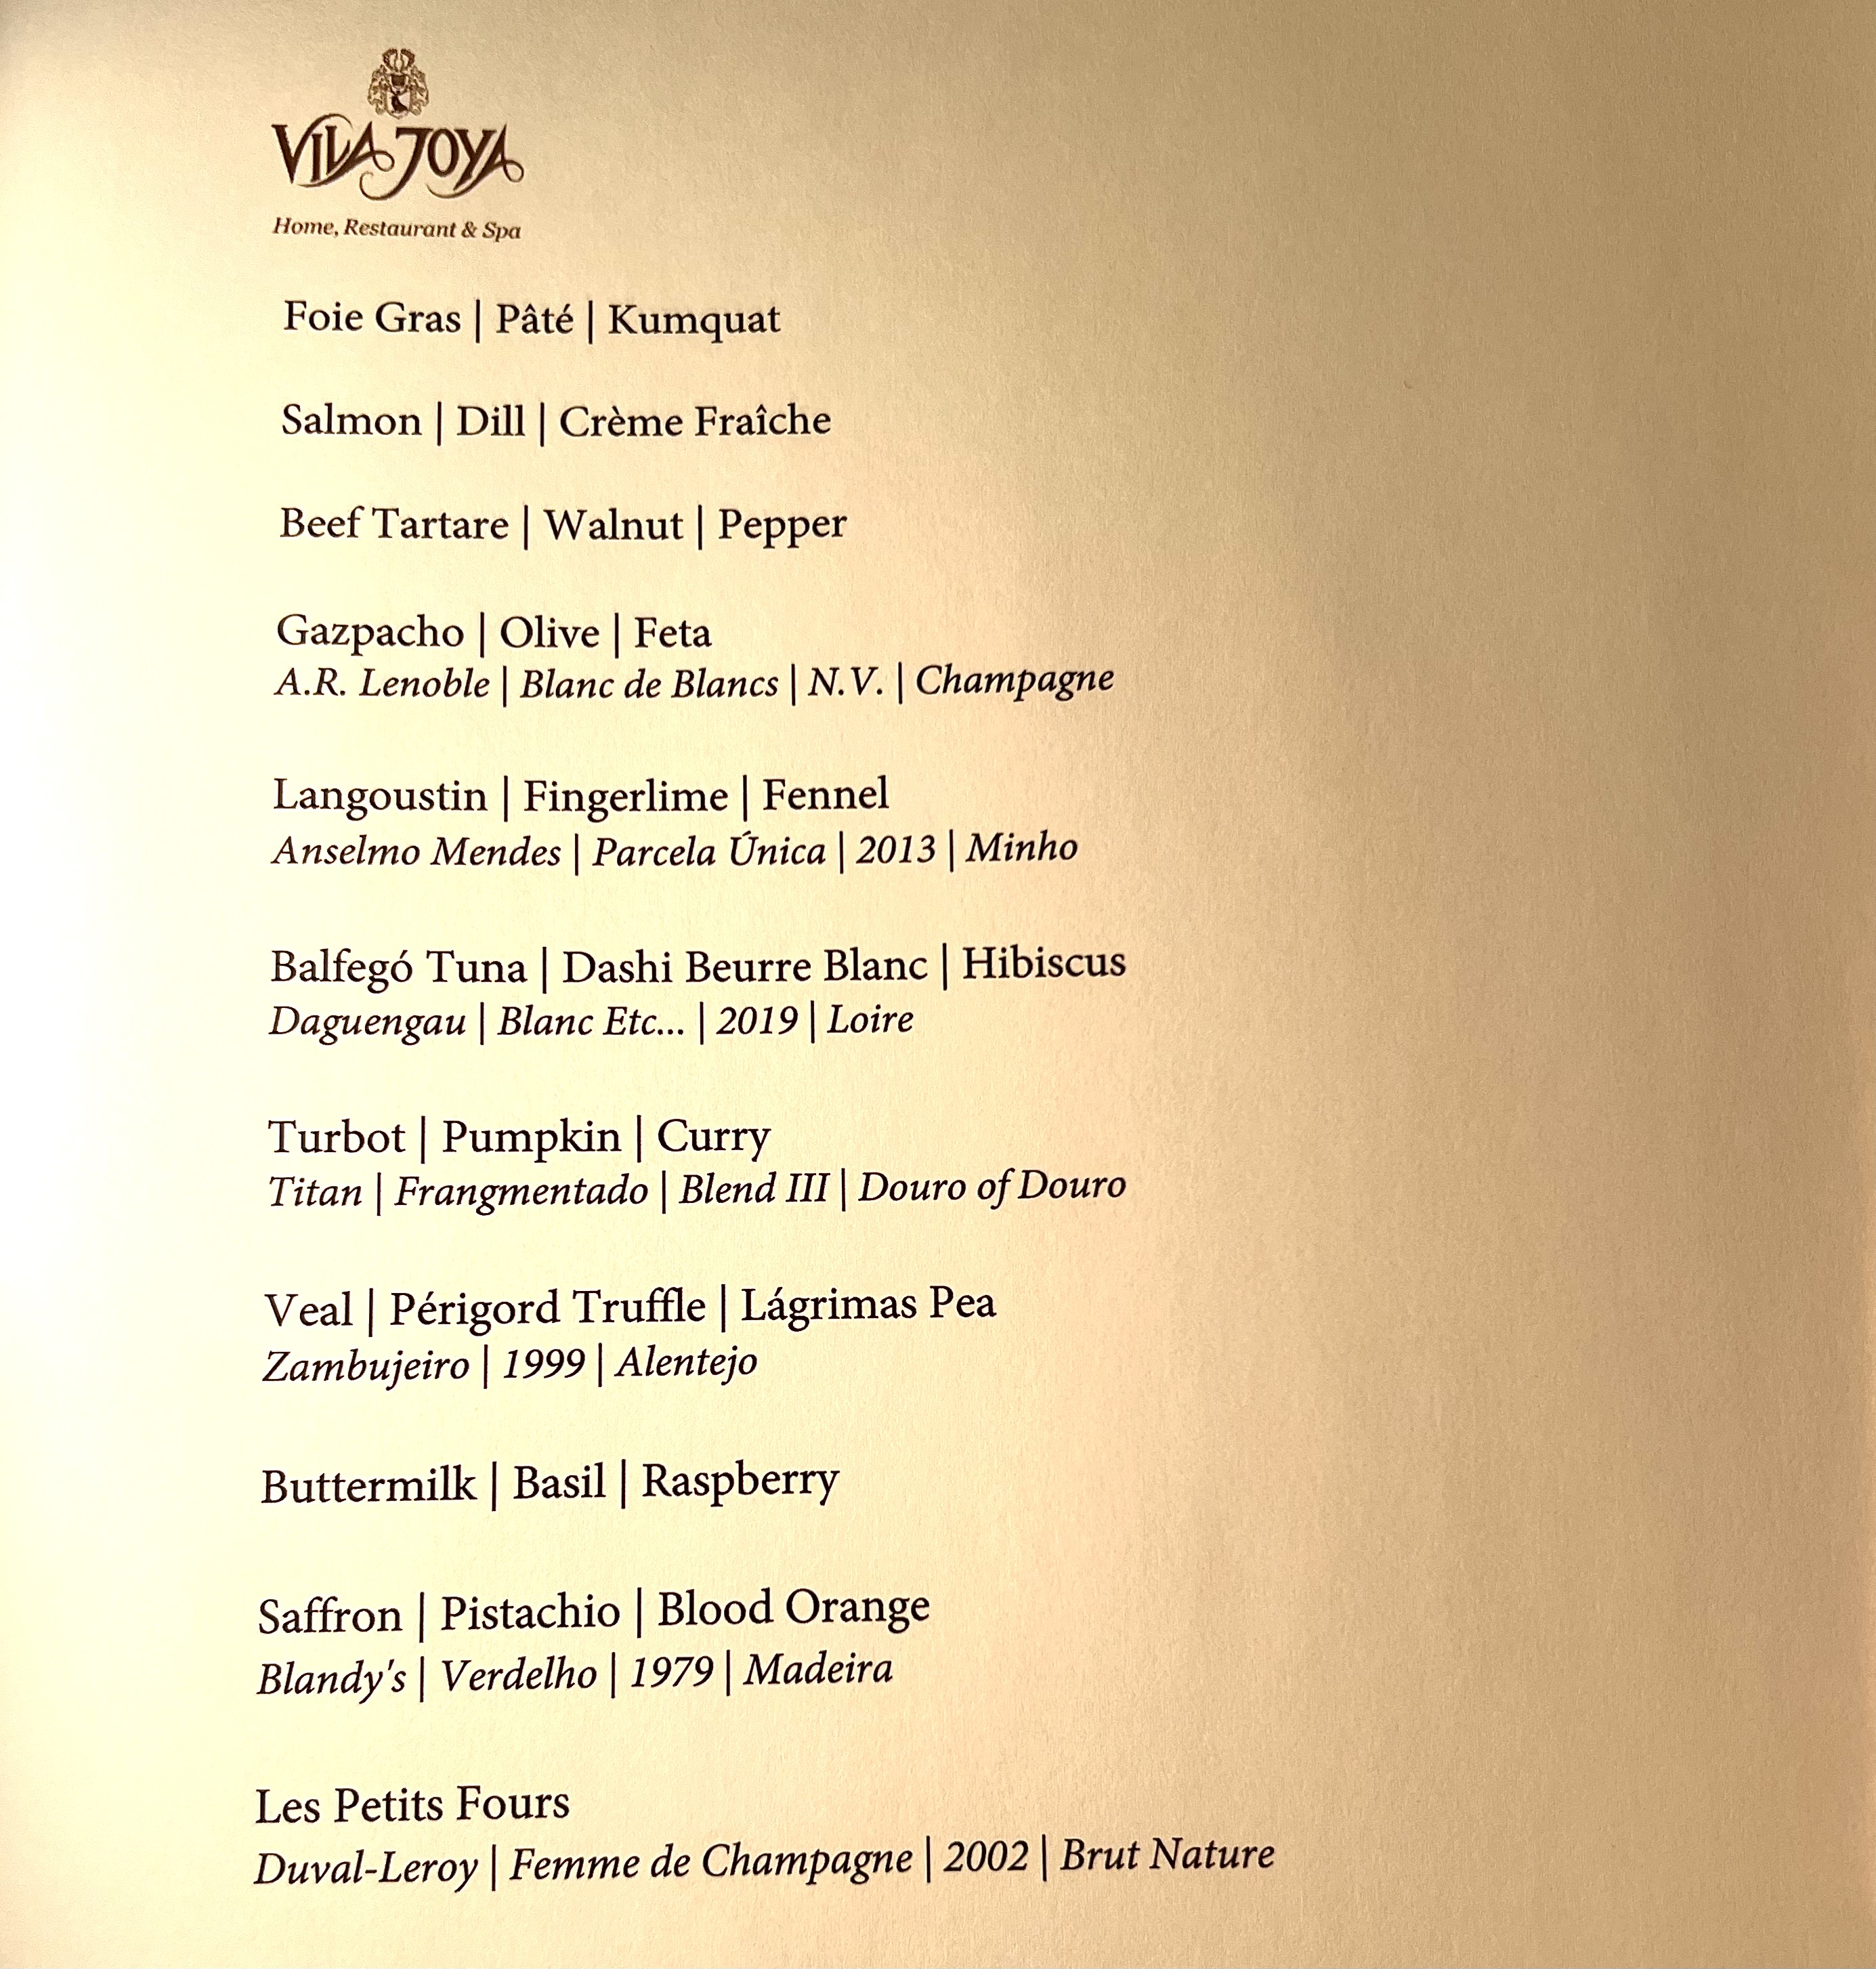
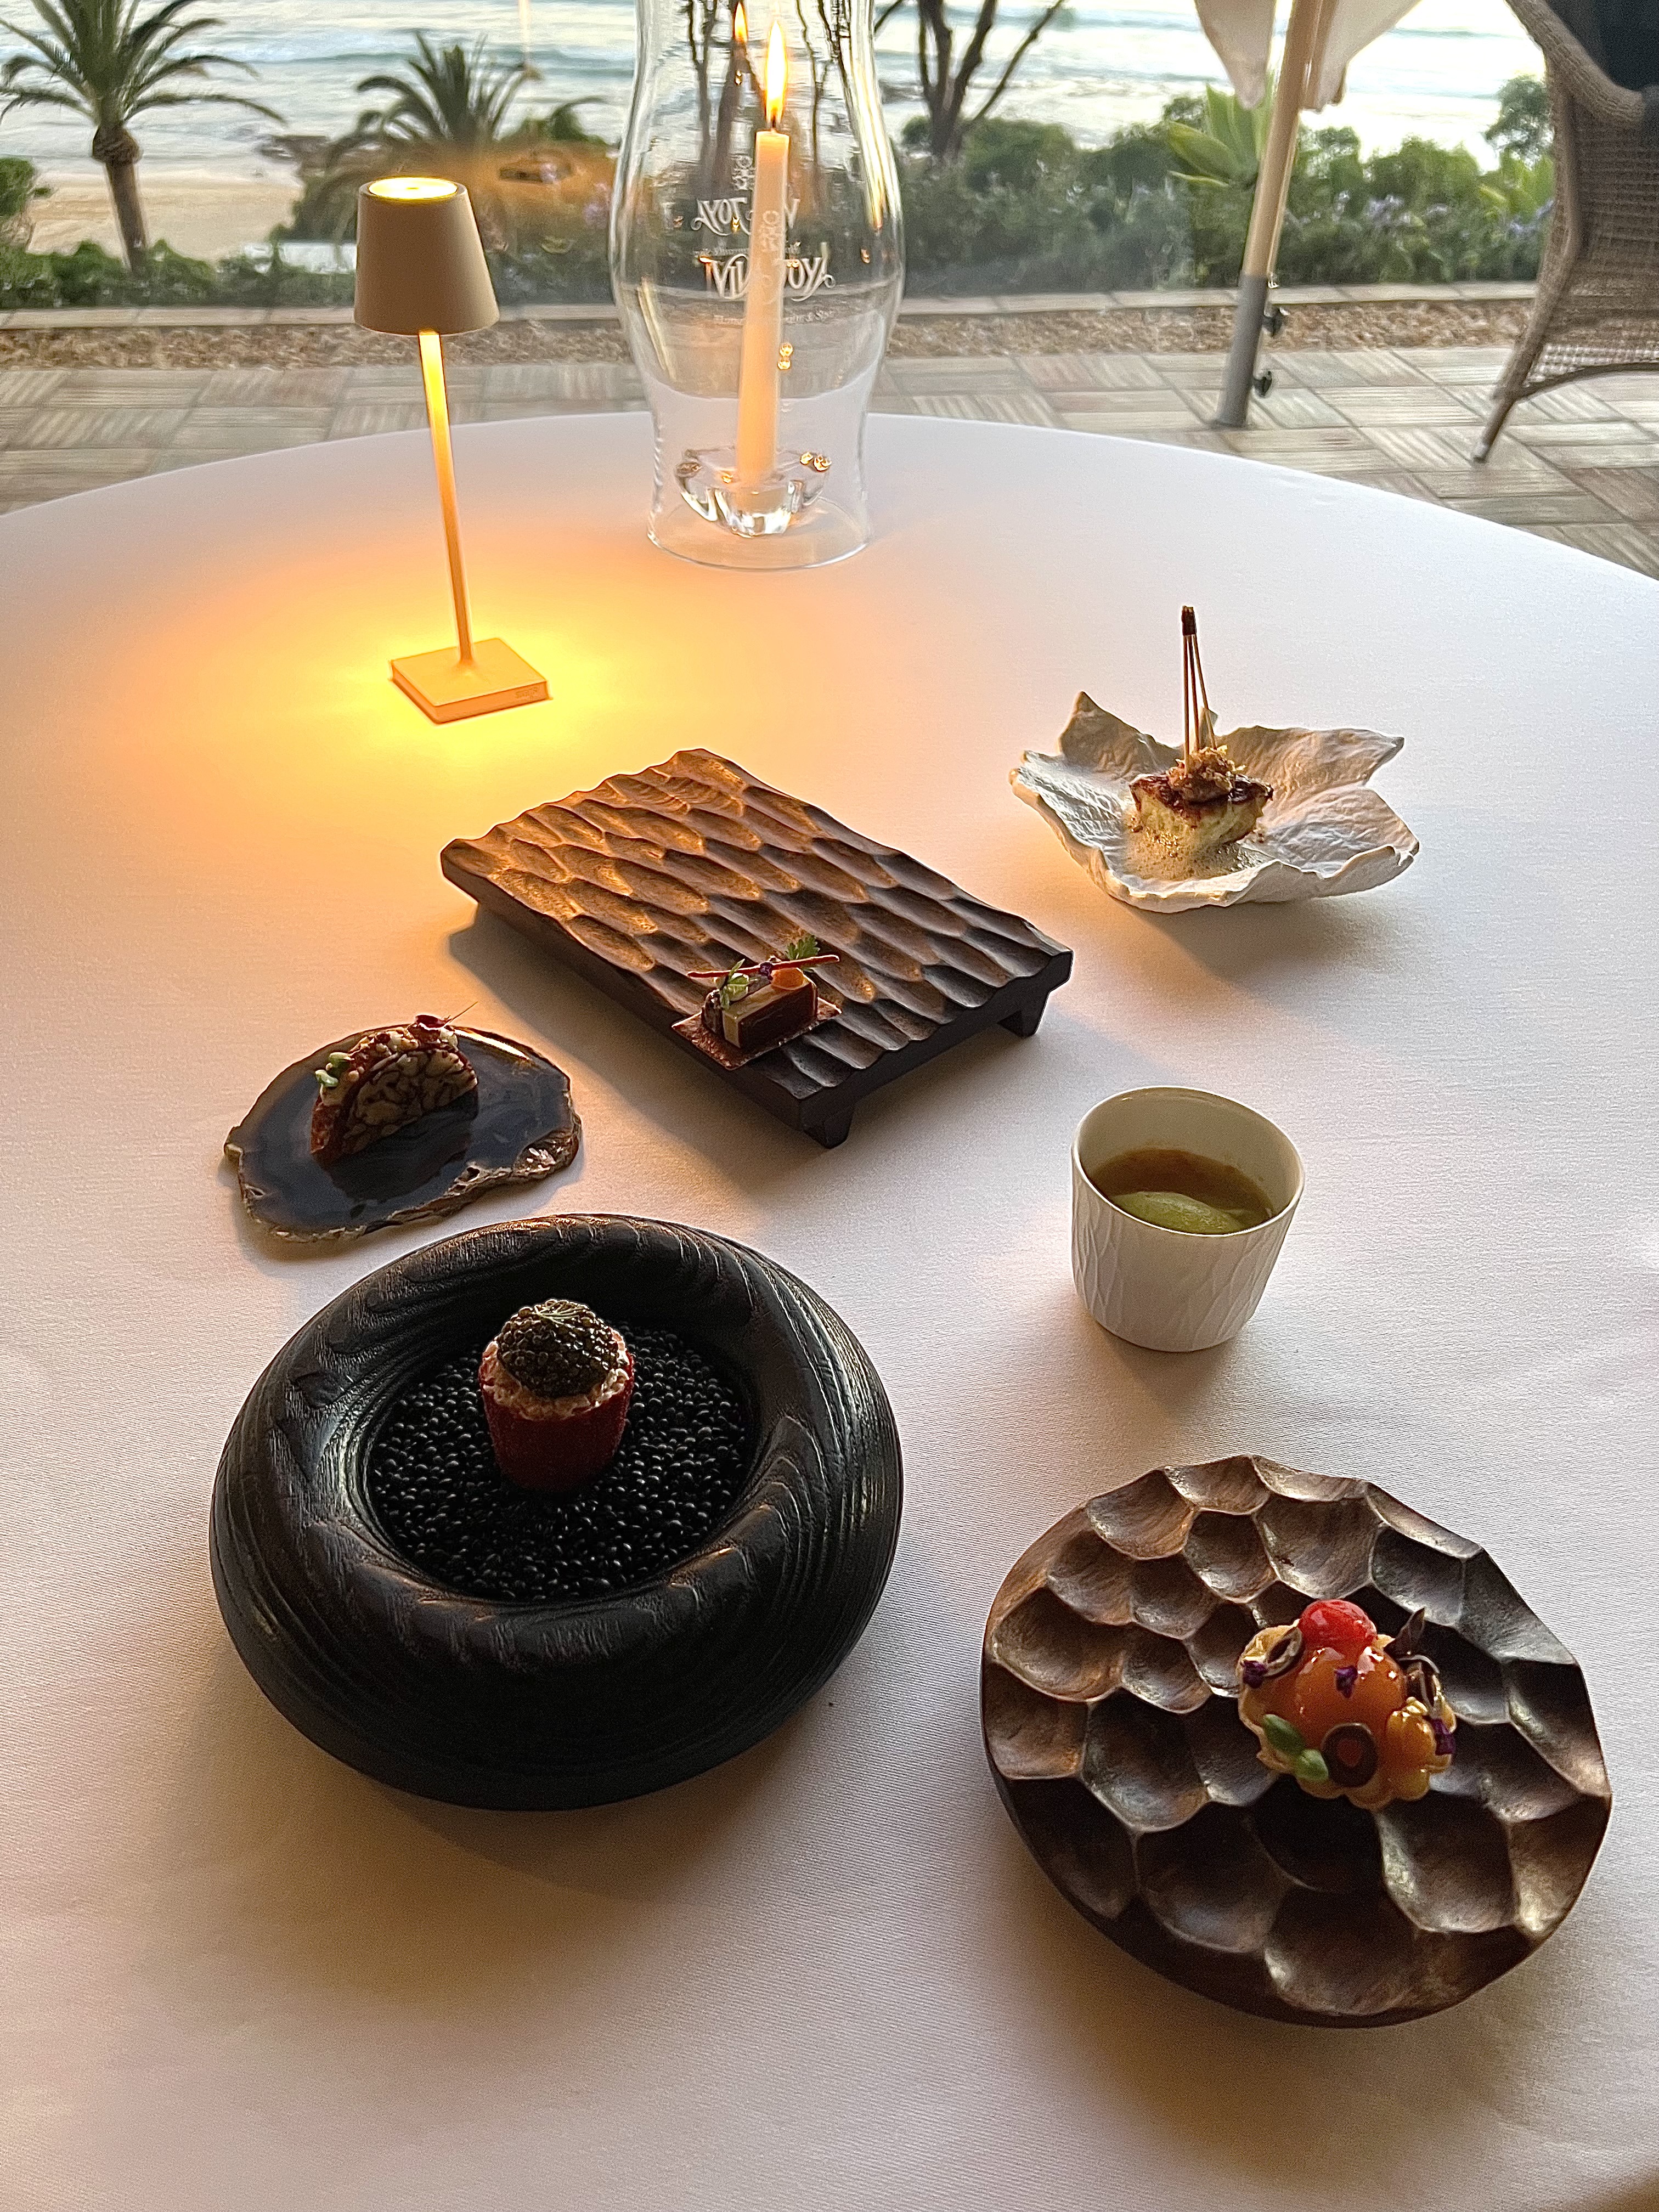
In my travels, I’ve had my share of Michelin star restaurant experiences, in Spain, England, and the US. And though the food has been amazing, only one or two are etched in my mind as perhaps the most incredible dining experience I’ve ever had. But after dining at Vila Joya on the Mediterranean in Portugal, I can now add a third to the list.
Austrian chef Dieter Koschina came to southern Portugal in 1991, and earned his first Michelin star in 1995. He received his second in 1999. And he has been creating outrageously beautiful dishes ever since.
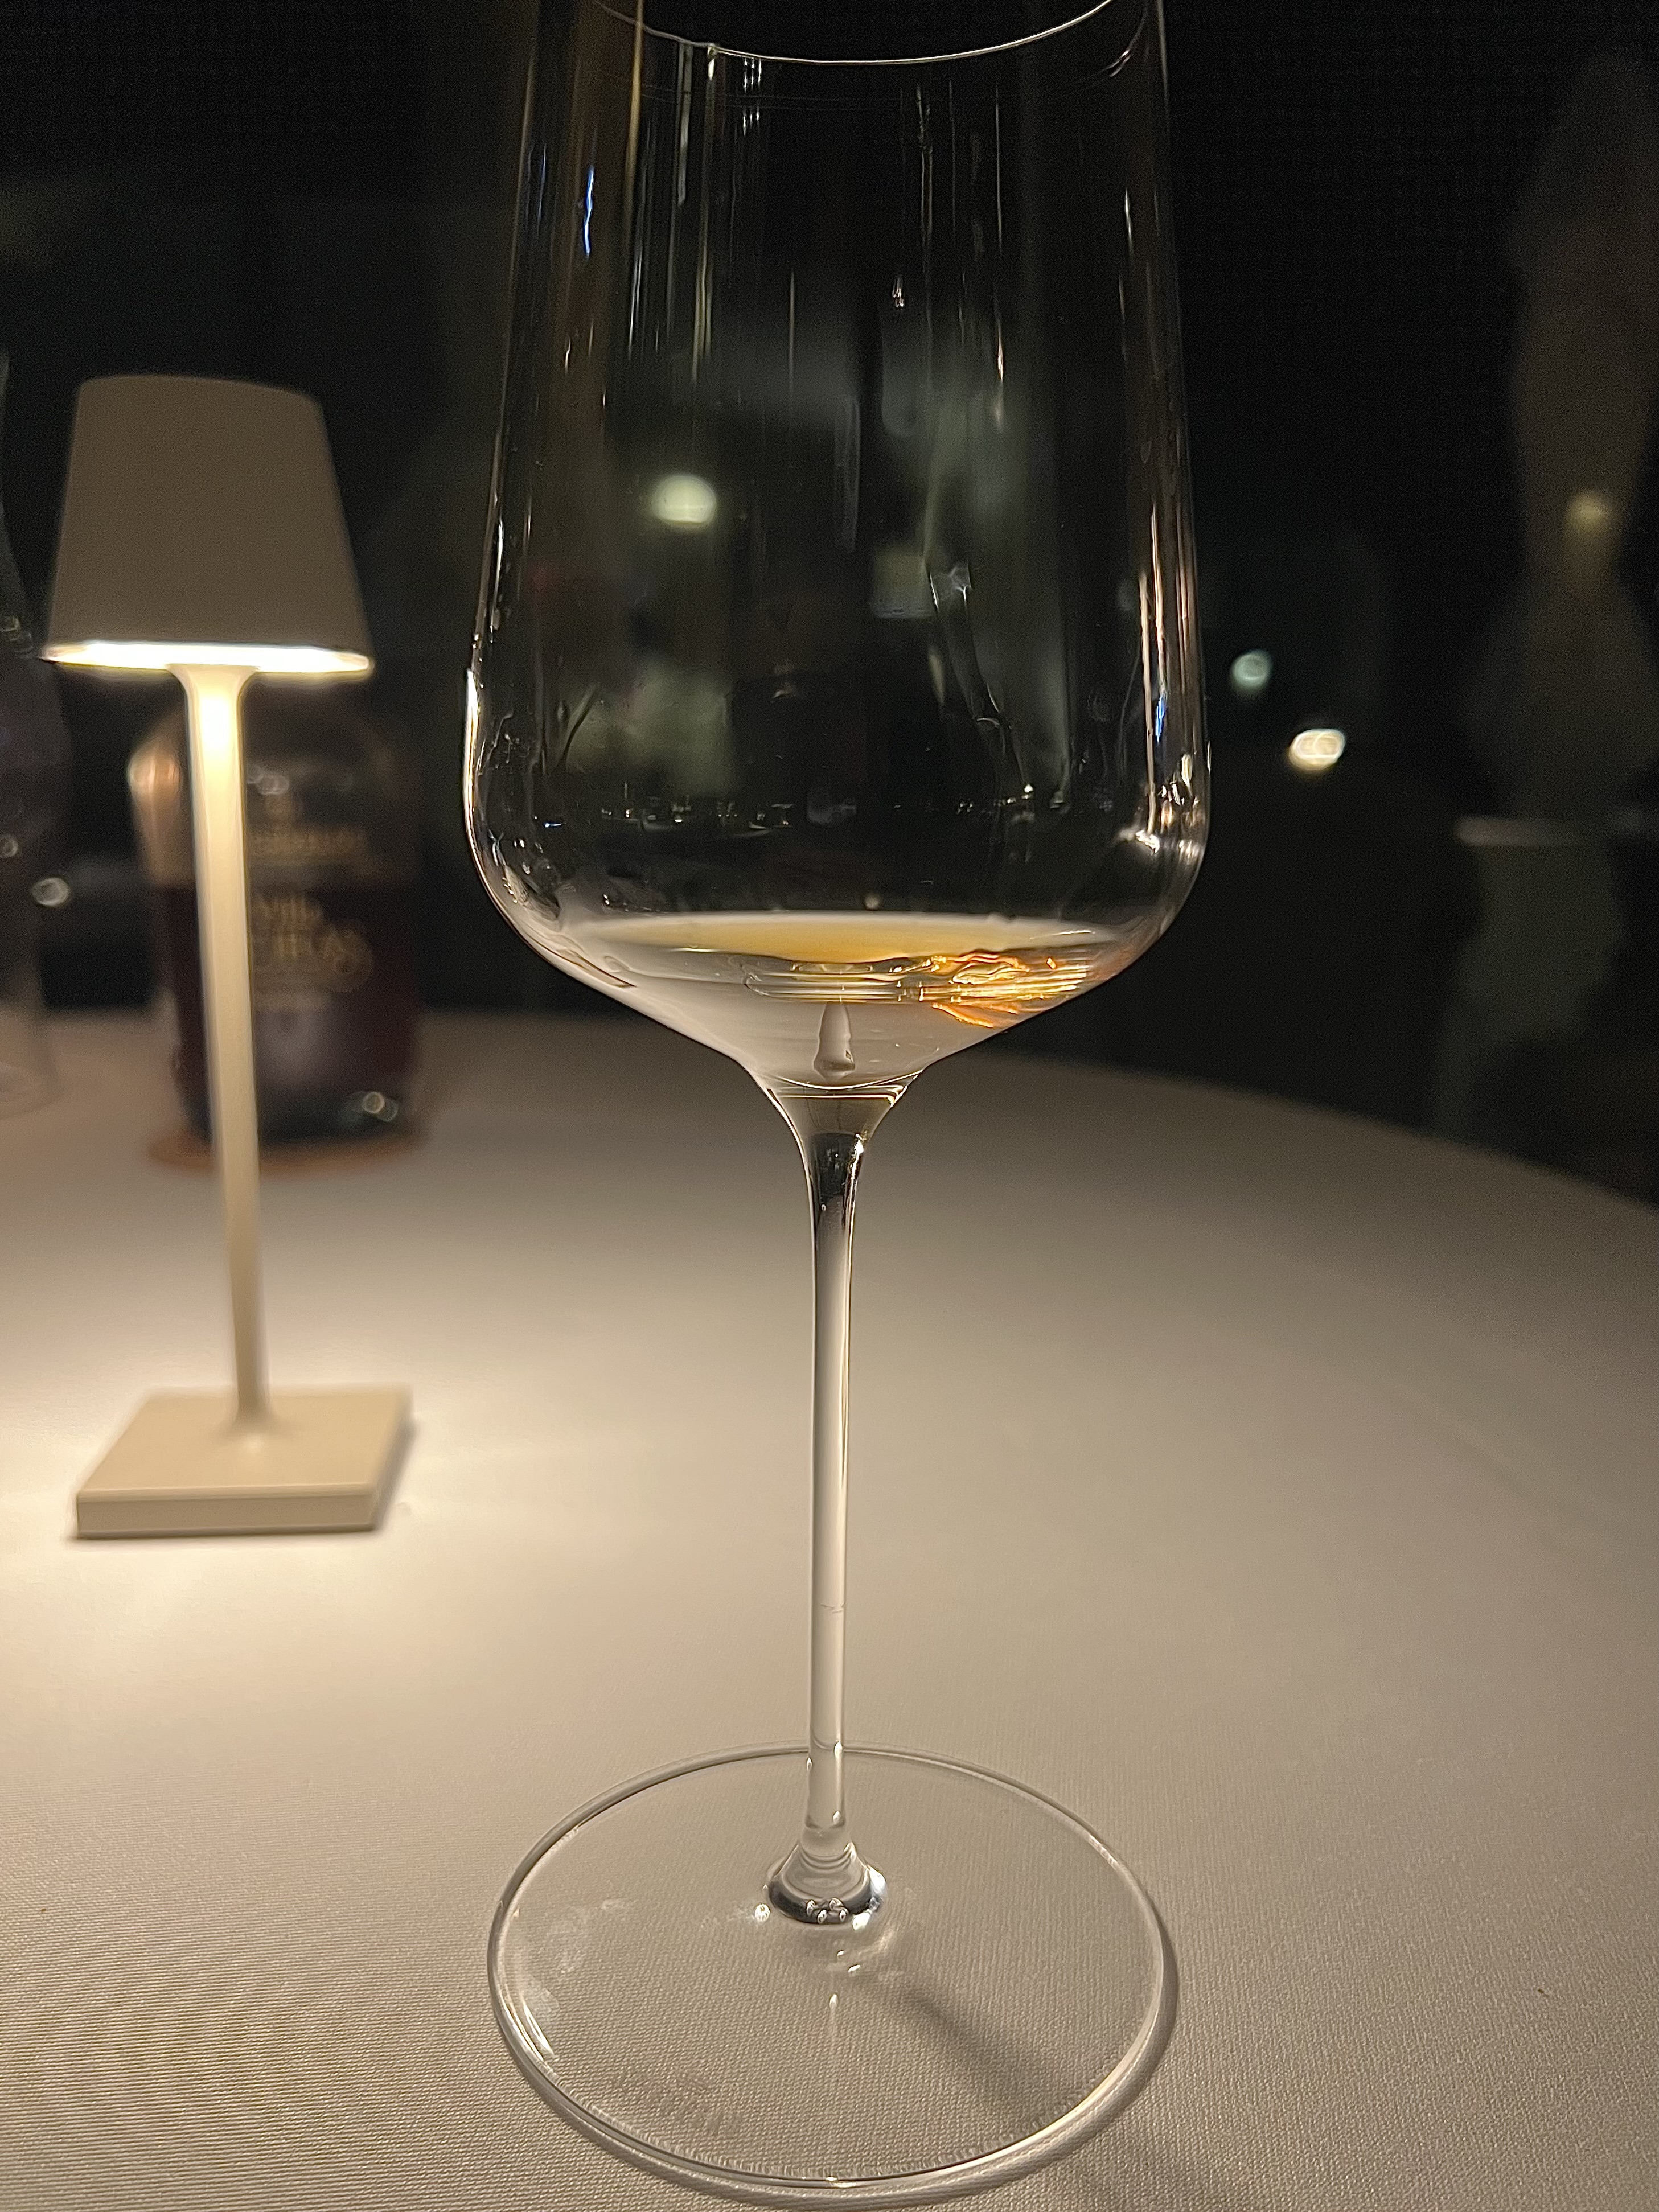
My reservation was at 7:30 PM, and they asked if I would like to make a cocktail reservation a half hour earlier, at 7. I thought that would be a great idea, and so I arrived, to be shown a comfortable couch facing the Mediterranean as I was handed the drink list. I’ve had OK cocktails up to this point on my trip, so I was really craving a perfectly made ice cold gin martini, and that’s exactly what showed up moments later.
I asked for a twist in my martini, and it came with beautiful little flowers, punched out of the lemon peel.
As I sipped my martini, I looked over the tasting menu I was about to explore with much anticipation.
Once I finished my cocktail, I was moved a bit closer to the large floor-to-ceiling windows, to get a much better view of the beautiful Mediterranean waters below.
The sun was setting as I started my dinner experience, mother nature‘s light show illuminating every plate as it appeared on my table.
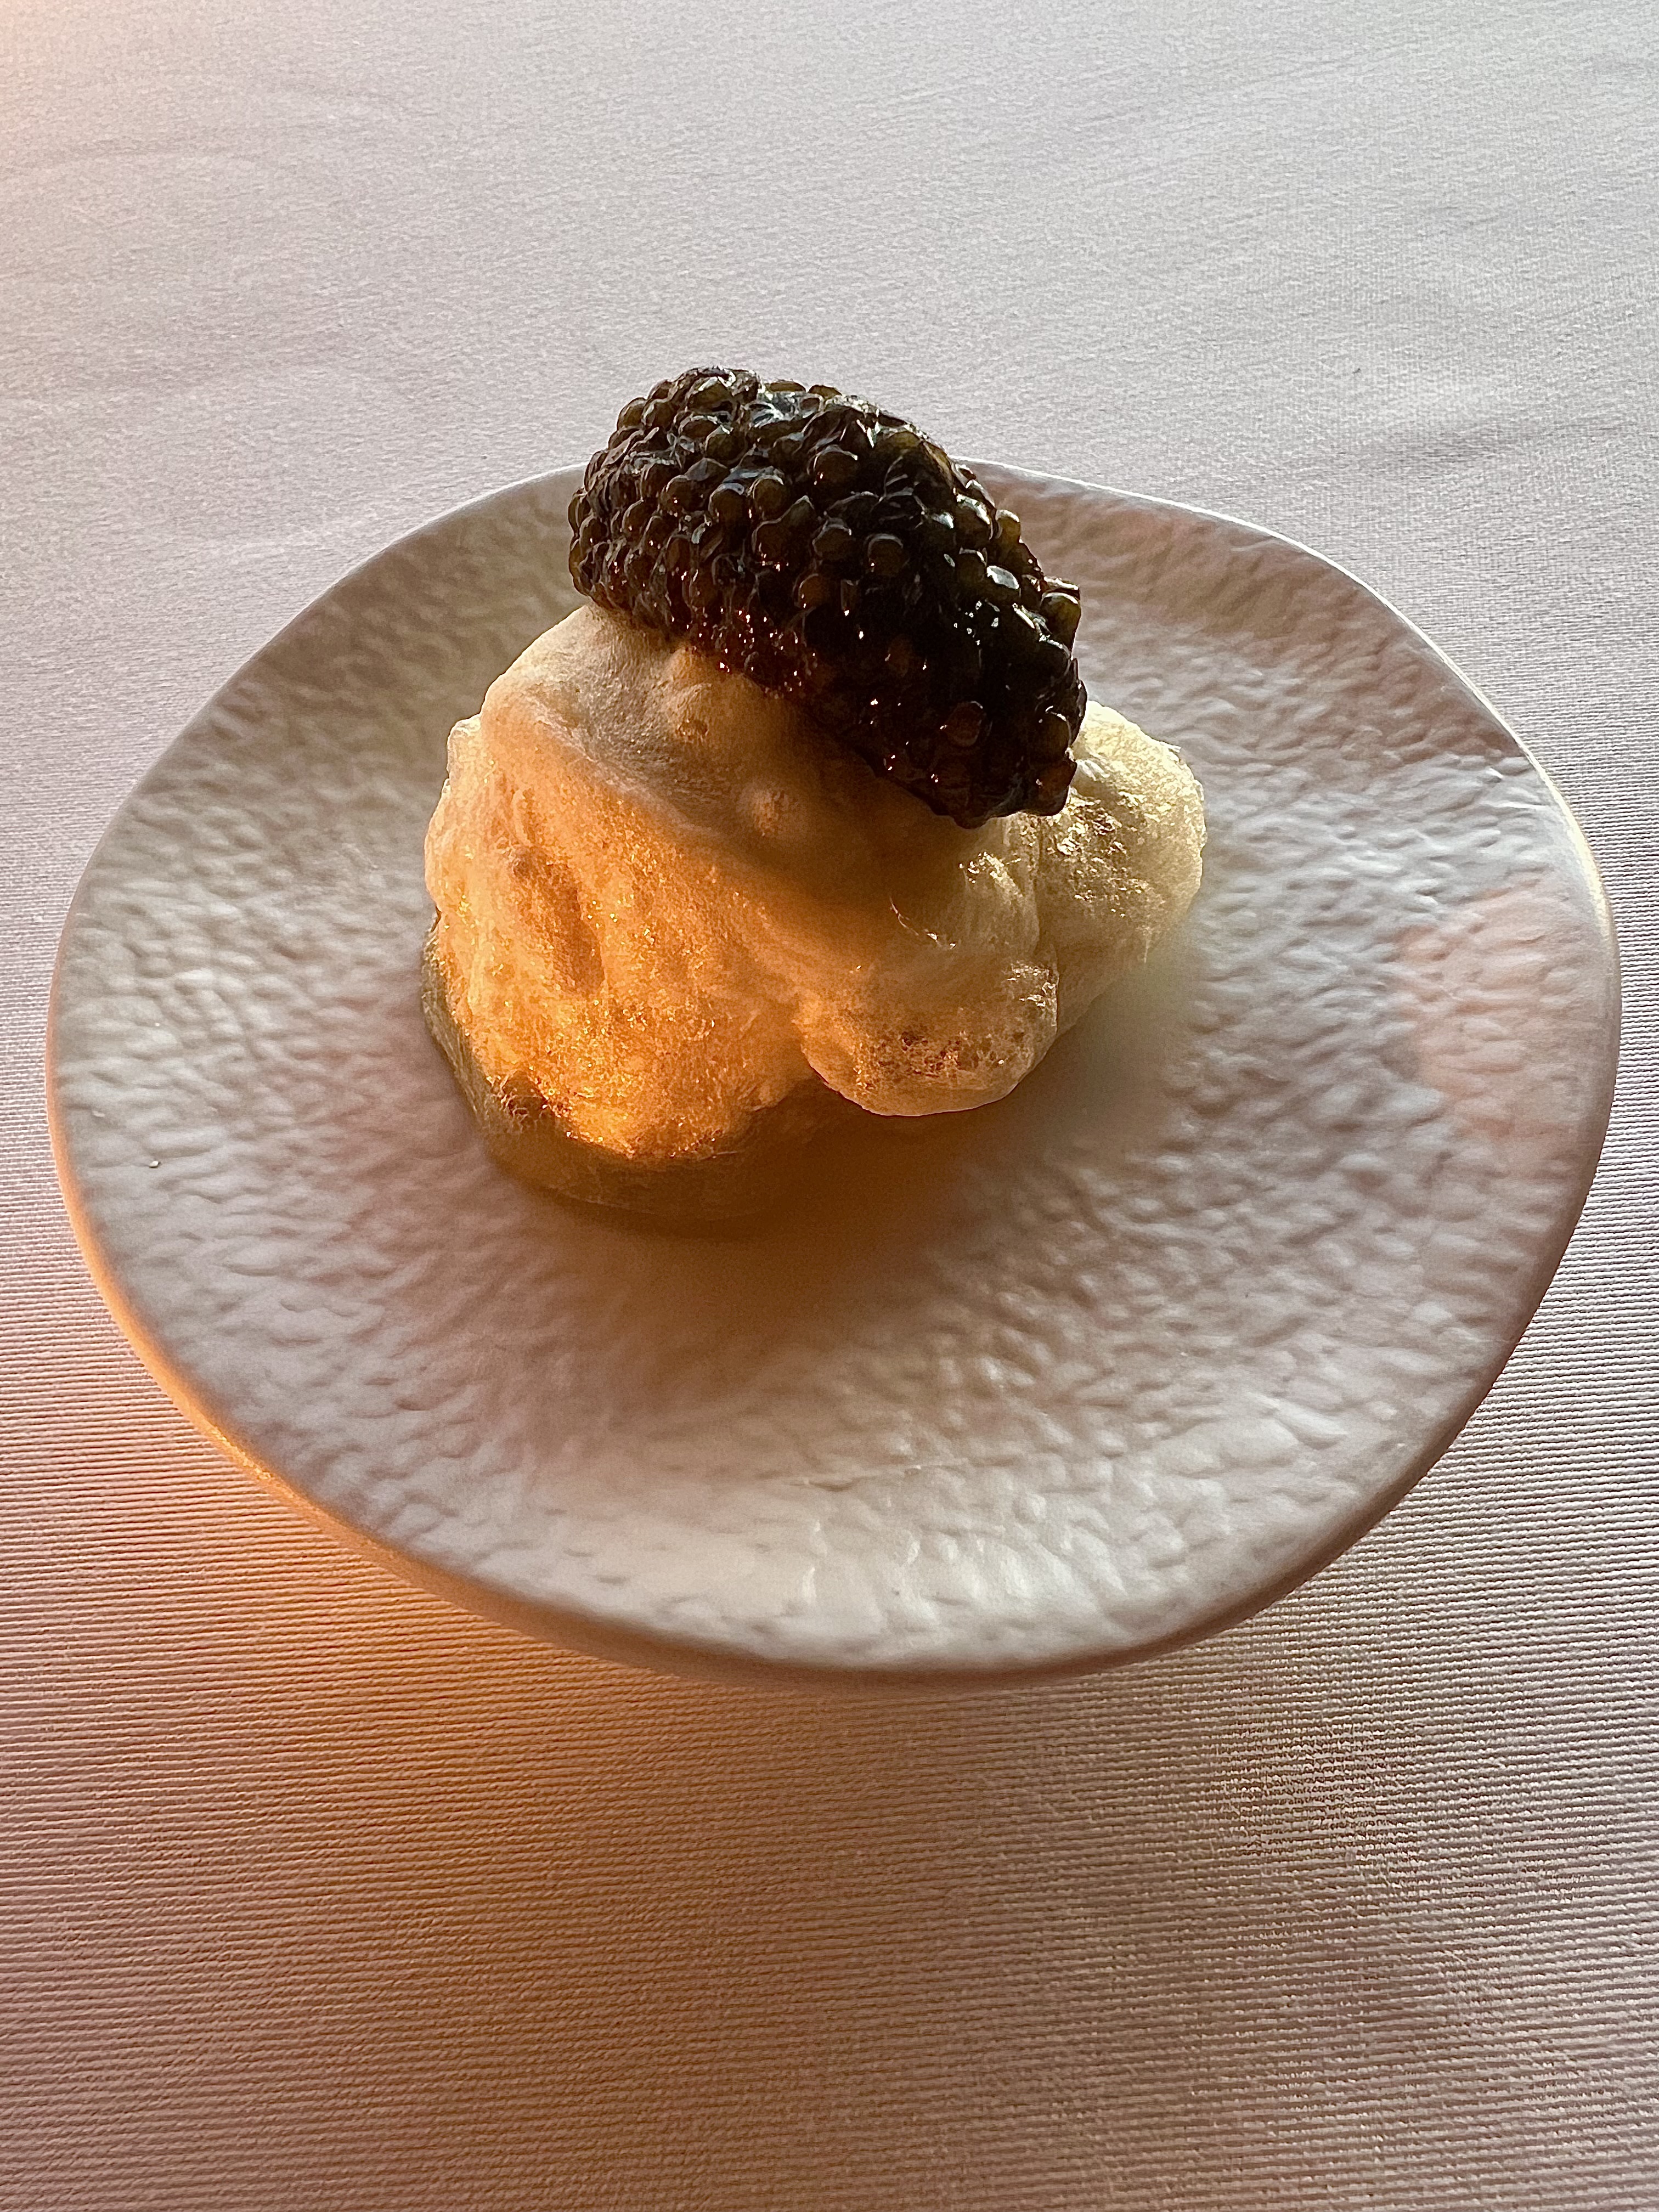
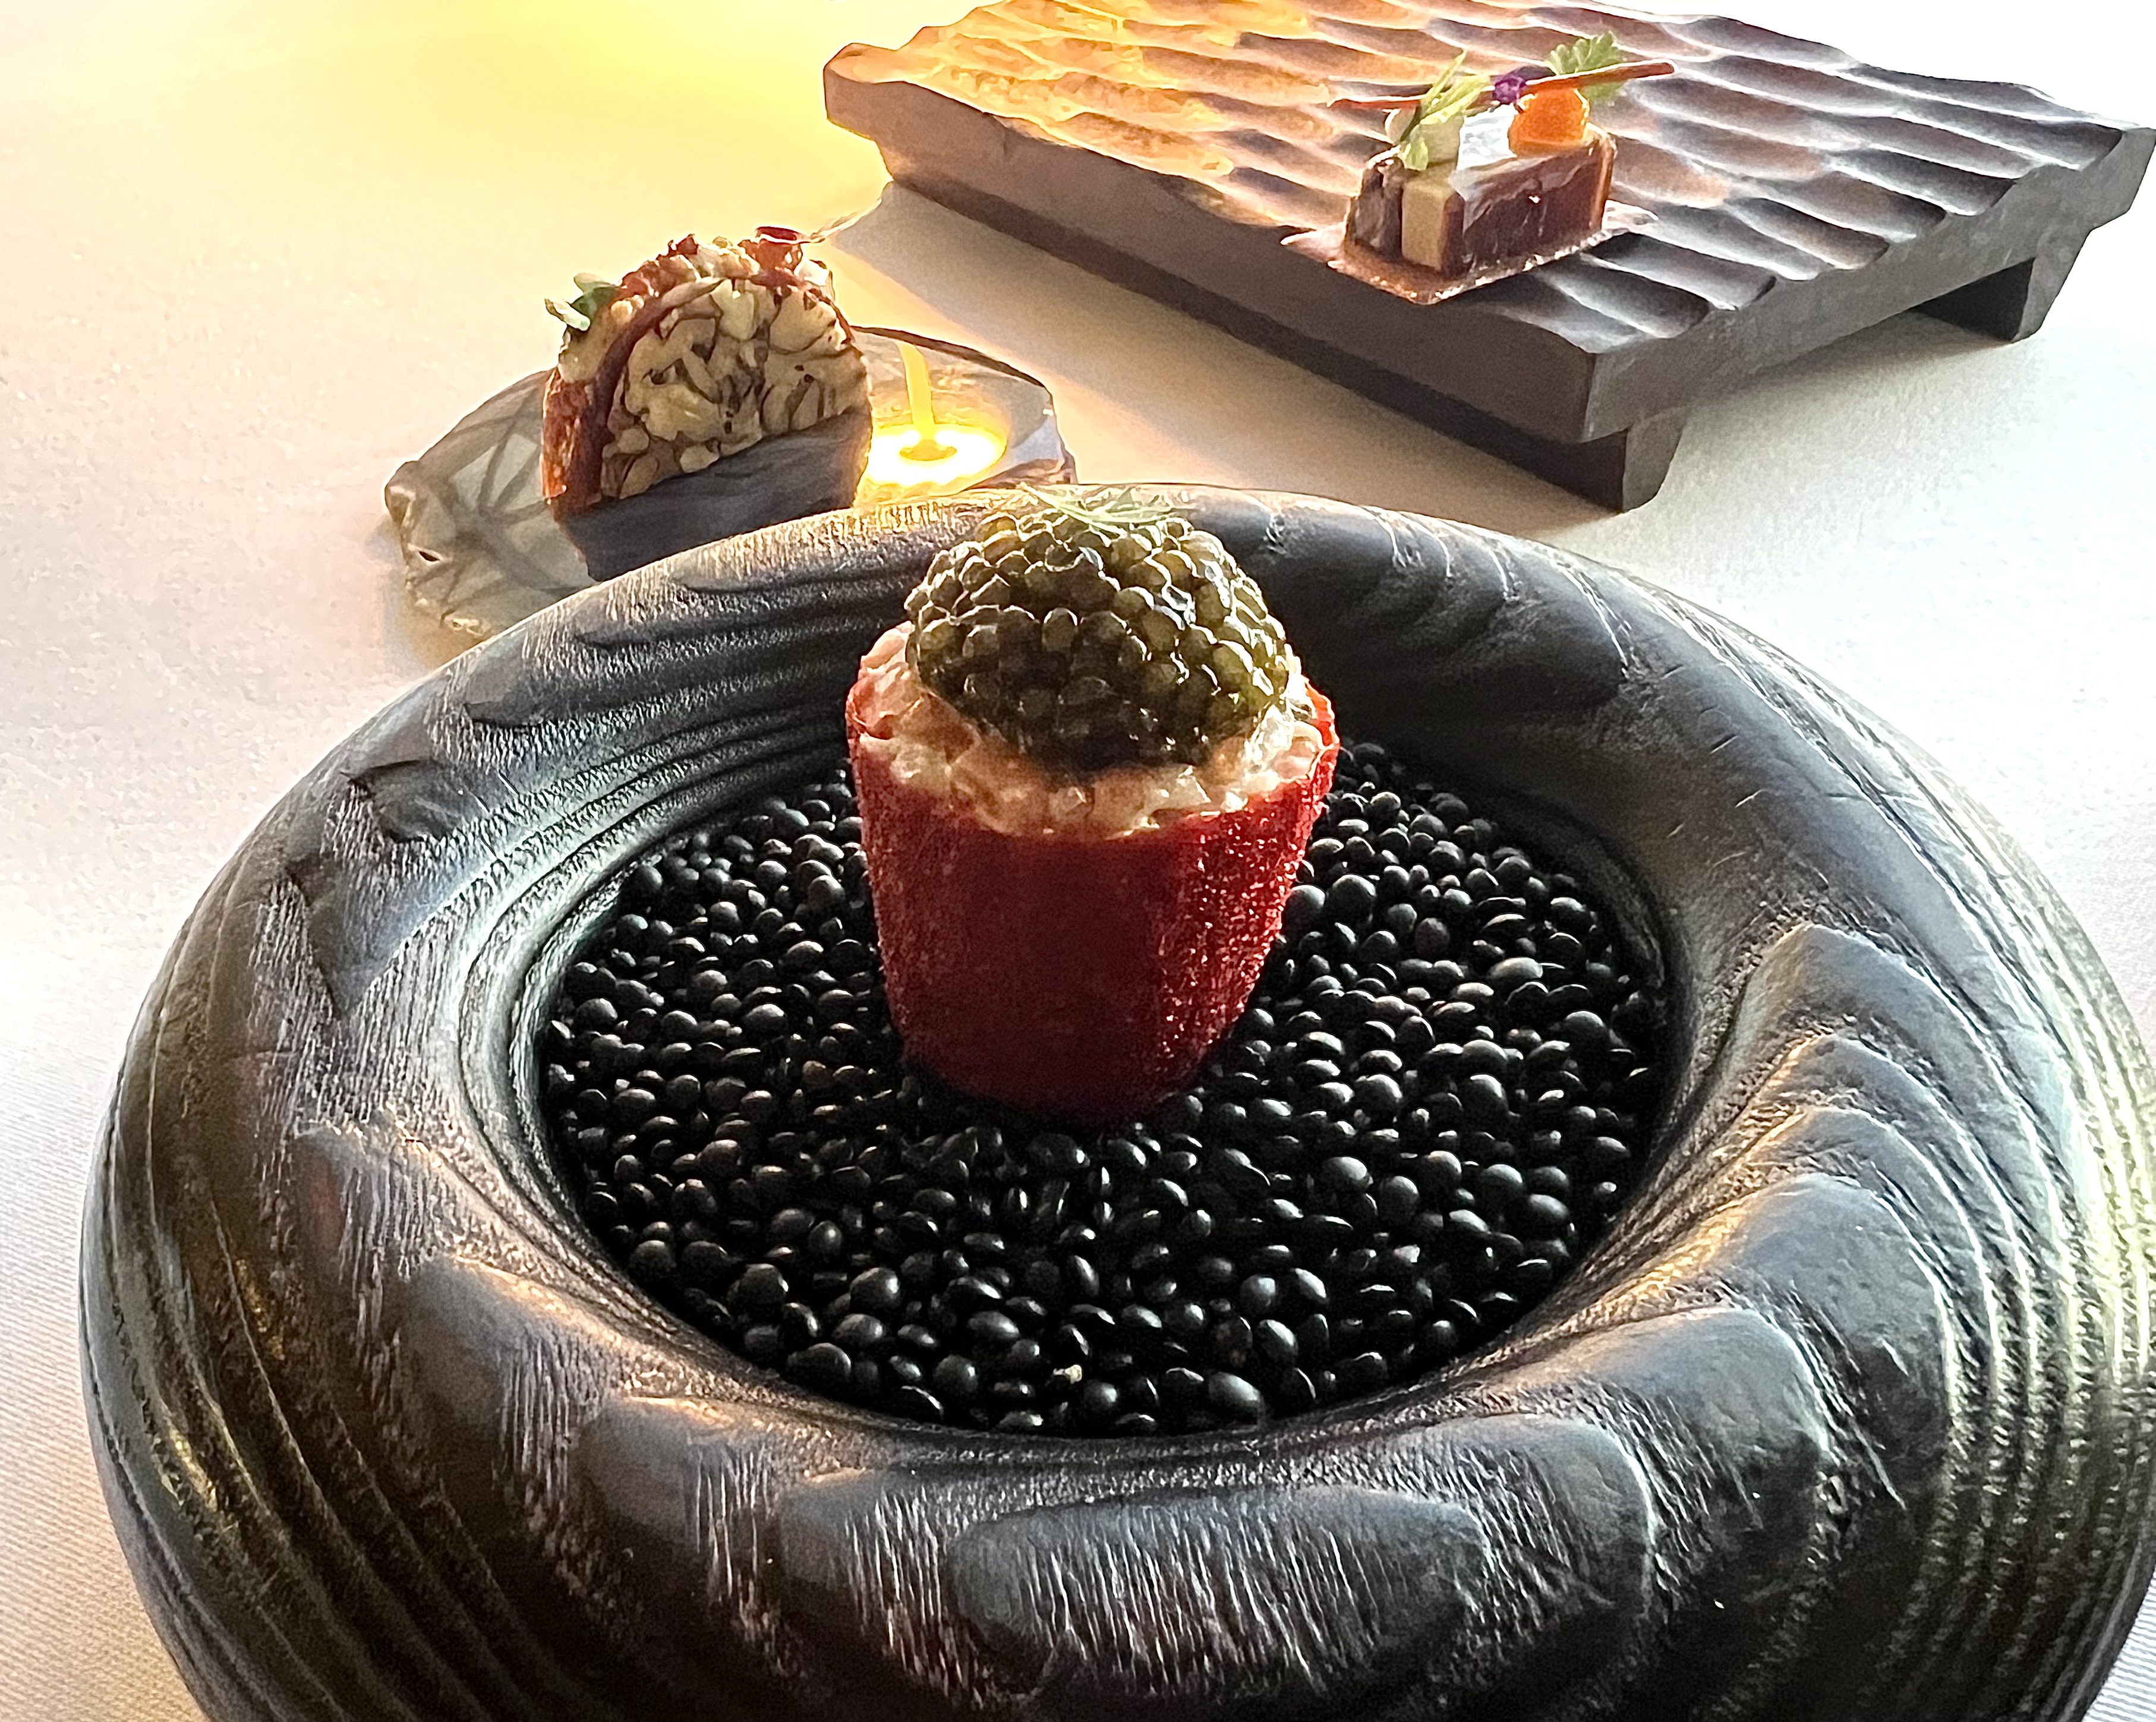
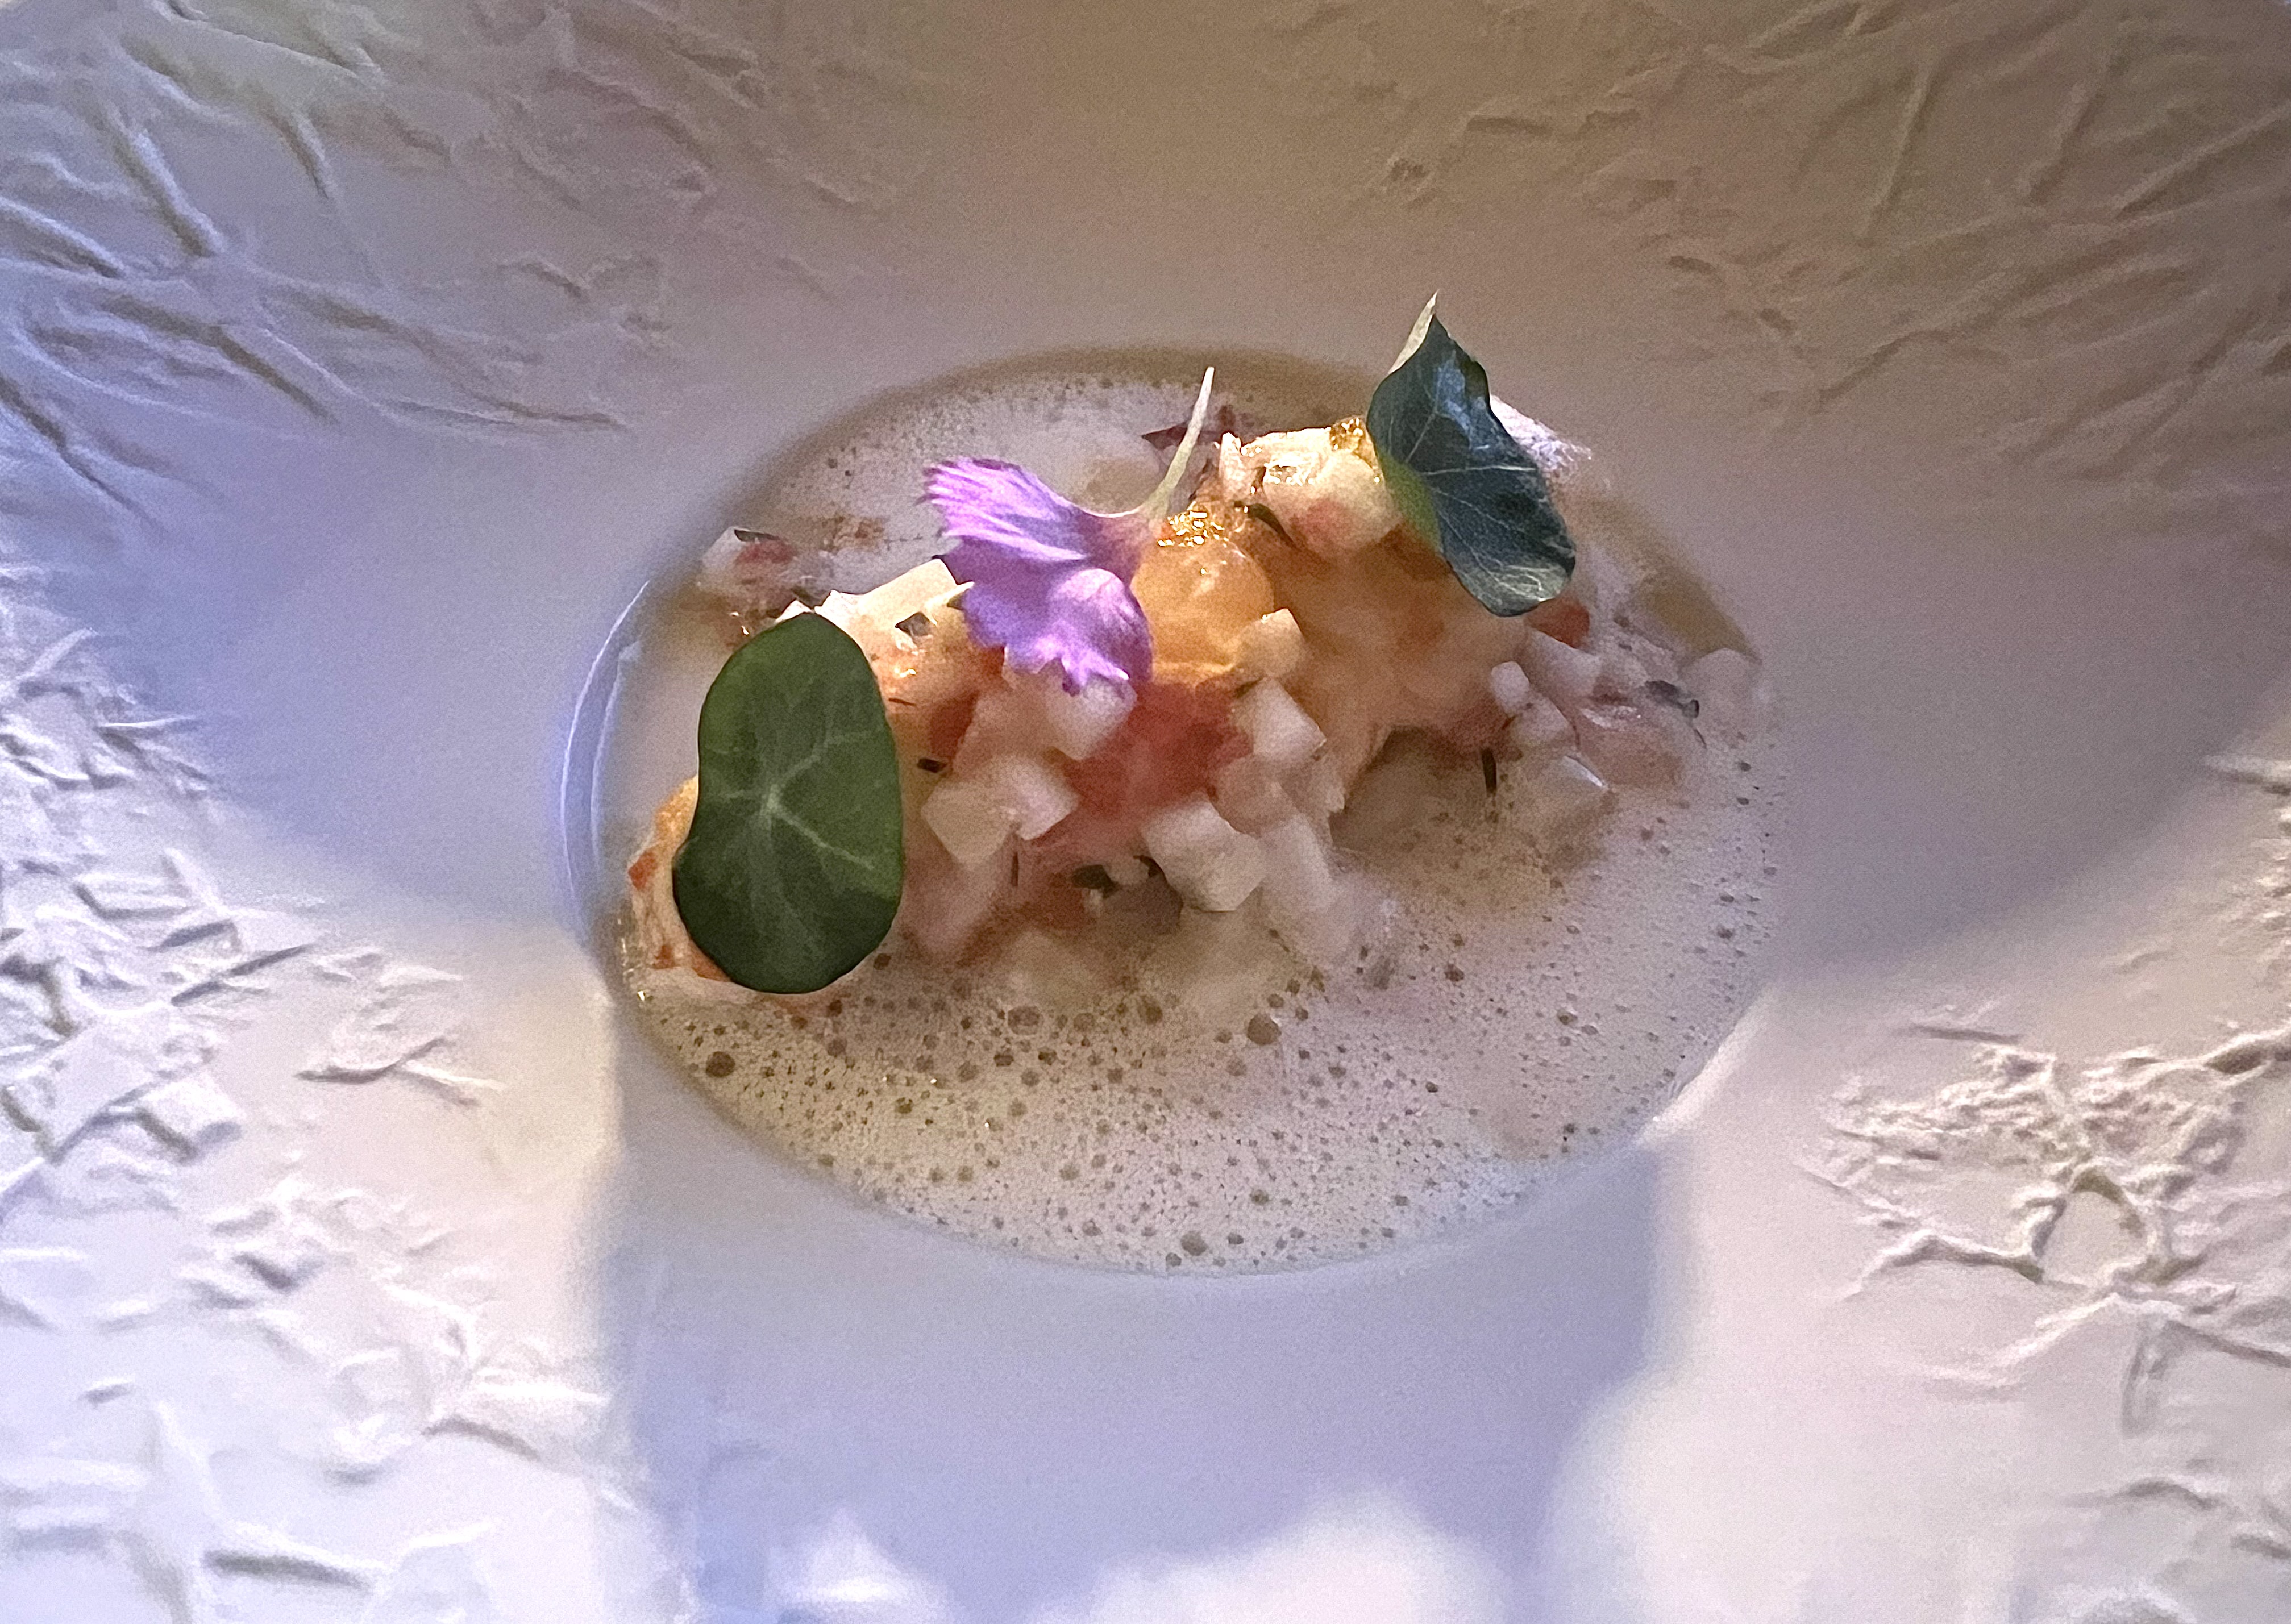
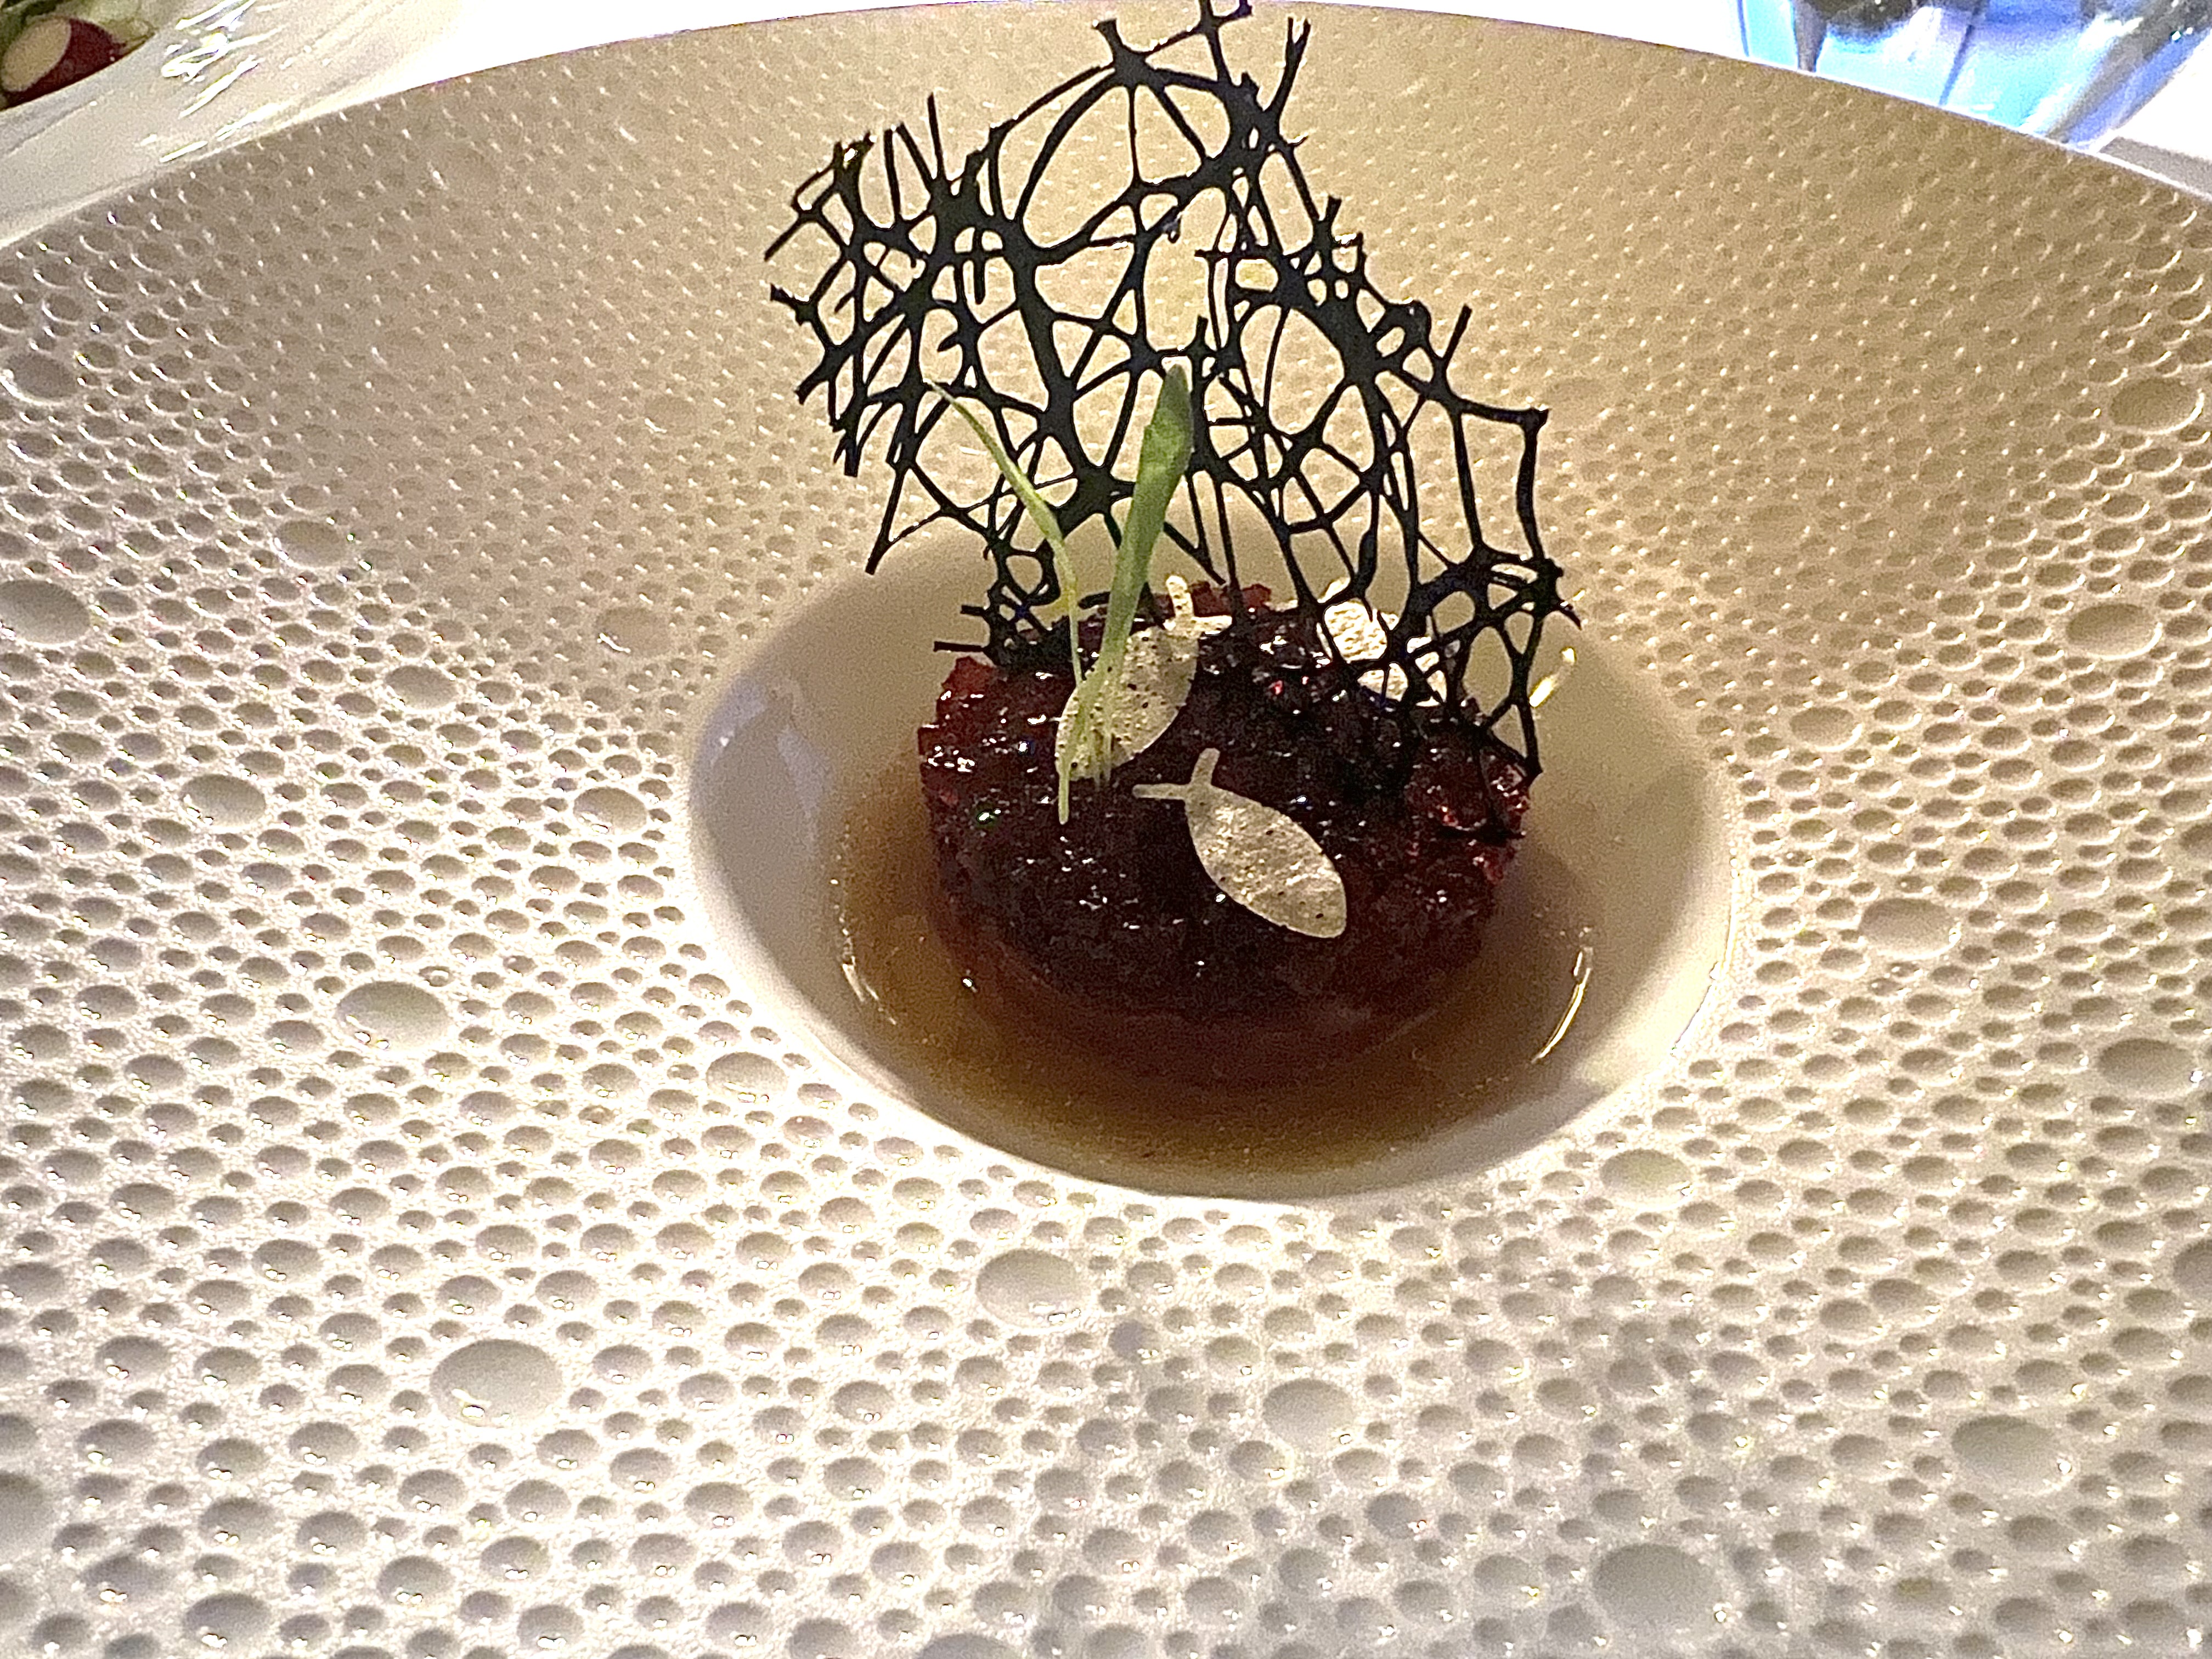
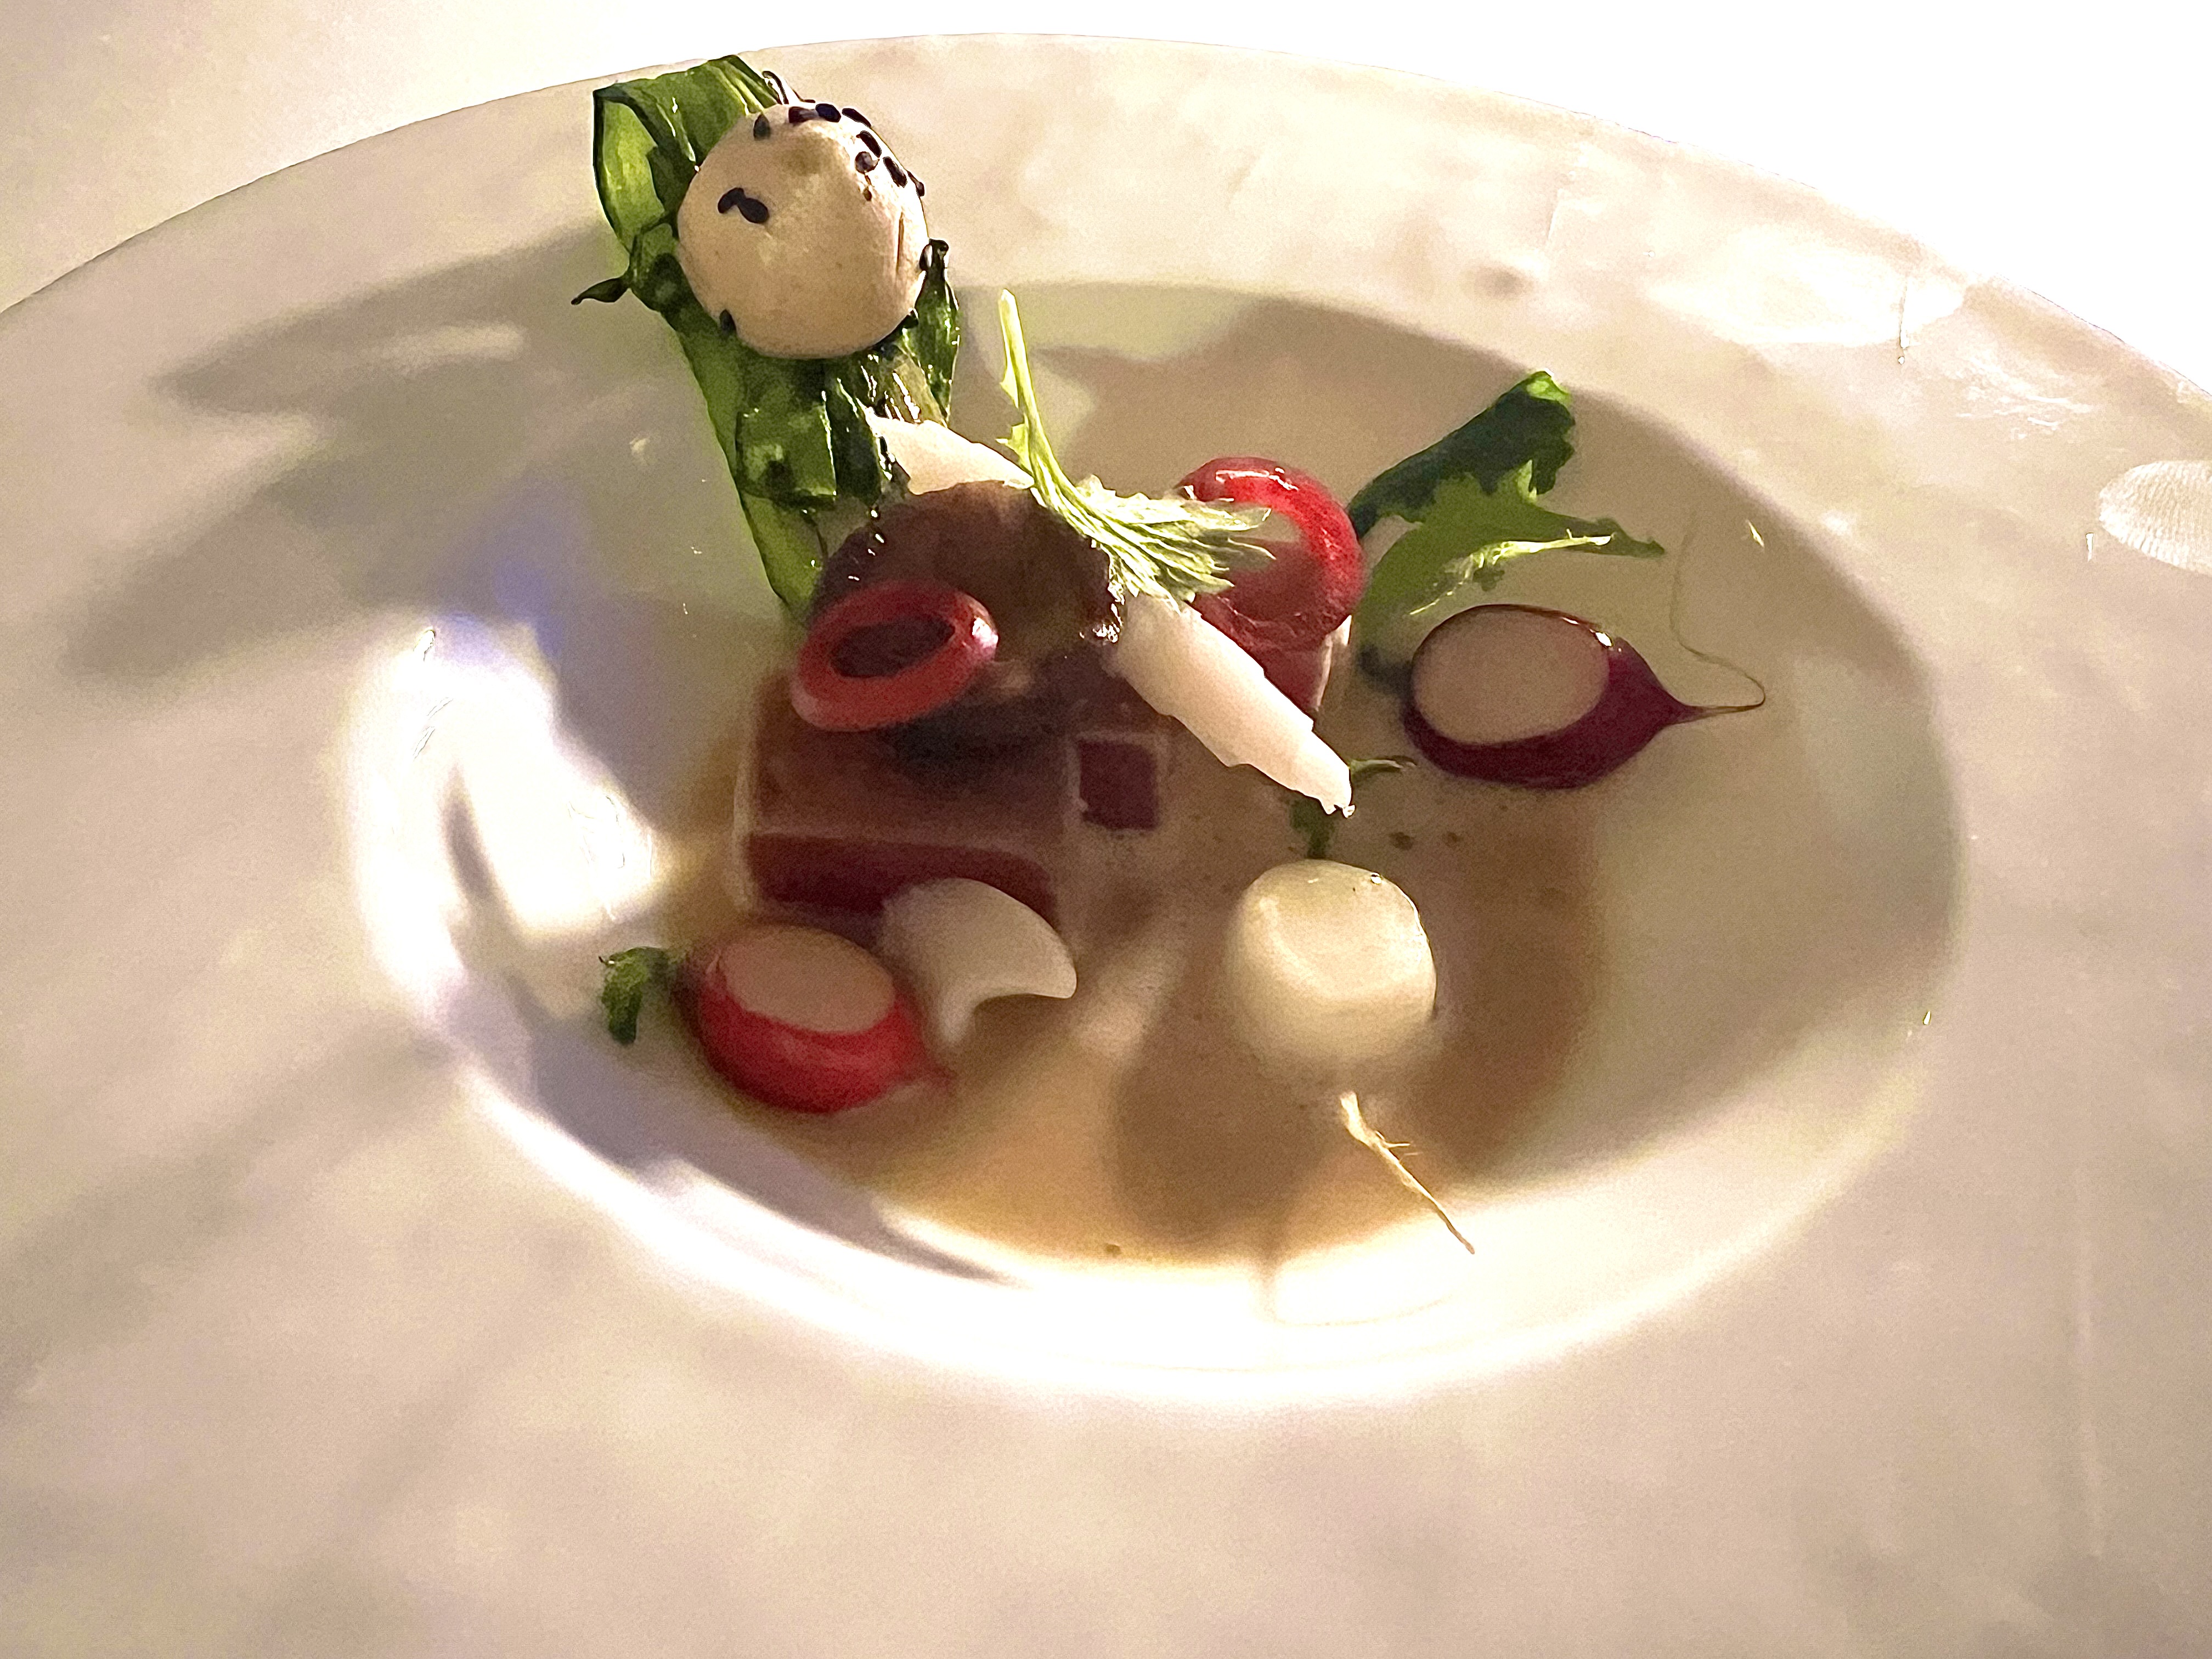
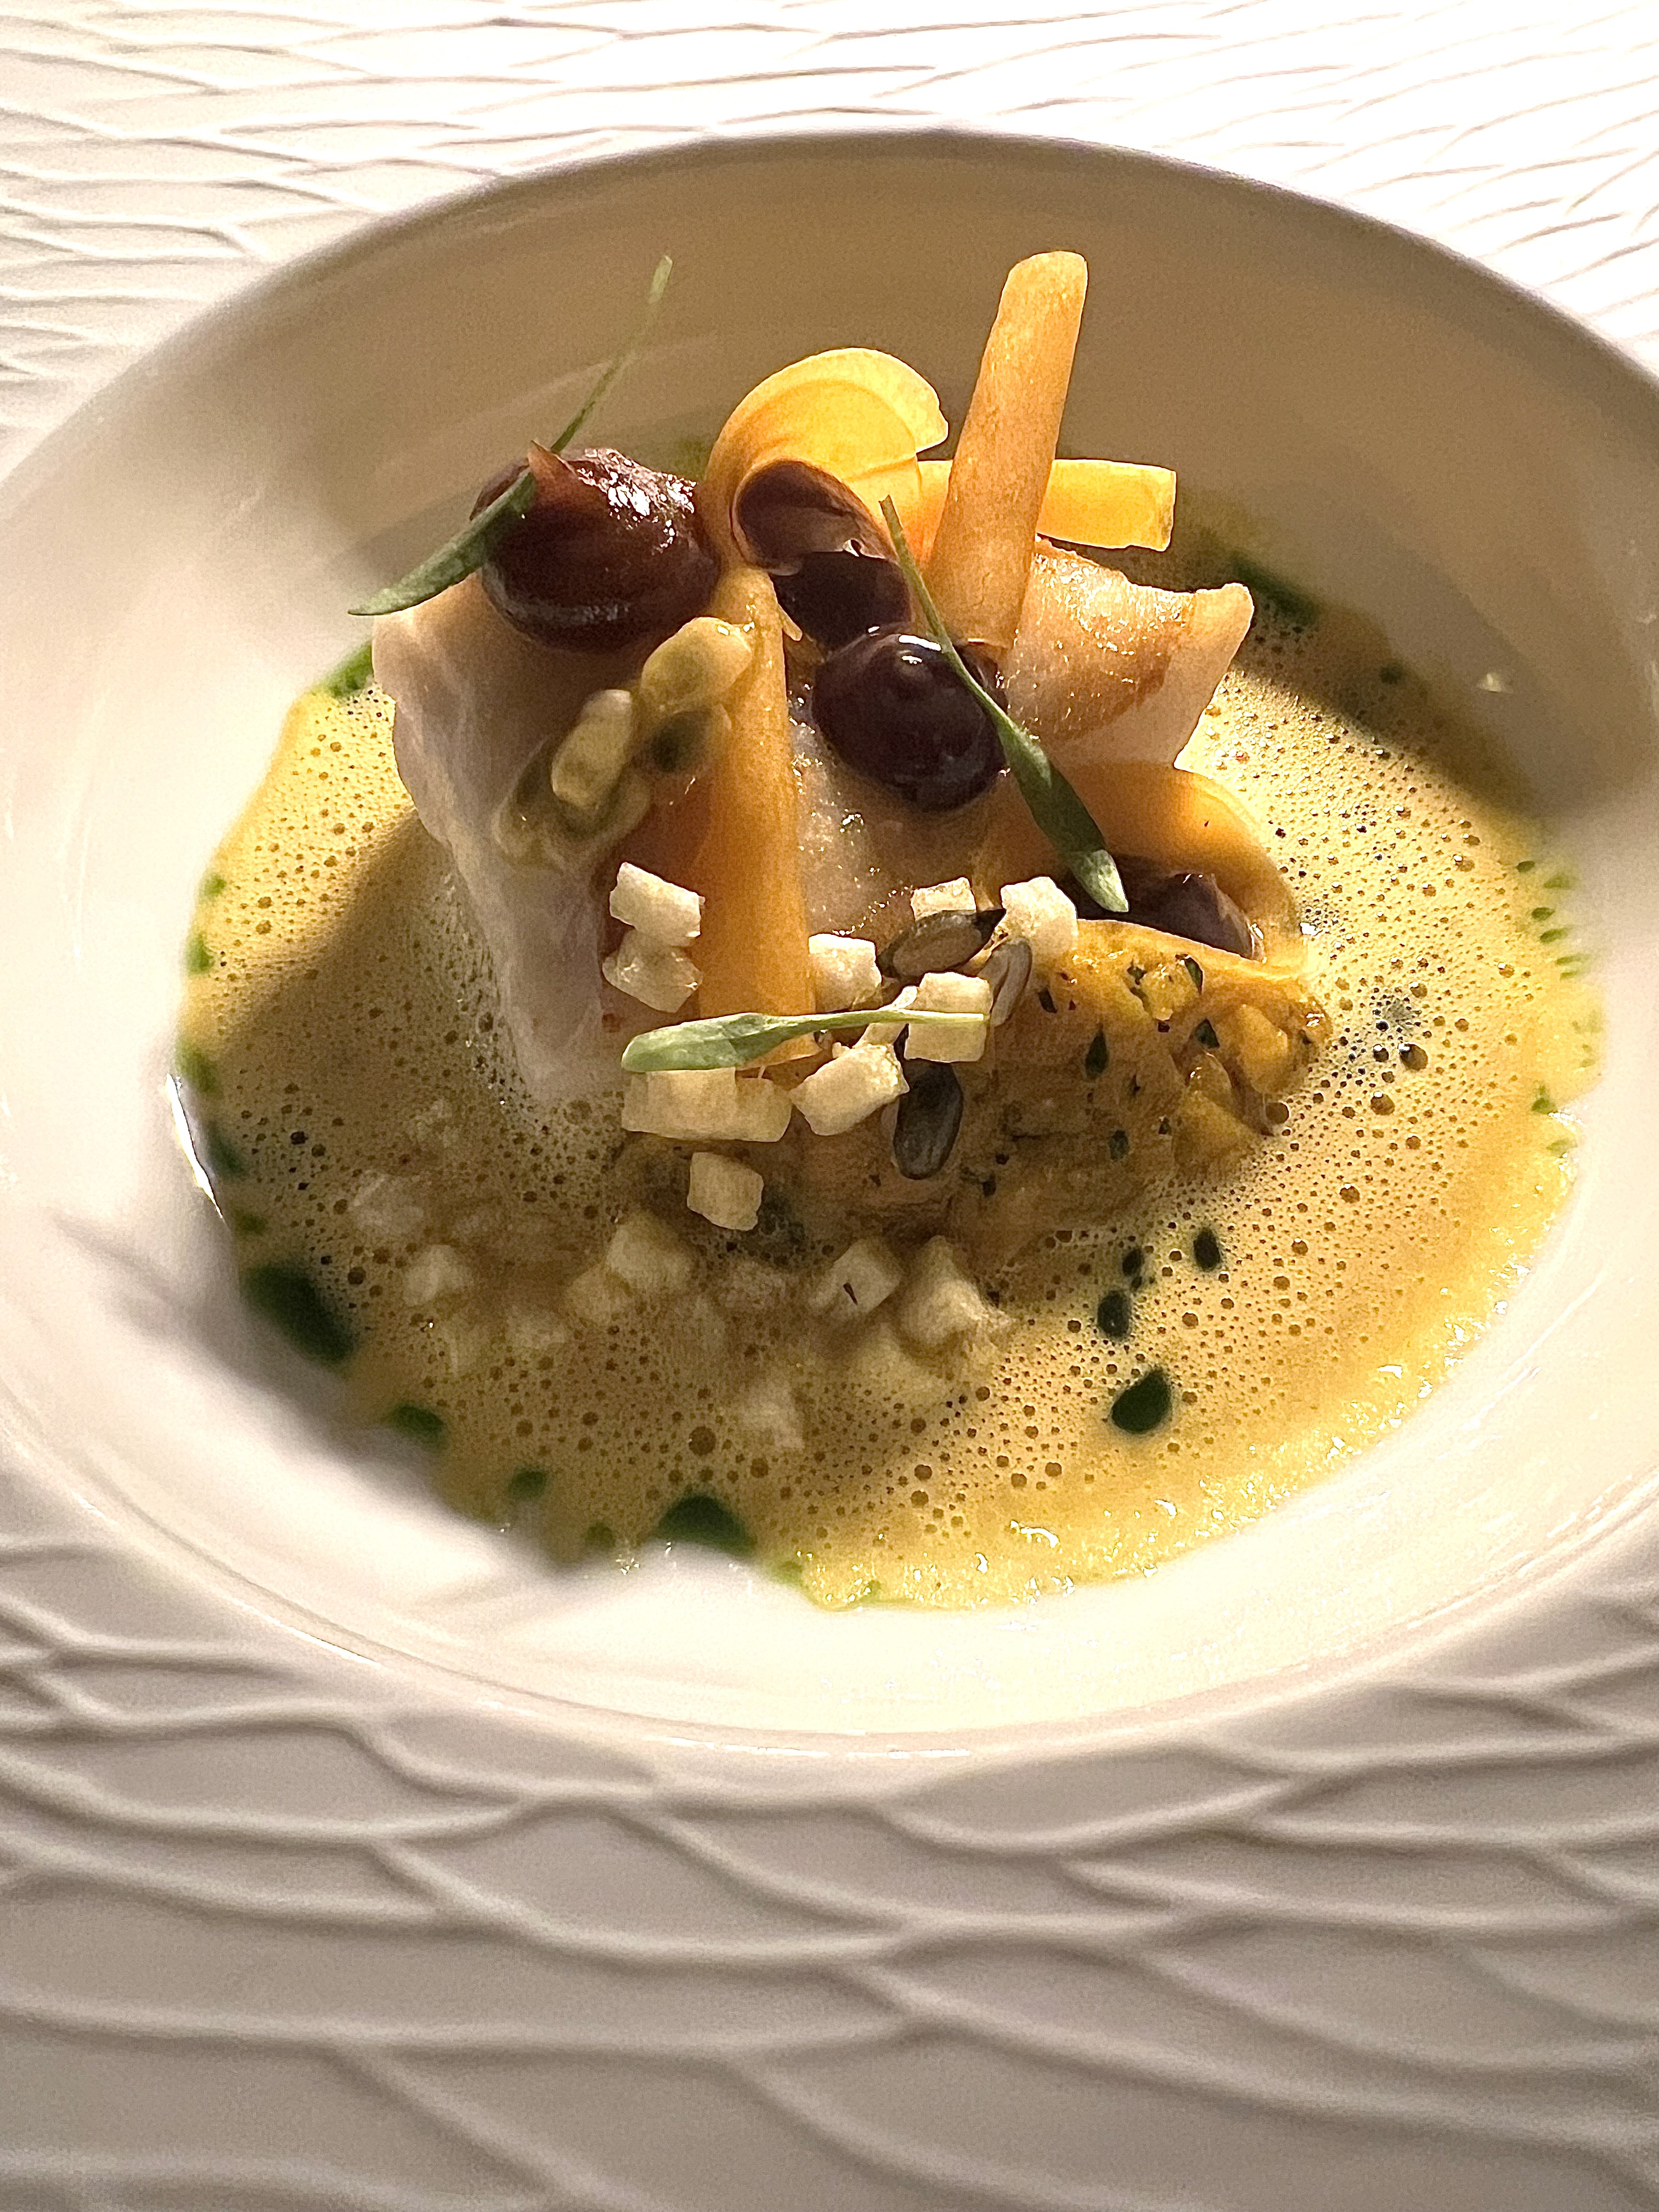
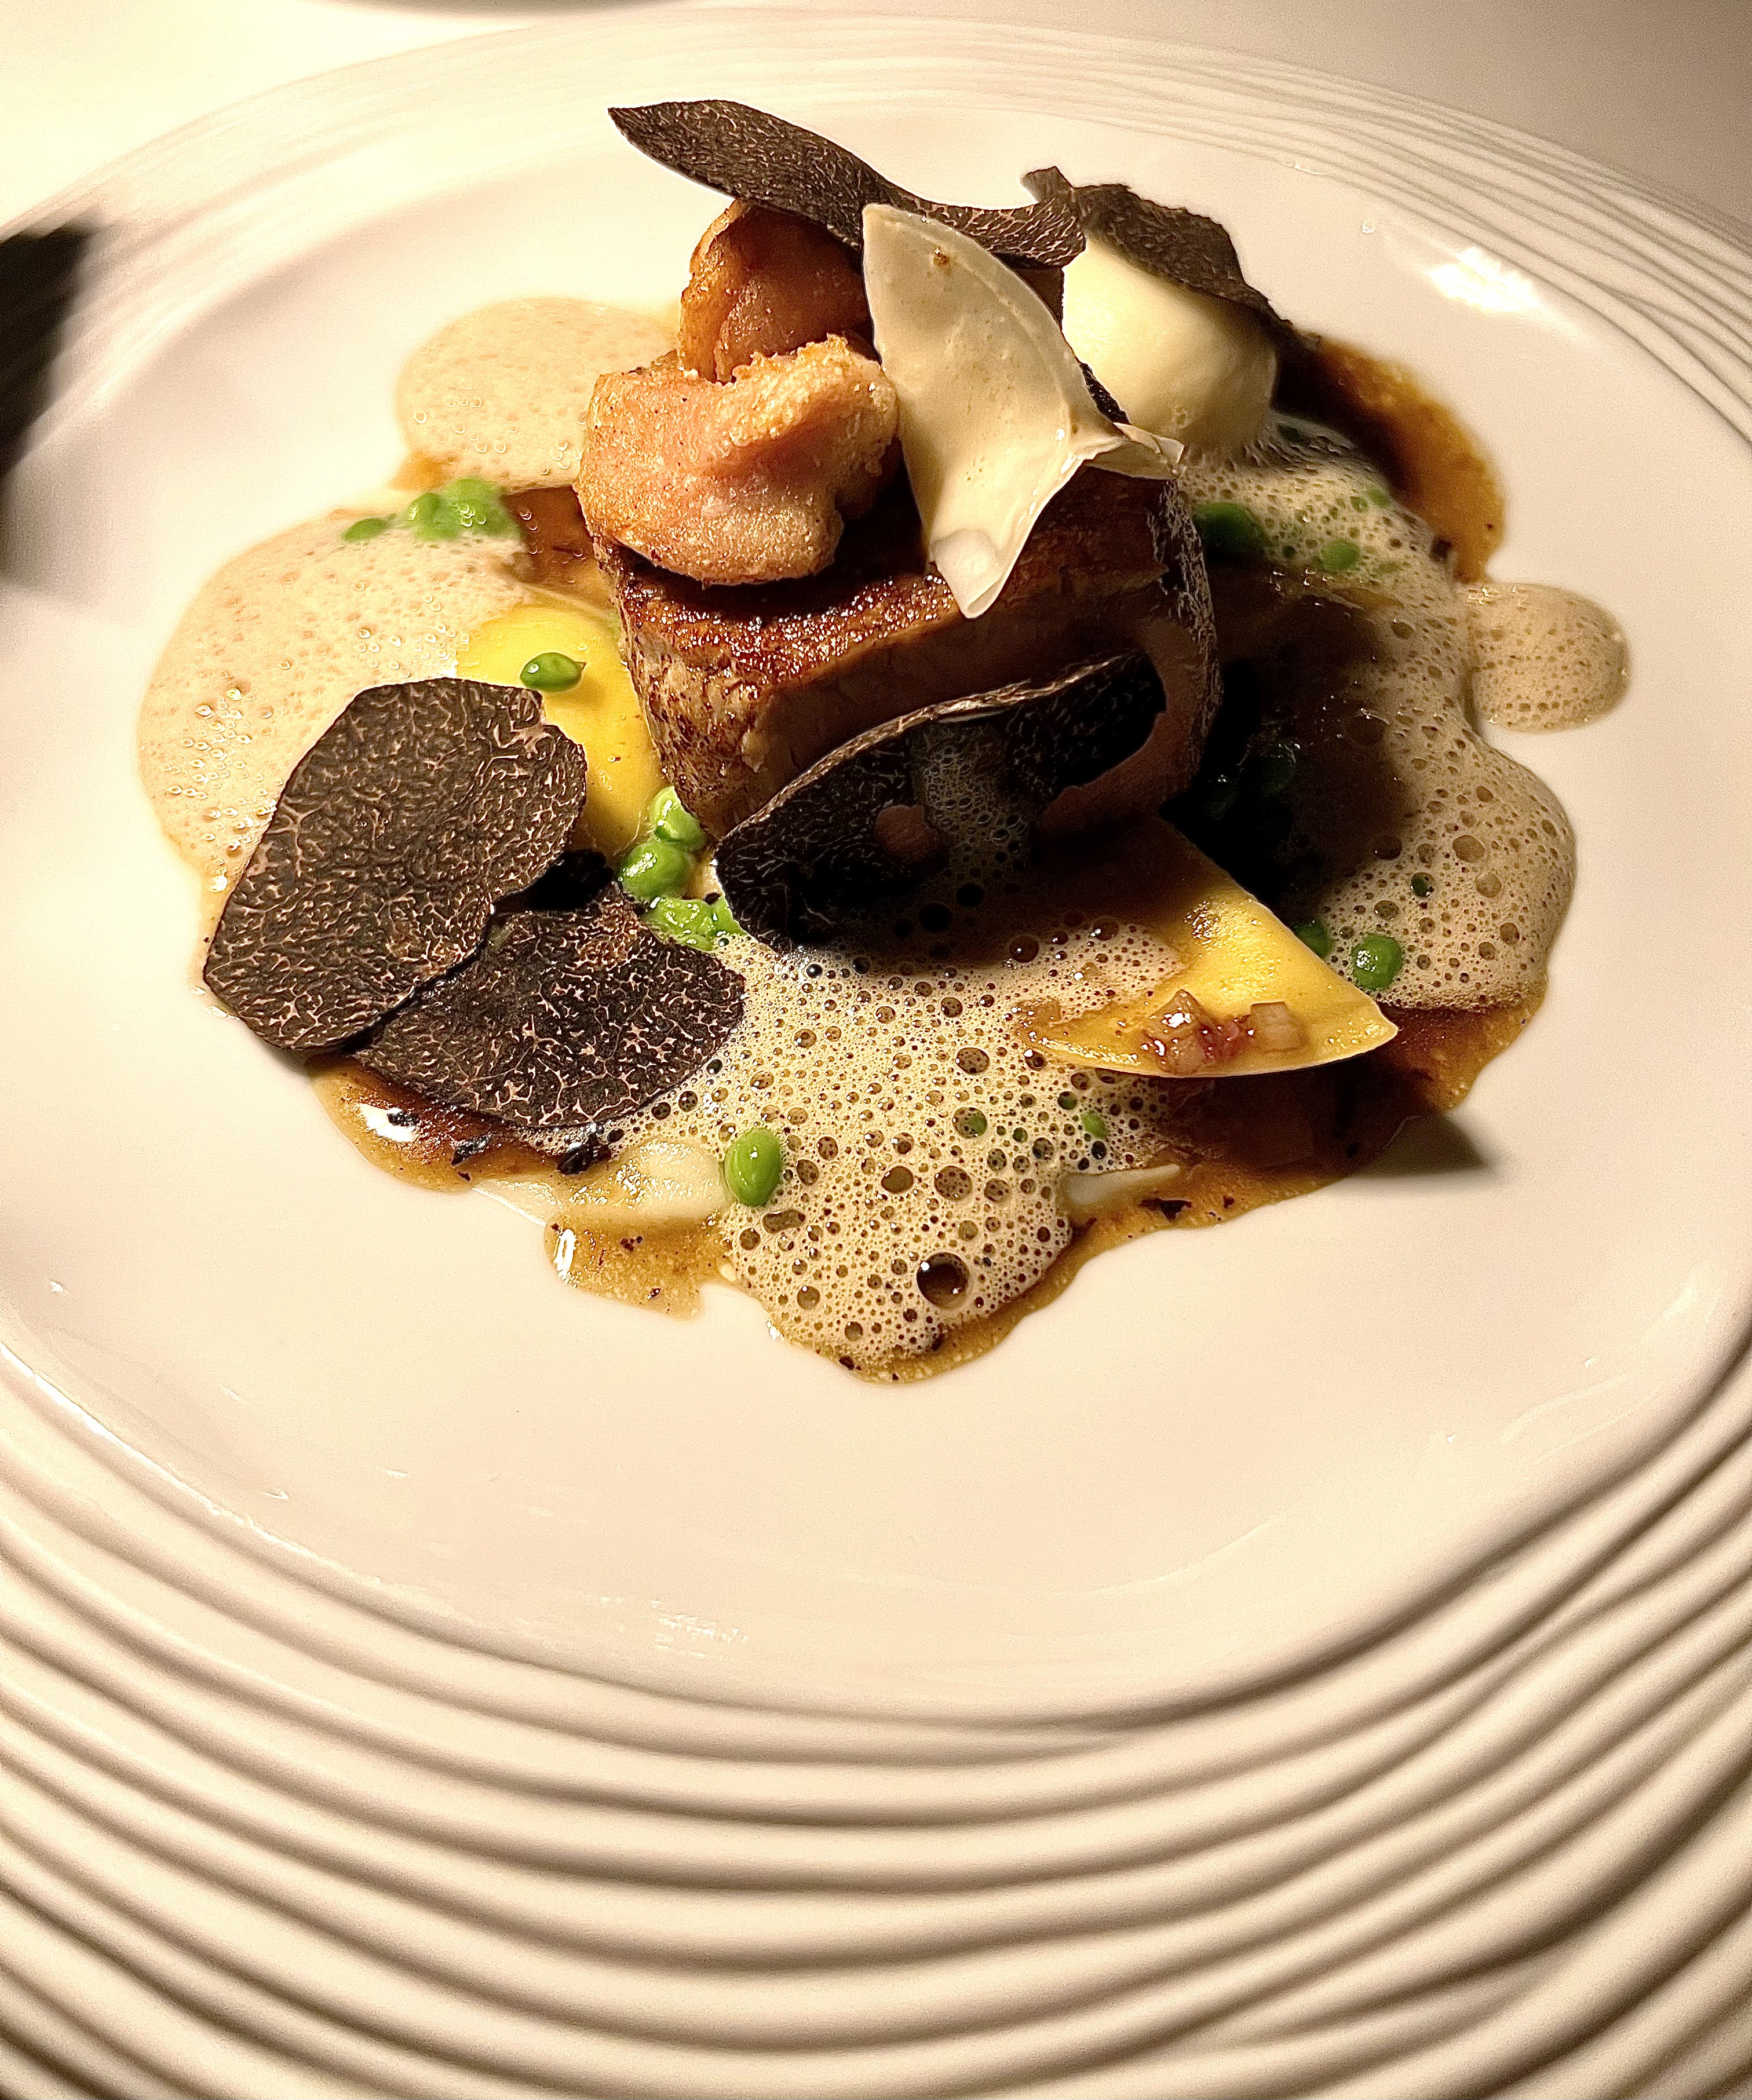
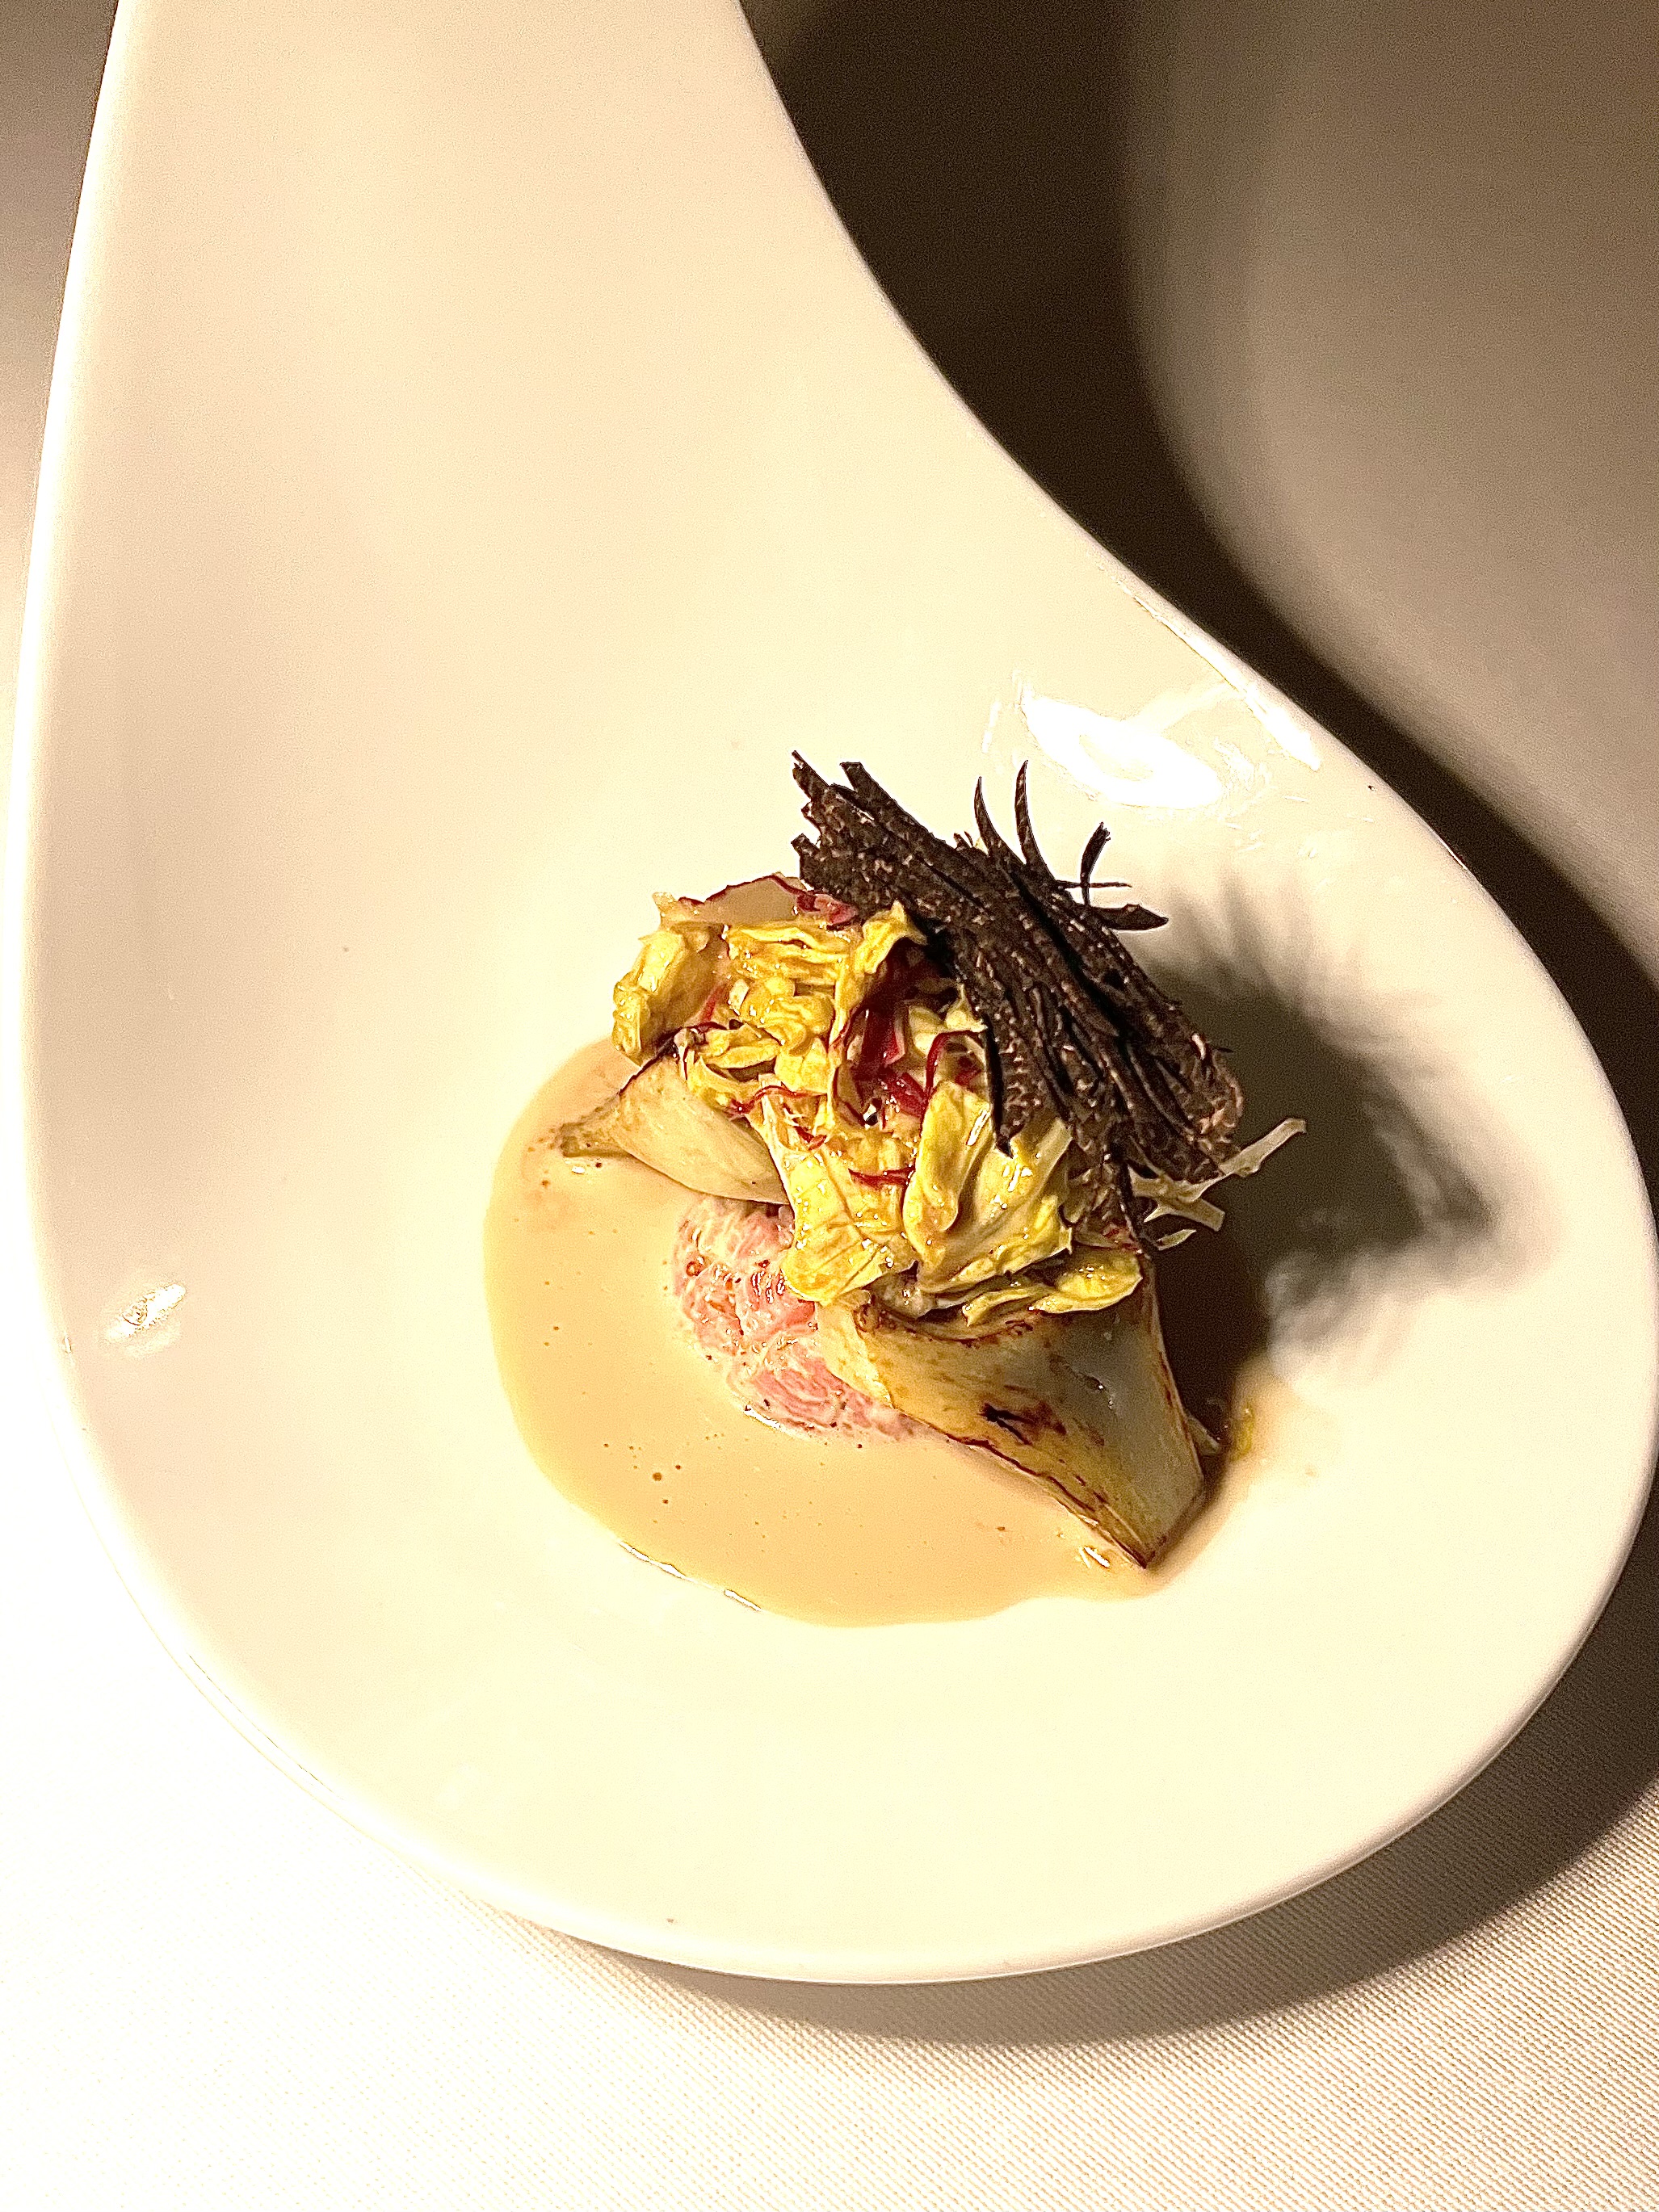
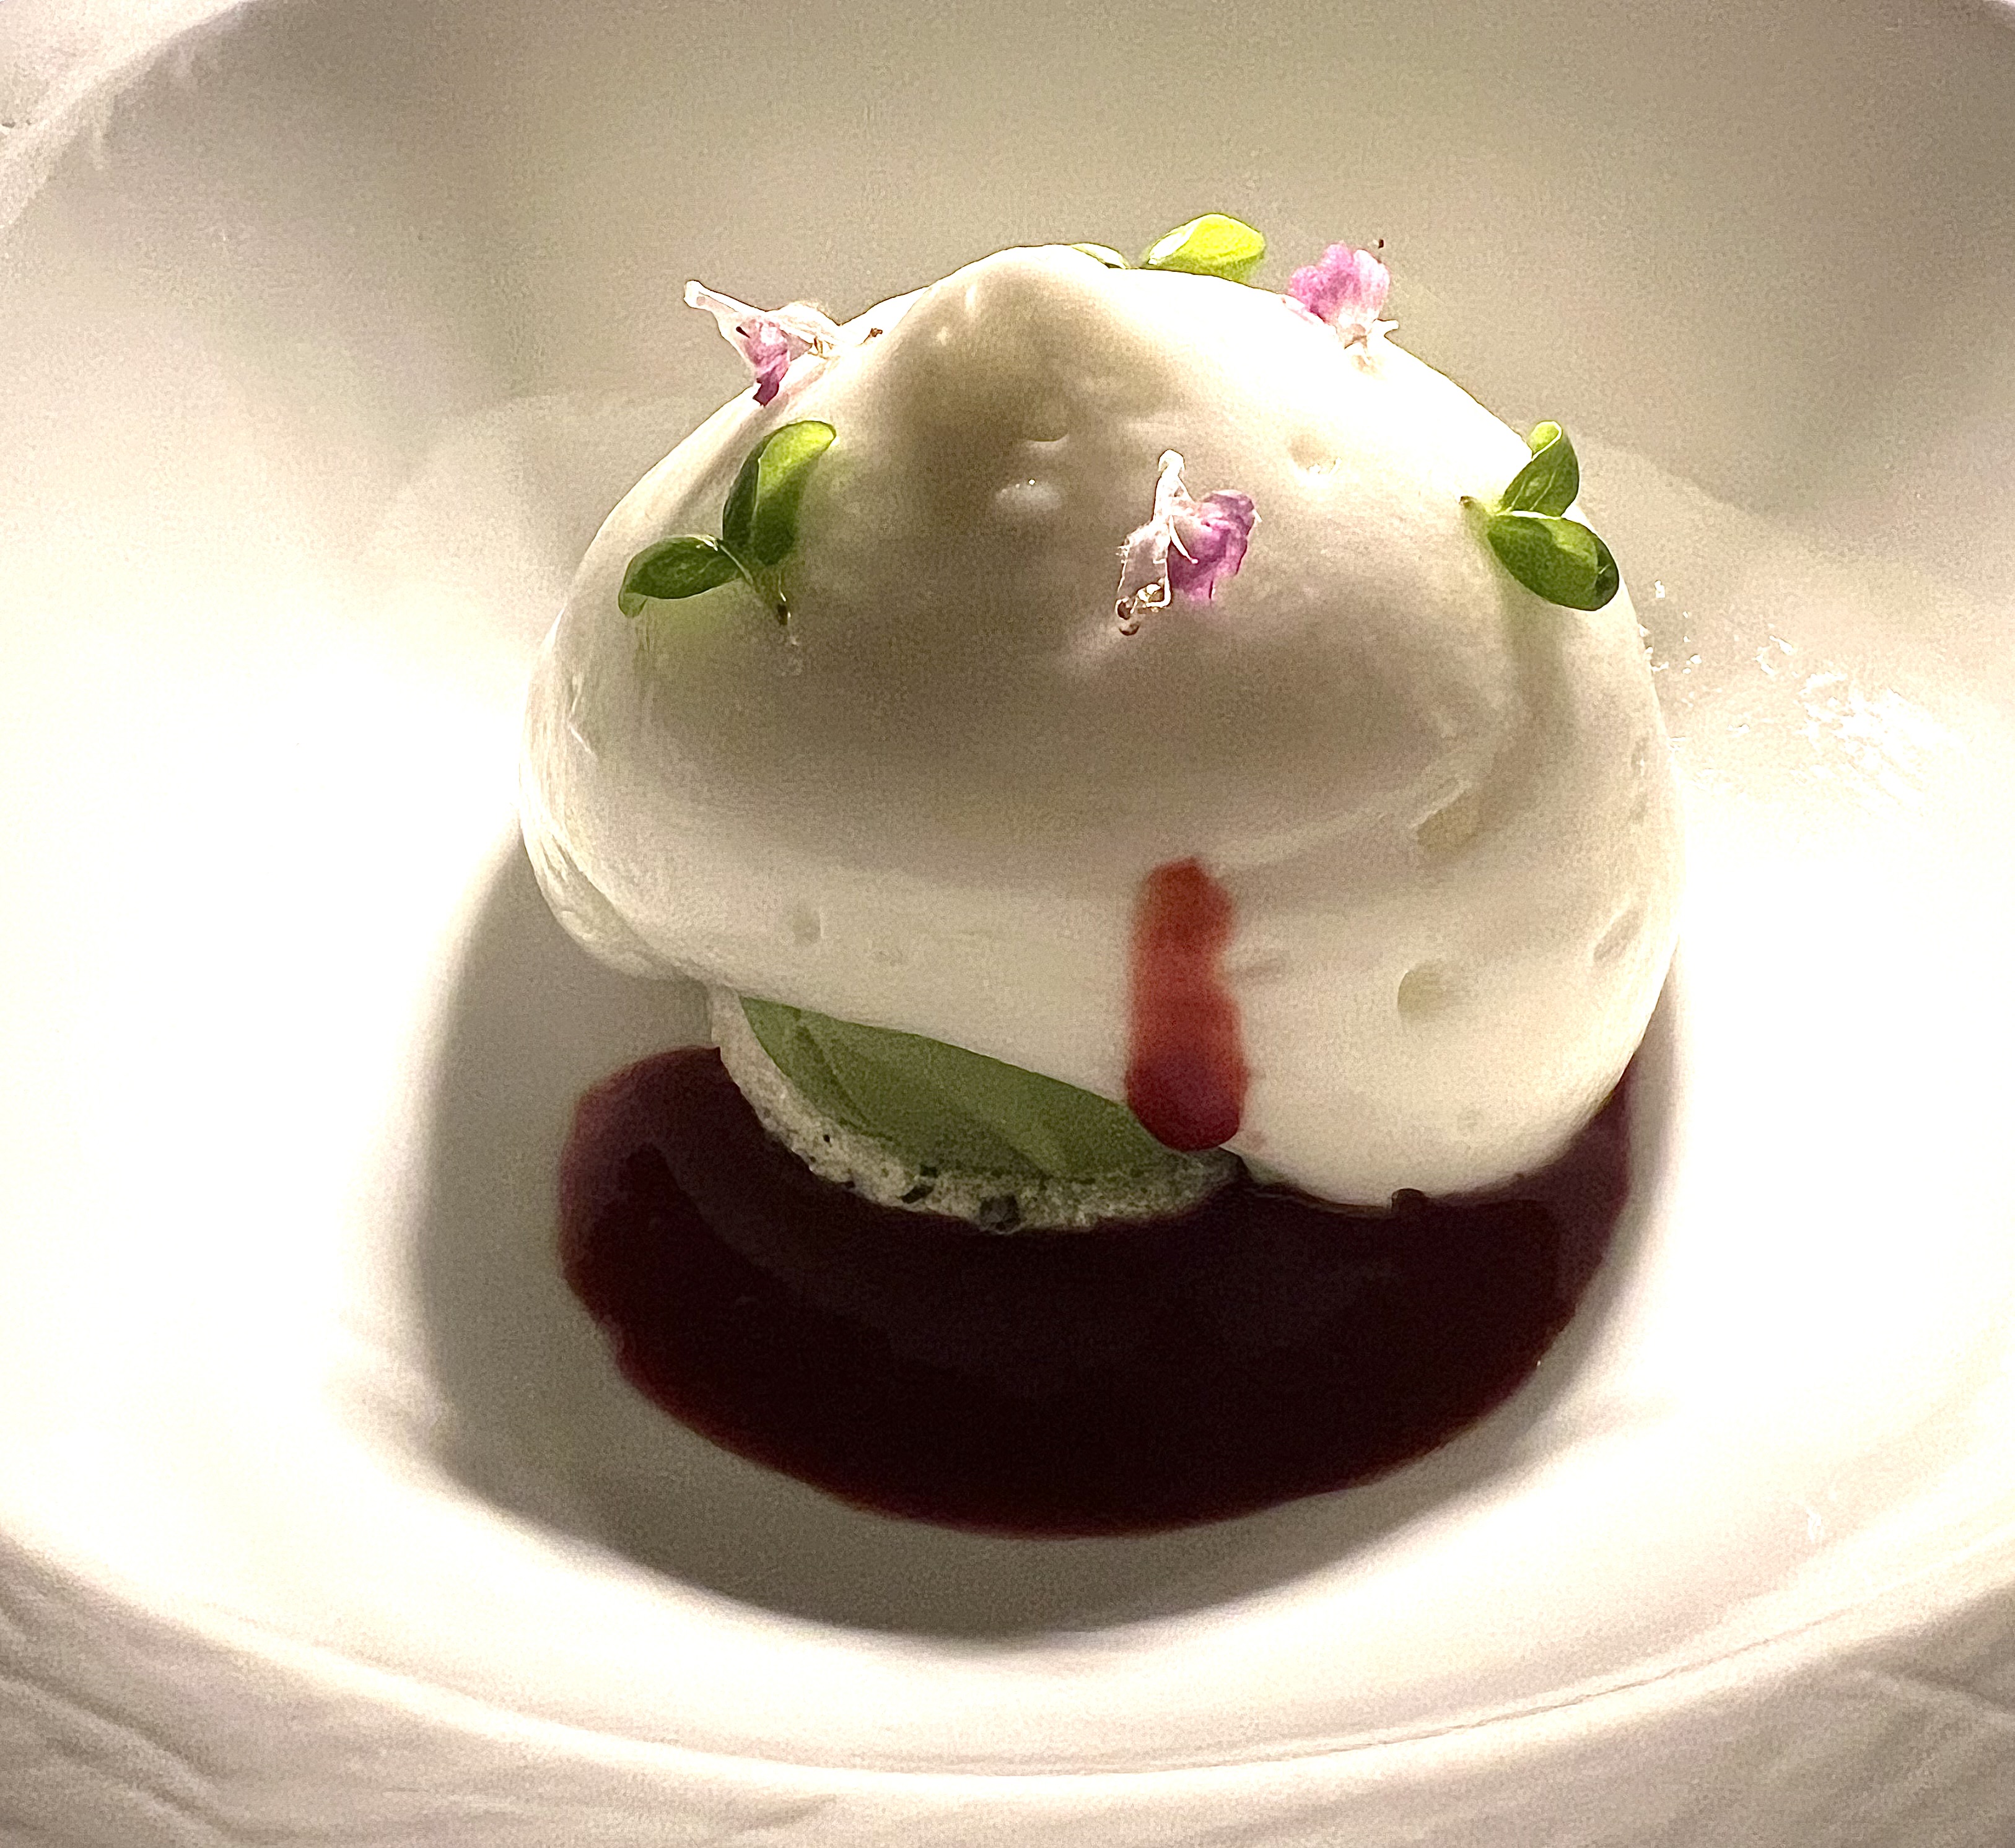
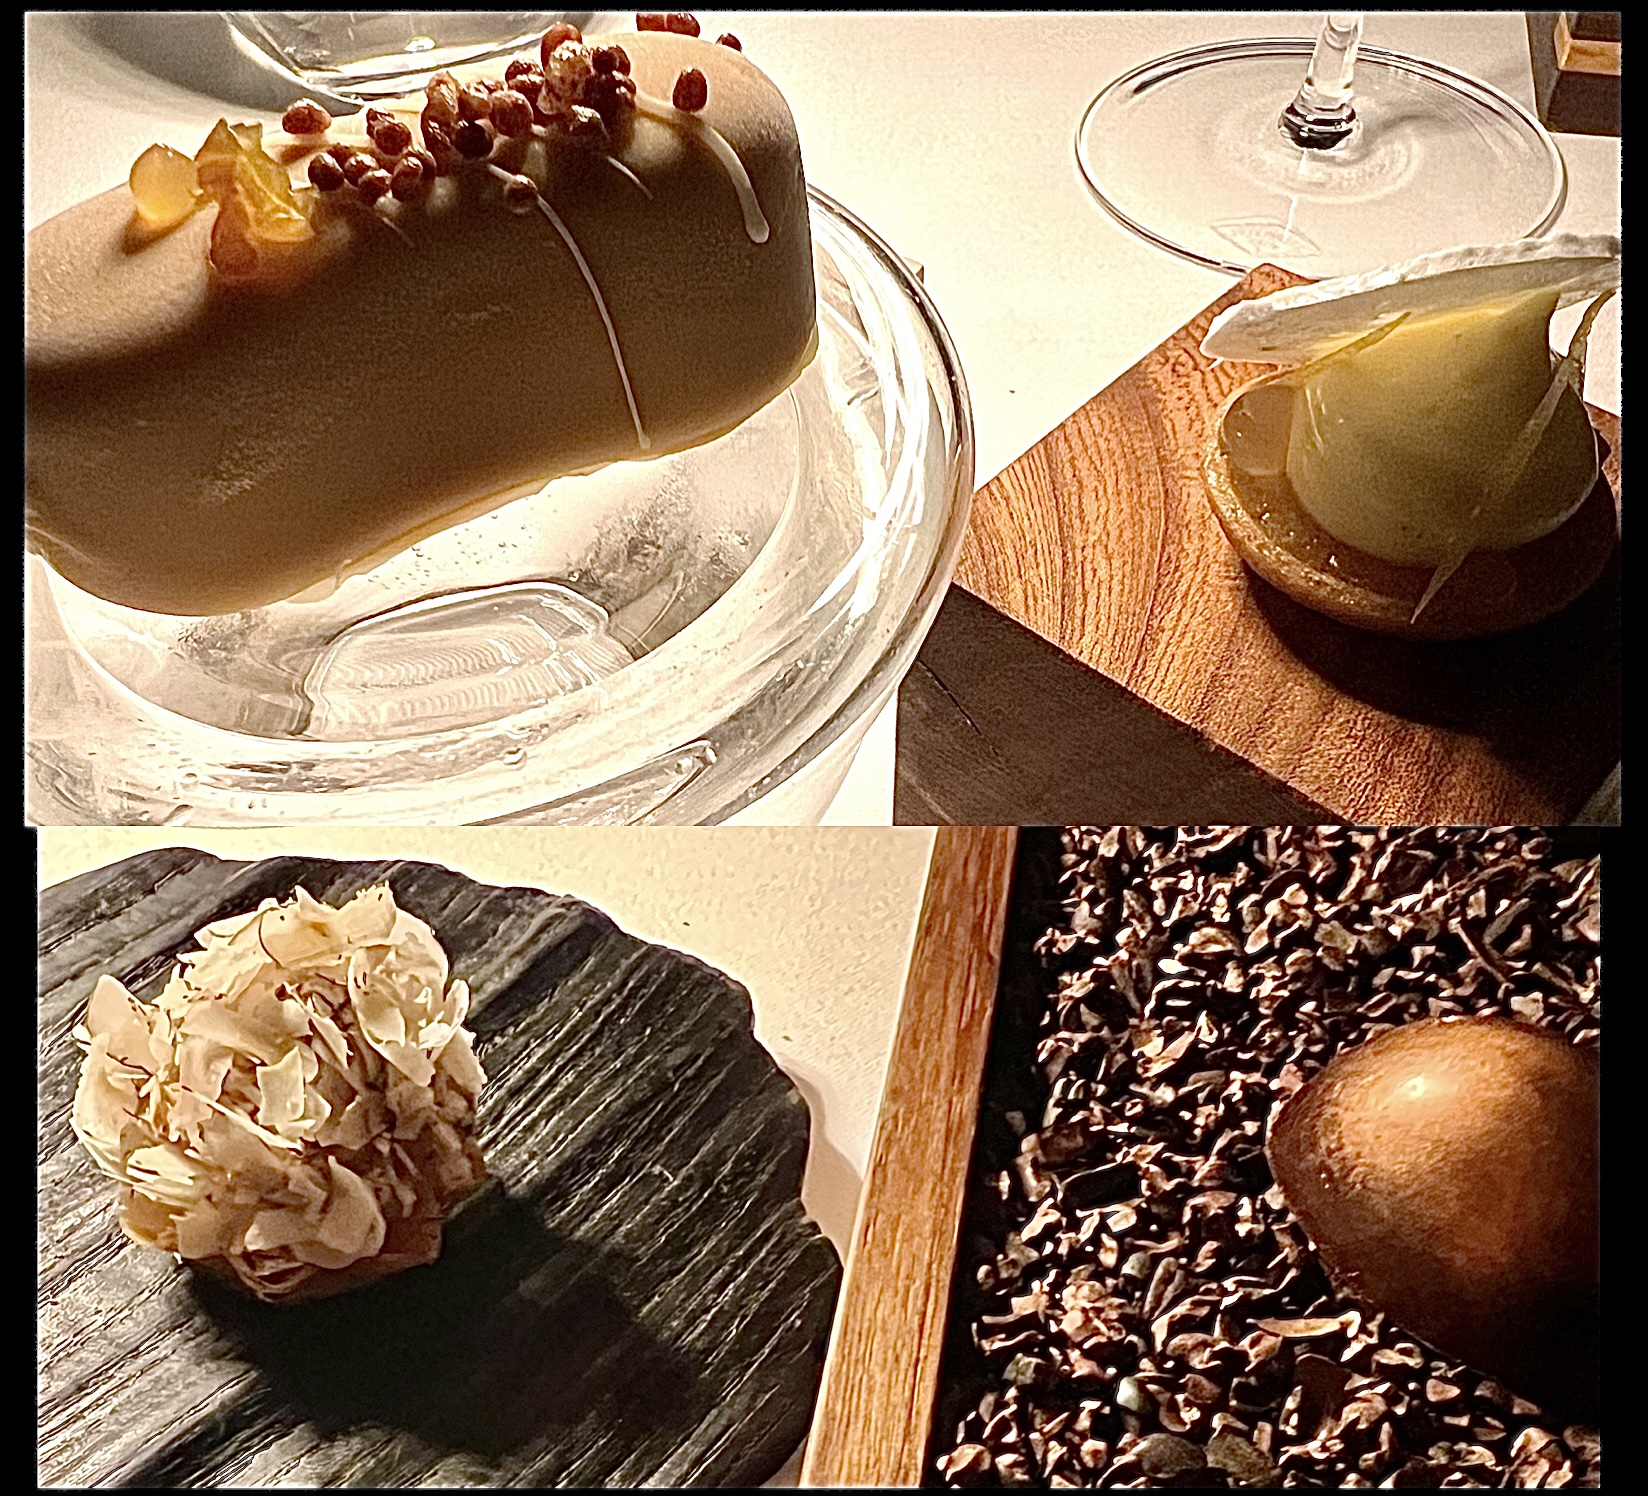
This incredibly delicate potato shell, surrounding sour cream and topped with a generous amount of caviar, was a great way to start any meal, anywhere, anytime!And so it began…
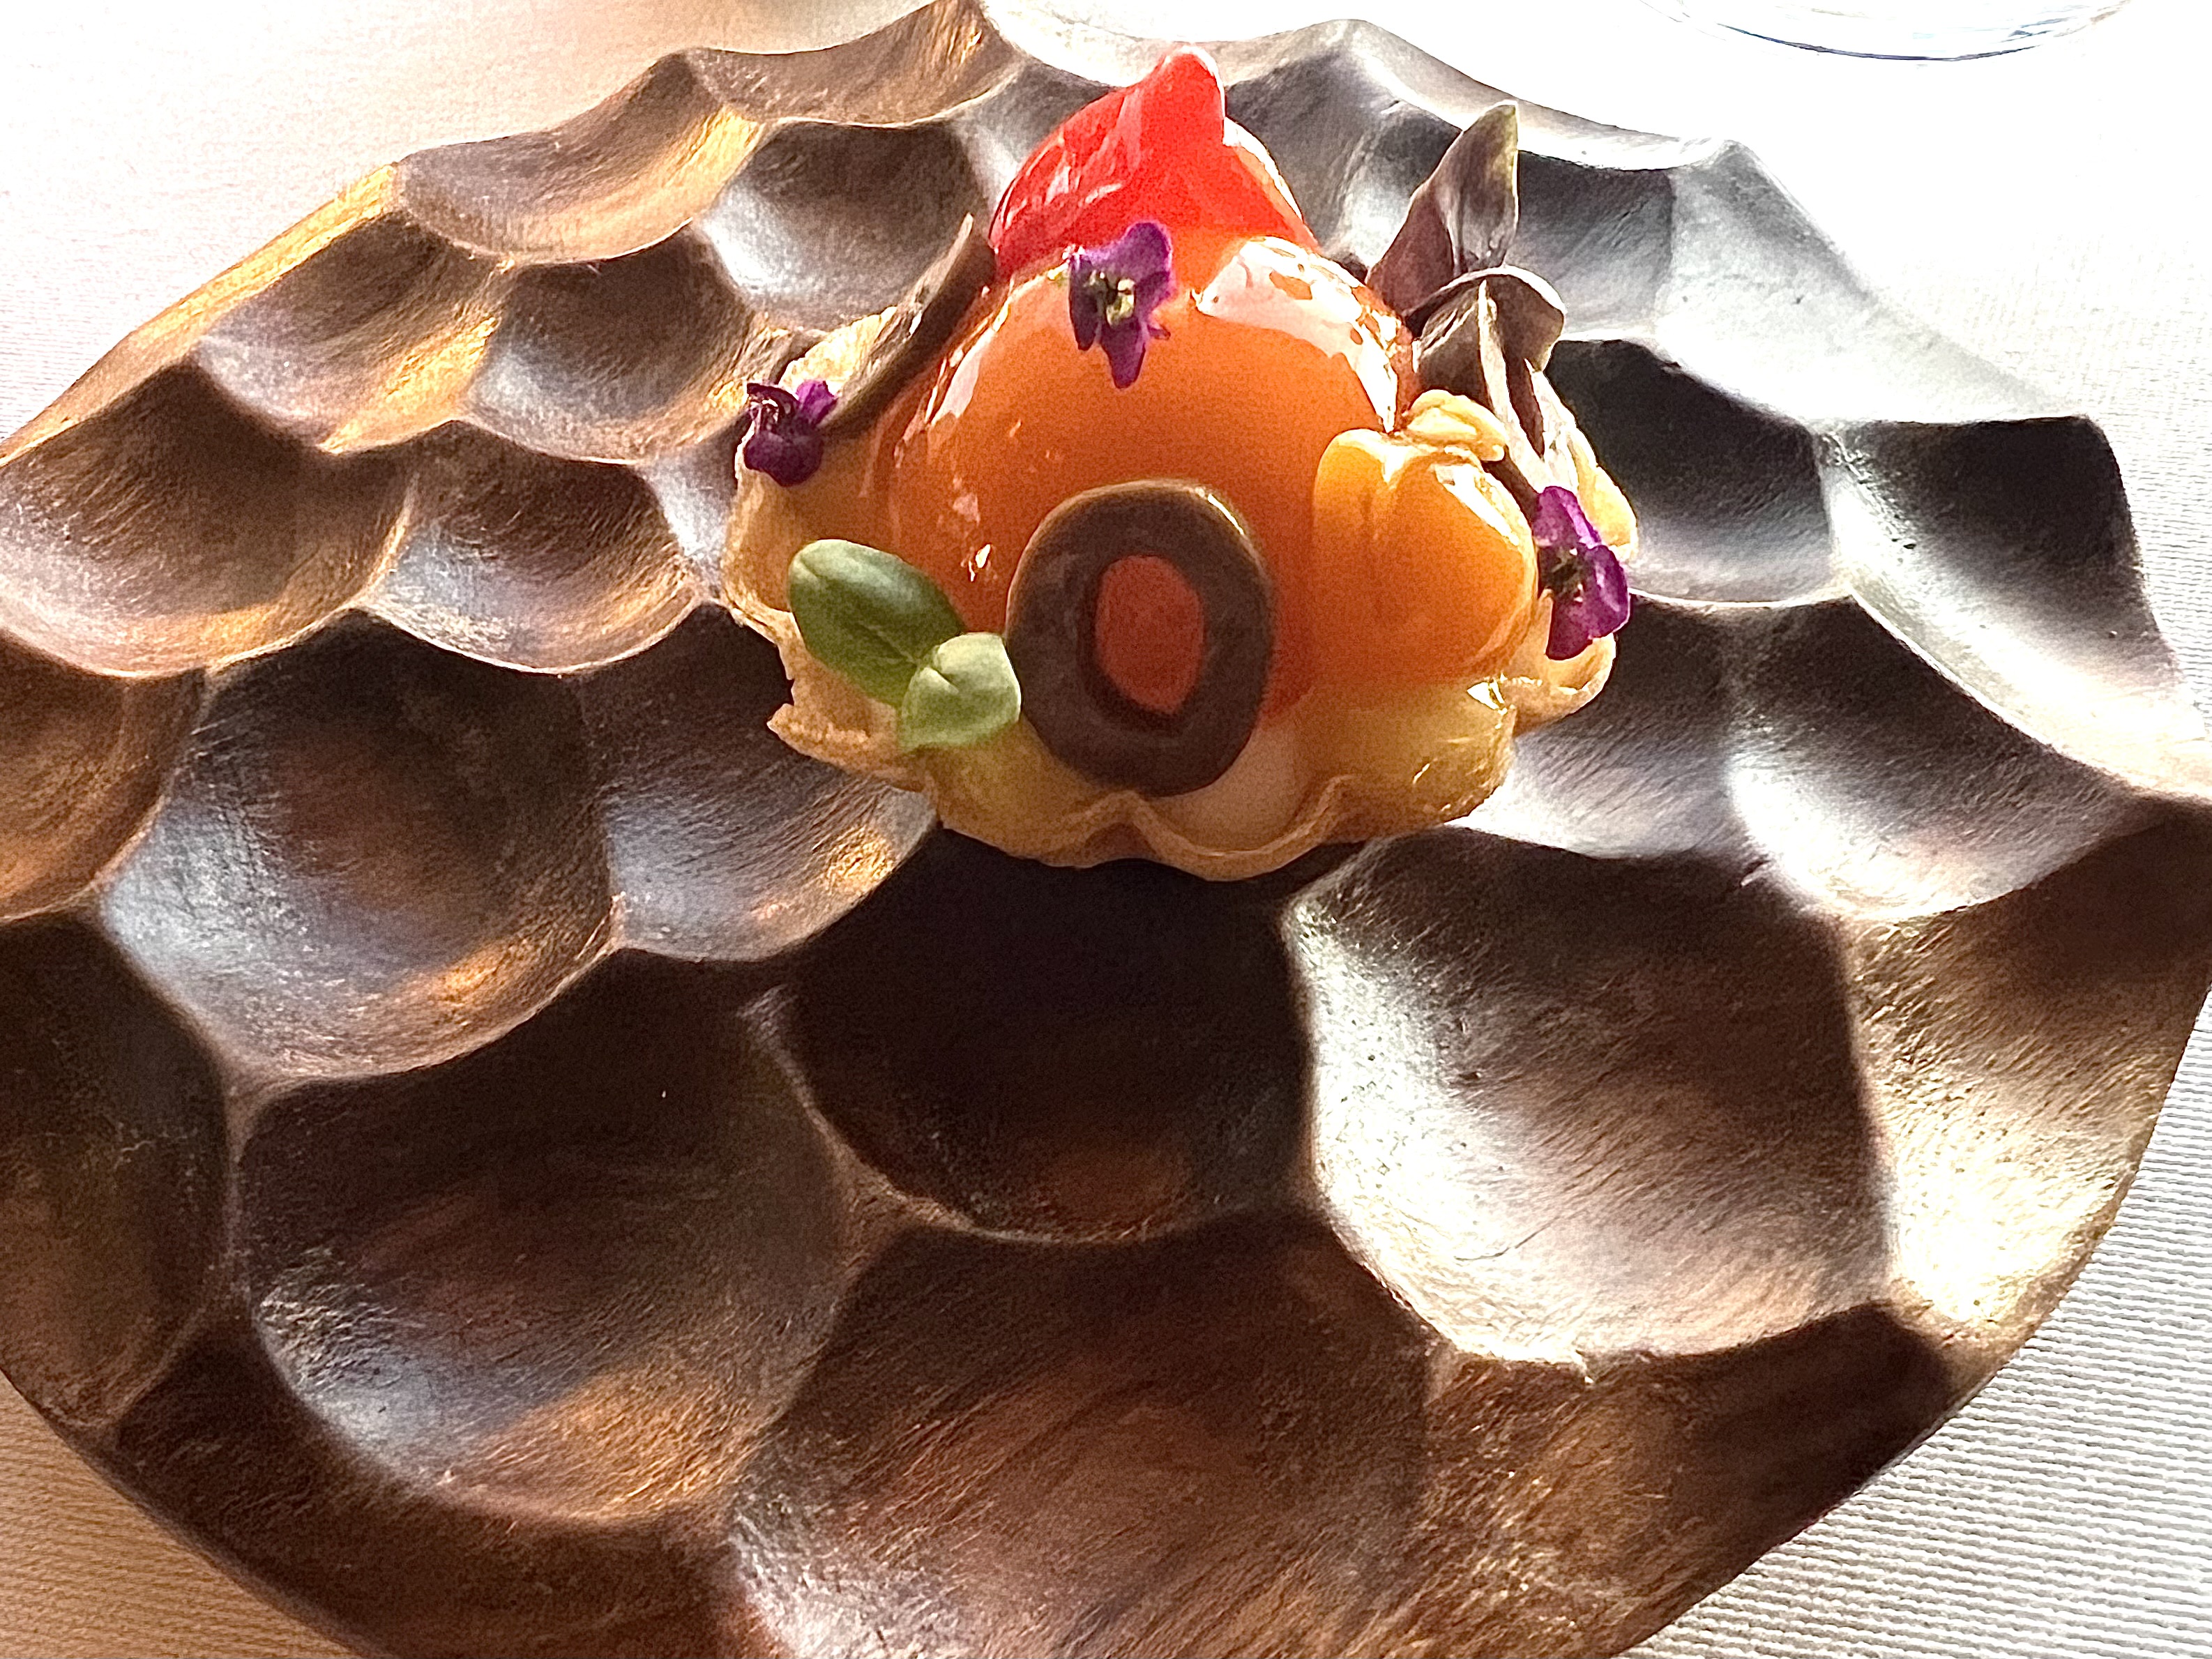
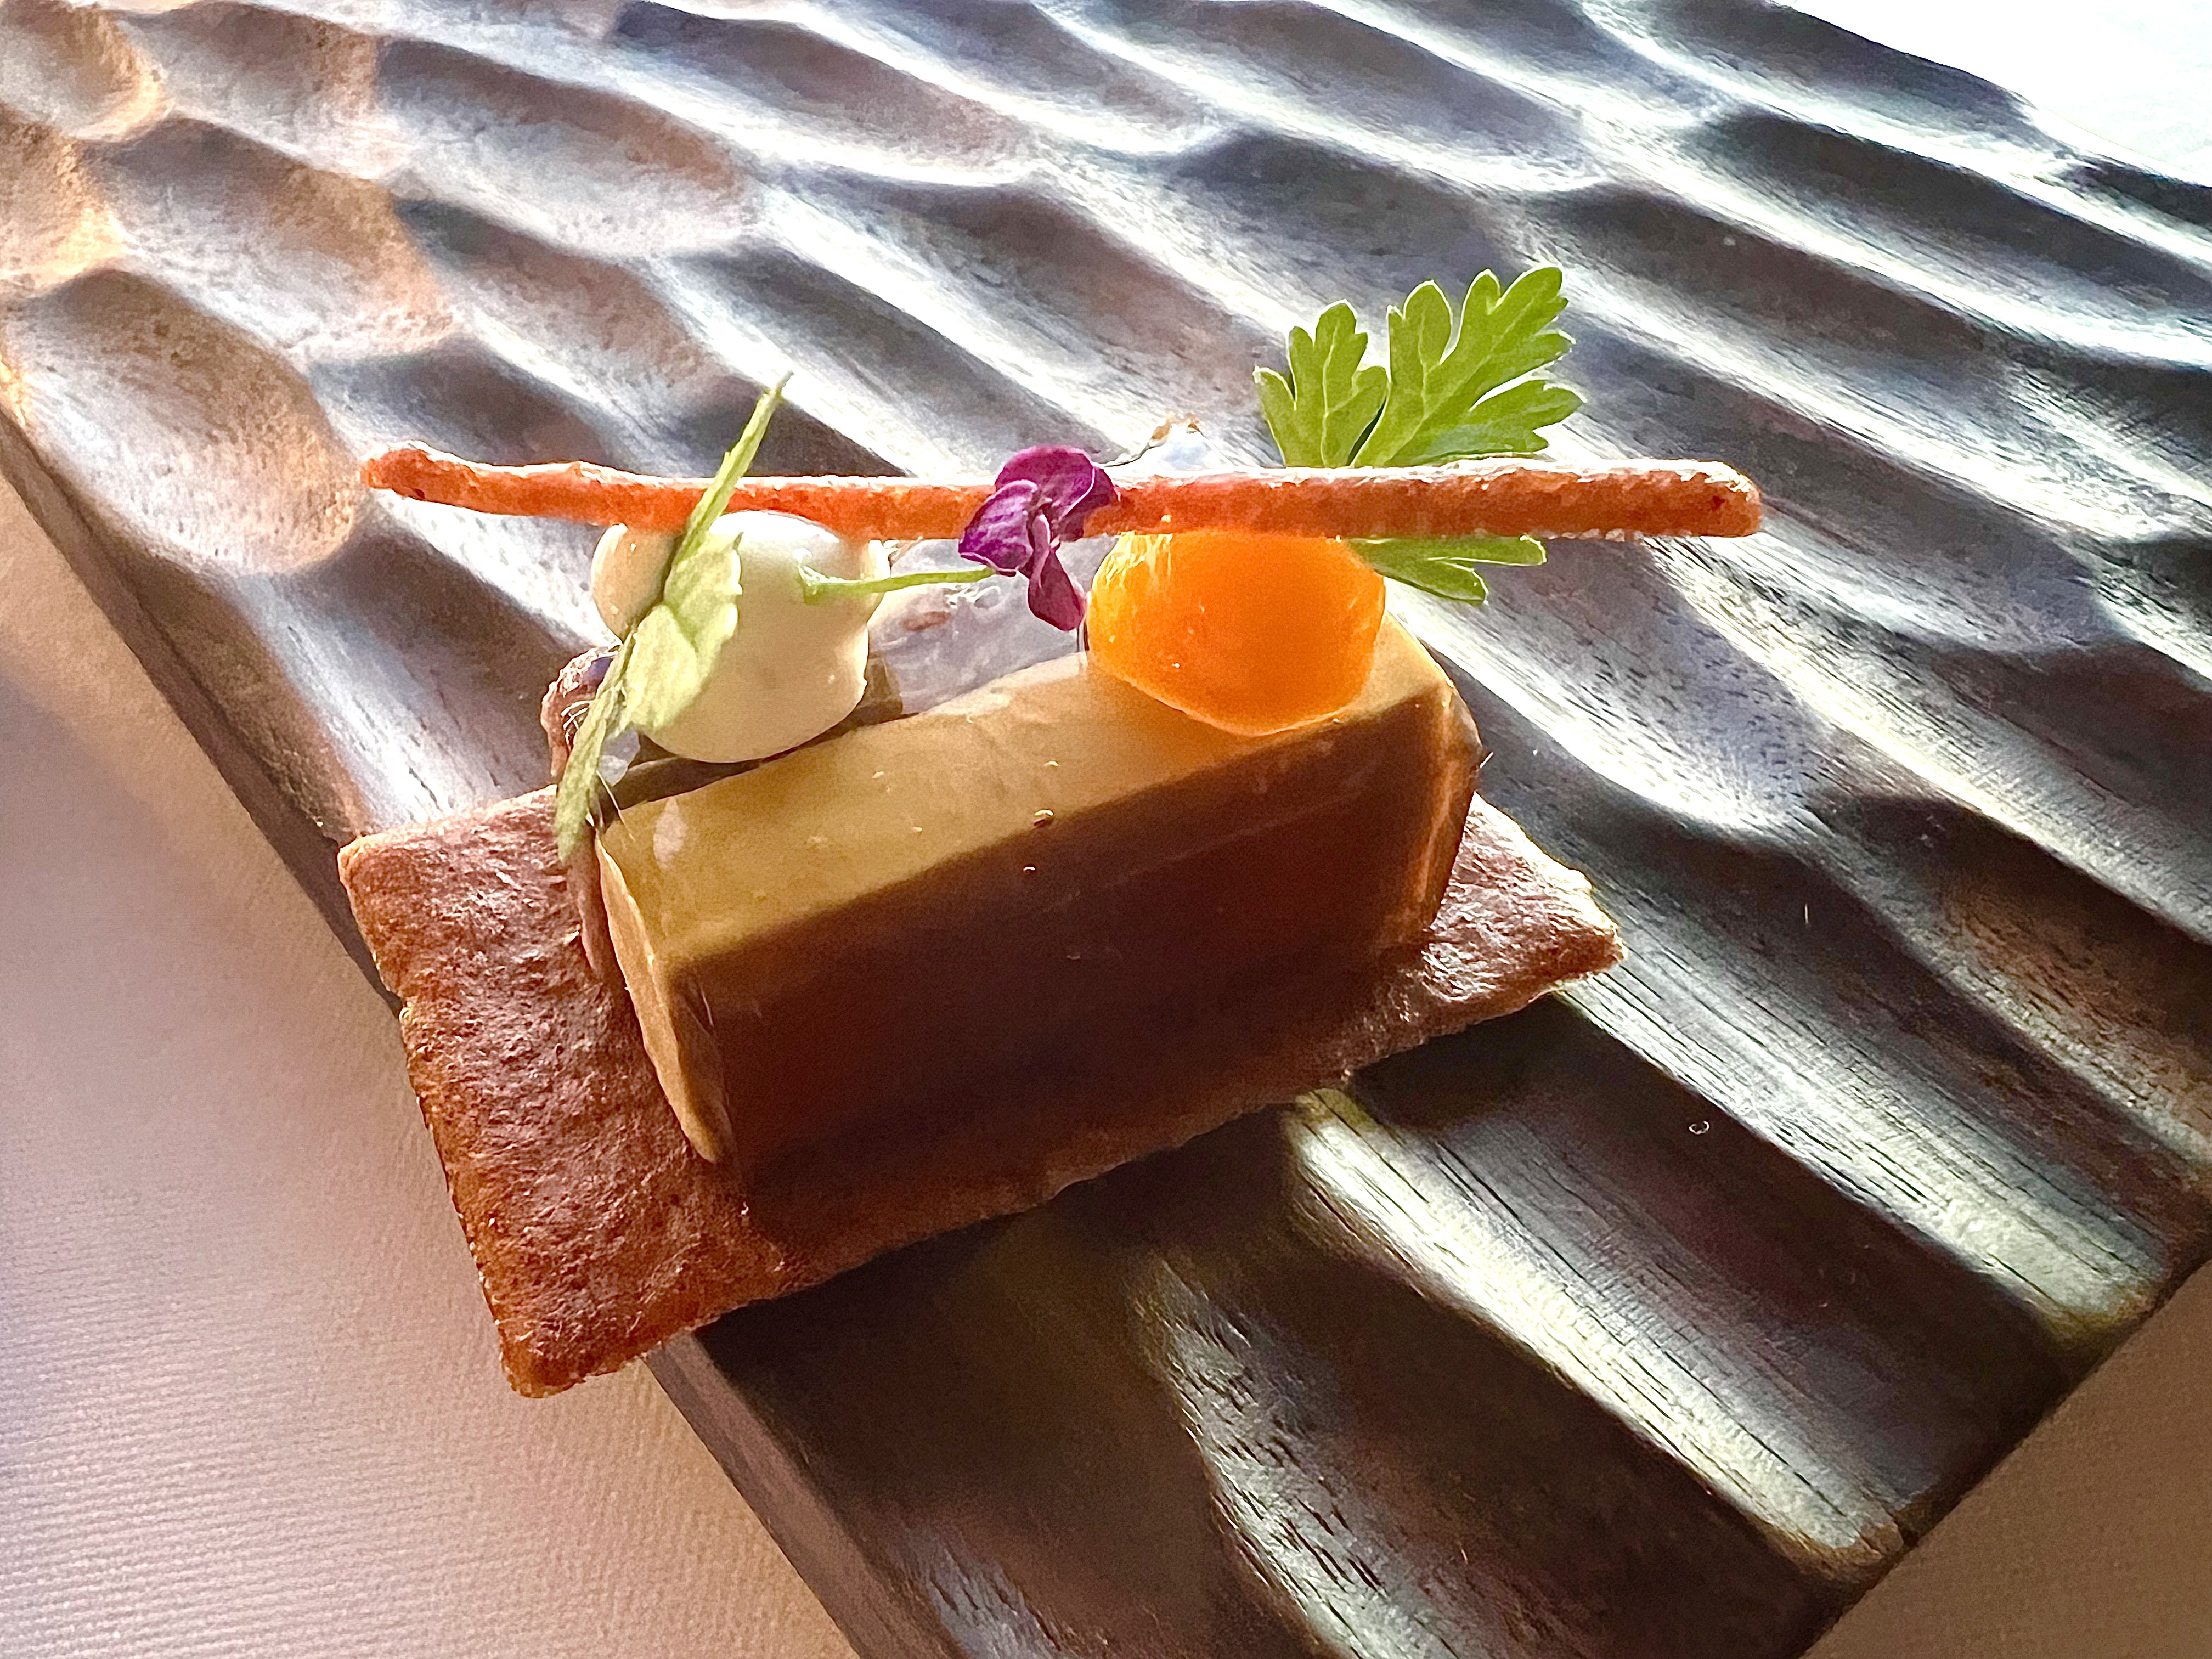
I’m going to let you follow along with the menu I posted above to see if you can match the dishes with the list!
All small plates, intensely flavored, all beautifully plated and skillfully prepared.
…And more than one dessert!
End of the meal…now dark outside…
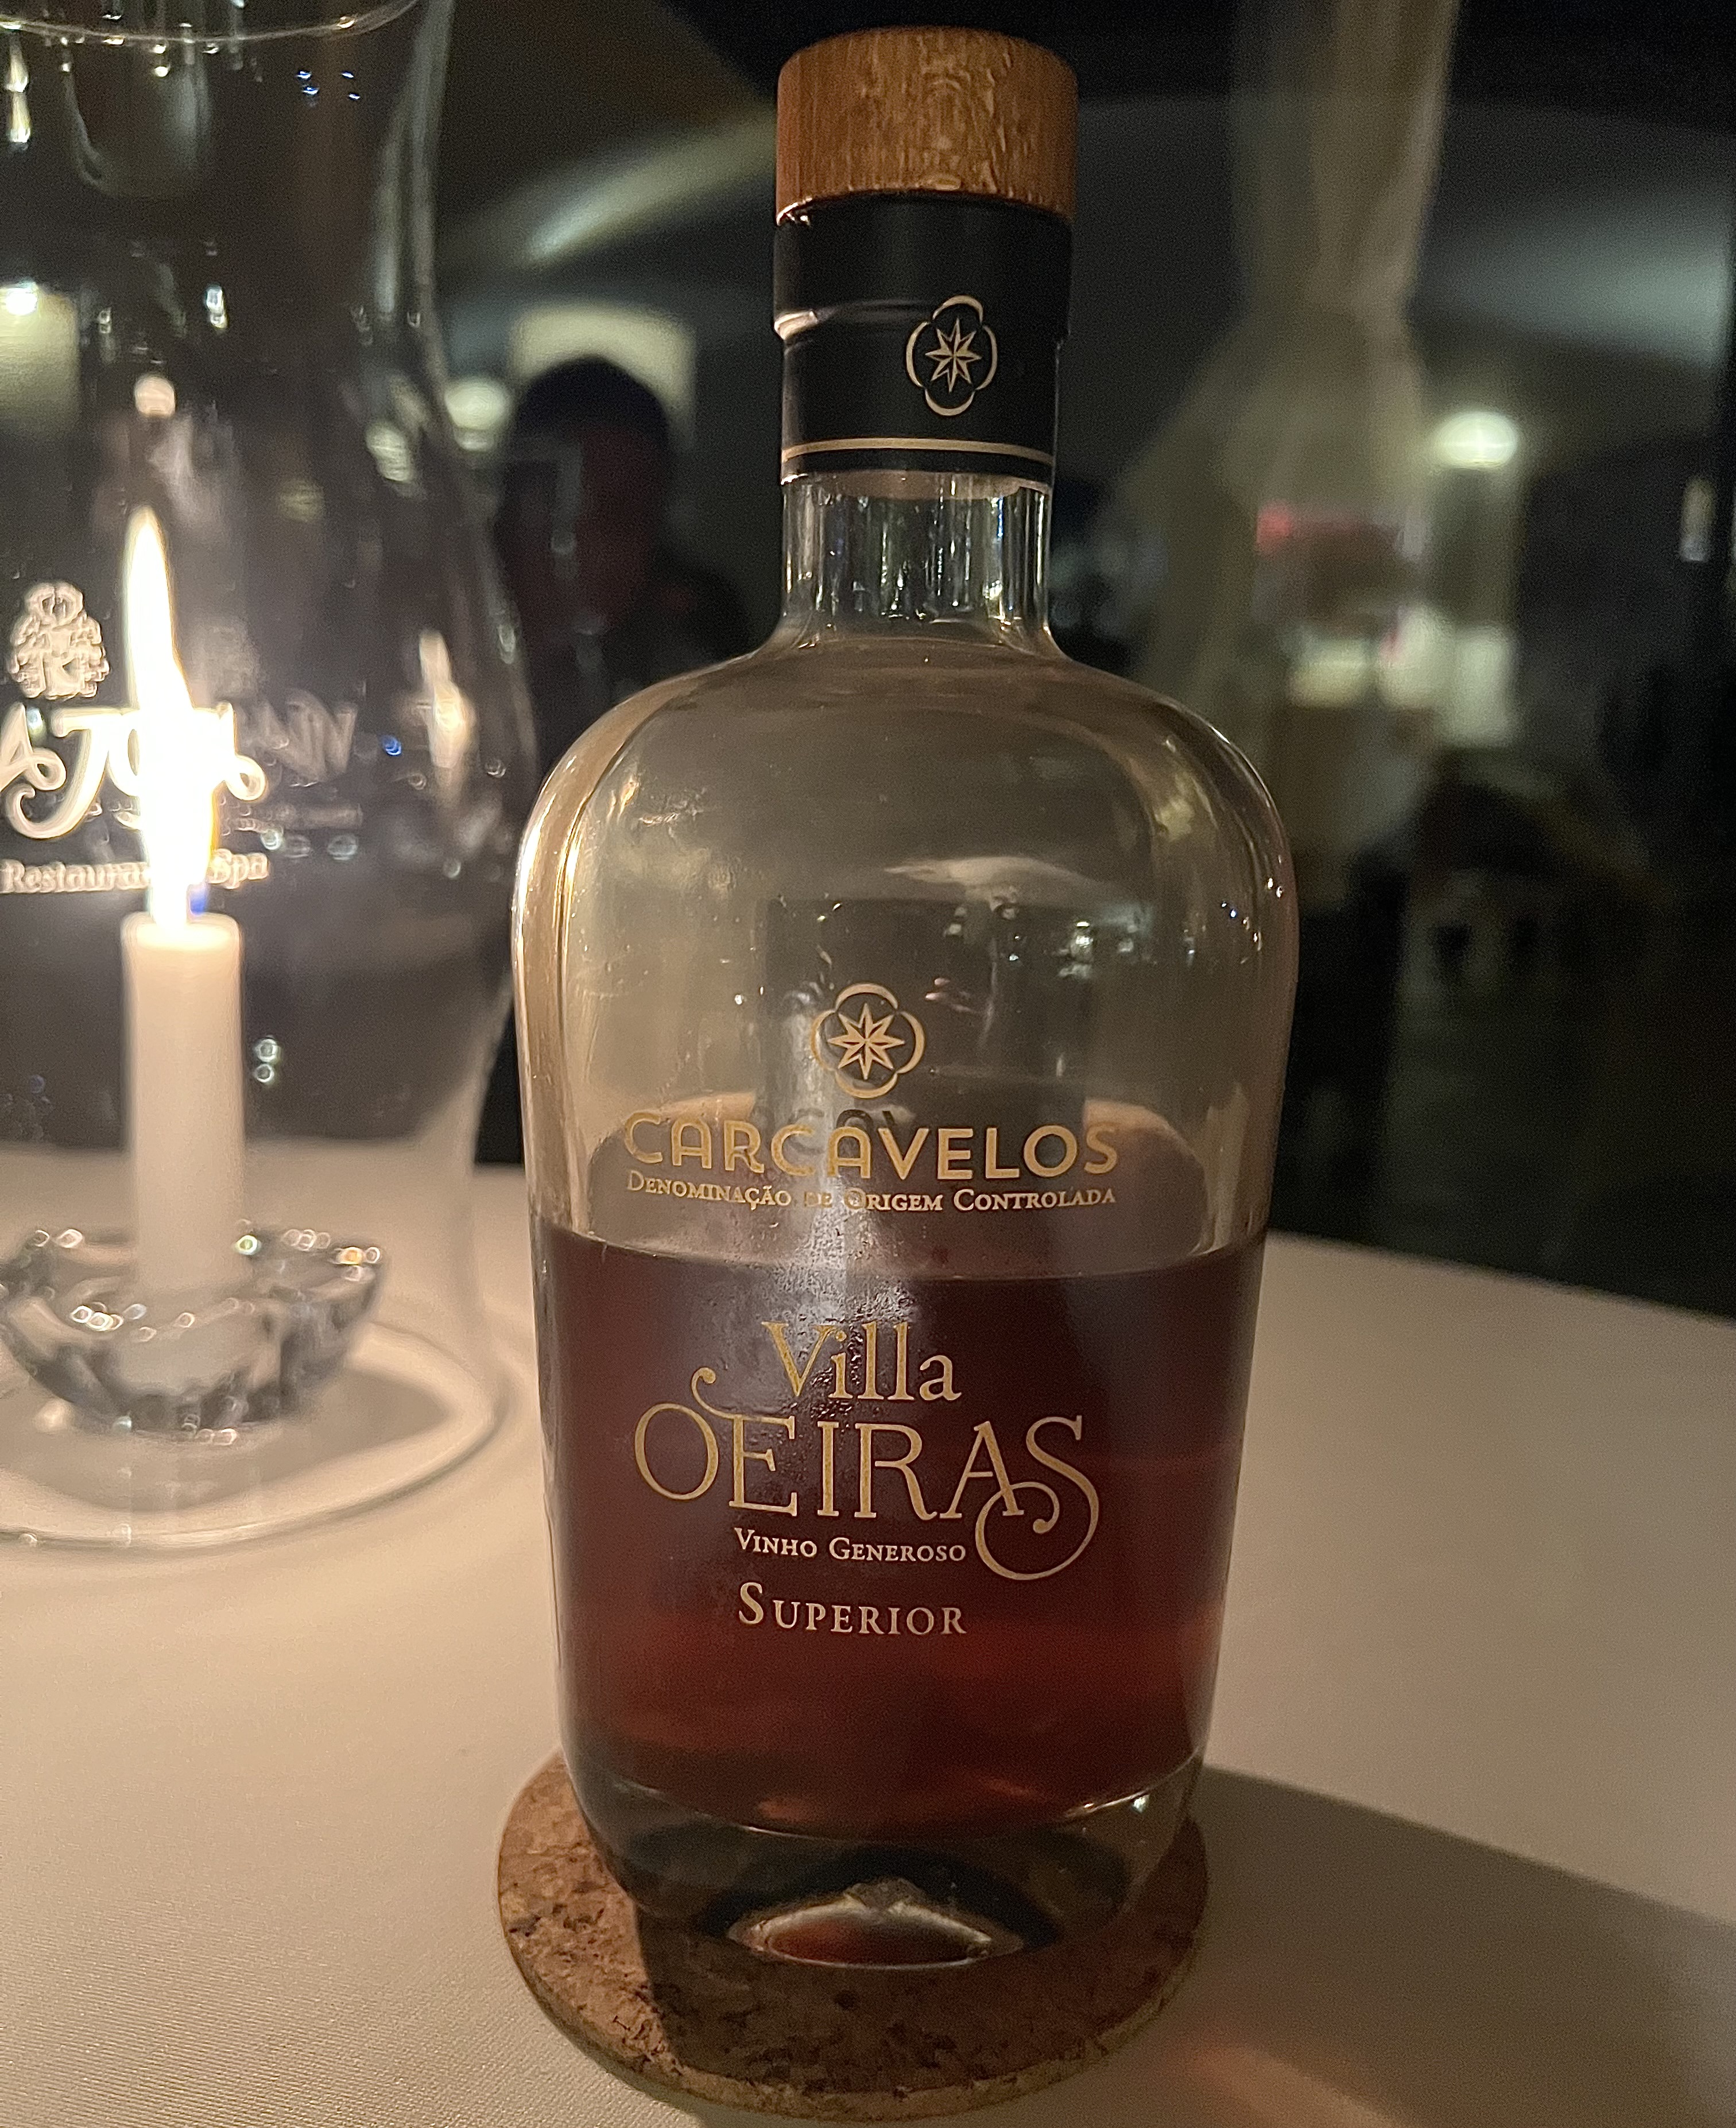
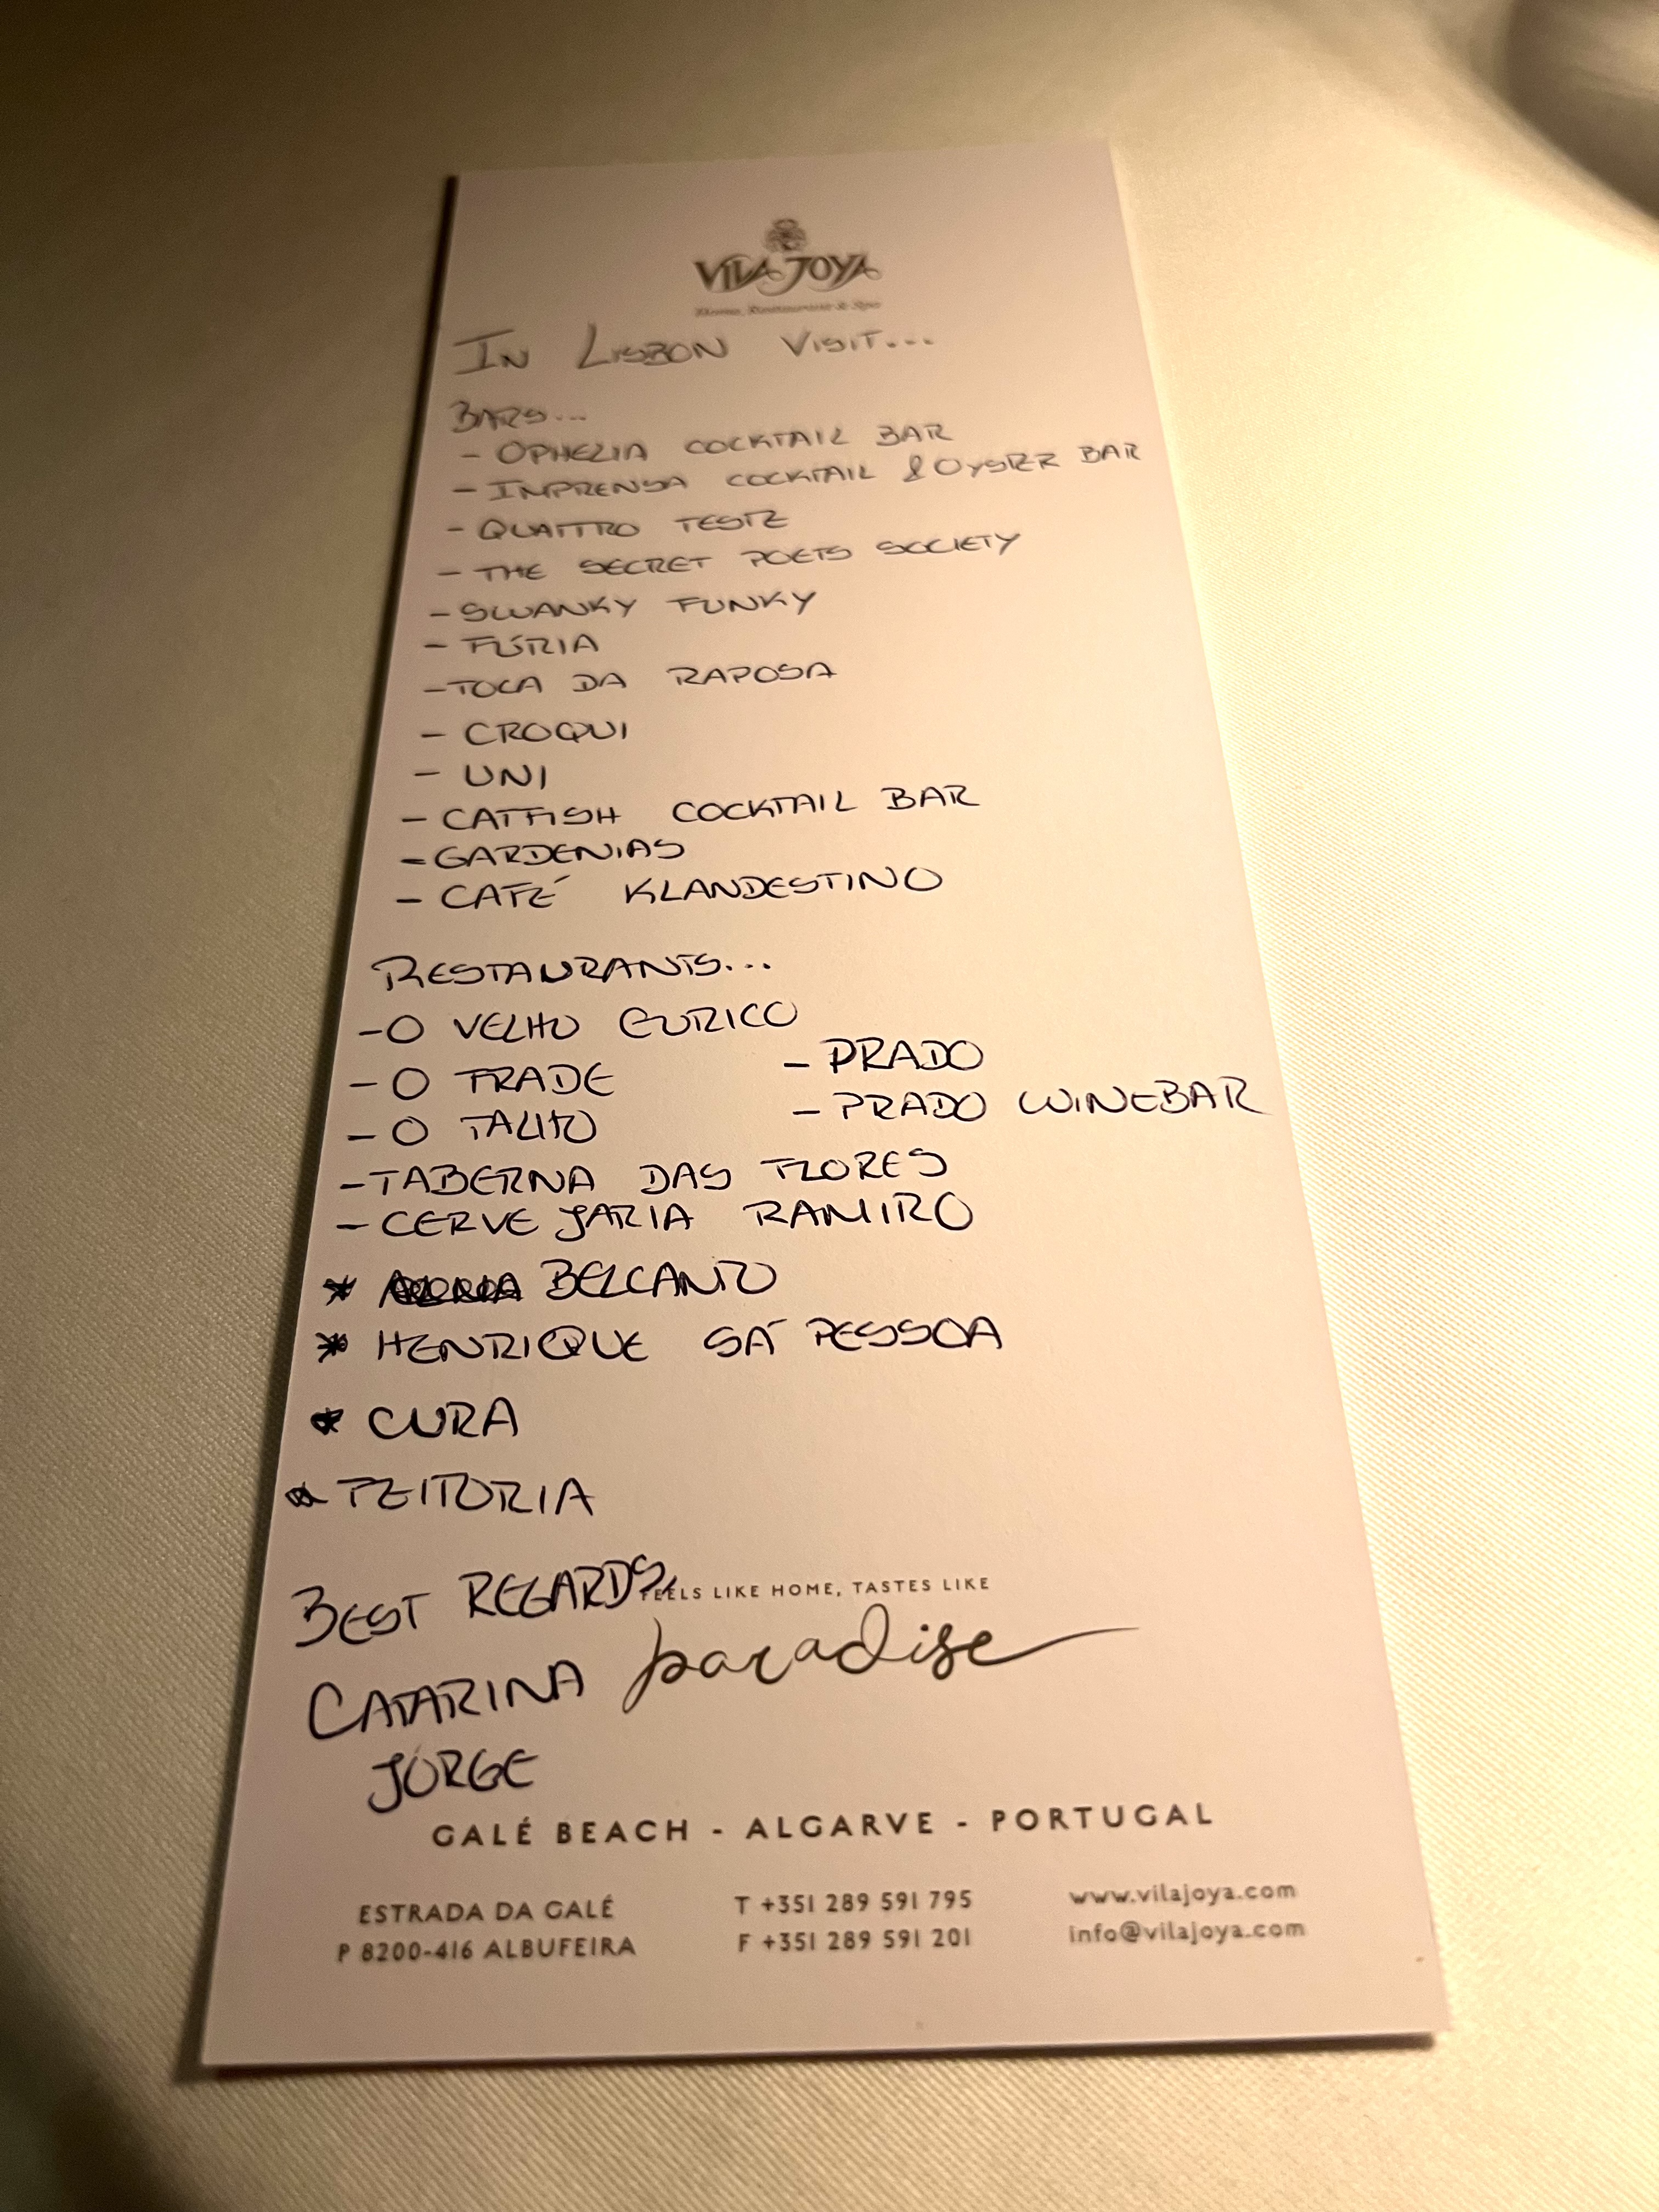
Before I departed, my lovely sommelier, Catarina, wrote down a list of great cocktail lounges and restaurants I had to visit in Lisbon, my next stop.
A look back at my 1000+ mile trip through Portugal continues…
The southernmost region of Portugal is called Algarve, and that was my ultimate destination after leaving the seaside village of Nazaré, driving through Albcobaça and Évora. It was about a 4-hour drive, not including stops (and missing exits!) I drove through miles and mile–wait, I was in Europe–kilometers and kilometers–with hectares and hectares–of vineyards and olive trees.
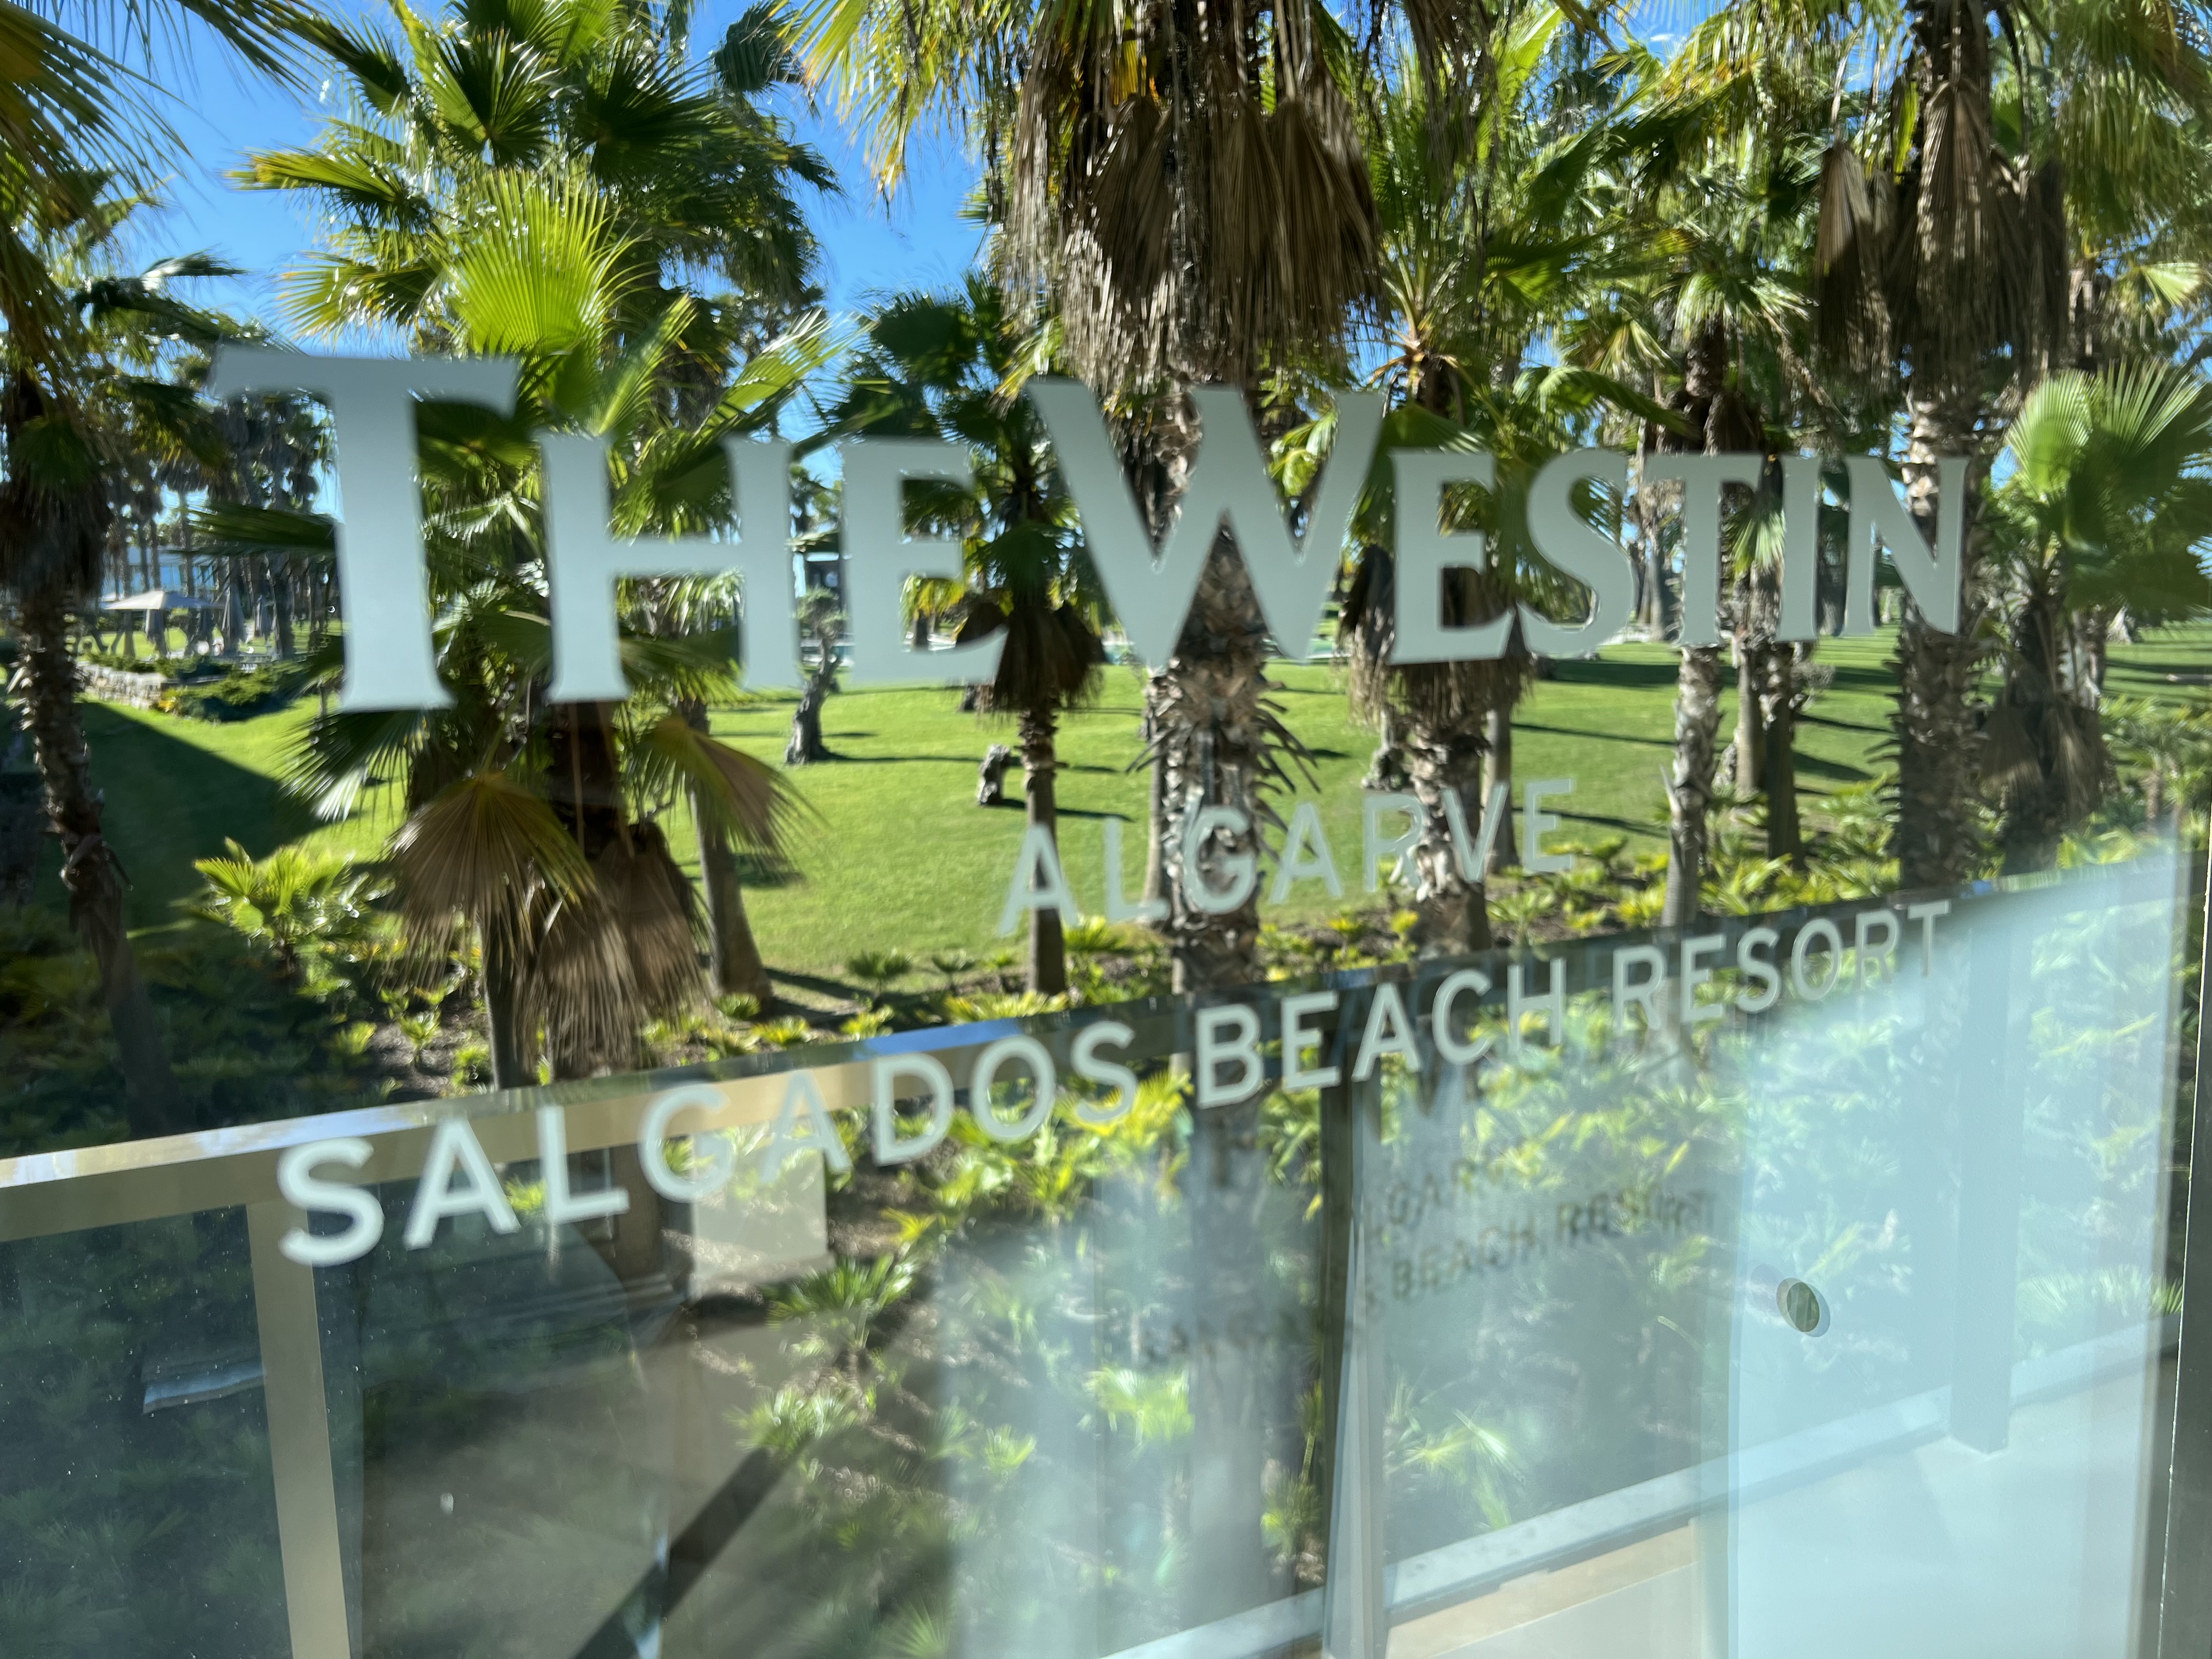
My 2-night stop was at the Westin Algarve Salgados Beach Resort, a beautiful property on the Mediterranean. And although my room was fantastic and the grounds were impeccable, there were a few maintenance issues with my room. And for food, only the lobby bar area was open my first night. Sadly, although we were far from the busy season, it was clear the staff was completely unprepared, perhaps even untrained.
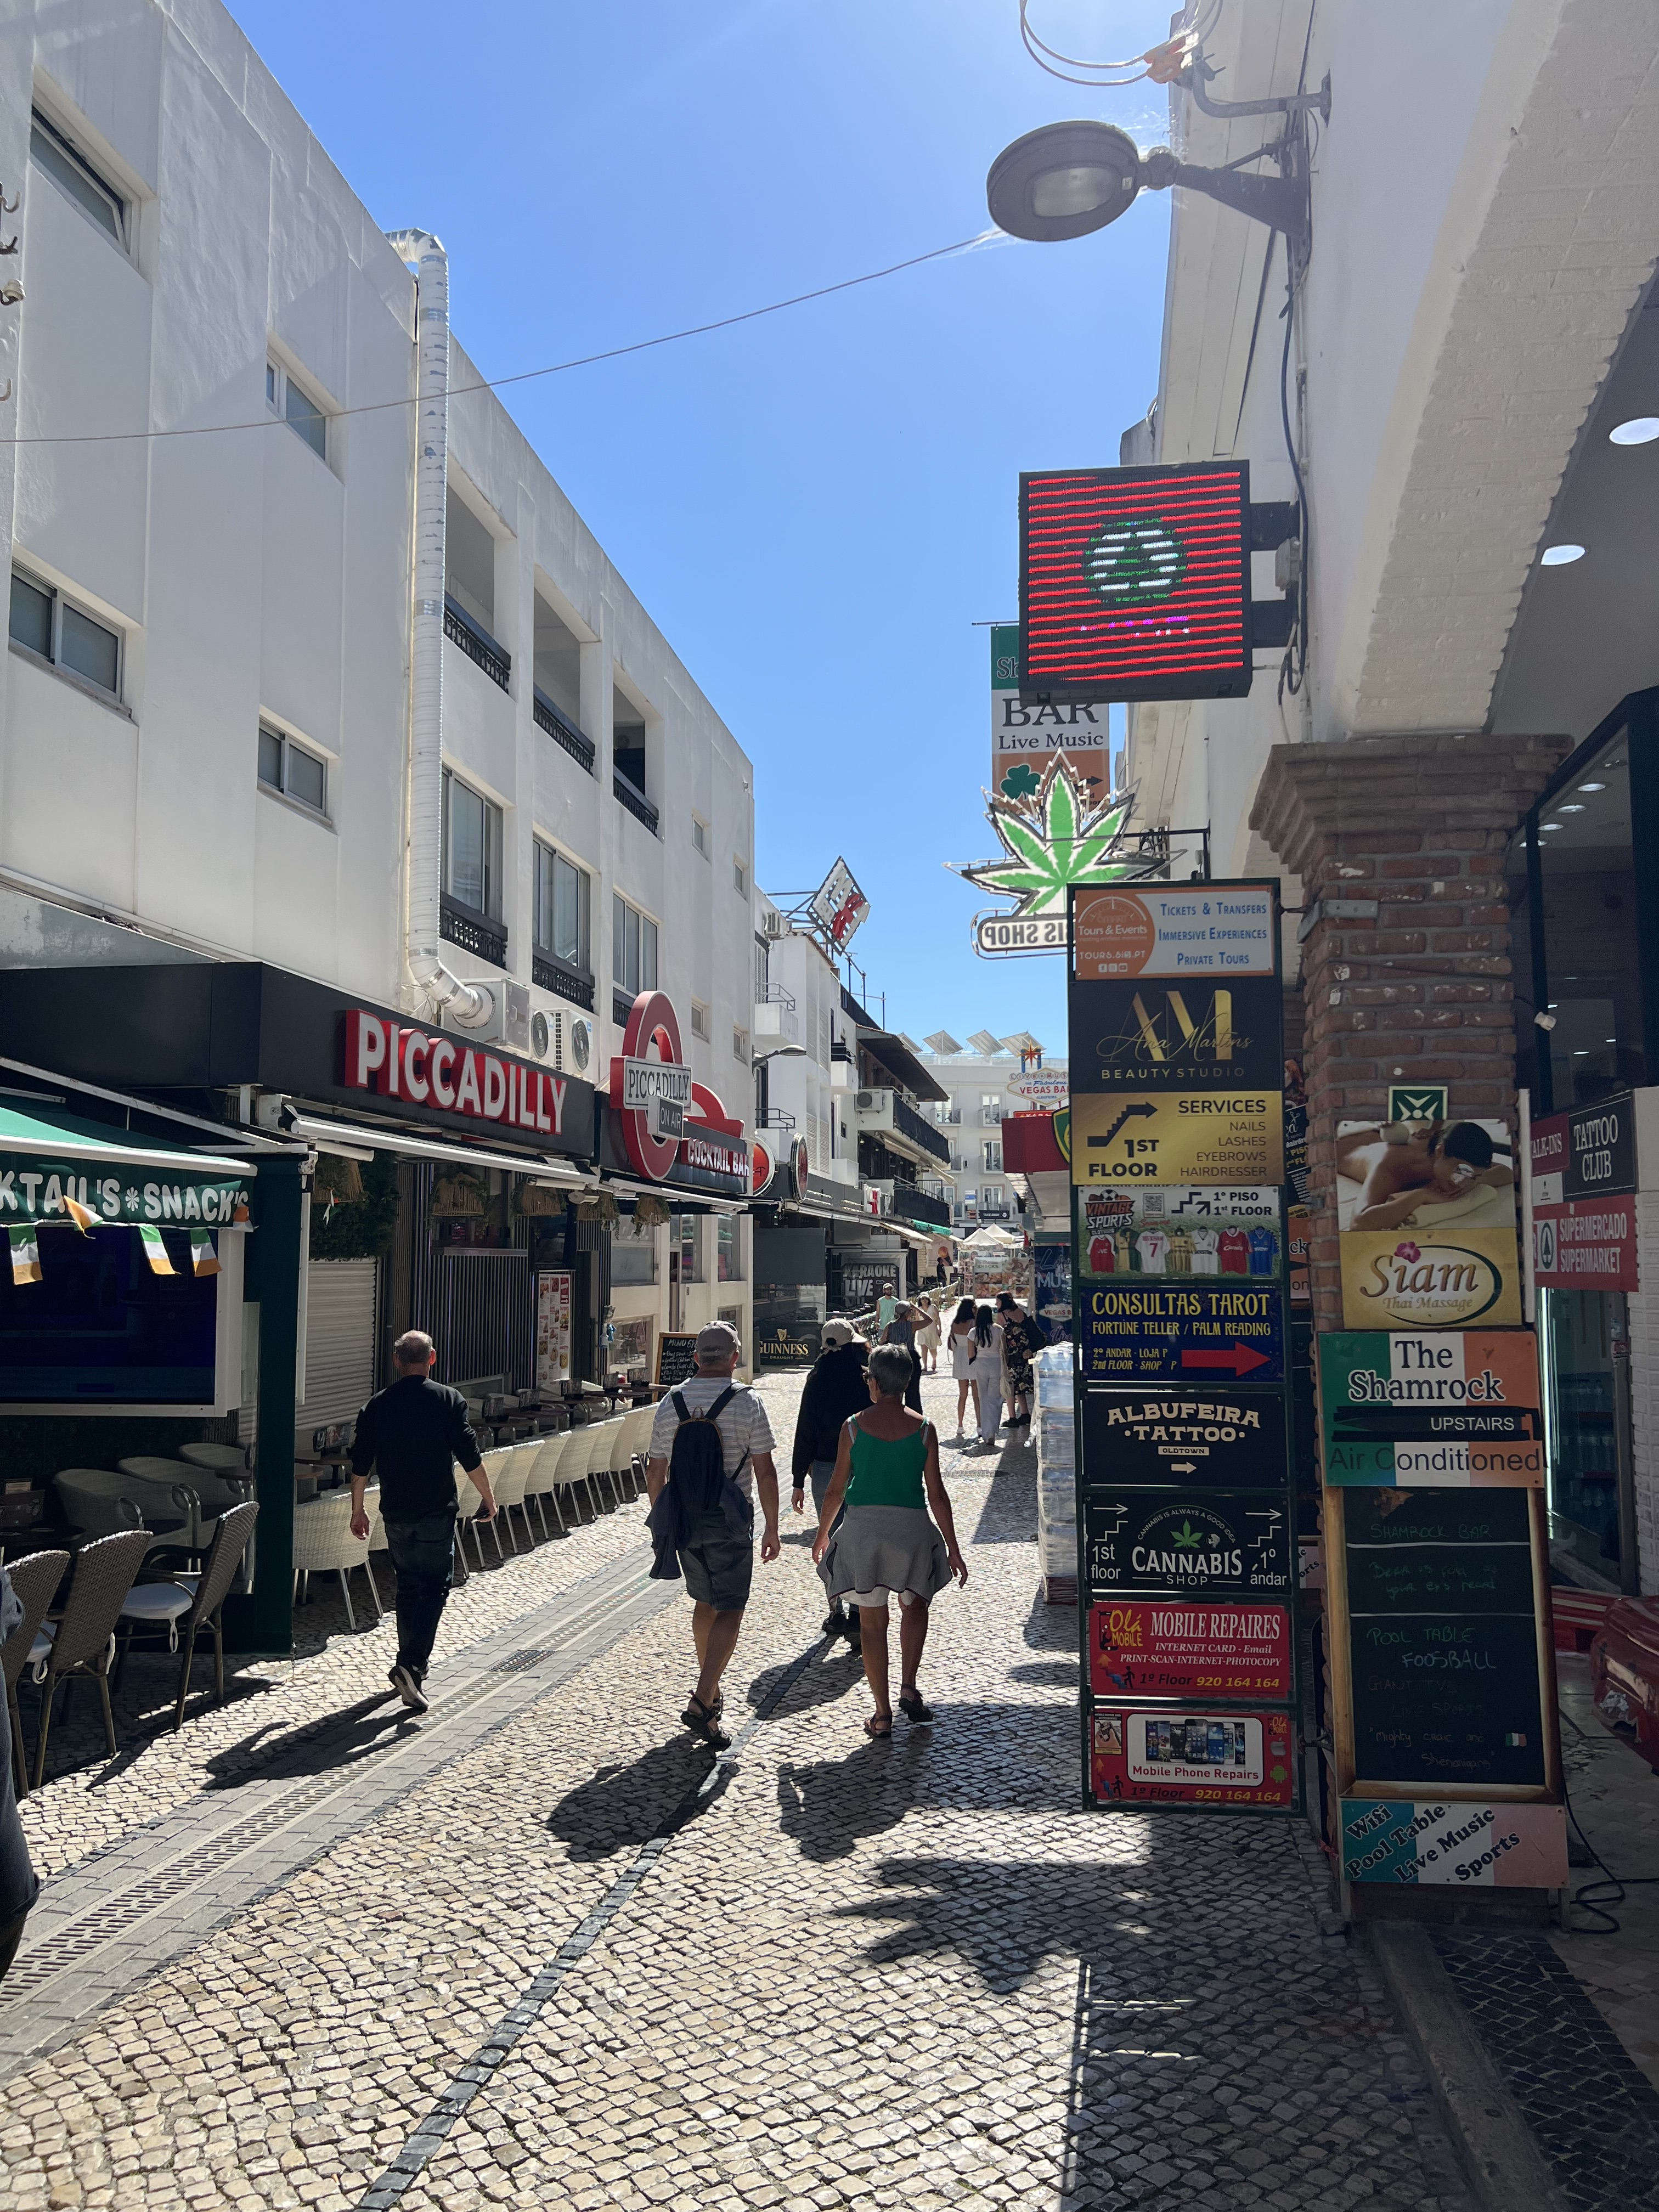
Albufeira
The old town of Albufeira was a quick Uber ride away, and I spent an afternoon walking up and down the narrow streets that were packed with souvenir shops, bars and restaurants. It reminded me of Bourbon Street in New Orleans, just a tourist trap, but with a lot less charm and no good music (except for one local street performer.)
I almost booked a hotel in Albufeira, and I’m so glad I didn’t. If it was this noisy in the off-season, I can’t even imagine what the busy season would be like, especially in the evening when the real loud partying begins.
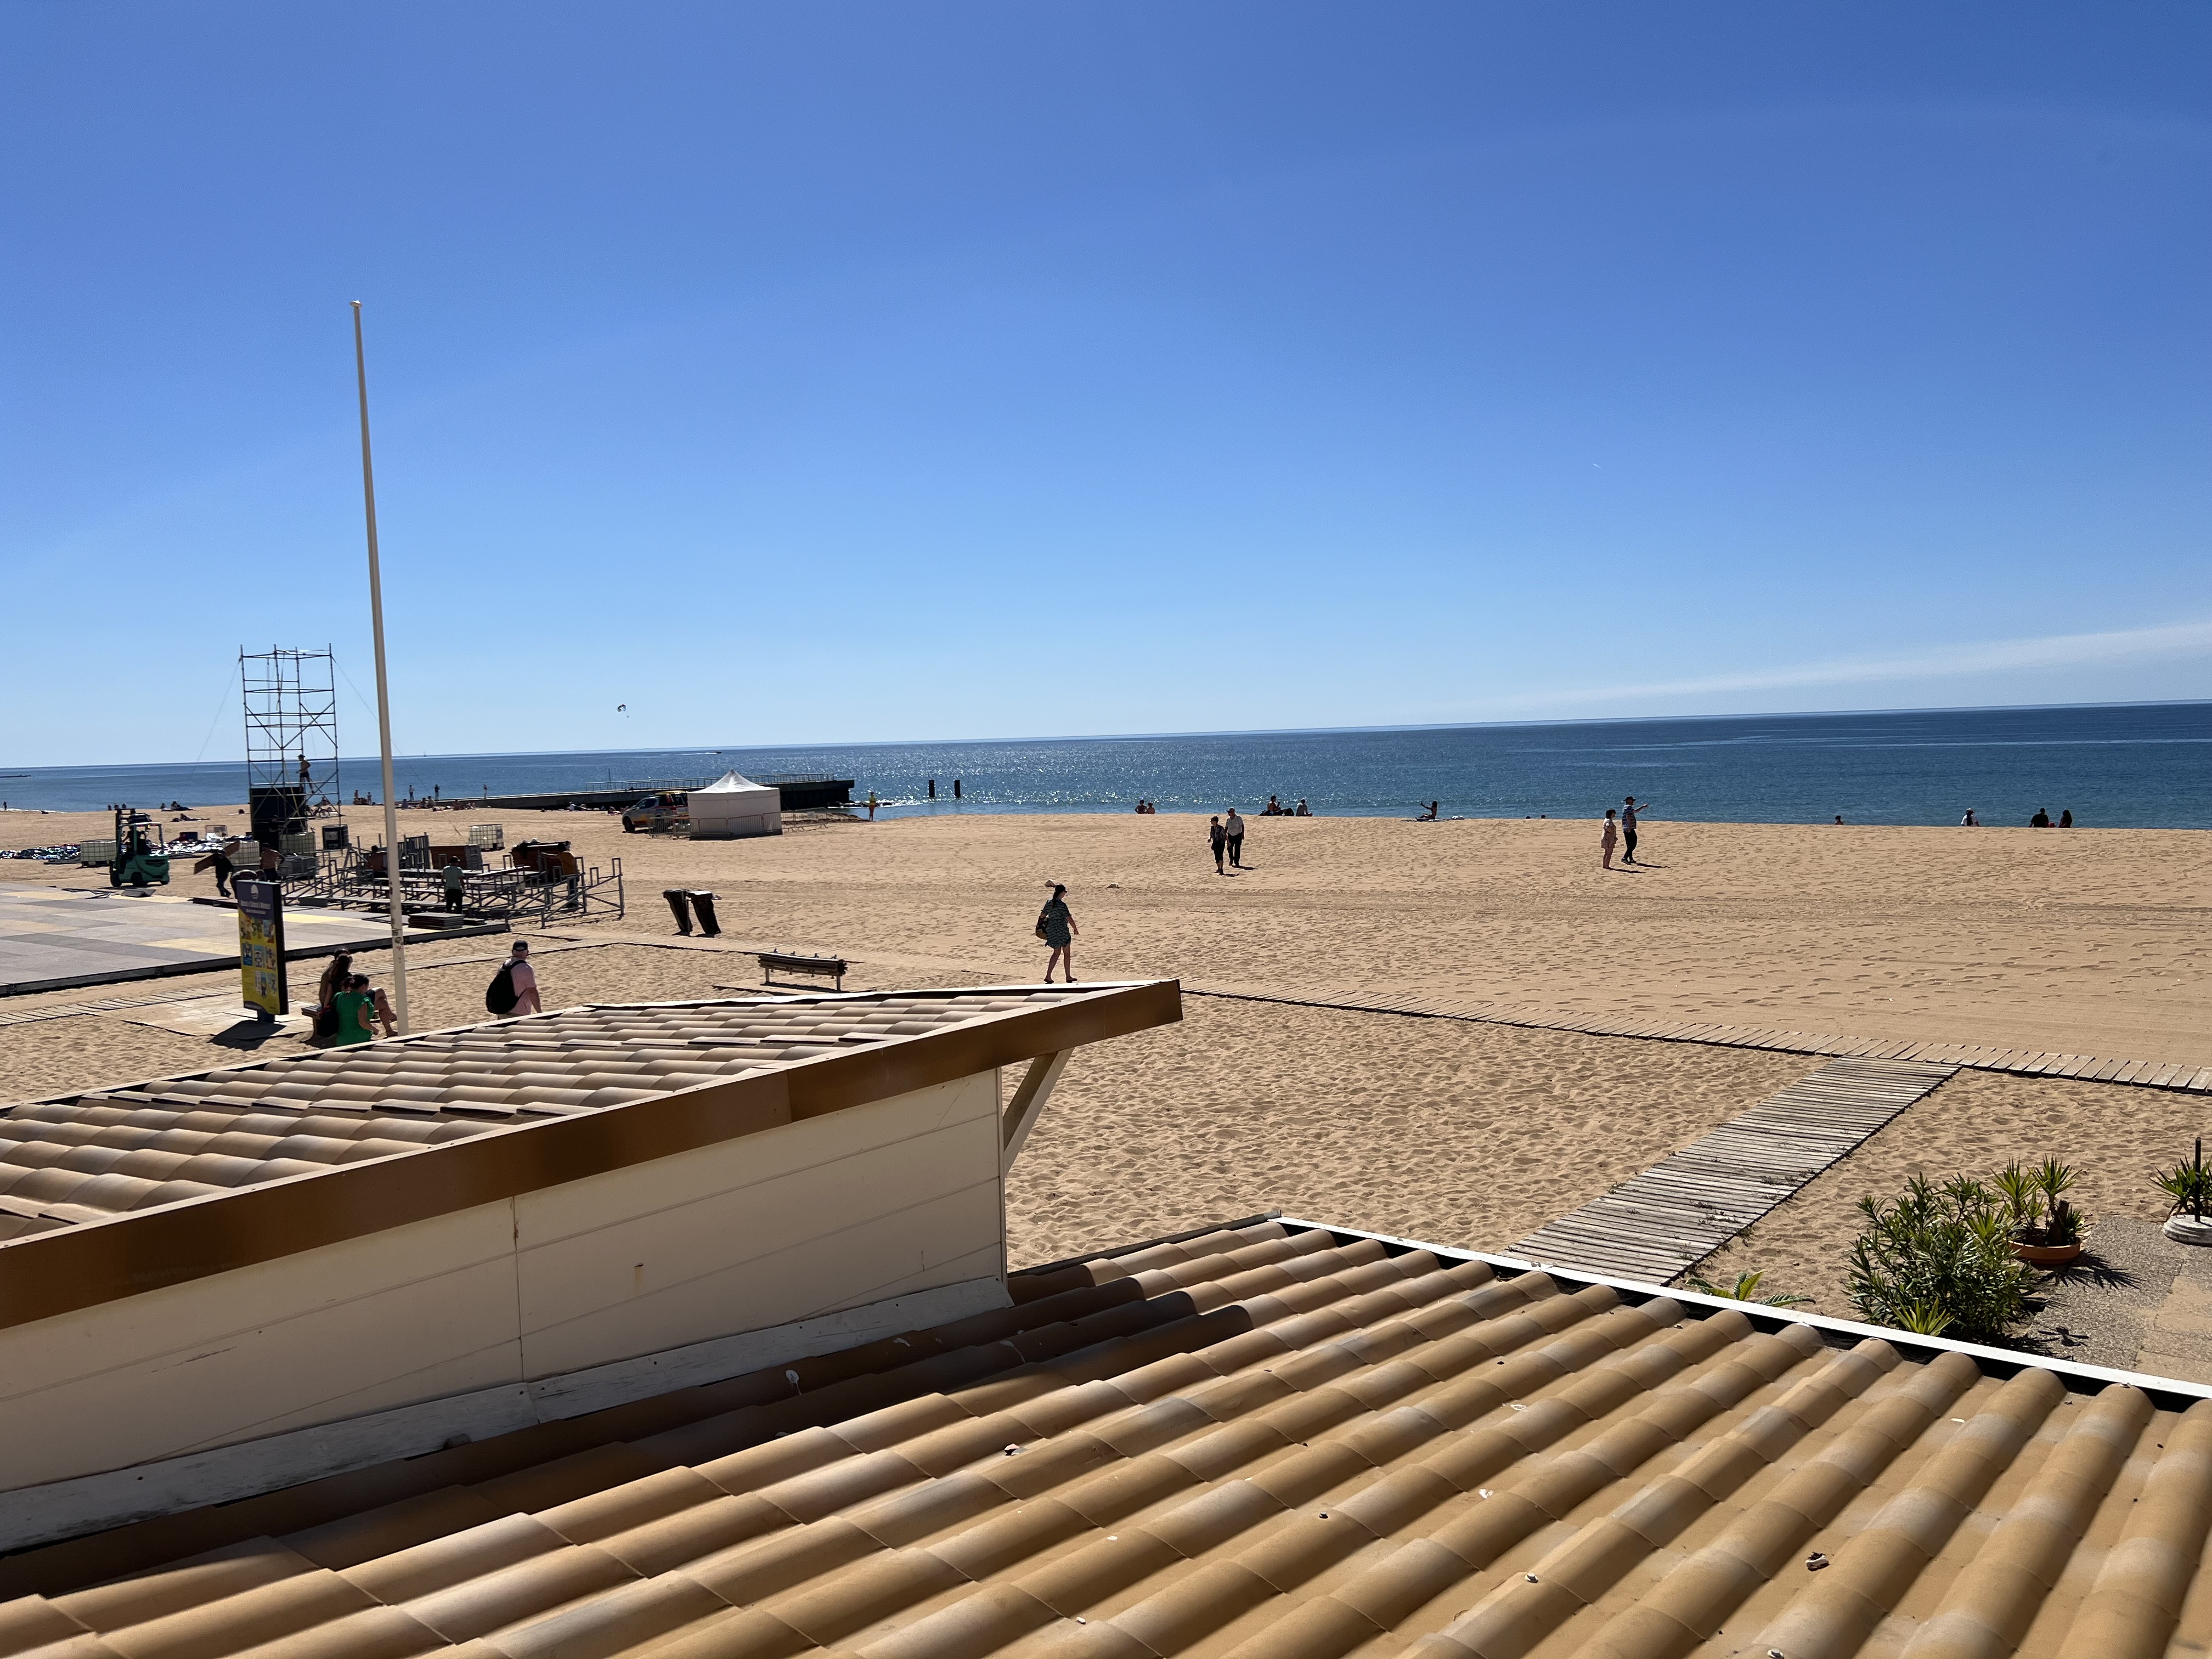
A view of the Mediterranean
I was glad to say I visited, but I was also glad to leave. Perhaps the least attractive and least inviting part of my entire trip.
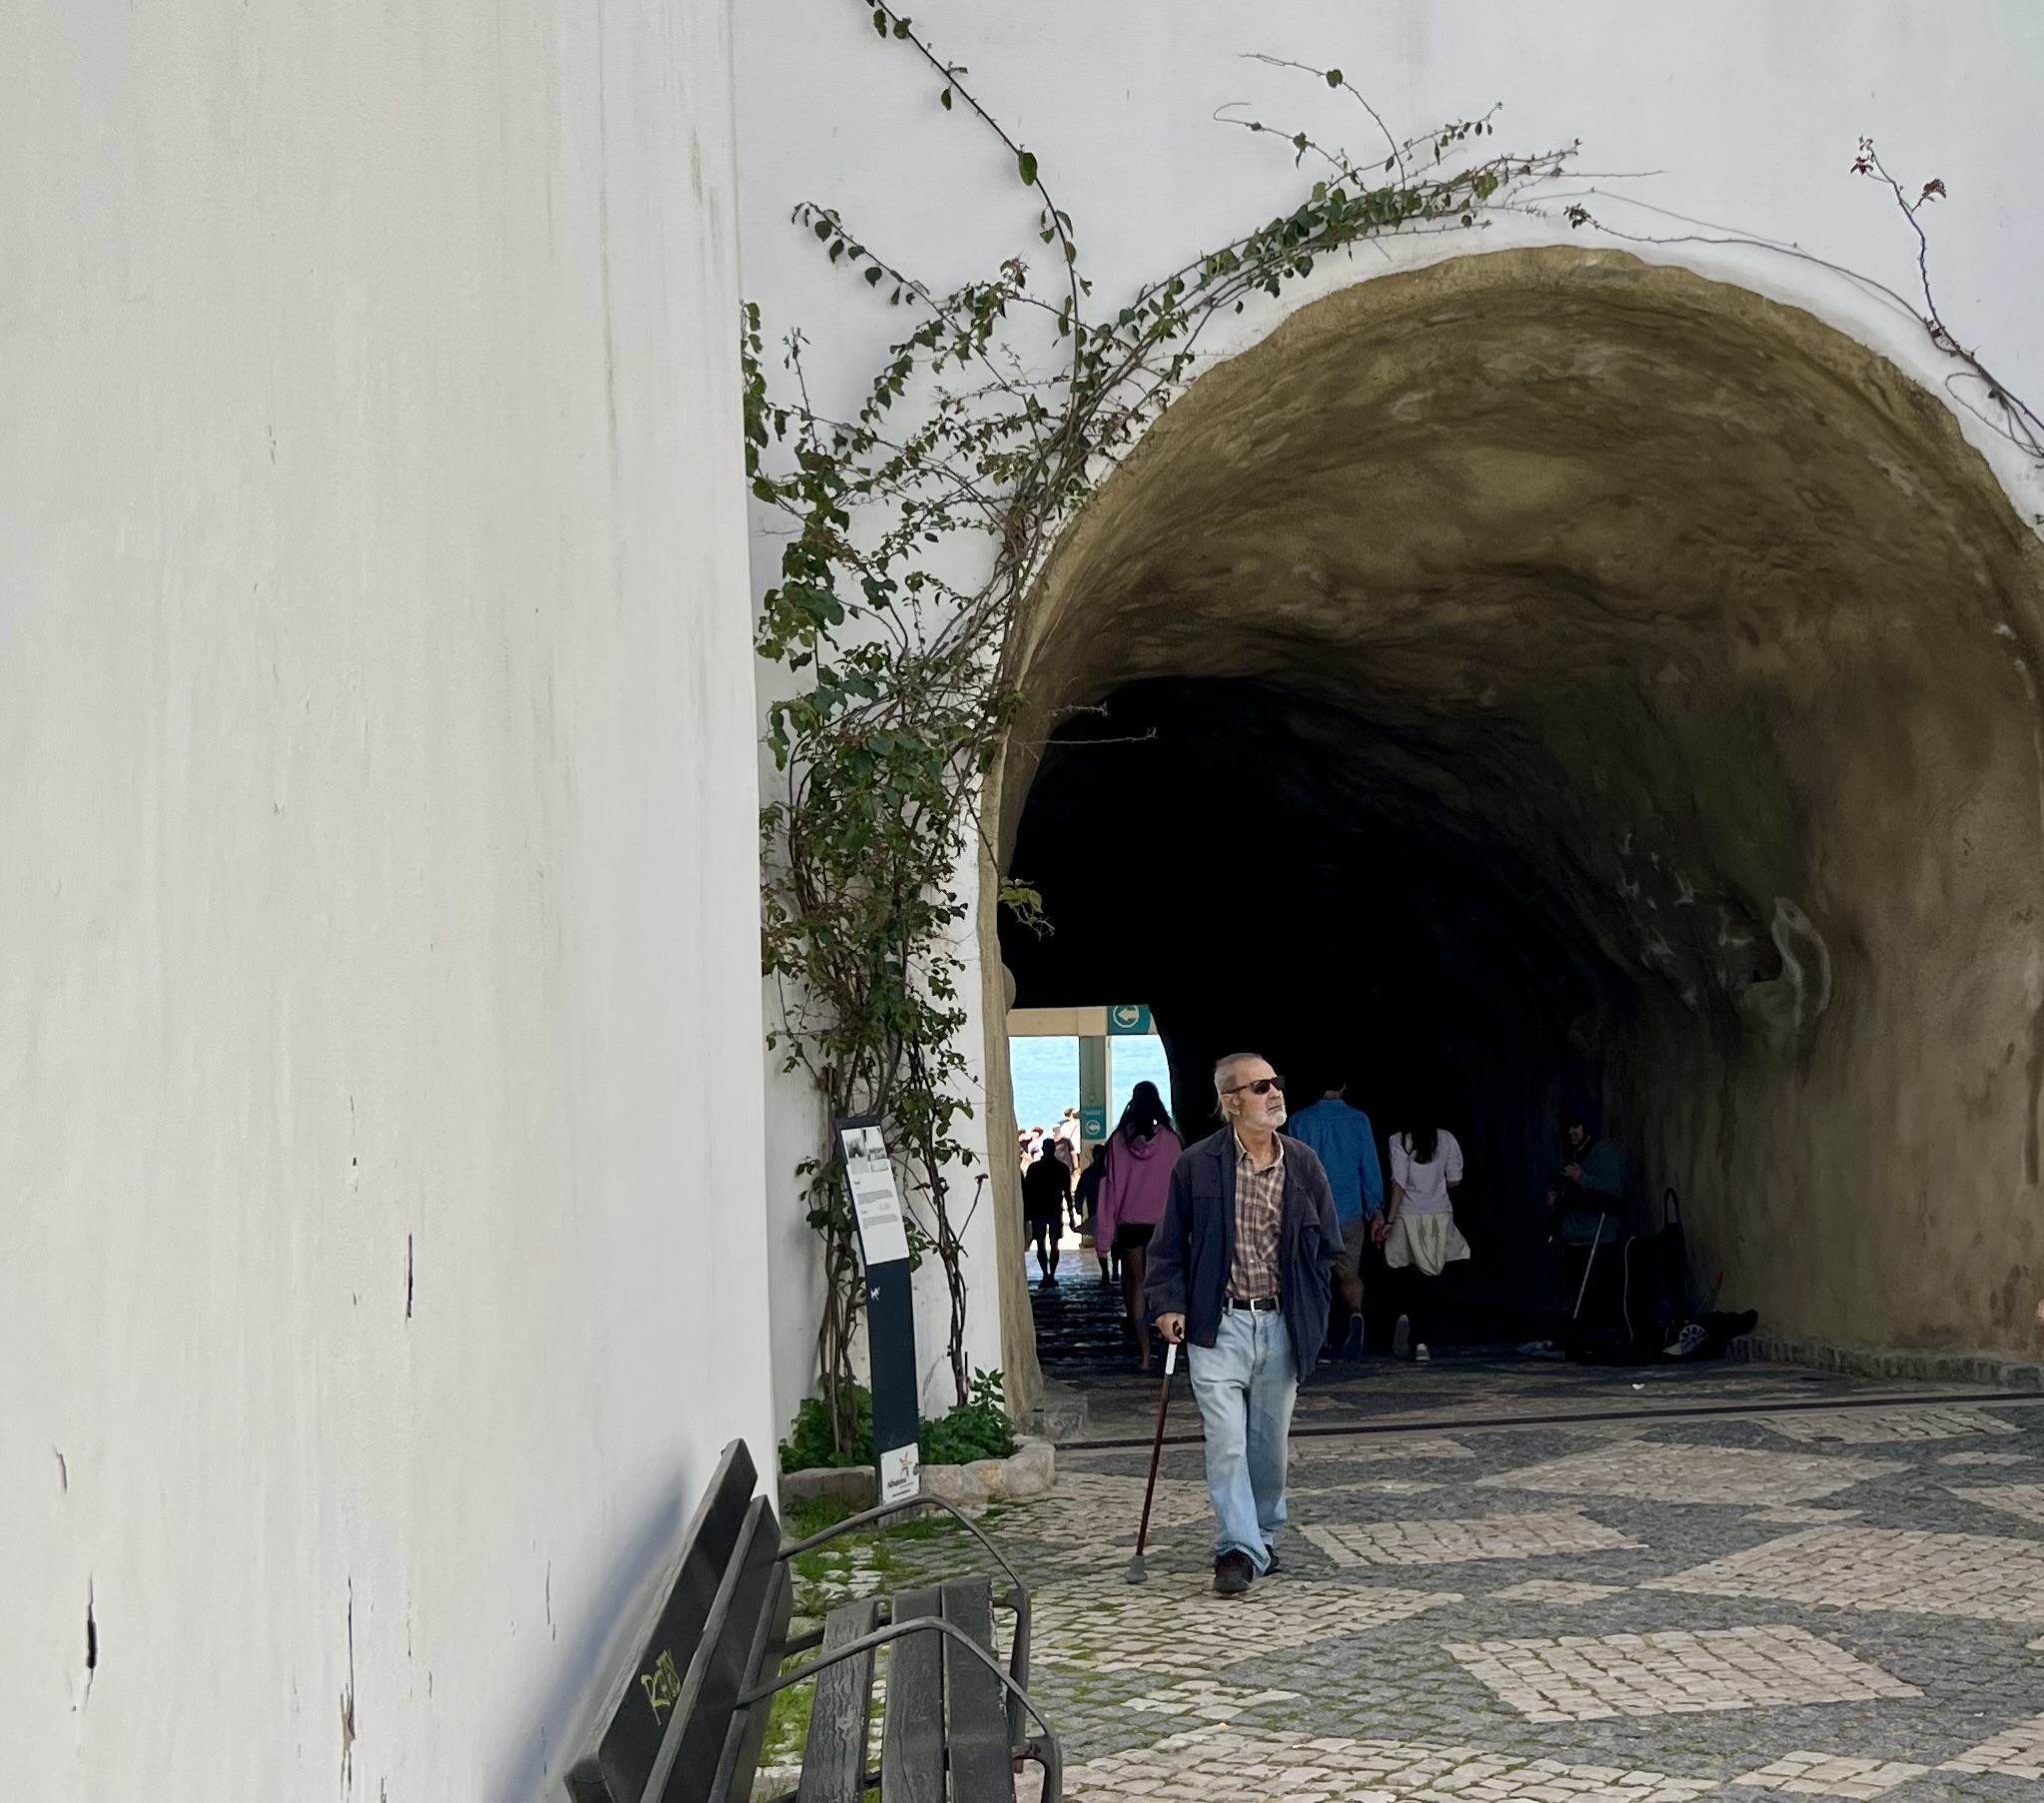
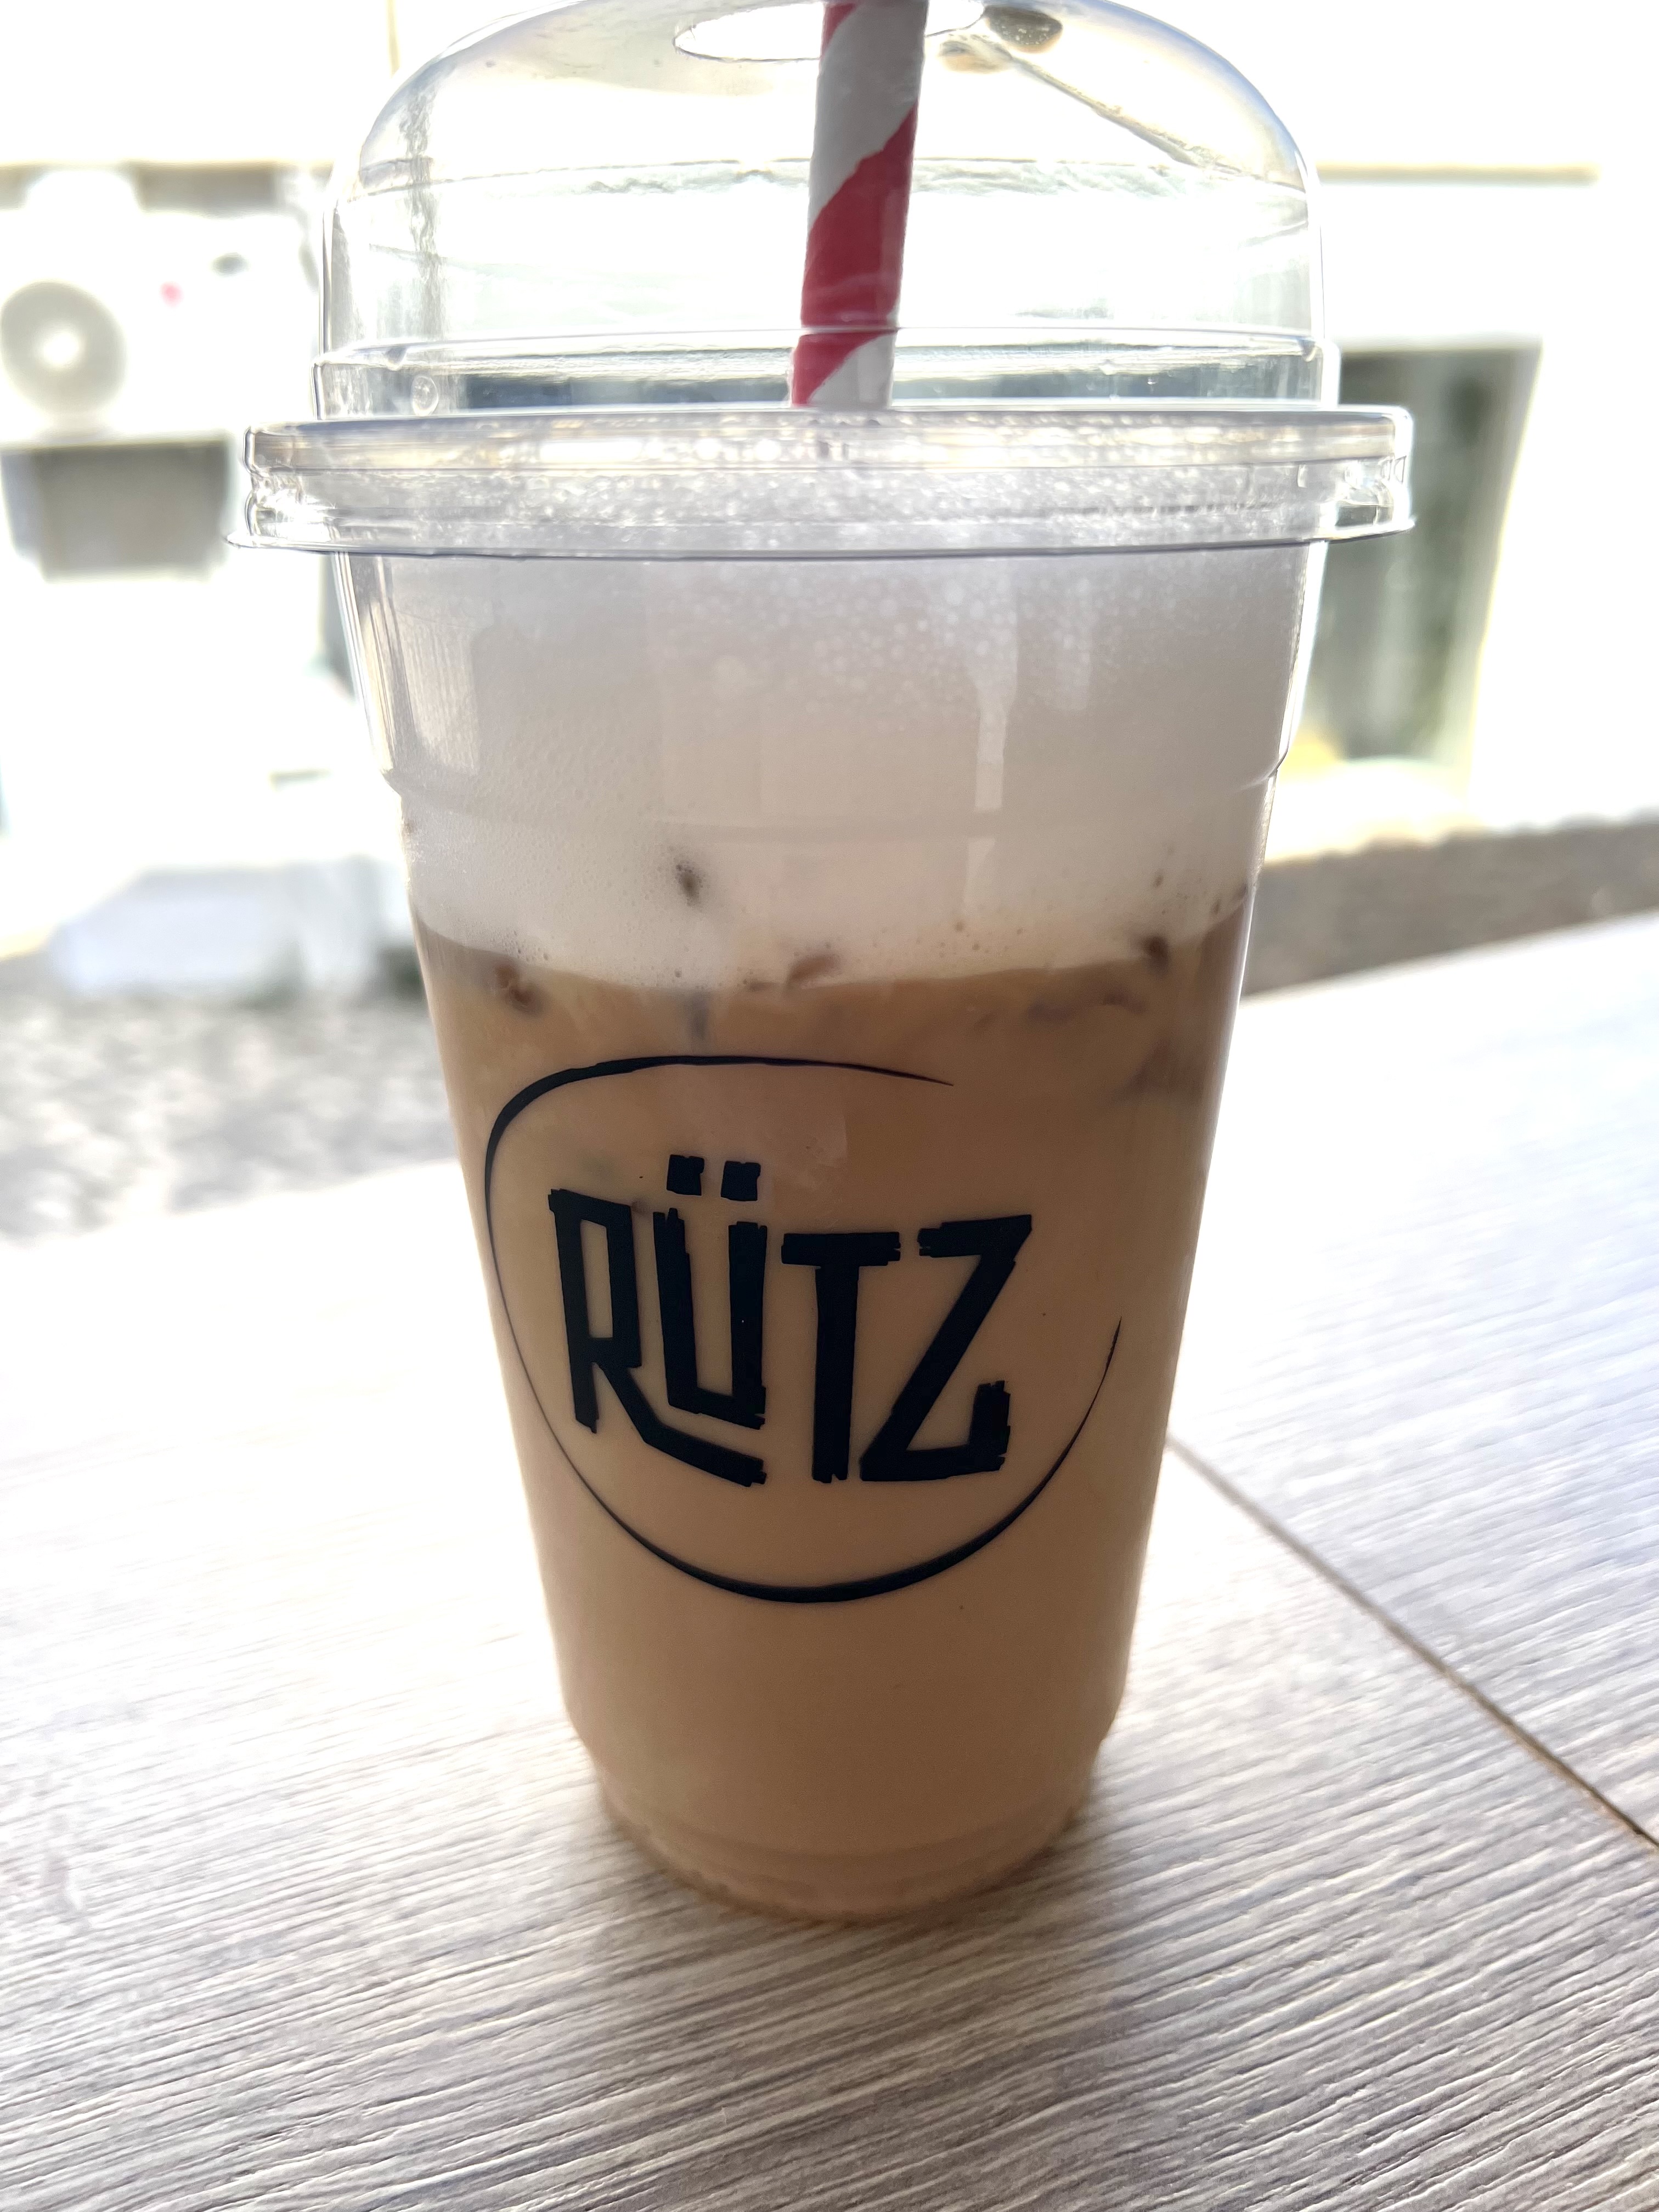
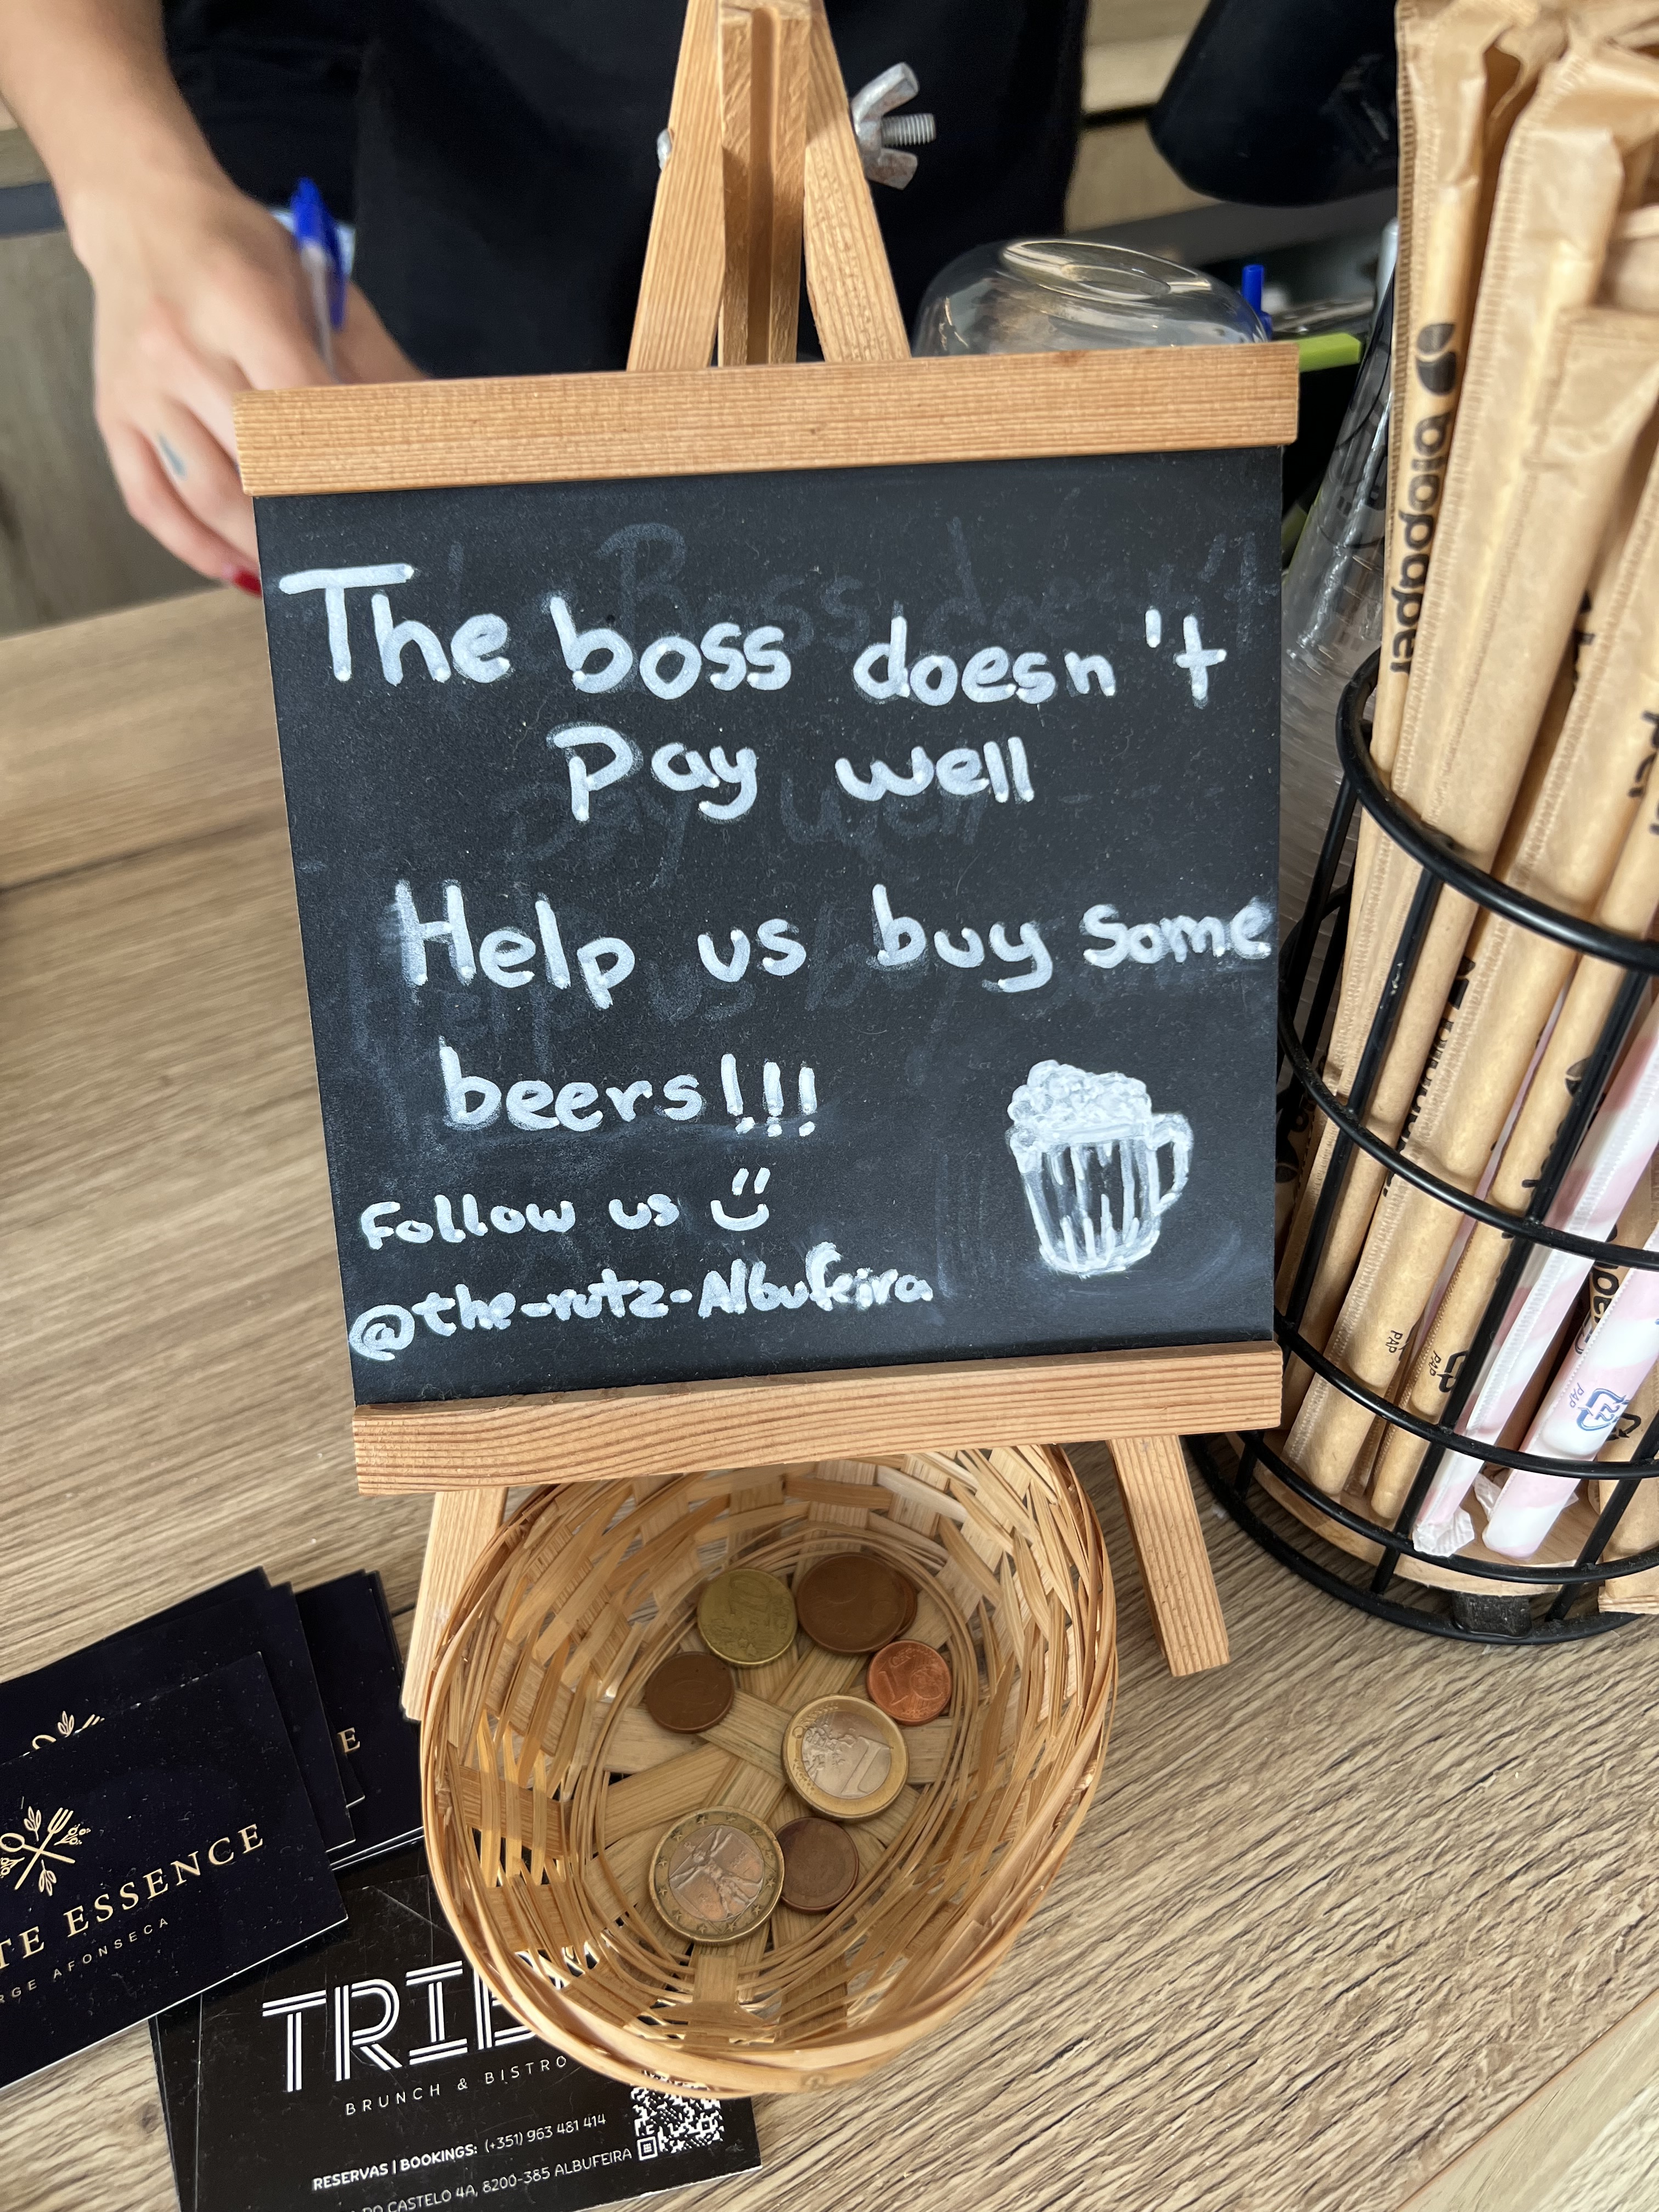
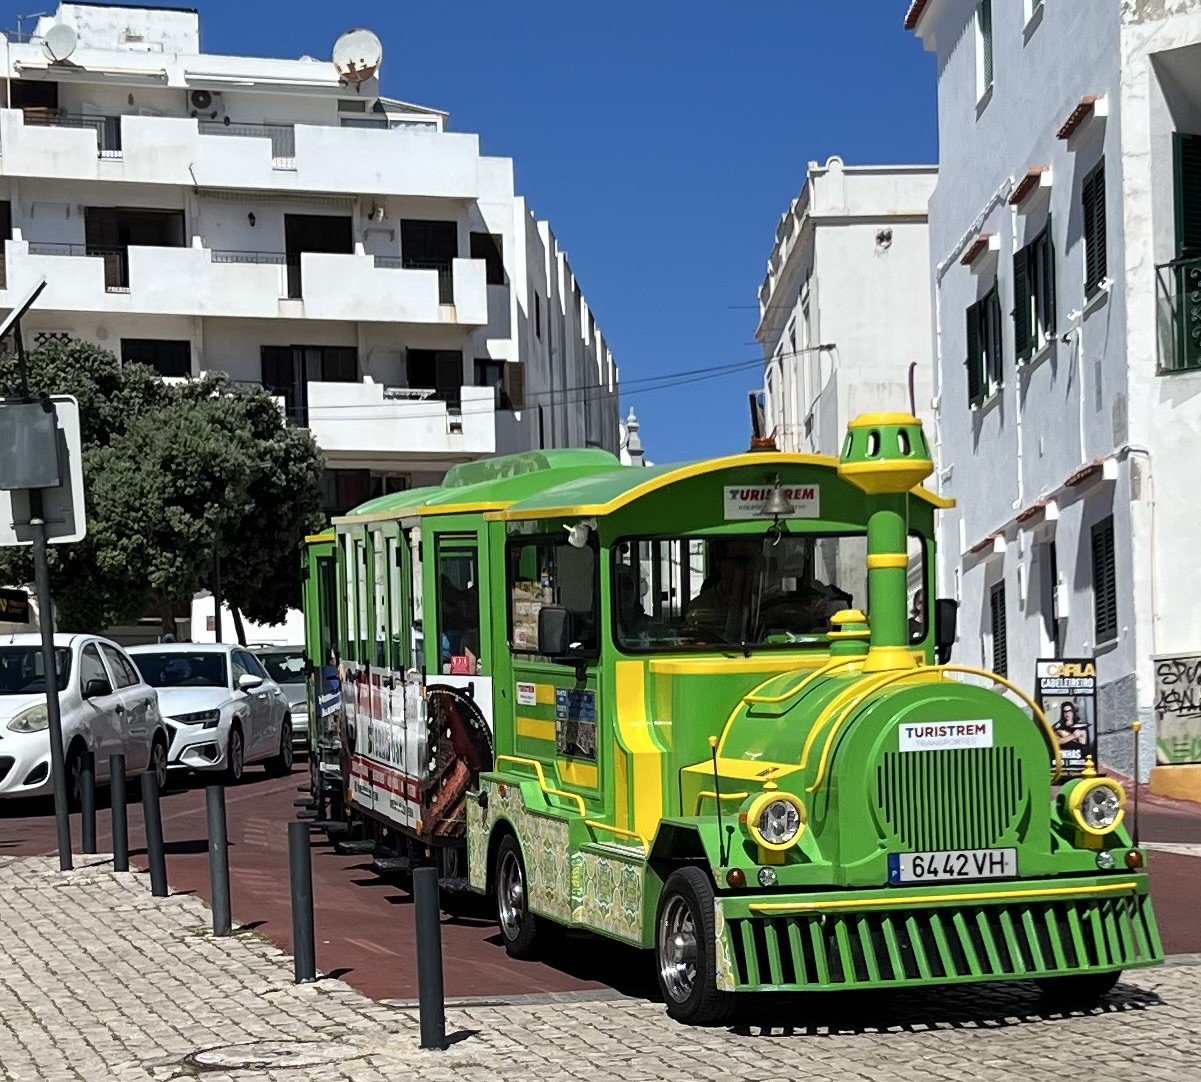
The somewhat famous Albufeira “tunel,” built in the 1930’s to give people access to the beach.The only food I had in Albufeira was this iced cappuccino. And it was the best coffee I had on the entire trip!The young ladies working the coffee shop were jammin’ all day, so I made sure to treat them well.Wanna paint a target on your back? Take the “tourist train!”
Starting in the mid 1700’s, sailors in the British Navy were given a daily ration of rum. They called it a “tot,” and the practice of daily “tot” distribution lasted for almost 200 years, until July 31, 1970. When it ended, not only were there many sad British sailors, but there was also a vast amount of leftover rum. Much of it was sold off at high prices because the taste was excellent and the methods of its distillation were no longer used.
It made sense. In the old days, when liquids were stored in wooden barrels aboard ship, water, beer, and wine would go bad very quickly. Only something with a much higher alcohol content wouldn’t spoil. Rum was the answer. And getting the sailors drunk every day kept them from deserting…it was good for morale!
But while the sailors drank rum, Royal Navy officers drank gin. The use of exotic spices in gin was made possible by imports from Africa and Asia. Gin’s prevalence around the world is largely due to the fact that sailors set foot in many new cities on new continents.
And though the British Navy stopped the practice of issuing alcohol to its sailors in 1970, the Royal New Zealand Navy abolished the practice as late as 1990!
Until a recent trip to New Zealand, I was not a huge fan of gin. Don’t get me wrong: I liked it. A gin and tonic was a nice refreshing drink on a hot summer’s day. And my fascination with the Vesper martini, a combination of gin and vodka, made me appreciate gin even more.
But it wasn’t until I went to New Zealand, and tasted their magnificent gins, in combination with delicious tonics only available in that country, did I really start to appreciate the subtle differences between them.
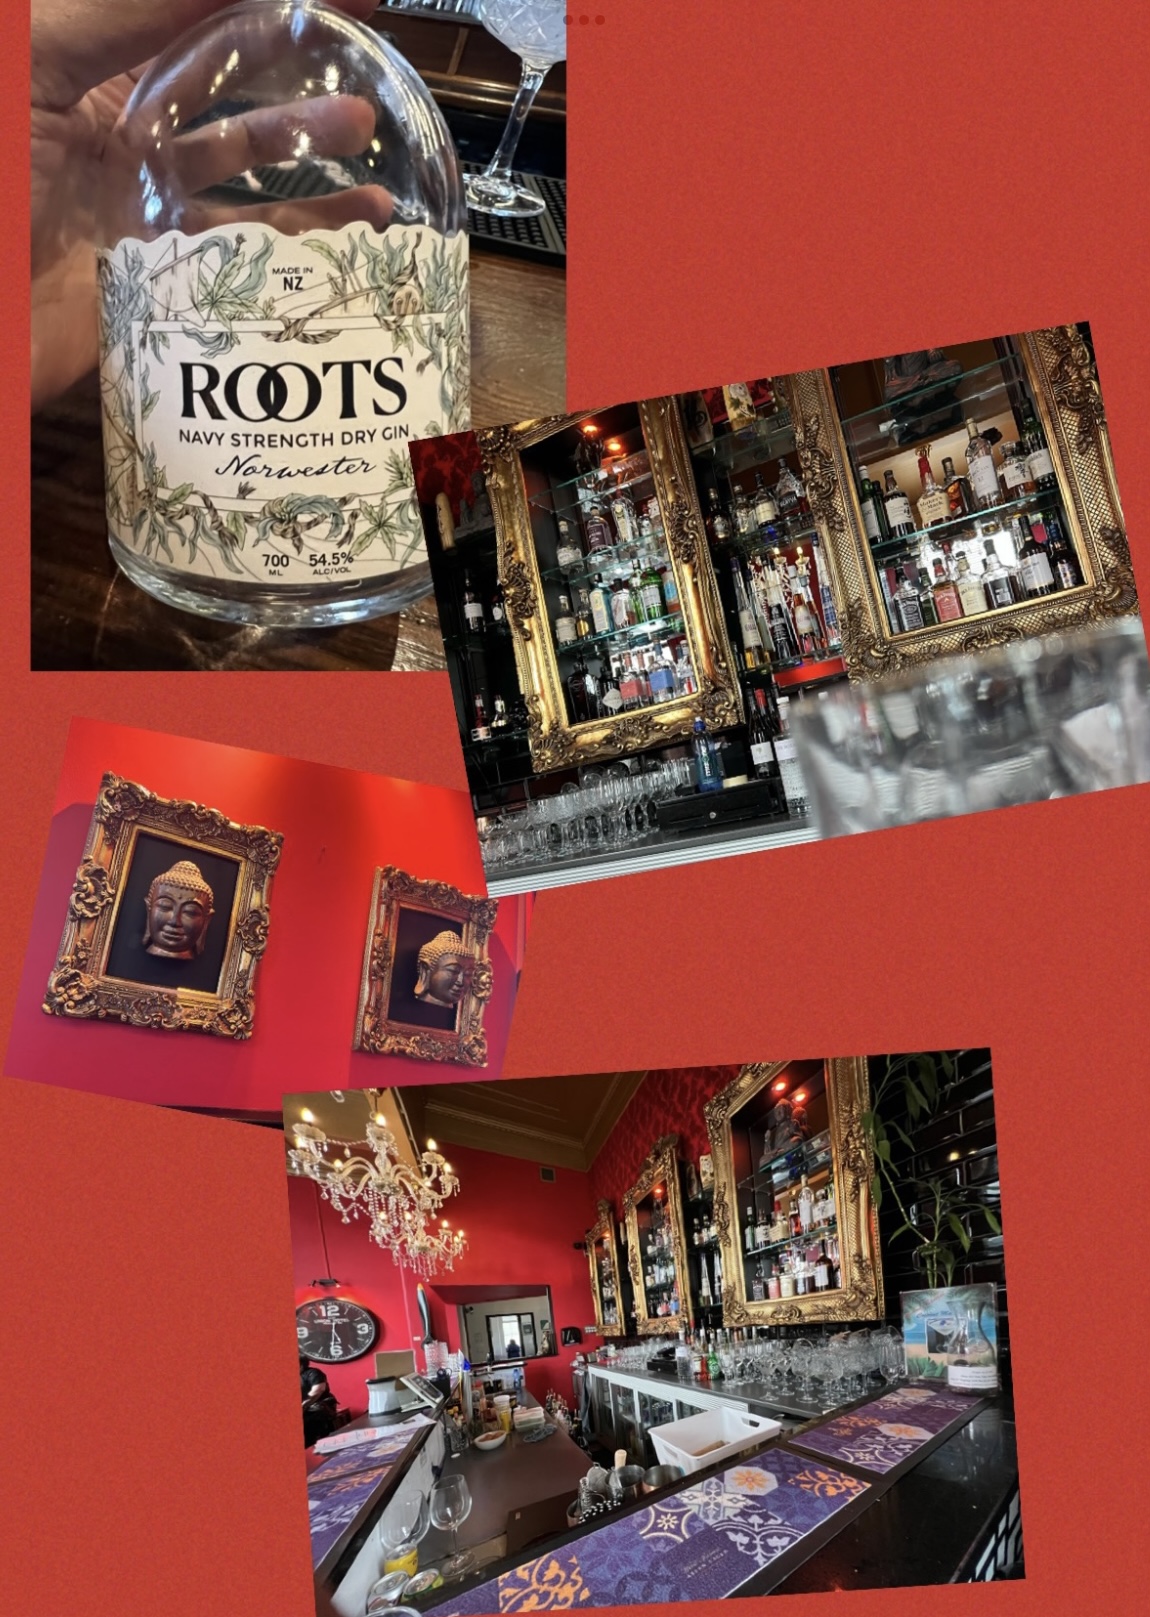
The first thing that caught my eye when I was served a sample of Roots gin, distilled in Marlborough, was the label: “Navy strength dry gin.” I asked what that meant. Well, for one thing, it had more alcohol. And the reason for that was surprising. Since gin, like rum, was stored in wooden barrels on ships, very often next to barrels of gunpowder, the gin had to contain enough alcohol so that if it spilled onto the gunpowder, the gunpowder would still ignite! Not enough alcohol in the gin would waterlog the gunpowder and make it useless. So tests were actually done by pouring gin on gunpowder to see what the minimum percentage of alcohol was required to keep the gunpowder burning. The answer was about 57%. Anything below that and the gunpowder would not burn. They coined the term “Navy strength.”
(Although the bottle of Roots gin above weighs in at 54.5%, it’s properly called “Navy strength.” In 1866, to keep sailors from getting completely hammered, the British Royal Navy reduced the alcohol content of the rum they were distributing to 54.5%. Hence, a new “Navy strength.”)
I was allowed to take only 1 bottle home from New Zealand, but, as you can see, it was not Navy strength. Still delicious!
The other advantage to a Navy strength gin is taste. If you’re not diluting it with water, not only are you getting more alcohol, but you’re also getting more of the herbaceous flavor you want in a gin.
Up until my trip to New Zealand, my experience with gin was limited to the usual list of suspects: Tanqueray,Bombay Sapphire, and Hendrick’s. I also more recently discovered Ford’s, a very nice London dry gin I sometimes use in my Vesper martinis.
But in New Zealand, many of the gins were floral and herb-forward, and I found that I like that. I like that a lot. For example, Victor, another Marlborough gin, was like “Hendrick’s on steroids.” I said that to my bartender at the Urban Eatery and Oyster Bar in Nelson, NZ, and she agreed. Delicious.
Although gins may vary in alcohol content, rules about serving liquor in New Zealand are very strict, certainly by US standards. For example, a “double” in New Zealand is 30ml. That’s 1 ounce! And that’s a standard pour for a cocktail. You can, I found out, ask for a “double-double.” And in that case, they would serve you a 1-ounce shot on the side with your drink, and you would have to pour it in yourself.
When I told the bartenders in New Zealand that we have 4-ounce martinis at any decent steakhouse in the US, and they realized that was 120 mls, their jaws pretty much dropped and hit the bar. One bartender gasped: “That’s irresponsible!” I told her that two of those drinks is widely considered the “businessman’s lunch” here in the states. She just shook her head.
Much to choose from at Kismet, my favorite bar in Nelson, NZ.
The phrase “proof” also has a very different meaning.
In the states, it’s pretty simple: it’s double the percentage of alcohol. So a bottle that’s 40% alcohol is 80 proof.
But the phrase “proof” comes from there British Royal Navy’s “proof” test. They would take the gin, pour it onto gunpowder, and if it ignited, that would prove there is sufficient alcohol in the gin. They would say that the gin was “gunpowder proof,” and it would be allowed onboard the ship.
So in the UK, a spirit with 57.15% is 100 degrees proof. A spirit with 40% alcohol is 70 degrees proof.
For me, it’s easier to simply remember to check the percentage of alcohol, and go from there.
One of the reasons I fell in love with New Zealand gin was because it was often served with East Imperial tonic, a New Zealand product that was not available in the United States for some time. But when I returned from my trip, I googled it and found that it was now being distributed in the US! When the amount of alcohol you’re allowed in your glass is limited (by our standards, anyway), what fills the rest of it up becomes incredibly important. East Imperial was the best line of tonics I’ve ever tried. (I’m saying was now, because, sadly, the company went under last year, and I managed to purchase a couple of 12-packs of the last of the available inventory. Once it’s gone, it’s back to Fever Tree.)
It stands to reason that a great cocktail is the sum total of its parts: great gin, great tonic, great ice.
I was enjoying a few Roots and tonics at the Bamboo Tiger, a bar inside the D’Urville Hotel in Blenheim, NZ, when we felt earthquake tremors. (My first!) It only lasted a few seconds, and when the chandeliers stopped moving, everyone pretty much went right back to business!
I spent about 10 days last summer in Scotland and Ireland, and though they’re known for their whiskey, it was their gins that really impressed me. But I’ll save that for another blog.