Posts Tagged ‘garden’

If you’ve got a windowsill, you can grow a variety of sprouts that will add lots of fresh flavor to any salad or stir fry. Once you’ve sprouted the seeds, the clock starts, and they can go badly rather quickly. That’s why the sprouts that you buy in a supermarket can already be half way to stale city before you even bring them home. Growing your own assures fresh sprouts when you want them, and you can’t beat the flavor.


Two trays of mung bean seeds and one tray of a radish mix.

Two trays of mung bean seeds and one tray of a radish mix.


Suppliers of sprouting seeds are easy to find. My two favorites are High Mowing Seeds (www.highmowingseeds.com) and Johnny’s Selected Seeds (www.johnnyseed.com.) They also sell the sprouter, which is a stackable plastic structure that holds several layers of seeds at one time.
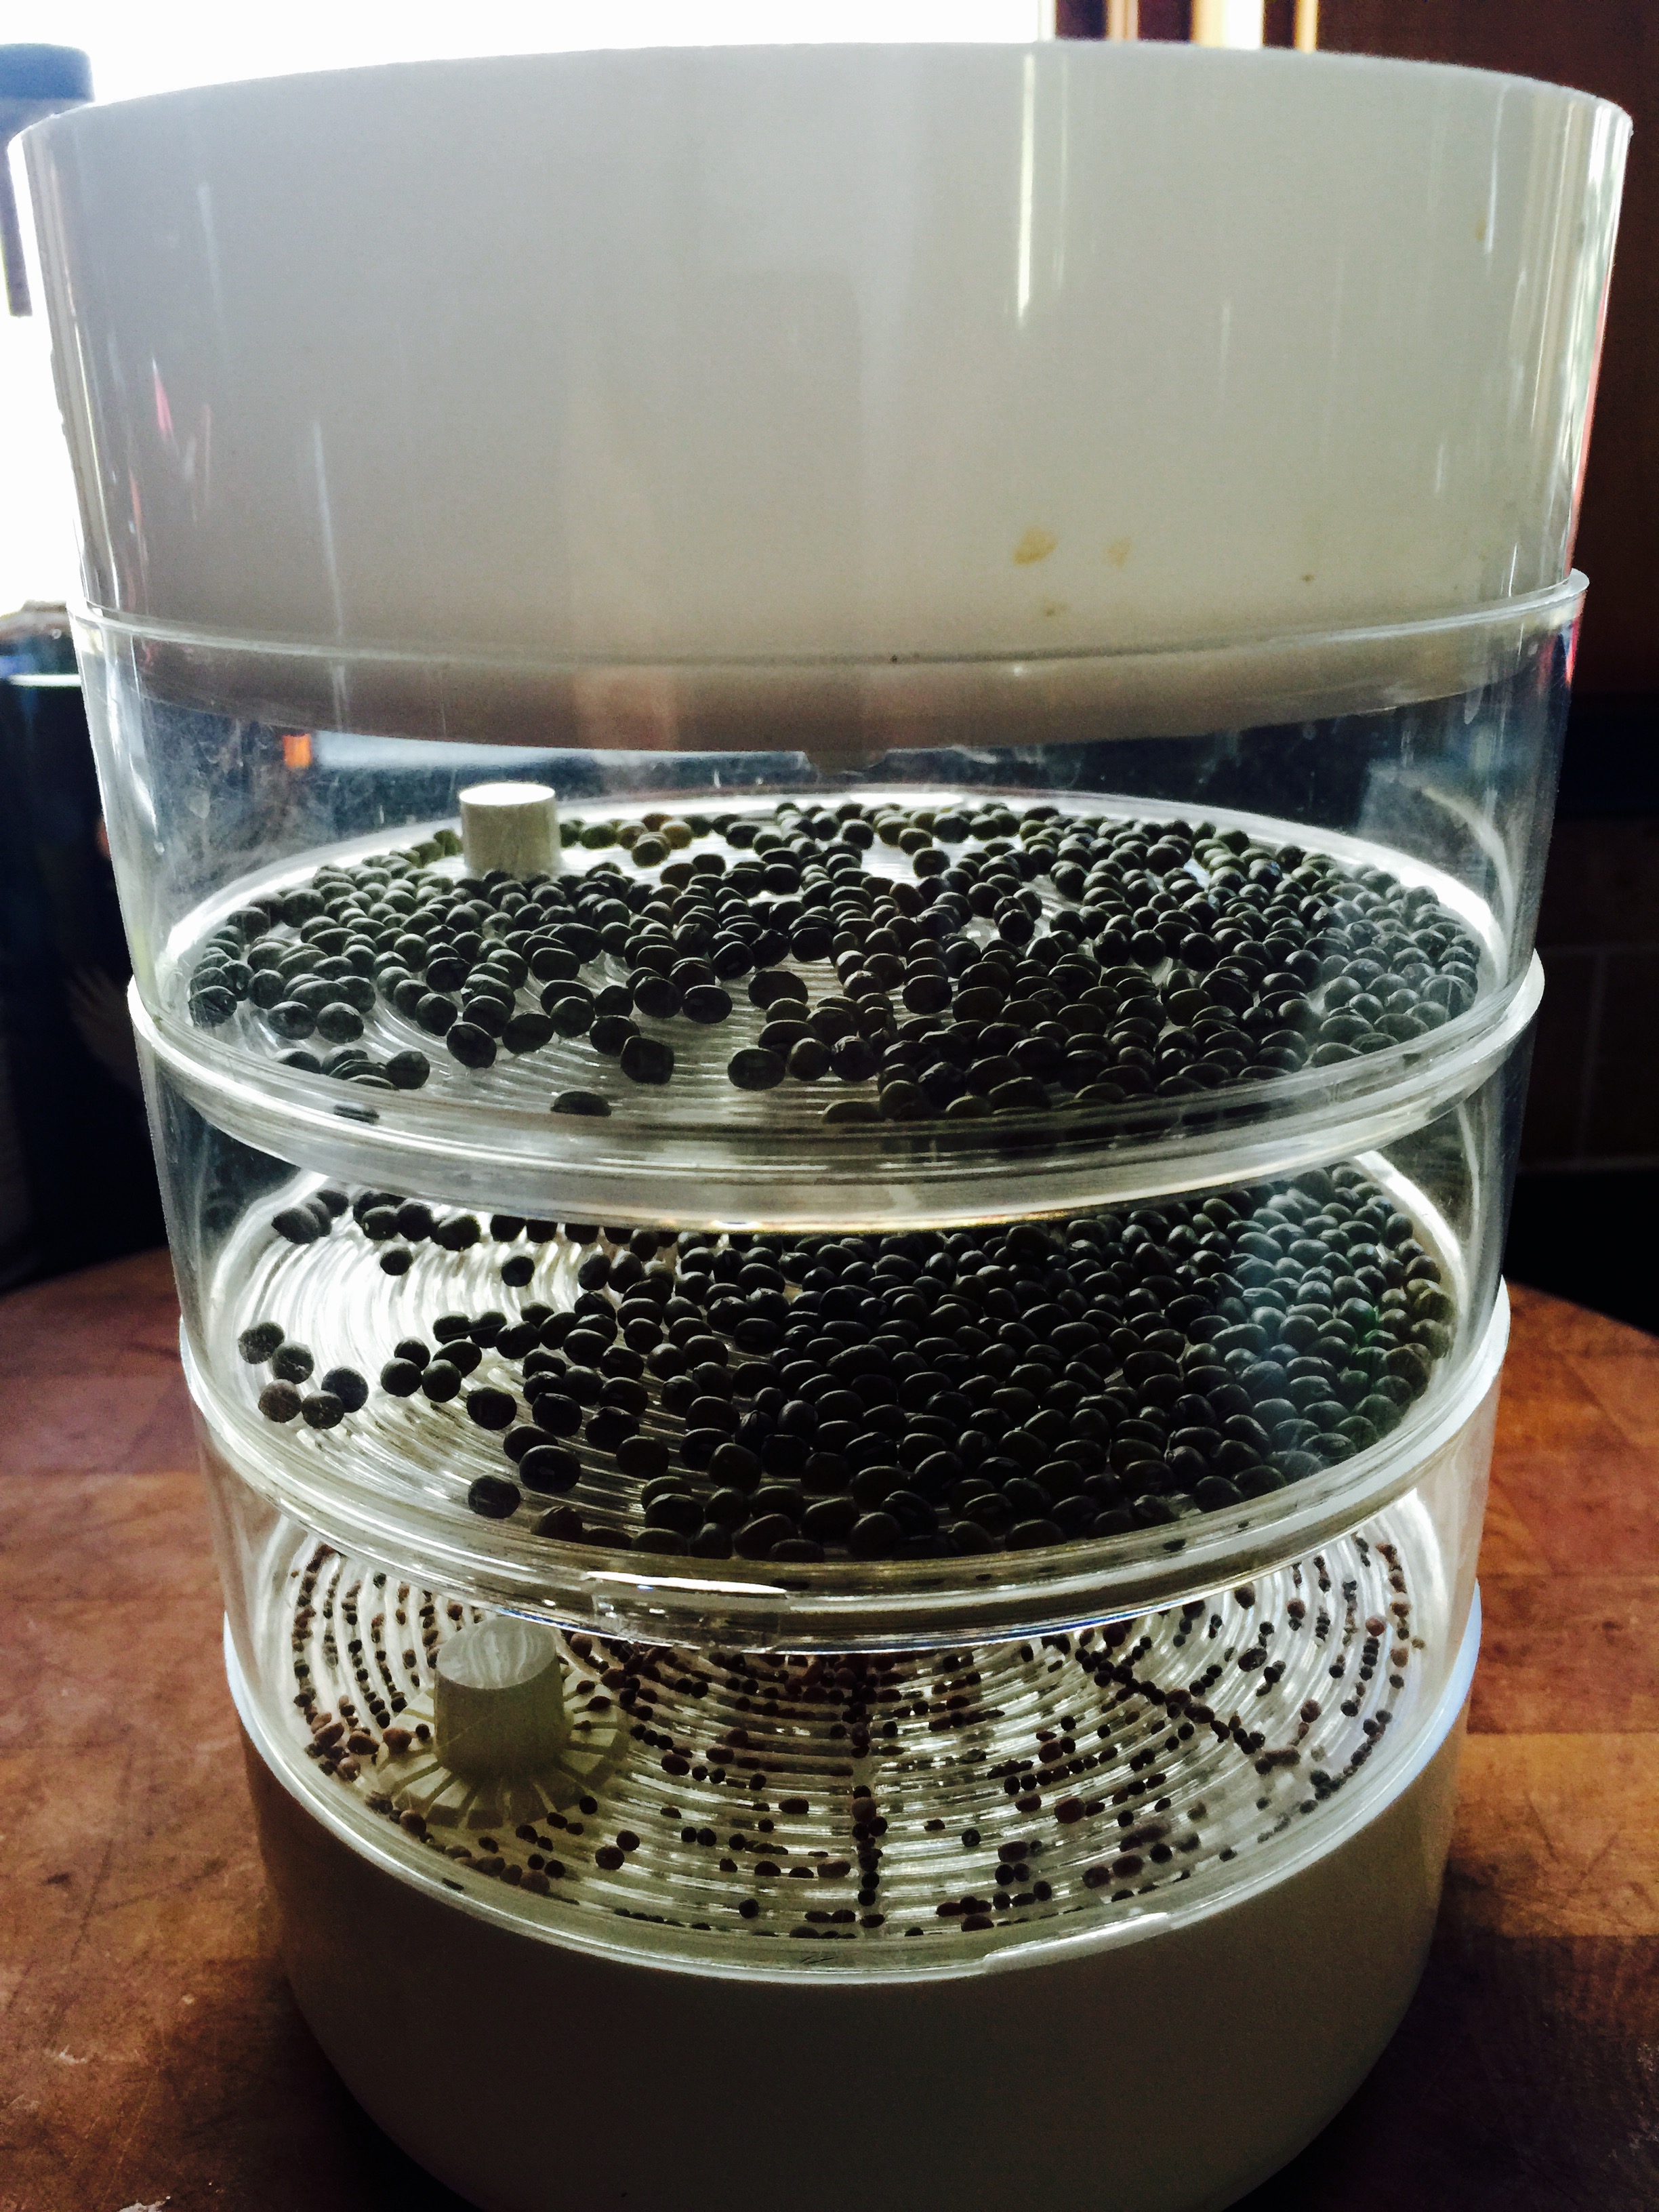
Stacked and ready to go.

Stacked and ready to go.


Just pour in the seeds, stack ’em up, and pour water in the top. The water trickles down through the layers, leaving behind just enough moisture to germinated the seeds.
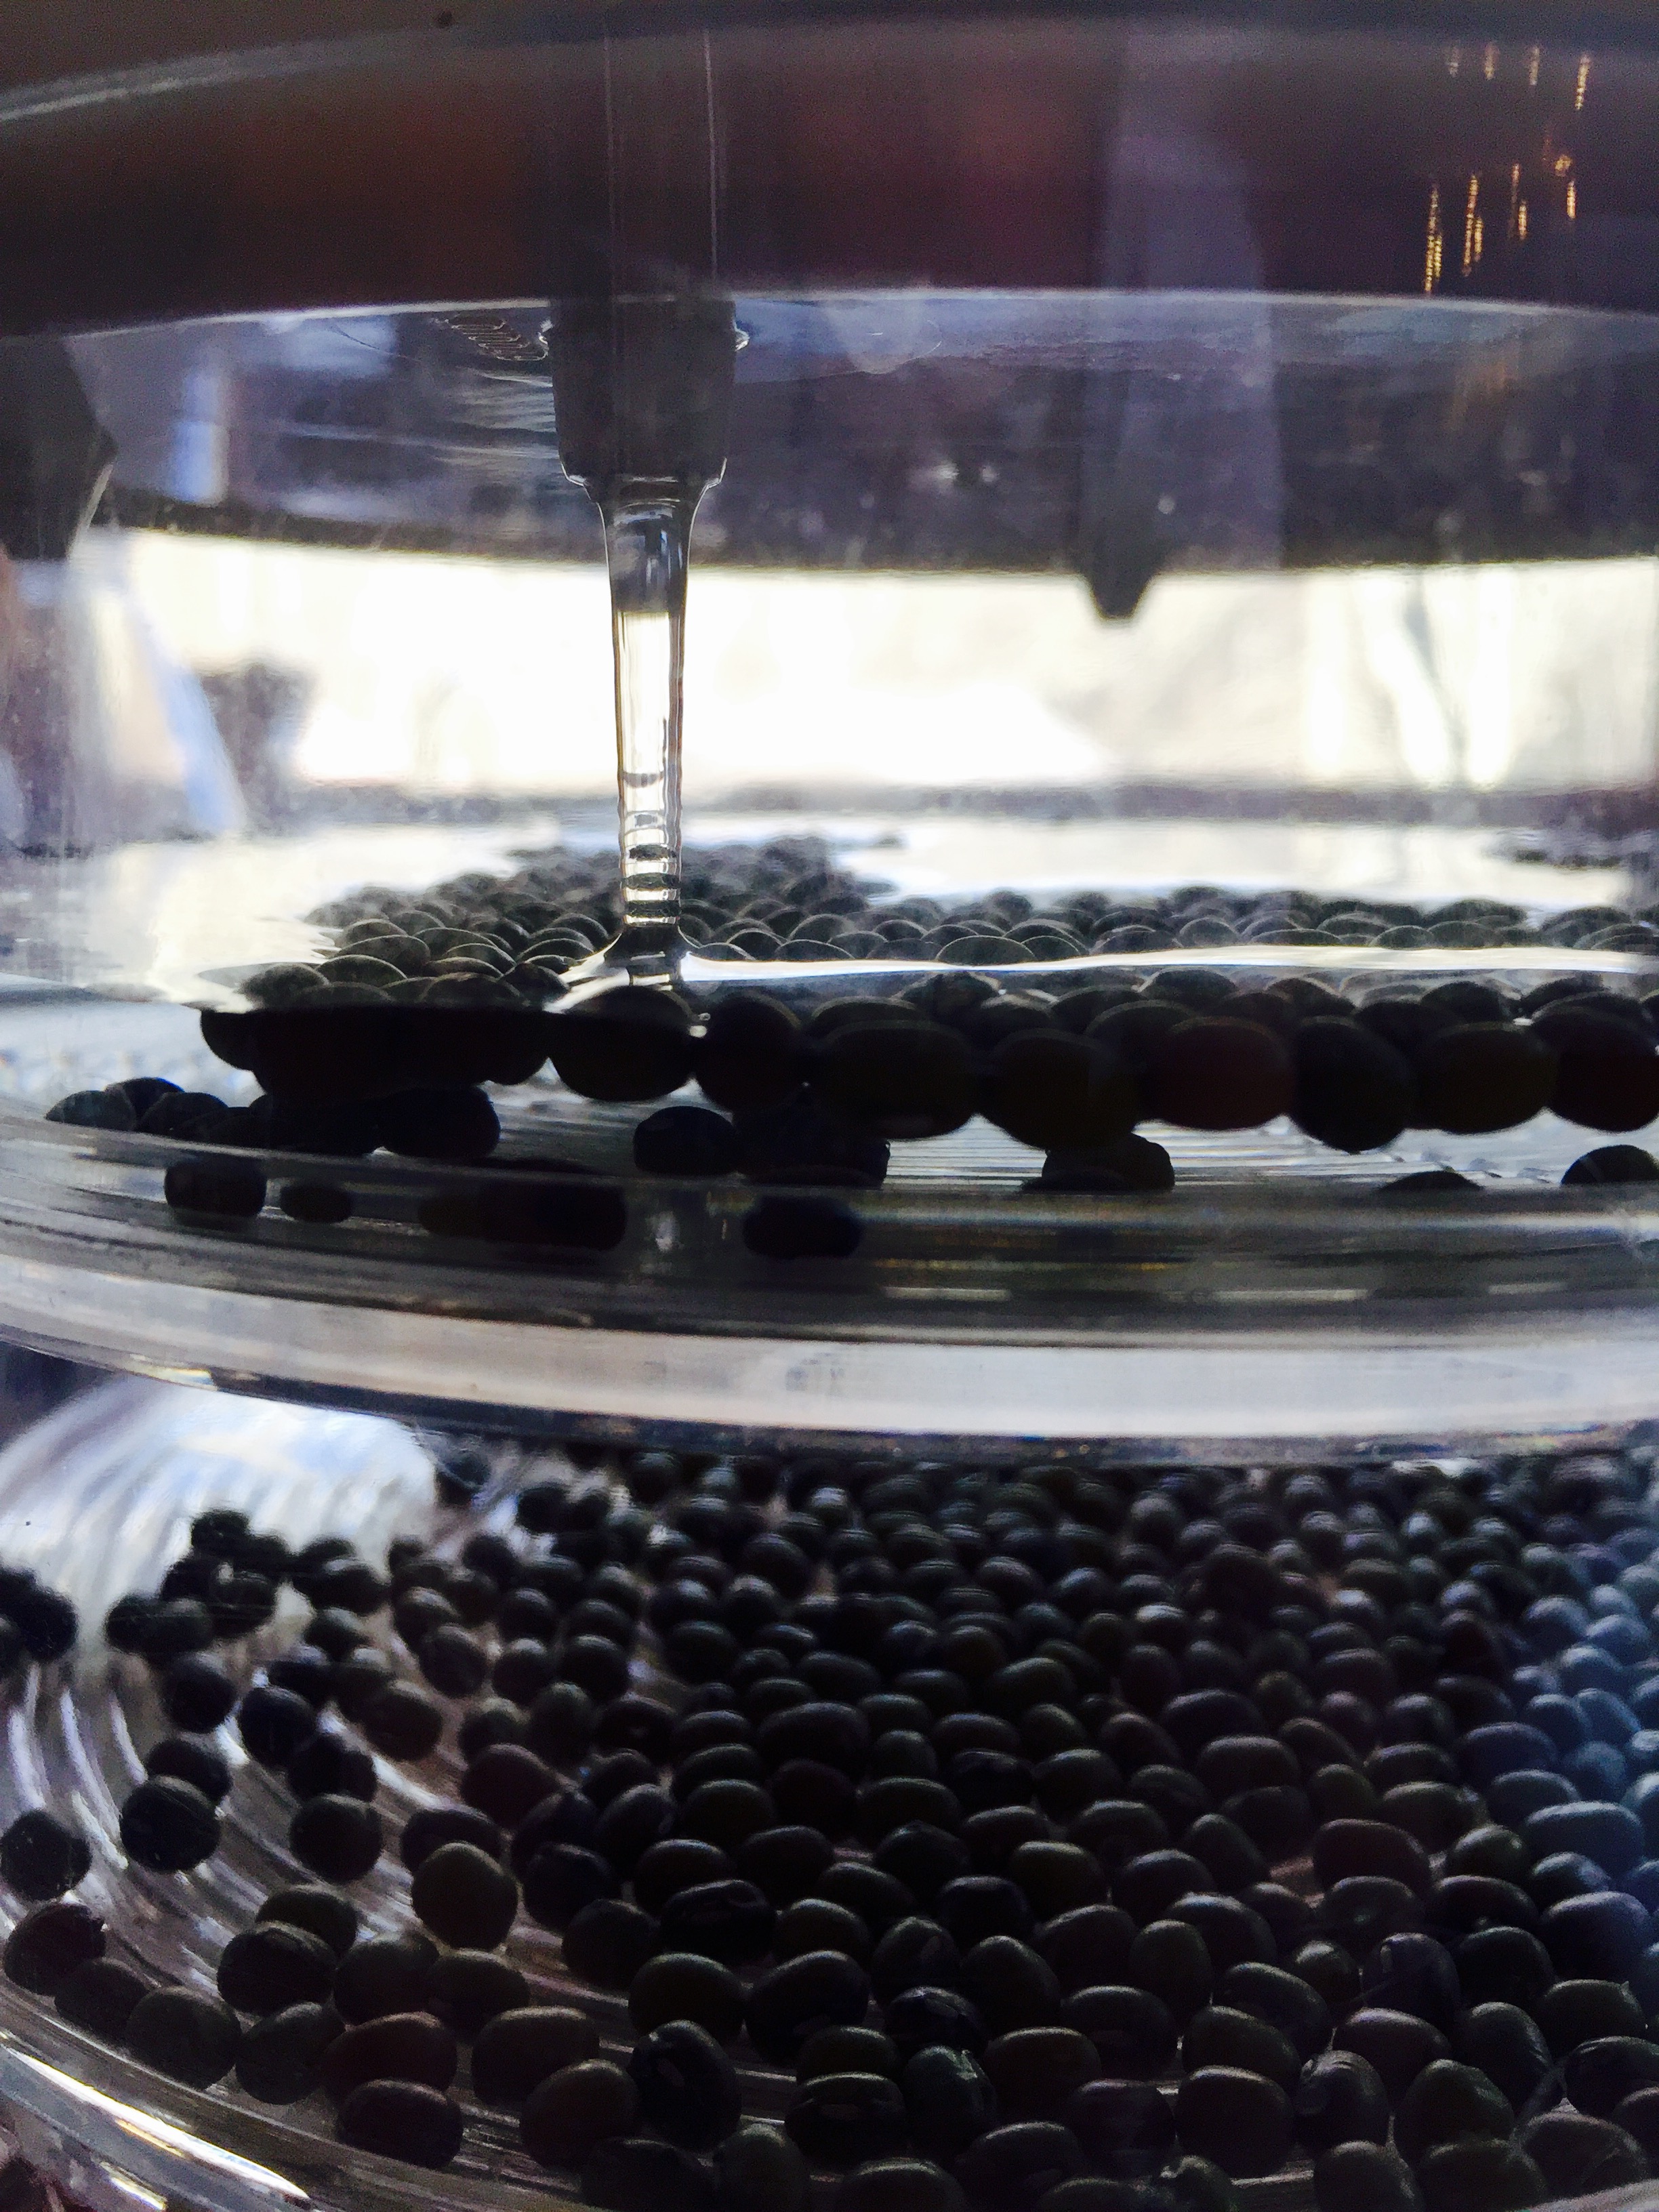
Water trickles down through the different levels.

Water trickles down through the different levels.

Water the seeds a few times a day and in just two days, you’ll see your sprouts come alive. within 4 or 5 days, they’re totally grown, at which time you can bag them and keep them in the fridge, and start a new batch of sprouts.

Mung bean sprouts after just one day.

Sprouts after just one day.


...and after several days.

…and after several days.

If you like micro greens, those are pretty easy to grow indoors as well, though you’ll need a windowsill with good sunlight. (Grow lights work well, too.) You place some potting mix in a shallow tray, press the seeds into the potting mix, and then water them.

Seeds ready to sprout (from left to right): sunflower, popcorn, peas.

Seeds ready to sprout (from left to right): sunflower, popcorn, peas.


In a few days, the seeds will start to sprout. when they get a few inches tall, simply snip them with a pair of scissors, and toss them into your salad. When all the seeds have sprouted, the soil and the used seeds can all go into your compost pile or garden.
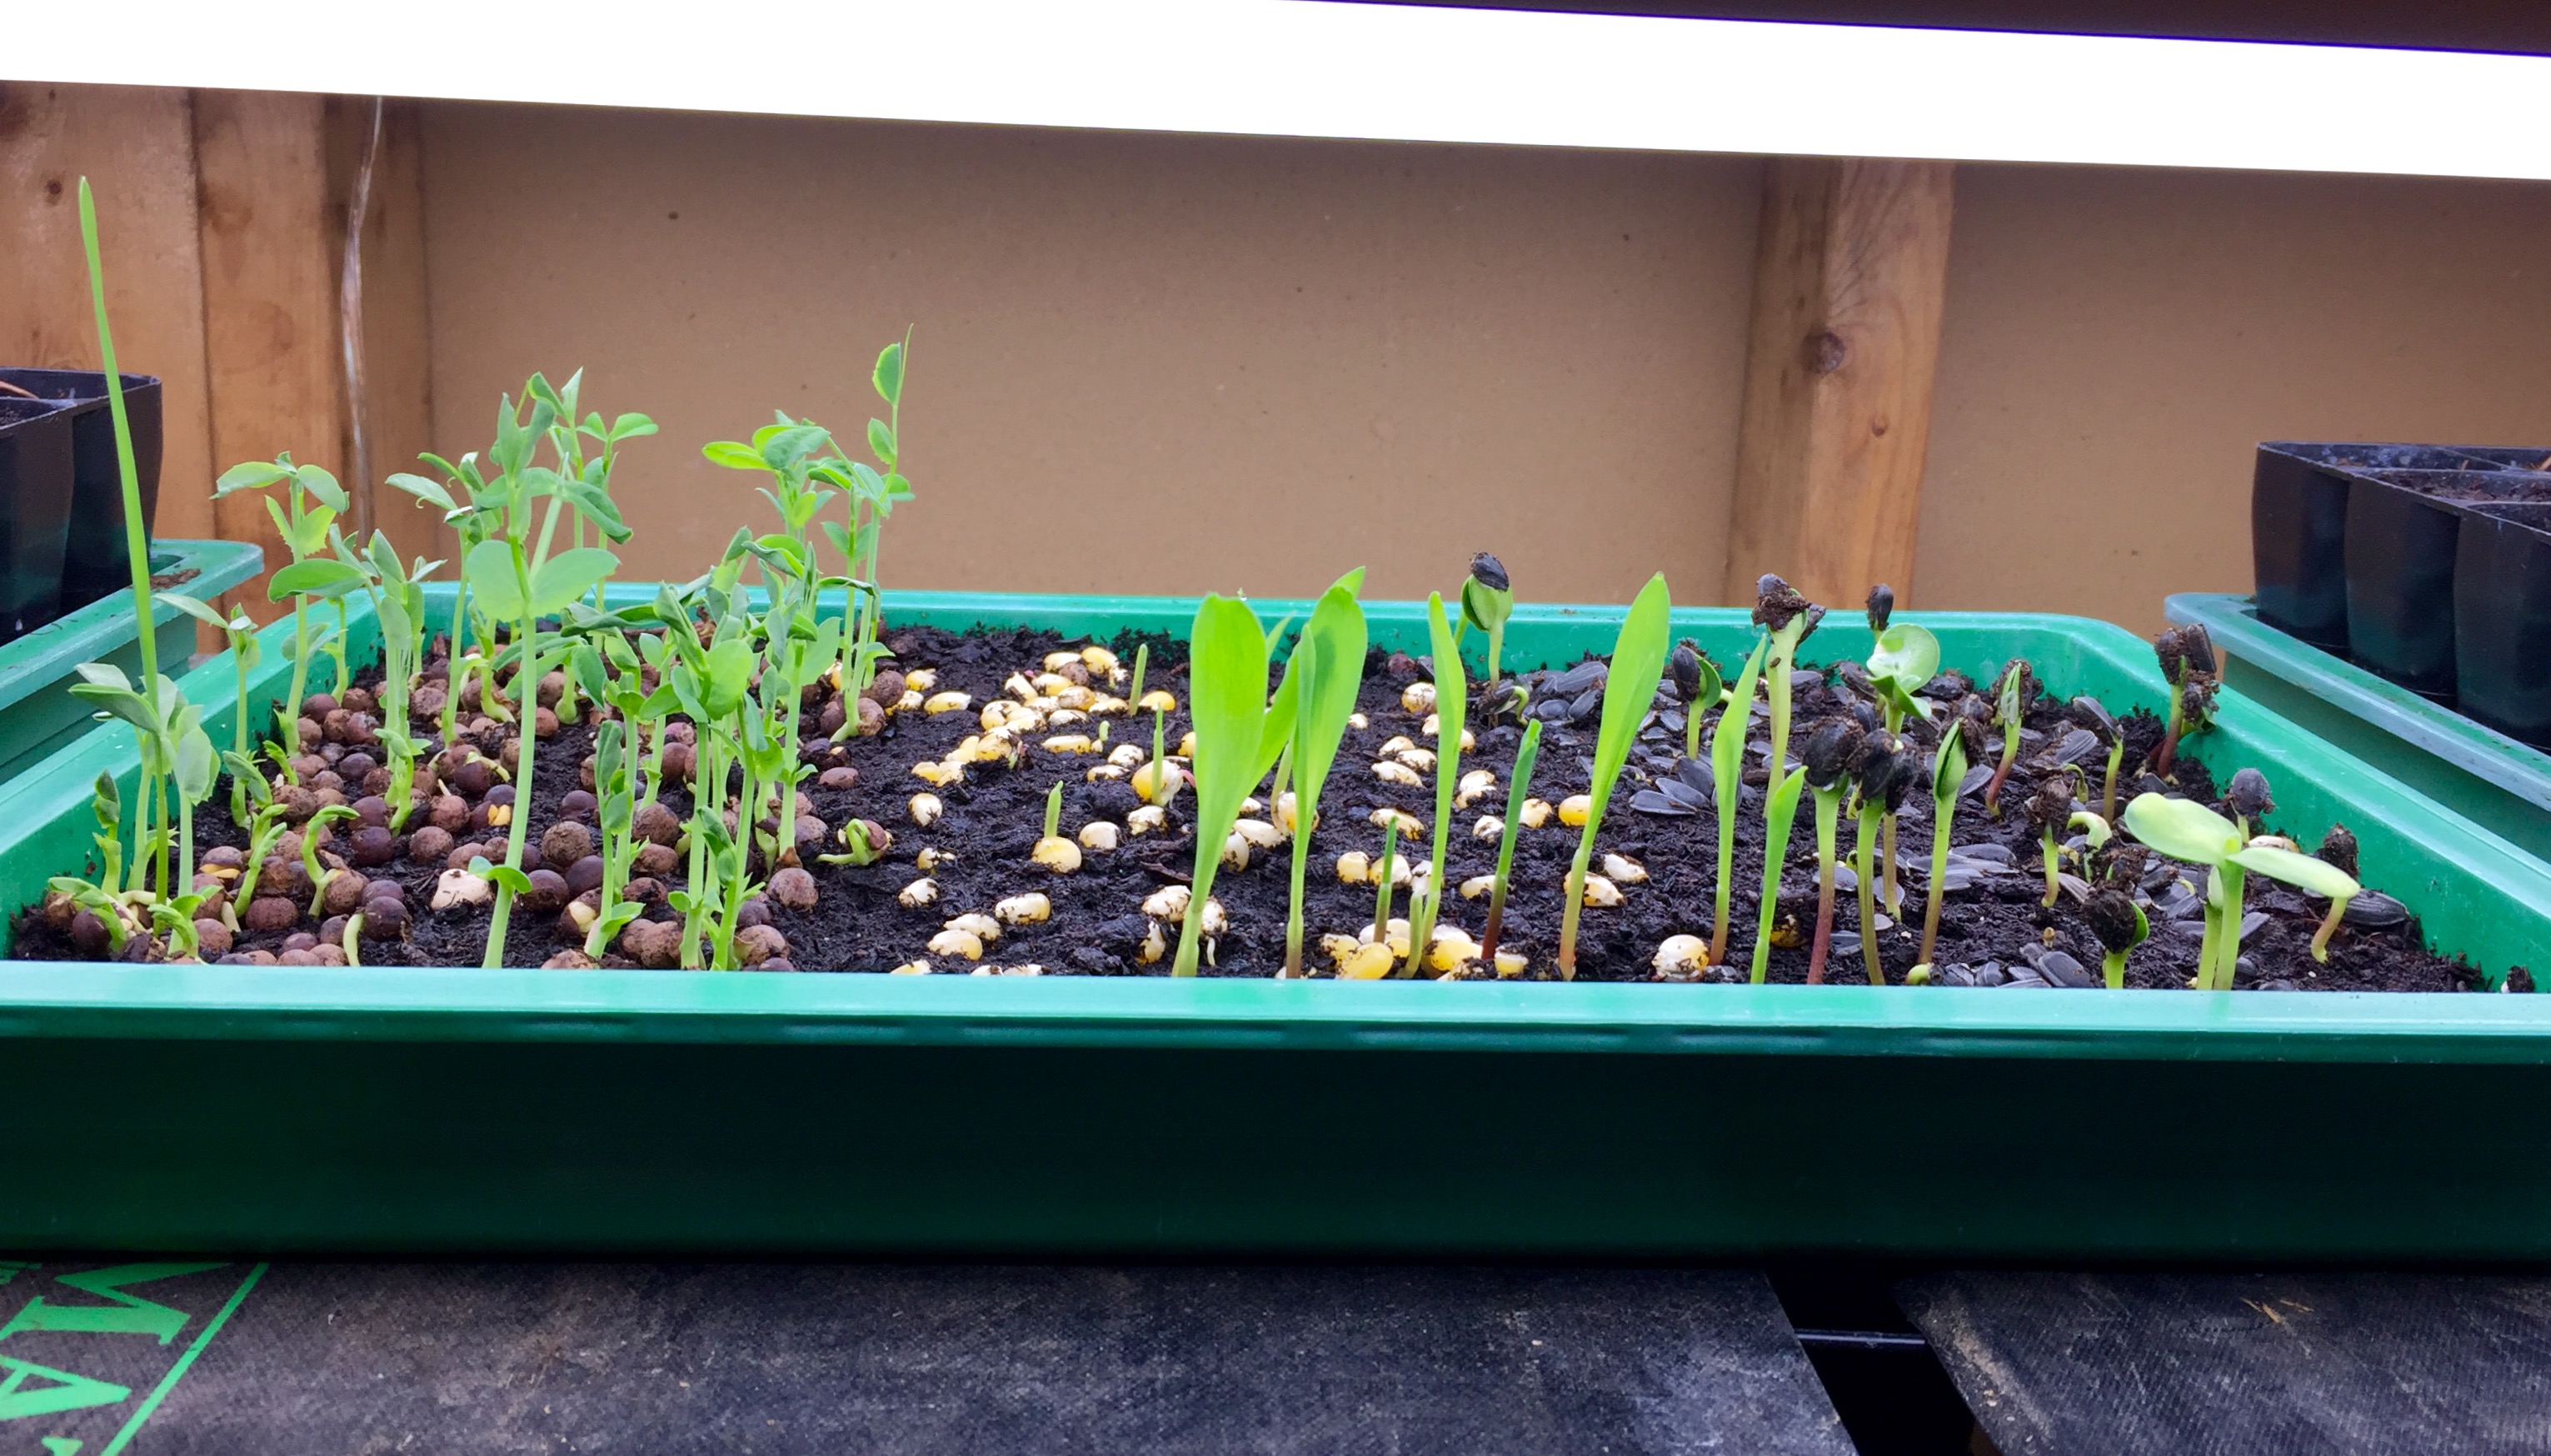
Sprouting under grow lights.

Sprouting under grow lights.


I’ve bested the old adage: “Plant your peas by St. Patrick’s Day” by a week! Today’s unusually warm weather got me out in the yard, and although this 32-foot square raised bed doesn’t look like much right now, underneath that soil lurks Sugar Snap peas, Arugula, Easter Egg radishes, Spinach, and a variety of Asian greens.


FullSizeRender


That fencing material on the ground will surround the bed to keep nosy bunnies from devouring the first tasty shoots that pop up out of the soil.

I’ll take pictures every few weeks so we can see the progress.

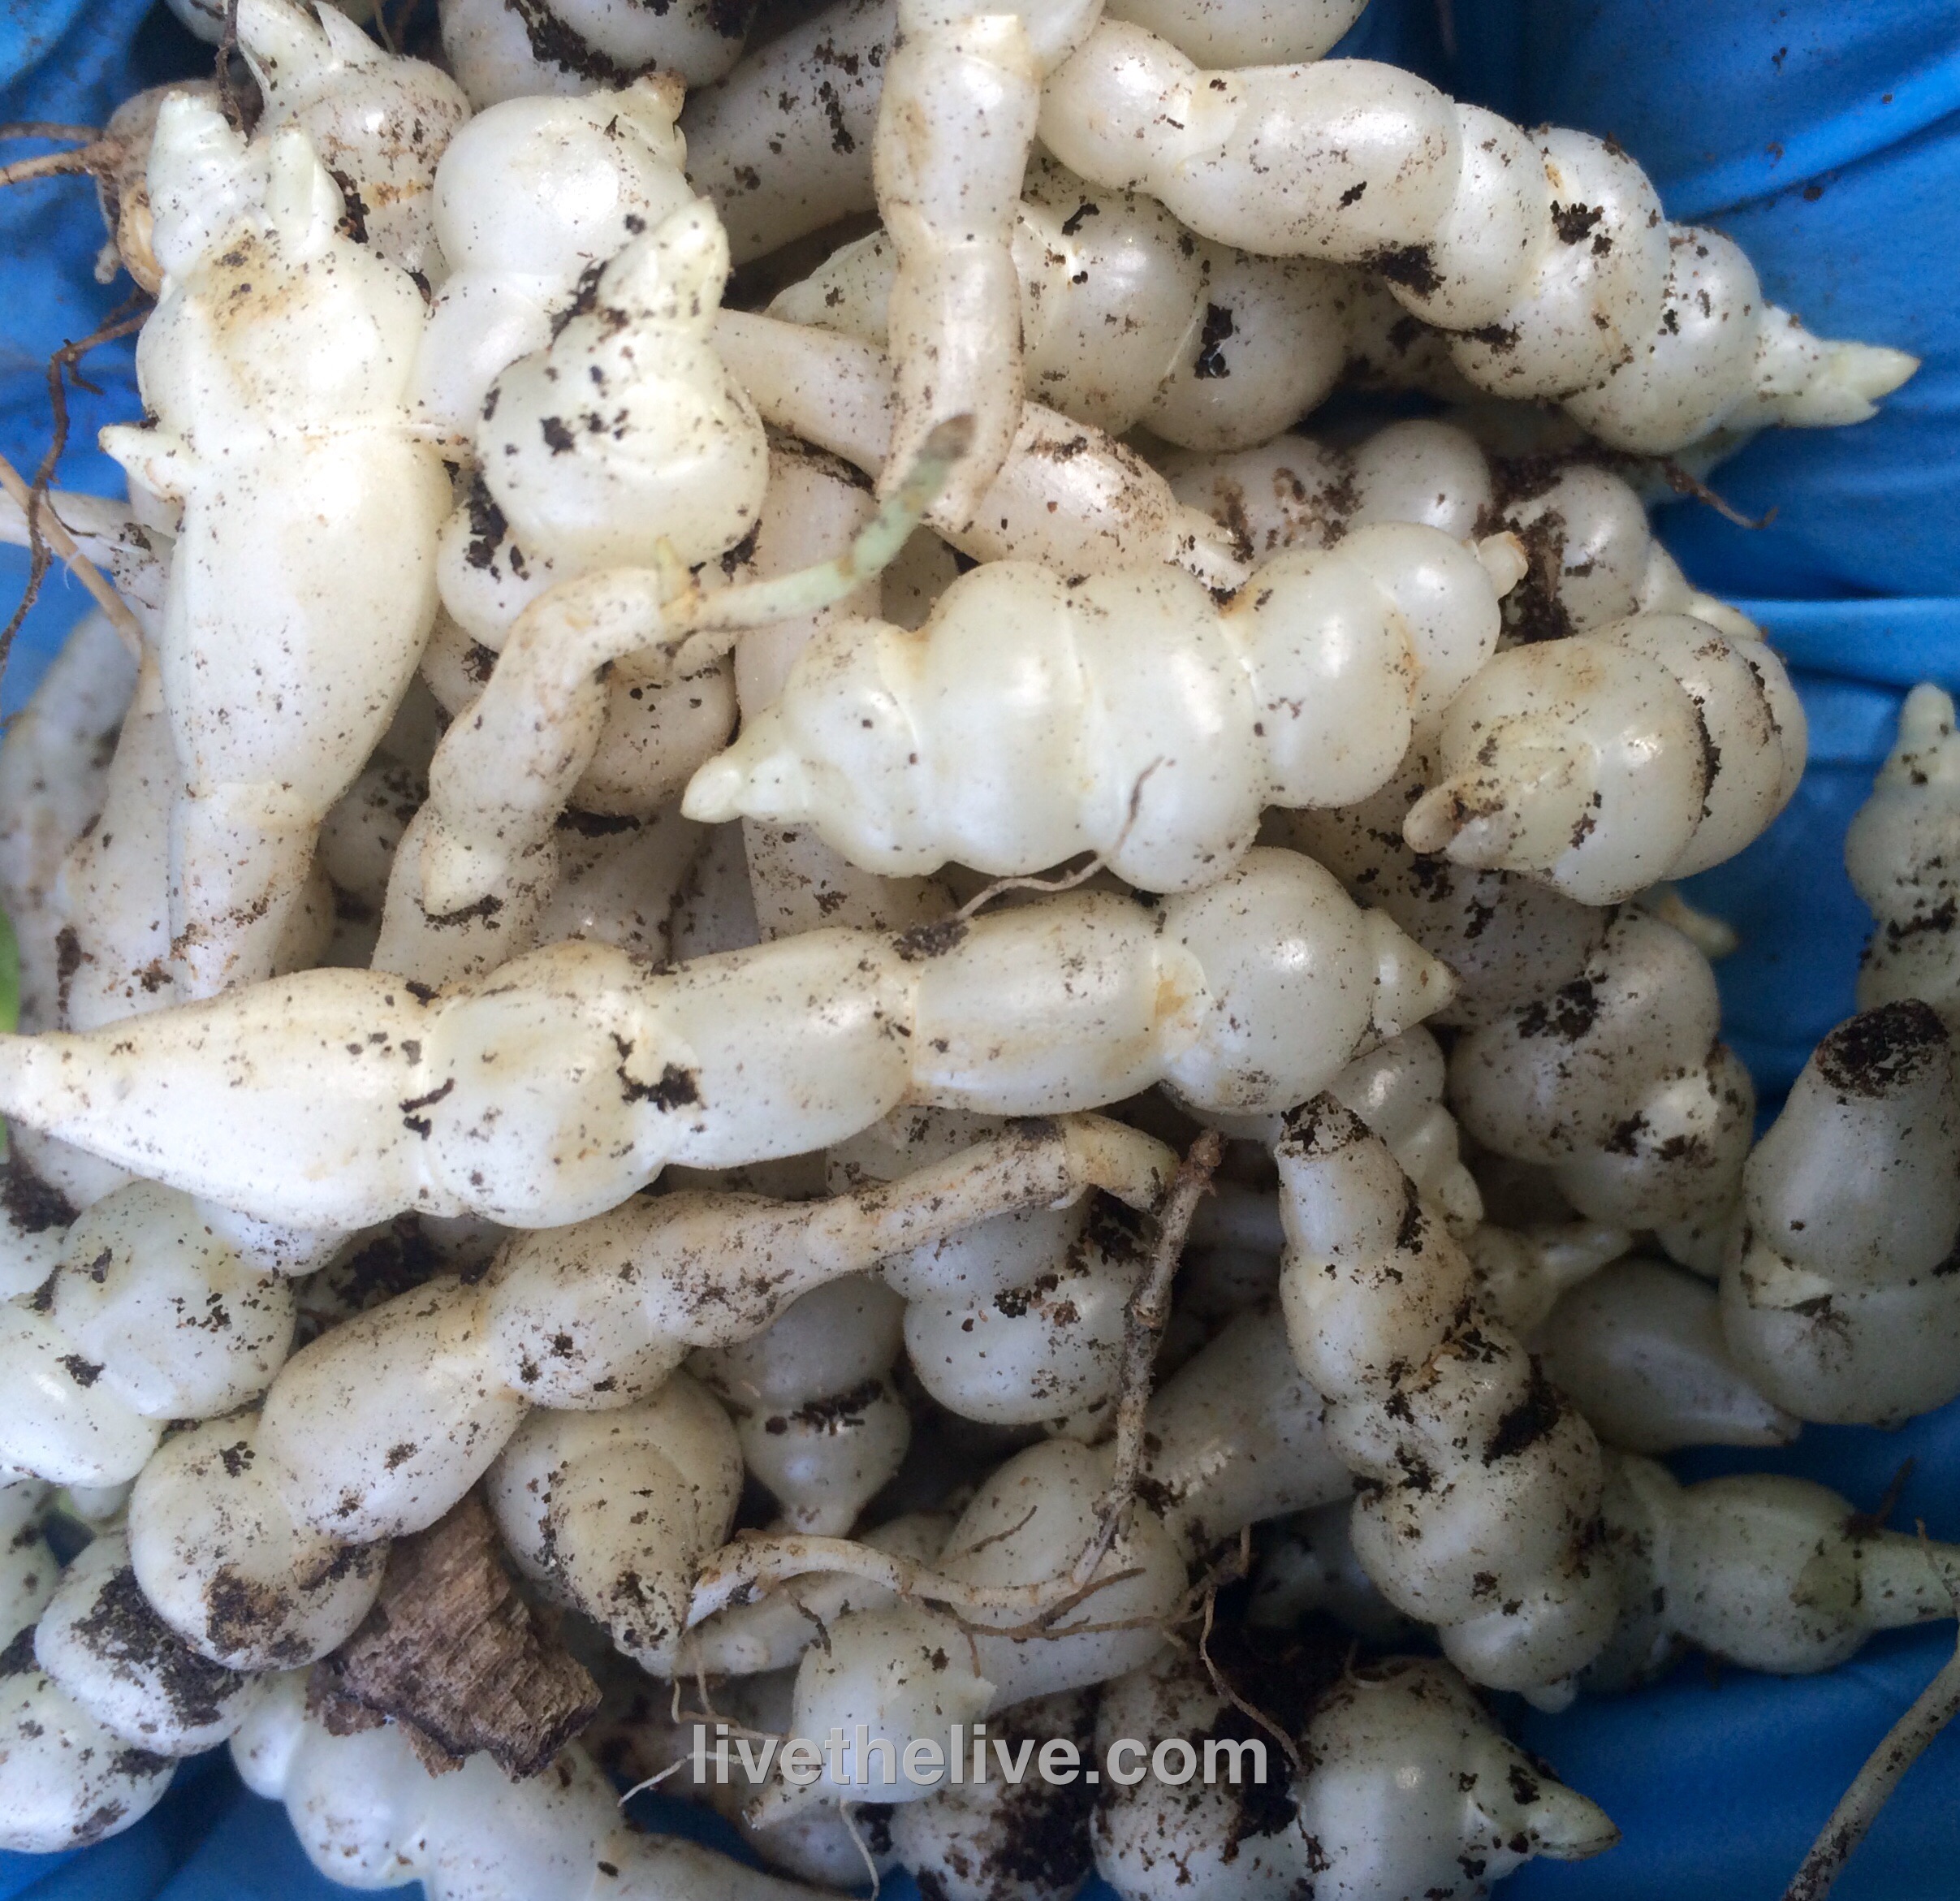
A few years ago, at Le Saint-Amour, a great restaurant in Quebec City, the dish I ordered had these small strange-looking root vegetables sitting next to my roasted duck entrée. They resembled tiny twisted parsnips…or caterpillars! I needed to know what these things were, and so I asked my French waiter, who came back with a piece of paper that had the word “crosne” written on it. He said: “I don’t know how they say it in English.”
Back at the hotel room, I went right to the laptop and started a search on-line and discovered that crosnes (pronounced crones) are also known as Chinese artichokes, and although they are somewhat common in European gardens, they’re really difficult to find in the states.
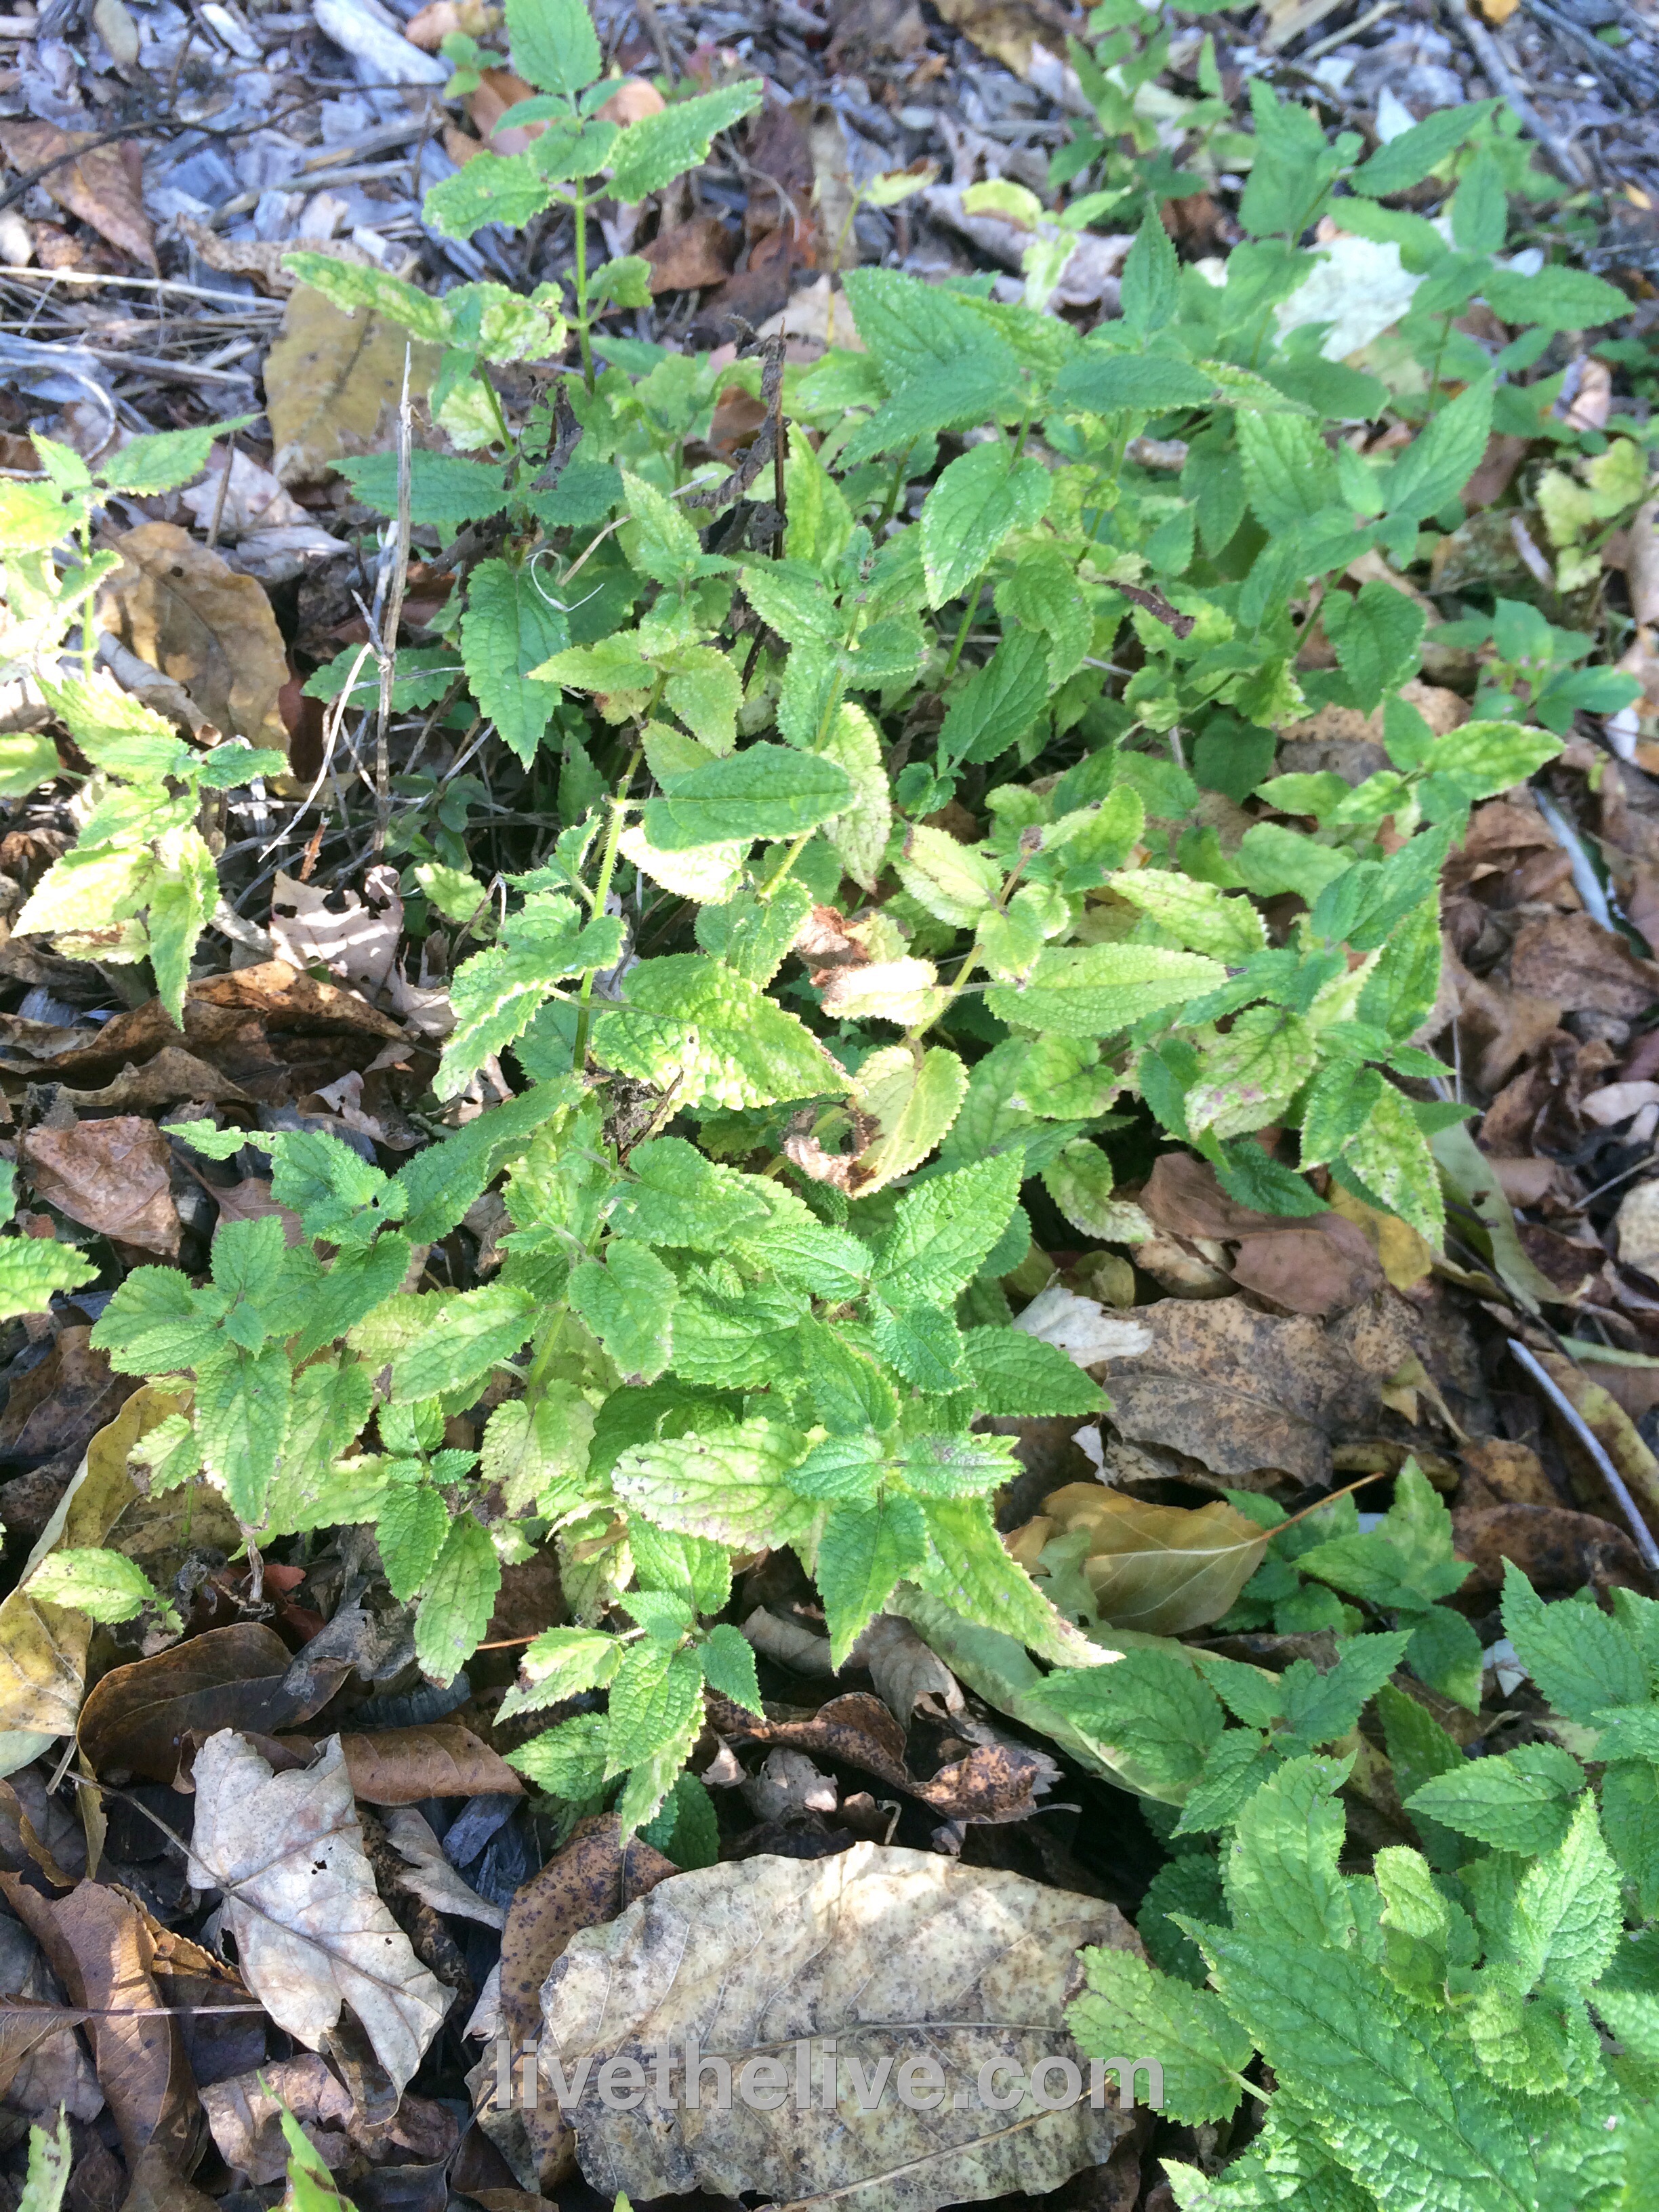
The leaves look like mint, but don't have a fragrance.

The leaves look like mint, but don’t have a fragrance.

The plant is a relative of mint (though the leaves have no aroma), a perennial, is easy to grow, spreads on its own, and has those small, convoluted and delicious root clumps (known as tubers to gardeners.) So what’s not to like? Well, apparently, it’s not the gardeners that don’t want to deal with them…it’s the chefs! The tubers are very small and need a little extra effort to make sure they’re washed clean before cooking. They don’t need to be peeled (now that would be a pain in the ass) but to many chefs, even the washing is too much of a hassle.
image
As a Master Gardener, I found all of this pretty interesting so I searched for sources to buy crosnes plants. It took a while (most growers were in Europe or Great Britain), but I finally found a source in Oregon that sold the plants and I bought a few for my home garden.
image

Much like mint, crosnes are pretty hardy and are tough to remove once well established, so they need to be planted in an area where you don’t mind if they take over. The tubers are ready to harvest October through November, and as long as I leave some in the ground over the winter, the crosnes will be back again the next year. Seems pretty low-maintenance for such a delicious treat!

image

As for preparation, a light saute in olive oil and butter (or lard), and a little salt and pepper, is all they need. They also go well with a deep, rich demi glace reduction like I had with my duck at Le Saint-Amour.

If you grow tomato plants in pots, you already know that you don’t need an actual garden plot to have a successful harvest of fresh produce. Herbs and greens can also be grown without much effort.

But have you tried potatoes or sweet potatoes?

image

POTATOES

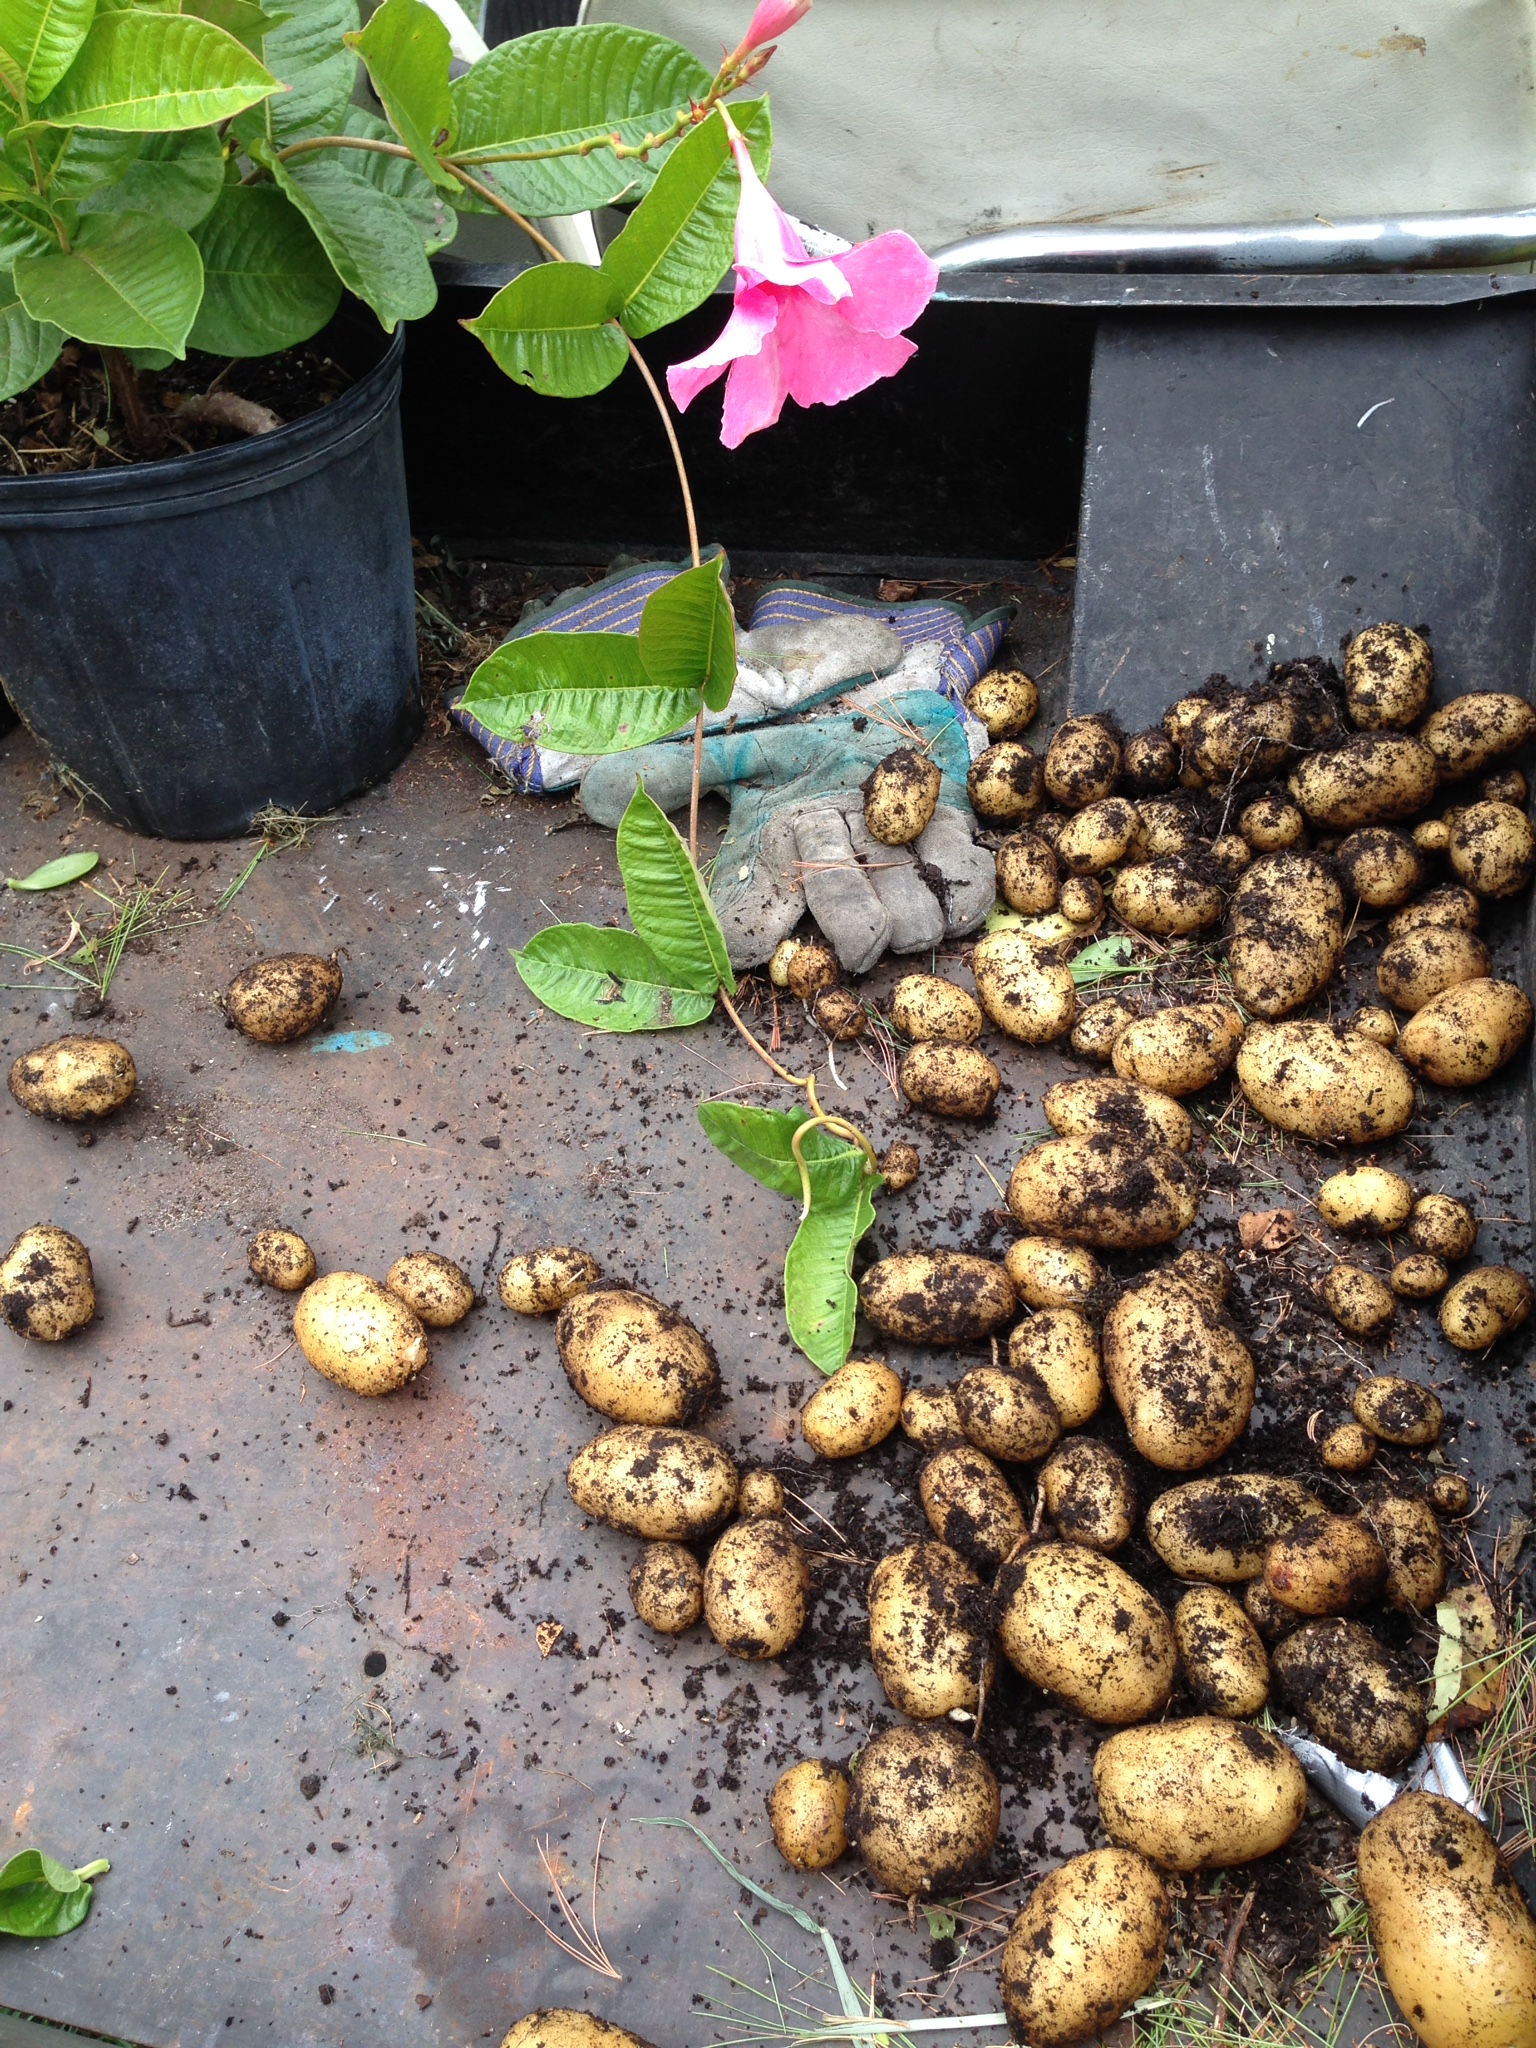
Growing potatoes in pots is actually better in many ways than growing them in your garden. They can take up some serious garden space, especially tough for gardeners that have a relatively small space to grow their veggies. Putting potatoes in pots makes them concentrate their growing efforts on the limited space they’re given, and I’ve found that they produce a sizable harvest despite their restrictions.

You can buy seed potatoes from gardening companies online but you can also go to the store and simply buy a bag of organic potatoes. Have some of them for dinner, and leave the rest in a corner without sunshine to sprout right in the bag. Because they’re organic, they haven’t been sprayed with a sprout-inhibitor, and you’ll see that they’ll start to grow in no time. (You can also place each potato in a glass of water to aid in sprouting.) Once the potatoes sprout, cut each into 2 or 3 pieces, each piece with a bud. Get a large pot you want to grow them in (plastic is lighter and easier), making sure it has holes in the bottom for drainage, and fill it with only 3 inches of soil. Gently press the potato buds into this soil about 4 inches apart and water them. Every week as they grow, keep adding soil to the pot all the way up the stems to just under the top leaves. When you’ve filled the pot with soil, let the potatoes continue growing…they’re now on their own. They will bloom, and then the stems will start to wither and die. When the stems have died off (if you can wait that long!) simply tilt the pot over and you’ll pour out your potato harvest! Lots of fun for the kids to find this “buried treasure.”


Sweet potatoes growing in my yard in a pot with elephant ears.

Sweet potatoes growing in my yard in a pot with elephant ears.

SWEET POTATOES

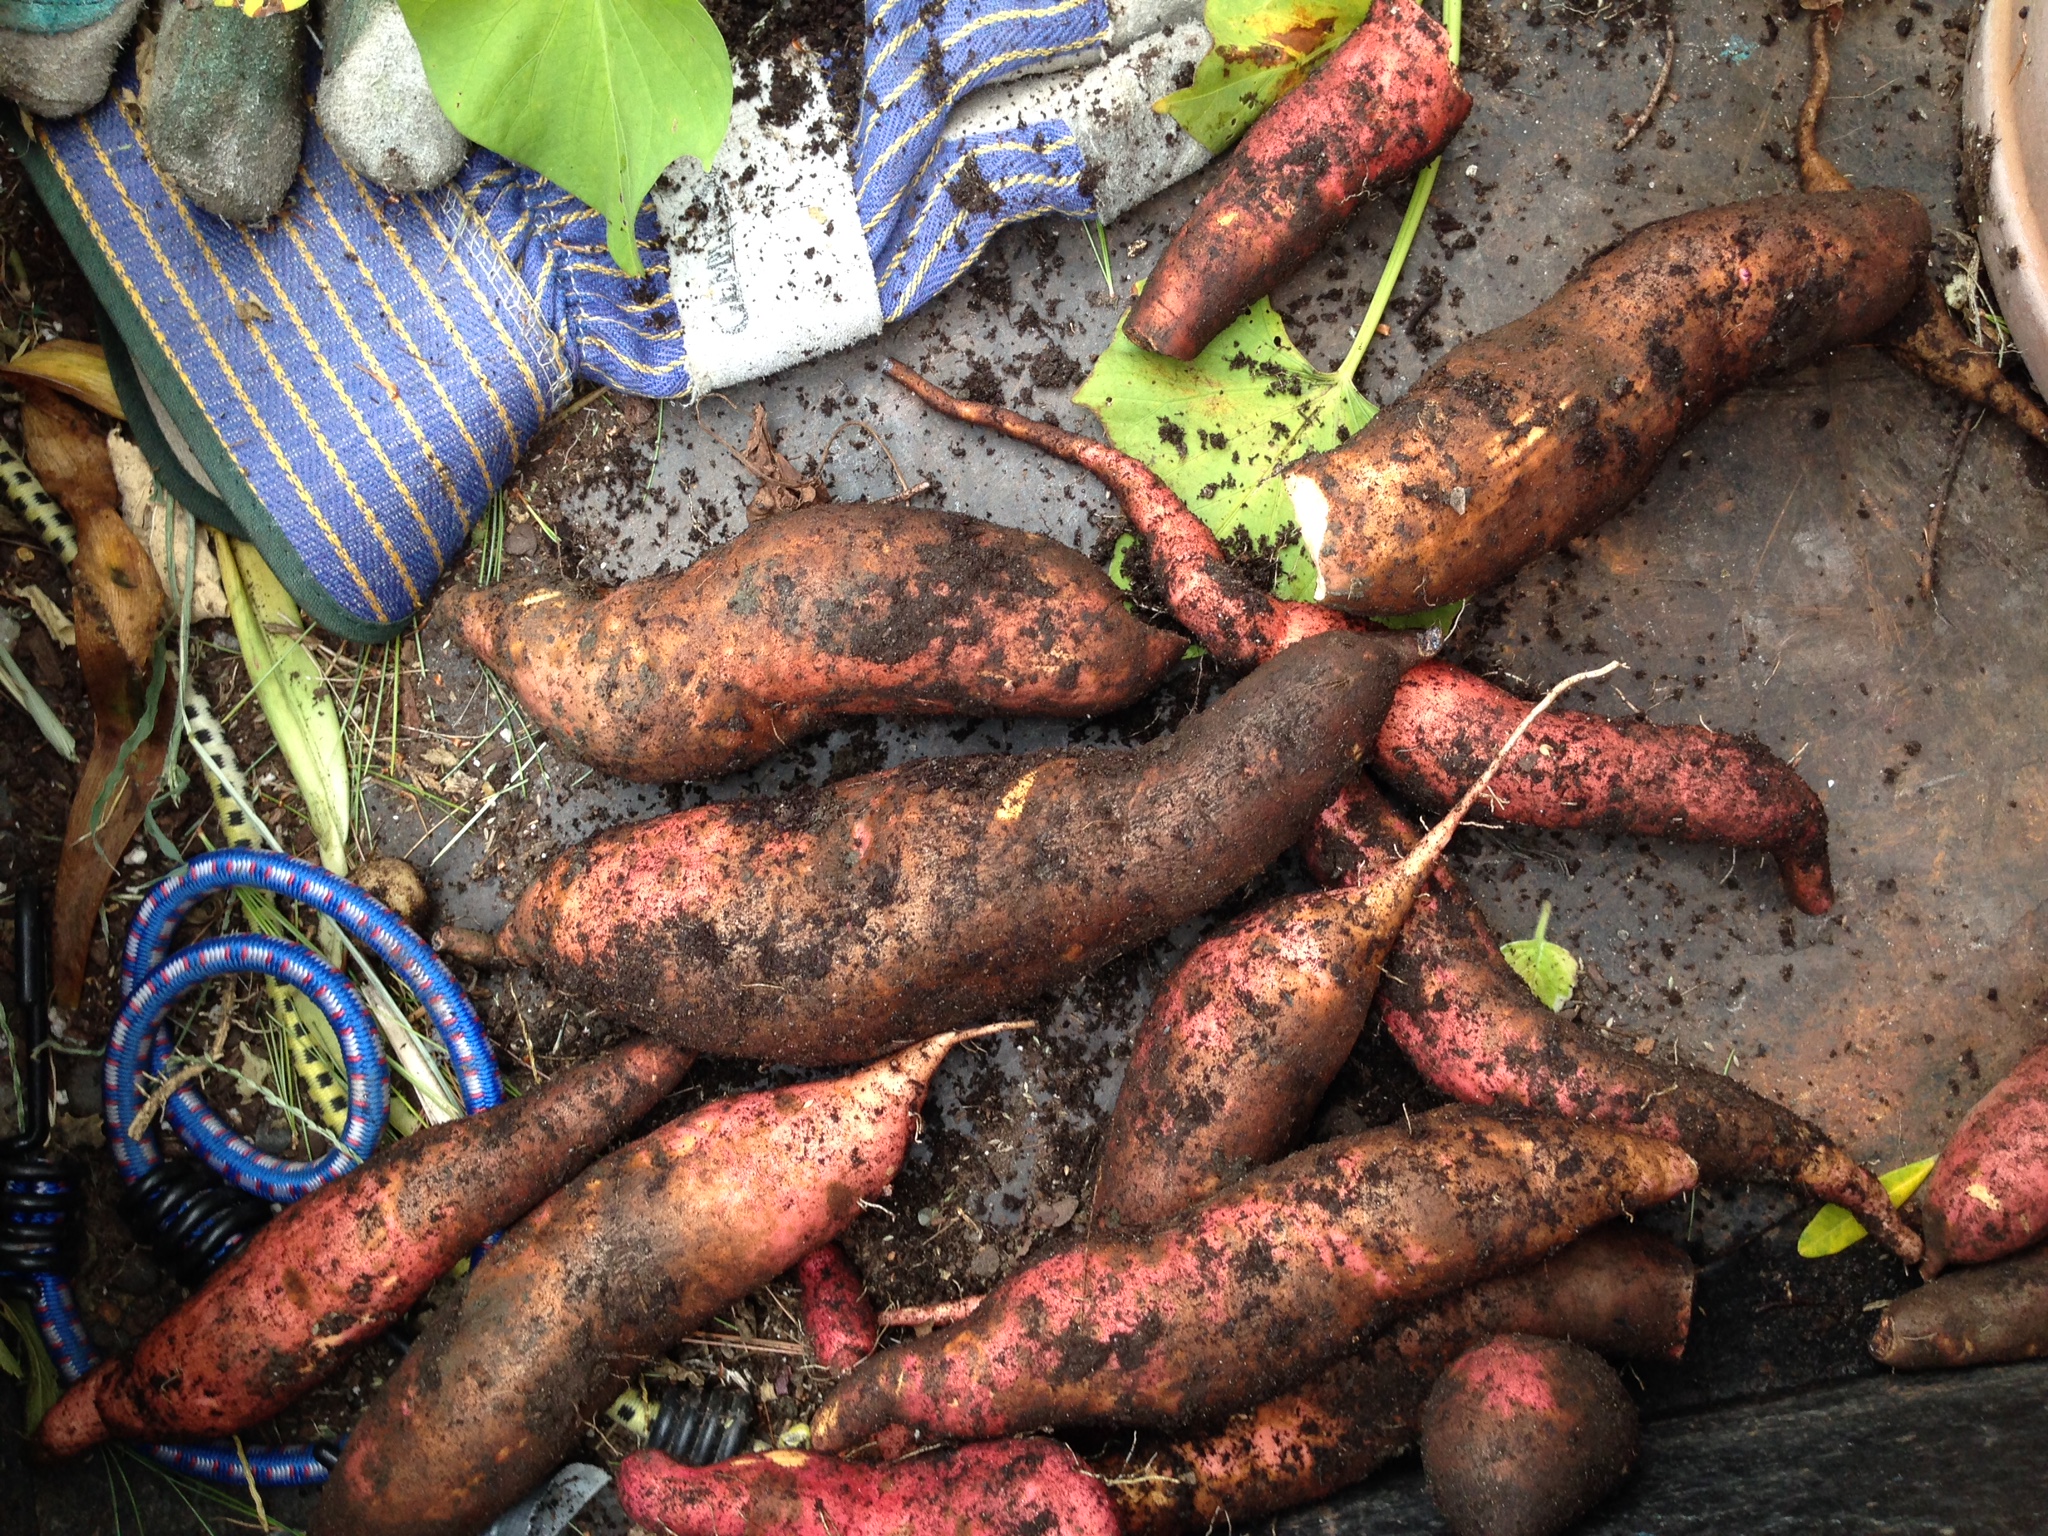
My wife loves sweet potato vines to decorate flower pots. So instead of  buying decorative sweet potato vines that don’t produce edible fruit, I buy edible sweet potato plants from a reliable garden catalog. I simply stick them in the potting soil next to our favorite flowers and let them grow all season long. The decorative leaves will cascade down the sides of the flower pots, but inside, under the soil surface, they’ll be secretly making delicious sweet potatoes!

When the growing season is over, gently dig away the potting soil in the pot (I use my hands to prevent damaging the sweet potatoes) and admire your harvest!

image

Potatoes and sweet potatoes need to be store in a cool place away from sunlight (and away from onions.) A cool garage works great.


Now’s the time to head to your local farm stand and pick up a bag of gorgeous plum tomatoes, before the season is gone! And this is what you do with them…

These are not sun-dried tomatoes. They’re better, because fresh plum tomatoes are still moist after roasting, with a bit of that magic tomato liquid in every cup! A great, simple platter to offer at parties.

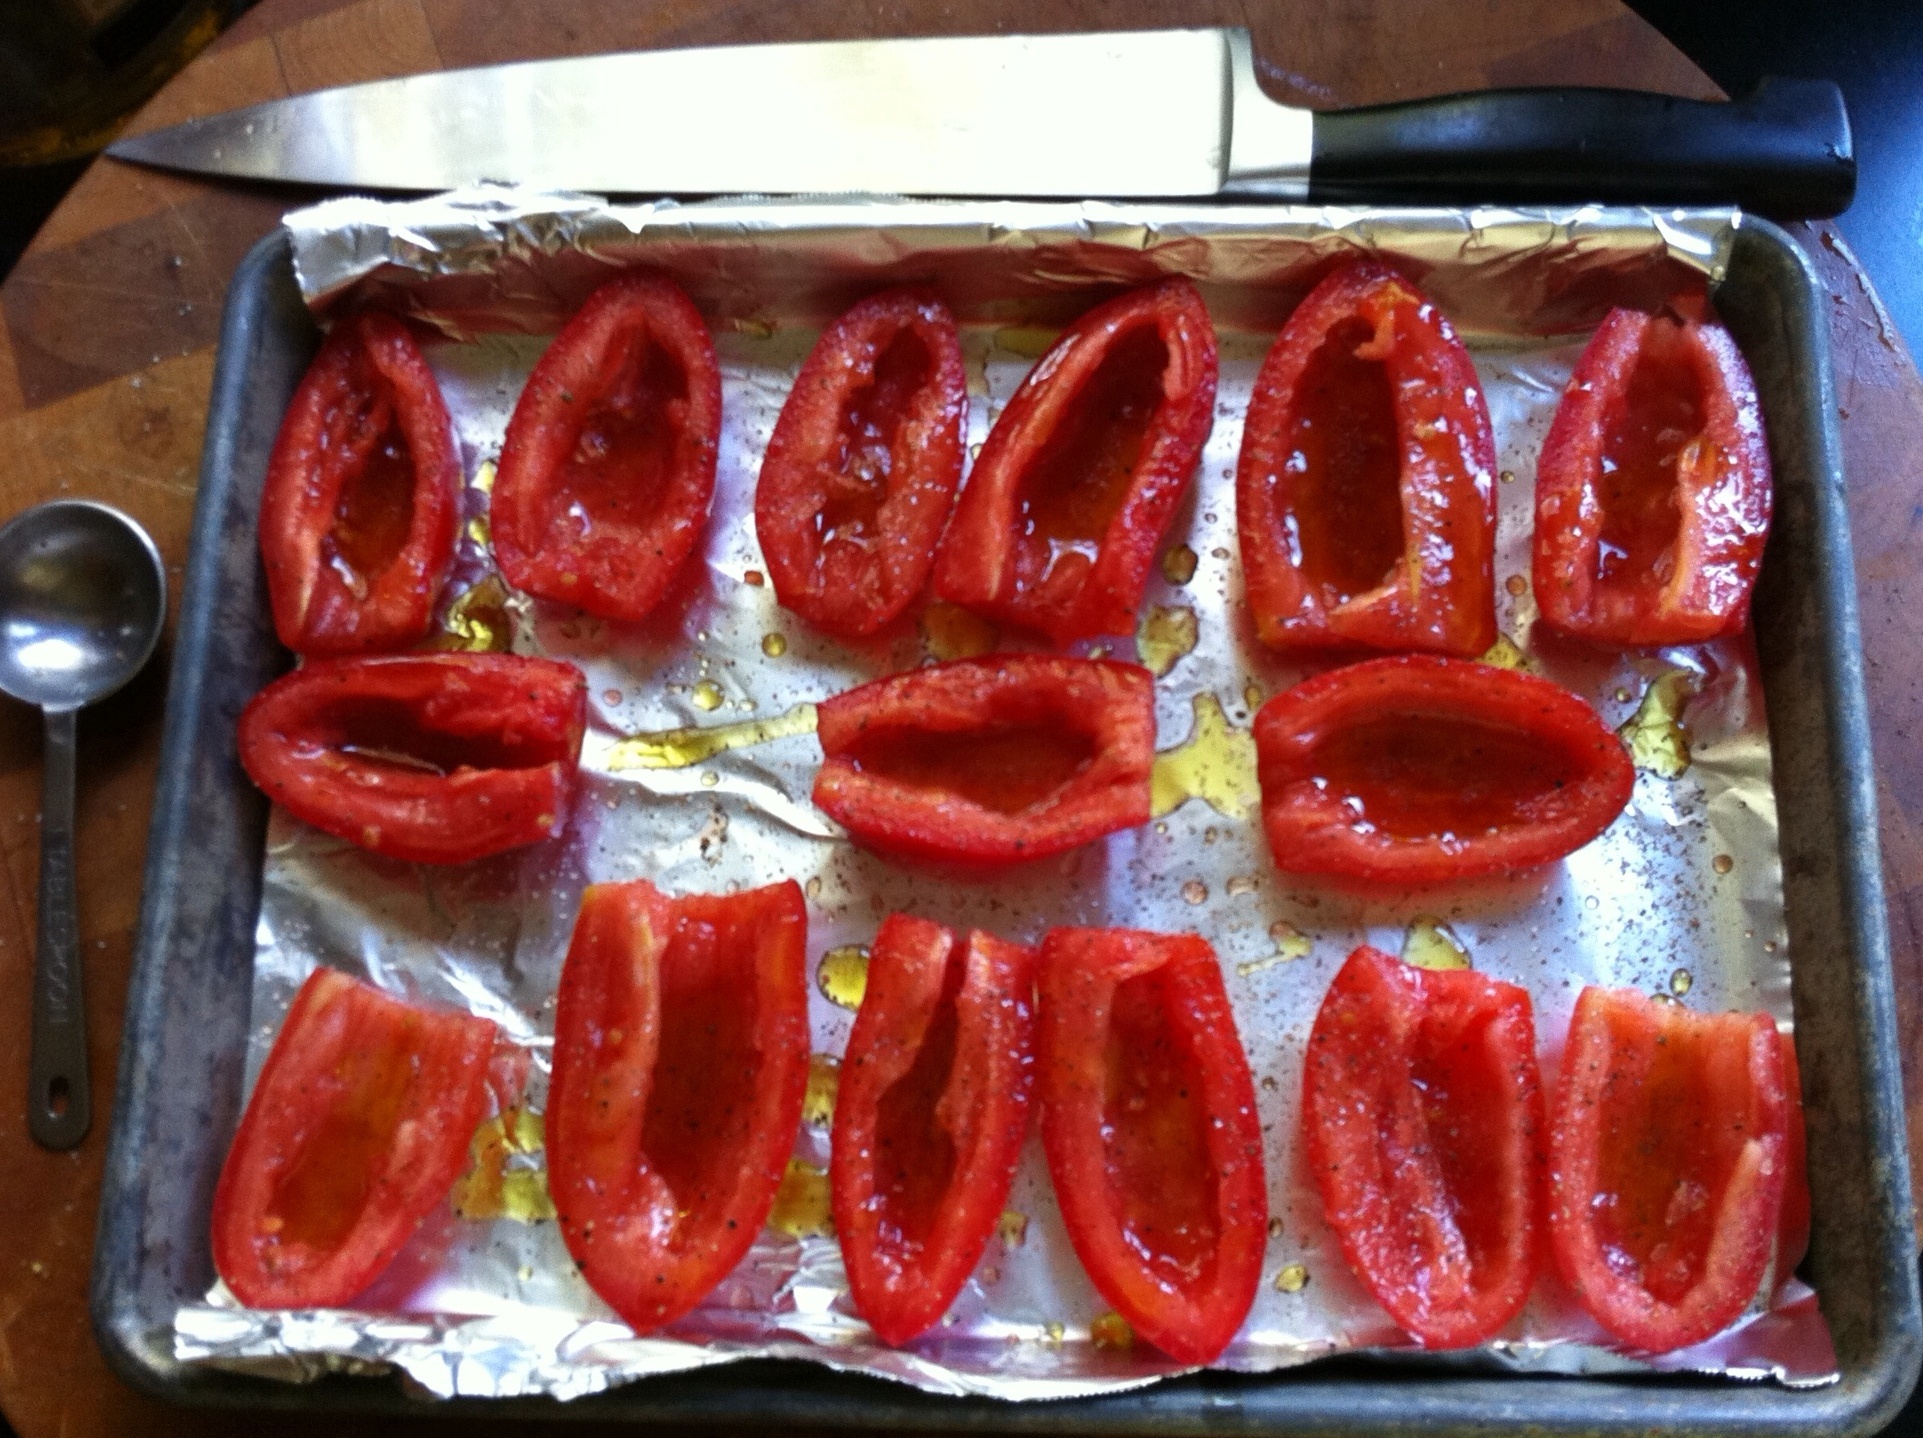
Tomatoes before

Tomatoes before

12 to 18 halved, seeded plum tomatoes
1/4 cup extra virgin olive oil
2 tablespoons organic cane sugar
Freshly ground pepper
Fleur de Sel or sea salt

Pre-heat the oven to 250.

Line a baking sheet with foil and rub it lightly with olive oil.

Arrange halved and seeded tomatoes on it in a single layer, cut side up. Drizzle evenly with 1/4 cup olive oil, sprinkle with 2 tablespoons sugar, and season with pepper to taste.

Bake the tomatoes until they are still juicy but slightly wrinkled, about 3 hours. Transfer to a platter and let cool slightly.

Just before serving, sprinkle tomatoes with Fleur de Sel, and garnish if you like, with chopped parsley leaves, mint leaves, or basil.

Tomatoes after

Tomatoes after

KOHL-SLAW

Posted: August 11, 2015 in Food, garden, Recipes
Tags: , , , ,

Kohlrabi is probably one of the most misunderstood vegetables you’ll find in the supermarket. Most people don’t have a clue about what to do with them. Kohlrabi is a member of the cabbage family and can be eaten raw as well as cooked.

For me, the real joy of kohlrabi is biting into a crunchy, sweet, freshly picked and peeled bulb right out of the garden. Unfortunately, much of the kohlrabi you find in a supermarket is grown larger than a tennis ball, making it tough, woody and dry. And they usually remove all the leaves, which are delicious cooked or raw.

I decided to make a slaw with the leaves and bulbs of my kohlarabi harvest, to best use all the parts of the plant. I used my Awesomesauce as the dressing. Find the recipe here: http://wp.me/p1c1Nl-gT

kohlrabi LTL

2 kohlrabi bulbs, with leaves
1 carrot
Alz Awesomesauce
salt and pepper to taste


Wash the veggies thoroughly before using. Pull the leaves off the kohlrabi bulb, and remove the stems. Grab a bunch of leaves at a time, roll them up tightly, and slice as thinly as you can into thin ribbons. Place in a bowl. Do this with all the leaves.

Peel the thick skin off the kohlrabi bulb and slice it as thinly as you can. Then take the slices and cut thin sticks out of them. Toss into the bowl.

Season the leaves and bulbs slices with a little salt and pepper, then add Awesomesauce to taste and toss well.

Refrigerate covered, and let the flavors blend for a couple of hours before using.

CHIVE TALKIN’

Posted: May 26, 2015 in Food, garden, pizza, Uncategorized
Tags: , , , , ,

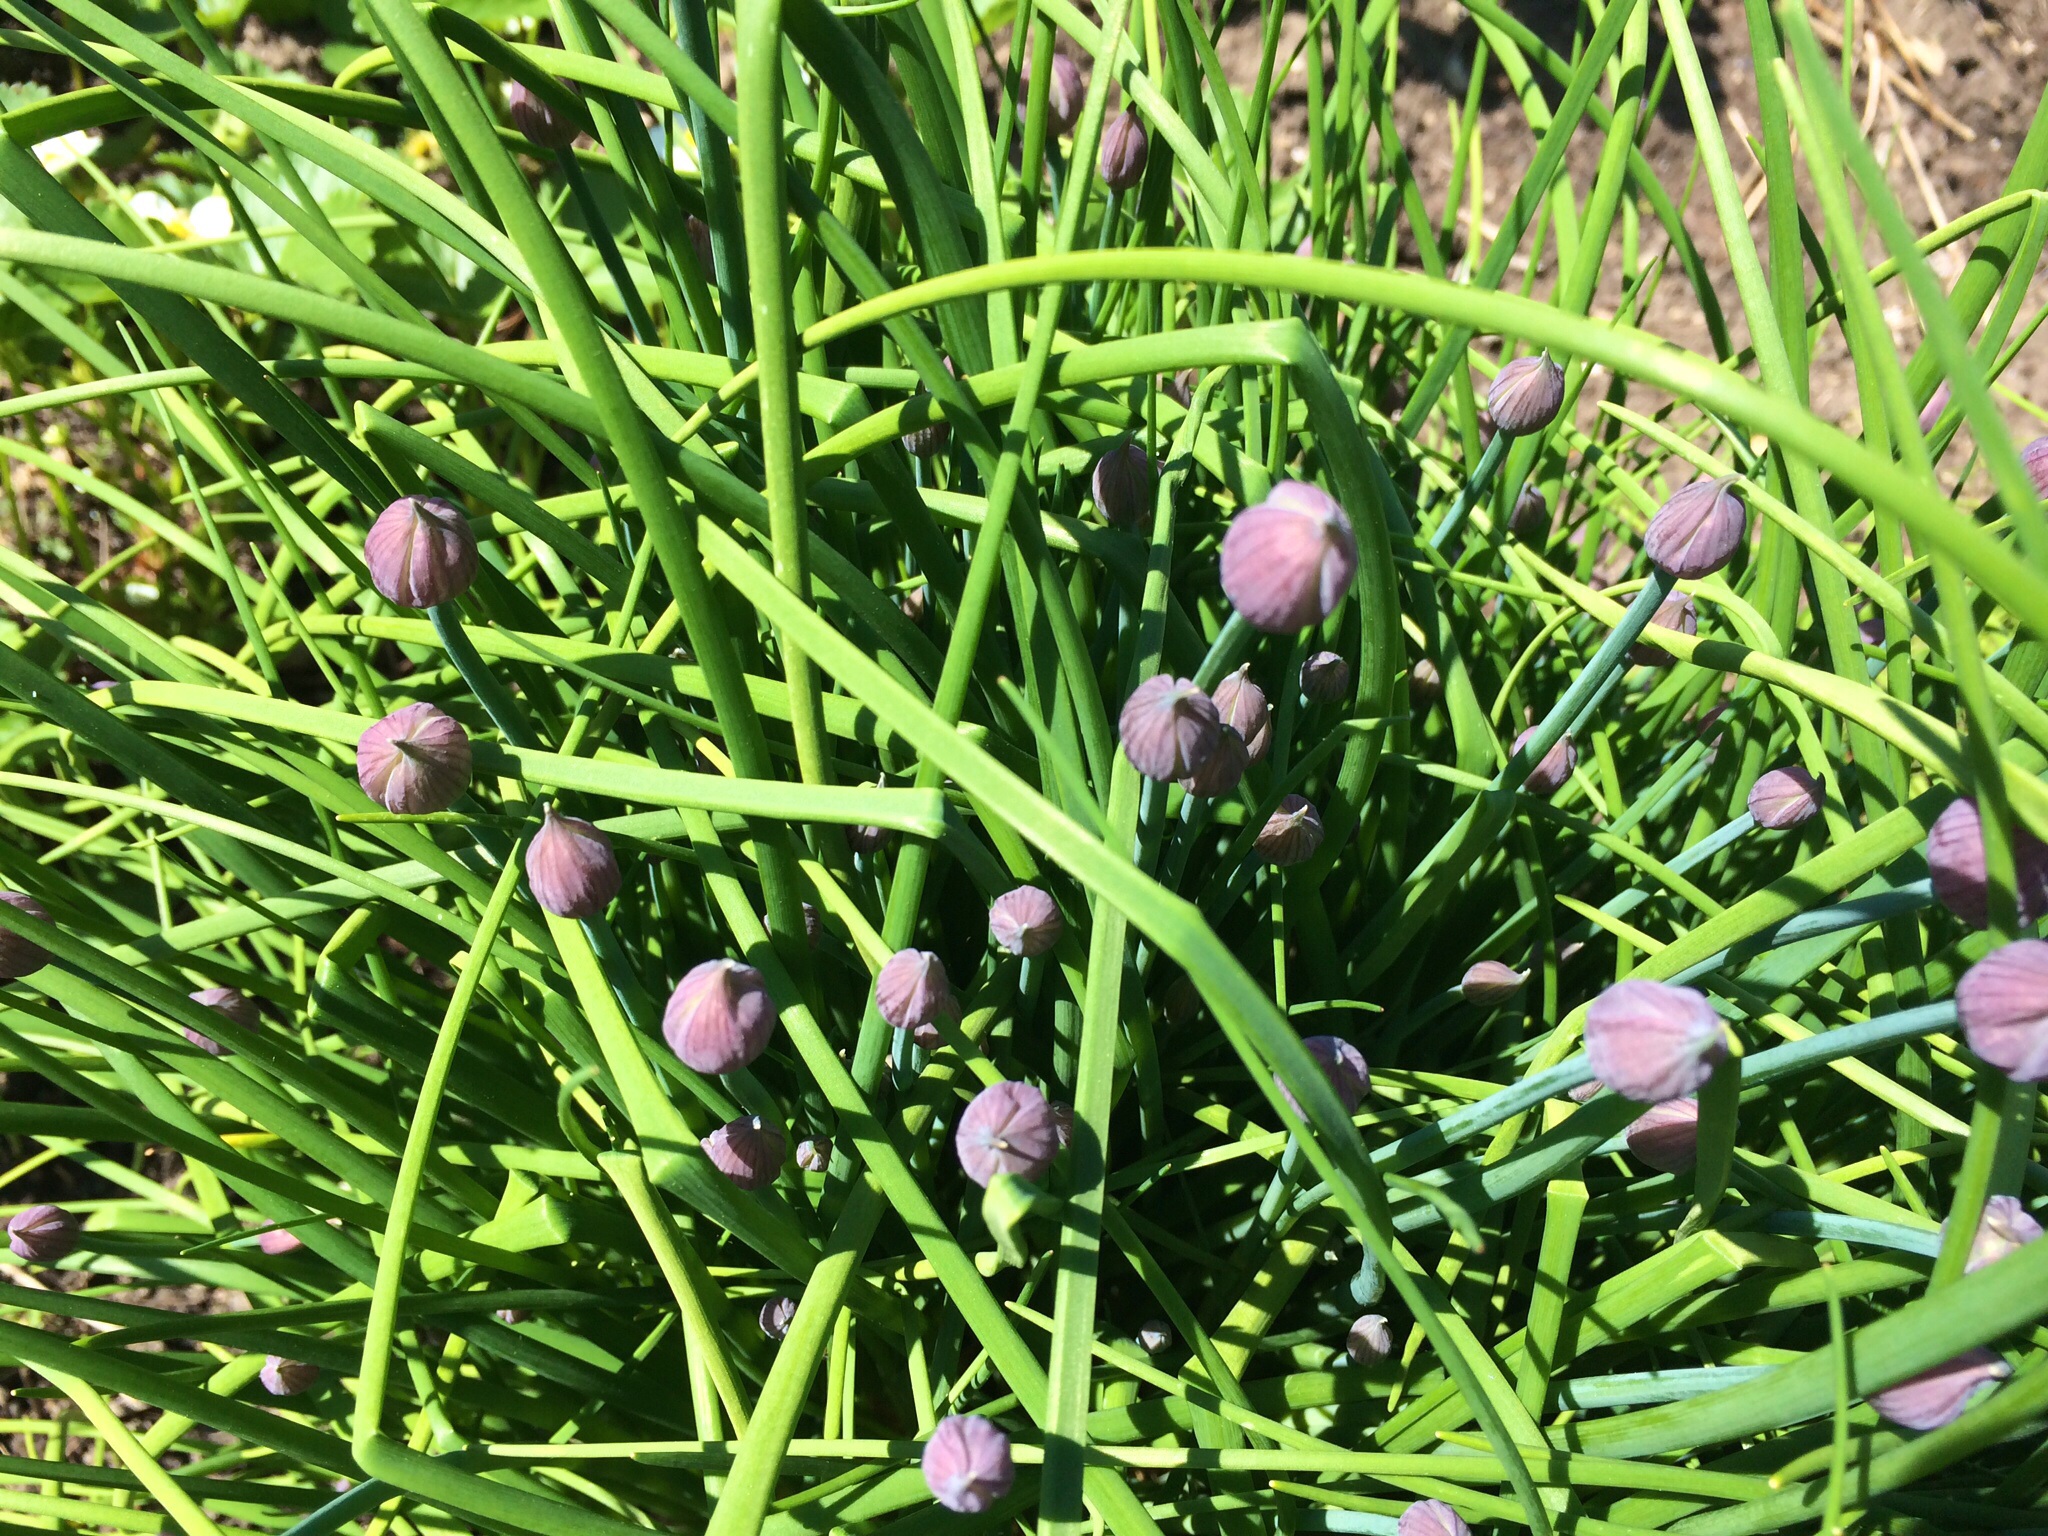
This is the time of year when the chives in my herb garden are busting out with blossoms. Before they pop, I head out every few days and snip the larger ones off the chive plants, wrap them in freezer bags and freeze them.

image

I use those blossoms over the course of the year on my signature marinated beef and chive blossom pizza. I just take a packet of chive blossoms out of the freezer, and sauté them in olive oil and salt and pepper, then sprinkle them on the pizza before baking.

My signature marinated beef tenderloin and chive blossom pizza.

My signature marinated beef tenderloin and chive blossom pizza.

Pick 'em and freeze 'em in May!

Pick ’em and freeze ’em in May!

Chive blossoms not only add great flavor, but they look cool on the plate, too.  I’ll add them as a side to almost any meat dish, or chop them after sauteing and sprinkle them in rice or quinoa.


I don’t let the crazy New England winter weather get me down! Spring is just a couple of weeks away! And that’s why I’d like to take you on a tour of my gardens. I hope you enjoy them!

My sitting area, where I can view several of my gardens, all from one comfortable seat!

My sitting area, where I can view several of my gardens, all from one comfortable seat!


The peonies and coneflowers will be up in no time!

The peonies and cone flowers will be up in no time!

I hear snow makes a great insulator. If that's the case, I've got an insulation bonanza!

I hear snow makes a great insulator. If that’s the case, I’ve got an insulation bonanza!


No garden is complete without compost bins busily cranking out that brown gold!

No garden is complete without compost bins busily cranking out that brown gold!


Asparagus, anyone?

Asparagus, anyone?

My guardian owl watches over the veggies and keeps the annoying critters out!

My guardian owl watches over the veggies and keeps the annoying critters out!


Thanks so much for touring my garden! It’s a lot of work, but it’s so gratifying!

A few years ago, at Le Saint-Amour, a great restaurant in Quebec City, the dish I ordered had these small strange-looking root vegetables sitting next to my roasted duck entrée. They resembled tiny twisted parsnips…or caterpillars! I needed to know what these things were, and so I asked my French waiter, who came back with a piece of paper that had the word “crosne” written on it. He said: “I don’t know how they say it in English.”
Back at the hotel room, I went right to the laptop and started a search on-line and discovered that crosnes (pronounced crones) are also known as Chinese artichokes, and although they are somewhat common in European gardens, they are really difficult to find in the states.
The leaves look like mint, but don't have a fragrance.

The leaves look like mint, but don’t have a fragrance.

The plant is a relative of mint (though the leaves have no aroma), a perennial, is easy to grow, spreads on its own, and has those small, convoluted and delicious root clumps (known as tubers to gardeners.) So what’s not to like? Well, apparently, it’s not the gardeners that don’t want to deal with them…it’s the cooks! The tubers are very small and therefore need a little extra effort to make sure they are washed clean before cooking. They don’t need to be peeled (now that would be a pain in the ass) but to many chefs, even the washing is too much of a hassle.
image
Now it seems that more chefs are discovering crosnes, and they just can’t get a hold of them.
As a Master Gardener, I found all of this pretty interesting so I searched for sources of buying crosnes plants for my own garden. It took a while (most growers were in Europe or Great Britain), but I finally found a source in Oregon that sold the plants and I bought a few for my home garden.
image

A relative of the mint plant, crosnes are pretty hardy and are tough to remove once well established, so they need to be planted in an area where you don’t mind if they take over. The tubers are ready to harvest around October, and as long as I leave some in the ground over the winter, the crosnes will be back again the next year. Seems pretty low-maintenance for such a delicious little treat!

image

As for preparation, a light saute in olive oil and butter (or lard), salt and pepper is all they need, until cooked but crisp. They also go well with a deep, rich demi glace reduction like I had with my duck at Le Saint-Amour.

KOHL-SLAW

Posted: July 8, 2014 in Food, garden, Recipes
Tags: , , , ,

Kohlrabi is probably one of the most misunderstood vegetables you’ll find in the supermarket. Most people don’t have a clue about what to do with them. Kohlrabi is a member of the cabbage family and can be eaten raw as well as cooked.

For me, the real joy of kohlrabi is biting into a crunchy, sweet, freshly picked and peeled bulb right out of the garden. Unfortunately, much of the kohlrabi you find in a supermarket is grown larger than a tennis ball, making it tough, woody and dry. And they usually remove all the leaves, which are delicious cooked or raw.

My kohlrabi harvest has just begun in my home garden, and I decided to make a slaw with the leaves and bulb, to best use all the parts of the plant. I used my Awesomesauce recipe as the dressing. Find the recipe here: http://wp.me/p1c1Nl-gT

kohlrabi LTL

Ingredients:


2 kohlrabi bulbs, with leaves

1 carrot

Alz Awesomesauce

salt and pepper to taste


Wash the veggies thoroughly before using. Pull the leaves off the kohlrabi bulb, and remove the stems. Grab a bunch of leaves at a time, roll them up tightly, and slice as thinly as you can into thin ribbons. Place in a bowl. Do this with all the leaves.

Peel the thick skin off the kohlrabi bulb and slice it as thinly as you can. Then take the slices and cut thin sticks out of them. Toss into the bowl.

Season the leaves and bulbs slices with a little salt and pepper, then add Awesomesauce to taste and toss well.

Refrigerate covered, and let the flavors blend for a couple of hours before using.