Posts Tagged ‘garden’

Many people, even avid gardeners, seem to think that composting is extremely complicated and that it will take up too much of their time. And so they miss out on one of the most important free sources of organic matter for their gardens.
Composting is a win–win in every way imaginable.
Composting allows you to recycle kitchen food scraps. When you consider the fact that about 30% of all landfill waste is food scraps that could have been recycled into compost, you quickly see the value of this process.
Composting saves you trips to the dump and dirty looks from your garbage man when you leave too many bags at the end of your driveway. Why put all those grass and leaf clippings into a landfill when you can transform them into organic material that will nourish your garden plants?
Good composting basically means supplying microbes with the right balance of food so that they can thrive and break down your yard and kitchen waste. Despite what you may read elsewhere, the reality of backyard composting is that you will never get that super-hot pile they talk about in all the composting manuals. But, if you have a pile that cooks reasonably well, and becomes a haven for many happy redworms, you can consider your efforts a success.
My compost bins, with dahlias, cosmos and scarlet runner beans in front.

My compost bins, with dahlias, cosmos and scarlet runner beans in front.

Compost piles are aerobic, meaning they need fresh air to be successful, so it is important to aerate your compost pile once in a while. Simply take a shovel or pitchfork and “fluff” the pile up, mixing the contents. You’ll find that this small amount of maintenance will keep the aerobic microbes happy, and will keep the anaerobic microbes (the ones that don’t require air and cause the compost pile to smell bad) away.
Keep your compost pile out of the full sun. Successful composting requires the pile to be moist, and the summer sun will dry things out very quickly. Semi-shade is a better way to go.
The main types of food for your compost pile, easily split into 2 categories, are green and brown. Green waste is made of fresh plant material from the garden, kitchen fruit and vegetable scraps, and coffee grounds. They don’t necessarily need to be the color green. The term “green,” in this case, means they contain nitrogen. Avoid weeds because weed seeds can survive the average home composter and will sprout when you return the compost back to your soil the next season. And avoid all animal products (meat, dairy) unless you like rotten smells and animals tearing up your yard.
Brown waste is made of straw, leaves, wood chips, sawdust, newspaper, and even some cardboard. Brown waste tends to be drier than green waste, so it’s a good idea to soak things like newspaper and cardboard before putting it into your compost pile.
Too much green material will cause your compost to take on a not-so-delightful bouquet reminiscent of ammonia because of the excess of nitrogen. Adding a little brown stuff to it and mixing it through will help it stay odor-free.
The end of the season, when the leaves have fallen in my yard, is the only time I use the bagger on my riding lawn mower. (I let the mulched grass clippings go back into the soil the rest of the season.) But in the fall, I bag the grass clippings and leaves together, effectively combining green and brown in a perfect mix that starts to cook in my compost piles almost immediately. The result is some pretty well broken down material by the springtime.
If you’ve got a lot of leaves, most leaf blowers can suck up leaves, too, and they grind them up into fine particles that are worth their weight in gold. Throw them in your compost pile, or even till into your garden soil in the fall.
I keep a metal compost bucket with a lid under the kitchen sink. No need to buy an expensive bucket with a carbon-filter built into the lid from those garden catalogs. Just a good metal or plastic bucket with a lid, and before I dump my vegetable scraps and coffee grinds into it, I line the bottom with a single sheet of newspaper. That’s all I  need to keep the bucket from stinking up the room until I dump it into the compost pile.
There are many composters to choose from, from rotating drums that claim you’ll get compost in 14 days, to simple wooden or wire frames that hold the pile in check. Use what works best for you. I have a system of 3 bins made from wooden slats. When I fill one, I start on the next. Other than aerating them once in a while, I don’t mess with them. It takes about a year, but at the end of a long winter, I usually have some pretty nice compost to use in the springtime garden.
A word about manure in your garden: You should never use raw manure directly in your garden. You don’t want raw parasite-laden manure touching or splashing up onto your vegetables. If you get a supply of fresh horse or cow manure, mix it into your garden in the fall after you’ve harvested all of your veggies. It will winter over and be ready to make your garden happy the next season. Or let it sit in your compost bin for a year before using it. Though some will rave about the benefits of chicken manure, the fact is it harbors salmonella, which takes a year or two to go away. I won’t use it.
As I mentioned a little while ago, I grow two varieties of bamboo in my yard, and although they are quite invasive, I have my own methods of keeping the plants in check.

One stand of bamboo is in a corner of my yard that is overrun by brambles and other nasty vines. So I have no issues with the bamboo taking over this area at all. I’d rather have a desirable invasive than an ugly one.

The other stand of bamboo is a larger variety that grows to 25 feet tall, and it requires more maintenance to keep it in the area I want it to stay in. So, when some of the shoots get in my way, I simply cut them with a hacksaw and use them in my garden.

image

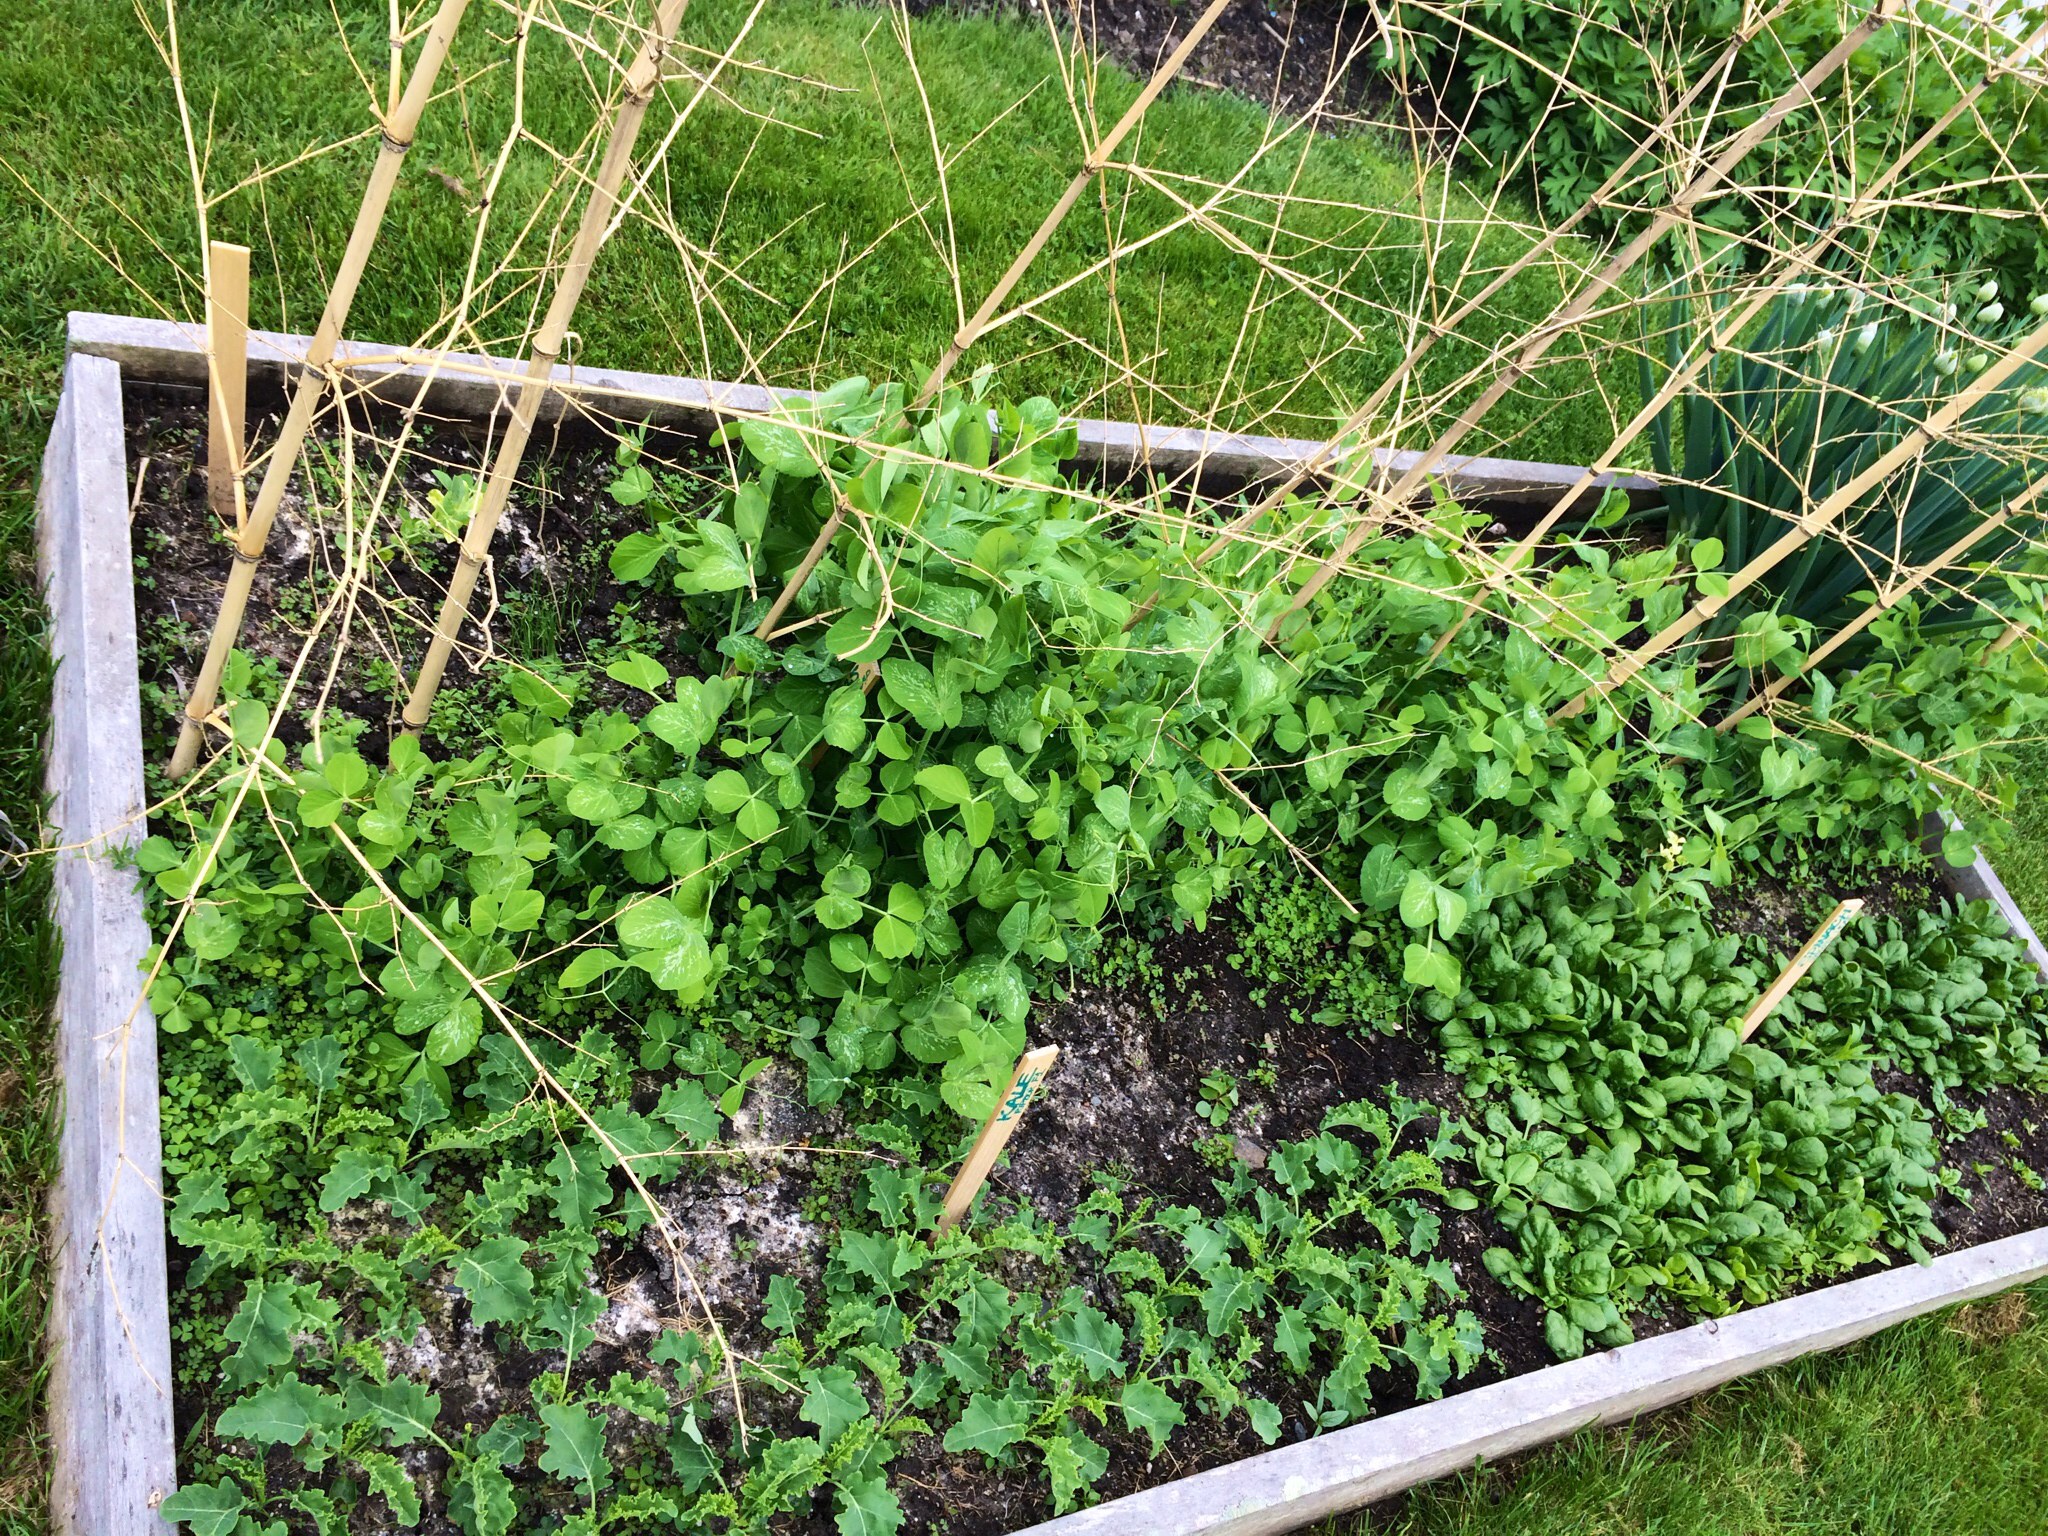
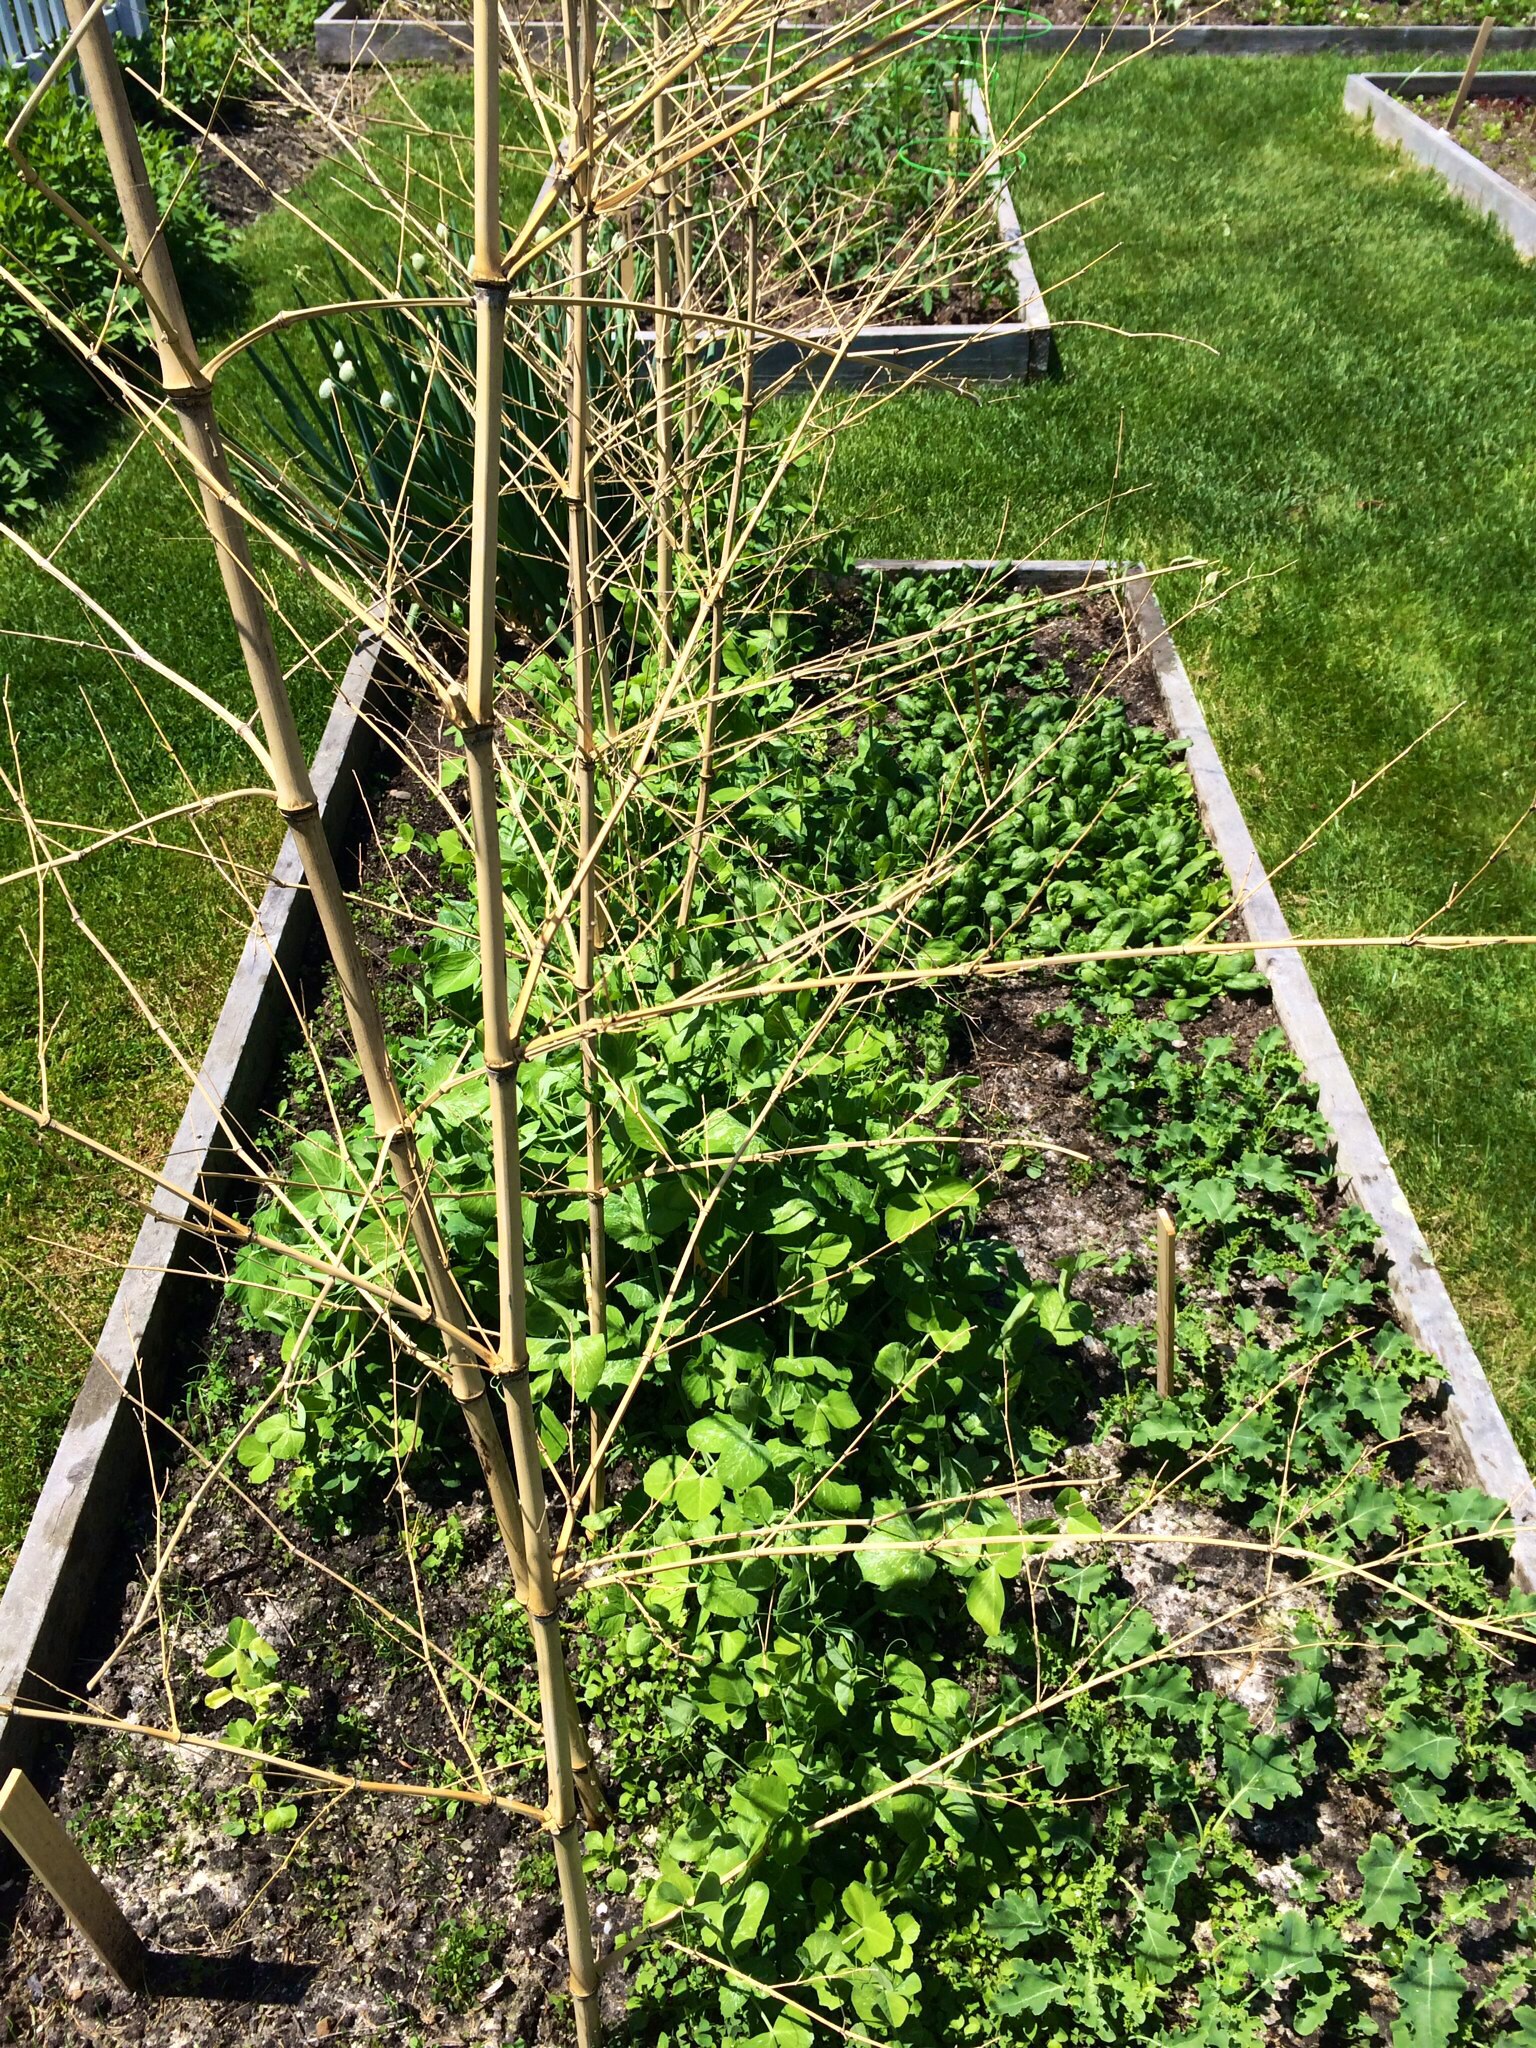
I use them as tomato stakes, supports for my cucumbers vines, and even pea brush, as shown here. For pea brush, I don’t remove the smaller side branches, which gives something for the peas to attach to. The photo above was from earlier in the season. Here’s what it looks like now: over 6 feet tall!

peas1

Another view earlier in the season…

Peas with pea brush, kale, spinach.

Peas with pea brush, kale, spinach.

…And now…

peas2

The kale and spinach have been harvested. (The weather’s too hot for them now.) And I’ve sown some lettuce mixes in their place. Since the bed of lettuce is on the north side of the peas, the lettuce will be shaded by the peas in the hot sun.

Bamboo is a great way to give my garden a more natural look, and not having rusty metal poles everywhere.

I grow two varieties of bamboo in my yard, and although they are quite invasive, I have my own methods of keeping the plants in check.

One stand of bamboo is in a corner of my yard that is overrun by brambles and other nasty vines. So I have no issues with the bamboo taking over this area at all. I’d rather have a desirable invasive than an ugly one.

The other stand of bamboo is a larger variety that grows to 25 feet tall, and it requires more maintenance to keep it in the area I want it to stay in. So, when some of the shoots get in my way, I simply cut them with a hacksaw and use them in my garden.

image

I use them as tomato stakes, supports for my cucumbers vines, and even pea brush, as shown here. For pea brush, I don’t remove the smaller side branches, which gives something for the peas to attach to.


Peas with pea brush, kale, spinach.

Peas with pea brush, kale, spinach.


A great way to give my garden a more natural look, rather than having rusty metal poles everywhere.

CHIVE TALKIN’

Posted: May 20, 2014 in Food, garden, pizza, Uncategorized
Tags: , , , , ,

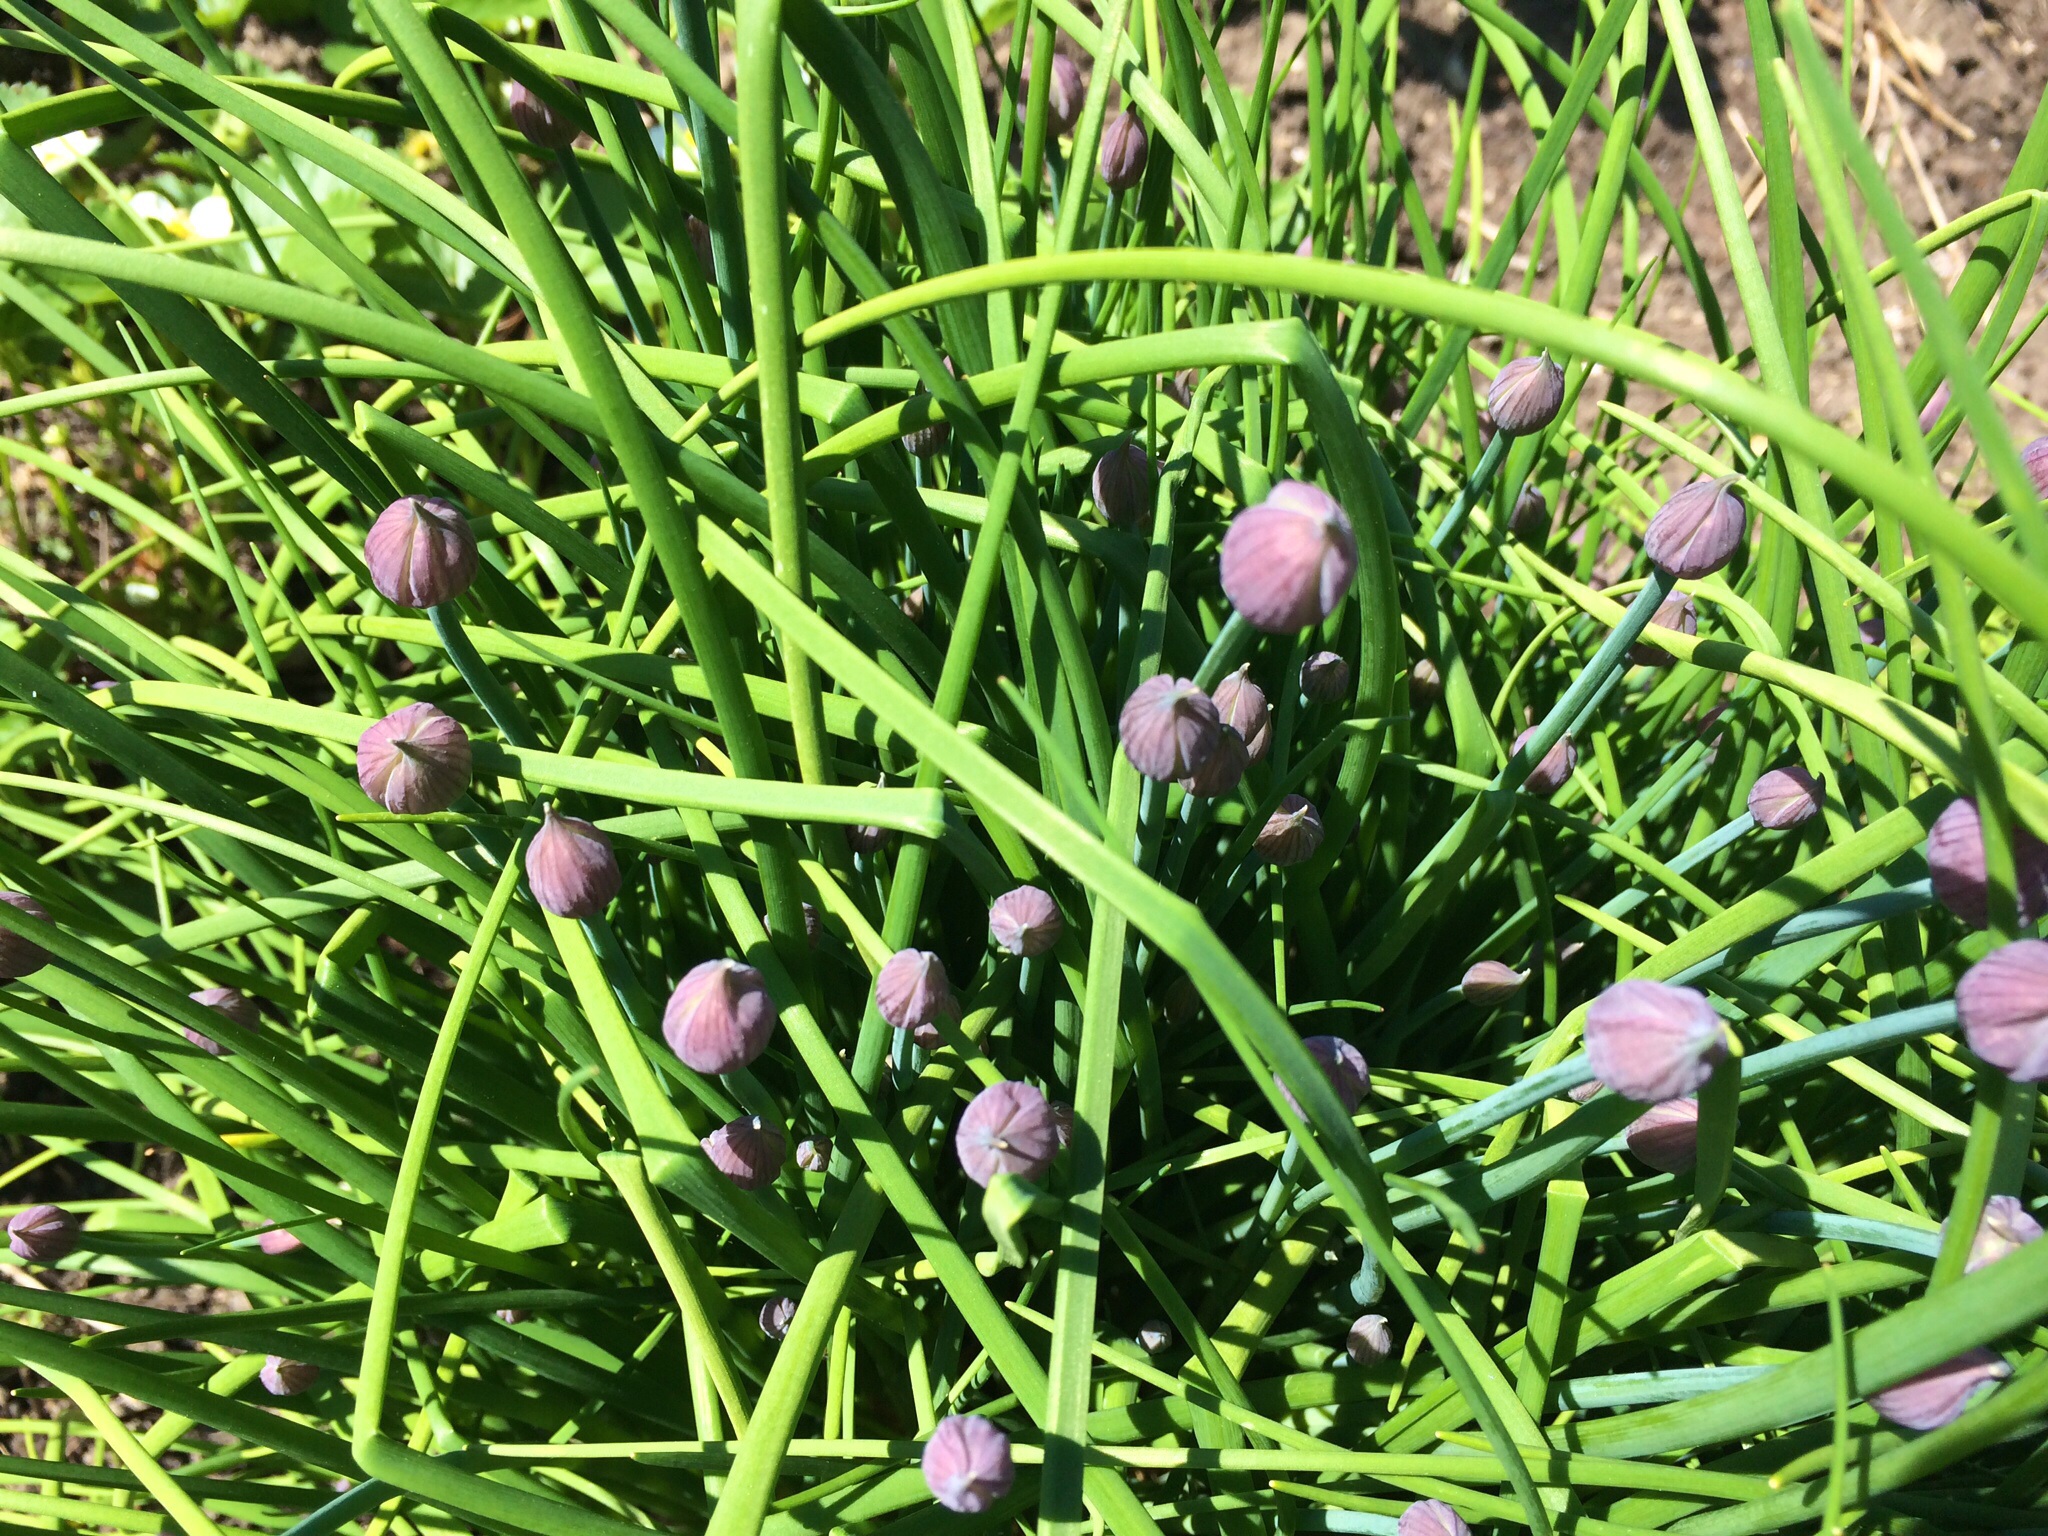
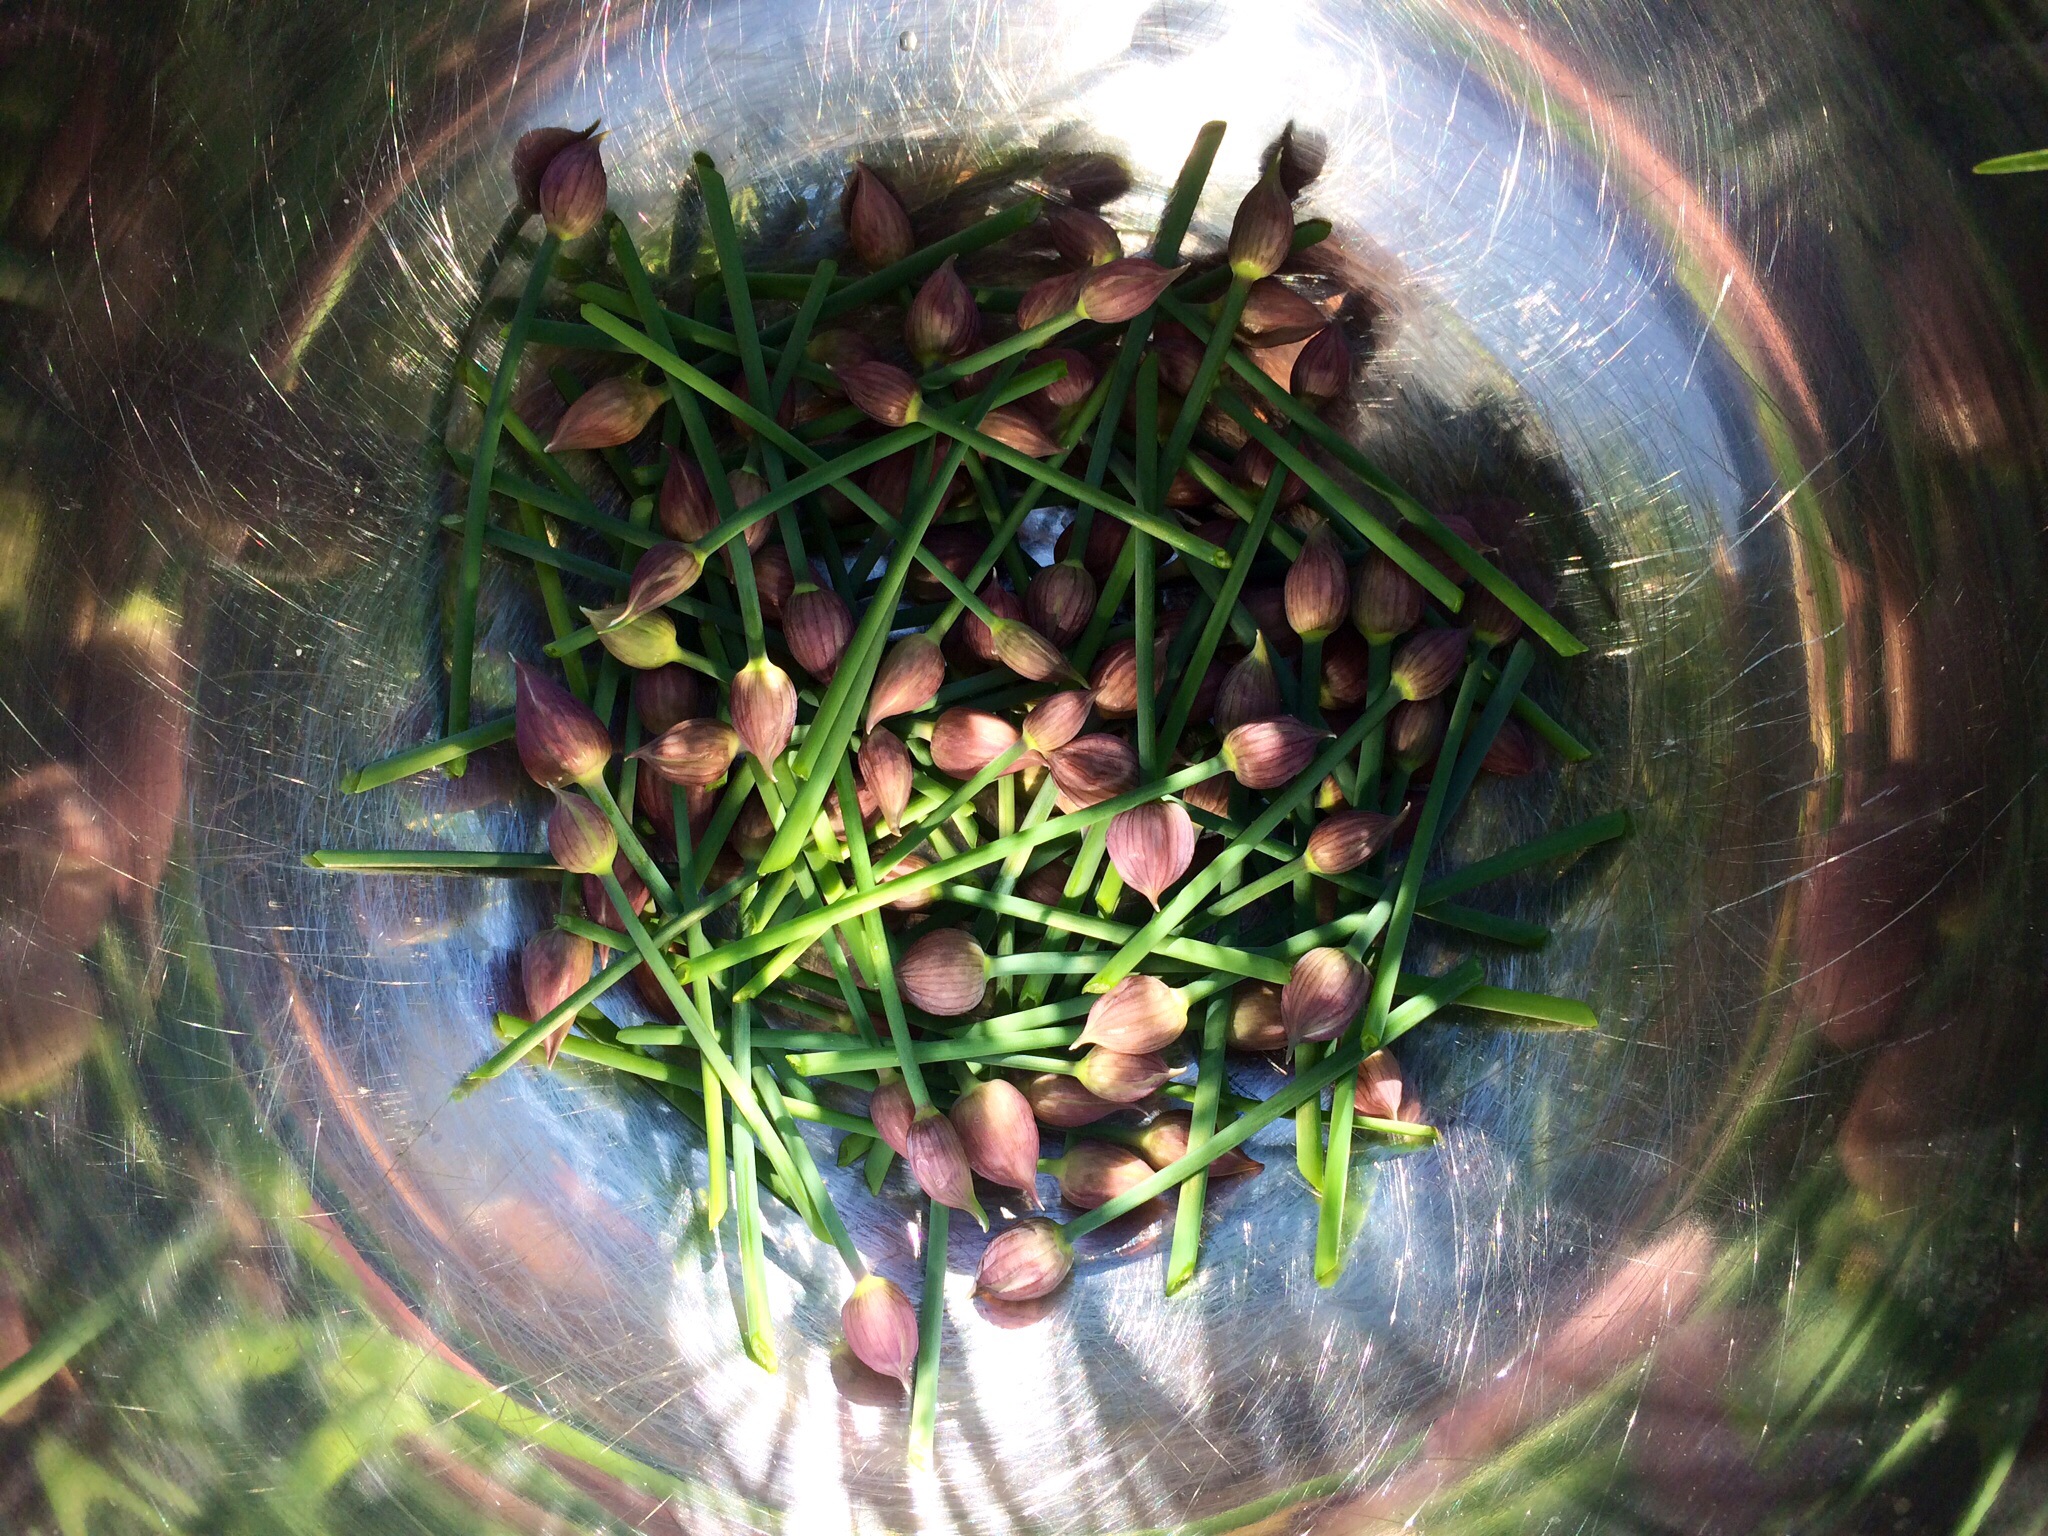
This is the time of year when the chives in my herb garden are busting out with blossoms. Before they pop, I head out every few days and snip the larger blossoms off the chive plants and wrap bunches of them in Ziploc bags and freeze them.

image

I use those blossoms over the course of the next year on my signature marinated beef and chive blossom pizza. I just take a packet of chive blossoms out of the freezer, and sauté them for just a bit in olive oil and salt and pepper, then place them on the pizza before baking.

image

The chive blossoms not only add great flavor, but they look cool on the plate, too. Great as a side for almost any meat dish.


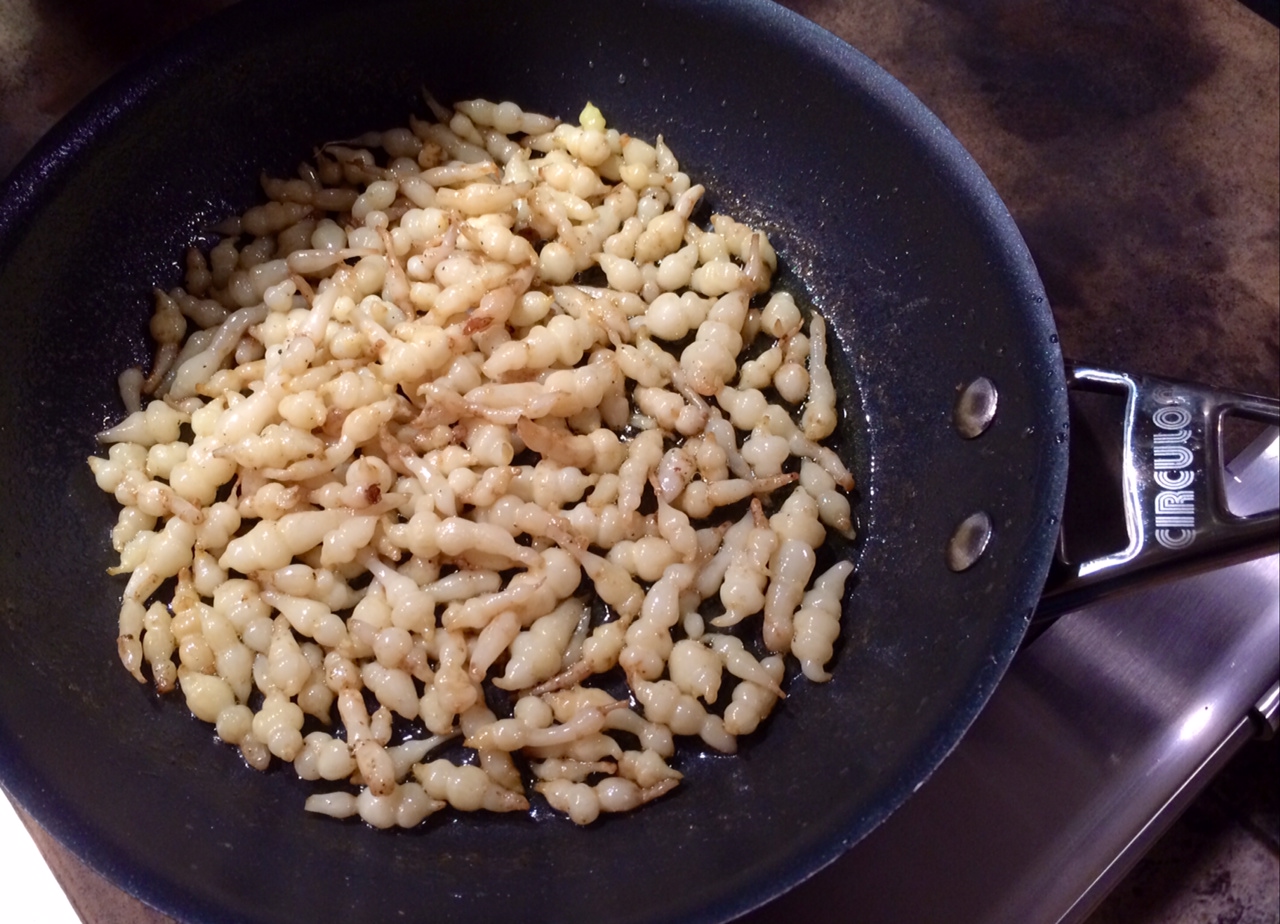
A few years ago, at Le Saint-Amour, a great restaurant in Quebec City, the dish I ordered had these small strange-looking root vegetables sitting next to the roasted duck entrée. They resembled tiny twisted parsnips…or caterpillars! I needed to know what these things were, and so I asked my French waiter, who came back with a piece of paper that had the word “crosne” written on it. He said: “I don’t know how they say it in English.”
Back at the hotel room, I went right to the laptop and started a search on-line and discovered that crosnes (pronounced crones) are also known as Chinese artichokes, and although they are somewhat common in European gardens, they are really difficult to find in the states.
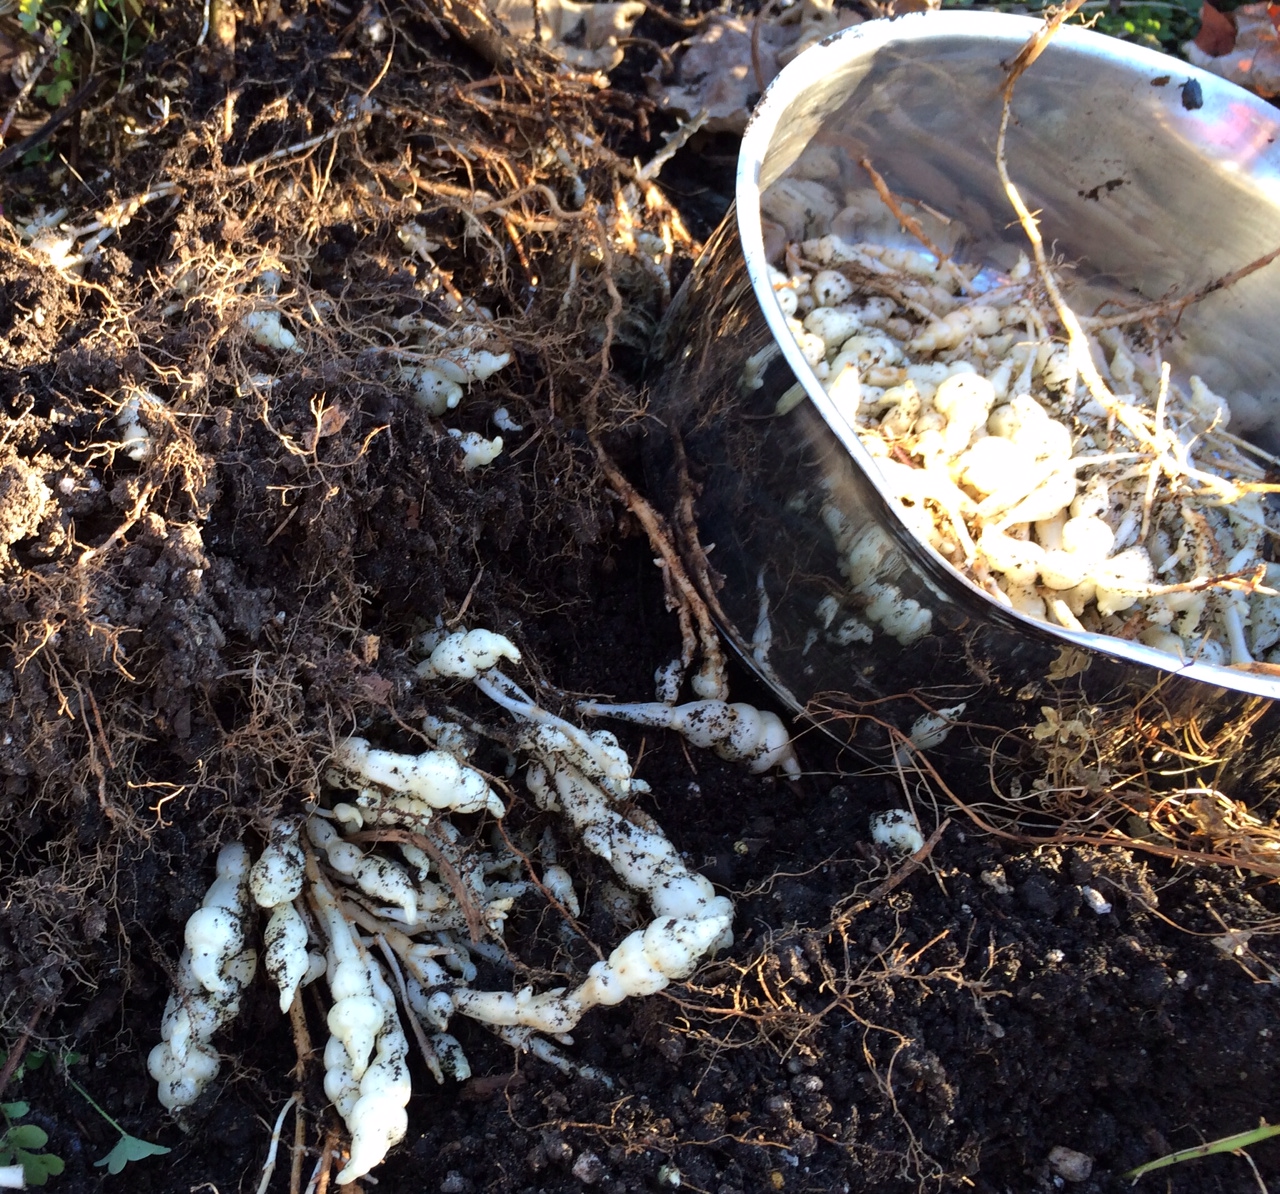
The plant is a relative of mint (though the leaves have no aroma), a perennial, is easy to grow, spreads on its own, and has those small, convoluted and delicious root clumps (known as tubers to gardeners.) So what’s not to like? Well, apparently, it’s not the gardeners that don’t want to deal with them…it’s the cooks! The tubers are very small and therefore need a little extra effort to make sure they are washed clean before cooking. They don’t need to be peeled (now that would be a pain in the ass) but to many chefs, even the washing is too much of a hassle.
Now it seems that many more chefs are discovering crosnes, and they just can’t get a hold of them.
Harvesting crosnes in the garden. I leave the small tubers in the ground for next season's crop.

Harvesting crosnes in the garden. I leave the small tubers in the ground for next season’s crop.

As a rabid gardener, I found all of this pretty interesting so I searched for sources of buying crosne seeds or plants for my own garden. It took a while (most growers were in Europe or Great Britain), but I finally found a source in Oregon that sold the plants and I bought a few for my home garden.

A relative of the mint plant, crosnes are pretty hardy and are tough to remove once well established, so they need to be planted in an area where you don’t mind if they take over. The tubers are ready to harvest around October, and as long as I leave some in the ground over the winter, the crosnes will be back again the next year. Seems pretty low-maintenance for such a delicious little treat!

photo (2)

As for preparation, a light saute in olive oil and butter, salt and pepper is all they need, until cooked but crisp. They also go well with a deep, rich reduction like I had with my duck at Le Saint-Amour.

Now’s the time to head to your local farm stand and pick up a bag of gorgeous plum tomatoes, before the season is gone! And this is what you do with them…

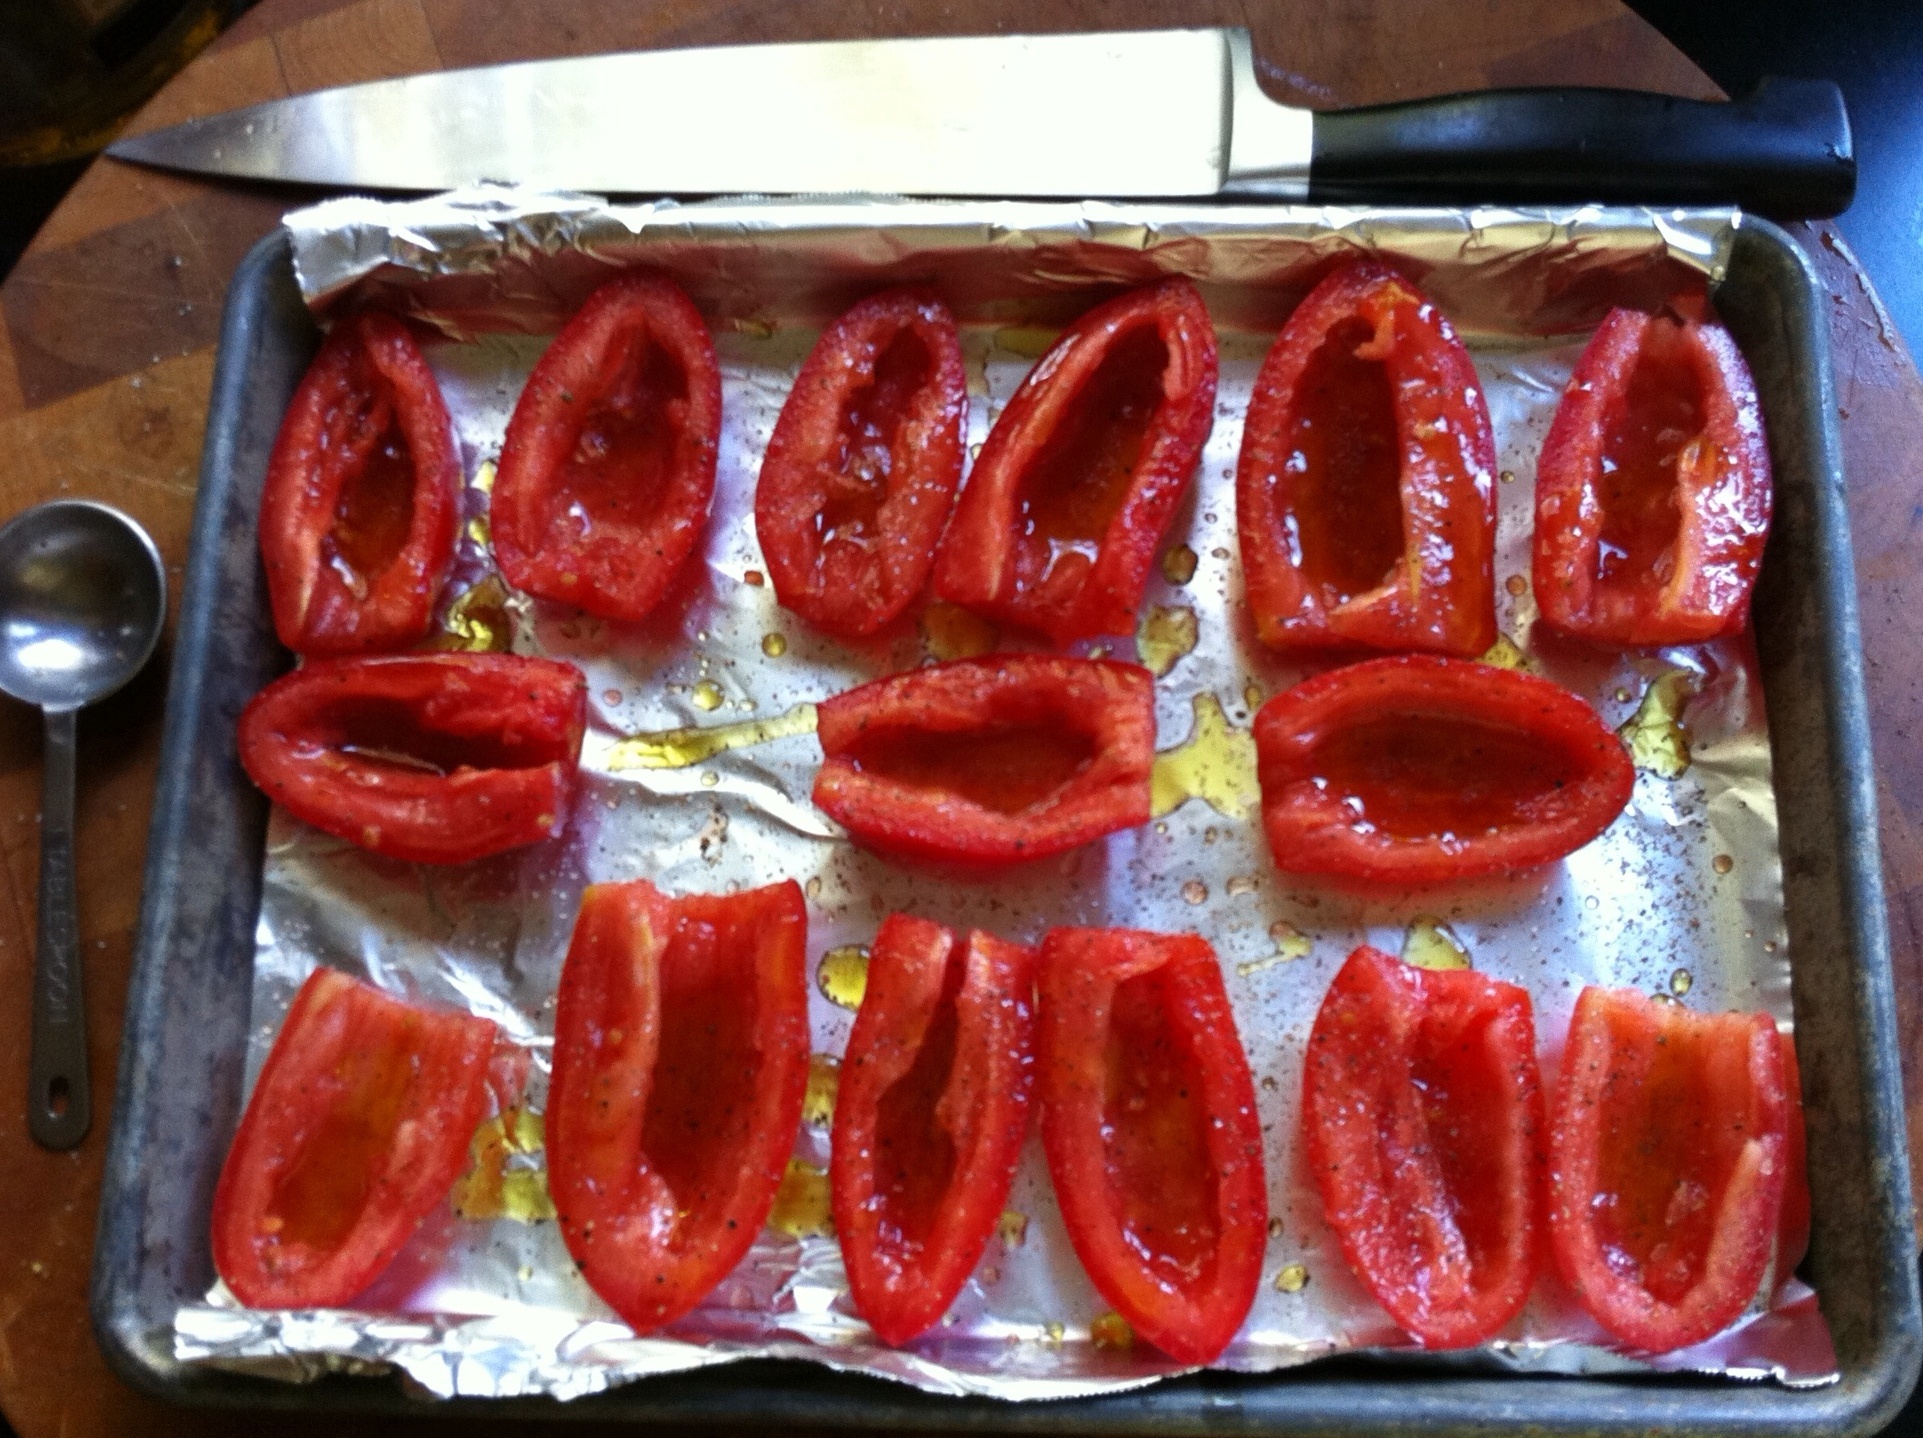
These are not sun-dried tomatoes. They’re better, because fresh plum tomatoes are still moist after roasting, with a bit of that magic tomato liquid in every cup! A great, simple platter to offer at parties.

Tomatoes before

Tomatoes before

Ingredients:

12 to 18 halved, seeded plum tomatoes

1/4 cup extra virgin olive oil

2 tablespoons organic cane sugar

Freshly ground pepper

Fleur de Sel or sea salt

Pre-heat oven to 250.

Line a baking sheet with foil and rub it lightly with olive oil.

Arrange halved and seeded tomatoes on it in a single layer, cut side up. Drizzle evenly with 1/4 cup olive oil, sprinkle with 2 tablespoons sugar, and season with pepper to taste.

Bake the tomatoes until they are still juicy but slightly wrinkled, about 3 hours. Transfer to a platter and let cool slightly.

Just before serving, sprinkle tomatoes with Fleur de Sel, and garnish if you like, with chopped parsley leaves, mint leaves, or basil.

Tomatoes after

Tomatoes after

It’s been 45 years since I watched my grandfather dig the long, dirty, gnarled horseradish roots out of his garden with a sharp spade, lunging at the ground with all of his strength to cut through the thick fibers of the plant.
After harvesting a large piece, he would wash the dirt from it and then peel it, leaving behind a beautifully smooth white root.
He had a large bowl set under a grater, and he would hand grate the horseradish root with incredible speed. But no matter how fast he went, the potent vapors released by the root would make their way to his eyes, and he was forced to stop several times to wipe the tears away with his old handkerchief and regain his composure before returning to grate the root again.
Onions were child’s play compared to horseradish, and I understood why he did all the preparation just outside of the kitchen door of his Queens, NY home.
Once grated, he would add some water, vinegar, and salt, and his prepared horseradish was complete. He’d store it in tightly sealed glass jars in the fridge, and when it was time to sample the goods, he would carefully open a jar, poke his knife in, and spread the prepared horseradish over beef, beets, twice-smoked bacon, or anything else he desired.
I’d watch his face slowly turn red, small beads of perspiration developing on his forehead, and he’d turn and smile at me and tell me: “Labai skanu!” (Very tasty!)

At the age of 10, I couldn’t figure out what he saw in horseradish, but it didn’t take long before I was hooked myself, as it was a staple at any Lithuanian dinner table.

Opting for the stuff that came in a jar in the supermarket, I never made my own prepared horseradish, however, until just last week, a full 45 years later.

I’ve had a huge horseradish plant growing in my garden for years, and I just never got around to doing anything with it. But the other night, as I was preparing my cocktail sauce recipe and I realized that I was out of prepared horseradish, it became clear that the time of reckoning had arrived. It was time, in the finest tradition of my grandfather, to make my own prepared horseradish.

Freshly harvested horseradish roots

Freshly harvested horseradish roots

I went out to the yard with a sharp shovel and lunged at the horseradish plant, splitting a few roots off of the main crown. I pulled them out of the ground, detached the long leaves, and headed back to the kitchen.
Today’s kitchen technology gave me a distinct advantage over my grandfather, and after washing and peeling the root, I chopped it into smaller pieces and tossed them into a food processor. No hand grating necessary!
The processor pulverized the root in no time, and I added water, vinegar and salt as my grandfather did, being very careful not to stick my face too close to the opening of the processor where the vapors were their most powerful.
A small taste on my tongue just about had my eyeballs shoot out of my head, and I muttered silently to myself: “Labai skanu!”

My grandfather would be proud.

Horseradish is a member of the Brassicaceae family, which includes mustard, cabbage, wasabi, and broccoli. The horseradish root itself hardly has any aroma. But when you crush it, enzymes from the broken plant cells produce mustard oil, which irritates the mucous membranes of the sinuses and eyes. To keep the horseradish from losing its pungency and freshness, vinegar must be added immediately.

Prepared Horseradish

Ingredients:

6 oz fresh horseradish root, peeled
6 tablespoons water
3 tablespoons white vinegar
3 pinches of salt

Chop the horseradish root into small pieces and add water, vinegar and salt. Process until proper consistency is reached.
Careful! Use proper ventilation or the vapors will blow your eyeballs and sinuses out!

IT’S TIME TO MAKE PESTO!

Posted: July 11, 2013 in Food, garden, Recipes
Tags: , ,
We eat a ton of pesto at home, and I’m amazed at how much my 6-year-old daughter loves the stuff. Most of the time, it’s simply mixed with pasta. But we stir it into tomato sauce and smear it on grilled chicken or beef as well.
Part of the problem with store-bought pesto is that it can get pretty expensive. You can save a lot of money by making pesto at home yourself. Don’t go to the supermarket to buy ingredients like pine nuts or olive oil. They come in stupid little jars that are crazy expensive. Instead, go to membership stores like BJ’s and buy in bulk…and with basil growing like crazy in the garden, now is pesto-making time!
Here’s my sure-fire pesto recipe. I make massive amounts of it, store it in plastic storage containers, and put them in the deep freeze. They last all year, and thaw out easily.
Ingredients:
2 cups fresh basil, packed down a little
1 cup grated Parmesan cheese
1/2 cup pine nuts
1 cup extra virgin olive oil
1 garlic clove, crushed
1 teaspoon salt
Put all the ingredients in a food processor and let it rip!
Pesto combinations are endless. Some people use walnuts or pecans instead of pine nuts. Some go crazy with the garlic. Tweak your pesto however you like it. And make enough to enjoy it year round!

A couple of photos of what’s happening in the spring garden…

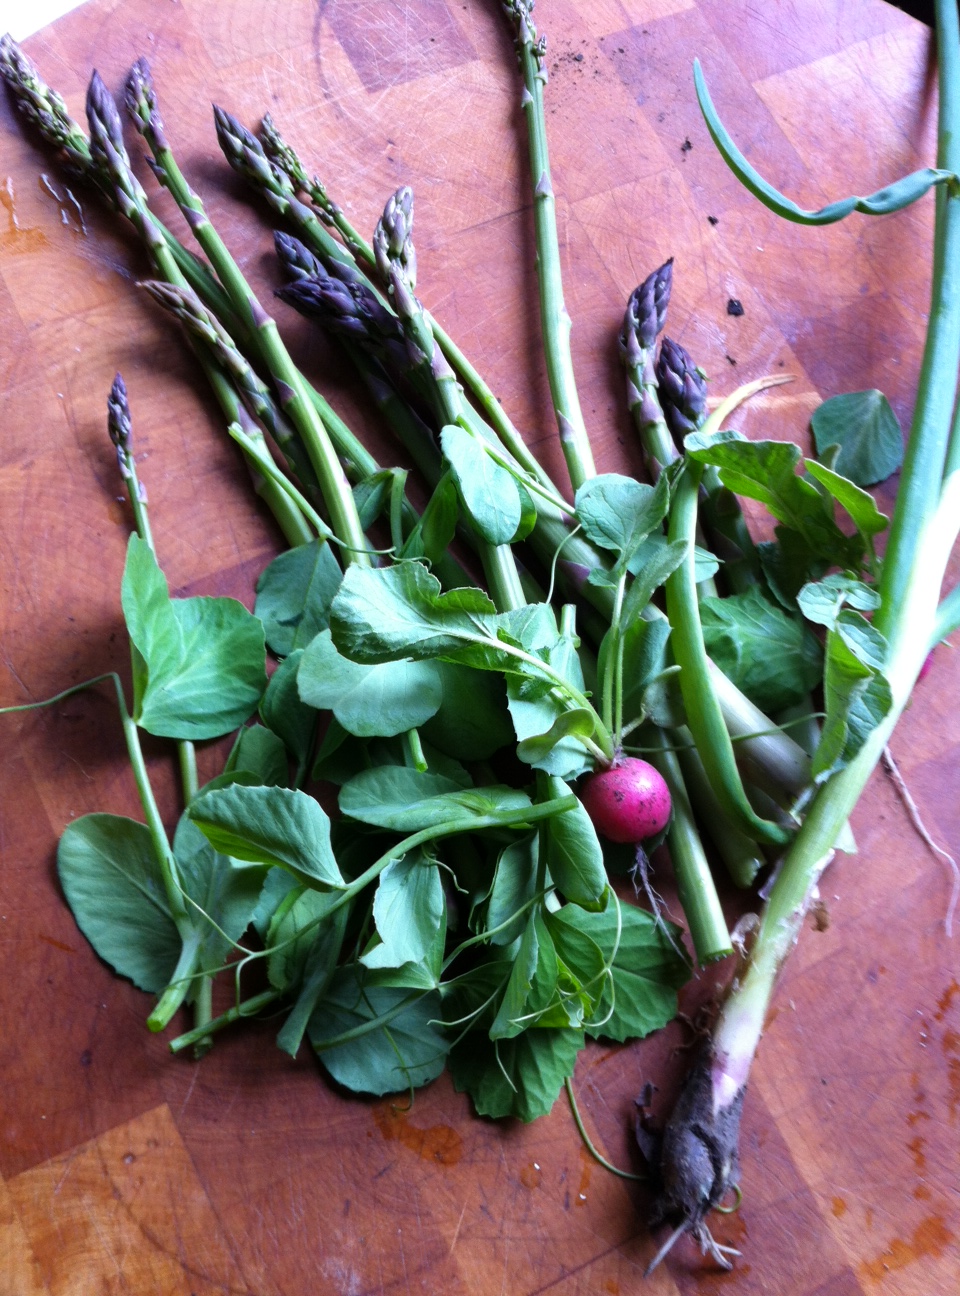
An early spring salad: asparagus, pea tendrils, radishes, scallions.

An early spring salad: asparagus, pea tendrils, radishes, scallions.


How do I get to make a fried chive blossom pizza in December? I pick 'em and freeze 'em in May!

How do I get to make a fried chive blossom pizza in December? I pick ’em and freeze ’em in May!


Horseradish just doesn’t get the credit it deserves. A world without horseradish would mean boring Bloody Mary’s, cocktail sauces with no kick, and steaks and roast beef sandwiches just crying out for sauces and mayos with personality.

Horseradish is a perennial plant from the Brassicaceae family, which also includes mustard, wasabi, broccoli, and cabbage. It’s mainly grown for its white tapered root, which, when not disturbed, has little aroma. But when you cut or grate it, enzymes from the damaged plant cells release oils that give horseradish that wonderful pungent smell and flavor. It loses this pungency just as quickly, unless you store it in vinegar, which is why bottled or “prepared” horseradish is always found in a vinegar solution.

In the garden, horseradish can become invasive, meaning it will want to take over if you let it, but in my garden, it doesn’t get to do that because I regularly harvest a couple of roots for my kitchen.


Horseradish in the garden

Growing up in a Lithuanian family, there were very few spices ever used in cooking. Most of the food was pretty bland. Mom would salt food, but even black pepper was pretty rare. Peppers of any kind were never used–they never grew in Lithuania–so horseradish became the universal ingredient when a kick was needed. My grandfather loved it. I can still remember my grandfather crying his eyes out as he grated a freshly picked horseradish root from his garden. It was absolutely a labor of love. He would keep his grated horseradish in vinegar in the fridge, and then when dinner came around, it would quickly find its way to the table next to just about any meat my grandmother was cooking.

These days, with food processors in just about any kitchen, there’s no excuse not to use fresh horseradish. Your nasal passages and eyeballs are safe from being blown out.

Some of the basic applications for horseradish are still the best. The following recipes use prepared horseradish you easily find in the supermarket, but use fresh if you have it.


A freshly harvested horseradish root

For a simple horseradish mayo:

1/4 cup mayonnaise

2 Tablespoons prepared horseradish
Combine both ingredients in a bowl, cover with plastic, and refirgerate. Goes great on a roast beef sandwich.


For a fancier horseradish sauce that goes great on grilled salmon:

3/4 cup sour cream

1/4 cup mayonnaise

2 Tablespoons prepared horseradish

2 Tablespoons chopped fresh basil

1 Tablespoon fresh lemon juice

1 teaspoon soy sauce

Combine all ingredients in a bowl, cover with plastic, and place in fridge for a few hours for the flavors to blend.


Alz cocktail sauce

2 cups ketchup

4 Tablespoons prepared horseradish

1 Tablespoon fresh lemon juice

1 teaspoon Worcestershire sauce

½ teaspoon Tabasco

5 grinds of fresh black pepper

¼ teaspoon salt

1 teaspoon vodka

Combine all ingredients. Store in a tight plastic container in the freezer. Thanks to the vodka, my cocktail sauce never freezes solid, so just scoop out what you need and let it thaw.