Posts Tagged ‘recipe’

The 151st running of the Kentucky Derby is today and although I’m not a big horse racing fan, I am a huge fan of the official drink: the Mint Julep!

The Mint Julep is such a perfect, classic and historic bourbon drink, it seems silly to wait until Derby Day to have one. Of course, as any aficionado of spirits will tell you, there are as many right ways as wrong ways of making one.

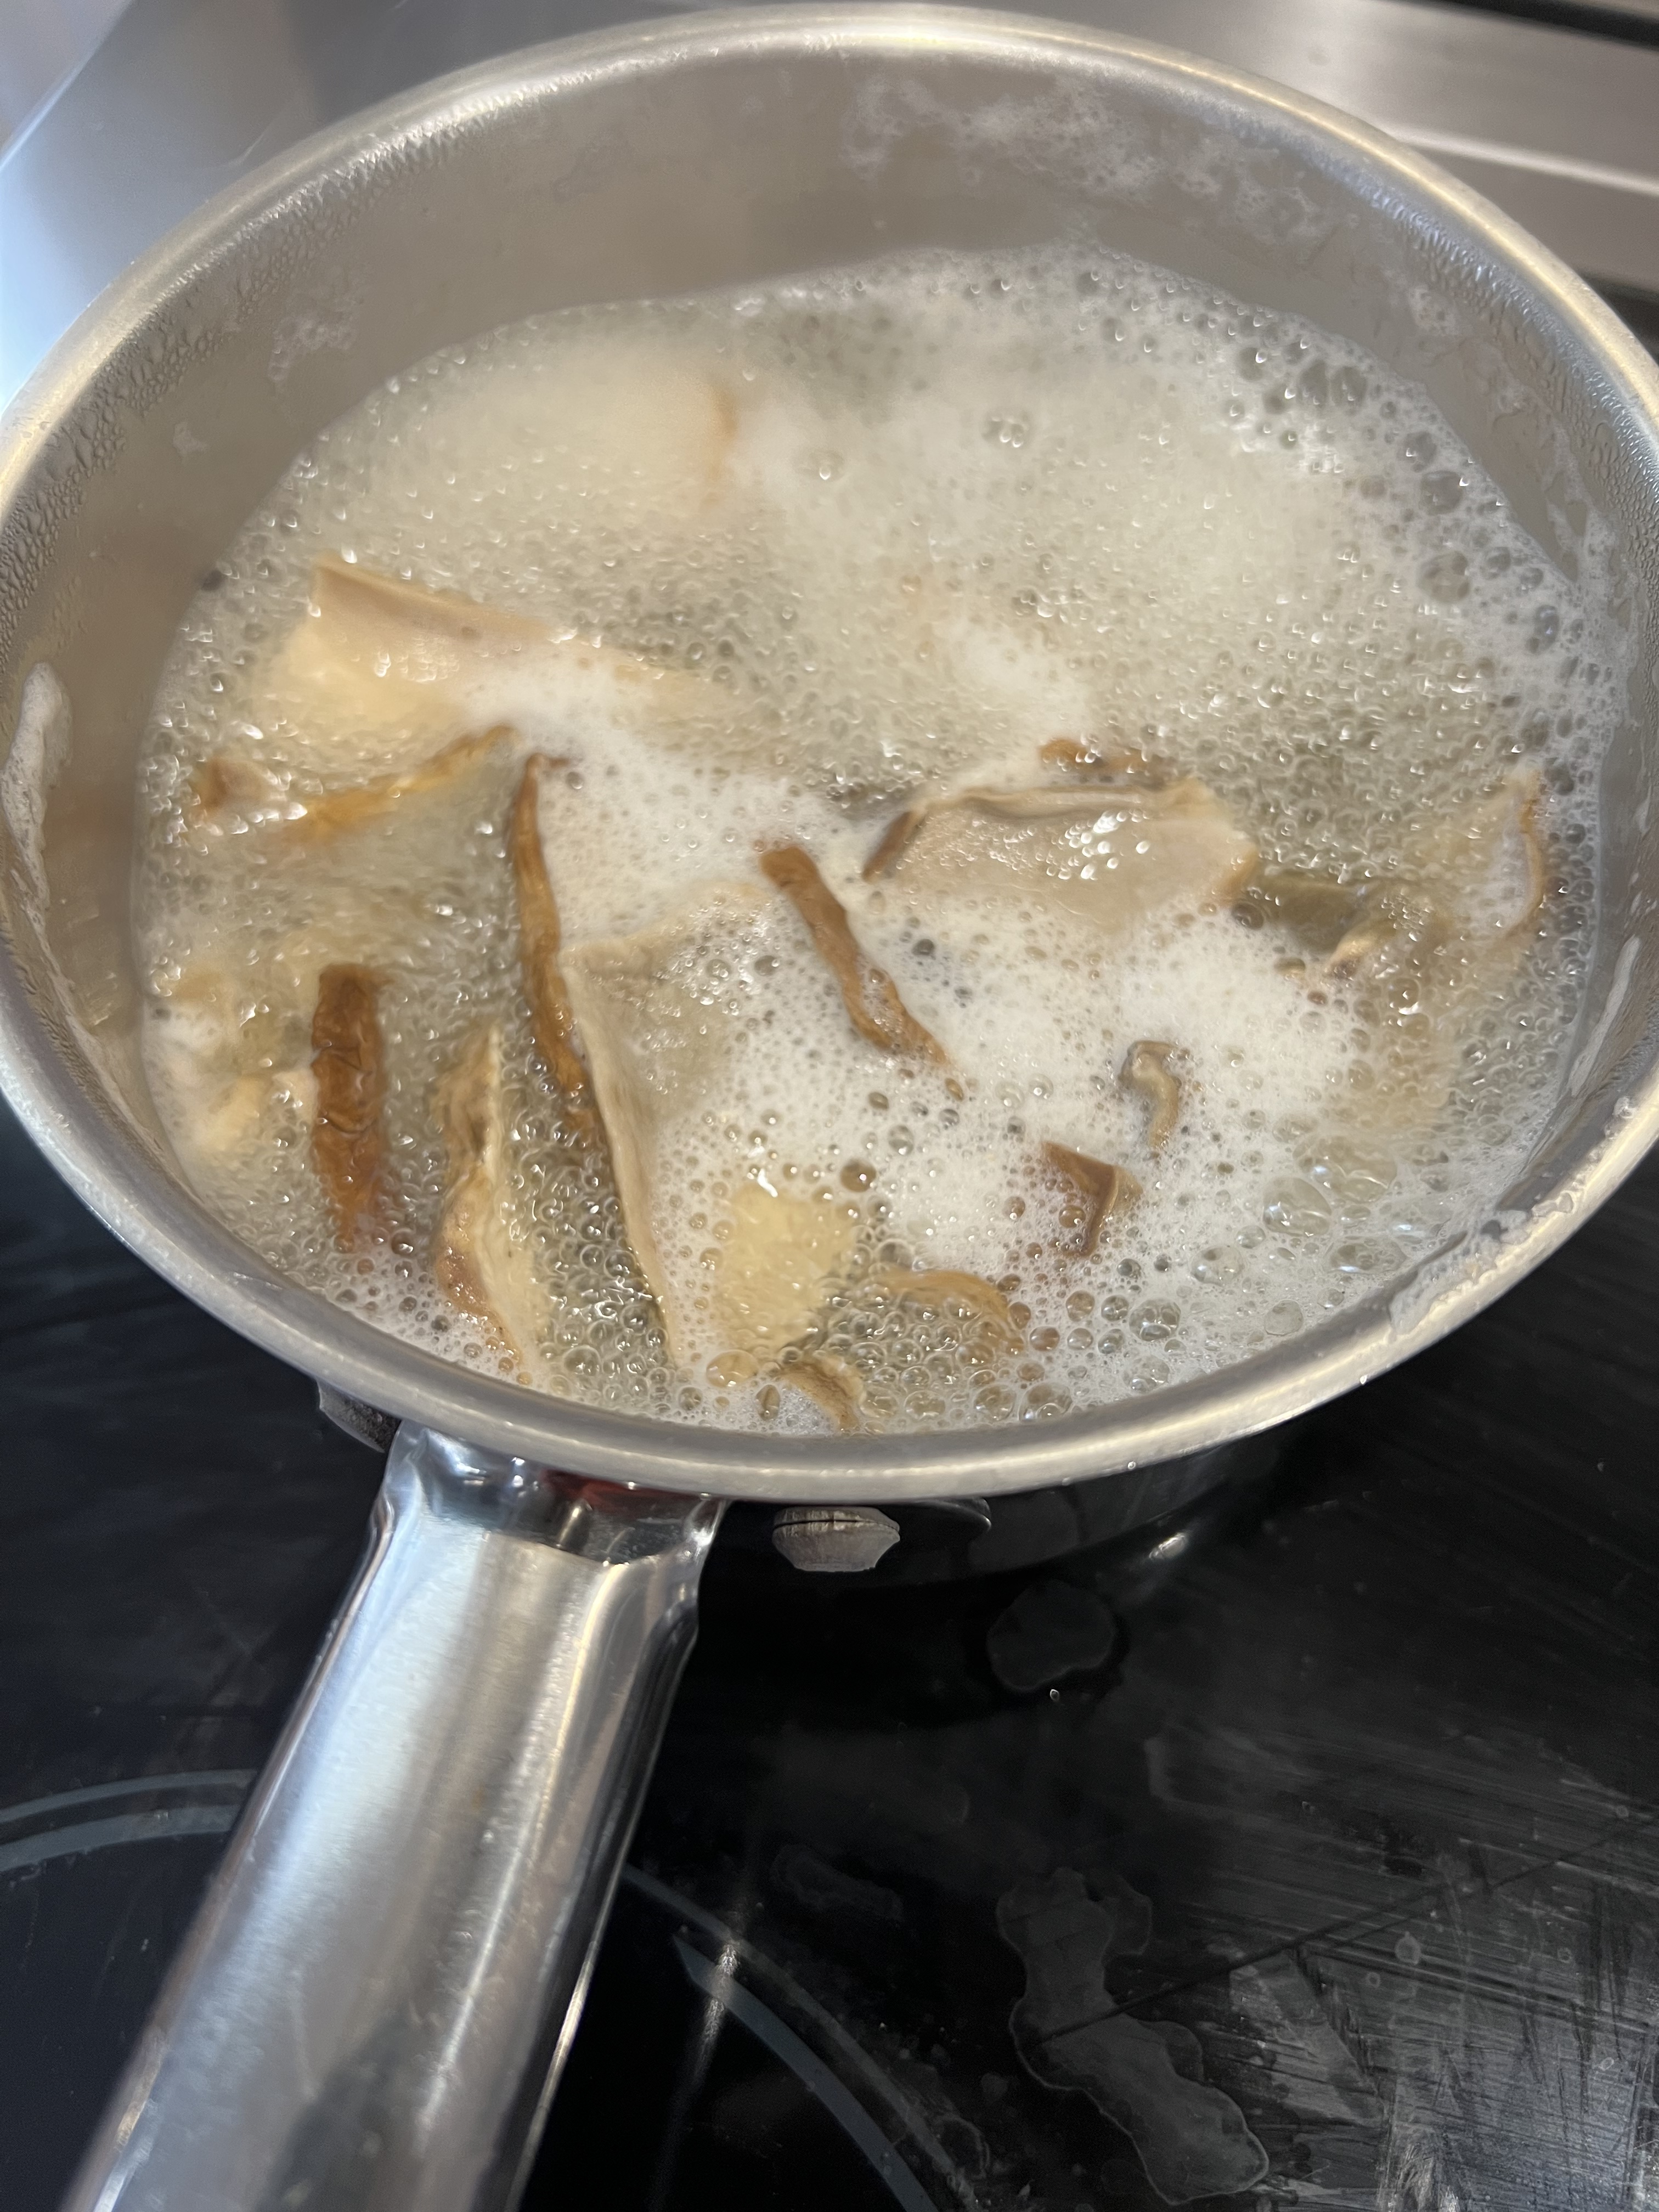
The first step in my Mint Julep is making the simple syrup. Learning from one of my old radio buddies, my pal Rick O’B, I infuse mint into my simple syrup to take my cocktail to the next level. I use the standard ratio of 1 cup of clean, filtered water to 1 cup of sugar. I place the sugar and water in a saucepan and heat until just boiling. I’ve found that it needs to reach this stage for the sugar to really dissolve.

Waiting for the sugar to dissolve.

As soon as it starts to boil, I remove the saucepan from the heat, and throw in a handful of freshly picked mint leaves, stirring to make sure the mint gets in there, and then I leave the saucepan to cool to room temperature.


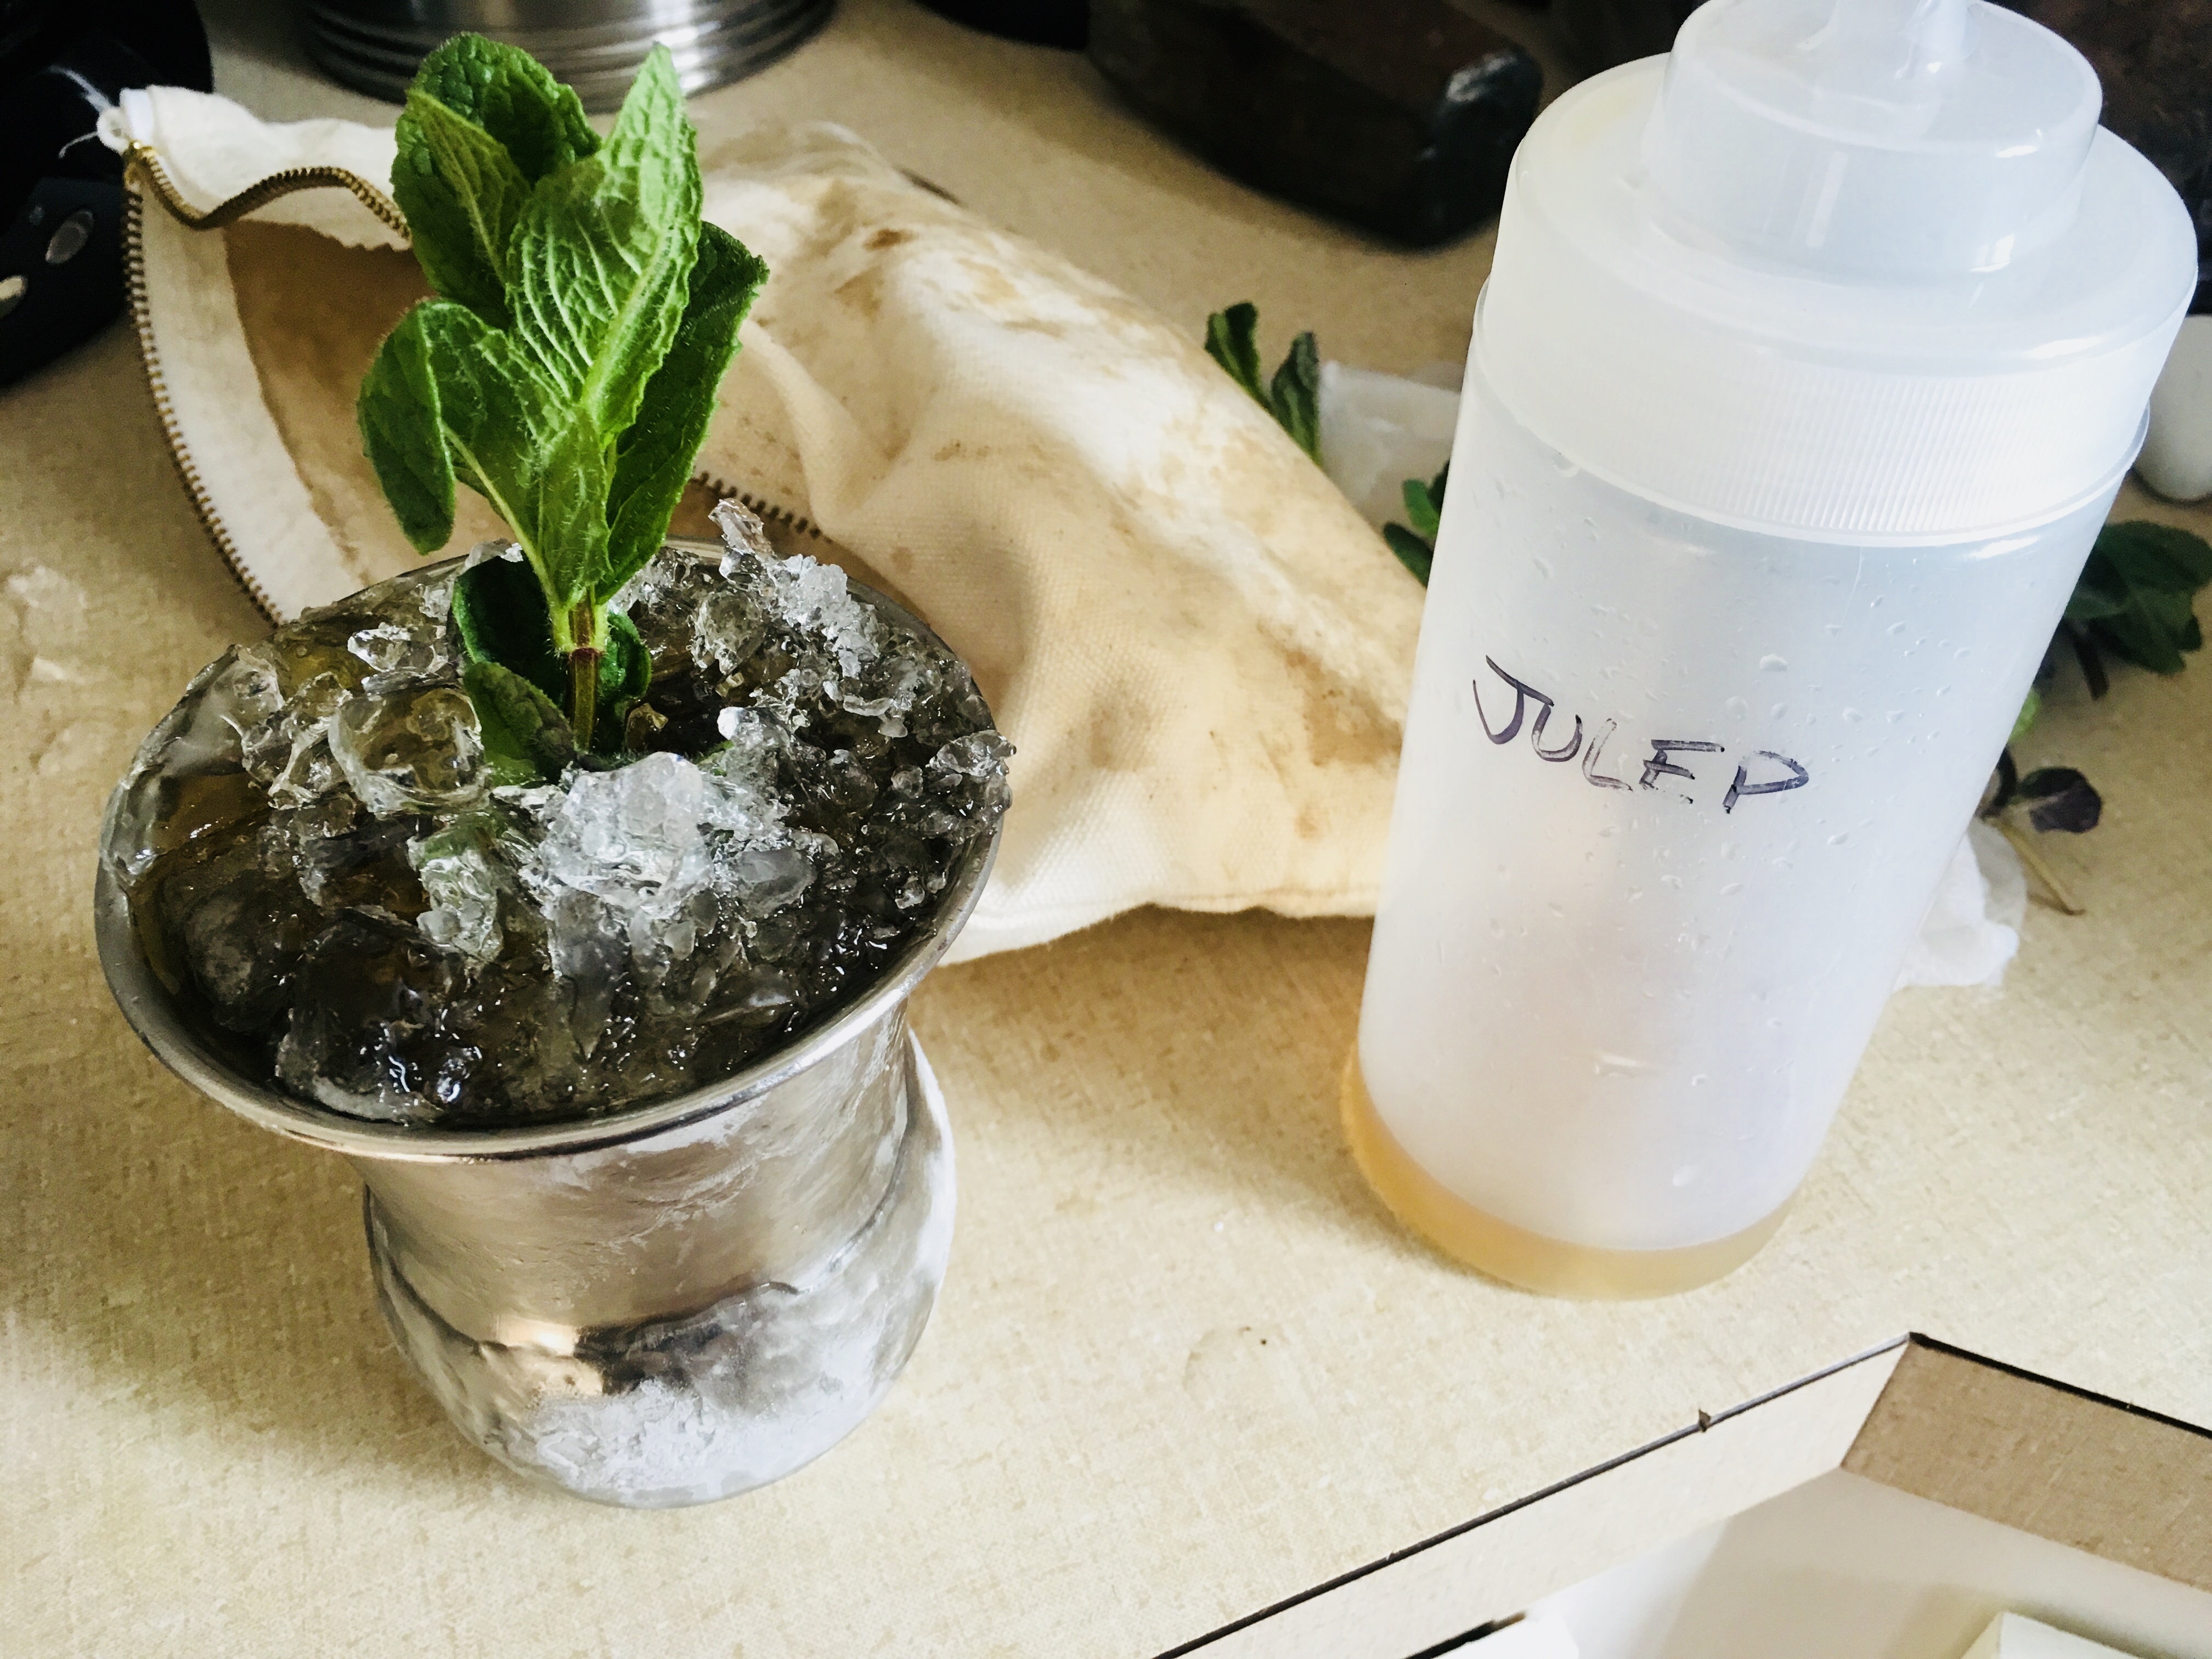
Once it’s at room temp, I strain the simple syrup into a bottle with a tight sealing lid, and place it in the refrigerator to cool. It will keep for about a week.

An equally important ingredient for a perfect Mint Julep is the ice: specifically, crushed ice from clean, filtered water. Don’t even think of using tap water for any cocktail much less this one. Why ruin an expensive bottle of bourbon by going cheap on the ice? I make my own ice cubes, then put them in an untreated canvas ice bag and bash them with a mallet to the perfect crushed size. But if you don’t want to go through all the trouble, just buy a bag of good ice. Untreated canvas bags for crushing ice can be purchased online from bar supply companies for about $30. I got an untreated canvas tool bag (the exact same shape and size) at Home Depot for 3 bucks.


Da bag.


The next step is a little tougher: which bourbon to choose. The explosion of choices on the bourbon market has made it all but impossible for the average imbiber to know which bourbon is best for their tastes. If you’re a beginner, I suggest you go to a trusted bartender and explain that you’re new to the bourbon world, and could you have the tiniest of tastes and sniffs of what he’s got at his bar. Chances are, you’ll get a sampling of some of the better known brands: Maker’s Mark, Woodford Reserve, perhaps Buffalo Trace or Bulleit, and the standard Jim Beam. This is a very good start. (Also, hinting to wife and friends that “I’m trying new bourbons” around your birthday or Father’s Day inevitably gets you a few bottles as well!)

My go-to bourbon for Mint Juleps used to be Eagle Rare 10-year-old when it was around $32.99 a bottle. Now it’s up to $80! My latest go-to bourbon is 1792 Small Batch. At $29, it’s almost unbelievable, like someone made a mistake in the stock room! Very tasty on its own and great for mixing. Others that work well and are around the same price range include Buffalo Trace, and Larceny.

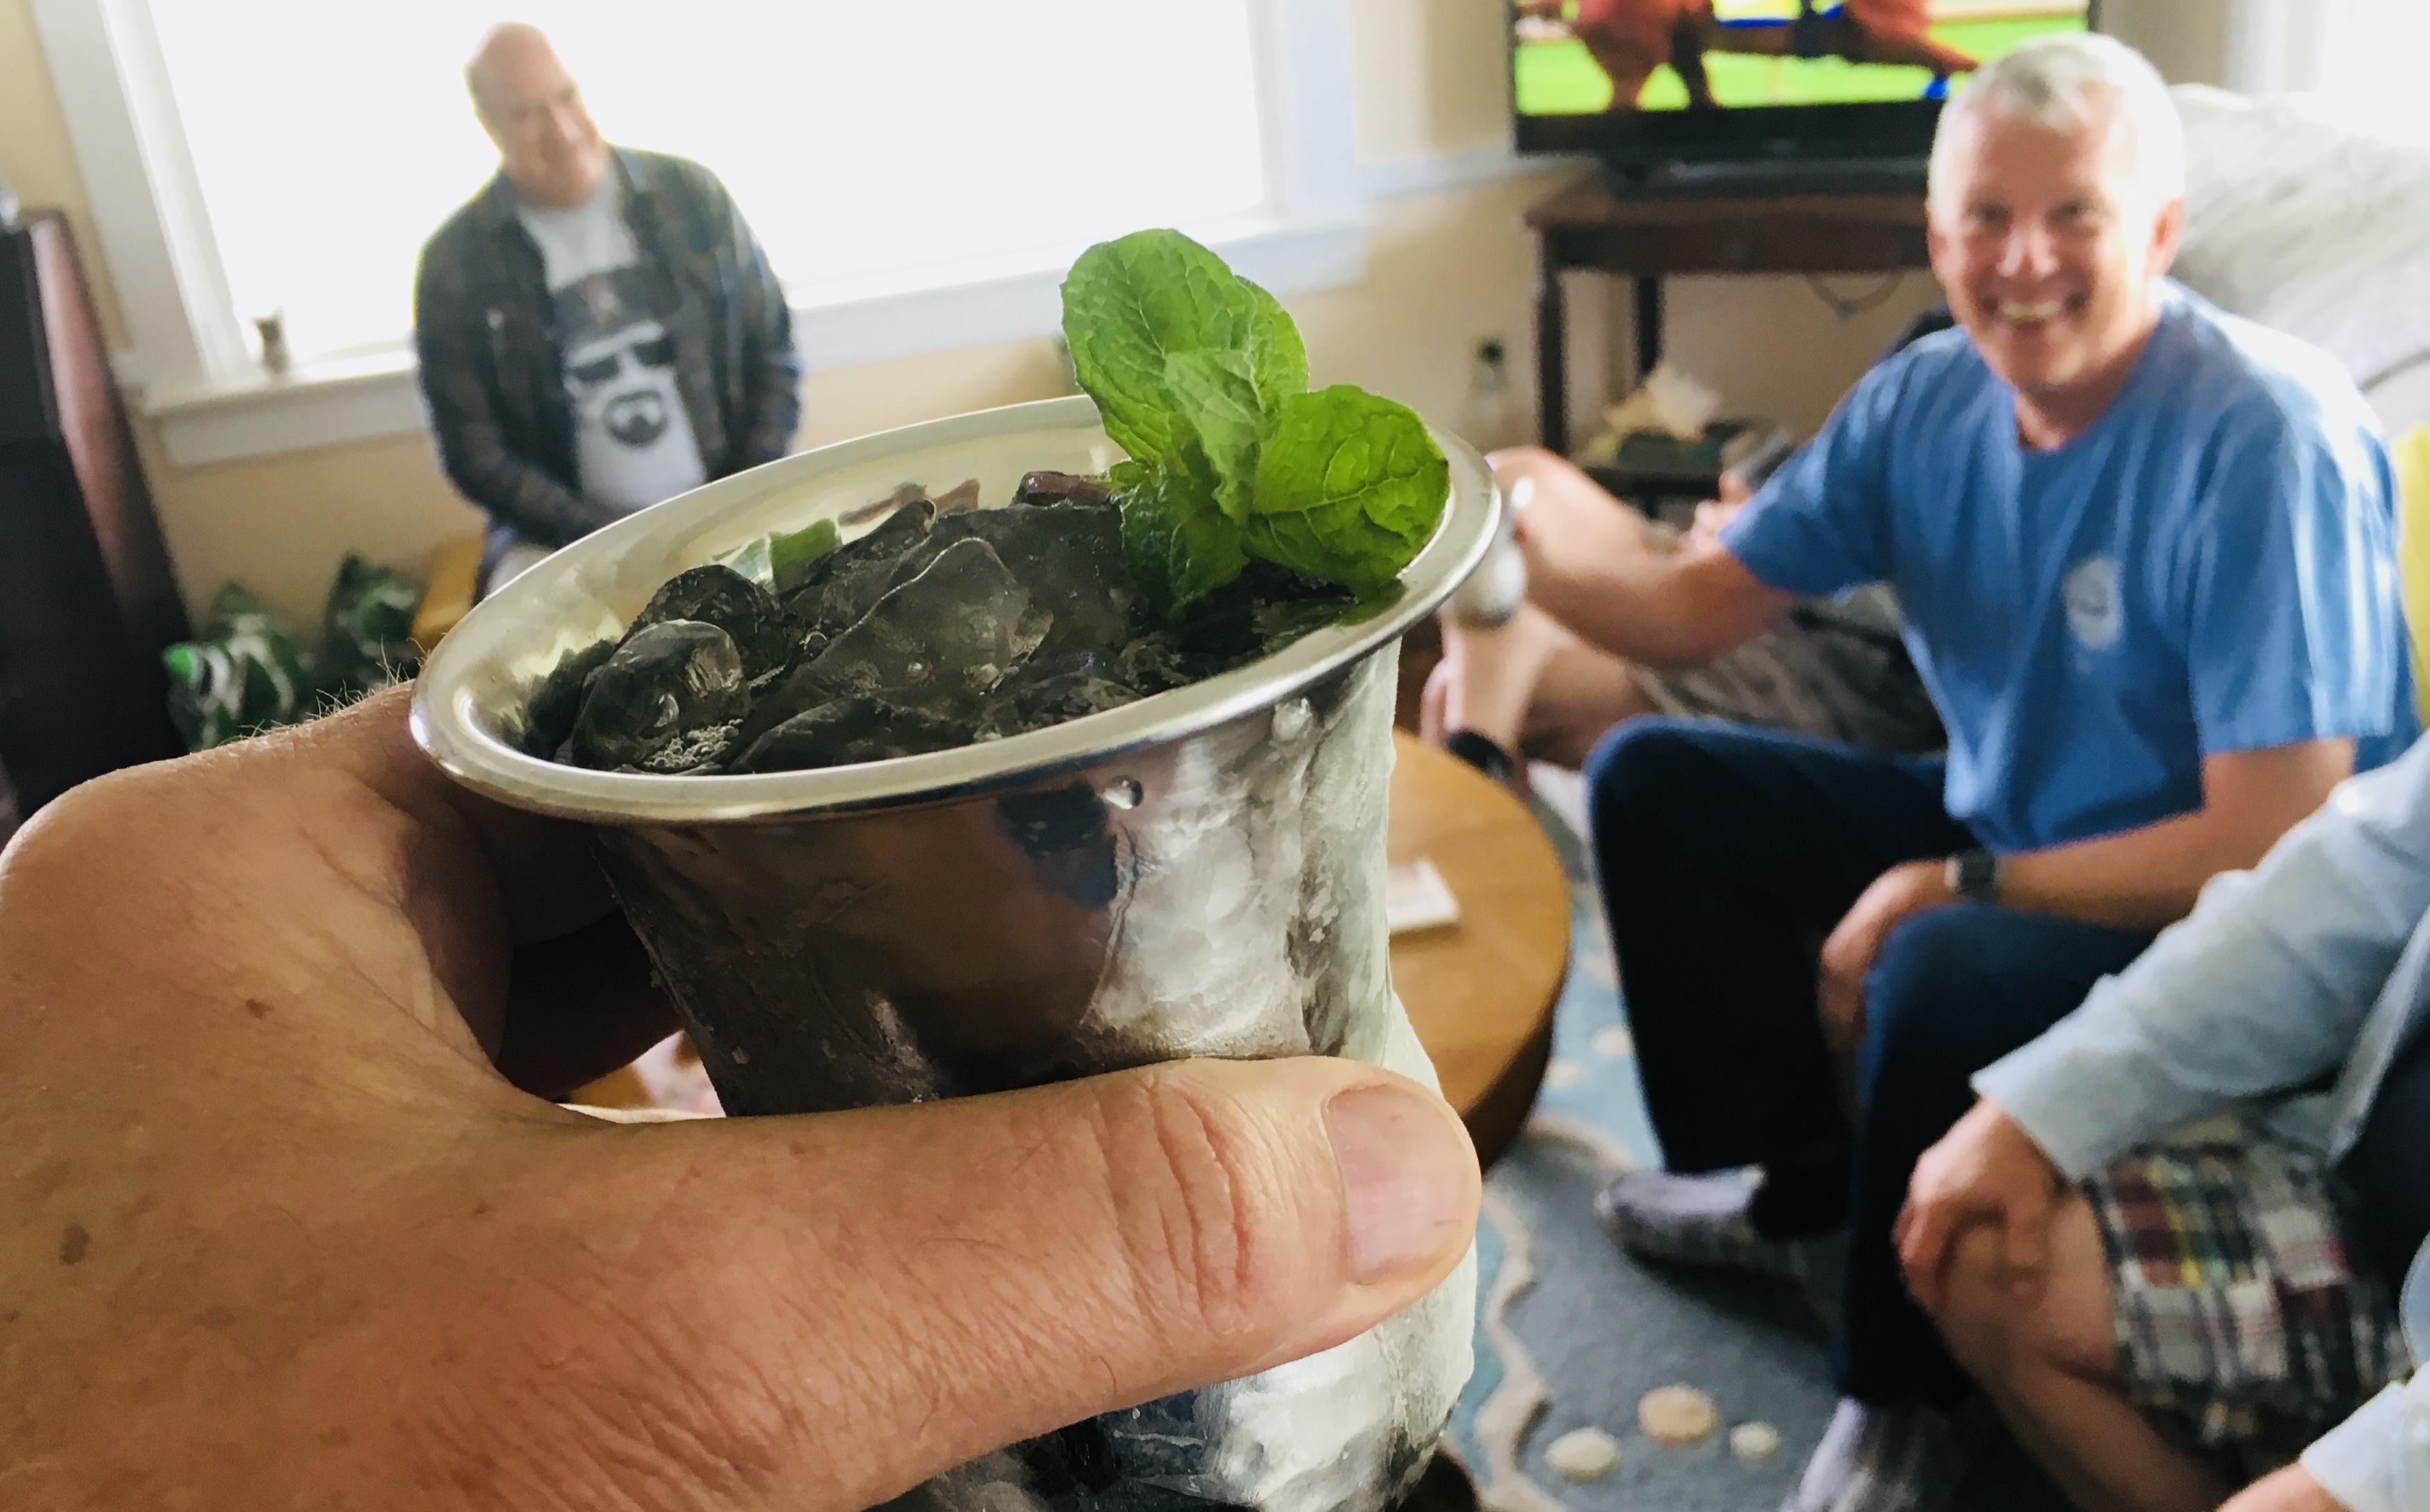
Finally, a Mint Julep needs a metal–not glass– Julep cup. Made of pewter or aluminum, it frosts on the outside as you stir your drink, keeping your beverage ice-cold on even the hottest of days.


3 oz. bourbon
1 oz. mint-infused simple syrup
crushed ice
Julep cup
Fresh mint for garnish

Crush the ice and pack it into the Julep cup, even letting it dome slightly over the top. Don’t worry…the alcohol will melt it.

I like to add 1.5 ounces of bourbon, then the ounce of simple syrup, another 1.5 ounces of bourbon on top, and then a quick squirt of simple syrup to top it off. Break off a few mint leaves from the stem and push them into the ice. A beautiful layer of frost will form on the outside of the cup. Add more ice, if necessary, and garnish with a sprig of mint.


A nice selection of bourbons. This is an old photo: that Pappy Van Winkle is long gone…but I saved the bottle!


So much bourbon, so little time!


Lamb seems to be one of those meats that people either love or hate. Growing up in a home where my Mom served it pretty often, and did a pretty good job of cooking it, I happen to love it, and actually crave it now and again.


I buy much of my meats from Cooks Venture, a company that humanely raises a special breed of chickens, and also sources high quality meats from all over the world.

When I saw a New Zealand boneless lamb shoulder roast on their website, I had to buy it. Though New Zealand lamb can be a bit gamey to many people, I love that flavor, and there is no better quality of lamb than that from the land of the kiwi.


I knew I wanted to marinate the roast, and there was no way the marinade would penetrate into the meat if it was rolled and tied like it came in the package. So I decided to cut the string that wrapped the lamb roast, and unroll it, so that every inch of that lamb would make contact with the marinade.

Tied…


Untied and unrolled.


Once I marinated the lamb overnight, I rolled it back up, retied it as best I could, and cooked it in a 350 degree oven until the roast registered 120 degrees on my meat thermometer: medium rare.

I finished the lamb on my outdoor grill over hardwood charcoal to get a little smokiness and char.

The marinade I used can be used for any cut of lamb you might want to cook. (I love the small lamb chops that look like mini t-bones. Their flavor is incredible.)

1/2 cup olive oil
1/2 cup balsamic vinegar
1 tablespoon fresh rosemary, chopped
1 tablespoon fresh thyme leaves, chopped
1 tablespoon Kosher salt
1 tablespoon maple syrup
1 tablespoon Dijon mustard
1 teaspoon black pepper
1 teaspoon dried oregano
3 cloves garlic, sliced thin

Combine all the marinade ingredients in a bowl, mixing well.


Lamb and marinade ready for an overnight in the fridge.


Place the lamb in a Ziploc bag, and pour in the marinade. Seal the bag tightly, squeezing any excess air out of it, and squish it around carefully, so that the marinade makes contact with every part of the lamb.

Place the bag on a pan (to prevent accidents in the fridge) and place it in the fridge overnight. Give it a squish every few hours if you can.

The next day, remove the pan from the fridge and let the lamb come up to room temperature.

Pre-heat the oven to 350 degrees.

Carefully remove the lamb from the bag (I do this over the sink), discarding the marinade.


Marinated, seasoned, re-rolled and re-tied. Ready for the oven.

If you’re using an unrolled lamb roast, like I did, roll it our flat on a cutting board and season it with salt and pepper.

Carefully roll the roast up the way it was originally and tie it with string, as best you can.

Place the roast on a baking sheet and bake it until the meat reads 120 degrees on a meat thermometer…that’s medium-rare.

Out of the oven and onto the grill…


While the roast is in the oven, start a hardwood charcoal fire.

When the roast is out of the oven, place it on the grill and grill it on all sides until it has some nice grill marks and char.


Let the roast rest for at least 15 minutes before slicing. (Cut the strings off before you do.)


A COUPLE-A CHUCK ROASTS

Posted: April 27, 2025 in Uncategorized
Tags: , , , ,

Chuck roast is an inexpensive cut of beef, but it requires a little TLC to make it tender and tasty. I had a couple of grass-fed chuck roasts in the freezer, and decided to try two different ways of seasoning them before cooking them low and slow.

With the first, I used Asian spices…

2 lb. chuck roast, preferably grass-fed
1 tablespoon Chinese five spice
1 tablespoon Kosher salt
1 tablespoon granulated onion
1 tablespoon granulated garlic
1 teaspoon black pepper
2 tablespoons hoisin sauce
1 teaspoon sesame oil

Pre-heat the oven to 250°.

Let the chuck roast come to room temperature before cooking.

Combine the Chinese five spice, salt, onion, garlic and pepper in a bowl.

Rub the spice mixture all over the chuck roast, and then wrap the roast in aluminum foil. Place the foil in an oven-proof pan and bake the chuck roast for about 2 hours, until it’s tender. Carefully pour of the fat before the next step.

In a separate bowl, mix the hoisin sauce and sesame oil, and brush it all over the chuck roast. Put the roast back in the oven, uncovered, for about 15 minutes, until a nice glaze forms on the meat.

Let it rest for 15 minutes. Slice the chuck roast on the diagonal for maximum tenderness.

With the second chuck roast, I went with Italian style seasonings, also with tasty results.

2 lb. chuck roast, preferably grass-fed
olive oil
1 tablespoon Kosher salt
1 tablespoon granulated garlic
1 tablespoon granulated onion
1 tablespoon oregano
1 teaspoon black pepper

Pre-heat the oven to 250°.

Rub the chuck roast with olive oil, and then rub the spices all over it, placing it in the foil and wrapping it. Place the foil in an oven-proof pan and bake it for about 2 hours, until tender.

Carefully pour off the fat, and let the meat rest for 15 minutes before slicing on the diagonal.

ONE TON OF WONTON

Posted: April 20, 2025 in Uncategorized
Tags: , , , ,

I love wonton soup. So every once in a while, I make my own version of it in large batches at home. The great thing about wonton soup is you can put whatever you want in it. After all, it’s your recipe.

I use whatever homemade stock I happen to have in the freezer. I’ll go out and buy some veggies, but I also use whatever veggies I might happen to have in the fridge that need to be used up. And I use a LOT of them.

I always have Asian spices and seasonings in the fridge or on the shelf, so that’s never a problem. And then it’s a matter of meat or seafood, or in this case, a little bit of both.

I had homemade chicken and pork stock in the freezer, so those went into the pot. I had a couple of pork chops in the freezer, so I decided to use those. I also had some frozen shrimp. And my cheat is frozen chicken dumplings, which add great flavor and pasta to the soup.

I found these at my local store, but any dumplings you like will work.

There are no exact measurements for this, because it really is based on what you have, how much you want to make, and what flavors you like. But this is the basic rundown of how I made my last batch…

16 ounces homemade chicken stock
8 ounces homemade pork stock
24 ounces water
2 medium onions, diced
2 carrots, diced
1 medium head of broccoli, chopped
1/2 head of a medium cabbage, finely sliced
2 6-ounce boneless pork chops
soy sauce
hoisin sauce
Chinese garlic sauce
rice vinegar
sesame oil
oyster sauce
frozen peeled and deveined wild-caught American shrimp
frozen chicken and vegetable dumplings

I thawed the chicken and pork stock and poured it into a large pot along with the water. I put it on high heat.

I diced the onions and the carrots and put them in the pot. I chopped the broccoli and put it into the pot. I prefer to slice the cabbage thinly with a knife, so that it still retains some texture. I put that into the pot.

I let the pot come to a boil and let it roll until the veggies started to get tender.

Meanwhile, I thinly sliced the two pork chops into strips and placed them in a bowl. I added the soy sauce, hoisin sauce, chili, garlic sauce, rice vinegar, and sesame oil to the pork and tossed it around it to marinate.

While the veggies were boiling, in a frying pan, I added some oil and stir-fried the marinated pork. Once it was nice and caramelized, I poured it into the pot with the veggies.

It’s very easy to overdo the salt with this recipe, so I seasoned as I went, adding a little more soy sauce, hoisin, and oyster sauce, tasting all the time.

Once the veggies became tender, but still had a bite to them, and the liquid in the pot had reduced a bit, the soup was officially done. It was at this point that I decided what else I wanted to add to it.

For this particular meal, I decided I wanted the shrimp and the dumplings. So I took a handful of frozen shrimp, cutting them into smaller pieces, and put them in the bottom of a sauce pan. I also took about a dozen of the frozen dumplings and added them to the same sauce pan.

Because there is a lot of soup in the large pot, I ladled out the amount I wanted into the sauce pan with the frozen shrimp and dumplings, and brought all it to a boil over high heat. The dumplings cooked in just a few minutes, and the shrimp even more quickly than that. The soup was done.

Because the dumplings cook so quickly, as does the shrimp, I chose not to add them to the large pot, because reheating the soup would make all of that mushy. When I reheat the soup, I can add new batches of dumplings and shrimp, so that they are perfectly tender and flavorful. (Or simply leave them out altogether, depending on my mood.)

I put some of the leftover soup in containers to freeze, and some in the fridge to enjoy the next day, reheating it with whatever ingredients I chose the next time.

ASIAN-STYLE PORK CHUNX

Posted: April 12, 2025 in Uncategorized
Tags: , , , ,

These delicious “chunx” of pork are full of fantastic Asian flavors and go great with broccoli and rice…or just by themselves. Plus, I used inexpensive boneless pork sparerib meat, which saves a few bucks.

3 pounds boneless pork ribs
1/2 a large onion, diced
1/2 cup soy sauce
4 tablespoons hoisin sauce
1 teaspoon Chinese chili garlic sauce
Zest and juice of 1 lemon
2 star anise
2 cinnamon sticks
1/2 cup maple syrup
4 cups chicken broth, preferably homemade

This recipe is similar to my Asian bacon recipe, only it uses a cheaper, easier to find, cut of pork: boneless sparerib meat. You can usually find packages of this meat in a 3-pound size at most supermarkets.

The rib meat is fatty, however, and often has some gristle. So I trim as much of that away as I can to keep the tasty bites tender. 

I cut the pork into 1-inch cubes, and toss them in a bowl with the diced onion. I add the soy sauce, hoisin sauce, and Chinese chili garlic sauce to the bowl and mix everything really well.

I will let the pork marinate for 2 hours at room temperature, remixing every half-hour or so. (If the pork needs to stay out longer, I put it in the refrigerator, bringing it back to room temperature when I’m ready to cook.)

I preheat the oven to 350°.

I line a baking pan with nonstick aluminum foil and place the pork and onion pieces on it in a single layer, reserving any leftover marinade for later.

I bake the pork and onions for 30 minutes.

While the pork is in the oven, I get a large pot and place the lemon zest, lemon juice, star anise, cinnamon sticks, maple syrup, and chicken broth in the pot. I bring it to a boil, then reduce it to a simmer.

After the pork and onions have cooked for 30 minutes, I remove them from the baking pan and place them in the pot, pouring in all the juices that might be in the baking pan. At this point, I can add any leftover marinade into the pot as well.

Bringing the heat under the pot back on high, I continue cooking until the liquid in the pot starts reducing. As it reduces, I turn the heat down as well, so I don’t burn any sugars in the pot. I stir the pork pieces once in a while.

Soon, the liquid will be reduced to a glaze. I keep tossing the pork in that glaze until it looks nice and shiny and gooey and sticky. And that’s when they’re ready!

Serve the pork chunks immediately!

Somebody in marketing made a fortune when they took a product that had been around since 1945 (the convection oven), renamed it an “air fryer,” and sold millions of them. I still call my old oven a convection oven, but whatever you call yours, this recipe will work in it.

I love cauliflower roasted, boiled, baked–whatever–but my daughter does not. But when she had it air-fried at a restaurant, she suddenly fell in love with the stuff, and I knew it was time to make some at home.

Cutting a head of cauliflower into florets is an easy thing to do. But it’s even easier to buy a bag of cauliflower florets already cut up at a supermarket or membership warehouse.

If you want this recipe to be gluten-free, do what I do: buy a loaf of Udi’s frozen white bread, toast it in the oven, and then let it dry out a bit at room temperature. Place it in a food processor and whiz it up for larger crumbs. I like my breadcrumbs fine for this recipe, so I then move them to a blender and grind them fine.

Fine grind.
1 head of cauliflower, cut into florets
2 large eggs
1 cup of breadcrumbs (I like them unseasoned and finely milled)
spray can of olive or avocado oil

There are many versions of sweet and spicy Asian-inspired sauces and glazes out there. Simply choose the one that has your favorite ingredients. This one works really well with the cauliflower.

4 tablespoons honey
2 tablespoons chili garlic sauce
2 tablespoons brown sugar
1 tablespoon + 1 teaspoon soy sauce
1/4 teaspoon granulated garlic
1/4 teaspoon ground ginger

Combine these ingredients in a saucepan and bring it up to a medium heat. When it comes to a boil, take it off the heat and let it cool. (I double this recipe simply because the sauce is so good, and I’ll want to put it on other things, like chicken.)

Pre-heat the oven to 400 degrees.

Scramble the 2 eggs in a bowl.

Add the breadcrumbs to another bowl.

For the oven, set up a slotted metal tray to sit on a baking tray, so that there’s airflow underneath it. The cauliflower goes on the slotted tray, and the baking tray catches any breadcrumbs that may drop. Spray some oil on the slotted tray to keep things from sticking.

Take your cauliflower pieces and place them in batches in the egg, coating them completely. Then move them to the breadcrumb bowl, tossing them to get covered. Once they’re nicely coated, place them on the slotted tray. Do the same with the rest of the cauliflower.

Spray the cauliflower with the oil, and place them in the oven, baking for 30–45 minutes, depending on how cooked you like them.

I’ve seen restaurants that completely coat the cauliflower with the sauce, but I prefer to drizzle it on, with some extra on the side for dipping.

It’s hard to improve on buttery, creamy mashed potatoes, but I think this recipe does just that. Like with pasta carbonara, you add pork, egg yolks, and Parmesan cheese to take this to another level.

The classic pasta carbonara uses guanciale, which is cured pork cheeks. Many recipes call for pancetta instead (which is the cured but unsmoked belly of the pig.) But since I cure my own guanciale, this was a no-brainer.

Egg yolks are stirred into the warm pasta in carbonara, and are cooked simply from the heat from the pasta. Here, I stir the egg yolks into the mashed potatoes, but then they go back in the oven to cook more.

And all too often, the phrase “Parmesan cheese” is used in recipes. That opens the floodgates to some truly horrendous cheeses, including the non-refrigerated stuff on the supermarket shelf that is 50% sawdust! There is only one King of Cheeses: Parmigiano Reggianio. Look for it, ask for it, pay the price. It’s worth every penny.

Parmigiano Reggiano
3 lbs. Yukon gold potatoes, peeled and chopped into large chunks
6 oz. guanciale, finely chopped
3/4 cup grated Parmigiano Reggiano
1/2 cup heavy cream
1/8 teaspoon freshly grated nutmeg
1 stick (8 tablespoons) unsalted butter, brought to room temperature, separated
Kosher salt and freshly ground black pepper
1 large egg
2 large egg yolks

Preheat the oven to 400 degrees.

Place the potatoes in a large pot and cover them with cold water. Bring them to a boil, and then cook them until they’re fork-tender. Drain the potatoes in a colander and let them dry out a little, about 10 minutes. Then place the potatoes back in the pot.

Cook the guanciale in a non-stick pan over medium heat, stirring often, until the bits are golden brown and crispy. Transfer the cooked guanicale bits to paper towels to absorb the excess fat.

To the pot with the potatoes, add the cheese, the cream, the nutmeg (I always have whole nutmeg around to grate into my rum drinks!), 6 tablespoons of the butter, and some salt and pepper. Get out the old potato masher and mash away until the potatoes are smooth.

In a separate small bowl, whisk together the whole egg and the 2 egg yolks, then add them to the pot with the potatoes, and stir until they are well combined.

Add in all but about 1 tablespoon of the guanciale, mixing well.

Grab your favorite baking dish, and pour in the mashed potatoes, smoothing them out to make them look nice. (We originally tried piping some of the potatoes with a pastry bag, but it kept getting clogged with the guanciale and we gave up!)

Didn’t work so well….
…but delicious anyway!

Sprinkle the remaining guanciale on top of the potatoes and place the baking dish in the oven.

Bake until the potatoes are golden around the edges, about 30 minutes.

Chop up the remaining 2 oz. of butter and scatter it over the top of the potatoes, letting the butter melt in while the potatoes cool.

I really love the flavors of this recipe, and the great thing is that you can use it as a marinade and a dipping sauce–not just for beef–but a dipping sauce for grilled chicken, dumplings, anything. It’s that good.

Make more than you think you’ll need because you can keep it in the fridge for future dipping.

If you use gluten-free soy sauce, this recipe is GF. Chili garlic sauce can be found in the Asian foods section of most supermarkets.

A little side salad with blue cheese and home-cured and smoked bacon doesn’t hurt, either!

1/4 cup soy sauce
1/8 cup sesame oil
2 tablespoons freshly grated ginger
2 tablespoons finely chopped garlic
2 tablespoons finely chopped cilantro
2 tablespoons chopped salted pistachio nuts
2 scallions, minced
1 tablespoon light brown sugar
1 tablespoon freshly squeezed lime juice
1 teaspoon chili garlic sauce


Combine all the ingredients in a bowl and mix them together well.


Whatever cut of beef you’re using, make sure it isn’t too thick, or the marinade won’t penetrate the meat.

I like to use beef flap or flank steak, because it’s full of flavor, and I slice it crosswise to make cuts of meat that are about 1/2″ thick.

I place the beef in a bowl, and pour just a little marinade in at a time. I don’t want the meat swimming in the marinade…just enough so that it makes contact with all the surfaces of the meat.

Place the unused marinade in a sealed container in the fridge.

If you’re cooking soon, let the beef marinate at room temperature. But ideally, you want the beef to marinate in the fridge overnight–the longer the better–to really soak up the flavors of the marinade.

Before cooking, take the beef out of the fridge and let it come back to room temperature. Discard the marinade that was in the bowl with the beef.

If your beef flap is thin enough, tossing it onto a very hot cast iron skillet to sear it on both sides will bring the beef to a perfect medium-rare. Otherwise, you can sear it in a regular pan and then finish it in the oven–or–fire up the grill!

Use the remaining marinade for dipping.


Thighs finishing on the grill.


Whether you use chicken breast or chicken thighs — I used both here— the flavor is outstanding, especially if you can finish it on the grill!


Here’s great hack for fresh ginger that I learned from Liz, the owner of Wishing Stone Farm, an organic farm in Little Compton, RI, where they grow their own ginger roots. Place your ginger root in a Ziploc bag and keep it in the freezer. Whenever a recipe calls for freshly grated ginger, simply pull the frozen root out of the freezer and grate it, skin and all, while it’s frozen. Then simply place the root back in the Ziploc and back in the freezer until next time. No waste!

STEAK AU POIVRE

Posted: March 7, 2025 in Uncategorized
Tags: , , , ,

A classic French beef dish, Steak au Poivre is the perfect example of delicious simplicity. If you love pepper, you can make this wonderful dish with just a few ingredients. My personal twist was to use black peppercorns instead of the green peppercorns that are often used, and I also added porcini mushrooms to the sauce, because…well…why not?

The classic Steak au Poivre uses a tender, lean cut of beef like filet. But I had a couple of grass-fed sirloins in the fridge, and they worked out just fine.

2 sirloin steaks, about 6 oz. each
Kosher salt
2 tablespoons whole black peppercorns
2 tablespoons butter, divided
1 teaspoon olive oil
1/3 cup Cognac, plus 1 teaspoon
1 cup heavy cream
dried porcini mushrooms (optional)


If you’re using the porcinis, place them in a sauce pan, and add water to cover them. Bring the water to a boil, set the pan aside, and let the porcinis rehydrate. Once they’ve rehydrated, remove them from the pan (save the liquid) and chop them up finely. Set them aside.

Rehydrating the porcinis.


Remove the steaks from the fridge at least 30 minutes before cooking, so they are at room temperature. Season them on all sides with the salt.

Coarsely crush the peppercorns. (I have a pepper mill that makes coarsely crushed pepper, so I used that.) Spread the peppercorns evenly on a plate, and press the sirloins, on both sides, into the pepper so that it coats the surface of the meat. Set them aside.


In a medium skillet over medium heat, melt 1 tablespoon of the butter and the olive oil. As soon as the butter and oil start to smoke, place the steaks in the pan. Cook them for about 4 minutes on each side. Once they’re done, remove the steaks, place them on a plate, and cover them with foil to keep them warm.


Pour off the excess fat from the pan, but don’t wipe the pan clean!

Back to the porcinis: in a separate skillet, add 1 tablespoon of butter and the chopped porcinis, sautéing them for a few minutes over medium heat. Slowly pour in the mushroom liquid from the sauce pan, making sure any sediment at the bottom gets left behind. Cook this liquid down with the mushrooms until it has reduced almost completely.


Back to the steak pan: off the heat, add 1/3 cup of Cognac to the pan and carefully ignite the alcohol with a long match or lighter.


Gently shake the pan until the flames die. Return the pan to the medium heat and add the cream. Bring the mixture to a boil and whisk it until the sauce coats the back of a spoon, about 5 minutes or so. Add the teaspoon of Cognac. (If you’re using the mushrooms, add them to the sauce at this point, stirring them in.)


Add the steaks back to the pan, spooning the sauce over the meat.


A FABULOUS FISH BAKE

Posted: March 4, 2025 in Uncategorized
Tags: , , , ,

Those who say that cheese and fish don’t go together, haven’t tried shrimp scampi, a tuna melt, or even a McDonald’s filet-o-fish sandwich! Hearty and satisfying, this dish is all comfort.

As I researched this recipe, I found versions that had potatoes or pasta. I wanted a lower calorie and lower carb option, so I went with just cauliflower and broccoli. But feel free to substitute as you like. Potatoes don’t need to be pre-cooked, as long as you cut them into small cubes. Pasta needs to be cooked to the almost al dente stage—very firm—and then added to the pan.

I originally came up with this recipe when I found some tuna and salmon in my freezer, and I wanted to use them up. But this recipe works even better with any white fish, like cod or halibut.

If you use gluten-free flour and breadcrumbs (easy enough to do), this dish is gluten-free.


6 oz. cod, fresh or thawed if frozen
8 oz. mixed broccoli and cauliflower, cut into smaller pieces (you can use fresh or frozen)
1/2 small onion, finely chopped
1 tablespoon unsalted butter 
1 tablespoon all-purpose flour
1/2 cup milk
2 oz. sharp cheddar cheese, grated, separated
1/4 teaspoon granulated garlic
Salt and pepper
1 tablespoon breadcrumbs


Preheat the oven to 350 degrees.

Cut the fish into large chunks, removing any skin, and place it in a bowl. 

Pour the broccoli and cauliflower into the bowl.

Melt the butter in a saucepan over medium heat, and add the onion, sautéing it until it’s soft but not brown. Stir in the flour and cook for a minute or two. Slowly pour in the milk, stirring constantly. Season with salt, pepper, and the granulated garlic. Add all the cheddar cheese except a tablespoon, mixing well and making sure it all melts.


Pour the sauce into the bowl with the veggies and the fish, and mix everything gently, trying not to break the fish pieces up too much.


Pour the contents of the bowl into a baking dish just big enough to hold it all. You don’t want it spread out…you want it to have some depth so it doesn’t dry out.

Sprinkle the top with the remaining cheese and the breadcrumbs.


Bake for about 30 minutes, until it’s golden and bubbly.


This recipe could serve 2, but I devoured it on my own!