Posts Tagged ‘recipe’

It’s hard to improve on buttery, creamy mashed potatoes, but I think this recipe does just that. Like with pasta carbonara, you add pork, egg yolks, and Parmesan cheese to take this to another level.

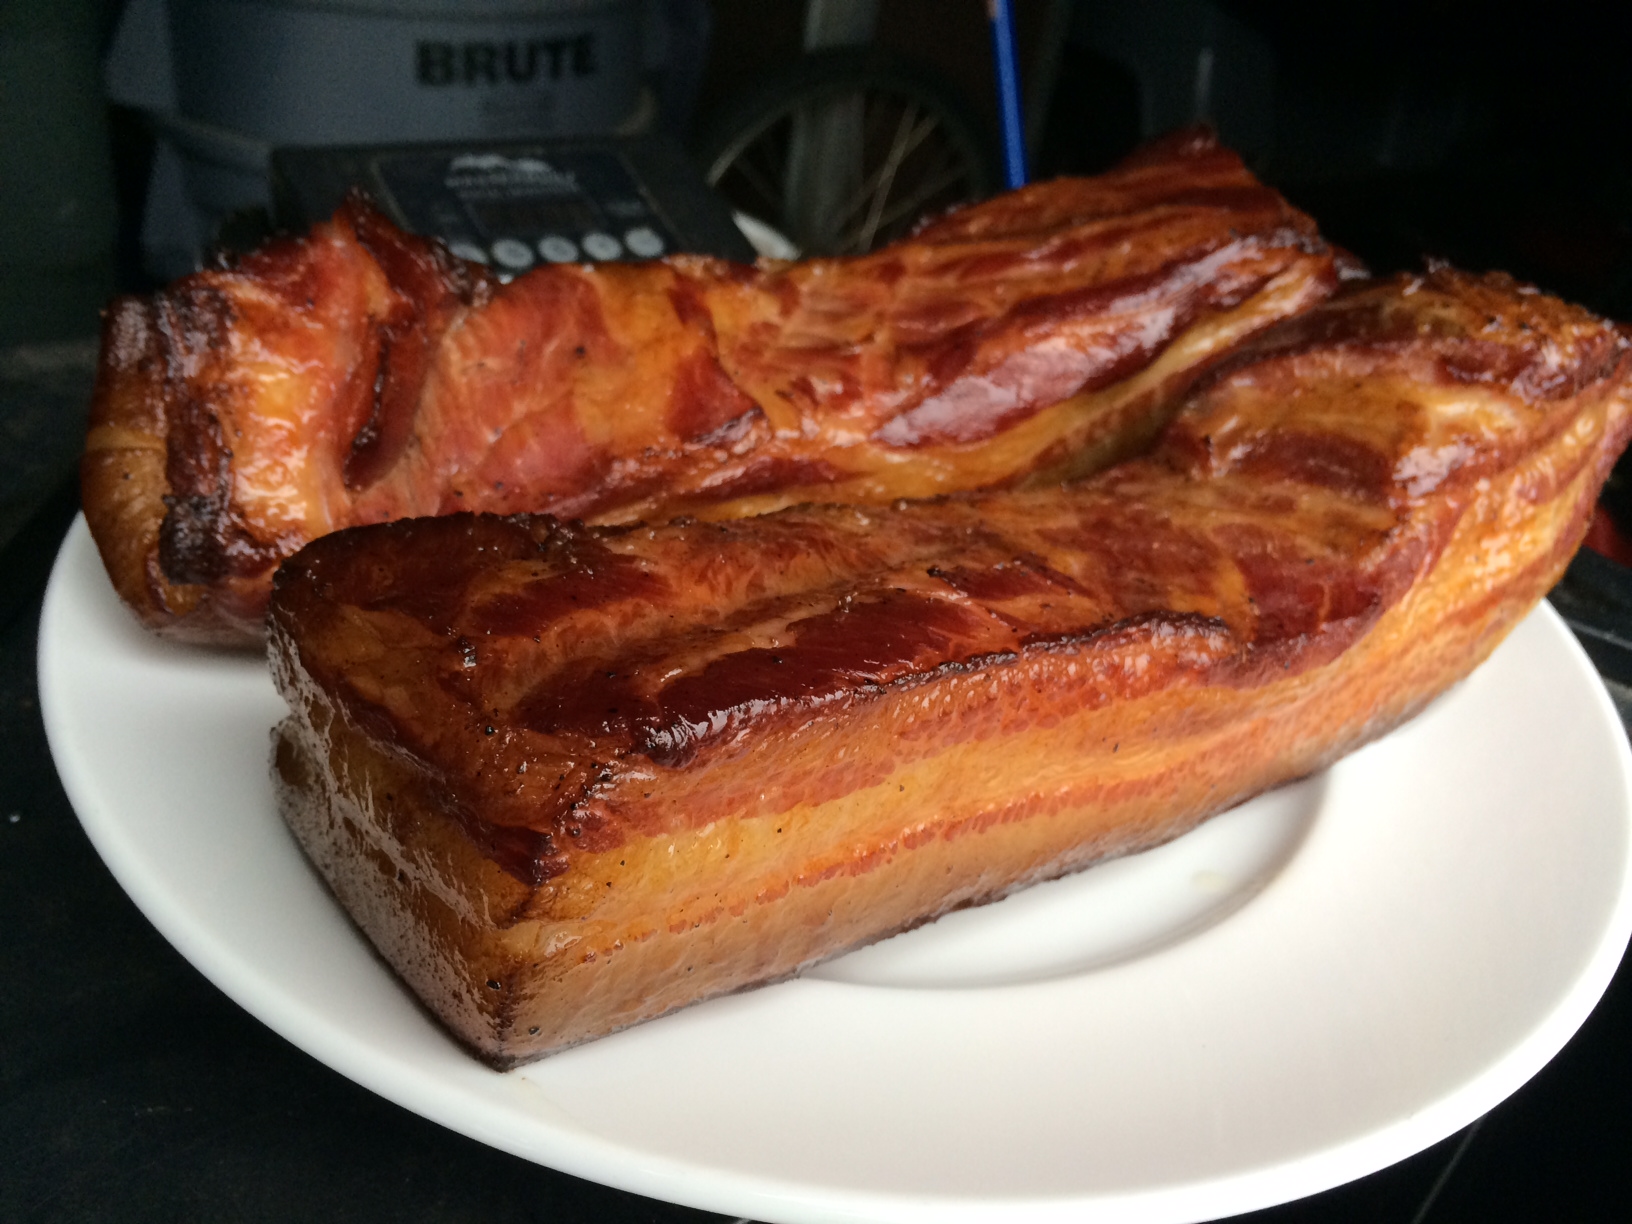
The classic pasta carbonara uses guanciale, which is cured pork cheeks. Many recipes call for pancetta instead (which is the cured but unsmoked belly of the pig.) But since I cure my own guanciale, this was a no-brainer.

Egg yolks are stirred into the warm pasta in carbonara, and are cooked simply from the heat from the pasta. Here, I stir the egg yolks into the mashed potatoes, but then they go back in the oven to cook more.

And all too often, the phrase “Parmesan cheese” is used in recipes. That opens the floodgates to some truly horrendous cheeses, including the non-refrigerated stuff on the supermarket shelf that is 50% sawdust! There is only one King of Cheeses: Parmigiano Reggianio. Look for it, ask for it, pay the price. It’s worth every penny.

Parmigiano Reggiano
3 lbs. Yukon gold potatoes, peeled and chopped into large chunks
6 oz. guanciale, finely chopped
3/4 cup grated Parmigiano Reggiano
1/2 cup heavy cream
1/8 teaspoon freshly grated nutmeg
1 stick (8 tablespoons) unsalted butter, brought to room temperature, separated
Kosher salt and freshly ground black pepper
1 large egg
2 large egg yolks

Preheat the oven to 400 degrees.

Place the potatoes in a large pot and cover them with cold water. Bring them to a boil, and then cook them until they’re fork-tender. Drain the potatoes in a colander and let them dry out a little, about 10 minutes. Then place the potatoes back in the pot.

Cook the guanciale in a non-stick pan over medium heat, stirring often, until the bits are golden brown and crispy. Transfer the cooked guanicale bits to paper towels to absorb the excess fat.

To the pot with the potatoes, add the cheese, the cream, the nutmeg (I always have whole nutmeg around to grate into my rum drinks!), 6 tablespoons of the butter, and some salt and pepper. Get out the old potato masher and mash away until the potatoes are smooth.

In a separate small bowl, whisk together the whole egg and the 2 egg yolks, then add them to the pot with the potatoes, and stir until they are well combined.

Add in all but about 1 tablespoon of the guanciale, mixing well.

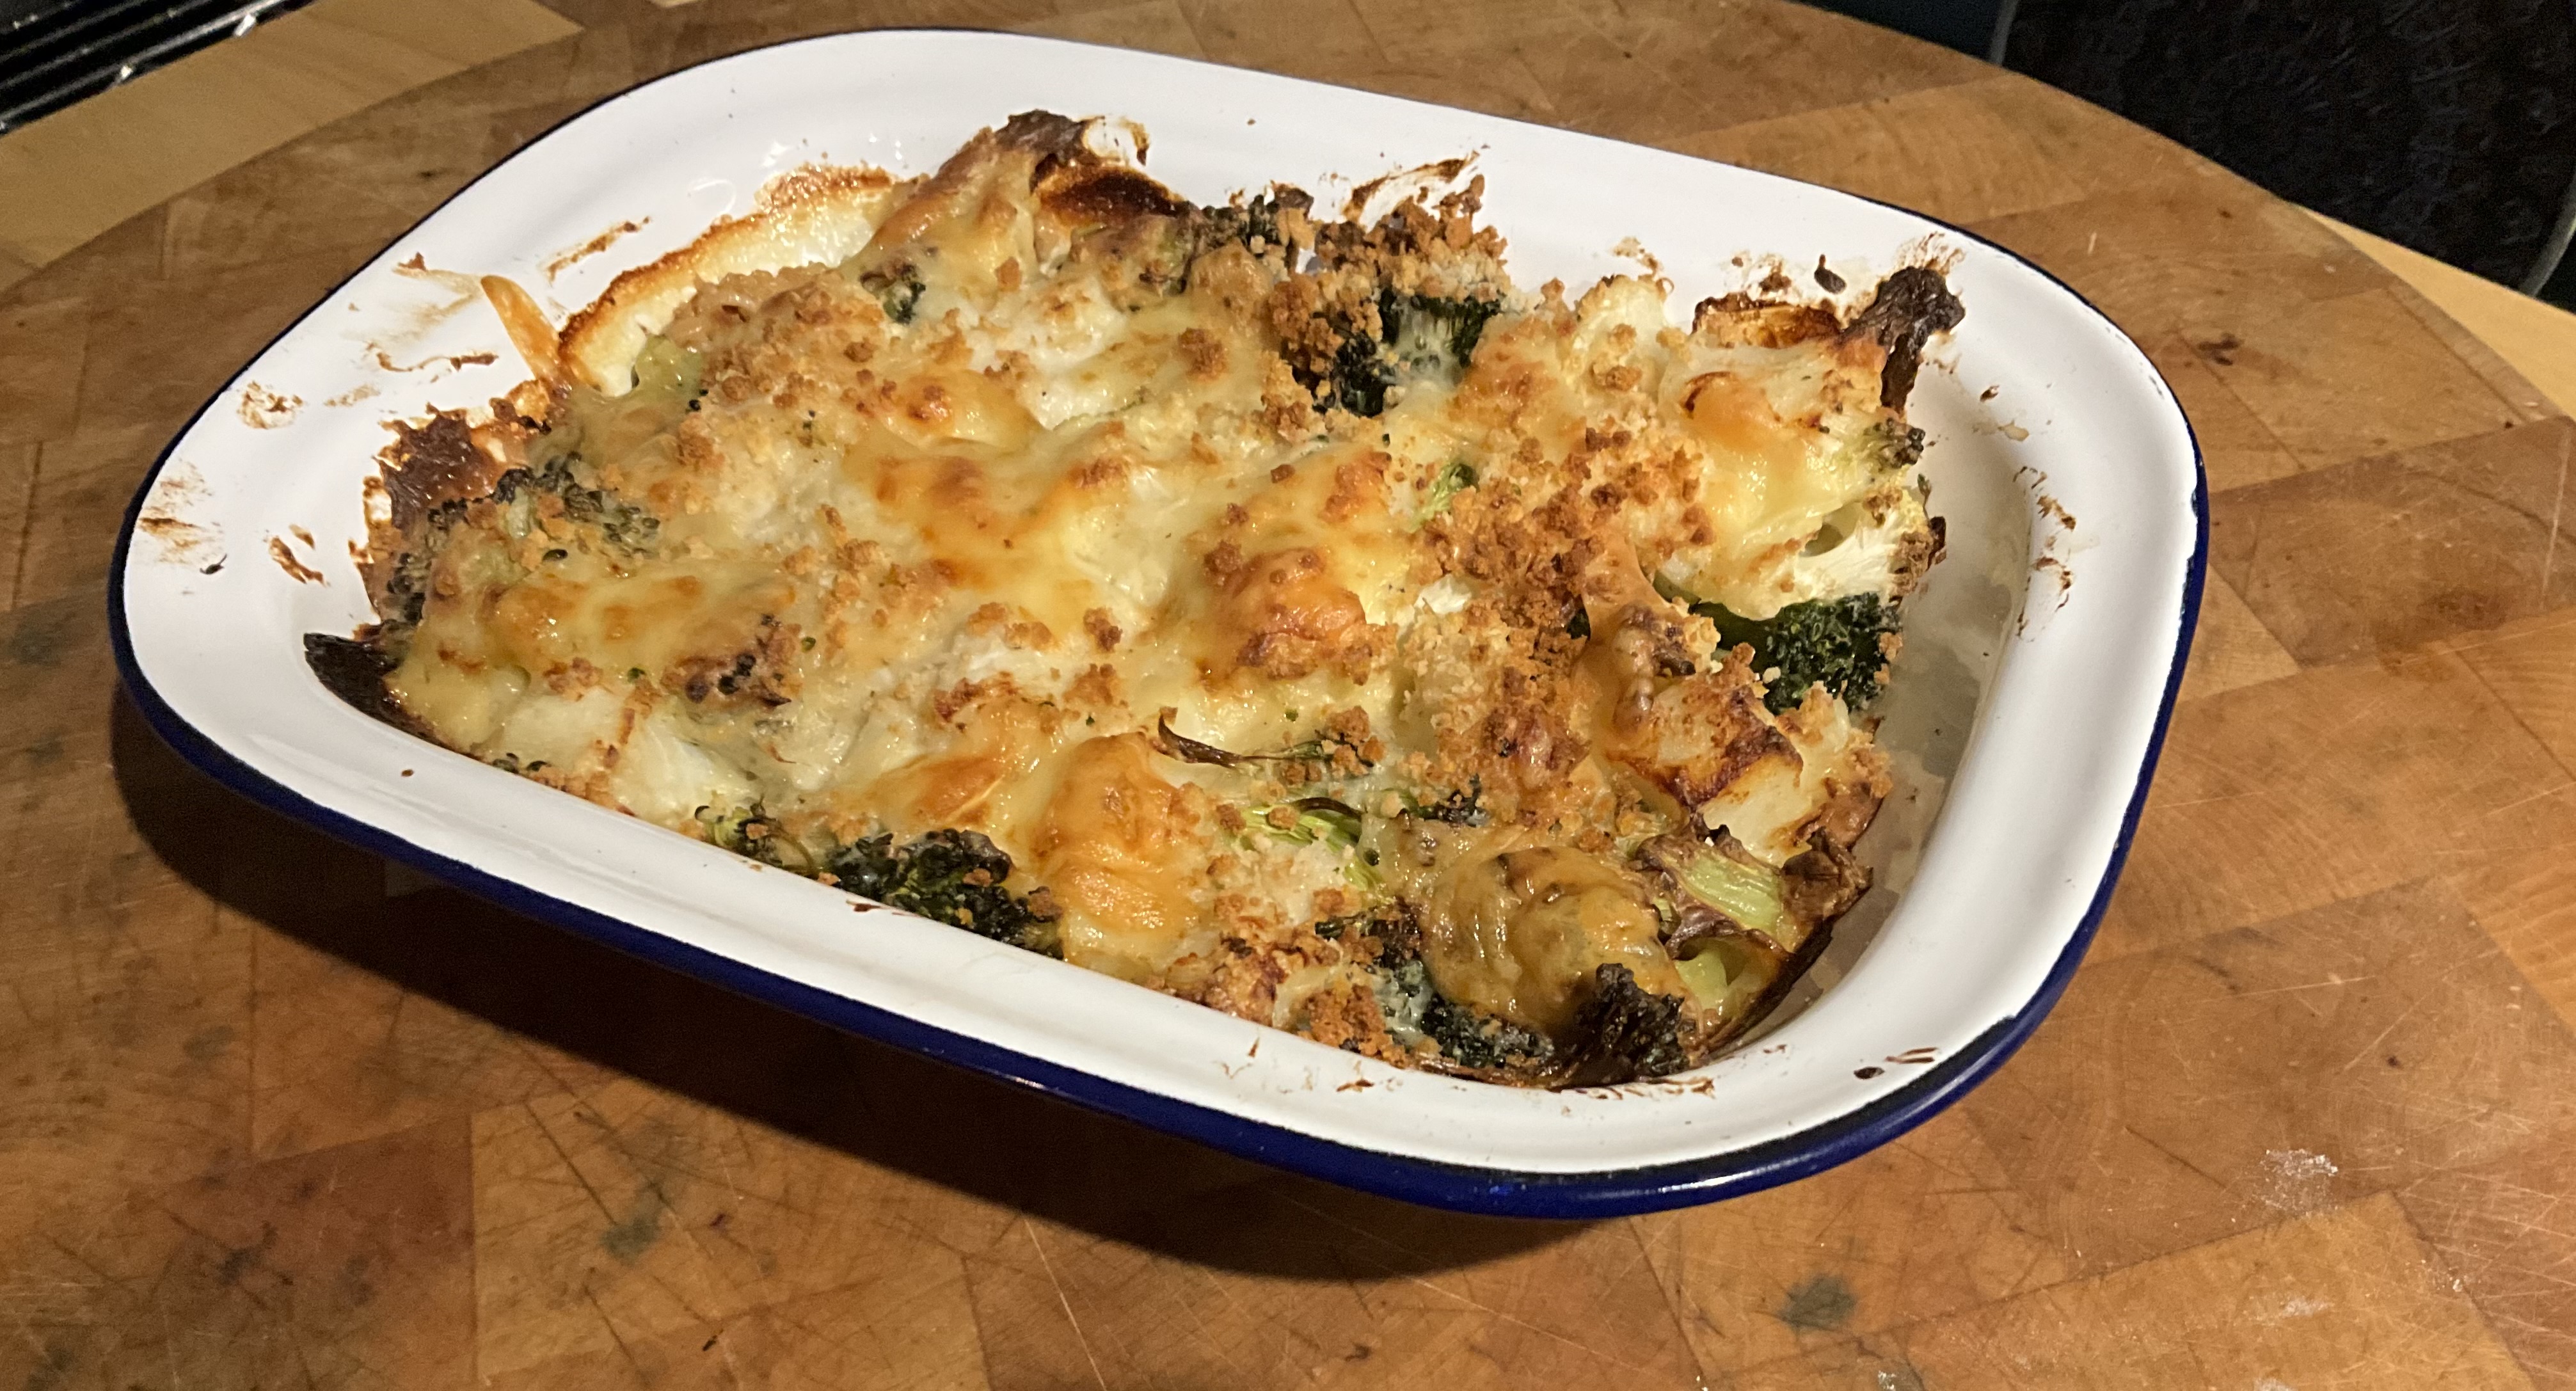
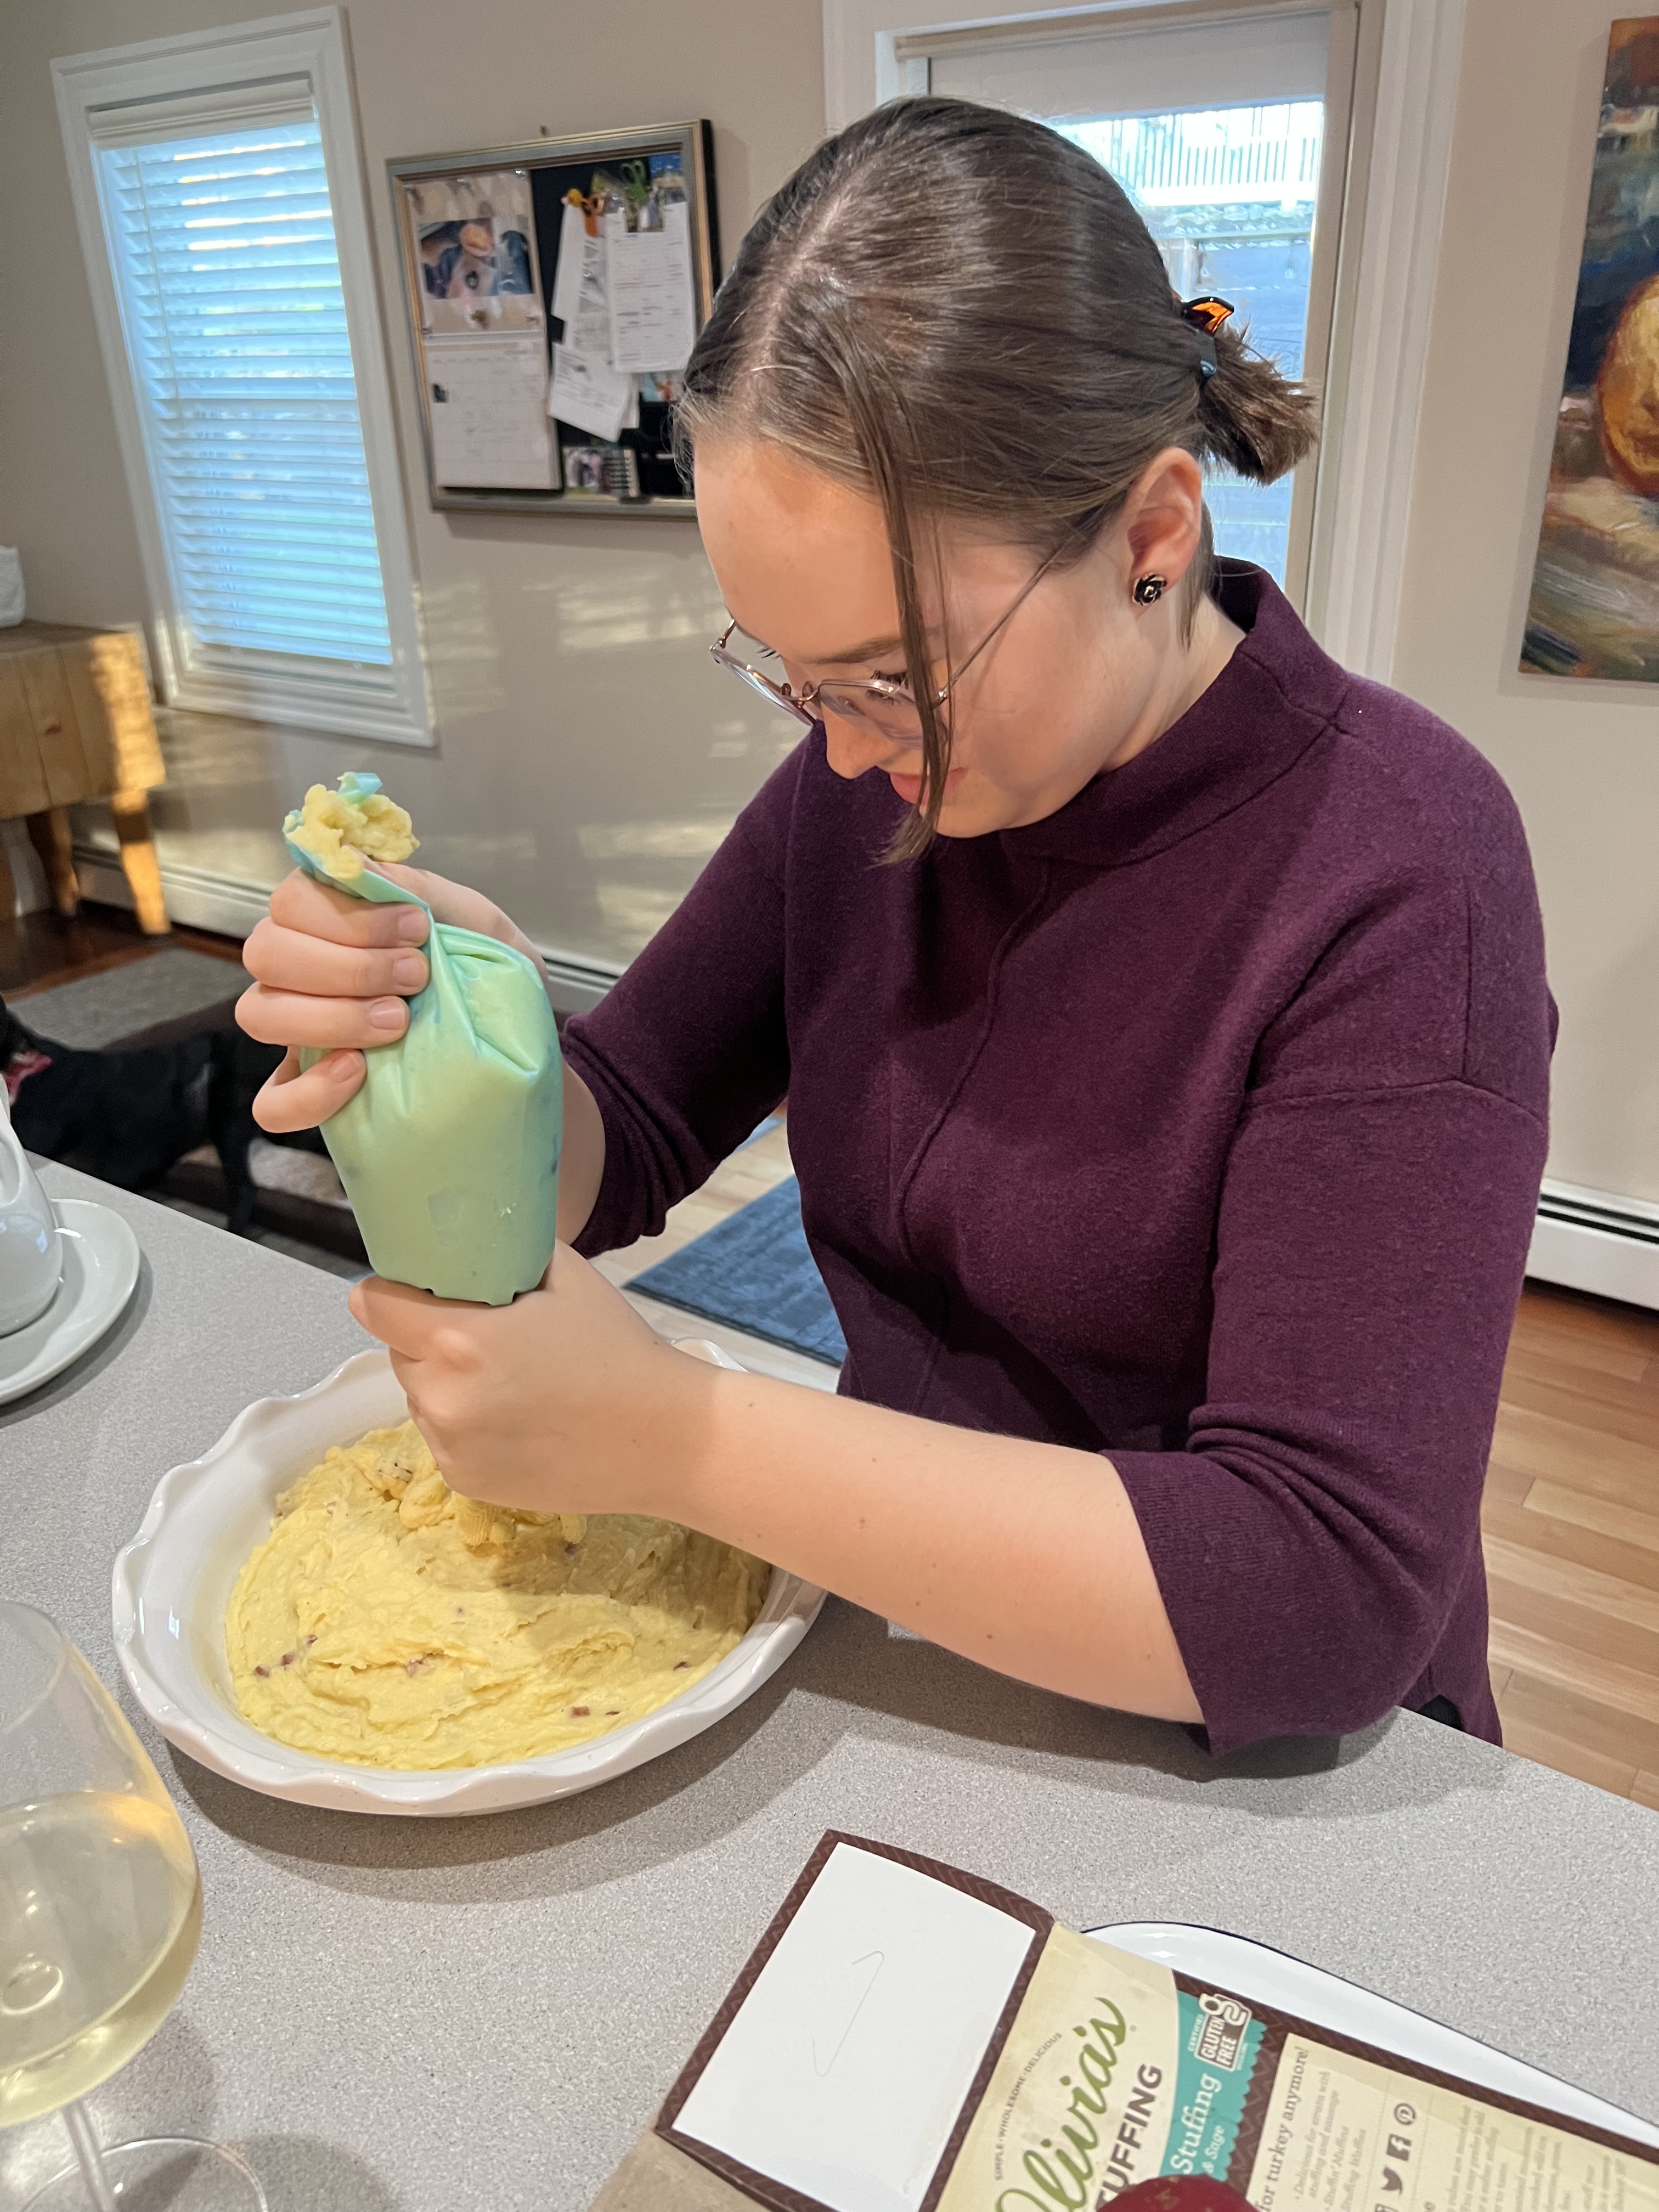
Grab your favorite baking dish, and pour in the mashed potatoes, smoothing them out to make them look nice. (We originally tried piping some of the potatoes with a pastry bag, but it kept getting clogged with the guanciale and we gave up!)

Didn’t work so well….
…but delicious anyway!

Sprinkle the remaining guanciale on top of the potatoes and place the baking dish in the oven.

Bake until the potatoes are golden around the edges, about 30 minutes.

Chop up the remaining 2 oz. of butter and scatter it over the top of the potatoes, letting the butter melt in while the potatoes cool.

I really love the flavors of this recipe, and the great thing is that you can use it as a marinade and a dipping sauce–not just for beef–but a dipping sauce for grilled chicken, dumplings, anything. It’s that good.

Make more than you think you’ll need because you can keep it in the fridge for future dipping.

If you use gluten-free soy sauce, this recipe is GF. Chili garlic sauce can be found in the Asian foods section of most supermarkets.

A little side salad with blue cheese and home-cured and smoked bacon doesn’t hurt, either!

1/4 cup soy sauce
1/8 cup sesame oil
2 tablespoons freshly grated ginger
2 tablespoons finely chopped garlic
2 tablespoons finely chopped cilantro
2 tablespoons chopped salted pistachio nuts
2 scallions, minced
1 tablespoon light brown sugar
1 tablespoon freshly squeezed lime juice
1 teaspoon chili garlic sauce


Combine all the ingredients in a bowl and mix them together well.


Whatever cut of beef you’re using, make sure it isn’t too thick, or the marinade won’t penetrate the meat.

I like to use beef flap or flank steak, because it’s full of flavor, and I slice it crosswise to make cuts of meat that are about 1/2″ thick.

I place the beef in a bowl, and pour just a little marinade in at a time. I don’t want the meat swimming in the marinade…just enough so that it makes contact with all the surfaces of the meat.

Place the unused marinade in a sealed container in the fridge.

If you’re cooking soon, let the beef marinate at room temperature. But ideally, you want the beef to marinate in the fridge overnight–the longer the better–to really soak up the flavors of the marinade.

Before cooking, take the beef out of the fridge and let it come back to room temperature. Discard the marinade that was in the bowl with the beef.

If your beef flap is thin enough, tossing it onto a very hot cast iron skillet to sear it on both sides will bring the beef to a perfect medium-rare. Otherwise, you can sear it in a regular pan and then finish it in the oven–or–fire up the grill!

Use the remaining marinade for dipping.


Thighs finishing on the grill.


Whether you use chicken breast or chicken thighs — I used both here— the flavor is outstanding, especially if you can finish it on the grill!


Here’s great hack for fresh ginger that I learned from Liz, the owner of Wishing Stone Farm, an organic farm in Little Compton, RI, where they grow their own ginger roots. Place your ginger root in a Ziploc bag and keep it in the freezer. Whenever a recipe calls for freshly grated ginger, simply pull the frozen root out of the freezer and grate it, skin and all, while it’s frozen. Then simply place the root back in the Ziploc and back in the freezer until next time. No waste!

STEAK AU POIVRE

Posted: March 7, 2025 in Uncategorized
Tags: , , , ,

A classic French beef dish, Steak au Poivre is the perfect example of delicious simplicity. If you love pepper, you can make this wonderful dish with just a few ingredients. My personal twist was to use black peppercorns instead of the green peppercorns that are often used, and I also added porcini mushrooms to the sauce, because…well…why not?

The classic Steak au Poivre uses a tender, lean cut of beef like filet. But I had a couple of grass-fed sirloins in the fridge, and they worked out just fine.

2 sirloin steaks, about 6 oz. each
Kosher salt
2 tablespoons whole black peppercorns
2 tablespoons butter, divided
1 teaspoon olive oil
1/3 cup Cognac, plus 1 teaspoon
1 cup heavy cream
dried porcini mushrooms (optional)


If you’re using the porcinis, place them in a sauce pan, and add water to cover them. Bring the water to a boil, set the pan aside, and let the porcinis rehydrate. Once they’ve rehydrated, remove them from the pan (save the liquid) and chop them up finely. Set them aside.

Rehydrating the porcinis.


Remove the steaks from the fridge at least 30 minutes before cooking, so they are at room temperature. Season them on all sides with the salt.

Coarsely crush the peppercorns. (I have a pepper mill that makes coarsely crushed pepper, so I used that.) Spread the peppercorns evenly on a plate, and press the sirloins, on both sides, into the pepper so that it coats the surface of the meat. Set them aside.


In a medium skillet over medium heat, melt 1 tablespoon of the butter and the olive oil. As soon as the butter and oil start to smoke, place the steaks in the pan. Cook them for about 4 minutes on each side. Once they’re done, remove the steaks, place them on a plate, and cover them with foil to keep them warm.


Pour off the excess fat from the pan, but don’t wipe the pan clean!

Back to the porcinis: in a separate skillet, add 1 tablespoon of butter and the chopped porcinis, sautéing them for a few minutes over medium heat. Slowly pour in the mushroom liquid from the sauce pan, making sure any sediment at the bottom gets left behind. Cook this liquid down with the mushrooms until it has reduced almost completely.


Back to the steak pan: off the heat, add 1/3 cup of Cognac to the pan and carefully ignite the alcohol with a long match or lighter.


Gently shake the pan until the flames die. Return the pan to the medium heat and add the cream. Bring the mixture to a boil and whisk it until the sauce coats the back of a spoon, about 5 minutes or so. Add the teaspoon of Cognac. (If you’re using the mushrooms, add them to the sauce at this point, stirring them in.)


Add the steaks back to the pan, spooning the sauce over the meat.


A FABULOUS FISH BAKE

Posted: March 4, 2025 in Uncategorized
Tags: , , , ,

Those who say that cheese and fish don’t go together, haven’t tried shrimp scampi, a tuna melt, or even a McDonald’s filet-o-fish sandwich! Hearty and satisfying, this dish is all comfort.

As I researched this recipe, I found versions that had potatoes or pasta. I wanted a lower calorie and lower carb option, so I went with just cauliflower and broccoli. But feel free to substitute as you like. Potatoes don’t need to be pre-cooked, as long as you cut them into small cubes. Pasta needs to be cooked to the almost al dente stage—very firm—and then added to the pan.

I originally came up with this recipe when I found some tuna and salmon in my freezer, and I wanted to use them up. But this recipe works even better with any white fish, like cod or halibut.

If you use gluten-free flour and breadcrumbs (easy enough to do), this dish is gluten-free.


6 oz. cod, fresh or thawed if frozen
8 oz. mixed broccoli and cauliflower, cut into smaller pieces (you can use fresh or frozen)
1/2 small onion, finely chopped
1 tablespoon unsalted butter 
1 tablespoon all-purpose flour
1/2 cup milk
2 oz. sharp cheddar cheese, grated, separated
1/4 teaspoon granulated garlic
Salt and pepper
1 tablespoon breadcrumbs


Preheat the oven to 350 degrees.

Cut the fish into large chunks, removing any skin, and place it in a bowl. 

Pour the broccoli and cauliflower into the bowl.

Melt the butter in a saucepan over medium heat, and add the onion, sautéing it until it’s soft but not brown. Stir in the flour and cook for a minute or two. Slowly pour in the milk, stirring constantly. Season with salt, pepper, and the granulated garlic. Add all the cheddar cheese except a tablespoon, mixing well and making sure it all melts.


Pour the sauce into the bowl with the veggies and the fish, and mix everything gently, trying not to break the fish pieces up too much.


Pour the contents of the bowl into a baking dish just big enough to hold it all. You don’t want it spread out…you want it to have some depth so it doesn’t dry out.

Sprinkle the top with the remaining cheese and the breadcrumbs.


Bake for about 30 minutes, until it’s golden and bubbly.


This recipe could serve 2, but I devoured it on my own!

Mardi Gras is less than a week away!! Here’s a great dish from New Orleans…

One of my favorite dishes to come out of New Orleans is Barbecue Shrimp, so on a visit to the Crescent City a couple of years ago, I had to make a stop at the place where it all started.

The first unusual thing you notice about the classic dish, New Orleans Barbecue Shrimp, is that it’s not cooked on a barbecue grill and it has no barbecue sauce.

So why the name?

Its origin goes back to the mid-1950’s, to an Italian restaurant in New Orleans called Pascale’s Manale. The story goes that a regular customer had just returned from Chicago, where he had dined on an amazing shrimp dish. He asked the chef at Pascale’s Manale to try to replicate it, and what resulted was actually better than the original. And though no barbecue grill or sauce was used, it is believed that they gave it the name “BBQ Shrimp” to cash in on the backyard barbecuing craze that was all the rage at the time. Whatever they call it, I have to say that it’s worth a special trip to have the dish!

The classic New Orleans Barbecue Shrimp is served with shell-on shrimp, so you have to make a big, buttery mess of yourself as you devour it. And it’s served with plenty of crusty French bread.

At home, sometimes I’ll leave out the bread and go for rice instead. And I’ll peel the shrimp completely, using the shrimp shells to make the stock I cook the rice in.

image
For the seasoning…
1 1/2 teaspoons salt
1 1/2 teaspoons fresh ground black pepper
1 teaspoon fresh rosemary, very finely chopped
1/4 teaspoon oregano
1/4 teaspoon granulated garlic
1/4 teaspoon granulated onion
1/4 teaspoon paprika
1/4 teaspoon dried thyme
1/8 teaspoon cayenne pepper
1/8 teaspoon white pepper

Mix all the seasoning spices and set them aside.

image
For the BBQ shrimp…
2 lbs. large wild-caught American shrimp, peeled and de-veined
1 stick butter (4 oz.)
1/2 cup beer
1/4 cup Worcestershire sauce
olive oil
For the rice…
1 cup rice (I like jasmine rice)
2 1/4 cups water or seafood stock (see below)
1 teaspoon olive oil
1/2 teaspoon Tony Chachere’s Original Creole Seasoning

image

Cook the rice following the directions on the package. I like using stock instead of water when I cook my rice, so after peeling all the shrimp, I toss the shells in a saucepan full of water and I boil the heck out of it, strain it, and use that stock to cook the rice. I add the olive oil and the Tony Chachere’s (available online or at your favorite food store) to the stock before cooking the rice.

To cook the shrimp, I heat a little olive oil in a large skillet over moderate heat. Then I add the shrimp, and sear them on one side (about 30 seconds) and then flip them over to sear on the other side (another 30 seconds.) I’m not trying to cook them all the way through, just get them a bit caramelized. Then I remove the shrimp from the skillet and set them aside.

(I often serve the BBQ Shrimp over the rice with broccoli. If you want to use broccoli, add a little butter and olive oil to the same pan you seared the shrimp in. Cook until the broccoli is nicely caramelized, then remove from the pan and set aside.)

In the same skillet, I heat the butter until the foam subsides. Then I add the beer, Worcestershire sauce, and 2 teaspoons of the seasoning mix. I mix well, then add the shrimp and broccoli back in the pan, simmering for about 5 minutes, stirring occasionally.

Serve over the rice!

Happy new year! The last two days have been busy, and I somehow missed out on National Bacon Day, December 30th!

Let’s face it: there are few foods as magical as bacon. Add bacon to just about any dish you’re preparing, and it elevates it to incredible new heights of flavor. The BLT is possibly the greatest food combination ever invented: just a few simple, fresh ingredients, when placed together, transforming into one of the greatest sandwiches on planet Earth.

BLT wraps: home-cured and smoked bacon, local farmstead romaine, home garden tomatoes, always Hellman’s mayo.

If I’m buying bacon, I go on-line to Burger’s Smokehouse, a family run business in Missouri that has made great bacon for decades. The prices are good, and they include shipping. (www.smokehouse.com) I buy in quantity and freeze what I don’t need right away. My favorite is the thick-sliced country bacon “steaks.”

But nothings beats making your own.

Bacon comes from the pork belly, and they’re easy to find in any good butcher shop. But to get something a notch above, I’ll buy a heritage breed, like Berkshire pork, from Heritage Pork International. (www.heritagepork.com)  I follow the simple curing techniques outlined in “Charcuterie,” a great book written by Michael Ruhlman and Brian Polcyn.

To cure bacon, all you really need is salt and sugar, and what they in the curing biz call “pink salt,” which is not to be confused with salt that happens to be pink, like Himalayan salt you would find in a gourmet store. Pink salt is bright pink to let you know that it’s a special salt that should only be used in small quantities for curing. The reason is: nitrites. Nitrites delay the spoilage of the meat, and help keep the flavors of spices and smoke. They also keep the meat nice and pink instead of an unappetizing gray. That’s good. However, nitrites can break down into nitrosamines, which have been known to cause cancer in lab animals. But let’s face it: you would need to eat a ton of cured meat to really worry about this. (I buy uncured deli meats and hot dogs at the supermarket, because processed meats are a different story. But since I know exactly what goes into my own bacon, I’m not worried about the level of nitrites.)

To make the basic dry cure:

1/2 lb. kosher salt (I use Diamond Crystal Kosher salt)
1/2 cup light brown sugar or turbinado sugar
1 oz. pink curing salt

Mix the ingredients well. An important note: all salts do not all weigh the same, so go by the weight and not a cup measurement. (Morton’s Kosher salt, for example, is heavier than Diamond Crystal.) I keep this basic dry cure stored in my pantry, ready to use when I need it.

When it’s time to be makin’ the bacon, I combine this dry cure with other ingredients to make my bacon rub.

My bacon rub:

1/2 cup basic dry cure
1/2 cup brown sugar or turbinado sugar
1 tablespoon fresh cracked black pepper
1 tablespoon granulated garlic
1 tablespoon granulated onion

Mix these ingredients well (yes, there’s quite a bit of sugar there, but I like my bacon a little sweet!) Rub it generously all over the pork belly.

I have a large plastic container with a lid that fits one slab of pork belly perfectly. I place the belly inside it, put the lid on, and place the container in the fridge. The pork belly stays there for at least a couple of weeks, maybe three. I flip the belly every few days. You’ll see that the salt will draw moisture out of the meat and form a gooey brine. This brine will continue to cure your pork belly, so leave it in there. Just flip it, put the lid back on the container, and back in the fridge.

In two or three weeks, you’ll be able to tell the pork belly has cured because it feels firm. Wash the brine off the meat well with cold water, and pat it dry with paper towels. Place the belly in the fridge for an hour or so and it will develop a tackiness to the touch. This is a thin layer of proteins known as a pelicle, and it helps the smoke stick to the meat.

Now it’s time to cook. You can simply cook the pork belly (without smoking it) at 200° for about 2 hours, until the internal temperature reaches 160°. This isn’t bacon…it’s pancetta. Or you can simply slice it and fry it up in a pan. (Also delicious.) But it’s the smoke that makes it bacon.

Smoking foods can be a challenge to many, so a great alternative to the traditional charcoal smoker is an electric one. It allows you to control the exact temperature inside the smoker without checking on it constantly (a real luxury when you’re slow smoking brisket or pork shoulder for many hours), and it offers a tray where you place your wood chips or pellets to give your food that authentic smoky flavor.

My electric smoker has a digital readout, which allows me to set an exact temperature. I smoke my pork belly at 250° for 2 hours, using hickory chips. (I’m not a fan of applewood, the other commonly used smoking wood for bacon.)

Bellies in the smoker

Bellies in the smoker. A water bath underneath to catch any grease drippage.

Smoked bacon

A couple of hours later: beautiful bacon!

The reward is so worth the effort. Just remember that you still need to cook the bacon before you can eat it. Don’t eat it straight out of the smoker. That first slice you cut off your bacon and toss in a pan to lightly fry for a few moments will be the best bite you’ve ever had in your life!
And if you’re making one slab of bacon, why not make it three or four? It freezes well. And…you will eat it. You know you will!

Lamb is such an underrated meat. It was one of the things my Mom cooked really well, so I grew up loving it, and was never bothered by the gaminess of it.

If the gaminess does bother you, look for American lamb. If gamier meat doesn’t bother you, go for the gusto and get grass-fed New Zealand or Australian lamb.

The balsamic vinegar in this recipe is not the crazy expensive stuff. It’s the bottle you can get for about 9 bucks in the supermarket.

Screenshot

Here’s the marinade I used…

1/2 cup olive oil
1/4 cup balsamic vinegar
1 tablespoon fresh rosemary, chopped (or 1 teaspoon dry)
1 tablespoon fresh thyme leaves, chopped (or 1 teaspoon dry)
1 tablespoon Kosher salt
1 tablespoon maple syrup
1 tablespoon Dijon mustard
1 teaspoon black pepper
1 teaspoon dried oregano
1 teaspoon granulated onion
1 teaspoon granulated garlic

Mix the marinade ingredients together in a bowl. 

Place the lamb in a plastic bag and pour the marinade in, squishing it around to make sure it makes contact with the meat. Place it in a pan or a bowl to prevent accidental leaking.

Screenshot

Let the lamb marinate for several hours at room temperature, or in the fridge overnight.

Before cooking, bring the lamb back to room temperature.

Screenshot

Use some oil in a hot pan, and then sear the lamb on both sides. Place a lid on the pan, and reduce the heat to medium-low.

I cook lamb until I get the lamb to a perfect medium. That means cooking to 130-135 degrees. But cook it the way you like it!

Update:

Last night, I used this recipe to marinate some baby lamb chops. I love these, because they look like mini porterhouse steaks, and meat off the bone is always juicier and tastier.

I placed the lamb in a freezer bag with the marinade, and let it marinate a solid three hours at room temperature. Any longer than that, and it would go to the fridge.

I always remove meat from the fridge and let it come back to room temperature before I cook it…and this time, I decided to try my air fryer, set at 400. Not only did it cook the lamb perfectly, it gave it that nice slight char on the outside, as if I grilled it. Delicious!

Despite the large Italian community we have here in southern New England, there’s no exceptional pizza to speak of. I suppose you could say “them’s fightin’ words!” but if it’s here, I haven’t found it yet. (Fellini Pizza is about the best in Providence.)

So where is the excellent pizza? New York City, of course. OK…maybe I’m prejudiced because I’m a Brooklyn boy, and worked in a variety of pizzerias in my younger days, but there’s no doubt in my mind that if you want the best pizza–or bagel, for that matter–you’ve got to go to the Big Apple. (Even “Frank Pepe’s” in New Haven, CT is a mere stop on the way to the real deal.)

Pizza in the Big Apple can be confusing, as there are many different varieties to choose from. Brick oven pizzas abound, but there are pizza lovers who won’t settle for anything less than an old-fashioned pizza baked in a coal-fired oven. The extremely high heat of a coal-fired oven cooks the pizza in just a minute, and imparts a crusty, charred flavor you can’t get any other way. There are only about a dozen coal-fired pizzerias left in New York City, and many of them have been around for a hundred years or more, so it’s definitely a matter of making a special trip to enjoy this style of pizza. (Providence now has its own coal-fired pizza, but it just can’t compare.)

There’s plenty of good, basic pizza in New York City, too: the traditional thin, round Neopolitan pie, and the thicker, square Sicilian pie, baked in that Blodgett pizza oven we all knew in our early pizza-making days.

Many years ago, when I heard through the pizza lovers’ grapevine that a “new” pizza was out there, one that was gaining a cult following, I needed to know about it. And more importantly, I needed to taste it!

It’s called Pizza Montanara, and there’s still only a few pizzerias in New York City that serve it. The one I go to without fail is PizzArte, on West 55th, and I have to say it’s the ultimate pizza.


Pizza Montanara, sitting next to me in the car, just waiting to be devoured.


What makes Pizza Montanara so spectacular, quite simply, is that the dough is fried in oil for 30 seconds, flipped and fried another 30 seconds, before they put the sauce and cheese on it, and then they cook it in a wood burning oven. It is not greasy. The frying process puffs the dough up and creates a beautiful pillow-like softness that I’ve never experienced in a pizza before. Imagine a pizza cloud and you’ve got Pizza Montanara.

Where to get Pizza Montanara.


I’ve made Pizza Montanara at home, with limited success. I poured a few inches of olive oil in a large cast iron skillet, stretched my dough into a small pie, and gently floated it into the pan. Using a spatula and tongs, I was able to flip the fried dough over after about 30 seconds, then removed it from the pan after another 30 seconds. It was golden and puffy. I quickly sauced and cheesed it and in the oven it went. But it’s a messy process that doesn’t always come out just right. I need more practice!


Frying the pizza dough. I use olive oil for better flavor, but I have to watch the temperature, because the smoking point is low (about 375 for extra virgin olive oil) and burnt oil is not what anybody wants!


A homemade Pizza Montanara, with buffalo mozzarella and pepperoni.


A four-cheese Montanara, with mozzarella, sharp Provolone, Parmiggiano Reggiano, and ricotta…and lots of garlic!


Every time I post a photo of Pizza Montanara on Facebook or Instagram, my friends don’t believe that this could possibly be a life-changing pizza experience. It is. After a trip to Manhattan, we’ll devour 3 pizzas on the ride home. Nothing makes New York traffic easier to bear than a Pizza Montanara in the seat next to you!

Pizza Arte also makes one helluva gluten-free pizza.


One of our favorite restaurants here in southern New England is The Back Eddy in Westport, Massachusetts.Great water views, great food, wonderful people. 

One of their best-selling appetizers is deviled eggs, topped with raw tuna or without. My version has none of the finesse of their original dish, but it has a lot more tuna and all the flavor…which works for me!


FullSizeRender (5)

6 hard-boiled eggs
1/4 cup + extra mayonnaise
8 oz. high quality raw tuna
3 tablespoons soy sauce
1/2 teaspoon chili oil
1/4 cup finely chopped scallions
1 teaspoon sesame seeds
handful fresh spinach, or cucumbers (see below)

My favorite method of hard-boiling eggs is to put them in a pot of cold water. Turn the heat on high and bring it to a boil. As soon as the water boils, take the pot off the heat, and cover it with a lid. Let it sit for 15 minutes. Then run them under cold water to cool. 

The official word on making sure there are no parasites in raw fish requires freezing and storing fish at a surrounding temperature of -4 degrees Fahrenheit or colder for seven days; or freezing at a surrounding temperature of -31 degrees or colder until the fish is solid and storing at the same temperature for 15 hours; or freezing at a surrounding temperature of -31 degrees until the fish is solid and storing at -4 degrees or below for 24 hours.

Since I don’t have the refrigeration equipment to do that, I buy high quality tuna already frozen into convenient bricks. Many supermarkets, like Whole Foods, carry them.

I always try to buy responsibly sourced, fair trade seafood, like this beautiful ahi tuna.


If the tuna is frozen, I let it thaw a little. If it has thawed, I return it into the freezer for about 10 minutes to firm up. That makes it easier to cut. I slice the tuna carefully into the smallest cubes I can make. Once done, I place the tuna in a bowl and put it back in the fridge until I’m ready to use it. If I feel the tuna is releasing a lot of water, I’ll put it on top of a paper towel in the fridge.

In a separate small bowl, I combine the soy sauce and the chili oil, and set it aside.

I finely chop the scallions, and set them aside.

Once the eggs have cooled, I peel them and cut them in half. I scoop out the yolks and place them in a bowl, starting with 1/4 cup of the mayonnaise, adding more if needed. I use a fork or whisk to get as many of the lumps out as possible. If I wanted to get serious, I could put them in a blender or food processor to make a creamy puree. An option is to place the puree in a piping bag and carefully squeeze it out into each egg half. I’d do that if I was serving guests. But otherwise, I simply use a spoon.

Once all the egg halves are filled, I place them on a plate and put them back in the fridge until ready to serve. 

When it’s time to serve, I take the tuna out of the fridge, pouring the soy sauce/chili oil mix into the bowl with the tuna and I mix well. I let the tuna marinate for just 2 minutes, pouring off the excess marinade. I don’t want it to marinate too long, or it’ll get very salty.

I remove the plate of eggs from the fridge and carefully put a small spoonful of tuna on top of each one. I garnish with the sesame seeds and the chopped scallions and serve immediately.


FullSizeRender

It’s nice to have some crackers, toasted bread or even chips, on the side.

It’s been a few years since I visited New Orleans, and it was great to see that many of the old food destinations were still there: the Napoleon House, Café Dumonde, Acme Oyster House, and across the street from it: Felix‘s Oyster House.

My friend, Rick, told me I had to try the char-grilled oysters at Felix‘s. He hadn’t been there, but he read a lot about them and they were supposed to be amazing.  Well, that’s all the encouragement I needed, and I made a beeline to Felix’s that very day.

When you think about it, it’s no great culinary feat to grill an oyster. But yet, I never thought of doing it on my own. The dozen oysters I devoured that day were buttery, garlicky, with a hint of char and smoke that made them absolutely delicious, quite easily the best oysters I’ve ever had in my life.

I knew that as soon as I came home from this trip, I would have to try to make these myself. I have to say I came pretty darn close!

If you don’t use a charcoal or wood fire to make these, you’re simply leaving out one of the most important ingredients to the entire recipe. A gas grill or a kitchen stove can cook an oyster, but the only way you can take it to the next level is by putting it on open flame, a wood-burning flame.

This recipe is good for about a dozen oysters. Using gluten-free breadcrumbs makes this recipe gluten-free.

The first step is to get your hardwood charcoal fire started. I use a charcoal chimney and newspaper–never any lighter fluid.

Once the coals are lit, head to the kitchen…

4 tablespoons salted butter
2 tablespoons minced garlic
2 tablespoons fresh Italian parsley, finely chopped
2 tablespoons Parmesan cheese, grated (I use Parmigiano Reggiano)
4 tablespoons breadcrumbs


Combine the butter, garlic, parsley, and cheese in a sauté pan over medium heat. All you’re looking to do is to melt the butter, so once it’s melted, take the pan off the heat and this mix is ready to use.

Shuck your dozen oysters. Remember: they will shrink a little bit while cooking, so don’t be afraid to go for bigger ones.

Lay the opened oysters in a pan, carefully trying to preserve as much of the oyster liquor (liquid) in each shell as possible.

When the hardwood charcoal has heated up, and you’ve spread the coals evenly on your grill, you are ready to cook the oysters. You want the grill to be hot.

You don’t need to put the oysters directly on the hardwood charcoal. Putting a grill over the coals is fine, and it keeps the oyster shells from tipping over.


Before placing the oysters on the grill, sprinkle each one with some of the breadcrumbs. Then place the oysters on the grill, being careful not to burn your hands! 


Using a spoon, pour some of the butter mixture into each oyster shell. It will flame up! That’s OK. Use up the entire butter mixture for all 12 oysters.


The oysters are ready when you see that golden brown color all around the edges of the oyster shell, when most of the liquid in the shell has evaporated. Don’t let them dry out completely.

Using tongs, remove the oysters from the flame and enjoy! Just be careful…they can be lava hot!