Author Archive

THAI MARINADE AND DIPPING SAUCE

Posted: August 14, 2021 in Uncategorized

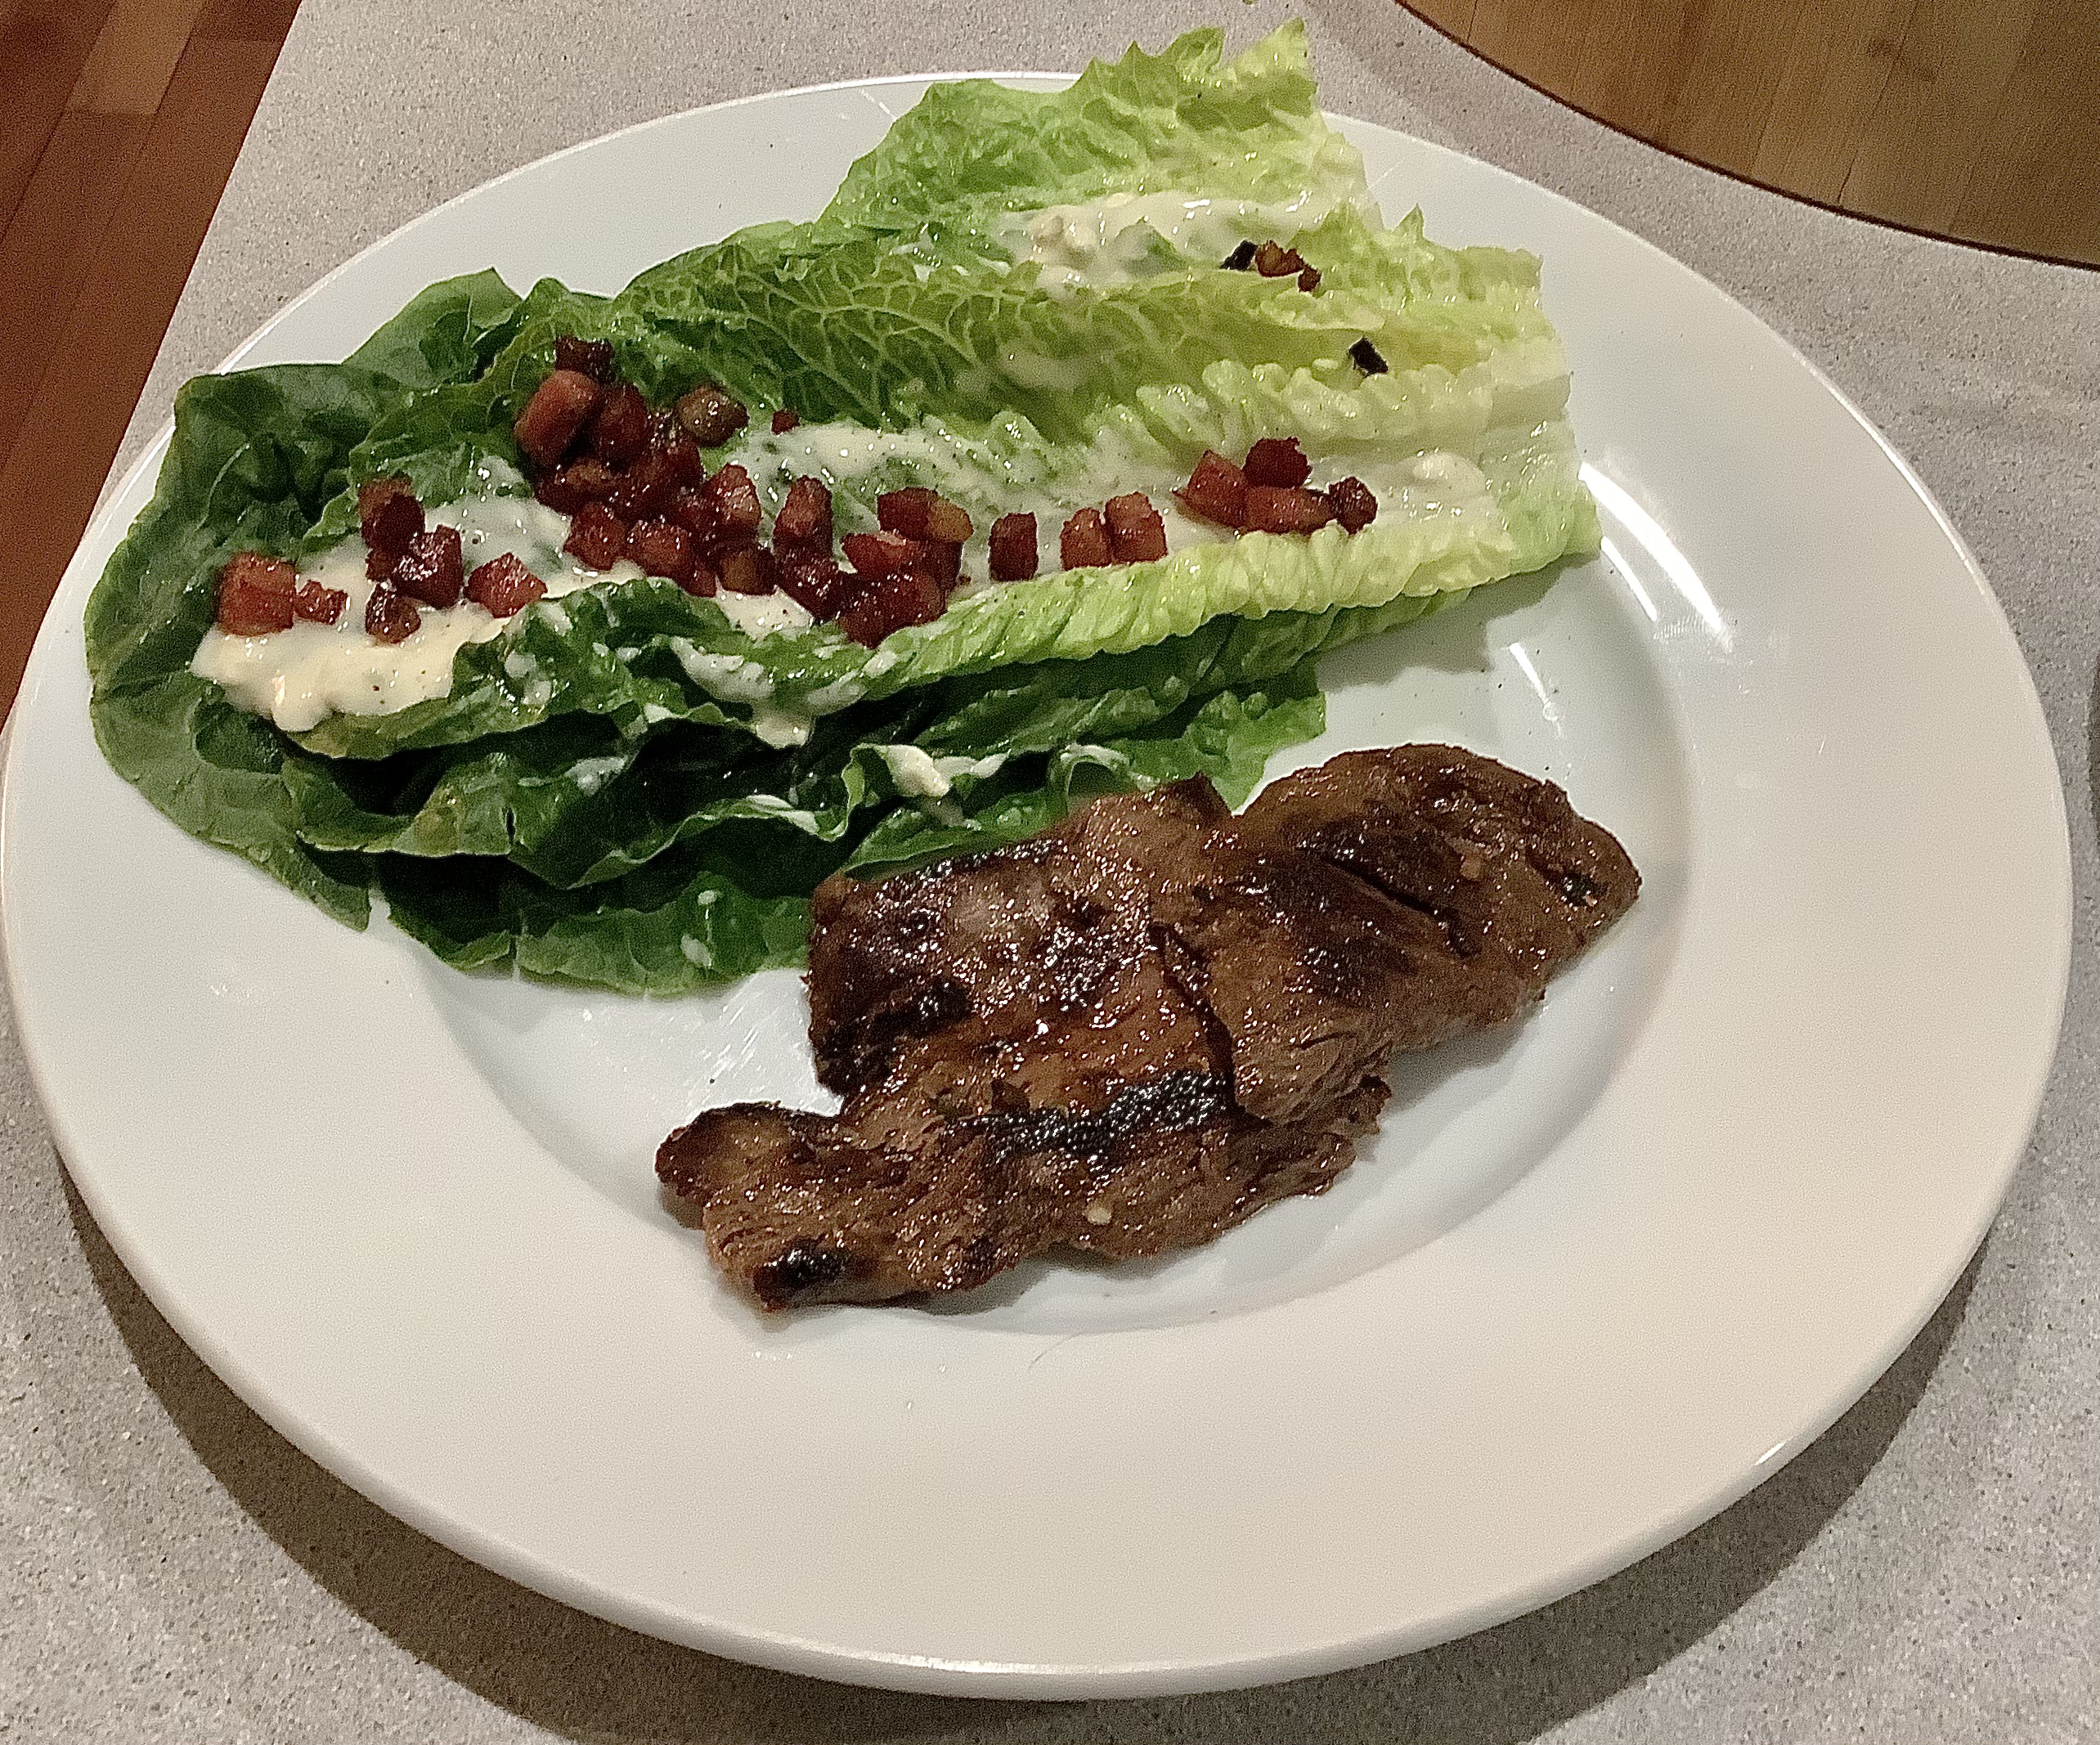
In a previous blog, I featured my recipe for a “Thai Grilled Steak.” This recipe is very similar to it. In fact, I was trying to recreate that recipe the other night so that I could marinate a beautiful cut of grass-fed beef flap I had, but I didn’t have all the ingredients in my pantry. So I improvised, and I think I made it just a little bit better!

I really love the flavors of this recipe, and the great thing is that you can use it as a marinade and a dipping sauce–not just for the beef flap–but a dipping sauce for grilled chicken, dumplings, anything. It’s that good.

Make more than you think you’ll need because you can keep it in the fridge for future dipping.

If you use gluten-free soy sauce, this recipe is GF. Chili garlic sauce can be found in the Asian foods section of most supermarkets.

A little side salad with blue cheese and home-cured and smoked bacon doesn’t hurt, either!

1/4 cup soy sauce
1/8 cup sesame oil
2 tablespoons freshly grated ginger
2 tablespoons finely chopped garlic
2 tablespoons finely chopped cilantro
2 tablespoons chopped salted pistachio nuts
2 scallions, minced
1 tablespoon light brown sugar
1 tablespoon freshly squeezed lime juice
1 teaspoon chili garlic sauce


Combine all the ingredients in a bowl and mix them together well.


Whatever cut of beef you’re using, make sure it isn’t too thick, or the marinade won’t penetrate the meat.

I like to use beef flap because it’s full of flavor, and I slice it crosswise to make cuts of meat that are about 1/2″ thick.

I place the beef in a bowl, and pour just a little marinade in at a time. I don’t want the meat swimming in the marinade…just enough so that it makes contact with all the surfaces of the meat.

Place the unused marinade in a sealed container in the fridge.

If I’m cooking soon, I let the beef marinate at room temperature. But ideally, I want the beef to marinate in the fridge overnight–the longer the better–to really soak up the flavors of the marinade.

Before cooking, take the beef out of the fridge and let it come back to room temperature. Discard the marinade that was in the bowl with the beef.

If your beef flap is thin enough, tossing it onto a very hot cast iron skillet to sear it on both sides will bring the beef to a perfect medium-rare. Otherwise, you can sear it in a regular pan and then finish it in the oven–or–fire up the grill!

Use the remaining marinade for dipping.

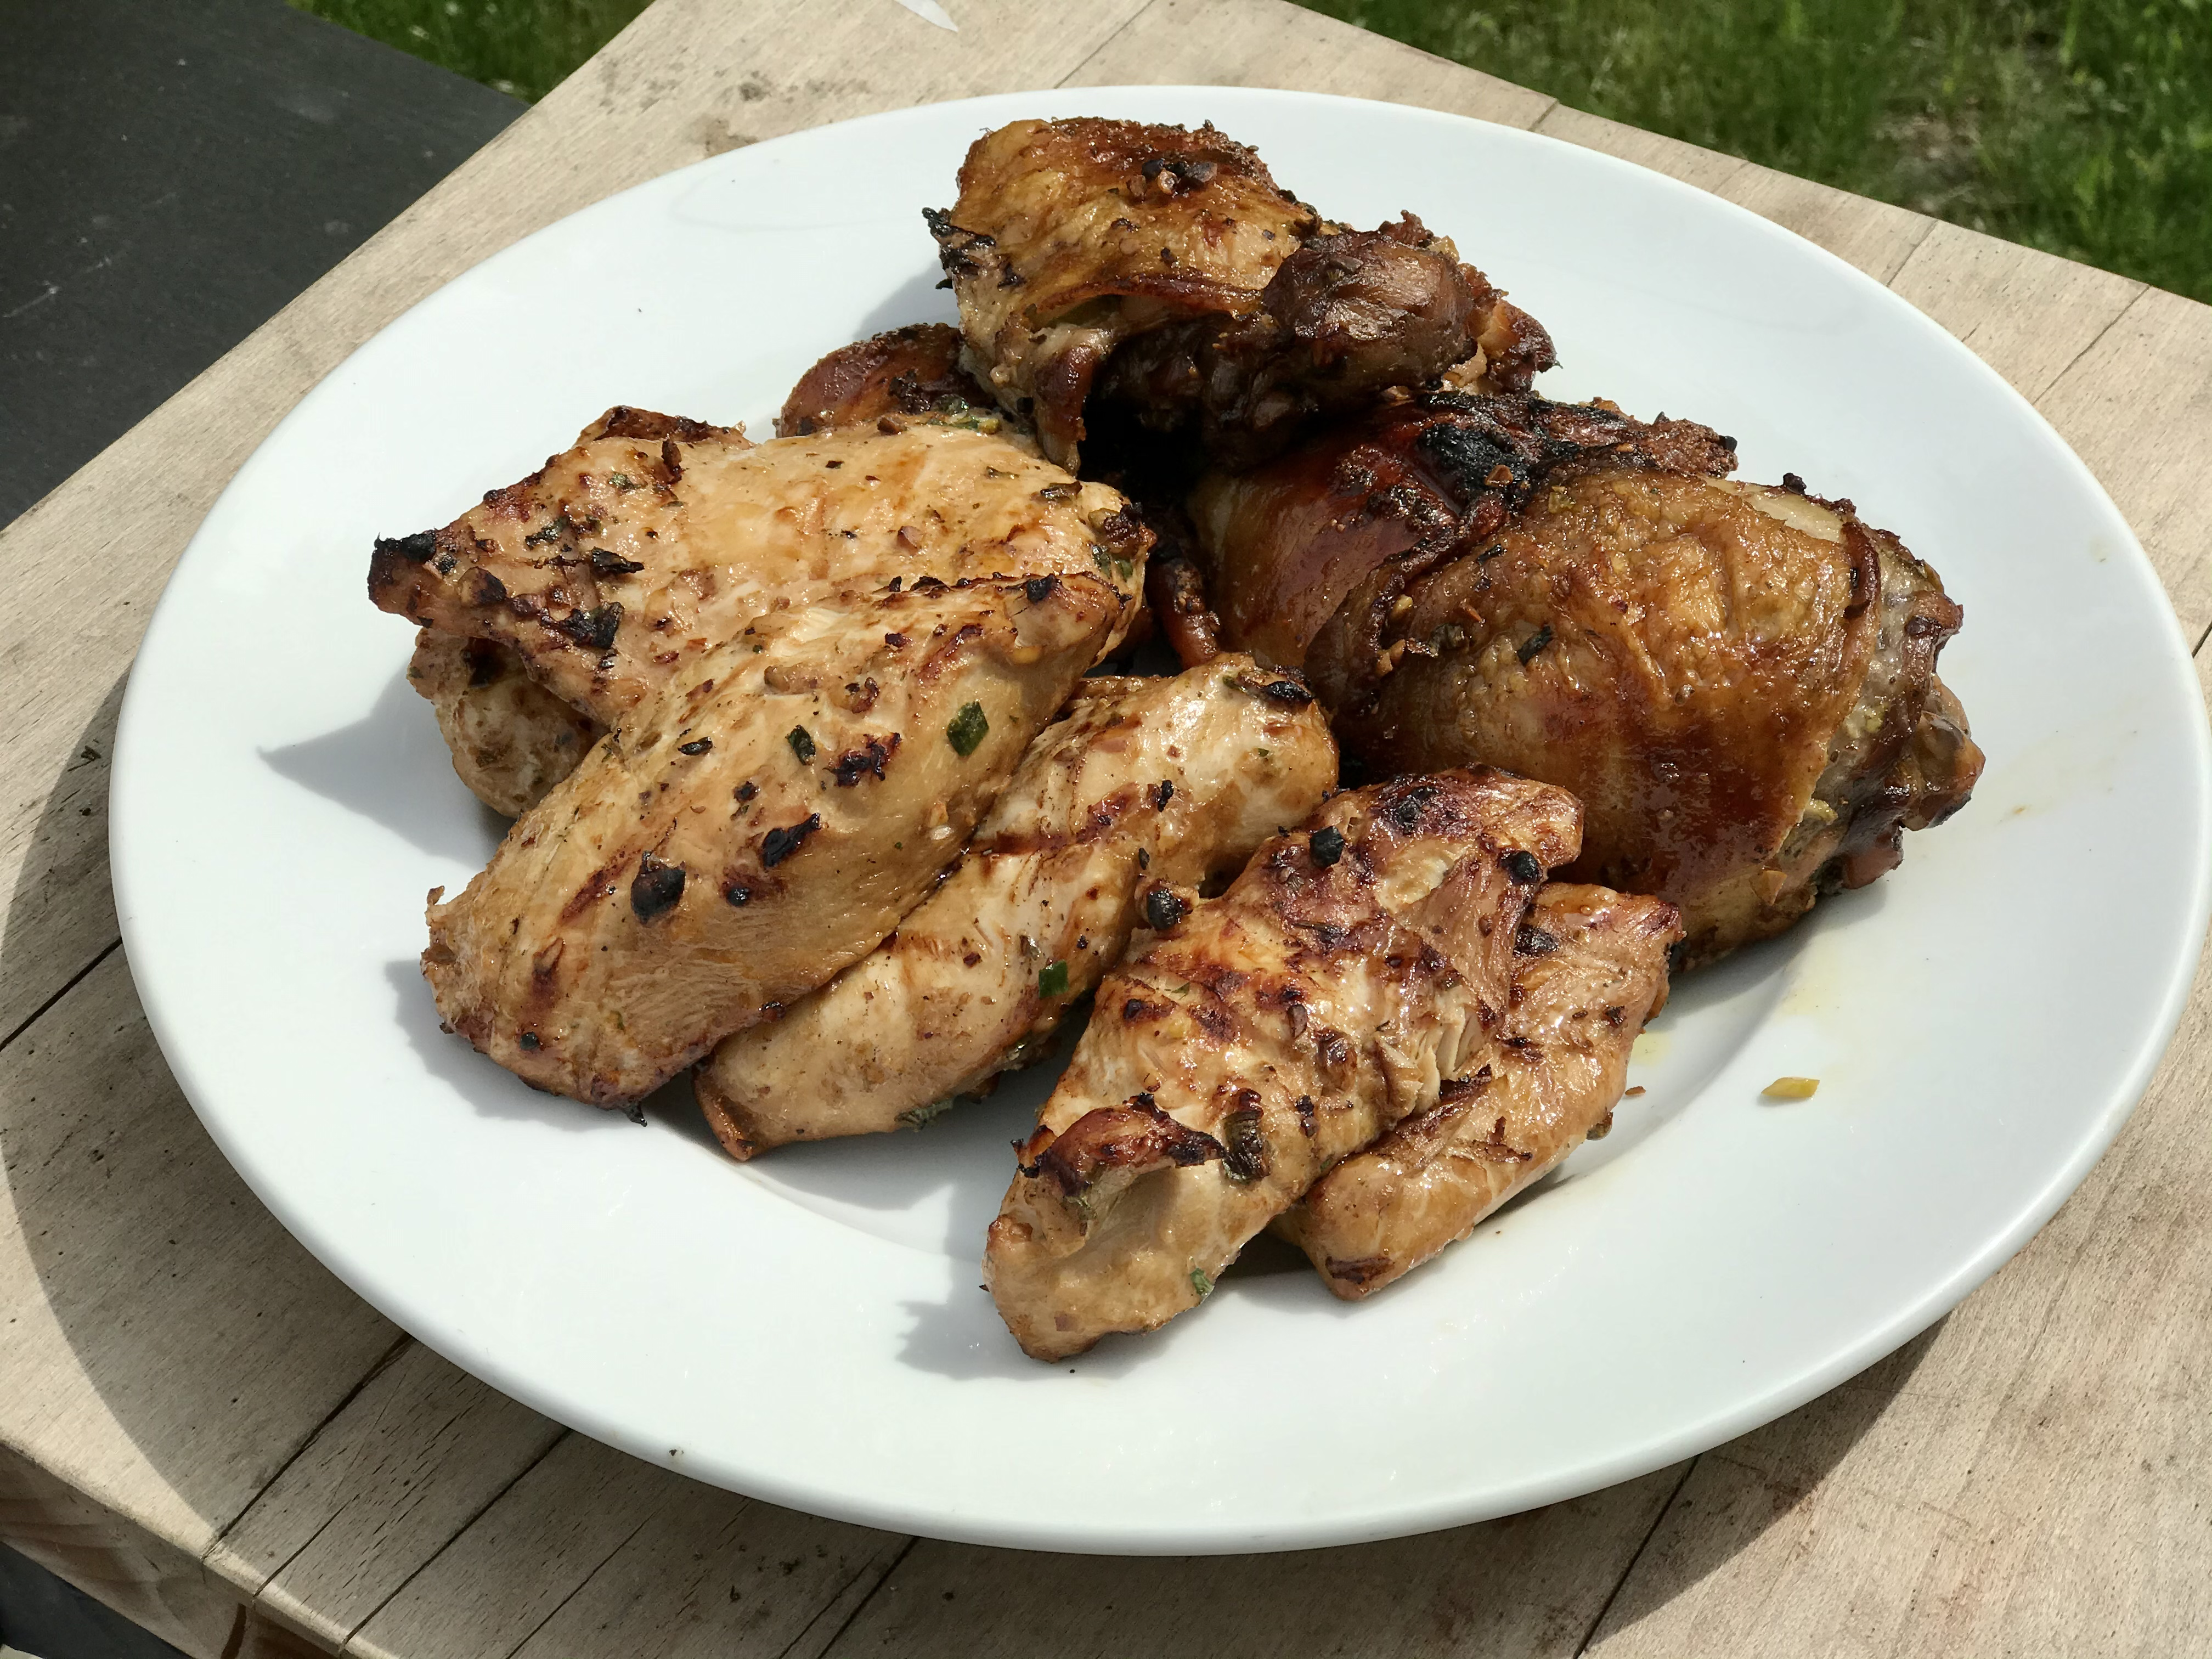
If you’re marinating chicken, basically the same steps apply. Marinate the meat as long as possible before cooking, and use the remaining sauce for dipping. But with chicken, you have to be careful not to cross-contaminate. Any sauce that touches raw chicken should not be used for dipping later on!


Thighs finishing on the grill.


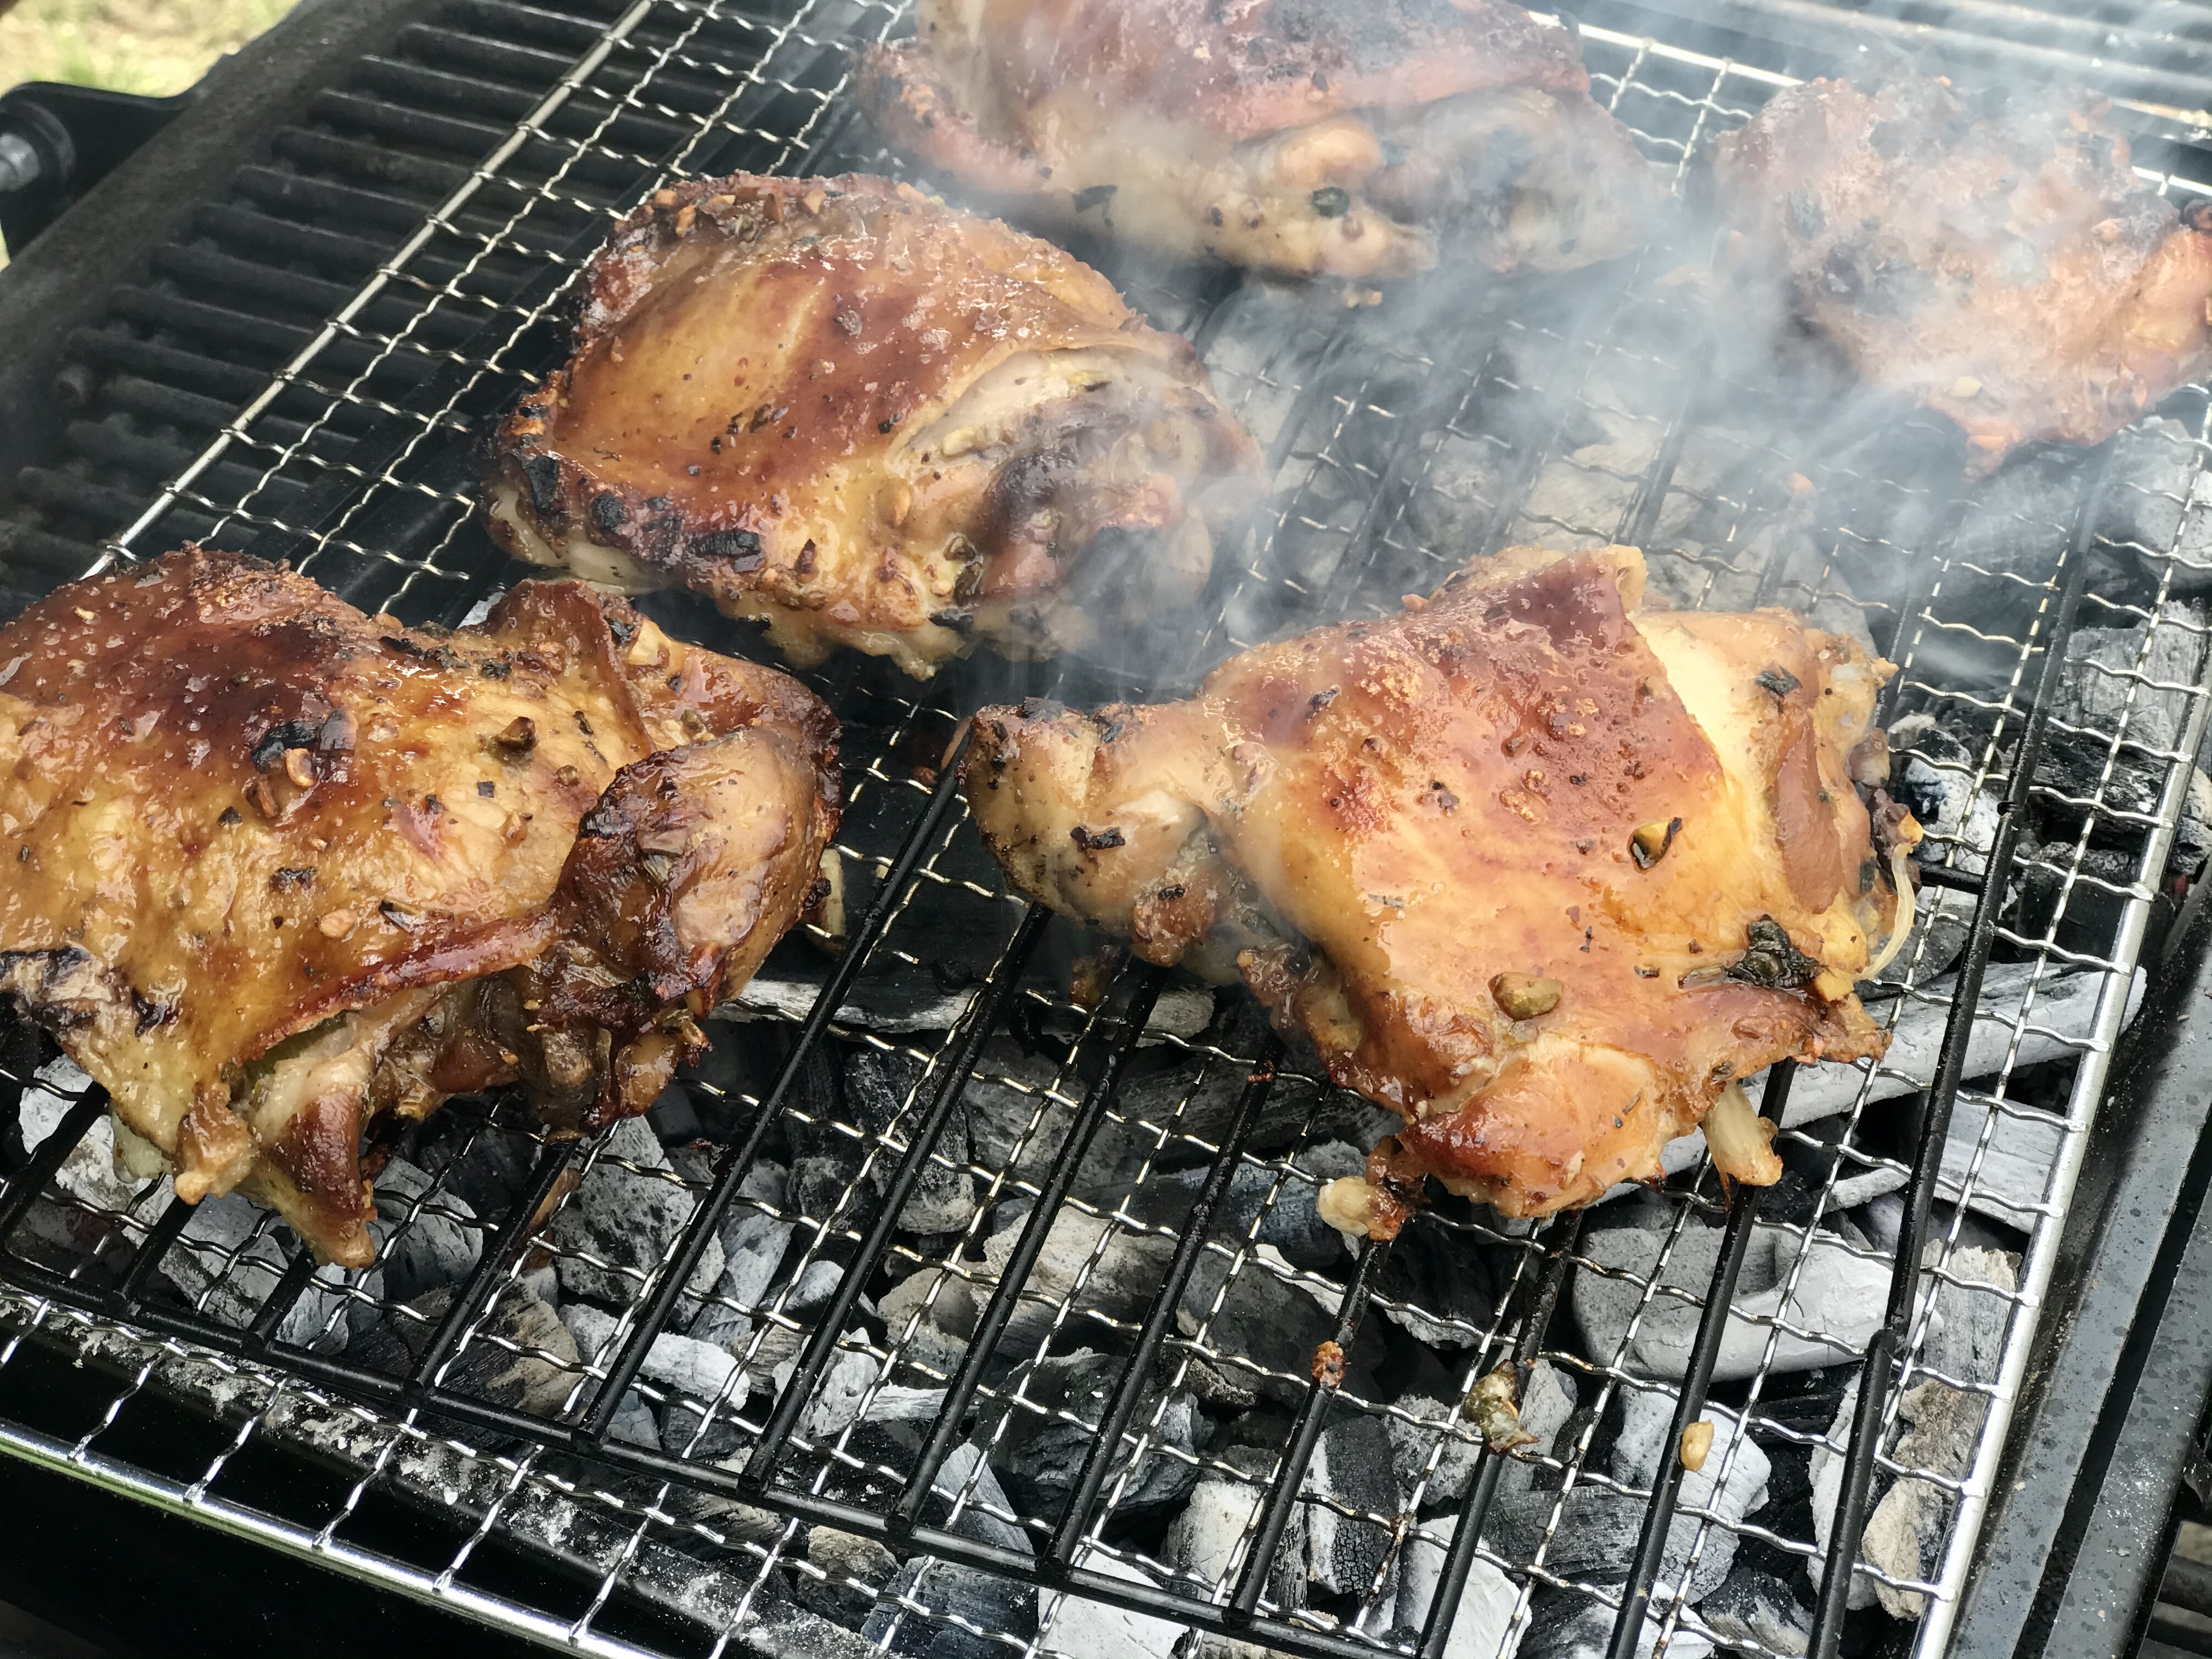
Whether you use chicken breast or chicken thighs — I used both here— the flavor is outstanding, especially if you can finish it on the grill!


Here’s great hack for fresh ginger that I learned from Liz, the owner of Wishing Stone Farm, an organic farm in Little Compton, RI, where they grow their own ginger roots. Place your ginger root in a Ziploc bag and keep it in the freezer. Whenever a recipe calls for grated ginger, simply pull the frozen root out of the freezer and grate it, skin and all, while it’s frozen. Then simply place the root back in the Ziploc and back in the freezer until next time. No waste!

MY BEEF STROGANOFF

Posted: August 10, 2021 in Uncategorized

Beef Stroganoff is a classic dish that I remember from my childhood. It’s easy to make and really satisfying, and you can add or remove ingredients as you wish to make it your own.


This is a recipe that is easily changed to accommodate your personal tastes, so feel free to do so. For example, the classic recipe uses sliced white mushrooms. I had some dried porcini in my stash–much more intense in favor–but I like that, so I used them. Classic stroganoff uses egg noodles. I went with bucatini pasta. And the beef is usually a cut like flank steak, but I like using beef flap. Just be sure to slice the meat thinly and against the grain to keep it really tender.

This recipe makes a lot, so feel free to cut the ingredients in half for a smaller batch…


2 lbs. beef flap, trimmed and cut into thin strips
1 stick (4 oz.) unsalted butter
1 oz. dried porcini mushrooms
1 onion, finely chopped
2 tablespoons chopped fresh tarragon
2 cups sour cream, at room temperature
salt and pepper

1 lb. egg noodles or pasta


Place the dried porcini in a sauce pan with about 1 1/2 cups of water. Set it on high heat and let it boil until the liquid has reduced to about 1/2 a cup. Set it aside. When it has cooled a bit, strain off the liquid into a glass and chop up the mushrooms on a cutting board.


Melt a couple of tablespoons of the butter in a large pan, and start browning the beef in small batches, placing the cooked beef in a bowl on the side while you add more beef to the pan. Don’t overcrowd the pan or the beef will steam and not brown. It may take a few batches to get all the beef cooked.


Once the beef is done, in the same pan, toss in the chopped onions with a little more of the butter and sauté until they’re translucent. You can add some of the mushroom liquid to the pan now, to deglaze it and remove some of the yummy bits stuck to the bottom.


Add what’s left of the butter to the pan, then add the mushrooms and the tarragon. Season well with salt and pepper and add the rest of the mushroom liquid, being careful not to pour out any grit that may have settled to the bottom of the glass. Cook until it has thickened a bit.


You can stop preparations at this point until you’re ready to serve your guests.

Place the pasta in a pot of salted boiling water and cook until al dente.

When the pasta is almost done, return the pan with the mushroom mixture to medium heat, and add the sour cream to it, mixing well. Add the beef and any juices that are in the bowl with it, mixing well.


Drain the pasta and serve the beef stroganoff immediately, seasoning with a finishing salt, like Maldon.


This is a great side dish for any special occasion. And you can substitute to suit your needs. Goat cheese not your speed? Try Gruyère, smoked gouda, or even mozzarella. Need it to be gluten-free? Use GF breadcrumbs. Don’t like mushrooms? Okay…I can’t help you there…

image

1 package large white mushrooms
olive oil
1/2 shallot, finely chopped
1 clove garlic, through a press
1 tablespoon fresh thyme, finely chopped
pinch of red pepper flakes
salt and pepper
fresh goat cheese
bread crumbs
1 tablespoon fresh parsley, finely chopped

Pre-heat the oven to 400 degrees.

Rinse the mushrooms in cold water to clean them. Remove the stems of the mushrooms and set them aside. Rub the mushroom caps with olive oil and place them on a baking sheet, open side-down, in a 400-degree oven for a few minutes.

In a pan, sauté the shallot and garlic in a little olive oil. Chop the mushroom stems finely and add them to the pan. Add the thyme and pepper flakes.

Reduce the oven temp to 350 degrees after removing the mushroom caps. Flip the mushroom caps over so that they look like little bowls. Break off a small piece of goat cheese and place it in each mushroom. Top each with the sautéed shallot mixture. Sprinkle breadcrumbs on top and sprinkle parsley over that.

Return the baking sheet to the oven, cooking the mushrooms until they are lightly golden in color, and the cheese has melted.

image

Mushroom myth: Soaking mushrooms in cold water makes them mushy. Not true! Mushrooms do not soak up any water when left to soak for even 30 minutes. So use your mushroom brush…use your kitchen towel…whatever you like. But I prefer to get them clean simply with cold water.

MY POTATO SALAD

Posted: August 4, 2021 in Uncategorized

I don’t have many rules about food. But I do know what I like and what I don’t like. For example, a lobster roll should never have anything green in it: no bed of lettuce, no chopped celery. I think it takes away from the magnificent flavor and texture of the lobster. Butter and mayo? Yes, please.

So when it comes to potato salad, I’m a “with mayonnaise” fan. And I’m a “if it’s mayonnaise, it has to be Hellman’s” guy. Other than that, I think potato salad is up to individual interpretation.

Here’s my recipe…

2 pounds potatoes, cut into equal bite-sized pieces, skin on
2 tablespoons white vinegar
3 hard-boiled eggs, finely chopped

1 cup mayonnaise
1 tablespoon capers
2 teaspoons Dijon mustard
1 teaspoon celery seed
1 teaspoon Kosher salt
1/2 teaspoon freshly cracked black pepper
1/4 cup finely chopped Vidalia onion

Wash and cut the potatoes into equal bite-sized pieces. Put them in a pot of cold water and cook them until they are fork tender. (Do not salt the water.)

Drain the potatoes and place them in a bowl. Add the 2 tablespoons of white vinegar and toss the potatoes until they have completely absorbed the vinegar.

Finely chop the three hard-boiled eggs and add them to the bowl with the potatoes.

In a separate bowl, combine the mayonnaise, capers, Dijon mustard, celery seed, salt and pepper, and the finely chopped Vidalia onion. Mix well.

Add the mayonnaise mix to the bowl with the potatoes and eggs and mix well.

Refrigerate the potato salad, covered, and re-season it with more salt and pepper, if necessary, before serving.

The definition of a consomme is: “a clear soup made with concentrated stock.” I might add “mind-blowing” to that sentence, especially with this recipe. The key to success– and this is crucial–is to use absolutely garden-fresh, in-season ingredients. If you try this with greenhouse or supermarket tomatoes, you’re just wasting your time.

FullSizeRender (9)

4 1/2 lbs. of fresh garden tomatoes (my favorite is the heirloom: Brandywine)
1 large bunch of fresh basil, leaves and stems
1 2-inch piece of fresh horseradish, peeled
1 clove of garlic, peeled
1 tablespoon white wine vinegar (I use Alessi)
2 oz. vodka (I use Tito’s)
sea salt and pepper

Remove the core of the tomatoes, but leave everything else, including seeds and skin.

Put all the tomatoes, basil, horseradish, garlic, vinegar and vodka in a blender or food processor. You might need to do this in batches if your equipment can’t handle it all.

Process until you get a kind of slush.

Line a mixing bowl with a double layer of cheesecloth and pour the tomato slush mixture into it. Gather up the corners of the cheesecloth carefully, and tie them securely so you can lift the bundle up by the knot. Hang the bundle from a hook over a clean bowl in the fridge so that it catches the liquid that drips out, and leave the whole thing in there overnight. The liquid that drips out will be clear.

Cheesecloth bundle dripping overnight in the fridge.

Cheesecloth bundle dripping overnight in the fridge.

To serve, chill bowls (or in this case: the sipping glasses) in the fridge. When you’re ready to serve, ladle out the consomme and garnish each with a tiny basil leaf. A drop of excellent quality olive oil is optional.

Synthetic cheesecloth apparatus. The real thing works better.

Synthetic cheesecloth apparatus. The real thing works better.

I tried using a synthetic cheesecloth for this recipe, and I found that it doesn’t filter out enough of the solids to make a clear consomme. You could use it along with real cheesecloth, just to use the stand, or just hang it all in real cheesecloth, as described in this recipe.

When it’s done right, gazpacho is one of the most delicious summer soups you’ll ever have. The secret, of course, is using super-fresh veggies. That’s why I crave it at the first sign of a vine-ripened tomato in my garden or a local farm stand. When my tomato plants have dozens of ripening fruits on them every day, I eat some in salads…I make tomato sauce with others…but the reddest and ripest become gazpacho!

I never make this out of season, and I’m always wary of restaurants that do! Very often, they’ll try to hide the taste of older veggies by adding too much salt or lots of spice.

The consistency of gazpacho is a personal preference. I like mine a bit chewy…not chunky like salsa, but not watery like soup…somewhere in between the two is perfection.

All the work is pretty much in the slicing, peeling and chopping…so I do it carefully.

1 large Vidalia onion, peeled and roughly chopped
1 carrot, peeled and roughly chopped
5 large tomatoes, peeled, seeded, and roughly chopped
2 medium cucumbers, peeled, seeded, and roughly chopped
6 sprigs of flat-leaf parsley
1/2 cup olives, drained  (I like kalamatas)
1/2 cup good quality extra virgin olive oil
Juice of 1/2 a large lemon
3 tablespoons white vinegar
Sea salt and freshly cracked black pepper

An easy way to peel tomatoes is to turn them upside down and make an X with a knife, puncturing the skin. Drop the tomatoes in boiling water for about 30 seconds, and the skin will start peeling away from the meat. Scoop the tomatoes out of the water, and immediately drop them into a bowl of ice water, letting them cool for 5 minutes. The skin will peel right off. Cut the tomatoes in half and (over the sink!) gently press your thumbs into the seed compartments, popping them out. Give the tomato a little shake to remove any last seeds, and it’s ready to be chopped.

Make an X, then drop the tomatoes in boiling water for 30 seconds.

While the tomatoes are cooling, you can peel and chop the other veggies.

Peel and roughly chop the onion and carrot, and place them in a food processor. Let it run for about 10 seconds.

Add the peeled and seeded tomatoes, the peeled and seeded cucumbers, and the sprigs of parsley and continue processing.

Add the olives, olive oil, lemon juice, vinegar, sea salt and black pepper.

Process until the veggies are finely chopped, and you’ve got a soup. Store it in the fridge for at least one hour to chill before serving.

Garnish with a sprig of parsley and a sprinkle of Fleur de Sel or other tasty finishing salt.

I’ve served this to visiting friends often, and received many requests for the recipe. It requires a bit of setting up, but you can put it together right before serving to your guests…or yourself.

I use sushi-grade tuna for this dish, which is easily found online. It comes in 4-ounce packages, which is the perfect size for a single recipe. I buy them in quantity (it’s cheaper that way), and keep them in the freezer. You can also find tuna in small frozen “bricks” at Whole Foods or similar higher-end supermarkets. They might even have some fresh, in season.

It’s important you know where your tuna comes from, and if it was handled properly. If you go to a reputable seafood market, that shouldn’t be a problem.

If you’re concerned about parasites in raw fish, buying the bricks that have been in the deep-freeze is the way to go. And when it comes to mercury, the smaller the fish, the better. So if this is a concern, opt for ahi (also called yellowfin) tuna.

The topping…
¼ cup sour cream
1 tablespoon fresh squeezed lime juice
The marinade…
6 tablespoons soy sauce
1/2 teaspoon chili garlic sauce
Other Ingredients…
½ lb. sushi grade raw tuna, chopped into ¼-inch cubes
Tortilla chips, regular or the little bowls
Finely chopped scallions

Combine the topping ingredients in a bowl, and place it in the fridge.

Mix the marinade ingredients in a separate bowl and set it aside.

Chop the tuna into ¼-inch cubes, and if it looks wet, place it on some paper towels to absorb the excess moisture. (It can release quite a bit of moisture if it was frozen…you don’t want it watery before you marinate it.)

Marinate the tuna in the soy/chili garlic mix for just 10 minutes, then pour off the excess. (It will be really salty if you let marinate any longer.) Keep it in the fridge as well.

Finely chop the scallions.

Just before serving, take a tortilla chip or little bowl, place 1 tablespoon of the tuna on top, top this with ½ teaspoon of the sour cream mixture, and then garnish it with the finely chopped scallions.

Serve them immediately, and eat these quickly, before the tuna makes the tortilla soggy!

I don’t have the patience to boil Mason jars and lids and all that crap. But I love me my pickles, especially when this year’s garden is cranking out cucumbers in record numbers!

This is such an easy way to make great pickles, it’s almost unbelievable…and no water is needed! The salt extracts just enough moisture, like when curing meat, to make it work. This method works great if you want fresh pickles to eat immediately, but if you want to keep them for longer periods of time, you’ll have to go back to the old tried-and-true methods.

Fortunately for me, I devour these pickles as soon as they’re ready!

I originally used a plastic bag for this, but I found that using a plastic container keeps the pickles aligned better and it’s less messy.

pickles

fresh cucumbers
sea salt
a handful of fresh dill
a couple of cloves of garlic, thinly sliced

Get a resealable plastic container.

Cut the ends off the cucumbers and then slice them lengthwise, in half or in quarters. Lay them neatly next to each other in one layer in the container, skin-side down. Sprinkle the sea salt over the cucumbers. Sprinkle some of the chopped garlic on top. Then, tear off some fresh dill and lay it to cover the pickles.

You should be able to get a second row of pickles on top of the first, again sprinkling with the salt, garlic, and topping with dill.

Placing the lid on the container, squeeze out as much air out of the container as you can.

Put the container in the fridge overnight. Making sure the lid is tightly sealed on the container, flip it over every few hours. (I always put a plate underneath it when it’s upside down in case it leaks a little.)

The pickles will be ready to eat the next day, but they’re even better after 48 hours.

It seems like the popularity of shishito peppers has exploded overnight. Once a rare treat that I could only get on the menu at one of my favorite Boston restaurants, Toro, now they’re everywhere: farmers markets, bistro and pub menus, and of course…my own garden!

Shishito peppers are mostly mild…but you can get hold of a spicy one every 10 peppers or so…kind of a Russian pepper roulette!

Shishitos straight from the garden!

Shishitos are incredibly easy to grow…just like any other pepper. They love a full day’s worth of sun, and lots of fertilizer. If you have success growing tomatoes, shishitos should be on your list. Plus, they’re really quite prolific: it’s not uncommon to find a couple dozen peppers growing on each plant!

Shishitos are also easy to prepare, and take just minutes. Ideally, if you’ve already got a charcoal grill going, you’re almost there. Simply place the shishitos in a bowl and drizzle in a little olive oil. Toss the peppers to coat, and place them directly on the ashed-over coals of the fire. Work quickly turning them over with tongs. You want them to blister, but you don’t want them to burn! They’ll pop, deflate, and get soft. That’s when they’re ready. Simply place them on a serving plate, and sprinkle some really good sea salt (I like Fleur de Sel) over them while they’re still hot.

If you don’t have the time for a charcoal grill, you can still prepare delicious shishitos by placing them in a pan. Sprinkle in a little olive oil, and toss them around to coat them. Turn the burner on high, and cook the shishitos until they’re blistered, but not burned. Cook them on all sides, carefully flipping them over with tongs. Like on the charcoal, they will pop, deflate and get soft. Transfer them to a serving plate and sprinkle immediately with salt.

To enjoy shishitos, you simply grab them by the stem and bite!

I came up with this crunchy appetizer a few years ago, when I needed a tasty bite for one of our summer parties. I wanted something fresh that highlighted the veggies of the season, so when I spotted these baby bell peppers in the supermarket, I got the idea. I get requests for the recipe every year. 

image

Baby bell peppers
6 ears fresh corn, removed from the cob…or organic frozen corn
1/2 Vidalia onion, peeled, quartered, grilled, chopped
1 cup mayonnaise
1 teaspoon hot pepper sauce (I use Frank’s Red Hot)
6 oz. feta cheese or Queso Fresco, crumbled
Juice of 1 lime
Pinch of white pepper
1 tablespoon fresh parsley, finely chopped

image

Cut the corn kernels from the ears, and sauté them very briefly in a little olive oil. Place them in a bowl and let them cool.

Peel and quarter the Vidalia onion, and throw it on a hot grill with a little olive oil to get some nice grill marks on it, leaving the onion still crispy, not soft. If you’re cooking indoors, throw the quartered onion in a hot pan with a little olive oil, and cook it until you get some brown marks on it. Remove it, let cool, then place it in a food processor and pulse it until the onion is chopped into small bits, just smaller than the corn kernels. Add the onions to the corn.

In a separate small bowl, combine the mayonnaise and the Frank’s Red Hot. Pour in the crumbled cheese and mix well. Pour this into the corn and onion bowl and mix well.

Add the lime juice, white pepper and parsley to the bowl and mix well again.

Cut the baby bell peppers in half lengthwise, and remove the seeds and membrane. Stuff the peppers with the corn mixture and garnish with cilantro or parsley.

If you’re preparing this ahead of time, refrigerate the stuffed peppers until you’re ready to eat, but allow some time for them to warm up to a cool, not cold, temperature.