Author Archive

DIY TACO SEASONING

Posted: December 8, 2021 in beets, Food, morocco, Recipes, taco
Tags: , , , ,

It’s so easy to make taco seasoning at home. So why would you buy the spice factory floor sweepings they use for packaged taco seasoning sold in supermarkets? I’m not a huge fan of Mexican cuisine, but every once in a while, I crave a good taco. My tacos don’t resemble most, but that’s OK. It’s all about making it your own.


1 teaspoon granulated garlic
1 teaspoon onion powder
1/4 teaspoon crushed pepper flakes
1 teaspoon dried Mexican oregano
1 teaspoon paprika
2 teaspoons ground cumin
1 teaspoon sea salt
1 teaspoon black pepper
1 Spanish onion, finely chopped
olive oil
2 lbs. grass-fed ground beef

Combine all the spice ingredients in a bowl.

Sauté the onions in a bit of olive oil until they’re translucent. Add the beef and sauté until it’s cooked, mixing in the spice mixture a little at a time until you’ve used it all.

My tacos are a bit unusual. Although I use a soft flour tortilla and my seasoned and cooked ground beef, I spread a little Thousand Island dressing and chop some roasted golden beets.

But this taco meat goes great with the standard beans, shredded lettuce, guac, and salsa as well.


Tacos with roasted golden beets, baby Romaine salad mix, and Awesomesauce

Tacos with roasted golden beets, baby Romaine salad mix, and Thousand Island dressing.

For the beets: I wash the beets and quarter them, cutting the top and bottom off but leaving the skin. I place them in a sheet of aluminum foil, and sprinkle with salt, pepper and olive oil. I combine the ingredients to coat the beets, wrap the foil tightly into a package, and roast in a 400-degree oven for 1 hour. After roasting and the beets have cooled a bit, I slice them into smaller pieces for the tacos.

Slices of avocado go really well with this, too!

You can also mix the spices with 1 cup of flour and use it to season chicken before frying…or mix the seasoning with strips of chicken breast or beef for fajitas.

I’m a wuss. I can’t do heat. But I’ve always been fascinated by jerk chicken: it looks amazing and smells fantastic. So I decided to try making a kinder, gentler version by eliminating the number one high-heat ingredient: Scotch bonnet peppers.

On the scale of hotness known as the Scoville scale, Scotch bonnets reach anywhere between 100,000 to 350,000 Scoville units. To give you an idea how hot that is, jalapenos only reach 2,500 to a maximum of 8,000 Scoville units! That means those suckers are 40 times hotter than jalapenos! And that’s why I leave them out of my recipe.

I found that when I left the Scotch bonnets out, there was still plenty of fragrant, hot and smoky flavor in my jerk chicken.


Jerkalicious.


1 medium onion, coarsely chopped
3 medium scallions, chopped
2 garlic cloves, chopped
1 tablespoon Chinese five-spice powder
1 tablespoon allspice berries, coarsely ground
1 tablespoon black pepper, coarsely ground
1 teaspoon dried thyme
1 teaspoon freshly grated nutmeg
1 teaspoon salt
1/2 cup soy sauce
1 tablespoon olive oil
8 lbs. chicken, parts or whole birds quartered


In a food processor, combine the onion, scallions, garlic, five-spice powder, allspice, pepper, thyme, nutmeg and salt. Process it into a coarse paste.

With the machine on, add the soy sauce and olive oil in a steady stream.

Place the chicken pieces in a large Ziploc bag, and pour the marinade in. Zip the bag up and squish it around to make sure the marinade touches all parts of the chicken. Place the bag in a bowl (to prevent accidental leaks) and place the bowl in the fridge overnight.

Bring the chicken to room temperature before cooking.

Indoors: Place the chicken on a baking sheet and bake in a 350-degree oven for about 30 minutes. At the end, move the baking sheet under the broiler and cook a few minutes more, to get some caramelization going.

Outdoors: Light a grill and cook the chicken over a medium fire, turning it so it doesn’t burn. Cover the grill if you like, for smokier flavor. Make sure the chicken is cooked through before serving.


With the announcement that “No Time to Die” is the last film for Daniel Craig as James Bond, I thought it was time to bring back a classic. The story of the Vesper martini is an interesting one. Make yourself one and read all about it. Cheers!
At first, it seemed almost silly to try to make one…but the classic James Bond martini has always fascinated me. I’m not talking about the clichéd Sean Connery “vodka martini, shaken, not stirred.” I’m talking about the real James Bond martini, which appeared in Ian Fleming’s first 007 novel “Casino Royale” and only appeared in the 2006 “Casino Royale” motion picture starring Daniel Craig (the best Bond of all, if you ask me.)
Bondtini
To quote the novel:
‘A dry martini,’ he said. ‘One. In a deep champagne goblet.’ ‘Oui, monsieur.’ ‘Just a moment. Three measures of Gordon’s (gin), one of vodka, half a measure of Kina Lillet.  Shake it very well until it’s ice-cold, then add a large thin slice of lemon peel. Got it?’ ‘Certainly, monsieur.’ The barman seemed pleasant with the idea. ‘Gosh that’s certainly a drink,’ said Leiter. 
Bond laughed. ‘When I’m … er … concentrating.’ he explained, ‘I never have more than one drink before dinner. But I do like that one to be large and very strong and very cold and very well-made. I hate small portions of anything, particularly when they taste bad. This drink’s my own invention. I’m going to patent it when I can think of a good name.’ 
He watched carefully as the deep glass became frosted with the pale golden drink, slightly aerated by the bruising of the shaker. He reached for it and took a long sip. 
‘Excellent,’ he said to the barman, ‘but if you can get a vodka made with grain instead of potatoes, you will find it still better.’ 
Bond named this drink the Vesper martini, after the character Vesper Lynd, portrayed by Ursula Andress in the 1967 adaptation, and Eva Green in the 2006 adaptation of “Casino Royale.”
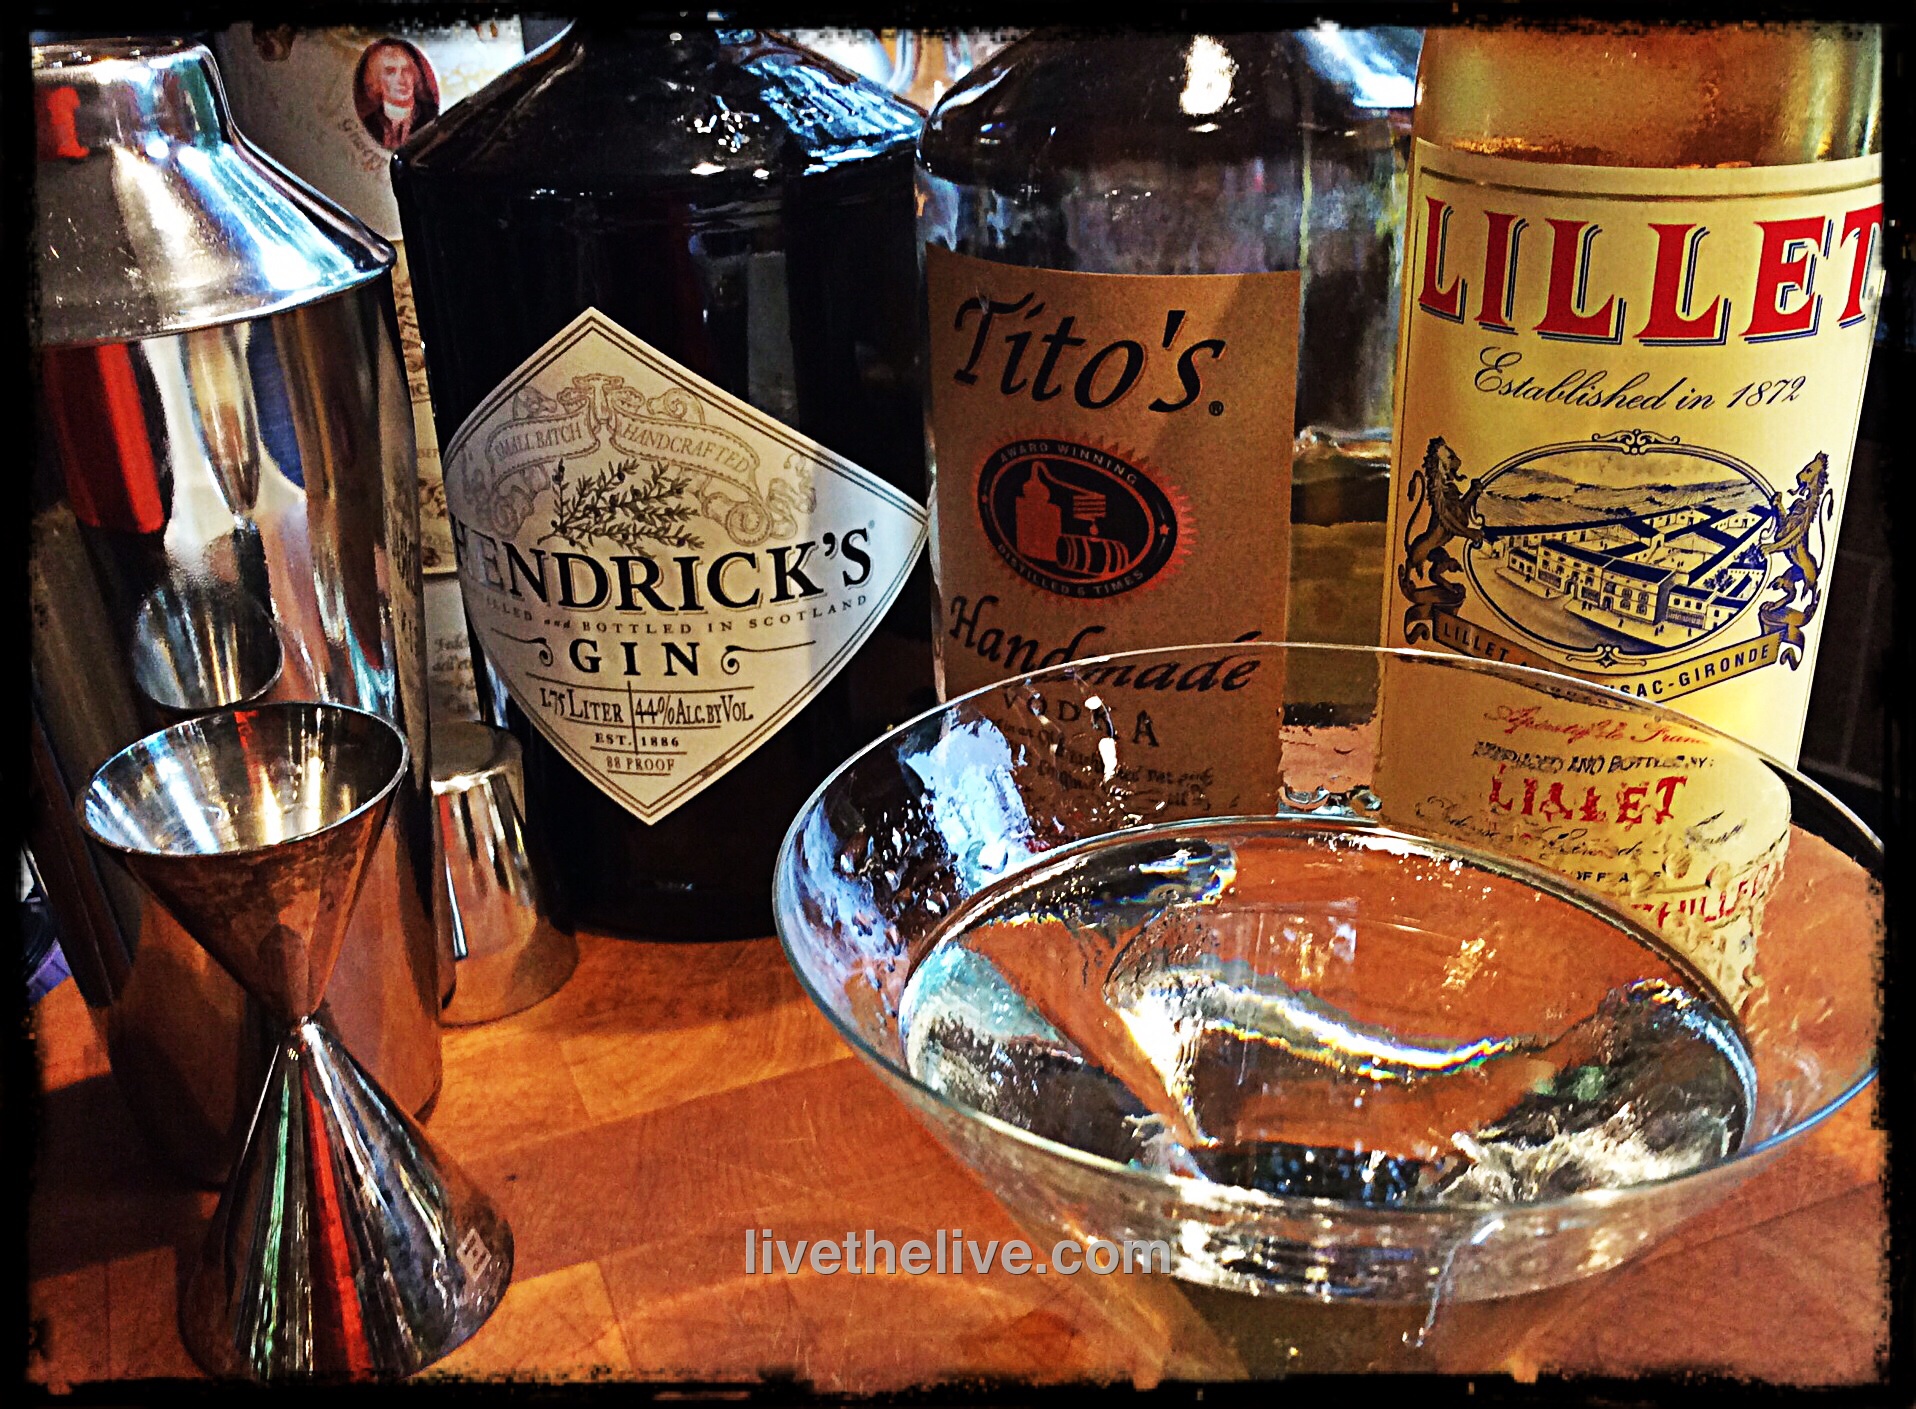
My first homemade version of this classic drink remained true to the measurements of the original, though I changed brands due to personal preference. In the novel, Bond just asks for “vodka.” (Of course, this was back in the 1950’s when we didn’t have hundreds of brands to choose from!) My choice for best-bang-for-the-buck grain vodka is Tito’s, made from corn. But an excellent choice for wheat-based vodka is Grey Goose.
Bond asks for Gordon’s gin. I’m partial to the floral notes of Hendrick’s. Again, in the 50’s, what good British agent wouldn’t drink Gordon’s?
And the original Kina Lillet had its recipe changed in the 1980’s to keep up with the times by reducing the quinine, which made it bitter. (Kina refers to the quinine, so it was removed from the label when the quinine was removed from the formula.) The French aperitif wine, Lillet, is today’s version: a blend of wine grapes, oranges, orange peels and quinine. Lillet is not a vermouth, though you’ll find it in the vermouth section of your favorite liquor store. With the rise in popularity of the Vesper martini, many bartenders and aficionados claim it’s just not the same without the original Kina Lillet formulation, and a search began to find a better substitute, one with a more pronounced quinine assertiveness.
ingredients again
Enter Cocchi Americano, an aromatized wine also found in the vermouth section of many liquor stores. With its quinine-forward recipe, Vesper fans claim it comes closer to the original Kina Lillet. Add a more London-style dry gin to the mix, like Bombay Sapphire, and you just about nail the cocktail Bond created all those years ago.
So…with measurements true to Bond, may I suggest two versions of the same cocktail!
My original, more floral, version…
3 oz. Hendrick’s gin
1 oz. grain-based vodka (like Tito’s or Grey Goose)
1/2 oz. Lillet
Combine these over ice in a cocktail shaker, and shake vigorously. Strain it into a chilled martini glass. I’m happy with a lemon peel or olives with this combination.
Bondtini2
Or…
The version closer to Bond’s original, which is equally wonderful in its own right: crisp and refreshing, a strong drink with a hint of bitterness from the quinine. Dangerously addictive!
3 oz. London dry gin (like Bombay Sapphire)
1 oz. grain-based vodka (like Grey Goose)
1/2 oz. Cocchi Americano
Combine these over ice in a cocktail shaker, and shake vigorously. Strain it into a chilled martini glass. Garnish with a large, thin lemon peel.
With the rising popularity of the Vesper martini, and the use of Cocchi Americano instead of Lillet, the makers of Lillet now claim they “never removed” the quinine from their original recipe. Many feel this is an outright lie, (back-pedaling a bit, aren’t we?) because they themselves stated they changed in the formula back in the 80’s. A little too late now for them to re-formulate. Cocchi Americano has become the go-to with many bartenders when recreating this classic cocktail.

Last Thanksgiving, I combined several traditional desserts in one: pumpkin pie, cheesecake, and tiramisu. The challenge was also to make it gluten-free. That was actually easier than it sounds.

Rather than using the traditional lady fingers you’d find in tiramisu, I used a gluten-free product that replaces graham crackers. And I served the dessert in individual bowls.


image

1 1/2 cups heavy whipping cream
2 packages (8 oz. each) cream cheese, softened
1 can (15 oz.) prepared pumpkin
3/4 cup milk
1/2 cup brown sugar, packed
4 teaspoons pumpkin or apple pie spice, divided
2 teaspoons vanilla extract, divided
1 cup strong brewed coffee, room temp ( I use espresso)
1 box (22 oz.) graham crackers or the gluten-free substitute


image

In a large bowl, whip the cream until soft peaks form. Set it aside.

In another large bowl, combine the cream cheese, pumpkin, milk, brown sugar, 2 teaspoons of the pumpkin spice, and 1 teaspoon of the vanilla. Beat with a mixer until well blended. Fold it gently into the whipped cream.

Pour the graham crackers into a food processor and process until you get very fine crumbs. Pour the crumbs into a bowl.

In a separate small bowl, combine the coffee and remaining pumpkin spice and vanilla. Pour the coffee mixture into the graham crackers a little at a time, and mix with a fork, until it resembles wet sand.

In each glass, alternately layer the pumpkin cream and the graham cracker mix. Serve with a little extra whipped cream on top, or with ice cream on the side.

PICKLED BEETS

Posted: November 26, 2021 in beets, Food, pickling, Recipes
Tags: , , ,

Growing up in a Lithuanian family, there was a small group of foods that I had to love to survive, since they constantly appeared on the dinner table: potatoes, cabbage, mushrooms, herring, and beets. Fortunately for me, I loved them all, despite my Mom’s desire to boil everything to death.

One of the many uses for beets, besides a cold summer soup and a hot winter soup, was pickling. Pickled beets are an excellent side dish for any hearty meat dish. (I love ’em with kielbasa!)  Store-bought pickled beets pack way too much sugar in every jar, so it was time to make my own.

A real time saver is a product called Love Beets, which you can find in any supermarket. If you use them, you can skip the roasting of the beets altogether.

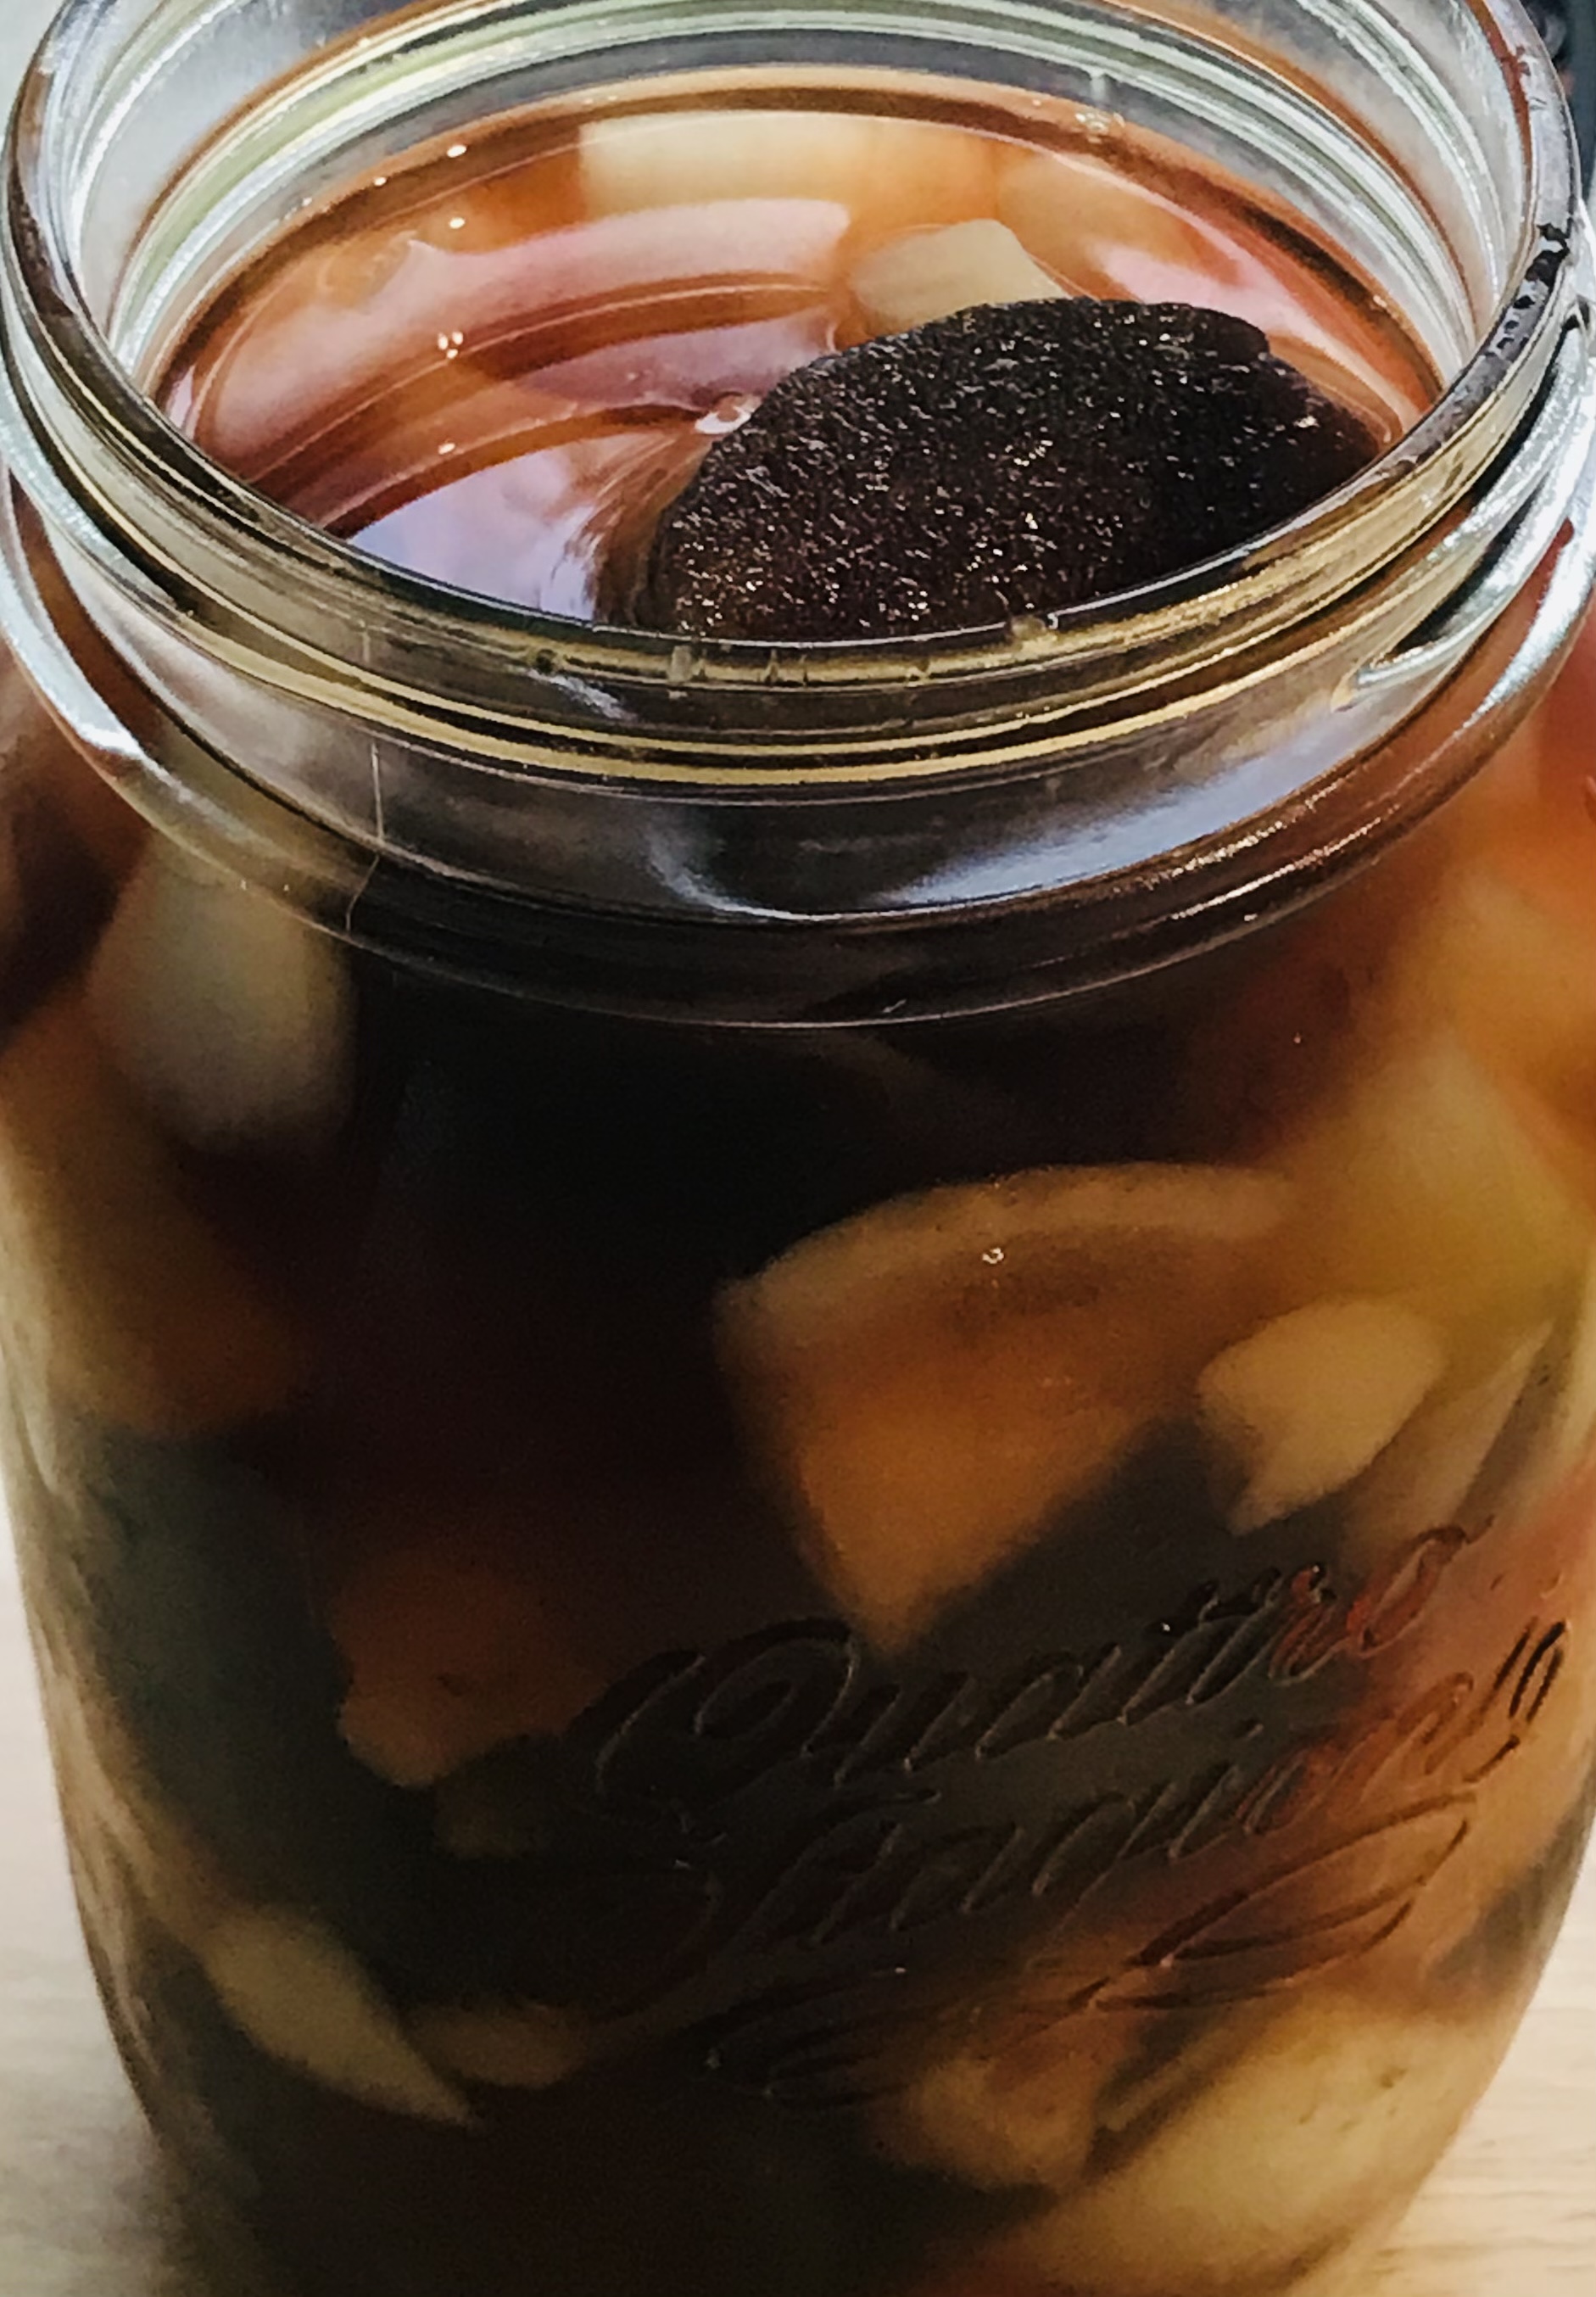
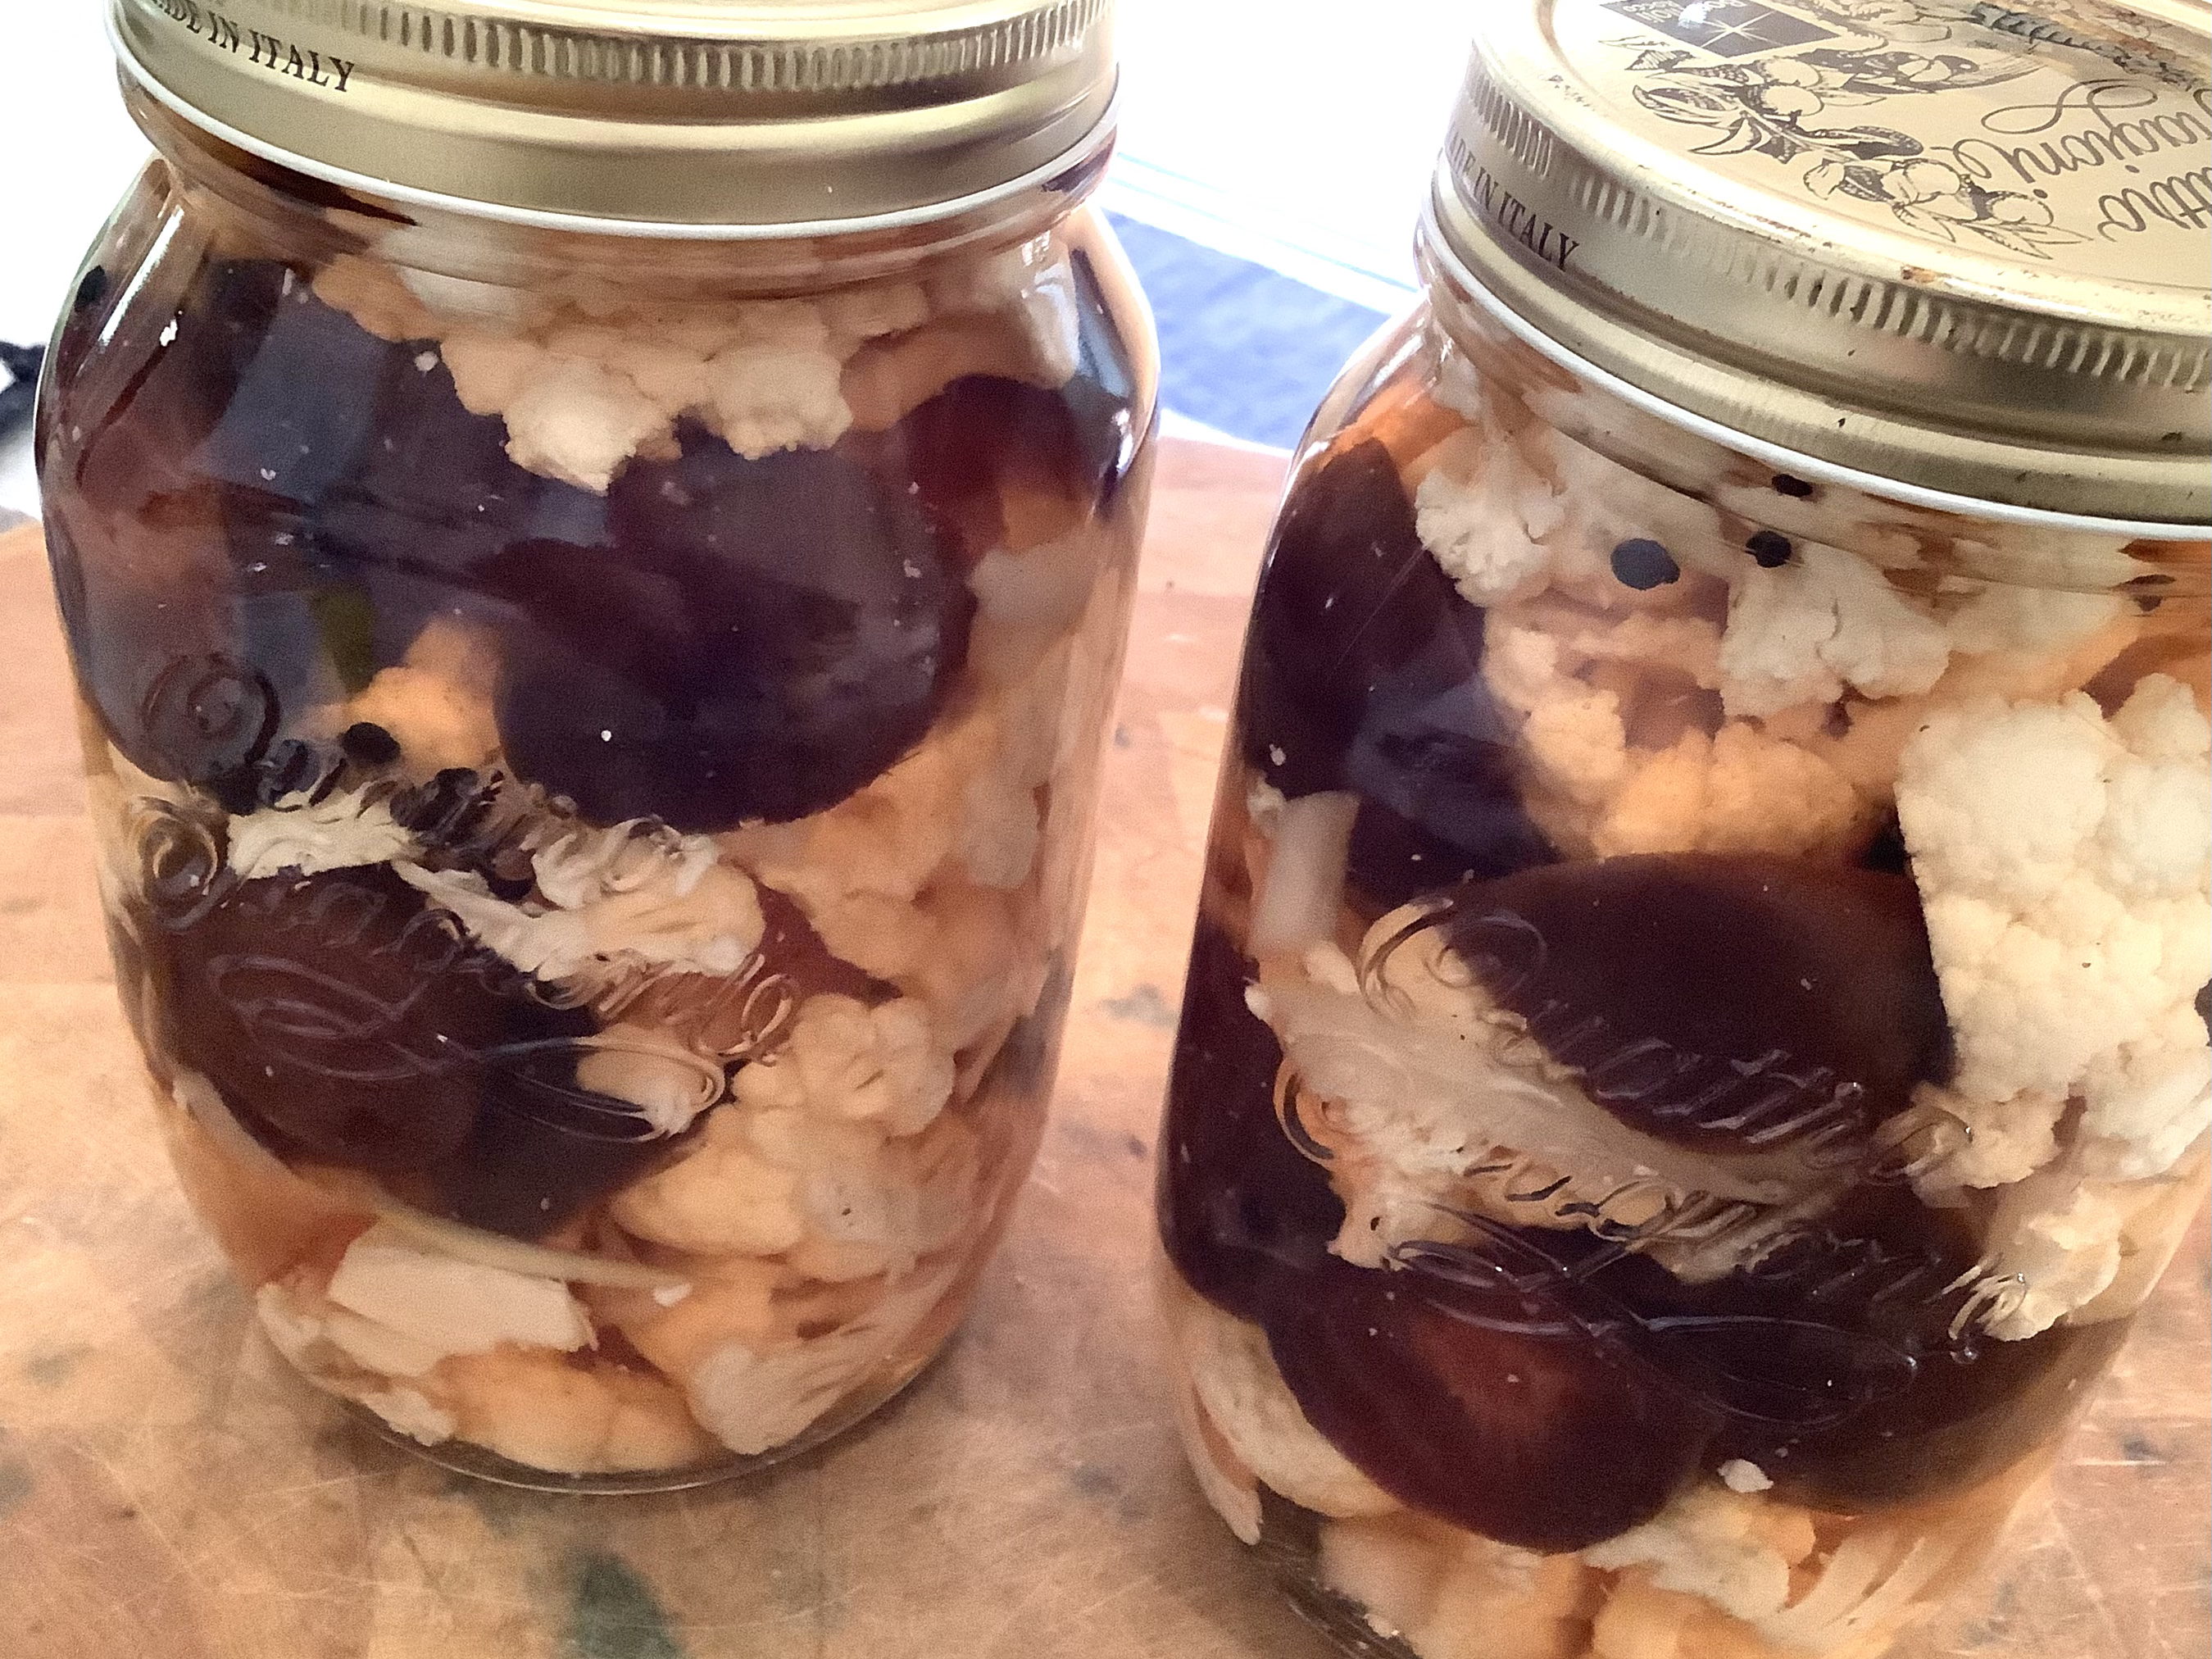
This recipe makes one large Mason jar’s worth of pickled veggies.


beets


4 to 8 beets, scrubbed (your favorite variety)
1 cup apple cider vinegar
1 cup water
3 garlic cloves, crushed
3 tablespoons sugar
2 teaspoons whole black peppercorns
1 tablespoon Kosher salt
1 onion, sliced (or more, if you love ’em like I do!)
cauliflower pieces (optional)
fresh dill (optional)


Pre-heat the oven to 450. Wrap the beets in foil and roast for about an hour, until tender. When they’re cool enough, carefully peel and quarter them. (If you’re using Love Beets, just open the package, and halve them if they’re small…quarter them if they’re larger.)

In a medium saucepan, combine the vinegar, water, garlic, sugar, peppercorns and salt. Bring it to a boil and simmer over moderately high heat, stirring until the sugar has dissolved. Let the pickling liquid cool to warm, about 15 minutes.

In a heat-proof glass jar or container, layer the beets, onion, and optional cauliflower. Pack them down a bit so there’s no a lot of air between them. Pour the pickling liquid in the jar, covering the veggies. Seal the jar tightly. Let it stand at room temp for 2 hours, then place it in the fridge overnight.


They stay fresh for a week, but they won’t last that long!


Years ago, I gave my self an important research project: Create your own version of the perfect espresso martini.

It took painstaking research, which required drinking many espresso martinis in many a bar on my travels.

My favorite version came from a bartender working at Knave, the lobby bar at the at Parker New York, the former Le Parker Meridien Hotel in Manhattan. It featured Coole Swan, an Irish cream liqueur I had never heard of before. The bartender was nice enough to write down the recipe for me, but I guess I had a little too much to drink…because I lost it! So it was up to me to use those brain cells I didn’t fry and come up with my own combination.

A lot of mixing late into the night, and I came up with what I consider to be my perfect espresso martini. As the marines say: “There are many like it, but this one is mine.”


Alz Espresso martini

My espresso martini


3 oz. good quality vodka, like Belvedere
3 oz. freshly brewed espresso
1.5 oz. Kahlua
1.5 oz. Coole Swan


Chill your martini glasses. Pour all the ingredients into a large shaker with ice. Shake vigorously. Strain into chilled glasses.

This recipe makes 2 martinis. Let me tell ya…this tasted as good the first time as it did several martinis later! I’ve found that using a high-end vodka really does make a difference in the quality and taste of the martini…as does freshly brewing your espresso just before assembling the drink.

My dog, Fellow, turned 12 on November 5th. He stood by me in the kitchen while I created this dish, so I decided to name it after him.


The original Oysters Rockefeller recipe is a closely guarded secret, created in 1899 at the famous New Orleans restaurant Antoine’s. Jules Alciatore, the son of founder Antoine Alciatore, developed the dish when they had a shortage of escargot, substituting locally available oysters. Antoine’s is still the only place in the world where you can be served the original Oysters Rockefeller recipe.

If you Google “Oysters Rockefeller,” you’ll find hundreds of recipes that claim to be the real thing, or close to it. But here’s the catch: most of them use spinach in the dish, and the folks at Antoine’s insist there was never any spinach used in the original recipe. So, before attempting my own version, I decided I would leave spinach out of my recipe…and I like it better that way.

My version, my Oysters Rock-a-Fellow, is a cheesier and gooier than the original. I use large, meatie oysters like Wellfleets from Cape Cod or local Rhode Island oysters. And, as you’ll see below, you can make the cheese portion of this dish the day before, saving yourself a lot of time on the day you want to serve it.

So, if you’re doing this the day of…start here. If you’re doing it the day before, start with the cheese mix below, then come back to the oysters the next day.


24 oysters, washed to remove grit

Scrub the oysters under cold water to get them clean.

Here’s how I make opening the oysters easier. (Plus the hot water cleans the oyster shells nicely.)

In a large pot, pour in enough cold water to fill the pot about halfway. Turn the heat on high and bring the pot to a boil.

The moment you reach a boil, turn the heat to medium and drop in 6 oysters, letting them bathe in the liquid for only 30 seconds. Scoop them out with a slotted spoon and place them in a bowl to cool. If the oysters open, they’ve been in there too long! You want them to stay closed. Do the same with the rest of the oysters, 6 at a time. Once all the oysters have had their 30 seconds, move the oyster bowl to a cutting board. Discard the liquid in the pot.

Pour Kosher salt onto a large sheet pan lined with foil.

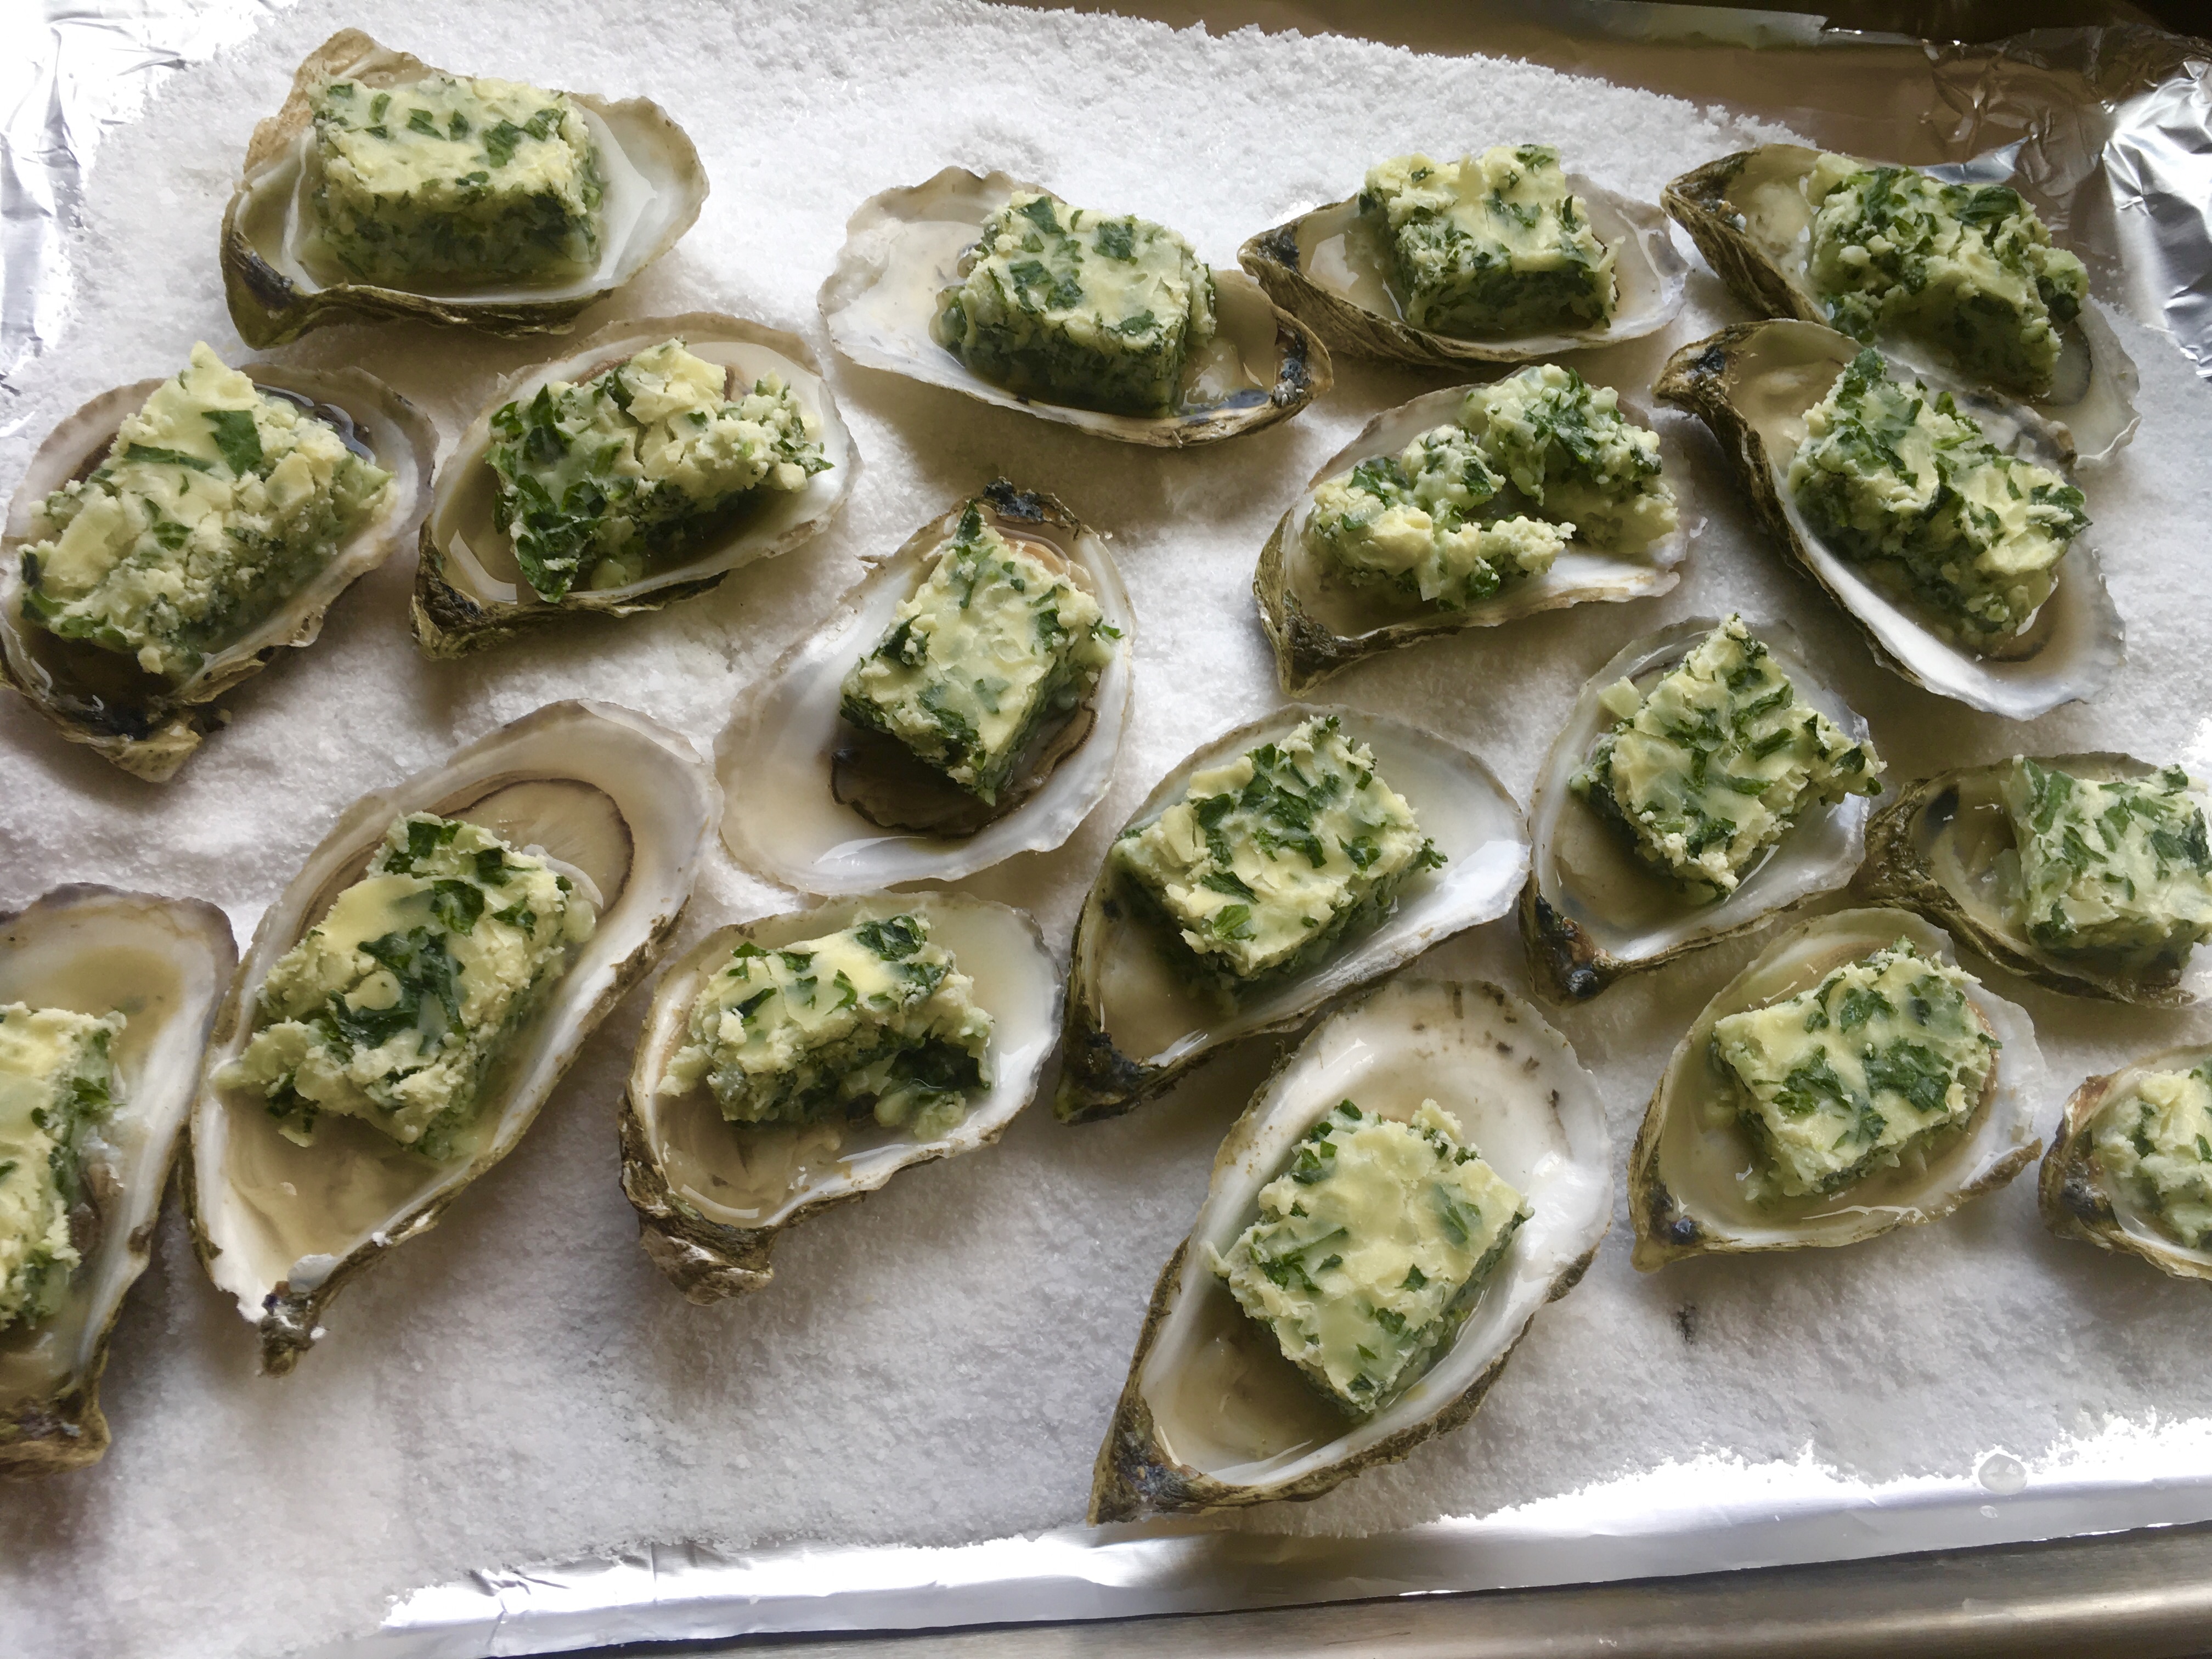
Once the oysters have cooled enough for you to handle, carefully remove the top shell off each one, discarding it, and lay the oysters on the bed of salt in the sheet pan, trying not to spill any of the precious oyster liquor inside. The salt holds the oysters in place.


Salt holds the oysters perfectly in place.


Pre-heat the oven to 425 degrees.

1/4 cup unsalted butter
1 small onion, finely chopped
1 garlic clove, finely chopped
1/4 cup low-fat milk
salt and pepper
3 cups (tightly packed) fresh arugula, finely chopped, about a 5 oz. container
6 oz. mild cheddar cheese (the white one), grated
6 oz. mozzarella, grated
Fine bread crumbs (Using GF breadcrumbs will keep this dish gluten-free)

In a sauce pan, melt the butter and then add the onion and garlic. Cook until the onion is translucent.

Add the milk, season with salt and pepper, and then add the arugula a little at a time, letting it wilt before adding more. Use all the arugula.

Once all the arugula is in the saucepan, sprinkle the cheese in a bit at a time, letting it melt, until you’ve used all the cheese: the cheddar and then the mozzarella.

Pour the gooey cheese mix into a lasagna pan, smooth it out with a spatula, and place it in the fridge to cool.


You can do this all the day before, because the cheese mix hardens and becomes easy to cut into cubes with a sharp knife.


Then simply place a cube of the cheese mix on each oyster…


…sprinkle a little bread crumb on top…


…and bake in the 425-degree oven for about 8–10 minutes until it’s golden and bubbly.


Whoever said that cheese and seafood don’t go together, never tried this!

I buy Udi’s gluten free frozen bread for my breadcrumbs. I take the loaf, toast the slices, then put them through the food processor. The taste is far better than buying pre-made GF breadcrumbs. Use regular breadcrumbs if you don’t need to worry about gluten.


Let’s face it: there’s no such thing as healthy eggnog. This recipe is delicious but is also a heart attack in a glass. I post it every year because my friends just love it.

My buddy, Rick Sammarco, a wicked talented bartender, credits his father, Al, for this eggnog. The original recipe calls for a lot more of everything. I’ve cut it down to a “more reasonable” size.

A word about salmonella: If you’re concerned about it, you need to decide what works for you. Some recipes tell you to make your eggnog weeks in advance to “sterilize” the drink with all the booze you’ve added to it. I’m not sure that really works. As for me, I use raw eggs in my Caesar salad dressing and in other recipes, so I’m willing to risk it here.

If you’re lucky, some stores–(though very few of them, and none near me)–sell pasteurized eggs. They say the taste is a bit funky, but that it does remove the salmonella.


eggnog


1.5 quarts vanilla ice cream (I use Breyer’s)
1 pint half & half
15 whole eggs (raw)
½ teaspoon vanilla extract
1/4 teaspoon cinnamon
1/4 teaspoon nutmeg
At least 3/8 cup of each:
spiced rum (I use Captain Morgan)
whiskey (I use Crown Royal)
brandy (I use E&J)


Let the ice cream soften 1 day in the fridge. Mix the ice cream, eggs, vanilla, half-and-half in a blender.

Add the spices and liquor. Blend until it’s frothy.

Taste, and add more cinnamon and nutmeg if you like.

After it’s fully blended, let it sit in the fridge, covered, for at least 12-24 hours for the flavors to blend. Even longer is better.


CLASSIC PARKER HOUSE ROLLS

Posted: November 14, 2021 in Uncategorized

What’s a Thanksgiving dinner without Parker House rolls?

Parker House rolls are one of my all-time favorite treats. They’re so light and delicious because milk and melted butter are used to make the dough. I’d make and eat them every weekend if it wasn’t for the fact that I’d gain a ton of weight in the process! So…I save them for special occasions.


There really is a Parker House. It’s a hotel in Boston where the rolls originated in the 1870’s. Legend has it that a disgruntled hotel baker threw a batch of unfinished rolls in the oven, and when they came out, they had a folded pocketbook shape that made them light on the inside, and crisp and buttery on the outside. A legend was born.

There are hundreds of Parkerhouse Roll recipes out there, but this is the one I swear by. It’s a great excuse to get out my old Kitchenaid standing mixer.


1 stick unsalted butter, melted and cooled, plus softened butter for brushing
1 tablespoon active dry yeast
1/4 cup lukewarm water (100 to 110 degrees)
1/4 cup sugar 1 cup whole milk, warmed
2 large eggs, at room temperature
4 cups all-purpose flour, plus more for dusting
2 1/2 teaspoons Kosher salt (I use Diamond Crystal)


Brush a large bowl with butter.

In the bowl of a stand mixer fitted with a paddle, combine the yeast with the water and a pinch of sugar. Let it stand until it gets foamy, about 10 minutes. This gets the yeast happy.


Add the milk, melted butter, eggs and remaining sugar and mix until it’s all combined.

Now switch to the dough hook and add the flour and salt. Knead at low speed until a smooth ball forms, about 2 minutes.

Scrape the dough onto a lightly floured board and knead it gently into a ball. Then place the ball in the buttered bowl, covering it with plastic wrap, and placing the bowl in a warm place. Let the dough double in volume. It’ll take about 1 1/2 hours.


Pre-heat the oven to 350.

Grease a 9-by-13 baking dish with more butter.

Turn the dough out onto a lightly floured board again, punching out the air bubbles, and forming it into a ball again. Cut the ball in half, then each half into 8 pieces.


You can either leave the pieces in their wedge shape, placing them in the baking dish top side up. Or you can roll the wedges into balls, placing them into the baking dish, spacing them out evenly.


Cover the baking dish with plastic wrap and let the dough rise again for about 30 minutes. By then, your oven will be nice and warm.


Bake the rolls for 20 to 25minutes, until they’re a beautiful golden color.


Serve them warm or at room temperature. If you bake the rolls earlier in the day, you can cover them in plastic wrap, and the re-heat gently before serving.

With Thanksgiving around the corner, I’m sharing my favorite holiday dishes I post every year around this time.

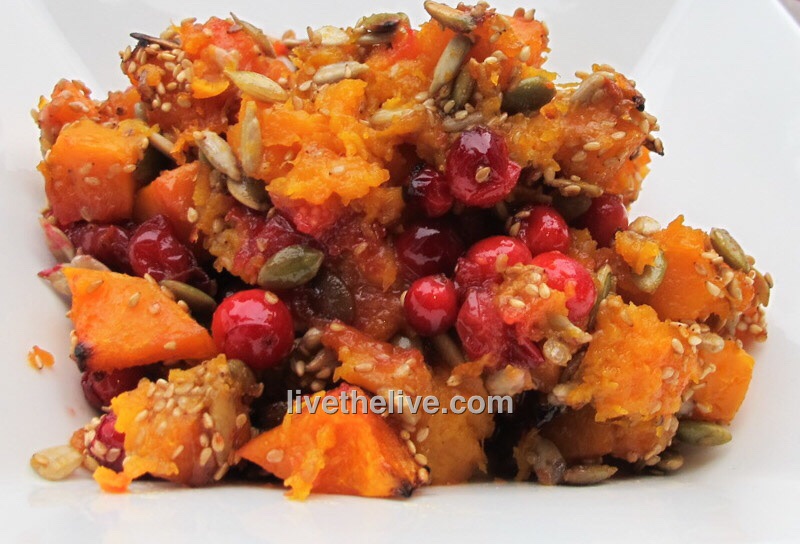
My Mom loved that nasty, gooey cranberry log that oozes out of the can. It would hit the bowl with a splurt and would wiggle for about an hour. I’m more than happy to avoid that and make this delicious side dish, which has become mandatory at our Thanksgiving table every year…


1 medium-sized butternut squash, washed and peeled with the seeds removed
Olive oil
Salt
1 cup fresh cranberries
¼ cup sunflower seeds
¼ cup pumpkin seeds or pepitas
¼ cup sesame seeds
¼ cup maple syrup, more if you like it really sweet


image


Pre-heat the oven to 400 degrees.

Once you’ve washed, peeled and seeded the butternut squash, cut it into ½” cubes. Sprinkle a little olive oil and salt on them and toss them to coat. Then spread the squash cubes in a single layer on a baking sheet. Bake them for about 30 minutes or until they’re golden on the edges.

Remove the squash from the oven and pour the cranberries into the hot tray. Mix gently. Pour the squash/cranberry mix into a smaller, deeper baking pan.

Increase the oven temperature to 425.

In a separate bowl, combine the sunflower seeds, pumpkin seeds and sesame seeds. Sprinkle the seeds evenly over the squash/cranberry mixture. Drizzle the maple syrup over everything and place the baking pan in the oven. Cook for another 20 minutes, until the seeds have roasted.

Drizzle a bit of maple syrup over the top just before bringing the pan to the table.