With Thanksgiving on everyone’s mind, I’d like to share my recipe for what I consider to be the perfect turkey.
I often get asked if I deep-fry my turkey for Thanksgiving. I think it’s way too messy and time-consuming for nothing better than an “OK-tasting” bird. I lived in the South for a few years, and my friends fried a turkey on several occasions. I wasn’t that impressed.
When frying, you need to find a safe spot in the yard to blast the propane-fueled fryer so you don’t burn your house down. Then you need to stand outside and freeze your butt off while it fries, while your friends and family are all indoors having cocktails. Then you need to get rid of gallons of used oil, and clean up a huge mess at the end of it all. And through all this, you need to make sure the oil is at the right temperature so you don’t get a scorched turkey on the outside and a raw turkey on the inside.
No, thanks.
I get great results by cooking my turkey in my Weber grill. I’ve cooked it this way every Thanksgiving for about 30 years. The standard Weber allows me to cook up to a 15 lb. bird–big enough for my purposes–and it comes out crispy, smoky and delicious. If you’re afraid to try this for the first time at Thanksgiving when it really matters, I understand. That’s how I did it years ago, and I never looked back.
-

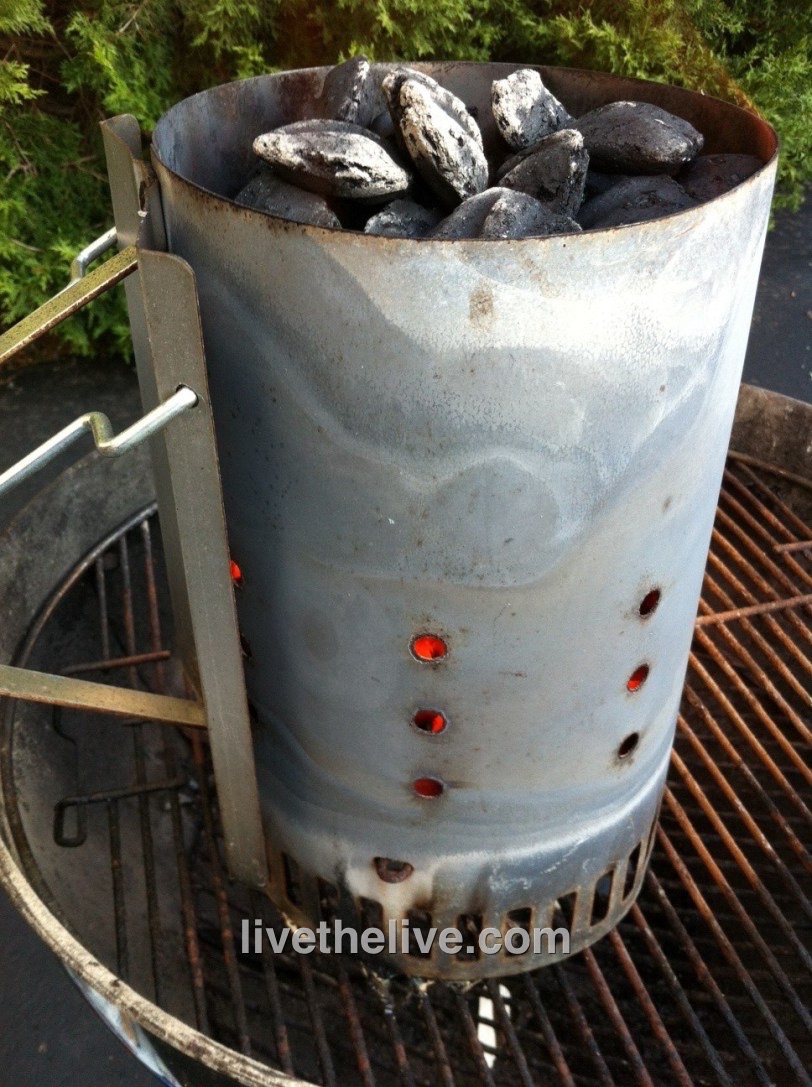
The charcoal chimney with hot coals awaits.
Although I’ve stopped using charcoal briquettes for basic grilling a long time ago, and now strictly use natural hardwood charcoal, this recipe works best with Kingsford briquettes. They burn slowly and evenly. I never use lighter fluid…I always start my fire with a few pieces of crumbled newspaper under a charcoal chimney.
The tools you need:
A Weber grill, with the dome top
Kingsford charcoal briquettes (don’t t use Match Lite or other pre-soaked briquettes)
A charcoal chimney, easily found at Home Depot or Lowe’s
A heavy-duty disposable aluminum pan
Ingredients:
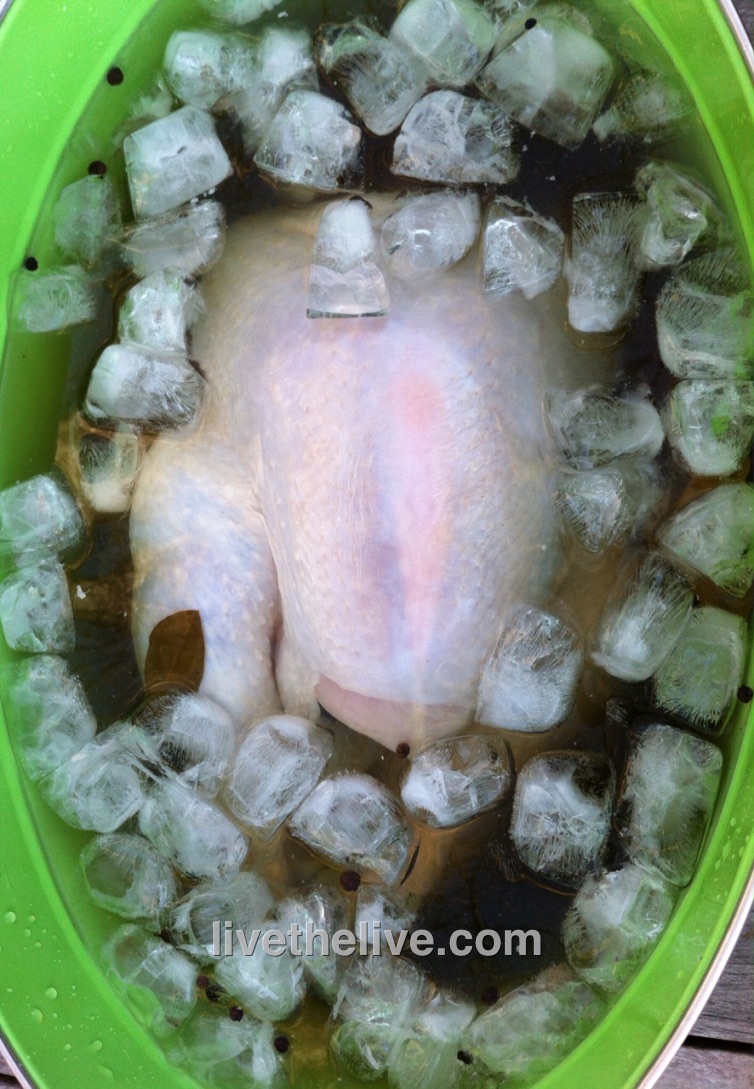
Whole turkey, up to 15 lbs., thawed and brined (see my previous blog about brining a turkey)
Olive oil (to rub on the turkey)
2 yellow onions, chopped
4 stalks of celery, chopped
½ lb. (2 sticks) of unsalted butter, melted
1 tablespoon granulated garlic
1 tablespoon granulated onion
2 tablespoons salt
1 tablespoon pepper
-

Spreading the coals away from the center of the grill.
If you want stuffing, it’s always wise to make it separately and cook it separately.
Light 8 to 10 lbs. of charcoal in the grill…depending on the size of the turkey and how cold it is outside.
If you brined the turkey first, you’ve already removed the giblets. If you’re not brining, go ahead remove the giblets from the thawed bird now. Place the turkey in the aluminum pan.
In a small bowl, mix the granulated garlic, granulated onion, salt, and pepper. (Definitely add any other seasonings you might like.)
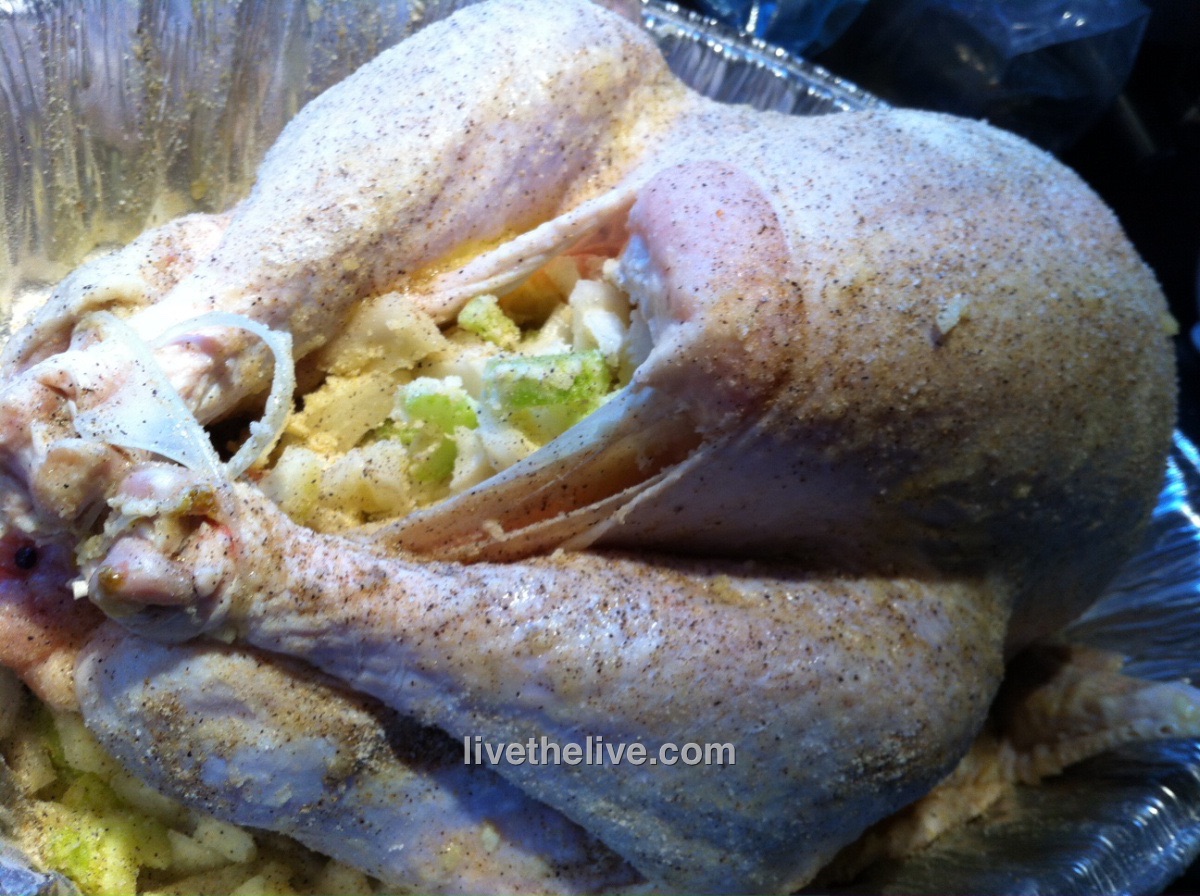
Coarsely chop the onions and celery. Place them in a another bowl. Mix them with the melted butter and 1/3 of the garlic/onion/salt/pepper mixture.
Place a small handful of this onion and celery “stuffing” mixture in the neck cavity of the turkey. Place the rest in the body cavity (where the stuffing would usually go.) You can fasten the bird with turkey skewers if you like. This “stuffing” is strictly to flavor the turkey…you don’t eat it!
-

The rubbed, stuffed and seasoned bird.
Rub the outside of the entire turkey with the olive oil and sprinkle the rest of the garlic/onion/salt/pepper mixture on the outside of the bird. Make sure you get the bird on the bottom as well.
When the coals in the grill have ashed over, spread them to the outside edges of the Weber grill equally. Put the cooking grill rack in place. Place the aluminum pan with the turkey in the center of the grill, keeping it away from the direct heat of the coals. If you’re using a meat thermometer, insert the probe into the thickest part of the breast, being careful not to hit the bone. Place the lid on the grill. (You may need to bend your aluminum pan a bit.) Open the vents on the bottom of the Weber as well as the vents on the lid. It’s important to get air circulating!

My old-school meat thermometer calls me from as far as 100 feet away! (Newer thermometers are wireless and talk to your smart phone.) Time to join family and friends for a cocktail!
No basting is necessary.
Now here’s the tough part: DO NOT OPEN THE GRILL TO CHECK ON THE TURKEY! (If you must look, shine a flashlight into the vent holes on the lid to take a peek at the pop-up timer, if there is one.) The whole point is to keep the heat inside the kettle. You’ll know your turkey is done when no more smoke or heat rises from the grill, and the turkey inside stops making sizzling noises. The internal meat temperature should be around 165 degrees.
And believe it or not, a 15-lb. turkey will be cooked in about 2 hours!
If you’re using a meat thermometer (recommended), remove the turkey when it hits about 155 degrees, wrap it in foil, leaving the thermometer still in the bird, and let it rest at least 20 minutes. The temperature will go up a bit to 165 or even a little higher, before it starts going down.

Beautifully grilled, perfectly cooked!