Sometimes, a cool adult beverage is just what you need after a long day of yard work. The cucumber plants in my garden have started producing, so it’s time to make this refreshing cocktail!
4 fresh cucumbers, peeled and seeded
Small ice cubes
1 cup loosely packed fresh mint leaves
2 teaspoons granulated organic cane sugar
3 tablespoons fresh lime juice
4 oz. vodka (I like Tito’s)
1 oz. orange liqueur (I like Cointreau)
Peel and seed the cucumbers. Coarsely chop them and then purée them in a food processor until smooth. Strain them through a fine sieve, pressing the solids to extract as much liquid as possible. Or, if you have one, use a juicer. Set the extracted cucumber juice aside.
To a large glass pitcher, add the mint leaves, sugar and lime juice. Muddle the ingredients so that the mint leaves release their oils. Add 3/4 cup (at least) of the cucumber juice. Add the vodka and Cointreau. Muddle again briefly.
Fill tall drinking glasses with ice cubes. Strain the cocktail into the glasses. Garnish with a cucumber spear or peel…or mint.
If you grow your own cucumbers and mint in your garden, this cocktail tastes even better…a fine reward for a job well done!
These 2 recipes are great side dishes for any occasion, and they’re tasty by themselves, or as an appetizer. Feel free to substitute to suit your needs. If you don’t like feta cheese, try Gruyère, smoked gouda, or even mozzarella. Need it to be gluten-free? Use GF breadcrumbs. Don’t have shallots? Use onions or scallions. Don’t like mushrooms? Okay…I can’t help you there…
1 package large white or brown mushrooms
olive oil
1/2 shallot, finely chopped
1 clove garlic, through a press
1 tablespoon fresh thyme, finely chopped
pinch of red pepper flakes
salt and pepper
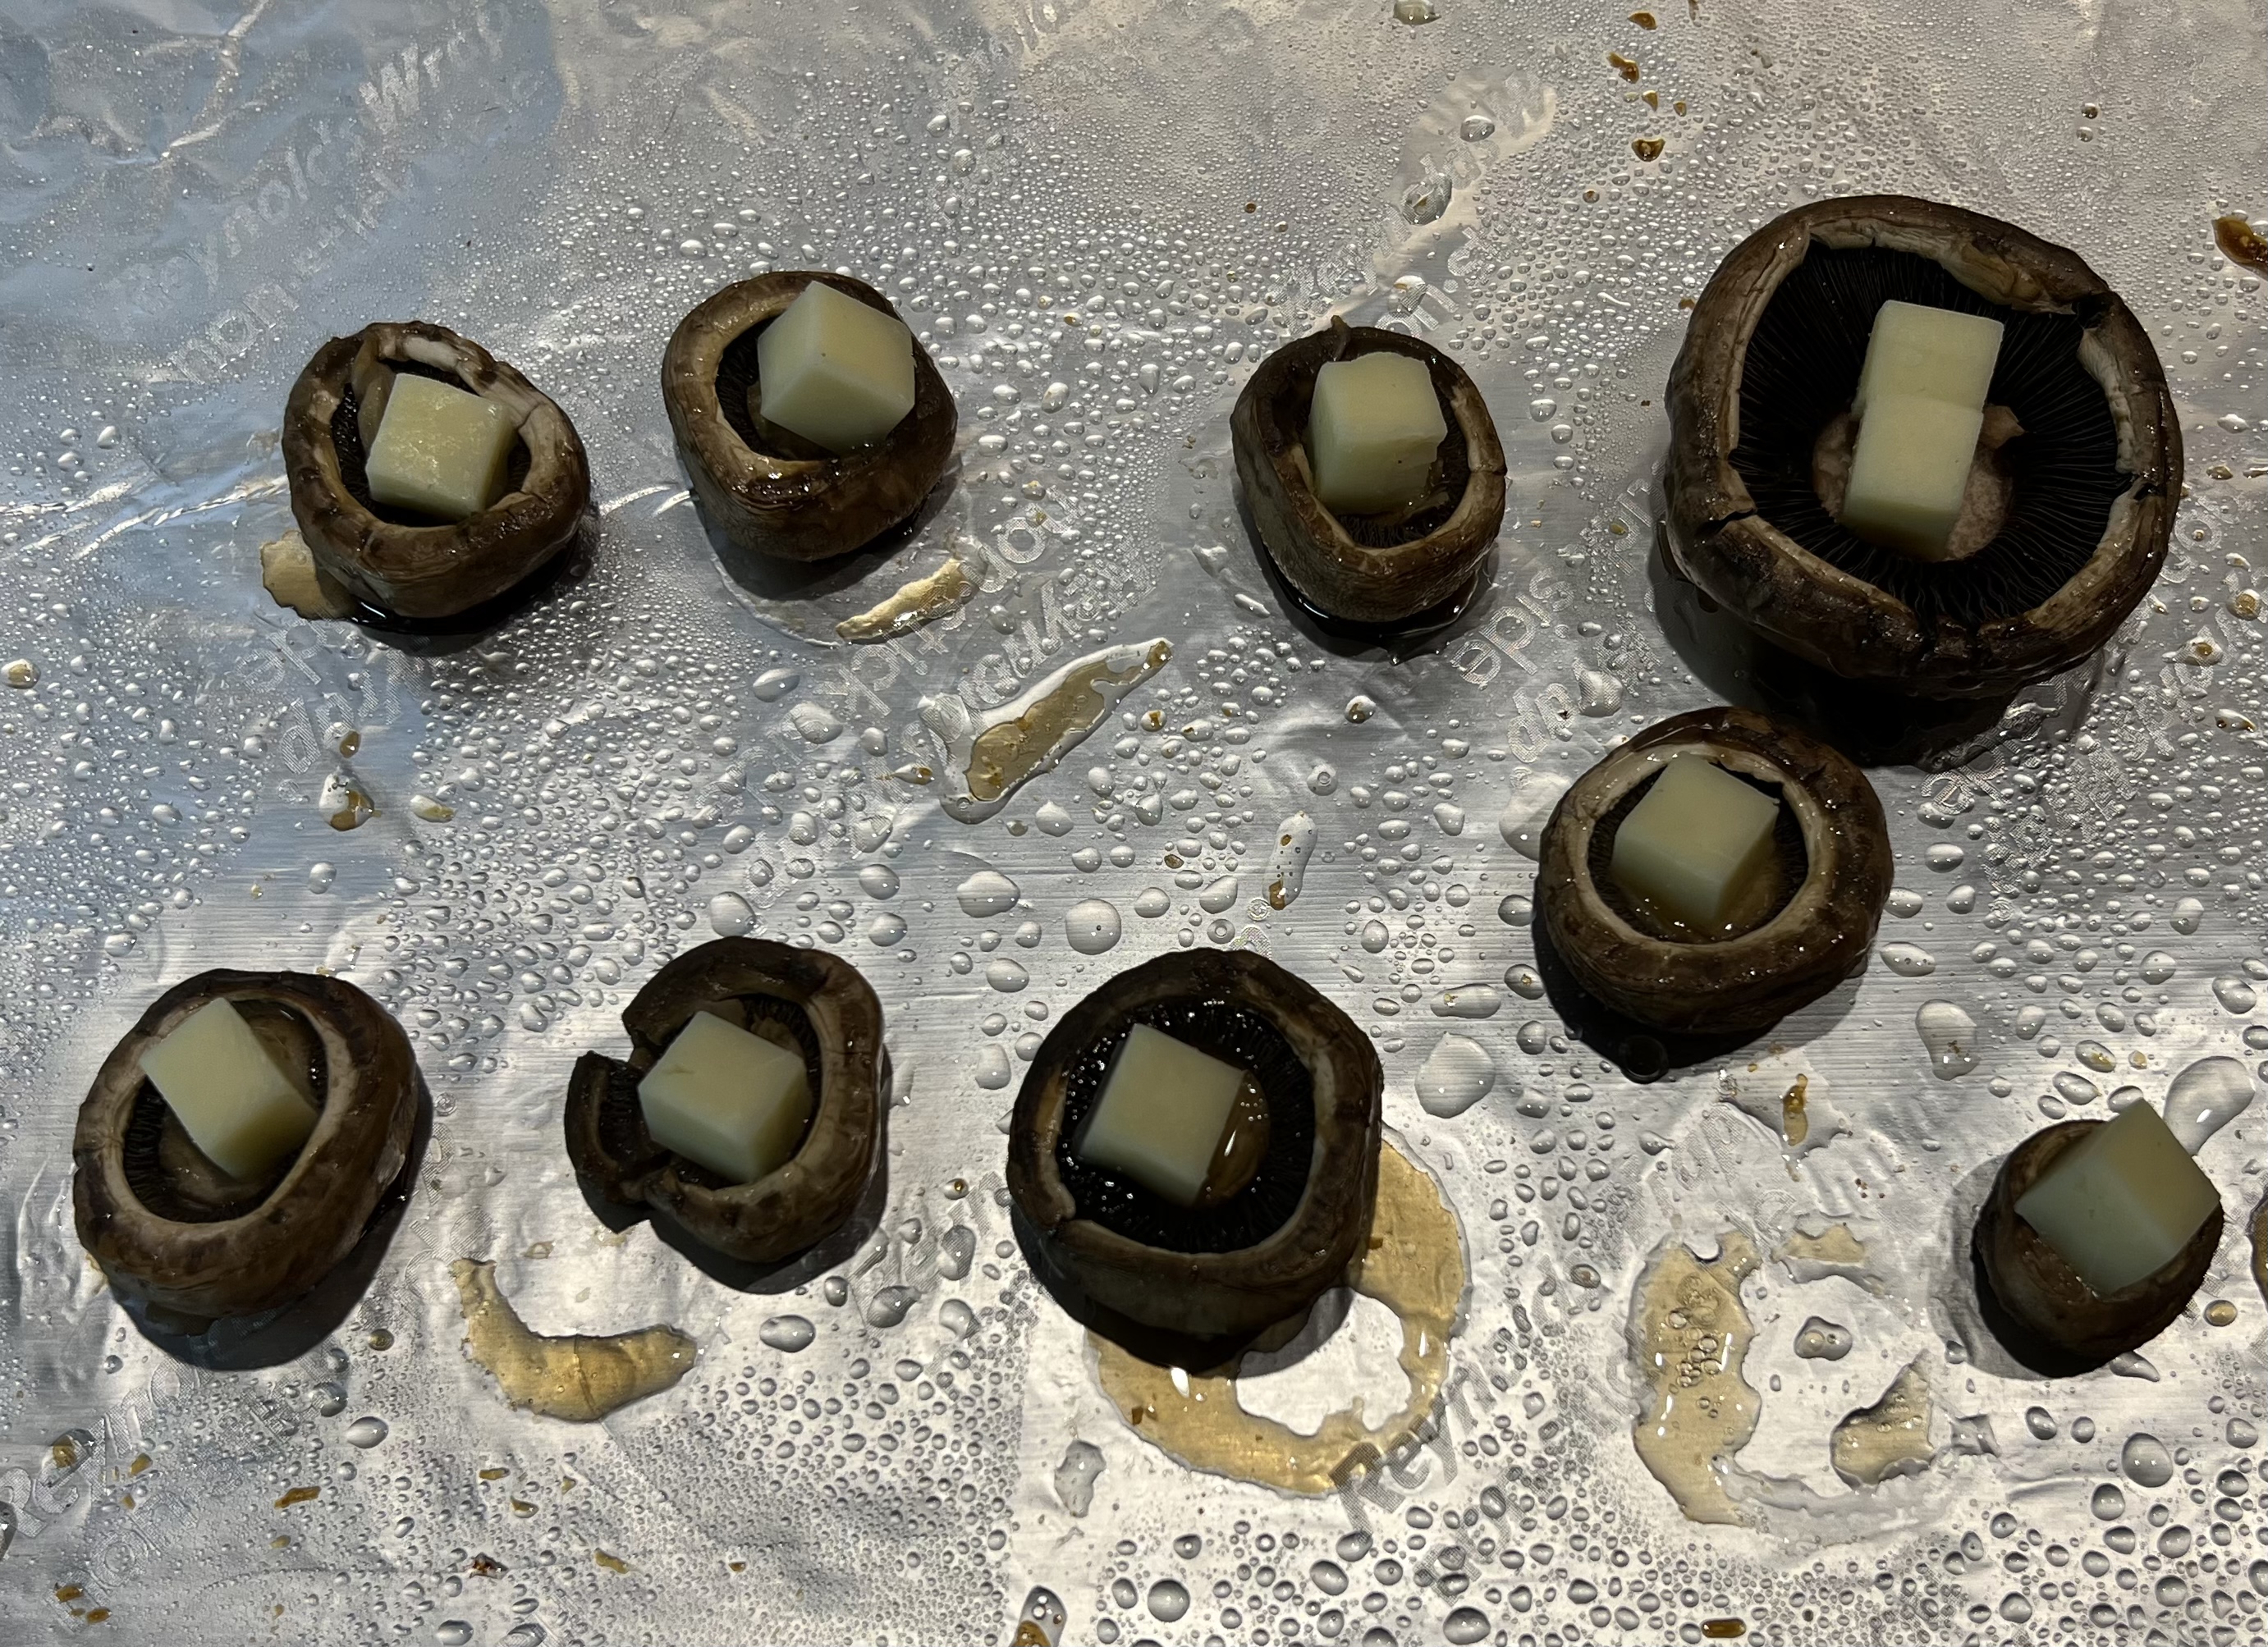
fresh feta cheese, cut into small cubes
bread crumbs
1 tablespoon fresh parsley, finely chopped
Pre-heat the oven to 400 degrees.
Rinse the mushrooms in cold water to clean them. Remove the stems of the mushrooms and set them aside. Rub the mushroom caps with olive oil and place them on a baking sheet, open side-down, in a 400-degree oven, for a few minutes.
In a pan, sauté the shallot and garlic in a little olive oil. Chop the mushroom stems finely and add them to the pan. Season well with the salt and pepper. Add the thyme and pepper flakes. Set the pan aside, off the heat.
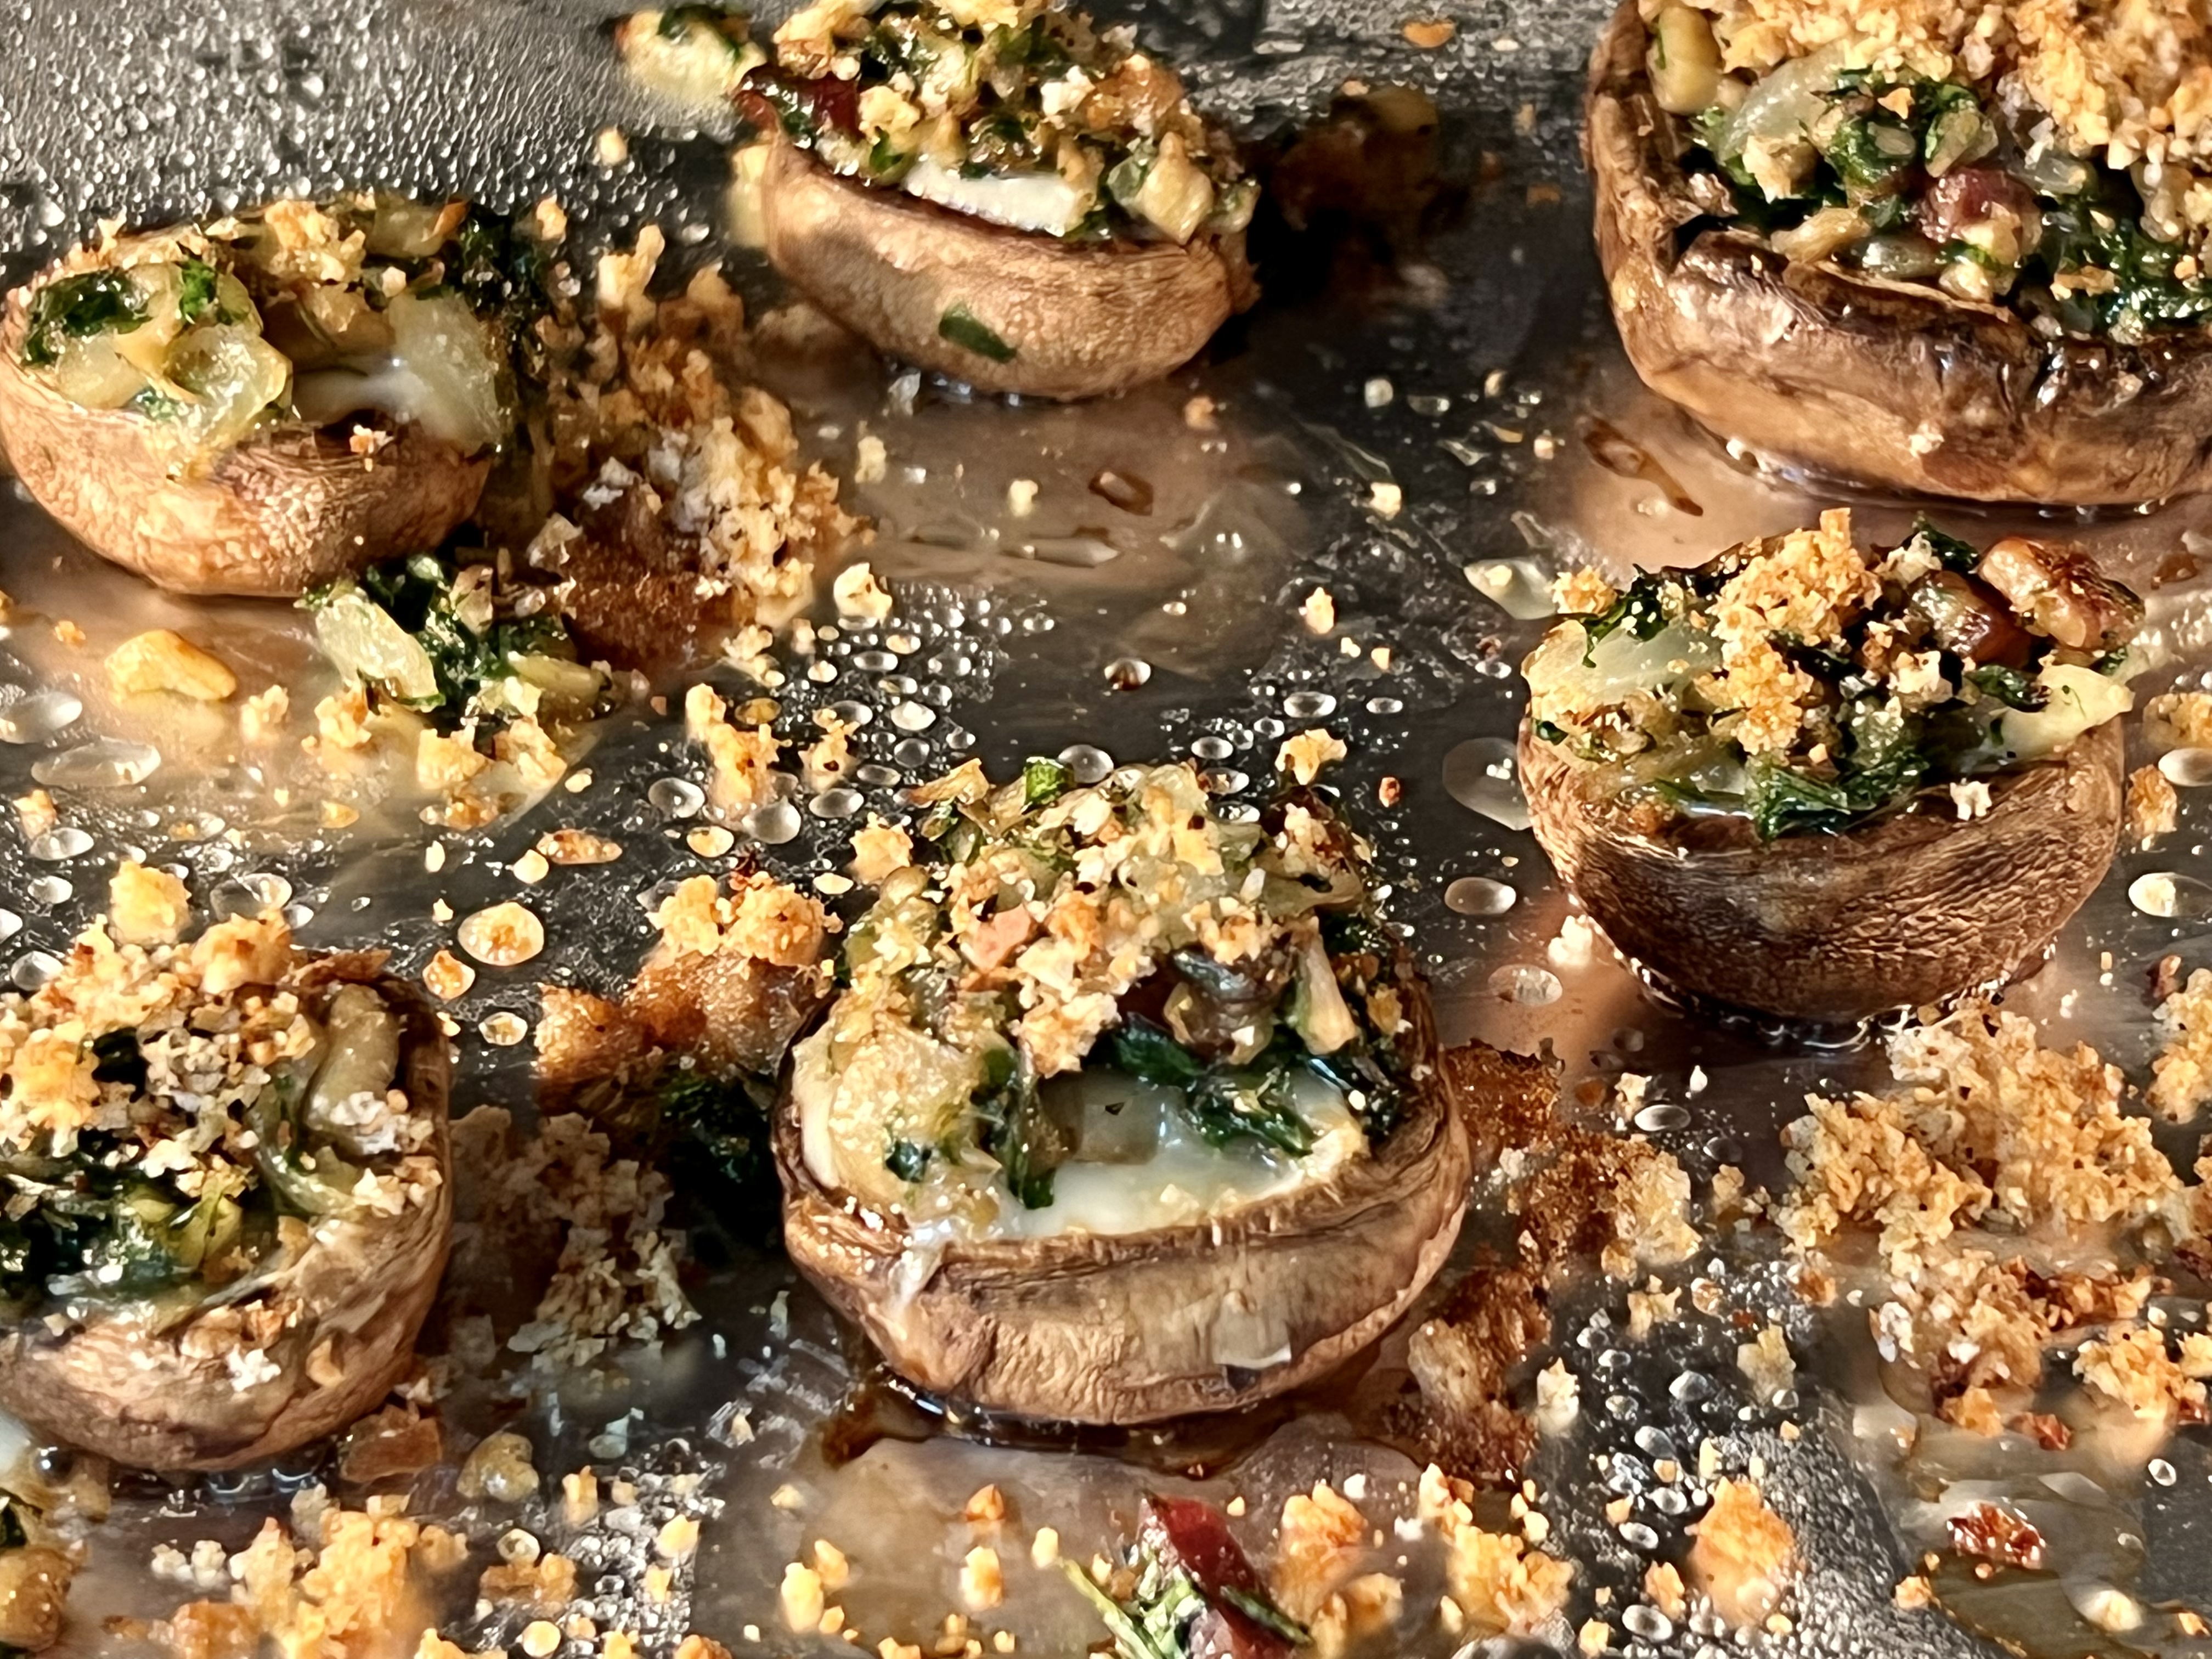
Reduce the oven temp to 350 degrees after removing the mushroom caps. Flip the mushroom caps over so that they look like little bowls. Take a cube of cheese and place one in each mushroom. Top each with the sautéed shallot mixture. Sprinkle breadcrumbs on top and sprinkle parsley over that.
Return the baking sheet to the oven, cooking the mushrooms until they are lightly golden in color, and the cheese has melted.
Mushroom myth: Soaking mushrooms in cold water makes them mushy. Not true! Mushrooms do not soak up any water when left to soak for even 30 minutes. So use your mushroom brush…use your kitchen towel…whatever you like. But I prefer to get them clean simply with cold water.
Here’s another recipe…
Chopped mushroom stems and cubed cheddar, ready to go.
1 package white or brown mushrooms
olive oil
1/4 of an onion, minced
1 clove of garlic, through a press
1 piece of cooked bacon, finely chopped
1 cup of baby arugula
salt and pepper
mild cheddar cheese, cubed
bread crumbs
The cooking directions are similar to the recipe above…
Pre-heat the oven to 400 degrees.
Rinse the mushrooms in cold water to clean them. Remove the stems of the mushrooms and set them aside. Rub the mushroom caps with olive oil and place them on a baking sheet, open side-down, in a 400-degree oven for a few minutes.
In a pan, sauté the onion and garlic in a little olive oil. Add the bacon. Chop the mushroom stems finely and add them to the pan. Season well with the salt and pepper. Add the arugula and let it wilt until it’s soft. Set the pan aside, off the heat.
Sautéed mushroom mix, ready to go.
Reduce the oven temp to 350 degrees after removing the mushroom caps. Flip the mushroom caps over so that they look like little bowls. Cut the cheddar cheese into small cubes and place one in each mushroom. Top each with the sautéed onion/garlic/bacon/arugula mixture. Sprinkle the breadcrumbs on top.
The cubes of cheddar fit inside the caps.
Return the baking sheet to the oven, cooking the mushrooms until they are lightly golden in color, and the cheese has melted.
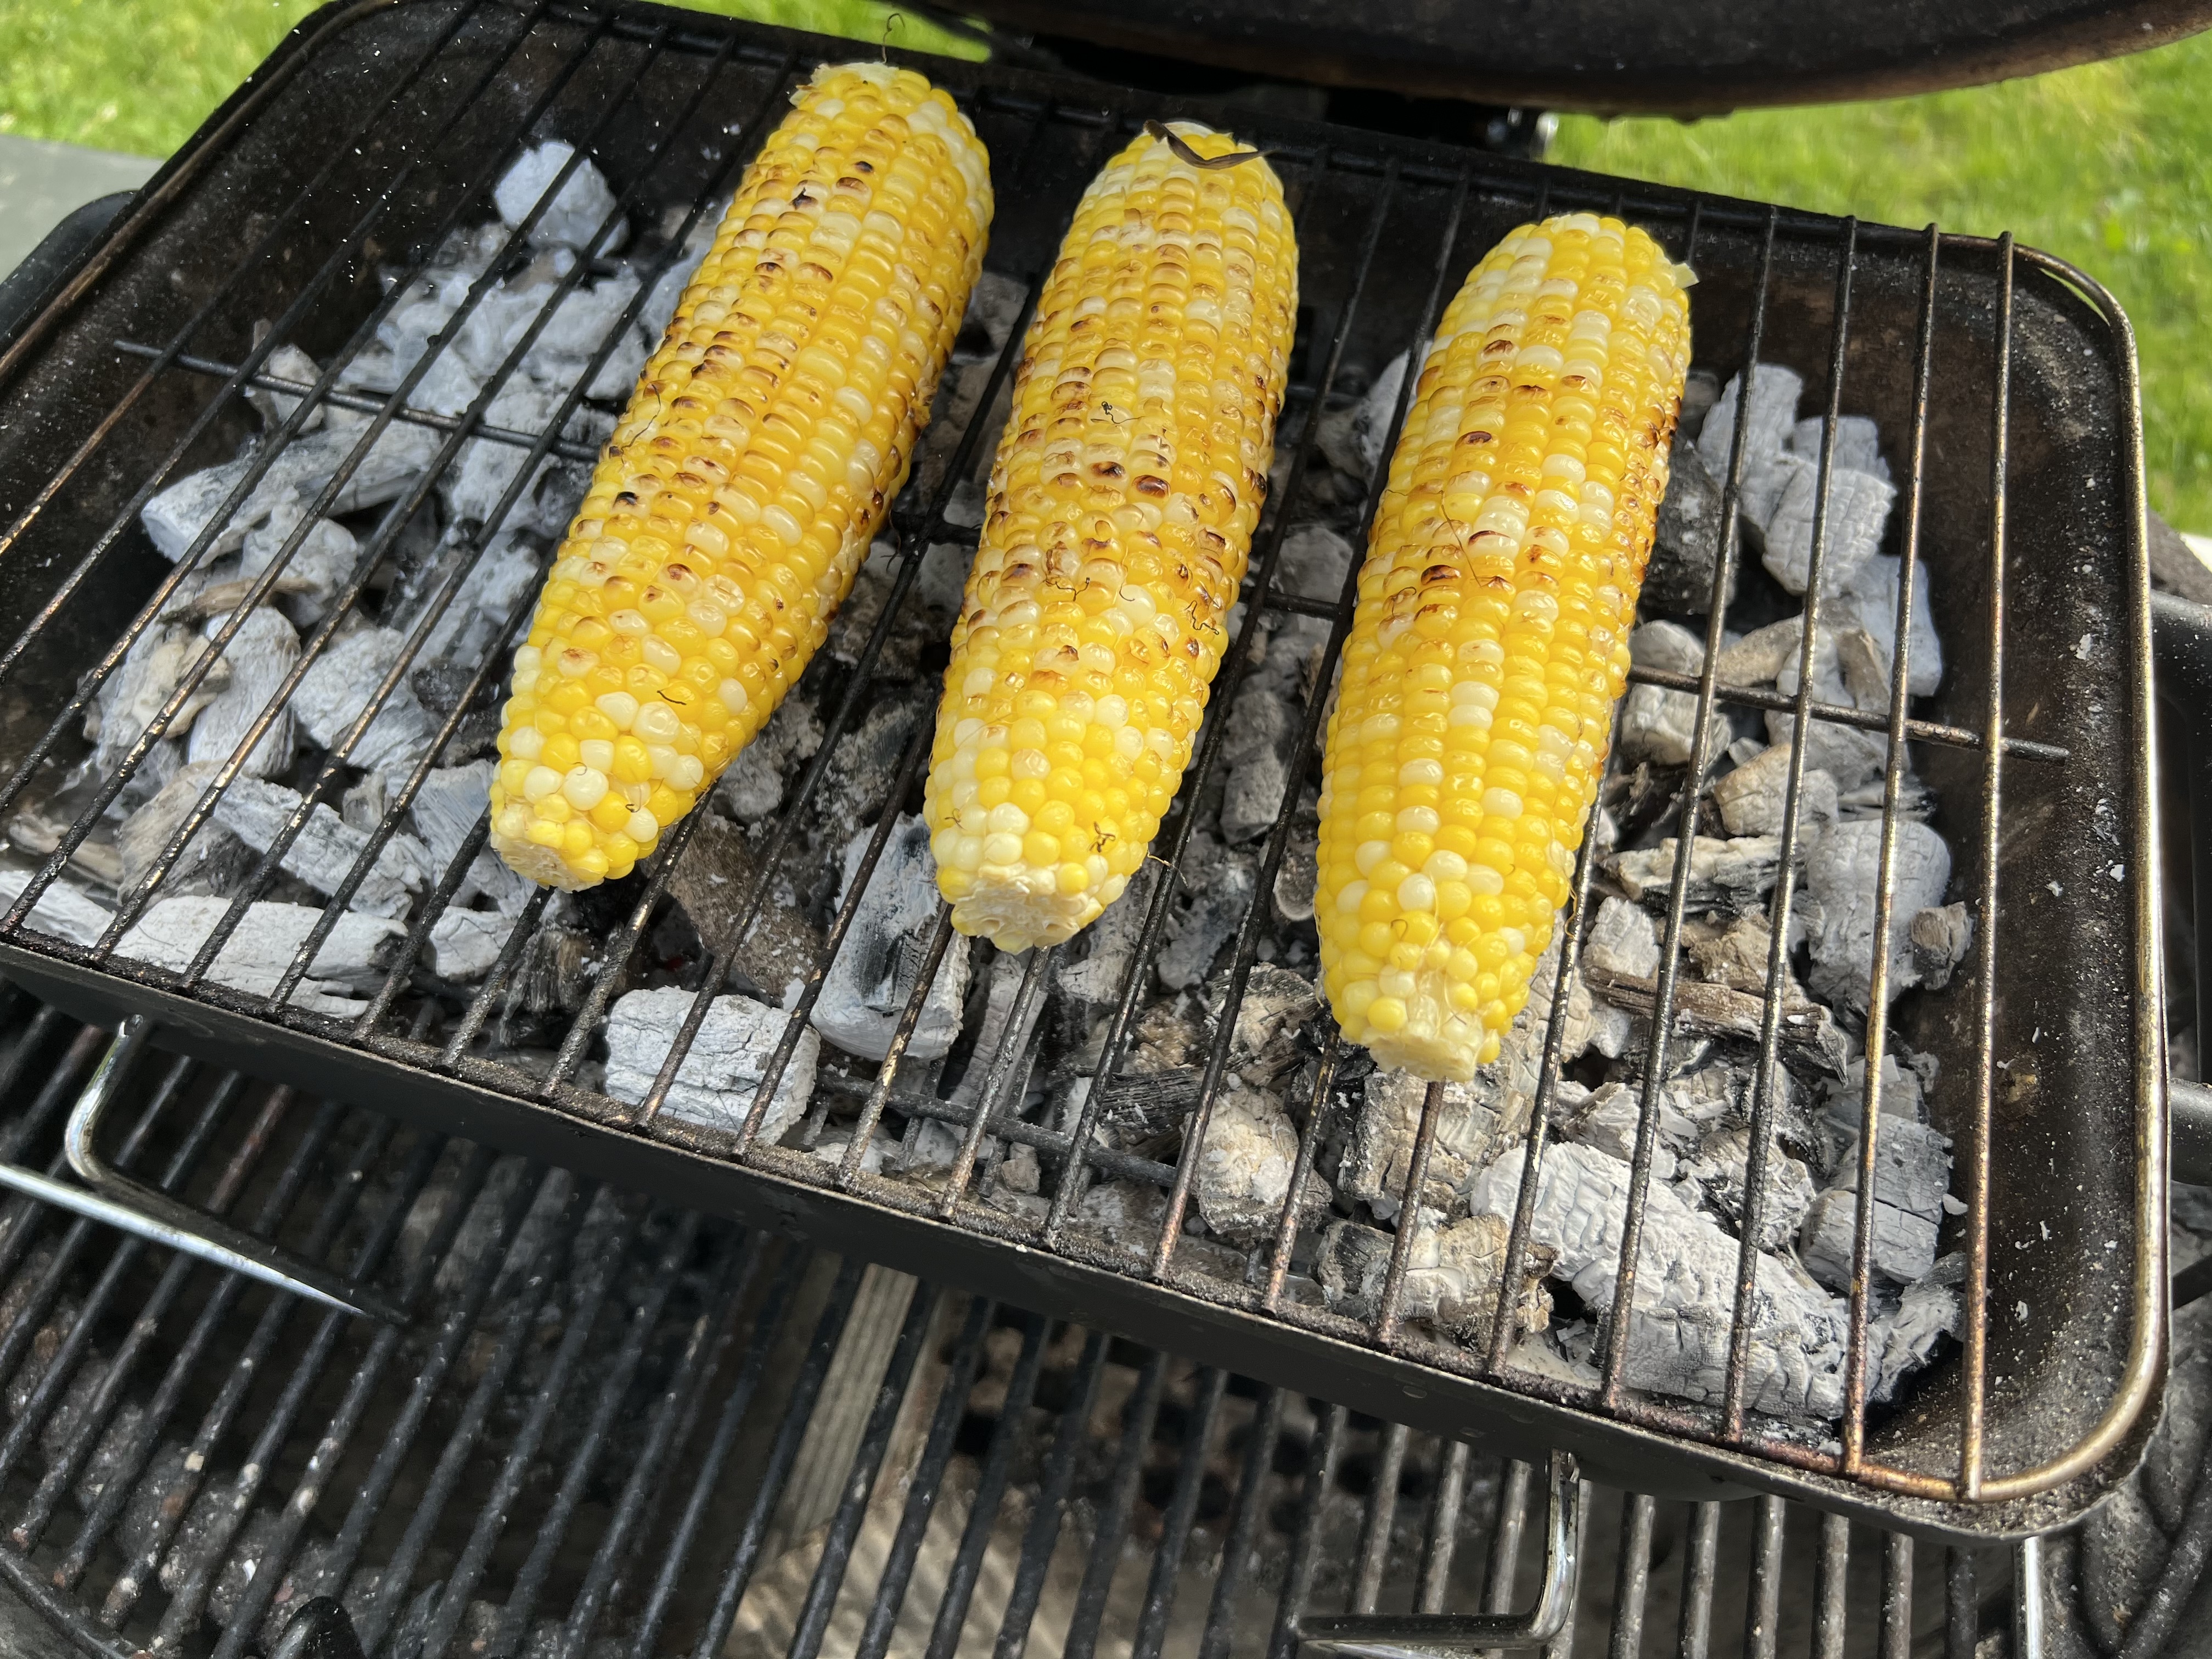
I didn’t mean to cheat…honest. But I wasn’t thinking when I bought my corn in the supermarket, and I bought ears that were already shucked. Classically, Mexican street corn is made by throwing unshucked ears of corn on the grill to cook them. So I improvised.
I took the shucked ears of corn, placed them in a pot of cold water, and brought it to a boil. I boiled the corn for just 2 minutes, removing them from the water at that point.
I placed the ears of corn on the grill, and watched over them carefully, rolling them back and forth so that they would have a nice char on them but wouldn’t burn. When I liked the color of the corn, I brought the ears inside and added the remaining ingredients, which can be prepared ahead of time.
1/2 cup mayonnaise 1/2 cup sour cream juice of 1 lime 1/2 teaspoon granulated garlic
Combine these ingredients in a bowl and place it in the fridge until it’s ready to use.
Once the corn comes off the grill, brush on the mayo/sour cream mixture all over the corn. Traditionally, chili powder is sprinkled on, but I prefer the Tony Chachere’s. Sprinkle the cotija cheese on top, and garnish with a little cilantro.
I published this just about a month ago, but it bears repeating because June 20th is the official start of Sazerac Cocktail Week!
If I asked you to name a cocktail that defines New Orleans, you might say The Hurricane. After all, it’s a tourist favorite at the famous Pat O’Brien’s on Bourbon Street.
But the official cocktail of New Orleans is the Sazerac, a potent concoction that was created early in the 19th century by Antoine Amédée Peychaud, a Creole apothecary who emigrated to New Orleans from the West Indies and set up shop in the French Quarter. He was known to dispense a proprietary mix of aromatic bitters from an old family recipe, now famously known as Peychaud’s bitters.
Sazerac ingredients.
Around 1850, Sewell T. Taylor sold his New Orleans bar, the Merchants Exchange Coffee House, to become an importer of spirits, and he began to import a brand of cognac named Sazerac-de-Forge et Fils. Meanwhile, Aaron Bird assumed proprietorship of the Merchants Exchange and changed its name to Sazerac Coffee House.
Legend has it that Bird began serving the “Sazerac Cocktail,” made with Sazerac cognac imported by Taylor, and allegedly with bitters being made by the local apothecary, Antoine Amedie Peychaud. The Sazerac Coffee House subsequently changed hands several times, until around 1870, when Thomas Handy became its proprietor. It is around this time that the primary ingredient in a Sazerac changed from cognac to rye whiskey, due to the phylloxera epidemic in Europe that devastated the vineyards of France.
At some point before his death in 1889, Handy recorded the recipe for the cocktail, which made its first printed appearance in William T. Boothby’s “The World’s Drinks and How to Mix Them” in 1908, although his recipe calls for Selner bitters, not Peychaud’s. After absinthe was banned in the United States in 1912, it was replaced by various anise-flavored liqueurs, most notably the locally produced Herbsaint, which first appeared in 1934.
In March 2008, Louisiana state senator Edwin R. Murray filed Senate Bill 6 designating the Sazerac as Louisiana’s official state cocktail. The bill was defeated on April 8, 2008. But, after further debate, on June 23, 2008, the Louisiana Legislature agreed to proclaim the Sazerac as New Orleans’ official cocktail.
The Sazerac, served at the Sazerac Bar in New Orleans.It’s always more fun when someone makes your drink for you!
Peychaud’s bitters are now owned by the Buffalo Trace distillery, home of many a fine bourbon, and also the makers of Sazerac rye, a registered trademark. So the Sazerac Bar has to pay a fee to use the name. That also explains why they use Sazerac rye in their version of this classic cocktail.
But like many popular drinks, everybody has their own version of a Sazerac. In fact, if you Google the drink, you’ll find dozens of versions: with cognac, rye, or bourbon (or even a combination)…with a sugar cube or simple syrup…and with a variety of absinthes.
Note: you can buy simple syrup–I prefer it in this recipe over sugar cubes–but it’s easy to make at home. Simply combine a cup of sugar with a cup of water in a saucepan and heat it until all the sugar dissolves. I keep my simple syrup in the fridge in a sealed container.
2 oz. rye whiskey (I use Old Overholt ) 1/2 oz. simple syrup 3 dashes Peychaud’s bitters Absinthe, to rinse, about 1/4 oz. (I use Herbsaint) garnish lemon peel
Add ice to a rocks glass to chill it. (I also put it in the freezer.)
While it’s chilling, get a cocktail mixing glass, add some ice, and combine the rye, simple syrup, and the bitters, and stir. (Thirty times, according to tradition.)
Take the rocks glass out of the freezer, pour the ice out, and pour the Herbsaint into the glass, swirling it around to coat the glass, then pouring out the excess.
Strain the mix of rye, simple syrup, and bitters into the rocks glass with the Herbsaint.
Run a lemon peel around the rim of the glass and garnish with it.
For me, rye, specifically Old Overholt, is the down-and-dirty way to go. After all, this is not a kiddy drink. A few sips, and you’re feeling no pain.
A Sazerac at the Napoleon House in New Orleans.
Though sipping a Sazerac in New Orleans is an amazing experience in itself, and I’ve had it at the SazeracBar as well as the Napoleon House and other bars in NOLA…perhaps my craziest Sazerac experience happened at the famous White Horse Tavern in New York City, the Big Apple’s second oldest continuously running bar. (It opened in 1880.) I think this is where I was told to use Old Overholt in my Sazerac, and have ever since.
Dylan Thomas was a regular there, and other celebrities, like Norman Mailer, Jim Morrison, Bob Dylan, and Hunter S. Thompson also had drinks there. So it’s probably not surprising that my buddy, Lee, and I overindulged on Sazeracs at this historic tavern.
It was a very cold winter’s night in the late 1980’s–a blizzard, in fact–and we decided to go out drinking in the city, because I was back home in New York on holiday vacation from Alabama, where I was working at the time. We had more than our share of Sazeracs, when we decided we would walk to a new eatery called the Gulf Coast, located on the west side. (All we knew was that the restaurant was about 10 blocks from where we were, but after 4 Sazeracs, “where we were” was questionable, to say the least.)
Now, this was before the internet–before cell phones–before Uber–and no cabs were running (because it was a blizzard, after all)–so we decided we would walk! Not the smartest thing we’ve ever done. It only took a few blocks for us to realize, even in our drunken stupor, that we made a very bad choice! We were certain that we would be found, huddled and frozen in an alley somewhere, only after the spring thaw.
The storm was so bad, we couldn’t even find our way back to the bar. Miraculously, somehow, we did make it to the Gulf Coast, and we lived to tell the tale.
As Homer Simpson once said: “To alcohol…the cause of, and cure for, all of life’s problems!”
Sazeracs. Try your first one at home. Or take an Uber!
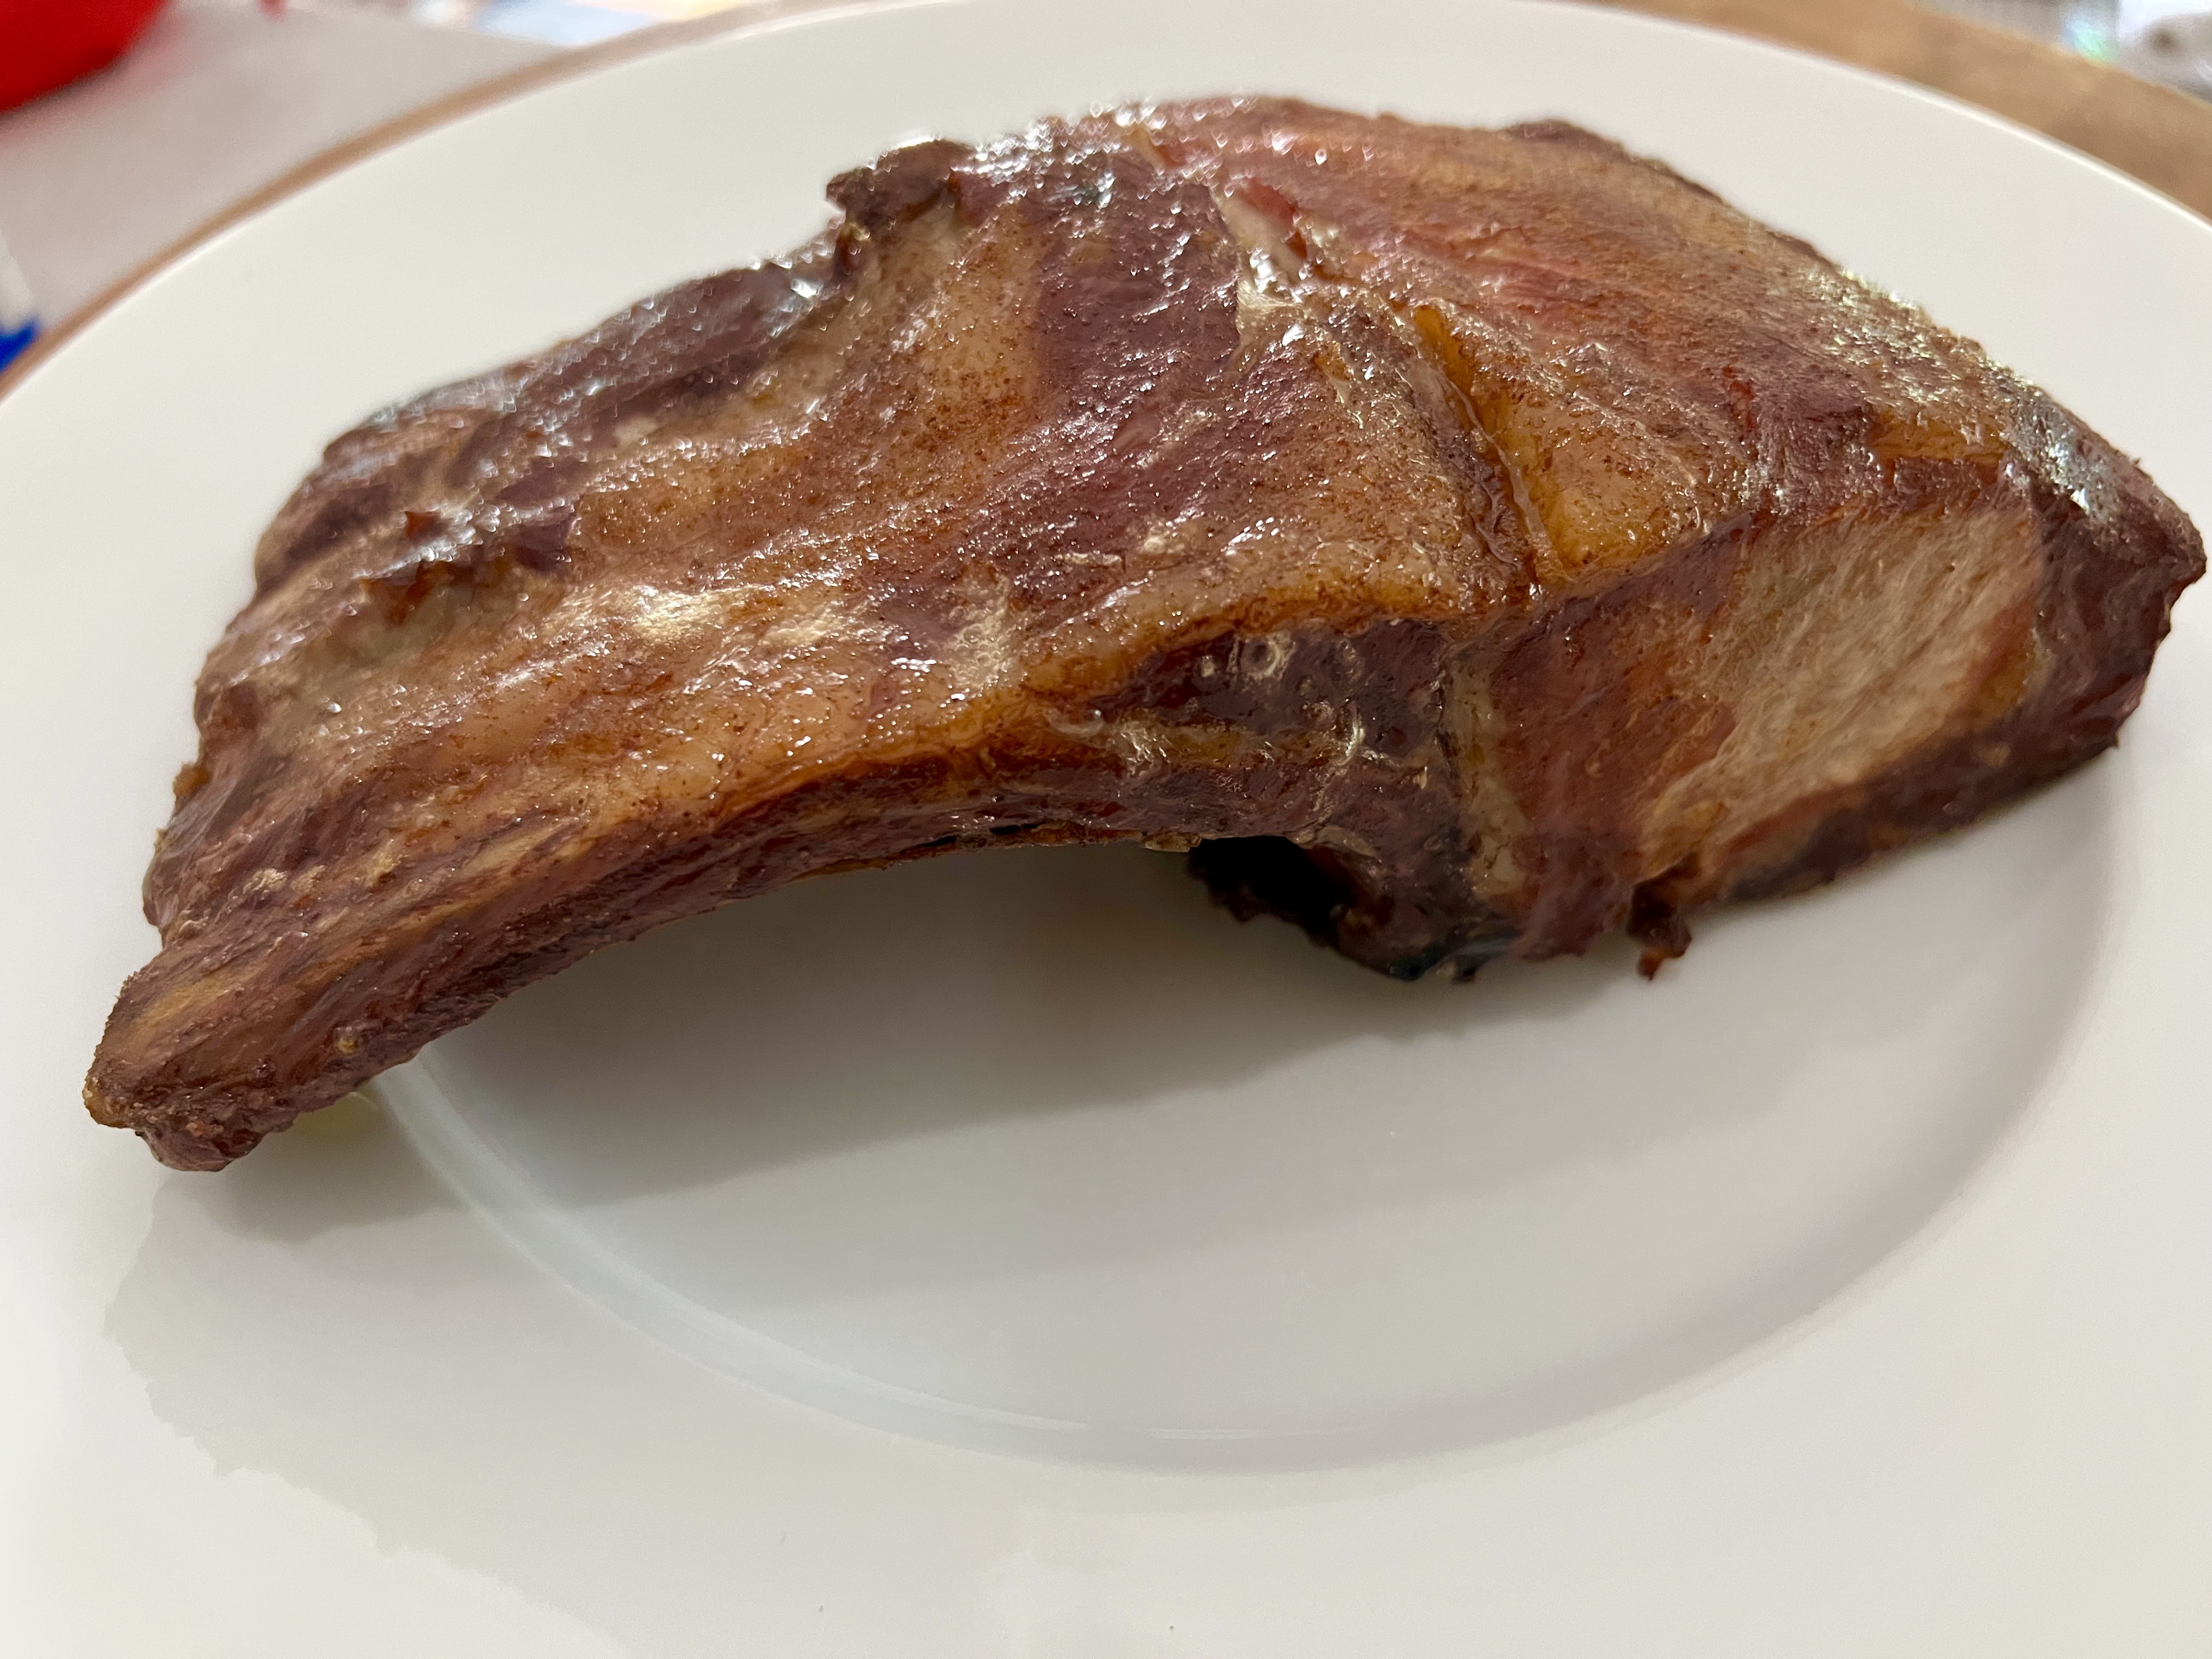
I recently purchased several different cuts of the famous Spanish Iberico pork from Campo Grande. One of the cuts was a four-rib slab. I chose to give it some smoke and a slathering of sauce.
The sauce requires a bit of heating, then needs to cool down to room temp, so make it while the pork is in the smoker.
I use the not-so-fancy balsamic for this dish…the stuff you get in the supermarket for about $9 a bottle. There’s no need to use the really good stuff for this.
I have a Masterbuilt electric smoker, which is really convenient for small cuts of meat like this that could otherwise burn to a crisp in a charcoal grill or woodfired smoker.
I set the digital smoker to 275°, because experience has told me that the hickory wood chips that I use will smoke really nicely at this temperature.
Porkaliciousness.
I removed the ribs from the packaging, and sprinkled them all over with Lawry’s seasoned salt, allowing the ribs to sit for an hour before going in the smoker.
Rubbed and ready.
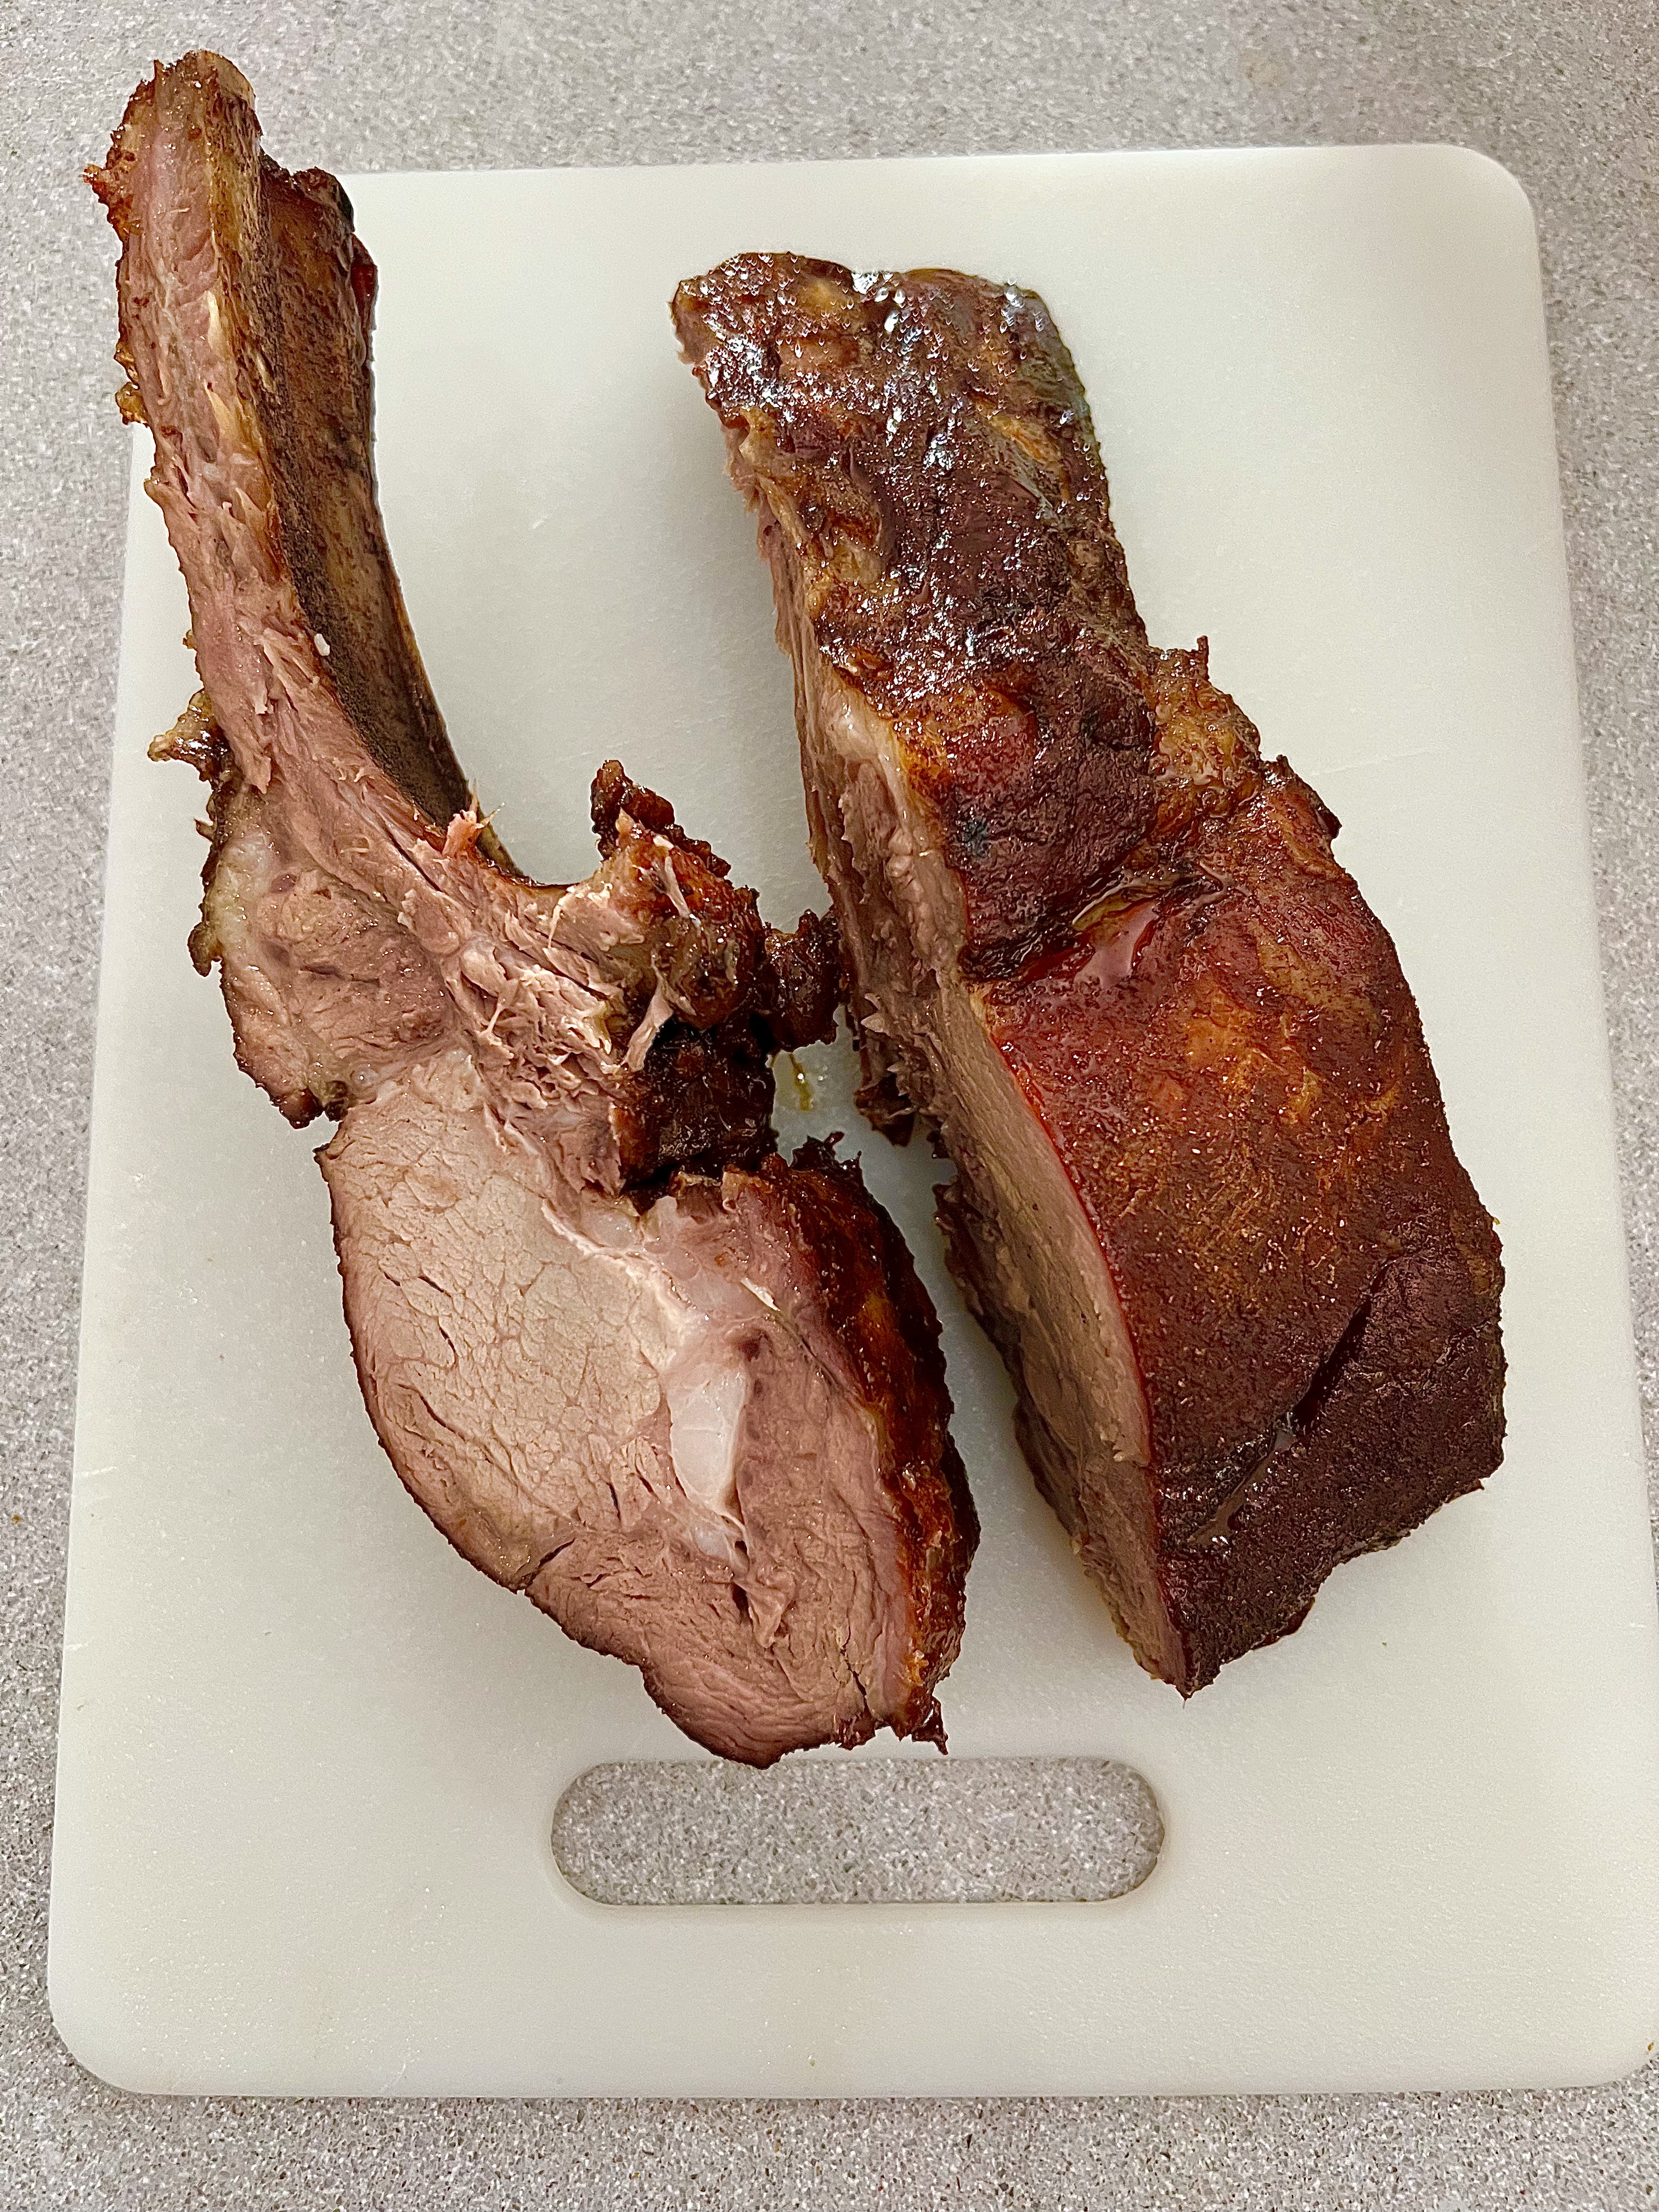
Using the chips, I smoked the ribs for about two hours. The end result gave the pork a beautiful caramel hue.
After 2 hours of smoking with hickory chips.
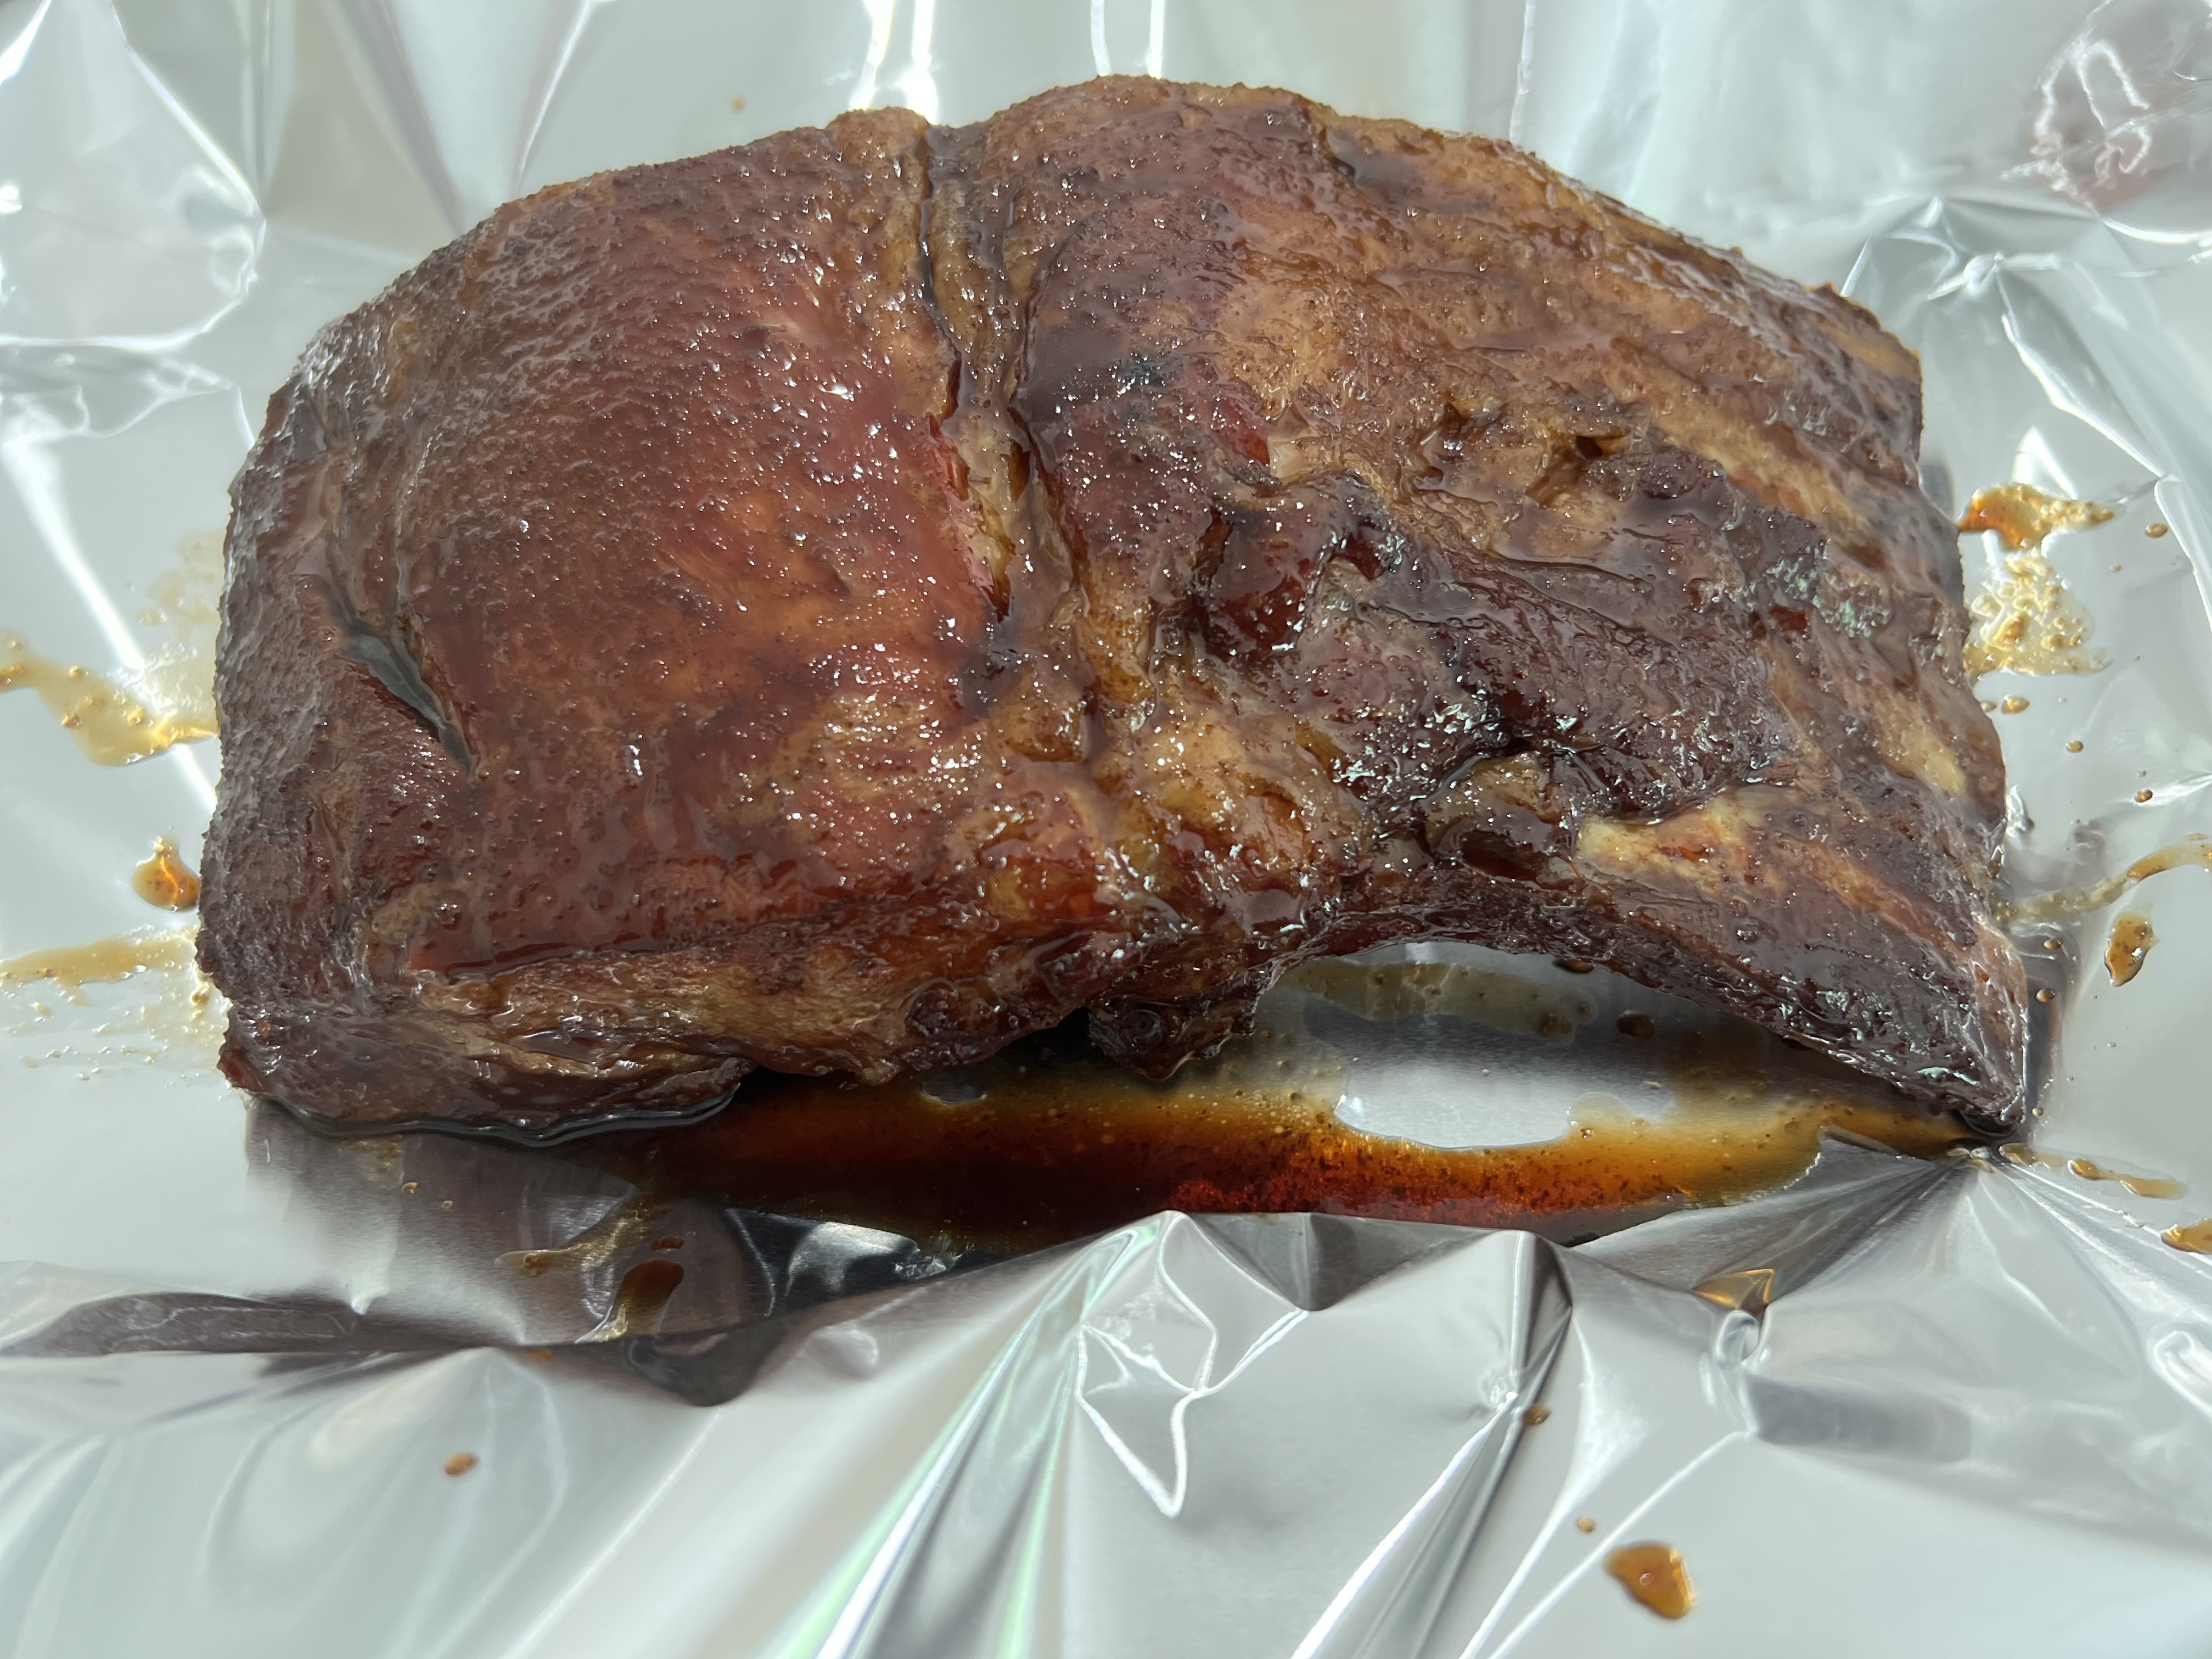
I removed the ribs from the smoker and placed them on a tray covered in foil. I brushed my sauce/glaze all over the ribs and then wrapped the foil tightly around them, placing them in my kitchen oven and cooking for another hour at 250°.
Glazed and ready to be wrapped in foil.
The sauce/glaze couldn’t be easier…
1/2 cup balsamic vinegar 1/2 cup maple syrup 1 teaspoon cayenne pepper sauce (I like Frank’s Red Hot) 1/2 teaspoon granulated garlic 1/2 teaspoon granulated onion
Combine everything in a saucepan and bring it to a boil, then lower it to a simmer. Cook until it has slightly thickened. Remove it from the heat and let it cool to room temperature before using. It will thicken a bit more off the heat.
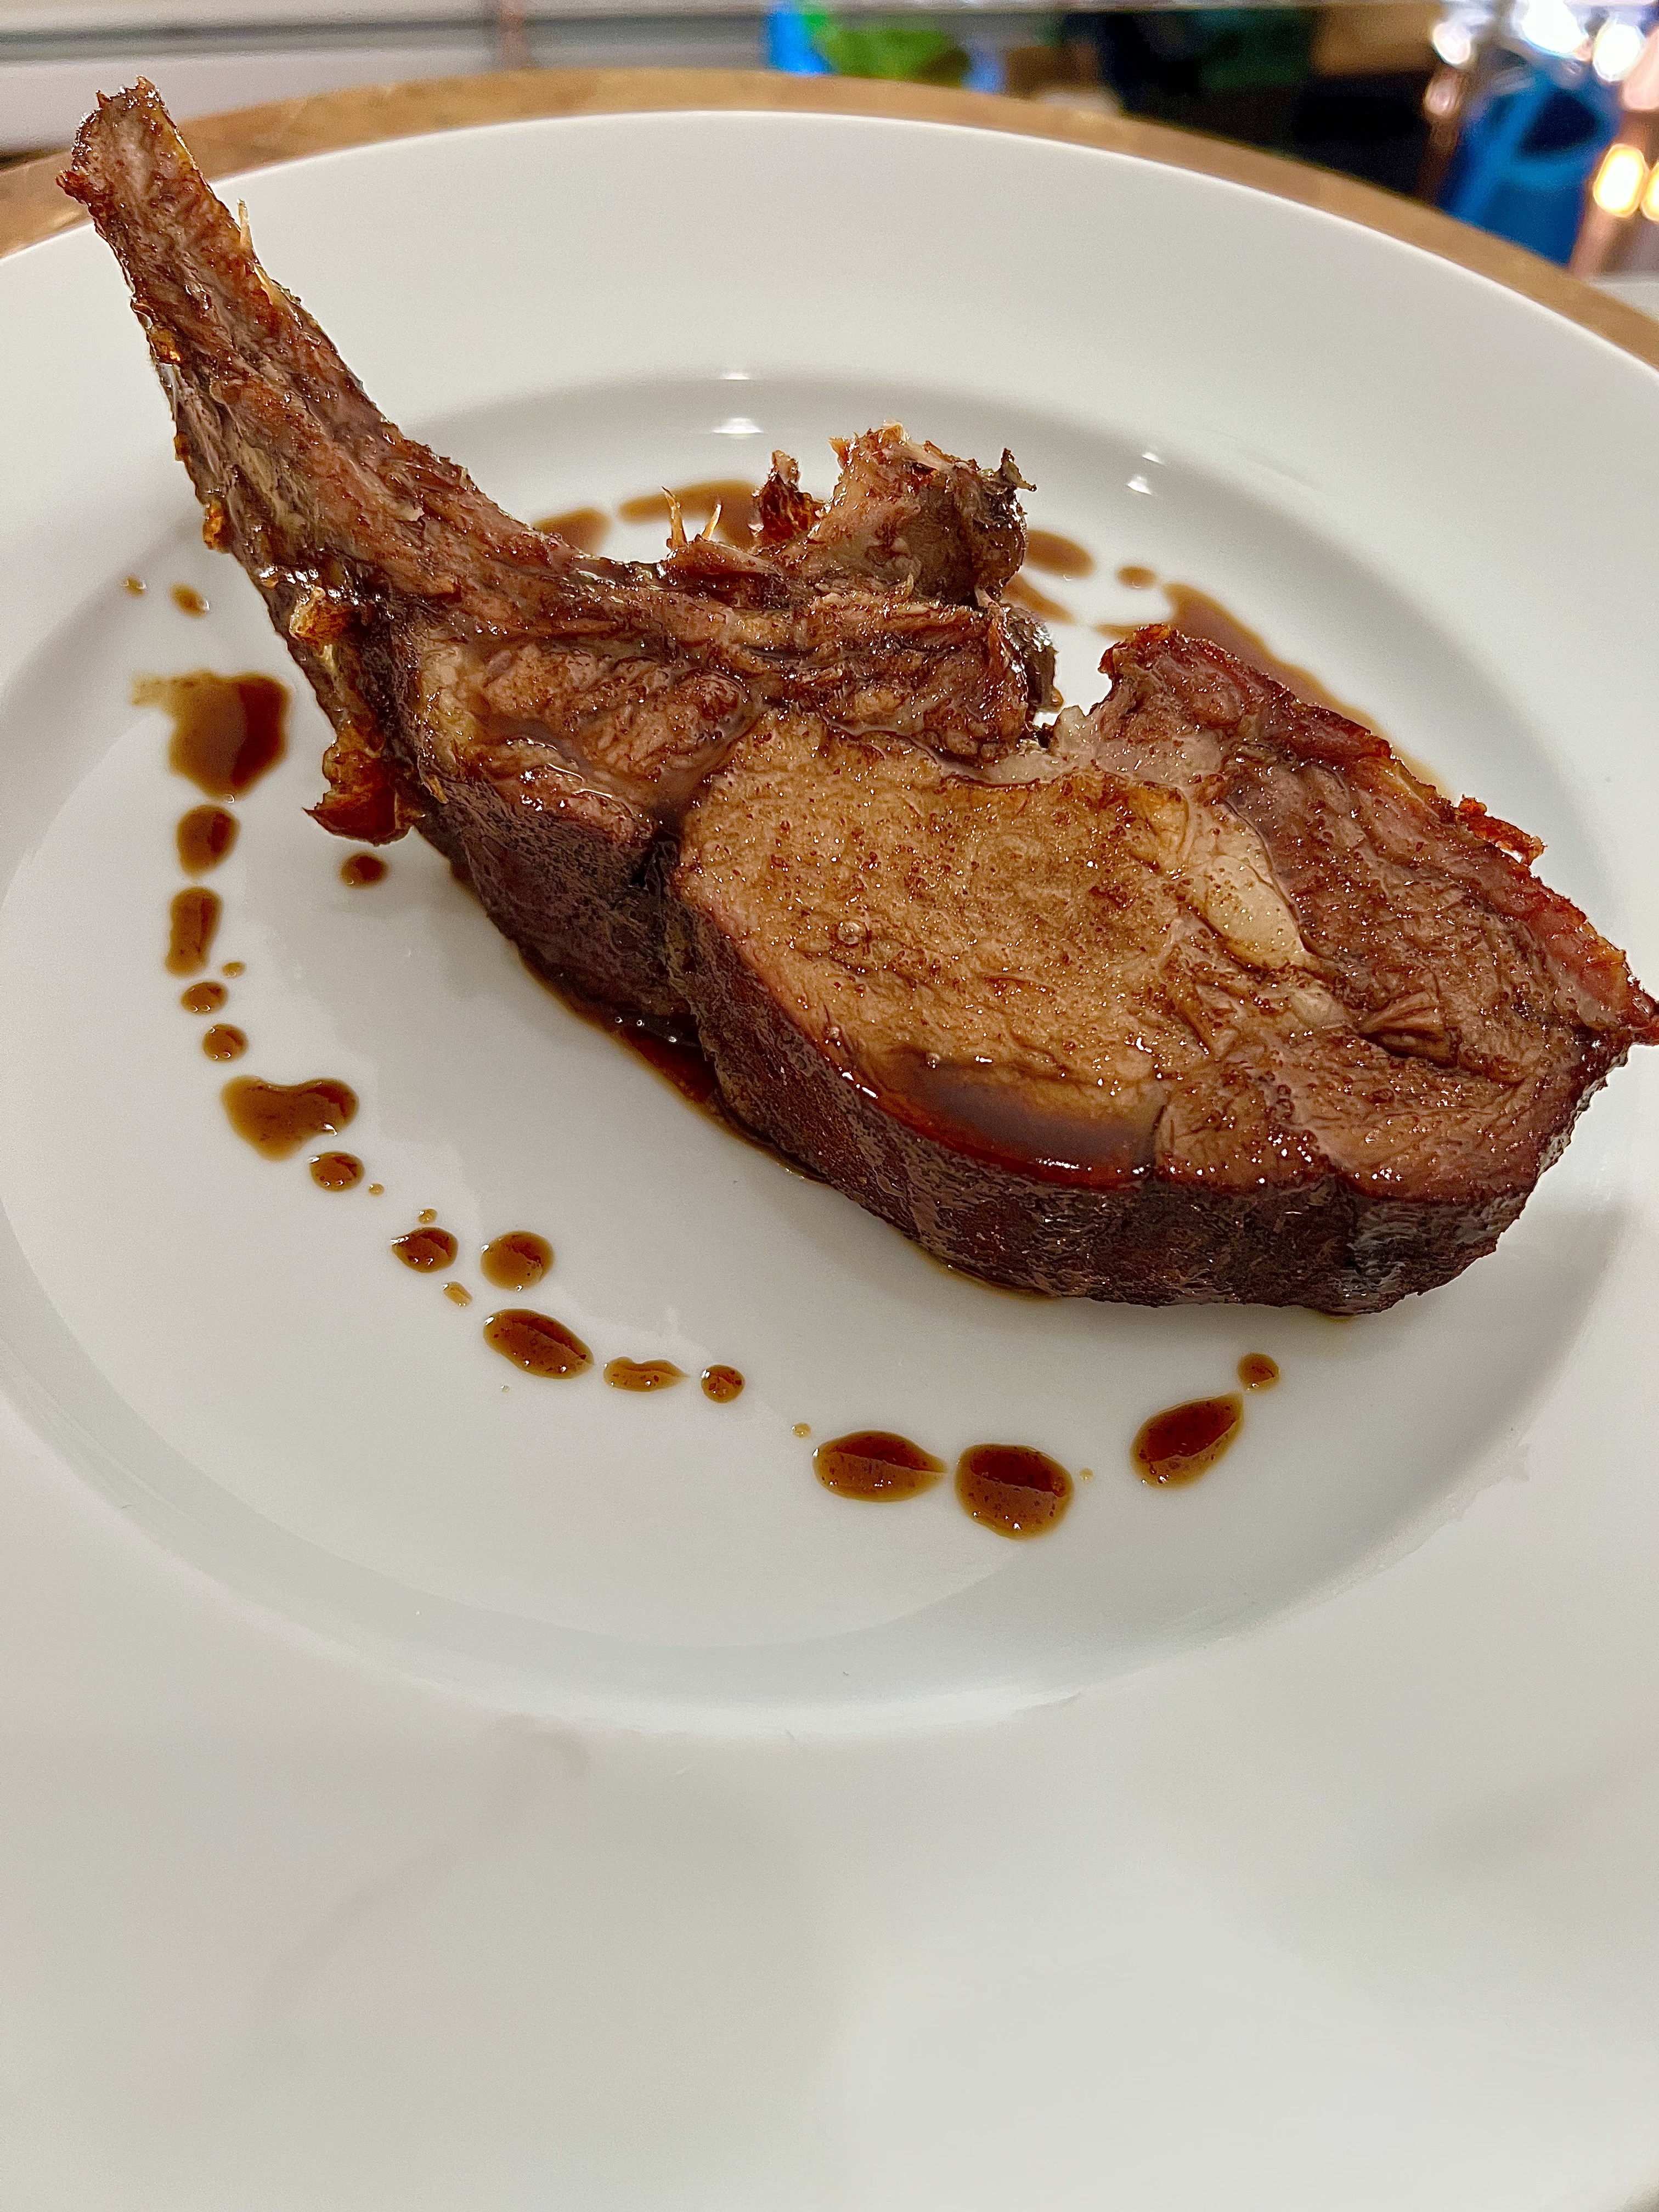
Beautifully cooked. It just needs another brush with the glaze…Fantastic!
I’m reminded of that old saying: “When life gives you kohlrabi that doesn’t form a ball, do something else with it.”
OK, it’s not an old saying. I just made it up. And it doesn’t exactly flow off your tongue. But it turned out to be a good move anyway.
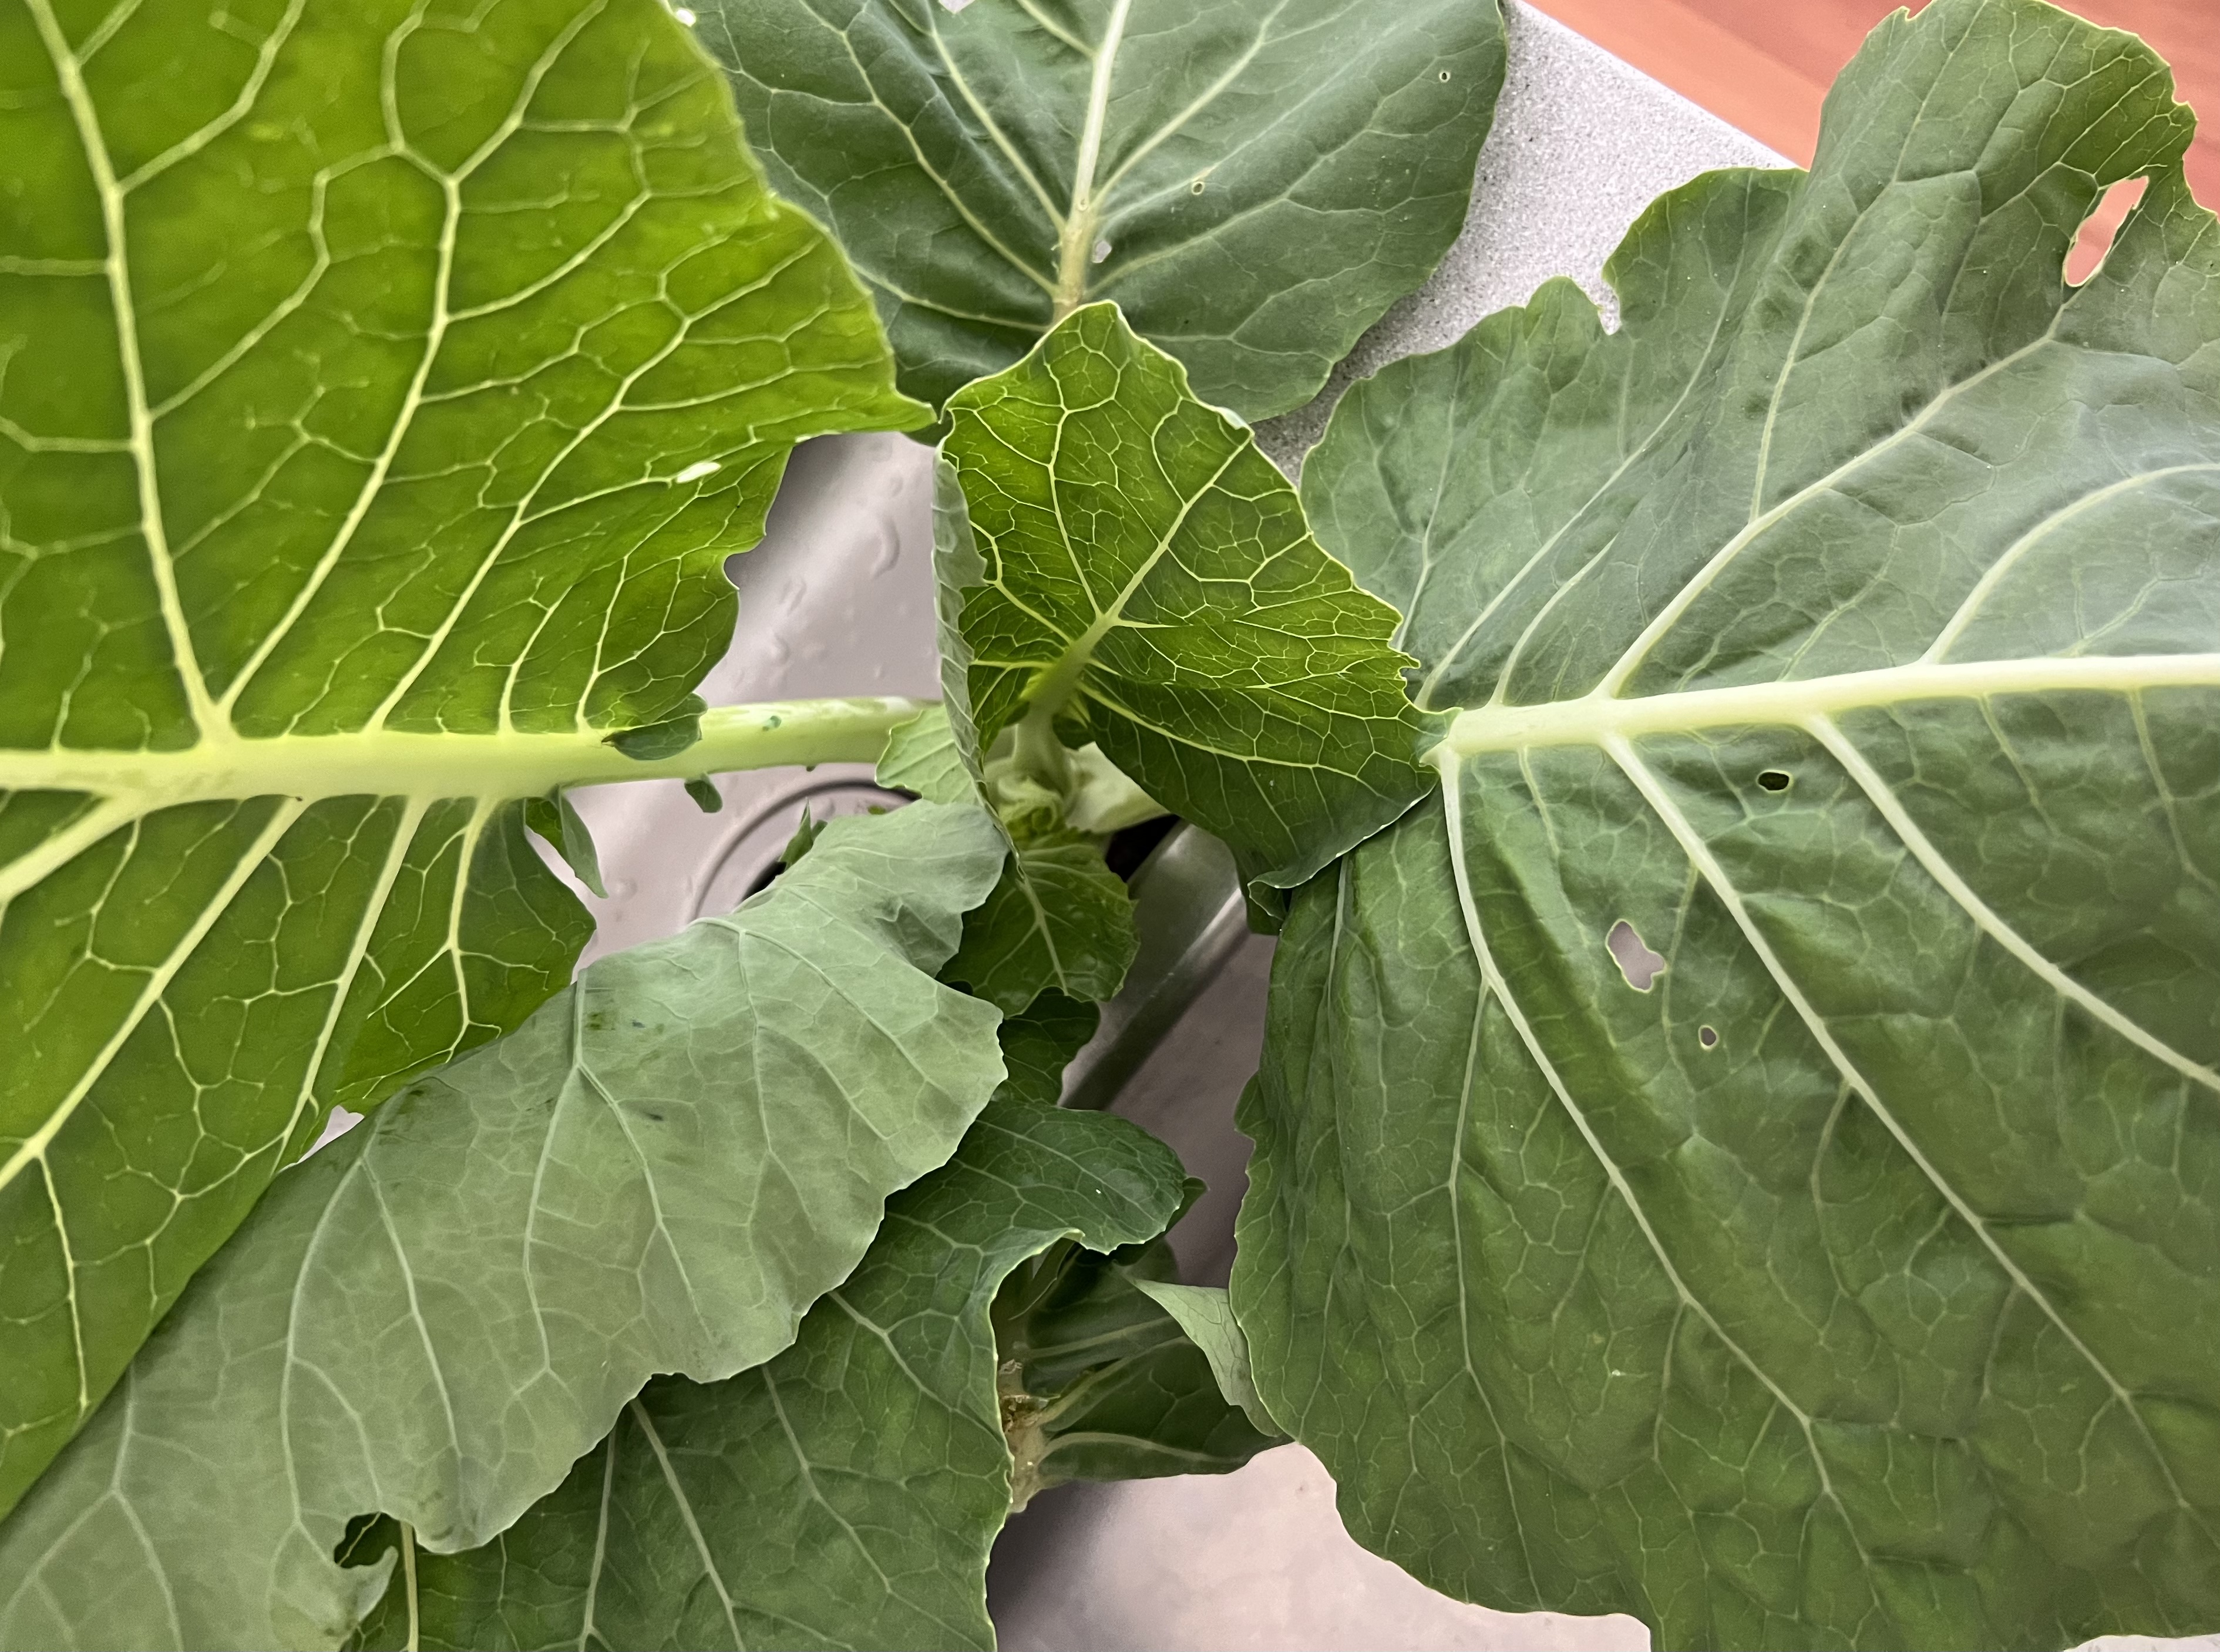
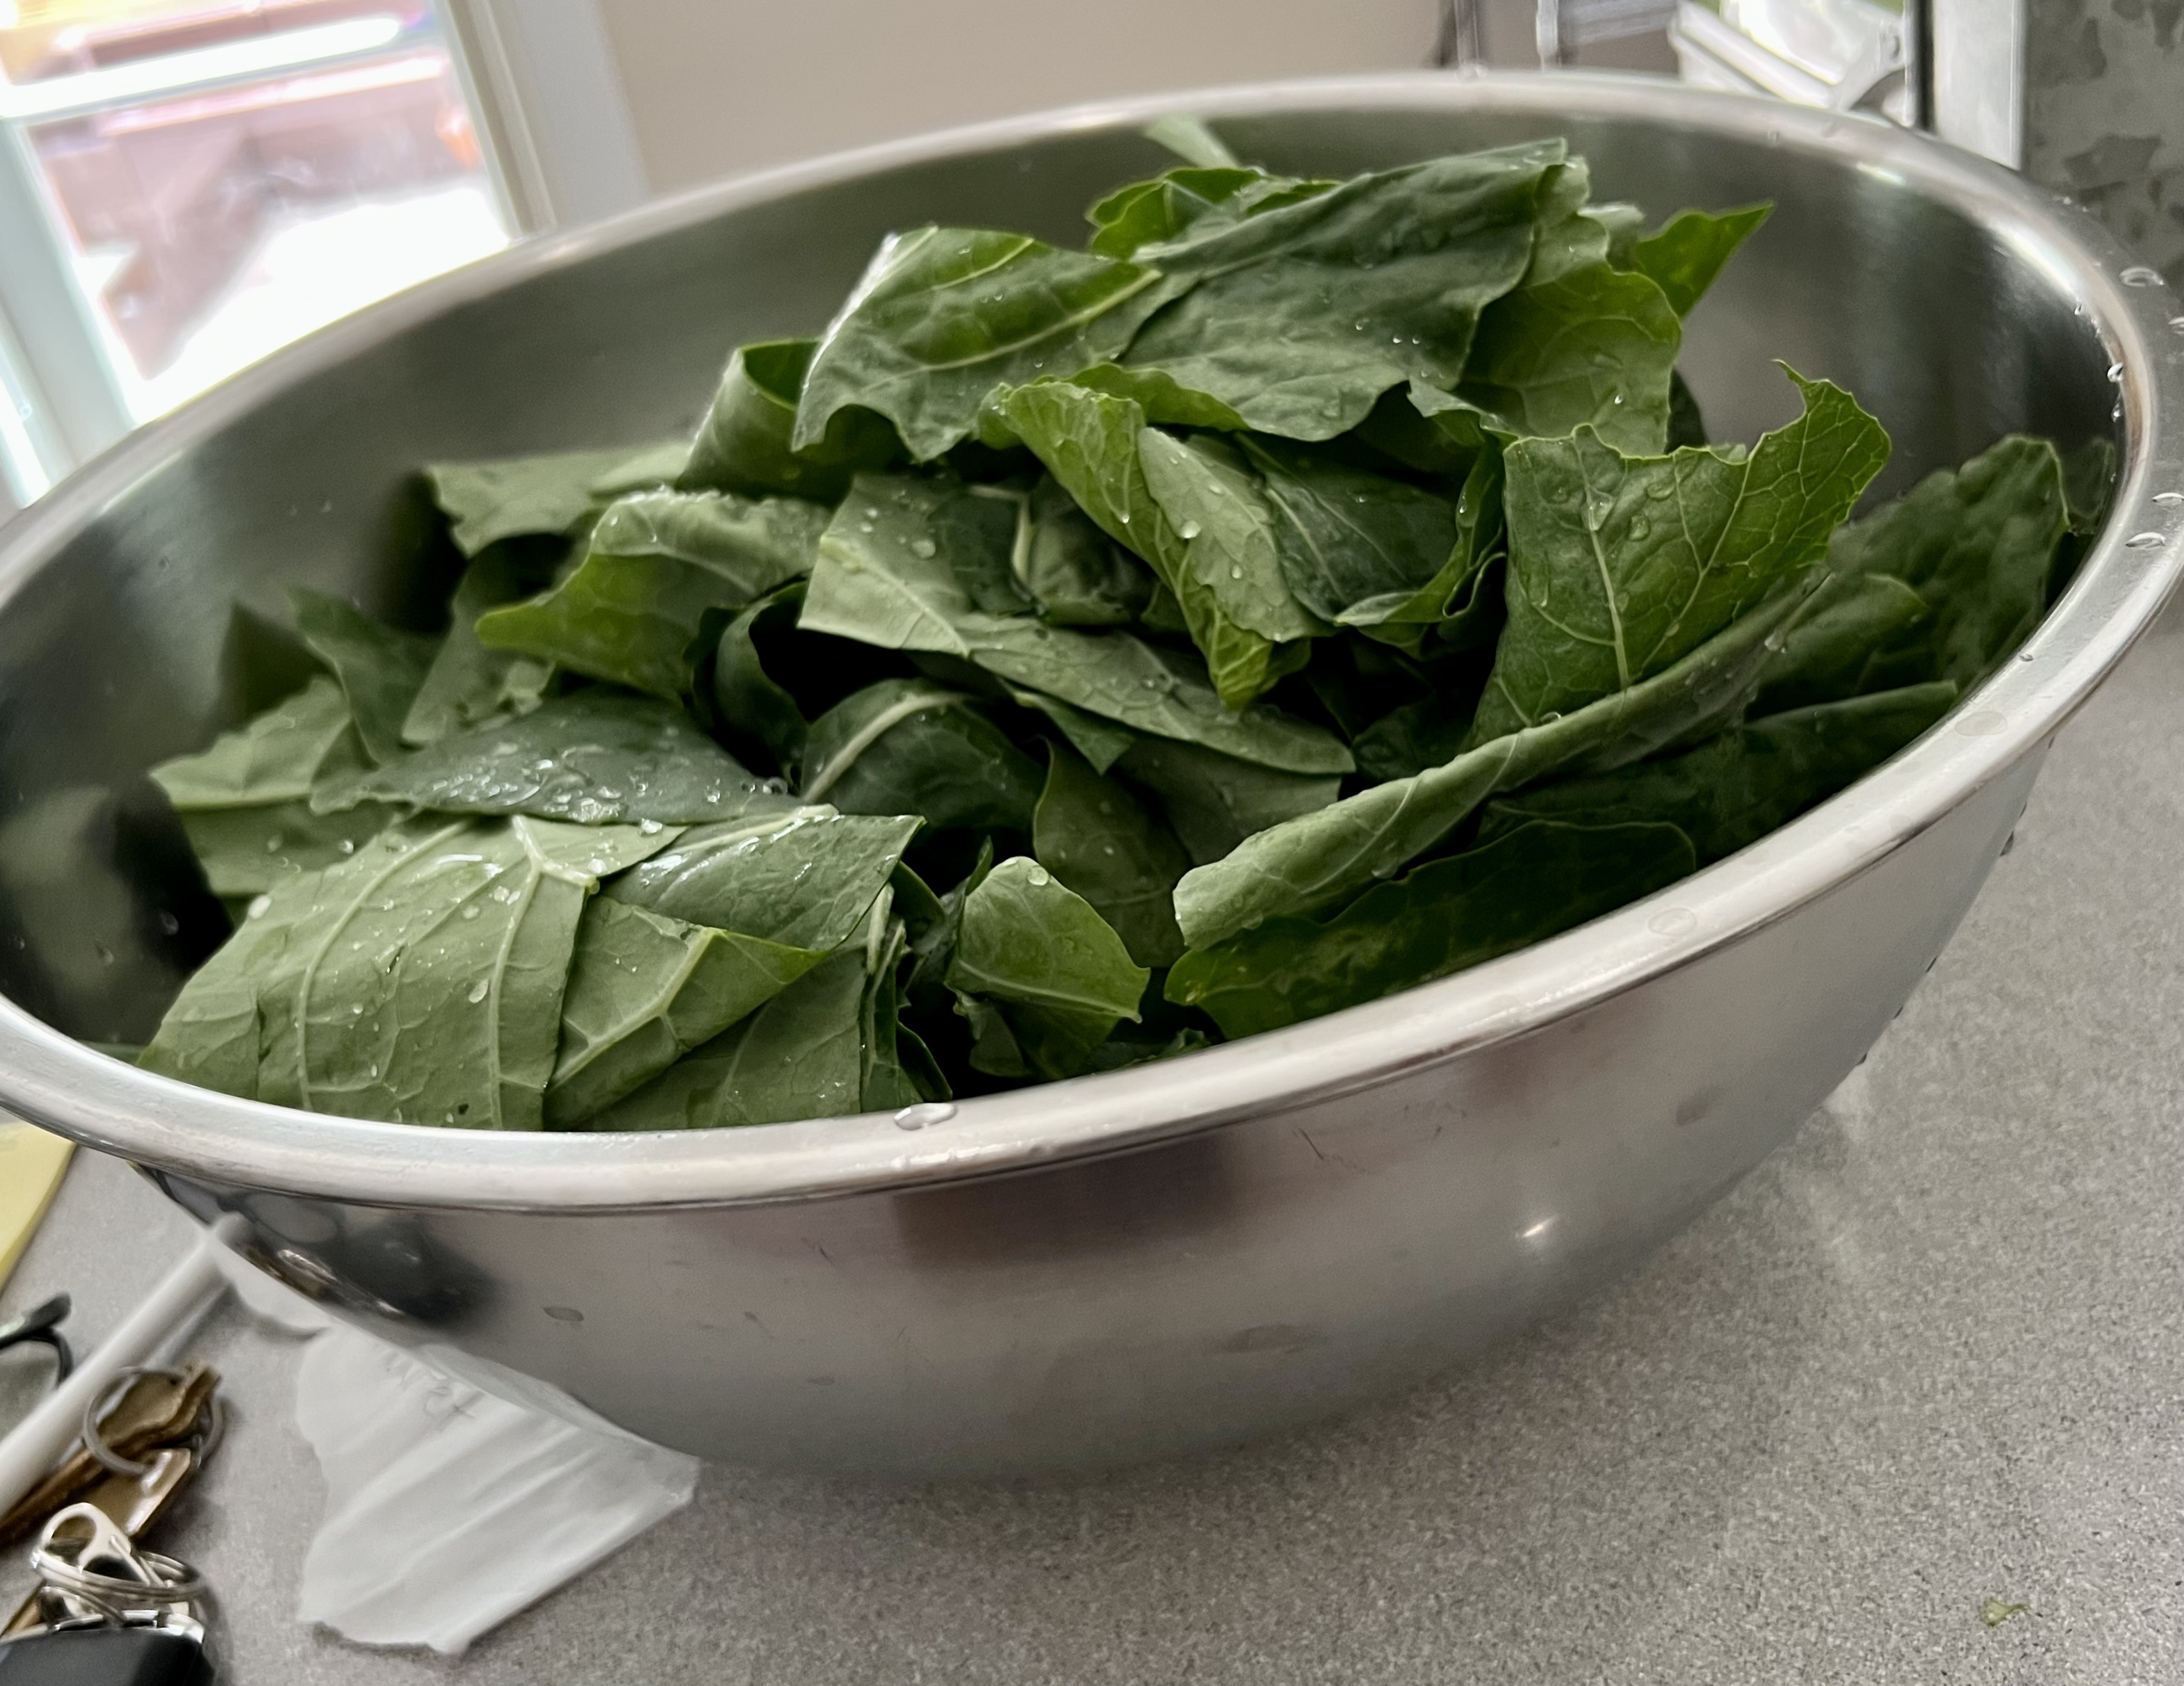
Big, beautiful kohlrabi leaves!
I’ve grown kohlrabi in my garden many times, but this was the first time where the plants did not form that ball at the bottom of the leaves. Checking my gardening books, it seems that extreme temperatures, meaning too hot or too cold in the spring, could cause this. Also, it’s possible the plants were growing too close together, which makes them concentrate their efforts on their leaves, and not the ball.
The way kohlrabi is supposed to grow in my garden!
In any case, it reminded me that we very often don’t utilize the entire plant when we harvest, and there’s nothing in the books that says you can’t eat the leaves of a kohlrabi plant.
If you pick the leaves when the plants are young, they’re tender enough to use in salads. In fact I’ve posted a blog about a “kohl-slaw” recipe that I made with tender young kohlrabi leaves.
But these plants were mature, with very large, happy leaves. So the answer was to cook them. I decided to treat them as if they were collard greens.
The first that was to harvest, de-stem, wash and trim all the leaves. There was a lot of them! I ended up with a very large bowl full of big, beautiful greens.
I had several chicken carcasses in the freezer from previous roasts, so I threw them in a large pot of water with with onions, carrots, and celery, to make homemade chicken stock.
Normally when cooking collard greens, you throw in a chunk of salted pork of some kind. But I didn’t have anything like that. I did, however, have a nice slab of beef brisket in my freezer from a previous smoking and grilling session. So I tossed that into the pot.
After a couple of hours, I removed the brisket from the pot and placed it in a container and put it in the fridge. I would use it later.
I strained the stock, discarding all the veggies and bones, and placed the stock in the fridge as well, for it to cool overnight.
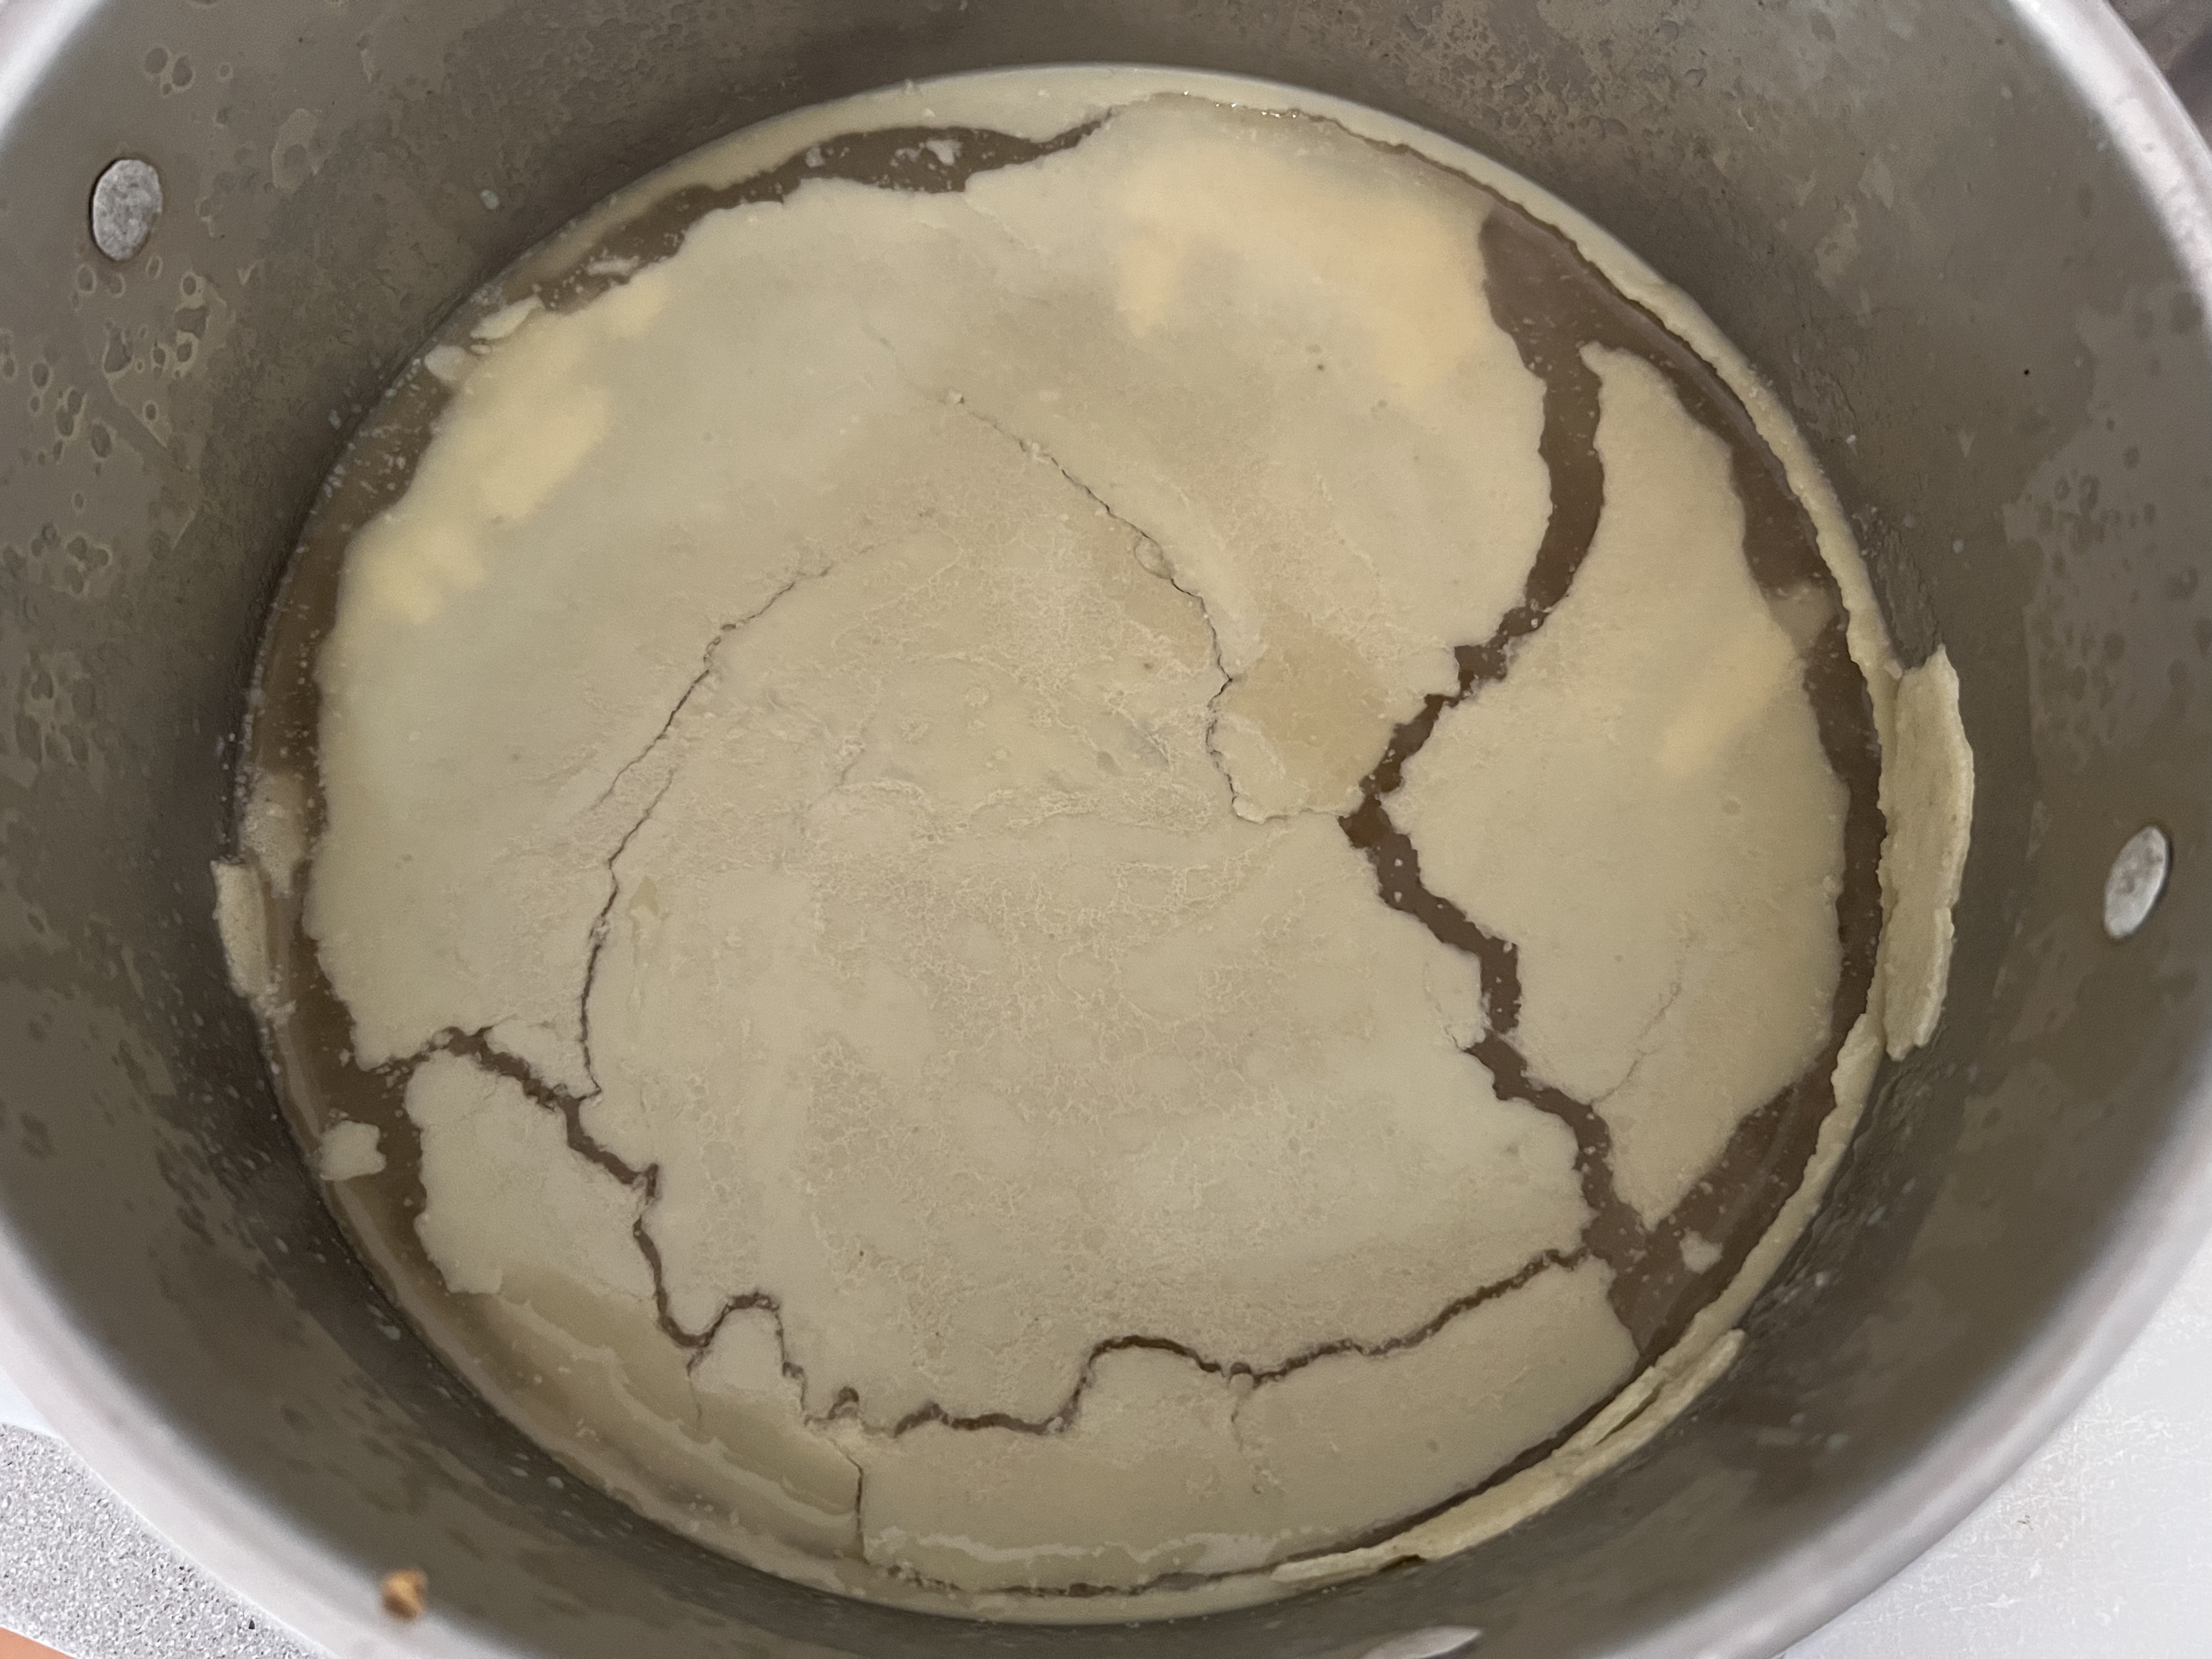
Once the stock has cooled, it’s easy to remove the fat.
The next day, I could easily scrape away most of the fat that was in the stock. Once I did that, I put the pot back on the stove and brought it to a boil. Meanwhile, I removed the brisket from the fridge and I chopped it up into small pieces, discarding the real fatty pieces that already served their purpose in flavoring the stock earlier.
I added the lean brisket to the pot and then I added my massive bag of cleaned and de-stemmed kohlrabi leaves.
It’s amazing how quickly that massive amount of leaves melts down into almost nothing!
I seasoned the stock with salt and pepper, reduced it to a simmer, placing a lid on the pot, and let it cook for about an hour.
After an hour, the “kohllards” were done! Really simple, but incredibly flavorful, and a great way to use what I thought originally was a failed crop.
Lamb seems to be one of those meats that people either love or hate. Growing up in a home where my Mom served it pretty often, and did a pretty good job of cooking it, I happen to love it, and actually crave it now and again.
I buy much of my meats from Cooks Venture, a company that humanely raises a special breed of chickens, and also sources high quality meats from all over the world.
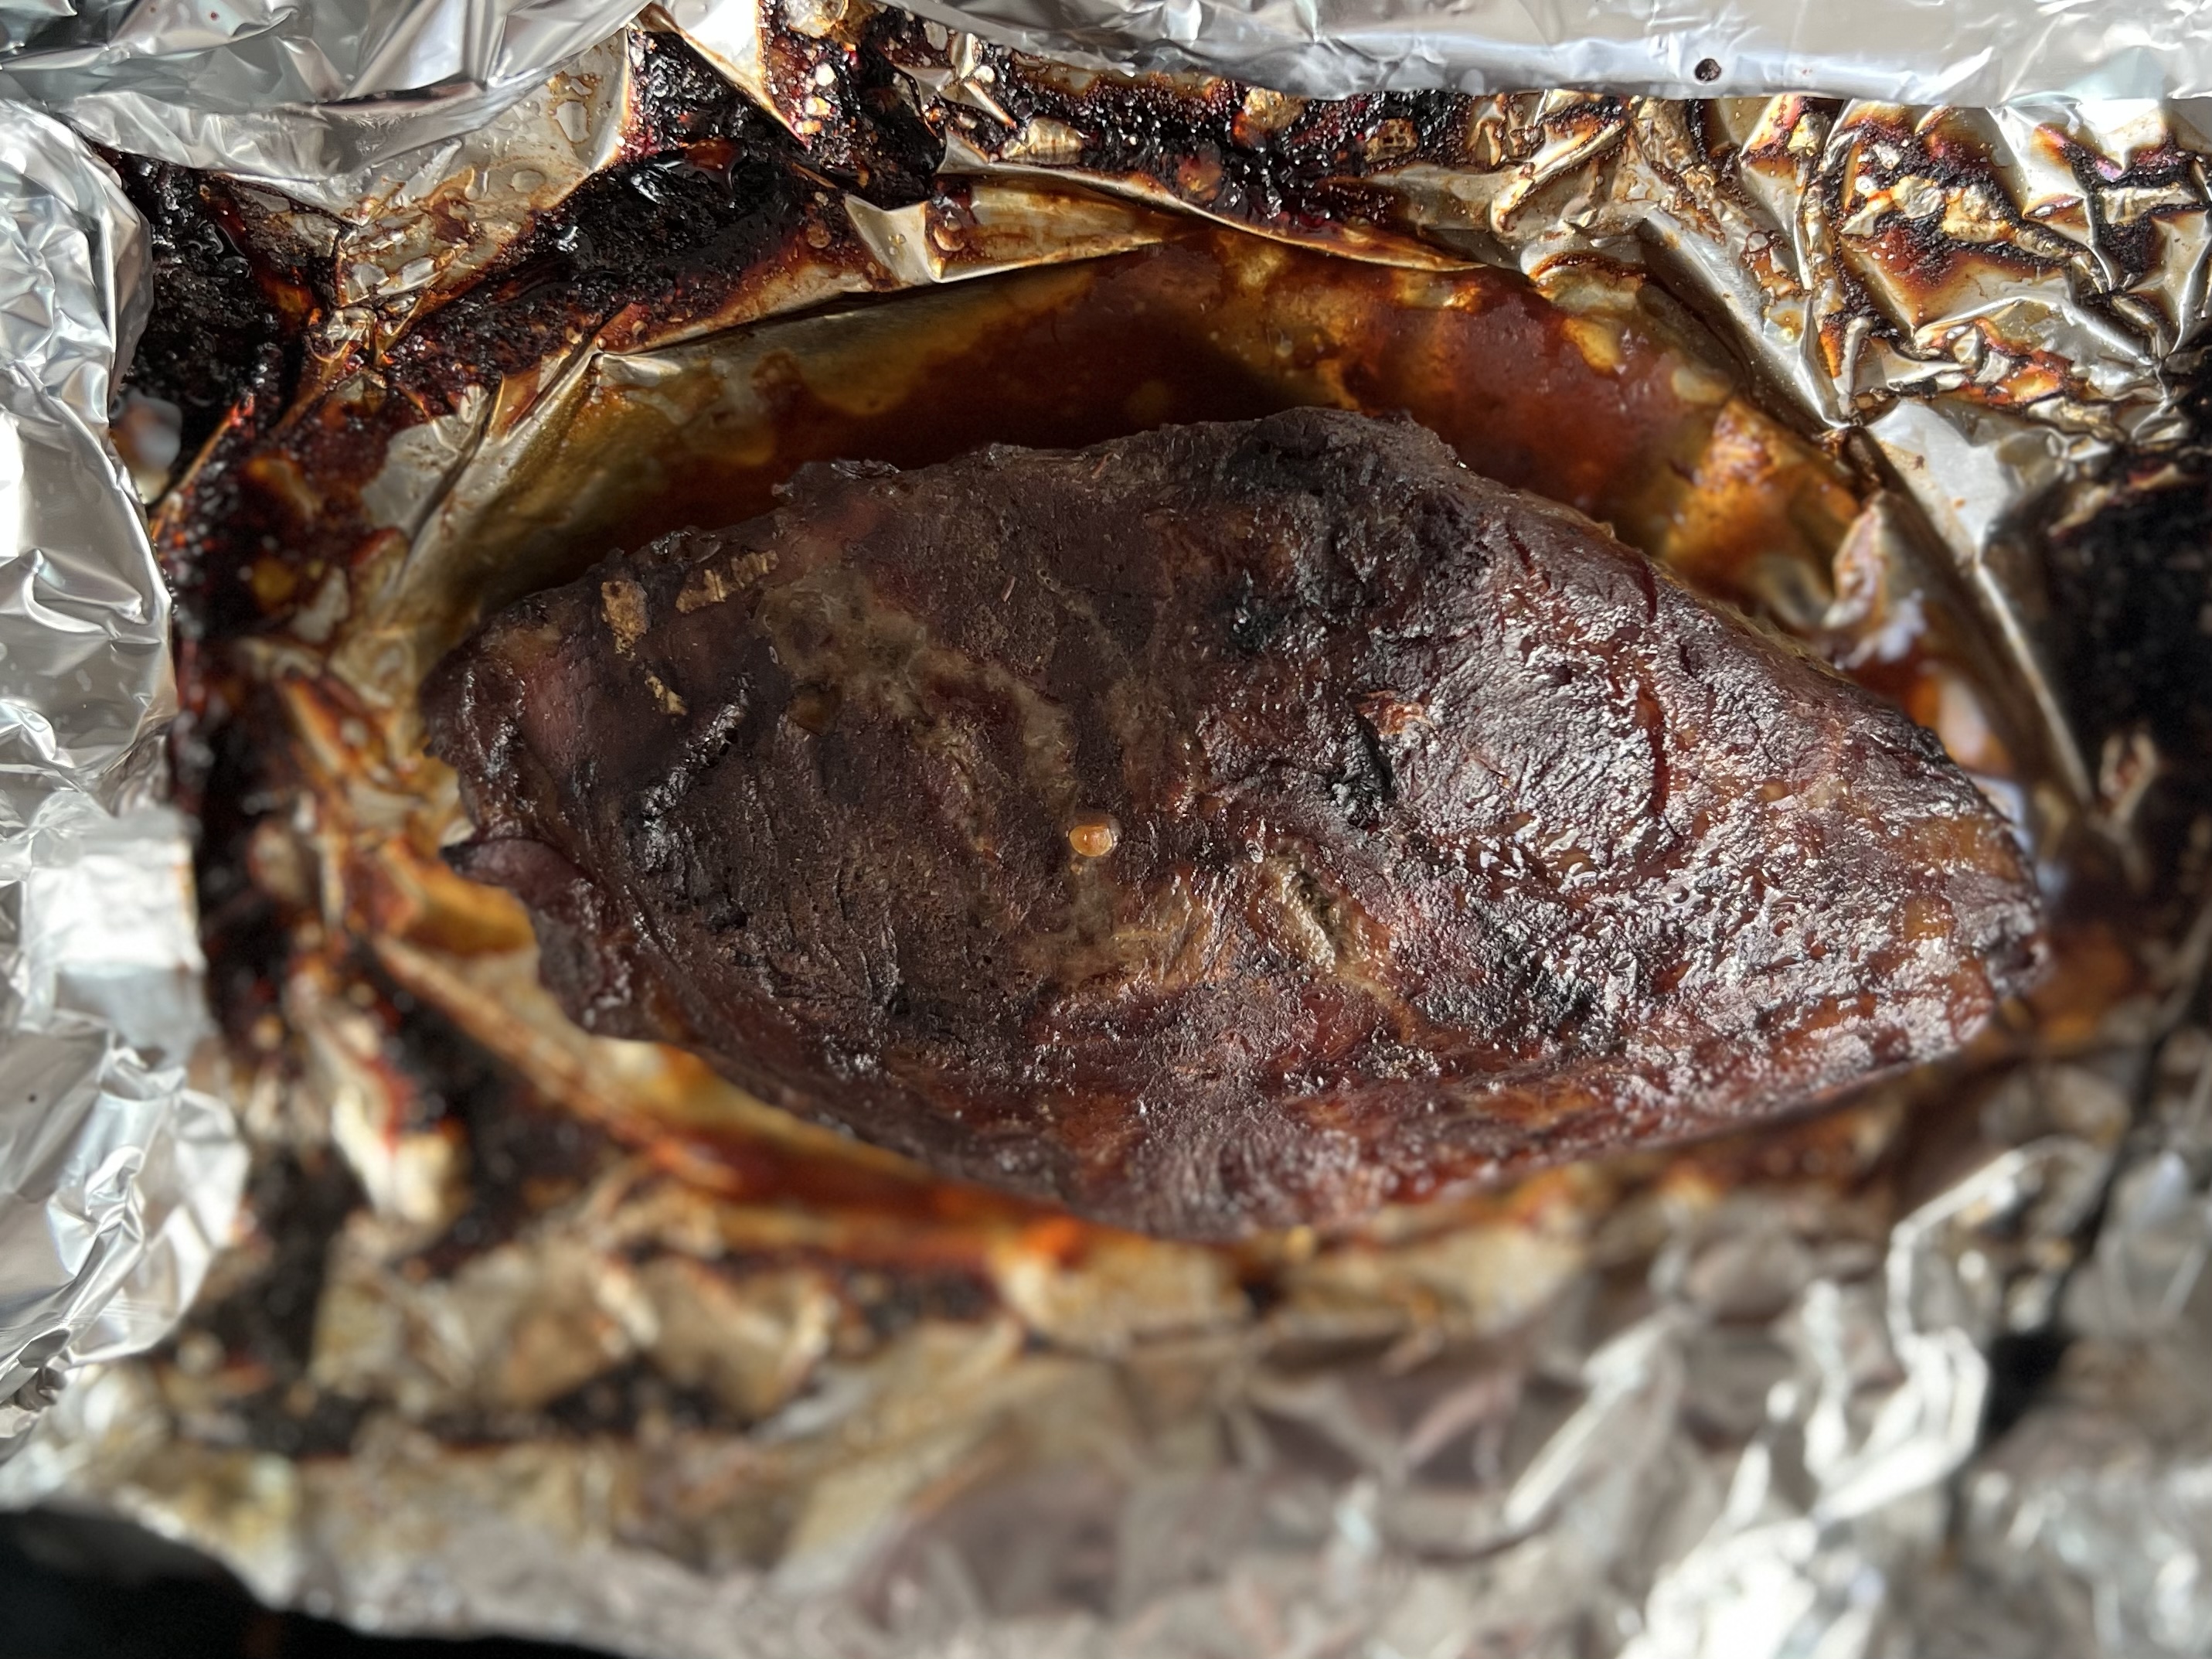
When I saw a New Zealand boneless lamb shoulder roast on their website, I had to buy it. Though New Zealand lamb can be a bit gamey to many people, I love that flavor, and there is no better quality of lamb than that from the land of the kiwi.
I knew I wanted to marinate the roast, and there was no way the marinade would penetrate into the meat if it was rolled and tied like it came in the package. So I decided to cut the string that wrapped the lamb roast, and unroll it, so that every inch of that lamb would make contact with the marinade.
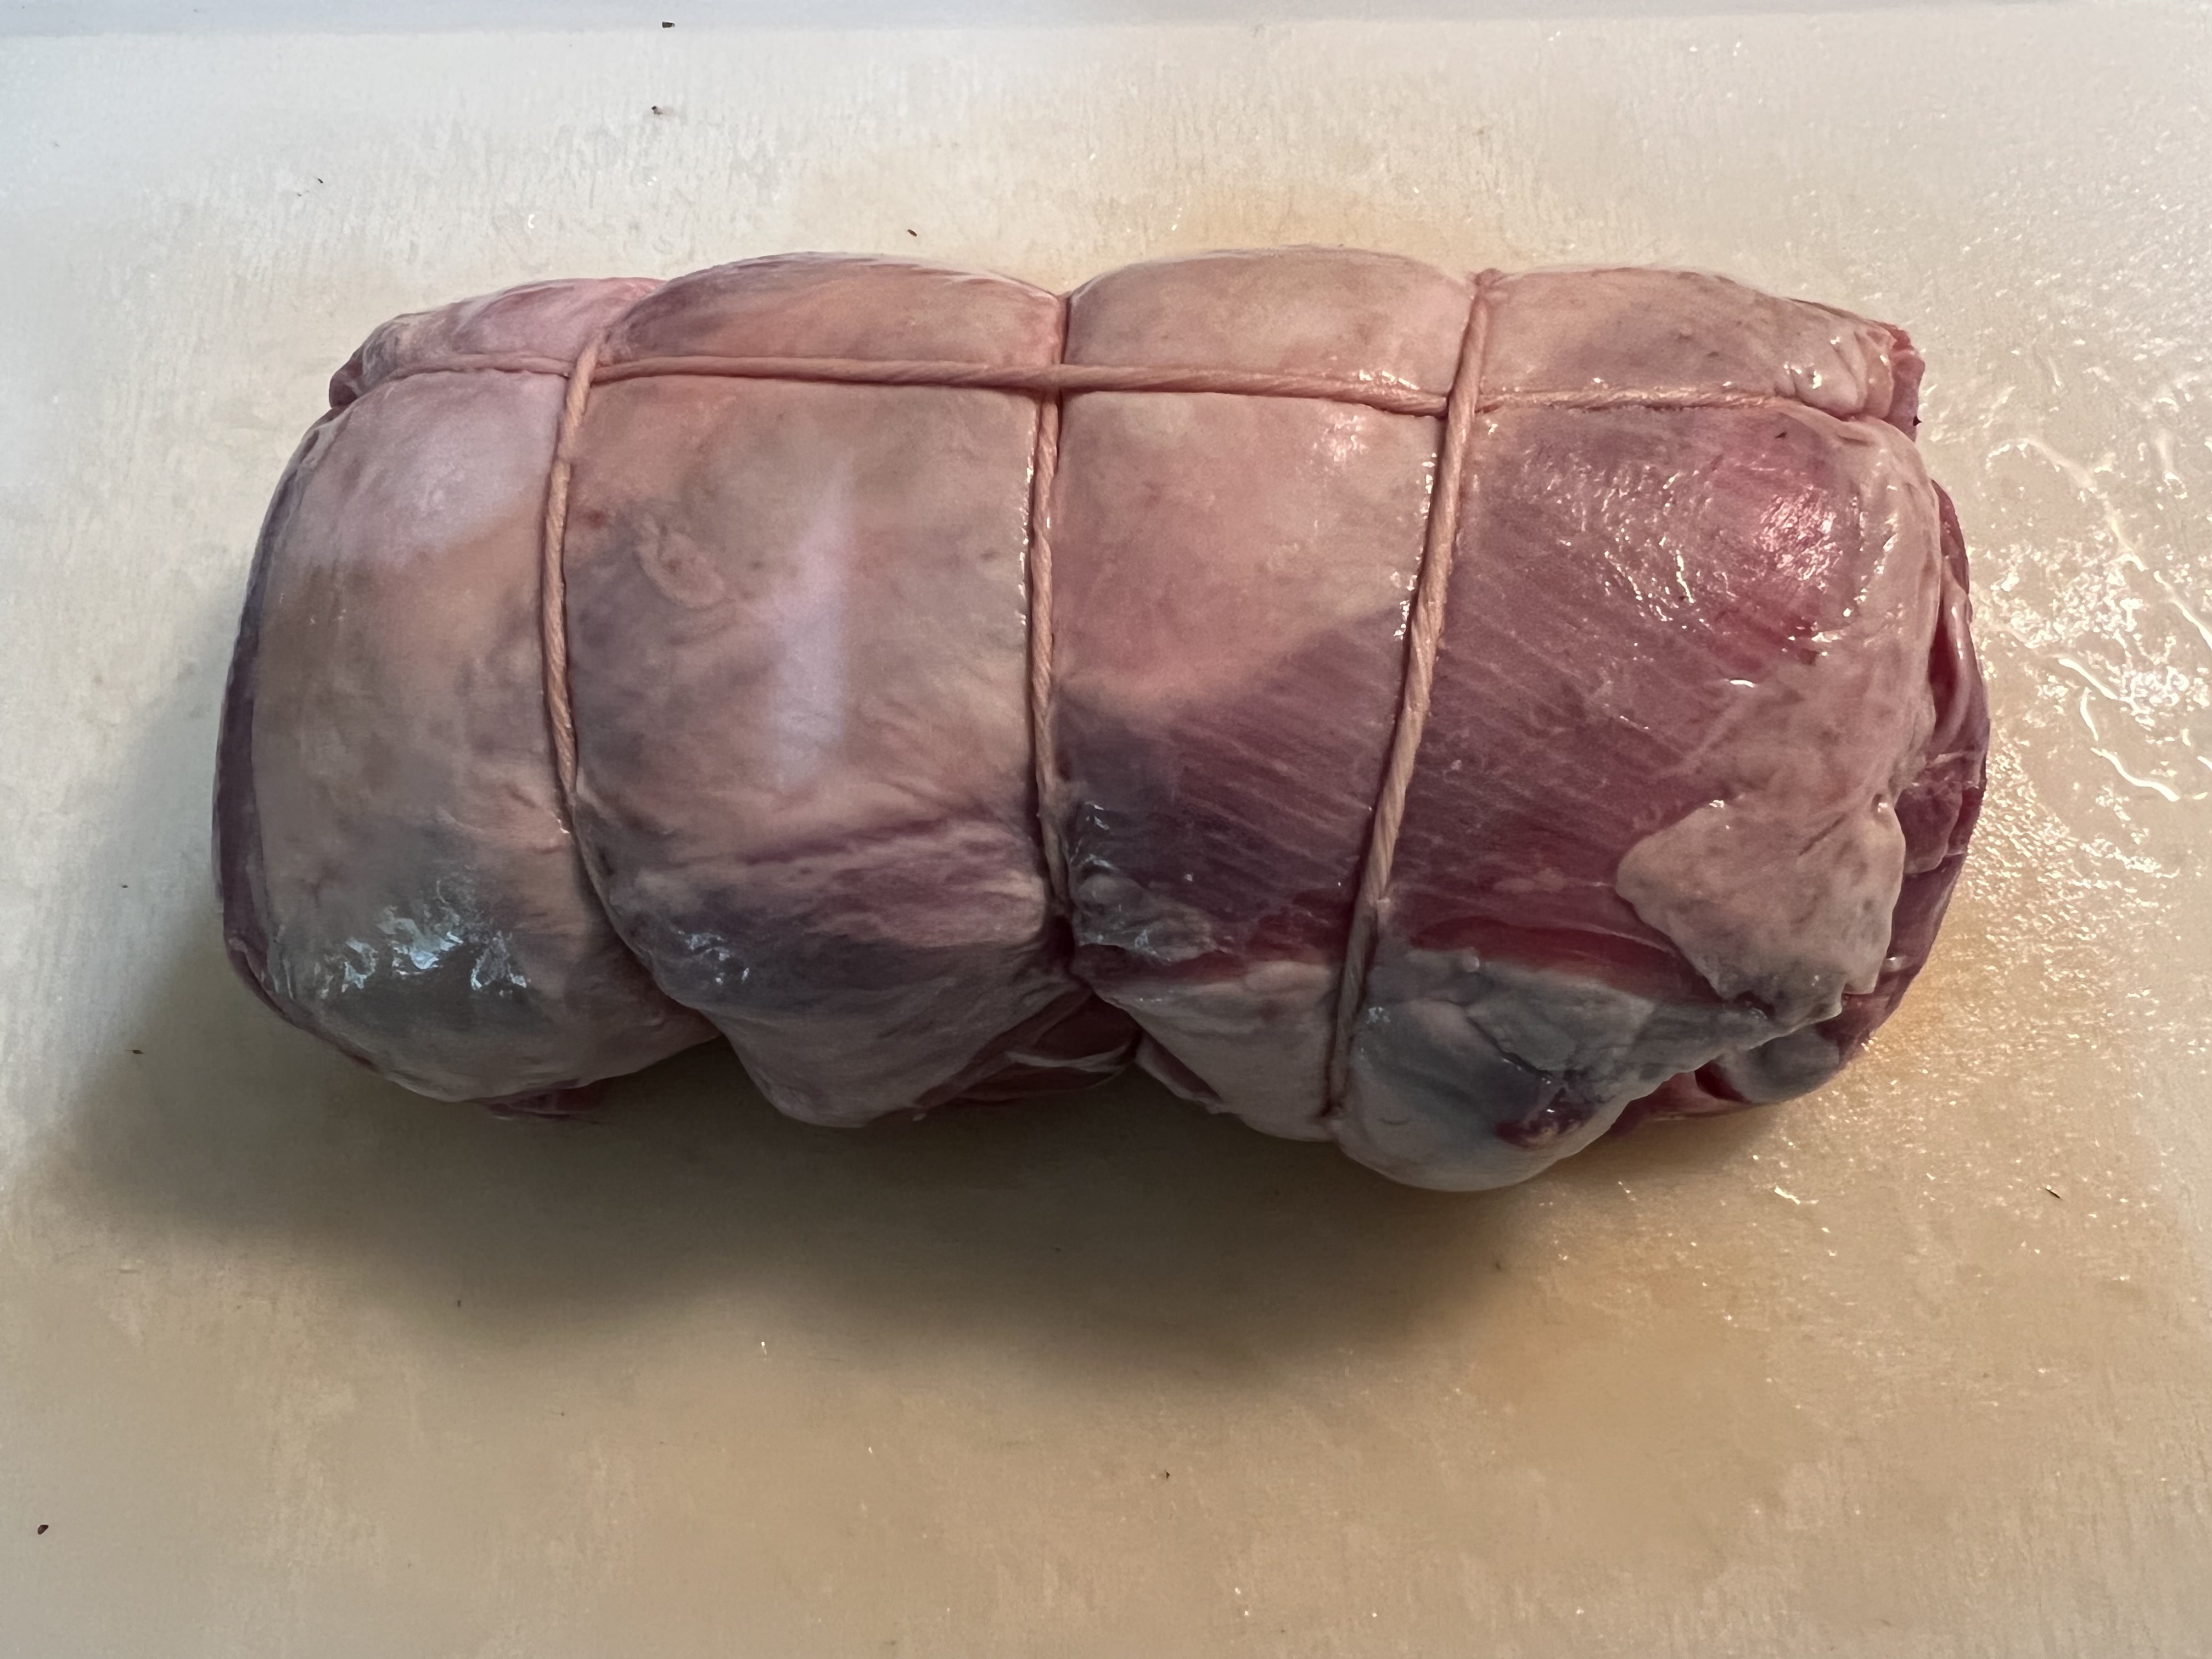
Tied…
Untied and unrolled.
Once I marinated the lamb overnight, I rolled it back up, retied it as best I could, and cooked it in a 350 degree oven until the roast registered 120 degrees on my meat thermometer: medium rare.
I finished the lamb on my outdoor grill over hardwood charcoal to get a little smokiness and char.
The marinade I used can be used for any cut of lamb you might want to cook. (I love the small lamb chops that look like mini t-bones. Their flavor is incredible.)
1/2 cup olive oil 1/2 cup balsamic vinegar 1 tablespoon fresh rosemary, chopped 1 tablespoon fresh thyme leaves, chopped 1 tablespoon Kosher salt 1 tablespoon maple syrup 1 tablespoon Dijon mustard 1 teaspoon black pepper 1 teaspoon dried oregano 3 cloves garlic, sliced thin
Combine all the marinade ingredients in a bowl, mixing well.
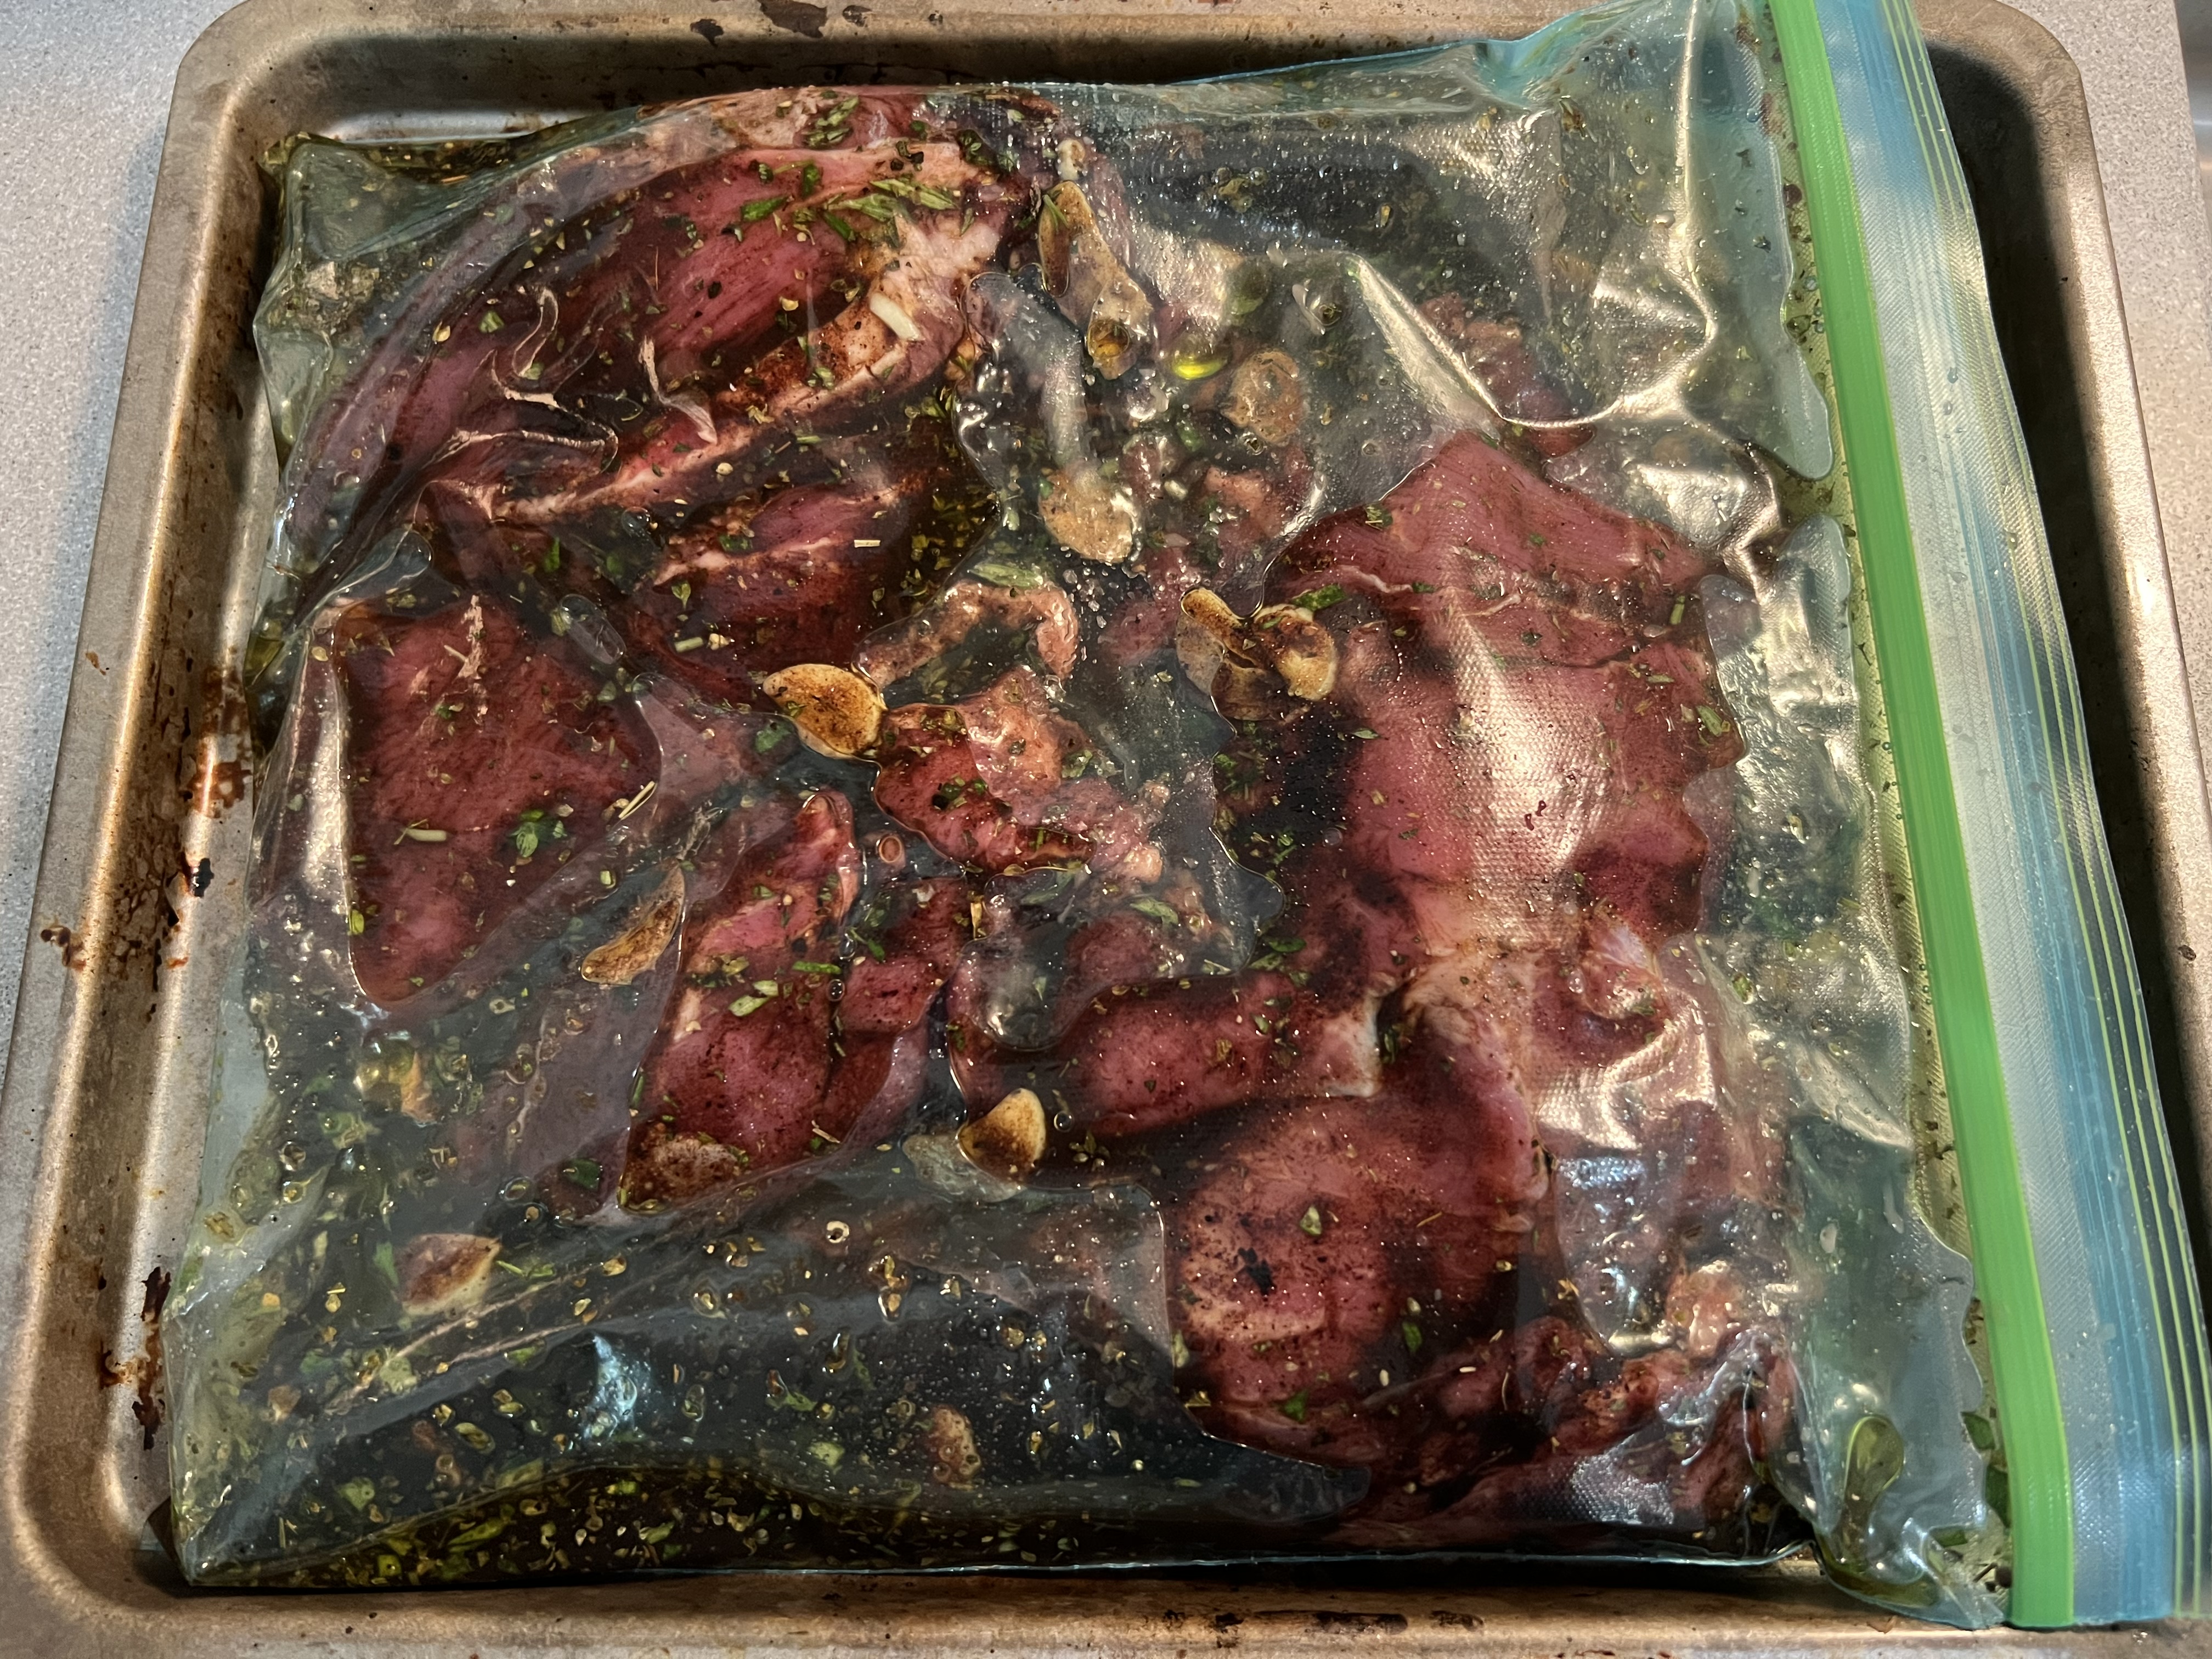
Lamb and marinade ready for an overnight in the fridge.
Place the lamb in a Ziploc bag, and pour in the marinade. Seal the bag tightly, squeezing any excess air out of it, and squish it around carefully, so that the marinade makes contact with every part of the lamb.
Place the bag on a pan (to prevent accidents in the fridge) and place it in the fridge overnight. Give it a squish every few hours if you can.
The next day, remove the pan from the fridge and let the lamb come up to room temperature.
Pre-heat the oven to 350 degrees.
Carefully remove the lamb from the bag (I do this over the sink), discarding the marinade.
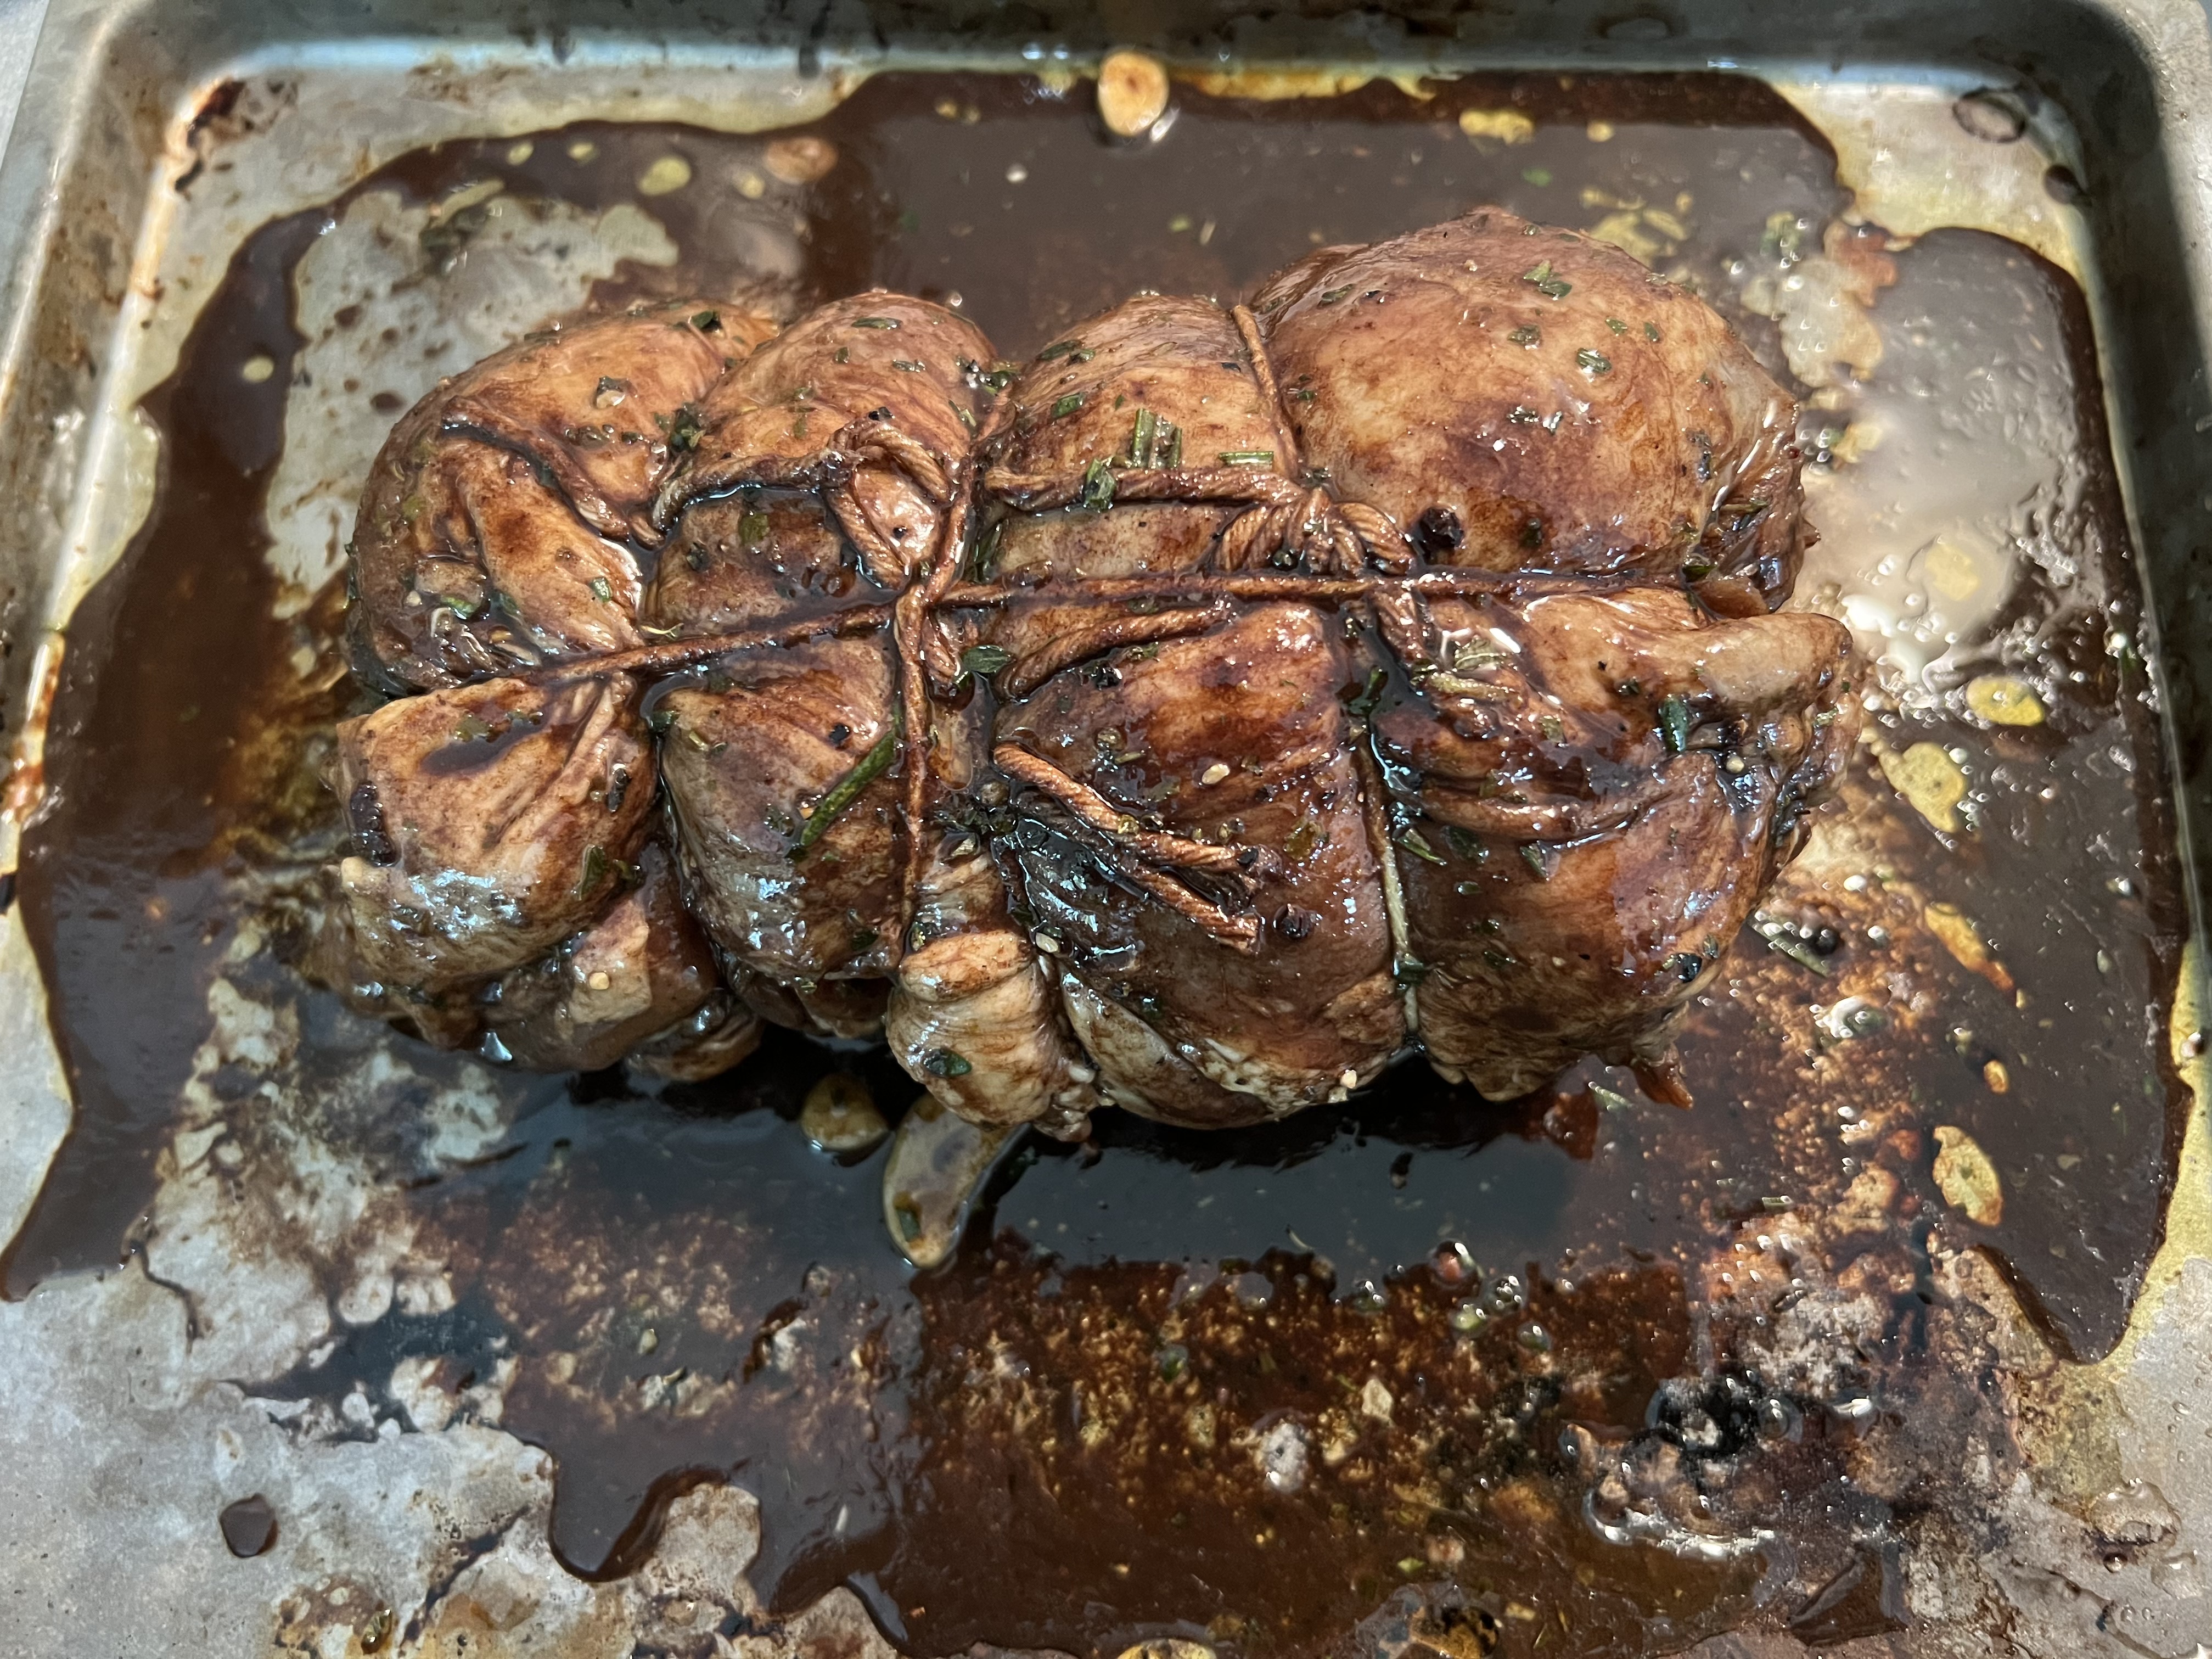
Marinated, seasoned, re-rolled and re-tied. Ready for the oven.
If you’re using an unrolled lamb roast, like I did, roll it our flat on a cutting board and season it with salt and pepper.
Carefully roll the roast up the way it was originally and tie it with string, as best you can.
Place the roast on a baking sheet and bake it until the meat reads 120 degrees on a meat thermometer…that’s medium-rare.
Out of the oven and onto the grill…
While the roast is in the oven, start a hardwood charcoal fire.
When the roast is out of the oven, place it on the grill and grill it on all sides until it has some nice grill marks and char.
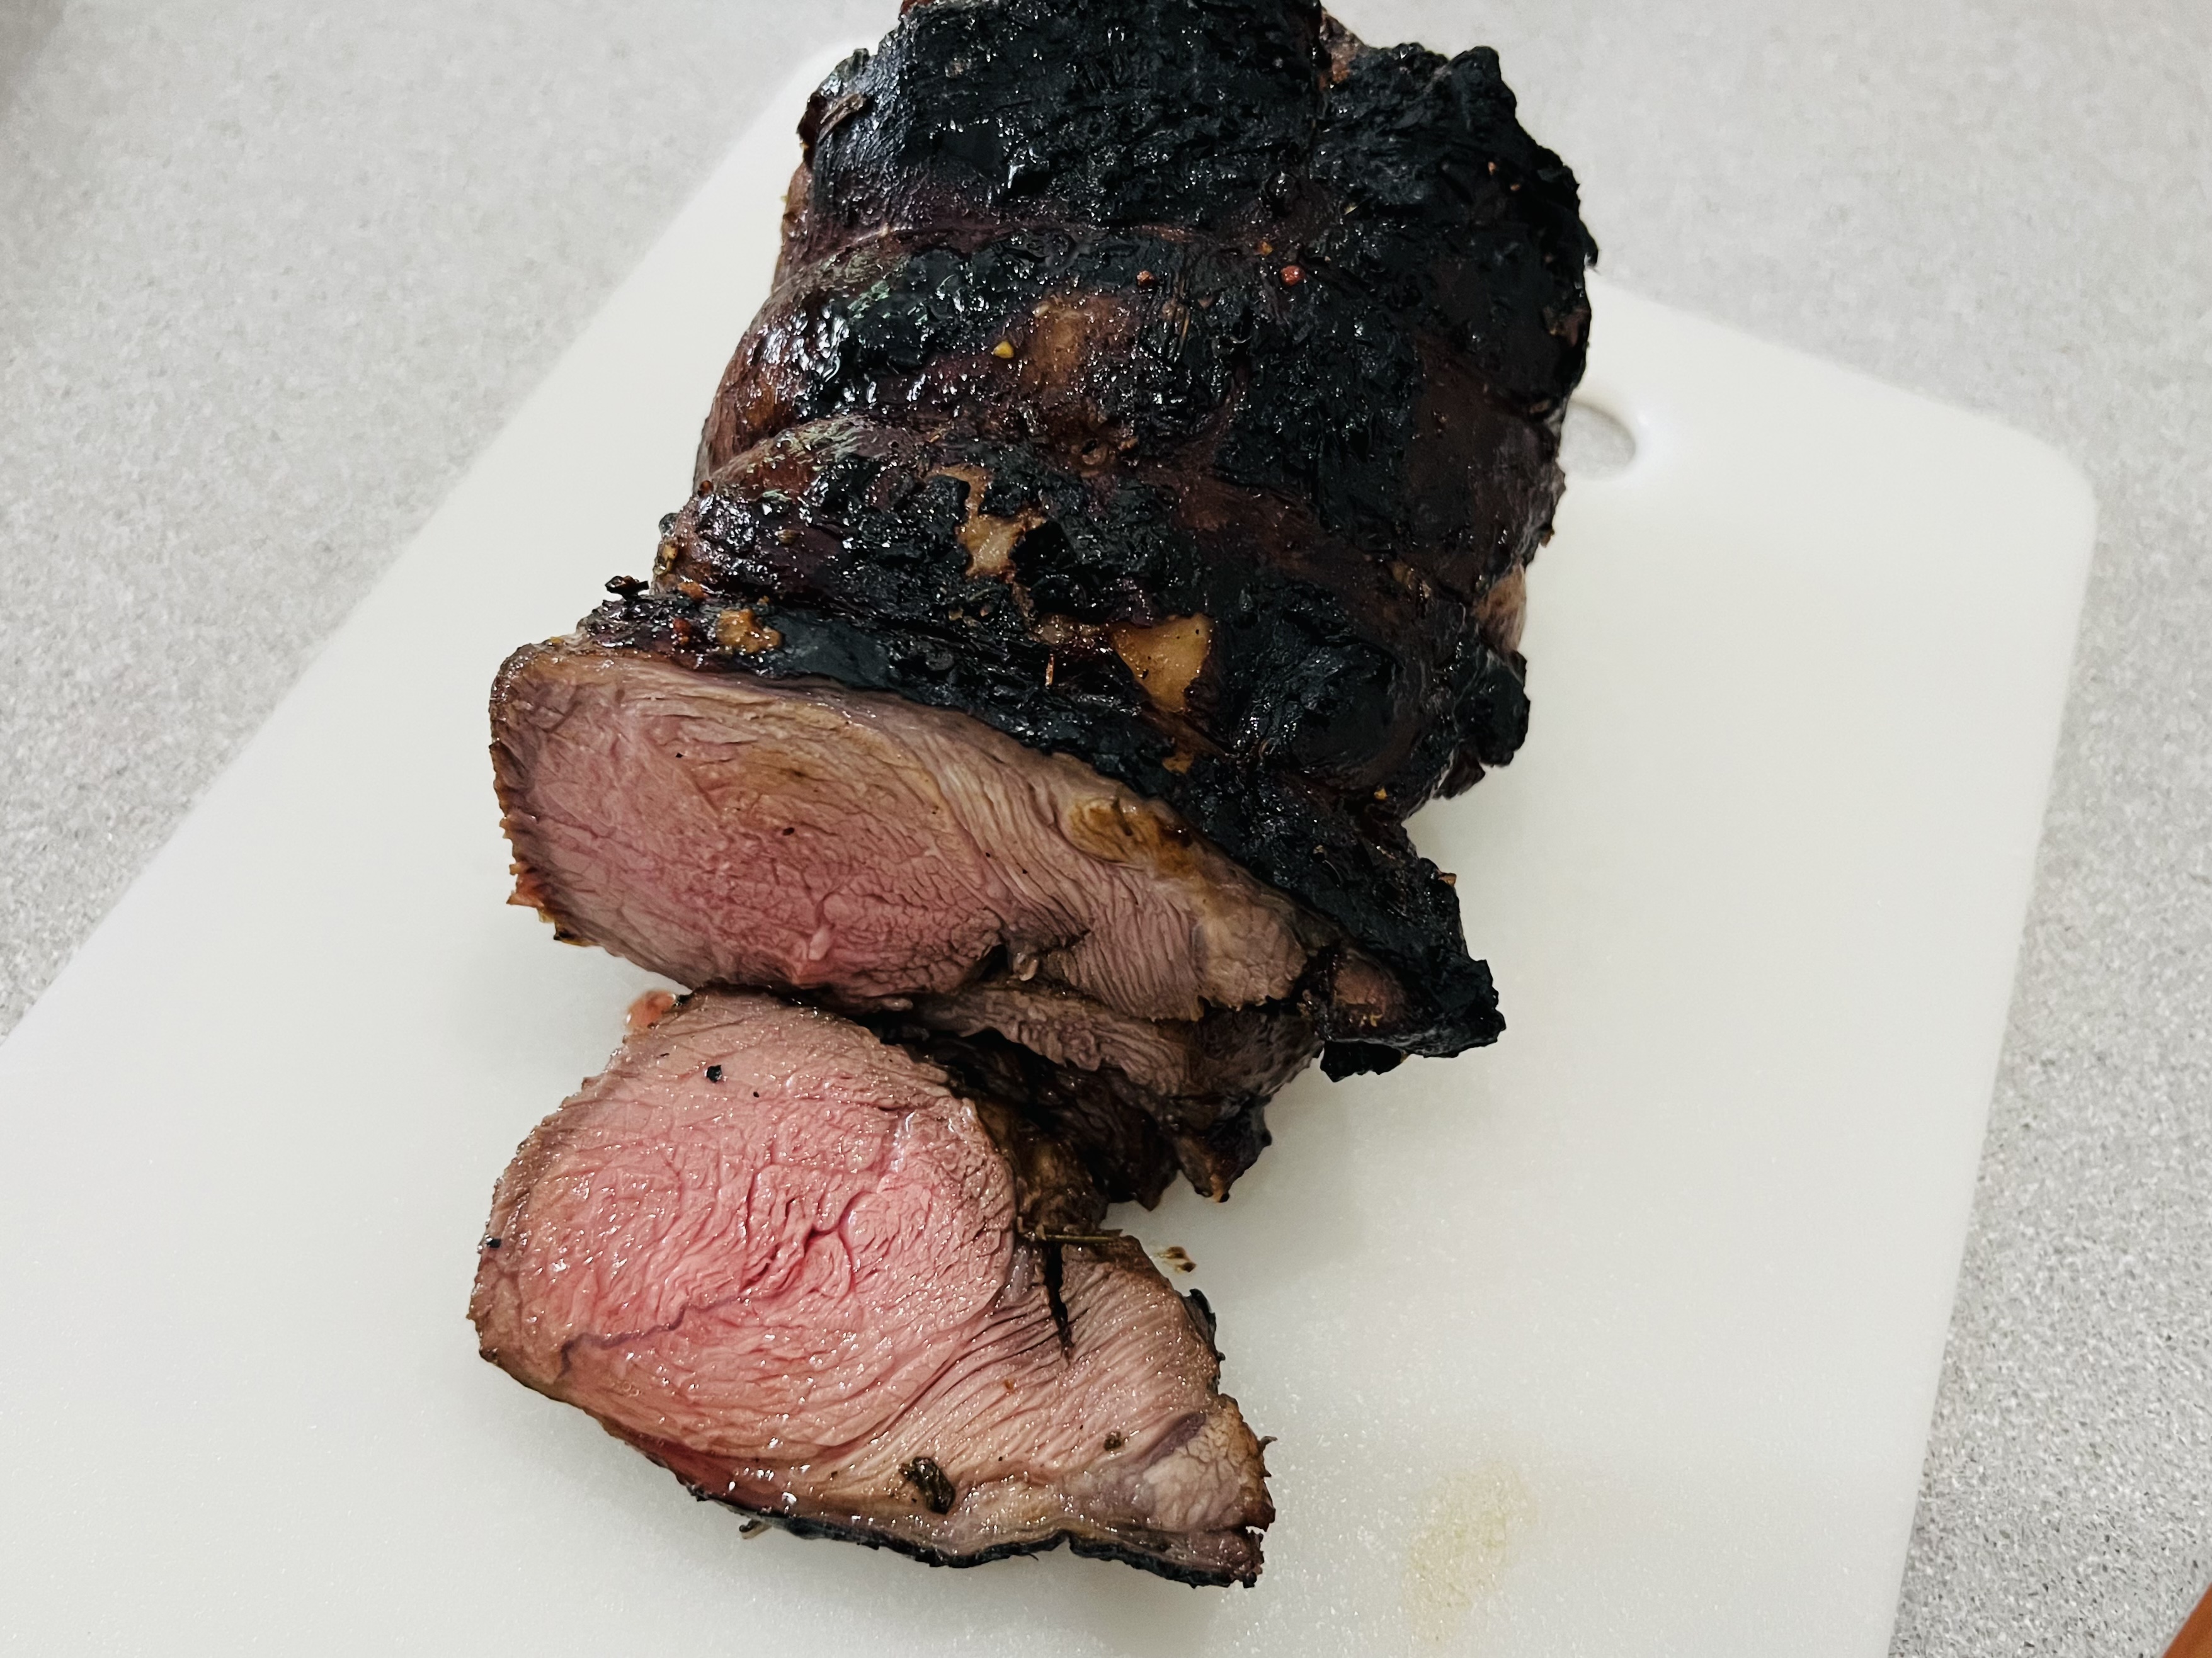
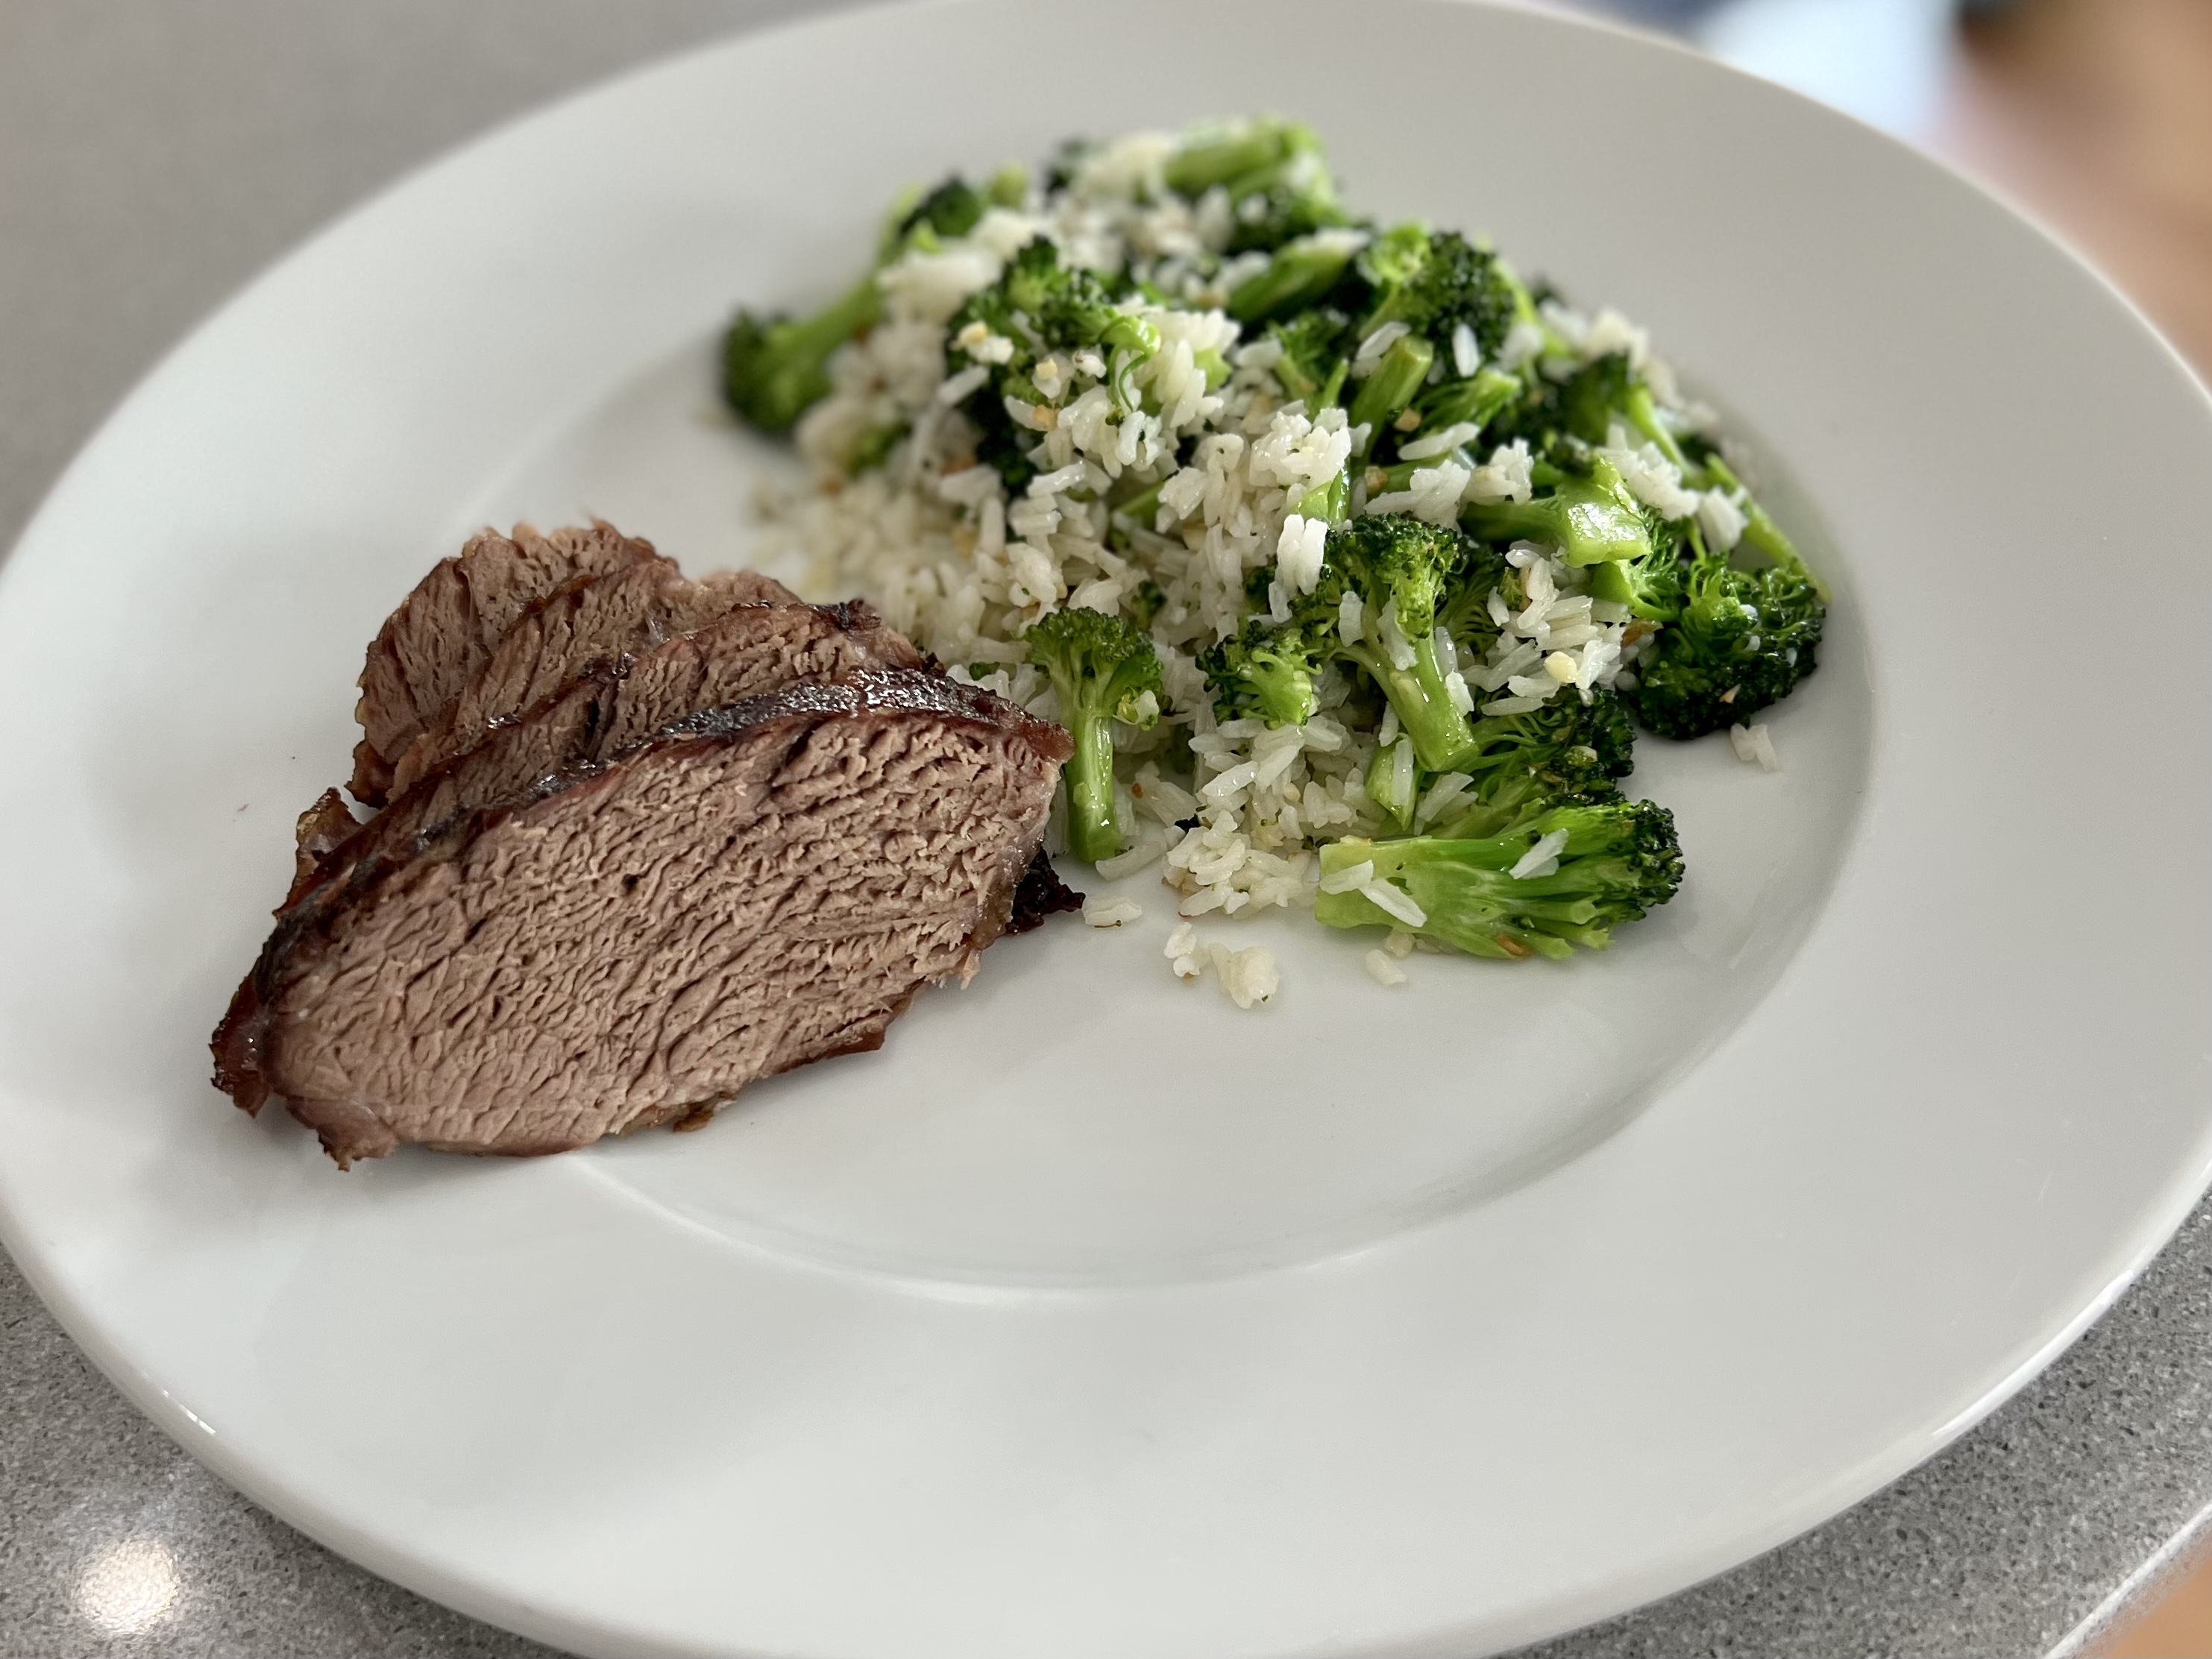
Let the roast rest for at least 15 minutes before slicing. (Cut the strings off before you do.)
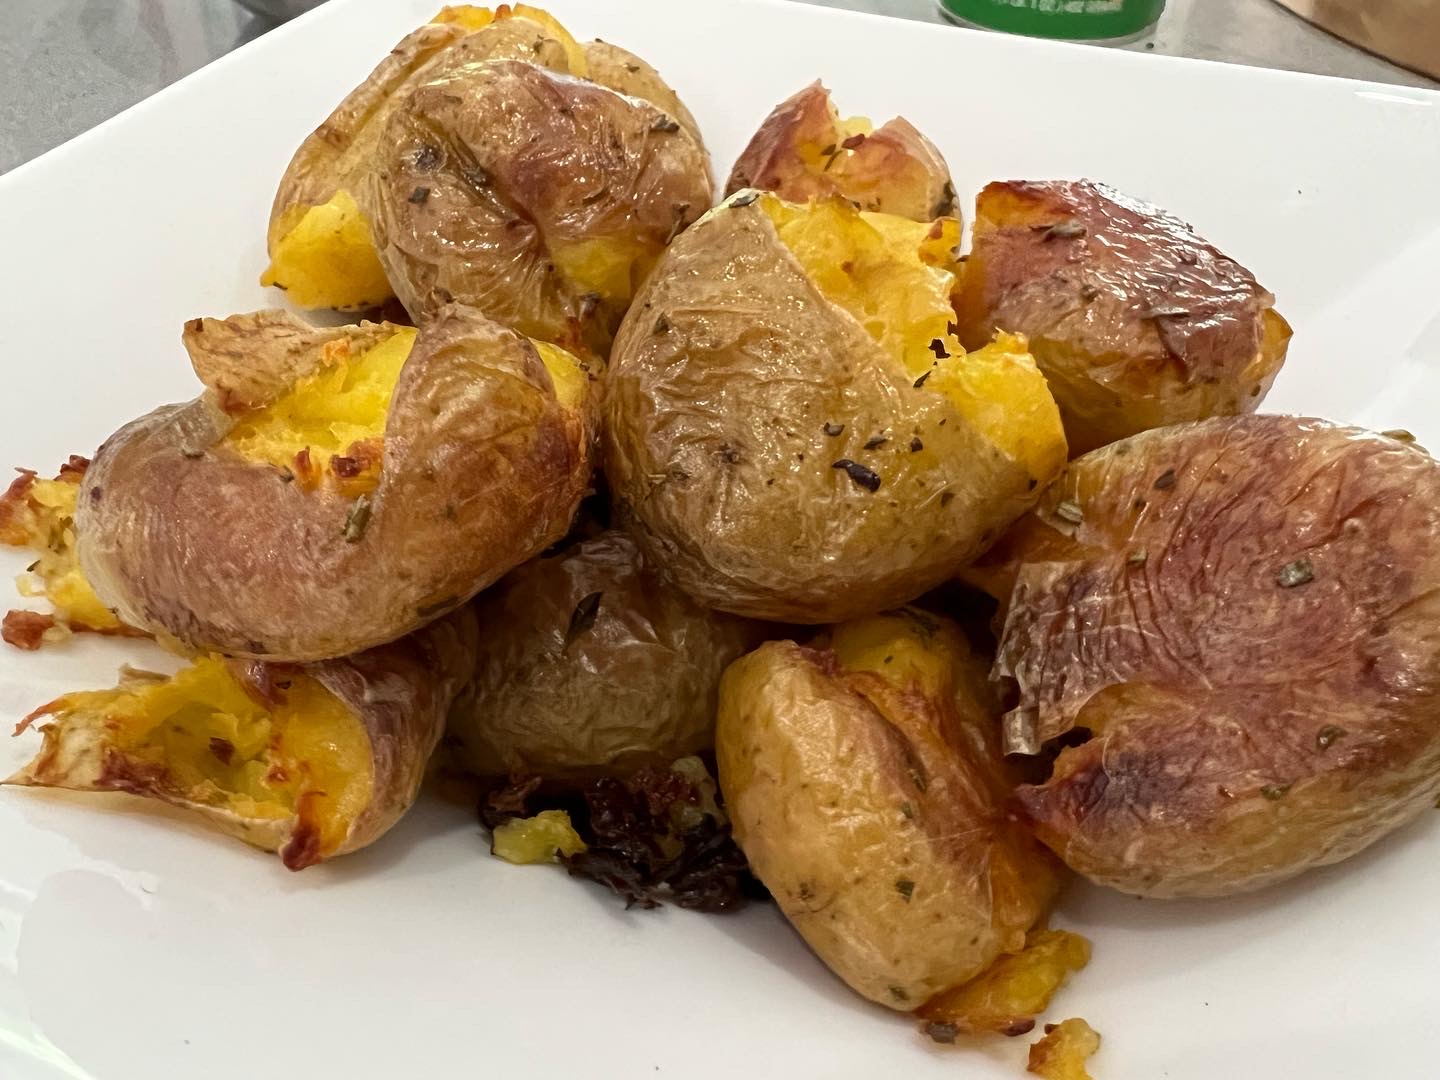
Simple and delicious, this recipe is inspired by Jamie Oliver, who uses peeled white potatoes. I prefer whole, small, Yukon golds or yellow potatoes, my personal favorites, with the skin on. I think the skin adds an extra level of wonderful crunch.
The great thing about this recipe is that there’s not a lot of measuring going on. You add what you like, as much as you like, and the oven does the rest!
Pre-heat the oven to 350 degrees.
Start by boiling 1 1/2 lbs. of organic potatoes in salted water until they are a bit firmer than fork-tender. Drain them in a colander and set them aside for the moment.
Pour a couple of tablespoons of olive oil in a baking pan, along with a tablespoon of white wine vinegar. (Red wine vinegar works just as well.)
Pour the potatoes into the baking pan, season them with salt and pepper, and toss them all around, making sure they are coated with the oil.
No herbs go in at this point, because they will burn. They will go in after the first 30 minutes of cooking.
Place the pan in the oven and cook for 30 minutes.
Take the pan out of the oven and, using a potato masher, gently push down on the potatoes in the pan to flatten them a bit, breaking the skin.
Chop up a handful of fresh herbs (I like rosemary and thyme) and sprinkle the herbs all over the potatoes. Toss it all together (with a spatula, not your hands–it’s hot!)…and place the pan back in the oven for another 30 minutes, until the potatoes are an amazing, crispy, golden brown.
One last touch of finishing salt (I love Fleur de Sel) makes it perfect!
I love pulled pork, or pork roast…cuts that use inexpensive, fatty cuts of meat that are full of flavor as long as you roast them low and slow.
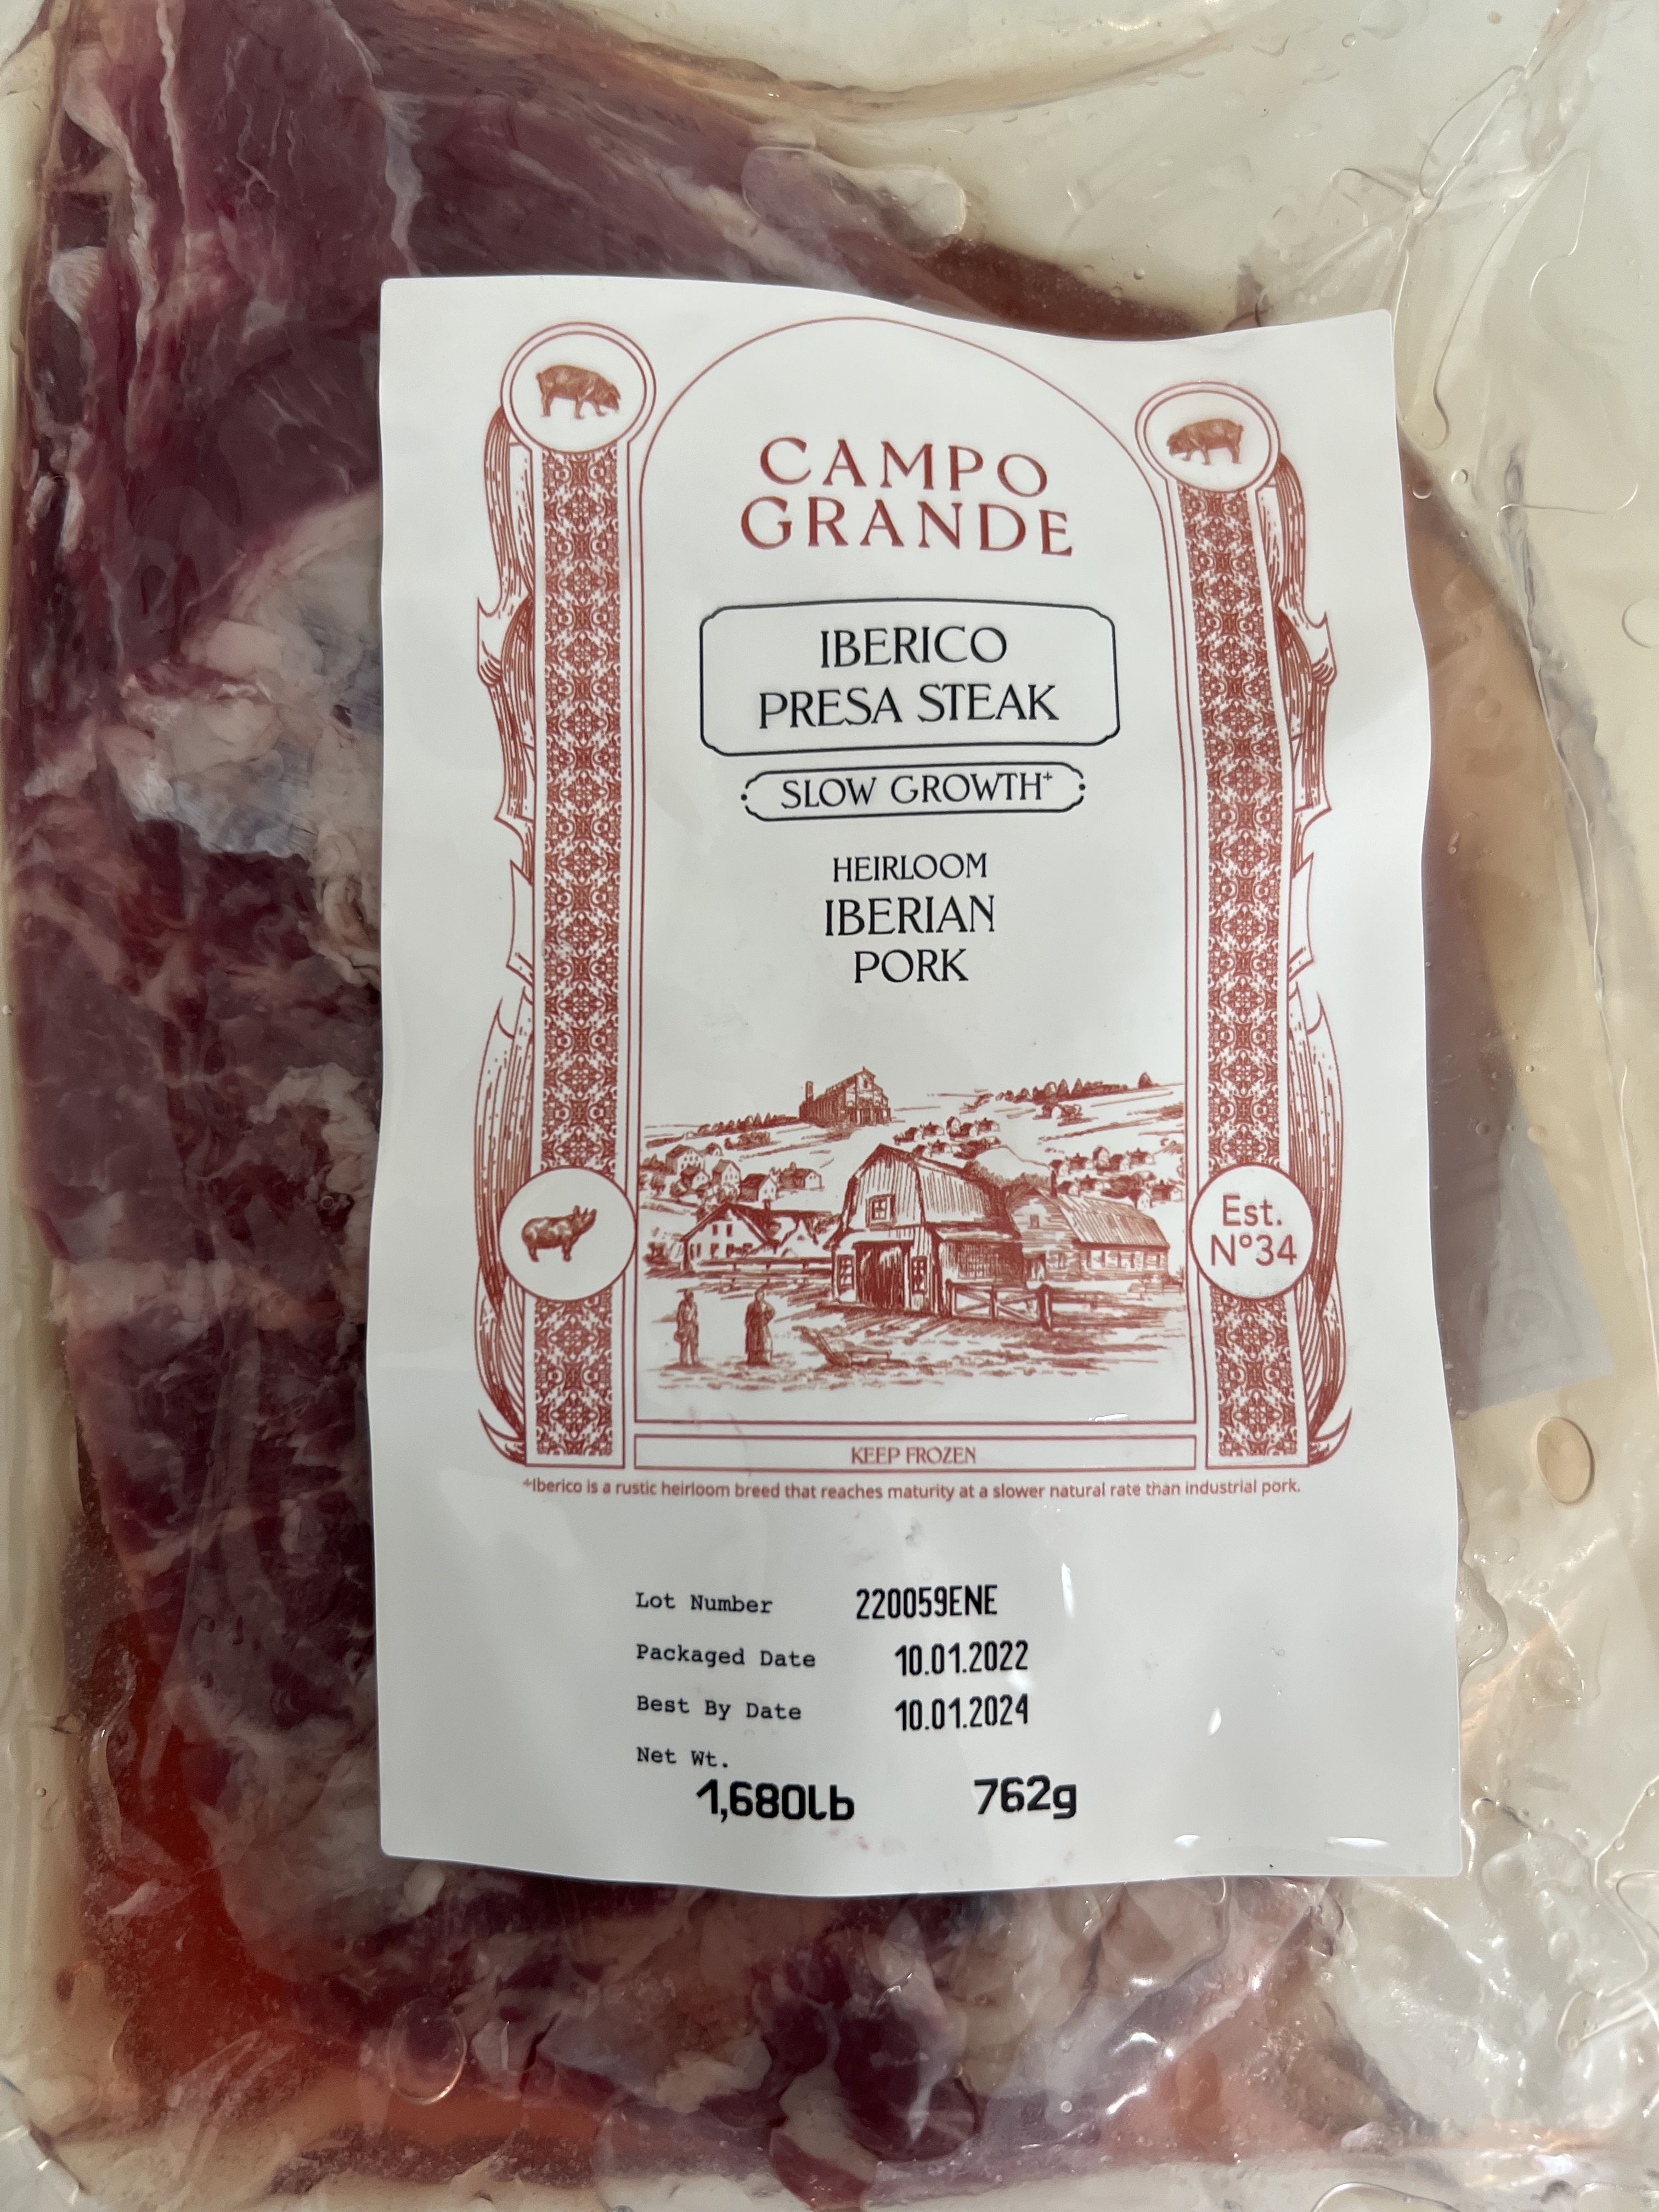
A very special cut of pork!
I recently received a gift of a very fancy cut of pork: Spanish Iberico, where the pigs roam freely, feasting on acorns. It’s some of the best pork you can buy.
But even with a much less expensive cut of pork, like a pork shoulder, you can achieve some delicious results as long as you give it time: time for the marinade to get absorbed into the meat, and time for the meat to cook slowly at a low temperature. Low and slow is key to melting the fat and gristle, and making the meat as tender as it can be.
The pork, before marinating.
Just like with a basic pulled pork recipe, the spices you use make all the difference. I usually make a spice rub that I generously rub all over a pork shoulder when I’m preparing pulled pork. Then it goes in the smoker for as much as 10 hours, depending on the size of the shoulder.
In this case, I’m using a marinade, which needs to be absorbed into the meat. So if I was using a larger cut, I would butterfly it, and marinate it that way. The Iberico pork that I used in this recipe was under 2 pounds, so I left it whole.
I combine all the marinade ingredients into a bowl…
3 tablespoons Chinese Five Spice powder 3 tablespoons soy sauce 2 tablespoons hoisin sauce 2 tablespoons maple syrup 1 tablespoon Chinese chili garlic sauce 1 tablespoon rice vinegar (same thing as rice wine vinegar) 1/2 an onion, chopped 3 garlic cloves, chopped (optional)
Once the piece of pork has been trimmed of any obvious hanging fat (remember, you don’t need to butcher the meat…the fat and gristle will melt while cooking and add flavor), place in a Ziplock-type freezer bag, and pour in the marinade. Squish the bag around carefully, to make the marinade makes good contact with the meat. Place the bag in a bowl (to prevent accidents) and place the bowl in the fridge overnight. Squish the bag around every few hours.
Pre-heat the oven to 275 degrees. Use a baking pan large enough to hold the roast.
Remove the roast from the marinade, and wrap it in aluminum foil. Place the foil on the baking pan and into the oven. The amount of time you cook the pork will depend on the size of the roast, so use a thermometer to check if the meat is ready. My roast was ready in less than 2 hours, but it was a small one.
Halfway through cooking, while I was checking the temperature, I opened the foil and basted the roast with some of the marinade. Then I re-wrapped it, and placed it back in the oven.
I save the marinade to brush on the roast halfway through the cooking process. I could also use it as a dipping sauce when serving, but if I did that, it’s important to place the marinade in a saucepan and bring it to a boil to kill all germs! Remember, that marinade was swimming around raw pork! Once it has boiled for a bit, you can set it aside to cool to room temperature.
Done!
Pork should be cooked to a temperature of 160 degrees, so I remove it from the oven at 150 degrees, knowing the temperature will still rise as the meat rests.
These pancakes, based on a recipe from chef April Bloomfield (The Spotted Pig and The Breslin in NYC), are made from fresh homemade ricotta cheese. Light as air…and really delicious! I’ve made a few batches of fresh ricotta cheese in my day, but when the family has a craving for these pancakes at the last minute, a good-quality store-bought ricotta cheese will do.
1 1/2 cups all-purpose flour (I use Cup4Cup GF flour if I want to make these gluten-free)
1/4 cup yellow cornmeal
2 tablespoons sugar
1/2 teaspoon salt
1/2 teaspoon baking powder
1/2 teaspoon baking soda
2 cups milk
2 large eggs, separated
1/2 cup fresh ricotta
In a large bowl, combine the flour, cornmeal, sugar, salt, baking powder and baking soda. In another large bowl, whisk together the milk, ricotta, and egg yolks. Fold the wet ingredients into the dry ingredients.
In a large stainless steel bowl, whisk the egg whites until they are stiff, but not dry. Fold gently into the batter.
Spray a non-stick griddle with a little cooking spray and drop about 1/4 cup of batter per pancake. Cook over medium heat for about 2 minutes per side, until golden and fluffy.