Since it’s National Bourbon Day, let’s not just drink some bourbon…let’s cook with it!
This recipe uses a smoker. If you don’t have one, or just don’t want all the smoke, start with aper-heated oven at 250° and go from there.
5 lbs St Louis style pork ribs Salt and pepper
1/4 cup honey 1/4 cup bourbon (use whatever you have on hand) zest and juice of 1 lime zest and juice of 1 lemon zest and juice of 1 orange 2 tablespoons Hoisin sauce 1 tablespoon Dijon mustard (I use Maille) 1 tablespoon soy sauce 2 teaspoons Worcestershire sauce 1 teaspoon chili oil
Season the ribs well with salt and pepper and cook in a smoker for 3 hours at 250°, using hickory chips.
While the ribs are smoking, combine the sauce ingredients in a sauce pan, bringing it to a boil, then lowering to medium heat and reducing the sauce by half until it thickens. Stir often, being careful not to let the honey foam up and spill over the top.
Pre-heat the oven at 250°.
Remove the ribs from the smoker and place them on a sheet pan that is lined with aluminum foil, with enough foil to wrap around the ribs. Brush the ribs on all sides with the sauce, stacking no more than 2 sets of ribs on top of each other, and then wrap them with foil.
Cook the ribs in the foil for 2 more hours, until tender.
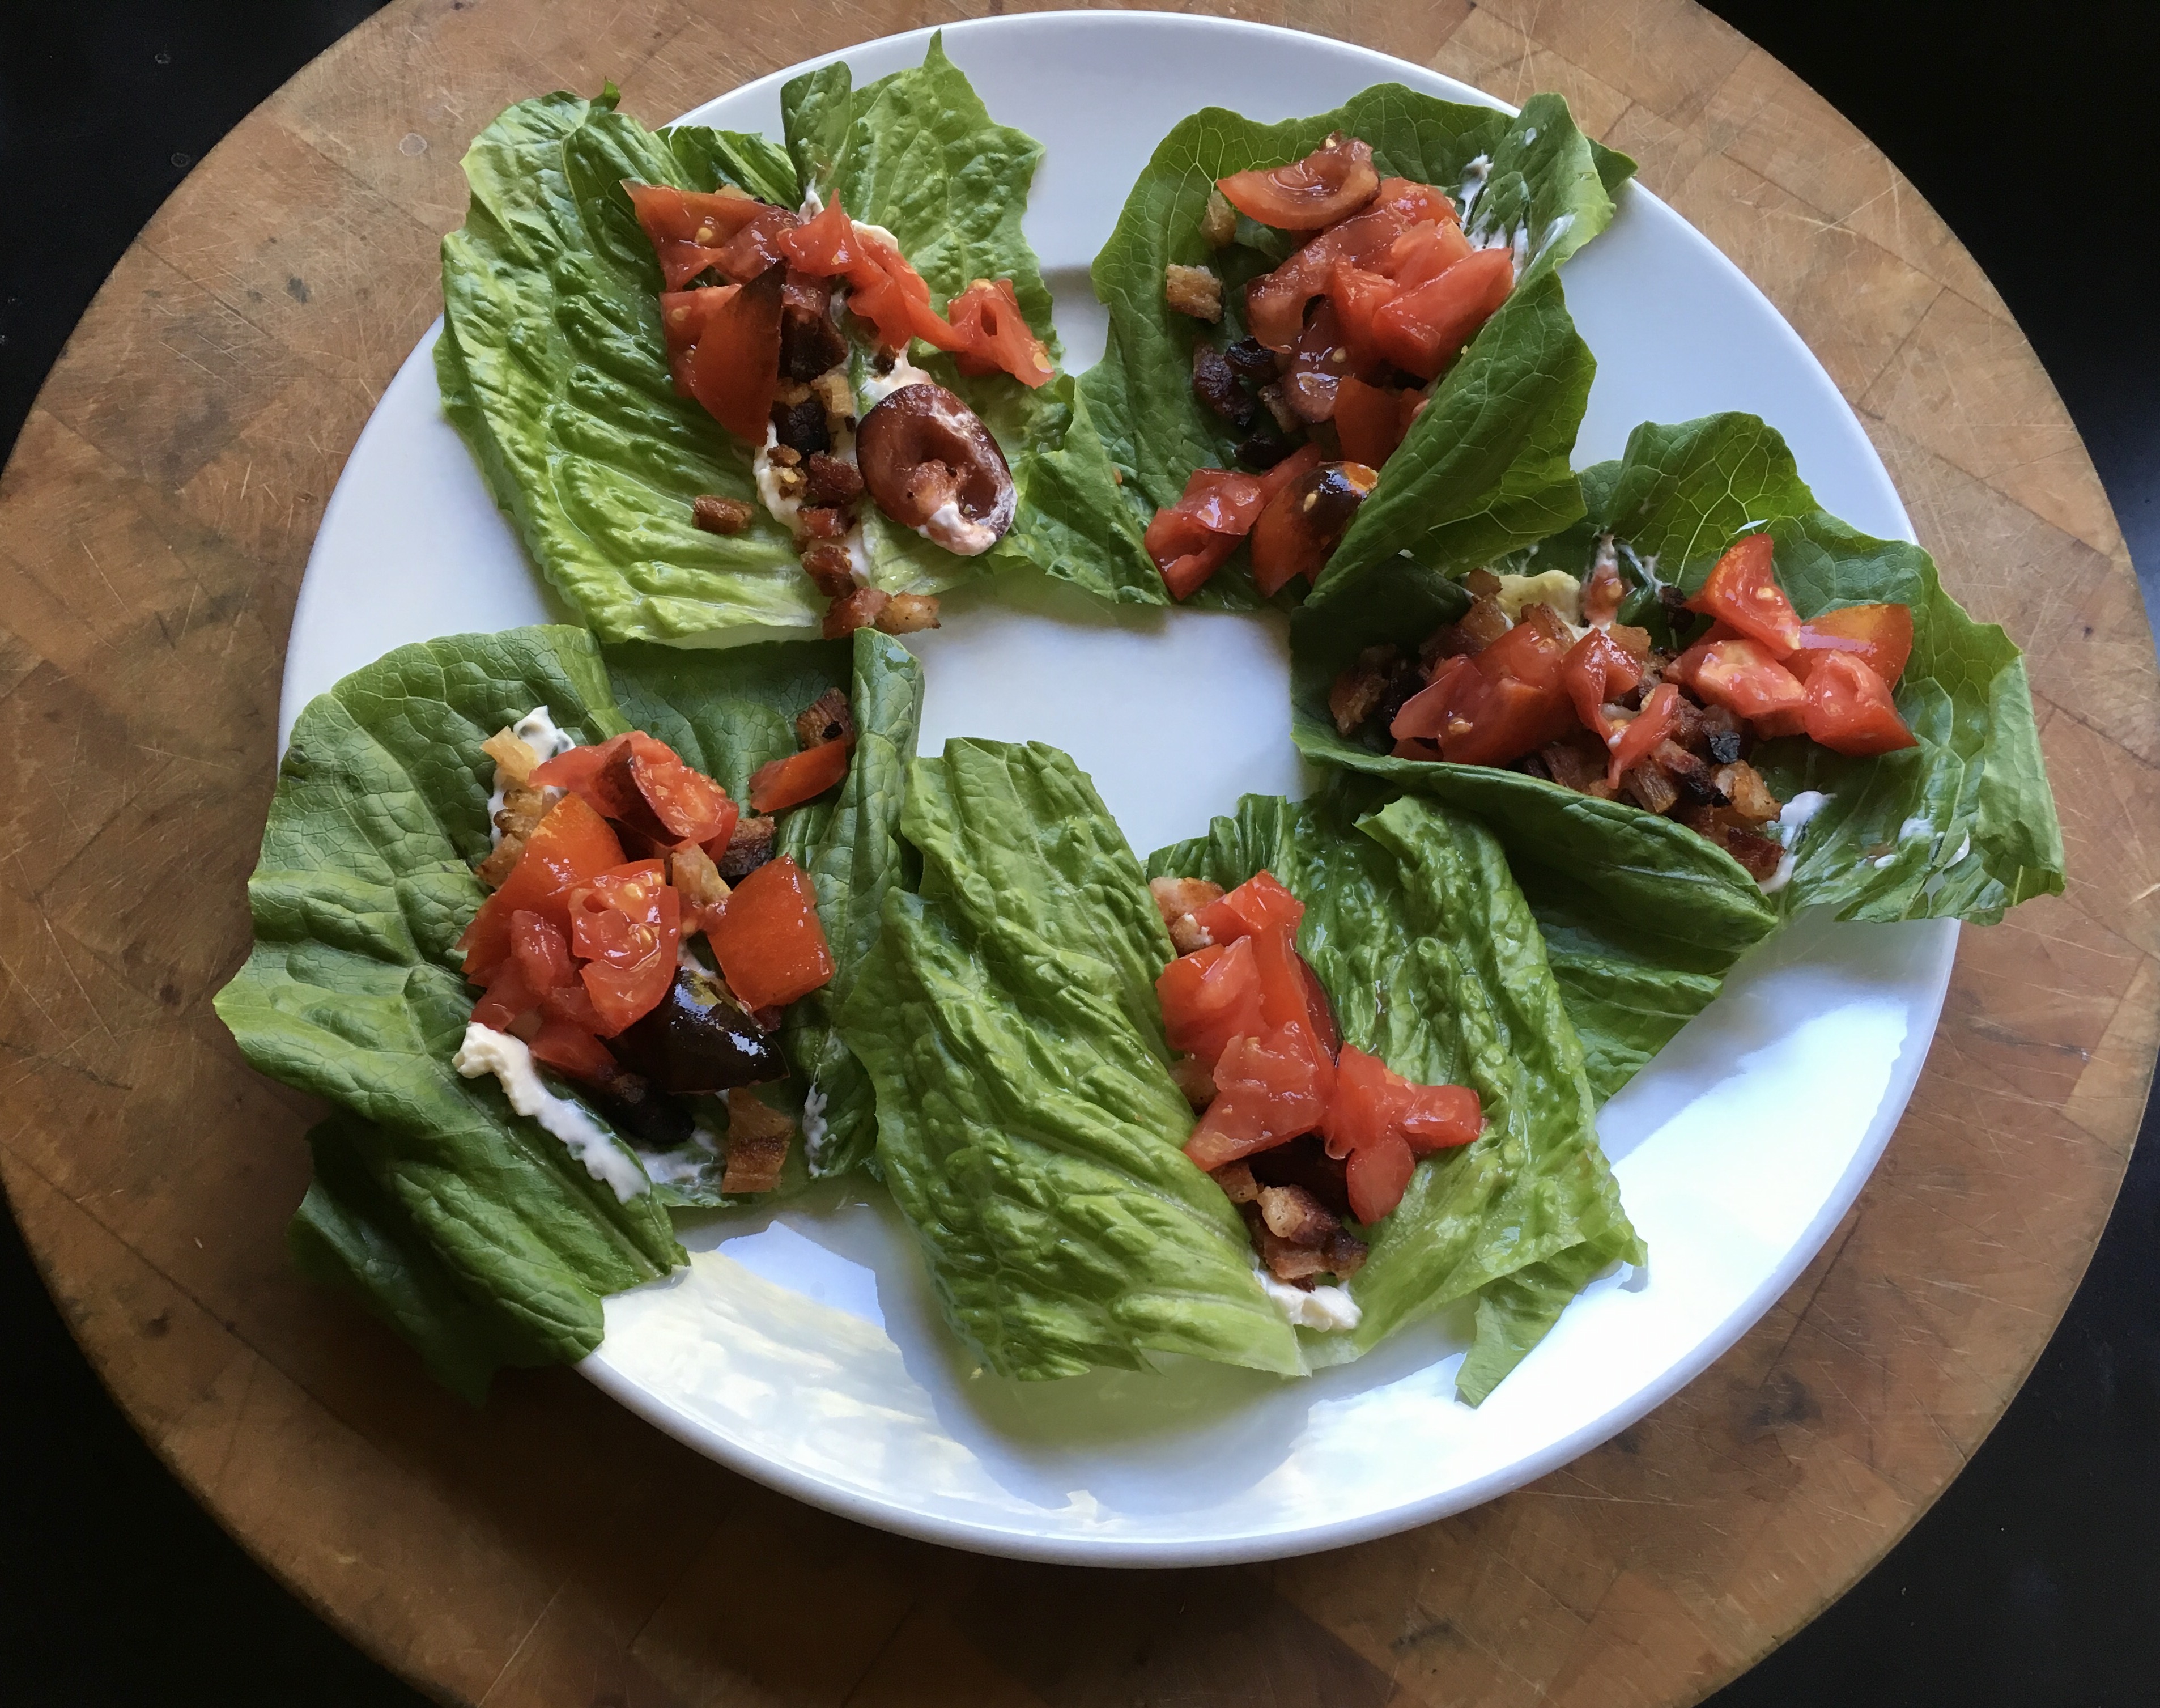
Let’s face it: there are few foods as magical as bacon. Add bacon to just about any dish you’re preparing, and it elevates it to incredible new heights of flavor. The BLT is possibly the greatest food combination ever invented: just a few simple, fresh ingredients, when placed together, transforming into one of the greatest sandwiches on planet Earth.
BLT wraps: home-cured and smoked bacon, local farmstead romaine, home garden tomatoes, always Hellman’s mayo.
If I’m buying bacon, I go on-line to Burger’s Smokehouse, a family run business in Missouri that has made great bacon for decades. The prices are good, and they include shipping. (smokehouse.com) I buy in quantity and freeze what I don’t need right away. My favorite is the thick-sliced country bacon “steaks.”
But nothings beats making your own.
Bacon comes from the pork belly, and they’re easy to find in any good butcher shop. But to get something a notch above, I’ll buy a heritage breed, like Berkshire pork, from Heritage Pork International. (heritagepork.com) I follow the simple curing techniques outlined in “Charcuterie,” a great book written by Michael Ruhlman and Brian Polcyn.
To cure bacon, all you really need is salt and sugar, and what they in the curing biz call “pink salt,” which is not to be confused with salt that happens to be pink, like Himalayan salt you would find in a gourmet store. Pink curing salt is bright pink to let you know that it’s a special salt that should only be used in small quantities for curing. The reason is: nitrites. Nitrites delay the spoilage of the meat, and help keep the flavors of spices and smoke. They also keep the meat nice and pink instead of an unappetizing gray. That’s good. However, nitrites can break down into nitrosamines, which have been known to cause cancer in lab animals. But let’s face it: you would need to eat a ton of cured meat to really worry about this. (I buy uncured deli meats and hot dogs at the supermarket, because processed meats are a different story. But since I know exactly what goes into my own bacon, I’m not worried about the level of nitrites.)
To make the basic dry cure:
1/2 lb. kosher salt (I use Diamond Crystal Kosher salt) 1/2 cup light brown sugar or turbinado sugar 1 oz. pink curing salt
Mix the ingredients well. An important note: all salts do not all weigh the same, so go by the weight and not a cup measurement. (Morton’s Kosher salt, for example, is heavier than Diamond Crystal.) I keep this basic dry cure stored in my pantry, ready to use when I need it.
When it’s time to be makin’ the bacon, I combine this dry cure with other ingredients to make my bacon rub.
My bacon rub:
1/2 cup basic dry cure 1/2 cup brown sugar or turbinado sugar 1 tablespoon fresh cracked black pepper 1 tablespoon granulated garlic 1 tablespoon granulated onion
Mix these ingredients well (yes, there’s quite a bit of sugar there, but I like my bacon a little sweet!) Rub it generously all over the pork belly.
I have a large plastic container with a lid that fits one average (4-lb.) slab of pork belly perfectly. I place the belly inside it, put the lid on, and place the container in the fridge. (Sometimes, I’ll season the belly and wrap it tightly with plastic wrap before putting it in the container. Optional.) The pork belly stays there for at least a couple of weeks, maybe three. I flip the belly every few days. You’ll see that the salt will draw moisture out of the meat and form a gooey brine. This brine will continue to cure your pork belly, so leave it in there. Just flip it, put the lid back on the container, and back in the fridge.
In two or three weeks, you’ll be able to tell the pork belly has cured because it feels firm. Wash the brine off the meat well with cold water, and pat it dry with paper towels. Place the belly in the fridge for an hour or so and it will develop a tackiness to the touch. This is a thin layer of proteins known as a pelicle, and it helps the smoke stick to the meat.
Now it’s time to cook. You can simply cook the pork belly (without smoking it) at 200° for about 2 hours, until the internal temperature reaches 160°. This isn’t bacon…it’s pancetta. Or you can simply slice it and fry it up in a pan. (Also delicious.) But it’s the smoke that makes it bacon.
Smoking foods can be a challenge to many, so a great alternative to the traditional charcoal smoker is an electric one. It allows you to control the exact temperature inside the smoker without checking on it constantly (a real luxury when you’re slow smoking brisket or pork shoulder for many hours), and it offers a tray where you place your wood chips or pellets to give your food that authentic smoky flavor.
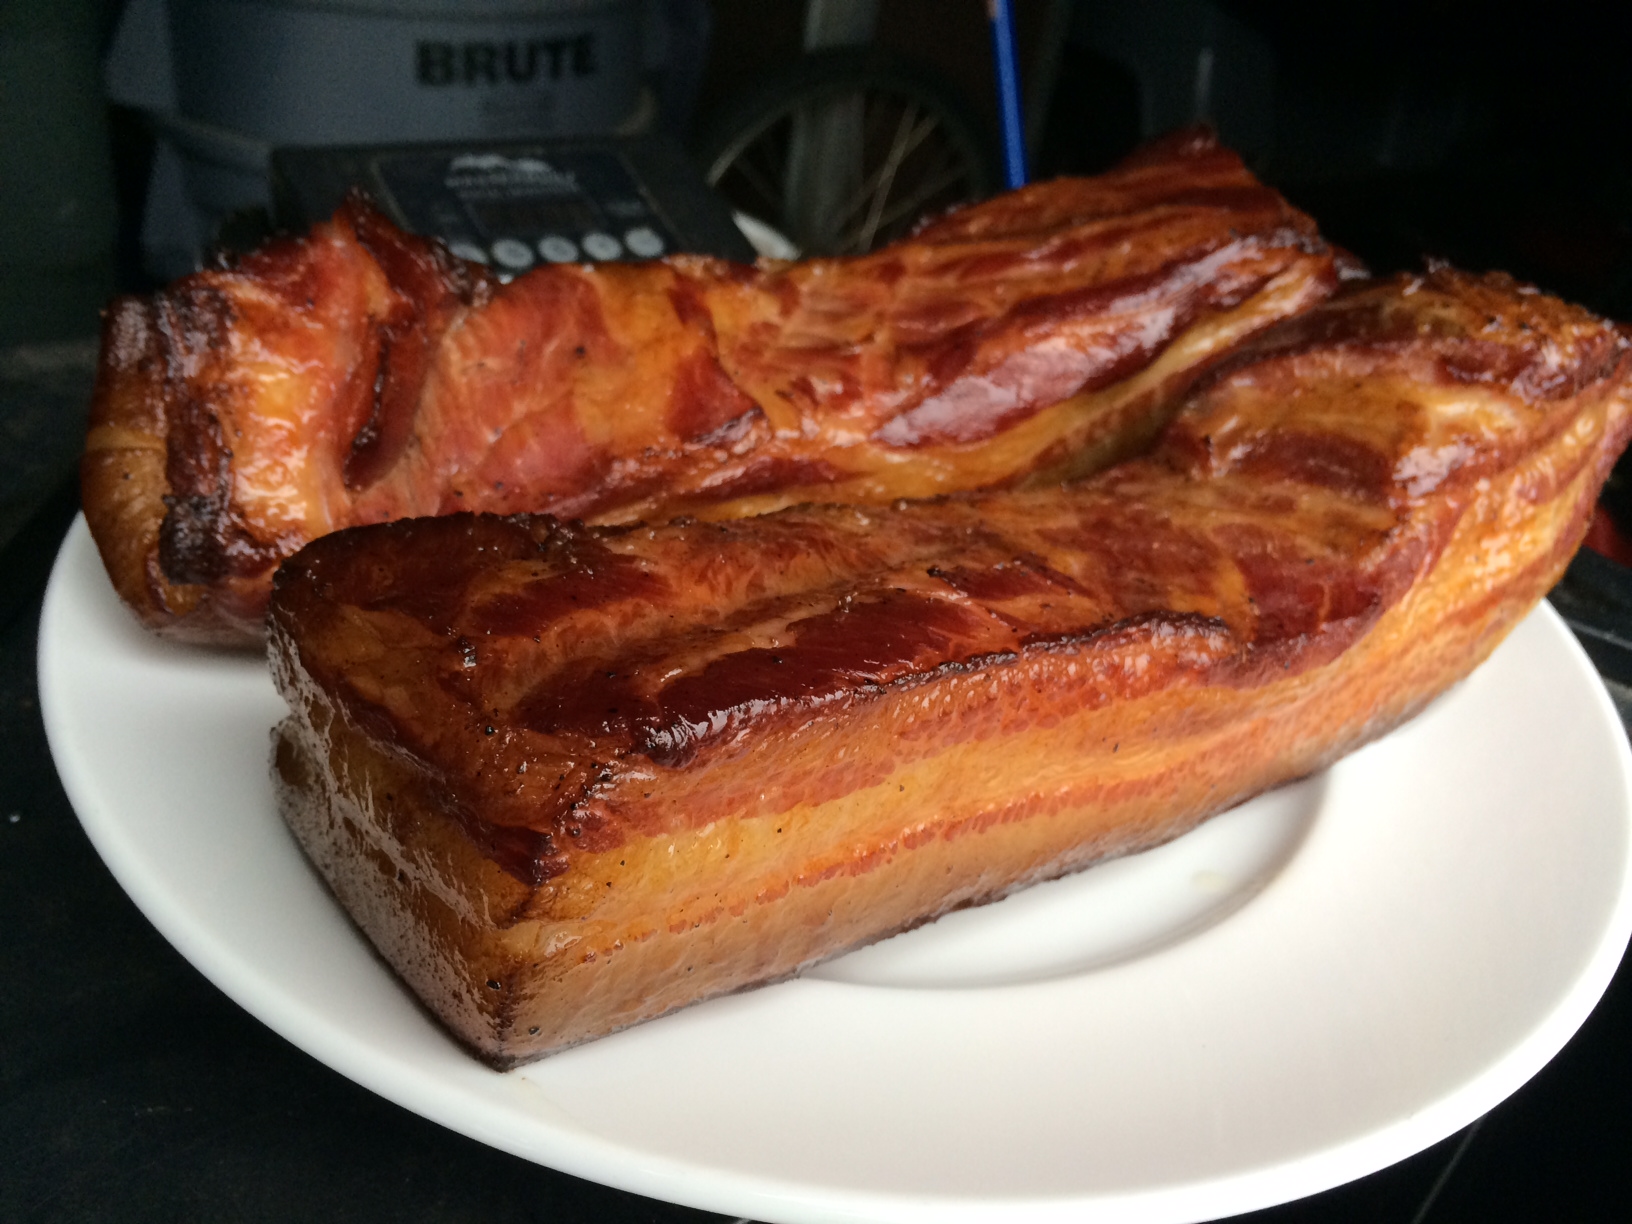
My electric smoker has a digital readout, which allows me to set an exact temperature. I smoke my pork belly at 250° for 2 hours, using hickory chips. (I’m not a fan of applewood, the other commonly used smoking wood for bacon.)
Bellies in the smoker. A water bath underneath to catch any grease drippage.A couple of hours later: beautiful bacon!
The reward is so worth the effort. Just remember that you still need to cook the bacon before you can eat it. Don’t eat it straight out of the smoker. That first slice you cut off your bacon and toss in a pan to lightly fry for a few moments will be the best bite you’ve ever had in your life!
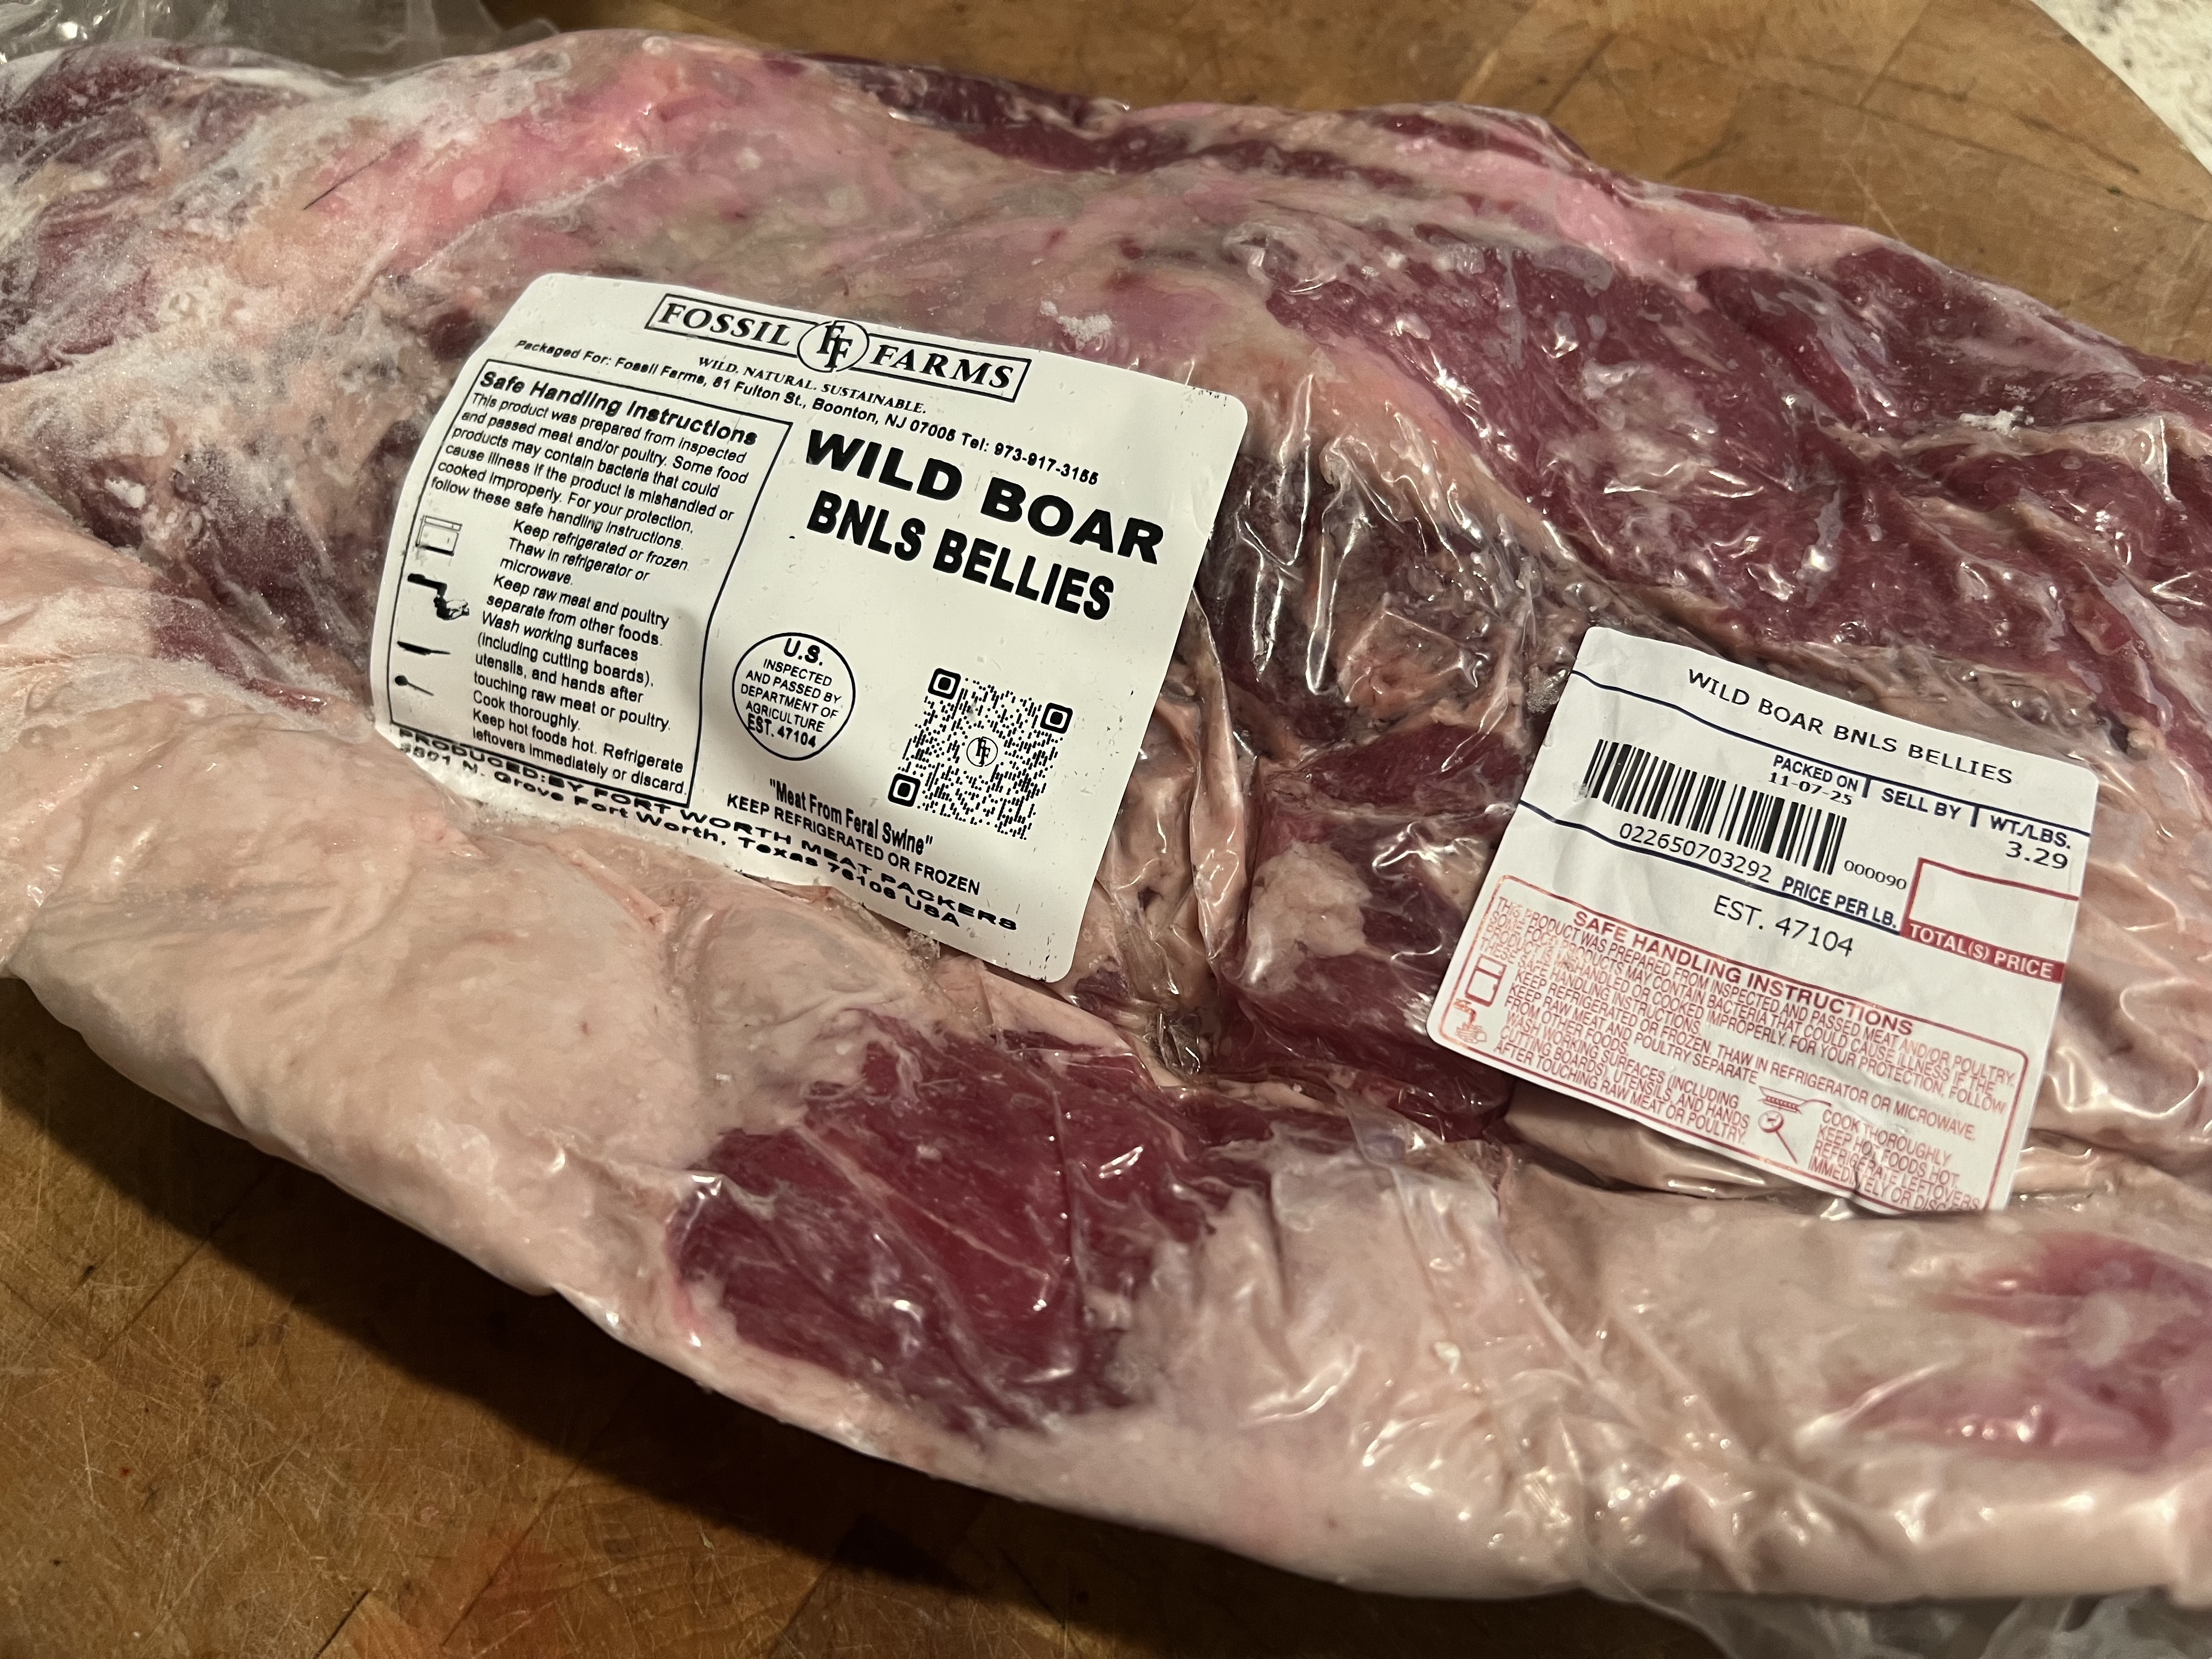
I recently received this wonderful gift from my buddy, Dr. Chezwick. I’ll be using the same techniques that I would for a regular slab of bacon, only I’ll cure it for less time, since it weighs less, and is thinner. I’m thinking it will be delicious!
Even though we’re still shoveling ourselves out from under the last snowstorm here in New England, now’s the time to start prepping brisket for corned beef on St. Patrick’s Day!
Before every St. Patty’s Day, supermarkets are full of packages of processed corned beef in preparation for the big celebration. But, interestingly, corned beef isn’t really an authentic Irish dish.
The phrase “corned beef” was coined by the British, and although the Irish were known for their corned beef throughout Europe in the 17th century, beef was far too expensive for the Irish themselves to eat and all of it was exported to other countries. Owning a cow in Ireland was a sign of wealth, and the Irish used theirs for dairy products, not beef.
The Irish ate pork, and a lot of it, because it was cheap to raise pigs, and they traditionally prepared something like Canadian bacon to celebrate St. Patrick’s Day in Ireland.
In the 1900’s, when the Irish came to America, both beef and salt were more affordable, and the Irish, who lived in poor, tight-knit communities, often next to Jewish communities, bought much of their beef from Kosher butchers. And so many of the Irish learned how to corn their beef using Jewish techniques, but adding cabbage and potatoes to the mix. That’s what we have today.
It takes about 3 weeks to make corned beef. Doing it yourself is not difficult. It just takes time.
Corned beef has nothing to do with corn. ‘Corning’ is a technique for preserving raw meats for long periods by soaking it in a salt brine. This method was used in England before the days of commercial refrigeration. Back then, the large salt kernels used in the brine were called “corns.”
Brining is a time-honored way of preserving meat and it prevents bacteria from growing. Both pastrami and corned beef are made by this method. Both start with a brisket of beef. Corned beef is then cooked–usually boiled–and served. Pastrami is made when the brined meat is rubbed with more spices and then smoked to add extra flavor. So corned beef and pastrami are the same meat, just treated differently.
Saltpeter is an ingredient that has been used in brining beef for years. It adds the traditional pink coloring to the corned beef and pastrami meat, a bit more appetizing than the gray color it tends to have if you don’t use it.
Saltpeter can also contain carcinogens, so there’s always talk of avoiding it. It’s found in pink curing salt, which is used in small amounts during the curing process. (Not to be confused with Himalayan pink salt, which is just plain salt.) Since I only make my corned beef once a year, I’m OK with it either way. The general rule of thumb is only 1 teaspoon pink curing salt per 5 pounds of meat.
I get grass-fed brisket in 10-pound slabs, but use whatever size you find comfortable. Just don’t go too small, or the brine will make that tiny piece of meat extremely salty.
Brining the beef brisket
Step one: corned beef…
beef brisket (about 8-10 pounds)
2 teaspoons paprika
1/4 cup warm water
3 cloves of minced garlic
2 tablespoons sugar
1 tablespoon mixed pickling spices
3/4 cup salt
1 teaspoon pink curing salt (optional)
2 quarts water
Place the brisket in a large container made of non-reactive material, like glass or plastic.
In the 1/4 cup of warm water, dissolve the sugar, minced cloves, paprika and pickling spices.
Dissolve the 3/4 cup of salt (and optional teaspoon of pink curing salt) in the 2 quarts of water. Pour in the sugar/garlic/paprika/pickling spices mix and stir everything together. Pour the mixture over the meat in the container. Make sure the meat is totally beneath the surface of the liquid. (You may need to weigh it down to do this. I place a couple of plates on top, which pushes the meat down into the brine.) If there’s just not enough liquid, double the recipe, leaving out the pink salt the second time. Cover the container.
Refrigerate the container and its contents for 3 weeks, turning the meat once or twice per week. At the end of the third week, remove the container from the refrigerator and take out the meat. Soak the meat in several changes of fresh cold water over a period of 12 hours to remove the excess salt. I add ice to the water to keep the meat cold.
At this point, if you want corned beef, most people boil it.
I prefer to lay some aluminum foil down on a sheet pan. Then I coarsely chop carrots, onions, and celery, placing them in a single layer on the foil. Then I lay my brisket on top of the veggies, and wrap the meat tightly in the foil. I place the baking pan in a pre-heated 350 degree oven and cook for about 3 1/2 hours. (That’s for an 8-pound slab of meat. The cooking time will be less for a smaller cut.)
If you want to make pastrami, there are more steps to take…
Step two: making Pastrami…
Brined and rinsed corned beef brisket from above recipe, patted dry with paper towels
1/4 cup Kosher salt
1/4 cup paprika
3 tablespoons coriander seeds
2 tablespoons black peppercorns
2 tablespoons yellow mustard seeds
1 tablespoon white peppercorns
3 tablespoons brown sugar
1 tablespoon granulated garlic
Combine the coriander seeds, black and white peppercorns and mustard seeds in a spice grinder and grind them coarsely. Place them in a bowl. Add the salt, paprika, brown sugar and granulated garlic. Mix well.
Rub the mix into the corned beef well, covering all sides.
Heat your smoker to 225 degrees and smoke the meat for several hours. (My wood of choice is always hickory.) When the internal temperature of the meat has reached 165 degrees, it’s done. It isn’t necessary to smoke pastrami as long as you would a regular brisket because the long brining time makes the meat more tender, and you’ll be steaming it next.
It is very important that absolutely everything that comes in contact with the meat is very clean. (This includes your hands.) Also, make very sure that every inch of the meat reaches the 165 degrees before it is removed from the smoker. The corned beef is now pastrami.
Delis that serve pastrami go one step further: they steam the meat so that it becomes incredibly tender and easy to slice. I place a baking pan with boiling water in the center of a 350° oven. I put a grate on top of it, placing the pastrami on top of the grate. Then I invert a bowl over the pastrami to keep the steam in. I will cook it this way for at least an hour to steam the meat before slicing and serving.
Sometimes the best ideas come from out of nowhere.
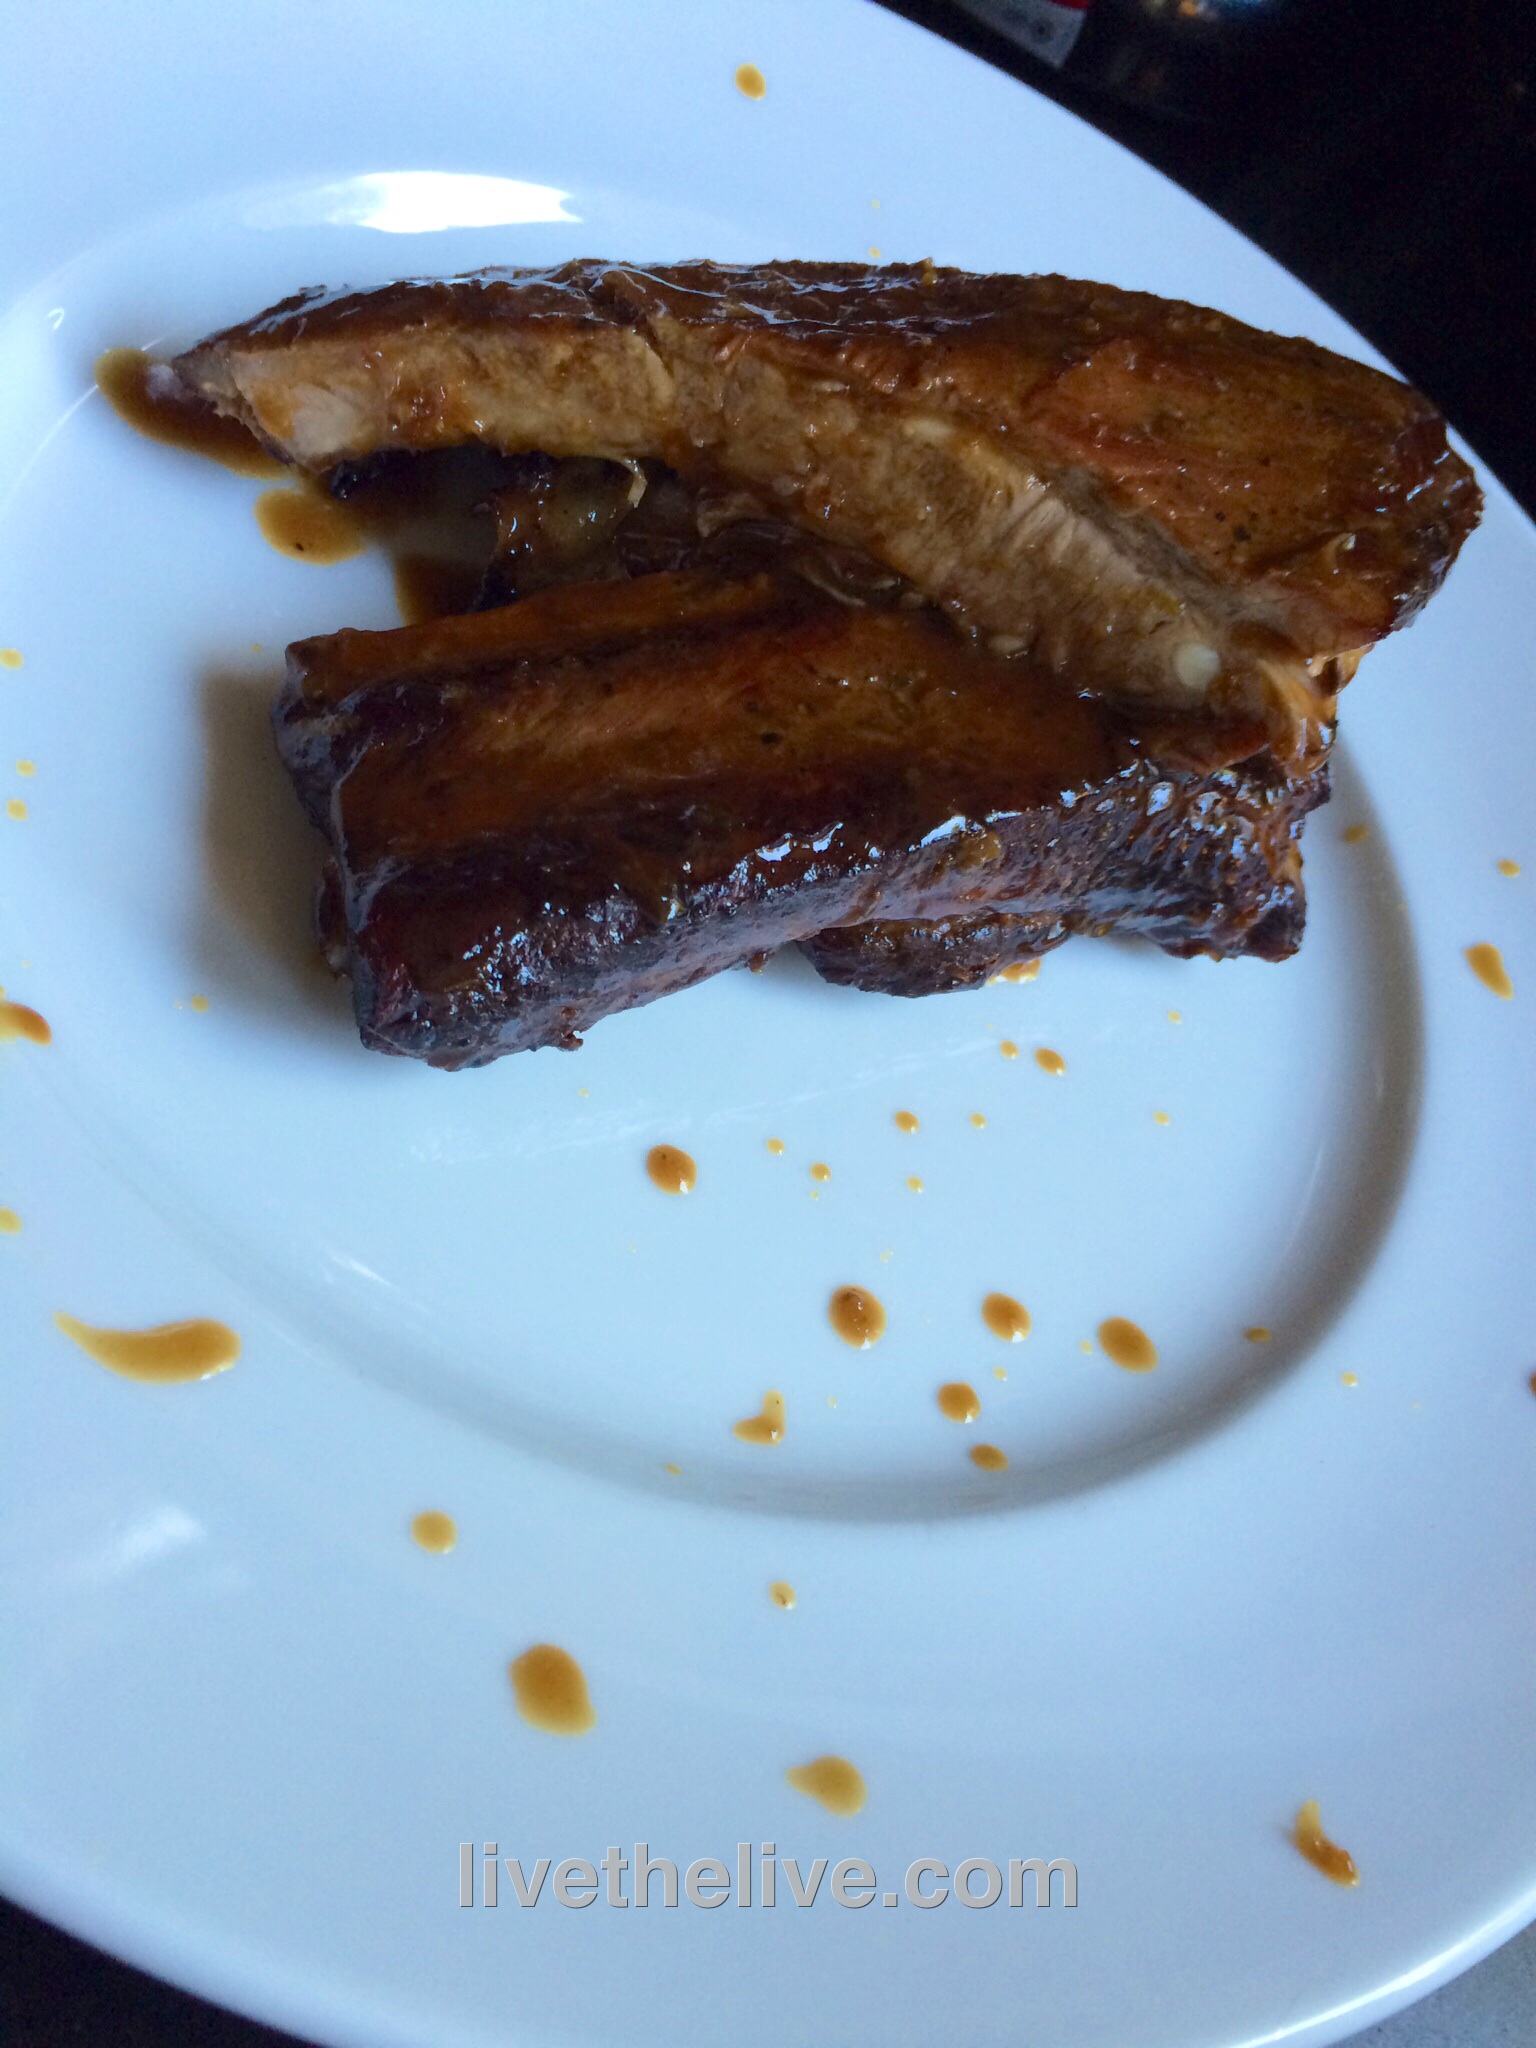
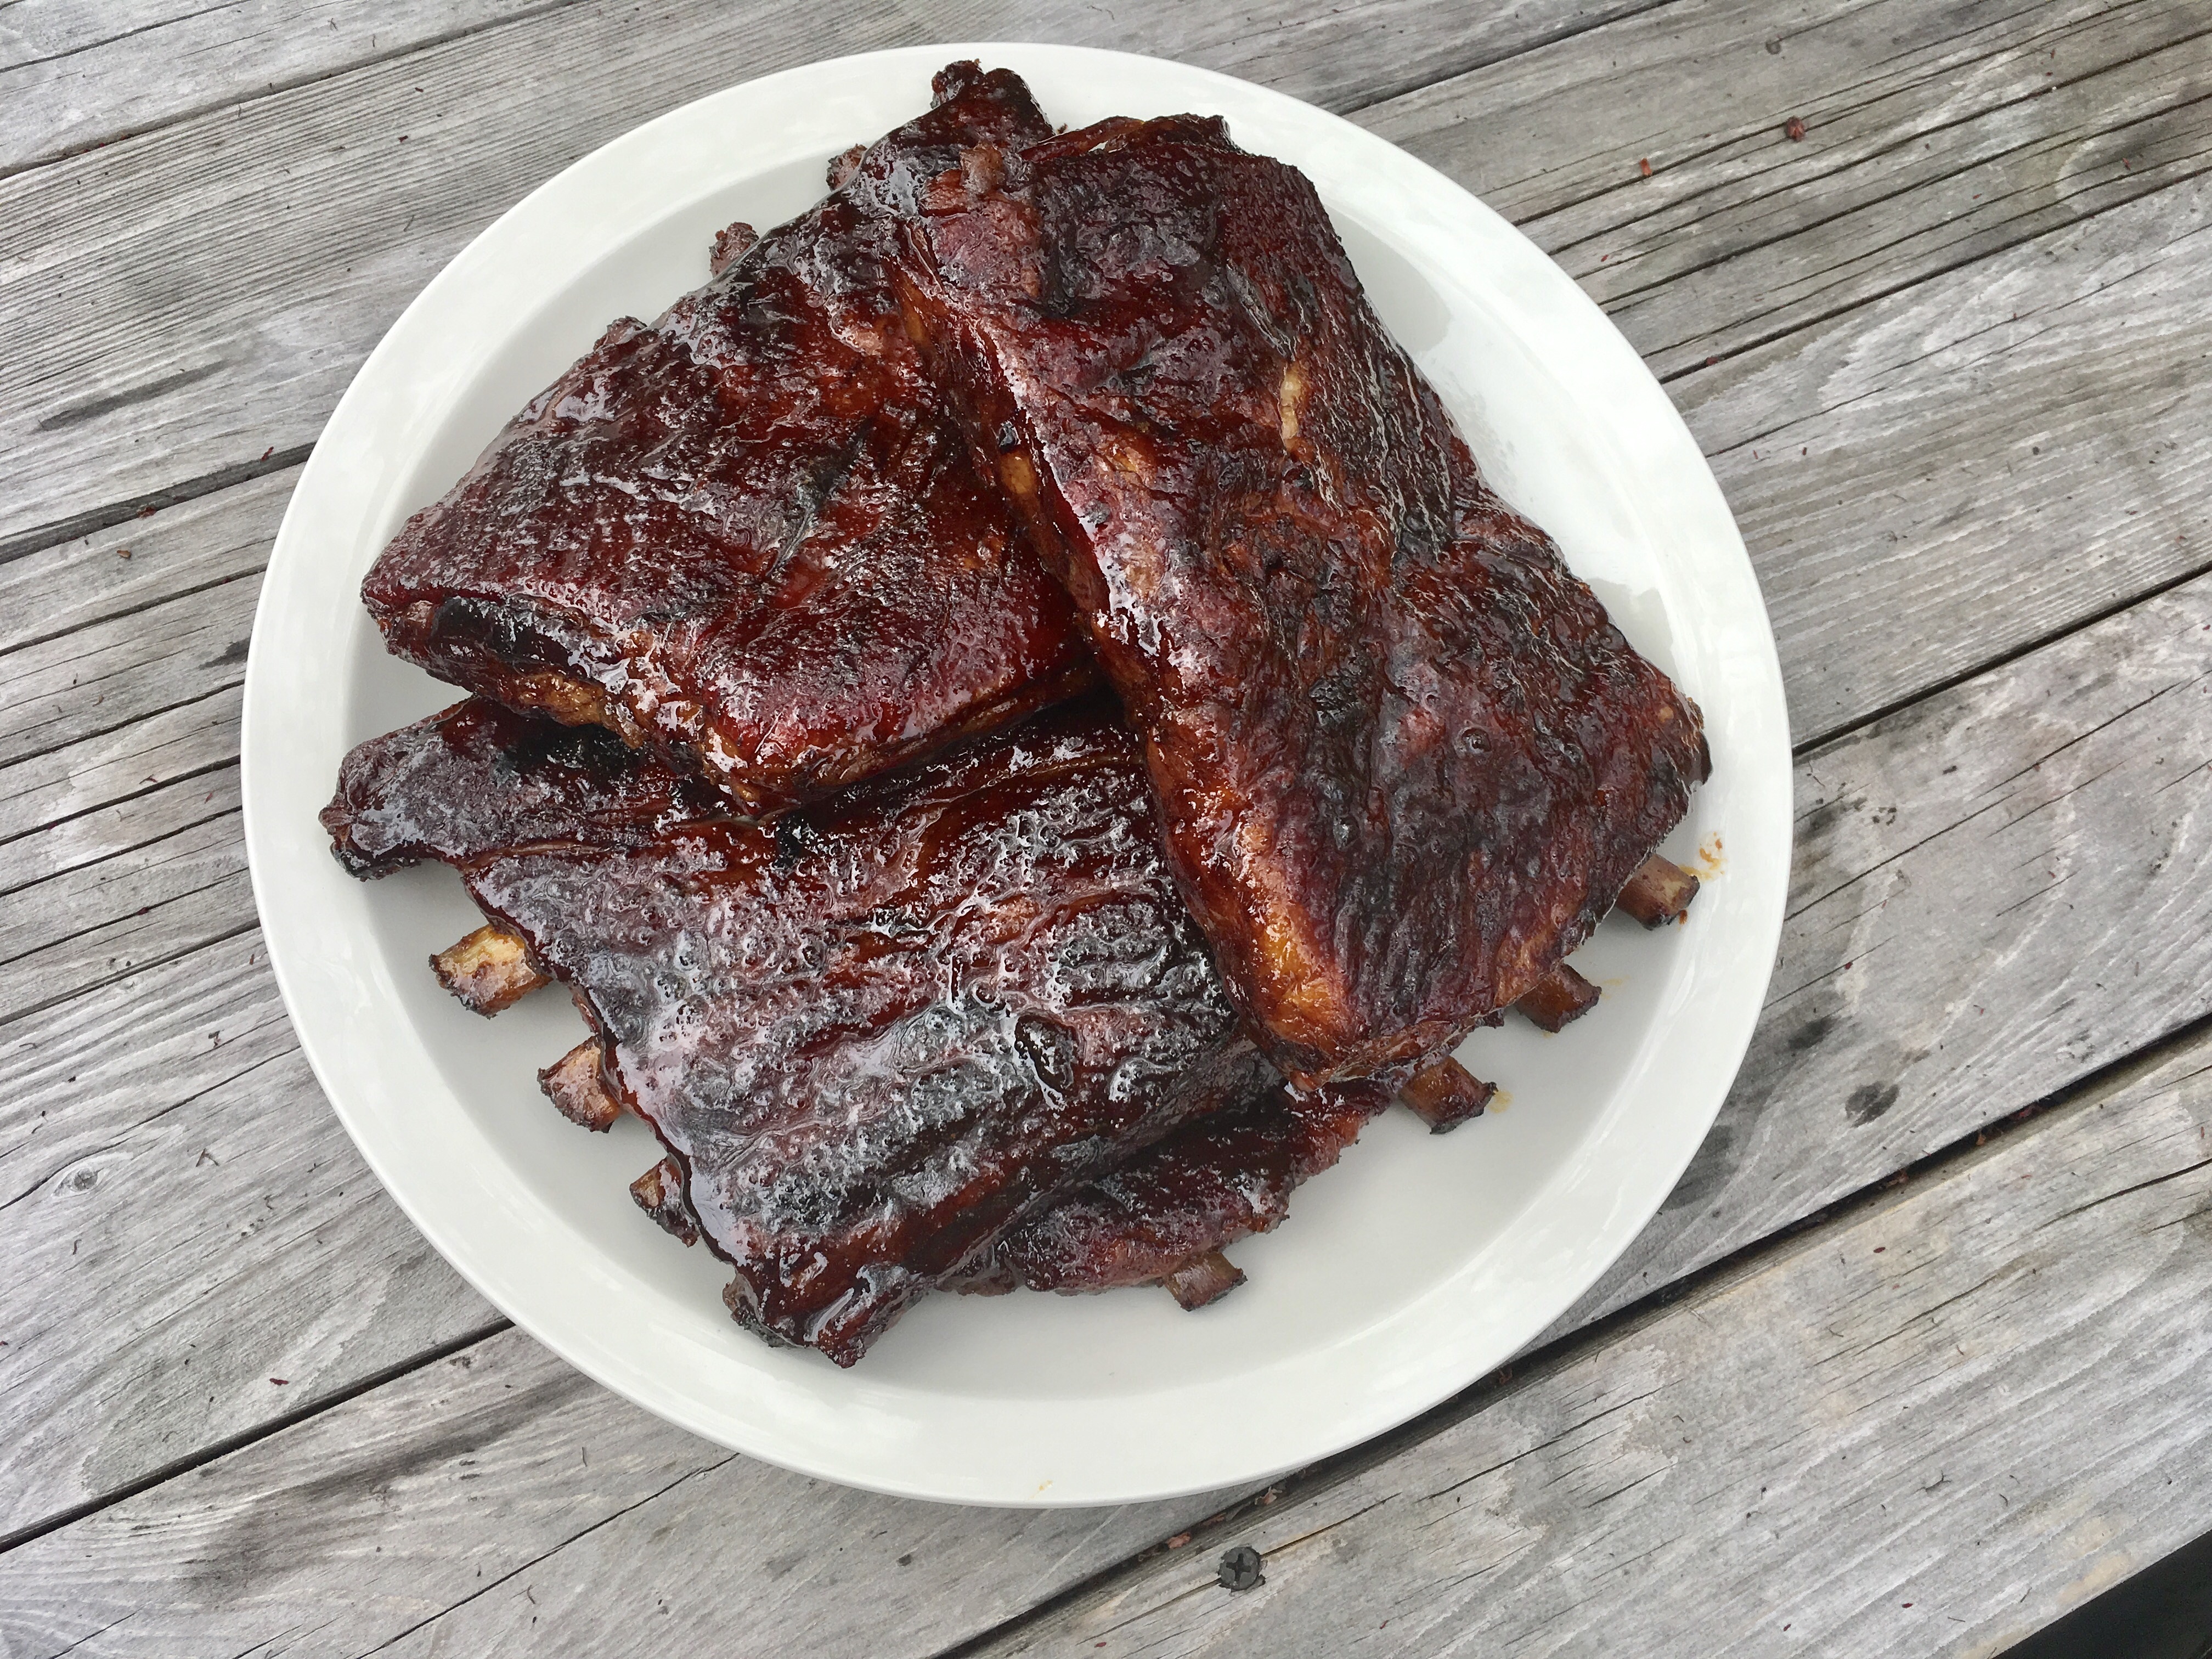
I had 5 lbs. of beautiful St. Louis-style heritage Berkshire (also known as Kurobuta) pork ribs thawing in the fridge, and I knew I wanted to create a new sauce or glaze with them, but I was feeling less than inspired. Our food-loving friends, Don and Johanna, showed up at our door with a gift they bought in Maine, at a shop called LeRoux Kitchen. It was a bottle of maple balsamic vinegar. It smelled wonderful…and tasted even better! I knew I had what I was looking for.
I used a smoker to make these ribs, but if you don’t have one (or just don’t want to bother with one), the ribs are just as awesome when baked in the oven.
You can easily make your own maple balsamic vinegar by combining a 1/2 cup of balsamic (not the super-expensive kind, but the $9-a-bottle kind) with 1 tablespoon of maple syrup. Add more or less maple to taste.
Yup…my old smoker…she’s been used a few times!
I originally used an electric digital smoker made by Masterbuilt. That beauty (above) has now made way for the Ninja Outdoor Woodfire Pizza Oven, which is also a smoker. I like the fact that I can set the temperature and time, and not have to constantly watch it. It has a side chute where I can add hickory smoking pellets when I want, and the results are consistent. I suppose some grilling fanatics might say I’m cheating, but a digital smoker allows me to live a life, hang out, do some yard work, whatever. I don’t have time to babysit.
I chose to smoke my ribs for about 4 hours in the smoker, lightly seasoning them first with Lawry’s Seasoned Salt, adding hickory chips to the smoker only once to give them a “light smoke.”
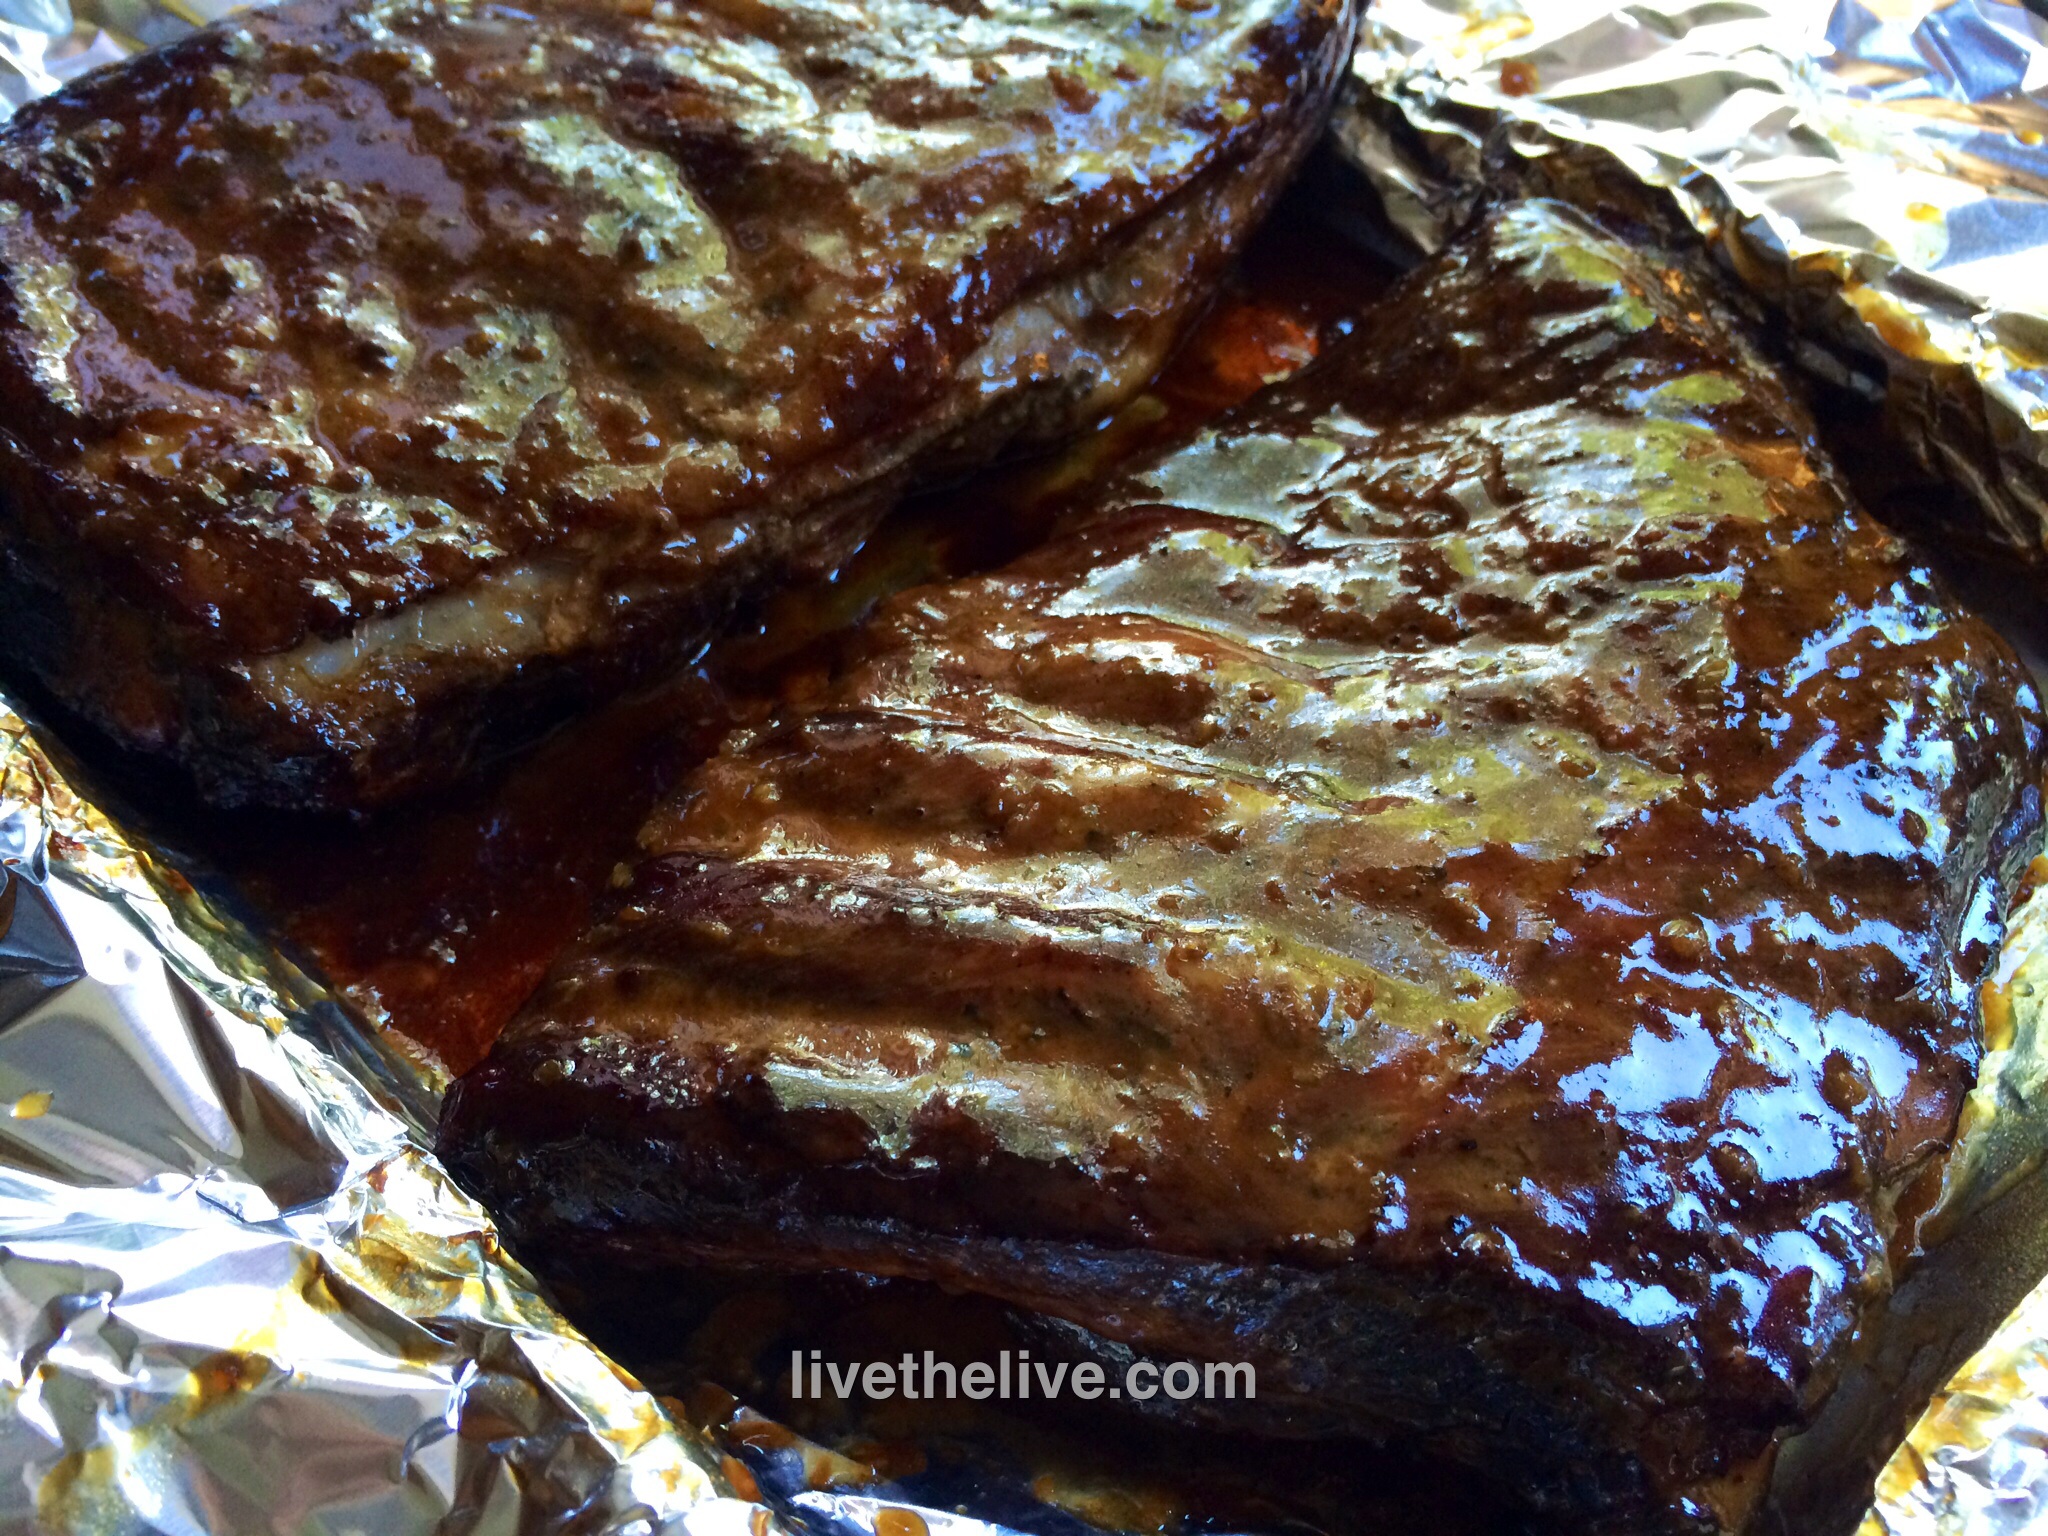
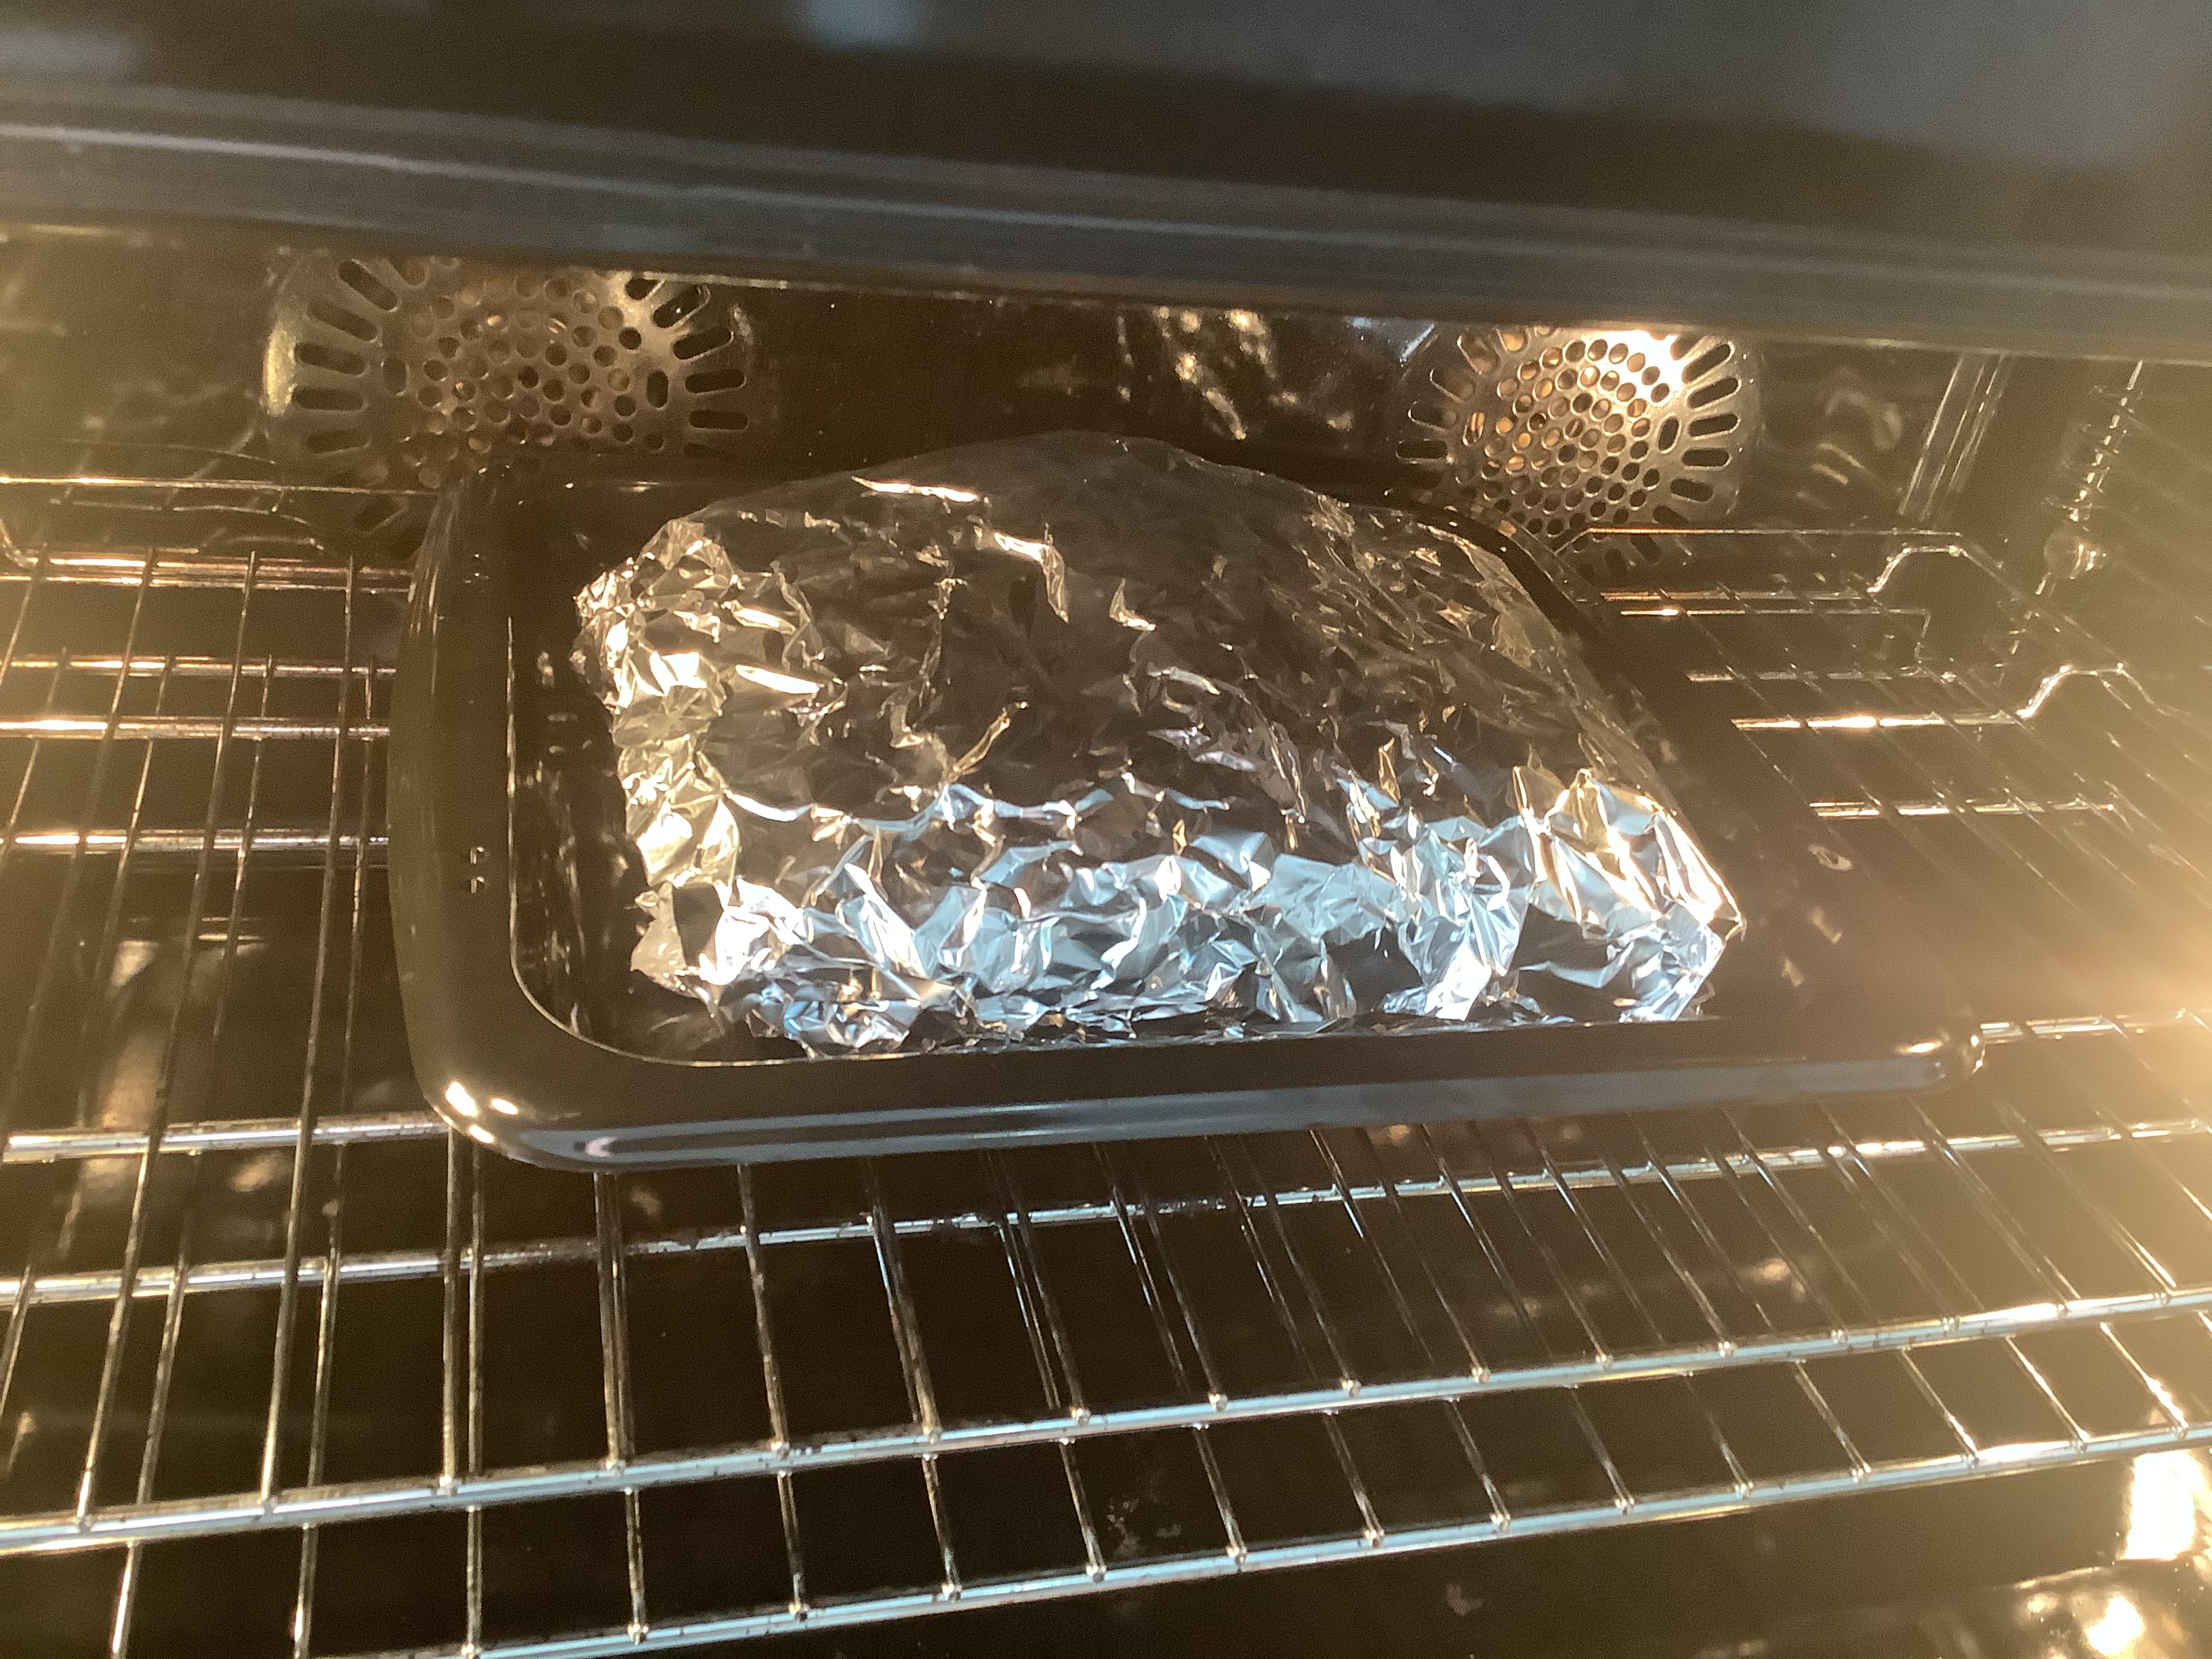
To avoid drying out the ribs, after a few hours of smoking, I like to brush them with a glaze, wrap them in foil, and then put them back in the smoker…or even in the oven. The glaze flavors the meat and also adds a little steam that tenderizes it.
Brushing with glaze, then wrapping in foil.
5 lbs. pork ribs (I get St. Louis-style Berkshire pork) Lawry’s Seasoned Salt
1 cup water
1/2 cup maple balsamic vinegar (OR 1/2 cup balsamic vinegar + 1 tablespoon maple syrup)
1/4 cup brown sugar
1/2 teaspoon granulated onion
1/2 teaspoon granulated garlic
1/2 teaspoon cayenne pepper sauce (I like Franks’ Red Hot)
Prepare the ribs by removing the inedible skin on the back of the rack. The easiest way to do this is to cut a little “tab” of skin, then pull it with your fingers. Holding the skin with a dry paper towel will help your grip. I cut the racks in half to fit my smoker.
Season the ribs lightly with Lawry’s Seasoned Salt on both sides and place them into a 250° smoker (or oven, if you don’t have a smoker) for 3 hours, smoking lightly with hickory wood. (Skip the hickory if you’re using the oven.)
In a saucepan over high heat, combine the water, maple balsamic vinegar, brown sugar, onion, garlic, and cayenne pepper sauce. Stir well, and let it come to a boil. Let it reduce by half, leaving it still watery. Set it aside.
After 3 hours, remove the ribs from the smoker (or oven), placing them on a sheet of aluminum foil. (I use Reynold’s Non-Stick Foil, since the glaze will be sticky.) Brush both sides of the ribs with half of the glaze, and place the ribs meat-side-up on the foil before sealing the it around the ribs. Place the aluminum foil packets on a baking sheet, then into a pre-heated 250° oven (or back in the smoker.)
Remove the ribs from the oven or smoker after 1 hour. Open the foil packets so that the ribs are now exposed. Brush the top of the ribs one more time, then put the foil back over the top and cook for 1 hour more.
Growing up in NY, I was introduced to smoked whitefish, herring, and lox at an amazing deli just down the road from my parents’ house. Smoked whitefish salad was readily available, but it had a lot of mayonnaise and filler. It’s a lot of work making it at home, but worth it.
Whole smoked whitefish may be a bit hard to find, and it could get expensive if you buy it from your local deli. But sometimes big membership stores like BJ’s will sell whole smoked whitefish.
I use capers in this recipe, but dill pickle relish works well, too.
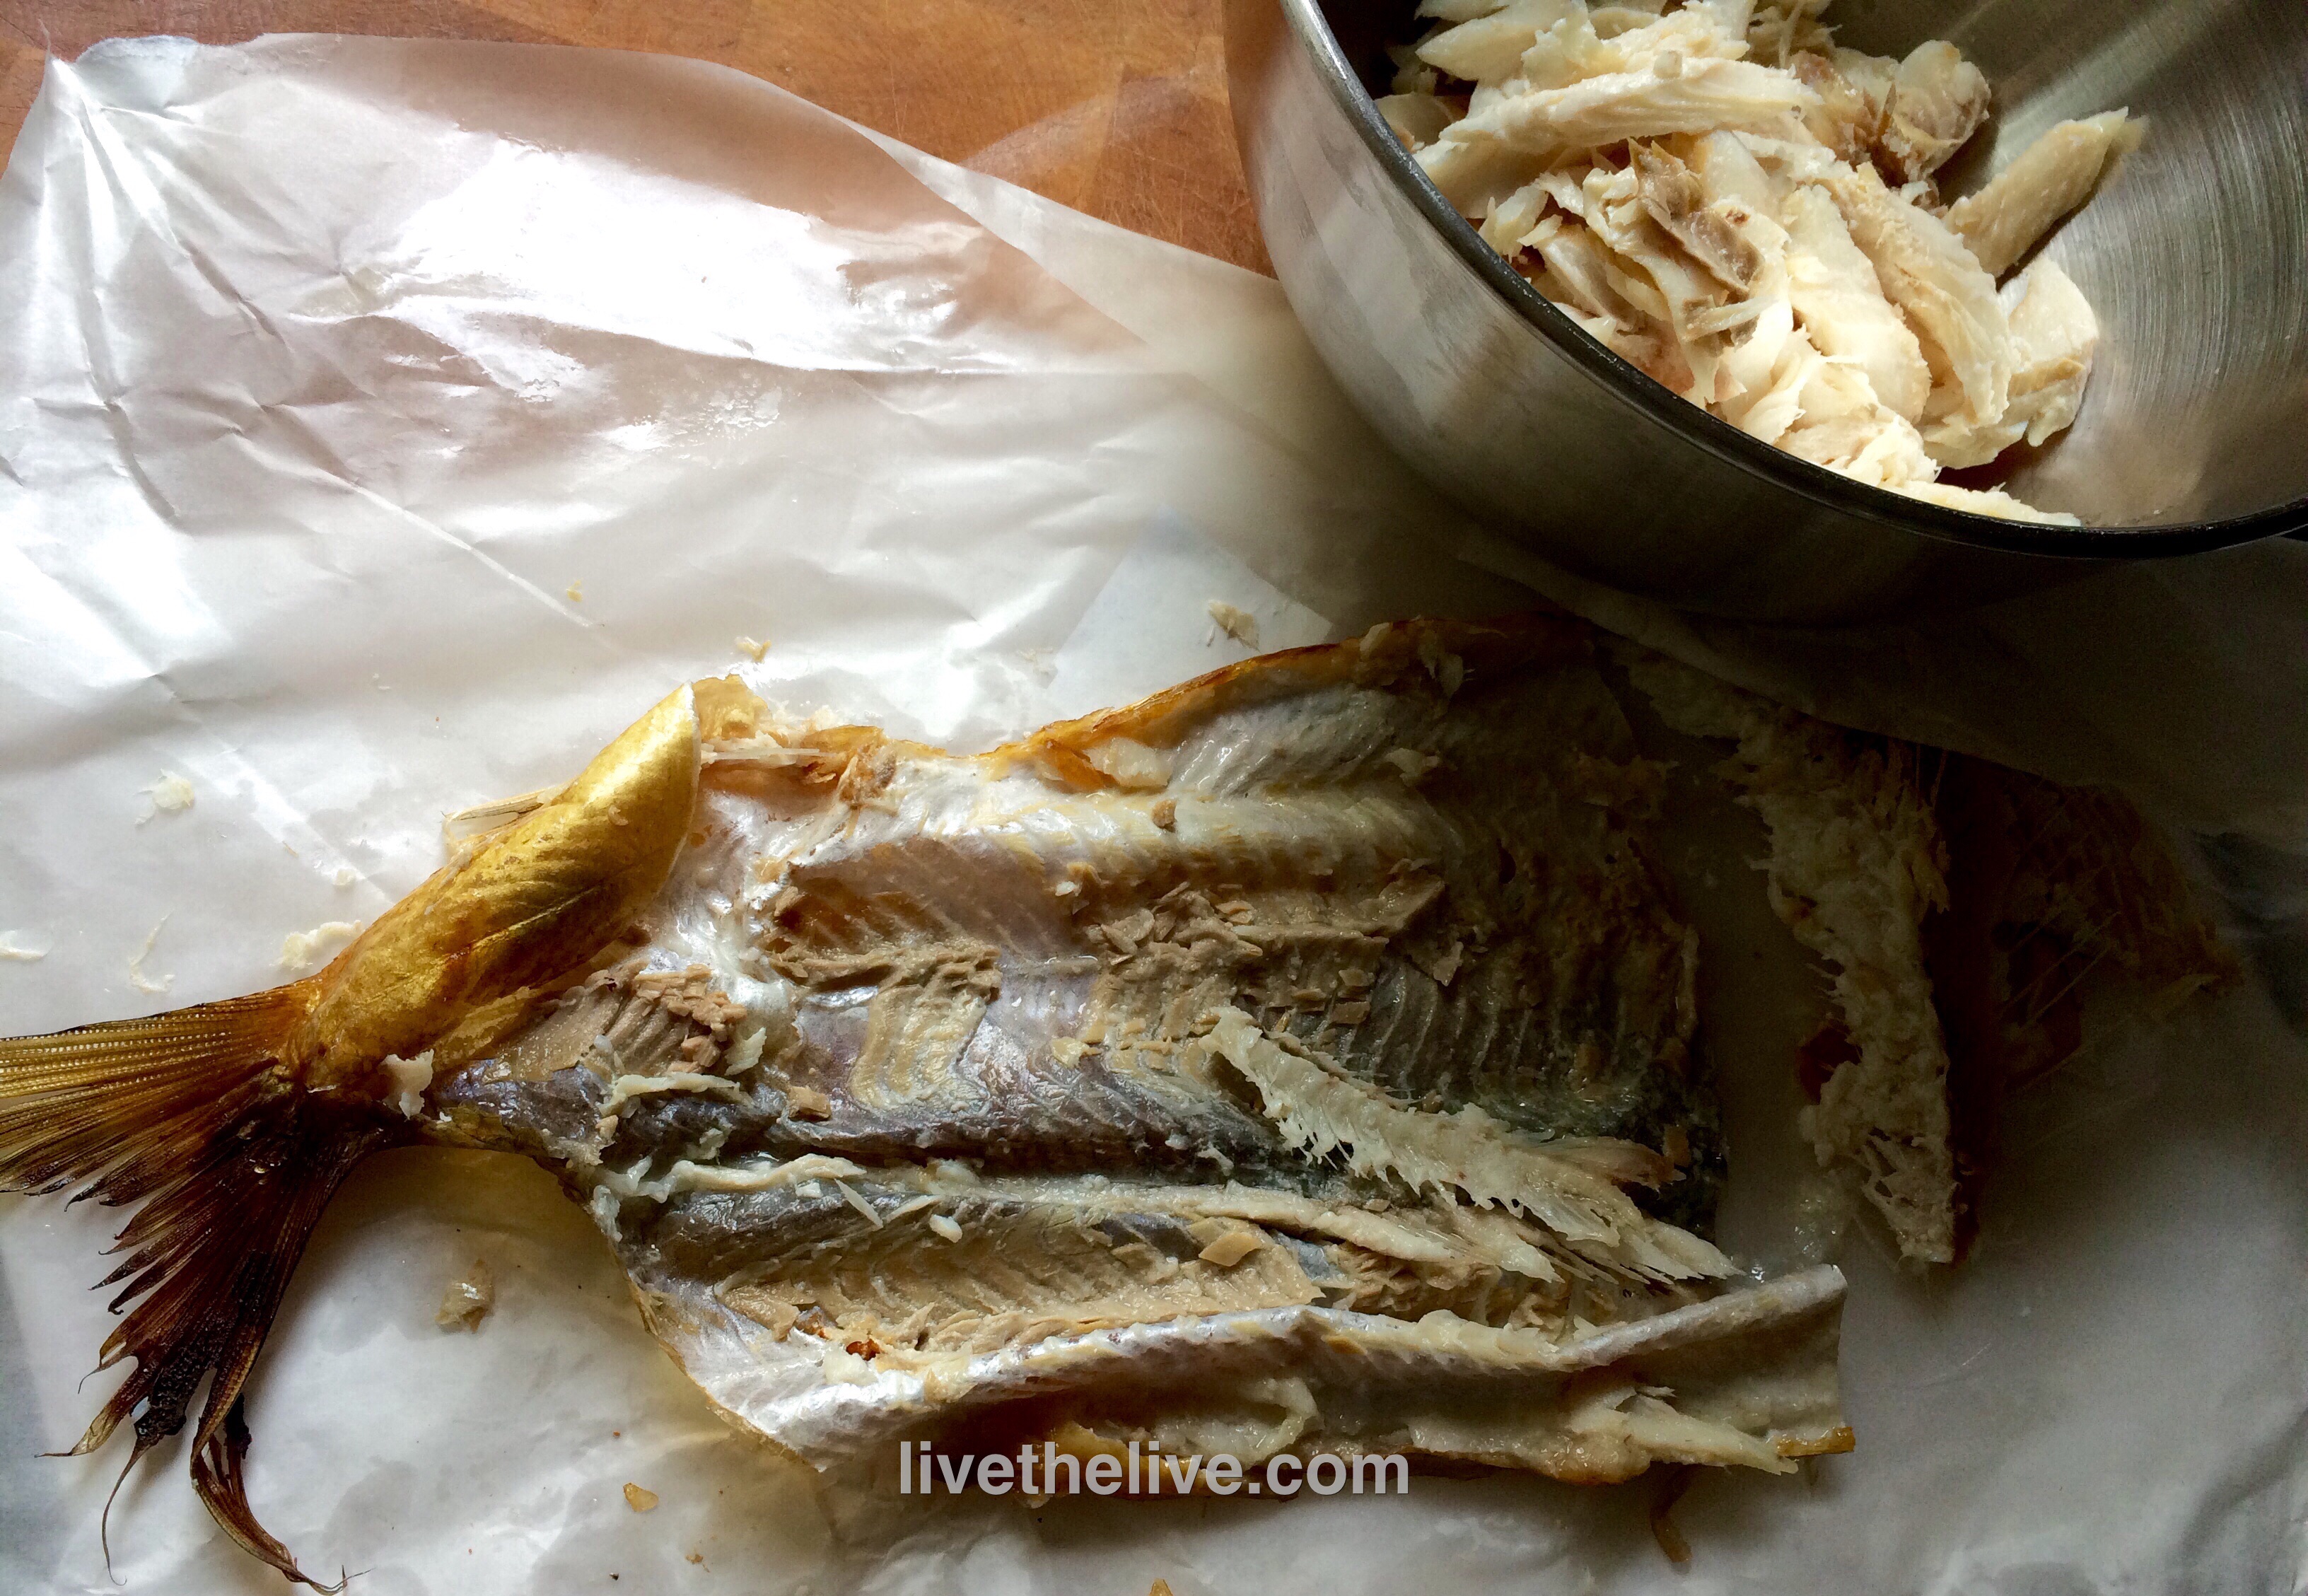
Remove every bit of meat. Double-check for bones!
1/2 whole smoked whitefish, meat removed
1/2 cup mayonnaise
1/4 cup finely chopped Vidalia onion
1 tablespoon capers, finely chopped
1 tablespoon freshly squeezed lemon juice
1 hard-boiled egg, finely chopped
Freshly ground pepper
Pinch of sea salt (I like Fleur de Sel)
Remove the meat from the smoked whitefish carefully, making sure all the small bones have been removed. Double-check to make sure you’ve done this really well. It pays to be really meticulous with this job so that you (or your guests) don’t gag on a fish bone later!
Place all the whitefish meat in a bowl.
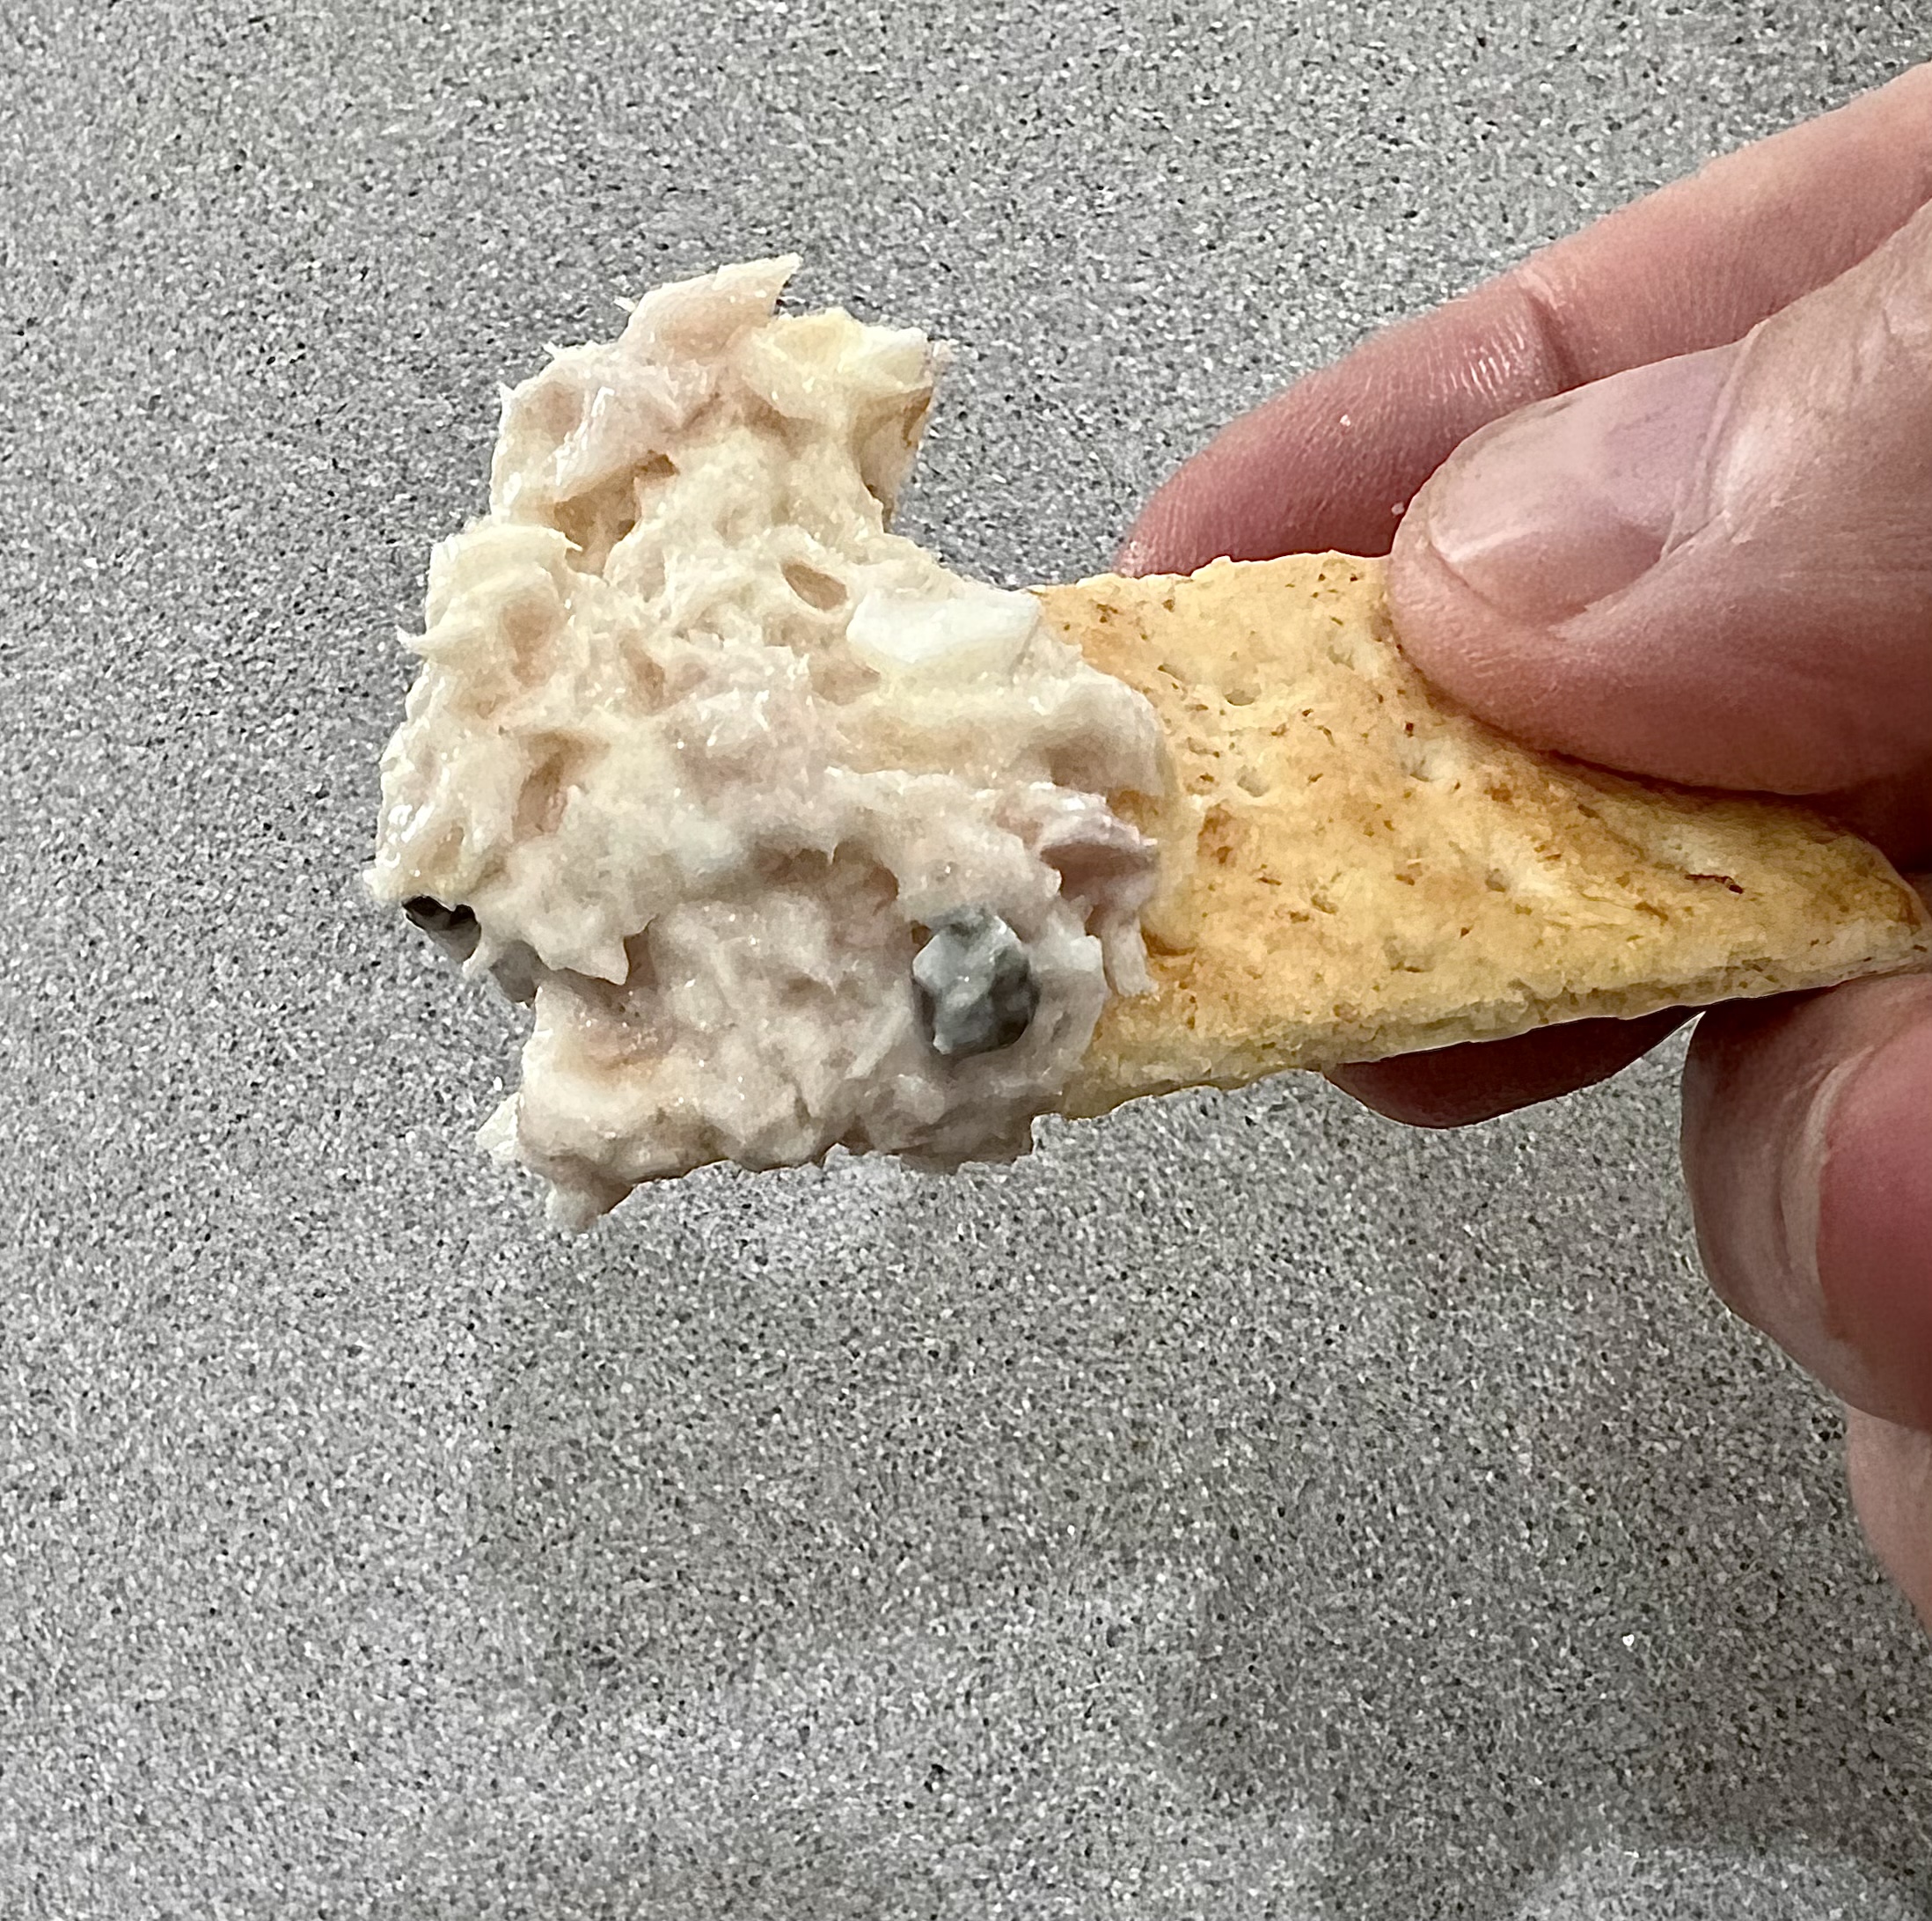
Combine all the other ingredients with the fish, mixing thoroughly. (Try not to mush it up too much!)
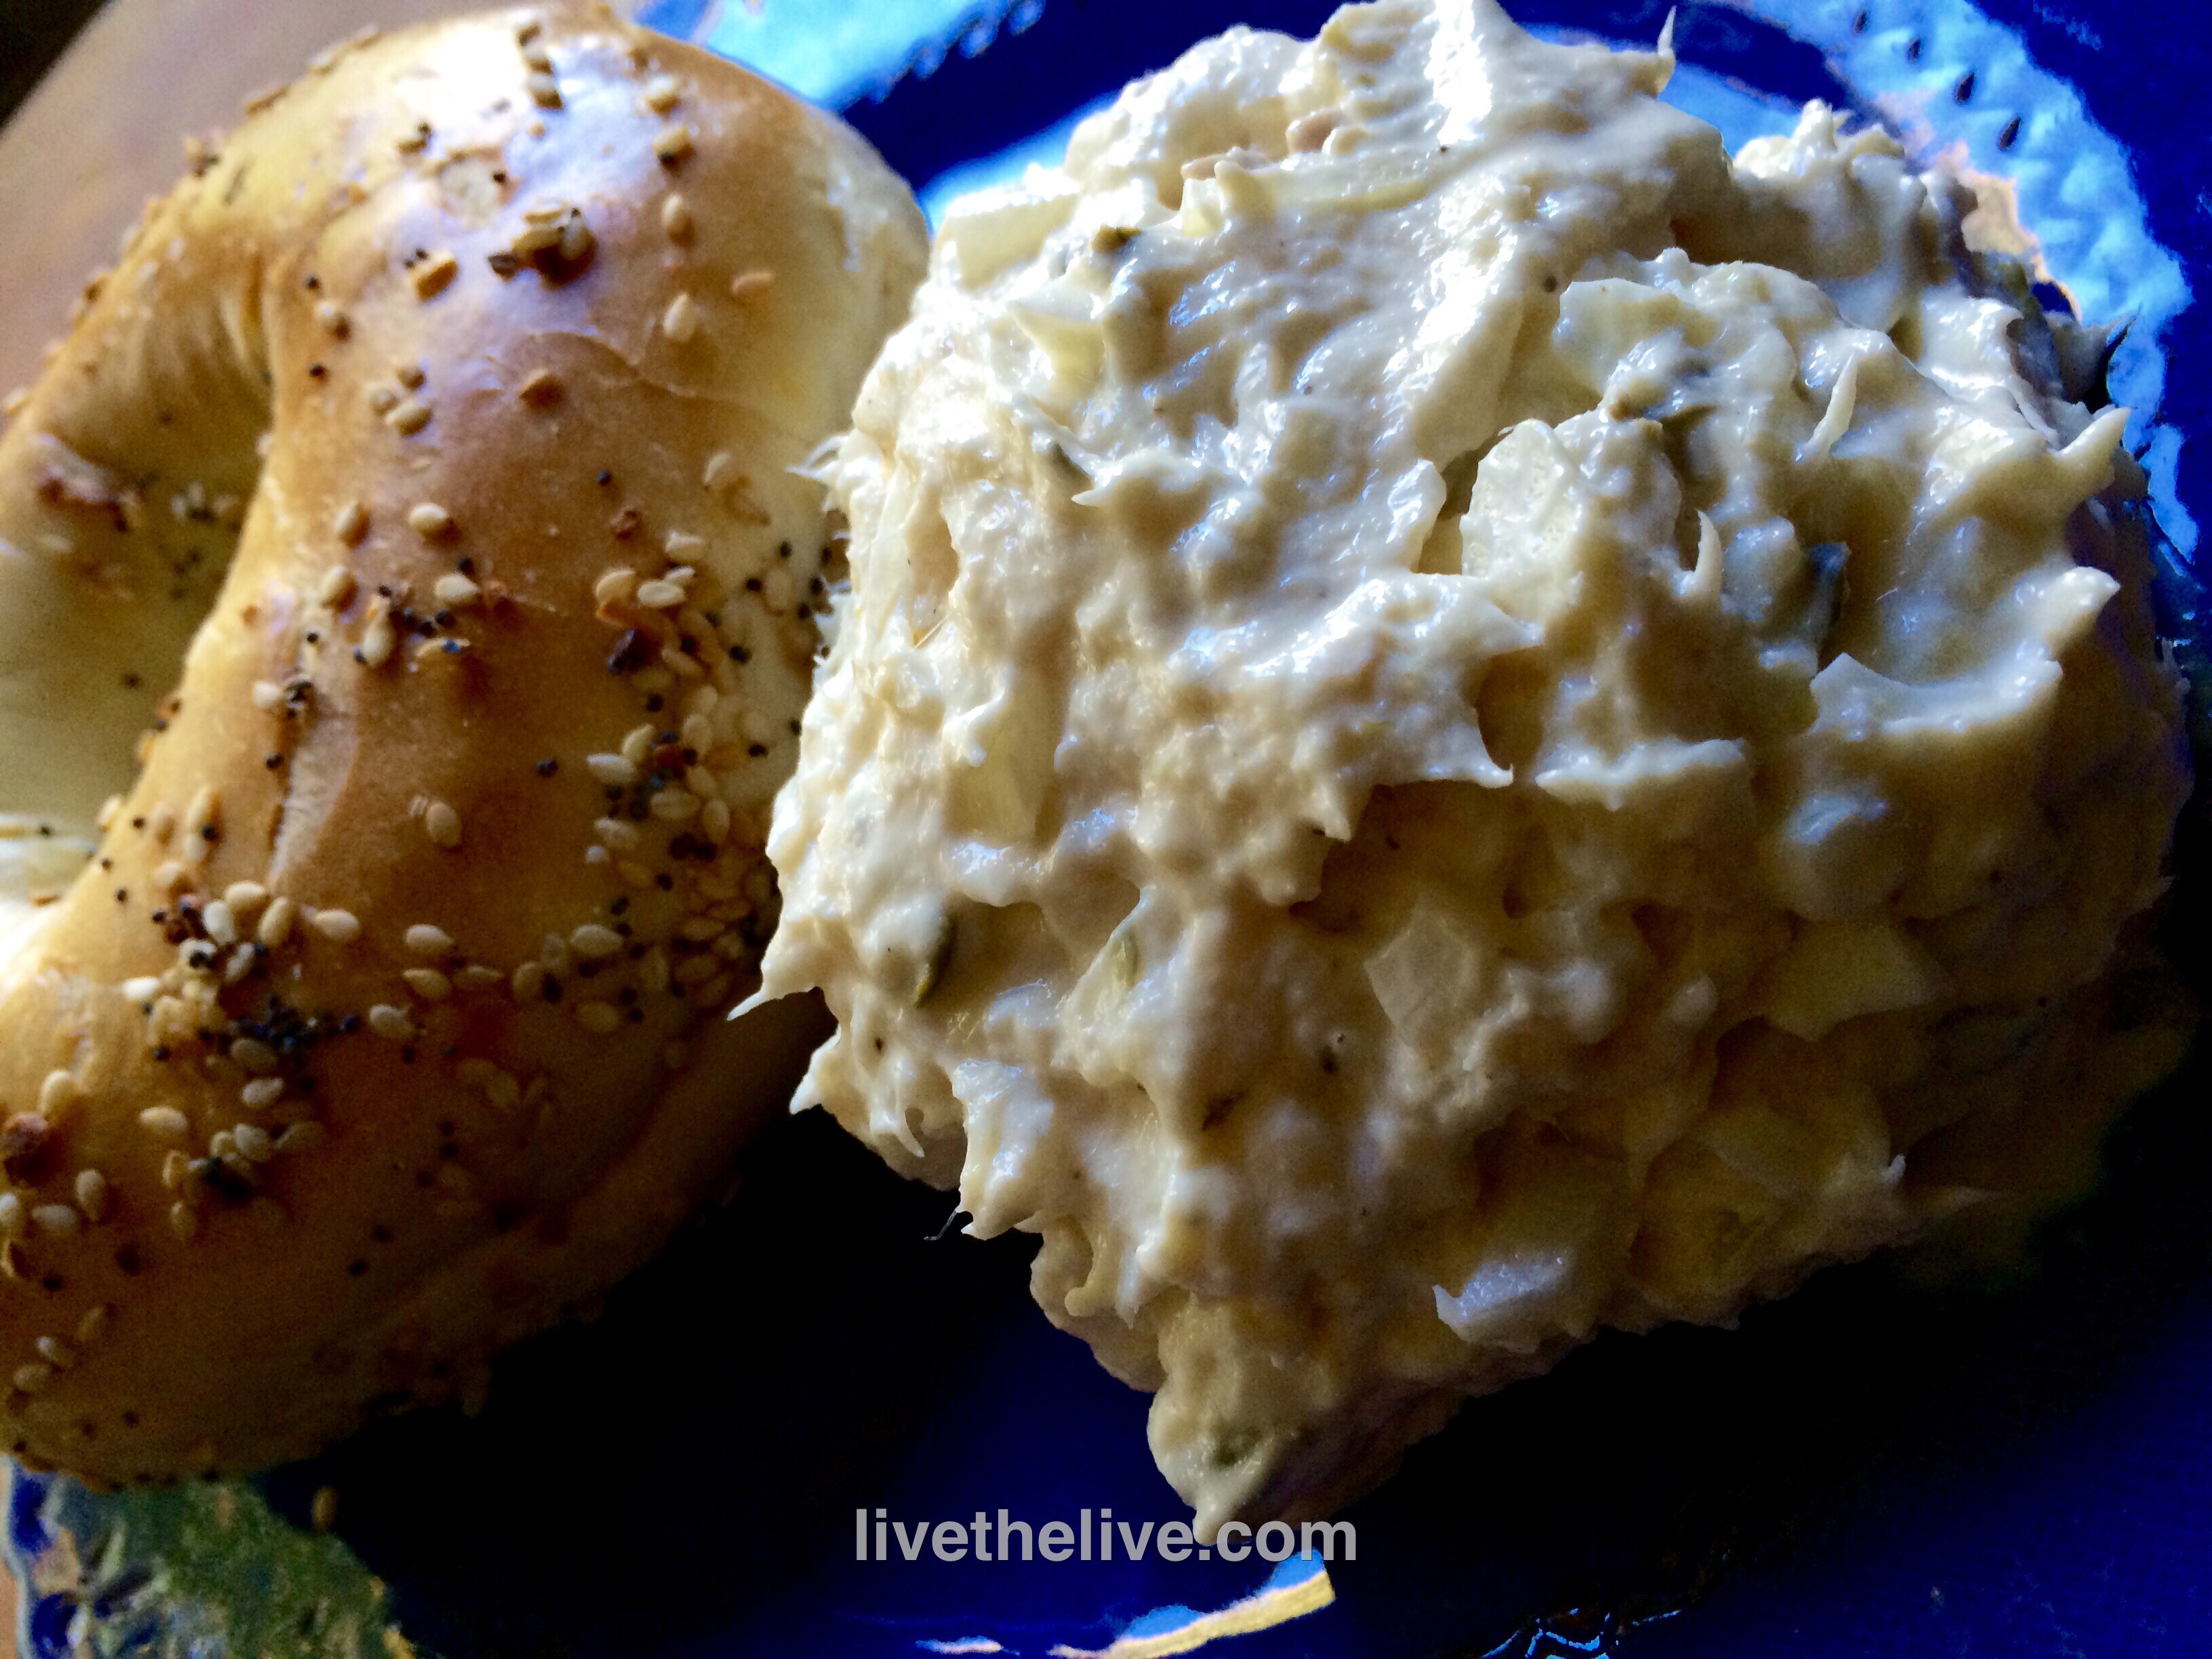
The standard way is to serve it with crackers. But there’s nothing wrong with slathering it onto an everything bagel! Or…if you have guests…slice everything bagels as thin as you can and toast them until they’re crisp like crackers. Then serve them on the side.
Here’s a shot of the real deal straight out of the smoker, at a fish store in Mackinaw City, Michigan, on the way to the Upper Peninsula. Man, that was some good eatin’!
Now’s the time to start prepping your brisket for corned beef on St. Patrick’s Day!
Before every St. Patty’s Day, supermarkets are full of packages of processed corned beef in preparation for the big celebration. But, interestingly, corned beef isn’t really an authentic Irish dish.
The phrase “corned beef” was coined by the British, and although the Irish were known for their corned beef throughout Europe in the 17th century, beef was far too expensive for the Irish themselves to eat and all of it was exported to other countries. Owning a cow in Ireland was a sign of wealth, and the Irish used theirs for dairy products, not beef.
The Irish ate pork, and a lot of it, because it was cheap to raise pigs, and they traditionally prepared something like Canadian bacon to celebrate St. Patrick’s Day in Ireland.
In the 1900’s, when the Irish came to America, both beef and salt were more affordable, and the Irish, who lived in poor, tight-knit communities, often next to Jewish communities, bought much of their beef from Kosher butchers. And so many of the Irish learned how to corn their beef using Jewish techniques, but adding cabbage and potatoes to the mix. That’s what we have today.
It takes about 3 weeks to make corned beef. Doing it yourself is not difficult. It just takes time.
Corned beef has nothing to do with corn. ‘Corning’ is a technique for preserving raw meats for long periods by soaking it in a salt brine. This method was used in England before the days of commercial refrigeration. Back then, the large salt kernels used in the brine were called “corns.”
Brining is a time-honored way of preserving meat and it prevents bacteria from growing. Both pastrami and corned beef are made by this method. Both start with a brisket of beef. Corned beef is then cooked–usually boiled–and served. Pastrami is made when the brined meat is rubbed with more spices and then smoked to add extra flavor. So corned beef and pastrami are the same meat, just treated differently.
Saltpeter is an ingredient that has been used in brining beef for years. It adds the traditional pink coloring to the corned beef and pastrami meat, a bit more appetizing than the gray color it tends to have if you don’t use it.
Saltpeter can also contain carcinogens, so there’s always talk of avoiding it. It’s found in pink curing salt, which is used in small amounts during the curing process. (Not to be confused with Himalayan pink salt, which is just plain salt.) Since I only make my corned beef once a year, I’m OK with it either way. The general rule of thumb is only 1 teaspoon pink curing salt per 5 pounds of meat.
I get grass-fed brisket in 10-pound slabs, but use whatever size you find comfortable. Just don’t go too small, or the brine will make that tiny piece of meat extremely salty.
Brining the beef brisket
Step one: corned beef…
beef brisket (about 8-10 pounds)
2 teaspoons paprika
1/4 cup warm water
3 cloves of minced garlic
2 tablespoons sugar
1 tablespoon mixed pickling spices
3/4 cup salt
1 teaspoon pink curing salt (optional)
2 quarts water
Place the brisket in a large container made of non-reactive material, like glass or plastic.
In the 1/4 cup of warm water, dissolve the sugar, minced cloves, paprika and pickling spices.
Dissolve the 3/4 cup of salt (and optional teaspoon of pink curing salt) in the 2 quarts of water. Pour in the sugar/garlic/paprika/pickling spices mix and stir everything together. Pour the mixture over the meat in the container. Make sure the meat is totally beneath the surface of the liquid. (You may need to weigh it down to do this. I place a couple of plates on top, which pushes the meat down into the brine.) If there’s just not enough liquid, double the recipe, leaving out the pink salt the second time. Cover the container.
Refrigerate the container and its contents for 3 weeks, turning the meat once or twice per week. At the end of the third week, remove the container from the refrigerator and take out the meat. Soak the meat in several changes of fresh cold water over a period of 12 hours to remove the excess salt. I add ice to the water to keep the meat cold.
At this point, if you want corned beef, most people boil it.
I prefer to lay some aluminum foil down on a sheet pan. Then I coarsely chop carrots, onions, and celery, placing them in a single layer on the foil. Then I lay my brisket on top of the veggies, and wrap the meat tightly in the foil. I place the baking pan in a pre-heated 350 degree oven and cook for about 3 1/2 hours. (That’s for an 8-pound slab of meat. The cooking time will be less for a smaller cut.)
If you want to make pastrami, there are more steps to take…
Step two: making Pastrami…
Brined and rinsed corned beef brisket from above recipe, patted dry with paper towels
1/4 cup Kosher salt
1/4 cup paprika
3 tablespoons coriander seeds
2 tablespoons black peppercorns
2 tablespoons yellow mustard seeds
1 tablespoon white peppercorns
3 tablespoons brown sugar
1 tablespoon granulated garlic
Combine the coriander seeds, black and white peppercorns and mustard seeds in a spice grinder and grind them coarsely. Place them in a bowl. Add the salt, paprika, brown sugar and granulated garlic. Mix well.
Rub the mix into the corned beef well, covering all sides.
Heat your smoker to 225 degrees and smoke the meat for several hours. (My wood of choice is always hickory.) When the internal temperature of the meat has reached 165 degrees, it’s done. It isn’t necessary to smoke pastrami as long as you would a regular brisket because the long brining time makes the meat more tender, and you’ll be steaming it next.
It is very important that absolutely everything that comes in contact with the meat is very clean. (This includes your hands.) Also, make very sure that every inch of the meat reaches the 165 degrees before it is removed from the smoker. The corned beef is now pastrami.
Delis that serve pastrami go one step further: they steam the meat so that it becomes incredibly tender and easy to slice. I place a baking pan with boiling water in the center of a 350° oven. I put a grate on top of it, placing the pastrami on top of the grate. Then I invert a bowl over the pastrami to keep the steam in. I will cook it this way for at least an hour to steam the meat before slicing and serving.
Happy new year! The last two days have been busy, and I somehow missed out on National Bacon Day, December 30th!
Let’s face it: there are few foods as magical as bacon. Add bacon to just about any dish you’re preparing, and it elevates it to incredible new heights of flavor. The BLT is possibly the greatest food combination ever invented: just a few simple, fresh ingredients, when placed together, transforming into one of the greatest sandwiches on planet Earth.
BLT wraps: home-cured and smoked bacon, local farmstead romaine, home garden tomatoes, always Hellman’s mayo.
If I’m buying bacon, I go on-line to Burger’s Smokehouse, a family run business in Missouri that has made great bacon for decades. The prices are good, and they include shipping. (www.smokehouse.com) I buy in quantity and freeze what I don’t need right away. My favorite is the thick-sliced country bacon “steaks.”
But nothings beats making your own.
Bacon comes from the pork belly, and they’re easy to find in any good butcher shop. But to get something a notch above, I’ll buy a heritage breed, like Berkshire pork, from Heritage Pork International. (www.heritagepork.com) I follow the simple curing techniques outlined in “Charcuterie,” a great book written by Michael Ruhlman and Brian Polcyn.
To cure bacon, all you really need is salt and sugar, and what they in the curing biz call “pink salt,” which is not to be confused with salt that happens to be pink, like Himalayan salt you would find in a gourmet store. Pink salt is bright pink to let you know that it’s a special salt that should only be used in small quantities for curing. The reason is: nitrites. Nitrites delay the spoilage of the meat, and help keep the flavors of spices and smoke. They also keep the meat nice and pink instead of an unappetizing gray. That’s good. However, nitrites can break down into nitrosamines, which have been known to cause cancer in lab animals. But let’s face it: you would need to eat a ton of cured meat to really worry about this. (I buy uncured deli meats and hot dogs at the supermarket, because processed meats are a different story. But since I know exactly what goes into my own bacon, I’m not worried about the level of nitrites.)
To make the basic dry cure:
1/2 lb. kosher salt (I use Diamond Crystal Kosher salt)
1/2 cup light brown sugar or turbinado sugar
1 oz. pink curing salt
Mix the ingredients well. An important note: all salts do not all weigh the same, so go by the weight and not a cup measurement. (Morton’s Kosher salt, for example, is heavier than Diamond Crystal.) I keep this basic dry cure stored in my pantry, ready to use when I need it.
When it’s time to be makin’ the bacon, I combine this dry cure with other ingredients to make my bacon rub.
My bacon rub:
1/2 cup basic dry cure
1/2 cup brown sugar or turbinado sugar
1 tablespoon fresh cracked black pepper
1 tablespoon granulated garlic
1 tablespoon granulated onion
Mix these ingredients well (yes, there’s quite a bit of sugar there, but I like my bacon a little sweet!) Rub it generously all over the pork belly.
I have a large plastic container with a lid that fits one slab of pork belly perfectly. I place the belly inside it, put the lid on, and place the container in the fridge. The pork belly stays there for at least a couple of weeks, maybe three. I flip the belly every few days. You’ll see that the salt will draw moisture out of the meat and form a gooey brine. This brine will continue to cure your pork belly, so leave it in there. Just flip it, put the lid back on the container, and back in the fridge.
In two or three weeks, you’ll be able to tell the pork belly has cured because it feels firm. Wash the brine off the meat well with cold water, and pat it dry with paper towels. Place the belly in the fridge for an hour or so and it will develop a tackiness to the touch. This is a thin layer of proteins known as a pelicle, and it helps the smoke stick to the meat.
Now it’s time to cook. You can simply cook the pork belly (without smoking it) at 200° for about 2 hours, until the internal temperature reaches 160°. This isn’t bacon…it’s pancetta. Or you can simply slice it and fry it up in a pan. (Also delicious.) But it’s the smoke that makes it bacon.
Smoking foods can be a challenge to many, so a great alternative to the traditional charcoal smoker is an electric one. It allows you to control the exact temperature inside the smoker without checking on it constantly (a real luxury when you’re slow smoking brisket or pork shoulder for many hours), and it offers a tray where you place your wood chips or pellets to give your food that authentic smoky flavor.
My electric smoker has a digital readout, which allows me to set an exact temperature. I smoke my pork belly at 250° for 2 hours, using hickory chips. (I’m not a fan of applewood, the other commonly used smoking wood for bacon.)
Bellies in the smoker. A water bath underneath to catch any grease drippage.
A couple of hours later: beautiful bacon!
The reward is so worth the effort. Just remember that you still need to cook the bacon before you can eat it. Don’t eat it straight out of the smoker. That first slice you cut off your bacon and toss in a pan to lightly fry for a few moments will be the best bite you’ve ever had in your life!
And if you’re making one slab of bacon, why not make it three or four? It freezes well. And…you will eat it. You know you will!
I missed posting my annual corned beef prep for St. Patty’s Day, but who says you have to only eat corned beef once a year? After all, corned beef isn’t really an authentic Irish dish.
The phrase “corned beef” was coined by the British. Although the Irish were known for their corned beef throughout Europe in the 17th century, beef was far too expensive for the Irish themselves to eat and all of it was exported to other countries. Owning a cow in Ireland was a sign of wealth, and the Irish used theirs for dairy products, not beef.
The Irish ate pork, and a lot of it, because it was cheap to raise pigs, and they traditionally prepared something like Canadian bacon to celebrate St. Patrick’s Day in Ireland.
In the 1900’s, when the Irish came to America, both beef and salt were more affordable, and the Irish, who lived in poor, tight-knit communities, often next to Jewish communities, bought much of their beef from Kosher butchers. And so many of the Irish learned how to corn their beef using Jewish techniques, but adding cabbage and potatoes to the mix. That’s what we have today.
It takes about 3 weeks to make corned beef. Doing it yourself is not difficult. It just takes time.
Corned beef has nothing to do with corn. ‘Corning’ is a technique for preserving raw meats for long periods by soaking it in a salt brine. This method was used in England before the days of commercial refrigeration. Back then, the large salt kernels used in the brine were called “corns.”
Brining is a time-honored way of preserving meat and it prevents bacteria from growing. Both pastrami and corned beef are made by this method. Both start with a brisket of beef. Corned beef is then cooked–usually boiled–and served. Pastrami is made when the brined meat is rubbed with more spices and then smoked to add extra flavor. So corned beef and pastrami are the same meat, just treated differently.
Saltpeter is an ingredient that has been used in brining beef for years. It adds the traditional pink coloring to the corned beef and pastrami meat, a bit more appetizing than the gray color it tends to have if you don’t use it.
Saltpeter can also contain carcinogens, so there’s always talk of avoiding it. It’s found in pink curing salt, which is used in small amounts during the curing process. (Not to be confused with Himalayan pink salt, which is just plain salt.) Since I only make my corned beef once a year, I’m OK with it either way. The general rule of thumb is only 1 teaspoon pink curing salt per 5 pounds of meat.
I get grass-fed brisket in 10-pound slabs, but use whatever size you find comfortable. Just don’t go too small, or the brine will make that tiny piece of meat extremely salty.
Brining the beef brisket
Step one: corned beef…
beef brisket (about 8-10 pounds)
2 teaspoons paprika
1/4 cup warm water
3 cloves of minced garlic
2 tablespoons sugar
1 tablespoon mixed pickling spices
3/4 cup salt
1 teaspoon pink curing salt (optional)
2 quarts water
Place the brisket in a large container made of non-reactive material, like glass or plastic.
In the 1/4 cup of warm water, dissolve the sugar, minced cloves, paprika and pickling spices.
Dissolve the 3/4 cup of salt (and optional teaspoon of pink curing salt) in the 2 quarts of water. Pour in the sugar/garlic/paprika/pickling spices mix and stir everything together. Pour the mixture over the meat in the container. Make sure the meat is totally beneath the surface of the liquid. (You may need to weigh it down to do this. I place a couple of plates on top, which pushes the meat down into the brine.) If there’s just not enough liquid, double the recipe, leaving out the pink salt the second time. Cover the container.
Refrigerate the container and its contents for 3 weeks, turning the meat once or twice per week. At the end of the third week, remove the container from the refrigerator and take out the meat. Soak the meat in several changes of fresh cold water over a period of 12 hours to remove the excess salt. I add ice to the water to keep the meat cold.
At this point, if you want corned beef, most people boil it.
I prefer to lay some aluminum foil down on a sheet pan. Then I coarsely chop carrots, onions, and celery, placing them in a single layer on the foil. Then I lay my brisket on top of the veggies, and wrap the meat tightly in the foil. I place the baking pan in a pre-heated 350 degree oven and cook for about 3 1/2 hours. (That’s for an 8-pound slab of meat. The cooking time will be less for a smaller cut.)
If you want to make pastrami, there are more steps to take…
Step two: making Pastrami…
Brined and rinsed corned beef brisket from above recipe, patted dry with paper towels
1/4 cup Kosher salt
1/4 cup paprika
3 tablespoons coriander seeds
2 tablespoons black peppercorns
2 tablespoons yellow mustard seeds
1 tablespoon white peppercorns
3 tablespoons brown sugar
1 tablespoon granulated garlic
Combine the coriander seeds, black and white peppercorns and mustard seeds in a spice grinder and grind them coarsely. Place them in a bowl. Add the salt, paprika, brown sugar and granulated garlic. Mix well.
Rub the mix into the corned beef well, covering all sides.
Heat your smoker to 225 degrees and smoke the meat for several hours. (My wood of choice is always hickory.) When the internal temperature of the meat has reached 165 degrees, it’s done. It isn’t necessary to smoke pastrami as long as you would a regular brisket because the long brining time makes the meat more tender, and you’ll be steaming it next.
It is very important that absolutely everything that comes in contact with the meat is very clean. (This includes your hands.) Also, make very sure that every inch of the meat reaches the 165 degrees before it is removed from the smoker. The corned beef is now pastrami.
Delis that serve pastrami go one step further: they steam the meat so that it becomes incredibly tender and easy to slice. I place a baking pan with boiling water in the center of a 350° oven. I put a grate on top of it, placing the pastrami on top of the grate. Then I invert a bowl over the pastrami to keep the steam in. I will cook it this way for at least an hour to steam the meat before slicing and serving.
Let’s face it: there are few foods as magical as bacon. Add bacon to just about any dish you’re preparing, and it elevates it to incredible new heights of flavor. The BLT is possibly the greatest food combination ever invented: just a few simple, fresh ingredients, when placed together, transforming into one of the greatest sandwiches on planet Earth.
BLT wraps: home-cured and smoked bacon, local farmstead romaine, home garden tomatoes, always Hellman’s mayo.
If I’m buying bacon, I go on-line to Burger’s Smokehouse, a family run business in Missouri that has made great bacon for decades. The prices are good, and they include shipping. (www.smokehouse.com) I buy in quantity and freeze what I don’t need right away. My favorite is the thick-sliced country bacon “steaks.”
But nothings beats making your own.
Bacon comes from the pork belly, and they’re easy to find in any good butcher shop. But to get something a notch above, I’ll buy a heritage breed, like Berkshire pork, from Heritage Pork International. (www.heritagepork.com) I follow the simple curing techniques outlined in “Charcuterie,” a great book written by Michael Ruhlman and Brian Polcyn.
To cure bacon, all you really need is salt and sugar, and what they in the curing biz call “pink salt,” which is not to be confused with salt that happens to be pink, like Himalayan salt you would find in a gourmet store. Pink salt is bright pink to let you know that it’s a special salt that should only be used in small quantities for curing. The reason is: nitrites. Nitrites delay the spoilage of the meat, and help keep the flavors of spices and smoke. They also keep the meat nice and pink instead of an unappetizing gray. That’s good. However, nitrites can break down into nitrosamines, which have been known to cause cancer in lab animals. But let’s face it: you would need to eat a ton of cured meat to really worry about this. (I buy uncured deli meats and hot dogs at the supermarket, because processed meats are a different story. But since I know exactly what goes into my own bacon, I’m not worried about the level of nitrites.)
To make the basic dry cure:
1/2 lb. kosher salt (I use Diamond Crystal Kosher salt)
1/2 cup light brown sugar or turbinado sugar
1 oz. pink curing salt
Mix the ingredients well. An important note: all salts do not all weigh the same, so go by the weight and not a cup measurement. (Morton’s Kosher salt, for example, is heavier than Diamond Crystal.) I keep this basic dry cure stored in my pantry, ready to use when I need it.
When it’s time to be makin’ the bacon, I combine this dry cure with other ingredients to make my bacon rub.
My bacon rub:
1/2 cup basic dry cure
1/2 cup brown sugar or turbinado sugar
1 tablespoon fresh cracked black pepper
1 tablespoon granulated garlic
1 tablespoon granulated onion
Mix these ingredients well (yes, there’s quite a bit of sugar there, but I like my bacon a little sweet!) Rub it generously all over the pork belly.
I have a large plastic container with a lid that fits one slab of pork belly perfectly. I place the belly inside it, put the lid on, and place the container in the fridge. The pork belly stays there for at least a couple of weeks, maybe three. I flip the belly every few days. You’ll see that the salt will draw moisture out of the meat and form a gooey brine. This brine will continue to cure your pork belly, so leave it in there. Just flip it, put the lid back on the container, and back in the fridge.
In two or three weeks, you’ll be able to tell the pork belly has cured because it feels firm. Wash the brine off the meat well with cold water, and pat it dry with paper towels. Place the belly in the fridge for an hour or so and it will develop a tackiness to the touch. This is a thin layer of proteins known as a pelicle, and it helps the smoke stick to the meat.
Now it’s time to cook. You can simply cook the pork belly (without smoking it) at 200 degrees for about 2 hours, until the internal temperature reaches 160 degrees. But this isn’t bacon…it’s pancetta.
I place the pork belly in my digital smoker, which allows me to set an exact temperature. I smoke it at 250 degrees for 2 hours, using hickory chips. Now it’s bacon.
Bellies in the smoker.
Beautiful bacon!
That’s it. You have achieved bacon!
The reward is so worth the effort. Just remember that you still need to slice the bacon and fry it. Don’t eat it straight out of the smoker. That first slice you cut off your bacon and toss in a pan to lightly fry for a few moments will be the best bite you’ve ever had in your life!
And if you’re making one slab of bacon, why not make it three or four? It freezes well. And…you will eat it. You know you will!
Growing up in NY, I was introduced to smoked whitefish, herring, and lox at an amazing deli just down the road from my parents’ house. Smoked whitefish salad was readily available, but it had a lot of mayonnaise and filler. It’s a lot of work making it at home, but worth it.
Whole smoked whitefish may be a bit hard to find, and it could get expensive if you buy it from your local deli. But sometimes big membership stores like BJ’s will sell whole smoked whitefish.
I use capers in this recipe, but dill pickle relish works well, too.
Remove every bit of meat. Double-check for bones!
1/2 whole smoked whitefish, meat removed
1/2 cup mayonnaise
1/4 cup finely chopped Vidalia onion
1 tablespoon capers, finely chopped
1 tablespoon freshly squeezed lemon juice
1 hard-boiled egg, finely chopped
Freshly ground pepper
Pinch of sea salt (I like Fleur de Sel)
Remove the meat from the smoked whitefish carefully, making sure all the small bones have been removed. Double-check to make sure you’ve done this really well. It pays to be really meticulous with this job so that you (or your guests) don’t gag on a fish bone later!
Place all the whitefish meat in a bowl.
Combine all the other ingredients with the fish, mixing thoroughly. (Try not to mush it up too much!)
The standard way is to serve it with crackers. But there’s nothing wrong with slathering it onto an everything bagel! Or…if you have guests…slice everything bagels as thin as you can and toast them until they’re crisp like crackers. Then serve them on the side.
Here’s a shot of the real deal straight out of the smoker, at a fish store in Mackinaw City, Michigan, on the way to the Upper Peninsula. Man, that was some good eatin’!