Let’s face it: there’s no such thing as healthy eggnog. This recipe is delicious but is also a heart attack in a glass. I post it every year because my friends just love it.
My buddy, Rick Sammarco, a wicked talented bartender, credits his father, Al, for this eggnog. The original recipe calls for a lot more of everything. I’ve cut it down to a “more reasonable” size.
A word about salmonella: If you’re concerned about it, you need to decide what works for you. Some recipes tell you to make your eggnog weeks in advance to “sterilize” the drink with all the booze you’ve added to it. I’m not sure that really works. As for me, I use raw eggs in my Caesar salad dressing and in other recipes, so I’m willing to risk it here.
If you’re lucky, some stores–(though very few of them, and none near me)–sell pasteurized eggs. They say the taste is a bit funky, but that it does remove the salmonella.
1.5 quarts vanilla ice cream (I use Breyer’s)
1 pint half & half
15 whole eggs (raw)
½ teaspoon vanilla extract
1/4 teaspoon cinnamon
1/4 teaspoon nutmeg
At least 3/8 cup of each:
spiced rum (I use Captain Morgan)
whiskey (I use Crown Royal)
brandy (I use E&J)
Let the ice cream soften 1 day in the fridge. Mix the ice cream, eggs, vanilla, half-and-half in a blender.
Add the spices and liquor. Blend until it’s frothy.
Taste, and add more cinnamon and nutmeg if you like.
After it’s fully blended, let it sit in the fridge, covered, for at least 12-24 hours for the flavors to blend. Even longer is better.
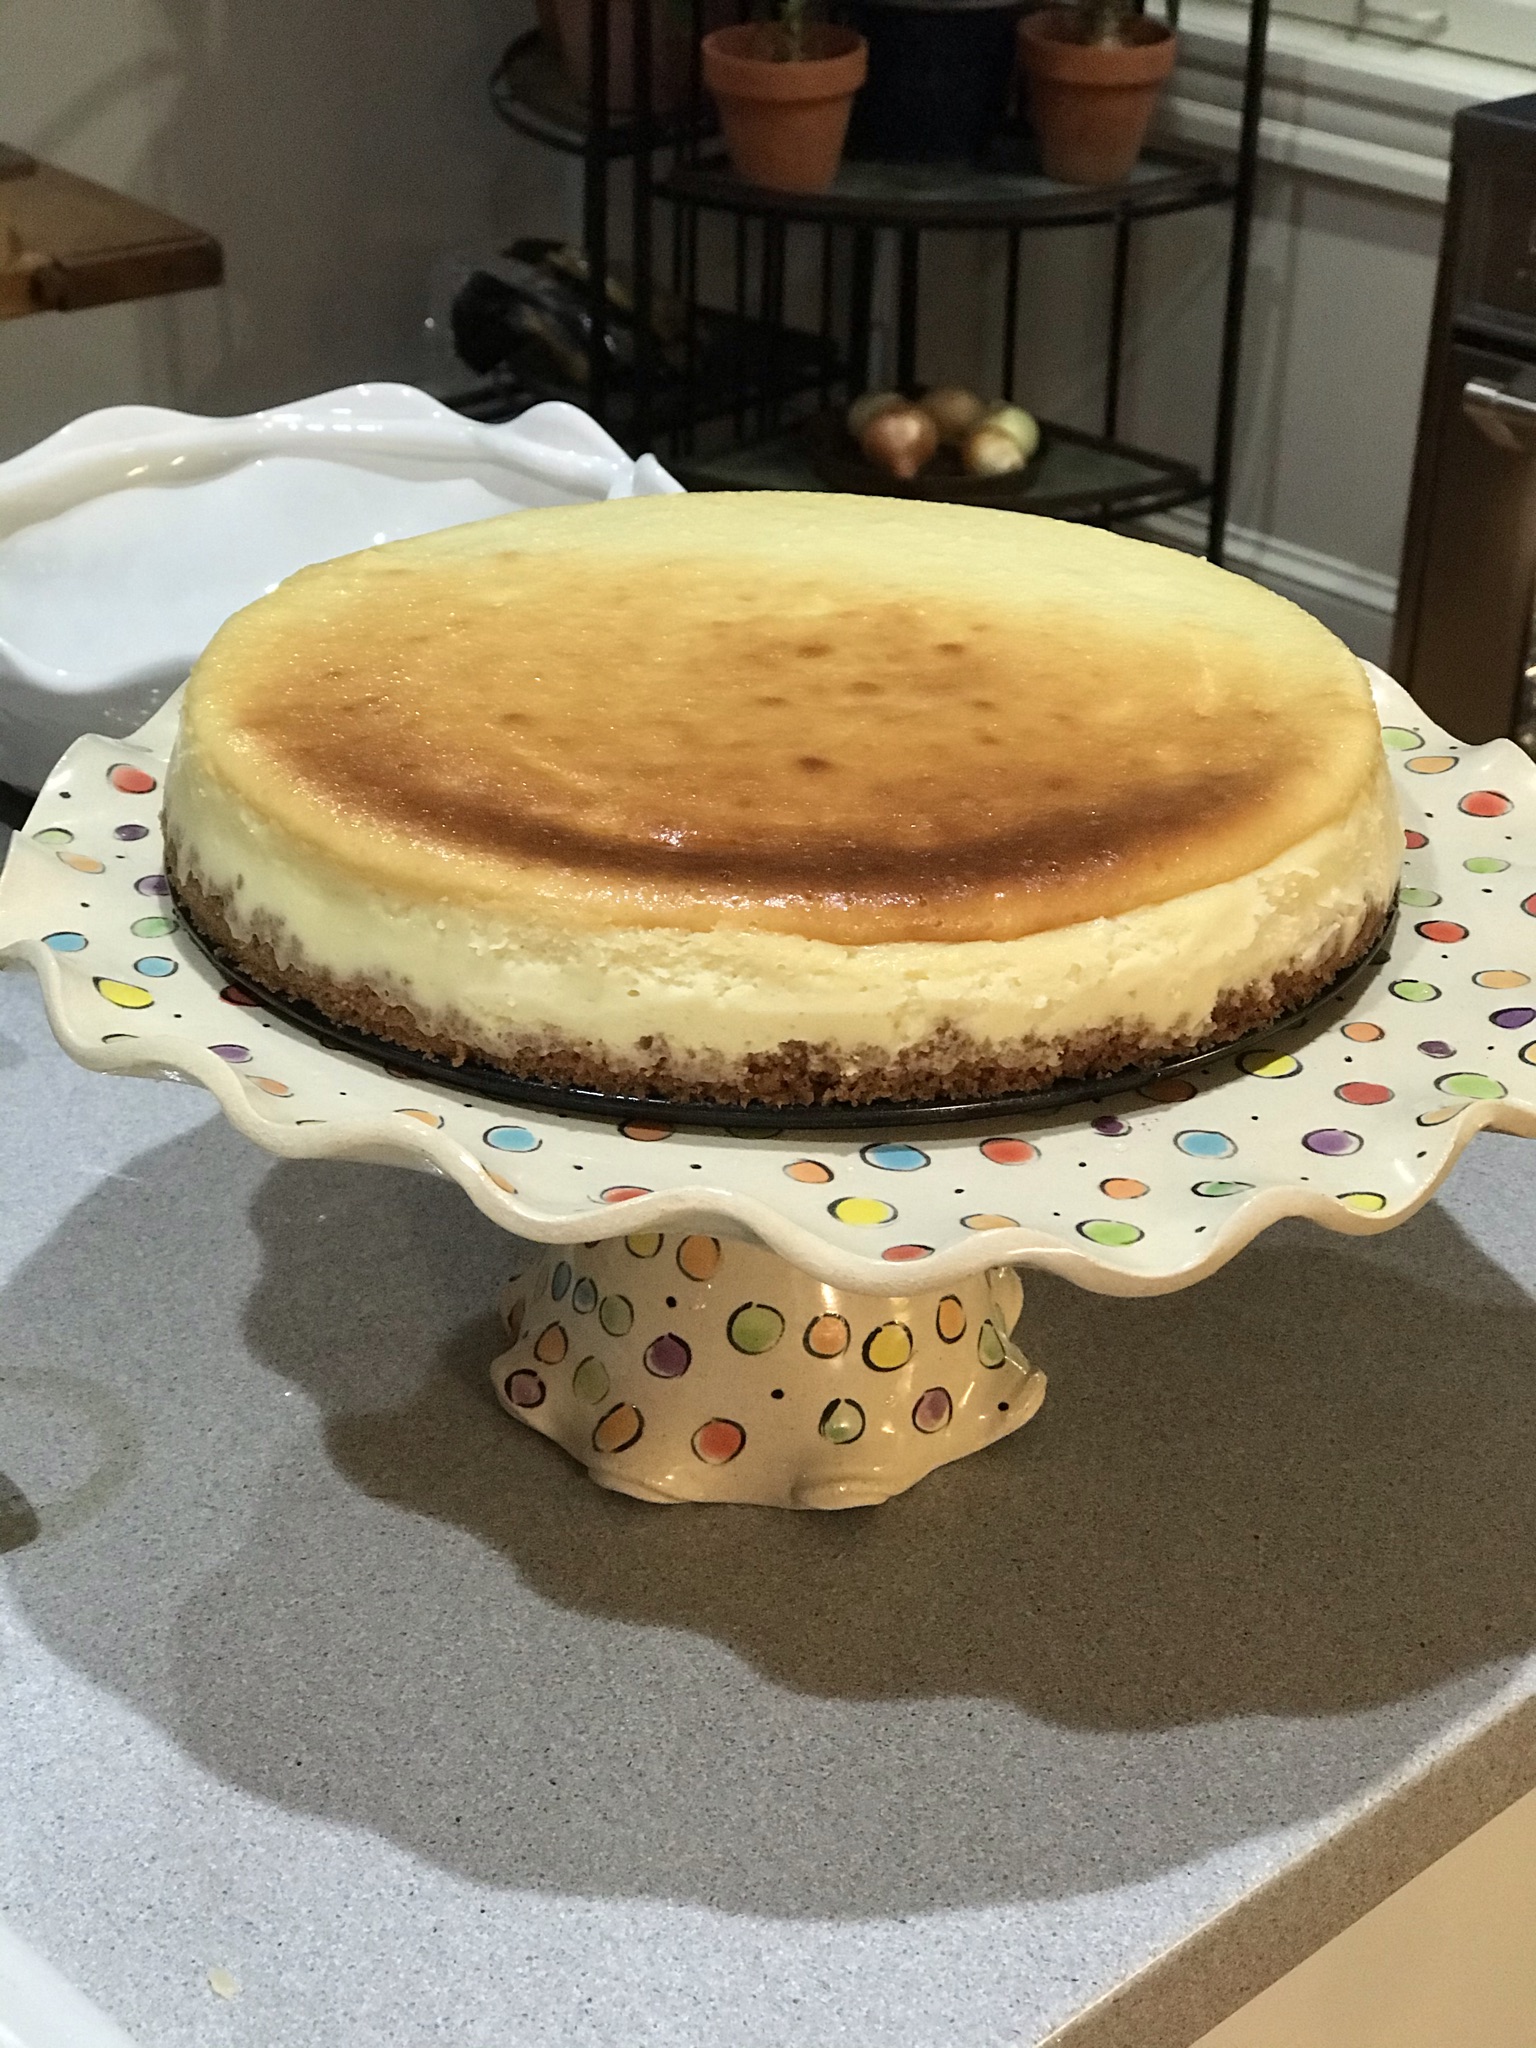
Cheesecake is one of my guiltiest pleasures, but that also means it has be the best I’ve ever had if I’m going to allow that many calories into my belly!
This recipe is not only delicious, but it results in a perfectly cooked cheesecake with no cracking!
One of the keys to a great cheesecake right is placing it in a water bath while baking. But if the springform pan allows water in (and they all do), it creates problems. The solution is to foil-wrap the springform pan really well.
But first, the crust…
1-1/2 cups graham cracker crumbs, from 12 whole crackers 5 tablespoons unsalted butter, melted 2 tablespoons sugar 1/8 teaspoon salt
Preheat the oven to 375° and set an oven rack in the lower middle position.
Here’s the crucial part: Wrap a 9- or 10-inch springform pan with one large piece of heavy-duty aluminum foil, covering the underside and extending all the way to the top so there are no seams on the bottom or sides of the pan. Just to make sure, repeat this process with another sheet of foil for insurance. This keeps the water bath out of your cheesecake, so do a thorough job of it!
Then spray the inside of the pan with nonstick cooking spray.
In a medium bowl, combine the graham cracker crumbs, melted butter, sugar, and salt. Stir until it’s well combined. Press the crumbs into an even layer on the the bottom of the prepared pan. Bake the crust for 10 minutes, until set. Remove the pan from the oven and set it aside.
32 oz. (four 8-oz. blocks) cream cheese, at room temperature 2 cups sugar 3 tablespoons all-purpose flour 4 teaspoons vanilla extract 1 teaspoon packed lemon zest, from 1 lemon 2 teaspoons fresh lemon juice, from 1 lemon 1/4 teaspoon salt 6 large eggs 1/2 cup sour cream
Reduce the oven temperature to 325°F. Boil some water.
In the bowl of an electric mixer fitted with the paddle attachment, beat the cream cheese, sugar, and flour together on medium speed until just smooth, about 1 minute. Scrape the bottom and sides of the bowl to be sure the mixture is evenly combined.
Add the vanilla, lemon zest, lemon juice, and salt. Beat on low speed until it’s all just combined. Add the eggs, one at a time, mixing on low speed until incorporated, scraping the bowl as necessary. Mix in the sour cream. Make sure the batter is uniform but don’t over-mix it.
By now, the oven should be cooled to 325°.
Set the cheesecake pan in a large roasting pan. Pour the batter on top of the crust. Pour the boiling water into the large roasting pan to come about 1 inch up the side of the cake pan.
Bake until the cake is just set, 1 hour and 30 minutes to 1 hour and 45 minutes (the cake should wobble just a bit when the pan is nudged). Remember: the cake will continue to cook outside of the oven before it cools!
Carefully remove the roasting pan from the oven and set it on a wire rack. Cool the cheesecake in the water bath until the water is just warm, about 45 minutes.
Remove the springform pan from the water bath and discard the foil. If necessary, run a thin-bladed knife around the edge of the cake to make sure it’s not sticking to the sides (which can cause cracks as it cools), then cover it with plastic wrap and put it in the fridge to cool for at least 8 hours or overnight.
After 8 hours, remove the sides of the springform pan. I like to serve the cheesecake right from the base of the pan. I’ve found that trying to remove the pan base only messes up the crust.
The secret to slicing beautiful pieces of cheesecake is to slice with a sharp knife, rinsing it in warm water and wiping it dry between every slice.
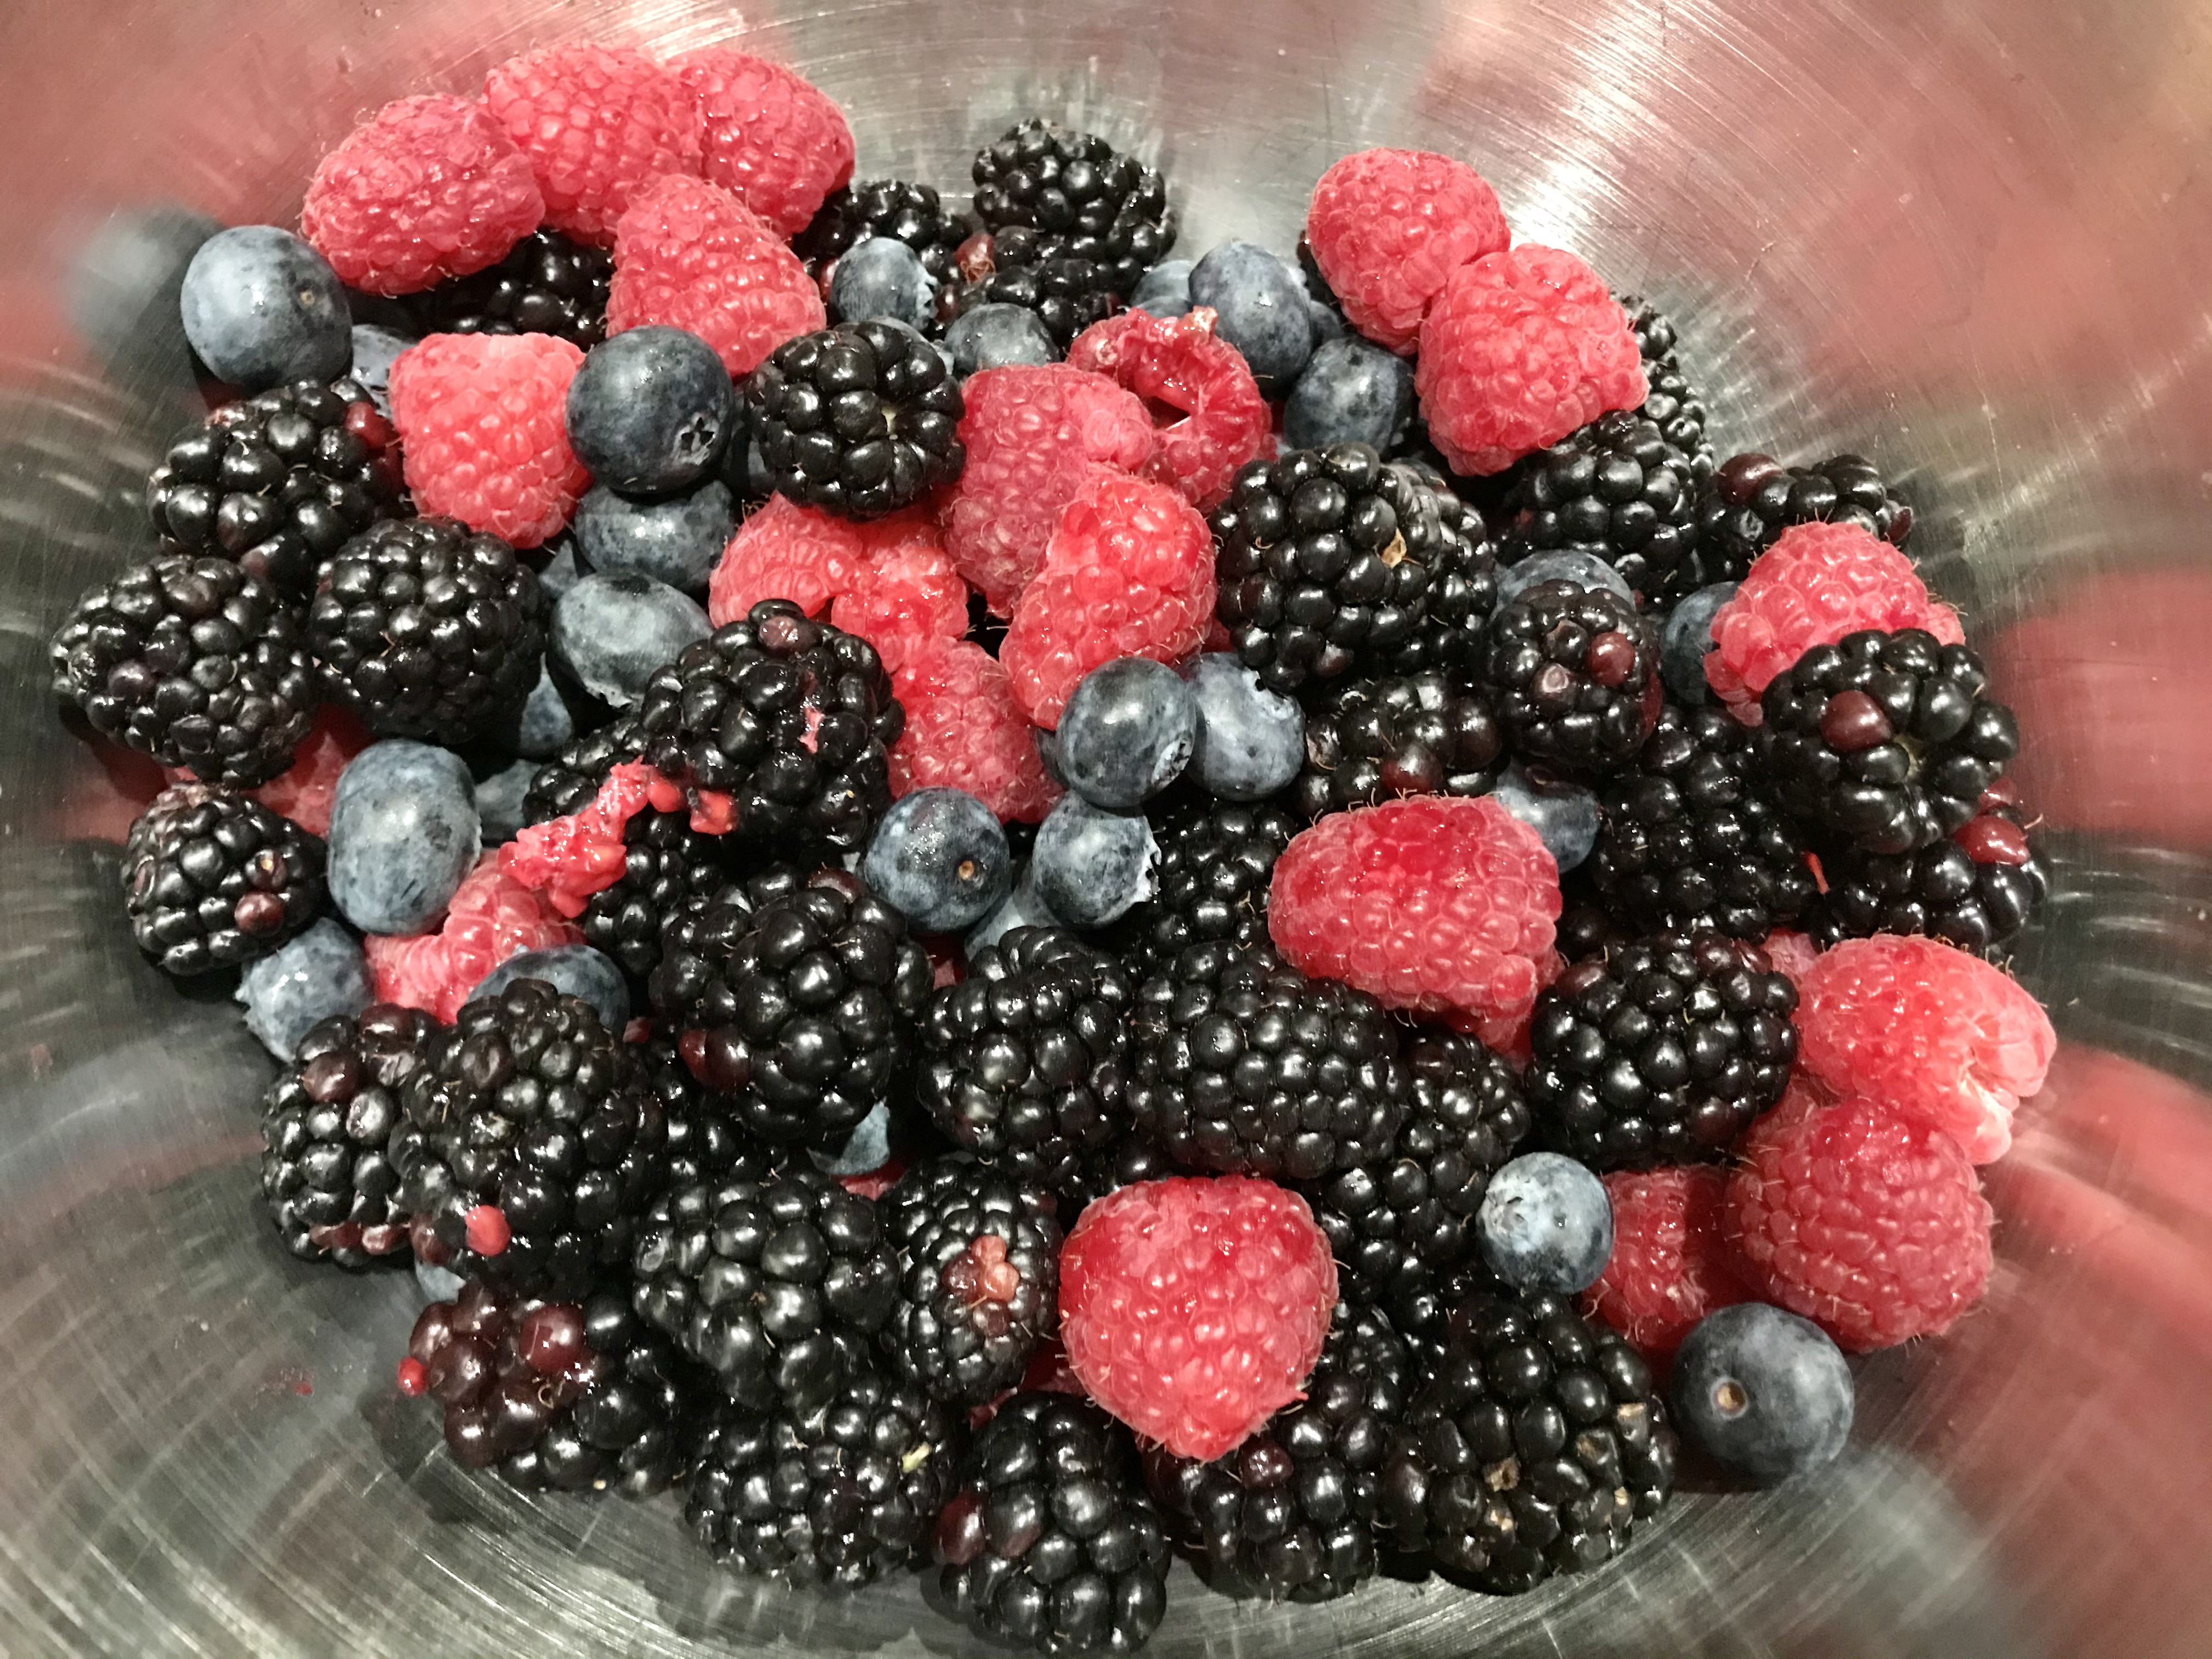
Nothing goes better with cheesecake than a simple berry sauce. I avoid the common strawberry and go for these organic berries instead…
1 small container fresh raspberries 1 small container fresh blueberries 1 small container fresh blackberries 1 tablespoon fresh lemon juice 3/4 cup sugar
Combine all of the berries in a large bowl and stir gently to combine. Spoon about 2/3 of the mixed berries into a medium saucepan. Transfer the remaining berries to a small bowl and refrigerate until ready to serve.
Add the lemon juice and sugar to the berries in the sauce pan. Bring to a gentle boil over medium heat and cook until the fruit is syrupy, about 5 minutes.
Move the hot berry mixture to a blender and purée it until it’s smooth. Set a fine mesh strainer over a bowl. Pour the sauce into the strainer and use the back of a large spoon soup to force the sauce through the strainer and into the bowl. Discard the seeds that remain in the strainer. Refrigerate the berry sauce until it’s cold.
Before serving, simply add the reserved berries to the sauce and stir them to combine.
Parker House rolls are one of my all-time favorite treats. They’re so light and delicious because milk and melted butter are used to make the dough. I’d make and eat them every weekend if it wasn’t for the fact that I’d gain a ton of weight in the process! So…I save them for special occasions.
There really is a Parker House. It’s a hotel in Boston where the rolls originated in the 1870’s. Legend has it that a disgruntled hotel baker threw a batch of unfinished rolls in the oven, and when they came out, they had a folded pocketbook shape that made them light on the inside, and crisp and buttery on the outside. A legend was born.
There are hundreds of Parkerhouse Roll recipes out there, but this is the one I swear by. It’s a great excuse to get out my old Kitchenaid standing mixer.
1 stick unsalted butter, melted and cooled, plus softened butter for brushing
1 tablespoon active dry yeast 1/4 cup lukewarm water (100 to 110 degrees) 1/4 cup sugar 1 cup whole milk, warmed 2 large eggs, at room temperature 4 cups all-purpose flour, plus more for dusting 2 1/2 teaspoons Kosher salt
Brush a large bowl with butter.
In the bowl of a stand mixer fitted with a paddle, combine the yeast with the water and a pinch of sugar. Let it stand until it gets foamy, about 10 minutes. This gets the yeast happy.
Add the milk, melted butter, eggs and remaining sugar and mix until it’s all combined.
Now switch to the dough hook and add the flour and salt. Knead at low speed until a smooth ball forms, about 2 minutes.
Scrape the dough onto a lightly floured board and knead it gently into a ball. Then place the ball in the buttered bowl, covering it with plastic wrap, and placing the bowl in a warm place. Let the dough double in volume. It’ll take about 1 1/2 hours.
Pre-heat the oven to 350.
Grease a 9-by-13 baking dish with more butter.
Turn the dough out onto a lightly floured board again, punching out the air bubbles, and forming it into a ball again. Cut the ball in half, then each half into 8 pieces.
You can either leave the pieces in their wedge shape, placing them in the baking dish top side up. Or you can roll the wedges into balls, placing them into the baking dish, spacing them out evenly.
Cover the baking dish with plastic wrap and let the dough rise again for about 30 minutes. By then, your oven will be nice and warm.
Bake the rolls for 20 to 25minutes, until they’re a beautiful golden color.
Serve them warm or at room temperature. If you bake the rolls earlier in the day, you can cover them in plastic wrap, and the re-heat gently before serving.
I live one town over from Fall River, Massachusetts, and just down the road from New Bedford, Massachusetts, two thriving proud Portuguese communities. My daughter is in middle school, and she had to take mandatory Portuguese language classes. We’ve got dozens of authentic Portuguese restaurants in the area, and even a well-stocked supermarket with its own bacalhau (salt cod) room: Portugalia Marketplace, in Fall River.
So when I first posted my recipe of Portuguese kale soup, I was told by many Portuguese friends that my soup wasn’t authentic so I couldn’t call it that. Fair enough. After all, my soup has far less carbs (no potatoes or pasta), fewer spices, and it uses homemade stock instead of water. It may not be Portuguese, but it’s full of flavor.
My version of the classic Portuguese kale soup.
4 cups home-made chicken or beef stock
4 cups water
1 cup lentils, rinsed in cold water
1 onion, finely chopped
1 carrot, finely chopped
2 stalks celery, finely chopped
1 clove garlic, through a press
1 lb. chourico, peeled and chopped into small cubes (I use Mello’s, out of Fall River, Mass.)
1 large bunch organic kale
salt and pepper
Add the stock and water to a large pot. Heat until boiling. Add the lentils.
In a saucepan with a little olive oil or bacon fat, sauté the onions, carrots, celery, and garlic for a few minutes. Add the chopped chourico and sauté a few minutes more. Add the contents of the sauté pan in the pot.
Wash and de-stem the kale, tearing the leaves into smaller pieces. Add the leaves to the pot and stir. The stems go in your compost pile. (You can also use them in a juicer.) Kale is always on the “dirty dozen” list of vegetables with large amounts of pesticides, so I always buy organic.
Cook the soup until the lentils are al dente. Taste and season for salt and pepper before serving.
Some of my favorite recipes happen when I’ve got a few leftover ingredients in the fridge that I really want to use up. The challenge is to make them work together.
Burgers are easy solutions to this dilemma, because, let’s face it: just about anything can go on a burger!
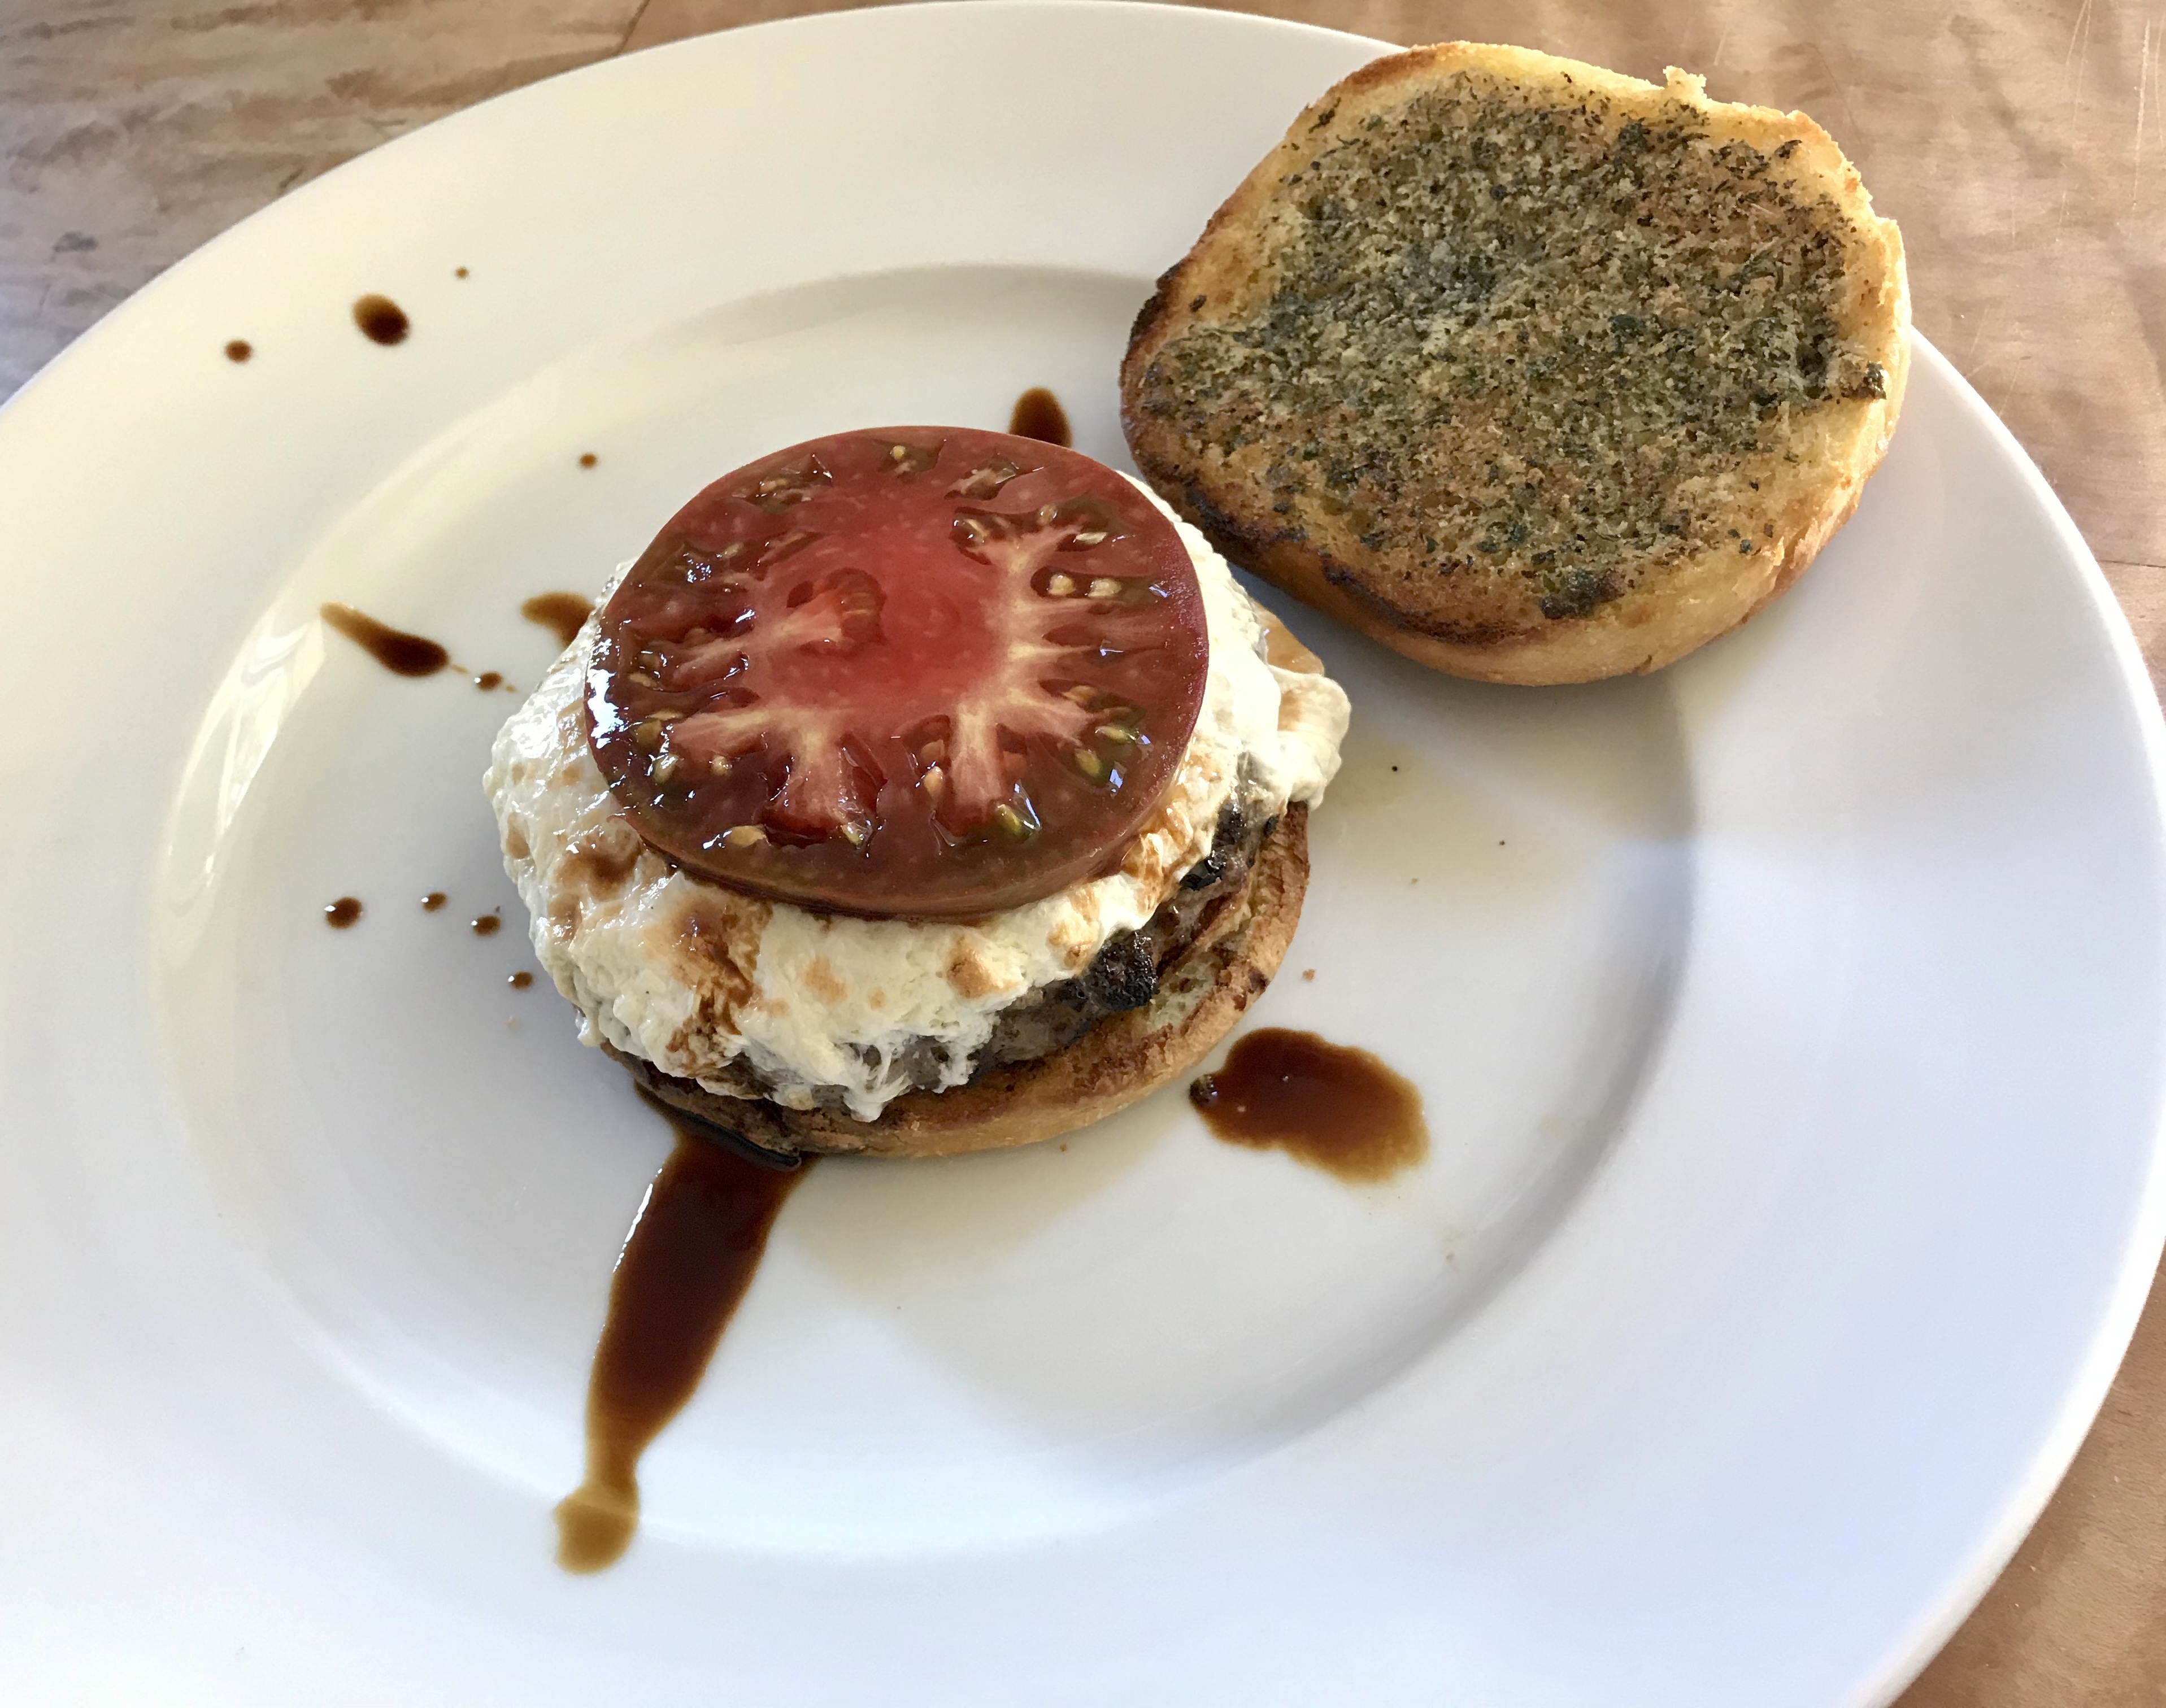
My thoughts behind this recipe went to a combination of things: a little garlic bread, a little Caprese salad, and, of course, a burger.
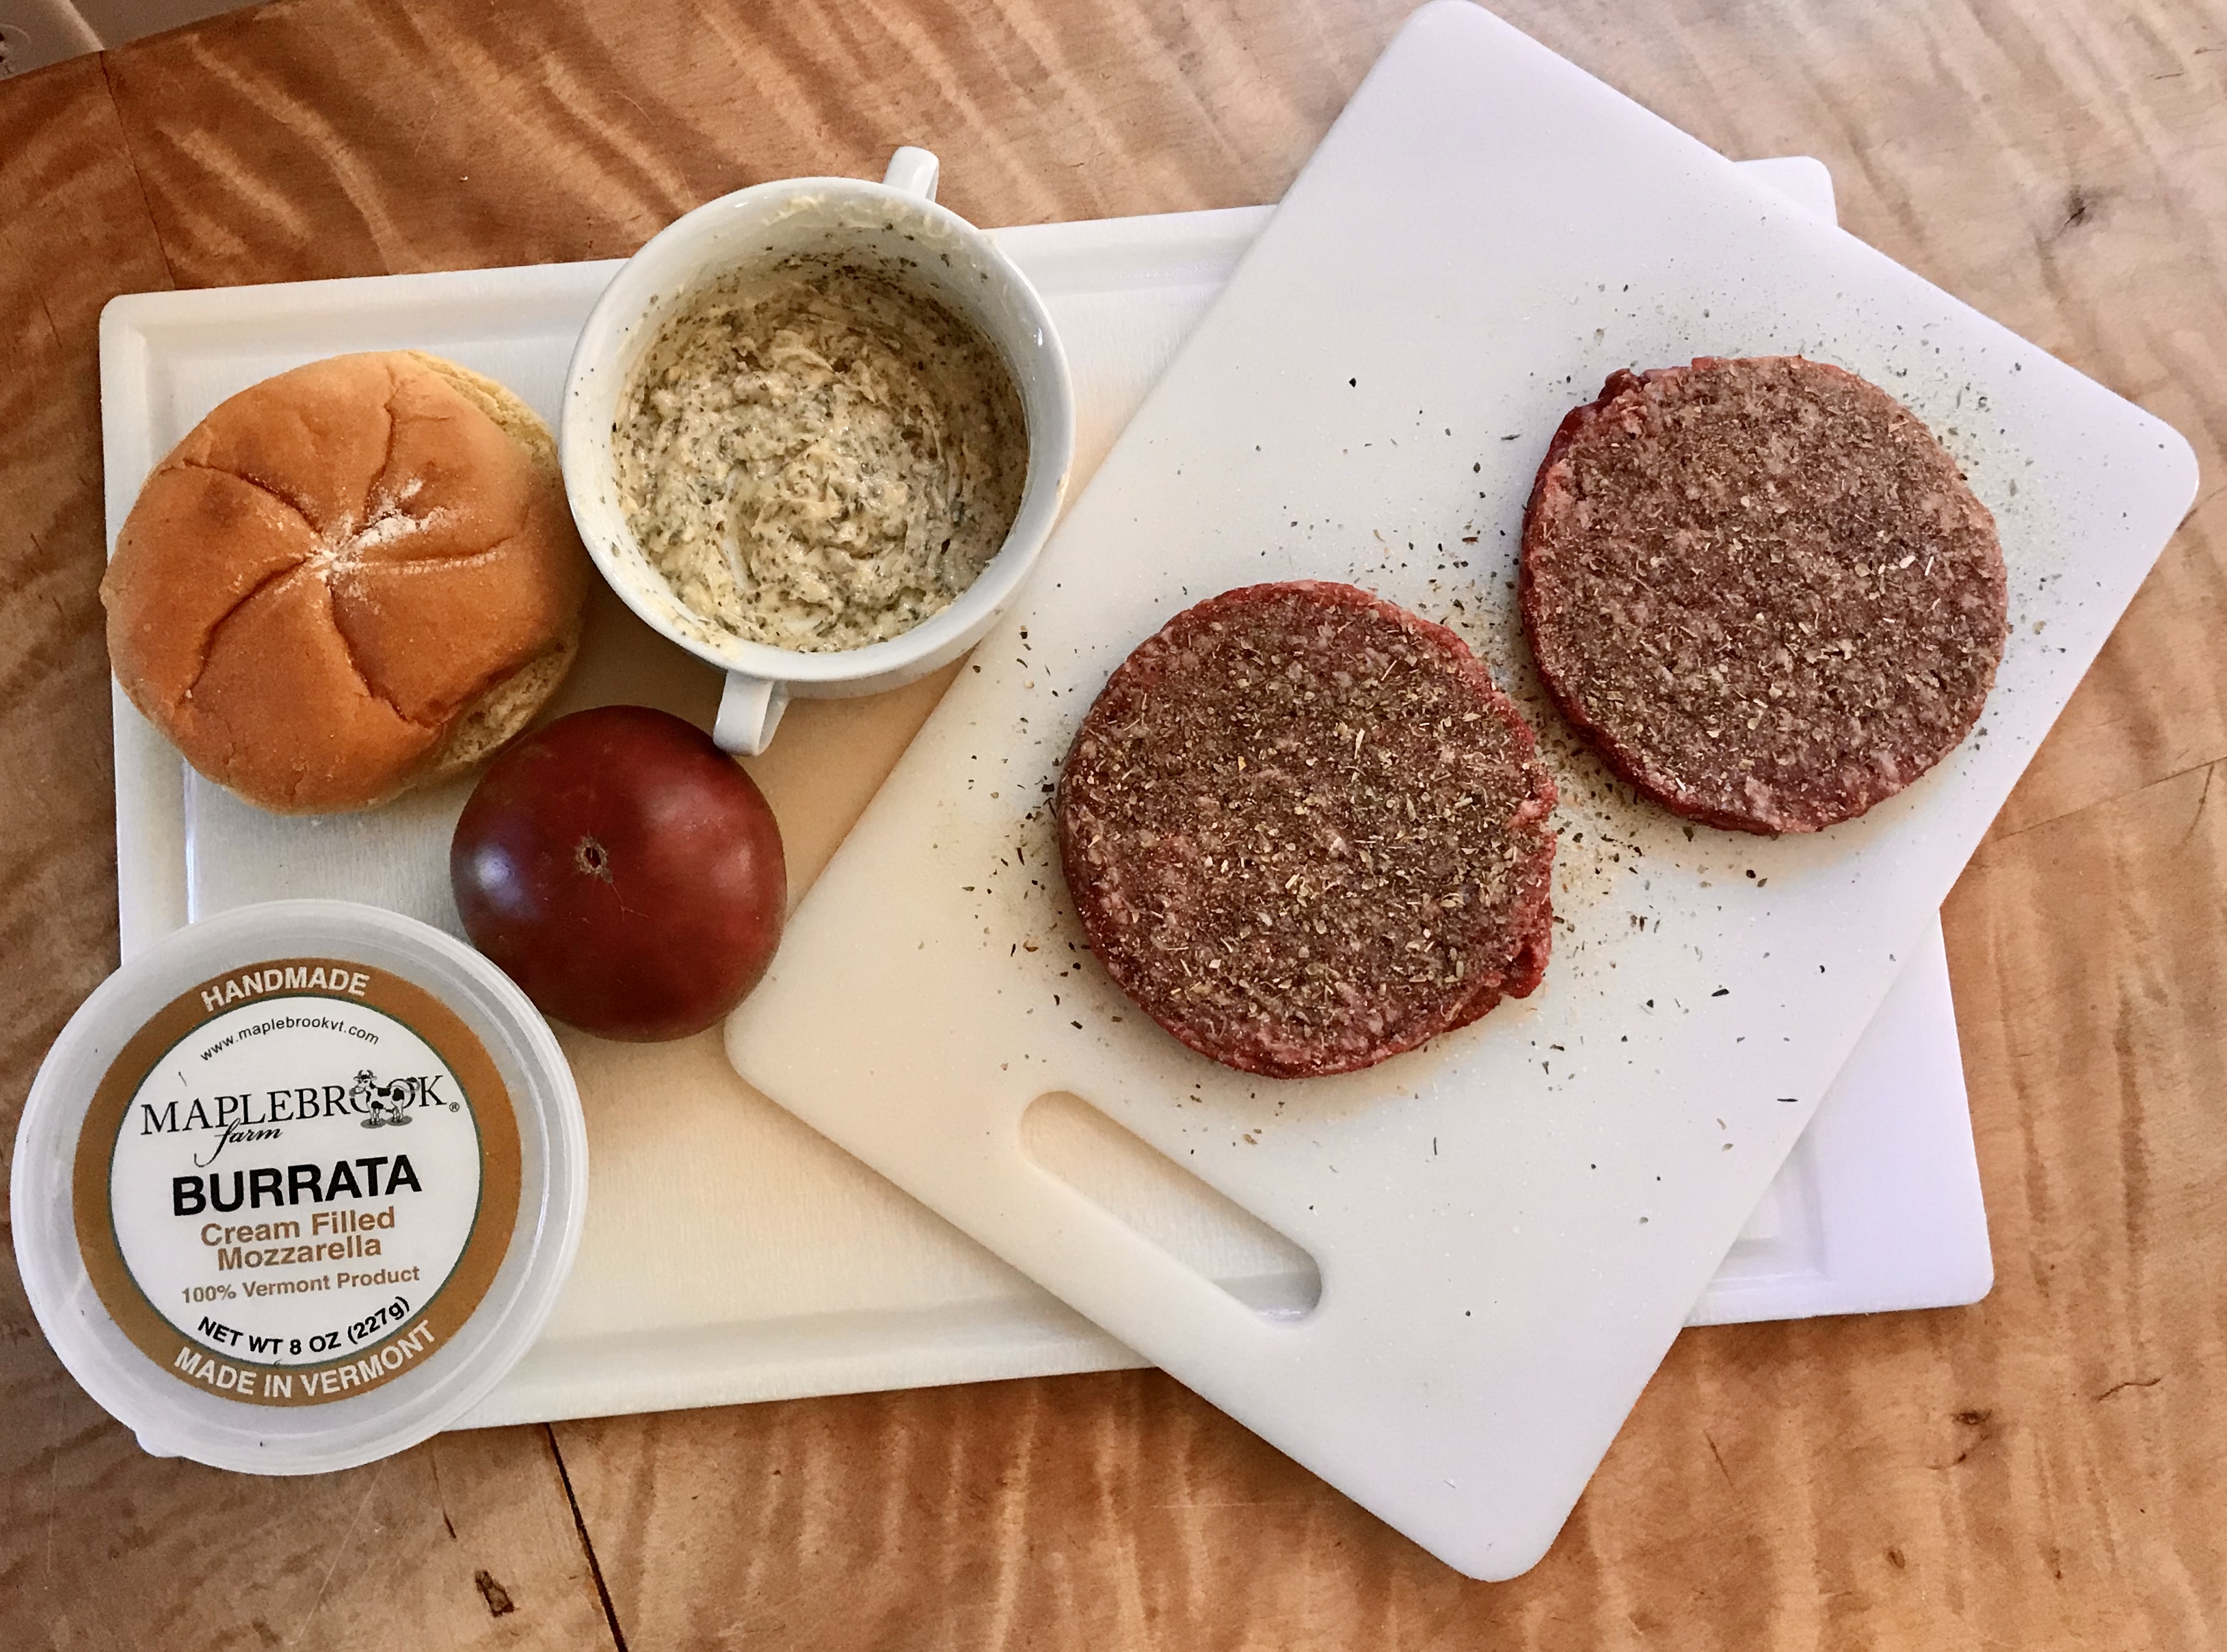
I had some burrata in the fridge. If you thought you couldn’t improve on mozzarella cheese, get yourself some burrata. The outer shell of the burrata is mozzarella, while the inside generally contains stracciatella and cream. It can be made from milk, or if it’s really decadent: Italian buffalo milk.
I use burrata instead of mozzarella when I make my Caprese salads…a combination of the cheese, fresh basil, and ripe tomatoes, drizzle with a high-quality balsamic vinegar.
I had kaiser rolls in the freezer. I wanted to go one step further, so I slathered them with my garlic bread smear, and toasted them.
And my burgers are always grass-fed beef, seasoned with salt and pepper, and pan-seared before finishing them in the oven.
I started with the garlic bread spread first.
Pre-heat the oven to 350.
1 stick (4 oz.) unsalted butter, softened 1 large clove garlic, squeezed through a press 1/2 teaspoon granulated garlic 1/2 teaspoon salt 1/2 teaspoon oregano 1/2 teaspoon parsley
I combined these ingredients in a bowl, mixing well, then smeared them on my kaiser roll halves, toasting them in the oven.
I got a pan very hot on the stovetop (cast iron is always best) and added a little fat. I use bacon grease if I have it. Otherwise I go with a high smoke point oil like avocado oil.
I seasoned the burger with salt and pepper, and placed it in the hot pan, searing it on one side, then flipping it to the other. I just want to sear the meat. I don’t want to cook the burger in the pan or it will overcook when I place it in the oven to finish.
I cut the burrata in half (it gets a little messy), and placed half of it (cut-side-down) onto the burger.
I placed the pan in the oven to finish cooking the burger and to melt the cheese. (If your pan isn’t oven-proof, get a tray that is, and just move the burger onto it and into the oven.)
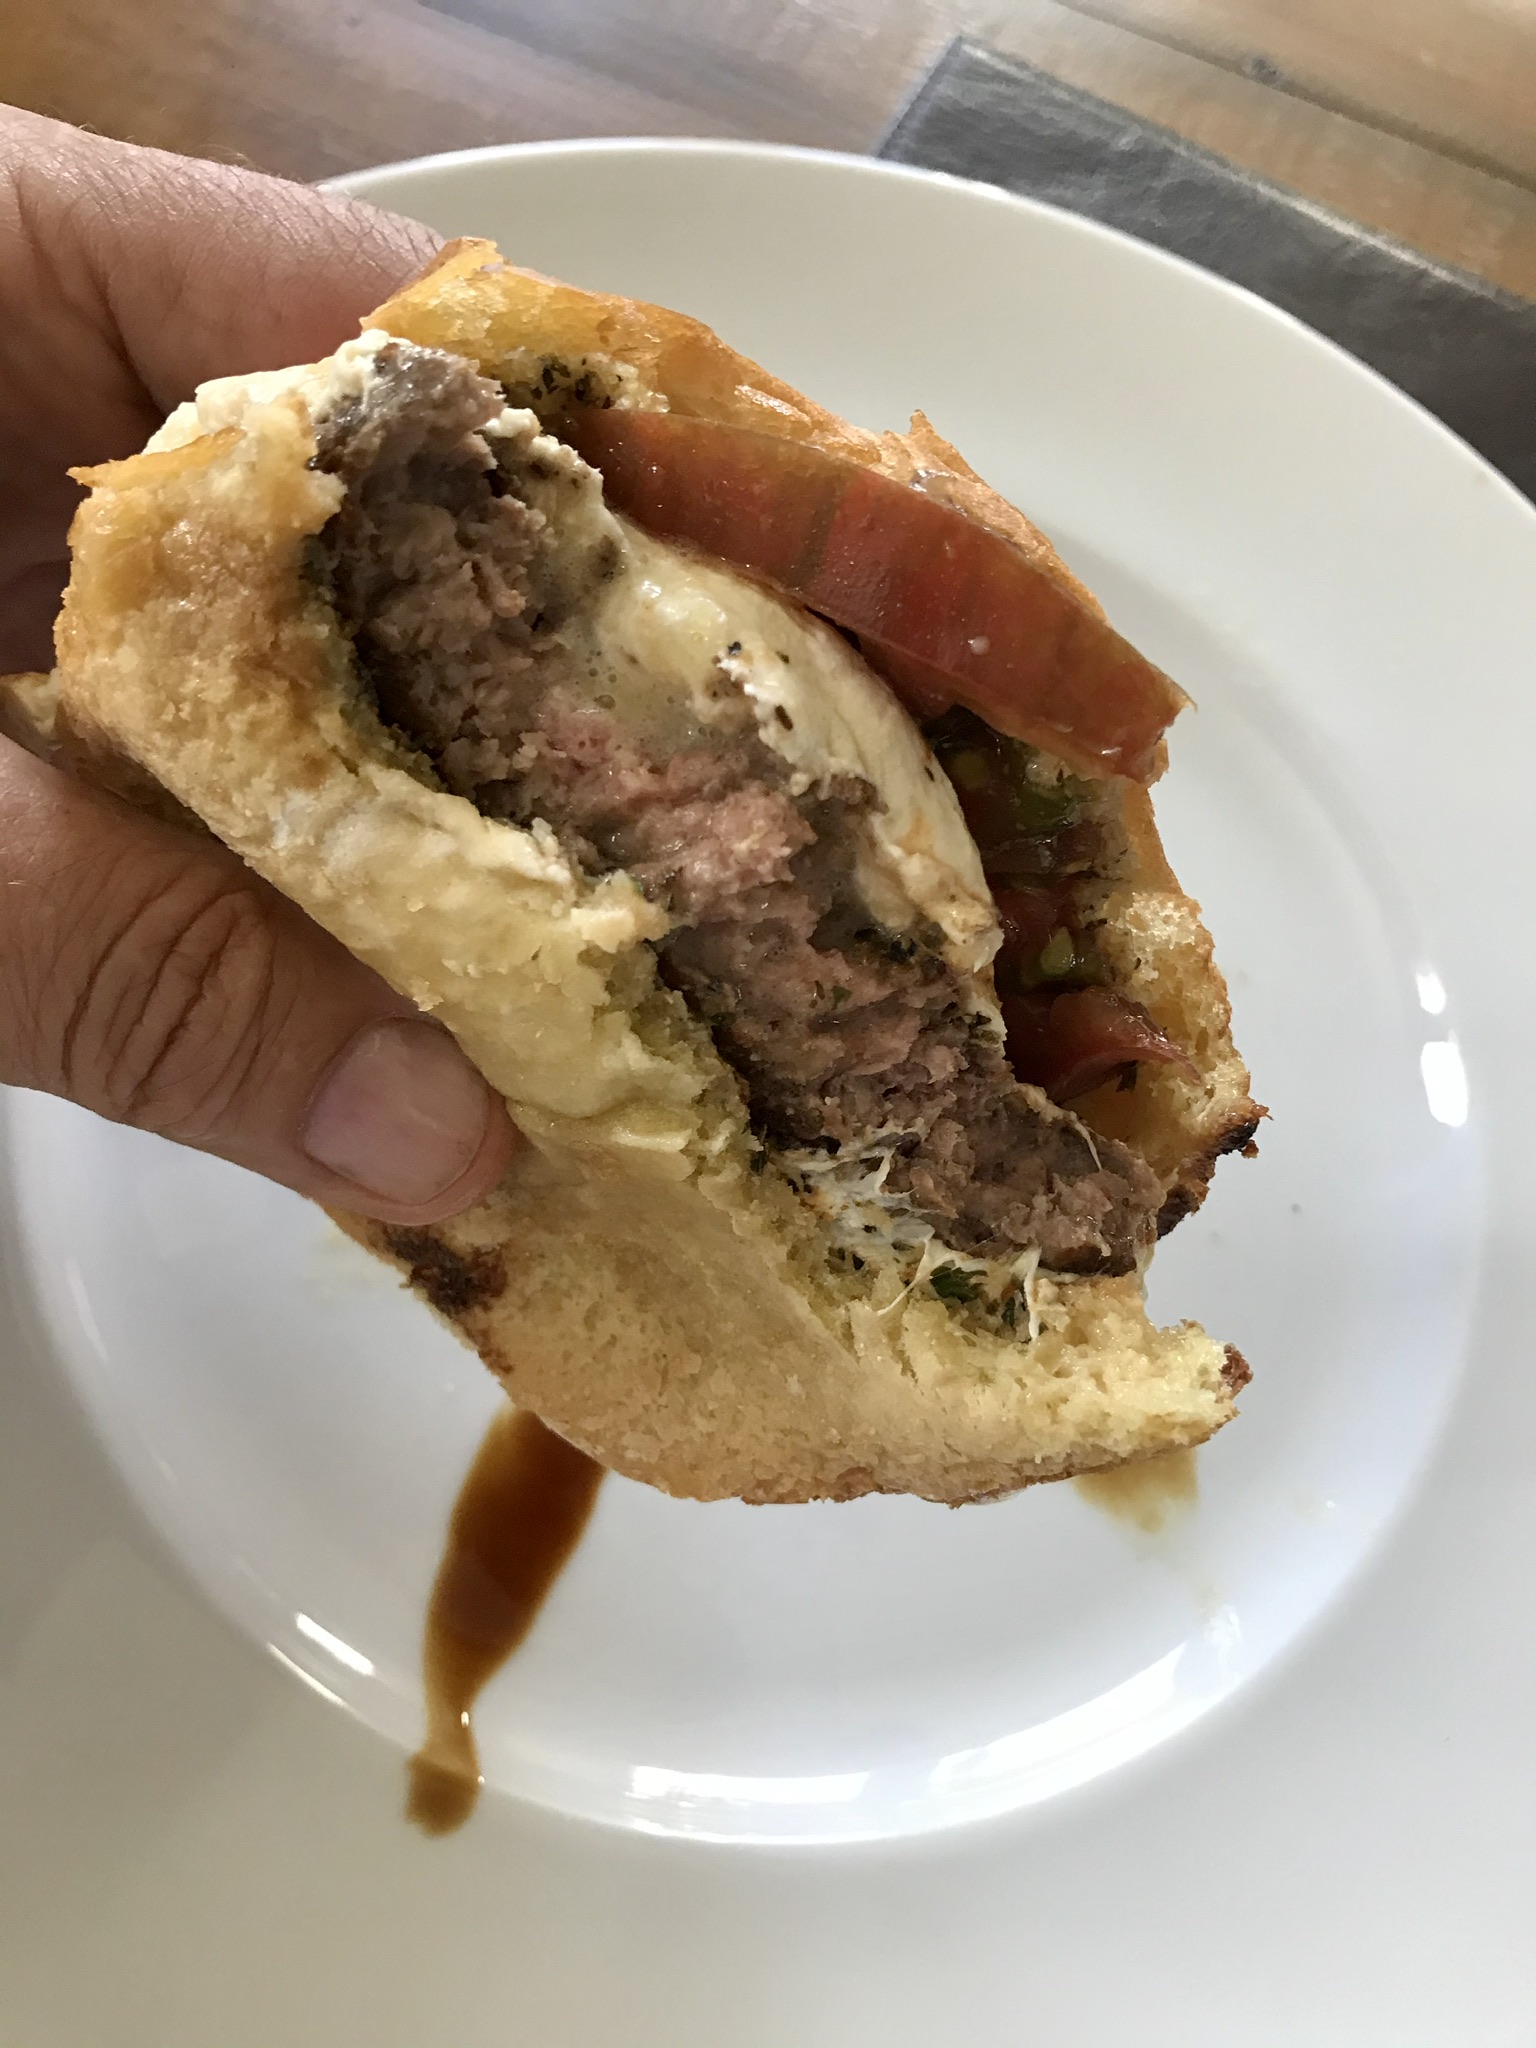
I cooked the burger until it was medium-rare and the cheese had melted.
I placed the burger on the toasted roll and added a nice slice of farm-fresh heirloom tomato.(Fresh basil is optional.) And I drizzled over the top with some good balsamic.
This is a story about something that is near and dear to my heart…and liver.
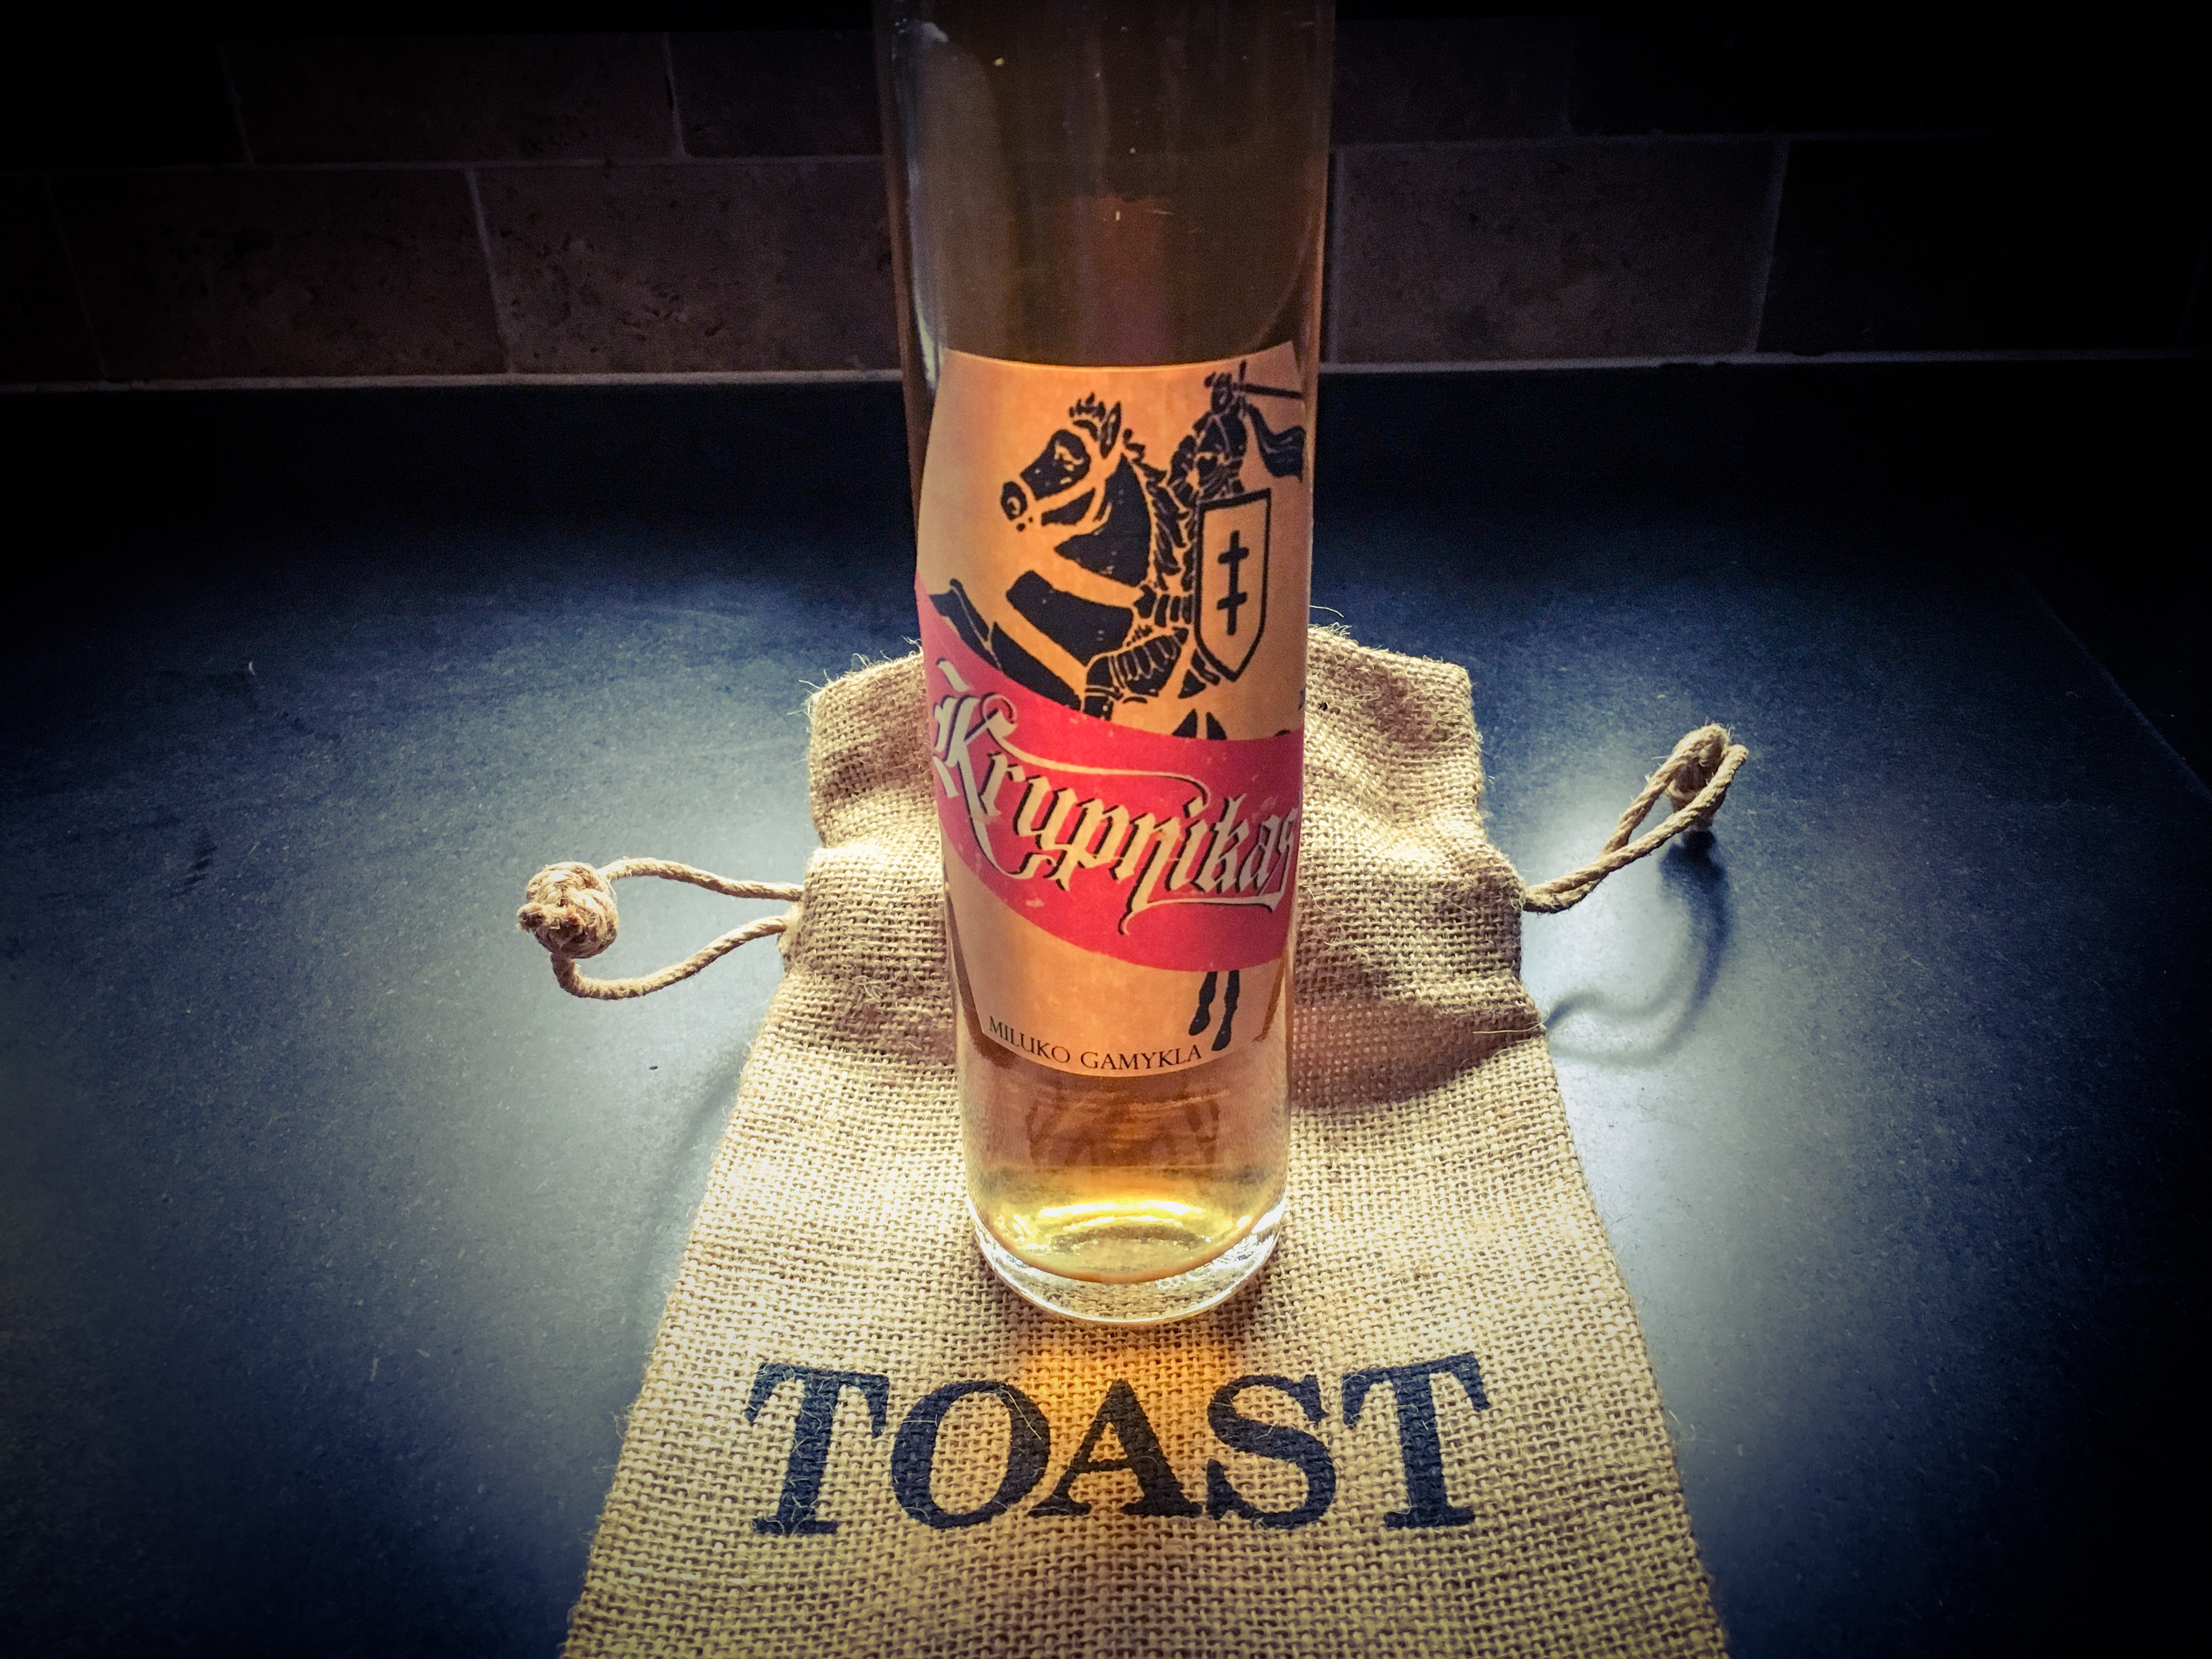
I’ve been making Krupnikas for over 40 years. (And no, I won’t be posting my secret recipe here.) It’s a honey-based liqueur that is popular in eastern Europe, especially in countries like Lithuania, where my parents were born. Though most of the Krupnikas that I’ve tasted is similar, no two recipes are exactly alike…and that’s where the arguments begin!
I have many friends that make Krupnikas. Some use a leaner approach (like me)…others go for the everything-in-one-basket approach. I’m not sure that more is necessarily better. Some friends claim that it isn’t real Krupnikas if you don’t use black pepper. But I’ve been to many pubs and restaurants in Lithuania and have never been served Krupnikas with black pepper in it. Other recipes include ginger, turmeric, and saffron. I don’t include any of these ingredients in my recipe.
If you Google “Krupnikas,” you’ll find many different recipes…some pretty good, some incredibly awful…(but none as good as mine!) I use grain alcohol…there’s no distilling involved. There were times in the last 40 years when grain alcohol was not readily available to me, and my Krupnikas production came to a screeching halt for a while. But these days, I find it easily. (Here in New England, it’s sold in Rhode Island and Massachusetts.) Desperate times without grain alcohol forced me to try vodka instead, but I never liked the final result.
There’s a version of Krupnikas that dates back to the early 1900’s in the coal region of northeastern and east central Pennsylvania, where Lithuanian immigrants created their own version, using moonshine as a base. They named it “Boilo,” and many people make this recipe every year during the Christmas holidays even today. But it’s more like a cousin of Krupnikas, if there can be such a thing.
Traditional Krupnikas uses a variety of unusual spices, none of which have their origins in Lithuania, so it’s interesting to hear how these exotic ingredients made their way via various trade routes to eastern Europe.
The story goes that Krupnikas was created by Benedictine monks in the 1500’s, and that it became popular in both Lithuania and Poland for celebrations like birthdays, weddings, and holidays. But when the Soviets shut down all Krupnikas production, the recipes went “underground,” passed down from generation to generation through closely guarded family recipes. That’s why everyone thinks their family recipe is the best!
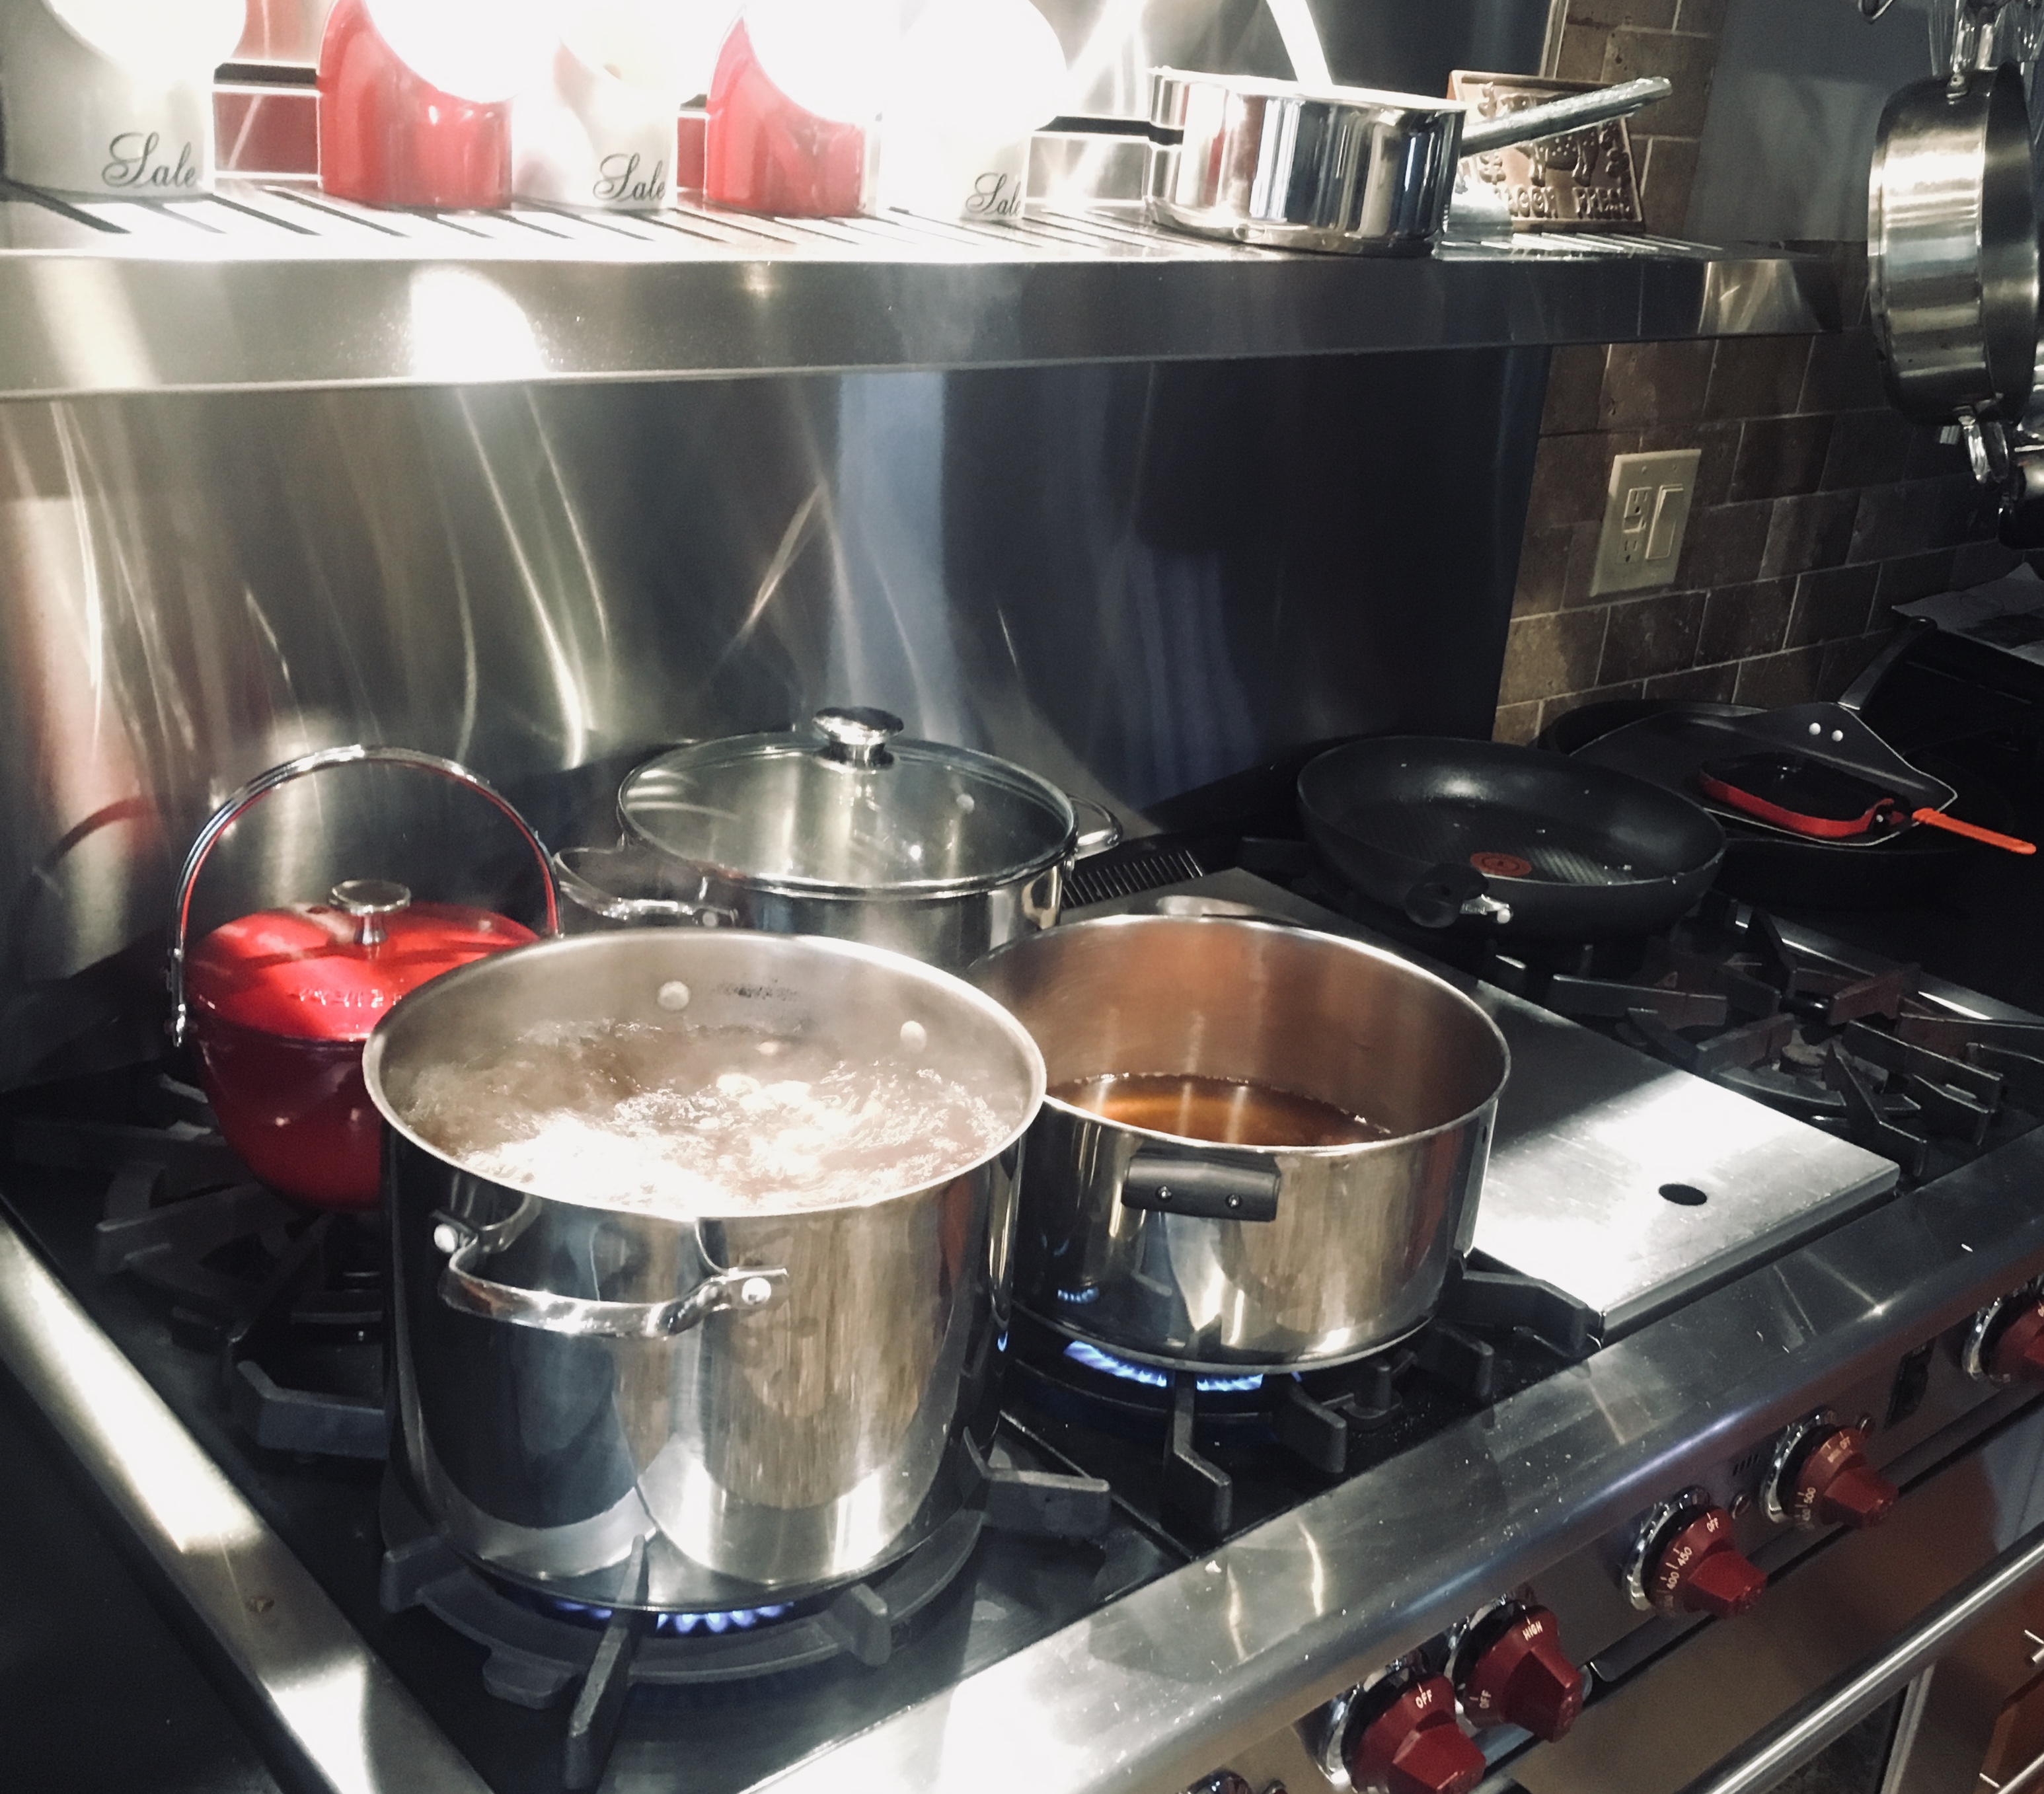
One pot for honey, one pot for the various spices I use…to be combined later.
My own Krupnikas making story started with my uncle, who would make large batches of the stuff in his tiny Richmond Hill, Queens, NY, kitchen. Because I am the godfather of my cousin, his son, I received a bottle as a gift from my uncle every Christmas. By New Year’s, that bottle would be gone. It wasn’t long before I got very tired of waiting 51 weeks for another bottle and I asked my uncle if he would share his recipe with me. He never did that exactly, but he did let me sit in on a brewing session and take notes in a cramped corner of his kitchen.
I took my notes home from my uncle’s house and tried to decipher what I wrote. Since there was no such thing as the internet back then (what we call “the dark ages,” kids), I drove all over New York City in search of some of the more exotic spices used in making my uncle’s Krupnikas recipe. I became a regular at several Asian and Indian stores, where, at first, they looked at this tall, geeky white dude somewhat suspiciously as I brought my spices to the counter for purchase.
Over the decades, through trial and error, I changed my uncle’s original recipe to the one that I proudly call my own today. You can’t buy it in a store, but if you have tons of money and want to go into business with me, I’m sure we can work something out! Or become my best friend and you’ll get a bottle at the end of every year…and then you’ll be the one waiting 51 weeks for another!
Versions of Krupnikas are available in liquor stores: Old Krupnik is a Polish liqueur, and the German brand Barenjager is another. And many whiskies, like Dewar’s and Jack Daniels, now have honey-flavored spirits as well.
Though quite different from my own recipe, there are two authentic Lithuanian-style Krupnikas liqueurs made in the United States by acquaintances of mine.
Based out of Durham, North Carolina, the Brothers Vilgalys Spirits Company (www.brothersvilgalys.com) has a pepperier version that uses local North Carolina wildflower honey. President of the company, Rim Vilgalys, the son of my good childhood friend from New York, has done what I never got around to do: make this fabulous elixir available to the public. You’ll find it at ABC stores throughout the state of North Carolina.
The second brand, made by a childhood friend, is made and sold in the New York area and goes by the name of KAS Krupnikas. (www.kasspirits.com)
Both are pretty darn good. But are they as good as mine? I think you already know my answer to that question!
My daughter and I love any foods that are heavy on the garlic, so this is a special treat we make when diets don’t matter! It’s buttery, it’s garlicky, it’s carby, and it’s absolutely delicious!
I use 2 kinds of garlic in my garlic bread: fresh and granulated. I think it adds a richer flavor than either one alone. And passing the fresh garlic through a press ensures that it will cook quickly and not leave you with that raw garlic taste in your mouth.
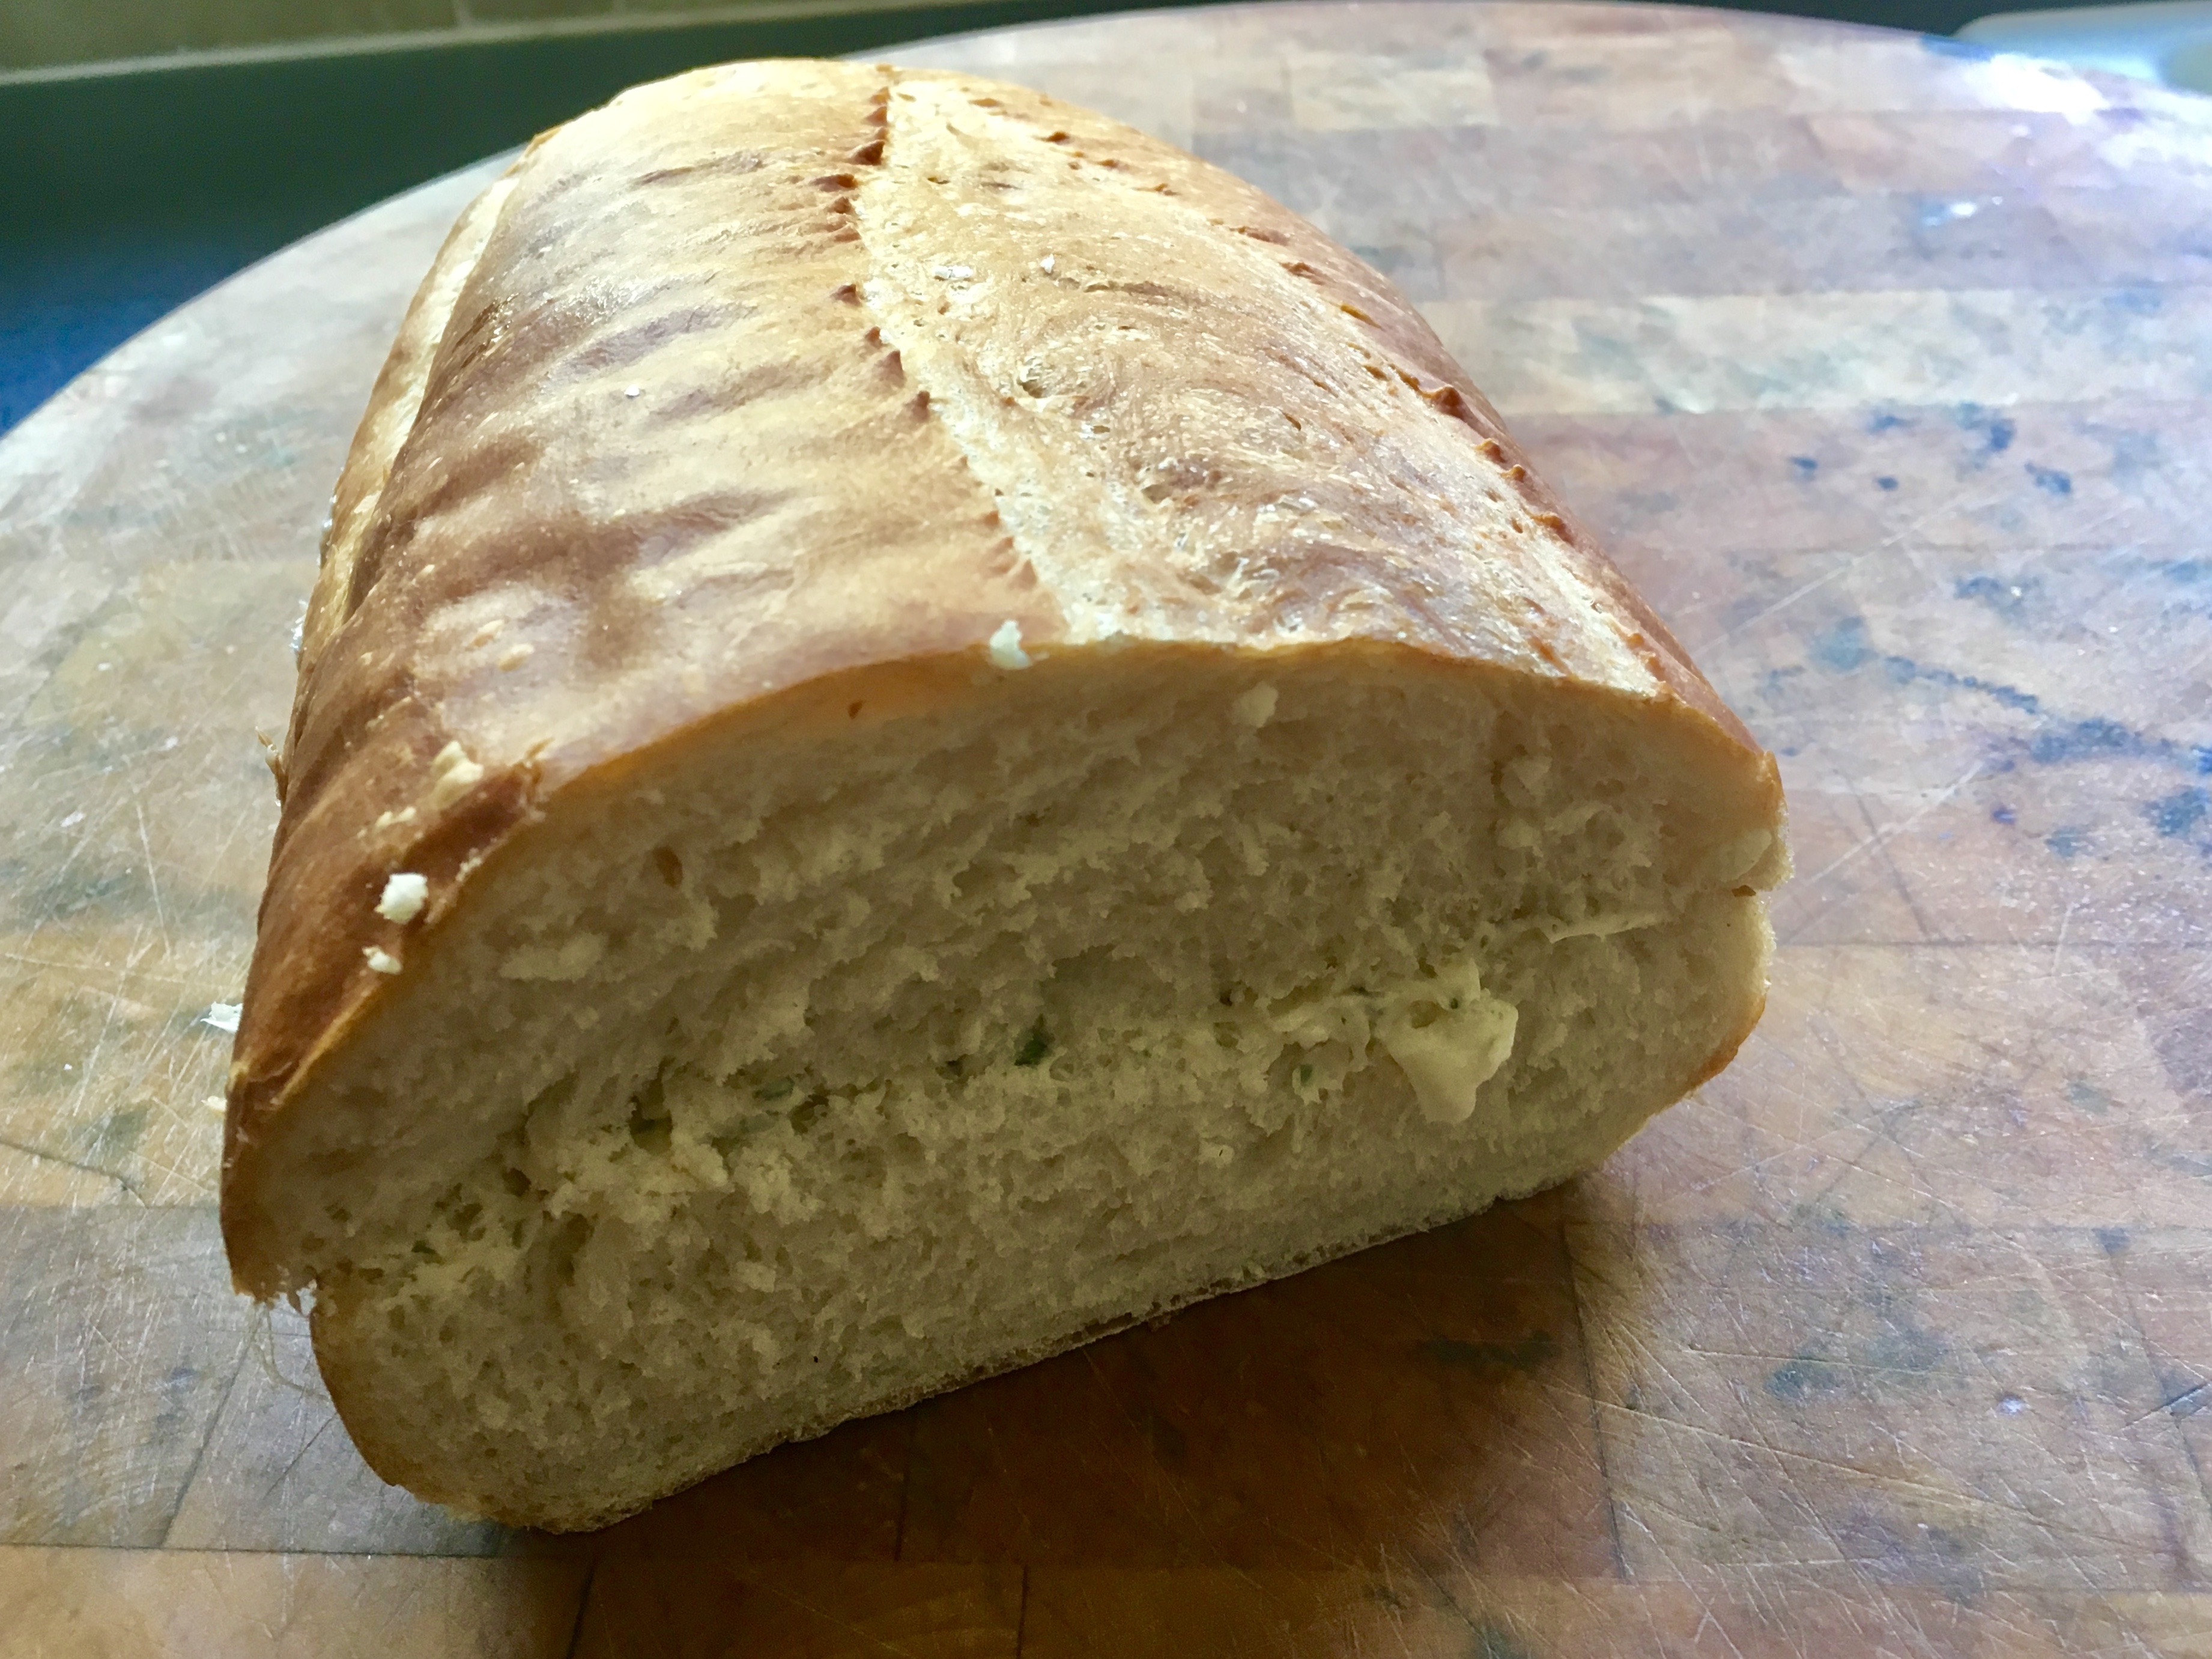
Although I love French baguettes, they’re too thin and crisp for garlic bread. I buy that long, soft, Italian loaf you can find in just about any supermarket bakery. When it bakes, the outside edges have a crisp bite to them, while the inside of the loaf stays soft…exactly what you want! The Italian loaf is big, so not only do I cut it lengthwise, I then cut each piece in half. This will make enough for us to enjoy one evening, and still store some in the freezer for a future craving.
This recipe makes enough for 1 garlic bread, 1 cheesy garlic bread, and also the bread you’ll be putting in the freezer for another time.
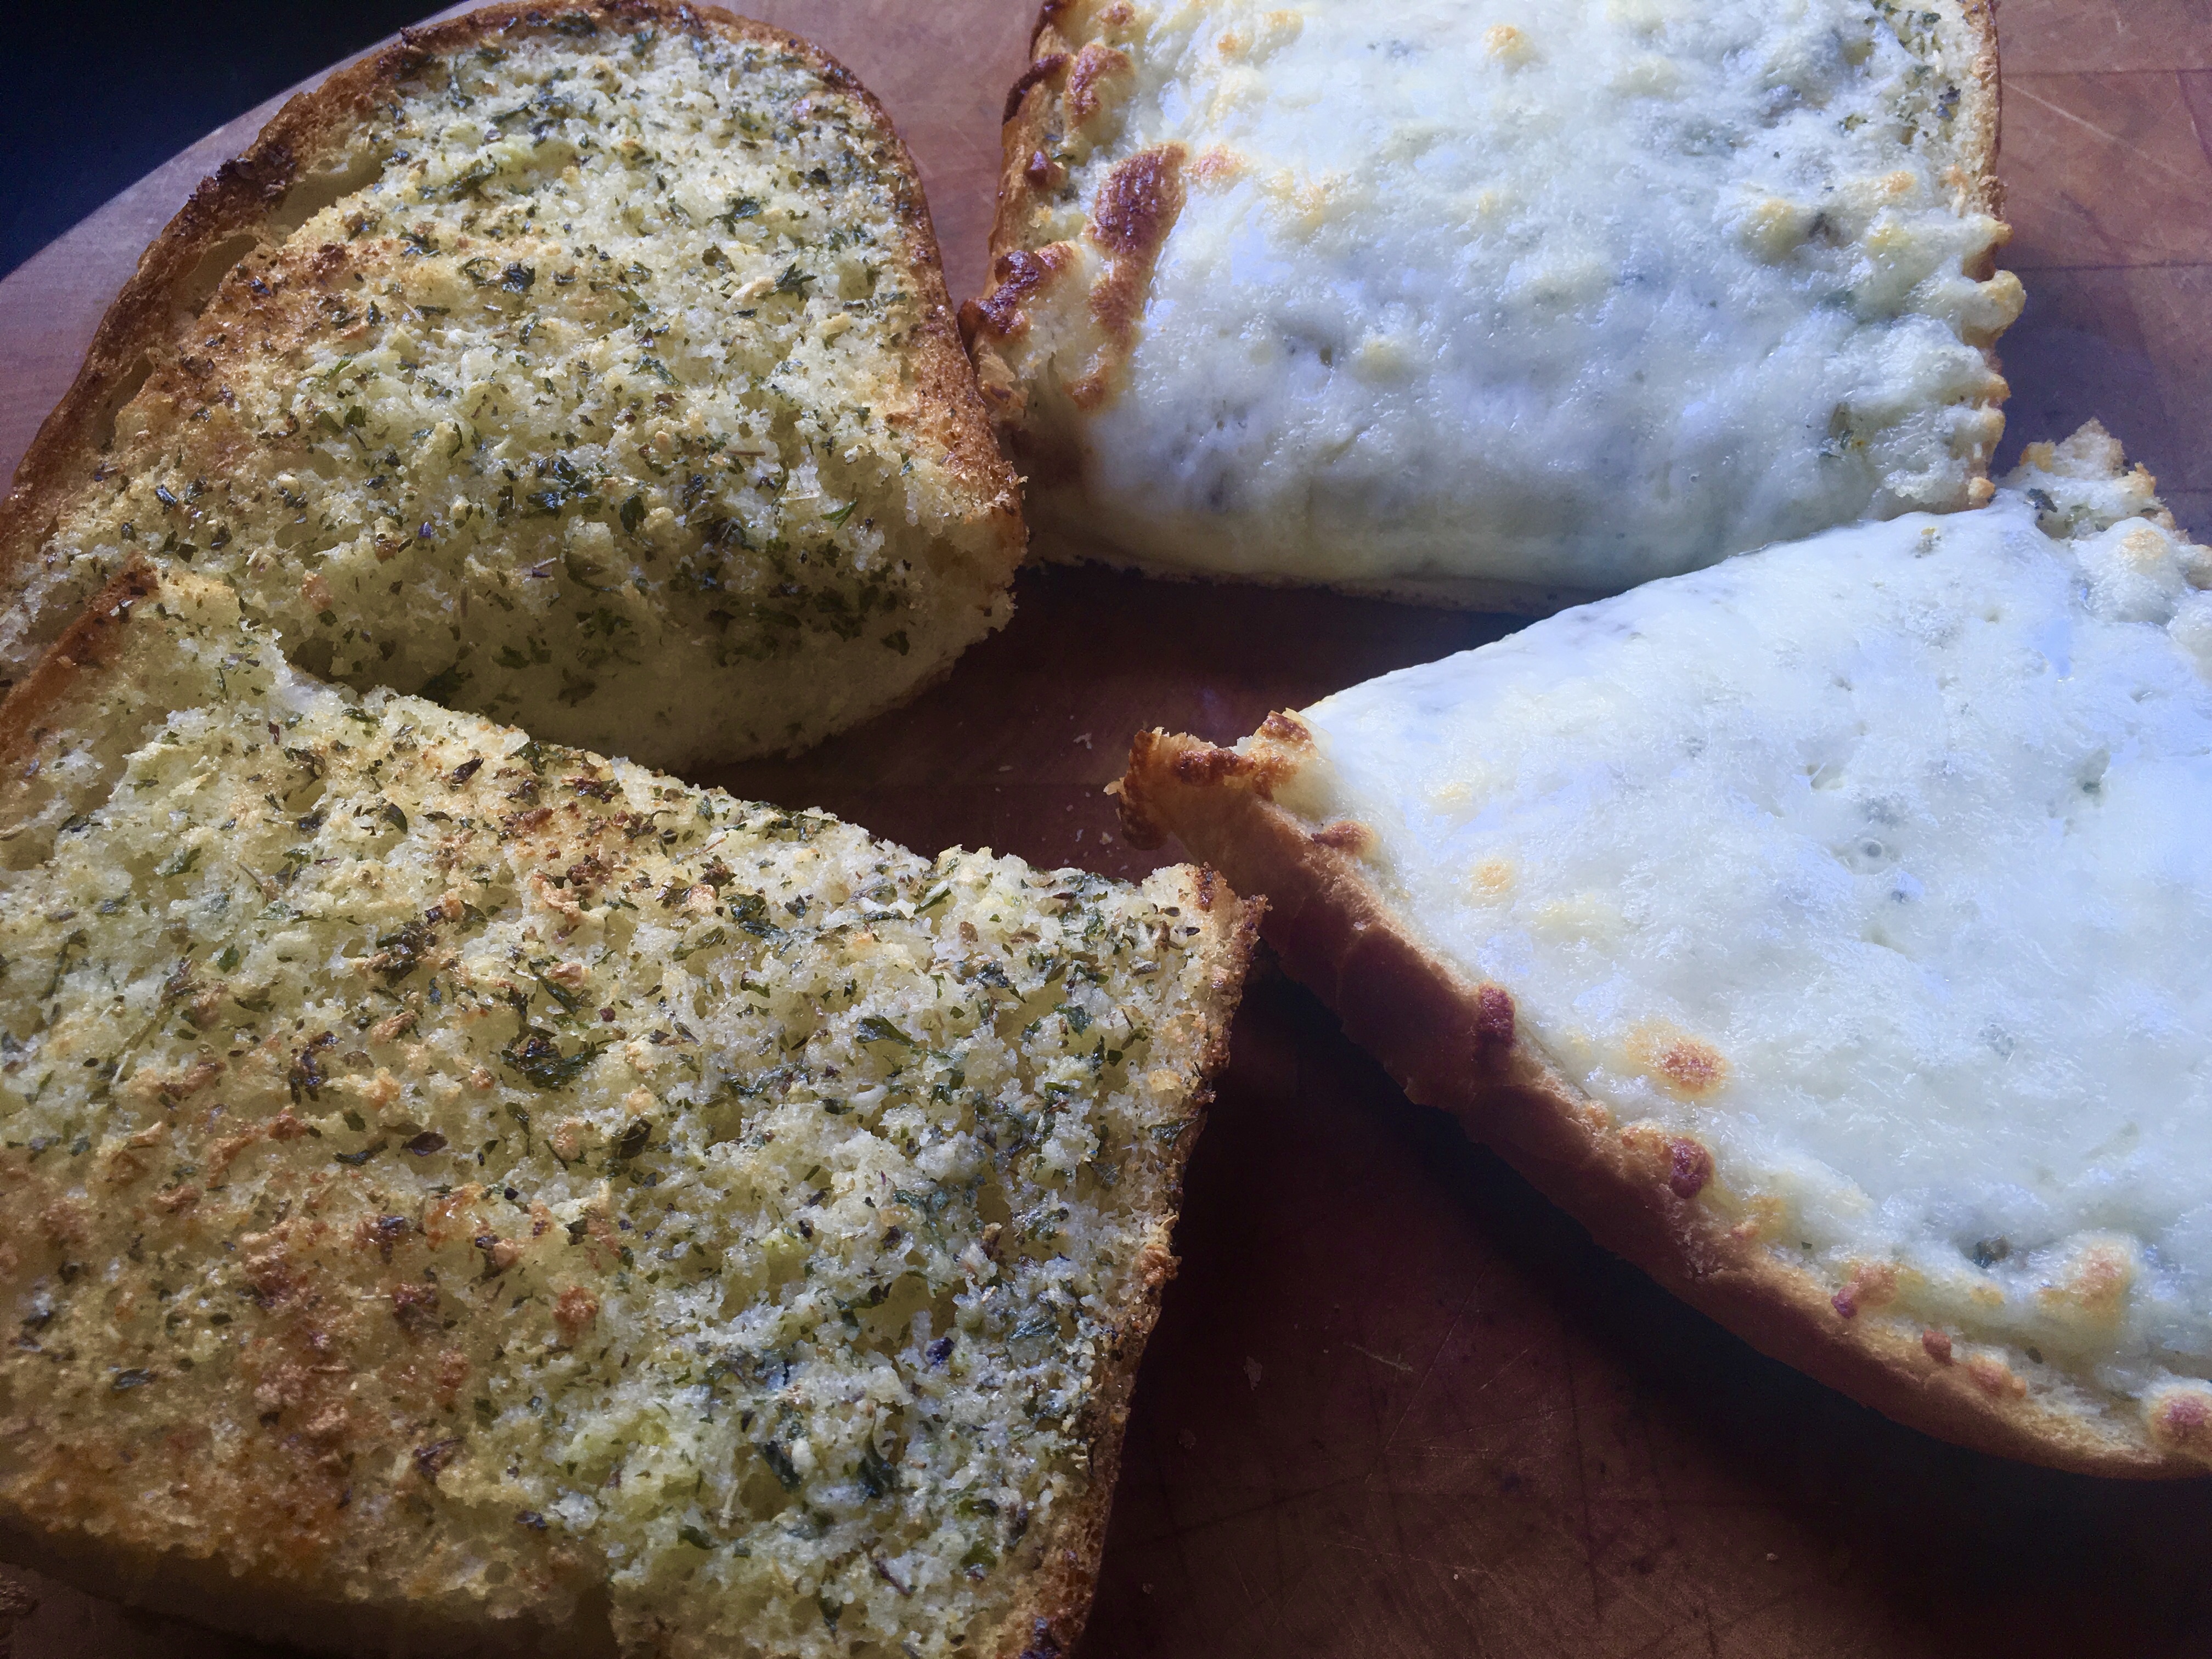
The delicious final product…but I digress…
2 sticks (8 oz.) unsalted butter
2 large cloves garlic, squeezed through a press
1 teaspoon granulated garlic
1 teaspoon salt
1 teaspoon oregano
1 teaspoon parsley
grated mozzarella cheese…a few ounces
In a bowl, let the butter soften to room temperature. Once it’s soft, squeeze the fresh garlic cloves through a garlic press and add them to the butter. Then add the granulated garlic, salt, oregano and parsley. Using a fork, mix the ingredients really well until you have a beautiful garlic and herb butter. (Once it’s mixed, I find it’s easier to spread with a spatula.)
Spread the garlic butter evenly on all 4 pieces of bread you’ve cut. Use it all up! Going thin on the butter serves no purpose here!
Place one of the loaves on a baking sheet. Add the grated mozzarella to one of the other loaves, and place it on the baking sheet as well.
Regular garlic bread on the left, cheesy garlic bread on the right…ready to go into the oven.
Pre-heat the oven to 400 degrees.
With the other two pieces of bread, I simply put them together…with cheese inside or not…
…and wrap them in aluminum foil. I place that in a freezer bag and keep it frozen until we have another craving. When it’s time to cook, I pre-heat the oven to 350, and bake the loaf in the foil for about 25 minutes. I take it out of the foil at the very end and bake another 5 minutes to get it to crisp up.
Ready to be devoured!
With the oven at 400, I bake my garlic bread and cheesy garlic bread for about 10 minutes, or until the edges of the bread start to turn a golden brown and the cheese on the cheesy side starts to melt.
I cut each piece in half so my daughter and I share in the 2 breads. There’s never any leftovers!
Some people don’t like cooking with veal because of the way the animals are treated, and I completely understand because I’m one of those. But…I’m fortunate that I can buy my veal from a nearby dairy farm, Sweet & Salty Farm in Little Compton, RI, where the animals are grass-fed and raised humanely. That makes for happier animals and incredibly flavorful meat…and no guilt about using it.
If you can’t get humanely raised veal, pork and beef work, too.
I also buy veal bones from Sweet & Salty Farm, roasting them on a sheet pan in a 400-degree oven for 30 minutes, then placing them in a large pot of water. I take some chopped carrots, onions, and celery, toss them in a little olive oil, and place them on a sheet pan, roasting them in the oven until they’ve caramelized, then add them to the pot with the veal bones. The secret to a great veal bone broth is to boil the bones and veggies for as long a time as possible. Restaurants will do this for days, replacing the water in the pot as needed. At home, I’ll start the broth in the morning and finish it by evening, straining out the veggies and bones at the very end of the cooking time.
The subtle flavor of veal can get lost with heavy seasonings, so I keep it simple. The addition of veal bone broth amplifies the flavor and keeps the meatballs from drying out.
1 lb. ground veal
1 cup toasted breadcrumbs (I use Udi’s bread to make it gluten-free)
2 teaspoons parsley
1 teaspoon oregano
1/2 teaspoon basil
1 teaspoon salt
1/2 teaspoon black pepper
1/2 teaspoon granulated garlic
1/2 teaspoon granulated onion
1 egg
extra virgin olive oil
1 lb. pasta, cooked firmer than al dente
2 cups veal bone broth or beef stock
salt and pepper for seasoning
2 tablespoons half-and-half
2 tablespoons butter
1 cup of frozen organic peas
Pre-heat the oven to 350 degrees.
Make the meatballs: In a bowl, combine the veal, breadcrumbs, parsley, oregano, basil, salt, pepper, garlic, onion and egg, mixing the ingredients thoroughly. Don’t over-mix.
Form the meatballs one by one, about golf ball size, and place them in an ovenproof pan. I line the pan with non-stick aluminum foil for easy clean up. Cook the meatballs for about 10 minutes. Don’t overcook them! (Even if you’re using pork, 10 minutes is OK because you will be cooking them longer. )
In a saucepan, heat the veal bone broth or beef broth. Once the meatballs have cooked in the oven, transfer them to the pot of broth and cover it with a lid, keeping the heat on low. If the broth doesn’t cover the meatballs, turn them every once in a while to keep them moist on all sides. Simmer the meatballs in the broth for about 30 minutes, then transfer them to a large sauté pan.
Turn the saucepan with the veal broth on high and reduce it to about 1/2 cup. Season it with salt and pepper.
In a large pot, cook the pasta to a bit firmer than al dente in well-salted water. Drain it and set it aside.
In the large sauté pan with the meatballs, add the butter and the half-and-half. Add the reduced veal broth, the pasta, and the peas.
Gently mix the ingredients in the pan until the peas have warmed through and the sauce clings to the pasta. Serve immediately.
With the ever-increasing popularity of bourbon, a new article comes out every few months explaining what rules need to be followed in order to have a whiskey classified as “bourbon.” But there are also differences in whiskies. I try to explain all of it as best I can in this blog.
There seems to be a lot of confusion about the spelling of whiskey and/or whisky, but the use of the letter “e” (or the lack thereof) is not random. Here’s the best explanation I’ve found…
The spelling whisky (plural whiskies) is generally used for those distilled in Scotland , Wales , Canada , and Japan. Whiskey (with an e; plural whiskeys) is used for the spirits distilled in Ireland and in the United States. The BATF (Bureau of Alcohol, Tobacco and Firearms) in 1968 specified “whisky” as the official U.S. spelling, but allowed labeling as “whiskey” in deference to tradition. Most U.S. producers still use the “whiskey” spelling, though as you can see, Maker’s Mark chooses not to.
International law reserves the term “Scotch whisky” to those whiskies produced in Scotland. Scottish law specifies that the whisky must be aged for a minimum of three years, in oak casks. Whiskies produced in other countries in the Scotch style must use another name. Similar conventions exist for “Irish whiskey,” “Canadian whisky,” and “Bourbon whiskey.” In North America, as well as in Continental Europe, the abbreviated term “Scotch” is usually used for “Scotch Whisky.” In England, Scotland, and Wales, the term “whisky” almost always refers to “Scotch Whisky”, and the term “Scotch” is rarely used by itself.
So what is bourbon?
Bourbon is a type of whiskey.
According to federal law, bourbon must be at least 51% corn, distilled at less than 160 proof, and aged for at least two years in new, charred oak barrels. (There are some other requirements, but those are the main ones.) Bourbon also must be made within the United States. In other words, a foreign product that meets all the other requirements still cannot be sold in the U.S. as bourbon.
Contrary to popular belief, there has never been a legal requirement that bourbon be made in Kentucky, which is why most Kentucky producers call their product “Kentucky Bourbon.”
Still confused? My advice is to sit back with your favorite glass of whisky, whiskey or bourbon…and just enjoy. Cheers!
This is a story about my Mom’s dad, my grandfather. Born in Lithuania, he came here during WWII. He was a short man, barely 5’5″ tall, but he was the strongest man I ever knew. As a kid, I watched him crush walnuts, and even hazelnuts, in his bare hands. He would go out into the water at Rockaway Beach, and the waves would hit him head-on, but never knock him down. He had little or no formal education, but he could fix or build anything, from concrete driveways to dog houses. And no matter what chore he took on, he wore a white shirt and tie with a vest while he did it. He never became a US citizen because he had a hard time with the English language, but he maintained his legal alien status, and spoke enough English to work in the kitchens of several high-end restaurants in Queens, NY.
My grandfather, Vaclovas Lukosevicius. A helluva name and a helluva guy. Now I know where I got my receding hairline!
I smoked my first cigarette with him when I was 12, and we had a good talk about it after my face returned to a lighter shade of blue-green. We would walk to his favorite bar on Jamaica Avenue in Richmond Hill, the Triangle Hofbrau (it’s still there) and they let me sit at the bar, snacking on pretzels with a 7-Up while he enjoyed a beer. My Mom was an only child, so I was the only grandson, and nobody made me feel more special than he did.
One of my grandfather’s passions was horseradish…homegrown, homemade horseradish.
It’s been almost 50 years since I watched my grandfather dig the long, dirty, gnarled horseradish roots out of his garden with a sharp spade, lunging at the ground with all of his strength to cut through the thick fibers of the plant.
After harvesting a large piece, he would wash the dirt from it and then peel it, leaving behind a beautifully smooth white root.
He had a large bowl set under a grater, and he would hand grate the horseradish root with incredible speed. But no matter how fast he went, the potent vapors released by the root would make their way to his eyes, and he was forced to stop several times to wipe the tears away with his old handkerchief and regain his composure before returning to grate the root again.
Onions were child’s play compared to horseradish, and I understood why he did all the preparation just outside of the kitchen door of his Queens, NY home.
Once grated, he would add some water, vinegar, and salt, and his prepared horseradish was complete. He’d store it in tightly sealed glass jars in the fridge, and when it was time to sample the goods, he would carefully open a jar, poke his knife in, and spread the prepared horseradish over beef, beets, twice-smoked bacon, or anything else he desired. I’d watch his face slowly turn red, small beads of perspiration developing on his forehead, and he’d turn and smile at me and tell me in Lithuanian: “Labai skanu!” (Very tasty!)
At the age of 10, I couldn’t figure out what he saw in horseradish, but it didn’t take long before I was hooked myself, as it was a staple at every family dinner table.
Opting for the stuff that came in a jar in the supermarket, I never made my own prepared horseradish until almost 50 years later.
I’ve had a huge horseradish plant growing in my garden for years, and I just never got around to doing anything with it. But the other night, as I was preparing my cocktail sauce recipe and I realized that I was out of prepared horseradish, it became clear that the time of reckoning had arrived. It was time, in the finest tradition of my grandfather, to make my own prepared horseradish.
Freshly harvested horseradish roots
I went out to the yard with a sharp shovel and lunged at the horseradish plant, splitting a few roots off of the main crown. I pulled them out of the ground, detached the long leaves, and headed back to the kitchen. Today’s kitchen technology gave me a distinct advantage over my grandfather, and after washing and peeling the root, I chopped it into smaller pieces and tossed them into a food processor. No hand grating necessary! The processor pulverized the root in no time, and I added water, vinegar and salt as my grandfather did, being very careful not to stick my face too close to the opening of the processor where the vapors were their most powerful. A small taste on my tongue just about had my eyeballs shoot out of my head, and I muttered silently to myself: “Labai skanu!”
My grandfather would be proud.
Horseradish is a member of the Brassicaceae family, which includes mustard, cabbage, wasabi, and broccoli. The horseradish root itself hardly has any aroma. But when you crush it, enzymes from the broken plant cells produce mustard oil, which irritates the mucous membranes of the sinuses and eyes. To keep the horseradish from losing its pungency and freshness, vinegar must be added immediately.
Prepared Horseradish
6 oz. fresh horseradish root, peeled 6 tablespoons water 3 tablespoons white vinegar 3 pinches of salt
Chop the horseradish root into small pieces and add water, vinegar and salt. Process until proper consistency is reached. Careful! Use proper ventilation or the vapors will blow your eyeballs and sinuses out!

















 Live the Live ™