PASTA WITH FIVE CHEESES

Posted: October 20, 2022 in Uncategorized

Al Forno in Providence, RI, is a legendary Italian restaurant that was established in 1980 and has graced the pages of many a food magazine ever since. Chefs Johanne Killeen and George Germon made it a culinary destination, creating dishes that many have copied, but never equaled. 

One of those creations was the grilled pizza. These days, you can find grilled pizzas just about anywhere in the country, but it was Al Forno that started it all.

Sadly, George Germon passed away in 2015, but the restaurant continues. And although the menu offers a wide variety of dishes, the one my daughter and I crave–that isn’t on the menu–is their 5-cheese pasta dish. It’s not baked ziti. It’s not lasagna. It’s something way beyond. (They do offer a four cheese pasta dish with pumpkin, but it’s just not the same, as far as I’m concerned.)


Taking the recipe from one of Johanne and George’s cookbooks, my daughter and I decided that we would re-create this magical dish at home as best we could.

One element obviously missing in our home is a wood-fired oven, something Al Forno uses.

And looking at their list of 5 cheeses (mozzarella, Pecorino Romano, fontina, ricotta and gorgonzola), I found that gorgonzola was a bit of a surprise. Having had the 5-cheese pasta dish at least 4 times at Al Forno, I never detected even a hint of blue cheese. In fact, if I would have, I don’t think I would’ve ordered it again. So we chose to remove the gorgonzola and add another favorite, sharp provolone, instead. It turned out to be an excellent choice.


Other than that, we stayed true to the recipe, using shell pasta because that’s what we always got at the restaurant.

2 cups heavy cream
1 cup chopped canned tomatoes in heavy puree (San Marzano’s, if you can get ’em)
4 oz. thinly sliced mozzarella cheese
1.5 oz. grated Pecorino Romano cheese
1.5 oz. coarsely shredded Fontina cheese
1.5 oz. grated Provolone cheese
2 tablespoons ricotta cheese
3/4 teaspoon Kosher salt, plus more for the pasta water
6 fresh basil leaves, coarsely chopped
1 lb. conchiglie (medium shell) pasta
4 tablespoons unsalted butter, sliced thinly
Shavings of raw scallion for garnish (optional)

Preheat the oven to 500°, or as close to it as your oven will get.

Bring a large pot of salted water to a boil.

In a mixing bowl, combine all the ingredients except the pasta and the butter. Stir well to combine.

Drop the pasta in the boiling water and parboil it for about 4 minutes. Drain it in a colander and add it to the ingredients in the mixing bowl. Combine it well.

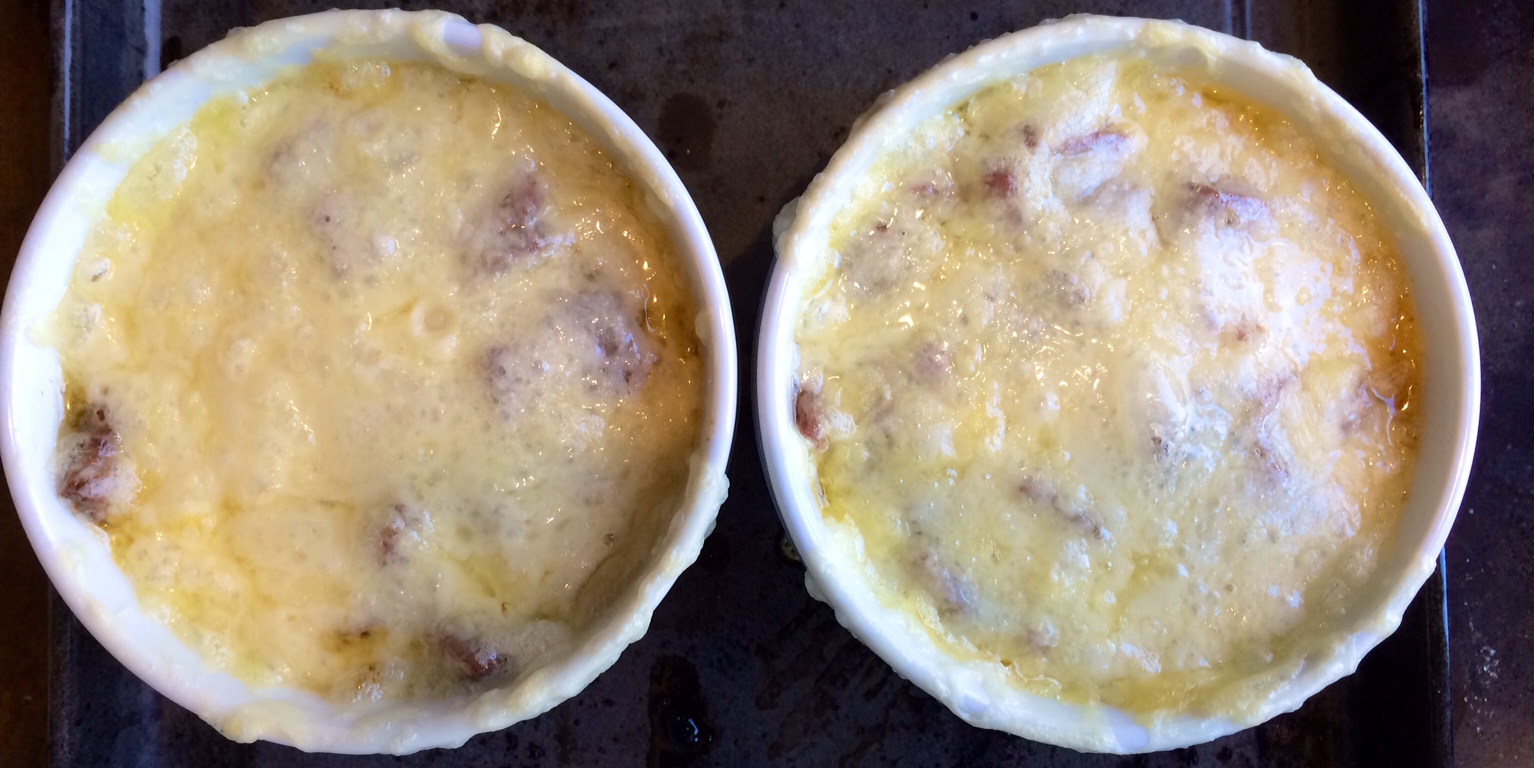
Divide the pasta mixture into small ceramic dishes, or just use one large baking dish. You want it to sit in a relatively shallow 1-inch layer.


Dot the top of the dish with the butter, and bake it until it’s bubbly and brown, about 7 to 10 minutes at 500…a little longer at lower temperatures.

Funny how help arrives when it’s all about pasta and cheese!

It’s the creamiest, cheesiest pasta dish you’ll ever have…and everyone will fight over those little charred pasta shells!

Optional: When I ordered this dish at Al Forno, they would top it with thin shavings of raw scallion on top. I loved that touch and do that at home as well.


Instead of opening a nasty can of Manwich or other similar product, the classic Sloppy Joe sandwich is easy enough to make from scratch.

My version takes on a Mexican twist (hence the name Sloppy José), using seasoned taco meat and a great barbecue sauce. Putting them together with a sprinkling of Mexican cheese on a bun with lettuce and tomato makes for one sloppy but delicious sandwich!

sloppy jose


For the barbecue sauce…

2 cups ketchup
3/4 cup water
6 tablespoons white vinegar
6 tablespoons apple cider vinegar
6 tablespoons brown sugar
3 tablespoons Worcestershire sauce
1 tablespoon chili powder
2 teaspoons salt
2 teaspoons black pepper
1 1/2 teaspoons cumin


Mix all the ingredients in a saucepan and simmer until the flavors have blended, about 20 minutes. Remove from the heat and cool to room temp. If you store it in an airtight container in the fridge, it’ll stay good for a few months.


For the seasoned taco meat…

1 teaspoon granulated garlic
1 teaspoon onion powder
1/4 teaspoon crushed pepper flakes
1 teaspoon dried Mexican oregano
1 teaspoon paprika
2 teaspoons ground cumin
1 teaspoon sea salt
1 teaspoon black pepper
1 Spanish onion, finely chopped
olive oil
2 lbs. grass-fed ground beef


Combine all the spice ingredients in a bowl.

Sauté the onions in a bit of olive oil until translucent. Add the beef and sauté until cooked, mixing in the spice mixture a little at a time until you’ve used it all.


For the sandwich…

Take some of the taco meat and place it in a small non-stick pan and heat it on medium. Squirt in as much of the barbecue sauce as you like, mixing thoroughly. Sprinkle some grated Mexican cheese on top. (I like Cotija, which is like a Mexican feta, but a bag of mixed cheeses works great, too.) Mix thoroughly, letting it all melt together into one warm, gooey mess. Throw it on a bun. Add lettuce, tomato, avocado slices, whatever you like!


RISOTTO

Posted: October 13, 2022 in Uncategorized

Good things come to those who wait. Risotto makes you wait!


When I recently made my slow-cooked braised beef short ribs, my daughter requested more than just a simple starch to go with it. One of her favorite dishes in the whole wide world is risotto, and though I’ve never made it before, I knew it wasn’t difficult…just time consuming. Well, a recent rainy Saturday was the perfect day to give it a try.

Like many great Italians dishes, risotto requires love. It requires patience. And it requires few ingredients, but they need to be the best quality ingredients you can get your hands on.

1 tablespoon unsalted butter
1 tablespoon olive oil
1/2 medium onion, chopped finely
4 cloves garlic, minced
1 cup Arborio rice (basmati is a good substitute)
1/4 cup dry white wine
4 cups chIcken or vegetable stock, kept warm on the stove top (homemade is best)
3 tablespoons chopped fresh parsley 
1 cup frozen peas
1 cup freshly grated Parmigiano Reggiano 


In a large pan, heat the butter and olive oil over medium heat. 


Add the onions and sauté them until they’re translucent.
Add the garlic and sauté for 10 seconds.

Add the rice and stir really well, so that every bit of the rice gets coated with the butter and oil mixture.
Add the wine, and stir gently, letting the rice absorb it.


Homemade chicken stock really brings the flavor!


Add a ladle of the stock to the rice, stirring gently, letting it absorb all the stock. Only once the stock has been absorbed do you add another ladle of stock. Repeat this process until all the stock has been used and the rice has softened. This should take about 25 minutes, and you need to be standing there, stirring gently, the entire time.


Just before the last bit of stock has been absorbed, add the parsley and the peas.


Stir for a bit and then add the grated cheese.


Serve immediately!


AL MILUKAS

http://www.livethelive.com

My blog about food, travel, high octane spirits, and living the live.

BRAISED BEEF SHORT RIBS

Posted: October 10, 2022 in Uncategorized

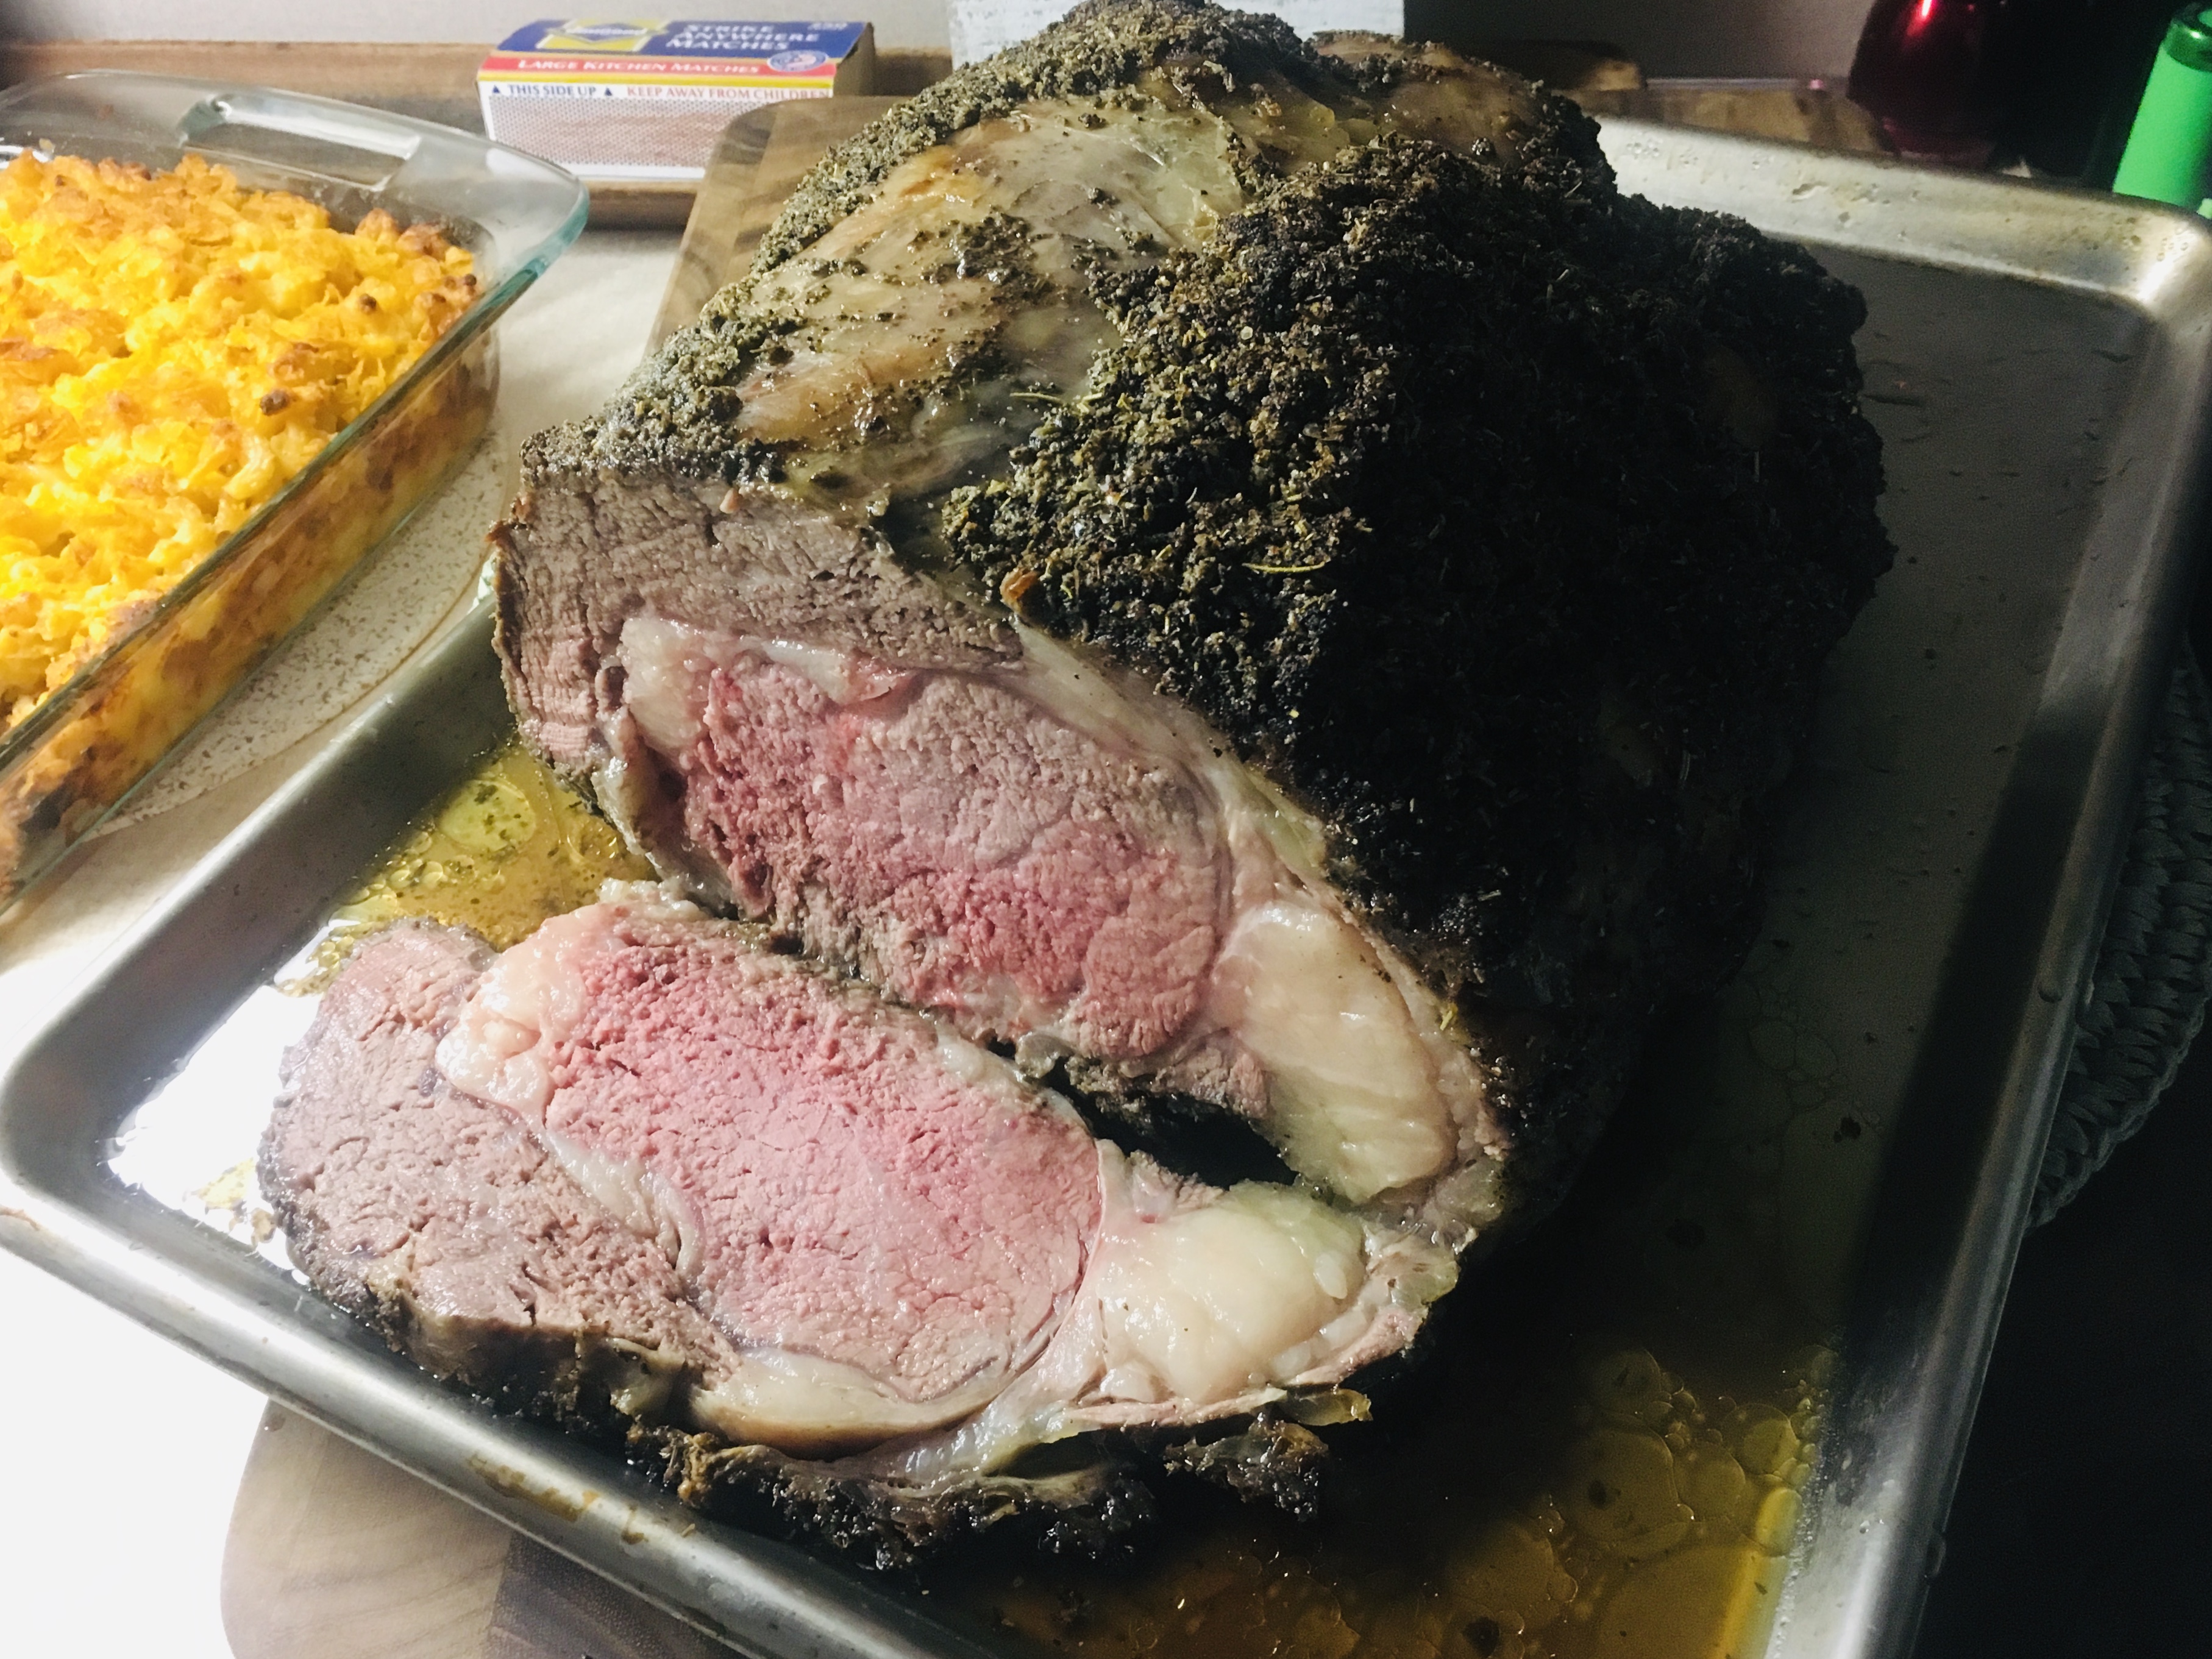
Although beef short ribs can be an expensive dish at many a fine restaurant, the expense is not in the ingredients, but in the time it takes to prepare it. But it is definitely worth the effort!


I used grass-fed beef short ribs for my recipe, and I think it made a huge difference in taste. But use what you like, and can easily find. Short ribs can be extremely fatty. Although you want to keep some of the fat, remove any excess fat that will only make the final braising liquid taste greasy.

I didn’t have a Dutch oven, which is really the right tool for this recipe, so I seared my beef and cooked the veggies in a pan, and then transferred everything to a deeper oven-safe pot with a lid when it was time to cook.

In doing my research for this recipe, I found dozens of variations. I wound up going with a hybrid of two, both from Food Network chefs: Ann Burrell, and Robert Irvine. Burrell’s recipe was heavy on the wine, and used water. Irvine’s was heavy on stock, a little wine, and no water.


3 to 5 lbs. grass-fed beef short ribs, trimmed
3 large carrots (200g)
3 stalks celery (200g)
1 medium onion (200g)
3 cloves garlic
Olive oil
Bacon fat (optional)
1 can (6 oz.) tomato paste
2 cups red wine, like a Cabernet Sauvignon
3 cups chicken or beef stock (homemade is best)
Kosher salt and pepper

About an hour before cooking, trim the beef short ribs and season them all over with Kosher salt. Set them aside.


Pre-heat the oven to 325.


Place the carrots, celery, onion and garlic in a food processor and process until you get something that resembles a paste.
Right before searing the short ribs, re-season them with salt and pepper.

Heat a large pan on high, and when hot, add enough olive oil to coat the bottom. Sear the beef short ribs in the oil, making sure they’re nice and brown on all sides.


Set the beef aside in a bowl, pour out the fat in the pan, and replenish with new olive oil, (and some bacon fat if you have it and want to use it), just enough to coat the bottom of the pan.


Pour in the veggies from the food processor, season them with salt and pepper, and sauté them until they really caramelize. You want them to start taking on a brown color. 


If the veggies start sticking to the pan, turn down the heat, but the stuff that sticks to the pan is full of flavor. Let that happen! It will all come off later when you deglaze with the wine.


You want those sticky brown bits!


Add the tomato paste and let it cook down for 5 minutes or so.


Add the red wine, and you’ll see how it deglazes the pan and cleans all those tasty brown bits off the bottom. Add the stock and continue stirring.


See how the wine cleans the bottom of the pan? It’s all about flavor!


Place the beef short ribs (and any juices that may be in the bowl) into a Dutch oven or large oven-safe pot. Pour the pan with the veggie-wine-stock mix over the top. Add water if needed to cover the beef.


Cover the pot and place it in the middle of the oven. Cook for 3 hours, flipping the beef ribs once halfway through. Add water at the halfway point if it looks like the meat is exposed.


After 3 hours, remove the lid off the pot and cook for another 45 minutes to an hour. This allows the braising liquid to reduce and concentrate its flavors.
You can turn the oven off at this point and just leave the pot in it until you’re ready to serve.


Serve with the braising liquid.

The risotto I made to go with it will be posted in another blog.

Bulgogi is the name given to the most common form of Korean barbecue. Unlike the daeji bulgogi that I cooked in a previous blog, this one is not based on a chili sauce that can take the roof of your mouth right off.

I used chicken, though this would work with pork as well, and for the best flavor, it’s best to marinate the meat in the fridge overnight.


FullSizeRender (12)

2/3 cup soy sauce
1/2 cup chopped scallions
6 tablespoons sugar (I use organic cane sugar)
5 tablespoons fresh garlic, grated or through a garlic press
5 tablespoons sesame oil
1 tablespoon sesame seeds
1 teaspoon black pepper
5 lbs. chicken pieces (I use skin-on thighs)


Combine all the ingredients except for the chicken in a bowl and mix well.

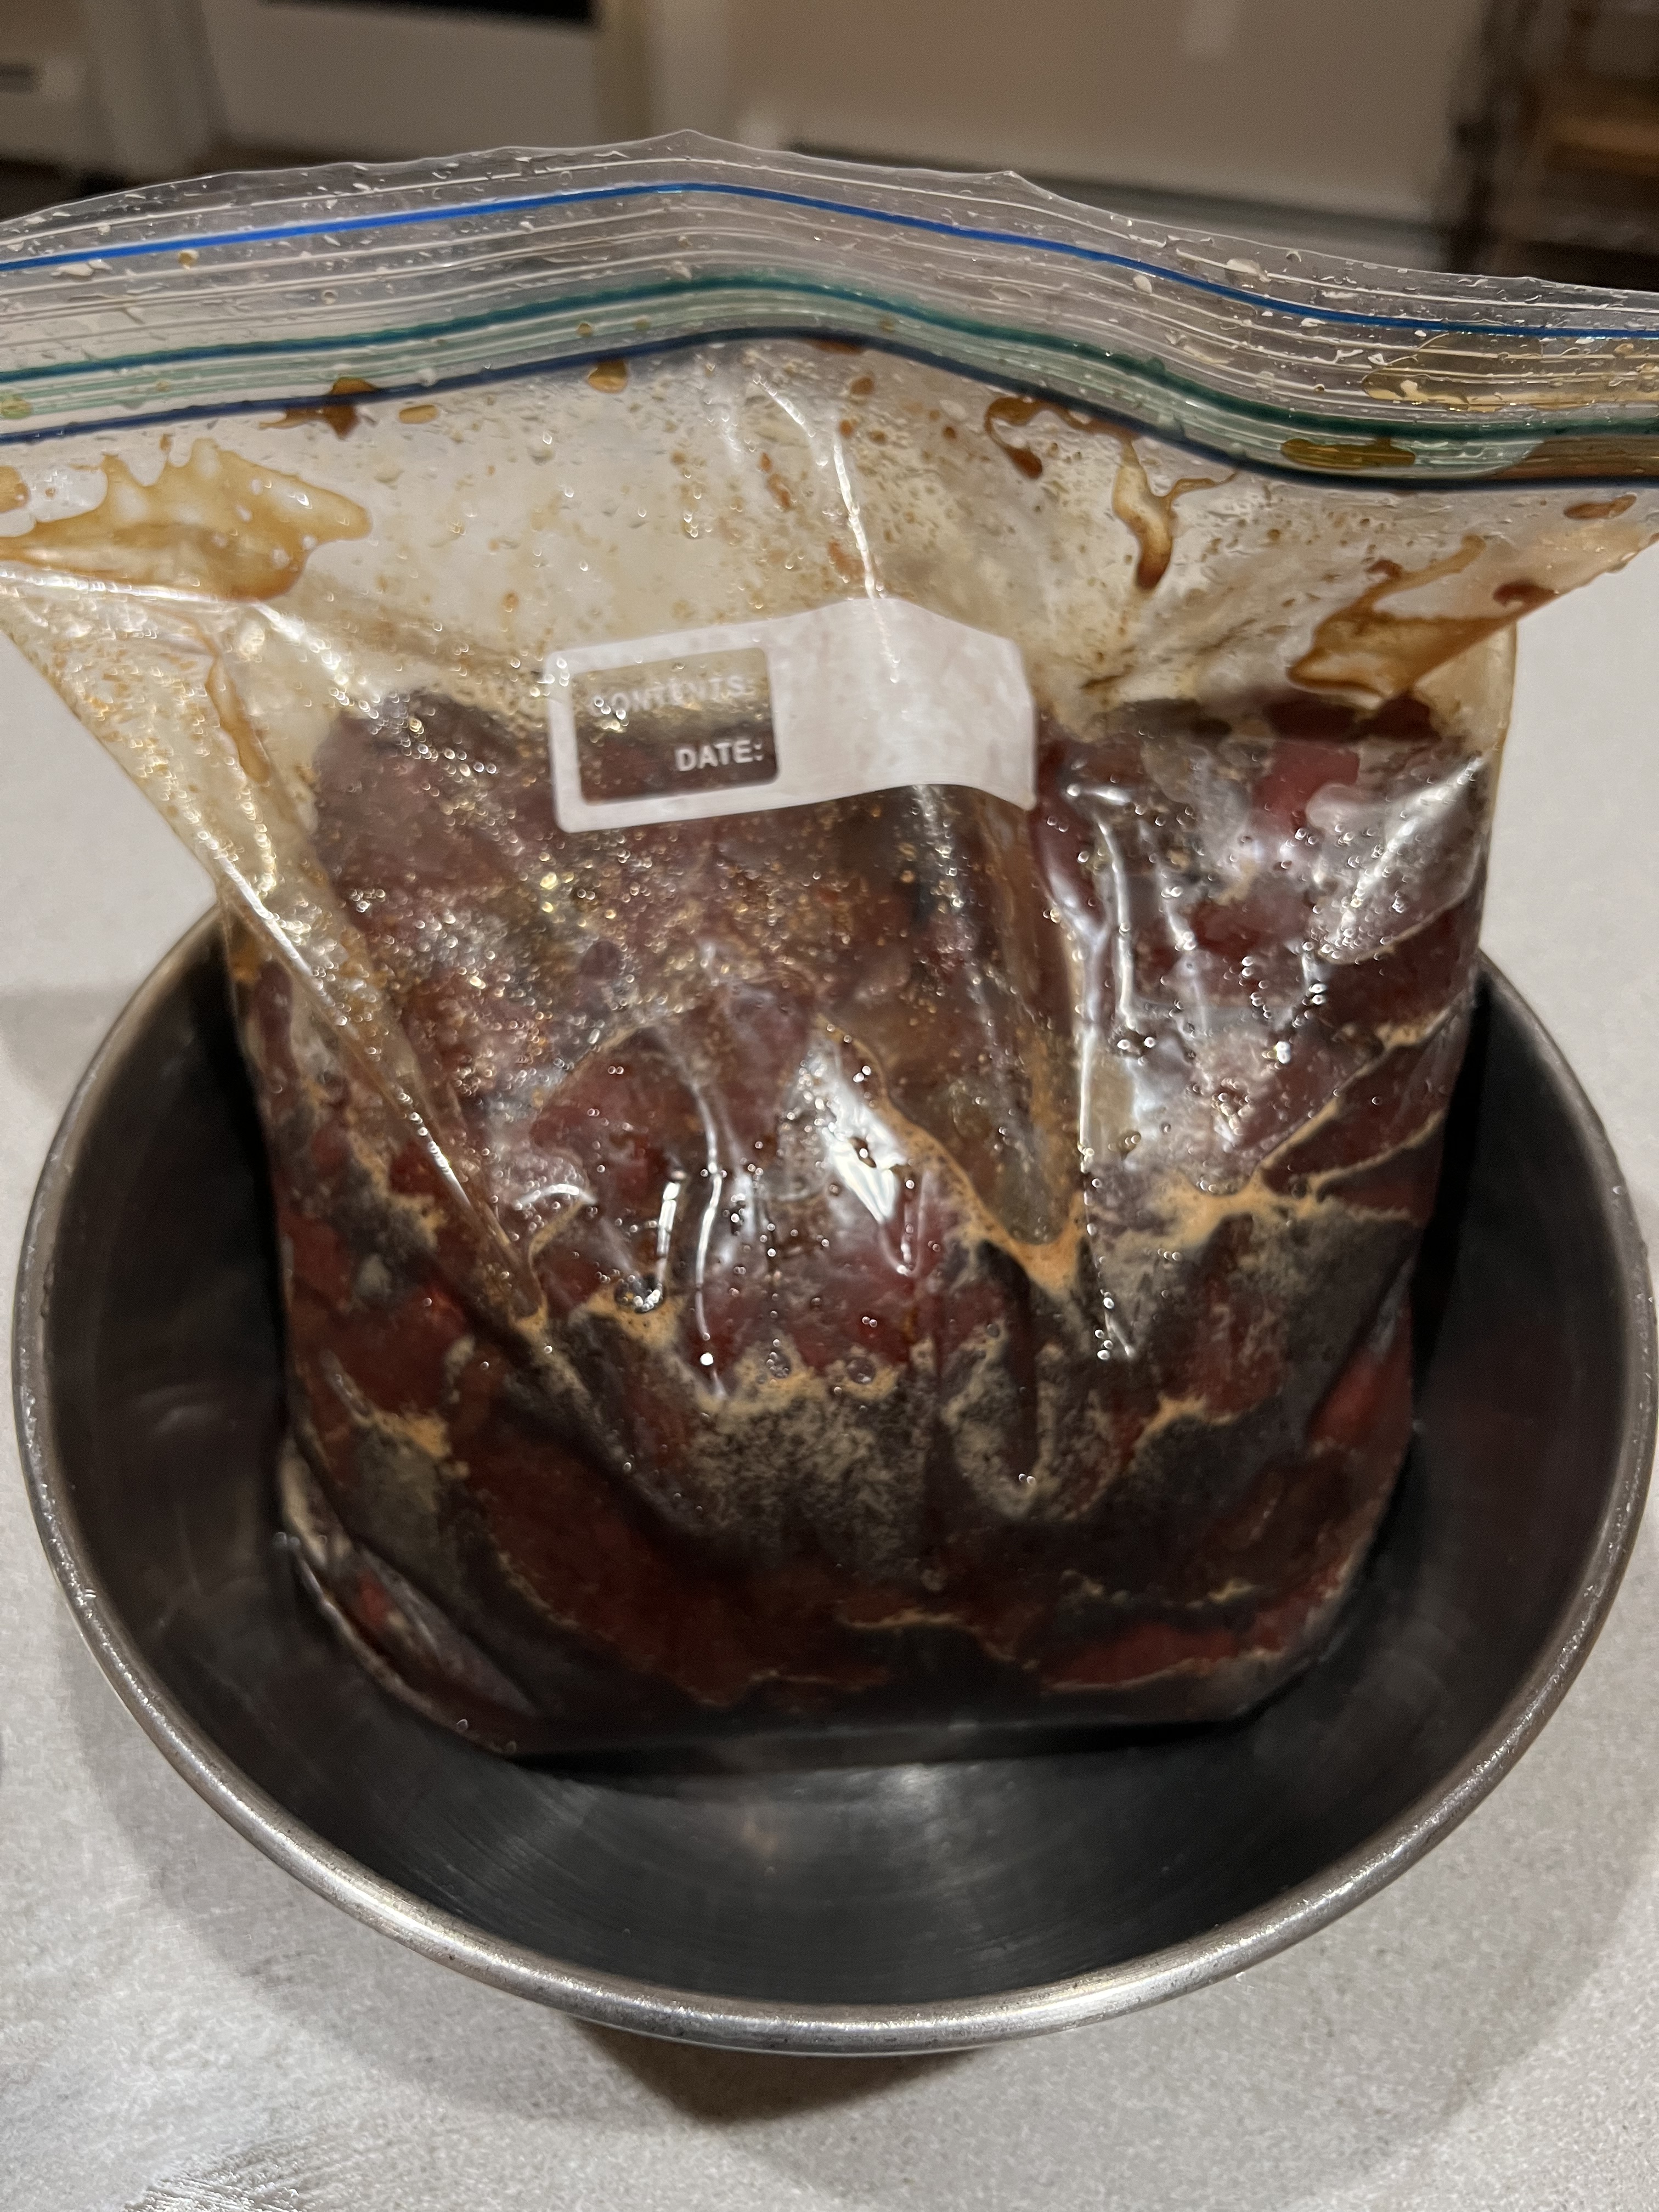
Place the chicken pieces in a large Ziploc bag and pour the marinade in. Seal the bag well and squish it around to make sure the marinade makes contact with the chicken. Place the bag in a bowl (to prevent accidental leakage) and keep it in the fridge overnight. Squish the bag around every few hours to make sure the marinade does its job.

When you’re ready to cook the next day, pre-heat the oven to 350 and remove the bag from the fridge and let it come to room temperature. Place the chicken on a sheet pan (discard the remaining marinade) and bake it for an hour.

Light a hot grill and push the coals to one side of the grill. Place the chicken pieces on the cool side of the grill and close the lid, opening the vents. Every few minutes, turn the chicken pieces over so they get nice grill marks but don’t burn.


FullSizeRender (11)

I’ve always been fascinated by Korean barbecue. Every time I see it on TV or catch a recipe on an e-mail blast, my mouth waters and I say to myself that I’ve got to experience it some day. But the painful reality is: Korean barbecue can be really spicy…and I’m a total wuss.

Korean barbecue 101: Gogigui means “meat roast” in Korean, and it refers to the method of roasting beef, pork, chicken, and other meats. Meats can be marinated or not. Bulgogi is the name of the most common Korean barbecue. Meat is marinated with soy sauce, sugar, sesame oil, garlic and pepper, and then grilled. Galbi uses beef short ribs, and adds onions to the marinade. And the hot stuff is daeji bulgogi, because the marinade isn’t soy sauce-based, but based on the hot-n-spicy Korean chili paste known as gochujang.

All of the marinades looked delicious, but the hot one with gochujang would be my biggest challenge, so I decided to start there. I found a great recipe, and quickly realized that I would have to turn the heat way down if I was actually going to try to eat it! For example, the original recipe called for 2 tablespoons of white pepper. I totally left it out. And it called for a full cup of gochujang. Not only did I cut that part in half, I doubled many of the other non-spicy ingredients.

So is it authentic Korean barbecue? Probably not. But it’s my version of it. It’s got lots a flavor and still carries a bit of heat.

For gluten-free diets: finding GF hoisin and soy sauce is pretty easy these days. Look for the La Choy brand. But I haven’t been able to find gochujang that has a GF label.


image


3/4 cup ketchup
1/2 cup gochujang
1/2 cup hoisin sauce
1/2 cup honey
1/2 cup soy sauce
1/4 cup brown sugar
2 tablespoons freshly grated ginger
1 tablespoon freshly grated garlic (I use a garlic press)
1 tablespoon unseasoned rice vinegar
4 lbs. chicken pieces


Pre-heat the oven to 500 or its top temperature.

In a bowl, mix everything but the chicken pieces. Brush the sauce onto the chicken pieces, then wrap them in aluminum foil. (I like to tear a long piece of aluminum foil and lay it on top of a sheet pan. I place the chicken pieces on the foil, brush them with sauce on all sides, then fold the foil over the chicken, making one large pouch that holds all the meat.) Leave the pouch on the sheet pan and place it in the oven, then lower the oven temp to 350.

Cook the chicken for about an hour at 350, making sure it’s almost completely cooked. Juices should run clear, not bloody, when you poke it with a fork.

Start a hardwood fire on your grill. Push the coals to one side of the grill so you have a hot side and a cooler side with no coals underneath it. Place the chicken pieces on the cool side of the grill (if you put it on the hot side, it will stick and burn), brush with more sauce, and put the lid on the grill, making sure you have the vents open for air circulation.


image

See those 2 black bits in the foreground? That’s where the chicken stuck to the grill because I placed them over the hot coals. Don’t do that.

After a few minutes, lift the lid, flip the chicken pieces over, brush them with sauce again, and close the lid. Keep doing this until the chicken is nice and caramelized, with tasty grill marks.

If you want to serve some of the sauce on the side, it’s important to pour some of the sauce off and set it aside in the very beginning, so you’re not using the same sauce that the basting brush touched the raw chicken with.


This will be the most amazing fish sandwich you’ll ever make.

There. I said it.


There’s no other way to describe this sandwich, something that shouldn’t work in some ways and yet is absolutely perfectly crunchy and delicious. It starts with the cole slaw, ideally made a day in advance…

1 medium cabbage, sliced thinly
2 medium carrots, peeled, and finely chopped
1/2 cup mayonnaise
1 tablespoon Kosher dill pickle juice
1 teaspoon celery seed (not salt)

You can use a machine, but I like to finely slice my cabbage with a kitchen knife, cutting as thin as possible. Place the chopped cabbage in a large bowl.

For the carrots, peel them to remove the outer skin, and throw that away. Continue to peel the carrots into paper-thin slivers until there’s no carrots left. Finely chop those slivers and add them to the cabbage.

Add the mayonnaise, pickle juice, and celery seed, mixing thoroughly. Keep it in the fridge, covered with plastic, until ready to use.  The next day, before using, taste it and decide whether you want more mayo or pickle juice. Mix it well before using.

Like a classic pulled pork sandwich, the slaw will go inside! But it needs a sauce to tie it all together. Make this a day ahead as well.

1/2 cup ketchup
1/2 cup mayonnaise
1 tablespoon dill pickle relish
1/4 teaspoon Tony Cacherre’s Original Creole Seasoning (optional)
1/4 teaspoon salt (skip if using Creole seasoning)
1/8 teaspoon pepper (skip if using Creole seasoning)

Tony Cacherre’s Original Creole Seasoning is a personal favorite, and it works well in this sandwich. You can find it in many stores, and online. But if you don’t have it handy, salt and pepper do the job.

Combine all the ingredients in a bowl, mixing well. Keep it in the fridge, covered, until ready to use.


Cod or other white fish, preferably fresh, cut into sandwich-sized pieces (about 4″ square)
1 cup all-purpose flour (or Cup4Cup gluten-free flour, see below)
1 teaspoon celery seed (not salt)
1 teaspoon salt
1/2 teaspoon black pepper
1/8 teaspoon cayenne (optional)
2 eggs
1 cup corn flakes, crumbled (or Corn Chex for gluten-free, see below)
avocado oil or other oil for frying

My brother-in-law treated us to a huge stash of grouper that he caught on a recent fishing trip. I used that instead of cod the last time I made this sandwich, and the results were fantastic. I suggest you use whatever white fish is your favorite.

Cut the fish into pieces that will fit the bread you’re using, and make sure the filets are the same thickness. Don’t make them thicker than 1/2″ or they’ll stay raw in the middle when you fry them. Set them aside.

In a bowl, combine the flour, celery seed, salt and pepper and cayenne (if you’re using it). Mix well.

In another bowl, crack the eggs and scramble them.

Put the corn flakes (or Corn Chex) in a plastic bag, squeezing the air out of it. Crush them into oatmeal-sized pieces, then pour them into a third bowl.

Heat a heavy pan with a couple of inches of oil. One by one, take the fish pieces and dredge them in the flour mixture, then into the egg, and then into the corn flakes, pressing into the corn flakes to make sure they stick to the fish.

When the oil in the pan is hot enough, fry the fish pieces on both sides, until cooked through and golden brown. Place them on paper towels to drain.


Pepperidge Farm Marble Swirl Rye Bread (or gluten-free bread)
Swiss cheese, sliced
Melted butter

Pre-heat an oven to 350 degrees.

To assemble the sandwiches, take a slice of the rye bread and spread some of the sauce on it. Place a piece of the fried fish on top, then cover it with some of the cole slaw. Place a few thin slices of Swiss cheese on top of the cole slaw. Take another slice of rye, slather it with the sauce, and place it on top of the slaw, sauce-side down.

Brush the top of the sandwich with the melted butter, and place the sandwich on a sheet pan. Do the same with the rest of the sandwiches.

Place the sandwiches in the oven and bake them until the cheese melts. Cut the sandwiches in half and serve.


The gluten-free sandwich in the front.


What I changed to make this sandwich gluten-free…


My go-to all-purpose gluten-free flour is Cup4Cup. It works really well in any dish that requires all-purpose flour.


Not all corn flakes are gluten-free, and the ones that are can be hard to find. I found that Corn Chex cereal is a good substitute. It’s gluten-free, and has a nice crunch.


The Pepperidge Farm Marble Swirl Rye Bread is the ideal bread to use for this sandwich. But I made a pretty darn tasty gluten-free version using this Schar bread, found in many supermarkets.


Cauliflower seems to be the “it” veggie these days. You’ll find it riced to take the place of rice or mashed potatoes, in a crust for pizza, and now, the dish du jour is a cauliflower steak. All you need to do is to slice the cauliflower into thick, steak-like pieces, and then bake them. The thicker cut gives the cauliflower a more meaty texture. Of course, with a meat sauce, I’m using cauliflower as a pasta substitute in this dish.


The marinade I use for the cauliflower is pretty simple, with my favorite Italian flavors. I use fresh herbs when I can, but you can use dry as well.


1/4 cup extra virgin olive oil
1/2 cups chopped scallions
2 garlic cloves, finely chopped
chopped fresh parsley and oregano to taste
salt and pepper

Combine these ingredients in a bowl.

Slice the head of cauliflower across the whole head into 1 1/2-inch steak-like pieces. Place them on a baking pan covered with non-stick aluminum foil. Brush the cauliflower on both sides with the marinade. Use it all up!

Place the baking pan in a pre-heated 400-degree oven and bake it for about an hour, until the cauliflower is golden brown on the edges. Flip the cauliflower steaks over after the first 30 minutes.


It’s OK if your cauliflower steaks break apart a bit. They’ll still taste great!


This meat sauce I use is one that I make all the time with simple ingredients…


1 lb. grass-fed ground beef
1 medium onion, finely chopped
1 28-oz. can of whole San Marzano tomatoes
dried oregano, basil and parsley
granulated garlic
extra virgin olive oil
salt and pepper


Heat the olive oil in a pan and add the onions. Sauté them until they’re translucent, then add the ground beef. Cook the beef until it has browned completely. Add the can of tomatoes, chopping the whole tomatoes up with a spatula (or squeezing them with your hands), breaking up the big pieces into smaller chunks. (I like my sauce a little chunky.) Add the oregano, basil, parsley, garlic, salt and pepper to taste.


Let the sauce cook down until it has thickened.


When the cauliflower steaks are ready, place them on a plate and pour the awesome meat sauce on them. Garnish with some freshly grated Parmigiano Reggiano.

Brining, the process of letting a hunk of protein soak in a salt solution for a few hours, is a great way to add flavor and moisture to any cut of meat. I brine chicken pieces for 3 hours before using a sweet and spicy rub. They can be grilled or roasted in the oven.

The first time tried this recipe, I used chicken wings. But later, I cut up a whole chicken, and found that parts is parts…every piece was delicious!


image

The brine…

1/2 cup Kosher salt
3 tablespoons light brown sugar
1 teaspoon whole black peppercorns
1 whole bay leaf
2 quarts water

Combine all the ingredients in a saucepan and heat until the sugar and salt dissolve. Remove from the heat, and let it cool to room temperature.


The rub…

1/4 cup light brown sugar
1/4 cup granulated sugar
1/4 cup sweet paprika
1 tablespoon Kosher salt
1 tablespoon granulated onion
2 teaspoons black pepper
1 teaspoon dried thyme
1 teaspoon dry mustard
1 teaspoon ground ginger
1 teaspoon cayenne pepper

Combine all the ingredients in a bowl.

‘

If you have a baking pan like this, you can brine and then cook the chicken in one pan.

Place about 3 lbs. of chicken wings or parts in a baking pan, as above. Place it in the fridge for 3 hours. Pour in the cooled brine, making sure the pieces are submerged.

After 3 hours, remove the chicken from the brine and dry the pieces with paper towels. Discard the brine, and place the chicken pieces back in the empty baking pan.

Sprinkle the chicken pieces with 1/3 cup of the rub, rubbing it in to coat the chicken well. (Wearing disposable gloves makes this less messy.) Place the pan with the chicken in the fridge until you’re ready to cook.


About 30 minutes before cooking, remove the pan from the fridge and let the chicken come to room temperature.

Pre-heat the oven to 350 or light a grill.

Toss the chicken with some more of the rub, if you like.

Bake at 350 for 30–40 minutes or until they’re done, about 165 degrees.

If you’re grilling, cook the wings over medium heat, turning them frequently to prevent burning. Cook until the chicken reaches temperature of 165 degrees.


I grill year-round. I’ll stand in 3 feet of snow to get smoked ribs just right, if I have to. Through years of tireless experimentation, I’ve come up with a barbecue sauce that I can be proud of. I prefer a slightly sweet and tangy barbecue sauce,  and it works really well with pork or chicken.

What makes this sauce special is the citrus. I originally used lemon juice for this recipe and it was good. Lime juice was better. Adding lime zest: even better than that. I tried orange juice and zest, even Meyer lemon. But the Big Daddy of ’em all was grapefruit. I was craving my barbecue sauce one day and only had a grapefruit in the fridge. I thought: how bad could this be? Turned out to be the perfect foil to the sweetness of the brown sugar and ketchup.

Try this sauce on your next batch of chicken wings or even a whole bird. Cook the bird almost all the way through, brushing the sauce on for the last 20 minutes so that the sugars don’t burn. Then just try to stop eating it!

Chix BBQ


GRAPEFRUIT BARBECUE SAUCE
1 cup ketchup
1/2 cup firmly packed brown sugar
Juice and zest of 1 grapefruit
3 tablespoons unsalted butter
1/4 cup dried onion flakes
1 teaspoon cayenne pepper sauce, like Frank’s Red Hot
1 teaspoon Worcestershire sauce
1 teaspoon granulated garlic
1/4 teaspoon black pepper
(no salt)

Combine all ingredients in a sauce pan. Bring to a boil and then simmer for about 20 minutes on low, until slightly thickened.


saucey

If you like a less sweet, more vinegary style to your barbecue sauce, this is the one. How could a sauce that’s inspired by what most people claim to be the best barbecue joint in the USA, Franklin’s Barbecue in Austin, Texas, be bad? People line up early in the morning and wait as much as four hours for a slab of brisket from this place. I’ll get there one day. In the meantime, I have the sauce…


2 cups ketchup
3/4 cup water
6 tablespoons cider vinegar
6 tablespoons white vinegar
6 tablespoons brown sugar
3 tablespoons Worcestershire sauce
1 tablespoon chili powder
2 teaspoons salt
2 teaspoons black pepper
1 1/2 teaspoons cumin


Mix all the ingredients in a saucepan and simmer until the flavors have blended, about 20 minutes. Remove from heat and cool to room temp. If you store it in an airtight container in the fridge, it’ll stay good for a few months.