Posts Tagged ‘recipe’

Chicken thighs are the best: their fat content makes them perfect for the grill because they don’t dry out like chicken breasts do. And I always leave the skin on for extra crispy flavor. I bought a package of chicken thighs the other day and decided to go Asian with my flavors, baking them in the oven so that they cook evenly, and then finishing them off on the grill to get that delicious smokey flavor and char.

I marinated the chicken thighs in the sauce for several hours before cooking. If you have the opportunity to marinate them overnight in the fridge, that’s even better. Just remember that if you want to use the marinade as a dipping sauce later on, divide it in half from the very beginning. Use half to marinate the chicken, and save the other half for later. If any of the marinade touches raw chicken, you can’t use it as a dipping sauce. (Salmonella!) So keep them separated.


3/4 cup ketchup
1/2 cup soy sauce
1/2 cup hoisin sauce
1/2 cup maple syrup
1/4 cup Chinese chili garlic sauce
1/4 cup brown sugar
1 tablespoon rice vinegar
2 garlic cloves, minced

Combine all the ingredients in a bowl, mixing well. Use half of it to marinate the chicken, and save the other half for dipping sauce or brushing on to the chicken later.

The Bell & Evans chicken thighs that I bought came in a package that works perfectly for marinating. One less thing to clean up!

If you’re cooking the same day, let the chicken marinate at room temperature for three hours. If you’re marinating overnight in the fridge, let the chicken come to room temperature before cooking.


Preheat the oven to 325°.


Place the chicken thighs on a sheet pan and bake until they are cooked through.…but not overcooked. If you’re not using the grill, place them under the broiler and watch them carefully, as the sugars in the marinade could burn. Give them some nice char.

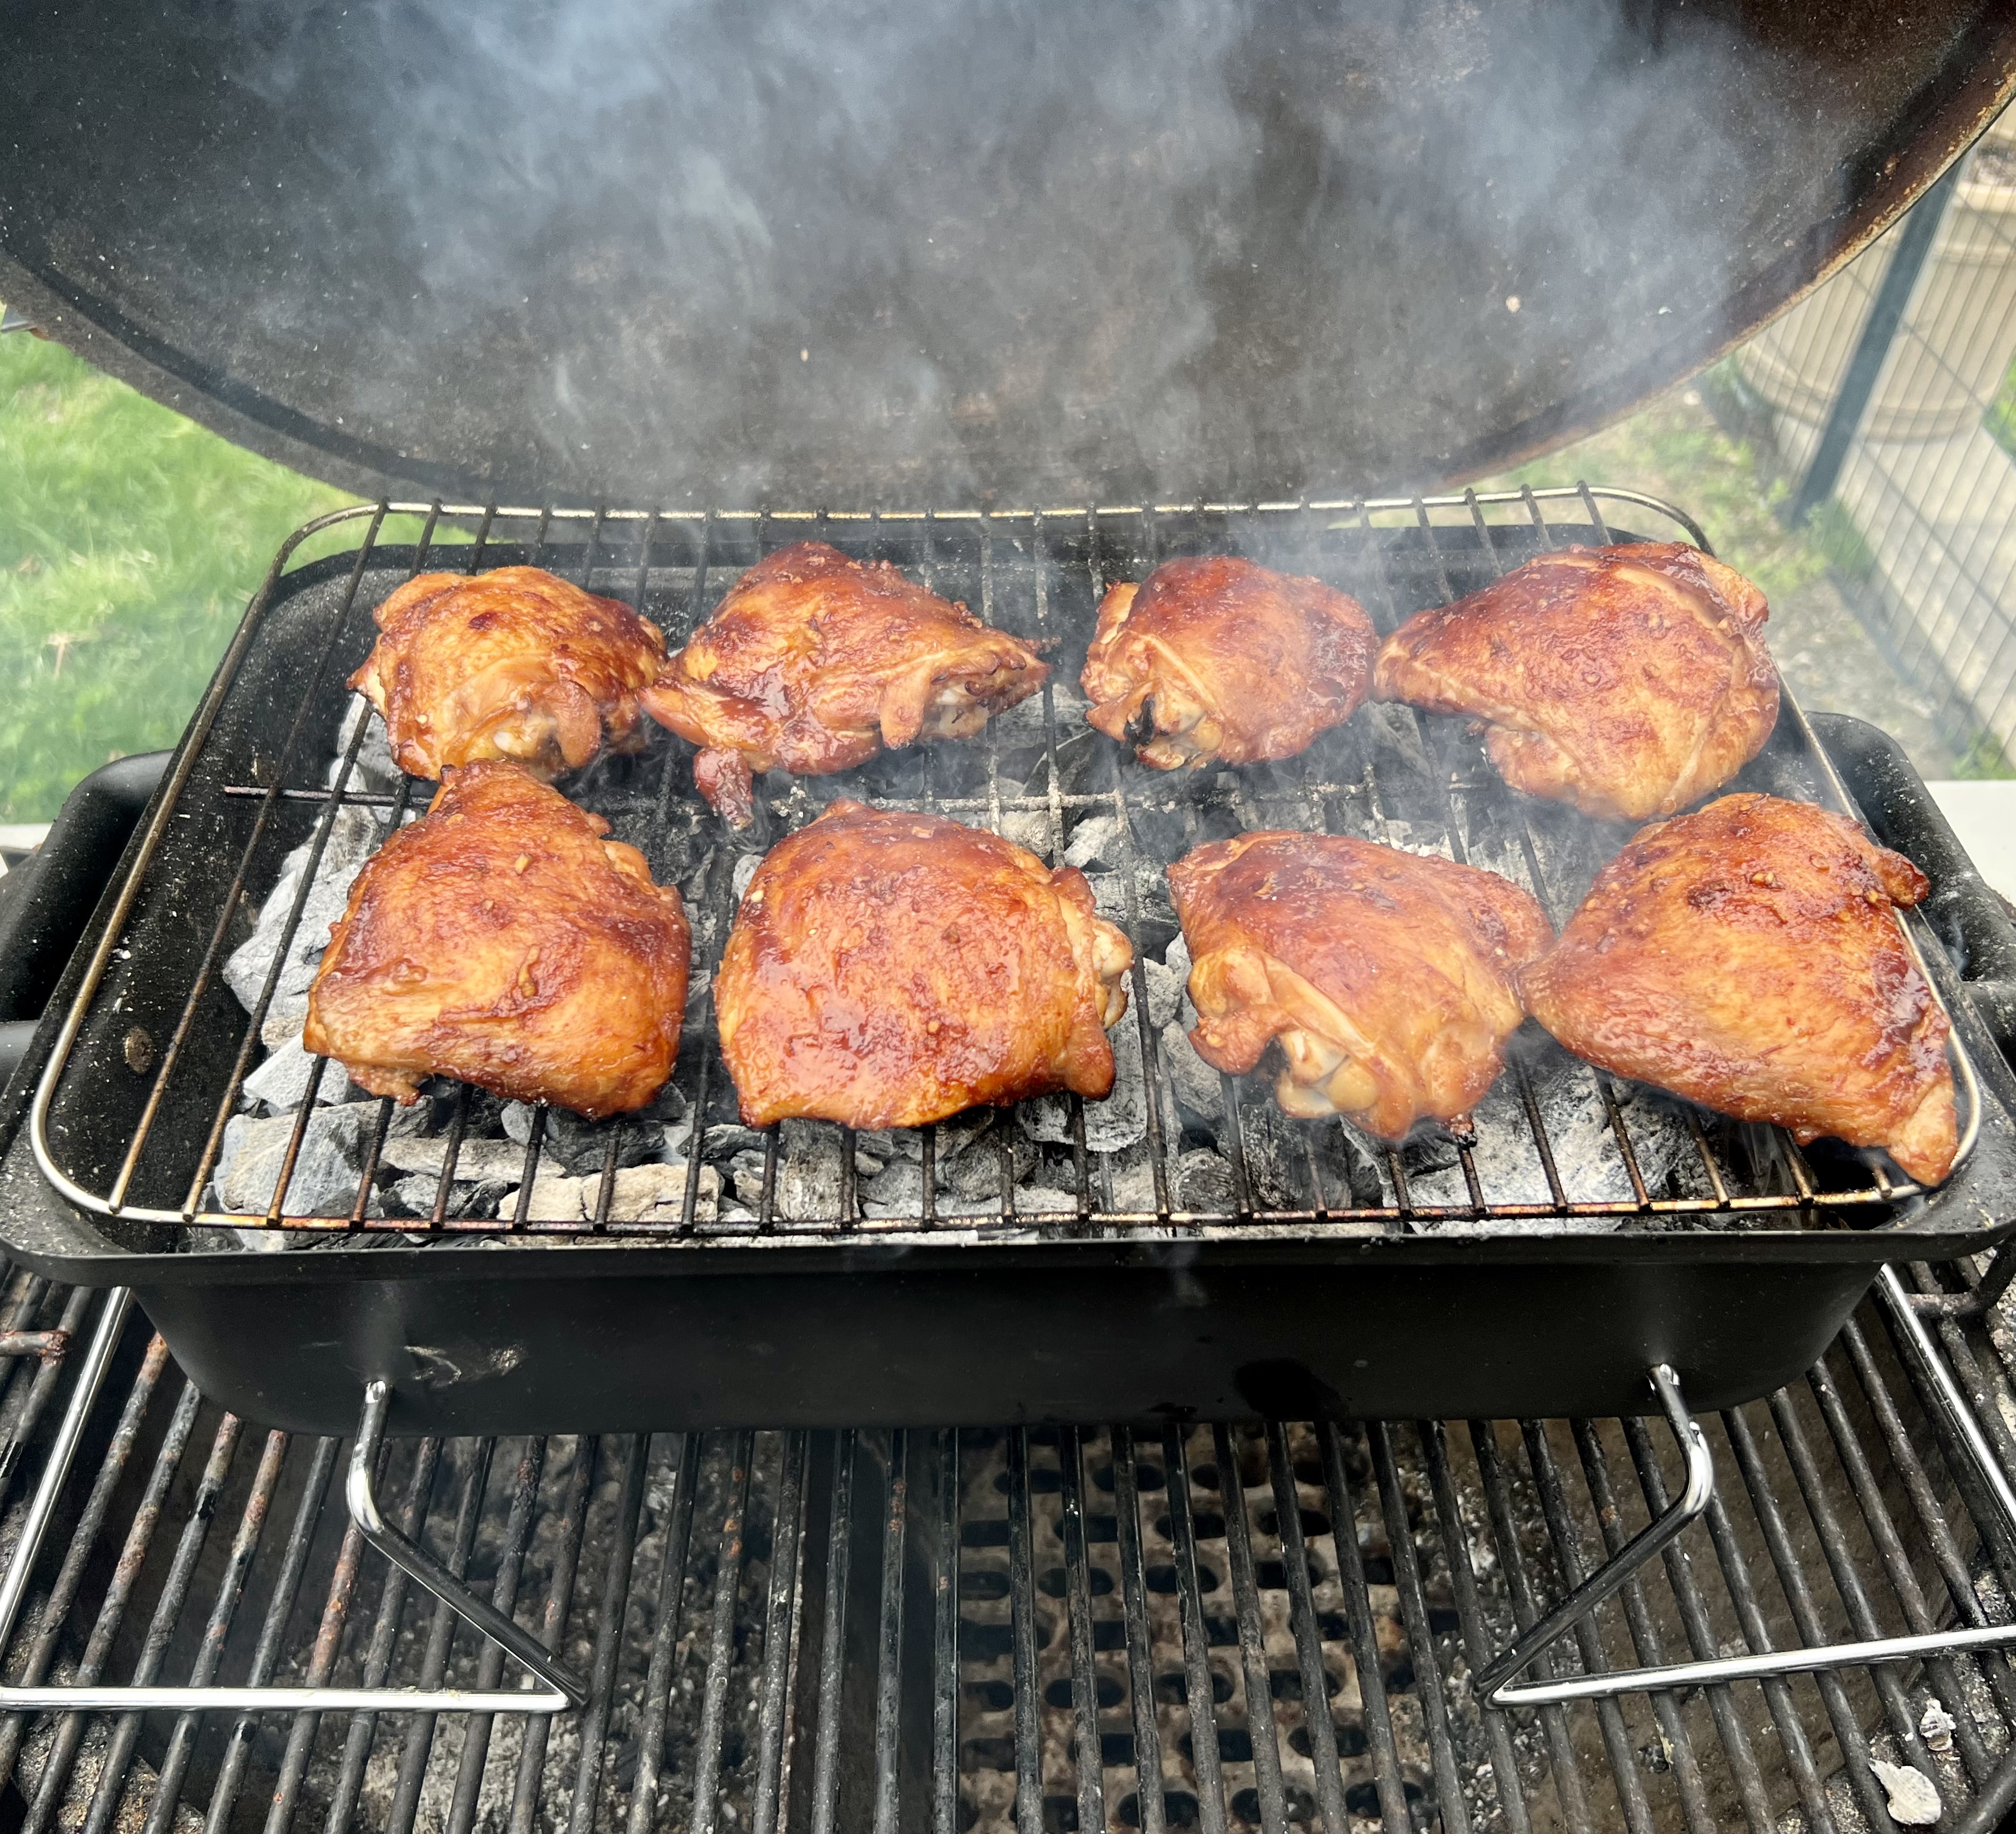
If you’re using the grill, light a fire and spread the coals so that you have a medium-hot flame. Grill the chicken thighs until they have a beautiful char on them, being careful not to burn them. Brush more of the marinade on them as they cook, if you like.

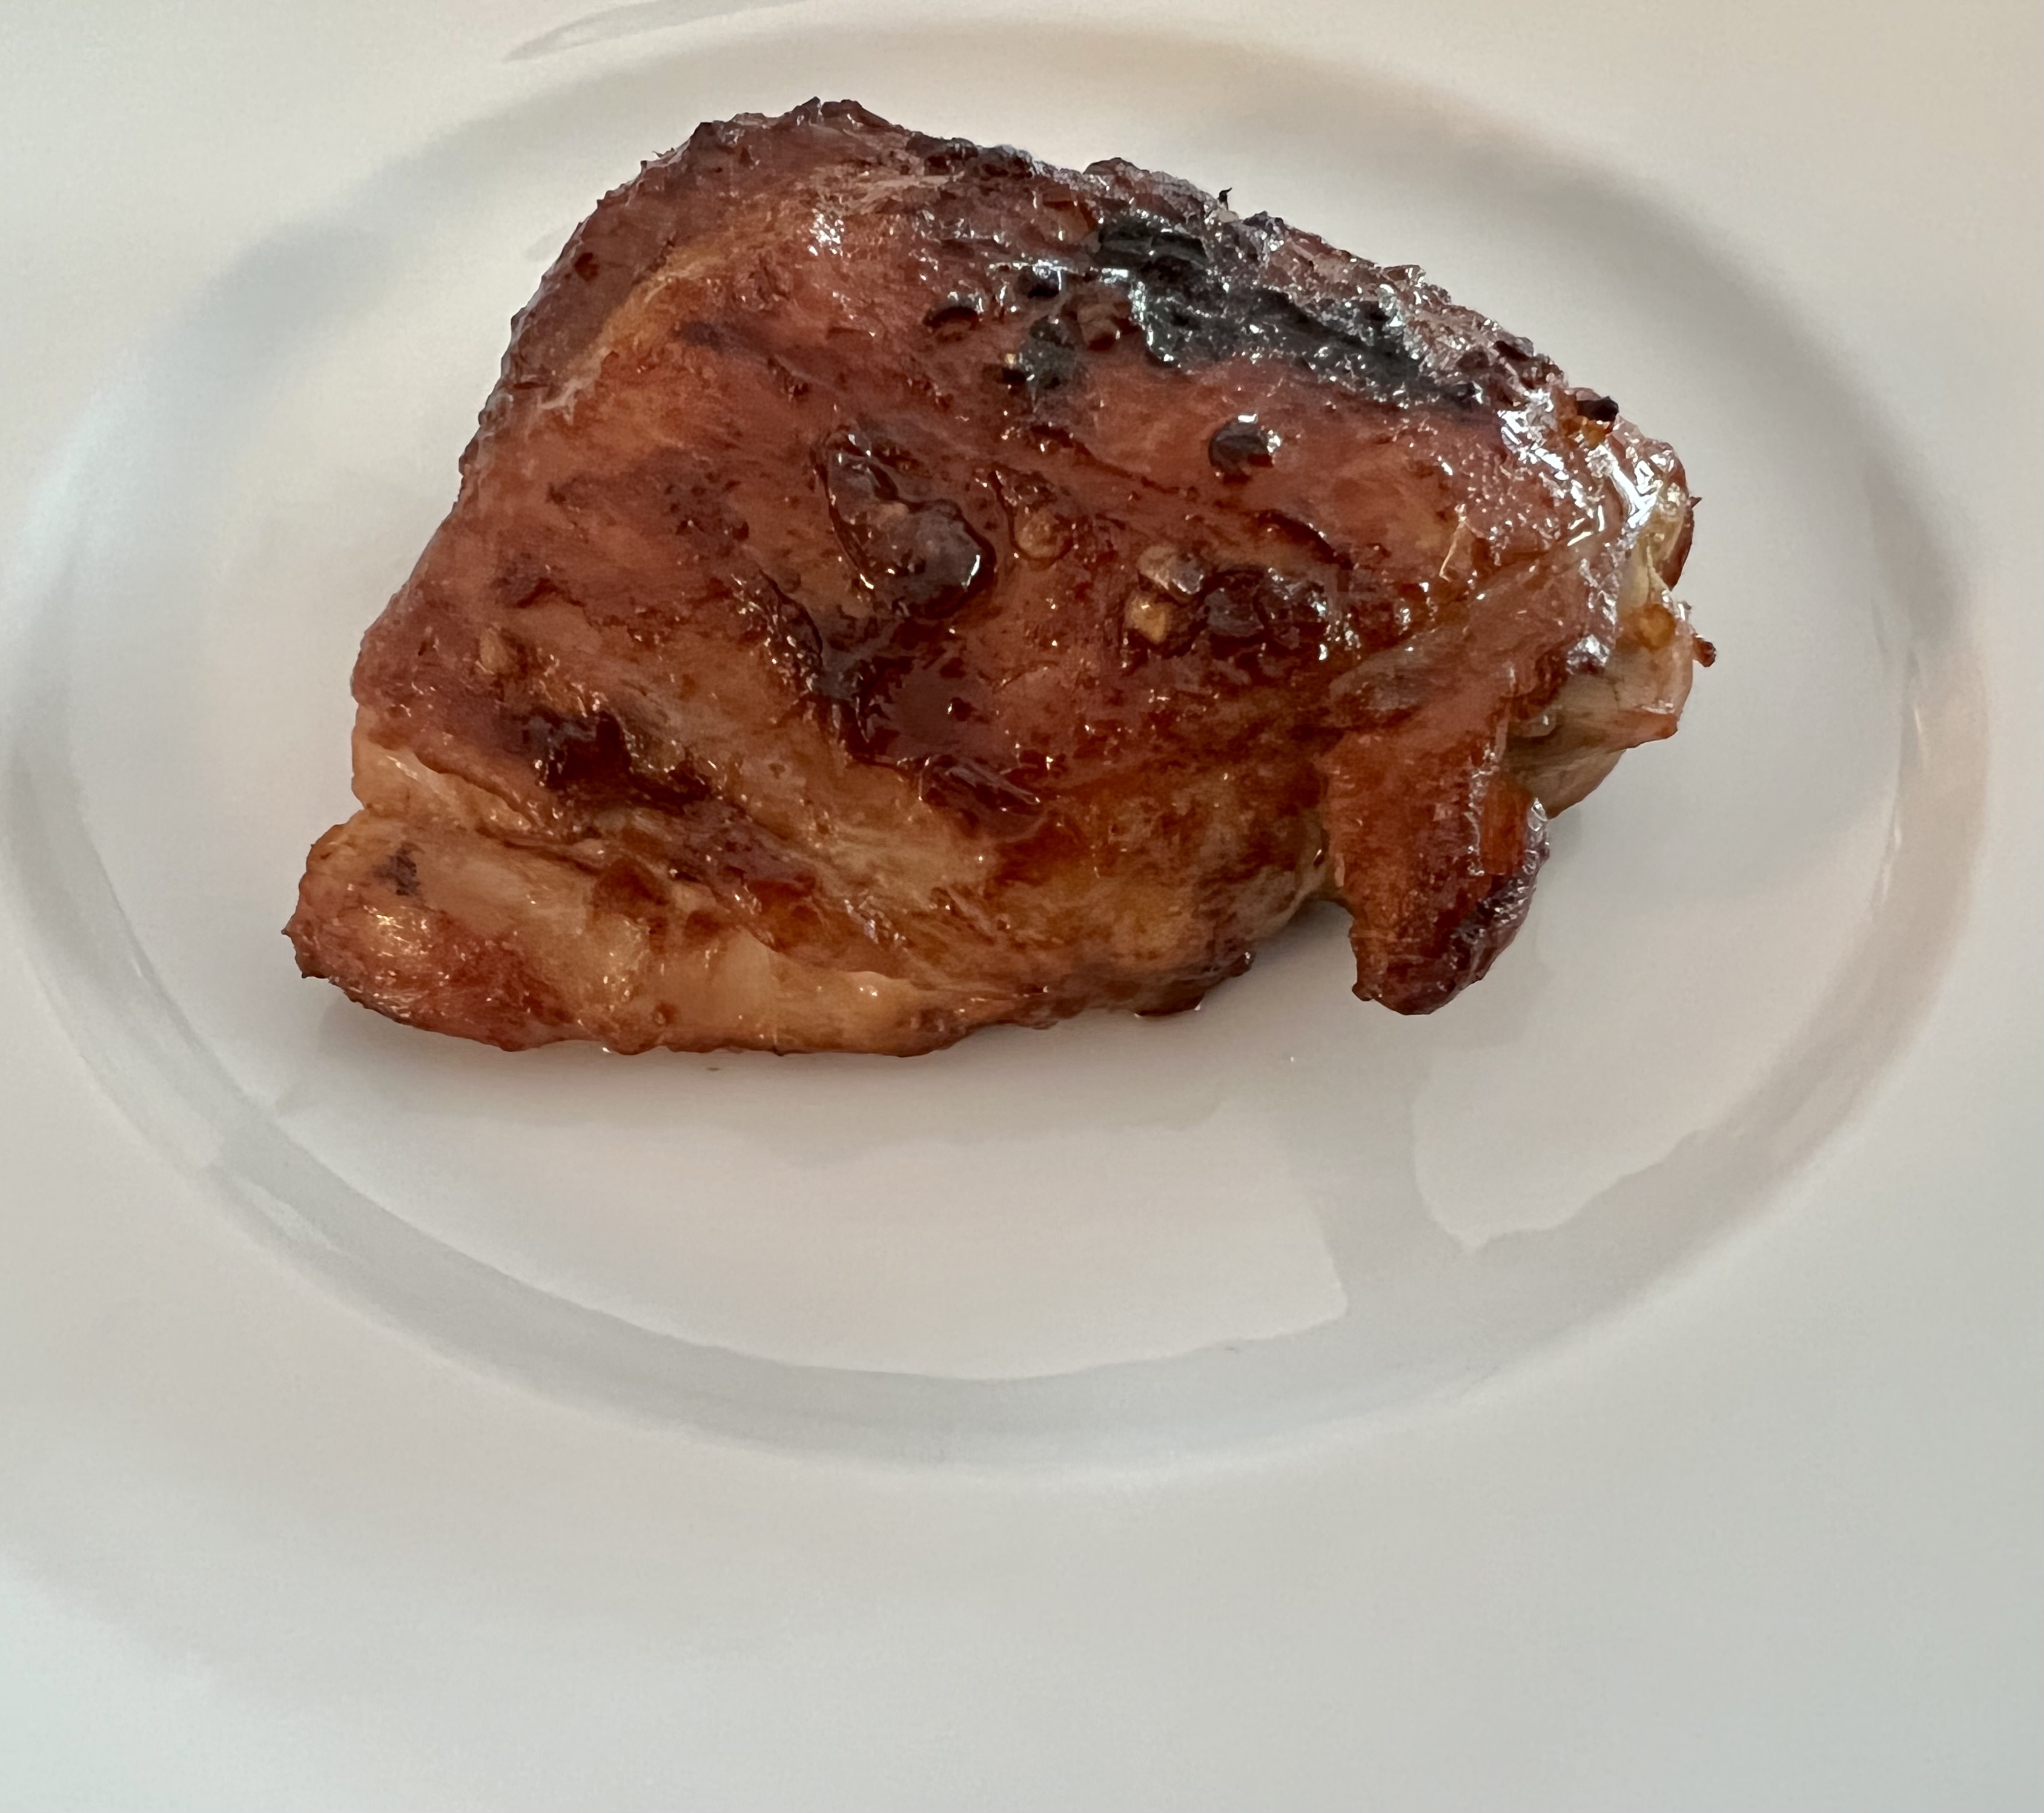
Serve the chicken thighs with the dipping sauce on the side.

The 150th running of the Kentucky Derby is Saturday, May 4th, 2024, and although I’m not a big horse racing fan, I am a huge fan of the official drink: the Mint Julep!

The Mint Julep is such a perfect, classic and historic bourbon drink, it seems silly to wait until Derby Day to have one. Of course, as any aficionado of spirits will tell you, there are as many right ways as wrong ways of making one.

The first step in my Mint Julep is making the simple syrup. Learning from one of my old radio buddies, my pal Rick O’B, I infuse mint into my simple syrup to take my cocktail to the next level. I use the standard ratio of 1 cup of clean, filtered water to 1 cup of sugar. I place the sugar and water in a saucepan and heat until just boiling. I’ve found that it needs to reach this stage for the sugar to really dissolve.

Waiting for the sugar to dissolve.

As soon as it starts to boil, I remove the saucepan from the heat, and throw in a handful of freshly picked mint leaves, stirring to make sure the mint gets in there, and then I leave the saucepan to cool to room temperature.


Once it’s at room temp, I strain the simple syrup into a bottle with a tight sealing lid, and place it in the refrigerator to cool. It will keep for about a week.

An equally important ingredient for a perfect Mint Julep is the ice: specifically, crushed ice from clean, filtered water. Don’t even think of using tap water for any cocktail much less this one. Why ruin an expensive bottle of bourbon by going cheap on the ice? I make my own ice cubes, then put them in an untreated canvas ice bag and bash them with a mallet to the perfect crushed size. But if you don’t want to go through all the trouble, just buy a bag of good ice. Untreated canvas bags for crushing ice can be purchased online from bar supply companies for about $30. I got an untreated canvas tool bag (the exact same shape and size) at Home Depot for 3 bucks.


Da bag.


The next step is a little tougher: which bourbon to choose. The explosion of choices on the bourbon market has made it all but impossible for the average imbiber to know which bourbon is best for their tastes. If you’re a beginner, I suggest you go to a trusted bartender and explain that you’re new to the bourbon world, and could you have the tiniest of tastes and sniffs of what he’s got at his bar. Chances are, you’ll get a sampling of some of the better known brands: Maker’s Mark, Woodford Reserve, perhaps Buffalo Trace or Bulleit, and the standard Jim Beam. This is a very good start. (Also, hinting to wife and friends that “I’m trying new bourbons” around your birthday or Father’s Day inevitably gets you a few bottles as well!)

My go-to bourbon for Mint Juleps used to be Eagle Rare 10-year-old when it was around $32.99 a bottle. Now it’s up to $80! My latest go-to bourbon is 1792 Small Batch. At $29, it’s almost unbelievable, like someone made a mistake in the stock room! Very tasty on its own and great for mixing. Others that work well and are around the same price range include Buffalo Trace, and Larceny.

Finally, a Mint Julep needs a metal–not glass– Julep cup. Made of pewter or aluminum, it frosts on the outside as you stir your drink, keeping your beverage ice-cold on even the hottest of days.


3 oz. bourbon
1 oz. mint-infused simple syrup
crushed ice
Julep cup
Fresh mint for garnish

Crush the ice and pack it into the Julep cup, even letting it dome slightly over the top. Don’t worry…the alcohol will melt it.

I like to add 1.5 ounces of bourbon, then the ounce of simple syrup, another 1.5 ounces of bourbon on top, and then a quick squirt of simple syrup to top it off. Break off a few mint leaves from the stem and push them into the ice. A beautiful layer of frost will form on the outside of the cup. Add more ice, if necessary, and garnish with a sprig of mint.


A nice selection of bourbons. This is an old photo: that Pappy Van Winkle is long gone…but I saved the bottle!


So much bourbon, so little time!


SHRIMP BURGERS

Posted: February 21, 2024 in Uncategorized
Tags: , , , ,

These shrimp burgers are not only delicious, they’re pretty low in calories. The key to success is to use raw shrimp, not cooked. (Overcooked shrimp is never a good thing.)

I always use wild-caught American shrimp, not that nasty stuff from Asia. I’ve found wild-caught American shrimp almost everywhere, from supermarkets to membership clubs, and for a great price. You just have to make a bit of an effort to read the packages.

For this recipe, you don’t need to spend extra money for large shrimp. You’ll be chopping them up anyway…and I think the smaller shrimp are tastier. (A white fish, like cod, is also a good substitute for the shrimp.)

These patties hold together pretty well without a lot of breadcrumbs because the shrimp that goes in the food processor becomes a sticky paste that holds everything together. At around 1 calorie per gram, shrimp is a dieter’s best friend.

This recipe can be made gluten-free simply by using GF breadcrumbs. I make my own by buying frozen GF bread, like Udi’s. I toast it, then put it in the food processor to make breadcrumbs. They’re delicious, and you’d never know they’re gluten free!

1 lb. thawed, peeled and deveined medium wild-caught American shrimp
1/3 cup breadcrumbs
1 tablespoon fresh-squeezed lemon juice
1/2 teaspoon sea salt
1/4 teaspoon granulated garlic
1/4 teaspoon freshly ground black pepper
1/2 small Vidalia onion or 1 scallion, finely chopped
1 large egg, lightly beaten
Splash of cayenne pepper sauce, like Frank’s Red Hot, or a pinch of cayenne pepper (optional)
Oil, for frying

Coarsely chop half of the shrimp. Place the other half in a food processor, and pulse it until smooth.

Combine all the shrimp in a bowl with the breadcrumbs, lemon juice, salt, garlic, pepper, onion, egg and optional cayenne pepper sauce.

I had a few radishes, so I chopped them up and mixed them with the onion. (That’s what the little red flakes are.) But that’s just me!

Refrigerate the mix for 10 minutes. Then remove it from the fridge and form the patties. (I like to use a 1/3 cup measure for this.) Once you’ve formed the patties, put them back in the fridge for another 10 minutes.

Heat the oil (I try to use as little as possible for calories’ sake) in a non-stick pan over medium-high heat. I like avocado oil, but use your favorite. And if you’re not on a diet, use 1/4 cup of oil to get a nice fry going. Carefully place the burgers in the pan (they’re fragile!) and cook them about 3 minutes per side.

Getting a good sear on the first side before flipping them will help hold them together. You don’t want to undercook the burgers, but you don’t want to overcook shrimp, either.

Sometimes a piece will break off. That’s OK!

I make a simple remoulade using 1 teaspoon Dijon mustard to 1 tablespoon mayonnaise. Another option is to combine mayo with some Old Bay seasoning.

I’ve gotten a few requests for my chicken fried rice recipe. Not sure if it’s authentic Asian, but I use a lot of the flavors and veggies that I find in chicken fried rice when I get takeout. It’s really not a difficult thing to do, but it does take some work, chopping everything up and getting it ready.

I don’t have a wok, and I don’t think it’s necessary. As long as you have a pan that’s big enough to hold everything at the end, you’re good to go.

All the Asian ingredients can be found in any supermarket. And if you want this dish to be gluten-free, use GF soy sauce and hoisin sauce. La Choy and Kikkoman make them.


I like to start by sautéing all the veggies, then removing them from the pan, putting them in a separate bowl, and then continuing with the chicken. It seems like the best order of business for me.

They say that you should use day-old rice, so, if you plan on making this recipe, boil up some rice the day before, and put it in the fridge. I like to use jasmine rice, but use whatever rice you like.

All measurements for this recipe are approximate. Again, add more of what you like, and take away what you don’t.

Don’t be afraid to explore the international aisle in your supermarket as well as the produce section for interesting veggies that you can add to this dish. I’m not a fan of water chestnuts, but that’s one option. And if you don’t like the little corn cobs, add some frozen corn. Bok choy, mushrooms, and scallions are all great choices.


1 tablespoon soy sauce
1 tablespoon hoisin sauce 
2 teaspoons rice vinegar 
1 teaspoon (or more) Chinese garlic sauce
1 teaspoon sesame oil

1 small onion, finely chopped
1cup of finely chopped cabbage
1/2 can of small Asian corn cobs, chopped
1 cup or more chopped broccoli
1 cup mung bean sprouts or pea shoots
1 cup frozen peas (optional)


3 cups of cooked rice
1 1/2 pounds of chicken breast, cut into small cubes
2 eggs


To make the marinade, combine the soy sauce, hoisin sauce, rice vinegar, Chinese garlic sauce, and sesame oil in a bowl.

Cut the chicken breasts into small 1/2-inch cubes and place them in a bowl. Add the marinade to the chicken, and make sure the meat is coated well. Let it marinate for a couple of hours at room temperature, or in the fridge if you need more time.

Get a large pan that will hold everything and put it on high heat. Add an oil with a high smoke point, like peanut oil, avocado oil or grapeseed oil.

Add the onions to the pan and sauté until they’re translucent. Add the cabbage, and let it wither. Add the corn cobs and sauté for a few minutes. Add the chopped broccoli, and continue to sauté. You can add the bean sprouts now, or save them for later if you want them to be very crunchy. Save the peas for later.

When the veggies have softened, pour them into a bowl and return the pan to the stove top. Add a little more oil and let it heat up.

Add the chicken pieces to the pan, pouring in all the marinade with it. Make sure the chicken is thoroughly cooked, and just starts to caramelize.

Scramble the two eggs in a small bowl and add them to the pan, constantly moving the chicken and eggs around to fully cook the eggs.

Add the rice to the pan and mix everything thoroughly. Then return the veggies and mix thoroughly again.

This is where you taste everything. Add what you think it needs. Maybe it’s some soy sauce…maybe a little hoisin…maybe salt and pepper…maybe a little sesame oil. Maybe more of everything! It’s up to your individual taste.

Toss the fried rice with the added seasonings, then add the bean sprouts and the peas, giving it one more good mix.

This chicken fried rice is great as meal in itself, and leftovers are always welcome.

SPICY SOY TUNA BITES

Posted: September 10, 2023 in Food, seafood, spicy, taco, tuna
Tags: , , , , , ,

I’ve served this to visiting friends often, and received many requests for the recipe. It requires a bit of setting up, but you can put it together right before serving to your guests…or yourself.

I use sushi-grade tuna for this dish, which is easily found online. It comes in 4-ounce packages, which is the perfect size for a single recipe. I buy them in quantity (it’s cheaper that way), and keep them in the freezer. You can also find tuna in small frozen “bricks” at Whole Foods or similar higher-end supermarkets. They might even have some fresh, in season.

It’s important you know where your tuna comes from, and if it was handled properly. If you go to a reputable seafood market, that shouldn’t be a problem.

If you’re concerned about parasites in raw fish, buying the bricks that have been in the deep-freeze is the way to go. And when it comes to mercury, the smaller the fish, the better. So if this is a concern, opt for ahi (also called yellowfin) tuna.

The topping…
¼ cup sour cream
1 tablespoon fresh squeezed lime juice
The marinade…
6 tablespoons soy sauce
1/2 teaspoon chili garlic sauce
Other Ingredients…
½ lb. sushi grade raw tuna, chopped into ¼-inch cubes
Tortilla chips, regular or the little bowls
Finely chopped scallions

Combine the topping ingredients in a bowl, and place it in the fridge.

Mix the marinade ingredients in a separate bowl and set it aside.

Chop the tuna into ¼-inch cubes, and if it looks wet, place it on some paper towels to absorb the excess moisture. (It can release quite a bit of moisture if it was frozen…you don’t want it watery before you marinate it.)

Marinate the tuna in the soy/chili garlic mix for just 10 minutes, then pour off the excess. (It will be really salty if you let marinate any longer.) Keep it in the fridge as well.

Finely chop the scallions.

Just before serving, take a tortilla chip or little bowl, place 1 tablespoon of the tuna on top, top this with ½ teaspoon of the sour cream mixture, and then garnish it with the finely chopped scallions.

Serve them immediately, and eat these quickly, before the tuna makes the tortilla soggy!

This is a simple salad you want to make now, while corn and tomatoes are still in season, but I’ve found that frozen organic corn and greenhouse tomatoes work pretty darn well.

2 lbs. fresh or frozen organic corn
1 container grape tomatoes, chopped
1 small red onion, finely chopped
6 oz. mild crumbled cheese, like cotija or feta
1 package (5 oz.) organic baby arugula
1 teaspoon Fleur de Sel
1 teaspoon black pepper
1 tablespoon capers, drained
2 teaspoons white balsamic vinegar
2 tablespoons extra virgin olive oil

If you’re using fresh corn, remove it from the ears, then pan sauté it  in a little olive oil, but leave it nice and crisp. If you can roast the ears of corn over some coals, even better. If you’re using frozen corn, pan sauté in a little olive oil. Set the corn aside to cool.

Mix the corn with all the other ingredients in a bowl. Cover and refrigerate.

Right before serving, taste and season it again, mixing well. I think it’s best a little cooler than room temperature.

I’ve served this to visiting friends often, and received many requests for the recipe. It requires a bit of setting up, but you can put it together right before serving to your guests…or yourself.

I use sushi-grade tuna for this dish, which is easily found online. It comes in 4-ounce packages, which is the perfect size for a single recipe. I buy them in quantity (it’s cheaper that way), and keep them in the freezer. You can also find tuna in small frozen “bricks” at Whole Foods or similar higher-end supermarkets. They might even have some fresh, in season.

It’s important you know where your tuna comes from, and if it was handled properly. If you go to a reputable seafood market, that shouldn’t be a problem.

If you’re concerned about parasites in raw fish, buying the bricks that have been in the deep-freeze is the way to go. And when it comes to mercury, the smaller the fish, the better. So if this is a concern, opt for ahi (also called yellowfin) tuna.

The topping…
¼ cup sour cream
1 tablespoon fresh squeezed lime juice
The marinade…
6 tablespoons soy sauce
1/2 teaspoon chili garlic sauce
Other Ingredients…
½ lb. sushi grade raw tuna, chopped into ¼-inch cubes
Tortilla chips, regular or the little bowls
Finely chopped scallions

Combine the topping ingredients in a bowl, and place it in the fridge.

Mix the marinade ingredients in a separate bowl and set it aside.

Chop the tuna into ¼-inch cubes, and if it looks wet, place it on some paper towels to absorb the excess moisture. (It can release quite a bit of moisture if it was frozen…you don’t want it watery before you marinate it.)

Marinate the tuna in the soy/chili garlic mix for just 10 minutes, then pour off the excess. (It will be really salty if you let marinate any longer.) Keep it in the fridge as well.

Finely chop the scallions.

Just before serving, take a tortilla chip or little bowl, place 1 tablespoon of the tuna on top, top this with ½ teaspoon of the sour cream mixture, and then garnish it with the finely chopped scallions.

Serve them immediately, and eat these quickly, before the tuna makes the tortilla soggy!

It’s National Bacon Lover’s Day!


And who doesn’t love bacon? …Especially when you can slather it on anything with this fabulous aioli!

Don’t let the innocent photo fool you. This stuff is addictive, thanks to the addition of bacon and bacon fat! And the food processor makes this aioli light as a cloud. Spread it on burgers. Use it on a BLT. Goes great with tuna. Or just get some chips and use it as a dip. Inhale!


avocado


3 avocados, seed removed and scooped out of their skins
6 strips of bacon, fried crisp, chopped and cooled…bacon fat reserved
juice and zest of 1 lemon
2 eggs, room temperature
1 clove garlic
1 cup extra virgin olive oil
salt, preferably Fleur de Sel
Freshly grated black pepper

In a food processor, blend the avocados, bacon pieces, lemon juice and zest, eggs, and garlic. With the processor still running, add the bacon fat slowly, then add the olive oil. Add a good pinch of salt and a few grinds of pepper.

You can substitute vegetable oil for the olive oil if you feel it’s too strong. But this is not for the weak!

Note: Yes, this baby uses raw eggs. If you’re queasy about that, there are raw egg substitutes in many supermarkets. I don’t use raw eggs often, but I do here…and in a really good Caesar salad.

Quarantining now, of course, but whenever I used to serve these tuna tacos to friends, I always got requests for the recipe. It requires a bit of setting up, but you can put it together right before serving to your guests…or yourself.

I use sushi-grade tuna for this dish, which is easily found online. It comes in 4-ounce packages, which is the perfect size for a single recipe. I buy them in quantity (it’s cheaper that way), and keep them in the freezer. You can also find tuna in small frozen “bricks” at Whole Foods or similar higher-end supermarkets. They might even have some fresh, in season.

If you’re worried about parasites in raw fish, sure, there’s always a chance something like that could happen. I’m willing to roll the dice when I eat raw meat when I make beef tartare, or use raw eggs in my Caesar salad dressing. To me, it’s worth the gamble. You have to decide what’s right for you.

It’s important you know where your tuna comes from, and if it was handled properly. If you go to a reputable seafood market, that shouldn’t be a problem.

The best way to get rid of parasites is by cooking or freezing. Cooking is not the answer for this particular recipe. But if you buy the frozen bricks, they’ve been in the deep-freeze long enough to kill any parasites. Also, when it comes to mercury, the smaller the fish, the better. So if this is a concern, opt for ahi (also called yellowfin) tuna.


The topping…
¼ cup sour cream
1 tablespoon fresh squeezed lime juice


The marinade…
6 tablespoons soy sauce
1/2 teaspoon chili garlic sauce
Other Ingredients…
½ lb. sushi grade raw tuna, chopped into ¼-inch cubes
Tortilla chips, regular or the little bowls
Finely chopped scallions

Combine the topping ingredients in a bowl, and place it in the fridge.

Mix the marinade ingredients in a separate bowl and set aside.

Chop the tuna into ¼-inch cubes, and if it looks wet, place it on some paper towels to absorb the excess moisture. (It can release quite a bit of moisture if it was frozen…you don’t want it watery before you marinate it.)

Marinate the tuna in the soy/chili garlic mix for just 10 minutes, then pour off the excess. (It will be really salty if you let marinate any longer.) Keep it in the fridge as well.

Finely chop the scallions.

Just before serving, take a tortilla chip or little bowl, place 1 tablespoon of the tuna on top, top this with ½ teaspoon of the sour cream mixture, and then garnish it with the finely chopped scallions.


Serve them immediately, and eat these quickly, before the tuna makes the tortilla soggy!


Don’t let the innocent photo fool you. This stuff is addictive, thanks to the addition of bacon and bacon fat! And the food processor makes this aioli light as a cloud. Spread it on burgers. Use it on a BLT. Goes great with tuna. Or just get some chips and use it as a dip. Inhale!


avocado


3 avocados, seed removed and scooped out of their skins
6 strips of bacon, fried crisp, chopped and cooled…bacon fat reserved
juice and zest of 1 lemon
2 eggs, room temperature
1 clove garlic
1 cup extra virgin olive oil
salt, preferably Fleur de Sel
Freshly grated black pepper

In a food processor, blend the avocados, bacon pieces, lemon juice and zest, eggs, and garlic. With the processor still running, add the bacon fat slowly, then add the olive oil. Add a good pinch of salt and a few grinds of pepper.

You can substitute vegetable oil for the olive oil if you feel it’s too strong. But this is not for the weak!

Note: Yes, this baby uses raw eggs. If you’re queasy about that, there are raw egg substitutes in many supermarkets. I don’t use raw eggs often, but I do here…and in a really good Caesar salad.