As recently as a couple of years ago, I had never heard of beef flap. But I purchased one from Slanker’s, a distributor of grass-fed beef out in Texas, and it’s become one of my favorite cuts of beef.
You won’t find beef flap in most supermarkets…at least I haven’t been able to find it…so online ordering may be one of the only ways to give it a try.
Beef flap is also known as bottom sirloin butt, and it comes from a part of the cow where flank steak comes from, only farther back. So it has its similarities to flank.
Beef flap is wonderfully marbled and is fantastic for a variety of dishes, including fajitas, stirfrying, or just enjoying it grilled.
I’ve marinated beef flap in many different ways, with Asian flavors and classic American BBQ spices, but one of my favorite ways is to give it a marinade that is similar to Italian dressing.
Some folks actually use bottled Italian dressing to marinate meat, but I prefer to make my own.
Olive oil White wine vinegar Salt Pepper Granulated garlic Granulated onion Dried oregano
Combine these ingredients in the proportions that you like in a bowl, mixing thoroughly.
I like to trim the beef flap, removing any silver skin that might be on it, and cutting it into pieces that are about 4” square and 1/4” thick. If the meat is too thick, I slice it lengthwise in half, to make a thinner cut. I place all the beef in a Ziploc bag, pour the marinade in, squeeze the air out of the bag and then seal it tightly.
I squish the bag all around to make sure that the marinade makes contact with all the meat, and I place the bag in the fridge overnight. (I usually put it in a bowl or tray, just to avoid any accidental spillage.)
The next day, I remove the meat from the fridge and let it come to room temperature before I cook it on a hot hardwood charcoal grill.
Beef flap cooks quickly on the grill, especially if you like it medium-rare, but because it has that fat marbling, it still stays juicy even if you like it well done.
And if you can’t get outside, a hot cast iron grill on the kitchen stove works just as well!
It’s that time of year when friends are coming over, and you want to make one drink you can serve everyone, rather than playing bartender all night. This one hits the spot.
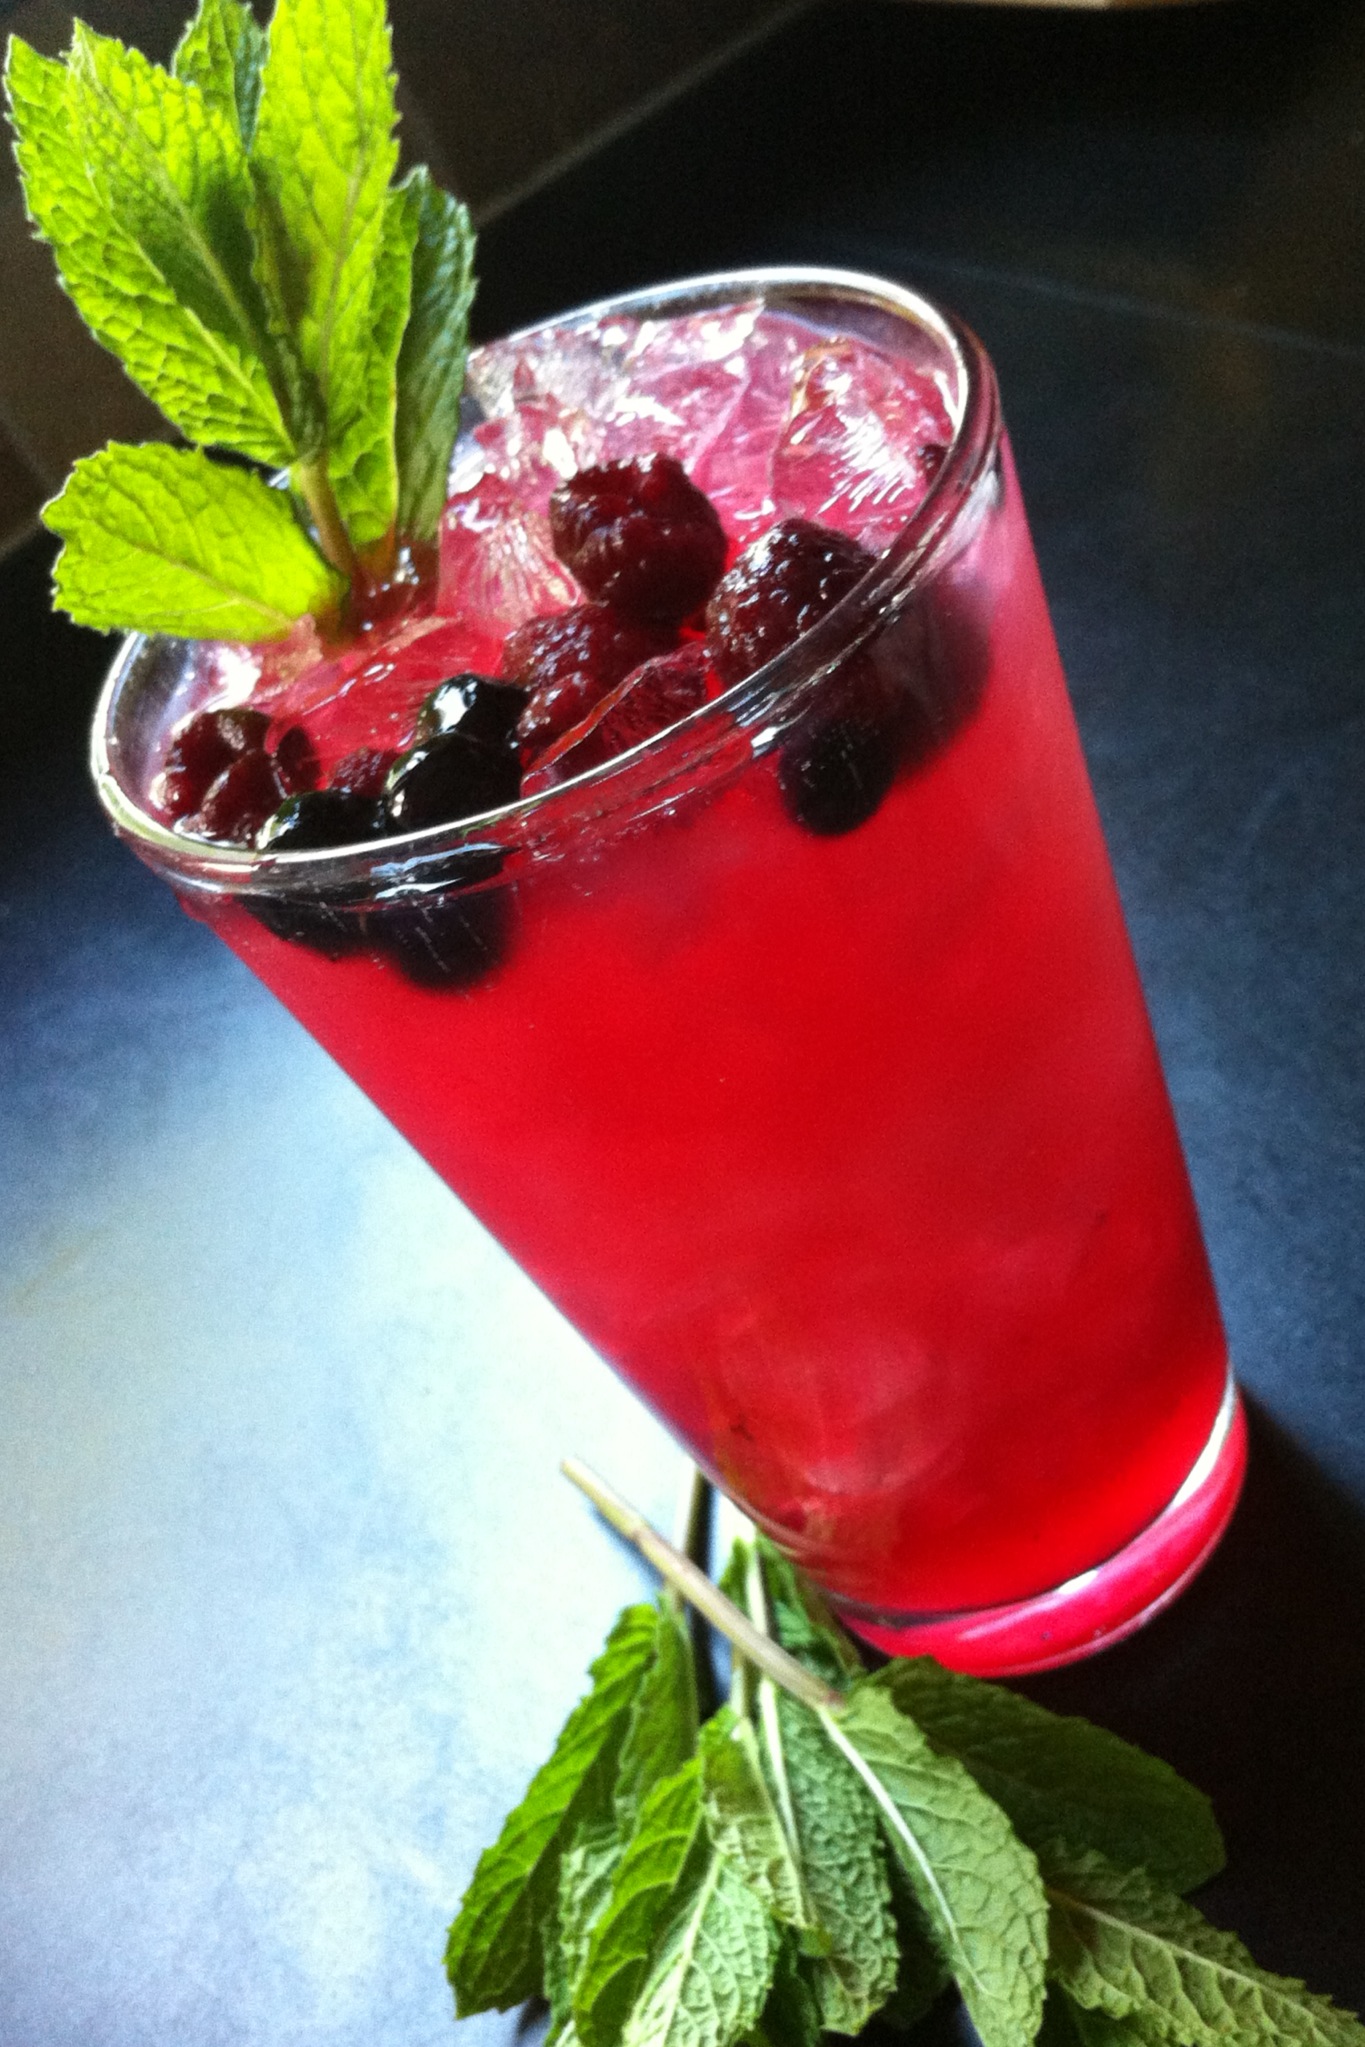
There’s only one thing better than a freshly made mojito…and that’s a pitcher of freshly made mojitos! Organic raspberries and blueberries are in the markets right now, and my mint plants are taking over the yard! All the ingredients for a great mojito!
Very often, I’ll use raspberries alone, but mojitos are even better when you combine the raspberries with blueberries. I stock up on organic berries, rinsing them and placing them in plastic bags that go in the freezer until I’m ready to make my mojitos. I always go organic with berries. Pesticides should never be a cocktail ingredient! Pay a little extra and get the good stuff…it makes a difference!
Once you make mojitos by the pitcher, you’ll never have them any other way. (Even if you’re drinking alone!)
Make ahead of time…
1 1/2 cups fresh squeezed lime juice
1 1/3 cups turbinado sugar (Sugar in the Raw is a common brand)
Mix both ingredients together, letting it stand at room temperature for a few minutes. I like to combine them in a Mason jar, then shake really hard until the sugar has dissolved. I keep it in the fridge, and it’s good for up to 3 weeks…ready to use any time. Shake it well again before using.
For the Mojitos…
1 cup sugar/lime mixture
1 cup mint leaves, packed
1/2 pint blueberries (fresh or frozen)
1/2 pint raspberries (fresh or frozen)
3 or 4 cups white rum (I use Don Q Cristal rum)
3 or 4 cups club soda or seltzer
Combine the mint leaves and 1/2 cup of the sugar/lime mixture in bottom of a pitcher. Muddle the mint up very well to release mint oils. Add the blueberries and continue to muddle.
Add the remaining sugar/lime mixture, rum and raspberries. Mix well. Just before serving, add the club soda and ice. Stir. Pour into tall glasses.
Or…for drinks one at a time, I put in a shot of the sugar/lime mixture into a tall glass. I throw in about 8 mint leaves and muddle them for a minute. Then I add 2 shots of rum, and a few raspberries and blueberries. I muddle again. I add ice, and I top it with the club soda, stirring well. An option is to pour it all into another tall glass. Garnish with a mint leaf.
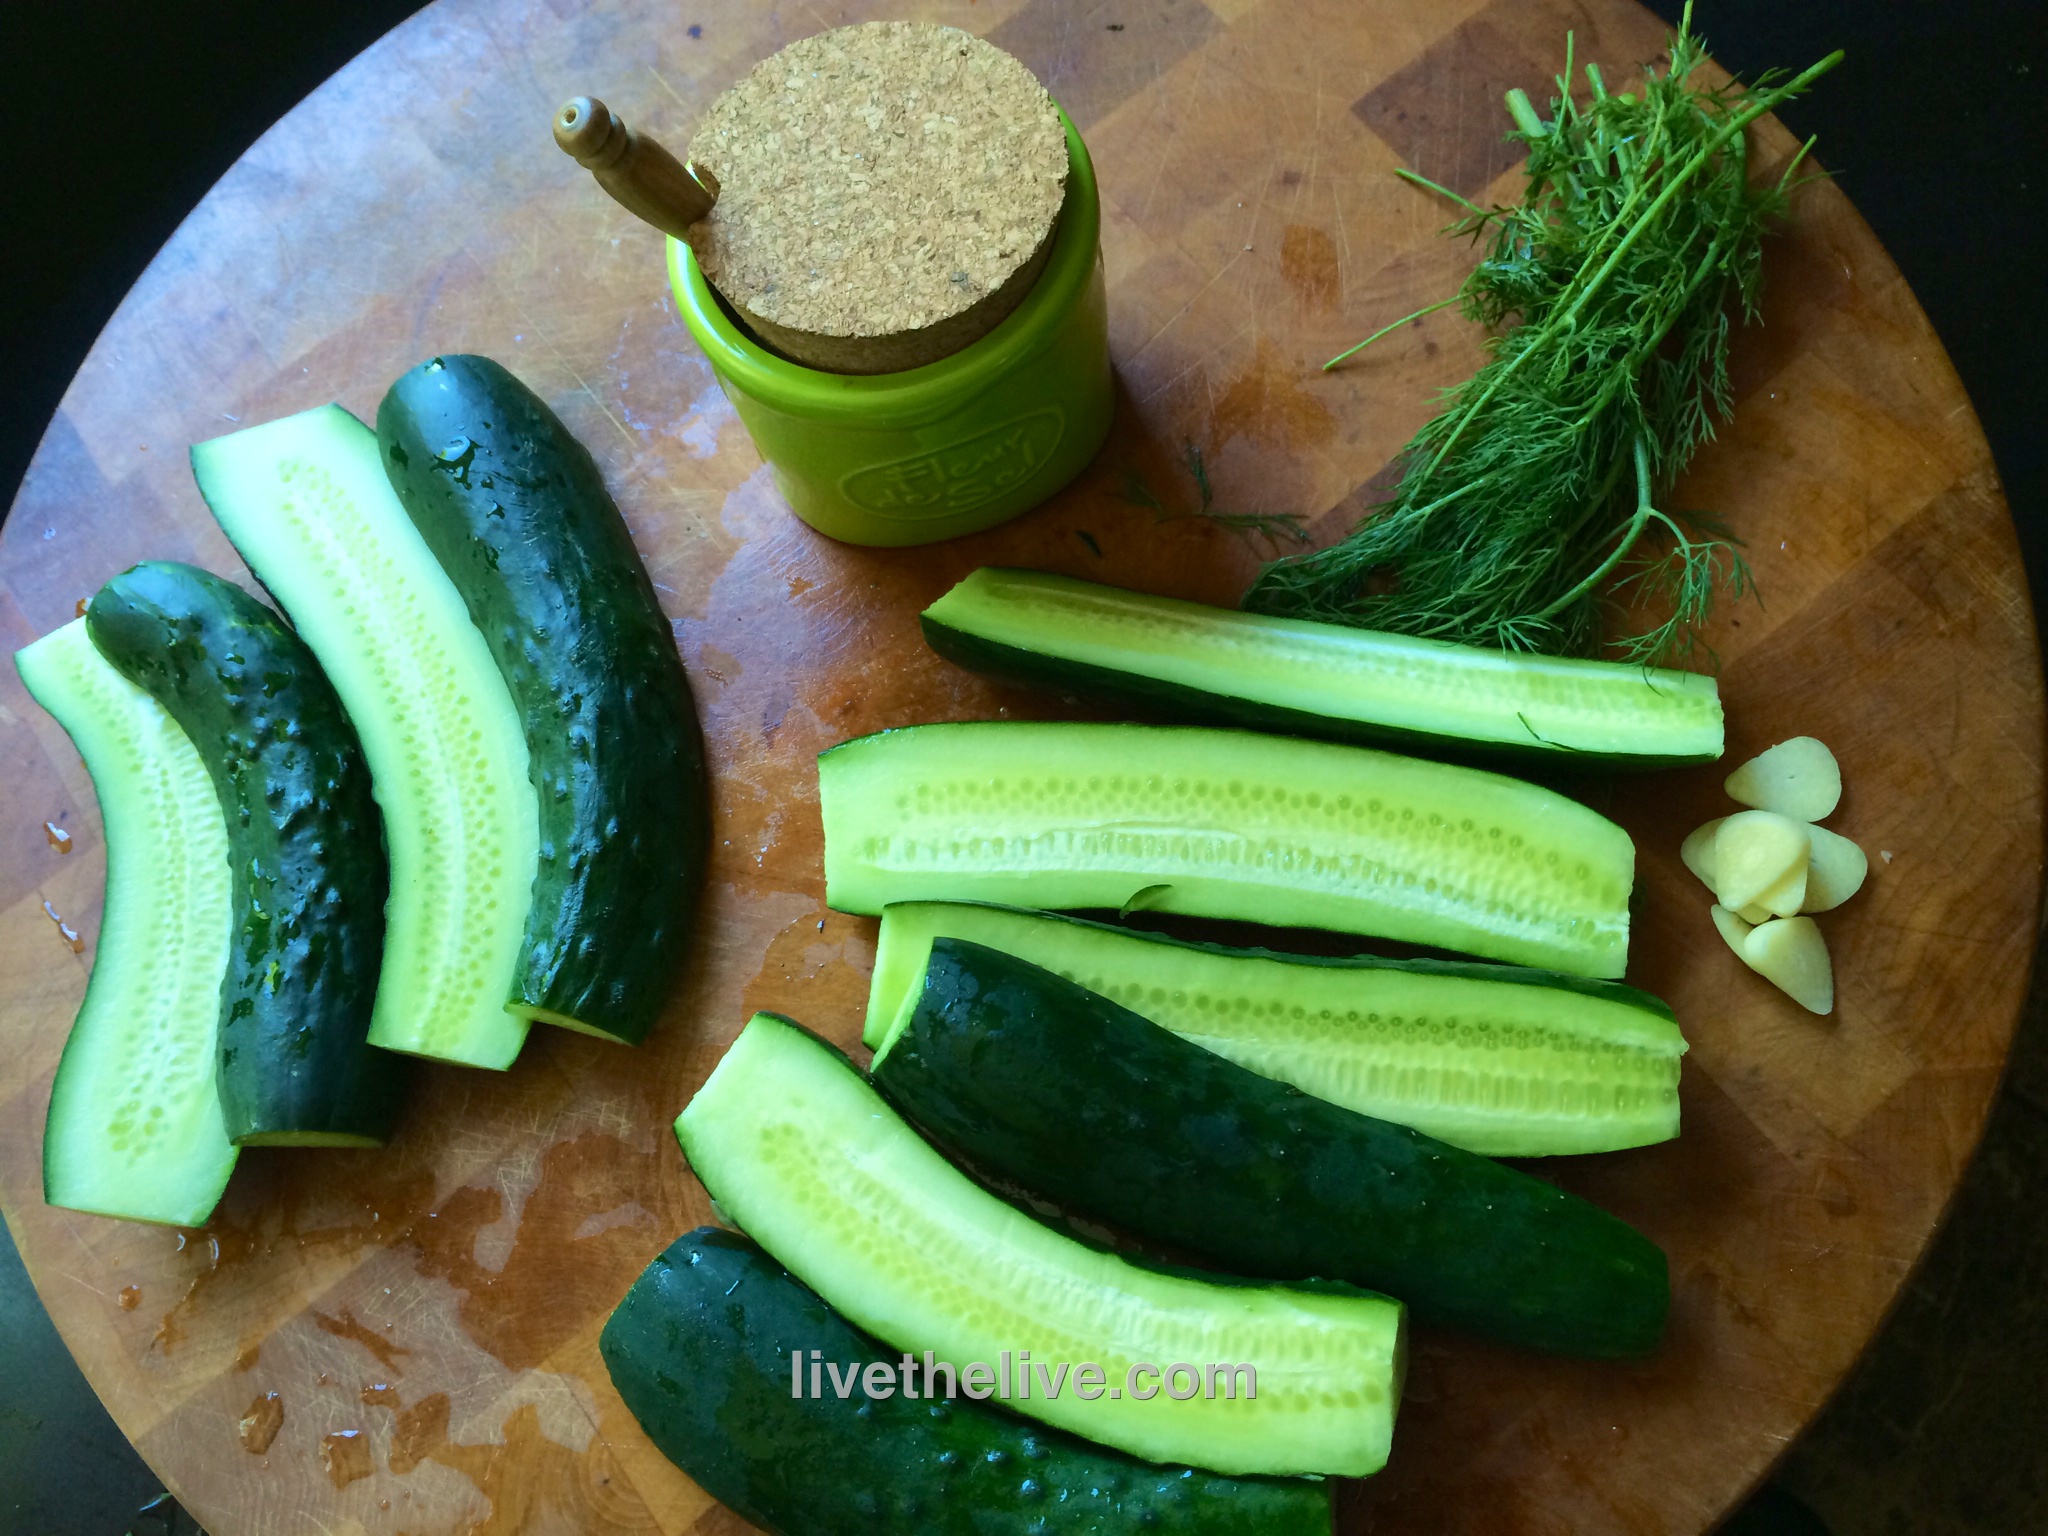
I don’t have the patience to boil Mason jars and lids and all that crap. But I love me my pickles, especially when this year’s garden is cranking out cucumbers in record numbers!
This is such an easy way to make great pickles, it’s almost unbelievable…and no water is needed! The salt extracts just enough moisture, like when curing meat, to make it work. This method works great if you want fresh pickles to eat immediately, but if you want to keep them for longer periods of time, you’ll have to go back to the old tried-and-true methods.
Fortunately for me, I devour these pickles as soon as they’re ready!
I originally used a plastic bag for this, but I found that using a plastic container keeps the pickles aligned better and it’s less messy.
fresh cucumbers sea salt a handful of fresh dill a couple of cloves of garlic, thinly sliced
Get a resealable plastic container.
Cut the ends off the cucumbers and then slice them lengthwise, in half or in quarters. Lay them neatly next to each other in one layer in the container, skin-side down. Sprinkle the sea salt over the cucumbers. Sprinkle some of the chopped garlic on top. Then, tear off some fresh dill and lay it to cover the pickles.
You should be able to get a second row of pickles on top of the first, again sprinkling with the salt, garlic, and topping with dill.
Placing the lid on the container, squeeze out as much air out of the container as you can.
Put the container in the fridge overnight. Making sure the lid is tightly sealed on the container, flip it over every few hours. (I always put a plate underneath it when it’s upside down in case it leaks a little.)
The pickles will be ready to eat the next day, but they’re even better after 48 hours.
The old method of using a Ziploc bag works as well, especially if you don’t have enough cucumbers to fill a container. I also put a few small onions in there, which will no doubt wind up in a future martini!
If I’m at a steakhouse and craving beef, I’ll usually order a cut like porterhouse or ribeye…great cuts of meat that need nothing more than a little salt and pepper, and a skillful grillmaster. The prep on that slab of meat before it even hits the grill has already been done: carving, dry-aging, trimming.
At home, we eat only humanely raised grass-fed beef. It’s expensive, so we buy the cuts that cost less, but need a bit of TLC before cooking. A cut like beef flap, which comes from the bottom sirloin butt (the back of the animal), looks like a skirt steak, a hanger steak, or a flank steak because of its thinness, but each comes from a different part of the animal.
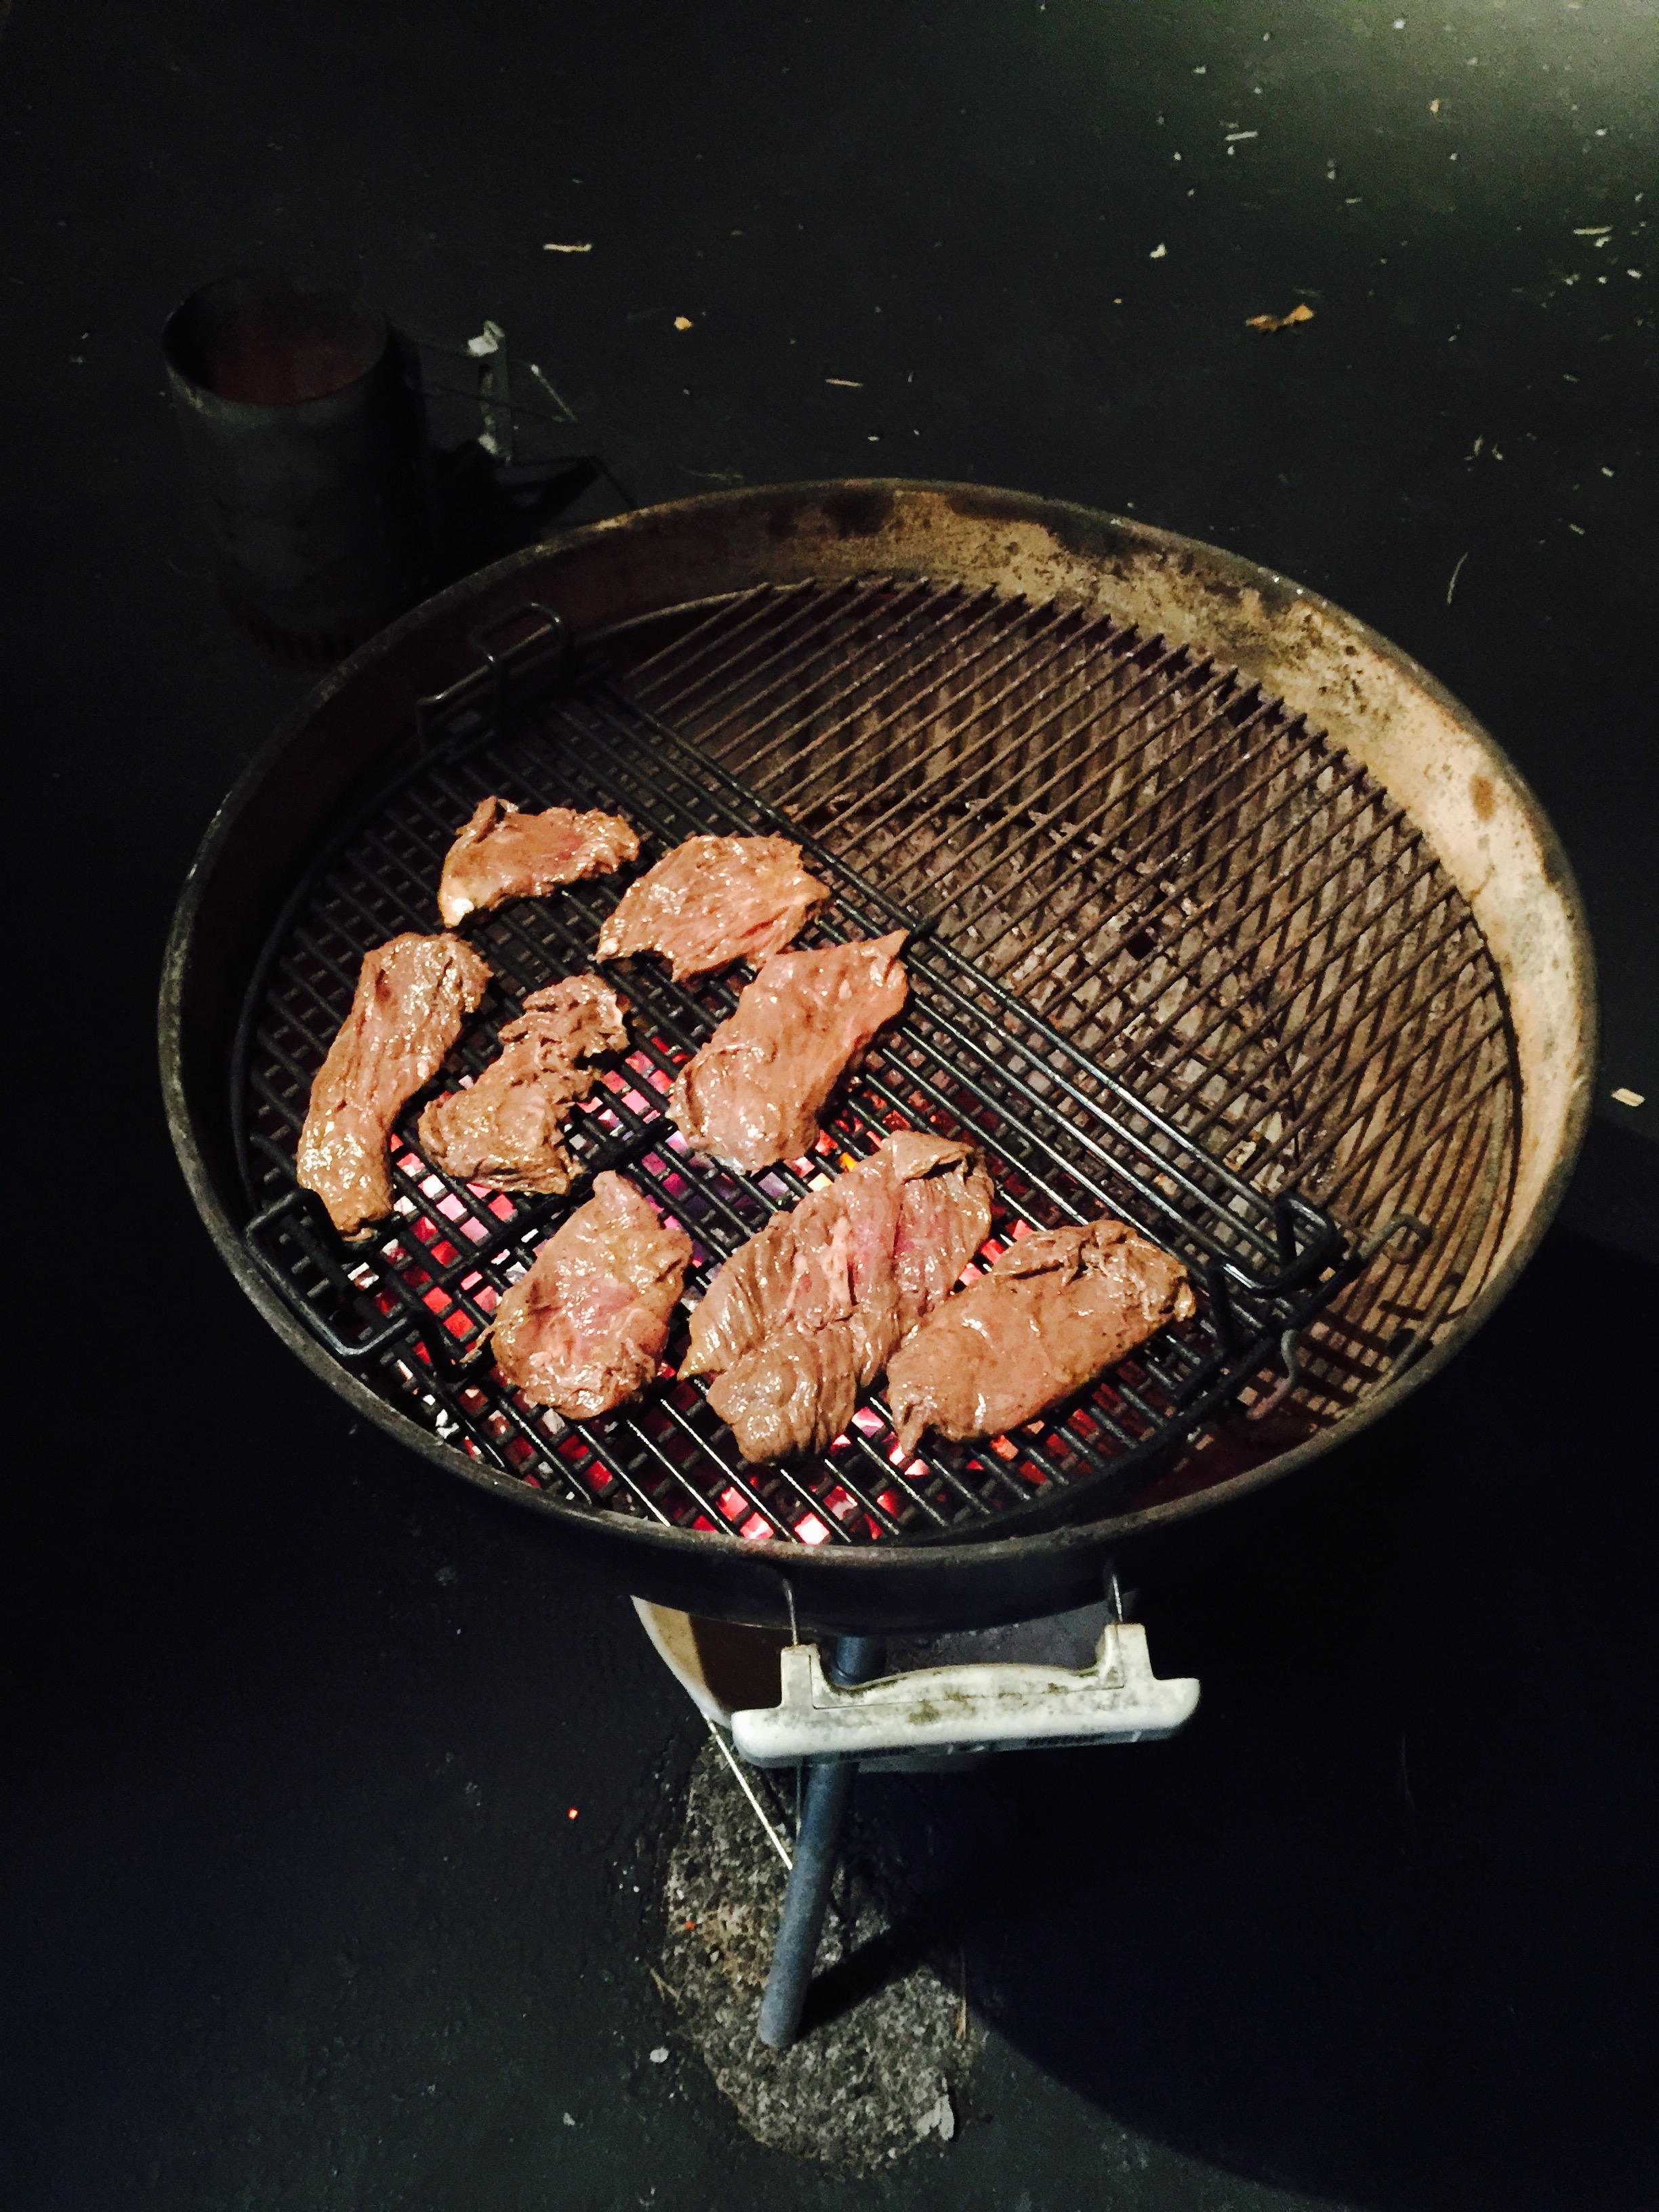
Though the beef flap is somewhat thin, I will often slice it lengthwise into two thinner pieces, because the meat’s thickness often varies, which can give you uneven cooking. I like to cook it hot and fast on a hardwood fire grill, but still keep it medium-rare. If the weather is really unforgiving, cooking the beef in a hot cast iron skillet works well, too.
Marinades are the key to tenderizing and flavoring tougher or cheaper cuts of meat. What you put in your marinade really depends on what flavors you like.
The recipes below are for 3 to 5 lbs. of beef. I always make more, because leftover marinated grilled beef makes an awesome steak and egg breakfast the next day!
A cold night is no excuse not to grill!
The instructions with all of these marinades is basically the same: combine all the ingredients in a bowl. Cut the beef flap (or whatever cut of meat you’re using) to a manageable size so that it fits a gallon-sized Ziploc bag easily. (Smaller, thinner pieces will also absorb the marinade better.) Place the beef in the bag, and then pour the marinade into the bag. Squeeze the excess air out and seal the bag. Gently squish the bag around so that the marinade makes contact with all the meat. Place the bag in a bowl in the fridge overnight, squishing the bag every few hours to make sure the marinade penetrates the meat. The bowl will prevent any accidents from happening in your fridge in case the bag leaks. The next day, remove the bag from the fridge and let it come to room temperature before grilling the meat. Discard the leftover marinade.
ALZ MARINADE #355
1/4 cup olive oil
1 lemon, zest and juice
1 tablespoon Worcestershire sauce
1 tablespoon soy sauce
1 teaspoon garlic salt
1 teaspoon Dijon mustard
Combine the ingredients. Marinate the meat overnight in the fridge or several hours at room temperature. Grill.
Marinating beef flap.
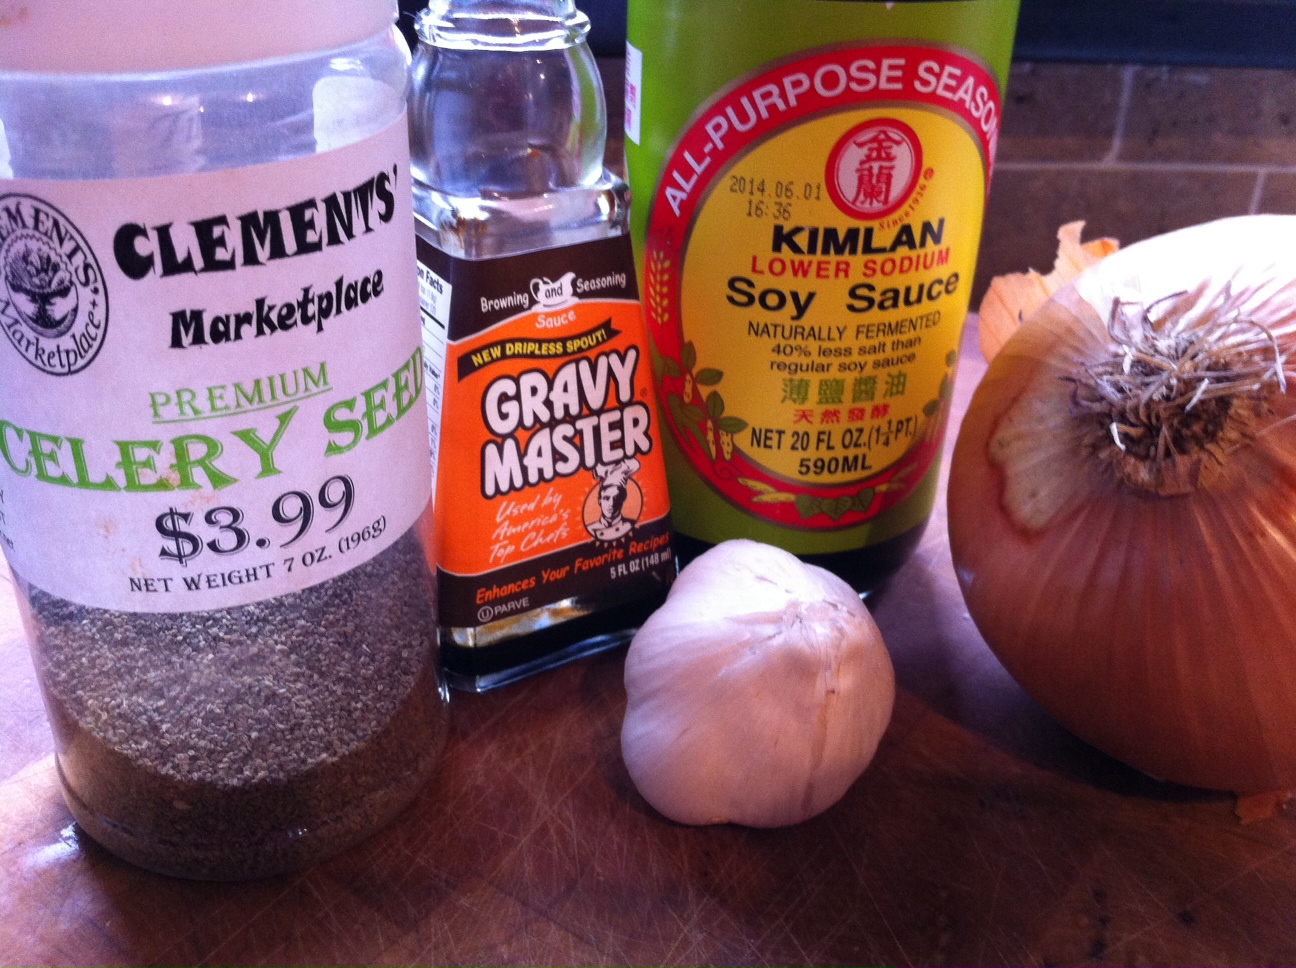
On the North Fork of Long Island, in the middle of wine country, there’s a restaurant that’s been around for a long time: a sort of hole-in-the-wall place you might not think twice about visiting, unless you hear that they’ve got a special secret marinade for their beef. The place is called The Elbow Room (I think they’ve expanded to a second or third location by now), and though I wasn’t impressed by the quality of their beef, I was impressed with its flavor. Here, with the help of friends, is what we think comes as close to that marinade as we can get. Gravymaster is a product you can find in any supermarket, usually in the gravy section. This marinade also works well with beef tips or a London broil.
1 cup soy sauce
1/4 cup Gravymaster
2 large Vidalia onions
2 cloves of garlic
2 teaspoons celery seed
1/2 teaspoon black pepper
Combine the onions and garlic in a large food processor and purée. Add the remaining ingredients and run the processor until it’s smooth and sort of resembles root beer (below.)
Marinate the meat overnight in the fridge or for several hours at room temperature. Grill. Awesome with beef sirloin tips (below.)
This incredibly simple marinade falls into the “Italian” category. You could almost use it as an Italian dressing on salads, but it works really well as a marinade for beef.
1/2 cup olive oil
1/4 cup balsamic vinegar
2 teaspoons Kosher salt
1 teaspoon pepper
The balsamic vinegar I use is not the expensive aged stuff that costs a fortune. It’s the $9-a-bottle stuff you can find in any supermarket. Simply combine the ingredients. Marinate the meat in the fridge overnight or for several hours at room temperature. Grill.
Does anyone remember Art Ginsburg, also known as Mr. Food? His syndicated segments appeared on the news for almost 10 years. I met him back in 1993, and he was quite the self-promoter…but a really nice guy. Art passed away years ago, but I still have his old cookbooks, and his simple but perfect pesto recipe has been my guide for decades.
We eat a ton of pesto at home, and I’m amazed at how much my daughter loves the stuff. Most of the time, it’s simply mixed with pasta. But we stir it into tomato sauce and smear it on grilled chicken or beef as well.
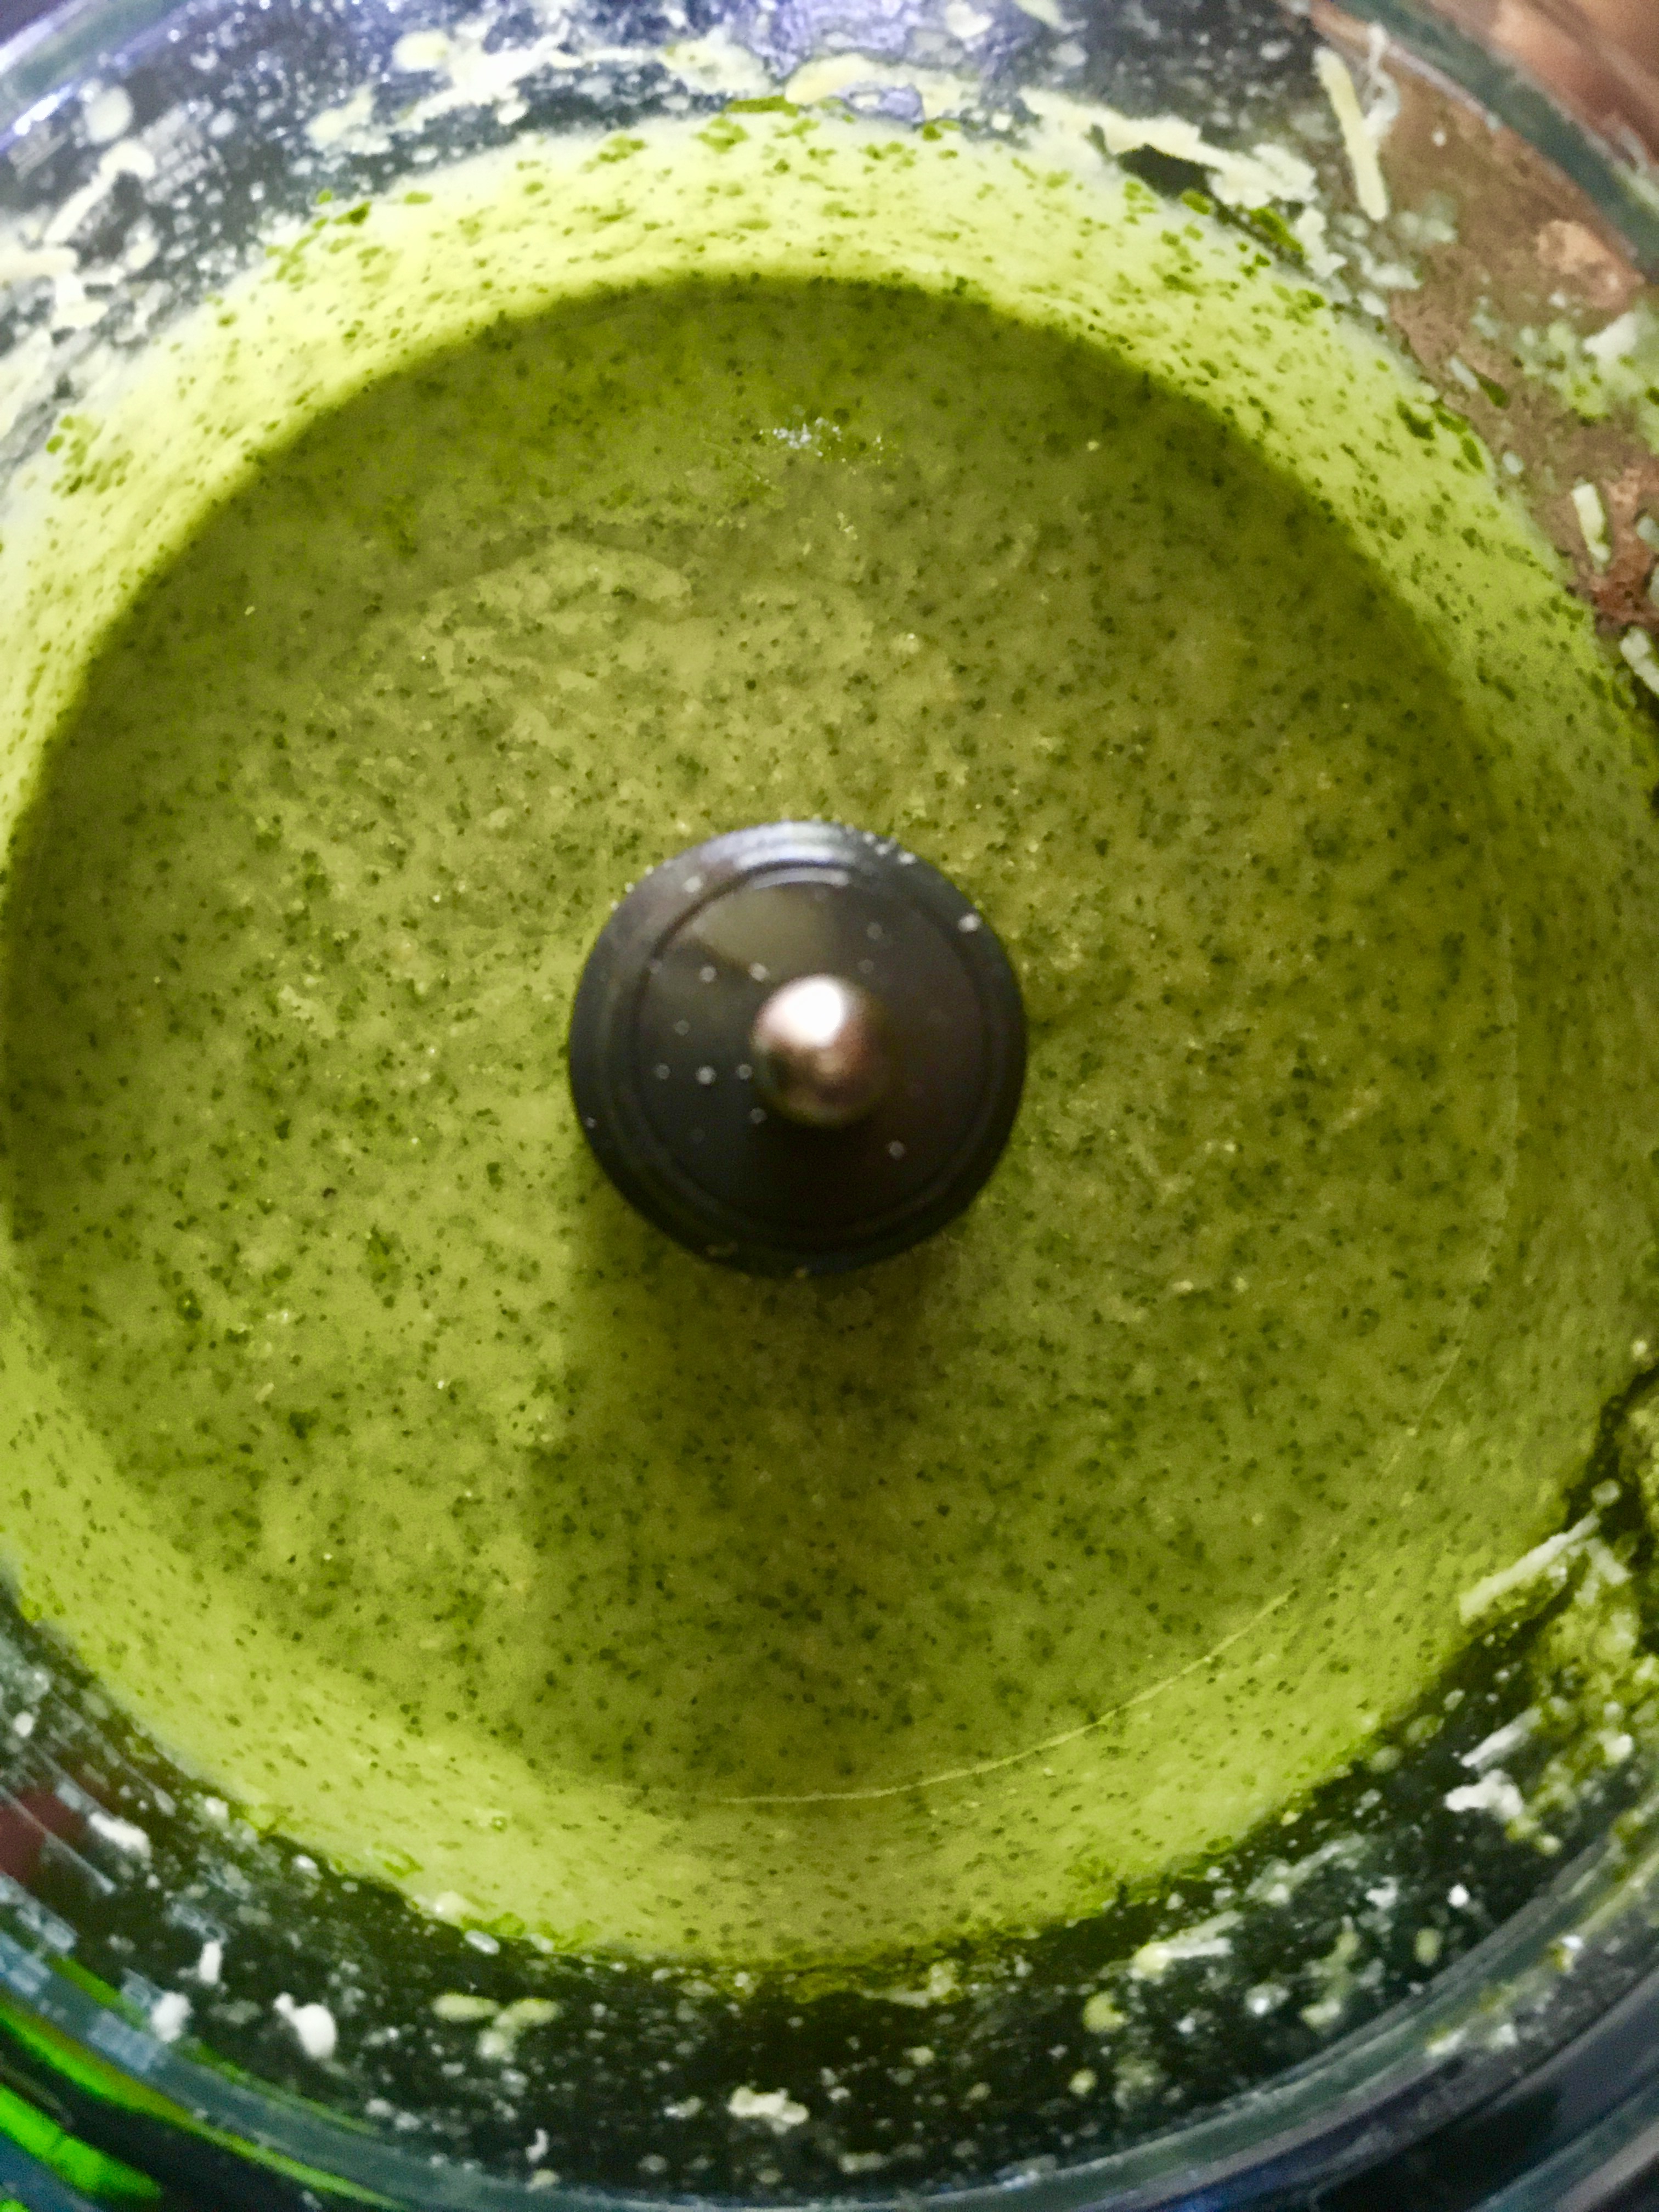
Basil is the main ingredient in classic Italian pesto, and it’s growing rapidly under the summer sun in my garden right now. And that’s key to great pesto: when Mother Nature says the basil’s ready, be sure you have all the other ingredients and get to work!
Basil, ready to be picked.
Besides the fact that it simply tastes bad, the problem with store-bought pesto is that it’s expensive. Although homemade pesto isn’t cheap, you can still save a lot of money by making it yourself.
Some of my tips for saving money: buy good quality ingredients in bulk. My go-to olive oil is California Olive Ranch ExtraVirgin Olive Oil. It gets high ratings, tastes amazing, and can be found in large bottles at most supermarkets and in quantity on Amazon. But spend the extra money on the pure California olive oil. Don’t go for the blends.
There’s been a rash of articles about already-grated parmesan cheese that is 50% cellulose (wood) fiber. Stay away from that junk and buy yourself a nice chunk of the real deal: Parmigiano-Reggiano. Grate it yourself and taste the difference!
The most expensive (and questionable) ingredient in basic pesto is pine nuts. If you look on the back of the package (and you always should!) you’ll see that most pine nuts come from China. I don’t buy any food products from China…period. So sourcing “safe” pine nuts can be difficult. The Italian pine nuts can be extremely expensive, but recently I’ve found pine nuts from the USA that are more reasonable in price.
They say they’re grown in New Mexico…
One of the reasons you want real pine nuts and not some look-alike from China is something called “pine mouth” or “pine nut mouth.” A small percentage of people experience a reaction after eating pine nuts that makes their mouth taste like metal–imagine putting a handful of pennies in your mouth–and the taste stays in their mouths for a couple of weeks, ruining their taste buds for the foods they love. (Eventually, it wears off.) Some scientists say you get “pine mouth” by eating counterfeit pine nuts–varieties like those from China that are not the same species. Others say that you can get the reaction even from real pine nuts. Research on this continues, but all the more reason not to buy any foods from China and other questionable countries.
There are alternatives to pine nuts, and you’ll find many pesto recipes that substitute with almonds, pistachios or walnuts. I think those nuts change the taste of the pesto, plus they have a skin that leaves a gritty residue, which I don’t like. So I don’t use them. The one nut that I’ve found that does a pretty good job filling in for pine nuts is macadamia nuts, although they, too, are a bit gritty. They are less expensive and usually come from Hawaii. Just remember to buy raw, unsalted macadamias.
So here’s my sure-fire pesto recipe. I make massive amounts of it, store it in plastic storage containers with a tightly sealing screw-top lid, and put them in the deep freeze. They last all year, and thaw out easily.
2 cups fresh basil, packed down a little
1 cup grated Parmesan cheese (preferably Parmigiano-Reggiano)
1/2 cup pine nuts
1 cup extra virgin olive oil
2 garlic cloves, crushed
1 teaspoon salt
When measuring the basil, I pick dry leaves from the garden and place them in a measuring cup, lightly packing them until I get 2 cups. (More is better than less!) Then I remove them from the measuring cup and wash them, tossing them in a salad spinner to dry. Then they go into the food processor. (If you wash them before measuring, they will pack much more tightly, and you won’t get the correct amount.)
Add the other ingredients in the food processor with the basil and let it rip!
The color and fragrance of freshly-made pesto is hard to beat! For me, a bowl of pasta with pesto is real comfort food.
I find little or no difference between the stove in my kitchen and an outdoor gas grill…so I don’t own one. I can make a perfectly delicious steak by searing it in a cast iron pan on the stovetop, then finishing it in a hot oven. So, for me, if the real reason for outdoor grilling is flavor, nothing can replace a hardwood charcoal grill.
Besides the quality and source of my beef, wood and smoke are what make the difference between a good steak and a great steak.
I know the #1 argument for going with gas over hardwood charcoal is time. “It takes too long to start a charcoal grill.” That’s a load of crap. Over the years, I’ve showed many friends that it takes no more time to light a charcoal fire than it does to start up a gas grill.
Of course, it starts with the grill itself. The classic Weber is still an awesome choice. For larger cooking needs, I also have a Primo ceramic grill.
Then I get a bag of hardwood charcoal. I’m not talking charcoal briquets, like Kingsford, that have a ton of additives in them. And I’m definitely not talking about Match Light. I’m talking pure hardwood charcoal, easily found in supermarkets and home stores.
Next: a charcoal chimney. It’s a metal tube with a handle and a grate at the bottom. I crumble a couple of sheets of newspaper into the bottom, pour charcoal into the top, light it, and I have hot coals in 10 minutes without lighter fluid.
And I NEVER use lighter fluid! Why spend good money on a great steak only to make it taste like gasoline?
The variety of wood chips available for smoking is another flavor factor when it comes to grilling with charcoal. My personal favorite is hickory, especially when I’m cooking pork or chicken. But apple, cherry, oak, mesquite: they all impart their own unique flavors. And they’re all available in most home stores where you find all the other barbecue gear.
Although I have an electric smoker for those low-and-slow jobs, like a big ol’ brisket or pork shoulder, I don’t need it when grilling a steak. I simply soak some wood chips in water for about a 1/2 hour before grilling (I’ve found that hot water speeds the process up), drain the water, and then sprinkle the moist chips on the hot coals in my grill. I throw the meat on the grill, close the lid (opening the vents, of course) and off we go.
So now, in 10 minutes, I’ve got a grill that’s ready to cook a steak with…about the same time as gas.
If you say: “I don’t cook with charcoal because it’s so messy!” …I honestly don’t know if you and I can be friends.
Because I’m using a small amount of hardwood charcoal for the average dinner, I don’t have to clean out my grill every time I use it. After a while, yes, some ashes pile up in the bottom of my grill and I have to dump them. But because they’re pure wood ashes, I can dump mine into my strawberry or raspberry patch. They love the stuff.
You still have to clean a gas grill after a while, and it always runs out of propane halfway through cooking when you have guests over for dinner. So where’s the convenience in that?
Charcoal grills give you everything you could ask for: low maintenance, ease of use–no propane tanks, valves and igniters–real wood flavor, not lava rocks, and the thrill of cooking meat over a real fire, bonding with the caveman in you. Grab a beer–or even better: a bourbon on the rocks–and start grilling!
Sometimes, a cool adult beverage is just what you need after a long day of yard work. The cucumber plants in my garden have started producing, so it’s time to make this refreshing cocktail!
4 fresh cucumbers, peeled and seeded
Small ice cubes
1 cup loosely packed fresh mint leaves
2 teaspoons granulated organic cane sugar
3 tablespoons fresh lime juice
4 oz. vodka (I like Tito’s)
1 oz. orange liqueur (I like Cointreau)
Peel and seed the cucumbers. Coarsely chop them and then purée them in a food processor until smooth. Strain them through a fine sieve, pressing the solids to extract as much liquid as possible. Or, if you have one, use a juicer. Set the extracted cucumber juice aside.
To a large glass pitcher, add the mint leaves, sugar and lime juice. Muddle the ingredients so that the mint leaves release their oils. Add 3/4 cup (at least) of the cucumber juice. Add the vodka and Cointreau. Muddle again briefly.
Fill tall drinking glasses with ice cubes. Strain the cocktail into the glasses. Garnish with a cucumber spear or peel…or mint.
If you grow your own cucumbers and mint in your garden, this cocktail tastes even better…a fine reward for a job well done!
These 2 recipes are great side dishes for any occasion, and they’re tasty by themselves, or as an appetizer. Feel free to substitute to suit your needs. If you don’t like feta cheese, try Gruyère, smoked gouda, or even mozzarella. Need it to be gluten-free? Use GF breadcrumbs. Don’t have shallots? Use onions or scallions. Don’t like mushrooms? Okay…I can’t help you there…
1 package large white or brown mushrooms
olive oil
1/2 shallot, finely chopped
1 clove garlic, through a press
1 tablespoon fresh thyme, finely chopped
pinch of red pepper flakes
salt and pepper
fresh feta cheese, cut into small cubes
bread crumbs
1 tablespoon fresh parsley, finely chopped
Pre-heat the oven to 400 degrees.
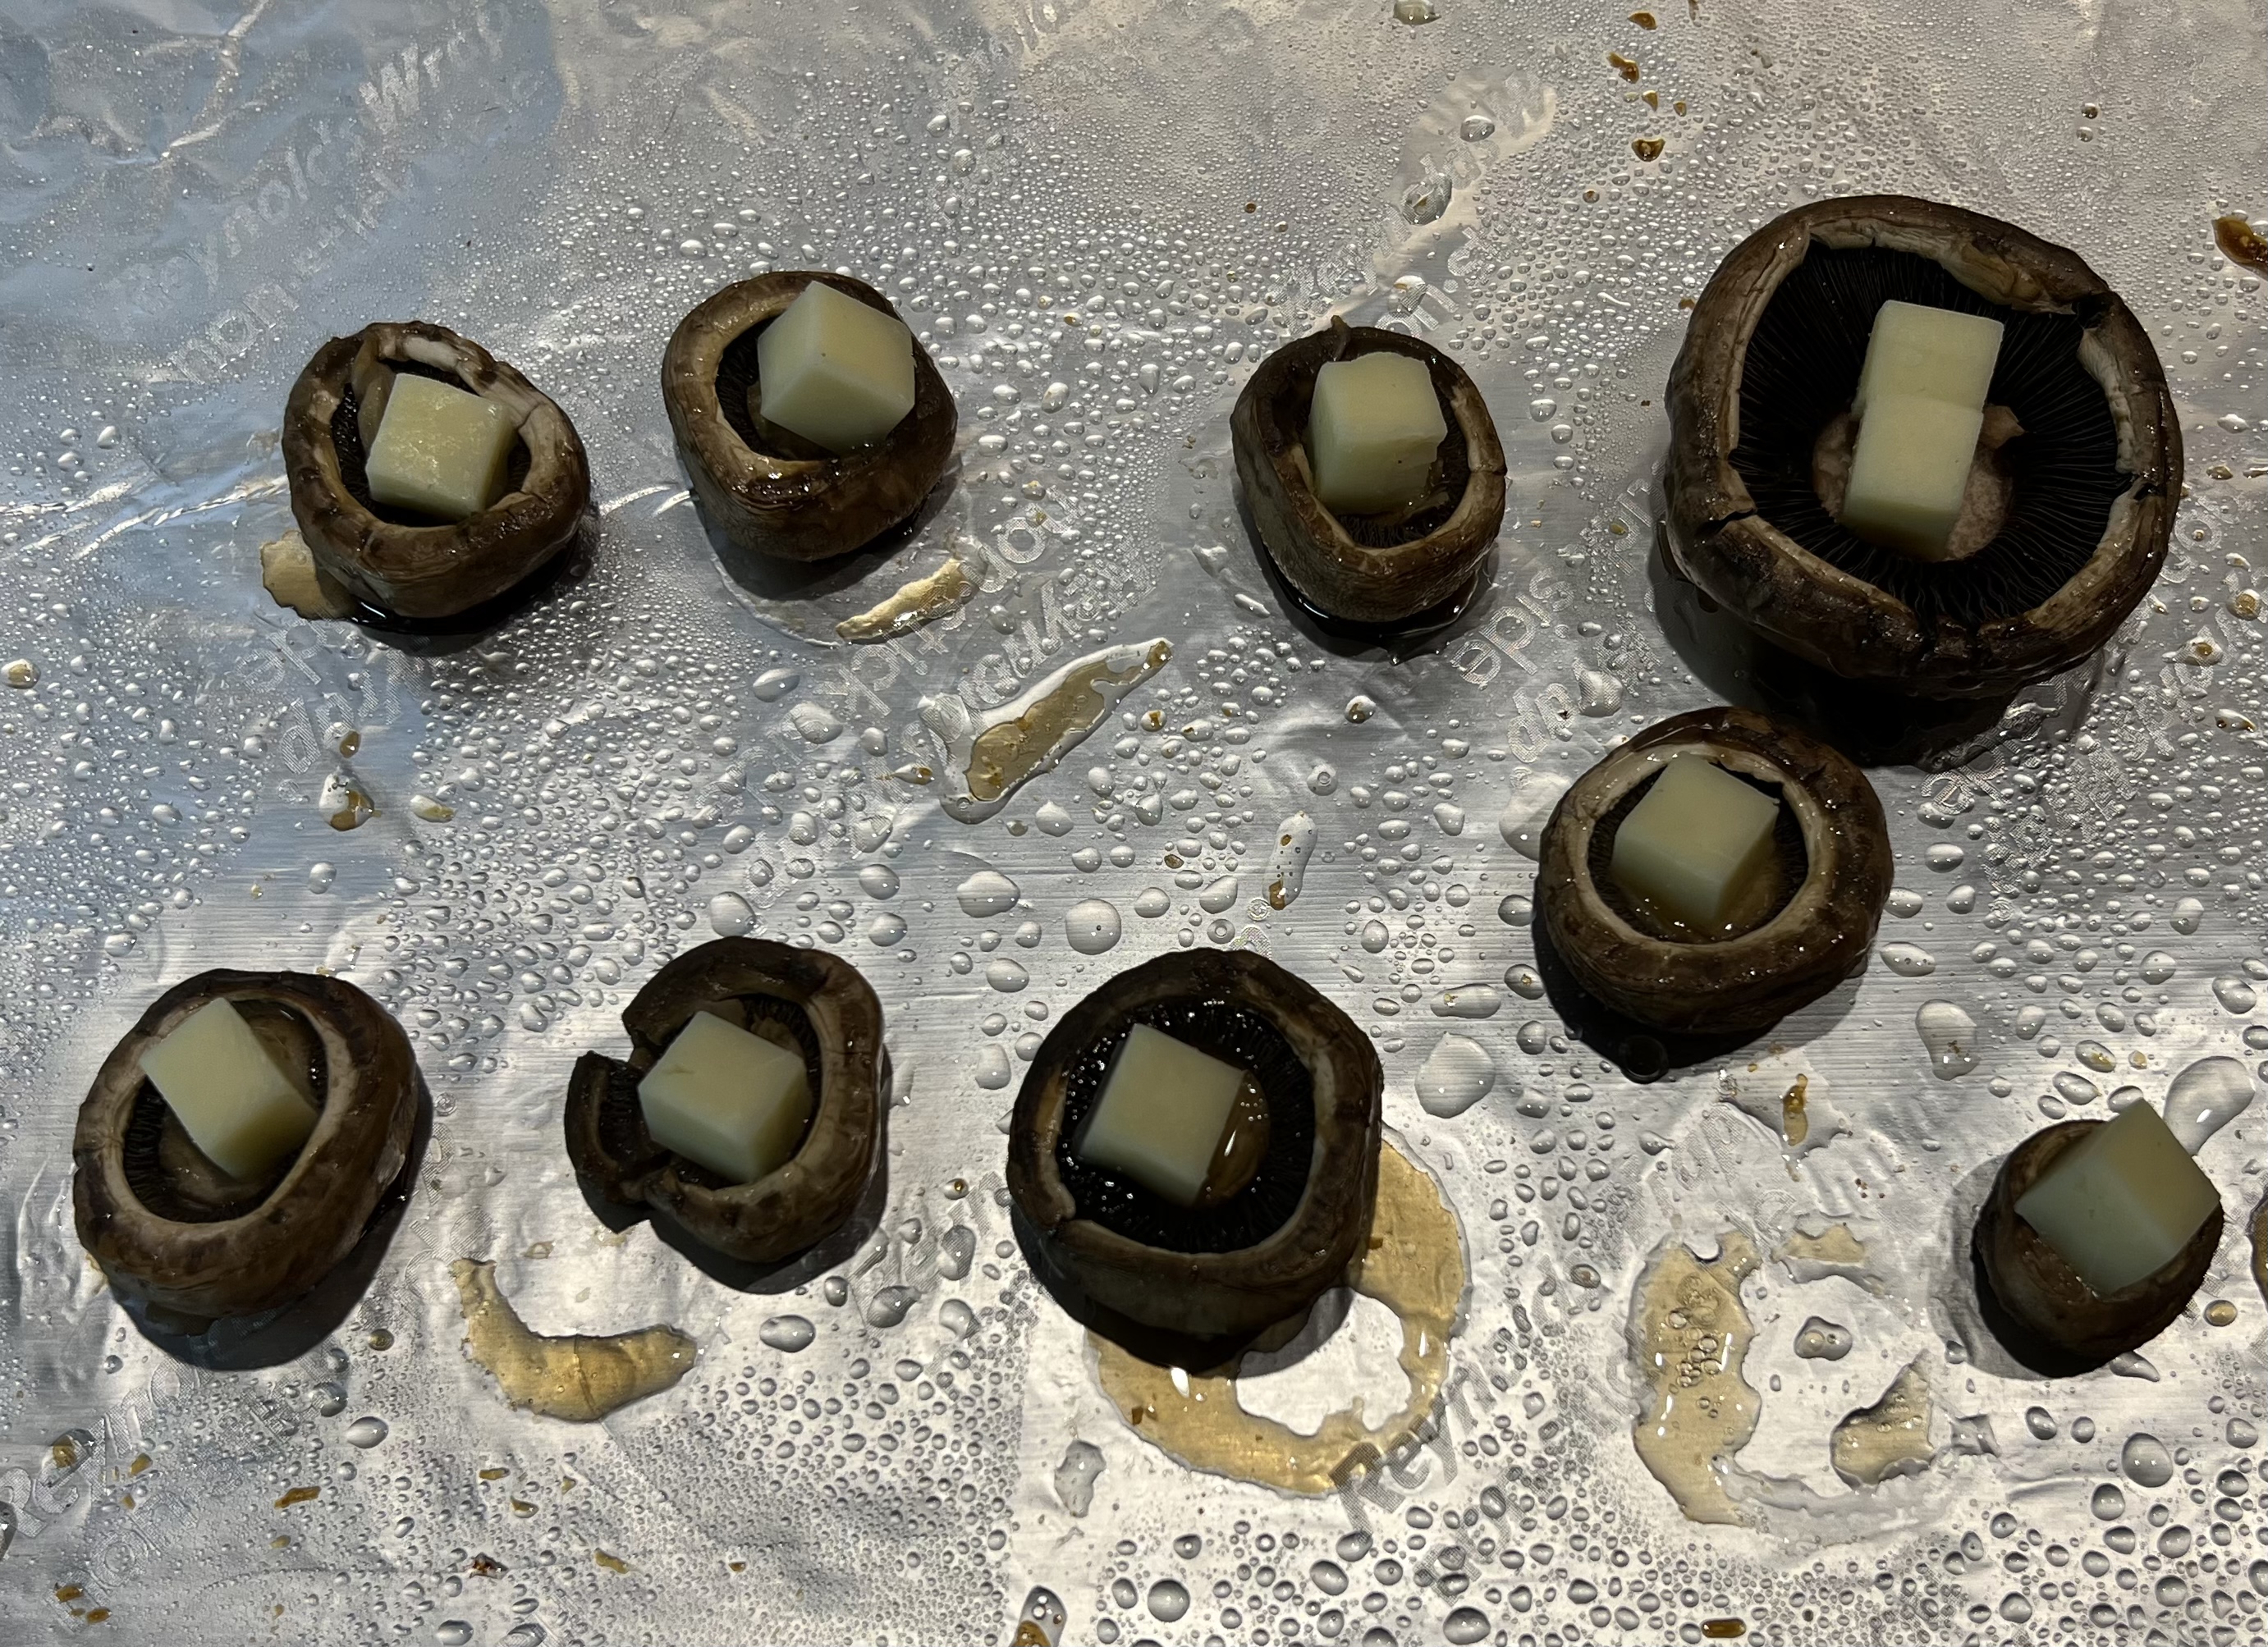
Rinse the mushrooms in cold water to clean them. Remove the stems of the mushrooms and set them aside. Rub the mushroom caps with olive oil and place them on a baking sheet, open side-down, in a 400-degree oven, for a few minutes.
In a pan, sauté the shallot and garlic in a little olive oil. Chop the mushroom stems finely and add them to the pan. Season well with the salt and pepper. Add the thyme and pepper flakes. Set the pan aside, off the heat.
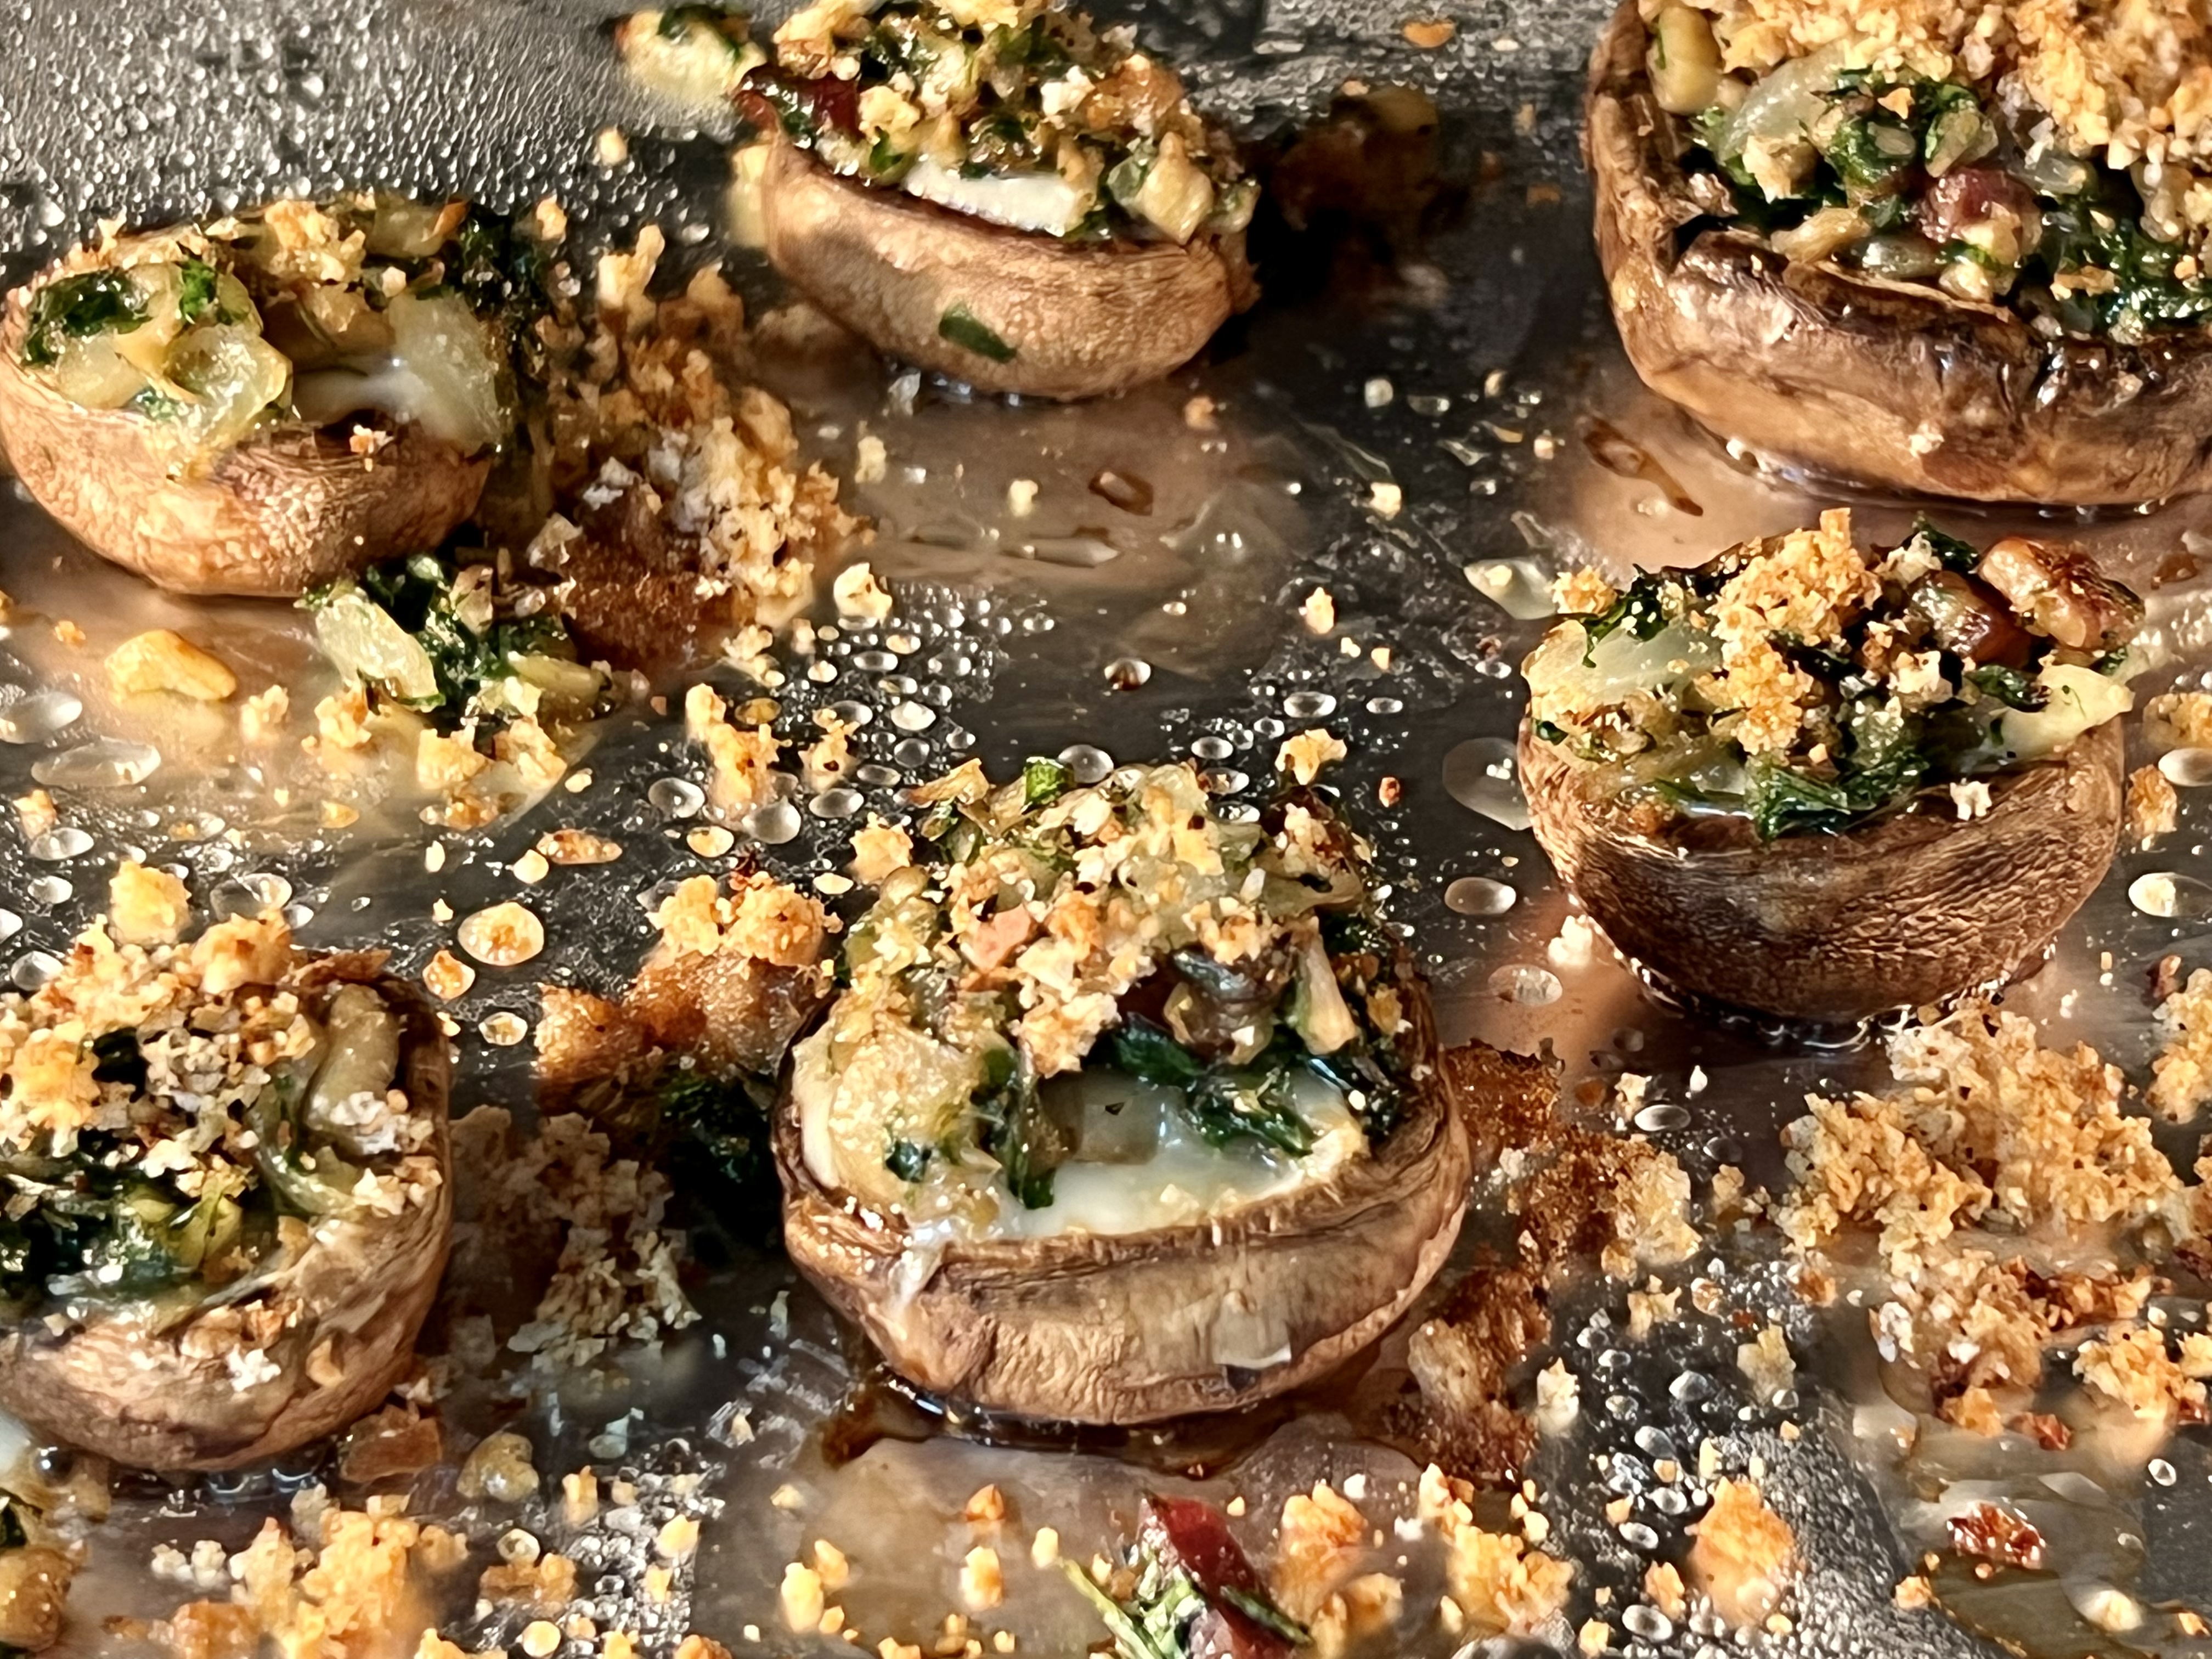
Reduce the oven temp to 350 degrees after removing the mushroom caps. Flip the mushroom caps over so that they look like little bowls. Take a cube of cheese and place one in each mushroom. Top each with the sautéed shallot mixture. Sprinkle breadcrumbs on top and sprinkle parsley over that.
Return the baking sheet to the oven, cooking the mushrooms until they are lightly golden in color, and the cheese has melted.
Mushroom myth: Soaking mushrooms in cold water makes them mushy. Not true! Mushrooms do not soak up any water when left to soak for even 30 minutes. So use your mushroom brush…use your kitchen towel…whatever you like. But I prefer to get them clean simply with cold water.
Here’s another recipe…
Chopped mushroom stems and cubed cheddar, ready to go.
1 package white or brown mushrooms
olive oil
1/4 of an onion, minced
1 clove of garlic, through a press
1 piece of cooked bacon, finely chopped
1 cup of baby arugula
salt and pepper
mild cheddar cheese, cubed
bread crumbs
The cooking directions are similar to the recipe above…
Pre-heat the oven to 400 degrees.
Rinse the mushrooms in cold water to clean them. Remove the stems of the mushrooms and set them aside. Rub the mushroom caps with olive oil and place them on a baking sheet, open side-down, in a 400-degree oven for a few minutes.
In a pan, sauté the onion and garlic in a little olive oil. Add the bacon. Chop the mushroom stems finely and add them to the pan. Season well with the salt and pepper. Add the arugula and let it wilt until it’s soft. Set the pan aside, off the heat.
Sautéed mushroom mix, ready to go.
Reduce the oven temp to 350 degrees after removing the mushroom caps. Flip the mushroom caps over so that they look like little bowls. Cut the cheddar cheese into small cubes and place one in each mushroom. Top each with the sautéed onion/garlic/bacon/arugula mixture. Sprinkle the breadcrumbs on top.
The cubes of cheddar fit inside the caps.
Return the baking sheet to the oven, cooking the mushrooms until they are lightly golden in color, and the cheese has melted.
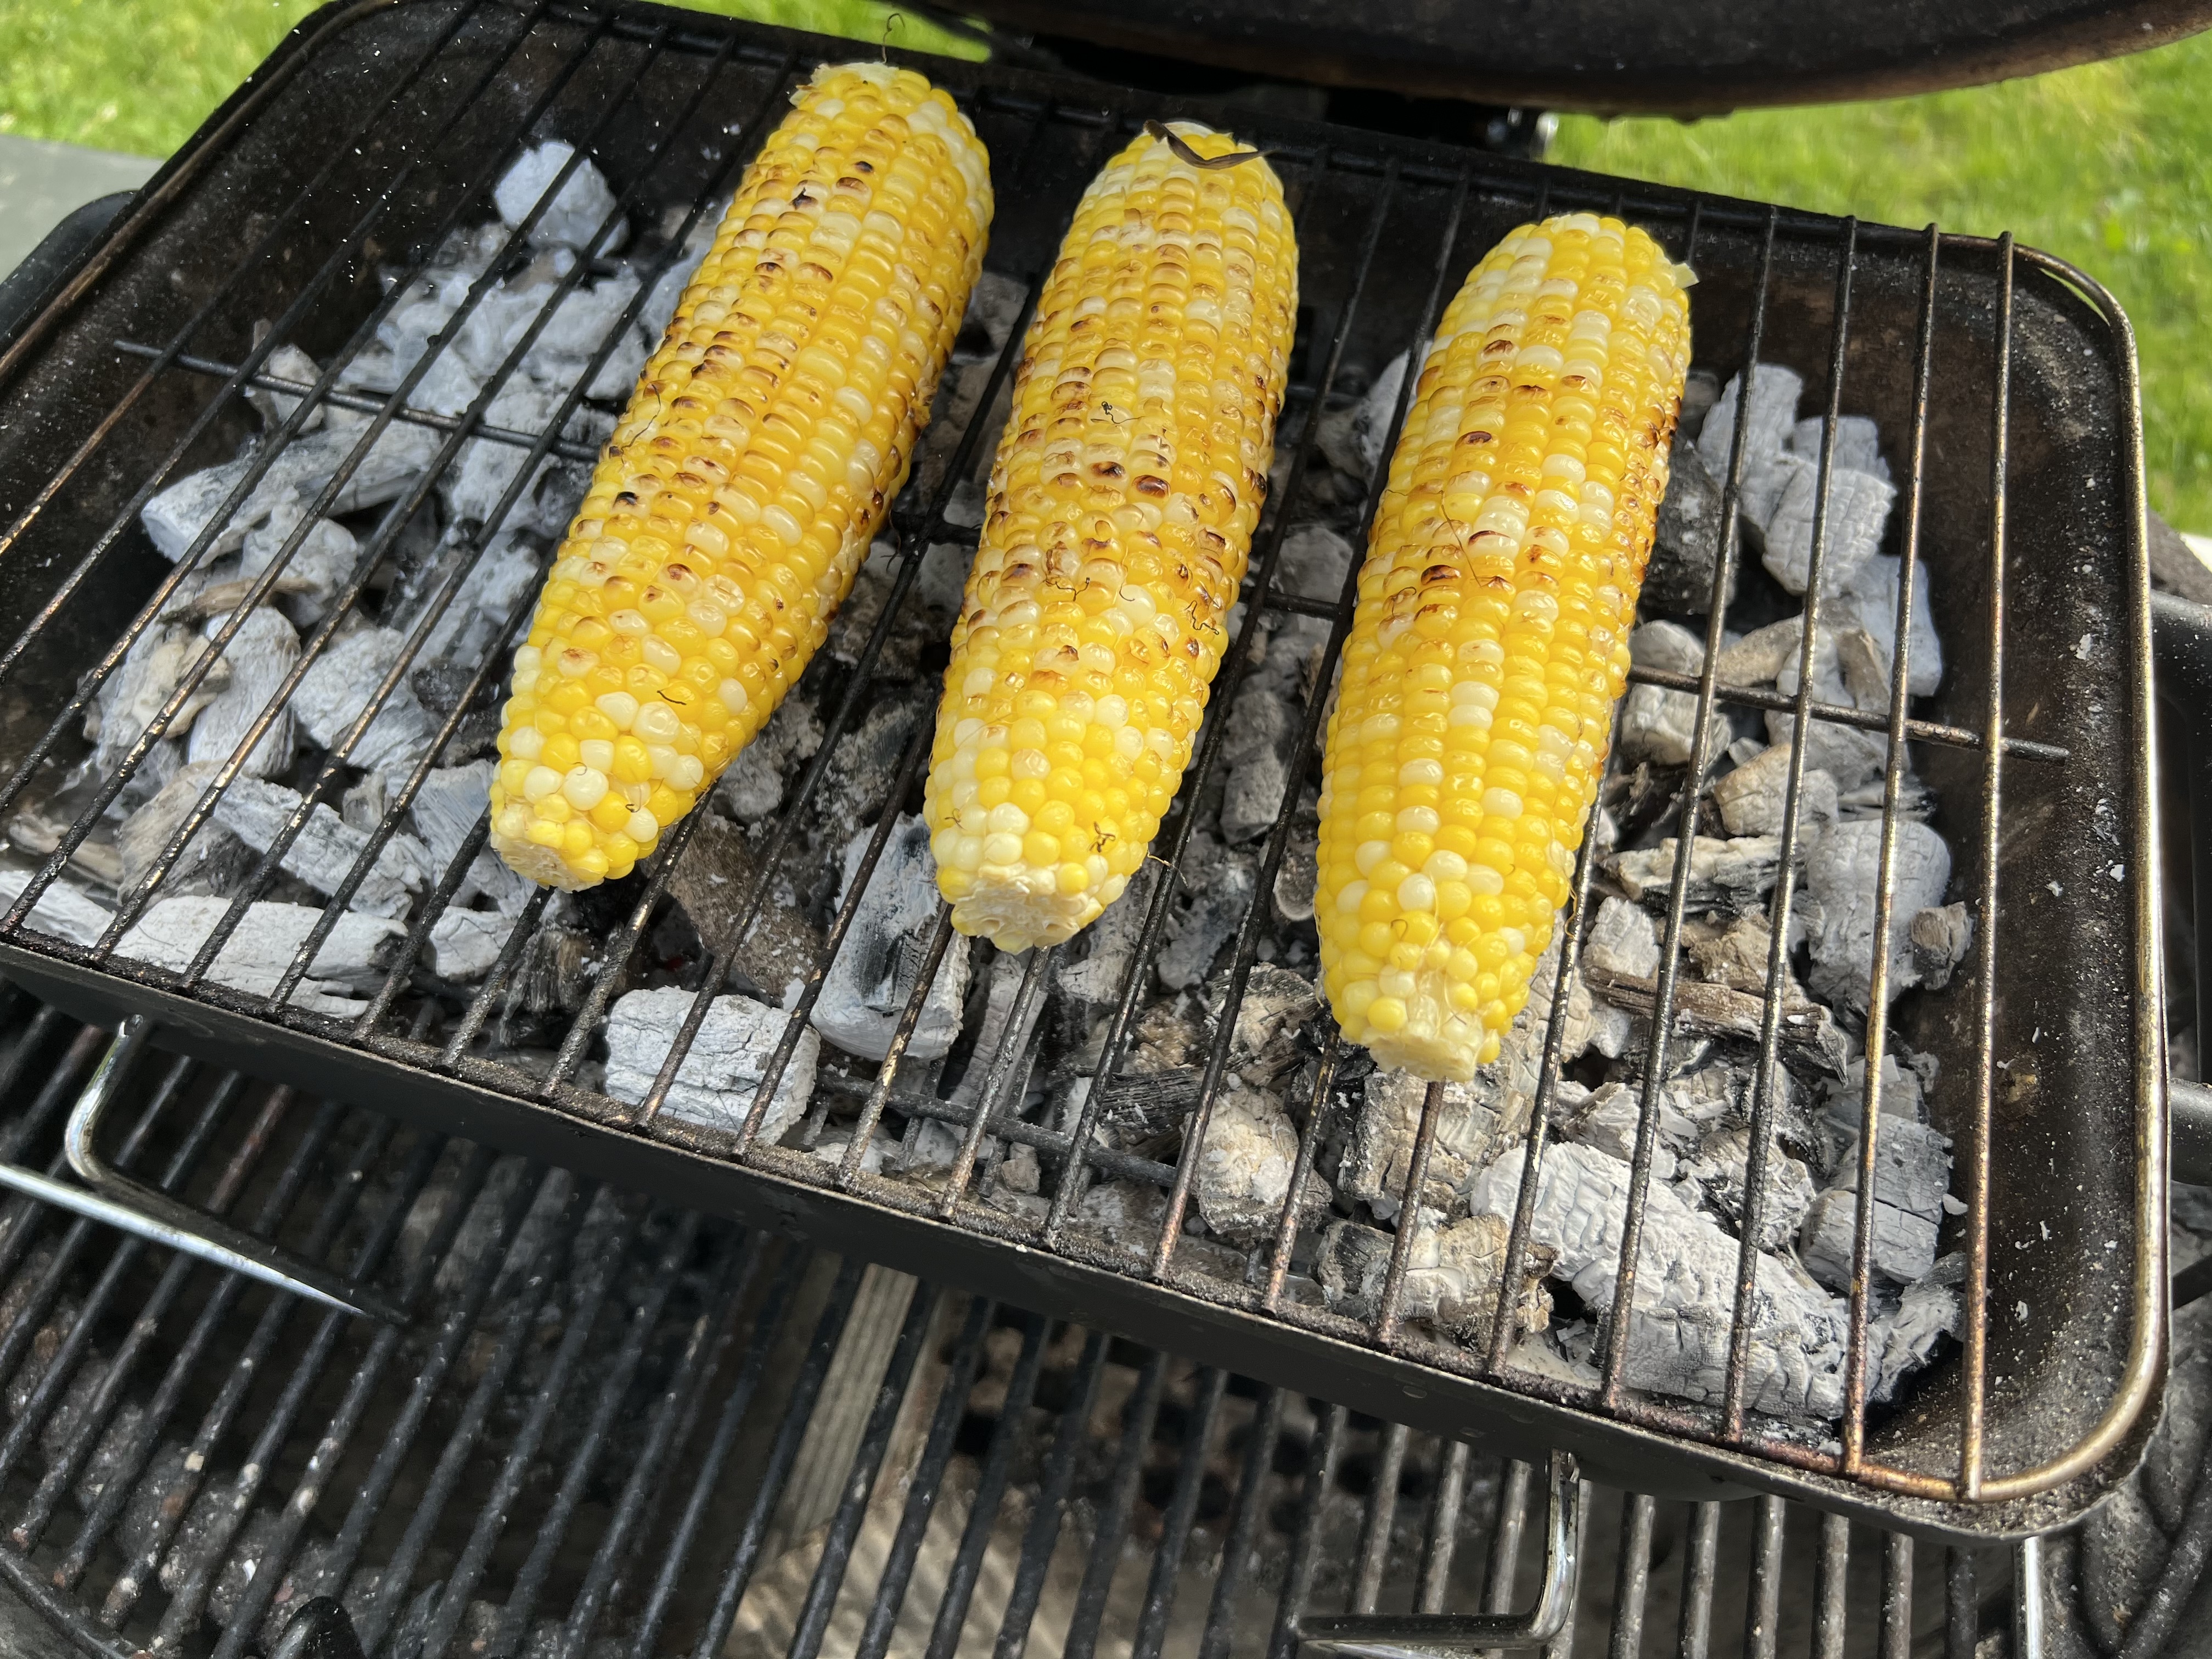
I didn’t mean to cheat…honest. But I wasn’t thinking when I bought my corn in the supermarket, and I bought ears that were already shucked. Classically, Mexican street corn is made by throwing unshucked ears of corn on the grill to cook them. So I improvised.
I took the shucked ears of corn, placed them in a pot of cold water, and brought it to a boil. I boiled the corn for just 2 minutes, removing them from the water at that point.
I placed the ears of corn on the grill, and watched over them carefully, rolling them back and forth so that they would have a nice char on them but wouldn’t burn. When I liked the color of the corn, I brought the ears inside and added the remaining ingredients, which can be prepared ahead of time.
1/2 cup mayonnaise 1/2 cup sour cream juice of 1 lime 1/2 teaspoon granulated garlic
Combine these ingredients in a bowl and place it in the fridge until it’s ready to use.
Once the corn comes off the grill, brush on the mayo/sour cream mixture all over the corn. Traditionally, chili powder is sprinkled on, but I prefer the Tony Chachere’s. Sprinkle the cotija cheese on top, and garnish with a little cilantro.
I published this just about a month ago, but it bears repeating because June 20th is the official start of Sazerac Cocktail Week!
If I asked you to name a cocktail that defines New Orleans, you might say The Hurricane. After all, it’s a tourist favorite at the famous Pat O’Brien’s on Bourbon Street.
But the official cocktail of New Orleans is the Sazerac, a potent concoction that was created early in the 19th century by Antoine Amédée Peychaud, a Creole apothecary who emigrated to New Orleans from the West Indies and set up shop in the French Quarter. He was known to dispense a proprietary mix of aromatic bitters from an old family recipe, now famously known as Peychaud’s bitters.
Sazerac ingredients.
Around 1850, Sewell T. Taylor sold his New Orleans bar, the Merchants Exchange Coffee House, to become an importer of spirits, and he began to import a brand of cognac named Sazerac-de-Forge et Fils. Meanwhile, Aaron Bird assumed proprietorship of the Merchants Exchange and changed its name to Sazerac Coffee House.
Legend has it that Bird began serving the “Sazerac Cocktail,” made with Sazerac cognac imported by Taylor, and allegedly with bitters being made by the local apothecary, Antoine Amedie Peychaud. The Sazerac Coffee House subsequently changed hands several times, until around 1870, when Thomas Handy became its proprietor. It is around this time that the primary ingredient in a Sazerac changed from cognac to rye whiskey, due to the phylloxera epidemic in Europe that devastated the vineyards of France.
At some point before his death in 1889, Handy recorded the recipe for the cocktail, which made its first printed appearance in William T. Boothby’s “The World’s Drinks and How to Mix Them” in 1908, although his recipe calls for Selner bitters, not Peychaud’s. After absinthe was banned in the United States in 1912, it was replaced by various anise-flavored liqueurs, most notably the locally produced Herbsaint, which first appeared in 1934.
In March 2008, Louisiana state senator Edwin R. Murray filed Senate Bill 6 designating the Sazerac as Louisiana’s official state cocktail. The bill was defeated on April 8, 2008. But, after further debate, on June 23, 2008, the Louisiana Legislature agreed to proclaim the Sazerac as New Orleans’ official cocktail.
The Sazerac, served at the Sazerac Bar in New Orleans.It’s always more fun when someone makes your drink for you!
Peychaud’s bitters are now owned by the Buffalo Trace distillery, home of many a fine bourbon, and also the makers of Sazerac rye, a registered trademark. So the Sazerac Bar has to pay a fee to use the name. That also explains why they use Sazerac rye in their version of this classic cocktail.
But like many popular drinks, everybody has their own version of a Sazerac. In fact, if you Google the drink, you’ll find dozens of versions: with cognac, rye, or bourbon (or even a combination)…with a sugar cube or simple syrup…and with a variety of absinthes.
Note: you can buy simple syrup–I prefer it in this recipe over sugar cubes–but it’s easy to make at home. Simply combine a cup of sugar with a cup of water in a saucepan and heat it until all the sugar dissolves. I keep my simple syrup in the fridge in a sealed container.
2 oz. rye whiskey (I use Old Overholt ) 1/2 oz. simple syrup 3 dashes Peychaud’s bitters Absinthe, to rinse, about 1/4 oz. (I use Herbsaint) garnish lemon peel
Add ice to a rocks glass to chill it. (I also put it in the freezer.)
While it’s chilling, get a cocktail mixing glass, add some ice, and combine the rye, simple syrup, and the bitters, and stir. (Thirty times, according to tradition.)
Take the rocks glass out of the freezer, pour the ice out, and pour the Herbsaint into the glass, swirling it around to coat the glass, then pouring out the excess.
Strain the mix of rye, simple syrup, and bitters into the rocks glass with the Herbsaint.
Run a lemon peel around the rim of the glass and garnish with it.
For me, rye, specifically Old Overholt, is the down-and-dirty way to go. After all, this is not a kiddy drink. A few sips, and you’re feeling no pain.
A Sazerac at the Napoleon House in New Orleans.
Though sipping a Sazerac in New Orleans is an amazing experience in itself, and I’ve had it at the SazeracBar as well as the Napoleon House and other bars in NOLA…perhaps my craziest Sazerac experience happened at the famous White Horse Tavern in New York City, the Big Apple’s second oldest continuously running bar. (It opened in 1880.) I think this is where I was told to use Old Overholt in my Sazerac, and have ever since.
Dylan Thomas was a regular there, and other celebrities, like Norman Mailer, Jim Morrison, Bob Dylan, and Hunter S. Thompson also had drinks there. So it’s probably not surprising that my buddy, Lee, and I overindulged on Sazeracs at this historic tavern.
It was a very cold winter’s night in the late 1980’s–a blizzard, in fact–and we decided to go out drinking in the city, because I was back home in New York on holiday vacation from Alabama, where I was working at the time. We had more than our share of Sazeracs, when we decided we would walk to a new eatery called the Gulf Coast, located on the west side. (All we knew was that the restaurant was about 10 blocks from where we were, but after 4 Sazeracs, “where we were” was questionable, to say the least.)
Now, this was before the internet–before cell phones–before Uber–and no cabs were running (because it was a blizzard, after all)–so we decided we would walk! Not the smartest thing we’ve ever done. It only took a few blocks for us to realize, even in our drunken stupor, that we made a very bad choice! We were certain that we would be found, huddled and frozen in an alley somewhere, only after the spring thaw.
The storm was so bad, we couldn’t even find our way back to the bar. Miraculously, somehow, we did make it to the Gulf Coast, and we lived to tell the tale.
As Homer Simpson once said: “To alcohol…the cause of, and cure for, all of life’s problems!”
Sazeracs. Try your first one at home. Or take an Uber!