Chicken thighs are the best: their fat content makes them perfect for the grill because they don’t dry out like chicken breasts do. And I always leave the skin on for extra crispy flavor. I bought a package of chicken thighs the other day and decided to go Asian with my flavors, baking them in the oven so that they cook evenly, and then finishing them off on the grill to get that delicious smokey flavor and char.
I marinated the chicken thighs in the sauce for several hours before cooking. If you have the opportunity to marinate them overnight in the fridge, that’s even better. Just remember that if you want to use the marinade as a dipping sauce later on, divide it in half from the very beginning. Use half to marinate the chicken, and save the other half for later. If any of the marinade touches raw chicken, you can’t use it as a dipping sauce. (Salmonella!) So keep them separated.
3/4 cup ketchup 1/2 cup soy sauce 1/2 cup hoisin sauce 1/2 cup maple syrup 1/4 cup Chinese chili garlic sauce 1/4 cup brown sugar 1 tablespoon rice vinegar 2 garlic cloves, minced
Combine all the ingredients in a bowl, mixing well. Use half of it to marinate the chicken, and save the other half for dipping sauce or brushing on to the chicken later.
The Bell & Evans chicken thighs that I bought came in a package that works perfectly for marinating. One less thing to clean up!
If you’re cooking the same day, let the chicken marinate at room temperature for three hours. If you’re marinating overnight in the fridge, let the chicken come to room temperature before cooking.
Preheat the oven to 325°.
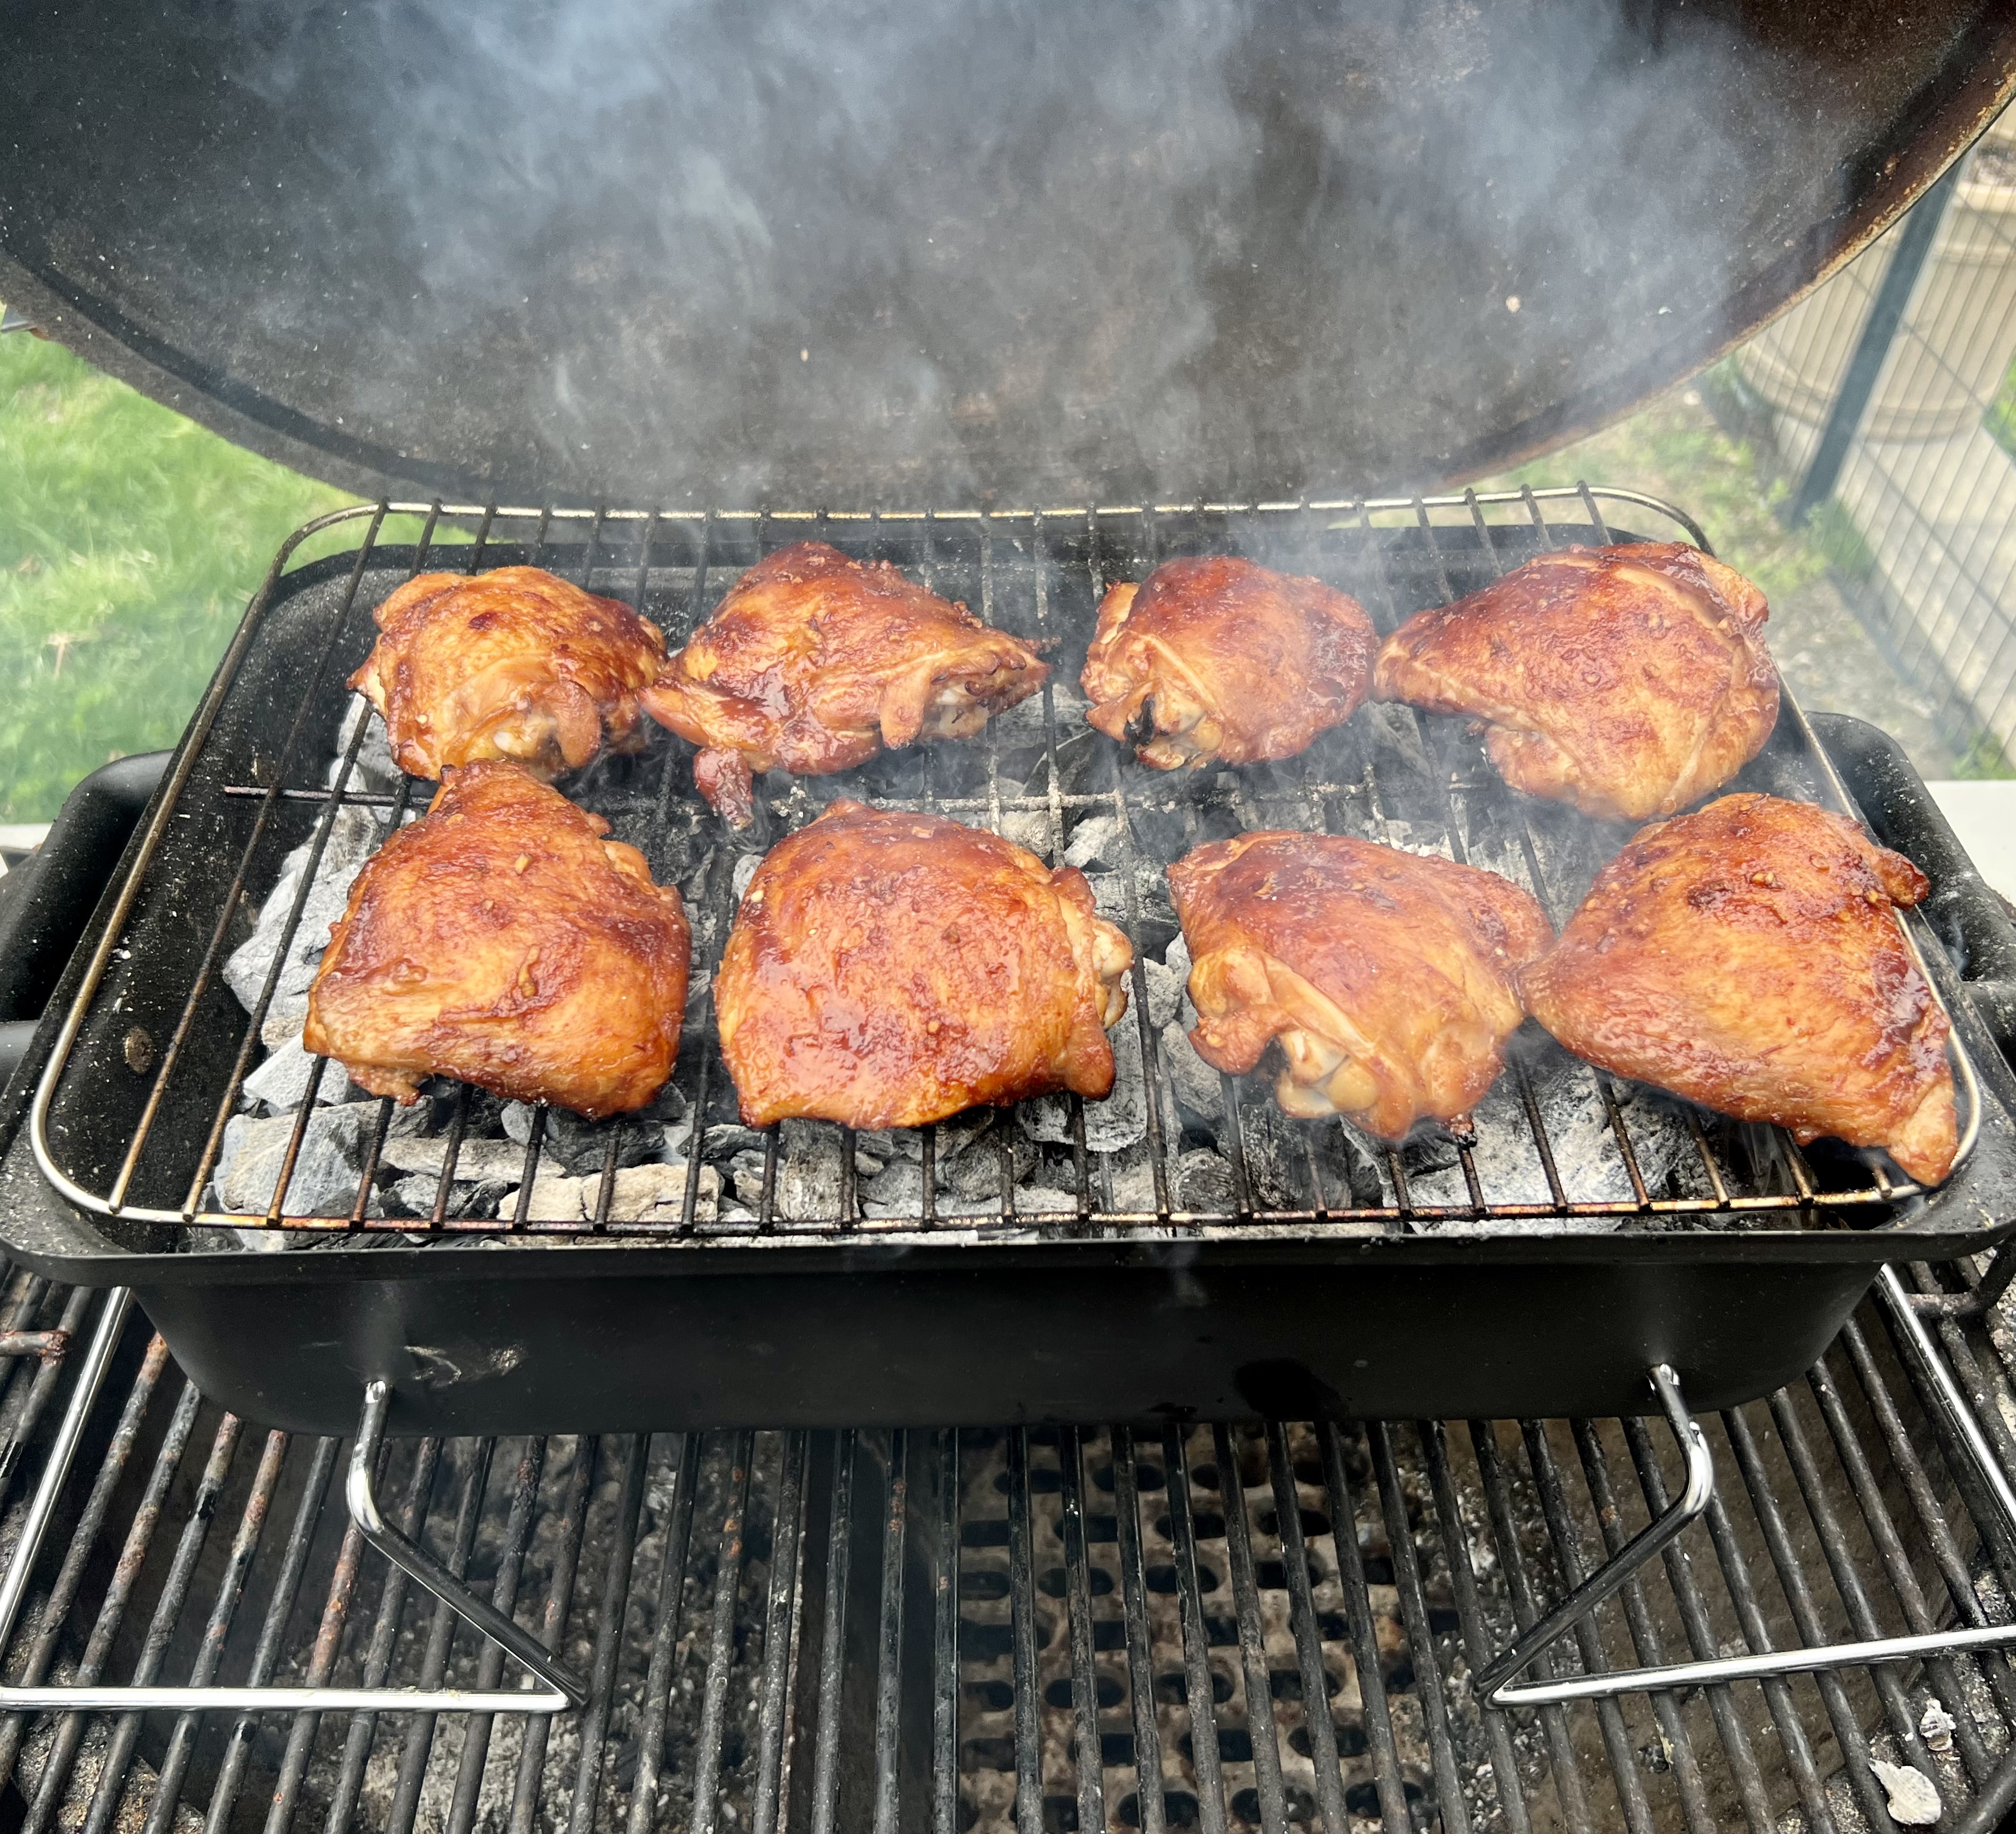
Cooked. Now they go to the broiler or the grill.
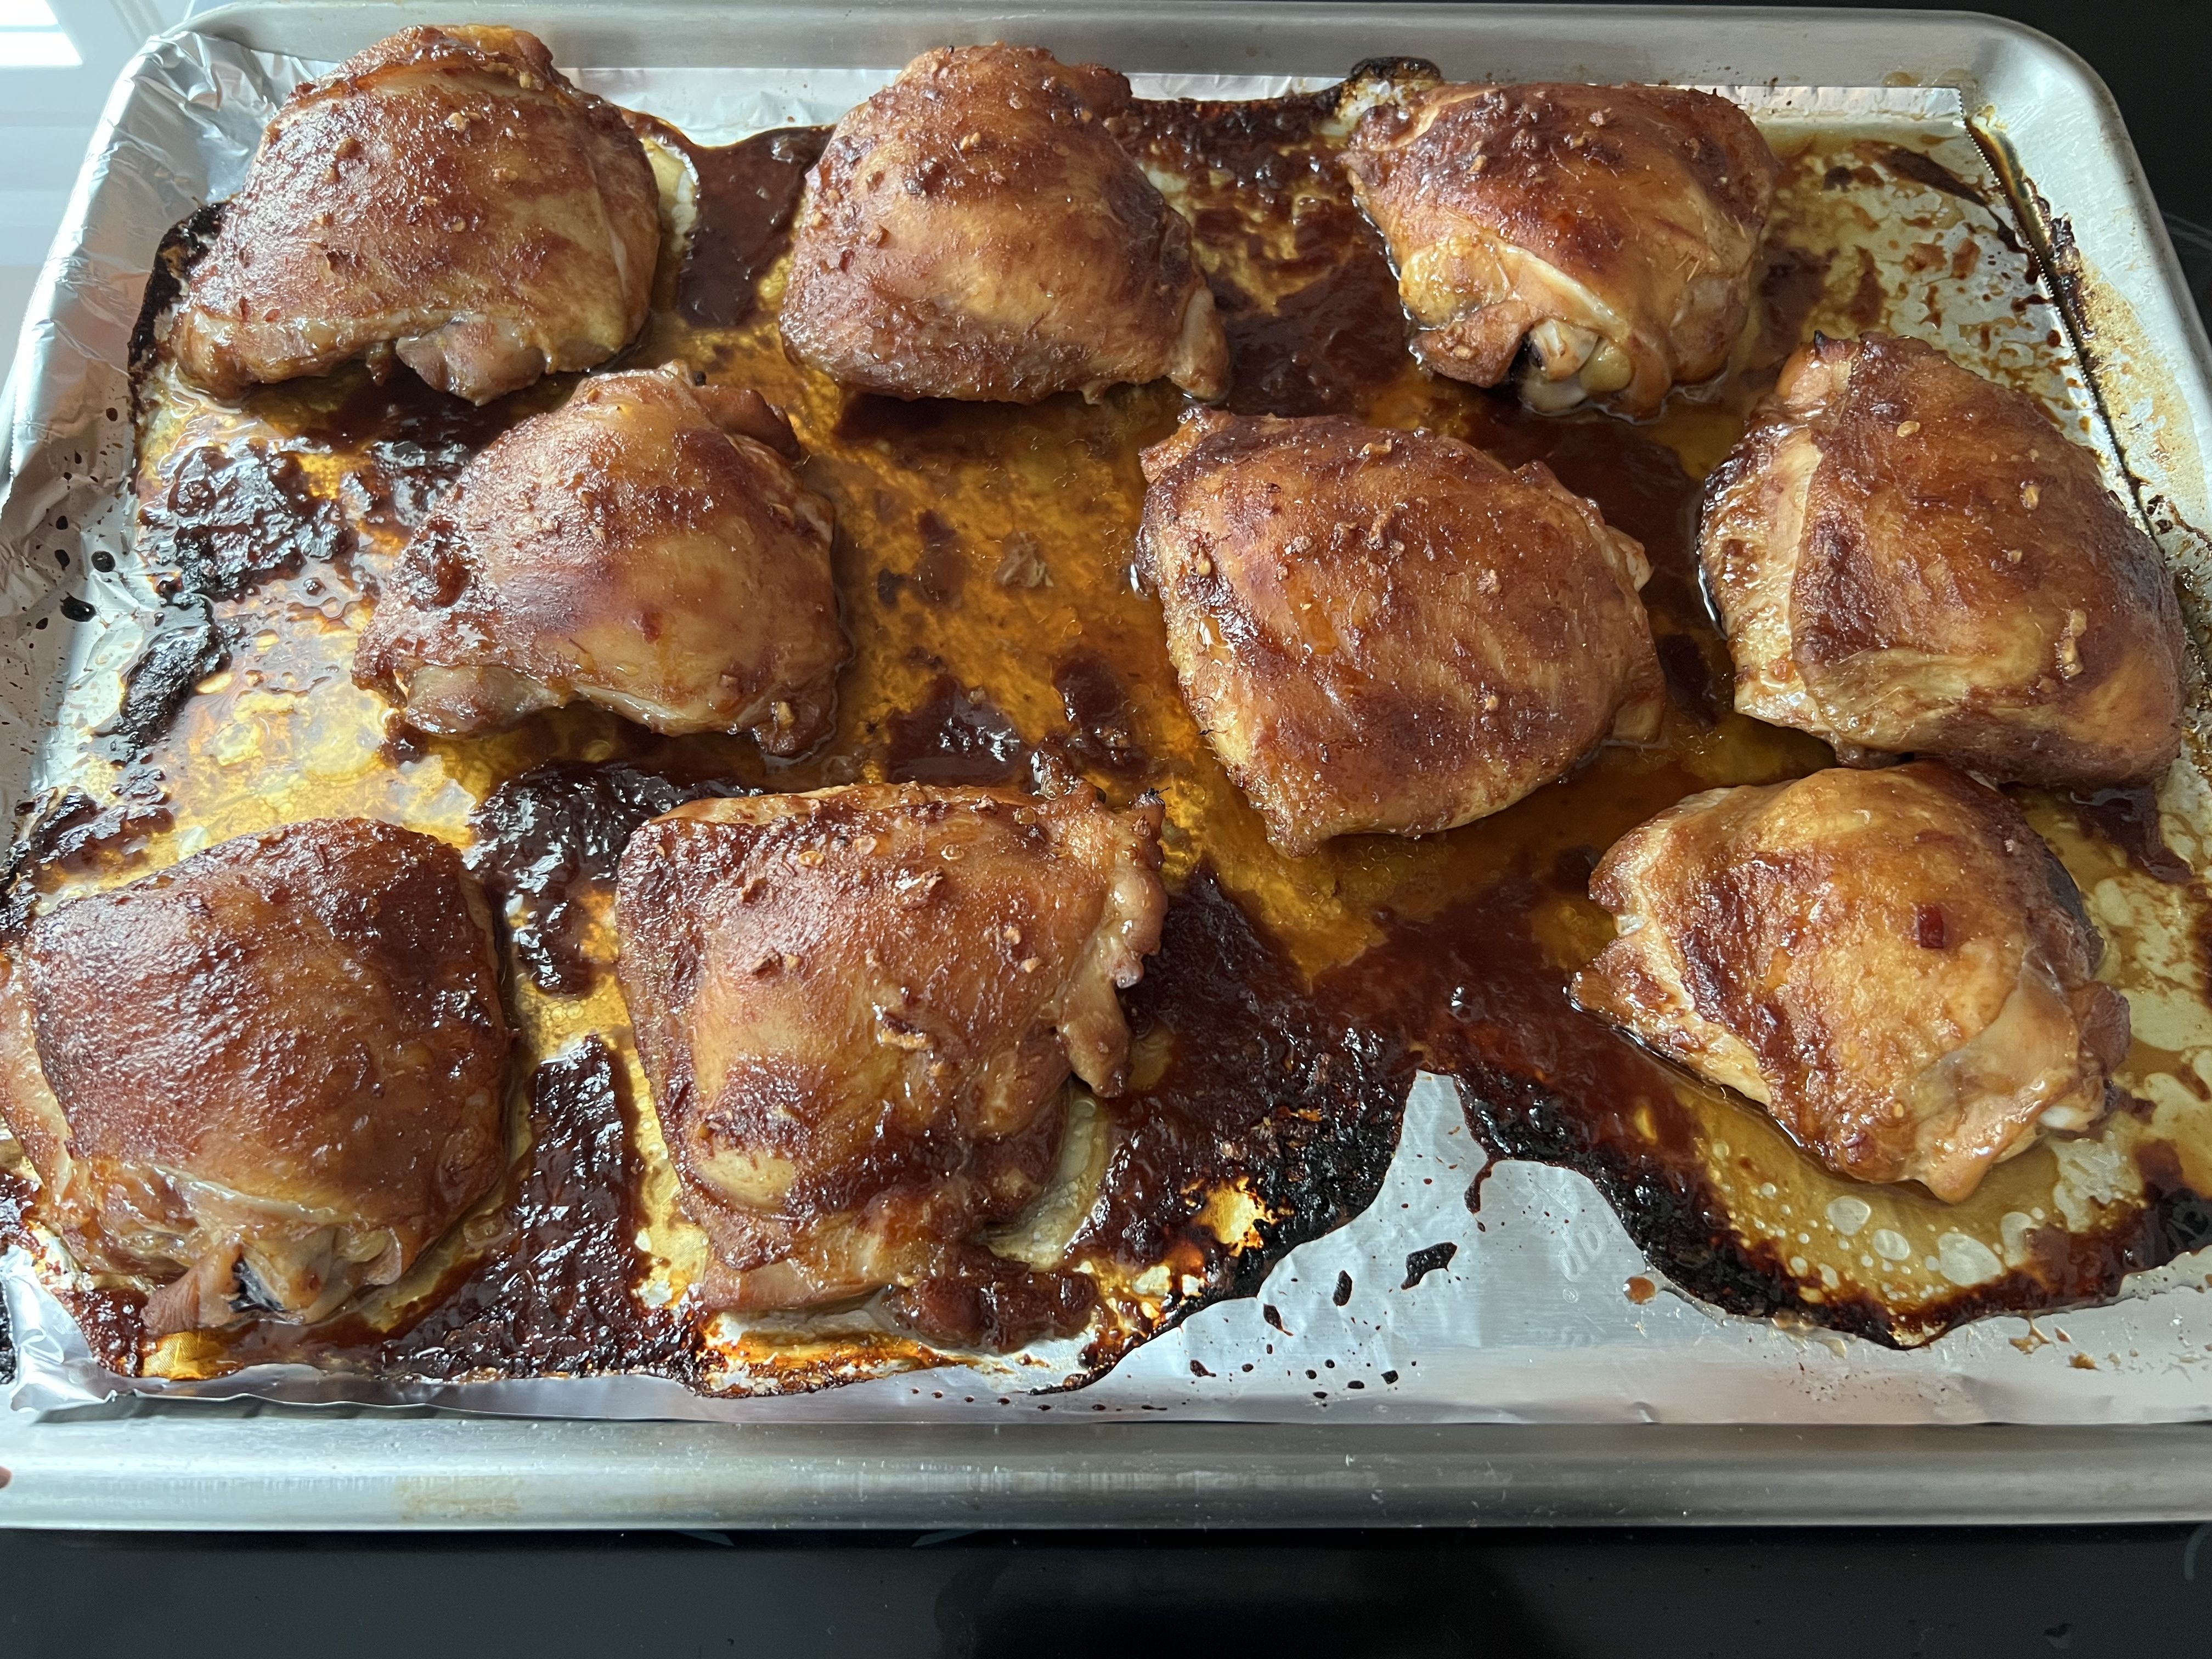
Place the chicken thighs on a sheet pan and bake until they are cooked through.…but not overcooked. If you’re not using the grill, place them under the broiler and watch them carefully, as the sugars in the marinade could burn. Give them some nice char.
If you’re using the grill, light a fire and spread the coals so that you have a medium-hot flame. Grill the chicken thighs until they have a beautiful char on them, being careful not to burn them. Brush more of the marinade on them as they cook, if you like.
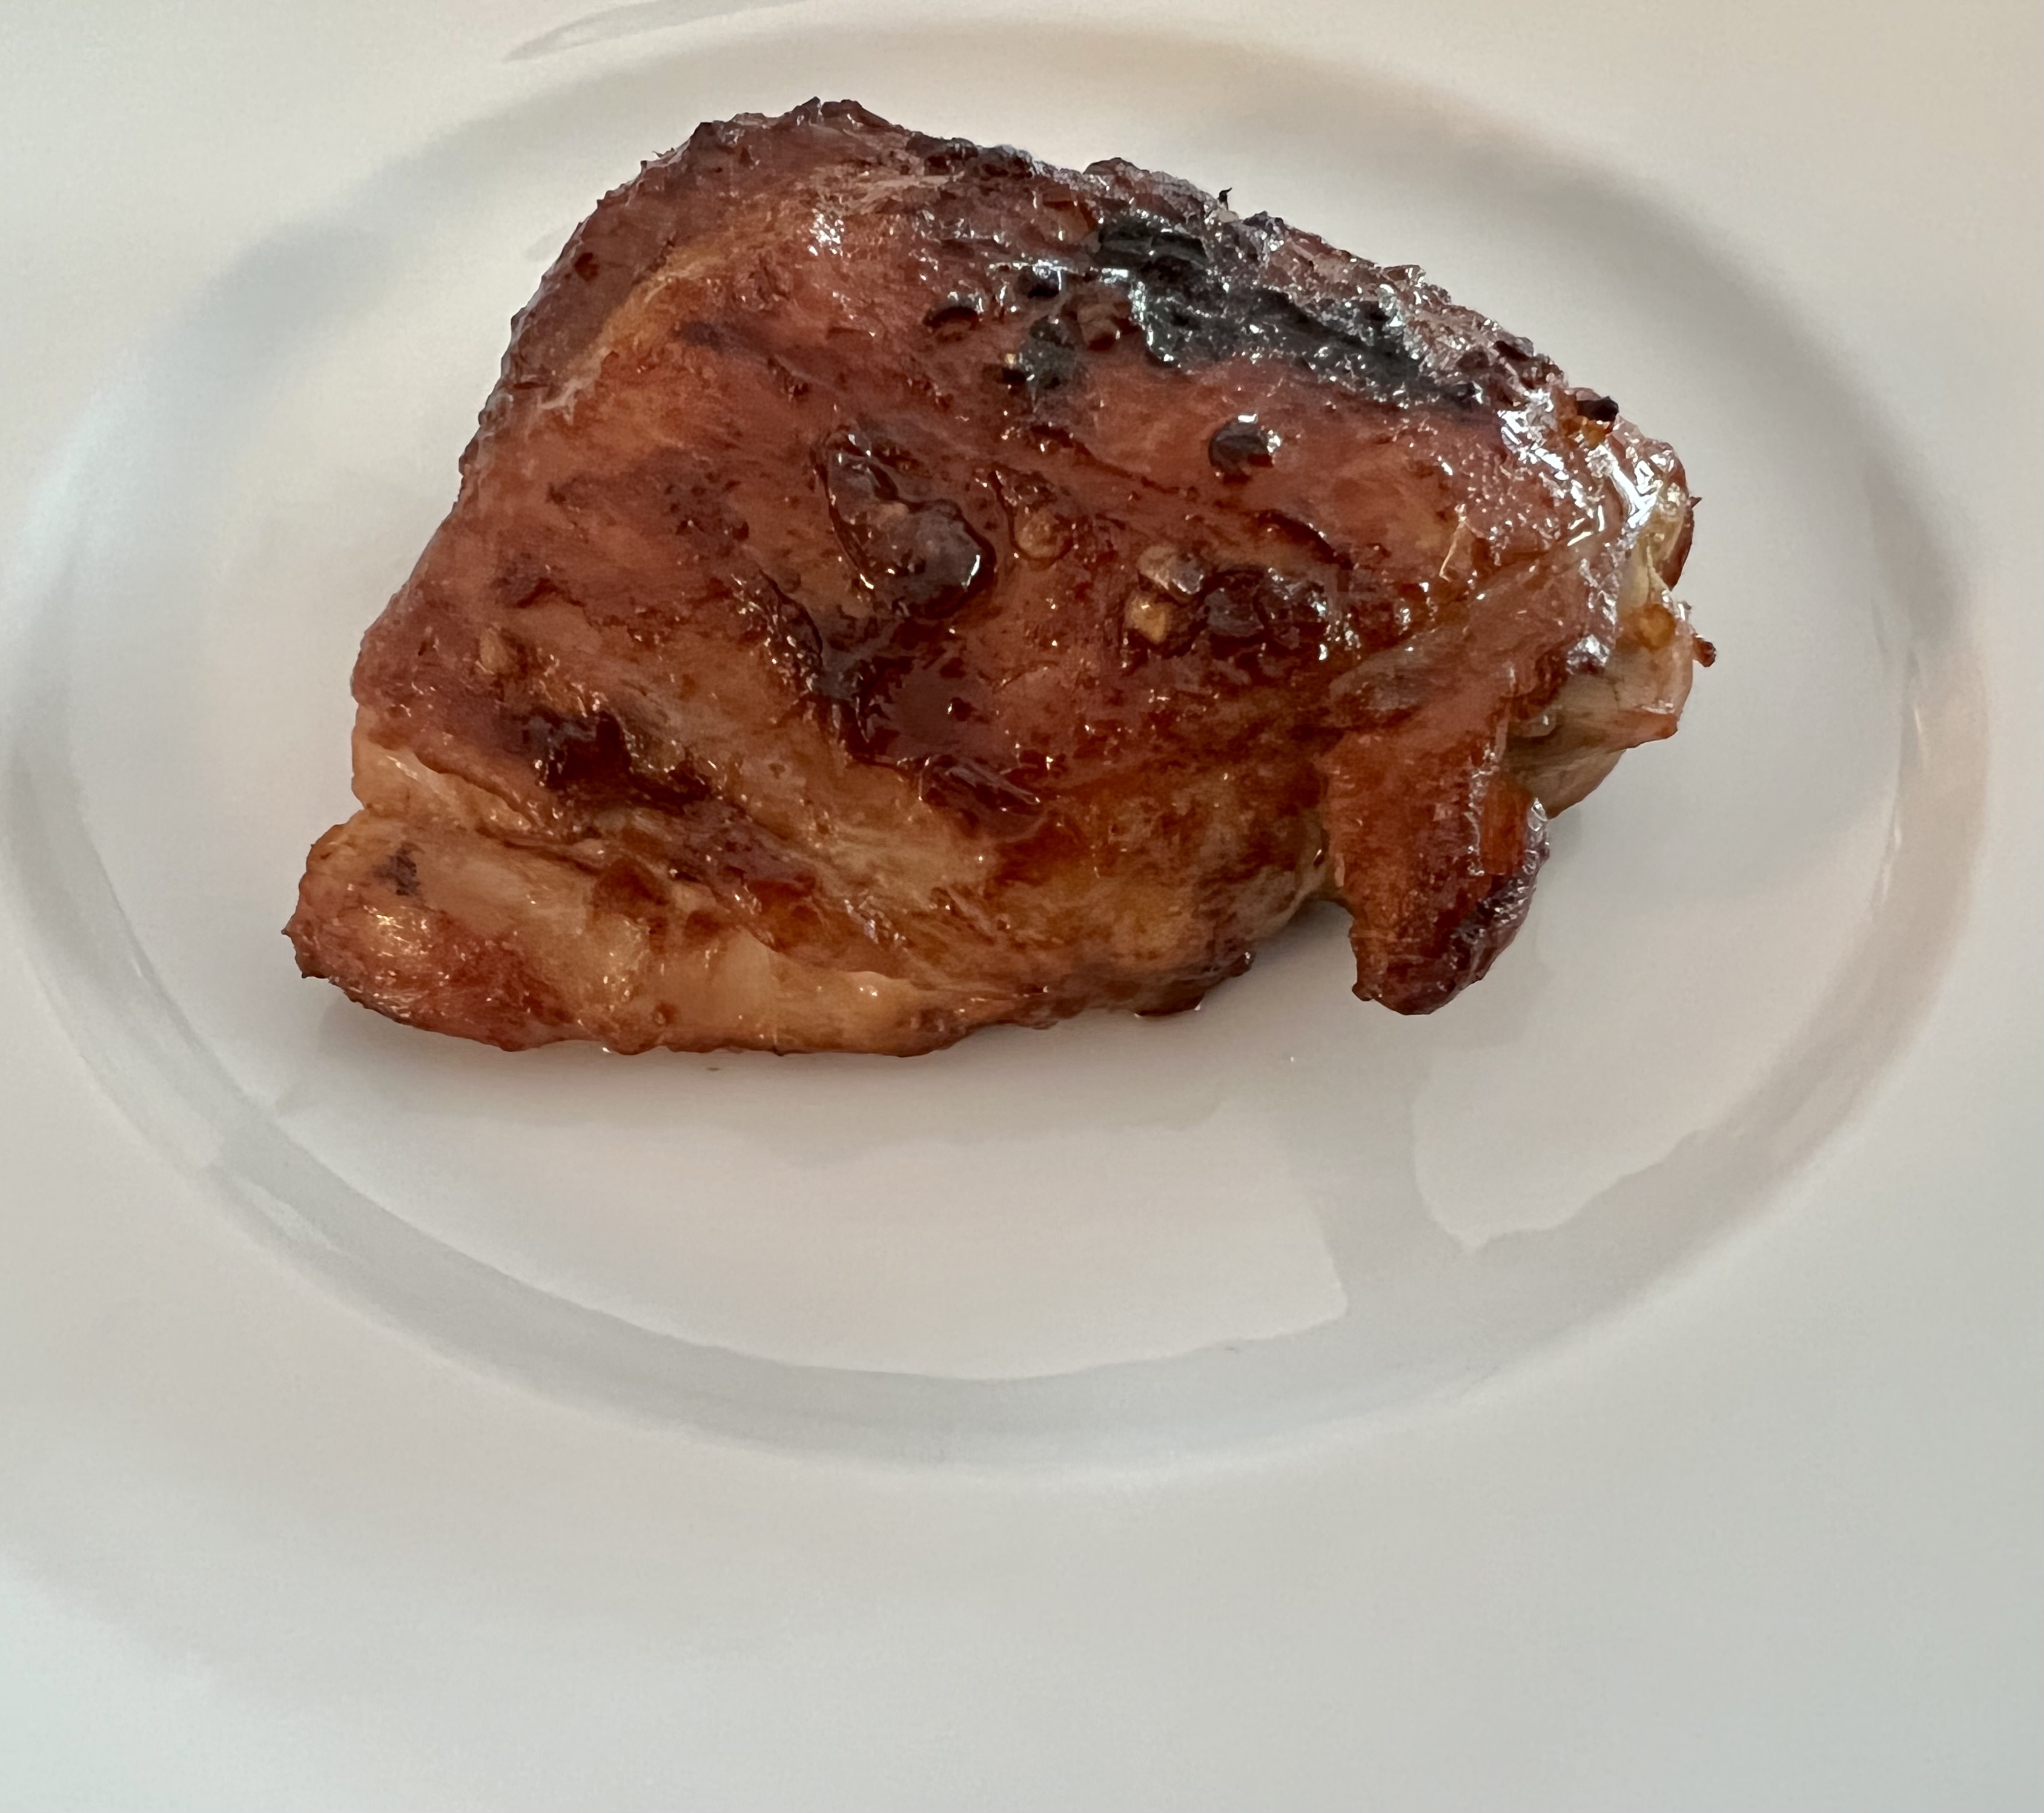
Serve the chicken thighs with the dipping sauce on the side.
If I asked you to name a cocktail that defines New Orleans, you might say The Hurricane. After all, it’s a tourist favorite at the famous Pat O’Brien’s on Bourbon Street.
But the official cocktail of New Orleans is the Sazerac, a potent concoction that was created early in the 19th century by Antoine Amédée Peychaud, a Creole apothecary who emigrated to New Orleans from the West Indies and set up shop in the French Quarter. He was known to dispense a proprietary mix of aromatic bitters from an old family recipe, now famously known as Peychaud’s bitters.
Sazerac ingredients.
Around 1850, Sewell T. Taylor sold his New Orleans bar, the Merchants Exchange Coffee House, to become an importer of spirits, and he began to import a brand of cognac named Sazerac-de-Forge et Fils. Meanwhile, Aaron Bird assumed proprietorship of the Merchants Exchange and changed its name to Sazerac Coffee House.
Legend has it that Bird began serving the “Sazerac Cocktail,” made with Sazerac cognac imported by Taylor, and allegedly with bitters being made by the local apothecary, Antoine Amedie Peychaud. The Sazerac Coffee House subsequently changed hands several times, until around 1870, when Thomas Handy became its proprietor. It is around this time that the primary ingredient in a Sazerac changed from cognac to rye whiskey, due to the phylloxera epidemic in Europe that devastated the vineyards of France.
At some point before his death in 1889, Handy recorded the recipe for the cocktail, which made its first printed appearance in William T. Boothby’s “The World’s Drinks and How to Mix Them” in 1908, although his recipe calls for Selner bitters, not Peychaud’s. After absinthe was banned in the United States in 1912, it was replaced by various anise-flavored liqueurs, most notably the locally produced Herbsaint, which first appeared in 1934.
In March 2008, Louisiana state senator Edwin R. Murray filed Senate Bill 6 designating the Sazerac as Louisiana’s official state cocktail. The bill was defeated on April 8, 2008. But, after further debate, on June 23, 2008, the Louisiana Legislature agreed to proclaim the Sazerac as New Orleans’ official cocktail.
The Sazerac, served at the Sazerac Bar in New Orleans.It’s always more fun when someone makes your drink for you!
Peychaud’s bitters are now owned by the Buffalo Trace distillery, home of many a fine bourbon, and also the makers of Sazerac rye, a registered trademark. So the Sazerac Bar has to pay a fee to use the name. That also explains why they use Sazerac rye in their version of this classic cocktail.
But like many popular drinks, everybody has their own version of a Sazerac. In fact, if you Google the drink, you’ll find dozens of versions: with cognac, rye, or bourbon (or even a combination)…with a sugar cube or simple syrup…and with a variety of absinthes.
Note: you can buy simple syrup–I prefer it in this recipe over sugar cubes–but it’s easy to make at home. Simply combine a cup of sugar with a cup of water in a saucepan and heat it until all the sugar dissolves. I keep my simple syrup in the fridge in a sealed container.
2 oz. rye whiskey (I use Old Overholt ) 1/2 oz. simple syrup 3 dashes Peychaud’s bitters Absinthe, to rinse, about 1/4 oz. (I use Herbsaint) garnish lemon peel
Add ice to a rocks glass to chill it. (I also put it in the freezer.)
While it’s chilling, get a cocktail mixing glass, add some ice, and combine the rye, simple syrup, and the bitters, and stir. (Thirty times, according to tradition.)
Take the rocks glass out of the freezer, pour the ice out, and pour the Herbsaint into the glass, swirling it around to coat the glass, then pouring out the excess.
Strain the mix of rye, simple syrup, and bitters into the rocks glass with the Herbsaint.
Run a lemon peel around the rim of the glass and garnish with it.
For me, rye, specifically Old Overholt, is the down-and-dirty way to go. After all, this is not a kiddy drink. A few sips, and you’re feeling no pain.
A Sazerac at the Napoleon House in New Orleans.
Though sipping a Sazerac in New Orleans is an amazing experience in itself, and I’ve had it at the SazeracBar as well as the Napoleon House and other bars in NOLA…perhaps my craziest Sazerac experience happened at the famous White Horse Tavern in New York City, the Big Apple’s second oldest continuously running bar. (It opened in 1880.) I think this is where I was told to use Old Overholt in my Sazerac, and have ever since.
Dylan Thomas was a regular there, and other celebrities, like Norman Mailer, Jim Morrison, Bob Dylan, and Hunter S. Thompson also had drinks there. So it’s probably not surprising that my buddy, Lee, and I overindulged on Sazeracs at this historic tavern.
It was a very cold winter’s night in the late 1980’s–a blizzard, in fact–and we decided to go out drinking in the city, because I was back home in New York on holiday vacation from Alabama, where I was working at the time. We had more than our share of Sazeracs, when we decided we would walk to a new eatery called the Gulf Coast, located on the west side. (All we knew was that the restaurant was about 10 blocks from where we were, but after 4 Sazeracs, “where we were” was questionable, to say the least.)
Now, this was before the internet–before cell phones–before Uber–and no cabs were running (because it was a blizzard, after all)–so we decided we would walk! Not the smartest thing we’ve ever done. It only took a few blocks for us to realize, even in our drunken stupor, that we made a very bad choice! We were certain that we would be found, huddled and frozen in an alley somewhere, only after the spring thaw.
The storm was so bad, we couldn’t even find our way back to the bar. Miraculously, somehow, we did make it to the Gulf Coast, and we lived to tell the tale.
As Homer Simpson once said: “To alcohol…the cause of, and cure for, all of life’s problems!”
Sazeracs. Try your first one at home. Or take an Uber!
These days, there’s a day for everything, but who knew that May 10th is National Shrimp Day?
Any excuse to make shrimp scampi is a good one, as far as I’m concerned!
I love shrimp scampi, and had the need to satisfy my cravings the other day. But what started as a simple scampi recipe, turned into something a bit more. I may never make scampi the same way again!
1 lb. wild-caught American shrimp, peeled and de-veined
4 tablespoons butter
4 tablespoons olive oil
2 teaspoons parsley
1 teaspoon garlic salt
1 teaspoon oregano
1/2 teaspoon granulated onion
1/4 teaspoon black pepper
3 tablespoons Spirgučiai (see below)
1/2 lb. fresh mozzarella, sliced
oregano, for sprinkling
Thaw the shrimp under cold water. Place them in a colander to drain.
Spirgučiaiis a Lithuanian favorite: chopped bacon and onions, fried until crisp and usually sprinkled over anything and everything in Lithuanian cooking. I always have some in my fridge, already prepared and just waiting to be used.
In a saucepan on medium heat, combine the butter, olive oil, parsley, garlic salt, oregano, onion, pepper and Spirgučiai. Heat only until everything melts and combines. Don’t let it burn. (If you don’t have Spirgučiai, all you need to do is take a couple of slices of bacon, chop them up, and fry them in a pan until crisp. Keep the bacon and the fat in the pan and then add the butter, olive oil, parsley, garlic salt, oregano, onion and pepper.)
In a small sheet pan lined with foil, lay the shrimp in a single layer and cook them halfway in a pre-heated 400-degree oven to remove the moisture from the shrimp.
Take the pan out of the oven, and drain off the moisture, if any. Pour the butter mix from the saucepan all over the shrimp and toss to coat. Return the shrimp to the oven for a few minutes, until they’ve heated through and are almost completely cooked. (Careful: never over-cook shrimp!)
Take the pan out of the oven, and place pieces of mozzarella on top, garnishing with a little oregano. Set the oven on broil and cook until the cheese has melted.
Slice with a spatula and serve on top of pasta, making sure you get some of that buttery scampi sauce.
As a low-carb option, you can serve this on broccoli or roasted spaghetti squash.
The 148th running of the Kentucky Derby is today, Saturday, May 7th, 2022, and although I’m not a big horse racing fan, I am a huge fan of the official drink: the Mint Julep!
The Mint Julep is such a perfect, classic and historic bourbon drink, it seems silly to wait until Derby Day to have one. Of course, as any aficionado of spirits will tell you, there are as many right ways as wrong ways of making one.
The first step in my Mint Julep is making the simple syrup. Learning from one of my old radio buddies, my pal Rick O’B, I infuse mint into my simple syrup to take my cocktail to the next level. I use the standard ratio of 1 cup of clean, filtered water to 1 cup of sugar, using an organic product like Woodstock Farms Organic Pure Cane Sugar. I place the sugar and water in a saucepan and heat until just boiling. I’ve found that it needs to reach this stage for the sugar to really dissolve. As soon as it starts to boil, I remove the saucepan from the heat, and throw in a handful of freshly picked mint leaves, stirring to make sure the mint gets in there, and then I leave the saucepan to cool to room temperature. Once it’s at room temp, I strain the simple syrup into a bottle with a tight sealing lid, and place it in the refrigerator to cool. It will keep for about a week.
An equally important ingredient for a perfect Mint Julep is the ice: specifically, crushed ice from clean, filtered water. Don’t even think of using tap water for any cocktail much less this one. Why ruin an expensive bottle of bourbon by going cheap on the ice? I make my own ice cubes, then put them in an untreated canvas ice bag and bash them with a mallet to the perfect crushed size. Untreated canvas bags for crushing ice can be purchased online from bar supply companies for about $30. I got an untreated canvas tool bag (the exact same shape and size) at Home Depot for 3 bucks.
Da bag.
The next step is a little tougher: which bourbon to choose. The explosion of choices on the bourbon market has made it all but impossible for the average imbiber to know which bourbon is best for their tastes. If you’re a beginner, I suggest you go to a trusted bartender and explain that you’re new to the bourbon world, and could you have the tiniest of tastes and sniffs of what he’s got at his bar. Chances are, you’ll get a sampling of some of the better known brands: Maker’s Mark, Woodford Reserve, perhaps Buffalo Trace or Bulleit, and the standard Jim Beam. This is a very good start. If you have deeper pockets, go to the manager of a trusted higher-end liquor store and explain that you’ve had all the rest, now what does he think is the best? (Also, hinting to wife and friends that “I’m trying new bourbons” around your birthday or Father’s Day inevitably gets you a few bottles as well!)
My go-to bourbon for Mint Juleps is the very affordable Eagle Rare 10-year-old at $32.99 a bottle…and you can never go wrong with the classic Maker’s Mark. It’s always on sale around Derby Day.
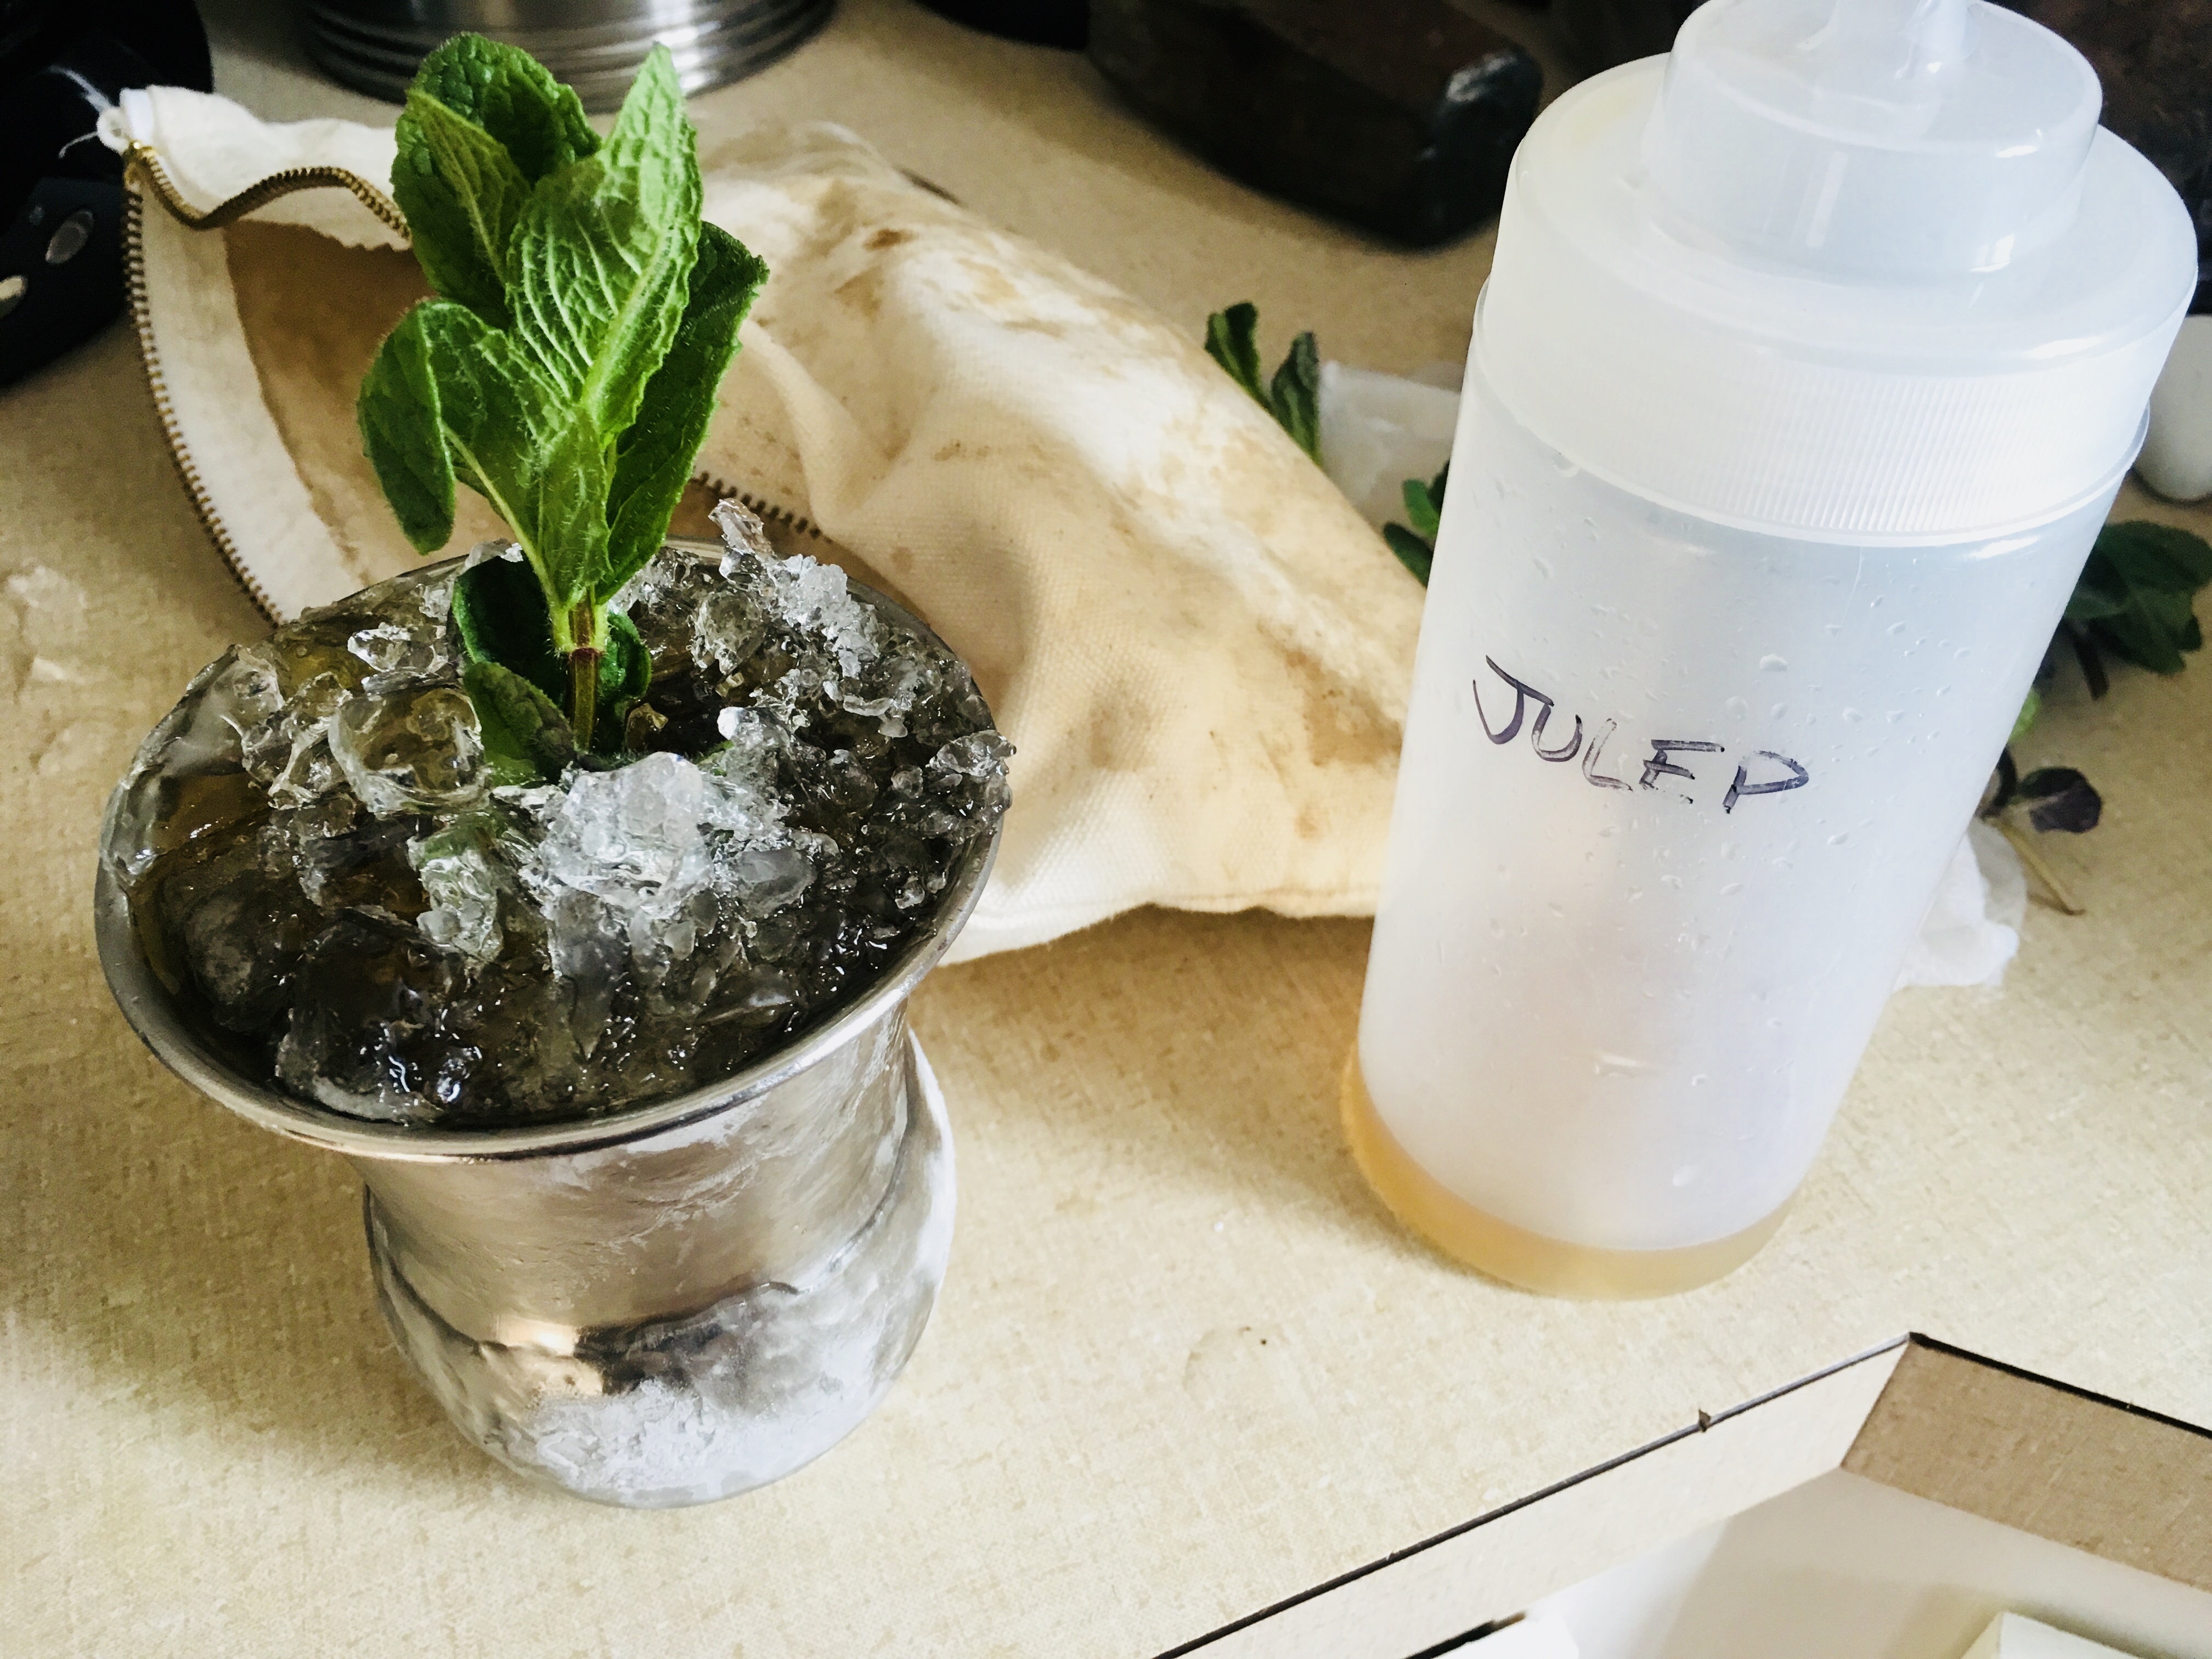
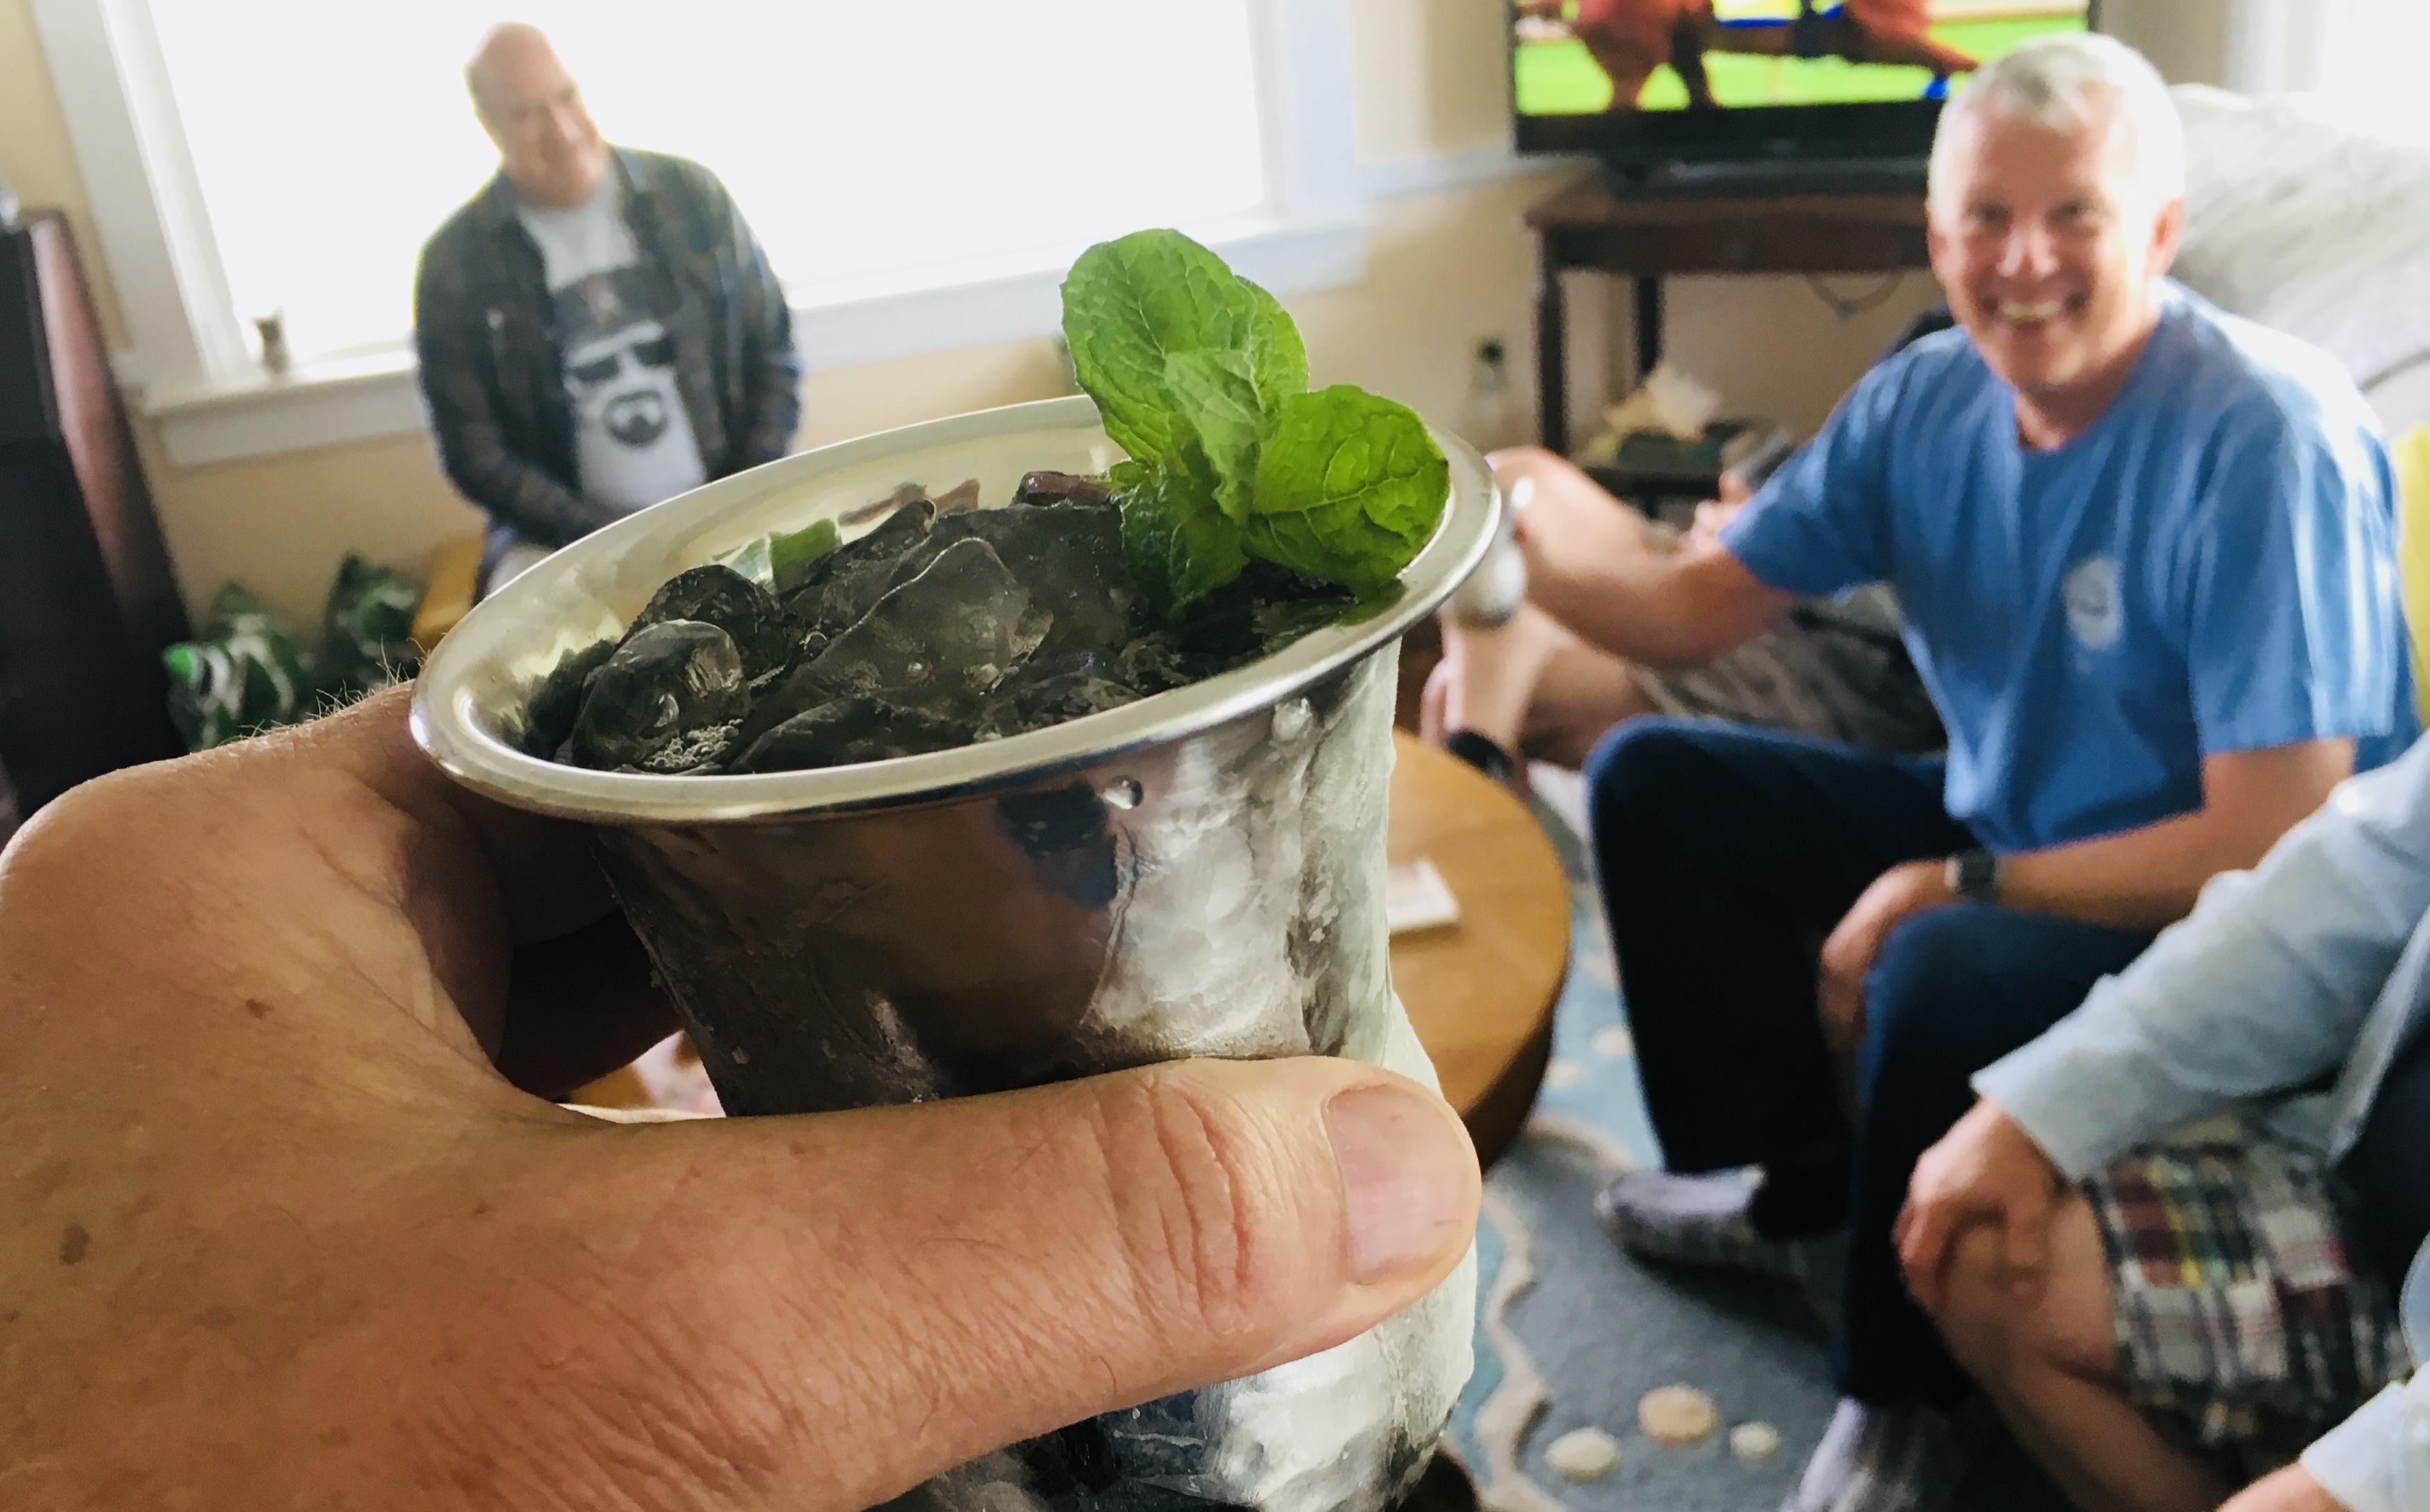
Finally, a Mint Julep needs a metal–not glass– Julep cup. Made of pewter or aluminum, it frosts on the outside as you stir your drink, keeping your beverage ice-cold on even the hottest of days.
3 oz. bourbon
1 oz. mint-infused simple syrup
crushed ice
Julep cup
Fresh mint for garnish
Crush the ice and pack it into the Julep cup, even letting it dome slightly over the top. Don’t worry…the alcohol will melt it.
I like to add 1.5 ounces of bourbon, then the ounce of simple syrup, then another 1.5 ounces of bourbon on top. Break off a few mint leaves from the stem and push them into the ice. Using a long spoon, stir the drink well. A beautiful layer of frost will form on the outside of the cup. Add more ice, if necessary, and garnish with a sprig of mint.
A nice selection of bourbons. This is an old photo: that Pappy Van Winkle is long gone…but I saved the bottle!
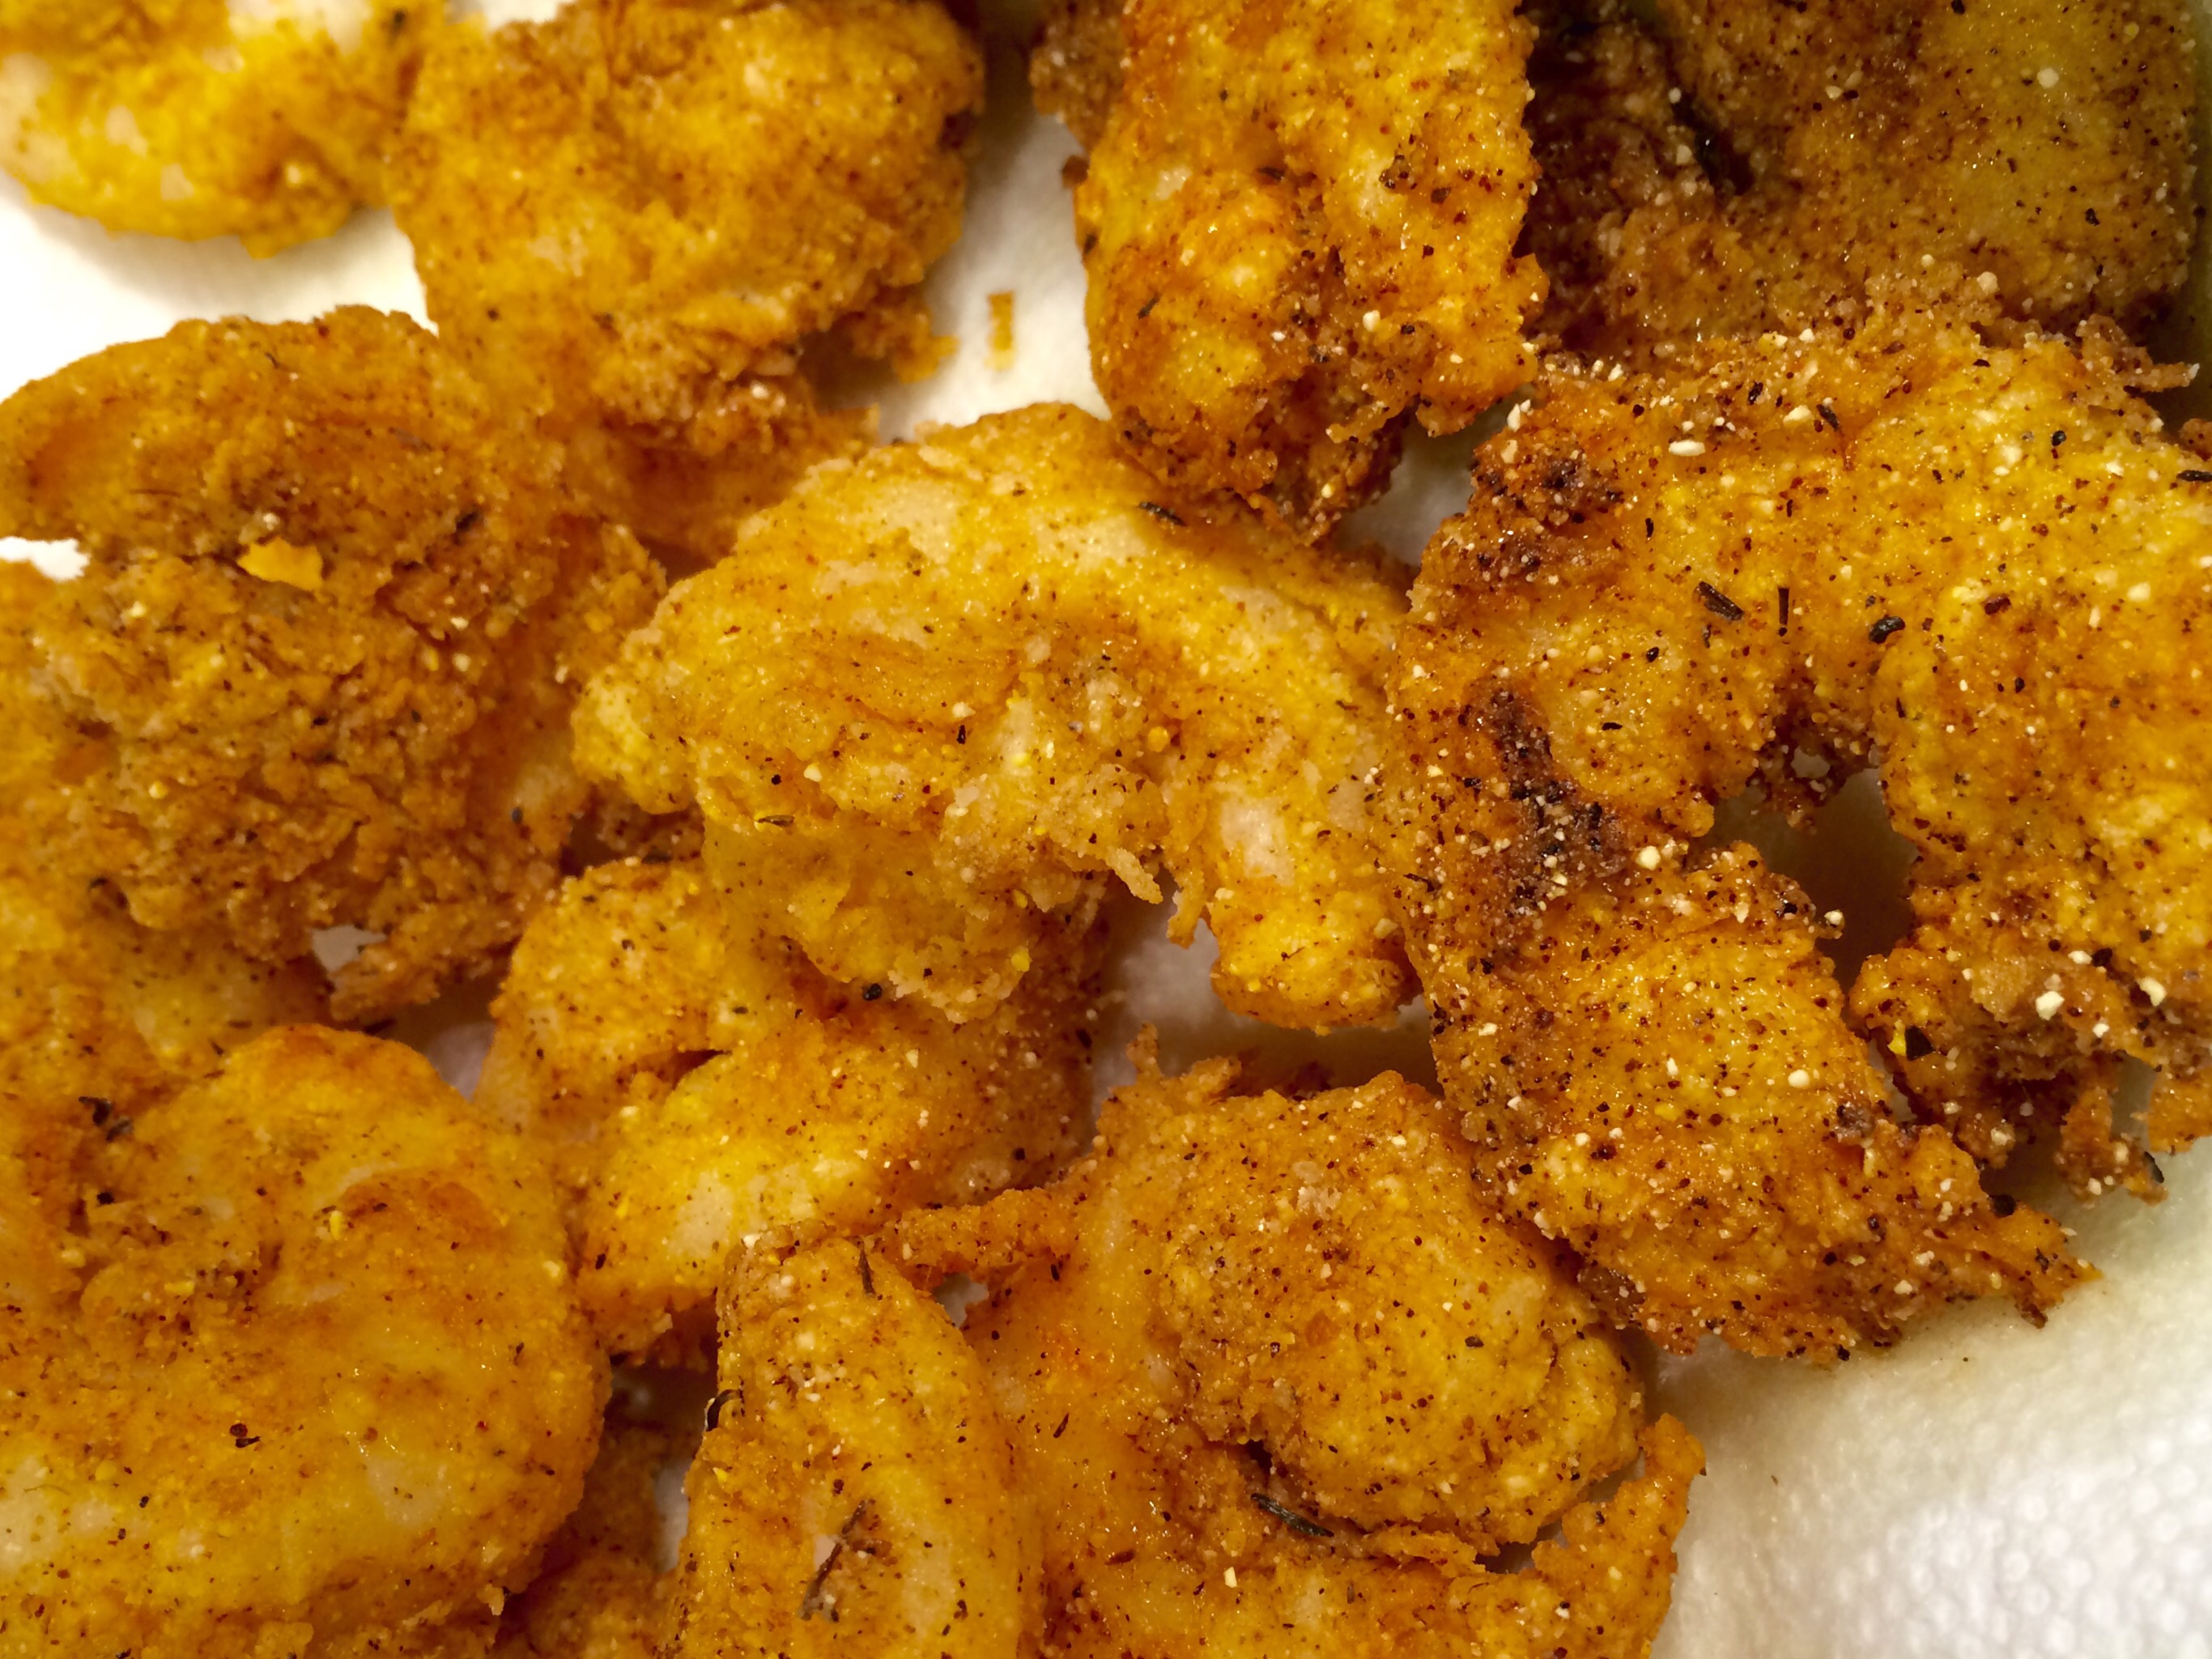
Great fried shrimp is like sea candy…you just can’t get enough. This recipe is easy and really delicious. I never use anything but wild-caught American shrimp!
This recipe can easily be made gluten-free by substituting the all-purpose flour with GF flour.
1 lb. wild-caught USA shrimp, peeled and deveined
1/2 cup all-purpose flour
1/2 cup yellow corn meal
2 tablespoons Paul Prudhomme Seafood Magic seasoning
1 teaspoon sea salt
1 raw egg, scrambled
avocado oil for frying
Combine the flour, corn meal, Prudhomme seasoning (see below) and salt in a bowl. Set it aside.
Scramble the egg in another bowl and set it aside.
Peel and de-vein the shrimp. Remove the entire shell, or leave the tip of the tail, depending on your preference.
Heat a pan with an inch of the oil. When it reaches 325 degrees, it’s ready for frying.
Dip the shrimp in the egg, and shake off any excess. Then toss the shrimp in the flour mixture, shaking off any excess. Carefully place the shrimp in the pan of oil.
Cook the shrimp for about 45 seconds, flip them over, and cook for another 45 seconds, until they’re golden brown. Don’t crowd the pan and never over-cook shrimp!
Drain them on paper towels and serve immediately!
The shrimp are delicious by themselves, but here’s an easy remoulade to make along with them…
1 cup mayo (I like Hellman’s)
1/4 cup mustard (I like Gulden’s)
1/4 teaspoon granulated garlic
1 tablespoon dill pickle relish
1/2 teaspoon Frank’s Red Hot
Pinch cayenne pepper
1/2 teaspoon salt
1/4 teaspoon white pepper
Combine the ingredients and keep in the fridge until ready to use.
It’s a bit of a cheat, but I find the Paul Prudhomme Seafood Magic seasoning has great flavor and works really well for this. I also use it on fish: simply pan sauté a filet in butter, and sprinkle on the seasoning. I originally started with the small jar found in most supermarkets, but then quickly graduated to the jumbo size can found online! And, by the way, it is gluten-free.
If you want to make your own seafood seasoning, a combination of salt, pepper, garlic powder, onion powder, paprika and cayenne will get you a result that’s pretty close to the Prudhomme seasoning.
My buddy, Lee, is in Maine right now, enjoying the limited season of freshly caught scallops. It inspired me to post this blog…
Here in Rhode Island, we have access to amazing seafood year-round. My friend Gary, is a lobster man. My neighbor farms oysters. And for anything else, I go to my friends’ farms: Simmons Organic Farm in Middletown, RI and WishingStone Organic Farm and Sweet & Salty Farm, both in Little Compton, RI…great places for veggies, bakery goods, pastured meats, yogurt, cheese, and more.
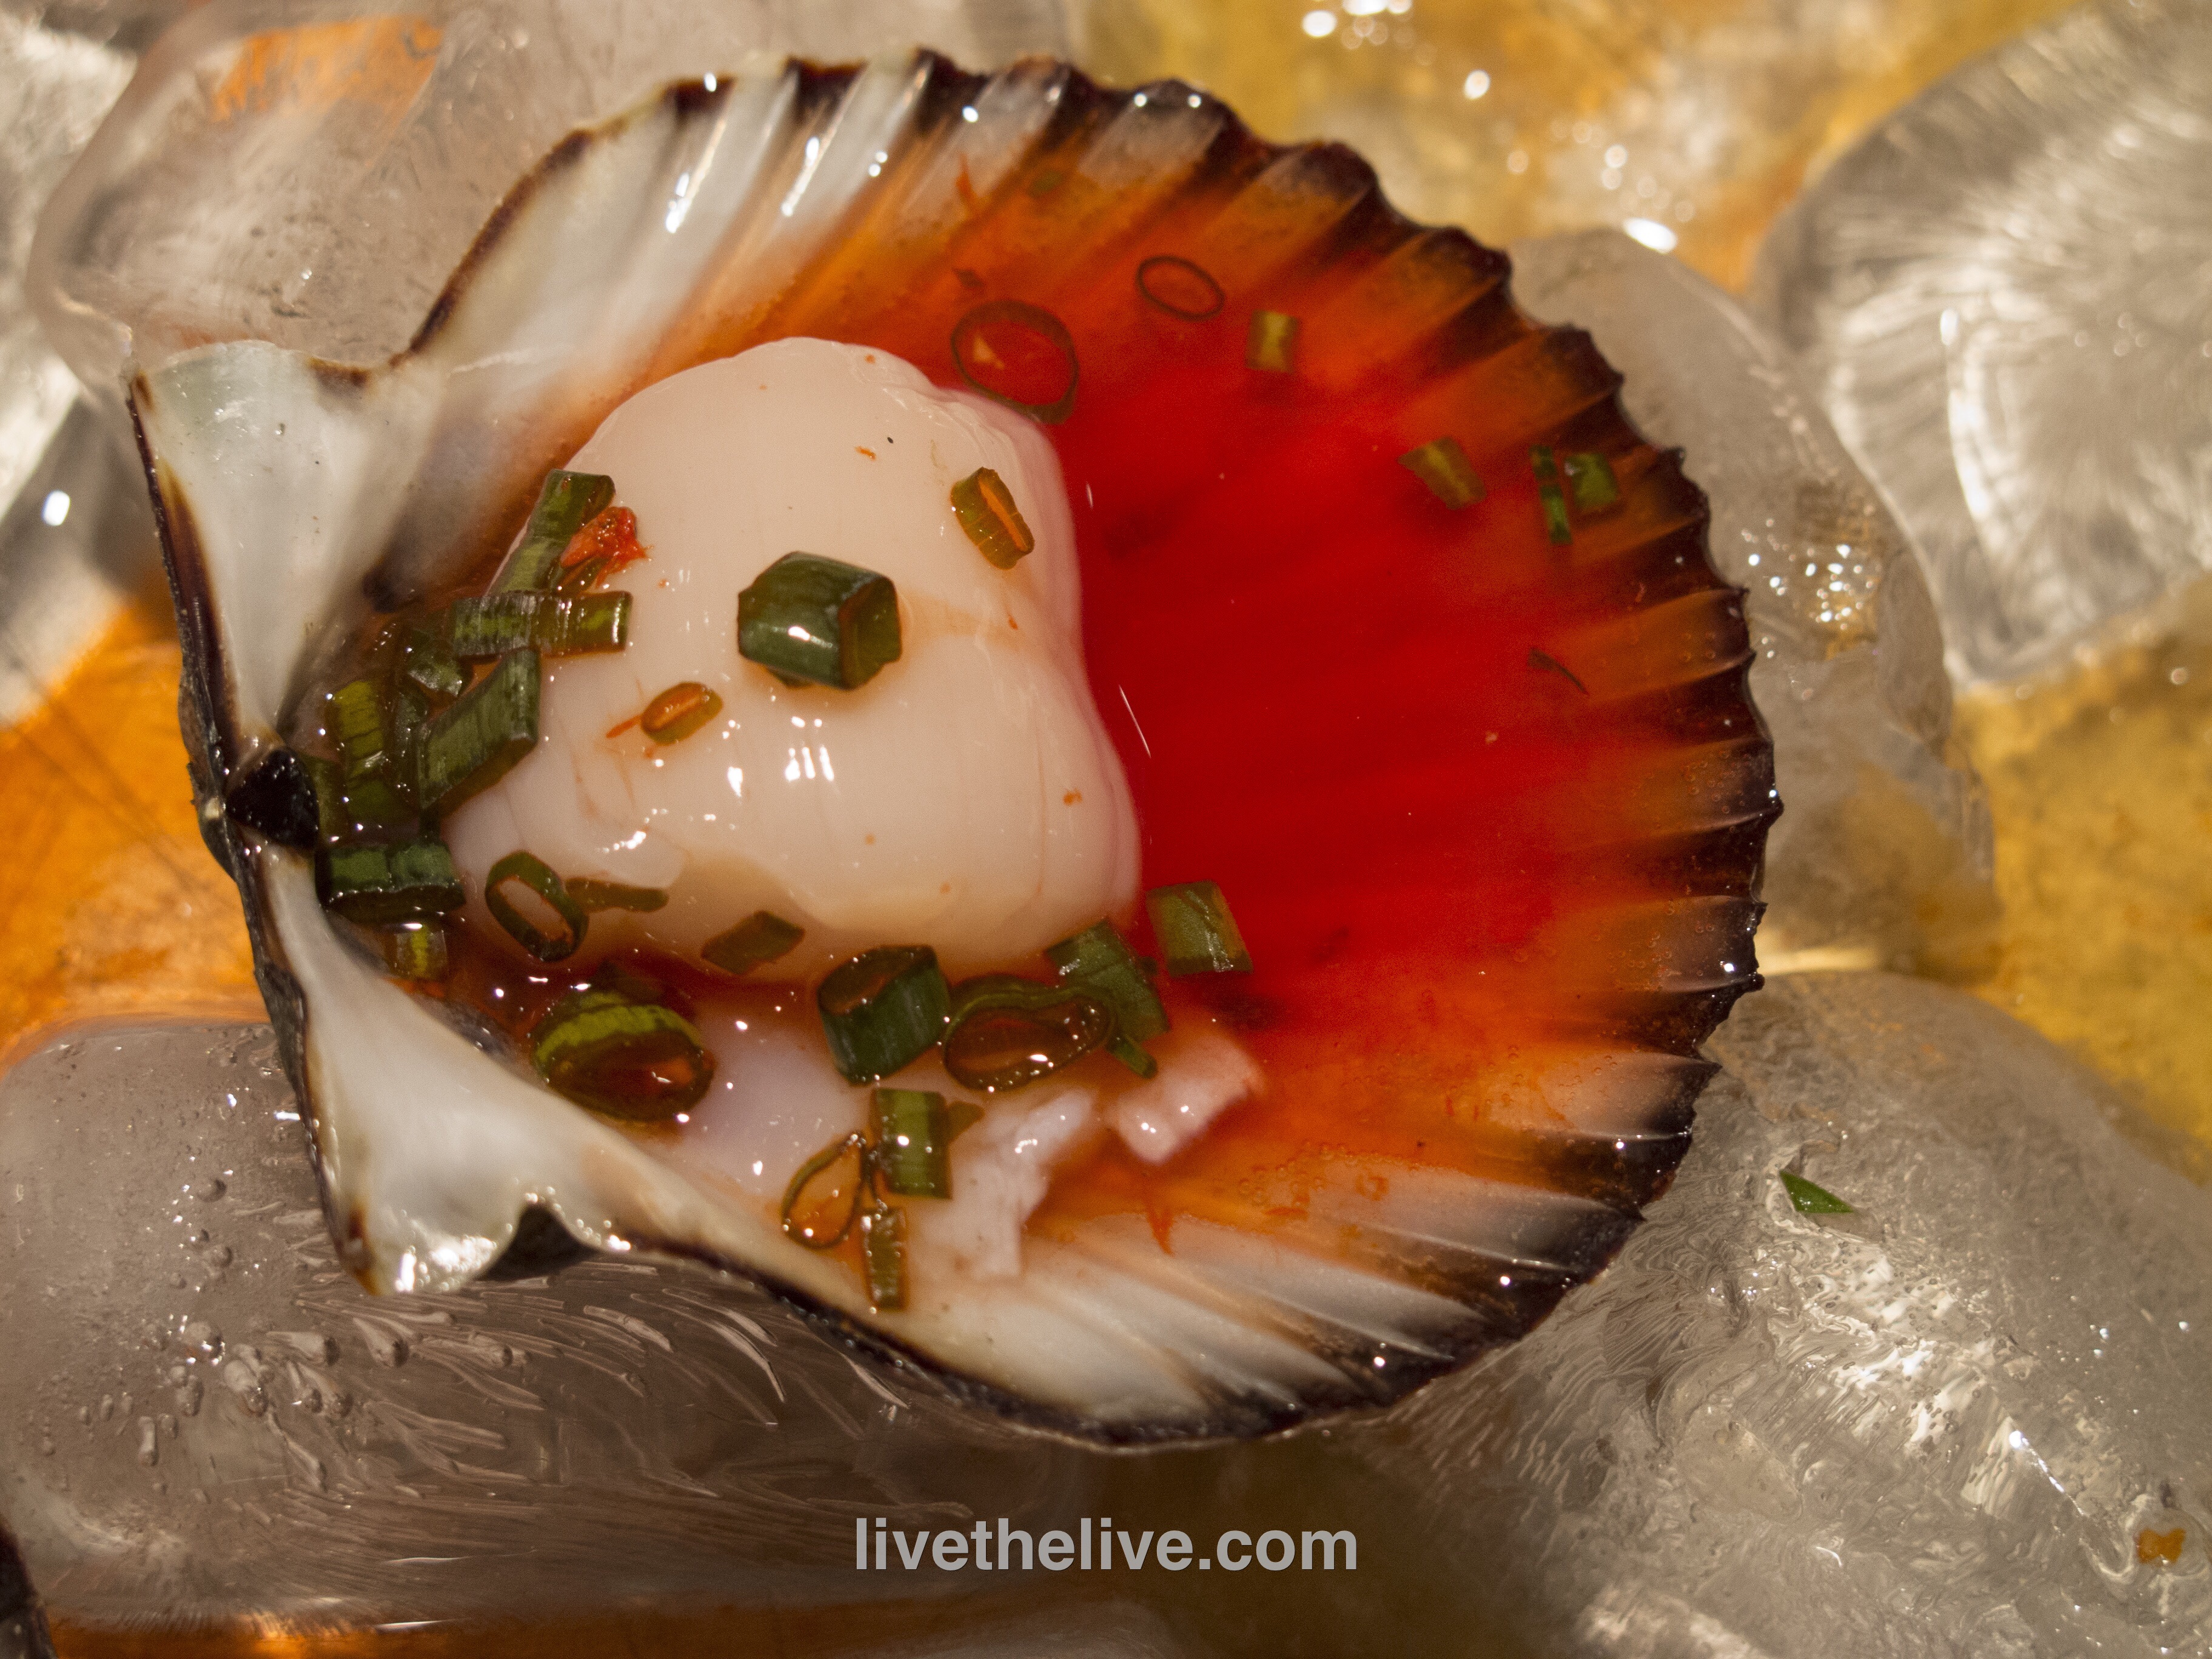
I was on a mission to find fresh mussels the other day, and in the process, stumbled upon fresh bay scallops, piled high on ice at a local farmers’ market. Unlike like the larger sea scallops or bomster scallops, bay scallops are small and sweet, about the size of a mini-marshmallow…hard to find and my absolute favorites.
As far as I’m concerned, there is no better way to eat a fresh scallop than right out of the shell with just a little marinade on top, popping these beauties into my mouth literally as they’re still pulsing on the shell.
Scallops are a bit trickier to open and clean than clams or oysters (at least for me) but all it took was a little practice while sipping a Stoli Elit martini and I got the hang of it in no time.
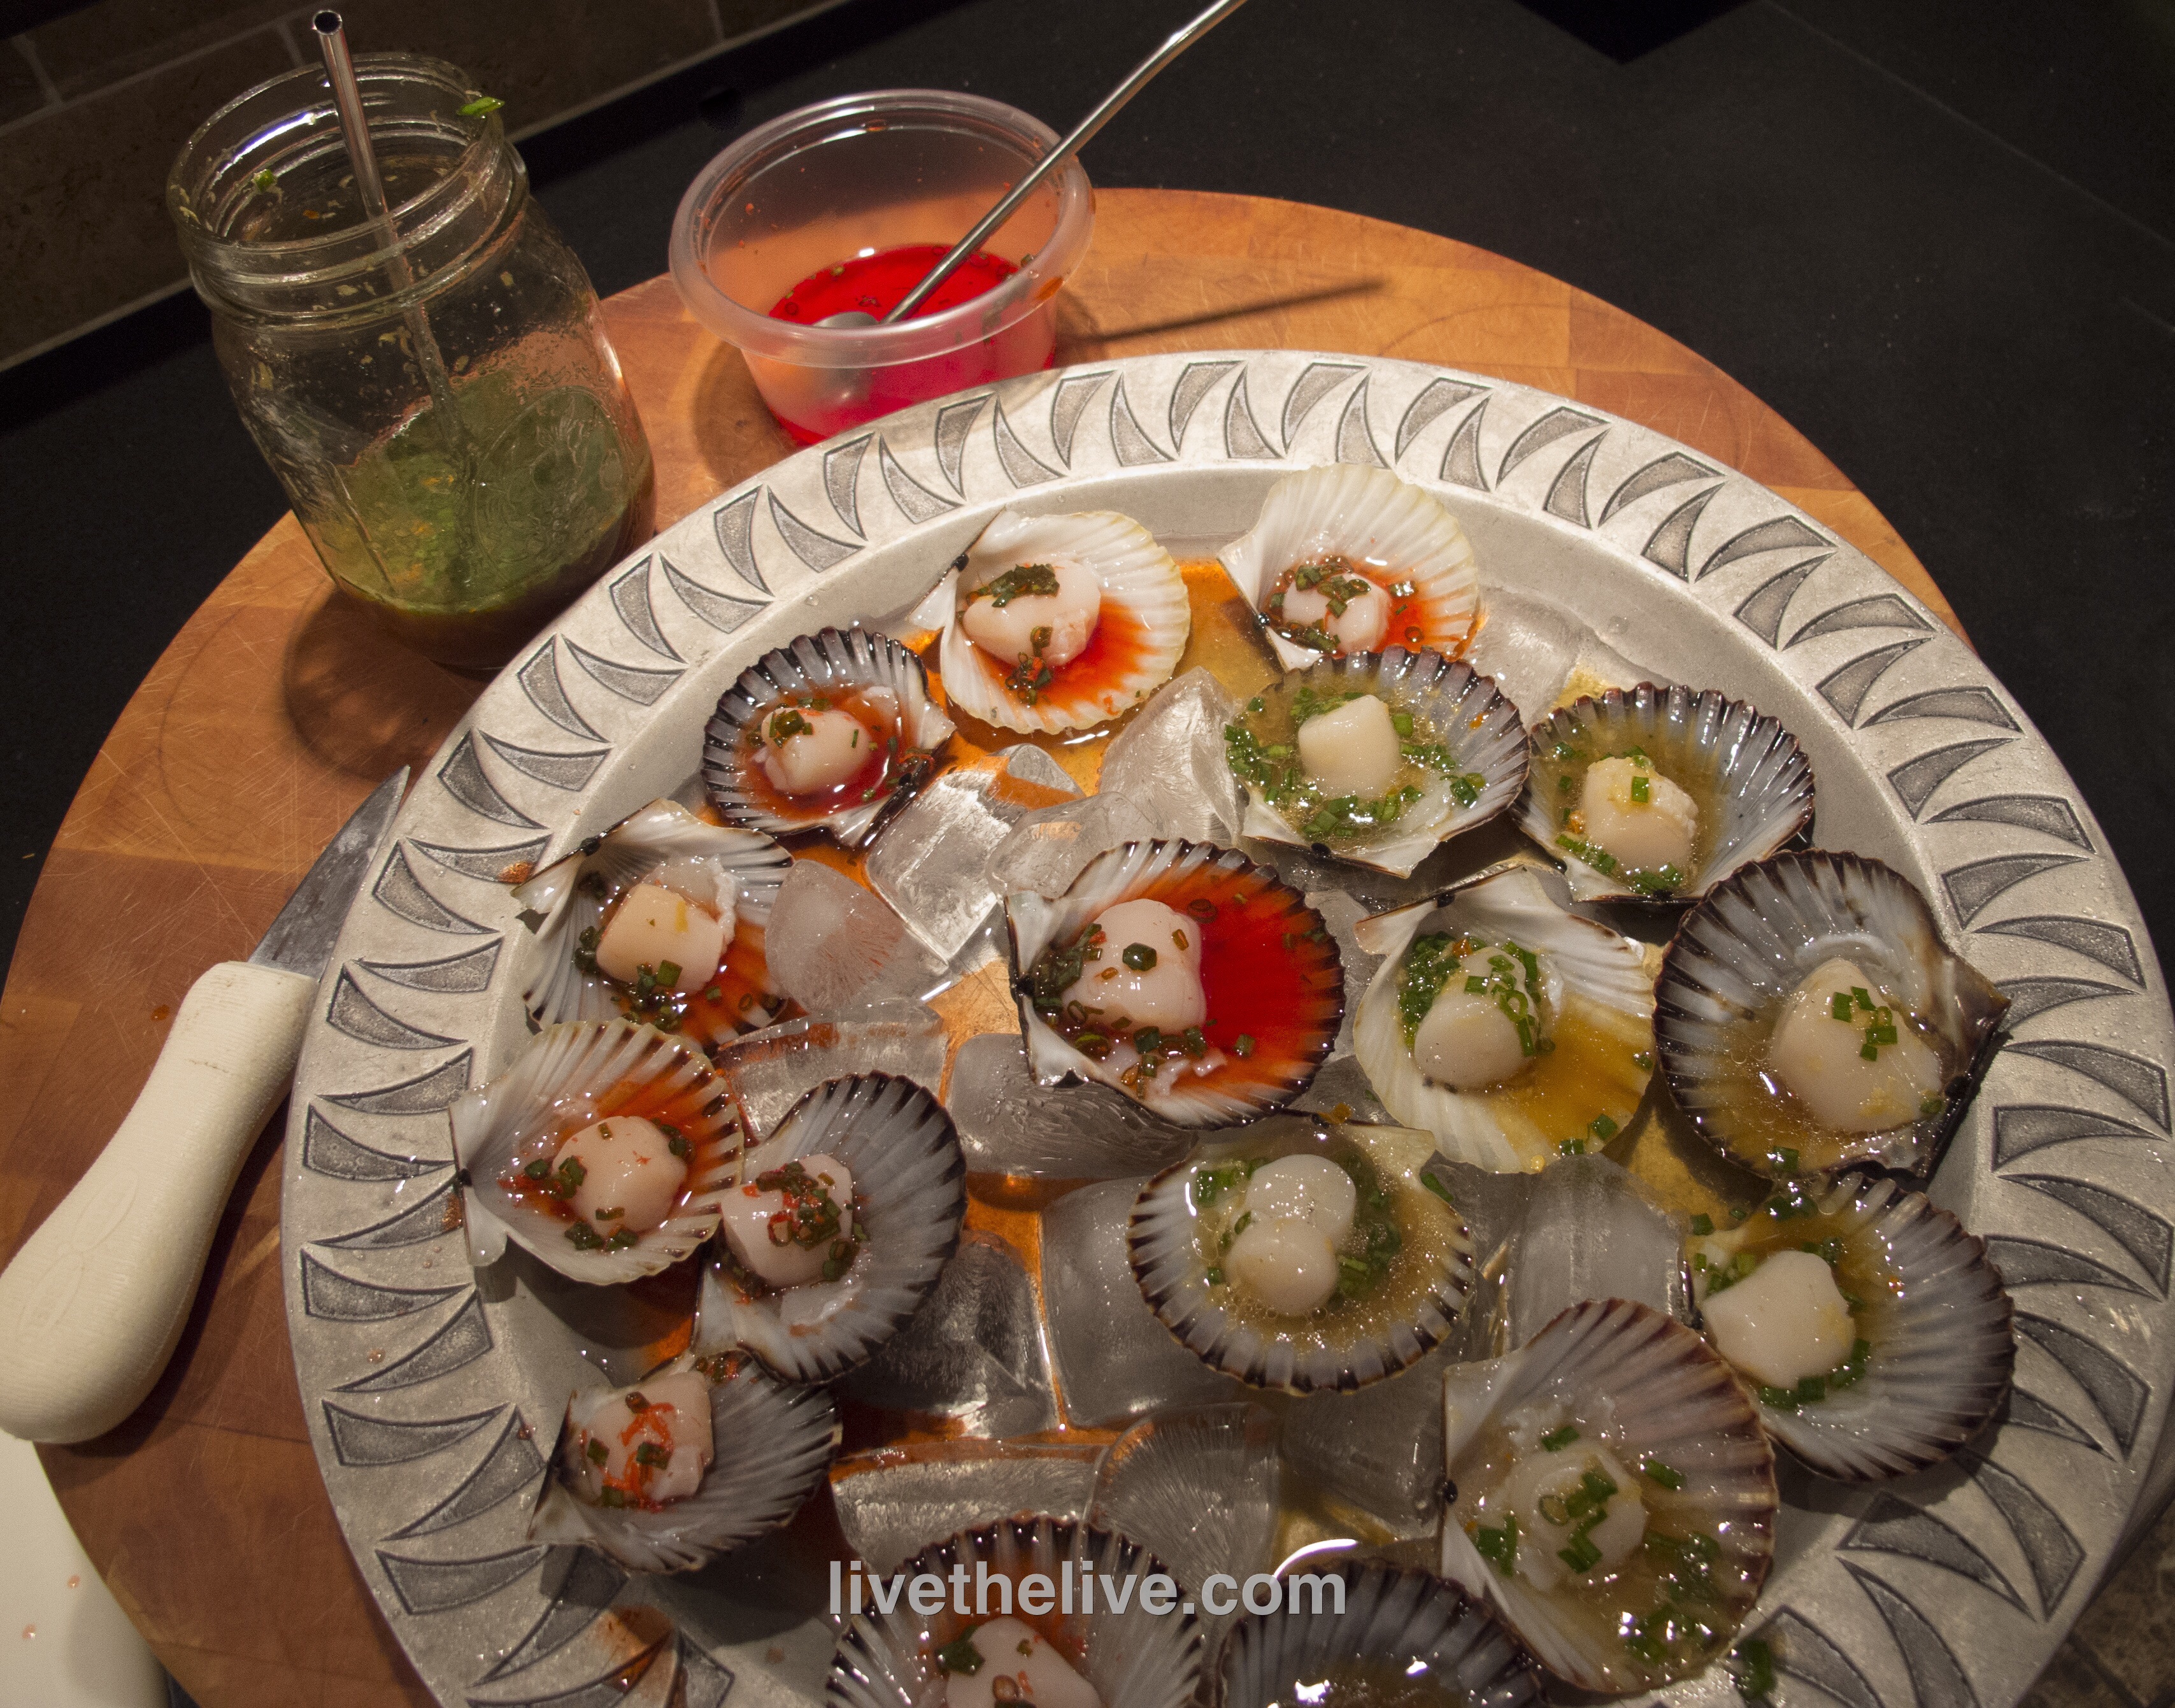
There are two marinades that I use when serving up raw scallops. The acidity in these marinades will cook the scallop a little, like in ceviche, though eating them raw is perfectly fine if they’re super-fresh.
“MILLS TAVERN” MARINADE
The first place I ever had a raw scallop was at Mills Tavern, a highly rated restaurant in Providence, RI. Freshly shucked scallops (in large flat shells) were served on ice with a tangy red marinade. I never got the recipe from the restaurant, but this is my version of that marinade.
Combine all the ingredients and chill before using.
A trick I learned from the folks at Wishing Stone Farm, where they grow their own ginger roots: keep the ginger stored in the freezer in a tightly sealed bag. Most of us don’t use ginger all that much, but we want fresh ginger when the recipe calls for it. By wrapping it tightly in plastic and storing it in the freezer, it’s ready to use any time. Simply take the ginger root out, and grate it finely–no need to peel the skin–while it’s still frozen. It will be almost powder like, and it will blend beautifully into any recipe you’re using. Then just put the rest back in the freezer.
ALZ CEVICHE MARINADE
My marinade is closer to a basic ceviche, using 3 kinds of citrus and some Asian flavors.
1/4 cup freshly squeezed orange juice
1 1/2 tablespoons freshly squeezed lemon juice
1 1/2 tablespoons freshly squeezed lime juice
2 tablespoons soy sauce
1 tablespoon + 1 teaspoon peanut oil
1/2 teaspoon honey
1 1/2 teaspoons fresh finely grated ginger
2 tablespoons finely chopped scallion
2 small dried chili peppers, finely chopped
Combine all the ingredients and chill before using.
Both marinades are gluten-free, as long as you use GF soy sauce. La Choy is an easy-to-find brand.
I moved to a new place in the fall of 2020. One of the toughest things to say goodbye to in my previous garden was my asparagus patch. Over the years, I had grown loads and loads of delicious asparagus, but sadly, there was no good way to transport that patch to my new place.
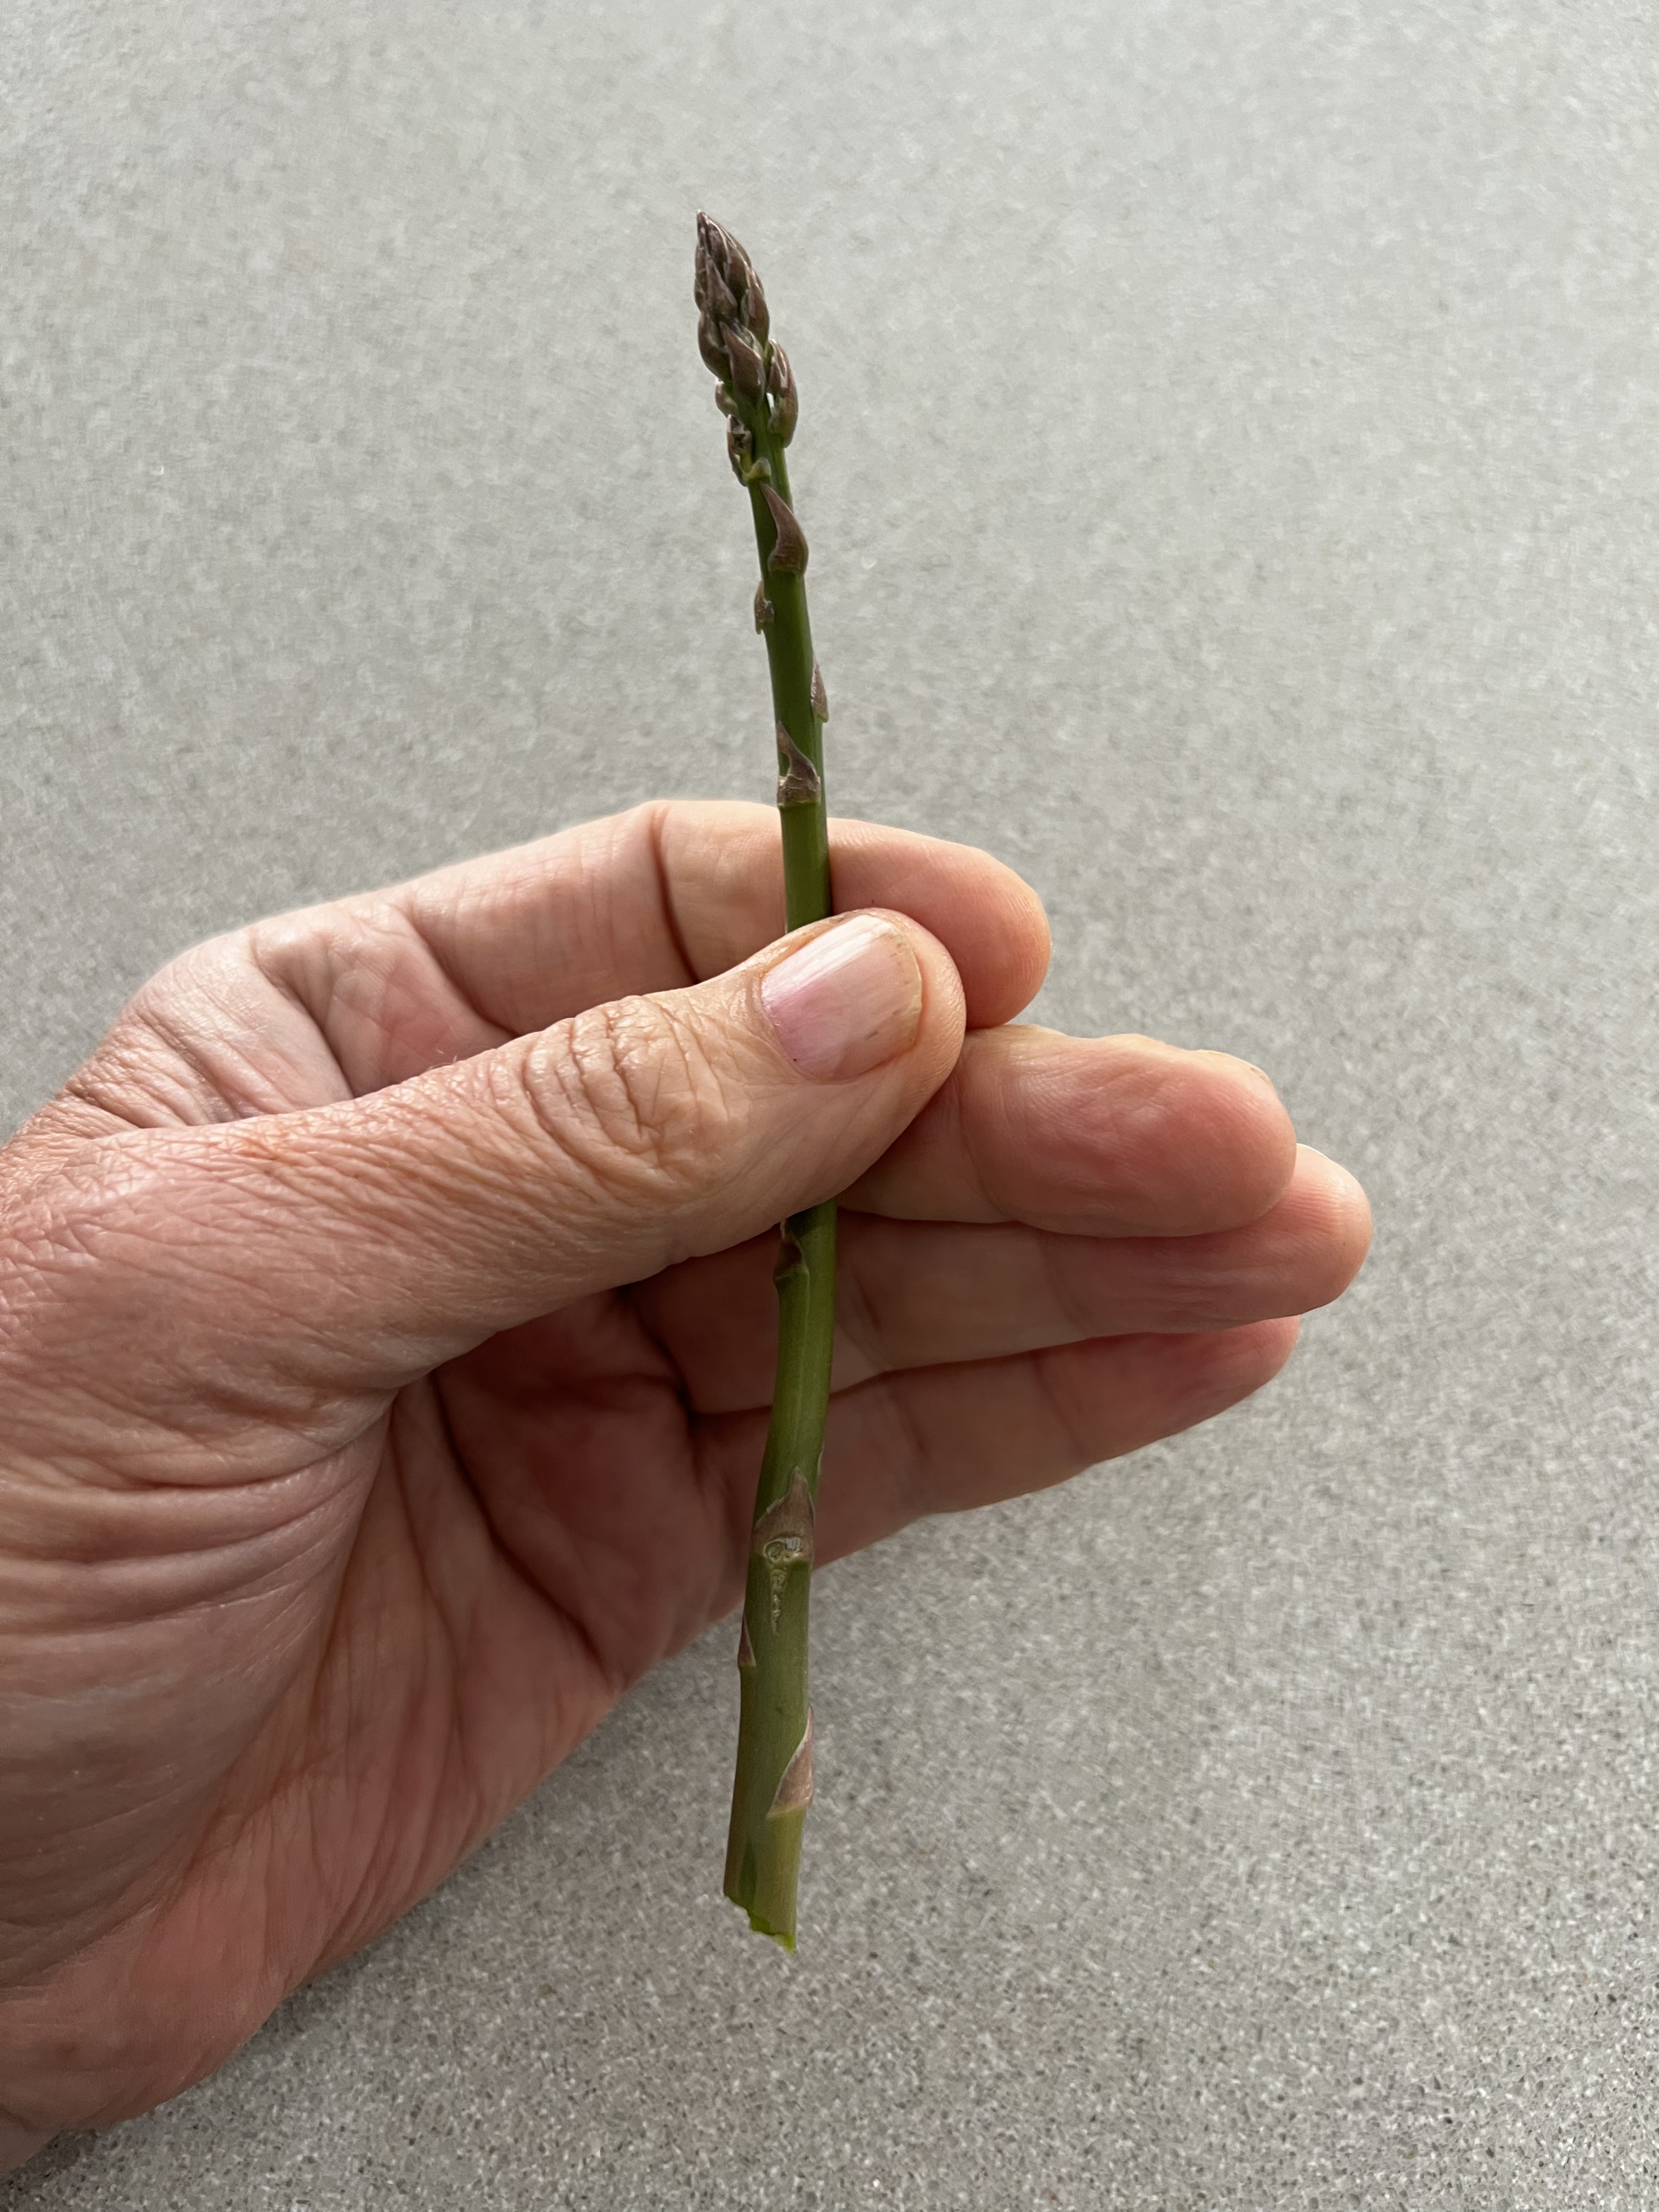
I’ve got a much smaller garden space in my new home, but asparagus is too important of a crop to leave out. So I bought a bunch of plants last spring and planted them. I got some beautiful asparagus ferns at the end of the season, and so now this year, I’m seeing tiny asparagus shoots popping up in the bed. They say you’re not supposed to harvest asparagus for at least a couple of year to let the new bed establish, but I find that pretty much impossible to do.
Yup. That’s all I’ve had so far this season!
In the meantime, I can only look back at my previous success with asparagus…
The home garden is already showing signs of activity. Overwintered kale and arugula plants are springing back to life, enough for a quick salad. Cool weather seeds that I’ve sown early: peas, turnips, radishes, broccoli raab, and others are sprouting. But nothing says the gardening season is here like my patch of homegrown asparagus taking off!
Asparagus is really easy to grow. You just need the space, and the plants practically do the rest.
Space them about a foot apart, and before you know it, you will have a vast network of tasty stalks sprouting through the soil every spring. They are so much better than anything you can buy in a supermarket.
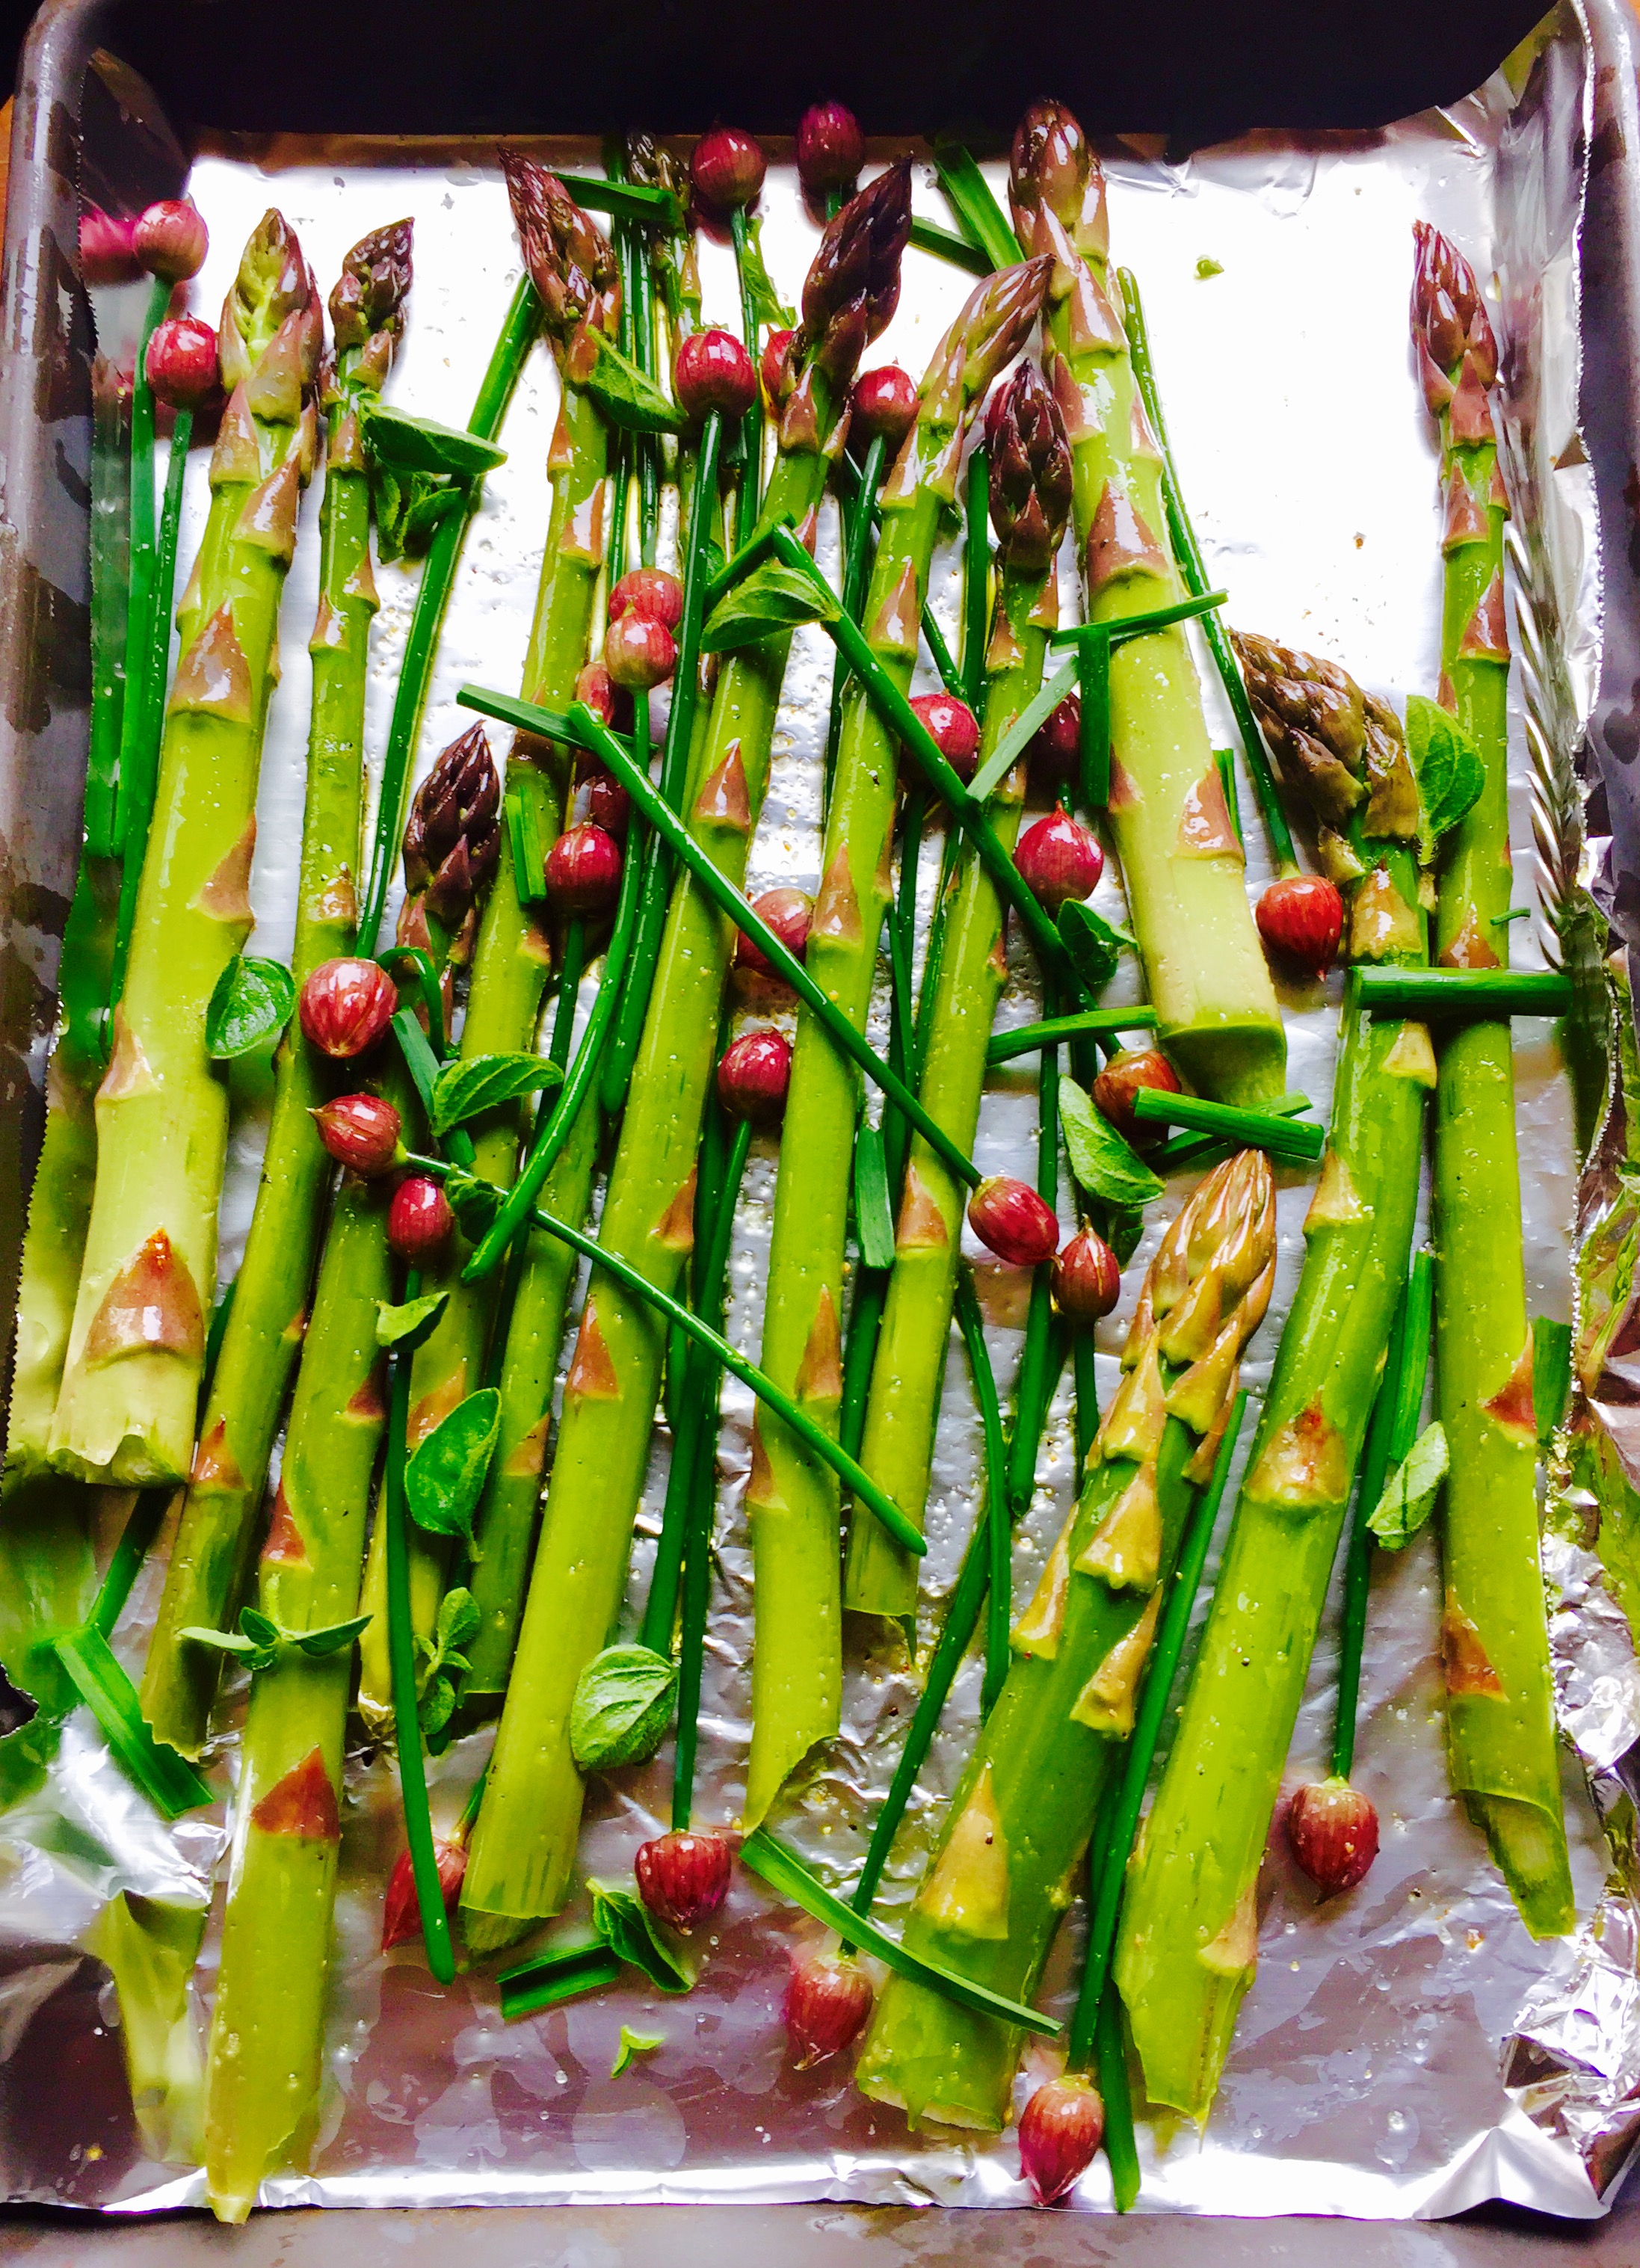
In the start of the growing season, the stalks don’t even make it into the house. I cut them and just eat them straight out of the garden. Eventually, they make the move to the kitchen, where I love to simply place them on a baking sheet and drizzle a little olive oil over them. Salt and pepper…and then in a 400-degree oven until they’ve caramelized.
Sometimes I toss some tasty chives with blossom buds on top of the asparagus and roast.
Midway through the season, I have so much asparagus that I just don’t know what to do with them all. My friends don’t want anymore and I can’t bear to throw them into the compost pile. So I pickle them…a really easy process that ensures I’ve got delicious asparagus year-round.
PICKLED ASPARAGUS
Several bunches of asparagus spears
2 cups white vinegar
1 cup cider vinegar
1 1/2 cups sugar
3 cups water
20 peppercorns
Garlic cloves, peeled
Salt (1 teaspoon per quart-sized Mason jar. Use less for smaller jars.)
Bring the vinegar, water, sugar and peppercorns to a boil. Set it aside.
Trim the bottom of the asparagus spears so that the spears are just slightly shorter than the height of the quart-sized Mason jar you will use. Or cut them into pieces that will fit smaller jars.
Pack the jars as tightly as you can with the asparagus spears. (They will shrink when processed.) Add the garlic clove and 1 teaspoon of salt to every quart-sized Mason jar…less for smaller jars.
Fill the jars with the vinegar mixture and seal.
Process the jars for 10 minutes. Let them cool before placing them in the refrigerator.
DOES YOUR PEE SMELL WHEN YOU EAT ASPARAGUS?
Asparagus has a sulfur-containing compound identified by scientists as methyl mercaptan. A colorless gas, this compound is also found in blood, feces, garlic, eggs, cheese and even skunk secretions. Another ingredient found in asparagus is asparagine. Present in foods like dairy products, seafood, poultry, fish and nuts, this amino acid is known to have a distinctive smell when heated. To metabolize both methyl mercaptan and asparagine, your body needs to break these compounds down and it’s this breakdown that’s responsible for your urine’s strange smell.
Since both methyl mercaptan and asparagine are associated with the sense of smell, there is debate over which ingredient is actually responsible for the asparagus-urine phenomenon. It could be one, or both.
Many people claim that, regardless of asparagus consumption, their urine does not smell. There are multiple theories about that as well. The first claims that everyone’s urine is in fact affected by asparagus, but only about half of the population have the specific gene that is required to smell the change. On the other hand, the second theory states that only half of the world’s population has the gene that’s required to break down the compounds found in asparagus and, if the body doesn’t break them down, no smell is emitted. In fact, one study published in the British Journal of Clinical Pharmacology found that only 46 percent of British people tested produced the odor while 100 percent of French people tested did. So whatever the reason, asparagus will forever be known as the vegetable that makes your urine smell strange.
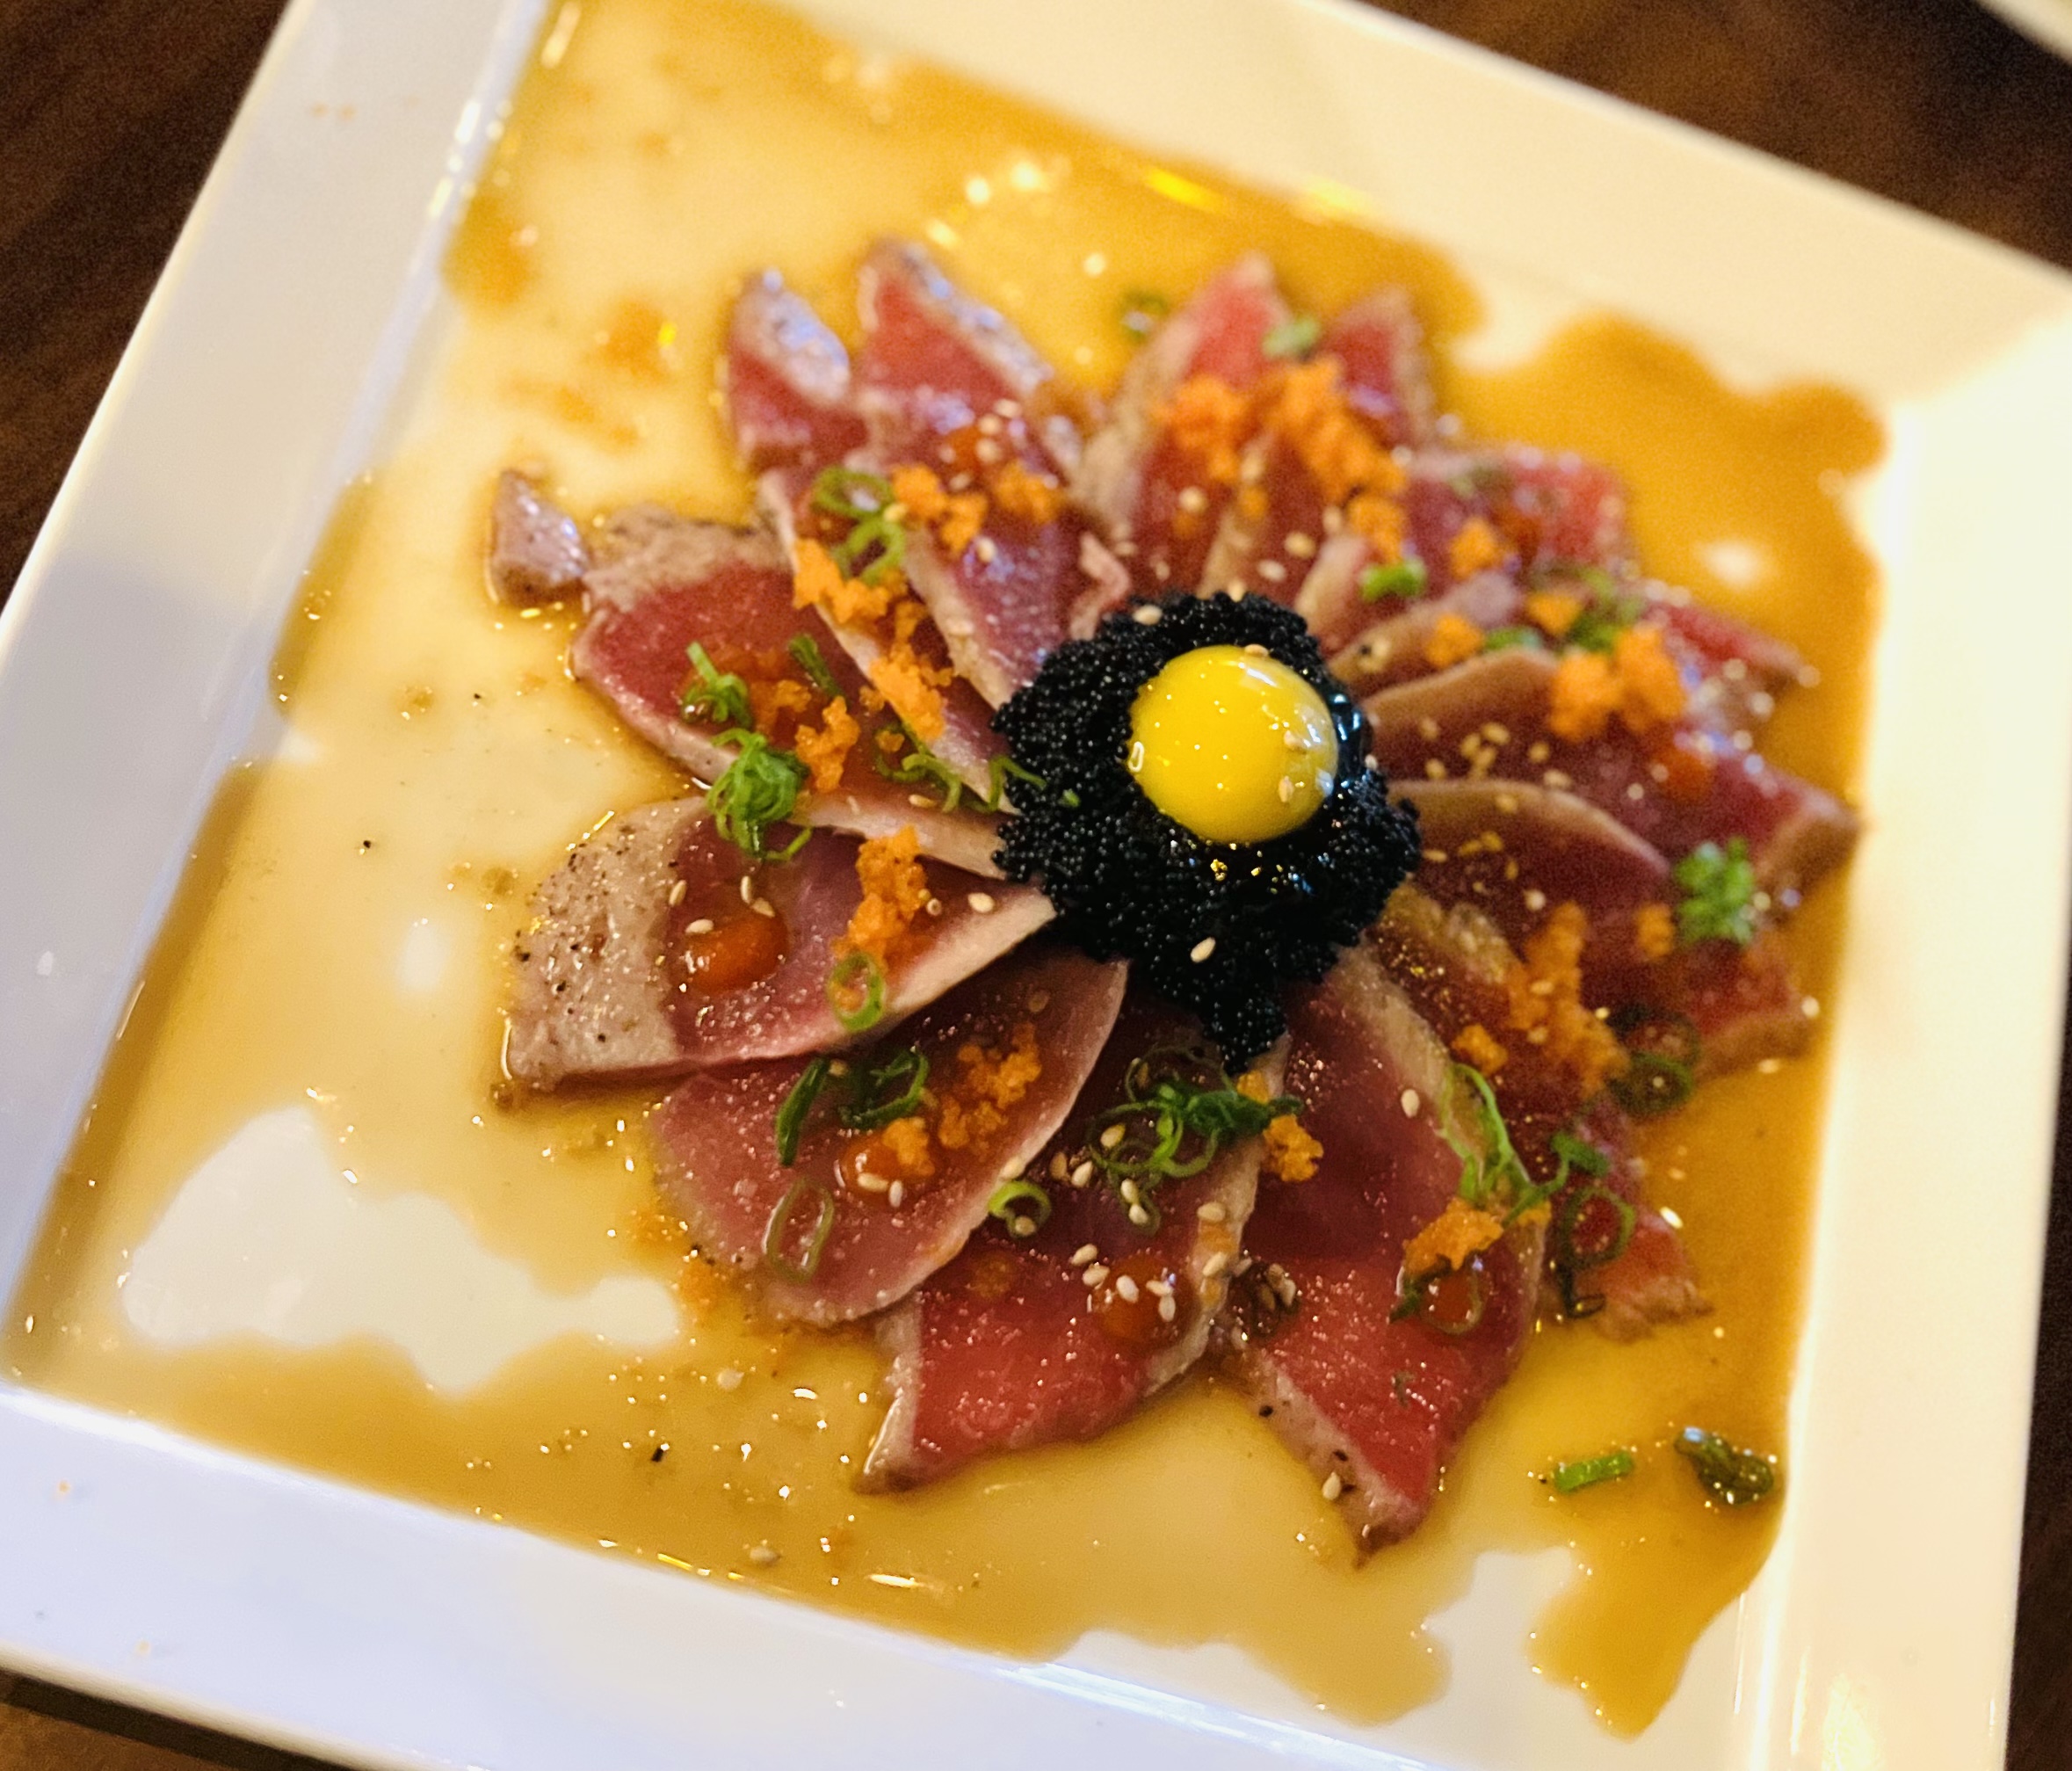
I recently returned from a trip to New Orleans, where I had oysters every which way: Bienville, Rockefeller, char-grilled, baked, and, of course, raw. But here in New England, we’re pretty proud of our oysters, and Rhode Island alone, we’ve got a wide variety to choose from. And we don’t just buy ’em and slurp ’em down: we go out and dig our own…and we have a different buck-a-shuck oyster bar to go to for any given day of the week.
Fresh oysters deserve an amazing cocktail sauce, and my recipe kicks butt: lots of horseradish, lots of flavor, and a secret ingredient: vodka. Not only does it give it a kick, it keeps it from freezing solid, so I can keep the cocktail sauce in the freezer until I need it. Then, I just scoop it out like sorbet.
2 cups ketchup
4 tablespoons prepared horseradish
1 tablespoon fresh lemon juice
1 teaspoon Worcestershire sauce
1/2 teaspoon Frank’s Red Hot, or other hot pepper sauce
5 grinds of fresh black pepper
1/4 teaspoon salt
1 teaspoon good quality vodka, like Tito’s
Combine all the ingredients. Store in a tight plastic container in the freezer.
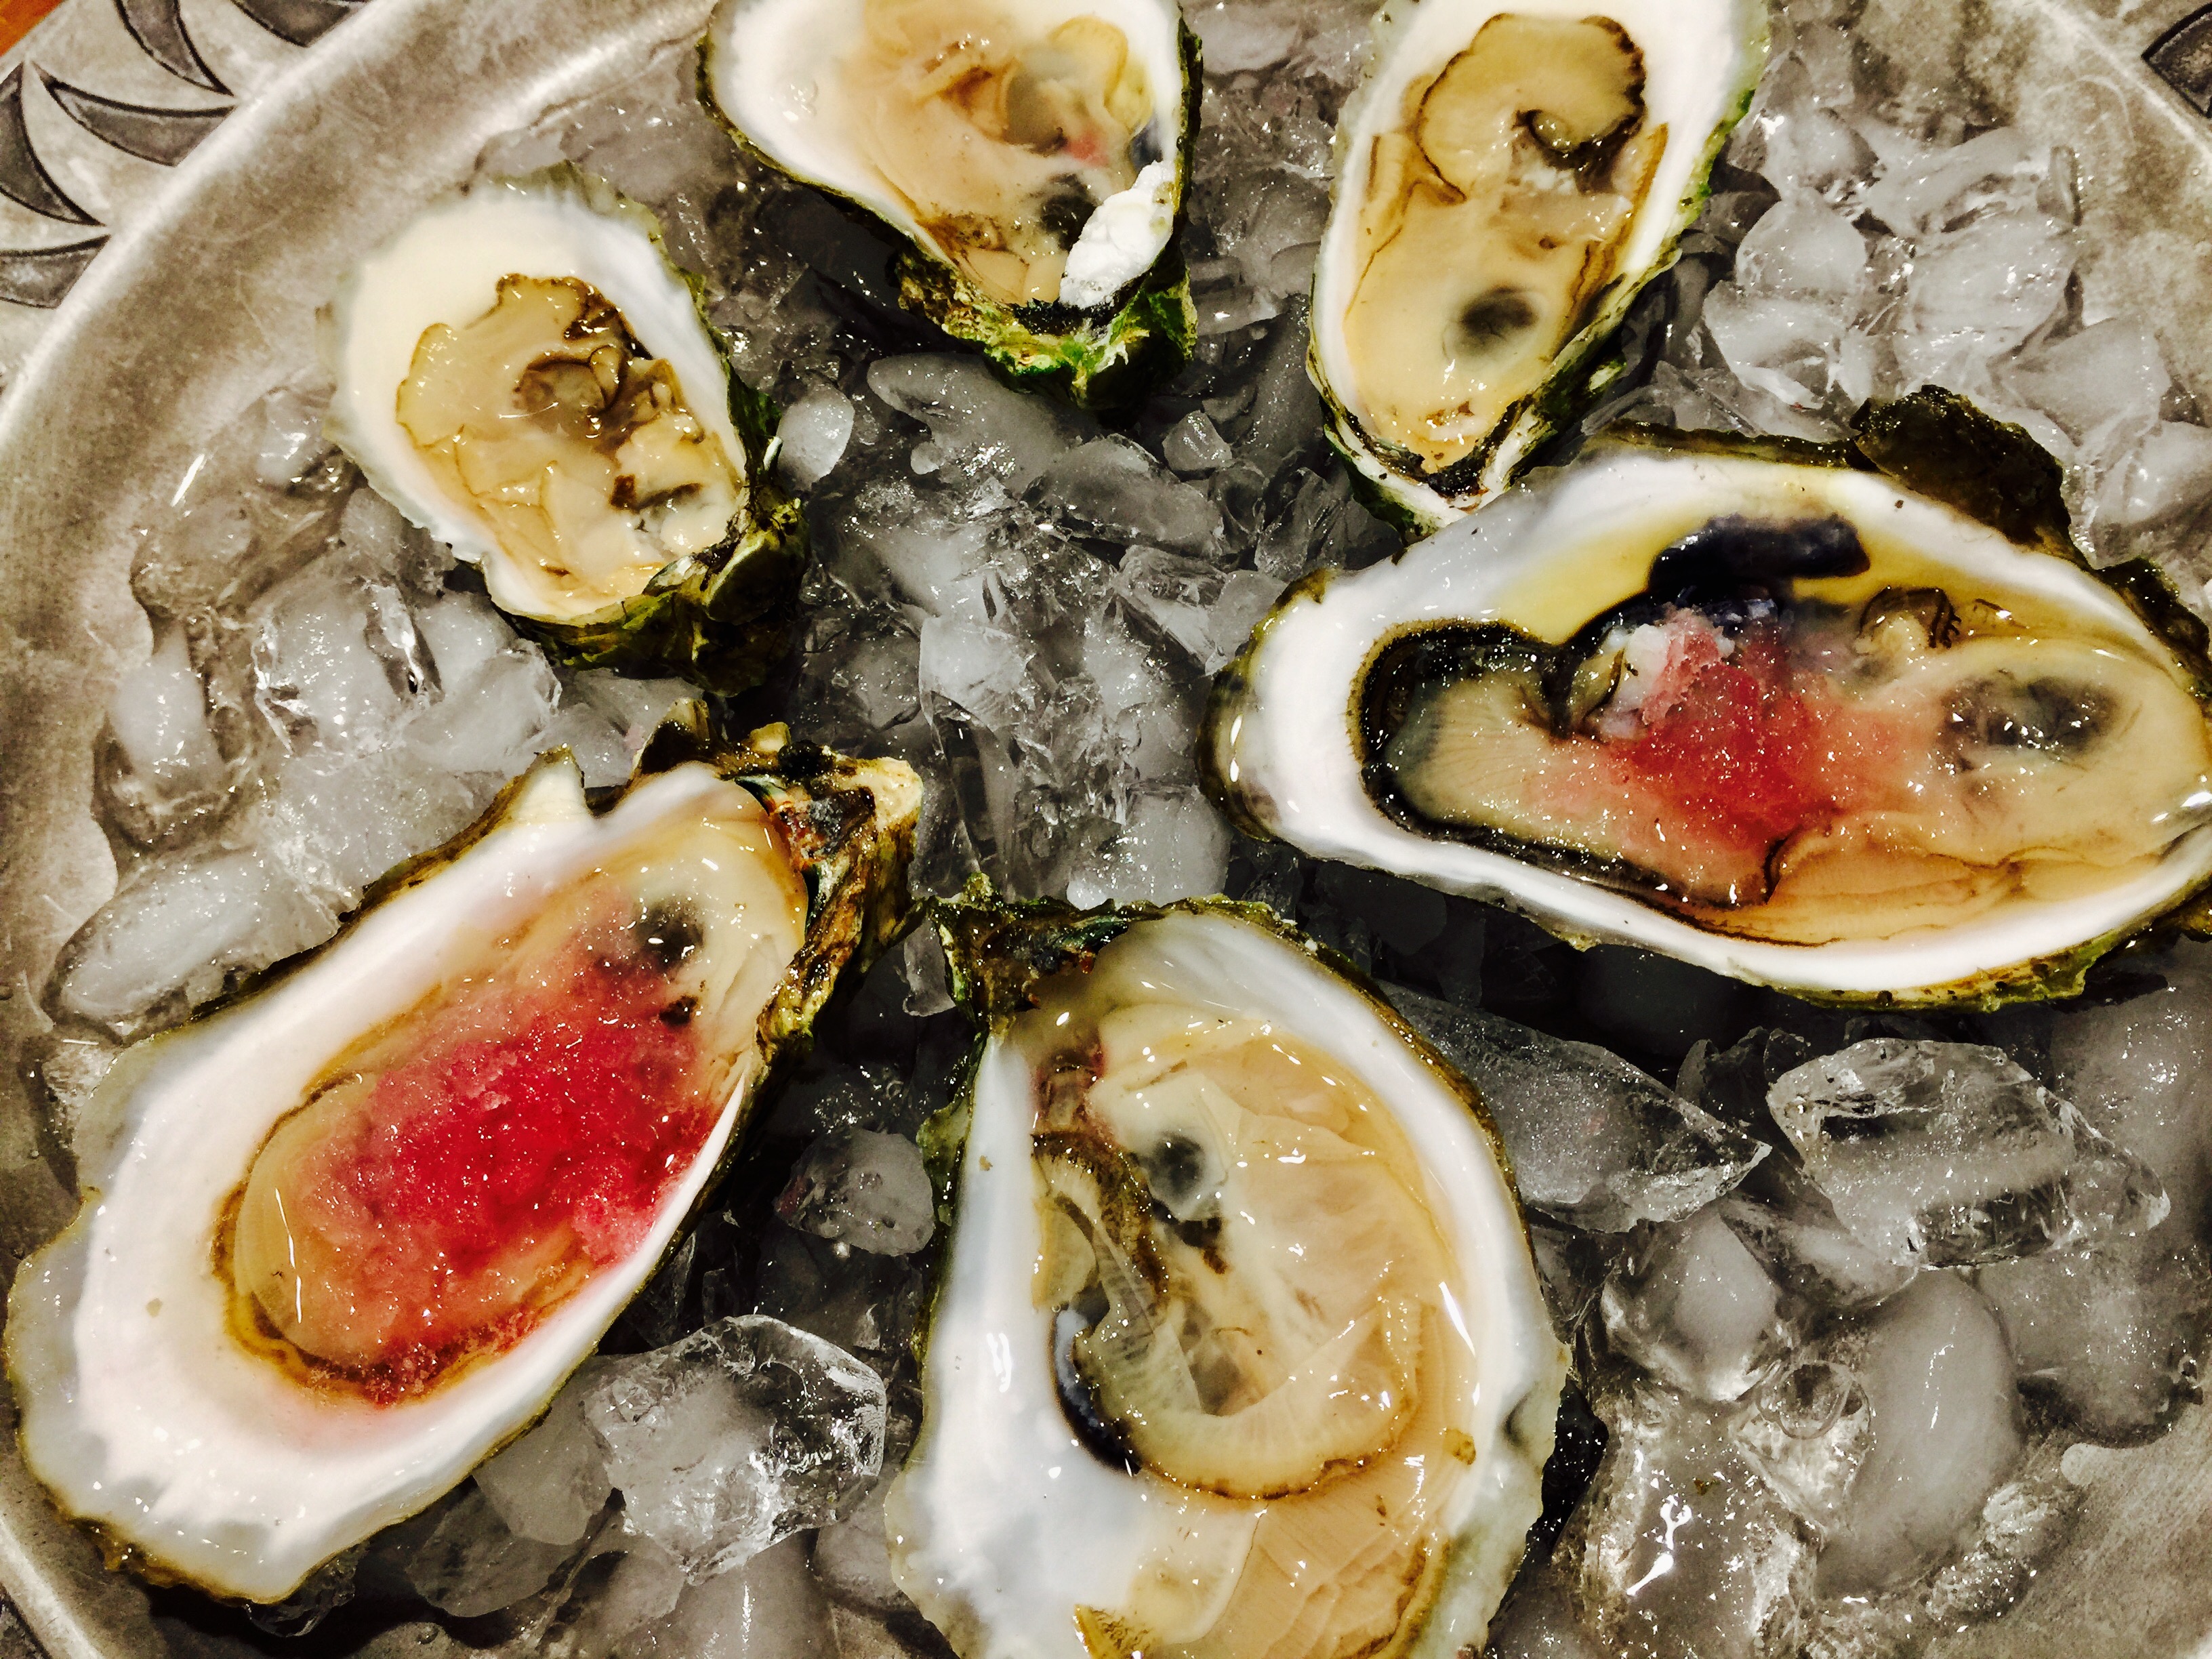
Freshly shucked oysters with pickled red onion ice.
When I’m in Portland, Maine, I visit one of the best oyster bars in the country: Eventide. Besides some wickedly creative dishes, they consistently have a fantastic variety of fresh oysters to choose from. And they offer a variety of “accoutrements” to go with them: anything from a red wine mignonette to kimchee ice. My favorite is the pickled red onion ice. All you need is a shot glass with a freshly shucked oyster inside, a half-shot of chilled vodka on top, and some pickled red onion ice, and you’ve got the best oyster shooter on planet Earth. I even suggested the shooter to the manager at Eventide. It has yet to make it to the menu. (But I remain hopeful!)
An oyster shooter with pickled red onion ice. Bottoms up!
I’ve managed to come up with a pretty good version of the pickled red onion ice at home, and I serve it alongside my cocktail sauce.
2 large red onions
1 tablespoon sugar
3 tablespoons apple cider vinegar
Peel and quarter the onions. Drop them in a medium-sized pot and cover with about a quart of water. Bring it to a boil and cook it down until it has reduced to a cup of concentrated onion water after straining.
Bring the strained onion water back to the stove, and on medium heat, add the sugar and vinegar, stirring. When the sugar dissolves, remove it from the heat and let it cool to room temperature before pouring it into a container and placing it in the freezer.
When it’s time to eat oysters, remove the block of red onion ice from its container, and, using a fine cheese grater, shave the ice over the top of the freshly shucked oysters and devour immediately! (It melts quickly.)
New Orleans is an amazing town, full of wonderful music, food, and people. No matter how many days or nights you have there, it’s never enough. But we recently did the best we could to see it all. It started with the best fried chicken I’ve ever had at Willie Mae’s Scotch House.
Fried chicken, fried okra, red beans and rice, and cornbread. We had dinner at Antoine‘s, the oldest restaurant in New Orleans. They are famous for inventing Oysters Rockefeller, which, I have to say, was a bit disappointing. There’s a lot of history here, but it doesn’t make up for some of the lack of service or quality of the food. Excellent filet mignon, however.
Brunch at the Court of Two Sisters was fabulous, just as I remembered it from 30 years ago. How can you not love a breakfast that includes Eggs Benedict, shrimp, and crawfish?
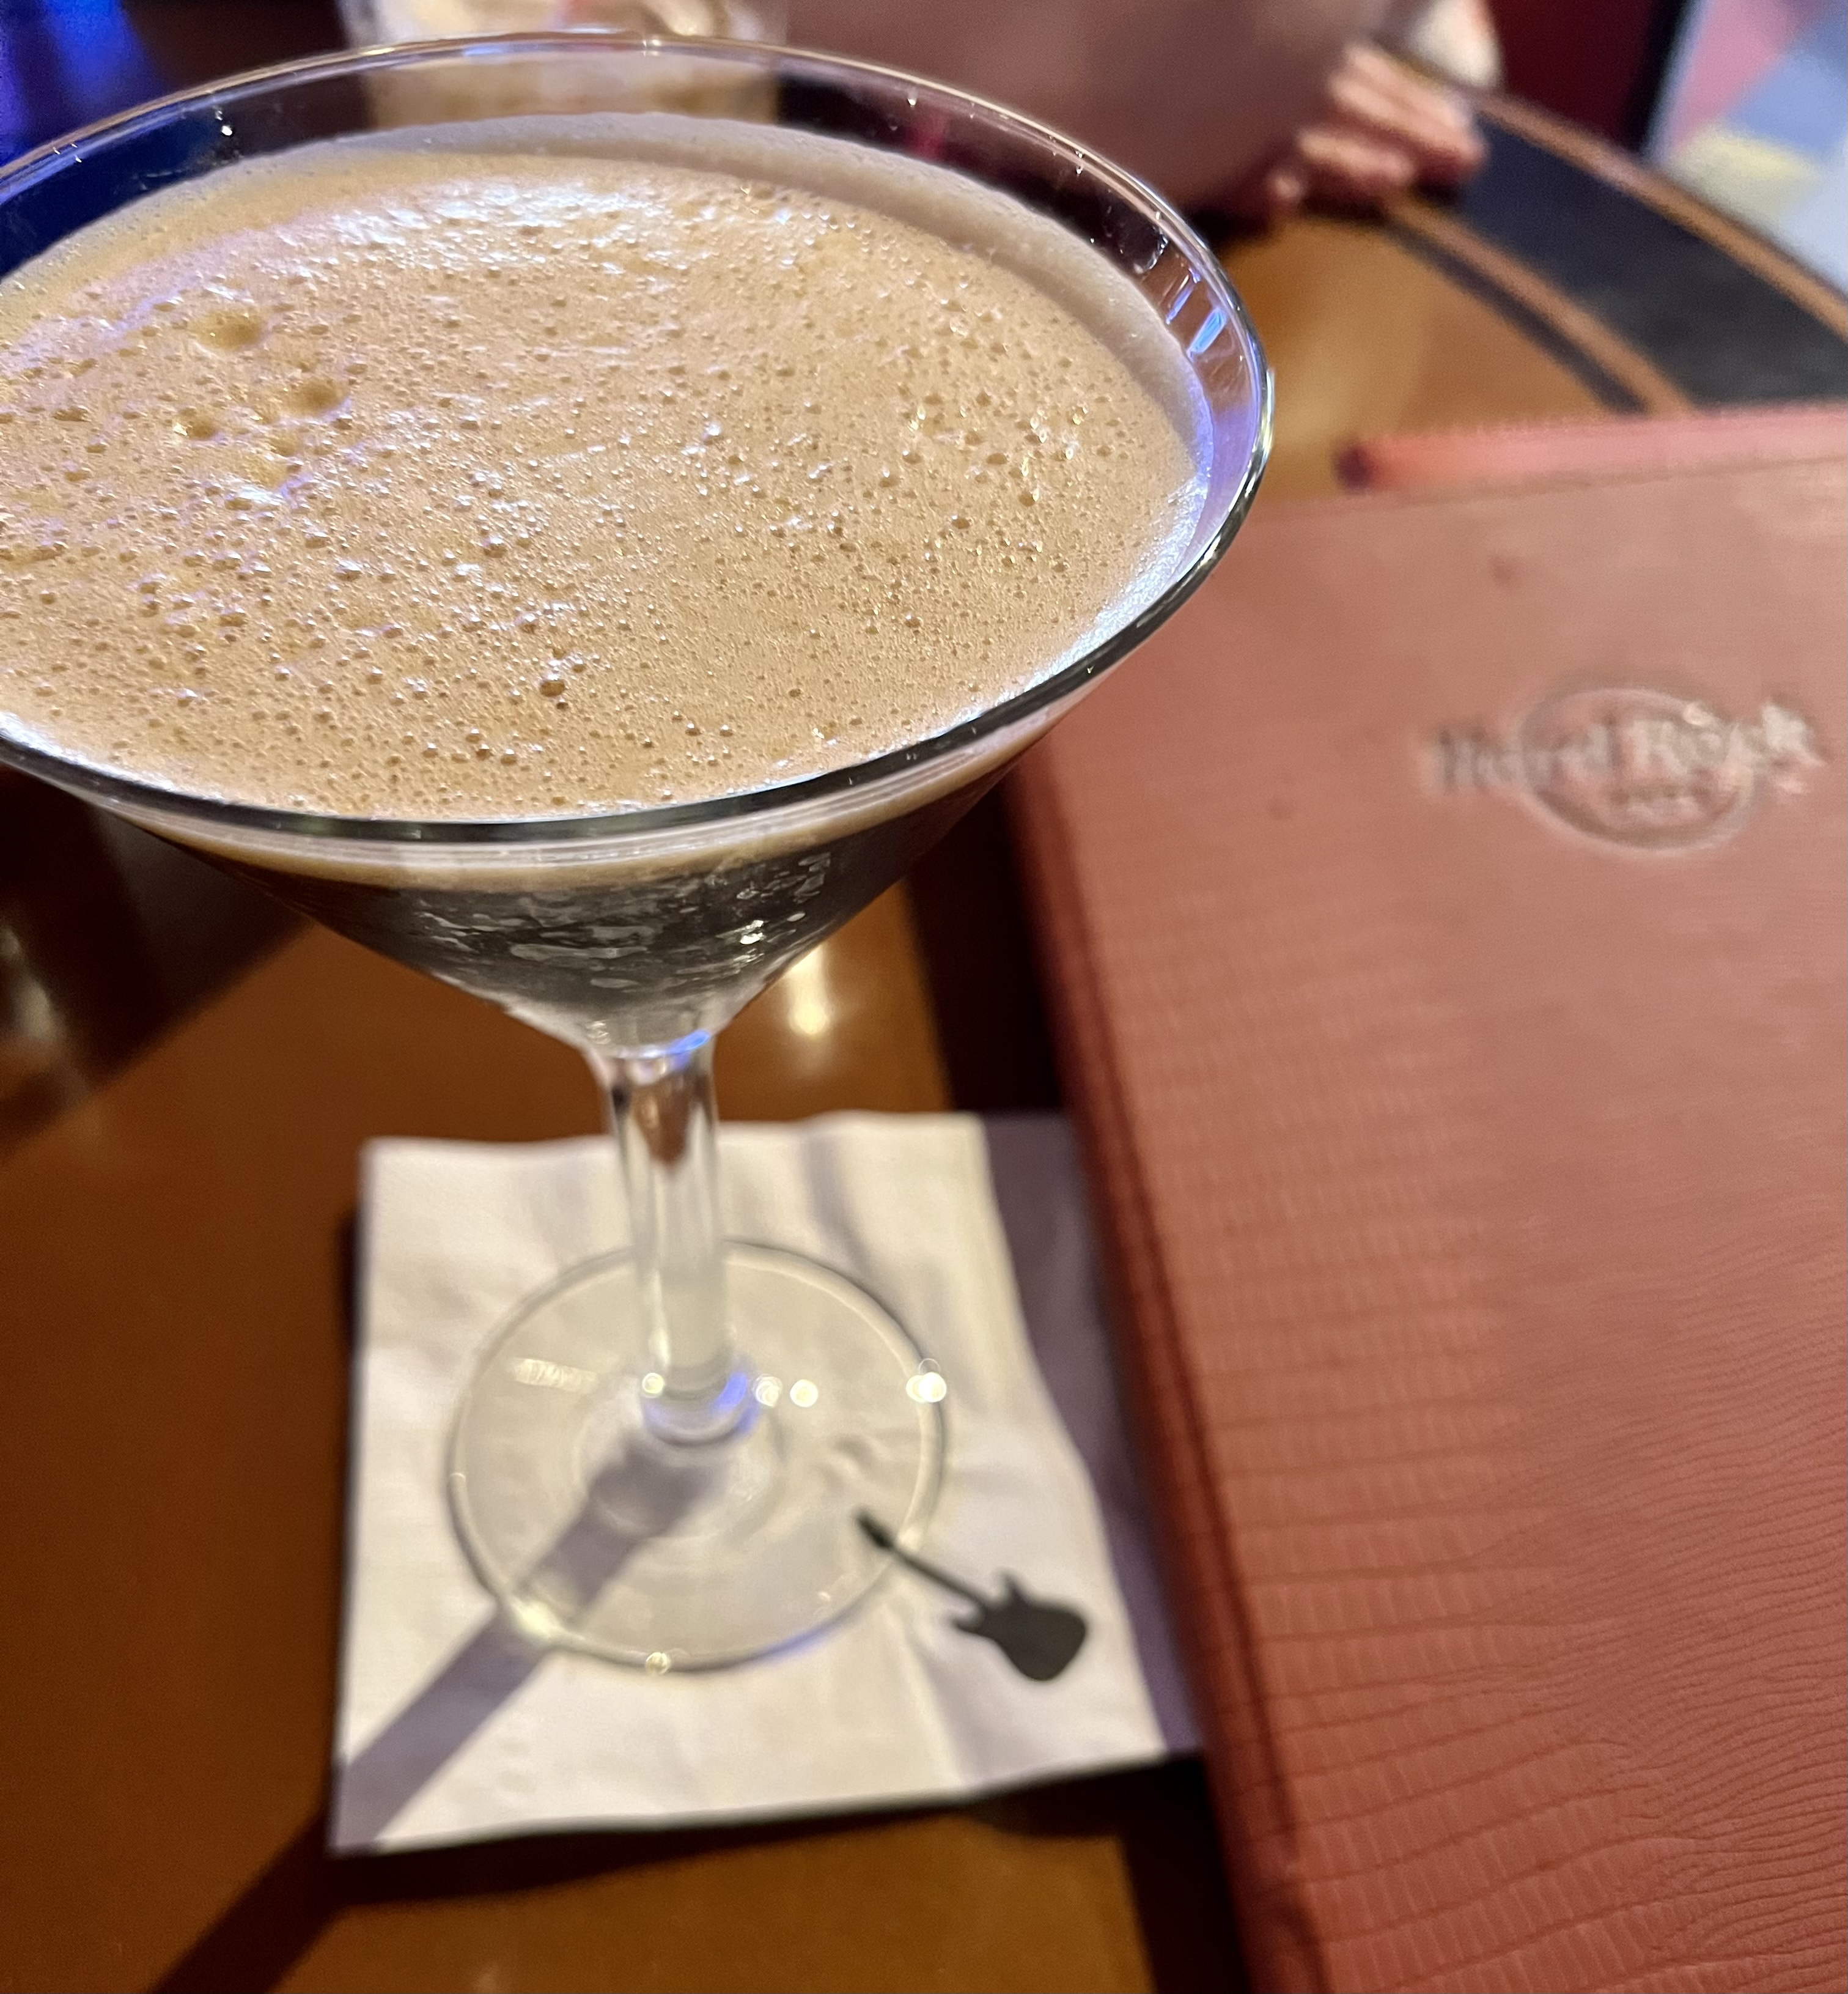
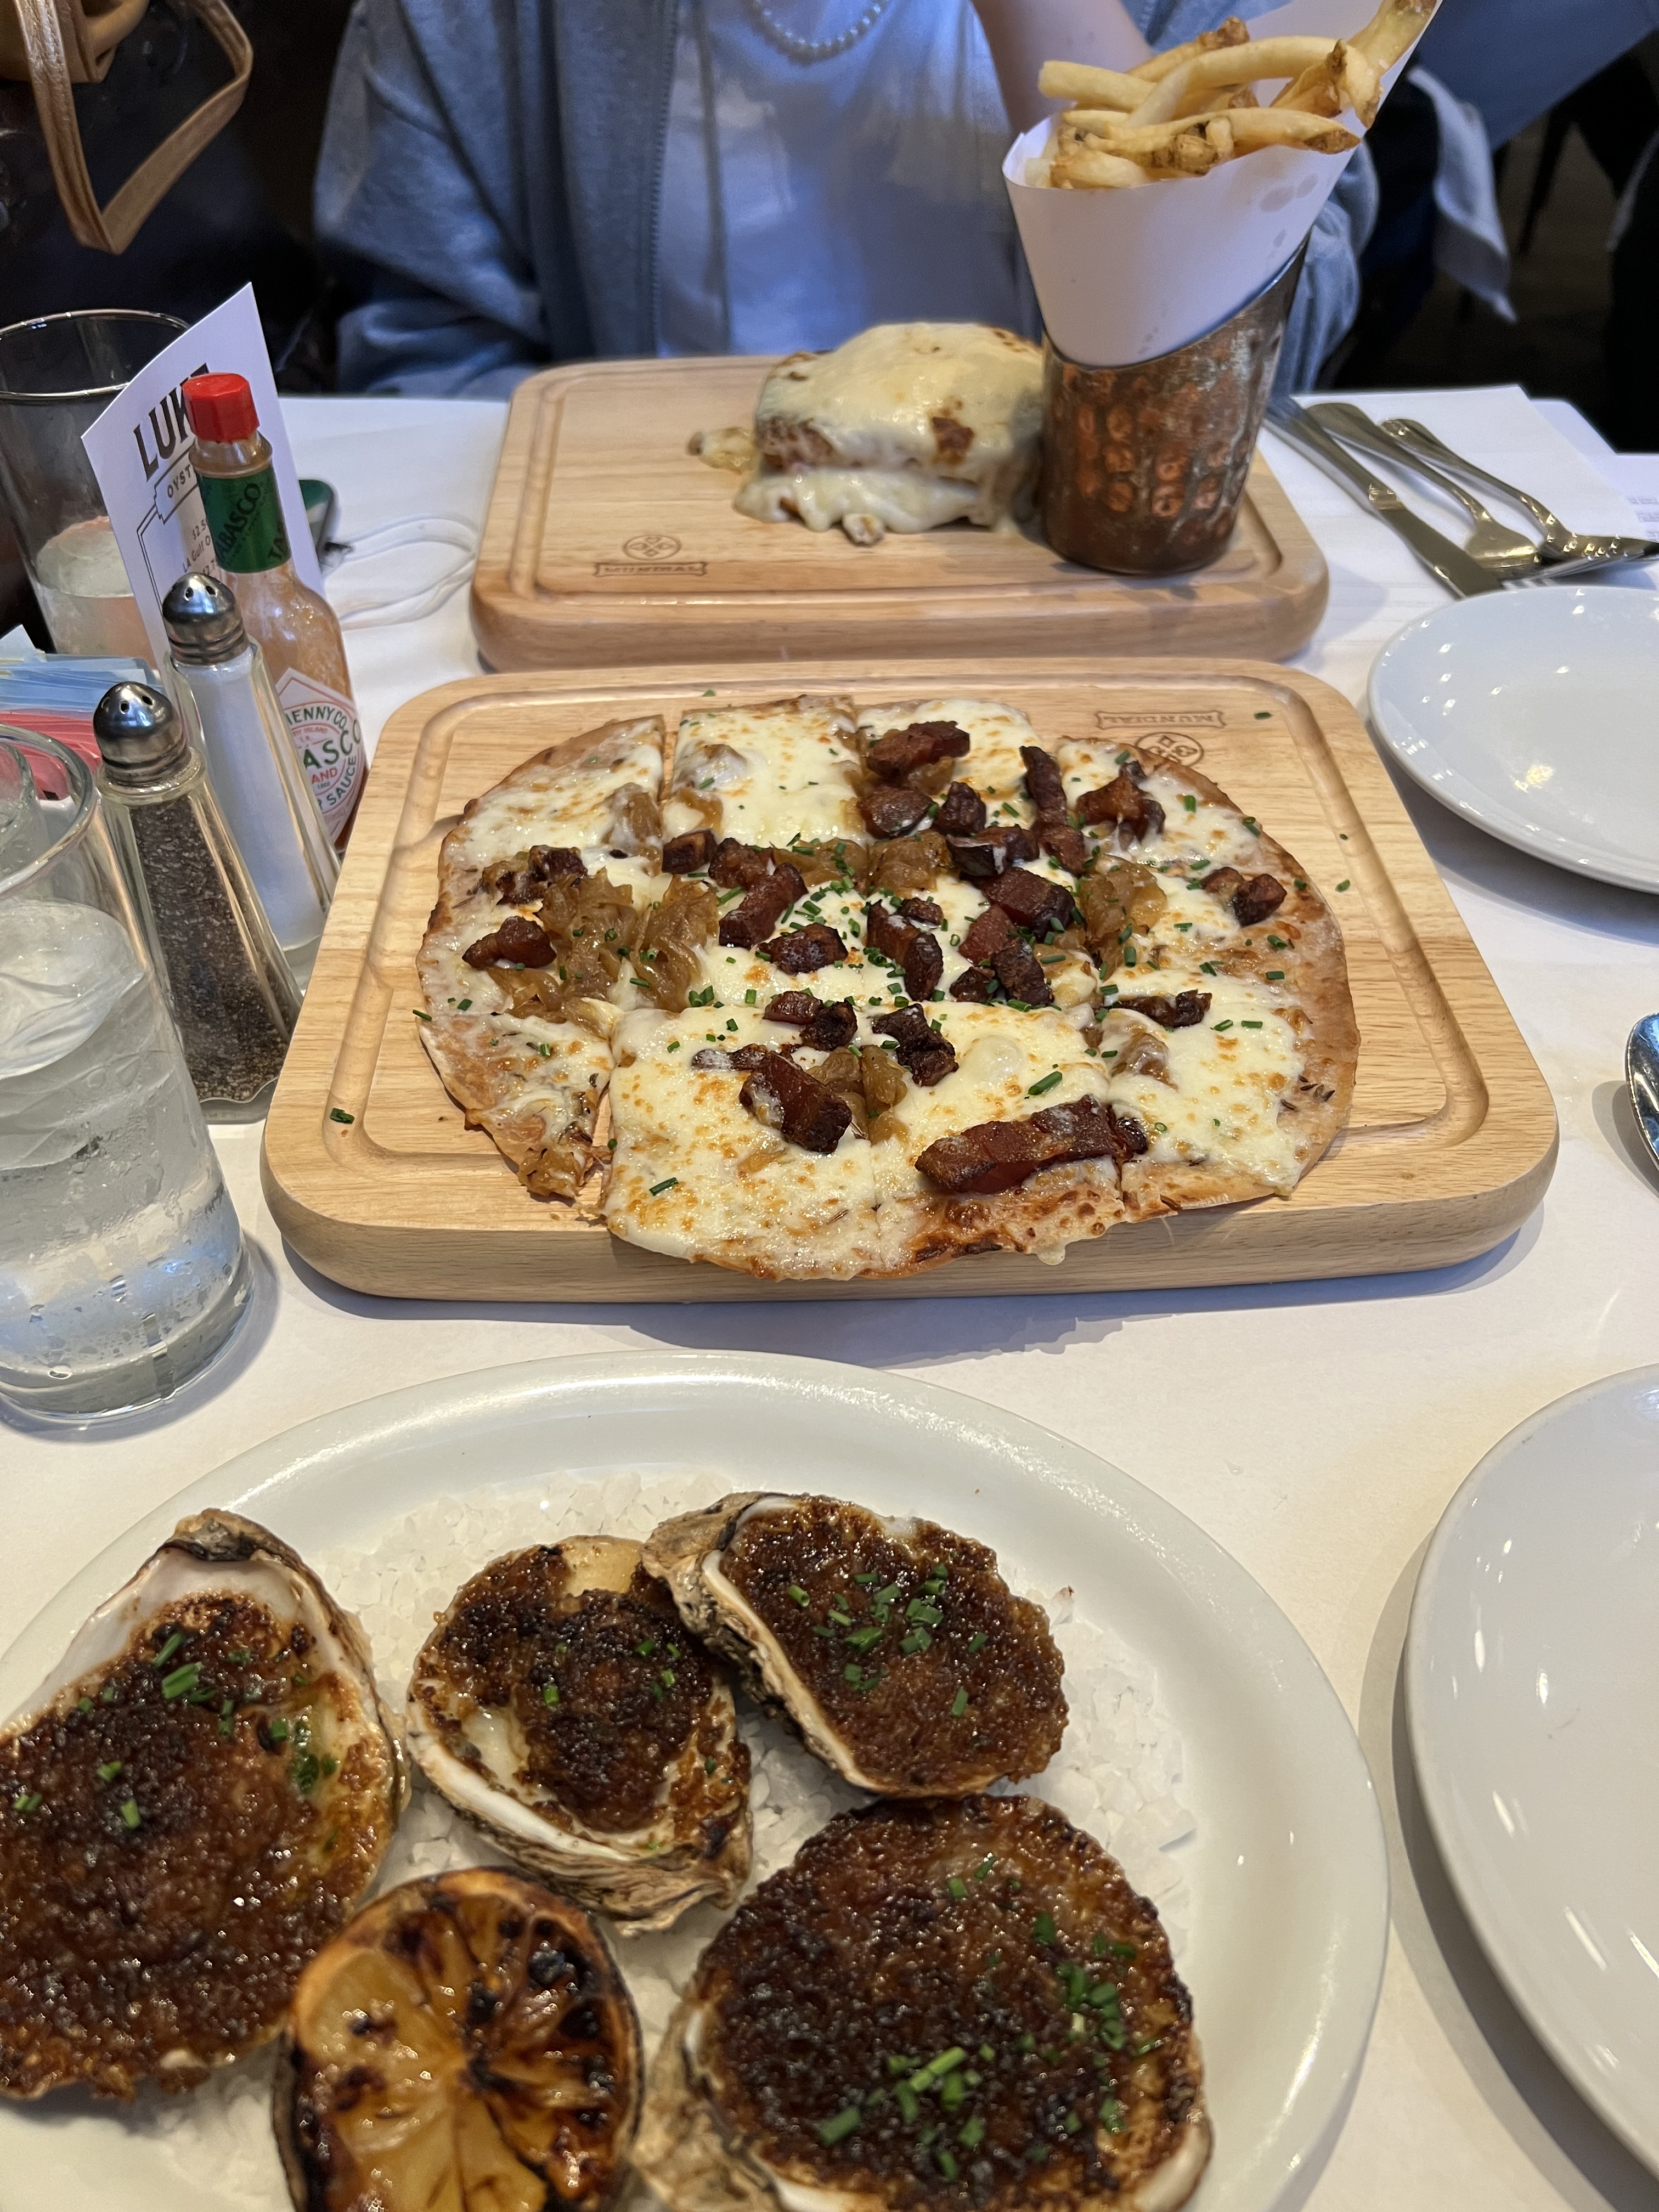
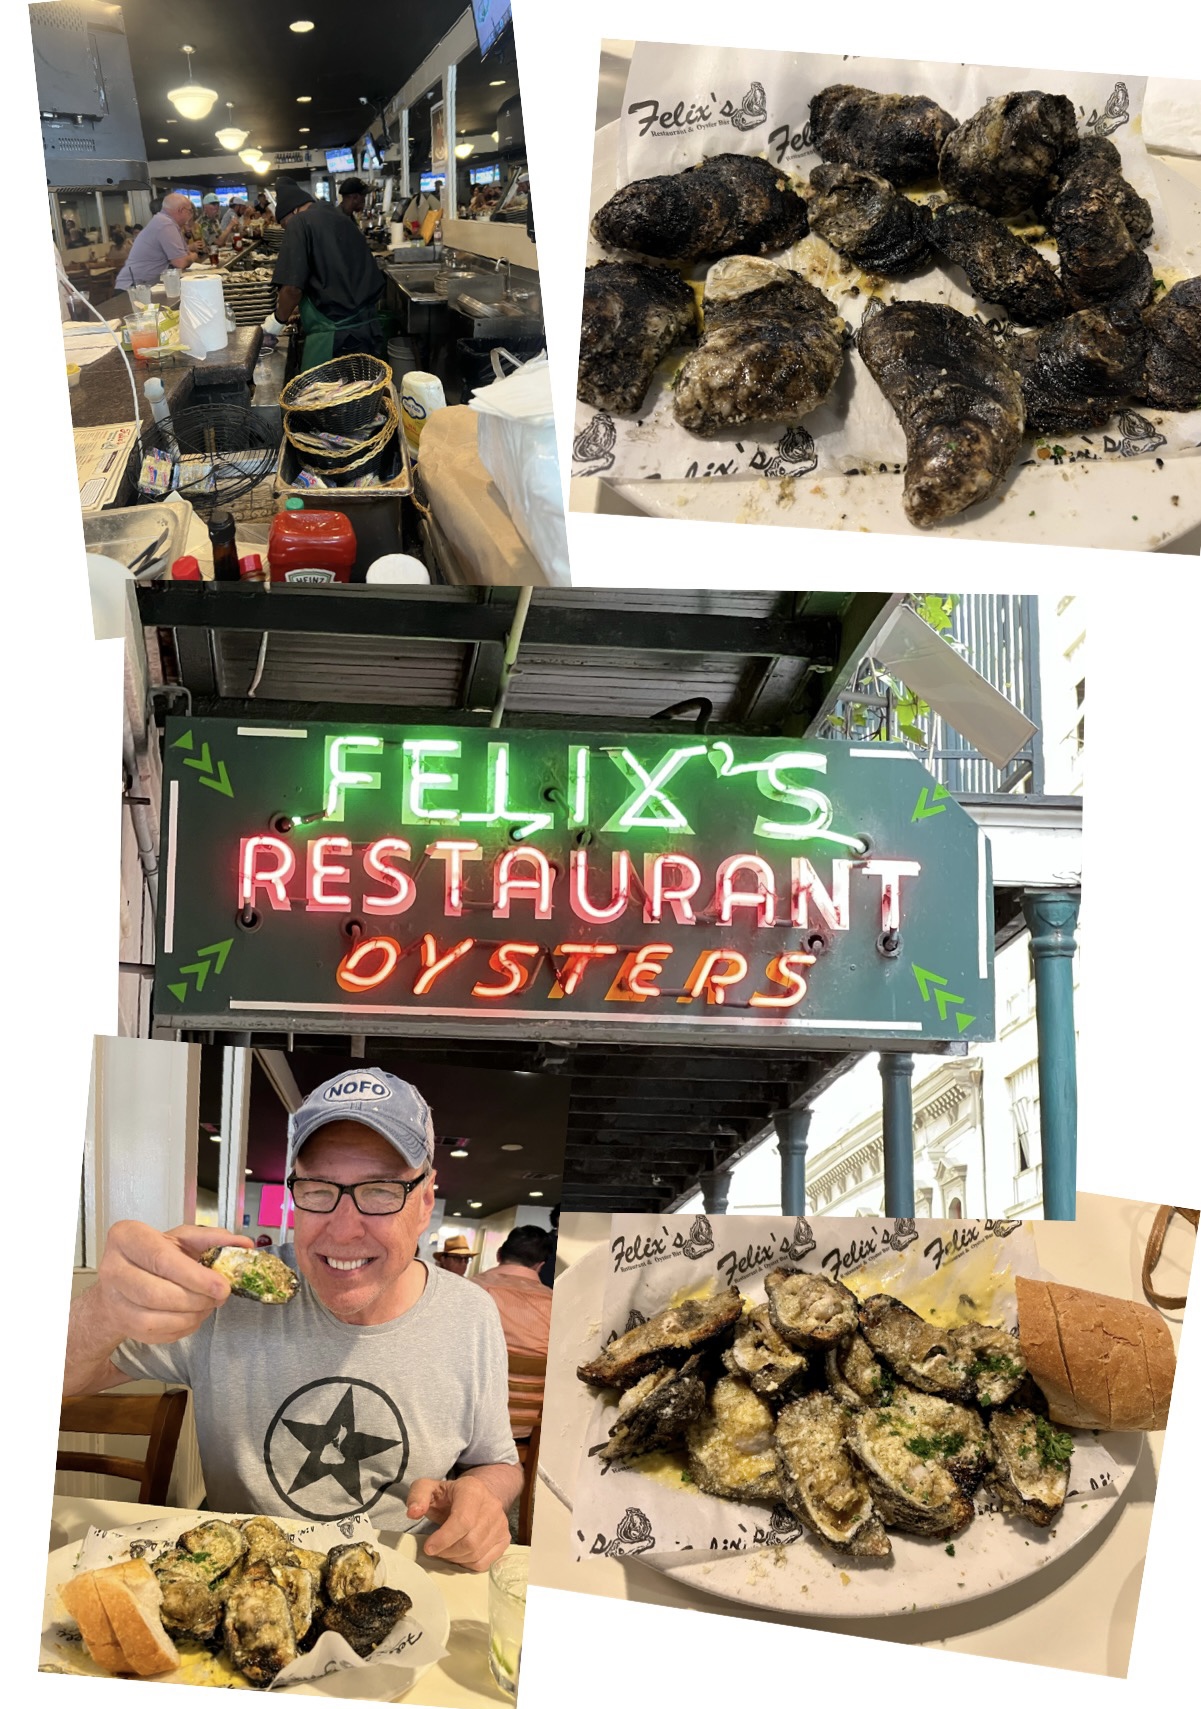
We always visit the Hard Rock Cafe in every town we go to, and NOLA was no exception. It was my daughter‘s 10th Hard Rock. An espresso martini in the afternoon was perfect.Pascal’s Manale is famous for inventing Louisiana BBQ shrimp. It was messy, and absolutely delicious! I must’ve eaten two loaves of bread, just dipping it in the sauce.Sometimes you need a break from all the Cajun food. Sushi at Tsunami fit the bill!Lunch at Luke, a John Besh restaurant, was delicious and cheesy. But their baked oysters had nothing on the char grilled oysters at Felix‘s. Those were the best I’ve ever had! What would a visit to New Orleans be without the classic cocktail called the Sazerac? And the only place to get it is at the Sazerac Bar at the Roosevelt Hotel! If you haven’t been to Café Dumonde, you haven’t been to New Orleans!
These are just a few of the places we ate and drank. Of course we did a lot more than just that. New Orleans has great museums, an awesome aquarium, and tons of shops and bars to enjoy.
Kohlrabi is probably one of the most misunderstood vegetables around. Most people don’t know what to do with them. Kohlrabi is a member of the cabbage family and can be eaten raw as well as cooked.
For me, the real joy of kohlrabi is biting into a crunchy, sweet, freshly picked and peeled bulb right out of the garden. Unfortunately, much of the kohlrabi you find in a supermarket (or even a farm stand) is grown larger than a tennis ball, making it tough, woody and dry…and they usually remove all the leaves, which are delicious.
I just sowed the kohlrabi seeds in my garden, and I can’t wait for the harvest! When it’s that fresh, I make a slaw out of the leaves as well as the bulb. I use my Awesomesauce recipe as the dressing.
2 kohlrabi bulbs with leaves, de-stemmed
1 carrot, peeled
Combine the Awesomesauce ingredients in a bowl and keep it in the fridge.
Wash the veggies thoroughly before using. Pull the leaves off the kohlrabi bulb, and remove the stems. Grab a bunch of leaves at a time, roll them up tightly, and slice as thinly as you can into thin ribbons. Place them in a bowl. Do this with all the leaves.
Peel the thick skin off the kohlrabi bulb and slice it as thinly as you can. Then take the slices and cut thin sticks out of them. Toss those into the bowl.
I like to peel the carrot with a veggie peeler, then finely chop the slices. Toss ’em into the bowl.
Add Awesomesauce to taste and toss well.
Cover and refrigerate, letting the flavors blend for a couple of hours before serving.