Archive for the ‘CHARCOAL’ Category

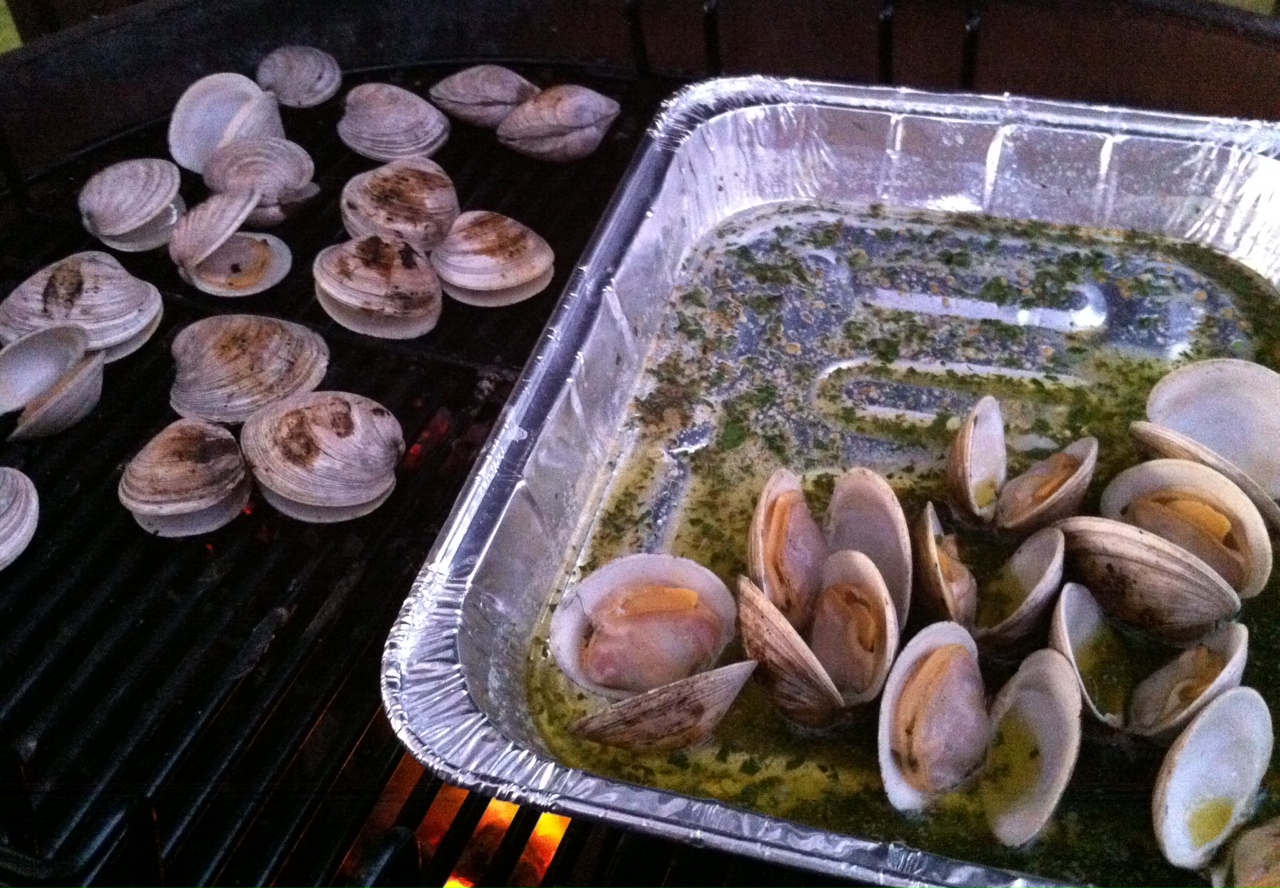
Enjoying clams without the clam knife: when you’ve got to feed a crowd, this is a delicious way to do it. Cooking clams on the grill is one of the tastiest ways to enjoy these awesome mollusks. Do it over hardwood charcoal to get that true smokey flavor.

clams on the grill

Ingredients:

A couple of dozen (or more) little neck clams, washed and purged

1 stick (8 oz) of butter

1/4 cup extra virgin olive oil

1/4 cup chopped parsley

1 teaspoon dried oregano

1/2 teaspoon dried basil

1 teaspoon minced garlic

1 teaspoon sea salt

Clams should be stored cold and dry in a fridge until ready to use…not in water, not on ice.

Fill a large bowl with cold water,add sea salt and some corn meal to it, and mix it around. Add the clams to this bowl and let them purge in this liquid for at least an hour. They will suck up the corn meal and spit out sand and grit. After an hour, pour off the water/salt/meal/grit mix, and thoroughly wash the clams.

Start your hardwood charcoal grill and divide it in half: coals on one side, no coals on the other.

While the coals are heating up, grab a disposable aluminum foil tray and place it on a burner on your stove over medium heat. Add the butter, olive oil, parsley, oregano, basil, garlic and salt, and stir to combine. Once the butter has melted and everything has blended, bring the tray over to the charcoal grill and place on the side of the grill without coals. It will stay warm.

Once the coals are hot, just place the clams directly on the grill. (Use tongs, unless you want to remove all of your knuckle hair.) When they start to open, carefully flip them over, trying not to lose any of the precious juices inside the clam. Cook them for as long as you like, from raw, to more thoroughly cooked. As each one reaches its desired doneness, place it in the aluminum tray, making sure it gets swished around in the butter and herb mix.

When all the clams have been cooked and are in the tray, serve with a fresh baguette or even over pasta. A glass of great white wine is a must.

When it comes to grilling, lamb is often overlooked. Yet it’s a wonderful, flavorful meat that makes a great burger. The taste of lamb can be a bit strong, however, so I mix 1 lb of ground lamb with 1 lb of ground grass-fed beef.

Ingredients:

1 lb ground lamb
1 lb ground beef
2 Tablespoons + 2 teaspoons extra Virgin olive oil
4 Tablespoons minced Spanish onion
2.5 teaspoons whole grain Dijon mustard
1 teaspoon each fresh parsley, mint, and dill, finely chopped
1 teaspoon dried Greek oregano
.5 teaspoon cumin
1 large clove garlic, squeezed through a garlic press
1 scallion, finely chopped, green part only
1 teaspoon salt
.5 teaspoon black pepper

Heat 2 Tablespoons olive oil in a skillet over high heat. Add onions. Cook until browned, about 6 minutes. Transfer onions to a plate. Let cool.
In a bowl, mix onions, lamb, pork, mustard, herbs, spices, garlic, scallions, salt and pepper.
Form meat into slider-sized patties. Place on baking sheet covered with non-stick foil, and place in fridge.
Prepare a medium-hot charcoal fire.

lamburger

To keep the Greek flavors going, I came up with this feta cheese dressing that works great with the lamburgers.

Ingredients:
3/4 cup plain Greek yogurt
1  cup mayo
1 teaspoon Worcestershire sauce
1/2 teaspoon cayenne pepper sauce, like Franks Red Hot
1 teaspoon Dijon mustard
1/2 teaspoon granulated garlic
1/2 teaspoon salt
1/2 teaspoon ground black pepper
4–5 ounces crumbled feta cheese

Combine all ingredients in a bowl. Mix well. Cover and refrigerate. Best the next day.

Don’t let the lamburgers get too cold in the fridge…just enough to firm the meat up a bit. If it gets too cold, give it a few minutes at room temp to warm up again.  Grill burgers until cooked to medium. Place on slider buns with lettuce and tomato, and smear the bun with the feta cheese dressing.

There are so many cool things you can get your foodie father (or yourself) this Father’s Day. Here are a couple more gadgets that have become indispensable in my grilling arsenal…

BBQ timer: Even someone that has barbecued all their lives runs the risk of burning or undercooking a roast or a large bird. Opening the grill and jabbing the meat with a thermometer several times causes the juices from the meat to run out, leaving it dry…and every time you open the grill, you lose precious heat. This is the better solution: You stick the needle into the roast or bird and leave it in there the entire time it cooks, so no juices leak out. You plug it into the monitor which then calls you when the meat is ready (from as far as 100 feet away!) You set the time or temperature, and then get to join your guests for the party. Redi-Check Remote Cooking Thermometer: www.target.com

Smoking Gun: This is a fun toy. There are times when you don’t need a full-on smoker. All you want to do is smoke a small piece of fish or a hunk of cheese.  You simply take some of the finely ground wood chip powder (comes with the gun) and place it in the pipe-like bowl. Light it, and the Smoking Gun will blow that smoke through a hose into the Ziploc bag where your piece of fish is waiting for its magical transformation to smoky deliciousness. (Thanks to chef Rizwan Ahmed of the Hourglass Brasserie in Bristol, RI, who introduced me to this very cool device.) You can get it at Williams Sonoma.

smoking gun

Skip the necktie. If your dad’s a foodie, he wants something cool for the barbecue grill this summer! All of these ideas have been rigorously tested by our panel of experts (OK, just me), and get a big thumbs up.

Digital Smoker: I’m a bit of a purist when it comes to grilling. I refuse to use a gas grill because I think there’s no difference between that and my kitchen stove. If I’m grilling, I want to use real hardwood charcoal, with real smoke and real flavor. But when it comes to smoking meats, basic smokers require constant maintenance so that the temperatures don’t fluctuate. With a 6-year-old daughter to take care of, that is something I don’t have time for, especially if I’m cooking something low and slow for about 12 hours. So my solution is a digital smoker. You plug it in, set the time and temperature, and then periodically add wood chips through a side drawer to smoke the meat. You can literally set it and forget it. I have it cook through the night, so I wake up to a beautifully smoked slab of meat in the morning. Masterbuilt Electric Digital Smokehouse: www.walmart.com

Cognac! How can you go wrong with booze for Father’s Day? But if you’re looking for something really special to give Dad (or your favorite morning DJ with a food blog), may I suggest Kelt XO. What makes Kelt XO special is that before bottling, they place the barrels of cognac on board ships that sail the world for months at a time. During this time, the cognac gently rocks back and forth in the barrels, slowly acquiring a smoothness you can’t find in other spirits. Each bottle even comes with a tag that tells you exactly what ports around the world your cognac has been to. At most high-end liquor stores.

jack daniels

Jack Daniels smoking chips: Whether you have a smoker or not, these chips will make anything you cook taste better. Made from the old oak barrels that they use to age Jack Daniels, you get a serious hit of whiskey in every bag…and in your food. Simply toss a handful of chips you’ve soaked in water for about a half hour, and they will infuse the food on your grill with flavor. You can also use them dry, on charcoal or gas grills. At Amazon.com.

Cookbook favorites: “Jamie at Home,” by Jamie Oliver (a great combination gardening/cookbook), “Charcuterie,” by Michael Ruhlman and Brian Polcyn (the best book on how to cure and smoke meats), “Barbecued Ribs, Smoked Butts, and Other Great Feeds,” by Jeanne Voltz (my absolute barbecue Bible!), and “Martin Yan’s Feast: The Best of Yan Can Cook” by Martin Yan (the authority on Asian cooking, with what amounts to his greatest hits.)

Gas grills make no sense to me at all. I find little or no difference between them and the gas stove I have in my home. I can make a perfectly acceptable steak by grilling it on my stovetop cast iron griddle…or I can sear it in a pan and pop it in a hot oven. If the real reason for grilling is flavor, why wouldn’t you want something that makes a real difference?

A hardwood charcoal grill is the way to go. Besides the quality and source of your beef, wood and smoke are what makes the difference between a good steak and a great steak.

beef brisket

I know the #1 argument for going with gas over hardwood charcoal is time. “It takes too long to start a charcoal grill.” That’s a load of crap. I’ve convinced many friends over the years by showing them that it takes no more time to light a charcoal fire than it does a gas grill.

Here’s what you need: Get yourself the charcoal grill you like…the classic Weber is still an awesome choice.

Get a bag of hardwood charcoal. I’m not talking charcoal briquets, like Kingsford, that have a ton of additives in them. And definitely don’t ever use crap like Match Light. I’m talking pure hardwood charcoal, easily found in many stores.

Get a charcoal chimney. It’s a metal tube with a handle and a grate at the bottom. You crumble a couple of sheets of newspaper into the bottom, pour charcoal into the top, light it, and you have hot coals in 10 minutes without lighter fluid.

And DON’T EVER use lighter fluid! Why would you spend good money on a steak and then want to make it taste like gasoline?

The variety of wood chips available for smoking is another flavor factor when it comes to grilling with charcoal. My personal favorite is hickory, especially when I’m cooking pork or chicken. But apple, cherry, oak, mesquite: they all impart their own unique flavors. I have apple and cherry trees in my yard. So whenever they need a little pruning, I save those cut pieces of wood and use them to smoke with.

You don’t need to buy a separate smoker. Simply soak some wood chips in water for about a 1/2 hour before grilling (I’ve found that hot water speeds the process up), drain the water, and then sprinkle the moist chips on the hot coals in your grill. Throw your meat on the grill, close the lid (opening the vents, of course) and off you go.

So now in 10 minutes, you’ve got a grill ready to cook a steak with…about the same as gas.

“I don’t cook with charcoal because it’s so messy!” So what are you…a girl? You probably have one of those fake gas fireplaces in your house, too.

Because I’m using a small amount of hardwood charcoal for the average dinner, I don’t have to clean out my grill every time I use it. After a while, yes, some ashes pile up in the bottom of my grill and I have to dump them. Because they’re pure wood ashes, I dump mine into my strawberry or raspberry patch. They love the stuff.

You still have to clean a gas grill after a while, and it always runs out of propane halfway through cooking when you have guests over for dinner. So where’s the convenience in that?

Charcoal grills give you everything you could ask for: low maintenance…ease of use–no stupid propane tanks, valves and igniters…real wood flavor–not lava rocks, whatever the hell those things are…and the thrill of cooking meat over a real fire–bonding with the caveman in you, not some pussy with an umbrella drink and his shiny chrome gas grill with a thermometer that doesn’t work and burners that don’t cook evenly or get hot enough.

Time to be a man again! Ditch the gas grill. Get the hardwood charcoal. Find out what a really good steak is supposed to taste like this Memorial Day weekend.

I know a lot of people are tempted to buy the turkey deep fryer this time of year, especially now that there’s an electric home turkey fryer that seems to make the job a lot easier and safer. (I’m still not OK with frying turkeys indoors, no matter how safe they say it is.)

The concept of a deep-fried turkey sounds pretty cool. And if you do it right, it tastes pretty good. I’ve had my share of fried turkeys when I lived in Alabama many years ago. But for me, it’s just too much damn work: finding a safe spot in the yard to blast the propane-fueled fryer so that you don’t burn your house down, standing outside and freezing your ass off while it fries, and then disposing of gallons of used oil at the end of it all. And making sure the oil is at the right temperature so you don’t get a scorched turkey on the outside and raw turkey on the inside.

So here’s what I do: I cook the turkey in my good old Weber grill. The standard Weber grill allows you to cook up to a 15 lb. turkey–big enough for my purposes–and it comes out crispy, smokey and delicious. If you’re afraid to try this for the first time at Thanksgiving when it really matters, wait a few months and buy a turkey when you have the craving and try it out.

The charcoal chimney with hot coals awaits.

Although I’ve stopped using charcoal briquettes a long time ago, and now strictly use natural hardwood charcoal, this recipe works best with Kingsford. The idea is for the coals to cook slowly and evenly. And never use lighter fluid…always start your fire with a few pieces of crumbled newspaper under a charcoal chimney.

Needed:

Weber grill, with the dome top

Kingsford charcoal briquettes (do not use Match Lite or other pre-soaked briquettes)

Heavy duty aluminum pan (disposable)


Ingredients:

Whole turkey, up to 15 lbs, thawed and previously brined (see my blog about brining a turkey)

Olive oil (to rub on turkey)

2 yellow onions, chopped

4 stalks of celery, chopped

½ lb (2 sticks) of unsalted butter, melted

1 tablespoon granulated garlic

1 tablespoon onion powder

2 tablespoons salt

1 tablespoon pepper

Spreading the coals away from the center of the grill.

If you want stuffing, make it separately and cook it separately.

Light 8 to 10 lbs of charcoal in the grill…depending on the size of the turkey and how cold it is outside.

Remove the giblets from the turkey. Place the bird in the aluminum pan.

In a small bowl, mix granulated garlic, onion powder, salt and pepper Add any other seasonings you like.

Coarsely chop onions and celery. Place in a another bowl. Mix with the melted butter and 1/3 of the salt/pepper/garlic powder mixture. Place a small handful of this “stuffing” mixture in the neck cavity of the turkey. Place the rest in the body cavity (where the stuffing would usually go.) You can fasten the bird with turkey skewers if you like. This “stuffing” is strictly to flavor the turkey…you don’t eat it!

The rubbed, stuffed and seasoned bird.

Rub the outside of the entire turkey with the olive oil and sprinkle the rest of the garlic/onion/salt/pepper mixture on the outside of the bird. Make sure you get the whole bird…on the bottom as well.

When the coals in the grill have ashed over, spread them to the outside edges of the Weber equally. Put the cooking grill rack in place. Place the aluminum pan with the turkey in the center of the grill, keeping it away from the direct heat of the coals. If using a a meat thermometer, insert the probe into the thickest part of the breast, being careful not to hit the bone. Place the lid on the grill. (You may need to bend your pan a bit.) Open the vents on the bottom of the Weber as well as the lid. Important to get air circulating!

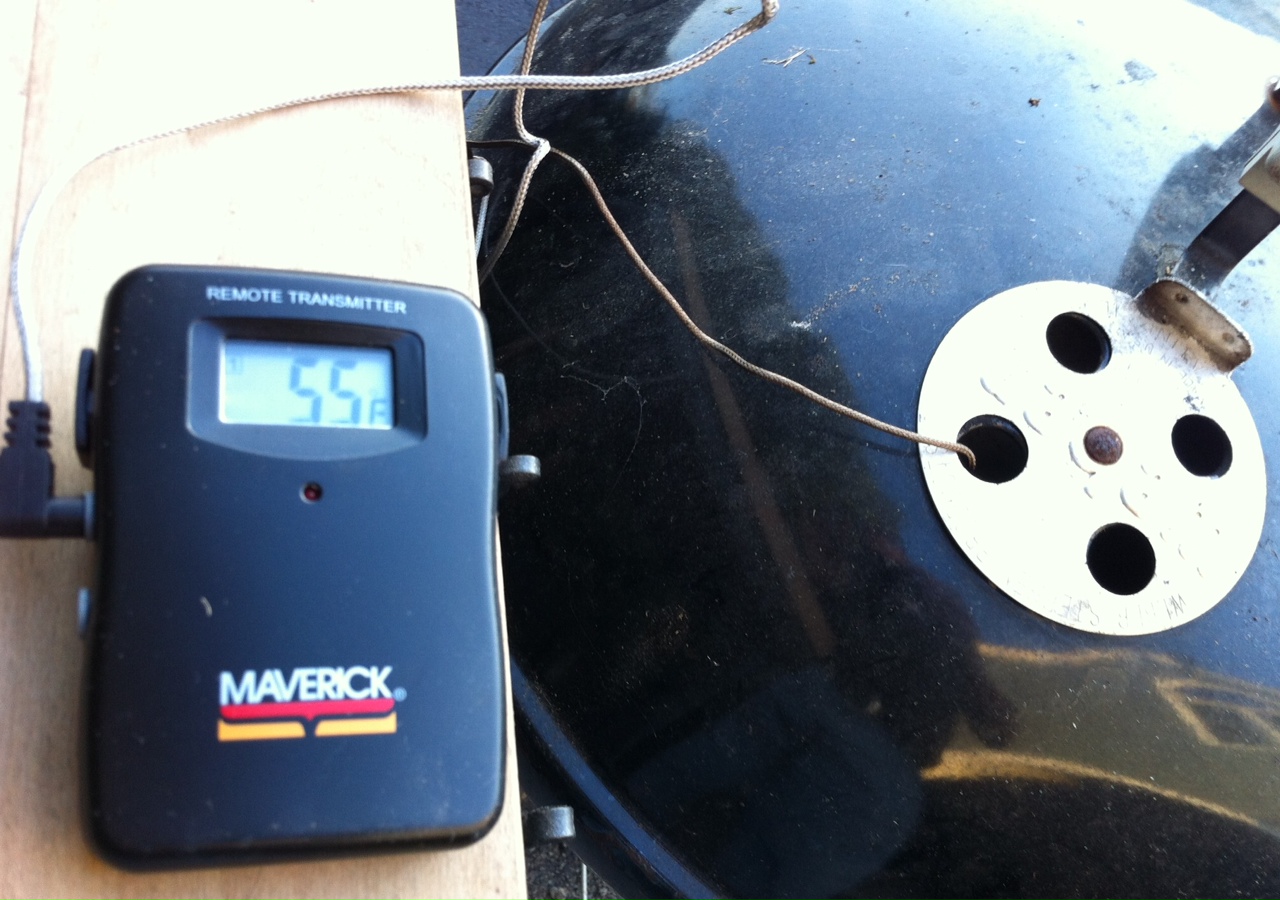
My meat thermometer calls me from as far as 100 feet away when the turkey reaches the optimum temperature that I pre-set. Time for a drink!

No basting is necessary.

Now here’s the tough part: DO NOT OPEN THE GRILL TO CHECK ON THE TURKEY! (If you must look, shine a flashlight into the vent holes on the lid to take a peek at the pop-up timer, if there is one.) The whole point is to keep the heat inside the kettle. You’ll know your turkey is done when no more smoke or heat rises from the grill, and the turkey inside stops making sizzling noises.

Remove the turkey and let it rest at least 15 minutes before carving.

Beautifully grilled, cooked to 180 degrees in less than 2 hours!

Gas grills make no sense to me at all. I find little or no difference between them and the gas stove I have in my home. I can make a perfectly acceptable steak by grilling it on my stovetop cast iron griddle…or I can sear it in a pan and pop it in a hot oven. If the real reason for grilling is flavor, why wouldn’t you want something that makes a real difference?


A charcoal grill is the way to go. Besides the quality and source of your beef, wood and smoke are what makes the difference between a good steak and a great steak.

I know the #1 argument for going with gas over charcoal is time. “It takes too long to start a charcoal grill.” That’s a load of crap. I’ve convinced many friends over the years by showing them that it takes no more time to light a charcoal fire than it does a gas grill.

Here’s what you need: Get yourself the charcoal grill you like…the classic Weber is still an awesome choice.

Get a bag of hardwood charcoal. I’m not talking charcoal briquets, like Kingsford, that have a ton of additives in them. And definitely don’t ever use crap like Match Light. I’m talking pure hardwood charcoal, easily found in many stores.

Get a charcoal chimney. It’s a metal tube with a handle and a grate at the bottom. You crumble a couple of sheets of newspaper into the bottom, pour charcoal into the top, light it, and you have hot coals in 10 minutes without lighter fluid.

And DON’T EVER use lighter fluid! Why would you spend good money on a steak and then want to make it taste like gasoline?


The variety of wood chips available for smoking is another flavor factor when it comes to grilling with charcoal. My personal favorite is hickory, especially when I’m cooking pork or chicken. But apple, cherry, oak, mesquite: they all impart their own unique flavors. I have apple and cherry trees in my yard. So whenever they need a little pruning, I save those cut pieces of wood and use them to smoke with. And I love Jack Daniel’s smoking chips, made from the oak barrels that have had JD soaking in them. You can actually get high from sniffing the bag when you first open it!


You don’t need to buy a separate smoker. Simply soak some wood chips in water for about a 1/2 hour before grilling (I’ve found that hot water speeds the process up), drain the water, and then sprinkle the moist chips on the hot coals in your grill. Throw your meat on the grill, close the lid (opening the vents, of course) and off you go.

“I don’t cook with charcoal because it’s so messy!” So what are you…a girl? You probably have one of those fake plastic log gas fireplaces in your house, too.

Because I’m using a small amount of charcoal for the average dinner, I don’t have to clean out my charcoal grill every time I use it. After a while, yes, some ashes pile up in the bottom of my grill and I have to dump them. But because they’re pure wood ashes, I dump mine into my strawberry or raspberry patch. They love the stuff.

You still have to clean a gas grill after a while anyway, and it always runs out of propane halfway through cooking when you have guests over for dinner. So where’s the convenience in that?

Charcoal grills give you everything you could ask for: low maintenance…ease of use–no stupid propane tanks, valves and igniters…real wood flavor–not lava rocks, whatever the hell those things are…and the thrill of cooking meat over a real fire–bonding with the caveman in you, not some pussy with an umbrella drink and his shiny chrome gas grill with a thermometer that doesn’t work and burners that don’t cook evenly or get hot enough. And I cook throughout the winter with my charcoal grill.

Time to be a man again! Ditch the gas grill. Get the charcoal. And rediscover what a really good steak is supposed to taste like.