Posts Tagged ‘dinner’

Lamb is such an underrated meat. It was one of the things my Mom cooked really well, so I grew up loving it, and was never bothered by the gaminess of it.

If the gaminess does bother you, look for American lamb. If gamier meat doesn’t bother you, go for the gusto and get grass-fed New Zealand or Australian lamb.

The balsamic vinegar in this recipe is not the crazy expensive stuff. It’s the bottle you can get for about 9 bucks in the supermarket.

Screenshot

Here’s the marinade I used…

1/2 cup olive oil
1/4 cup balsamic vinegar
1 tablespoon fresh rosemary, chopped (or 1 teaspoon dry)
1 tablespoon fresh thyme leaves, chopped (or 1 teaspoon dry)
1 tablespoon Kosher salt
1 tablespoon maple syrup
1 tablespoon Dijon mustard
1 teaspoon black pepper
1 teaspoon dried oregano
1 teaspoon granulated onion
1 teaspoon granulated garlic

Mix the marinade ingredients together in a bowl. 

Place the lamb in a plastic bag and pour the marinade in, squishing it around to make sure it makes contact with the meat. Place it in a pan or a bowl to prevent accidental leaking.

Screenshot

Let the lamb marinate for several hours at room temperature, or in the fridge overnight.

Before cooking, bring the lamb back to room temperature.

Screenshot

Use some oil in a hot pan, and then sear the lamb on both sides. Place a lid on the pan, and reduce the heat to medium-low.

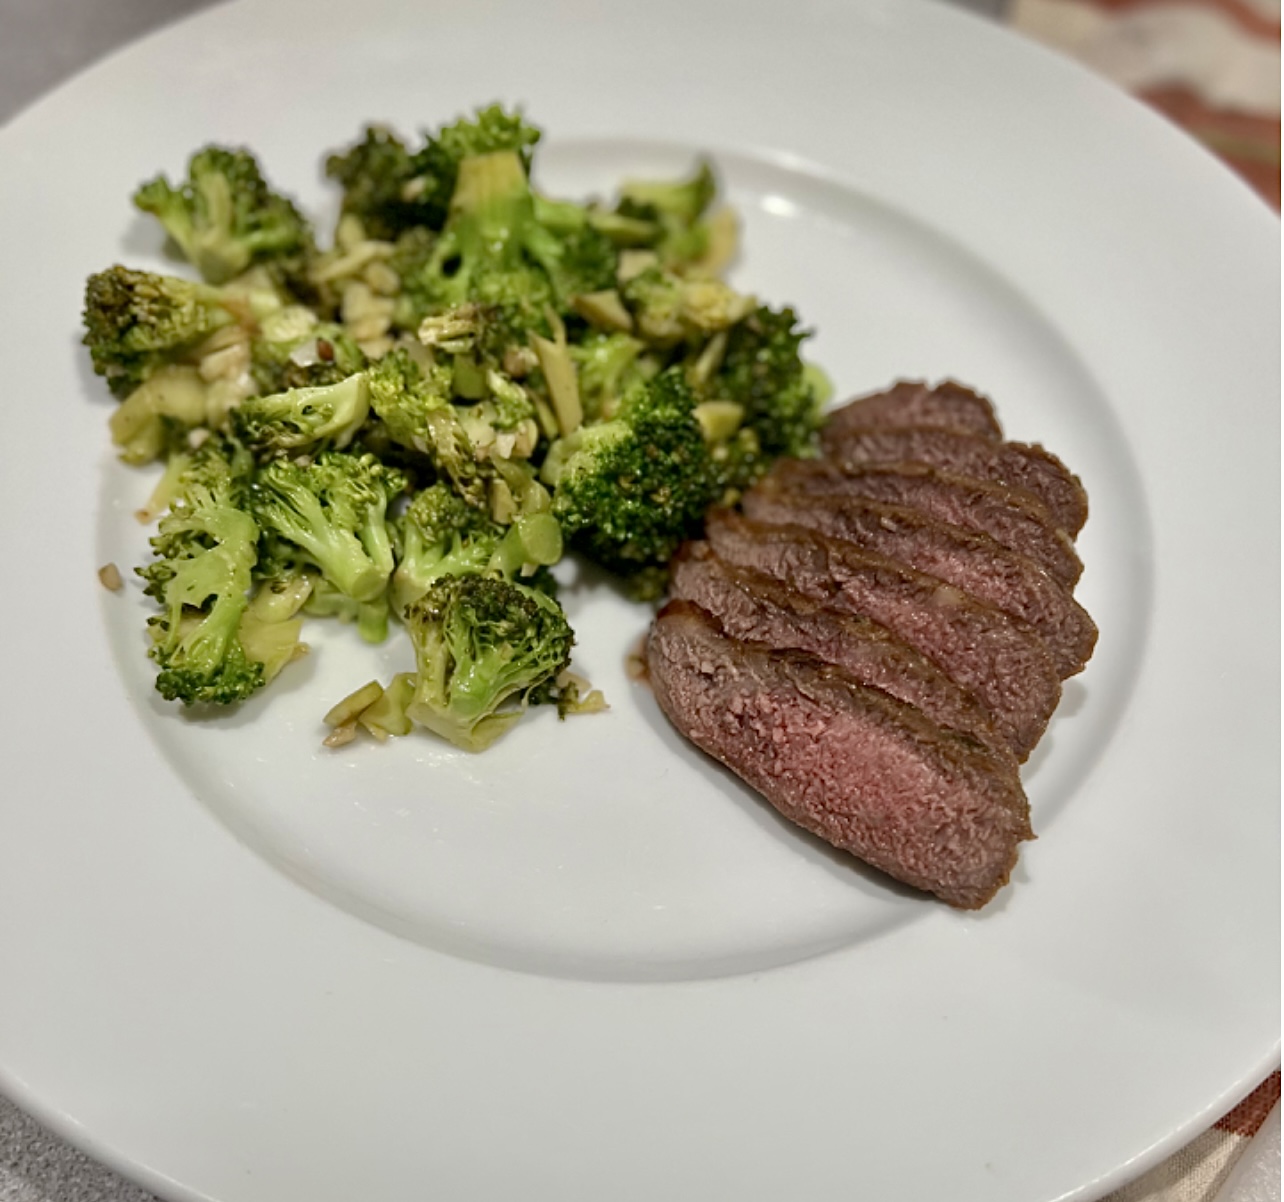
I cook lamb until I get the lamb to a perfect medium. That means cooking to 130-135 degrees. But cook it the way you like it!

Update:

Last night, I used this recipe to marinate some baby lamb chops. I love these, because they look like mini porterhouse steaks, and meat off the bone is always juicier and tastier.

I placed the lamb in a freezer bag with the marinade, and let it marinate a solid three hours at room temperature. Any longer than that, and it would go to the fridge.

I always remove meat from the fridge and let it come back to room temperature before I cook it…and this time, I decided to try my air fryer, set at 400. Not only did it cook the lamb perfectly, it gave it that nice slight char on the outside, as if I grilled it. Delicious!

Despite the large Italian community we have here in southern New England, there’s no exceptional pizza to speak of. I suppose you could say “them’s fightin’ words!” but if it’s here, I haven’t found it yet. (Fellini Pizza is about the best in Providence.)

So where is the excellent pizza? New York City, of course. OK…maybe I’m prejudiced because I’m a Brooklyn boy, and worked in a variety of pizzerias in my younger days, but there’s no doubt in my mind that if you want the best pizza–or bagel, for that matter–you’ve got to go to the Big Apple. (Even “Frank Pepe’s” in New Haven, CT is a mere stop on the way to the real deal.)

Pizza in the Big Apple can be confusing, as there are many different varieties to choose from. Brick oven pizzas abound, but there are pizza lovers who won’t settle for anything less than an old-fashioned pizza baked in a coal-fired oven. The extremely high heat of a coal-fired oven cooks the pizza in just a minute, and imparts a crusty, charred flavor you can’t get any other way. There are only about a dozen coal-fired pizzerias left in New York City, and many of them have been around for a hundred years or more, so it’s definitely a matter of making a special trip to enjoy this style of pizza. (Providence now has its own coal-fired pizza, but it just can’t compare.)

There’s plenty of good, basic pizza in New York City, too: the traditional thin, round Neopolitan pie, and the thicker, square Sicilian pie, baked in that Blodgett pizza oven we all knew in our early pizza-making days.

Many years ago, when I heard through the pizza lovers’ grapevine that a “new” pizza was out there, one that was gaining a cult following, I needed to know about it. And more importantly, I needed to taste it!

It’s called Pizza Montanara, and there’s still only a few pizzerias in New York City that serve it. The one I go to without fail is PizzArte, on West 55th, and I have to say it’s the ultimate pizza.


Pizza Montanara, sitting next to me in the car, just waiting to be devoured.


What makes Pizza Montanara so spectacular, quite simply, is that the dough is fried in oil for 30 seconds, flipped and fried another 30 seconds, before they put the sauce and cheese on it, and then they cook it in a wood burning oven. It is not greasy. The frying process puffs the dough up and creates a beautiful pillow-like softness that I’ve never experienced in a pizza before. Imagine a pizza cloud and you’ve got Pizza Montanara.

Where to get Pizza Montanara.


I’ve made Pizza Montanara at home, with limited success. I poured a few inches of olive oil in a large cast iron skillet, stretched my dough into a small pie, and gently floated it into the pan. Using a spatula and tongs, I was able to flip the fried dough over after about 30 seconds, then removed it from the pan after another 30 seconds. It was golden and puffy. I quickly sauced and cheesed it and in the oven it went. But it’s a messy process that doesn’t always come out just right. I need more practice!


Frying the pizza dough. I use olive oil for better flavor, but I have to watch the temperature, because the smoking point is low (about 375 for extra virgin olive oil) and burnt oil is not what anybody wants!


A homemade Pizza Montanara, with buffalo mozzarella and pepperoni.


A four-cheese Montanara, with mozzarella, sharp Provolone, Parmiggiano Reggiano, and ricotta…and lots of garlic!


Every time I post a photo of Pizza Montanara on Facebook or Instagram, my friends don’t believe that this could possibly be a life-changing pizza experience. It is. After a trip to Manhattan, we’ll devour 3 pizzas on the ride home. Nothing makes New York traffic easier to bear than a Pizza Montanara in the seat next to you!

Pizza Arte also makes one helluva gluten-free pizza.


Chicken thighs are the best: their fat content makes them perfect for the grill because they don’t dry out like chicken breasts do. And I always leave the skin on for extra crispy flavor. I bought a package of chicken thighs the other day and decided to go Asian with my flavors, baking them in the oven so that they cook evenly, and then finishing them off on the grill to get that delicious smokey flavor and char.

I marinated the chicken thighs in the sauce for several hours before cooking. If you have the opportunity to marinate them overnight in the fridge, that’s even better. Just remember that if you want to use the marinade as a dipping sauce later on, divide it in half from the very beginning. Use half to marinate the chicken, and save the other half for later. If any of the marinade touches raw chicken, you can’t use it as a dipping sauce. (Salmonella!) So keep them separated.


3/4 cup ketchup
1/2 cup soy sauce
1/2 cup hoisin sauce
1/2 cup maple syrup
1/4 cup Chinese chili garlic sauce
1/4 cup brown sugar
1 tablespoon rice vinegar
2 garlic cloves, minced

Combine all the ingredients in a bowl, mixing well. Use half of it to marinate the chicken, and save the other half for dipping sauce or brushing on to the chicken later.

The Bell & Evans chicken thighs that I bought came in a package that works perfectly for marinating. One less thing to clean up!

If you’re cooking the same day, let the chicken marinate at room temperature for three hours. If you’re marinating overnight in the fridge, let the chicken come to room temperature before cooking.


Preheat the oven to 325°.


Place the chicken thighs on a sheet pan and bake until they are cooked through.…but not overcooked. If you’re not using the grill, place them under the broiler and watch them carefully, as the sugars in the marinade could burn. Give them some nice char.

If you’re using the grill, light a fire and spread the coals so that you have a medium-hot flame. Grill the chicken thighs until they have a beautiful char on them, being careful not to burn them. Brush more of the marinade on them as they cook, if you like.

Serve the chicken thighs with the dipping sauce on the side.

This cold weather always has me craving comfort food…and nothing says comfort more than Shepherds Pie!


To make this recipe, I used organic vegetables, organic grass-fed dairy products, grass-fed beef, pastured eggs, and homemade chicken stock. These extra efforts made a big difference to me, but use what you are most comfortable with and have easiest access to.

And although the basic recipe calls for beef, I’ve had great success using lamb and even venison.

If you’re on a gluten-free diet, the only gluten in this recipe is in the all-purpose flour. Using a GF flour, like Cup4Cup or Bob’s Red Mill 1 to 1 Baking Flour, does a great job of thickening without the gluten.

Potatoes are the classic ingredient in Shepherds pie, but I found that sweet potatoes are a fantastic substitute. (See the photos at the bottom of the blog.) Give either one a shot yourself, or be really bold and try a combination of the two! The procedure is the same either way…

2 oz. cheddar cheese

1 1/2 lbs. Russets (or sweet potatoes), peeled and cubed
1/4 cup half-and-half
2 oz. unsalted butter
3/4 teaspoon Kosher salt
1/4 teaspoon freshly ground black pepper
1 egg yolk
 

Grate the cheddar cheese. Set it aside for later.

Peel and cube the potatoes and place them in a pot of cold water. Bring it to a boil and cook the potatoes until they are fork-tender.
While they are boiling, place the half-and-half and butter in a microwave safe bowl and zap them for 35 seconds to warm them up.
Once the potatoes are done, drain them and place them back in the pot. Add the half-and-half and butter and mash really well. Add the salt and pepper and continue mashing. Finally, add the egg yolk, mixing quickly and thoroughly. Then set the potatoes aside.


The meat filling…

2 tablespoons bacon fat (or your favorite oil)
1 cup chopped onion
2 carrots, peeled and diced small
2 garlic cloves, minced

1 1/2 lbs. beef, cut into 1/2″ cubes
1 teaspoon Kosher salt
1/2 teaspoon freshly ground black pepper
2 tablespoons all-purpose flour
2 teaspoons tomato paste
1 cup chicken broth, preferably homemade
1 teaspoon Worcestershire sauce
2 teaspoons freshly chopped rosemary leaves
1 teaspoon freshly chopped thyme leaves
1/2 cup fresh or frozen corn
1/2 cup of fresh or frozen peas

Preheat the oven to 400°.

While the potatoes are cooking, prepare the meat filling.

Place the bacon fat or oil in a pan and set it on medium high heat. Add the onions and the carrots and cook until the onions are translucent. Add the garlic and stir.
Add the beef and the salt and pepper and cook until the meat has browned nicely.
Sprinkle the meat with the flour, and mix to combine, cooking for another minute.
Add the tomato paste, chicken broth, Worcestershire sauce, rosemary and thyme, and stir to combine.
Bring this to a boil, reduce it to a simmer, and cook it for about 10 minutes, until the sauce has thickened nicely.

Add the corn and the peas to the meat mixture, and then pour it all into a baking pan. ( I used a 9-inch round metal baking pan that was about 3 inches deep.)

Spread the mashed potatoes on top of the meat mixture. If you use the mashed potatoes all around the edges, it seals the meat mixture in, and prevents bubbling over and messing up your oven. A rubber spatula makes this job easy.

Place the pan on a parchment-lined baking sheet (to prevent spills), and in the oven to bake for 15 minutes.

After 15 minutes, remove the pan and sprinkle the grated cheddar cheese on top of the potatoes. Then return the pan to the oven for 10 more minutes, until the cheese has melted and created a beautiful golden crust on top.

Remove the pan from the oven, placed it on a wire rack, and let it cool at least 15 minutes before serving.


As I said earlier, sweet potatoes make a great substitute for regular potatoes. Give them a try!


I’ve gotten a few requests for my chicken fried rice recipe. Not sure if it’s authentic Asian, but I use a lot of the flavors and veggies that I find in chicken fried rice when I get takeout. It’s really not a difficult thing to do, but it does take some work, chopping everything up and getting it ready.

I don’t have a wok, and I don’t think it’s necessary. As long as you have a pan that’s big enough to hold everything at the end, you’re good to go.

All the Asian ingredients can be found in any supermarket. And if you want this dish to be gluten-free, use GF soy sauce and hoisin sauce. La Choy and Kikkoman make them.


I like to start by sautéing all the veggies, then removing them from the pan, putting them in a separate bowl, and then continuing with the chicken. It seems like the best order of business for me.

They say that you should use day-old rice, so, if you plan on making this recipe, boil up some rice the day before, and put it in the fridge. I like to use jasmine rice, but use whatever rice you like.

All measurements for this recipe are approximate. Again, add more of what you like, and take away what you don’t.

Don’t be afraid to explore the international aisle in your supermarket as well as the produce section for interesting veggies that you can add to this dish. I’m not a fan of water chestnuts, but that’s one option. And if you don’t like the little corn cobs, add some frozen corn. Bok choy, mushrooms, and scallions are all great choices.


1 tablespoon soy sauce
1 tablespoon hoisin sauce 
2 teaspoons rice vinegar 
1 teaspoon (or more) Chinese garlic sauce
1 teaspoon sesame oil

1 small onion, finely chopped
1cup of finely chopped cabbage
1/2 can of small Asian corn cobs, chopped
1 cup or more chopped broccoli
1 cup mung bean sprouts or pea shoots
1 cup frozen peas (optional)


3 cups of cooked rice
1 1/2 pounds of chicken breast, cut into small cubes
2 eggs


To make the marinade, combine the soy sauce, hoisin sauce, rice vinegar, Chinese garlic sauce, and sesame oil in a bowl.

Cut the chicken breasts into small 1/2-inch cubes and place them in a bowl. Add the marinade to the chicken, and make sure the meat is coated well. Let it marinate for a couple of hours at room temperature, or in the fridge if you need more time.

Get a large pan that will hold everything and put it on high heat. Add an oil with a high smoke point, like peanut oil, avocado oil or grapeseed oil.

Add the onions to the pan and sauté until they’re translucent. Add the cabbage, and let it wither. Add the corn cobs and sauté for a few minutes. Add the chopped broccoli, and continue to sauté. You can add the bean sprouts now, or save them for later if you want them to be very crunchy. Save the peas for later.

When the veggies have softened, pour them into a bowl and return the pan to the stove top. Add a little more oil and let it heat up.

Add the chicken pieces to the pan, pouring in all the marinade with it. Make sure the chicken is thoroughly cooked, and just starts to caramelize.

Scramble the two eggs in a small bowl and add them to the pan, constantly moving the chicken and eggs around to fully cook the eggs.

Add the rice to the pan and mix everything thoroughly. Then return the veggies and mix thoroughly again.

This is where you taste everything. Add what you think it needs. Maybe it’s some soy sauce…maybe a little hoisin…maybe salt and pepper…maybe a little sesame oil. Maybe more of everything! It’s up to your individual taste.

Toss the fried rice with the added seasonings, then add the bean sprouts and the peas, giving it one more good mix.

This chicken fried rice is great as meal in itself, and leftovers are always welcome.