For me, 2-for-1 Moscow Mules means just that: 2 for 1 person! Fun meal at Staff in Reykjavík

For me, 2-for-1 Moscow Mules means just that: 2 for 1 person! Fun meal at Staff in Reykjavík
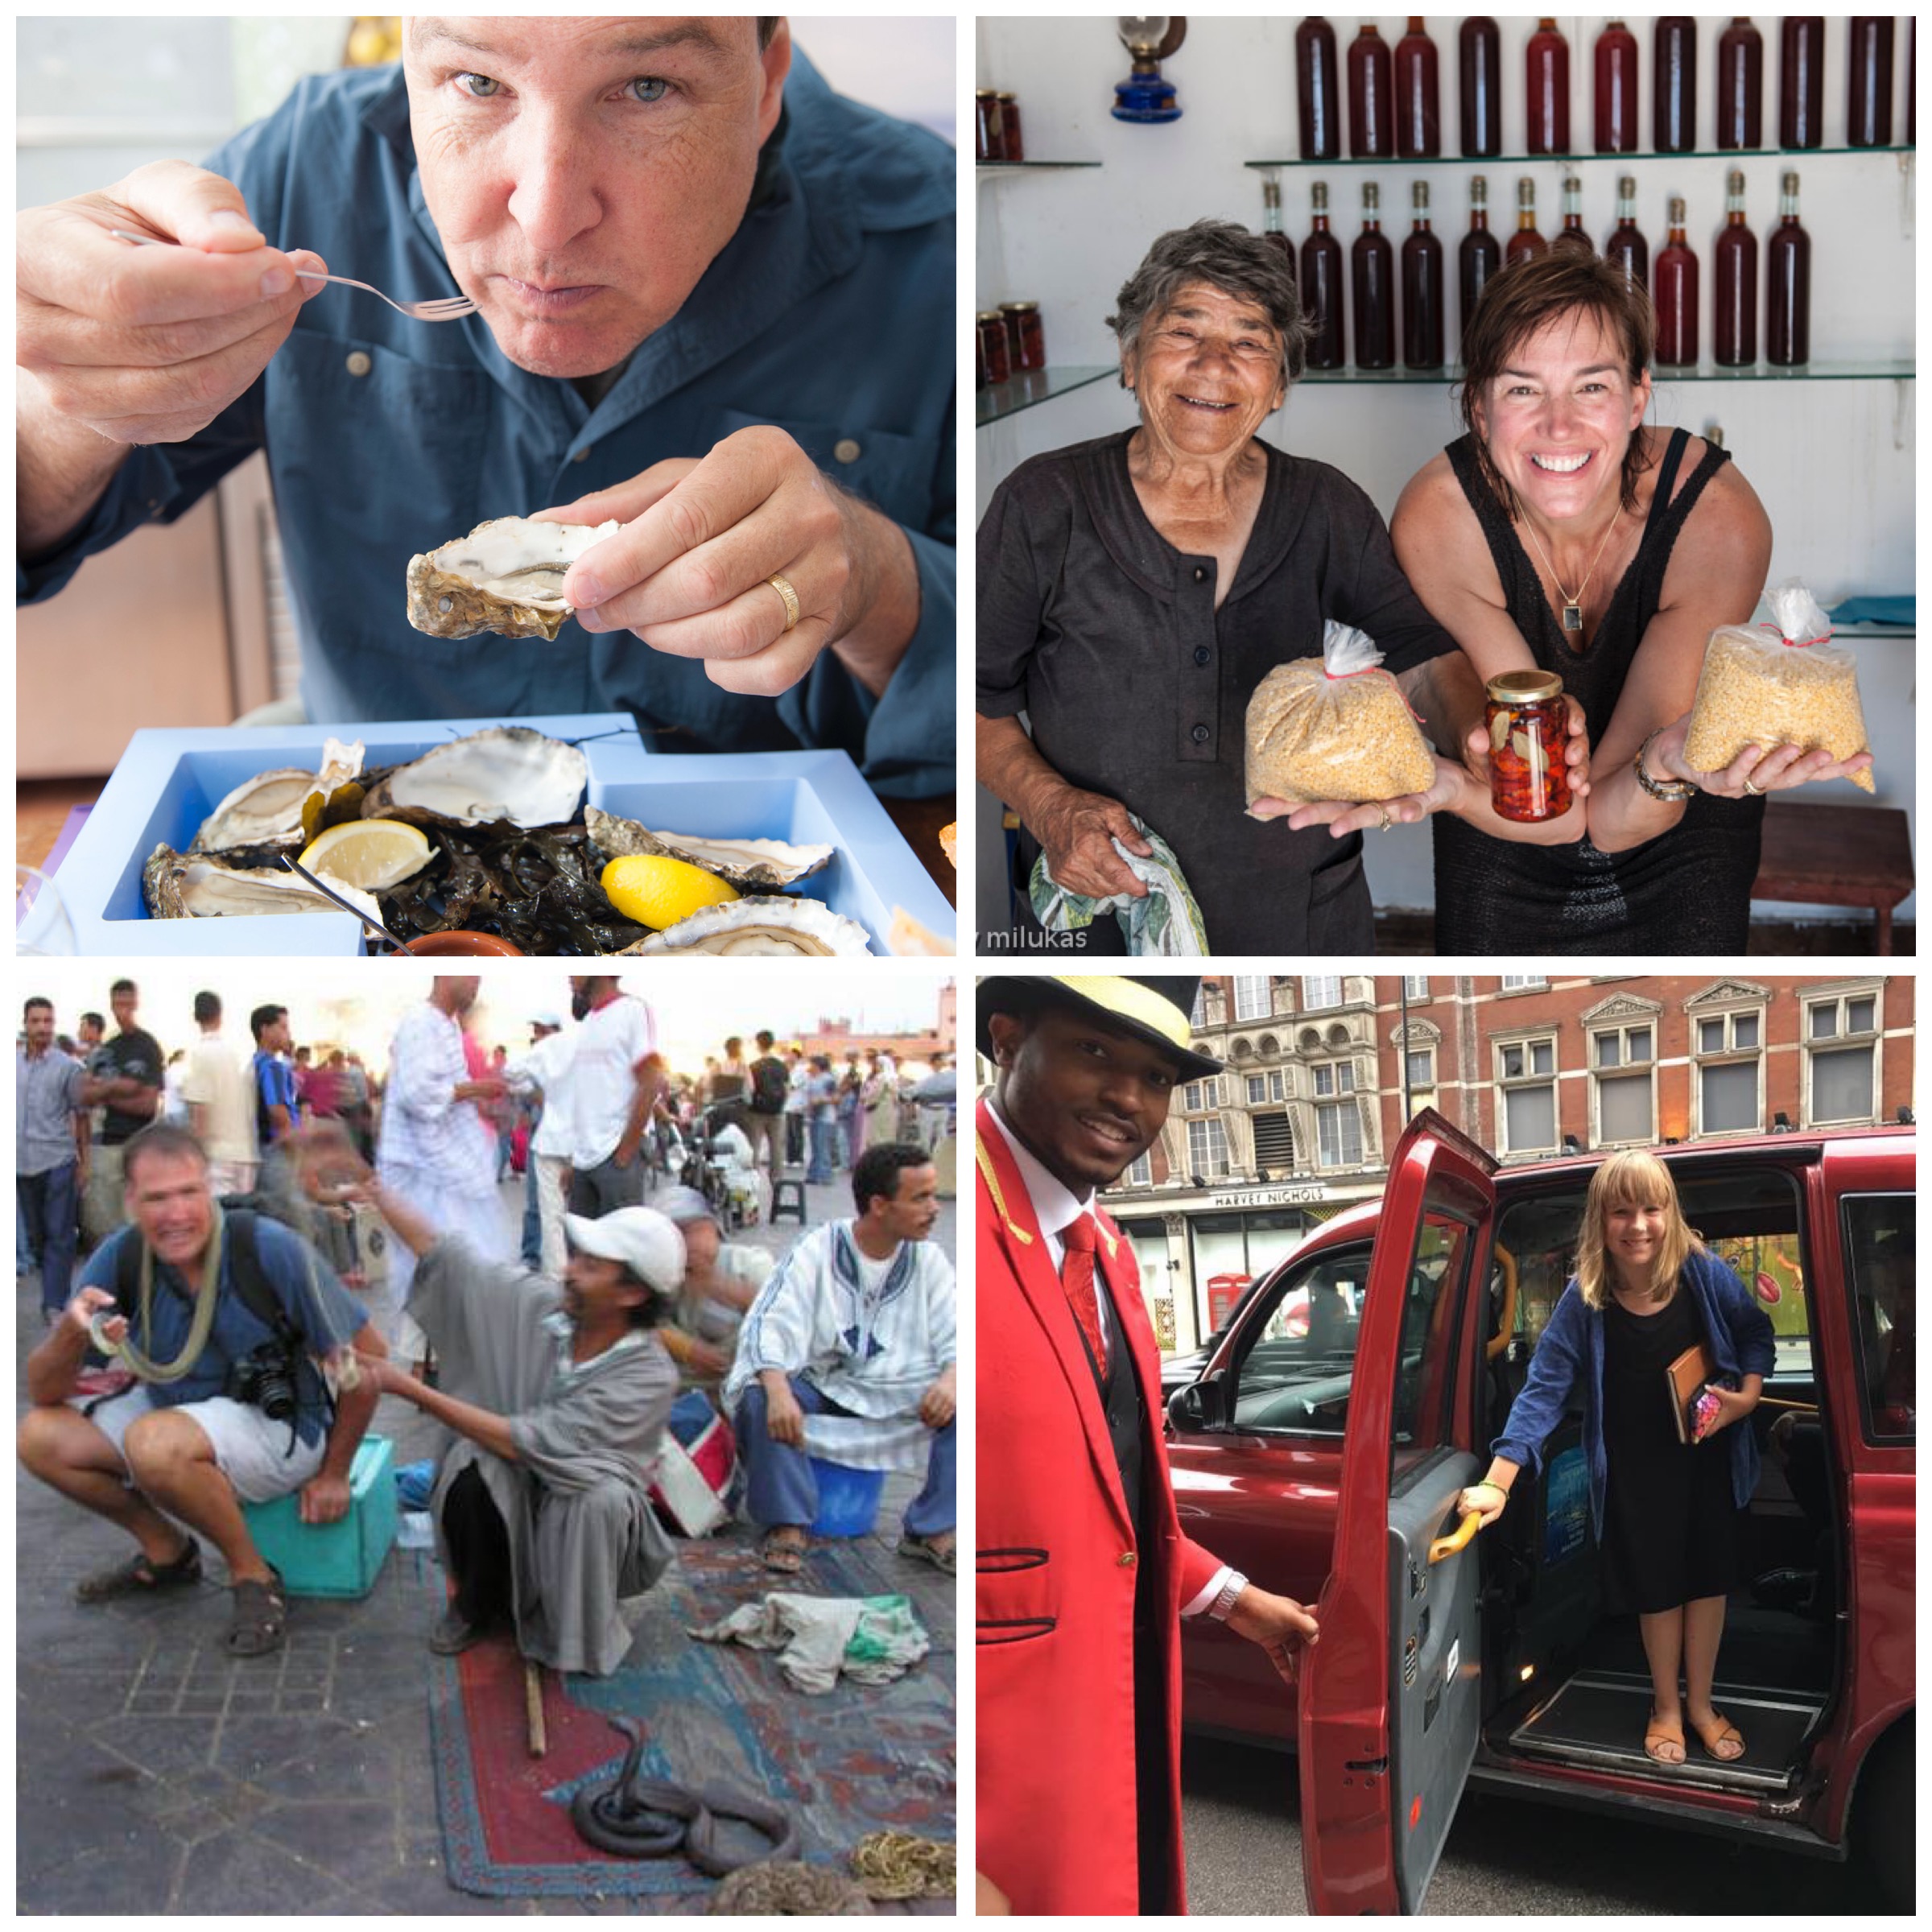
What makes Paris so special is the quality of the ingredients they use, from a Michelin star restaurant to a sandwich stand.
Nobody here settles for the cheap way out.
A simple sandwich: fresh baguette, Iberico ham, and a generous slathering of raclette cheese. Three ingredients, one incredible sandwich.
Almost didn’t get one. My daughter turned to me and said: “Dad, if you keep looking at it, you’re just going to torture yourself more. “ After all, what was the point of going to Paris if I wasn’t going to eat everything?
Not a bit of guilt. Not before and not after!

My daughter’s continuing quest to go to every Hard Rock Cafe possible. So far: Orlando, New York, Cayman Islands, Washington DC…and today: Paris! 
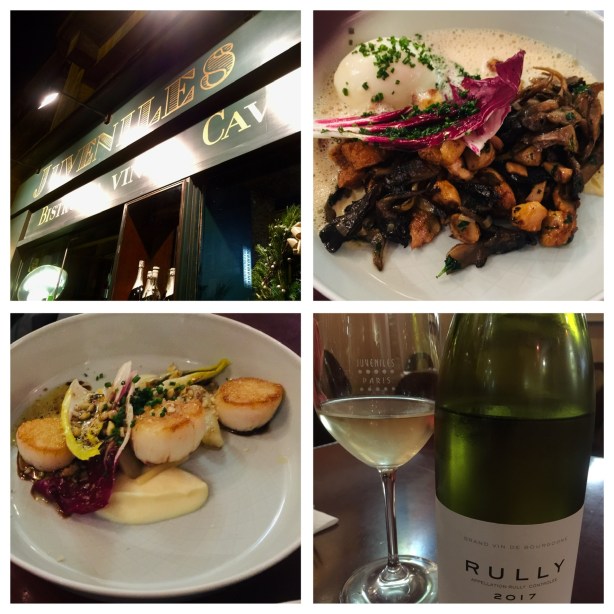
Visiting Paris again, we had to stop at our favorite wine bar, Juvéniles. Sadly, our friend, Tim Johnston, went home to England at the same time we arrived. Nonetheless, his daughter, Margeaux and her husband, and accomplished chef, treated us well.
Dinner included foie gras, sautéed mushrooms, fresh scallops from Brittany, guinea hen, and more!
I had a friend ask me that question the other day.
Seems that some people aren’t sure how to pronounce the name of this blog. I guess it’s time to explain it a little…
First, the pronunciation. It’s \ˈliv \ the \ˈliv \…as in “Live for today”….or…”Live to a ripe old age.” Both “lives” rhyme with “give.”
It is not /līv/ the /līv/ (rhymes with “hive”) or any combination of the two, like \ˈliv \ the /līv/.
Where this name came from is a story that my wife and I disagree on. Our versions are similar, but not exactly the same.
Here’s my version: I have a good friend named Lee, who is up on every trip we take, every restaurant we go to, every amazing place we see in this world. Having traveled to many countries, we’ve been fortunate to come home with some wonderful stories.
After one such trip, my Lee said to me: “Wow…you guys really know how to live!”
My wife has quirky fun way with words and her response was: “Everybody knows how to live. The secret is to live the live!” Since then, we use the phrase “live the live” to describe anything that would normally be described as “living the life” or “living it up.”
Live the live simply means to live your life to the fullest by whatever means you are able to do so. You can live the live by climbing a mountain, dining at a Michelin-star restaurant, or simply soaking up the sun on a beautiful beach in the Caribbean.
But if none of that is your speed, you could live the live by sitting in front of your TV on a Sunday afternoon, watching football while chowing down on pizza and beer.
Live the live is whatever makes your life special to you.

For me, live the live means traveling for food…sharing experiences with friends…meeting wonderful new people in far away places…and enjoying a few cocktails along the way.
Whatever your definition of live the live is, I hope that you can achieve it more than once in 2019.
Thanks so much for my reading my blog!
Despite the large Italian community we have here in southern New England, there’s no exceptional pizza to speak of. I suppose you could say “them’s fightin’ words!” but if it’s here, I haven’t found it yet. (Fellini Pizza is about the best in Providence.)
So where is the excellent pizza? New York City, of course. OK…maybe I’m prejudiced because I’m a Brooklyn boy, and worked in a variety of pizzerias in my younger days, but there’s no doubt in my mind that if you want the best pizza–or bagel, for that matter–you’ve got to go to the Big Apple. (Even the most excellent “Frank Pepe’s” in New Haven, CT is a mere stop on the way to the real deal.)
Pizza in NYC can be confusing as there are many different varieties to choose from. Brick oven pizzas abound, but there are pizza lovers who won’t settle for anything less than a pizza baked in a coal-fired oven. The extremely high heat of a coal-fired oven cooks the pizza in just a minute, and imparts a crusty, charred flavor you can’t get any other way. There are only about a dozen coal-fired pizzerias in New York City, and many of them have been around for 100 years or more, so it’s definitely a matter of making a special trip to enjoy this style of pizza. (Providence now has its own coal-fired pizza, but it can’t compare.)
Plenty of good, basic pizza, too: the traditional thin, round Neopolitan pie, and the thicker, square Sicilian pie, baked in that Blodgett pizza oven we all knew in our early pizza-making days.
Several years ago, when I heard through the pizza lovers’ grapevine that a “new” pizza was out there, one that was gaining a cult following, I needed to know about it. And more importantly, I needed to taste it!
It’s called Pizza Montanara, and there’s only a few pizzerias in New York City that serve it. The one I go to without fail is PizzArte, on West 55th, and I have to say it’s the ultimate pizza.

Pizza Montanara, sitting next to me in the car, just waiting to be devoured.
What makes Pizza Montanara so spectacular, quite simply, is that the dough is fried in oil for 30 seconds, flipped and fried another 30 seconds, before they put the sauce and cheese on it, and then they cook it in a wood burning oven. It is not greasy. The frying process puffs the dough up and creates a beautiful pillow-like softness that I’ve never experienced in a pizza before. Imagine a pizza cloud and you’ve got Pizza Montanara.

Where to get Pizza Montanara.
I’ve made Pizza Montanara at home, with some success. I poured a few inches of olive oil in a large skillet, stretched my dough into a small pie, and gently floated it into the pan. Using a spatula and tongs, I was able to flip the fried dough over after about 30 seconds, then removed it from the pan after another 30 seconds. It was golden and puffy. I quickly sauced and cheesed it and in the oven it went. But it’s a messy process I’d rather leave to the pros.
Every time I post a photo of Pizza Montanara on Facebook or Instagram, my friends don’t believe that this could possibly be a life-changing pizza experience. It is. I just came back from Manhattan, and we devoured 3 pizzas on the ride home. Nothing makes New York traffic easier to bear than a Pizza Montanara in the seat next to you!
Pizza Arte also makes one helluva gluten-free pizza.
Maybe you saw in the news recently that KFC just sold out (in just a few hours) of a firelog that contains the 11 secret herbs and spices of their original recipe chicken. Catch the story here: https://www.dailyrecord.com/story/money/2018/12/13/kfc-firelog-smells-just-like-its-fried-chicken-but-supplies-limited/2293216002/
It was just over a year ago where the nephew of Colonel Sanders himself revealed the 11 secret herbs and spices that made KFC‘s original recipe chicken a worldwide success. He claimed he worked for his uncle for many years and had to make huge batches of the seasoning mix.
Despite what they might say when asked, let’s face it: people just can’t get enough of KFC.
For me, going to KFC is a guilty pleasure. Although I’m a big proponent of grass-fed this and pastured that, my kryptonite is KFC’s original recipe chicken. There’s a KFC right next door to a local Home Depot in my area and my car literally drives itself to the pick-up window…I can’t help it. I justify the consumption of this heavenly grease by asking for no sides–no biscuit, no nothing. I get one breast and one thigh, and I drive off, steering my car with my knees as I indulge in my dirty secret, the hot grease dripping down my chin, a roll of paper towels at my side.
Making the KFC chicken recipe at home means I do have some control over product quality. I can use pastured or organic chicken. I can use clean oil. And I can oven-fry my chicken, meaning I fry it in oil until golden brown, then finish the cooking process in the oven.
I have to say, the recipe really works! Maybe if I placed the real KFC side-by-side with my home-made chicken, I’d notice a difference. But it was pretty damn close and absolutely delicious! If I could change one thing, I would use smaller chicken pieces next time. I used large pieces and the meat-to-breading ratio was off. Though it was mighty tasty, I was craving more breading per bite.
The recipe calls for all-purpose flour, but I used Cup4Cup gluten-free flour, and the results were excellent!

Combine the flour and the “11 herbs and spices” in a bowl. Mix well.
In another bowl, whisk together the milk and the egg. Add the chicken pieces to this bowl and let the chicken soak in it for 10 minutes.
Pre-heat the oven to 350 degrees.
Pour a couple of inches of the oil into a pan with high sides and heat it to 340 degrees, using a thermometer. Don’t fill it with too much oil, because oil expands when hot and it could spill over.
Take the chicken pieces and coat them with the seasoning mix one at a time, making sure you coat them well. Carefully place the chicken in the hot oil. Don’t overcrowd the pan…work in small batches. Too much chicken could cause the oil to spill over the top.
Fry the chicken pieces just until golden…no need to cook them all the way through. Place the pieces on a baking sheet lined with non-stick aluminum foil. When all the chicken has been fried, place the baking sheet in the oven and cook until the chicken pieces reach an internal temperature of at least 160 degrees.

Make a lot! Leftovers are great, and they re-heat really well in the oven! (Don’t use a microwave…the oven is best.)
It takes a few weeks for this limoncello recipe to be ready, so plan ahead!

It starts with beautiful lemons…
Many years ago, my wife and I visited the Amalfi coast, and we spent several nights on the beautiful island of Capri. On our last night, we dined at the historic Grand Hotel Quisisana, and our meal ended with a glass of the most delicious limoncello I ever had.
I asked the waiter if it was possible to get the recipe of the limoncello, and he made a big deal about the recipe being a “secret.” Though disappointed, I understood, and I left Capri thinking that I would never taste it again.

Sure, you can buy limoncello from Capri in a bottle, but what fun is that?
Two weeks later, now back at home, I was reading the latest issue of Conde Nast Traveler, and there in black and white, was the Quisisana limoncello recipe! WTF?
After making many batches of this limoncello, I started experimenting with other citrus, and the most successful by far was with grapefruit. Now I make a batch of each–lemon and grapefruit–every year. It’s important to use 100-proof vodka in this recipe. Most vodka is 80-proof, so you’ll need to go to a liquor store with a better selection to find it. Absolut makes a good one, as does Stoli.
Four ingredients, easy to make. The toughest part is waiting for it to mellow a bit.
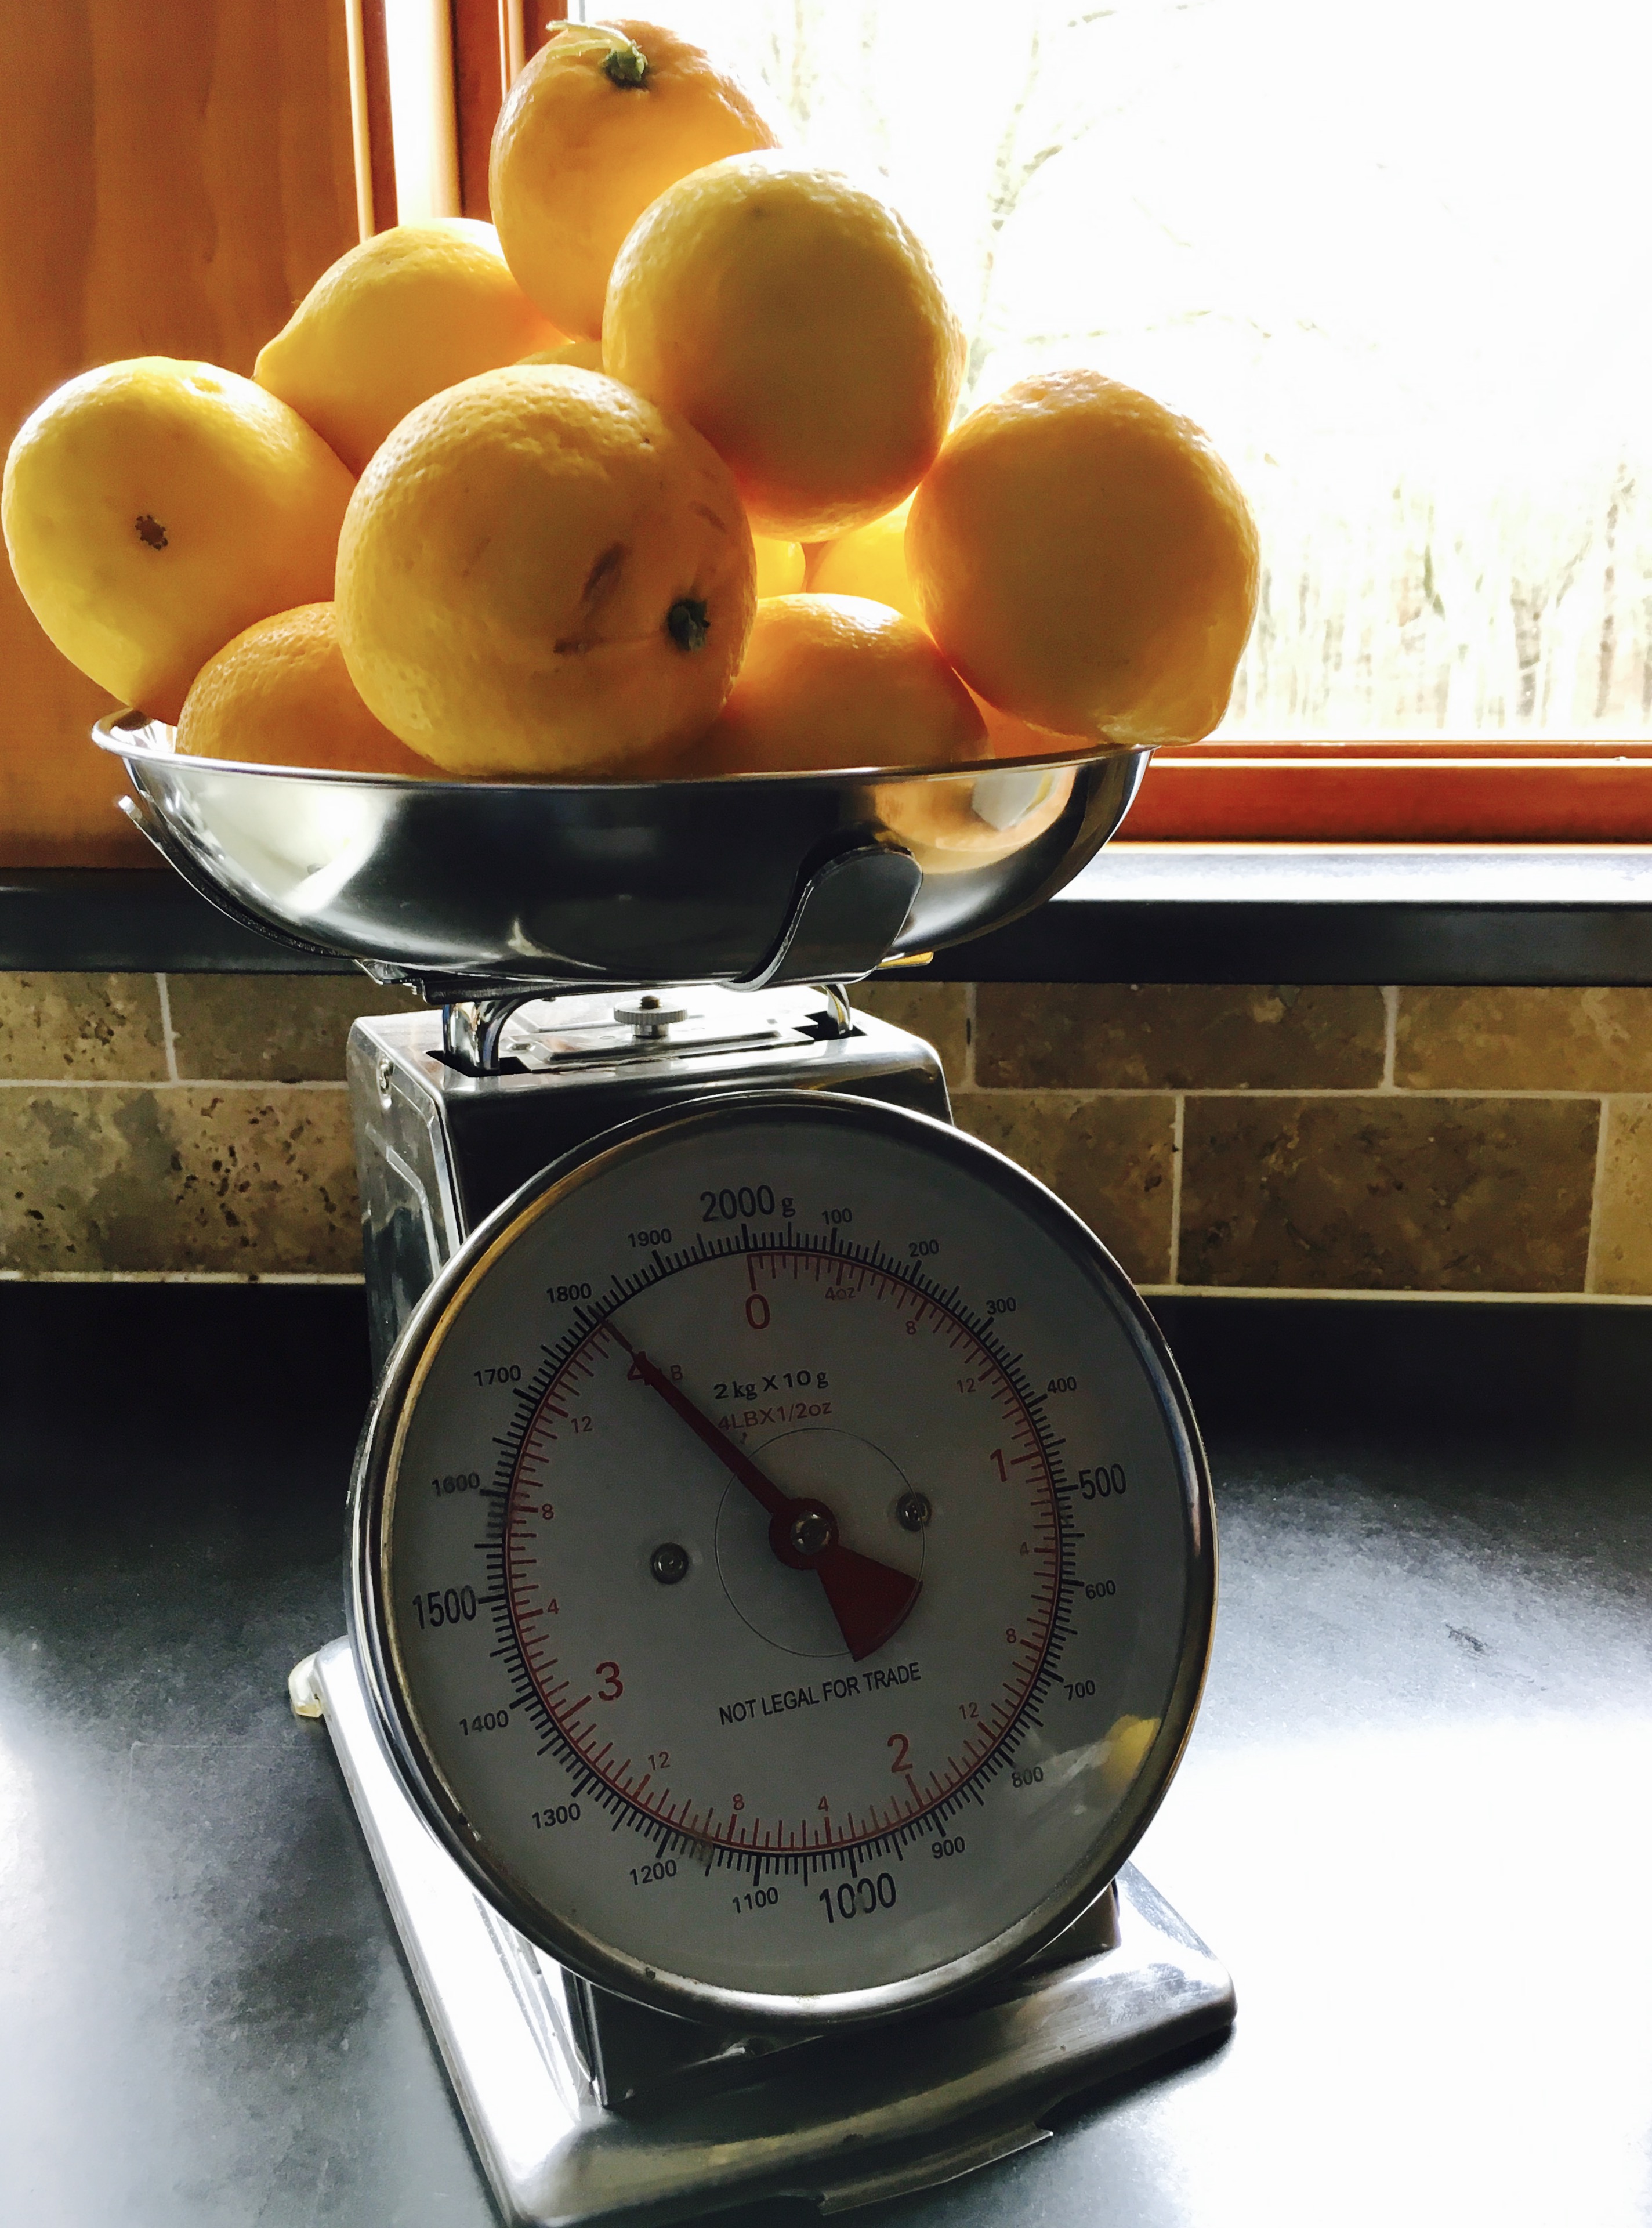
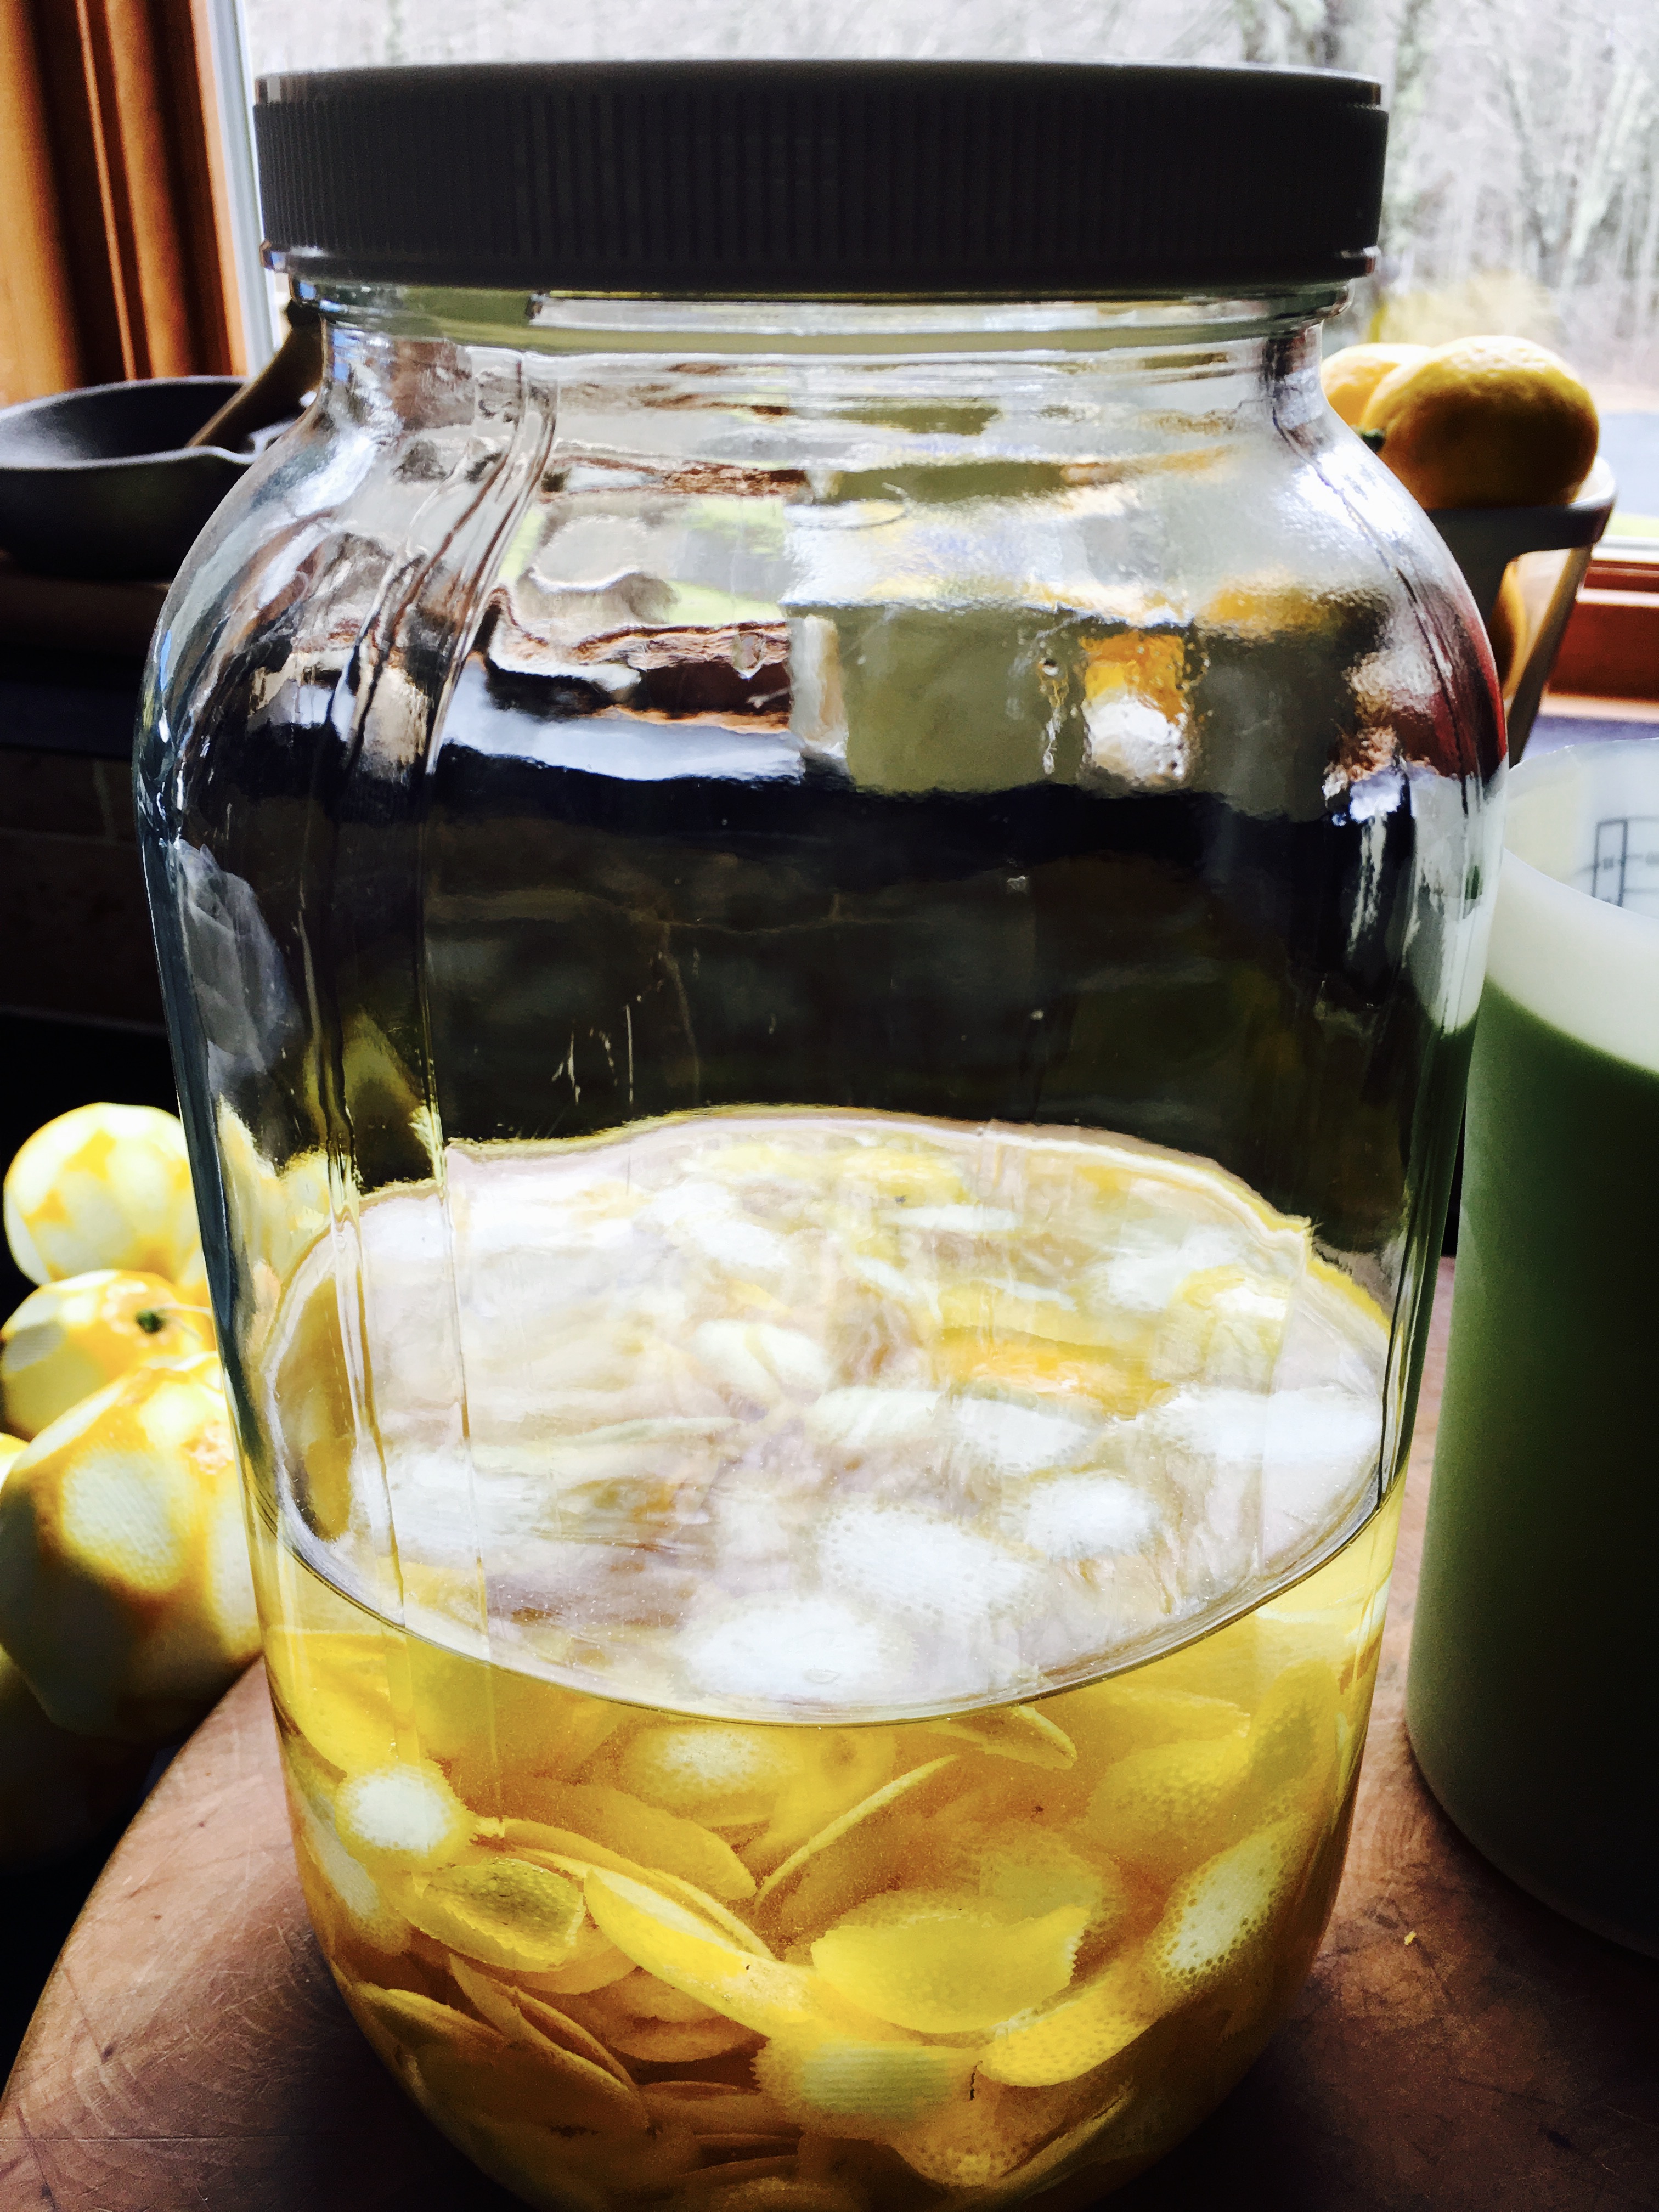
4 lbs. of lemons, but you only use the zest!

Just the zest!
Peel the zest off all the lemons, making sure you don’t get any of the white pith that could make the limoncello bitter. Place all the zest in the bottom of a glass jar with a lid that can hold all the vodka.
Pour the vodka on top of the lemon zest pieces, seal the container, and keep it at room temperature for a week, swirling the jar around gently once a day.
Vodka and zest.
On the sixth day, combine the sugar and water in a pot over medium-high heat, and stir until all the sugar completely dissolves. Remove from the heat, cover, and let it thoroughly cool to room temperature (overnight is best.)
On day seven, strain the lemon zest, pouring the infused vodka into a clean glass jar. Discard the lemon zest.
Pour the sugar/water mixture into the vodka and mix well.
At this point, you can pour the finished product into bottles, but let it mellow for about a month before drinking.
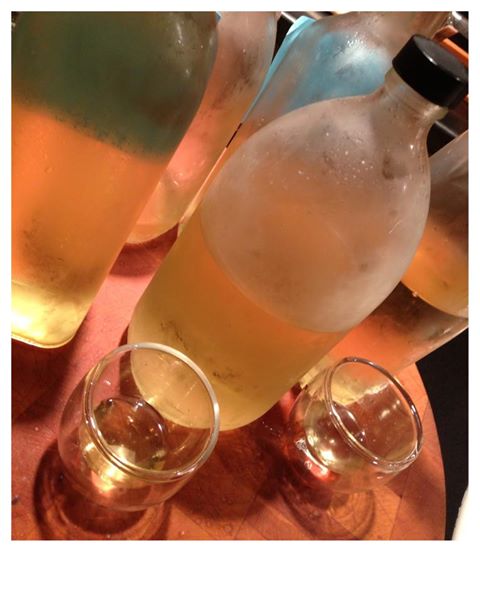
I keep my limoncello refrigerated.
For my family, a Caesar salad is the only salad to serve on special occasions. It’s another great addition to our Thanksgiving and Christmas table. But it all starts with a little history…
If someone told me that the classic Caesar salad was invented in Tijuana, Mexico, I’d say they were crazy. But that’s one bizarre truth in the creation of one of the world’s most iconic salads.
Famous restaurateur, Caesar Cardini, ran a restaurant in San Diego back in the early 1900’s. But when Prohibition hit the states, he opened another location in Mexico…Tijuana, to be exact, luring many of the day’s Hollywood stars across the border. They could gamble in Mexico, and they could feast on food and alcohol at Cardini’s.
The story goes that one July 4th, they were running out of food, and thinking quickly, Cardini created a salad at the spur of the moment, using only the ingredients he could find in the kitchen. Having the chef assemble the salad tableside meant it came with a grand performance, and word quickly spread of the incredible “Caesar salad.” (Cardini named it after himself.) Cardini’s is still at its original Tijuana location, and they serve thousands of Caesar salads, with a flamboyant tableside show, to tourists.
Though Cardini didn’t believe anchovies should be in his salad (they say Worcestershire was used instead), anchovies were eventually added when his brother, Alex, tweaked the recipe years later. (The Worcestershire was removed.)
It needs to be said that raw egg yolks are used in Caesar salad, and if you’re not comfortable using them because of salmonella concerns, you shouldn’t. Sometimes coddled eggs (slightly boiled) are used. Some stores, though not many, sell pasteurized eggs in the shell. I haven’t had a chance to use them–or even find them. Many recipes contain a variety of egg substitutes. But for me, it ain’t a Caesar without raw egg, so I’m willing to take my chances.
The Caesar salad that I compare all others to is the one my wife first made for me when we were dating. I don’t want to say that it convinced me to marry her, but it certainly factored into the equation!

The ingredients.
In presenting this Caesar salad recipe, my wife had promised the friend who first made this recipe for her that she would never reveal all of its secrets. But the great thing about recipes is that one slight change is all it takes to make someone else’s recipe your own…and that’s exactly what I did. No promises broken!
The first really important ingredient to get is a wooden bowl. No other bowl will do. We have an old wooden bowl at home with almost mystical properties that is used for nothing but our Caesar salad, and I have to say that it makes all the difference in the world.

The mystical wooden bowl. Years of Caesar salads have given it a special seasoning.
Once you have the bowl, what matters most is the freshest, best quality ingredients you can find: farm-fresh eggs, not supermarket ones…Parmigiano Reggiano, not generic Parmesan. The best quality extra virgin olive oil. Fresh lemon juice. Freshly cracked black pepper. High-quality anchovies. And organic Romaine lettuce, assuming there’s no recall like we’ve had recently. (Organic bibb or leaf lettuces make great substitutes.)
After that, it’s all about the love.

The process begins…
Place the egg yolks in the wooden bowl and whisk them until well mixed.
While whisking the yolks, pour the olive oil in the bowl VERY SLOWLY, whisking all the time, never stopping. Keep pouring the olive oil slowly until you’ve whisked all of it into the eggs and you get a beautiful emulsion.
Keep whisking and add the Dijon mustard, then the black pepper.
In a separate small bowl, mash the anchovies with a fork–even better, use a mortar and pestle, if you have one. Don’t leave any chunks. Slowly add the mashed anchovies to the wooden bowl, mixing them in with the whisk to combine the ingredients. You want them to dissolve completely in the dressing.
Once the dressing has reached its desired consistency, add the lemon juice and whisk some more.
Whisking slowly, sprinkle in the Parmigiano Reggiano.
When it’s all mixed together, dip a finger in the dressing and give it a taste. Does it need more lemon juice to cut the oil? Slice a second lemon and add a little. Taste again. Is the tartness of the cheese dancing on your tongue? If not, grate more and add a little more. Enough black pepper? There should be enough salt from the anchovies and cheese.
If you think you’ve “got it,” add the Romaine leaves to the salad bowl and toss gently to coat the lettuce.
When serving, top each salad serving with a little more cheese. Extra anchovies are optional.

If you’re saying “where’s the garlic?” …you’re right. Every good Caesar needs some. This recipe would use about 1 tablespoon of fresh, finely chopped garlic, added after the mustard. If I’m cooking alone, I always add the garlic. But we have people in our household that are allergic to garlic, so when family is here, we leave it out. The flavors of the dressing are so deliciously intense, you’ll be surprised how good it is without it!
I posted an Instagram photo of soup I made the other day, and had quite a few friends ask me what the recipe was. My little girl got hit with a cold the other day, and I knew only one thing would help: a bowl of my homemade chicken soup. But rather than adding pasta or potatoes, I decided to give it an Asian kick. It was simple, delicious, and soothing.
Making the ingredients for a great bowl of chicken soup, or wonton soup for that matter, takes a little time. But once you’ve got them, you can freeze them, so that putting them all together takes no time at all.

The key to a great chicken soup is making your own chicken stock. Let’s be honest, nothing out of a carton can possibly compare. For one thing, I buy the best quality pastured chicken I can get. Here in Rhode Island, that means buying from local farms like Pat’s Pastured in East Greenwich. They’re at my farmers market every weekend.
I prefer buying a whole bird, roasting it for dinner, then removing all the meat from the carcass before I start making stock. If I’m making fried chicken for dinner, I’ll cut the raw bird up into pieces, then drop the raw carcass into a pot to start the process. Either way–a cooked bird or raw bird works great. (Just remember that a cooked bird can have some salt on it, so you don’t want to add any.)
Making chicken stock is incredibly easy. It just takes time, which is an ingredient many people don’t have enough of. Honestly, though, if you’ve got time to binge-watch your favorite show on Netflix or watch a football game on a Sunday afternoon, you can make stock. If you can’t make stock at the same time you’re making dinner, simply put the carcass in a Ziploc bag and toss it in the freezer until you’ve got more time.
If you don’t want to deal with cutting up a chicken carcass, buy a pack of chicken parts. It doesn’t really matter what parts you use, as long as it’s something on the bone. You want all that good fat and gelatin.
Once you’re ready to make stock, fill a large pot with clean, filtered water. Drop in the chicken carcass or pieces. Chop an onion in half (you don’t have to peel it unless it’s dirty), 2 or 3 celery spears, and 2 or 3 carrots. (Wash the carrots well, or just peel them.) Everything goes in the pot. Turn the burner on high, and let it come to a boil. If it’s boiling too hard and spilling over, reduce the heat to medium.
Let it go for at least an hour, two is better. If it looks like too much water has evaporated, simply add more. How intense you want your stock is really up to you. You can reduce it like crazy to make something very concentrated, or you can cook it down to a point where it’s user-friendly right away. The best way to know is to taste it along the way.
When making your stock, feel free to add any other ingredients you like. But I stick with only the onion, carrots, and celery–avoiding garlic, salt, bay leaves, and other flavorings–adding them only when I use the stock at a later time in a particular soup or recipe.
Once the stock is done, I let it cool a bit before I strain it and pour it into individual plastic containers with tightly sealing lids. (Don’t use glass if the stock is going into the freezer!) Then it’s off to the freezer until I need to use it in a recipe.
When it’s time to make soup, I run the frozen container under warm water, and drop the frozen “block of stock” into a sauce pan, adding a little water to it, and setting the burner on medium to thaw. Then it’s time to decide on what I want to put in my soup. Most of the time that simply means using whatever I’ve got in my fridge.
When I made my almost-instant wonton soup the other day, I had some carrots and kale in the fridge. I peeled and thinly sliced the carrots, and I removed the stem from the kale before chopping it up. I dropped the veggies in the soup and brought the heat up to high to get it to a boil.
If I’m using potatoes, I usually peel and chop them into small cubes and add them raw to the boiling stock. If I’m adding chicken, I usually choose already-cooked chopped breast meat. And if I’m using pasta, I use dry or pre-cooked, but I only add the pre-cooked pasta at the very end to avoid it turning mushy. When making chicken noodle soup, I add a pinch of salt and, for flavor, a pinch of dried bouquet garni to the pot.
With my wonton soup, I skipped the pasta and potatoes, because I had a package of dumplings in my freezer. A half-dozen of them, still frozen, go right into the boiling water. They’re fully cooked in about 5 minutes.

These dumplings were delicious in my soup.
Once the dumplings are cooked, the soup is done! I turn the heat off, and add a couple of drops of sesame oil to the soup, mixing it in well.
Once I’ve placed the soup in the bowl, a few splashes of soy sauce, and it’s ready to serve.
