Posts Tagged ‘wings’

I’ve got dozens of chicken wing recipes, but even so, sometimes I just want something different. I decided to take my favorite taco seasonings recipe and adapt it to chicken wings. Caramba! One of the tastiest wings I’ve made in a long time!

This is such an easy and delicious recipe to make, even for a crowd. At your next party, just double or triple the recipe, as needed. And it works with a whole chicken as well.


2 teaspoons salt
2 teaspoons cumin
2 teaspoons oregano
1 teaspoon paprika
1 teaspoon granulated onion
1/2 teaspoon granulated garlic
1/2 teaspoon pepper
avocado oil
4–5 lbs. chicken wings

Preheat the oven to 375.

Combine the salt, cumin, oregano, paprika, onion, garlic, and pepper in a bowl. Mix well.

Cover a baking sheet with aluminum foil and spread the wings out on the sheet. Sprinkle the wings with the avocado oil and rub the oil all over the wings. This will help the wings cook evenly,  and it’ll help the seasonings stick to the wings.

Turn the wings bottom-side-up and sprinkle with the seasoning mix. Flip the wings over and sprinkle them again, coating them evenly.

Place the baking sheet in the oven and bake for about 45 minutes.

Advertisement

I grill year-round. I’ll stand in 3 feet of snow to get smoked ribs just right, if I have to. Through years of tireless experimentation, I’ve come up with a barbecue sauce that I can be proud of. I prefer a slightly sweet and tangy barbecue sauce,  and it works really well with pork or chicken.

What makes this sauce special is the citrus. I originally used lemon juice for this recipe and it was good. Lime juice was better. Adding lime zest: even better than that. I tried orange juice and zest, even Meyer lemon. But the Big Daddy of ’em all was grapefruit. I was craving my barbecue sauce one day and only had a grapefruit in the fridge. I thought: how bad could this be? Turned out to be the perfect foil to the sweetness of the brown sugar and ketchup.

Try this sauce on your next batch of chicken wings or even a whole bird. Cook the bird almost all the way through, brushing the sauce on for the last 20 minutes so that the sugars don’t burn. Then just try to stop eating it!

Chix BBQ


GRAPEFRUIT BARBECUE SAUCE
1 cup ketchup
1/2 cup firmly packed brown sugar
Juice and zest of 1 grapefruit
3 tablespoons unsalted butter
1/4 cup dried onion flakes
1 teaspoon cayenne pepper sauce, like Frank’s Red Hot
1 teaspoon Worcestershire sauce
1 teaspoon granulated garlic
1/4 teaspoon black pepper
(no salt)

Combine all ingredients in a sauce pan. Bring to a boil and then simmer for about 20 minutes on low, until slightly thickened.


saucey

If you like a less sweet, more vinegary style to your barbecue sauce, this is the one. How could a sauce that’s inspired by what most people claim to be the best barbecue joint in the USA, Franklin’s Barbecue in Austin, Texas, be bad? People line up early in the morning and wait as much as four hours for a slab of brisket from this place. I’ll get there one day. In the meantime, I have the sauce…


2 cups ketchup
3/4 cup water
6 tablespoons cider vinegar
6 tablespoons white vinegar
6 tablespoons brown sugar
3 tablespoons Worcestershire sauce
1 tablespoon chili powder
2 teaspoons salt
2 teaspoons black pepper
1 1/2 teaspoons cumin


Mix all the ingredients in a saucepan and simmer until the flavors have blended, about 20 minutes. Remove from heat and cool to room temp. If you store it in an airtight container in the fridge, it’ll stay good for a few months.


I can’t get enough of chicken, and I cook it at least a couple of times a week. So I have to keep coming up with new flavors to challenge my taste buds as well as myself.

This recipe works with wings, but if you’re experiencing a wing shortage in your area, any other chicken parts you like will work.

Here’s a hint with fresh ginger: buy a nice looking root and keep it wrapped well and in the freezer. When you need some, simply grate the frozen root, skin and all, and then place it back in the freezer until next time. It will last a lot longer than in the fridge.


honey glazed chicken


4 lbs. chicken wings
1/2 cup honey
1/2 cup water
1/4 cup soy sauce
1/4 cup apple cider vinegar
2 tablespoons sesame oil
1 teaspoon cayenne pepper sauce (I like Frank’s Red Hot)
1/2 teaspoon fresh ginger, minced
1/4 cup onion, minced
1 tablespoon garlic, minced
1 cup chicken stock, preferably homemade


Thaw chicken wings and place in a Ziploc bag.

In a separate bowl, whisk together all the other ingredients, except chicken stock, to make a marinade. Pour this marinade into the Ziploc with the chicken and seal, squeezing the air out of the bag. Squish the bag around so that the marinade thoroughly covers all the chicken wings. Place the bag in the fridge to marinate for at least 4 hours, but overnight is even better. Place the bag in a bowl to prevent accidental leakage in your fridge.

Pre-heat the oven to 325.

Carefully pour the marinade out of the Ziploc bag into a saucepan, adding the chicken stock, and reduce until it becomes a thick, gooey glaze. Be careful not to burn the sugars in the honey. Honey can also foam up and overflow if you’re not watching it.

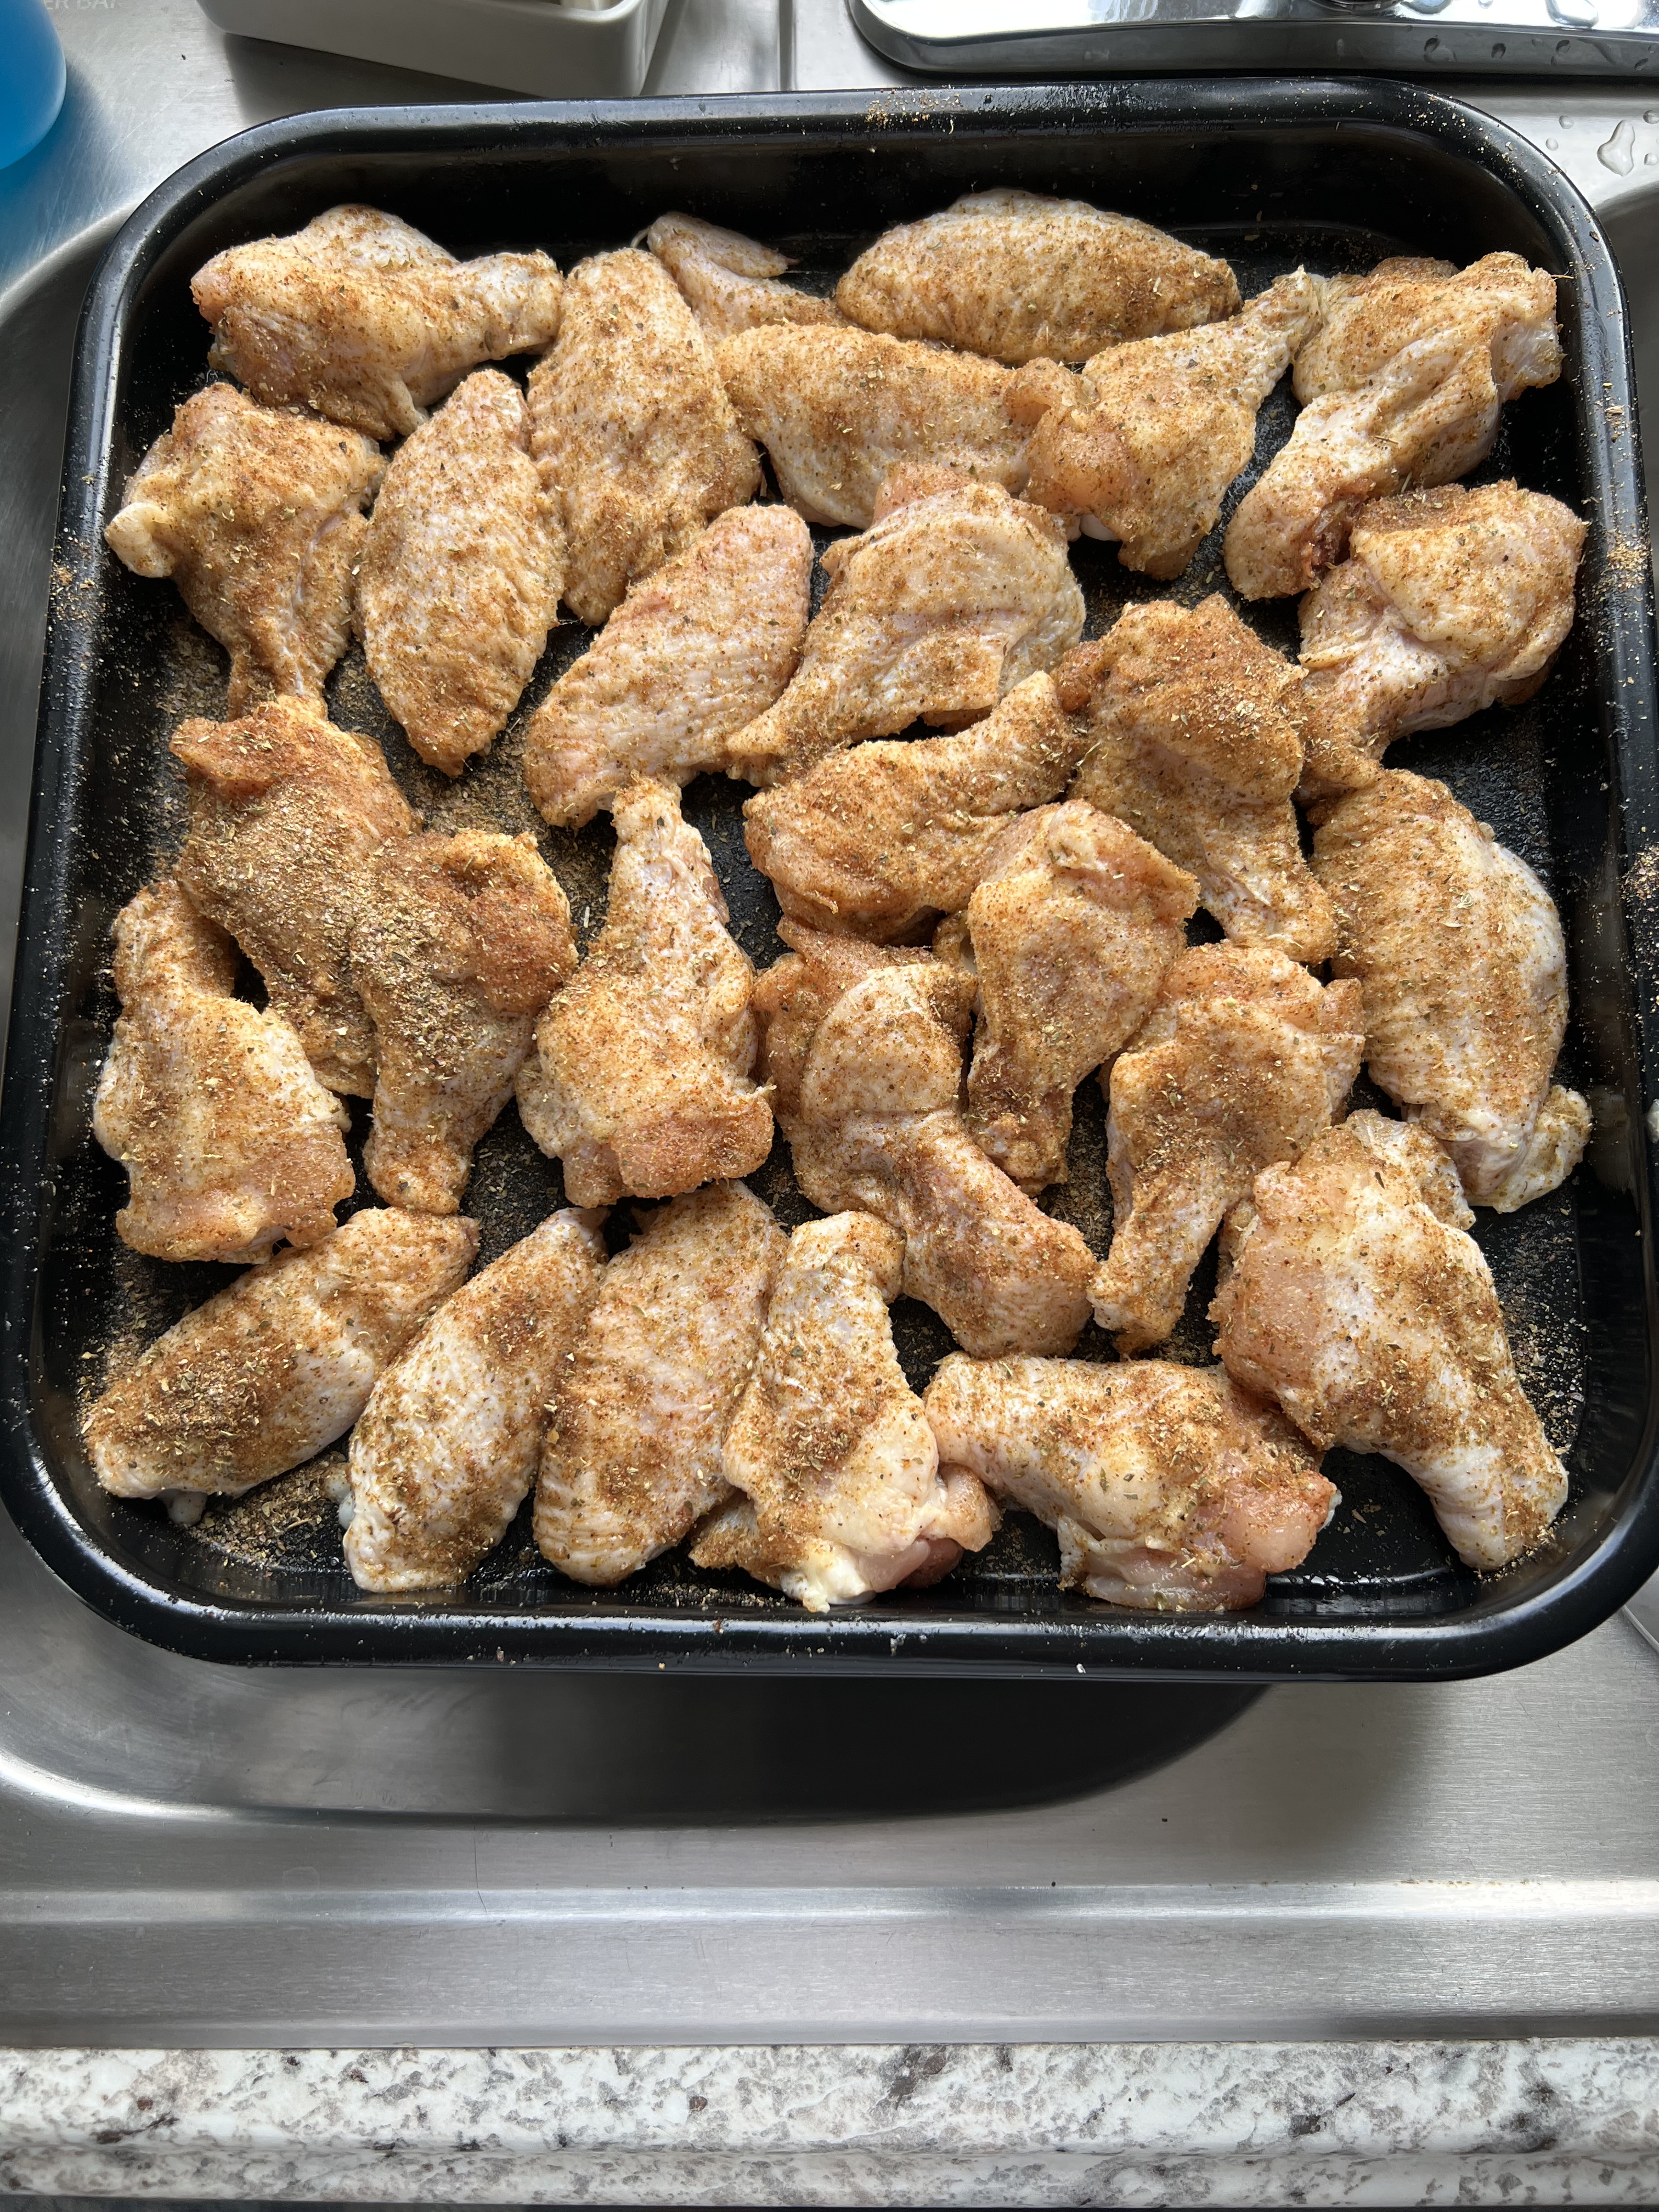
Remove the chicken pieces from the bag and place them on a baking sheet covered with non-stick aluminum foil. Bake for about 30 minutes.

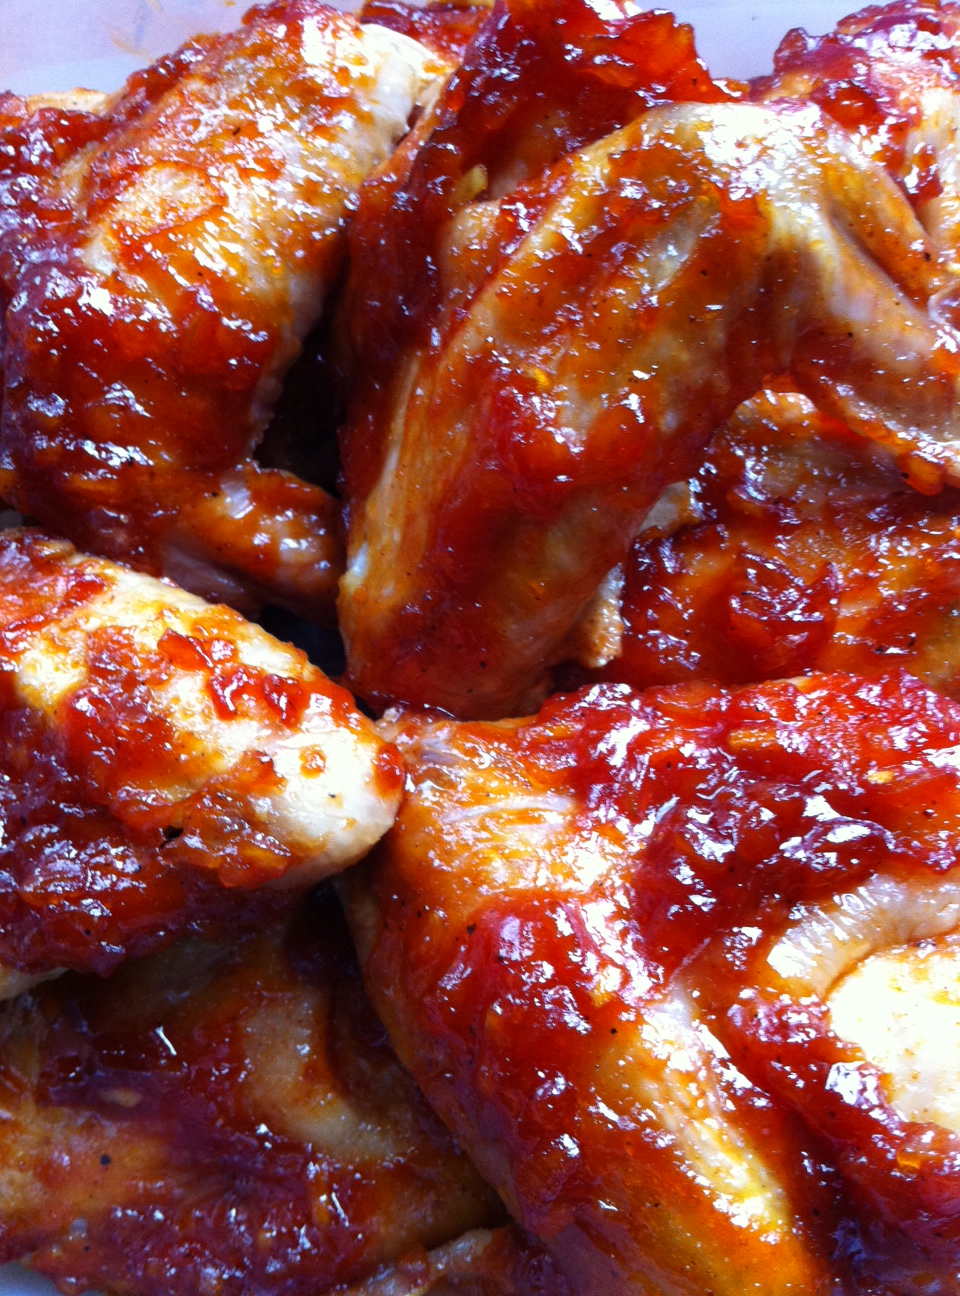
The reduced marinade glaze should be ready right around the time the chicken has cooked for 30 minutes or so. Brush the glaze on to the chicken, and place back in the oven to cook 15 more minutes.


 Over the years, I’ve tweaked this Asian marinade recipe, adding more ingredients. Feel free to use more or less according to your own taste. After all, that’s how any recipe becomes truly your own.
You’ll notice I have two bottles of soy sauce below. I sometimes mix half regular soy sauce with half lite soy to cut the sodium.
And, of course, with the chicken wing shortage we’re experiencing, chicken thighs make an excellent substitute.

10 lbs. chicken wings, the larger the better (or skin-on, bone-in chicken thighs)
1 cup soy sauce
1 small can (6 oz.) pineapple juice
2/3 cup brown sugar
1 tablespoon hoisin sauce
2 teaspoons chili garlic sauce
1 teaspoon granulated onion
1 teaspoon granulated garlic
1 teaspoon Chinese five spice
1 teaspoon sesame oil
1 teaspoon peanut satay sauce (optional)

Place the chicken pieces in a large  Ziploc bag. Whisk all the marinade ingredients together in a bowl. Add the marinade to the bag, seal it well, then squish the bag around so that the marinade makes contact with all of the chicken pieces.
To prevent accidental spills, place the bag in a clean bowl. Marinate the chicken for several hours at room temperature or overnight in the fridge, turning the bag once in a while to make sure everything gets even exposure to the marinade.
The next day, pour off the marinade and discard it, removing the chicken from the bag. Place the wings (or thighs) on a baking sheet lined with foil (I use Reynold’s non-stick) and bake at 325 degrees for about 30–45 minutes for wings…longer for thighs.

Every Rhode Island home needs to have a box of corn meal in case of Johnny Cake emergencies. If you’ve never had a Johnny Cake before, you’re missing out on a simple, delicious Rhode Island treat. But that’s a topic of another blog. The point is, I always keep a box of white corn meal in my pantry, and I used it to make the coating for my chicken.

fullsizerender-4

Corn meal is great, because it adds a wonderful crunch while keeping this recipe gluten-free, which may be an important factor for some. But even if you don’t have to be on a GF diet, corn meal adds great flavor.

To keep the batter light, I add flour to the corn meal.

2 cups buttermilk (whole milk is fine, too)
1 tablespoon hot sauce (I use Frank’s Red Hot)
4 lbs. chicken wings
1 cup white corn meal
1 cup flour (or use Cup4Cup, a gluten-free flour, to keep it GF)
1 1/2 teaspoons salt
1/2 teaspoon pepper
1/2 teaspoon granulated garlic
1/2 teaspoon granulated onion
1/2 teaspoon paprika
oil, lard or a combination of the 2 for frying

fullsizerender-3

Pour the buttermilk or whole milk into a large Ziploc bag. Add the hot sauce. Drop in the chicken wings, seal the bag,  and let them soak in the mixture in the fridge for at least several hours…overnight is better. Place the bag in a bowl to prevent bag leakage accidents.

In a separate bowl, combine the corn meal, flour, salt, pepper, garlic, onion, and paprika. Mix well.

Pre-heat the oven to 350 degrees.

I like to use a combination of grapeseed oil and pork fat (if I have it) when frying. Heat the oil to about 325 degrees.

Take the wings out of the bag one by one, and drop them in the bowl with the cornmeal mix, coating the chicken well on all sides, then shaking off the excess. Place the chicken wings in the hot oil carefully to avoid splashing hot oil on yourself.

Cook the chicken in the oil on both sides for just a few minutes, until golden. You’re not trying to cook them all the way through.

Place the chicken pieces on a foil-lined baking sheet. when you’ve fried all the chicken, place the baking sheet in the oven and cook until the wings are done, about 25 minutes.

I’ve got dozens of chicken wing recipes,  but even so, sometimes I just want something different. I decided to take my favorite taco seasonings recipe and adapt it to chicken wings. Caramba! One of the tastiest wings I’ve made in a long time!

This is such an easy and delicious recipe to make, even for a crowd. At your next party, just double or triple the recipe, as needed.

2 teaspoons salt
2 teaspoons cumin
2 teaspoons oregano
1 teaspoon paprika
1 teaspoon granulated onion
1/2 teaspoon granulated garlic
1/2 teaspoon pepper
avocado oil
4–5 lbs. chicken wings


Preheat the oven to 375.

Combine the salt, cumin, oregano, paprika, onion, garlic, and pepper in a bowl. Mix well.

Cover a baking sheet with aluminum foil and spread the wings out on the sheet. Sprinkle the wings with the avocado oil and rub the oil all over the wings. This will help the wings cook evenly,  and it’ll help the seasonings stick to the wings.

Turn the wings bottom-side-up and sprinkle with the seasoning mix. Flip the wings over and sprinkle them again, coating them evenly.

Place the baking sheet in the oven and bake for about 45 minutes.


I love fried chicken. But what makes this recipe great is that I get all the benefits of crispy fried chicken without all the grease and without standing watch over it the whole time.

You can use any chicken parts for this recipe. Fry the chicken until it just turns golden brown and then finish it in the oven.

I use gluten-free flour (Cup4Cup is my favorite) for this recipe, and it works perfectly. If you’ve got someone you love who hasn’t had real fried chicken because they’re on a gluten-free diet, they will love this. If you’re not on a GF diet, feel free to use regular all-purpose flour.


10 lbs. large chicken wings or chicken pieces
Avocado oil, for frying

For soaking:

1 quart buttermilk
1 tablespoon hot sauce (I use Frank’s Red Hot)

For the seasoned flour:

2 cups all-purpose flour
1 tablespoon sea salt
1 teaspoon freshly ground black pepper
1 teaspoon paprika
1 teaspoon granulated garlic
1 teaspoon granulated onion
1 teaspoon basil
1 teaspoon oregano

Open the bottle or carton of buttermilk and add 2 teaspoons of hot sauce. Close the container and shake to combine. Place the chicken pieces in a Ziploc bag, cover with the buttermilk, and seal the bag, letting the chicken soak in it for at least several hours. Overnight is best.

image


Pre-heat the oven to 350 degrees.

In a bowl, combine the flour, salt, pepper, paprika, granulated garlic, onion powder, basil and oregano. Mix well.

After the chicken has soaked in the buttermilk, remove the pieces one at a time, leaving the buttermilk on them as you toss the pieces into the seasoned flour. Shake off the excess flour, and then set the pieces aside on a metal baking rack placed on a sheet pan.

If you’ve got the time, and want to make the chicken extra crispy, let the chicken pieces sit for an hour, then re-flour them before frying. If not, go right to the next step.

Pour the oil into a large heavy-bottomed stock pot to a depth of 1-inch. Heat the oil to 360 degrees on a thermometer.

image

Working in batches, place the chicken pieces in the oil, being careful not to overcrowd them. Fry the chicken until it is golden brown on both sides, then place each piece back on the metal baking rack set on the sheet pan.

Once all the chicken has been fried, place the sheet pan in the oven for 30 to 40 minutes, until it’s fully cooked and crispy.

image


Feast!

Through years of tireless experimentation, I’ve come up with a barbecue sauce that I feel is the best I’ve ever made. Granted, everybody has their favorites, but I prefer a slightly sweet and tangy barbecue sauce. Unless I’m making a classic pulled pork sandwich, I usually avoid vinegar-based sauces.

What makes this sauce special is the citrus. I originally used lemon juice for this recipe and it was good. Lime juice with lime zest was better. I also tried oranges, tangerines, even Meyer lemons. But my breakthrough happened on a day when I was craving barbecued chicken and all I had in my fridge was a grapefruit. I thought: how bad could it be? Turned out to be the perfect foil to the sweetness of the brown sugar and ketchup.

My favorite chicken pieces are the leg quarters: thigh and drumstick all in one. Chicken breasts, even on pastured birds, are pretty flavorless and dry, so I pass on them for the darker meat that’s juicy and fatty. (Honestly, I find it hard to trust anyone that won’t eat meat off a bone.)

Cooking chicken in the oven before putting it on the grill has several advantages. I don’t have to stand over the grill, constantly worrying about the meat burning or the fire going out. I can simply set a timer when I need to brush on the barbecue sauce or remove the chicken pieces. And the chicken cooks evenly…one piece won’t be burned while another piece is undercooked. Cooking them low and slow in the oven keeps the chicken juicy and tender. And I’m assured that my chicken is thoroughly cooked…no worries about salmonella.

I pre-heat the oven to 350 just to get it nice and hot. I line a sheet pan with non-stick aluminum foil, placing the chicken pieces on it. I rub each piece with a little olive oil, and season them lightly with Lawry’s Seasoned Salt. The chicken goes into the oven and I immediately lower the temperature to 200 degrees.

While the chicken is cooking, I combine all the barbecue sauce ingredients in a sauce pan, bring it to a boil, then reduce it to a simmer, letting it cook for about 20 minutes, until it has thickened. Then I turn the heat off and set the pan aside.

I’ll bake the chicken for about an hour, taking the sheet pan out of the oven to brush the barbecue sauce on the pieces before returning to the oven again, now bringing the temperature up to 300 degrees. (Because there’s sugar in the barbecue sauce, I don’t want to crank the heat or it will burn.)

Taking the chicken out of the oven and brushing it with sauce.


In 30 minutes, I take the sheet pan out a second time, and brush the sauce on the chicken pieces again…then back in the 300-degree oven for another 30 minutes.

Once the chicken’s back in the oven, it’s time to start the grill. For projects like this, I like to use a small grill I bought for our family camping trips. It’s like a mini-Weber, and it grills enough food for 4 people easily, without wasting charcoal like a larger grill would.

These small grills are just 20 bucks, and they save you a ton of otherwise wasted, unused charcoal.


I use a smaller charcoal chimney for this project, and I use charcoal briquets, not hardwood, because I want an even fire. The coals are ashed over in just 10 minutes.

Out of the oven and onto the fire! The grill grate was nasty and rusty, so I just grabbed a clean one I had handy and popped it right on top. (I hate scrubbing grills!)


Once the chicken has cooked its total of 2 low-and-slow hours in the oven, I bring the pieces outside. I spread the coals evenly on my little grill, and place the chicken pieces on it, flipping the pieces so that both sides get nice and smokey with a little bit of char…about 5 or 10 minutes per side will do the trick.

Getting that char on the chicken is key to making it taste like it’s been on the grill all the time.


The chicken goes back to the kitchen, and while it’s still hot, I brush with the barbecue sauce one last time before serving.


Perfectly done…perfectly delicious!


Here is the magical barbecue sauce recipe…

1 cup ketchup
1/2 cup firmly packed brown sugar
Juice and zest of 1 grapefruit
3 tablespoons unsalted butter
1 teaspoon cayenne pepper sauce, like Frank’s Red Hot
1 teaspoon Worcestershire sauce
1 teaspoon granulated garlic
1 teaspoon granulated onion
1/4 teaspoon black pepper
(no salt)

Combine all the ingredients in a sauce pan. Bring it to a boil and then turn it down low, and let it simmer for about 20 minutes, or until slightly thickened.


I’ve got dozens of chicken wing recipes,  but even so, sometimes I just want something different. I decided to take my favorite taco seasonings recipe and adapt it to chicken wings. Caramba! One of the tastiest wings I’ve made in a long time!

This is such an easy and delicious recipe to make, even for a crowd. At your next party, just double or triple the recipe, as needed.

2 teaspoons salt
2 teaspoons cumin
2 teaspoons oregano
1 teaspoon paprika
1 teaspoon granulated onion
1/2 teaspoon granulated garlic
1/2 teaspoon pepper
avocado oil
4–5 lbs. chicken wings


Preheat the oven to 375.

Combine the salt, cumin, oregano, paprika, onion, garlic, and pepper in a bowl. Mix well.

Cover a baking sheet with aluminum foil and spread the wings out on the sheet. Sprinkle the wings with the avocado oil and rub the oil all over the wings. This will help the wings cook evenly,  and it’ll help the seasonings stick to the wings.

Turn the wings bottom-side-up and sprinkle with the seasoning mix. Flip the wings over and sprinkle them again, coating them evenly.

Place the baking sheet in the oven and bake for about 45 minutes.


I love fried chicken. And despite what most people think, fried food is really not that bad for you if you fry it properly. I use clean avocado oil every time, sometimes adding bacon fat or pork fat if I have it. And I get the oil to the right temperature: two key factors that will result in crispy chicken that isn’t bogged down with grease. What makes this recipe great is that I get all the benefits of crispy fried chicken without all the grease and without standing watch over it the whole time.

You can use any chicken parts for this recipe. Fry the chicken until it just turns golden brown and then finish it in the oven.

I use gluten-free flour (Cup4Cup is my favorite) for this recipe, and it works perfectly. If you’ve got someone you love who hasn’t had real fried chicken because they’re on a gluten-free diet, they will love this. If you’re not on a GF diet, feel free to use regular all-purpose flour.


10 lbs. large chicken wings or chicken pieces
Avocado oil, for frying

For soaking:

1 quart buttermilk
1 tablespoon hot sauce (I use Frank’s Red Hot)

For the seasoned flour:

2 cups all-purpose flour
1 tablespoon sea salt
1 teaspoon freshly ground black pepper
1 teaspoon paprika
1 teaspoon granulated garlic
1 teaspoon granulated onion
1 teaspoon basil
1 teaspoon oregano

Open the bottle or carton of buttermilk and add 2 teaspoons of hot sauce. Close the container and shake to combine. Place the chicken pieces in a Ziploc bag, cover with the buttermilk, and seal the bag, letting the chicken soak in it for at least several hours. Overnight is best.

image


Pre-heat the oven to 350 degrees.

In a bowl, combine the flour, salt, pepper, paprika, granulated garlic, onion powder, basil and oregano. Mix well.

After the chicken has soaked in the buttermilk, remove the pieces one at a time, leaving the buttermilk on them as you toss the pieces into the seasoned flour. Shake off the excess flour, and then set the pieces aside on a metal baking rack placed on a sheet pan.

If you’ve got the time, and want to make the chicken extra crispy, let the chicken pieces sit for an hour, then re-flour them before frying. If not, go right to the next step.

Pour the oil into a large heavy-bottomed stock pot to a depth of 1-inch. Heat the oil to 360 degrees on a thermometer.

image

Working in batches, place the chicken pieces in the oil, being careful not to overcrowd them. Fry the chicken until it is golden brown on both sides, then place each piece back on the metal baking rack set on the sheet pan.

Once all the chicken has been fried, place the sheet pan in the oven for 30 to 40 minutes, until it’s fully cooked and crispy.

image


Feast!