Author Archive

APPLESAUCE

Posted: November 29, 2023 in Uncategorized

Applesauce is so easy to make, I don’t know why I find myself buying that over-sweetened stuff in the supermarket when I get the craving.

Even the applesauce that claims there’s no added sugar is usually made with bruised and rejected apples.

Apples are a heavily sprayed crop, so I always buy organic. (Sadly, that’s also why I never go to you-pick-’em orchards anymore. For those apples to look as pretty as they do, they’ve been sprayed with a ton of pesticides, which I prefer not to eat. You can’t wipe or even wash them off completely.)

Your basic applesauce has only 4 ingredients. And if you don’t want any sweetener at all, it’s 3. Can’t be easier than that. The hardest part is getting the apples ready.

Apples, cinnamon, and water. That’s it.

I happened to have a bunch of organic Fuji apples this time, but use whatever apples you like. My Mom used to combine varieties. It’s up to you.

And if I choose to sweeten my applesauce, I use maple syrup instead of sugar.

2 lbs. organic apples, peeled, cored, and cubed
1/3 cup water
1/2 teaspoon cinnamon
1/4 cup (or more) maple syrup

Clean the apples and chop them up into nice chunks. Place them in a pan with the water.

Turn the stovetop on high, and bring the apples and water to a boil. as the apples cook, they will release a lot of their own liquid, and you’ll have “apple soup” for a while before it finally reduces.

Add the cinnamon, and continue cooking the apples until you have the consistency you like. (Some people like a more watery applesauce than others.)

I pull the pot off the stove and mashed most of the apples with a potato masher, then put it back on the stove to cook further. I leave some of the chunks whole, because I like a chunky applesauce. Always keep an eye on it, because you don’t want the natural sugars in the apples to burn.

When the apples are cooked to your liking, take the pan off the heat and add the maple syrup. Mix well.

Is there anything better than pure Vermont maple syrup? I don’t think so!

If you feel it’s too watery, bring it back over the heat, but watch it carefully.

Let the applesauce cool and enjoy!

It’s hard to improve on buttery, creamy mashed potatoes, but I think this recipe does just that. Like with pasta carbonara, you add pork, egg yolks, and Parmesan cheese to take this to another level.

The classic pasta carbonara uses guanciale, which is cured pork cheeks. Many recipes call for pancetta instead (which is the cured but unsmoked belly of the pig.) But since I cure my own guanciale, this was a no-brainer.

Egg yolks are stirred into the warm pasta in carbonara, and are cooked simply from the heat from the pasta. Here, I stir the egg yolks into the mashed potatoes, but then they go back in the oven to cook more.

And all too often, the phrase “Parmesan cheese” is used in recipes. That opens the floodgates to some truly horrendous cheeses, including the non-refrigerated stuff on the supermarket shelf that is 50% sawdust! There is only one King of Cheeses: Parmigiano Reggianio. Look for it, ask for it, pay the price. It’s worth every penny.

Parmigiano Reggiano
3 lbs. Yukon gold potatoes, peeled and chopped into large chunks
6 oz. guanciale, finely chopped
3/4 cup grated Parmigiano Reggiano
1/2 cup heavy cream
1/8 teaspoon freshly grated nutmeg
1 stick (8 tablespoons) unsalted butter, brought to room temperature, separated
Kosher salt and freshly ground black pepper
1 large egg
2 large egg yolks

Preheat the oven to 400 degrees.

Place the potatoes in a large pot and cover them with cold water. Bring them to a boil, and then cook them until they’re fork-tender. Drain the potatoes in a colander and let them dry out a little, about 10 minutes. Then place the potatoes back in the pot.

Cook the guanciale in a non-stick pan over medium heat, stirring often, until the bits are golden brown and crispy. Transfer the cooked guanicale bits to paper towels to absorb the excess fat.

To the pot with the potatoes, add the cheese, the cream, the nutmeg (I always have whole nutmeg around to grate into my rum drinks!), 6 tablespoons of the butter, and some salt and pepper. Get out the old potato masher and mash away until the potatoes are smooth.

In a separate small bowl, whisk together the whole egg and the 2 egg yolks, then add them to the pot with the potatoes, and stir until they are well combined.

Add in all but about 1 tablespoon of the guanciale, mixing well.

Grab your favorite baking dish, and pour in the mashed potatoes, smoothing them out to make them look nice. (We originally tried piping some of the potatoes with a pastry bag, but it kept getting clogged with the guanciale and we gave up!)

Didn’t work so well….
…but delicious anyway!

Sprinkle the remaining guanciale on top of the potatoes and place the baking dish in the oven.

Bake until the potatoes are golden around the edges, about 30 minutes.

Chop up the remaining 2 oz. of butter and scatter it over the top of the potatoes, letting the butter melt in while the potatoes cool.

The holidays mean guests are coming over, and everyone will be enjoying more cocktails than usual. Here’s the story of a classic.
Earlier this year, I took a trip to London with my daughter, and we checked off quite a large list of things we wanted to do: trips to Oxford and Stonehenge, museums, the theater, restaurants with fabulous food and some with equally amazing views, college tours, a proper British afternoon tea at the Ritz, and much more.
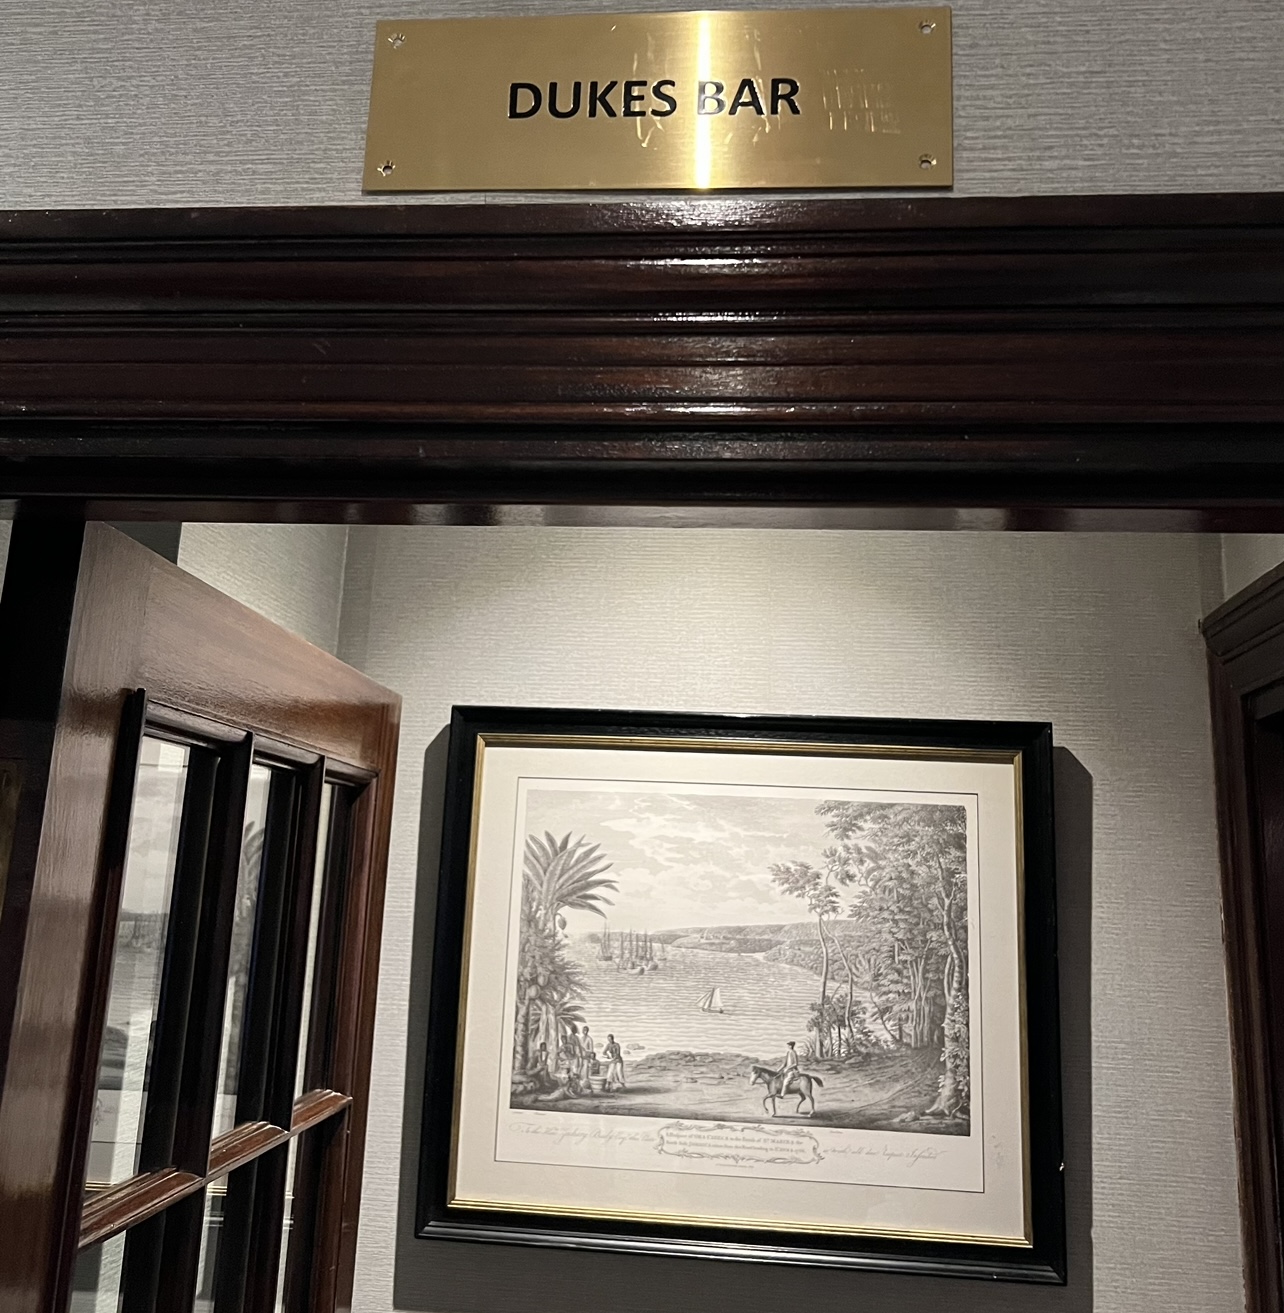
One of the top things on my personal list was to pay a visit to the renowned Dukes Bar at the Dukes Hotel, where, as legend has it, Ian Fleming, the author of the James Bond novels, not only came up with the phrase “shaken, not stirred,” but also created the now-famous Vesper martini.
Sadly, this is as close as I got to the Dukes Bar. People who stay at the hotel get to reserve a space in the incredibly small bar area, and everyone else has to wait in line on a first-come, first-served basis. Unfortunately for me, the wait to be seated was way too long and I never got to experience the Dukes Bar for myself.
*sigh*…looks like I’ll need to make another trip to London to check this one off my bucket list.
In the meantime, I can enjoy a Vesper at home…
At first, it seemed almost silly to try to make one…but the classic James Bond martini has always fascinated me. I’m not talking about the clichéd Sean Connery “vodka martini, shaken, not stirred.” I’m talking about the real James Bond martini, which appeared in Ian Fleming’s first 007 novel “Casino Royale” and only appeared in the 2006 “Casino Royale” motion picture starring Daniel Craig (the best Bond of all, if you ask me.)
Bondtini
To quote the novel:
‘A dry martini,’ he said. ‘One. In a deep champagne goblet.’ ‘Oui, monsieur.’ ‘Just a moment. Three measures of Gordon’s (gin), one of vodka, half a measure of Kina Lillet.  Shake it very well until it’s ice-cold, then add a large thin slice of lemon peel. Got it?’ ‘Certainly, monsieur.’ The barman seemed pleasant with the idea. ‘Gosh that’s certainly a drink,’ said Leiter. 
Bond laughed. ‘When I’m … er … concentrating.’ he explained, ‘I never have more than one drink before dinner. But I do like that one to be large and very strong and very cold and very well-made. I hate small portions of anything, particularly when they taste bad. This drink’s my own invention. I’m going to patent it when I can think of a good name.’ 
He watched carefully as the deep glass became frosted with the pale golden drink, slightly aerated by the bruising of the shaker. He reached for it and took a long sip. 
‘Excellent,’ he said to the barman, ‘but if you can get a vodka made with grain instead of potatoes, you will find it still better.’ 
Bond named this drink the Vesper martini, after the character Vesper Lynd, portrayed by Ursula Andress in the 1967 adaptation, and Eva Green in the 2006 adaptation of “Casino Royale.”
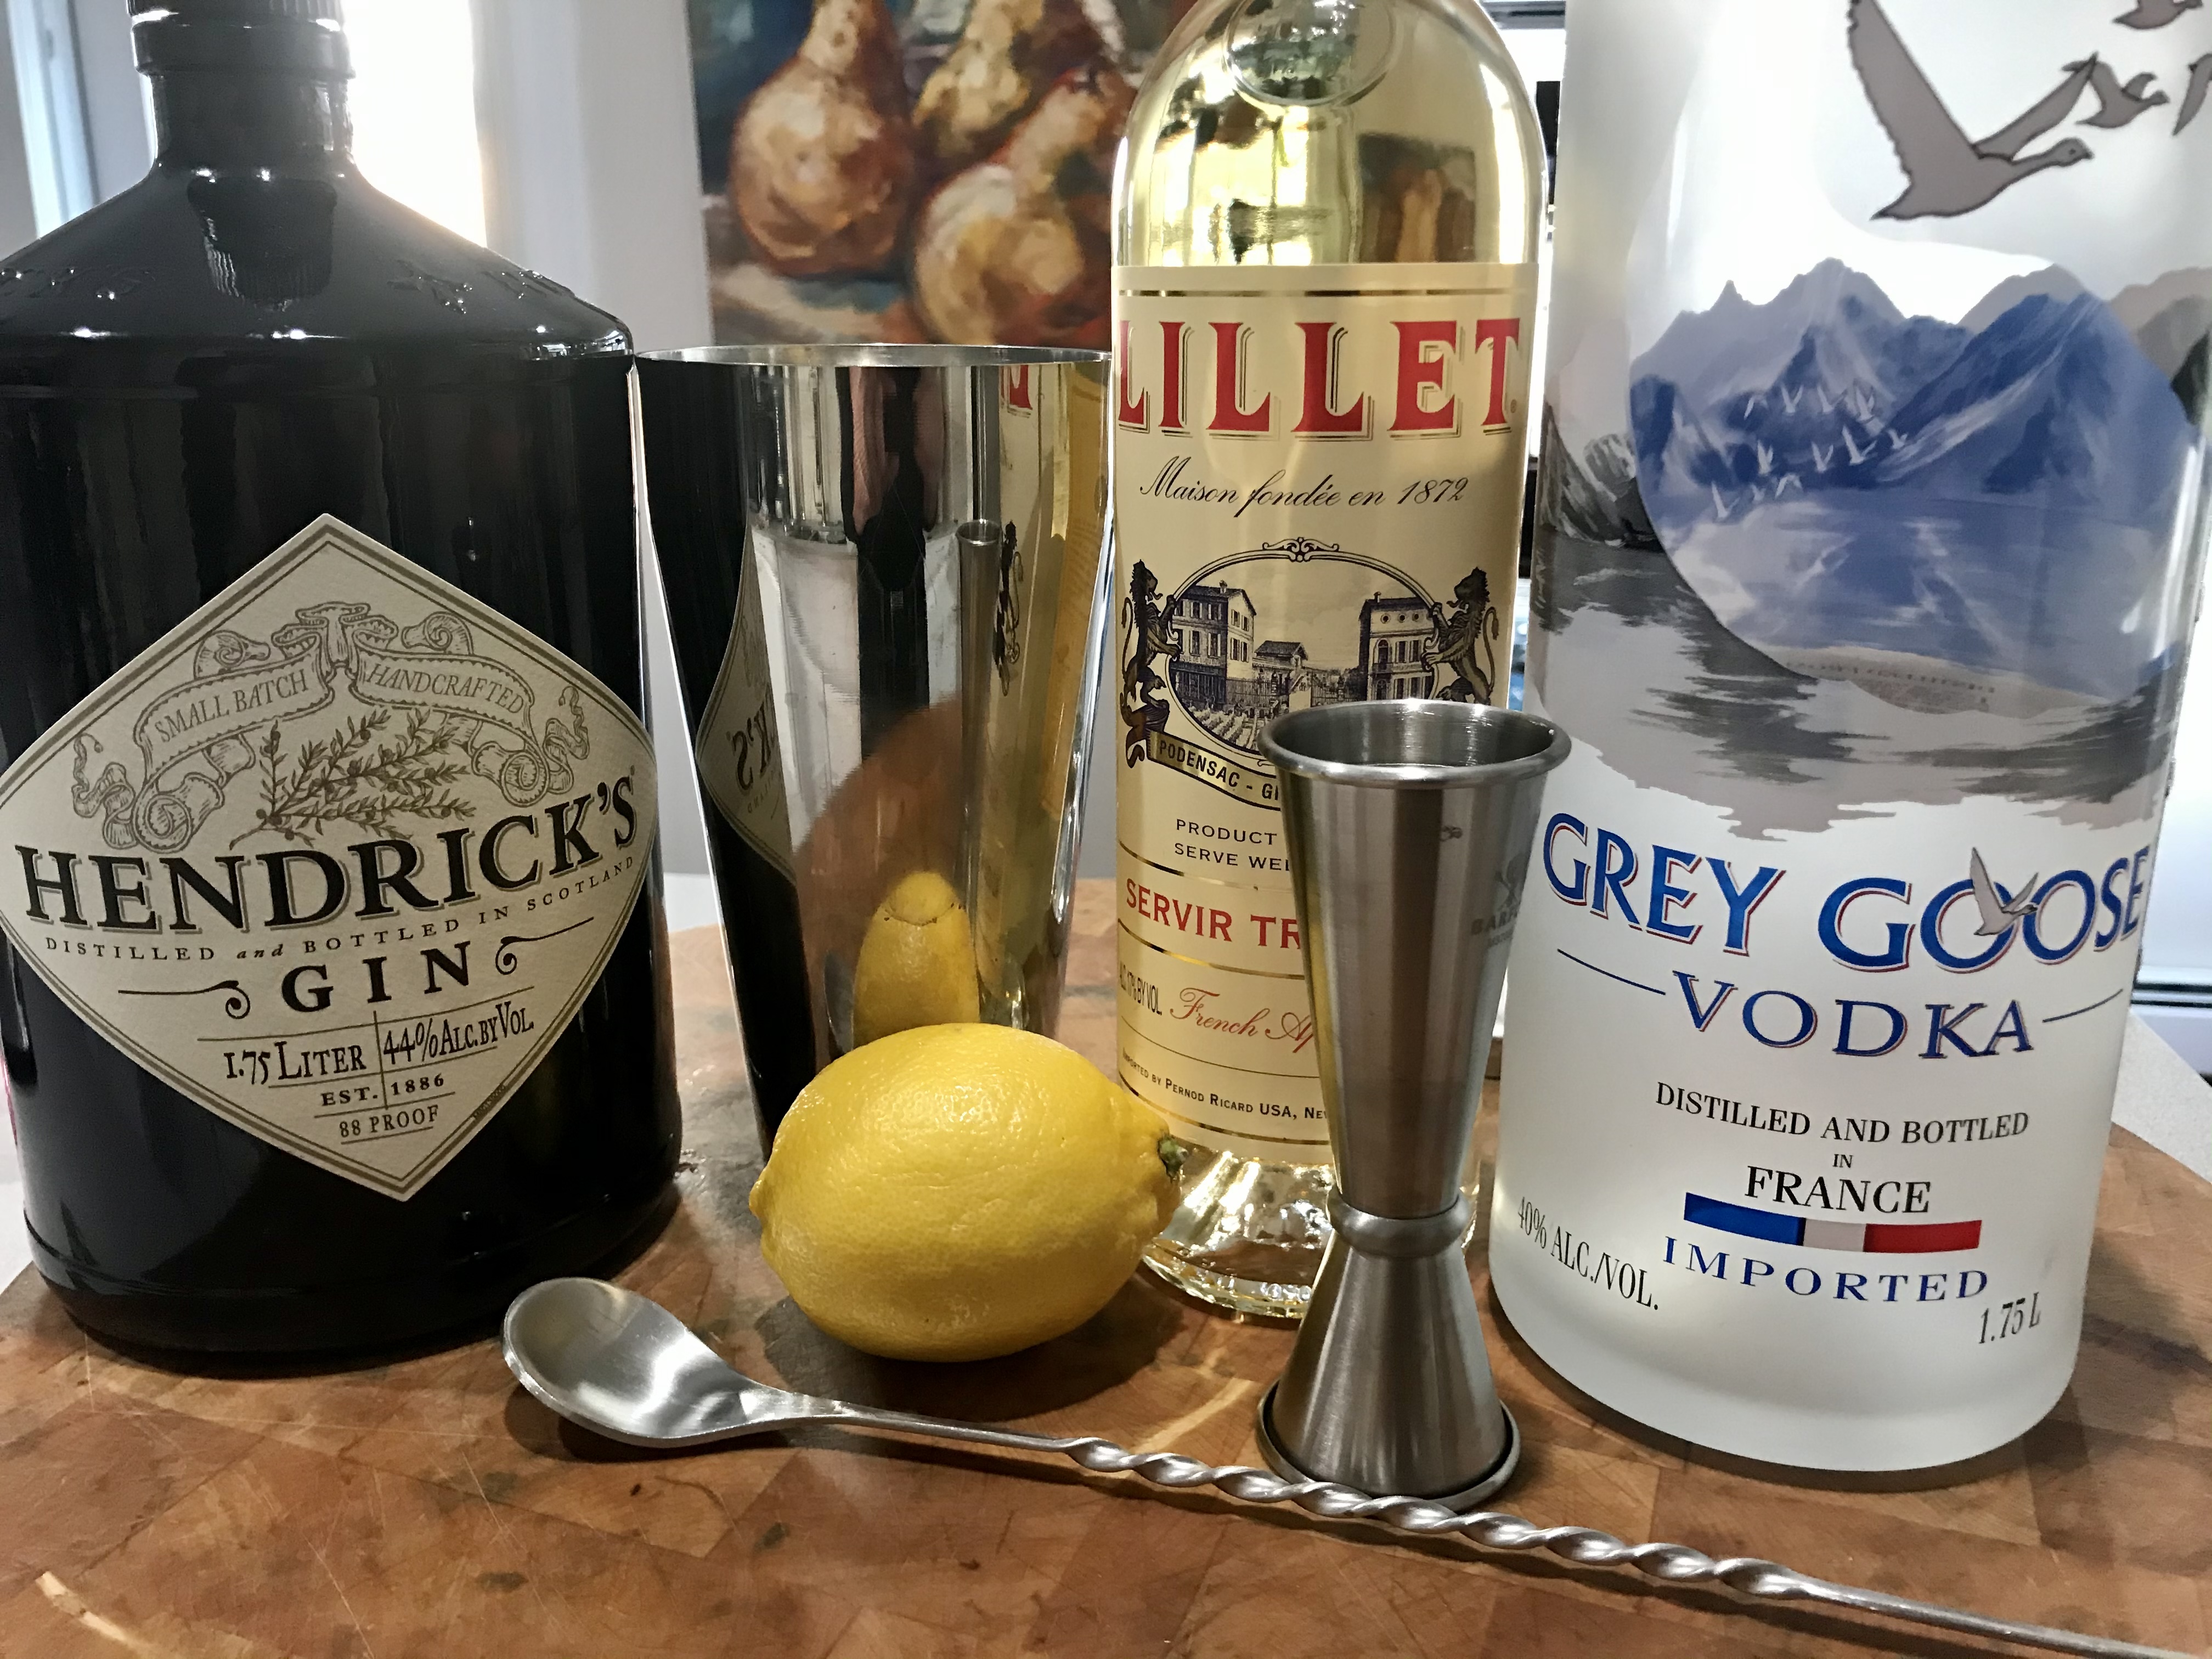
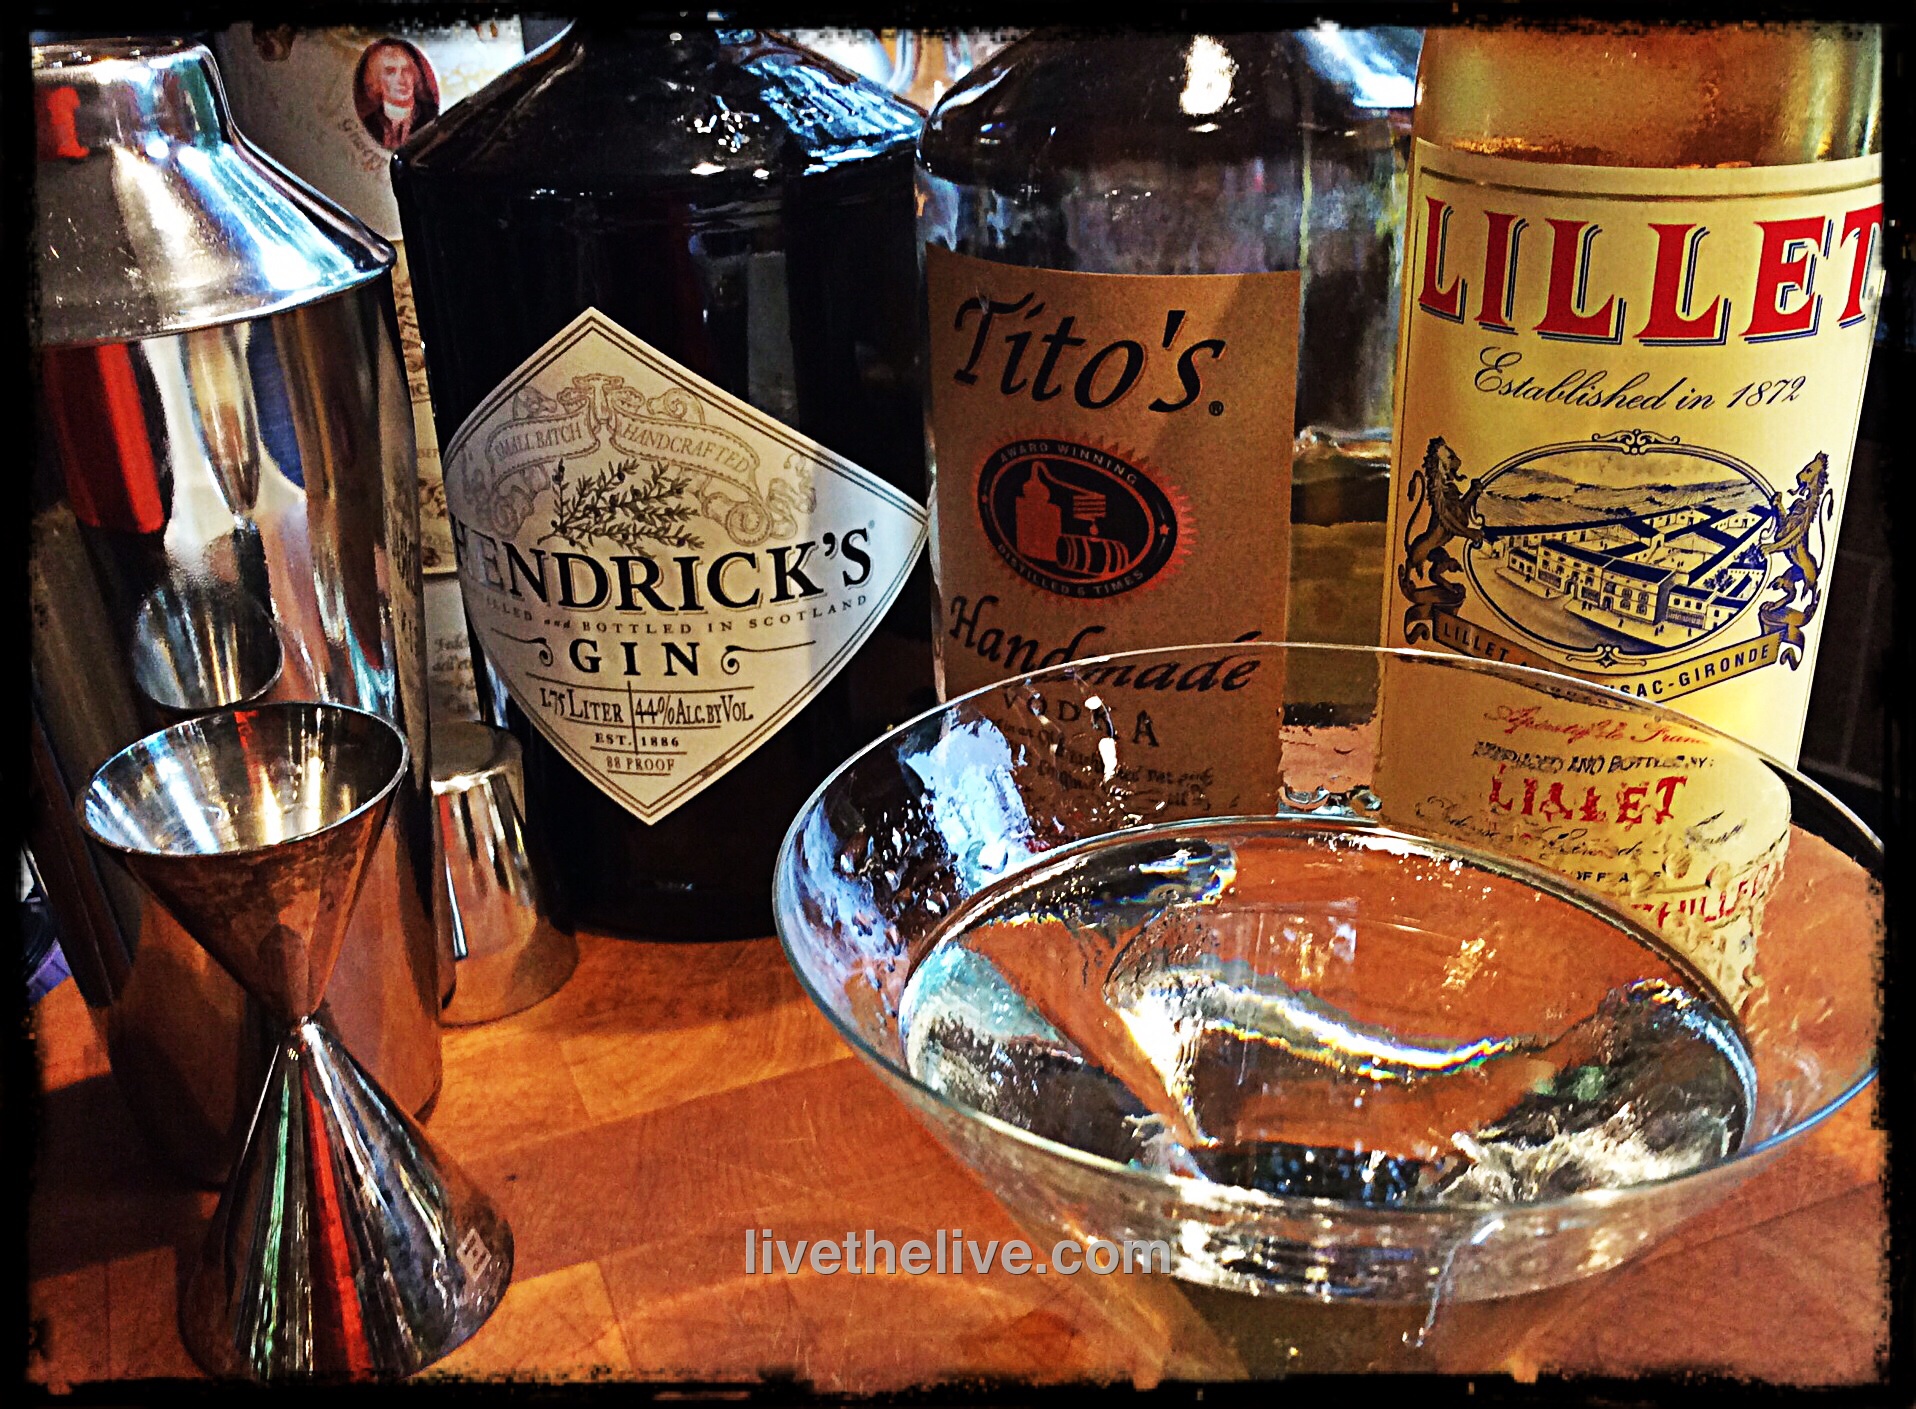
My first homemade version of this classic drink remained true to the measurements of the original, though I changed brands due to personal preference. In the novel, Bond just asks for “vodka.” (Of course, this was back in the 1950’s when we didn’t have hundreds of brands to choose from!) My choice for best-bang-for-the-buck grain vodka is Tito’s, made from corn. But an excellent choice for wheat-based vodka is Grey Goose.
Bond asks for Gordon’s gin. I’m partial to the floral notes of Hendrick’s. Again, in the 50’s, what good British agent wouldn’t drink Gordon’s?
And the original Kina Lillet had its recipe changed in the 1980’s to keep up with the times by reducing the quinine, which made it bitter. (Kina refers to the quinine, so it was removed from the label when the quinine was removed from the formula.) The French aperitif wine, Lillet, is today’s version: a blend of wine grapes, oranges, orange peels and quinine. Lillet is not a vermouth, though you’ll find it in the vermouth section of your favorite liquor store. With the rise in popularity of the Vesper martini, many bartenders and aficionados claim it’s just not the same without the original Kina Lillet formulation, and a search began to find a better substitute, one with a more pronounced quinine assertiveness.
ingredients again
Enter Cocchi Americano, an aromatized wine also found in the vermouth section of many liquor stores. With its quinine-forward recipe, Vesper fans claim it comes closer to the original Kina Lillet. Add a more London-style dry gin to the mix, like Bombay Sapphire, and you just about nail the cocktail Bond created all those years ago.
So…with measurements true to Bond, may I suggest two versions of the same cocktail!
My original, more floral, version…
3 oz. Hendrick’s gin
1 oz. grain-based vodka (like Tito’s or Grey Goose)
1/2 oz. Lillet
Combine these over ice in a cocktail shaker, and shake vigorously. Strain it into a chilled martini glass. I’m happy with a lemon peel or even olives with this combination.
Bondtini2
Or…
The version closer to Bond’s original, which is equally wonderful in its own right: crisp and refreshing, a strong drink with a hint of bitterness from the quinine. Dangerously addictive!
3 oz. London dry gin (like Bombay Sapphire)
1 oz. grain-based vodka (like Grey Goose)
1/2 oz. Cocchi Americano
Combine these over ice in a cocktail shaker, and shake vigorously. Strain it into a chilled martini glass. Garnish with a large, thin lemon peel.

With the rising popularity of the Vesper martini, and the use of Cocchi Americano instead of Lillet, the makers of Lillet now claim they “never removed” the quinine from their original recipe. Many feel this is an outright lie, (back-pedaling a bit, aren’t we?) because they themselves stated they changed in the formula back in the 80’s. A little too late now for them to re-formulate. Cocchi Americano has become the go-to with many bartenders (and myself) when recreating this classic cocktail. I no longer stock my bar with Lillet.

If you don’t want to spend the extra cash for Grey Goose, I found that this combination is also very satisfying: for the vodka, go with the original red label of Stoli with Bombay Sapphire gin and Cocchi Americano in the original proportions.
Cheers!

With people in my family that need to be on a gluten-free diet, I often experiment with a variety of doughs, trying to find just the right one for both, those who live a GF lifestyle and those who don’t. Those of us that can eat gluten, know that GF foods are very often sorely lacking in flavor and texture. So when a good recipe comes along, it’s worth sharing.


I originally made dinner rolls with this recipe, and although I was shooting for a Parker roll softness and consistency, what I got was more like a biscuit, although it was still quite soft and delicious. It got a big thumbs-up from the GF members of my family. And I thought they tasted pretty good as well.

Since I had leftover ingredients, I thought I would try making a pizza dough with the same recipe, and I think it came out quite successfully. In my experience, the biggest problem with gluten-free doughs is that you can’t stretch or mold them, they stick to your hands like crazy, and you need to use tons of oil so that they don’t stick to the pan when you’re baking. This recipe had none of those problems.

I was able to stretch the pizza dough out into a parchment lined pan, wetting my fingertips with cold water every once in a while to keep them from sticking, and then I let the dough rise for a couple of hours before popping it into the oven. But no oil was needed. And it never stuck to the parchment.


So here’s the recipe…almost exactly the same for the dinner rolls and pizza crust. Both start out with these ingredients…

1/4 cup warm water, about 110 degrees
1 tablespoon dry yeast
2 3/4 cups Bob’s Red Mill 1-to-1 gluten-free Baking Flour
2 tablespoons sugar, separated
1 teaspoon Xantham gum
1 teaspoon salt
1 cup warm whole milk, about 110 degrees
1 large egg
2 tablespoons melted unsalted butter

In the bowl of a mixer, combine the warm water with the yeast. Add 1 tablespoon of the sugar as well, to get the yeast going. Stir to combine and let it stand for 5 minutes.

In a separate bowl, combine the flour, the other tablespoon of sugar, the Xantham gum, and salt. Mix well.

When the yeast has bloomed, add the dry ingredients to the mixing bowl, along with the warm milk, egg, and melted butter. Mix on medium speed for about 3 minutes. The dough will be somewhat thick.

For the dinner rolls: Scoop out the dough in 1/3 cup measurements into a a baking sheet lined with parchment. Cover it with plastic and place it in a warm place to double in size, about 1 to 2 hours.


Pre-heat the oven to 350 degrees and bake for about 20 minutes, until they’re slightly golden in color.

While the rolls are baking, melt another 2 tablespoons of butter, and brush the rolls with it when they come out of the oven. Season with a little salt.

For the pizza: Take the ball of dough out of the mixer and spread it evenly onto a parchment-lined baking pan. Wet your fingers with cold water to keep the dough from sticking.


Cover the dough with plastic and let it rise in a warm place for 1 to 2 hours. (This is a good time to prepare your sauce, cheese and toppings for the pizza. Any sauce works here, from homemade to sauce in a jar. I had a variety of cheeses in the fridge, so I made a combination of mozzarella, fontina, pecorino Romano, and provolone.)

The risen dough, 90 minutes later.


Pre-heat the oven to 350 degrees.

Bake the dough—no sauce or cheese—for 10 minutes.


Remove it from the oven, add your sauce, cheese and toppings, then put it back in the oven and bake until the cheese has melted.


With Thanksgiving just days away, I’d like to share my recipe for what I consider to be the perfect turkey.

I often get asked if I deep-fry my turkey for Thanksgiving. I think it’s way too messy and time-consuming for nothing better than an “OK-tasting” bird. I lived in the South for a few years, and my friends fried a turkey on several occasions. I wasn’t that impressed.

When frying, you need to find a safe spot in the yard to blast the propane-fueled fryer so you don’t burn your house down. Then you need to stand outside and freeze your butt off while it fries, while your friends and family are all indoors having cocktails. Then you need to get rid of gallons of used oil, and clean up a huge mess at the end of it all. And through all this, you need to make sure the oil is at the right temperature so you don’t get a scorched turkey on the outside and a raw turkey on the inside.

No, thanks.

I get great results by cooking my turkey in my Weber grill. I’ve cooked it this way every Thanksgiving for about 30 years. The standard Weber allows me to cook up to a 15 lb. bird–big enough for my purposes–and it comes out crispy, smokey and delicious. If you’re afraid to try this for the first time at Thanksgiving when it really matters, I understand. That’s how I did it years ago, and I never looked back.


The charcoal chimney with hot coals awaits.

The charcoal chimney with hot coals awaits.


Although I’ve stopped using charcoal briquettes for basic grilling a long time ago, and now strictly use natural hardwood charcoal, this recipe works best with Kingsford briquettes. They burn slowly and evenly. I never use lighter fluid…I always start my fire with a few pieces of crumbled newspaper under a charcoal chimney.

The tools you need:
A Weber grill, with the dome top
Kingsford charcoal briquettes (don’t t use Match Lite or other pre-soaked briquettes)
A charcoal chimney, easily found at Home Depot or Lowe’s
A heavy-duty disposable aluminum pan
Ingredients:
Whole turkey, up to 15 lbs., thawed and brined (see my previous blog about brining a turkey)
Olive oil (to rub on the turkey)
2 yellow onions, chopped
4 stalks of celery, chopped
½ lb. (2 sticks) of unsalted butter, melted
1 tablespoon granulated garlic
1 tablespoon granulated onion
2 tablespoons salt
1 tablespoon pepper


Spreading the coals away from the center of the grill.

Spreading the coals away from the center of the grill.


If you want stuffing, it’s always wise to make it separately and cook it separately.

Light 8 to 10 lbs. of charcoal in the grill…depending on the size of the turkey and how cold it is outside.

If you brined the turkey first, you’ve already removed the giblets. If you’re not brining, go ahead remove the giblets from the thawed bird now. Place the turkey in the aluminum pan.

In a small bowl, mix the granulated garlic, granulated onion, salt, and pepper. (Definitely add any other seasonings you might like.)

Coarsely chop the onions and celery. Place them in a another bowl. Mix them with the melted butter and 1/3 of the garlic/onion/salt/pepper mixture.

Place a small handful of this onion and celery “stuffing” mixture in the neck cavity of the turkey. Place the rest in the body cavity (where the stuffing would usually go.) You can fasten the bird with turkey skewers if you like. This “stuffing” is strictly to flavor the turkey…you don’t eat it!


The rubbed, stuffed and seasoned bird.

The rubbed, stuffed and seasoned bird.


Rub the outside of the entire turkey with the olive oil and sprinkle the rest of the garlic/onion/salt/pepper mixture on the outside of the bird. Make sure you get the bird on the bottom as well.

When the coals in the grill have ashed over, spread them to the outside edges of the Weber grill equally. Put the cooking grill rack in place. Place the aluminum pan with the turkey in the center of the grill, keeping it away from the direct heat of the coals. If you’re using a meat thermometer, insert the probe into the thickest part of the breast, being careful not to hit the bone. Place the lid on the grill. (You may need to bend your aluminum pan a bit.) Open the vents on the bottom of the Weber as well as the vents on the lid. It’s important to get air circulating!


My meat thermometer calls me from as far as 100 feet away! Time for a cocktail!

My old-school meat thermometer calls me from as far as 100 feet away! (Newer thermometers are wireless and talk to your smart phone.) Time to join family and friends for a cocktail!


No basting is necessary.

Now here’s the tough part: DO NOT OPEN THE GRILL TO CHECK ON THE TURKEY! (If you must look, shine a flashlight into the vent holes on the lid to take a peek at the pop-up timer, if there is one.) The whole point is to keep the heat inside the kettle. You’ll know your turkey is done when no more smoke or heat rises from the grill, and the turkey inside stops making sizzling noises. The internal meat temperature should be around 165 degrees.

And believe it or not, a 15-lb. turkey will be cooked in about 2 hours!

If you’re using a meat thermometer (recommended), remove the turkey when it hits about 155 degrees, wrap it in foil, leaving the thermometer still in the bird, and let it rest at least 20 minutes. The temperature will go up a bit to 165 or even a little higher, before it starts going down.


Beautifully grilled, and perfectly cooked in less than 2 hours!

Beautifully grilled, perfectly cooked!


I get requests to publish my holiday recipes every year, so, with Turkey Day just days away, let’s get it started…

If people complain about your turkey being dry, you need to brine it before cooking. No matter what method you prefer to cook your bird, brining it beforehand will make it so much tastier and juicier. You really need to try it…and it’s easy to do.

It’s basic high school science: the brine has a greater concentration of salt and water than the molecules of the protein (in this case, a turkey) that is soaking in it. By simple diffusion, the protein molecules suck up the salty water and keep it. When you cook the meat, some of the water evaporates, but the meat still has far more moisture in it than it would have without the brine soaking, and you get a moister, more delicious bird.

Some people use giant syringes to inject their turkeys with crazy solutions, but I think that the old way is still the best when it comes to brining. Get a big pot, fill it with the brine, and soak the bird in it. Done.

Here’s my tried-and-true turkey brining recipe. Once the brining is done, you can cook the turkey whatever way you like best. I use a method where I grill it inside a Weber grill with charcoal. It comes out smoky and absolutely amazing. I’ll have that info in my next blog.

You must brine a thawed bird, so use your favorite method to thaw your turkey so that it’s ready on Thanksgiving morning. Brining can take 4 to 6 hours, so start early!

For this recipe, you’ll need a large pot to boil the brine ingredients, and then a larger pot to hold the turkey submerged in the brine. I use a turkey no bigger than 15 lbs. for two main reasons: there are only 3 people in our family, and the Weber grill I will later use can’t handle anything bigger.


image

1 gallon of water
2 onions
3 carrots
3 stalks celery
1 cup Kosher salt (I use Diamond Crystal…see below)
1 tablespoon black peppercorns
1/2 cup light brown sugar
1 1/2 teaspoons whole allspice
4 bay leaves
1 gallon of ice water
14–15 lb. turkey, thawed

Pour the first gallon of water in a large pot. Quarter the onions, carrots and celery (no need to peel them) and add them to the water. Add the salt, black peppercorns, brown sugar, allspice, and bay leaves. (I specify Diamond Crystal Kosher salt because all Kosher salt does not weigh the same! For example, Morton Kosher salt is much heavier for the same 1-cup measurement, so the brine will be saltier.)

Let the pot come to a boil for a few minutes. Remove it from the heat and let the brine cool down to room temperature.

Remove the giblets from the thawed turkey and place the bird in a container just big enough to hold it and 2 gallons of liquid.

Pour the now-cooled brine over the turkey, then pour in the gallon of ice water.

Make sure the turkey doesn’t float up by placing a plate on top. Put the turkey container in the fridge (or a cold garage or basement) for 4 to 6 hours, flipping the turkey over in the container halfway through.

After 4 to 6 hours, drain the turkey, rinsing off any spices that stuck to it, then pat it dry with paper towels. Now it’s ready to cook, using your favorite recipe.

If I’m brining a turkey for Thanksgiving, I do the brining in the morning and the turkey is ready to cook by early afternoon. And grilling it on a Weber grill only takes a couple of hours. It’s fast, requires no basting, and is absolutely delicious! That’s tomorrow!

ROASTED POTATOES

Posted: November 15, 2023 in Uncategorized

As much as everybody loves mashed potatoes on Thanksgiving, these potatoes take things to the next level. This Thanksgiving, maybe substitute these for the mashed…or, if you’re really adventurous, make both! The crunch on the outside, and the softness on the inside of these potatoes, is hard to beat.

I like using small, whole organic potatoes for this recipe. No peeling needed. Just put them in a big pot of water, bring it to a boil, and cook them until they are fork tender.
Drain the potatoes into a colander, and let them sit there for a few minutes to dry out.
Meanwhile, preheat the oven to 350°.
Get a baking pan and pour in a little bit of olive oil, a splash of red wine vinegar, salt and pepper, and some chopped fresh rosemary.
Dump in the potatoes, and toss all of the ingredients together.

They look a bit like olives!

Place the pan in the oven and bake for 30 minutes.
After 30 minutes, take the pan out of the oven and gently squash the potatoes with a flat object, like a glass. (I used my mint julep cup!) Toss them around again in the pan, and then return it to the oven for another 25 to 30 minutes.

The crunch, the texture of these potatoes is unreal!

With Thanksgiving around the corner, I’m sharing my favorite holiday dishes I post every year around this time.

My Mom loved that nasty, gooey cranberry log that oozes out of the can. It would hit the bowl with a splurt and would wiggle for about an hour. I’m more than happy to avoid that and make this delicious side dish, which has become a staple at our Thanksgiving table every year…

1 medium-sized butternut squash, washed and peeled with the seeds removed
Olive oil
Salt
1 cup fresh cranberries
¼ cup sunflower seeds
¼ cup pumpkin seeds or pepitas
¼ cup sesame seeds
¼ cup maple syrup, more if you like it really sweet

image

Pre-heat the oven to 400 degrees.

Once you’ve washed, peeled and seeded the butternut squash, cut it into ½” cubes. Sprinkle a little olive oil and salt on them and toss them to coat. Then spread the squash cubes in a single layer on a baking sheet. Bake them for about 30 minutes or until they’re golden on the edges.

Remove the squash from the oven and pour the cranberries into the hot tray. Mix gently. Pour the squash/cranberry mix into a smaller, deeper baking pan.

Increase the oven temperature to 425.

In a separate bowl, combine the sunflower seeds, pumpkin seeds and sesame seeds. Sprinkle the seeds evenly over the squash/cranberry mixture. Drizzle the maple syrup over everything and place the baking pan in the oven. Cook for another 20 minutes, until the seeds have roasted.

Drizzle a bit of maple syrup over the top just before bringing the pan to the table.

CLASSIC PARKER HOUSE ROLLS

Posted: November 7, 2023 in Uncategorized

The holidays on on our minds already. Time to start bringing out the recipes…

What’s a Thanksgiving dinner without Parker House rolls?

Parker House rolls are one of my all-time favorite treats. They’re so light and delicious because milk and melted butter are used to make the dough. I’d make and eat them every weekend if it wasn’t for the fact that I’d gain a ton of weight in the process! So…I save them for special occasions.


There really is a Parker House. It’s a hotel in Boston where the rolls originated in the 1870’s. Legend has it that a disgruntled hotel baker threw a batch of unfinished rolls in the oven, and when they came out, they had a folded pocketbook shape that made them light on the inside, and crisp and buttery on the outside. A legend was born.

There are hundreds of Parker House Roll recipes out there, but this is the one I swear by. It’s a great excuse to get out my old Kitchenaid standing mixer.


1 stick unsalted butter, melted and cooled, plus softened butter for brushing
1 tablespoon active dry yeast
1/4 cup lukewarm water (100 to 110 degrees)
1/4 cup sugar 1 cup whole milk, warmed
2 large eggs, at room temperature
4 cups all-purpose flour, plus more for dusting
2 1/2 teaspoons Kosher salt (I use Diamond Crystal)


Brush a large bowl with butter.

In the bowl of a stand mixer fitted with a paddle, combine the yeast with the water and a pinch of sugar. Let it stand until it gets foamy, about 10 minutes. This gets the yeast happy.


Add the milk, melted butter, eggs and remaining sugar and mix until it’s all combined.

Now switch to the dough hook and add the flour and salt. Knead at low speed until a smooth ball forms, about 2 minutes.

Scrape the dough onto a lightly floured board and knead it gently into a ball. Then place the ball in the buttered bowl, covering it with plastic wrap, and placing the bowl in a warm place. Let the dough double in volume. It’ll take about 1 1/2 hours.


Pre-heat the oven to 350.

Grease a 9-by-13 baking dish with more butter.

Turn the dough out onto a lightly floured board again, punching out the air bubbles, and forming it into a ball again. Cut the ball in half, then each half into 8 pieces.


You can either leave the pieces in their wedge shape, placing them in the baking dish top side up. Or you can roll the wedges into balls, placing them into the baking dish, spacing them out evenly.


Cover the baking dish with plastic wrap and let the dough rise again for about 30 minutes. By then, your oven will be nice and warm.


Bake the rolls for 20 to 25minutes, until they’re a beautiful golden color.


Serve them warm or at room temperature. If you bake the rolls earlier in the day, you can cover them in plastic wrap, and the re-heat gently before serving.

My Mom’s birthday is coming up next month, and even though she’s not with us anymore, I think a lot about the family favorites she used to cook. If there’s one dish that my Mom made all the time but I didn’t appreciate until I got older, this is it. Stuffed cabbage, cabbage rolls, or balandėliai, as we say in Lithuanian, was a staple in our home and one of my Dad’s favorites. 

I had seen my Mom make these beauties so often in my childhood, I didn’t even need to check online recipes out for guidance. That doesn’t mean I make them exactly like Mom, but my version came out pretty good. I think she would’ve been proud.


image

2 full strips of bacon, chopped
1 yellow onion, finely chopped
1 teaspoon salt
1/2 teaspoon pepper
1/2 teaspoon granulated garlic
1 lb. ground grass-fed beef
1 lb. ground pastured pork
1/2 cup breadcrumbs
2 eggs
1 large head cabbage
1 pint homemade chicken, beef or veal stock
750 g diced tomatoes (1 Pomi container)
1 teaspoon thyme
1 teaspoon salt
1/2 teaspoon pepper
1/4 teaspoon granulated garlic
1/4 teaspoon granulated onion

Chop the bacon into small pieces and fry them until crisp. Finely chop the onion, and add it to the bacon and rendered fat in the pan, cooking until the onions are translucent. Add the salt, pepper and garlic. Mix well, and remove it from the heat. Let it cool to room temperature.

In a large bowl, combine the beef, pork, breadcrumbs, eggs, and cooled bacon and onion mixture. Place it in the fridge to firm up.

Let a large pot of water come to a boil. Core the cabbage, leaving the leaves whole, and carefully immerse the head of cabbage into the hot water. (I use two sets of tongs to handle the cabbage.)

Little by little, the outermost leaves of the cabbage will come off the head, and you can remove them, setting them aside to cool. Continue doing this until you can no longer remove leaves from the remaining head of cabbage.

Remove the remaining head of cabbage from the hot water, and using your hands or a knife, break it into flat pieces. Line the bottom of a roasting pan with the pieces. These will keep the stuffed cabbage from burning and sticking to the bottom. If you need more to line the pan, use the smaller or torn pieces of cabbage.

Time to roll the stuffed cabbage. Take the meat out of the fridge. Lay a cabbage leaf flat on the counter, and add some of the meat mixture (about 1/4 cup, depending on the size of the cabbage leaf) inside. Roll the cabbage around the meat, folding the sides in as you go, much like a burrito. You might need to slice away the thickest part of the leaf stem to make rolling easier. Lay the stuffed cabbage in the roasting pan on top of the leftover cabbage pieces. (Unlike Mom, I don’t use toothpicks to hold the stuffed cabbage rolls together.)


Continue stuffing and rolling the cabbage leaves until you’ve got a pan full of them, shoulder-to-shoulder.

In a blender, food processor, or whisked in a bowl, combine the stock, diced tomatoes, thyme, salt, pepper, garlic and onion. Pour this mixture over the top of the cabbage rolls in the roasting pan, covering them.


If you have leftover cabbage, you can place another layer of them on top. Otherwise, cover the roasting pan with foil and place in a pre-heated 350 degree oven. Cook for an hour.


After an hour, remove the foil and cook further for another 45–60 minutes.


Really delicious and an instant flashback to great memories of dinner at home….thanks to Mom.