Archive for the ‘cheese’ Category

Not a very complex idea. I just put the stuff that’s usually on the outside, on the inside of my burgers. Why? Why not?

If I’m making bacon cheeseburgers to bring to a barbecue, even if it’s on my back deck, instead of bringing a package of bacon and a package of cheese and a stack of burgers, I’ve got all the ingredients conveniently in the patties. And as the burgers cook, the fat from the bacon and the gooey cheese melt and combine with the burger meat to make a really tasty and moist burger.

I make 2 lbs. of burgers at a time, using 1 lb. of ground grass-fed beef and 1 lb. of pastured ground veal. For the sake of this recipe, we’ll just call it beef.

image

2 lbs. ground beef

1/2 cup sharp cheddar cheese, cut into 1/4″ cubes

1/2 lb. bacon, cooked crisp, cooled and crumbled

garlic salt

avocado oil or pork fat


In a bowl, combine the beef, the cheese and the bacon, mixing well so that all the ingredients are evenly incorporated.

Form the beef into 1/4 lb. patties. Refrigerate them until you’re ready to cook to firm them up.

Heat a cast iron skillet and add a drop of oil or pork fat. Place the burgers in the hot skillet to sear and sprinkle with the garlic salt. When browned, flip the burgers and place the skillet in a 350-degree oven to finish cooking.

image


On our recent trip to Spain, croquettes were served in just about every restaurant we went to. My 7-year-old daughter fell in love with them, and they became the “chicken nugget” of our trip: the go-to kid food we knew we’d always find on the kids menu.

image

Once we got home to the States, I started looking for them and only found them on-line, not in stores. And since they’re shipped frozen, it required a large purchase: a major hassle to buy them.

Luckily, I found a great recipe in Saveur magazine, and decided to try it out. I was a bit clumsy at making them at first–they do need a bit of finesse–but by the end of the batch, I got the hang of it.

image


Ingredients:


2 lbs potatoes, peeled and cut into 1″ cubes

4 tablespoons unsalted butter

1 onion, minced

1/4 to 1/2 cup heavy cream

6 oz cheddar cheese, grated

6 oz ham, finely chopped

salt and pepper

1 cup all-purpose flour

2 eggs

2 cups Panko breadcrumbs

avocado oil (or vegetable oil–for frying)


image

Peel the potatoes, cut them into 1″ cubes and boil them in salted water until tender. Drain and set them aside.

Melt the butter in the same pot the potatoes were in, then add the onions and saute until translucent. Put the potatoes back in the pot and add 1/4 cup of the heavy cream. Mash the potatoes with a potato masher until smooth. Add more cream, if needed.

Add the cheese and mix until it has melted in. Add the ham and mix again. Season with salt and pepper.

Pour the contents of the pot into a metal bowl and place in the freezer to cool, stirring every 10 minutes until the mashed potato mix is cold, but not frozen.

Line up three bowls: flour in the first bowl, eggs (scrambled) in the second bowl, Panko in the third.

Remove the mashed potato mix from the freezer, and with floured hands, grab enough to gently roll a small meatball in your hands. (I’ve found that starting with a round shape makes it easier to work with.)

Roll the ball in the flour, then the egg, then drop in the Panko and roll again. With the ball in your hand, gently squeeze into a tubular shape, and then place it on a sheet pan lined with non-stick aluminum foil. Continue with the rest of the potato mixture. (You may need to add another egg or two if you run out.)

Once you’ve rolled all the croquettes, place them back in the freezer for 20 minutes to firm up. (I use a sheet pan lined with non-stick aluminum foil.)

Heat a pan with 2″ of oil to 350 degrees. Remove the croquettes from the freezer, and working in small batches, fry them until golden brown. Place on paper towels, and quickly season lightly with salt while hot, if desired.

image


The croquettes freeze really well, so this batch goes a long way. Once they’ve been fried, let them cool completely to room temp. Place them in Ziploc freezer bags and store in the freezer. When it’s time to cook them, let them thaw for about 15 minutes, then place in a pre-heated 325 degree oven for another 15 minutes.


I came up with this crunchy tasty appetizer a few years ago, when I needed a tasty bite for one of our famous summer parties. I wanted something fresh that highlighted the veggies of the season, so when I spotted these baby bell peppers in the supermarket, I came up with this tasty, crunchy appetizer.

image


Ingredients:


Baby bell peppers

6 ears fresh corn, removed from the cob…or organic frozen corn

1/2 Vidalia onion, peeled, quartered, grilled, chopped

1 cup mayonnaise

1 teaspoon hot pepper sauce (I use Frank’s Red Hot)

6 oz feta cheese, or  Queso Fresco, crumbled

Juice of 1 lime

Pinch of white pepper

1 tablespoon fresh parsley, finely chopped


image


Cut corn from ears, and saute very briefly in a little olive oil. Place in a bowl and let cool.

Peel and quarter the Vidalia onion, and throw it on a hot grill with a little olive oil to get some nice grill marks on it, leaving the onion still crispy, not soft. If indoors, throw the quartered onion in a hot pan with a little olive oil, and cook until you get some brown marks on it. Remove, let cool, then place in a food processor and pulse until the onion is chopped into small bits, just smaller than the corn kernels. Add onions to corn.

In a separate small bowl, combine mayonnaise and Frank’s Red Hot. Pour in crumbled cheese and mix well. Pour into corn and onion bowl and mix well.

Add lime juice, white pepper and parsley to the bowl and mix well again.

Cut the baby bell peppers in half lengthwise, and remove the seeds and membrane. Stuff the peppers with the corn mixture and garnish with cilantro or parsley.


If preparing ahead of time, refrigerate until ready to eat, but allow some time for them to warm up to room temp a bit.


Corn and tomatoes…when they’re in season, you just can’t beat the combination! This is a very simple salsa that takes advantage of their natural sweetness and is easy to make.

salsa


Ingredients:


1 lb frozen organic corn or equivalent fresh

2 ripe tomatoes, seeded and chopped

1/4 small red onion, finely chopped

6 oz mild crumbled cheese, like feta, cotija, or queso fresco

1 teaspoon Fleur de Sel

A pinch of black pepper

2 teaspoons white vinegar

2 tablespoons extra virgin olive oil


If using fresh corn, remove it from the ears, then pan saute  in a little olive oil, but leave it nice and crisp. If you can roast the ears of corn over some coals, even better. Let it cool.

Mix corn with all the other ingredients in a bowl. Cover and refrigerate.

Many people are choosing a gluten-free diet even though they don’t suffer from Celiac disease. Though many people stay undiagnosed, gluten sensitivity is pretty common. And even if you’re not sensitive to gluten, it can cause bloating, pain and fatigue. Many doctors are advising people to remove all or most of the gluten in their diets to see if they feel better as a result.

Gluten is a protein found in wheat and wheat products. So that means no bread, pasta, pizza, even soy sauce. Gluten is a hidden ingredient in many food products, so you need to do some research to figure out what alternatives are available. We’re pretty lucky…there are now entire sections of everyday food stores that carry gluten-free products.

I don’t have any sensitivity to gluten, and quite frankly, I find it hard to live without pizza or a nice slab of freshly baked bread now and then. And all the subsititute flours: rice, corn, quinoa, chickpea, or any combination of them–they all taste bad to me. But…I have a wife that has chosen a gluten-free diet. And since I’m the one that cooks all the meals at home, I’m making a valiant effort to find tasty alternatives.

I don’t spend my time baking gluten-free bread, cookies, cakes or other desserts. We have a great bakery nearby (www.evaruths.com) that does all that. Instead, I focus on the meals I’ve always made in the past and try to “de-glutenize” them.

Two of our favorite meals are chicken parmigiana and pizza.

The chicken parmigiana was relatively easy. The only gluten in my original recipe (http://wp.me/p1c1Nl-jq) was found in the breadcrumbs that I topped the chicken pieces with. I bought a package of Glutino gluten-free bread crumbs (made from corn) and the chicken came out pretty good. I still made a regular batch for myself…but my wife gave it a thumbs up.

Gluten-free chicken before I added sauce and cheese.

Gluten-free chicken before I added sauce and cheese.

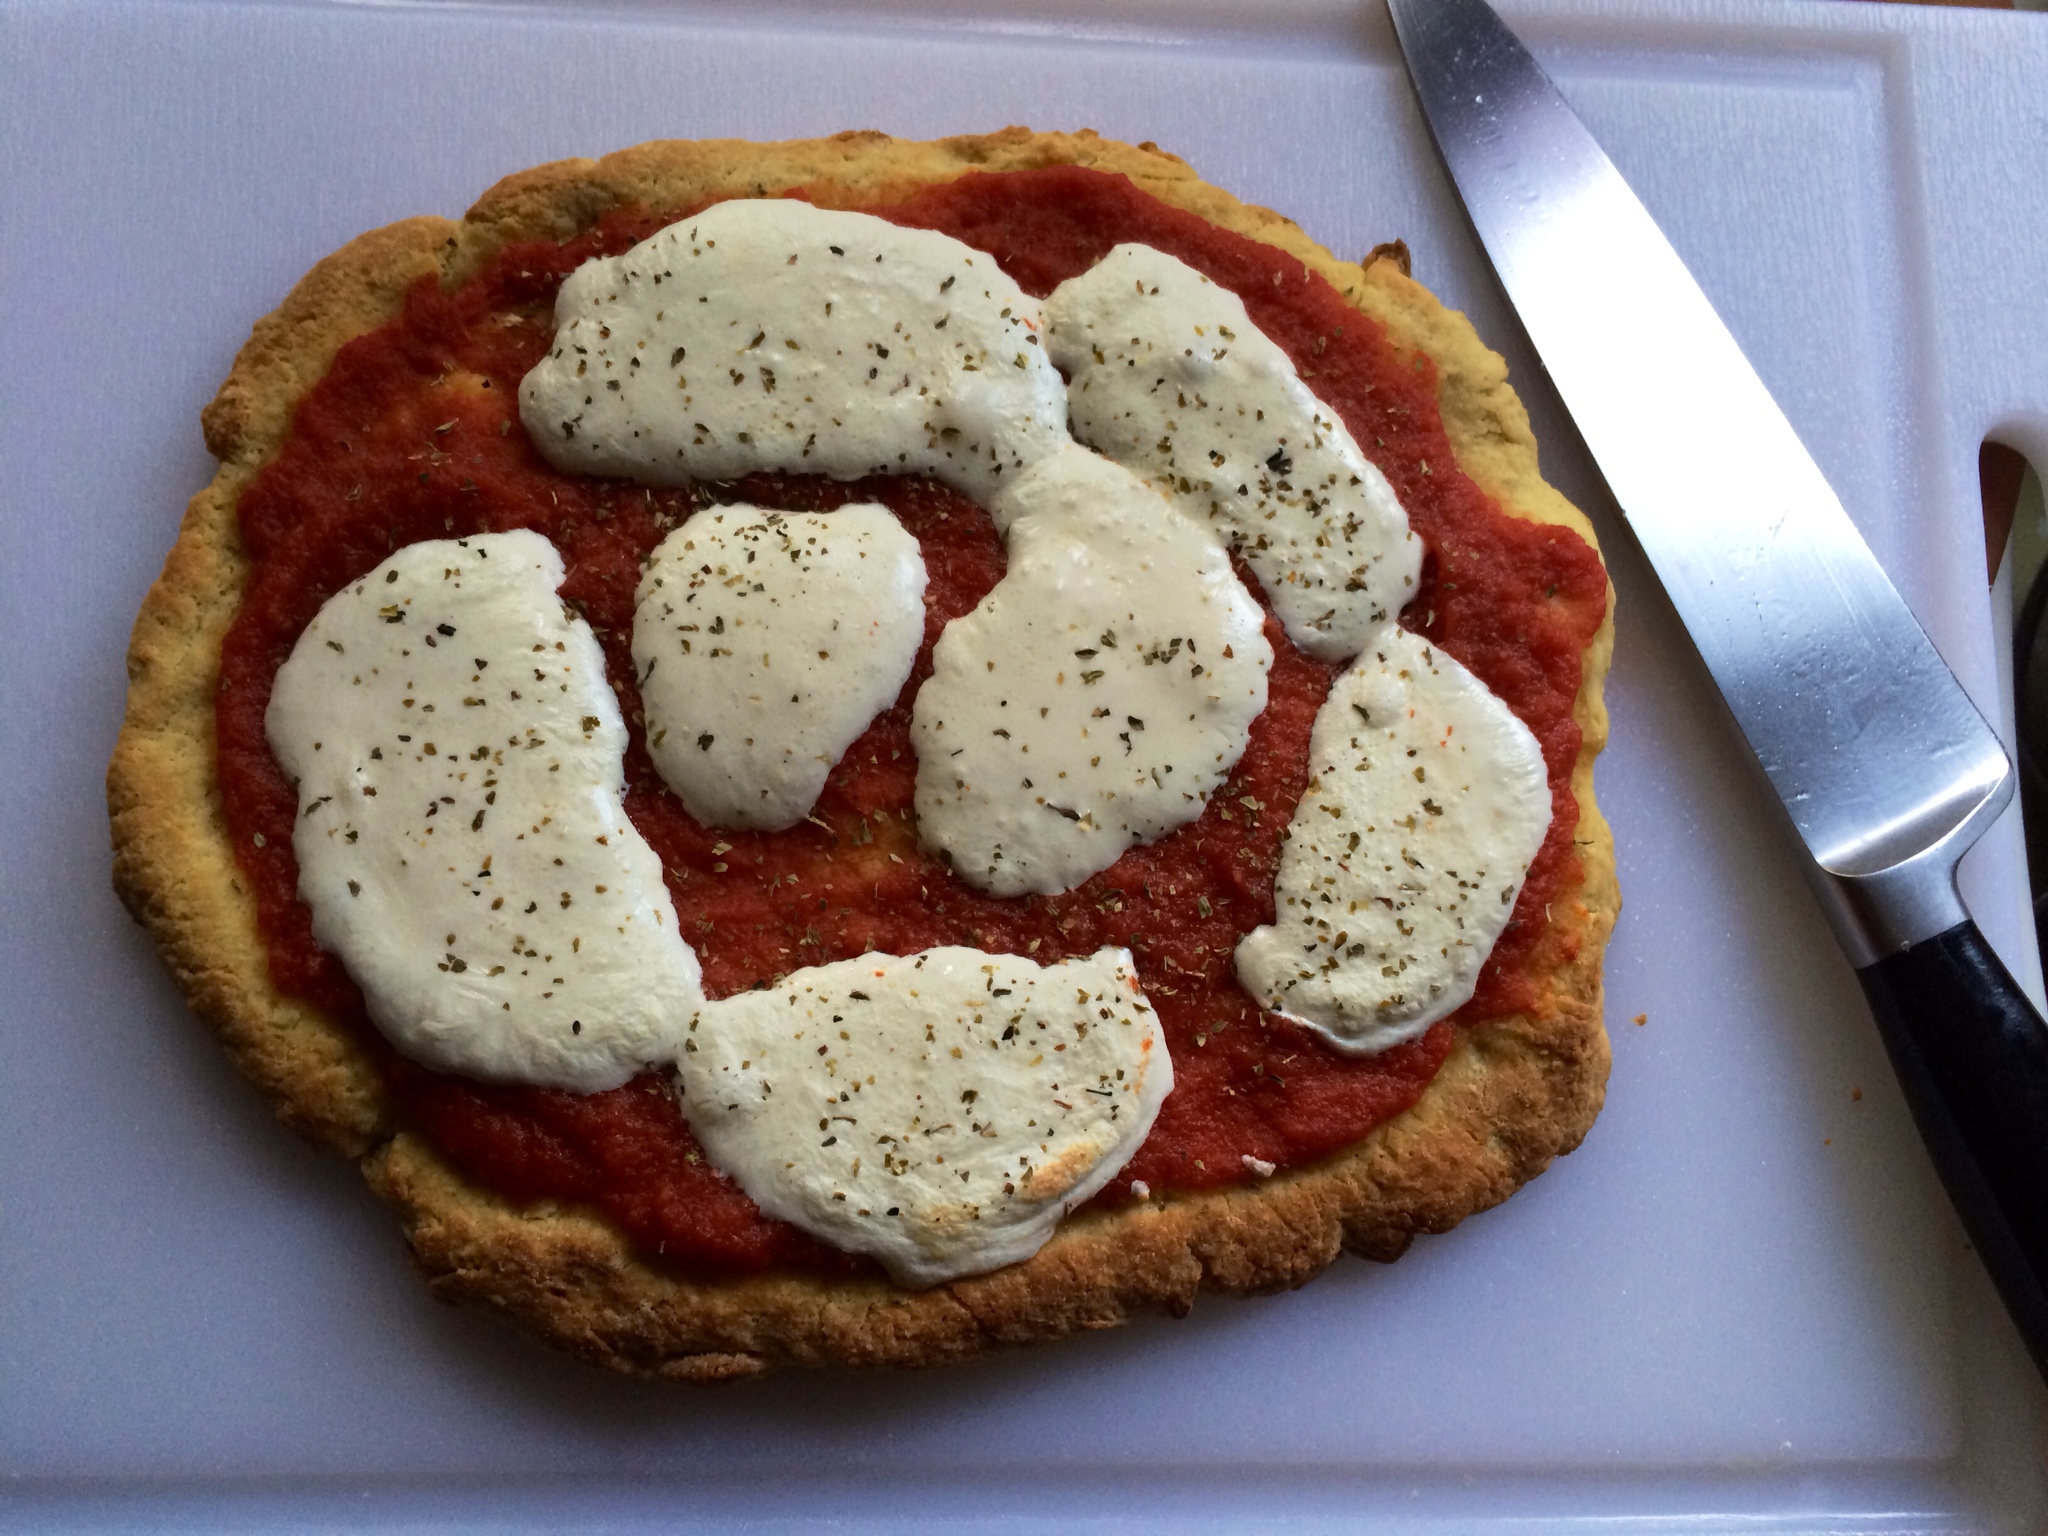
The tougher challenge was pizza. With dozens of flours to choose from, I wasn’t sure where to start. But I’m a fan of Bob’s Red Mill. I’ve been using their products for years. So when I saw they offered a Bob’s Red Mill All-Purpose gluten-free baking flour (a combination of garbanzo bean flour, potato starch, whole grain white and sorghum flour, tapioca flour and fava bean flour), I figured I’d make my first gluten-free pizza dough with that. I also learned that I had to buy some Xanthan Gum, a plant-based product that adds the elasticity that gluten usually provides.

gluten pizza1


The recipe:

1 cup gluten-free all-purpose flour

1 teaspoon xanthan gum

1 teaspoon salt

1 teaspoon sugar

1 1/4 teaspoons yeast

1 cup very warm (130 degree) water

1egg

olive oil


Use two bowls: one for the dry ingredients, one for the wet.

In the first bowl, mix flour, xanthan gum, salt, sugar and yeast with a whisk to combine.

In the second bowl, whisk egg with warm water.

Pour the wet ingredients into the dry, and using a wooden spoon, combine to form a dough. It will be somewhat dry. If it’s very dry, add a small amount of water at a time until the dough holds together.

Line a small sheet pan with Reynolds non-stick aluminum foil. Spread the dough out to the desired thickness, and then brush lightly with olive oil. Cover with plastic wrap and let it rise for about 45 minutes.

Bake the dough in a pre-heated 450-degree oven for about 5 minutes. Remove and add tomato sauce and cheese and other toppings, then place back in the oven and cook another 5 minutes, until golden.

gluten pizza2


My wife liked the pizza. I could definitely pass on it. But I will keep tweaking recipes. I’ve heard that Bob’s Red Mill now has a brand new all-purpose baking flour, Bob’s Red Mill Gluten Free 1-to-1 Baking Flour, where they’ve removed the bean flours and added xantham gum to the mix. They also have a special Pizza Crust Mix.

asparagus pastaAsparagus season has arrived in my garden. This is one of my favorite ways to enjoy it.
Ingredients:
4 mild Italian sausages, sliced into pieces 1/2″ thick
1 lb penne pasta
1/2 onion, finely chopped
1 cup chopped fresh trumpet mushrooms (white button mushrooms work, too)
2 cups fresh asparagus, sliced into 1-inch pieces
1 clove garlic, passed through a garlic press
1 cup homemade chicken broth
6 fresh sage leaves, finely chopped
1/2 cup freshly grated Parmigiano Reggiano cheese
extra virgin olive oil
salt and pepper
Have the pasta water boiling, and add pasta, cooking until just a bit more undercooked than al dente.
Heat a large pan, and drizzle in some olive oil. Sautee sausage pieces until browned and cooked through, but not over cooked. Remove sausages from the pan and place in a separate bowl. Remove all but 2 tablespoons of the fat left behind in the pan.
Place pan back on stove and saute onions until translucent. Add garlic, and saute for 10 seconds. Add sage, and saute for 10 seconds, stirring. Add chopped mushrooms and saute for a few minutes, then add chicken broth, and simmer until almost all the liquid has evaporated. Pour contents of the pan into the bowl with the sausages.
Return pan to the stove, add a little more olive oil, and on medium heat, saute the asparagus pieces. Cook until they are al dente, not too soft. Once the asparagus has reached this stage, return all the contents of the sausage/mushroom bowl to the pan to heat through. Drain the pasta, and add it to the pan as well, combining all the ingredients. If it looks too dry, add a little pasta water to the pan. Season with salt and pepper.
Make sure you serve this hot, with grated Parmigiano Reggiano on top, and drizzle lightly over the top with extra virgin olive oil.


My name for a messy yet delicious taco on a bun. I had leftover taco meat and leftover barbecue sauce…recipes from two previous blogs. Putting them together with a sprinkling of Mexican cheese on a bun with lettuce and tomato made for one sloppy but delicious sandwich!

sloppy jose

How to make one…

For the barbecue sauce, I used the sauce inspired by Franklin’s Barbecue in Austin, Texas, as featured in my last blog: http://wp.me/p1c1Nl-qX

For the seasoned taco meat…

Ingredients:

1 teaspoon granulated garlic

1 teaspoon onion powder

1/4 teaspoon crushed pepper flakes

1 teaspoon dried Mexican oregano

1 teaspoon paprika

2 teaspoons ground cumin

1 teaspoon sea salt

1 teaspoon black pepper

1 Spanish onion, finely chopped

olive oil

2lbs. grass-fed ground beef


Combine all the spice ingredients in a bowl.

Saute the onions in a bit of olive oil until translucent. Add the beef and saute until cooked, mixing in the spice mixture a little at a time until you’ve used it all.


For the sandwich…

Take some of the taco meat and place it in a small non-stick pan and heat on medium. Squirt in as much of the barbecue sauce as you like, mixing thoroughly. Sprinkle some grated Mexican cheese on top, mixing thoroughly and letting it all melt together into one warm, gooey mess. Throw it on a bun. Add lettuce, tomato, avocado slices, whatever you like!


REUBEN SEUP

Posted: April 24, 2014 in bacon, cheese, Food, Recipes, sauerkraut
Tags: , , , ,

Why have soup and a sandwich when your soup can be your sandwich? I had all the ingredients to make a Reuben sandwich. But I wanted soup. So I made Reuben Seup…I mean Soup!

Think French onion soup, but using Reuben ingredients…

rye

Take an oven-proof soup bowl. Line the bottom with some rye bread.

kraut

On top of that, place a nice helping of sauerkraut. I use sauerkraut that’s been rinsed and drained, then sauteed with some onions and bacon until lightly caramelized.

stock

Slice pastrami as thinly as possible, and simmer it in a pot of homemade chicken stock until tender. Season stock with salt and pepper, if needed. Pour the stock and pastrami over the sauerkraut.

swiss

Layer slices of Swiss cheese over the top of the bowl. Place under broiler until melted.

melty

Eat!

eat

It satisfied my soup and sandwich craving!


Corn and tomatoes…when they’re in season, you just can’t beat the combination! This is a very simple salsa that takes advantage of their natural sweetness and is easy to make.

salsa


Ingredients:


1 lb frozen organic corn or equivalent fresh

2 ripe tomatoes, seeded and chopped

1/4 small red onion, finely chopped

6 oz mild crumbled cheese, like feta, cotija, or queso fresco

1 teaspoon Fleur de Sel

A pinch of black pepper

2 teaspoons white vinegar

2 tablespoons extra virgin olive oil


If using fresh corn, remove it from the ears, then pan saute  in a little olive oil, but leave it nice and crisp. If you can roast the ears of corn over some coals, even better. Let it cool.

Mix corn with all the other ingredients in a bowl. Cover and refrigerate.

There are few foods that people take as personally as pizza. Tell someone that your pizza place is better than their pizza place, and chances are you’ll start a fight. Well, my pizza place is better than your pizza place, because I make it at home. Besides, I can run faster than you.

I’m not going to say that much of the pizza that I’ve tried here in Rhode Island is mediocre, but I will say that I was born in Brooklyn and grew up working in many New York pizza places in my youth. So yes, I do have a very strong opinion on what I think makes a good or bad pizza.

My homemade pizza is all about the basics. The better quality my original ingredients are, the better my pizza will be:


The dough…

The key ingredient is 00 flour, and it can be found in specialty stores,  or online. My favorite new source is Central Milling in Logan, Utah. They make a 00 flour that is top notch. I buy it through the Forno Bravo pizza oven website: http://www.fornobravo.com/store/Tipo-00-Pizza-Flour/ It makes a crustier and more flavorful dough. Ratios for this recipe depend on the humidity in my kitchen on any given day, but my basic pizza dough recipe is as follows:

4–5 cups 00 flour

1 cup tepid water

1 Tablespoon salt

1 packet Italian pizza yeast

a squirt of extra virgin olive oil

I mix all the dry ingredients in the bowl of a stand mixer, then slowly add the water as it mixes. After the ingredients are well mixed, and the dough pulls from the side of the bowl, I remove it to a floured board, where I knead the dough by hand for another 5 minutes, until it is smooth and elastic, shaping it into a ball. I rub a little olive oil over the ball of dough, place it in a bowl covered with plastic wrap, and let it rise for 2 hours, punching it down after that, and letting it rise another 2 hours again.

The sauce…

I’ve written a previous blog about real and fake cans of San Marzano tomatoes. I feel that San Marzanos make the best sauce, but not all cans of San Marzanos are created equal. The only way you can be guaranteed you have a real can of these beauties, grown in volcanic Italian soil in the shadow of Mt Vesuvius, is by the D.O.P. designation on the can. (D.O.P. stands for “Denominazione d’Origine Protetta,” and signifies that it’s the real deal.) Anything else that says San Marzano may not be.

San Marzanos are so amazing, that all I do is puree them in a food processor, pour the sauce into a pan, and let it reduce until it has thickened. No spices or additions of any kind.

The cheese…

I don’t need to go super-fancy with mozzarella di bufala (cheese made from the milk of the water buffalo) …but I don’t use the mass-produced supermarket stuff, either. Whole Foods has fresh mozarella from Maplebrook Farms in Vermont, and it is excellent.

The toppings…

A matter of choice. I wrote a while ago about how I make my own guanciale, a cured meat that comes from pork cheeks. Chopped and fried, that is one of my daughter’s favorite pizza toppings.

But my signature pizza that wows my dinner guests is my marinated beef tenderloin and fried chive blossom pizza. I marinate and grill a piece of beef tenderloin, slicing it thin. And in the springtime, when my chive plants are budding like crazy, I snip the blossoms before they open and place them in Ziploc freezer bags to use all year long. When it’s time, I grab a handful of the blossoms and fry them in a little olive oil, salt and pepper, and sprinkle them over the top of the beef tenderloin pizza. A touch of Fleur de Sel on top seals the deal.

My signature marinated beef tenderloin and chive blossom pizza.

The oven…

Many professional pizza ovens reach a temperature of 1000 degrees. My home oven only reaches 500, but it does the trick. I do use a pizza stone, and place it on the center rack of the oven, and let it heat up thoroughly before sliding a pizza onto it for cooking.

Recently, I’ve also started cooking pizzas on my barbecue grill (using a special stone for the grill) to add a smoky component. The grill gets hotter than my home oven, which is great, but it’s obviously a more work to set-up and clean.


My favorite pizza?

There are only a few pizzerias that I know of—all in NYC–that make pizza montanara, and for my money, it’s the best I’ve ever had. It’s a small, rustic pizza margherita using mozzarella di bufala and simple tomato sauce, garnished with a basil leaf. What makes it magical is the fact that after they stretch the dough–but before they put the toppings on it–they fry the dough in deep fryer with olive oil for just a minute. It puffs up like a pillow. Then they put the toppings on and quickly bake it in a very hot oven. The end result is a non-greasy, absolutely heavenly pizza cloud…the most delicious I’ve ever had.

I’ve actually had some great success recreating this pizza at home, frying the dough in a very large skillet of olive oil. The challenge is removing this giant piece of dough out of the skillet and into a pizza pan without dripping olive oil all over my stove and setting my house on fire! So far, so good!