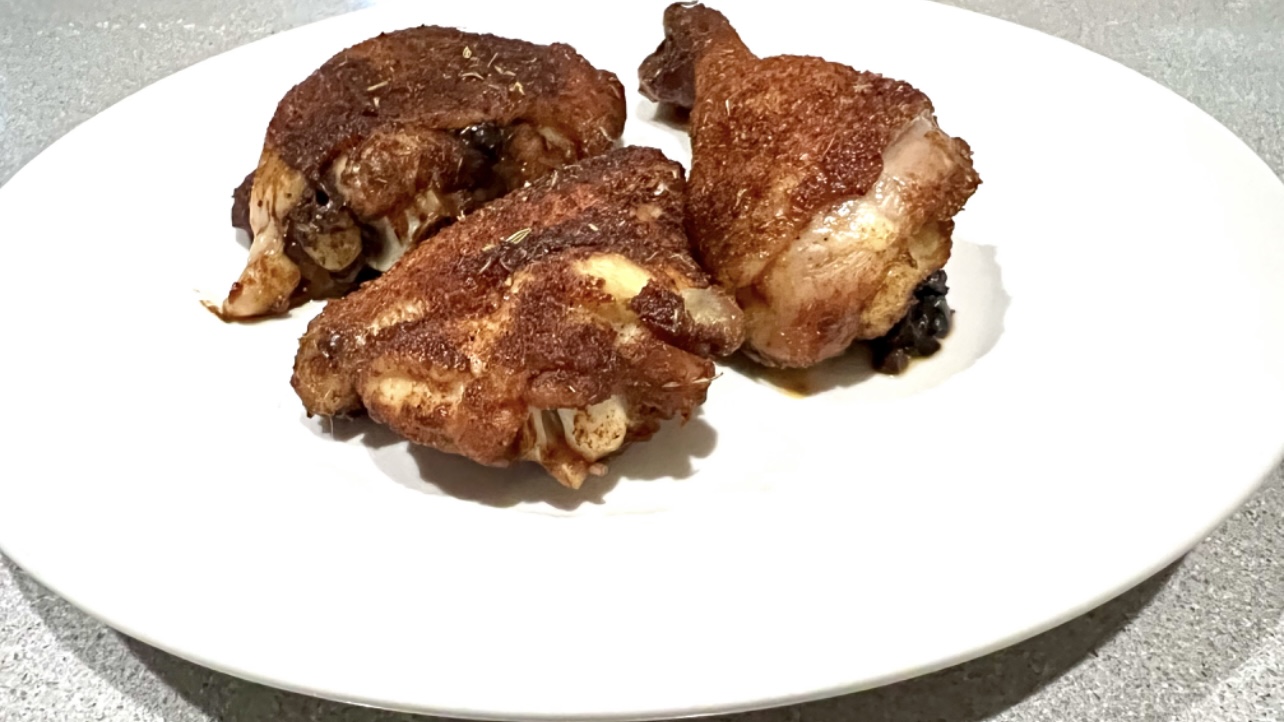
Archive for the ‘chicken’ Category

Chicken Rollatini was one of the first dishes I learned how to make back in my teenage days on Long Island, working at a local Italian restaurant called Pizza City East. (The original Pizza City was in Ozone Park, Queens.) It was a simple dish: a chicken breast rolled up with prosciutto and mozzarella, and baked in a mushroom cream sauce. My version these days substitutes ham for the prosciutto, provolone for the mozzarella, and an Alfredo-like sauce instead of  the mushroom cream sauce.


4 chicken breasts cut lengthwise to make 8 thin breasts, about 2 pounds
8 slices sliced ham
8 slices of provolone cheese
Remove the chicken tender portion of the chicken breasts and set those aside for another day.
I don’t like to pound out my chicken breasts. I like the texture of “real meat.” So I take a large breast, and slice it lengthwise to make 2 thinner breasts. I lay the breast down on the cutting board, add a slice of “real” ham (not the deli-sliced stuff, but a ham that I sliced myself), then a slice of provolone, and carefully roll it up, securing it with toothpicks. Sometimes it’s easier to roll the ham and cheese first, then wrap the chicken around it. Place the rollatinis on a baking sheet. Set aside, preferably in the fridge, until ready to cook.

Rolled and ready!

1/2 cup breadcrumbs
1 teaspoon parsley
1/2 teaspoon oregano
1/2 teaspoon salt
1/4 teaspoon pepper
1/4 teaspoon granulated onion
1/4 teaspoon granulated garlic
Combine these ingredients in a bowl. Set it aside.
2 carrots
2 parsnips
2 celery stalks
1/2 medium onion
Olive oil
Peel and chop the parsnips and carrots into quarters. Peel and chop the onion in half. Chop the celery into quarters as well. Place all the vegetables on a sheet pan and drizzle olive oil over the top, tossing them in the oil. Roast the vegetables in a 400° oven until caramelized, and the  carrots and parsnips are fork-tender, about 20 minutes. Remove the sheet pan from the oven and let the vegetables cool. Once the veggies have cooled, chop them finely with a knife or food processor. Set them aside.
3 cups your favorite rice, cooked
Cook the rice according to package directions. Once the rice is cooked, mix it with the chopped carrots, parsnips, celery and onion. Set it aside.
1 cup cream or half-and-half
3 tablespoons butter
1/2 cup freshly grated Parmigiano Reggiano
salt and pepper
For the Alfredo-like sauce, heat a saucepan over medium heat, melting the butter and then adding the cream or half-and-half. Once it’s warmed through, add the cheese and whisk until it has melted and the sauce is smooth. Season with salt and pepper. Set it aside, to re-warm later.
Take the pan of rollatinis out of the fridge to warm to room temperature, and reduce the heat of the oven to 350°.
Drizzle a little olive oil over the top of the rollatinis and rub it in. Sprinkle the breadcrumb mixture over the top and bake them for 30-45 minutes, until the chicken has cooked through.
To serve, remove the chicken rollatinis from the pan and plate on a bed of arugula (optional) with the rice on the side. Serve with the sauce.

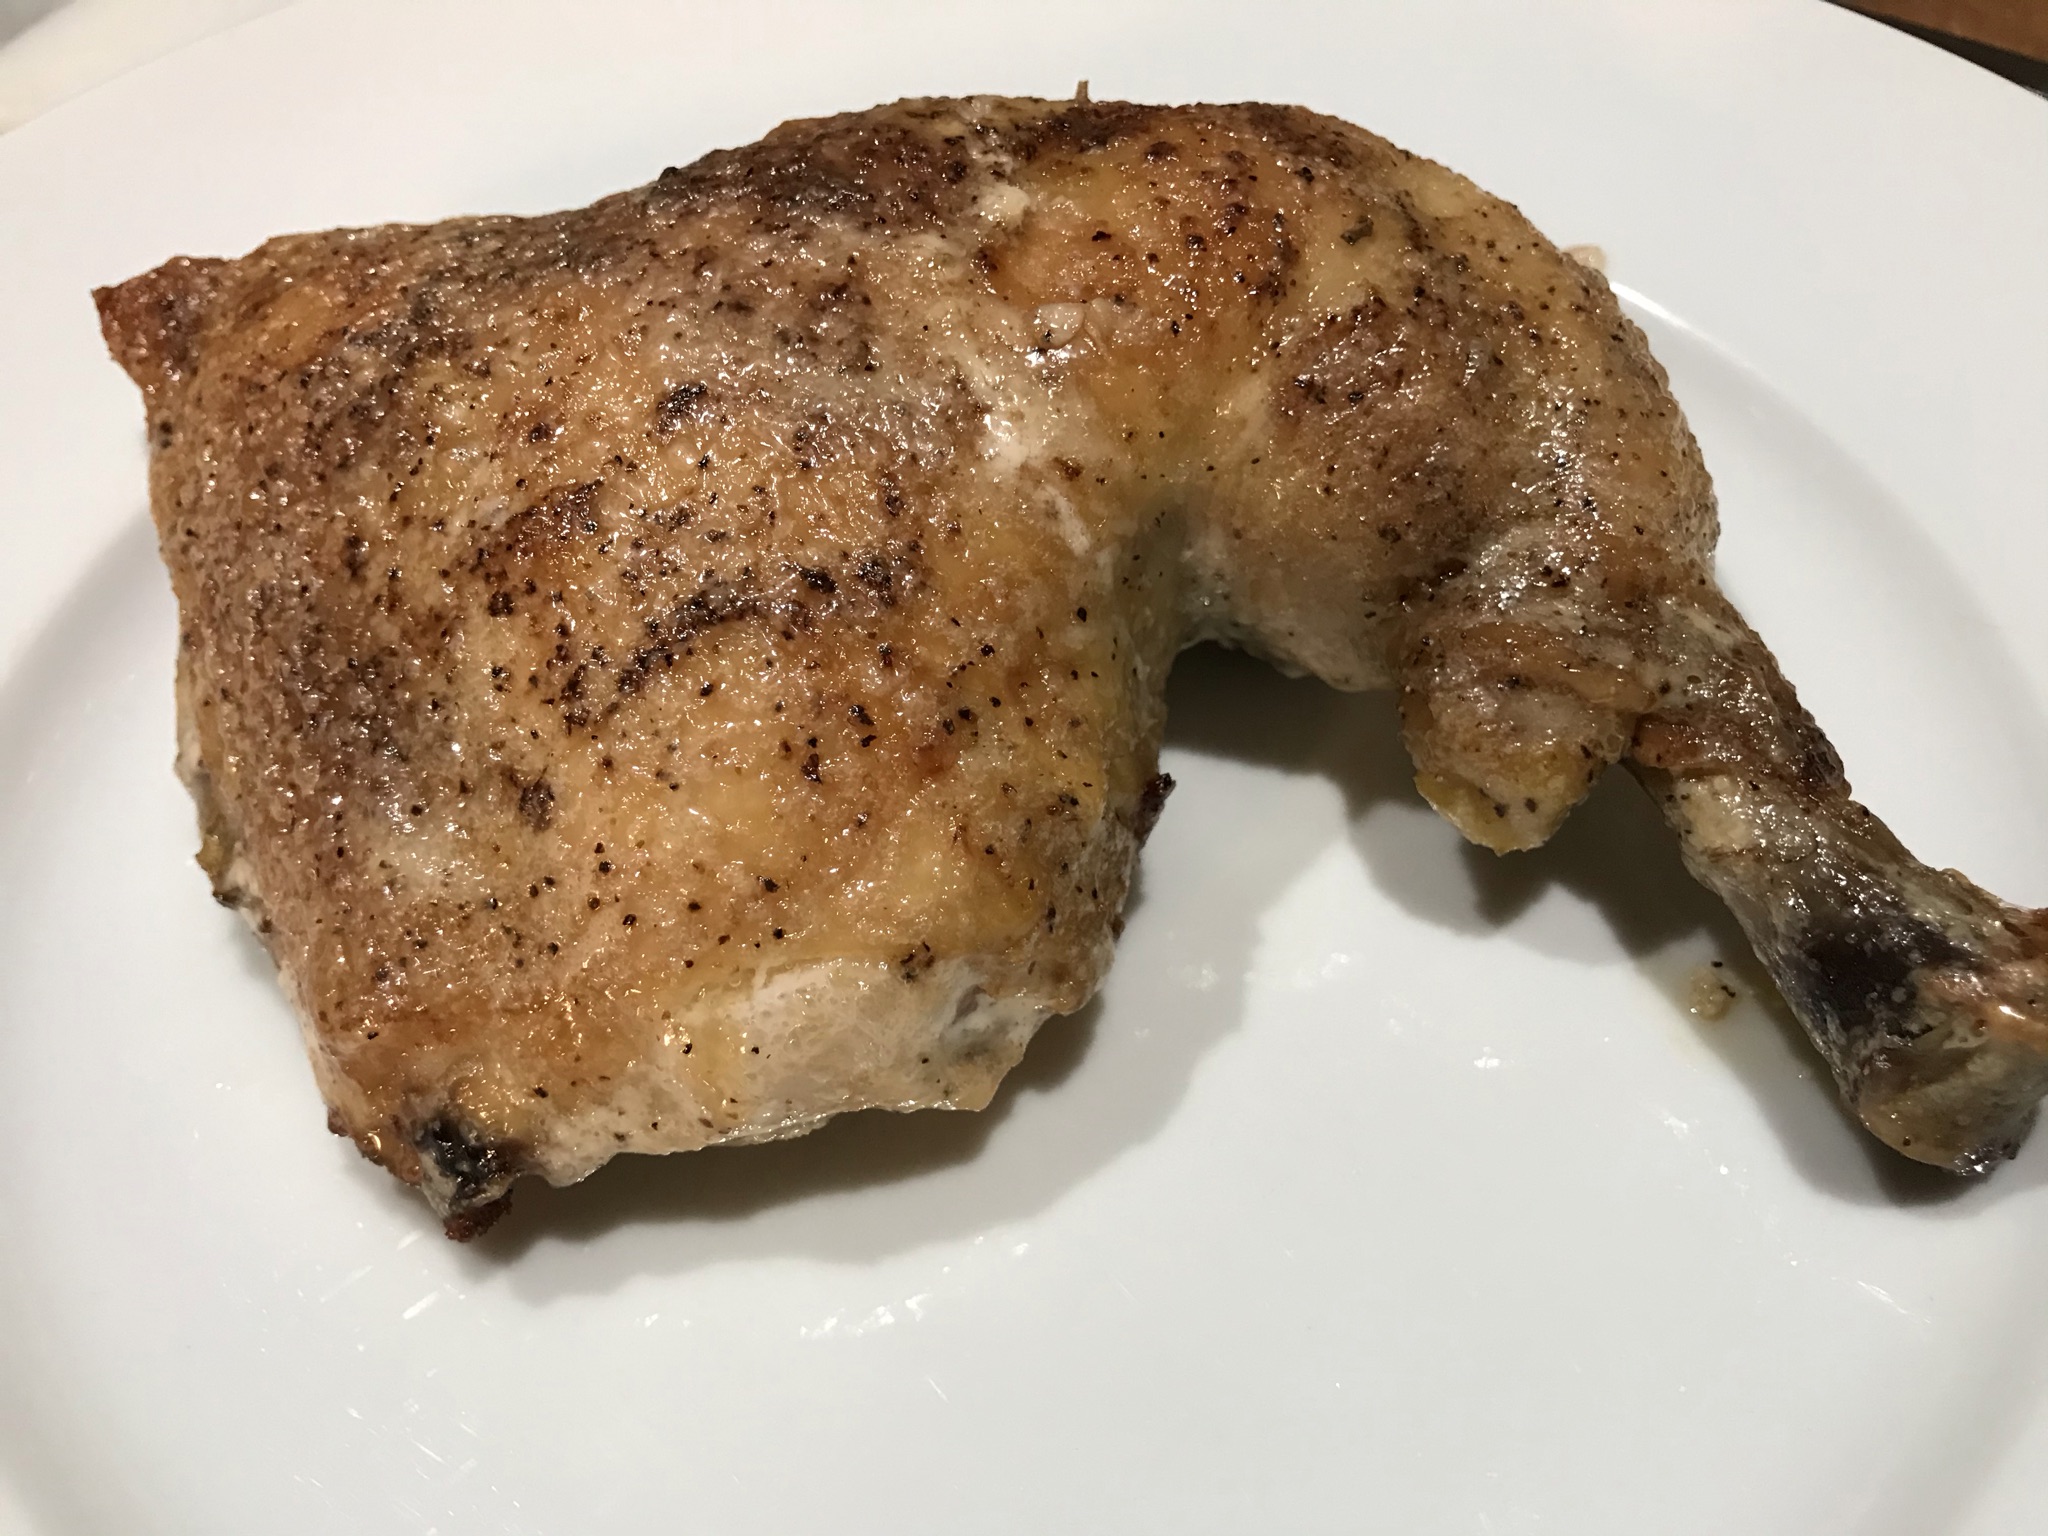
If you watch as much Food Network and Cooking Channel as I do, you’ve probably heard of Big Bob Gibson’s Bar-B-Q in Decatur, Alabama. Smokin’ and grillin’ since 1925, they put the now-famous Alabama white sauce on the map. They would smoke whole birds, then dunk the entire bird in a bucket of white sauce before returning them to the smoker to cook some more. And then they’d serve more of the precious white sauce on the side as you tore into the most amazing chicken you’ve ever had.

I lived in Mobile, Alabama 35 years ago. Never made it to Decatur. Probably never will. So it was time for me to try to recreate the magic at home. I think I did pretty well.

If you Google “Alabama white sauce,” you’ll get dozens of versions, each, I’m sure, pretty similar and pretty good. I did just that, and then tweaked it to make it my own.

I don’t smoke the birds. I simply season them with salt and pepper, and roast them in a convection oven at 350. When they’re almost done, I brush the chicken all over very liberally with my white sauce…bottom of the bird, too. Then it goes back in the oven for a little bit more.


Parts work as well as whole birds. I love using leg quarters for this recipe.


1 cup mayonnaise
4 tablespoons buttermilk
4 tablespoons white vinegar
2 teaspoons Dijon mustard
1 teaspoon ground black pepper
1 teaspoon granulated garlic
1 teaspoon granulated onion
1/2 teaspoon salt
1/2 teaspoon sugar

Combine all the ingredients and mix well. I like to keep it in a container with a lid so I can shake it up before using it.

Preheat the oven to 350.

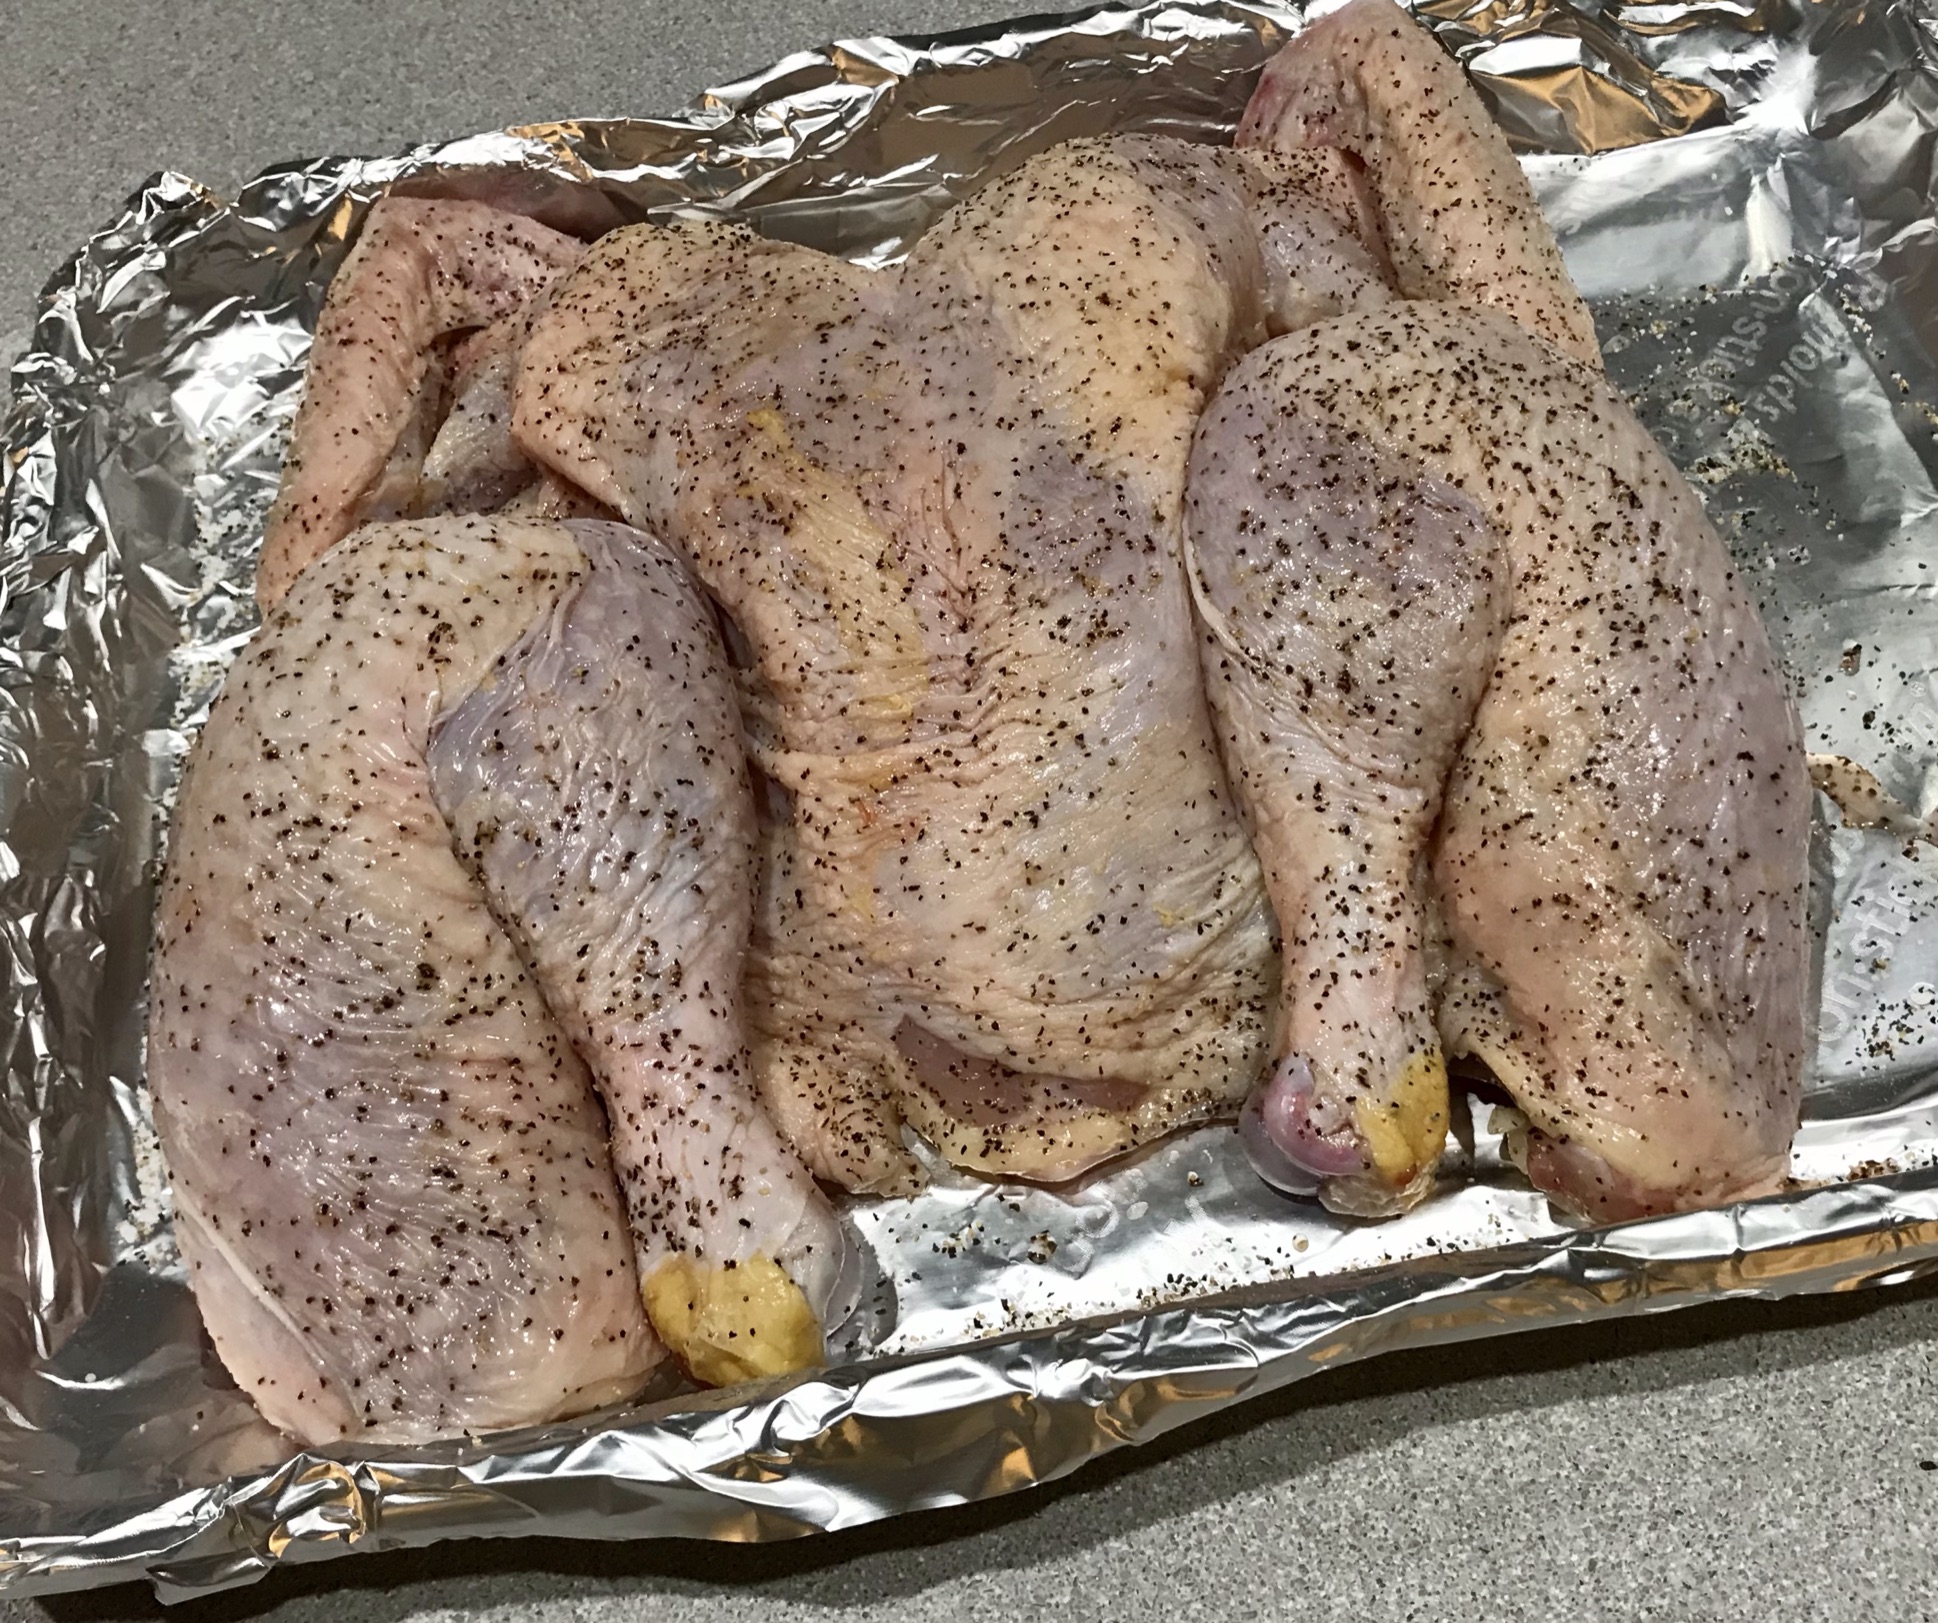
I like to roast a whole bird, though parts work just as well. If I’m roasting a whole bird, I like to spatchcock the bird so that it cooks evenly. 

(Aside from the fact that it sounds dirty, spatchcocking simply means removing the back bone of the bird so you can open it up and press it flat onto the roasting pan.)


A spatchcocked bird.


It’s relatively easy to do, especially if you have poultry shears. You just flip the bird upside down, and cut all the way up on either side of the back bone.

Be sure to save the backbone for chicken stock. If you’re like me and you pay extra for really good quality humanely raised chicken, every little bit needs to be saved and utilized to get the most bang for your buck.


I line a baking tray with foil, salt and pepper my bird all over, and place it on the baking tray and into the 350-degree oven. It takes a little less than an hour for a 4-lb. bird, but before it’s completely cooked through, I pull it out of the oven and brush on all sides with my Alabama white sauce.


Then it goes back into the oven for about 10 minutes.

The result is a tender and juicy bird, unlike any you’ve had before.


And save some of that white sauce to dip in while you’re eating!


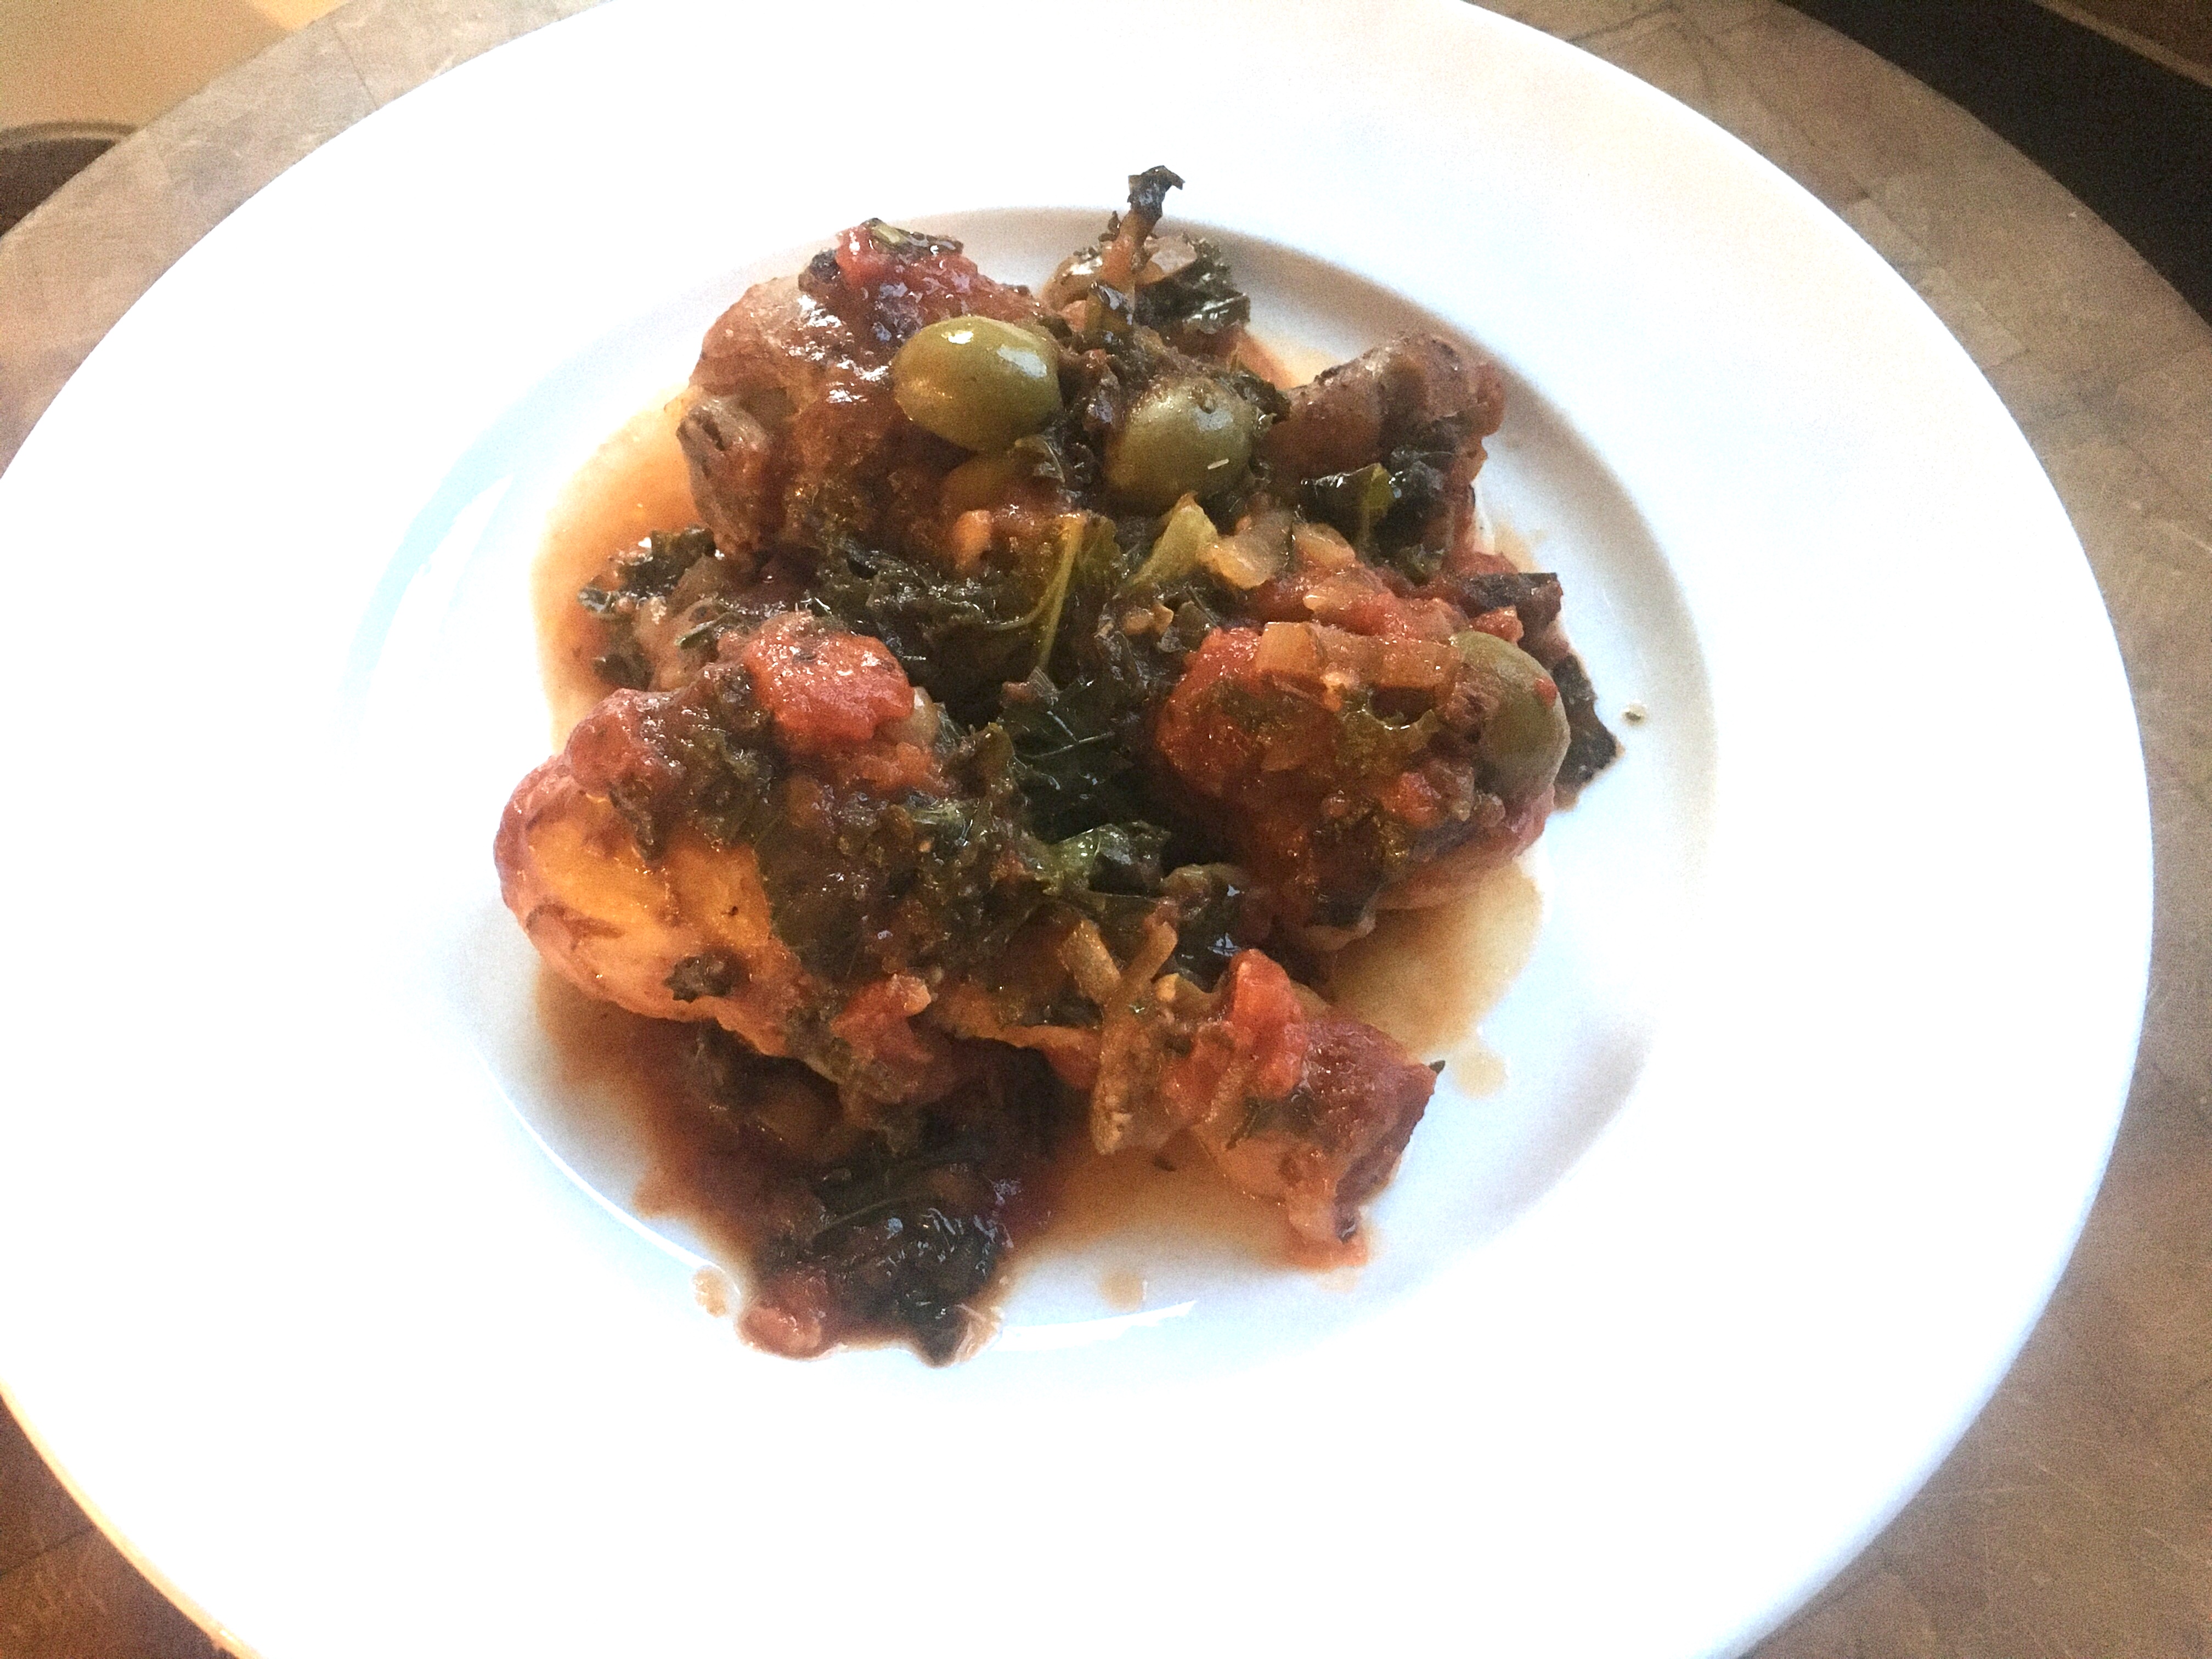
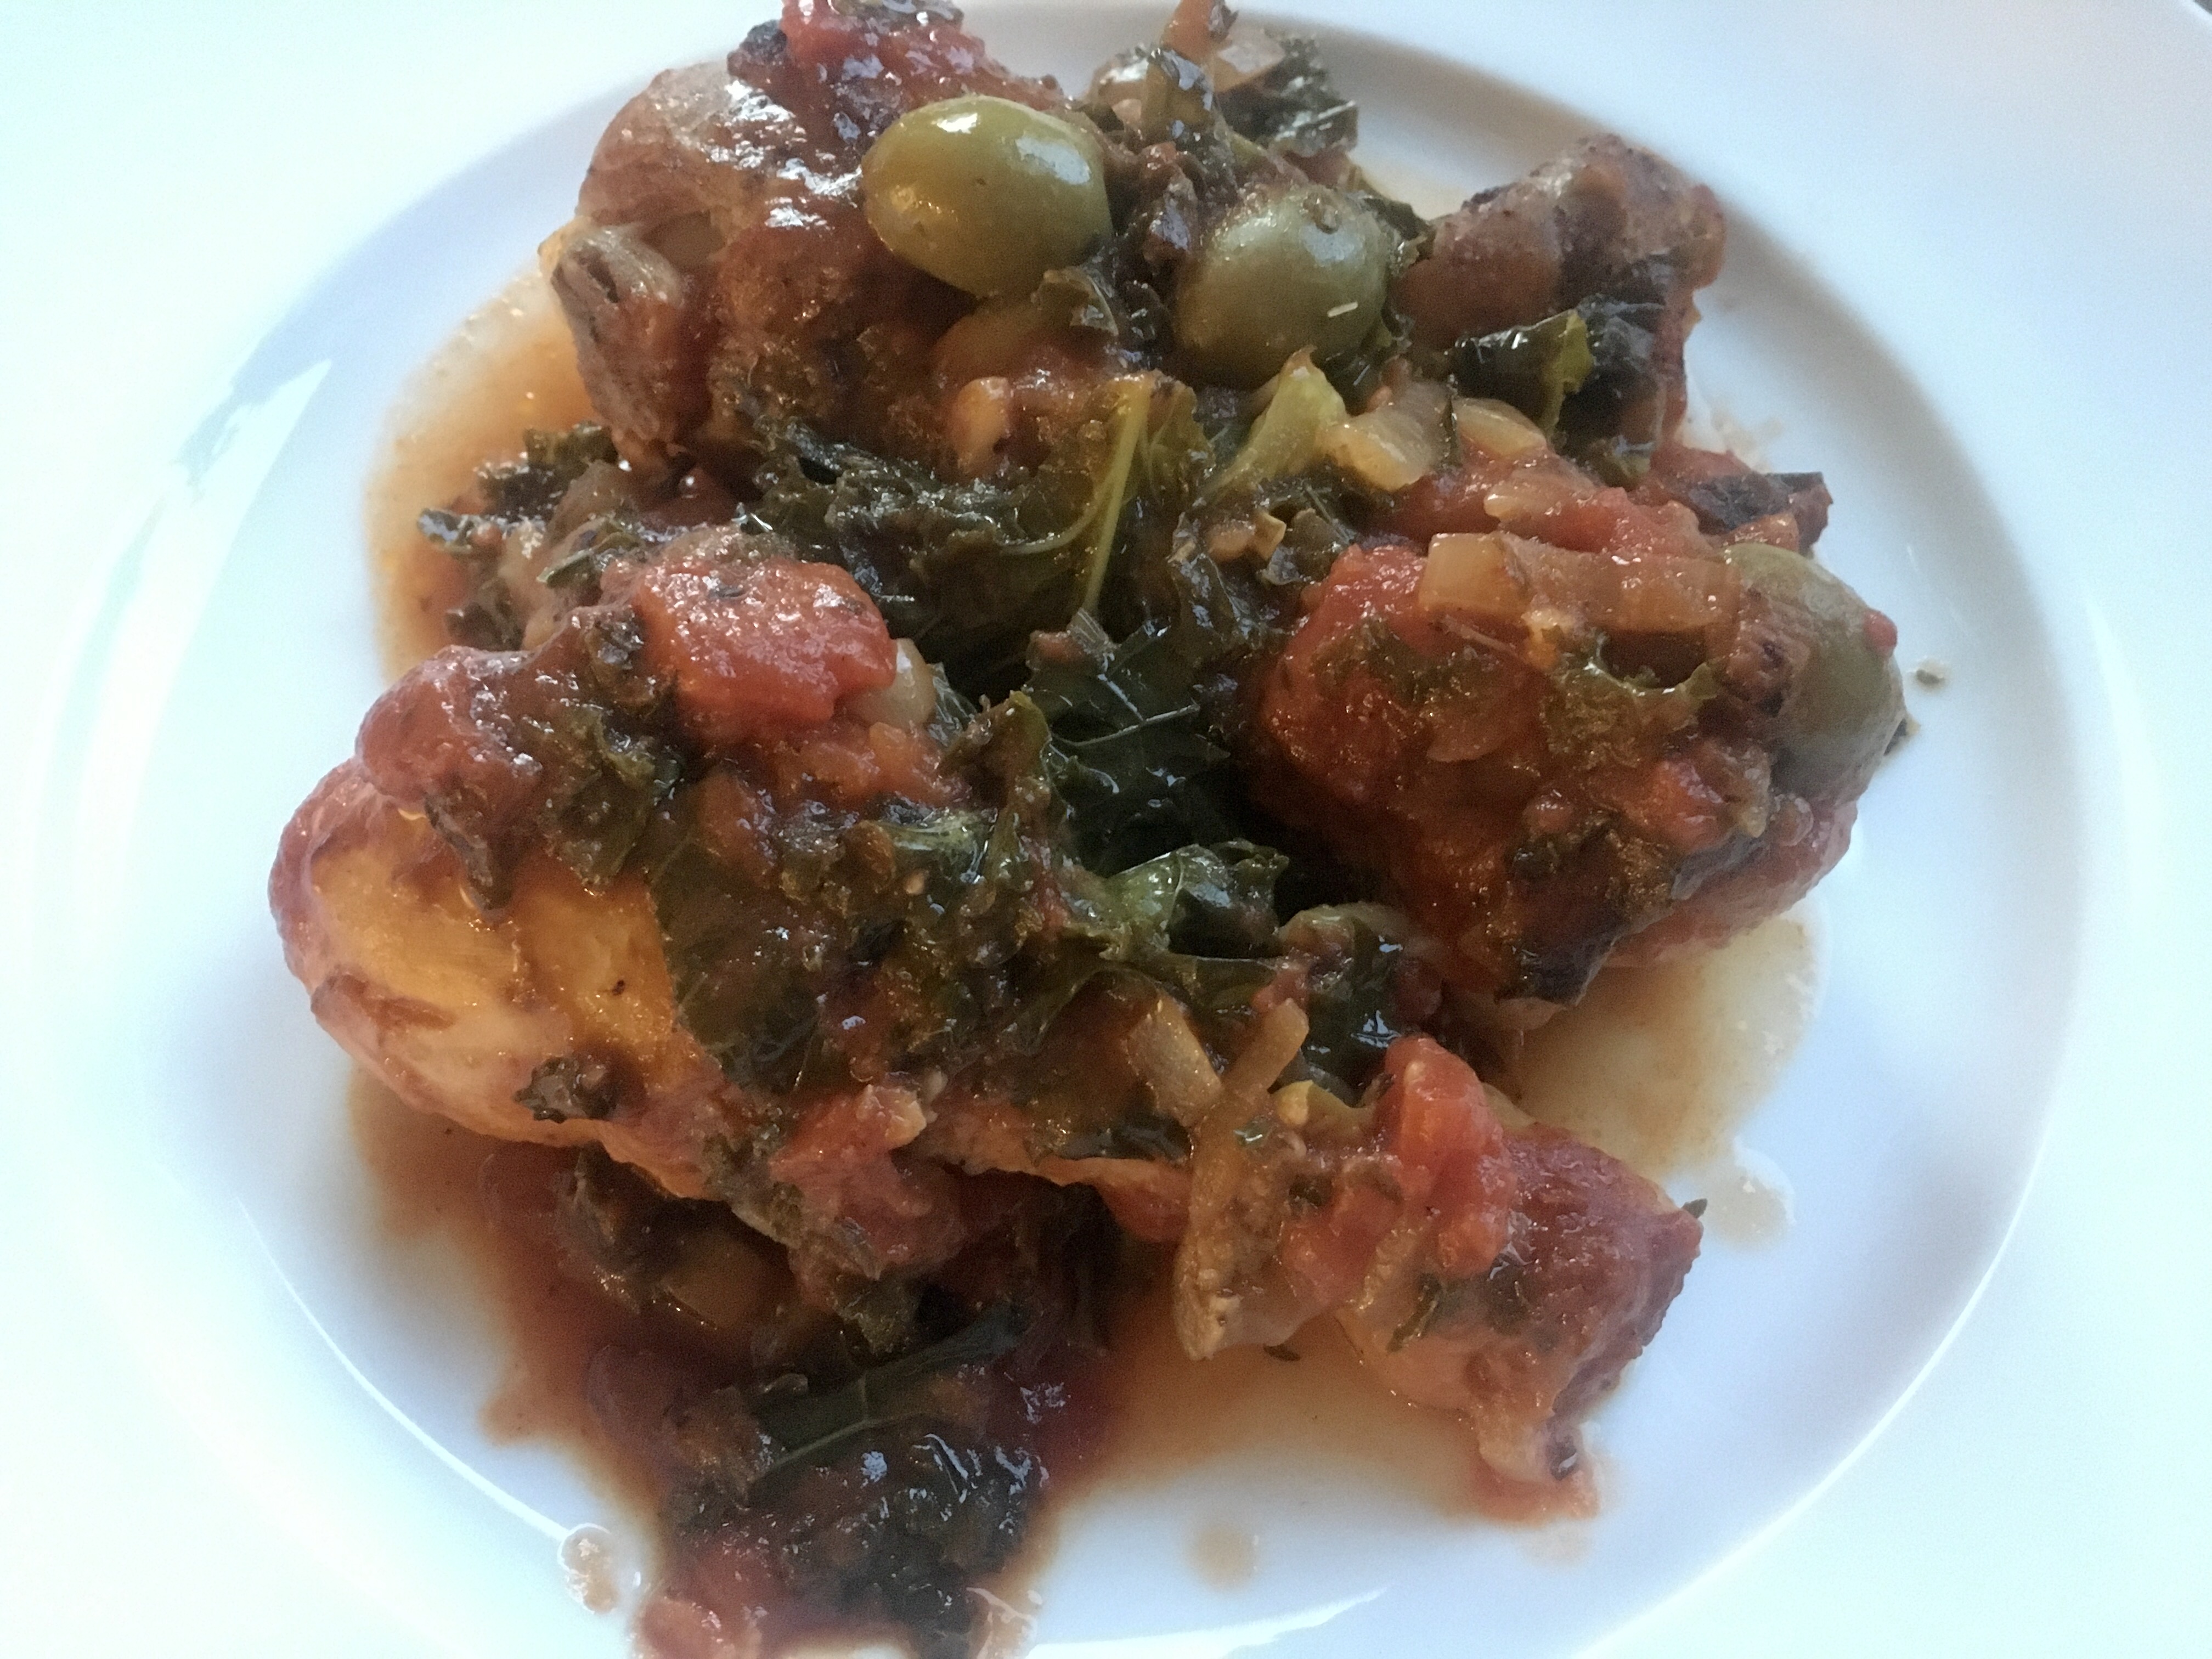
I was craving comfort food, and I didn’t want to go to the store, so I looked in the pantry and fridge for tasty ingredients, and went this route. There are many similar versions of this dish out there, using different cuts of chicken–or a whole bird cut up. I just happened to find a great deal on organic drumsticks at the store, so I went with that. But you should use any cut of chicken that is your favorite.


It takes about an hour to prepare this dish from start to finish, so it’s something you could even cook on a weeknight…and it’s certainly easy enough to double the recipe if guests are coming over.


It starts in the pan!


Traditionally, this is cooked in a large cast iron skillet, started on the stovetop, then placed in the oven. I choose to cook mine in a baking pan that fit my smaller convection oven, so I started everything on the stovetop, then made the transfer to the baking pan.


Now that the chicken has seared, we start the veggies.


If I’m on a diet, calories matter. Chicken drumsticks aren’t all that bad in the calorie count: about 100 calories for a medium-sized drumstick (whatever medium is)…and that’s with the skin on. No need to get into exact gram weight measurements here, but the real calories come later when you add a starch to the dish. It does go really well with pasta, rice or potatoes. (My choice would be fresh Italian bread to really sop up the sauce!) But alas…I had none of those. Just a salad on the side.

I go with organic ingredients whenever possible, especially kale, which is on the “Dirty Dozen” produce list almost every year. It gets sprayed a lot.


If sodium is not a problem for you, add more olives!


3–4 lbs. organic, pastured chicken drumsticks (about 12 medium)
salt, pepper and paprika
olive oil
2 small yellow onions, finely chopped
2 cloves garlic, squeezed through a press
1 teaspoon each: dried oregano, parsley, and thyme
1 tablespoon tomato paste
1 can (28 oz.) crushed tomatoes
1 cup chicken stock (homemade is best)
dry white wine (optional)
1/4 cup olives, sliced in half (I like green olives from Greece)
4 cups organic chopped kale (optional)

Pre-heat an oven to 350 degrees.

Season the chicken drumsticks with salt, pepper, and a bit of paprika.

Put a couple of tablespoons of olive oil in a hot pan. Add the chicken to the pan, and sear the drumsticks on all sides, getting them nice and brown. It’ll take about 10–15 minutes.

Remove the chicken pieces from the pan and add the chopped onions to the same pan. Let them cook for a few minutes until they’re translucent, then add the garlic. Let the garlic cook for about 10 seconds, then add the oregano, parsley, and thyme. Now add the tomato paste and stir it all around, cooking it for just a minute to caramelize it and give it more flavor.

Pour in the can of tomatoes and the chicken stock, stirring well. (A splash of wine is optional at this point.) Add the olives and let the sauce cook for a few minutes.


The sauce is all happy, and ready for the baking pan.


Pour the sauce into the baking pan. Add the chicken drumsticks to the pan, nestling them in the sauce. (I like to roll them around in it to cover all sides.)

Place the pan in the oven to cook.

After 30 minutes, remove the pan from the oven, and remove the drumsticks from the sauce, moving them onto a plate.


It looks like a lot of kale, but it withers down. Remember: go organic!


Take the kale and place it in the baking pan, tossing it around in the sauce. The sauce is hot, so the kale will start to wither and meld into the sauce in about a minute.


The kale’s withered down, and the chicken goes back in.

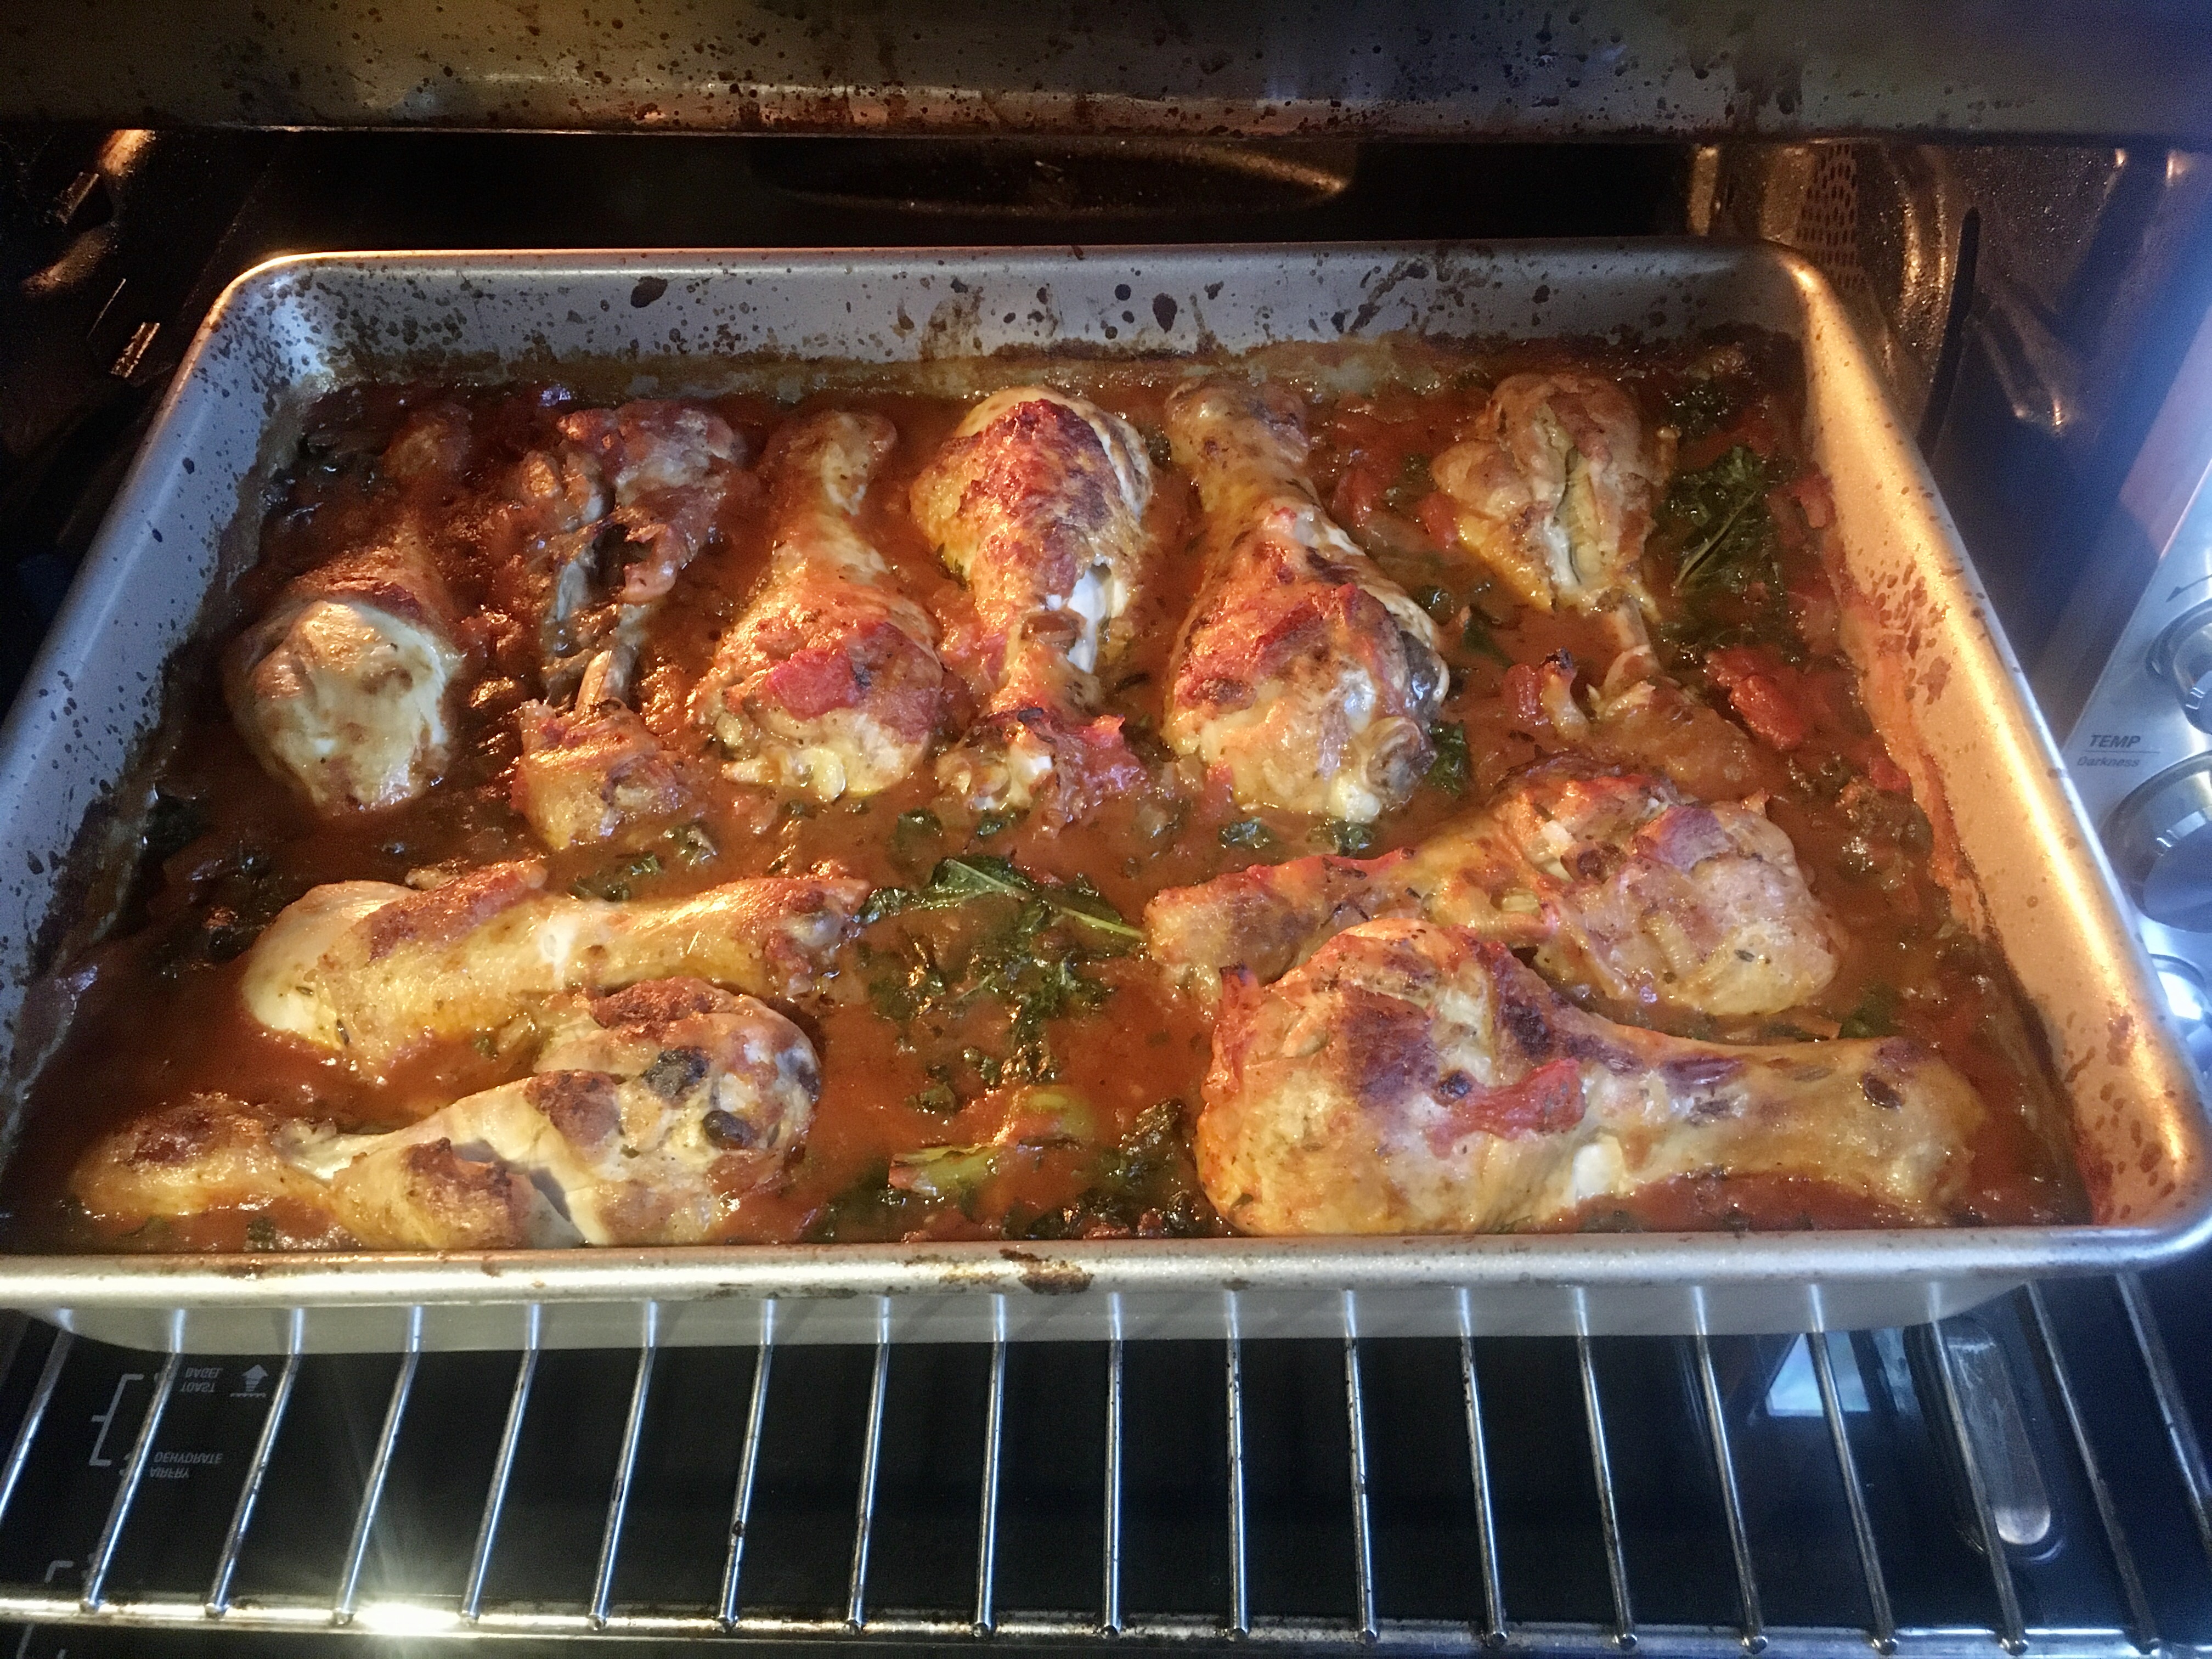
Now return the chicken drumsticks back to the baking pan, nestling them in the sauce again. Return the pan to the oven and bake for another 15 minutes. Turn the oven off and let the pan rest in the oven until you’re ready to serve.

Turn the oven off, but keep the door closed to keep the chicken warm.


Where’s that bread?…

If you’re trying to think of something new and interesting to bring to the July 4th celebration, this is it. It was a huge hit when I brought it to a neighborhood party a while ago.

Imagine the best of a deviled egg and a BBQ chicken sandwich, and you’ve got this appetizer that rocks in more ways than one….and you can make it ahead of time.

I boil the eggs and make the cole slaw the day before, then keep them in the fridge. Even the chicken can be cooked the day before and then warmed through before assembling right before you need it. Be sure to make a lot of them…they’ll go faster than the hard-boiled eggs in “Cool Hand Luke!”

This recipe is gluten-free, as long as you use GF soy sauce.


_DSC6511

For the chicken and BBQ sauce:
3 cups ketchup
1 tablespoon apple cider vinegar
2 tablespoons soy sauce
1 teaspoon hot sauce (I use Frank’s Red Hot)
1/4 cup + 2 tablespoons brown sugar
1 lb. boneless skinless chicken breasts
For the cole slaw:
2 tablespoons mayonnaise
1 tablespoon rice wine vinegar
1/2 teaspoon sugar
2 cups finely shredded cabbage
For the deviled eggs:
6 hard-boiled eggs
1/4 cup mayonnaise
1 tablespoon mustard (I use Gulden’s)

Pre-heat the oven to 250 degrees.

Combine the ketchup, apple cider vinegar, soy sauce, hot sauce, and brown sugar in a oven-proof pot with a lid. Mix well, then add the chicken breasts, making sure they’re immersed in the sauce. Cook low and slow in the oven for about 2 hours.

When the chicken is cooked through, shred the meat with 2 forks. Set it aside, but keep it warm.

Combine all the cole slaw ingredients in a bowl, mixing well, and place them in the fridge.

For perfectly hard-boiled eggs, place the eggs in a pot of cold water, and turn the heat on high. Just before the water starts to boil, put a lid on the pot and turn the heat off. Let the eggs sit in the hot water for 15 minutes. Once cooked, keep the eggs in the fridge.

Slice the eggs in half and place the yolks in a bowl with the mayonnaise and mustard. Mix well and keep in the fridge.

To assemble, take a teaspoon of the mayo/mustard/yolk mixture and place it in the cavity of one of the egg halves. Place another teaspoon of the shredded chicken on top (I like it warm, to counter the cold of the mayo and cole slaw), drizzling a little of the BBQ sauce that you cooked the chicken with on the meat. Then place a teaspoon of the cole slaw on top of the chicken.

Serve immediately!

I love avocado, and using it in this chicken burger recipe gives each bite a creamy, fatty richness the chicken needs.  It’s a simple burger, with just a handful of ingredients, but it’s really full of flavor.

If you want to go lo-carb, you can skip the breadcrumbs (and the bun for that matter.) If you’re going gluten-free, simply use GF breadcrumbs and buns and you’re all set to go.

If you don’t like avocado, leave it out. There’s still plenty of flavor.

Wanna add cheese? Go for it.

The bacon is optional, but what burger isn’t better with bacon?

The one thing I wouldn’t substitute is ground turkey for the chicken. To me, ground turkey is the cardboard of the meat world. It’s just nasty, and I won’t eat it.

chicken2

1 lb. ground chicken
1/4 cup breadcrumbs
1 ripe avocado, sliced into small cubes
1/2 teaspoon salt
1/4 teaspoon black pepper
pinch granulated garlic
slices of bacon, cooked
Sauce (recipe below)

chicken1

Combine the chicken, breadcrumbs, chopped avocado, salt and pepper, and garlic in a bowl and mix them thoroughly but carefully so that you don’t squash the cubes of avocado. I like to put the meat in the freezer for about 10 minutes to firm it up a bit.

Form the meat into burger patties. It will be a bit sticky, but just make sure you get the avocado evenly distributed. (I find that using gloves and lightly spraying my hand with avocado oil helps me make the patties without sticking.) Chill the patties again in the freezer for about 10 minutes to firm them up some more before cooking.

Pre-heat the oven to 350 degrees.

Heat a little avocado oil (or bacon fat!) in an oven-proof pan, and place the burgers in it when it’s hot. Let the burgers sear on one side, then flip them. (Make sure they sear well, or they’ll fall apart when you try to flip them.) Place the pan in the oven to finish cooking. It’s chicken…so you don’t want to undercook your burgers!

When they’re ready to serve, place the patties on a bun and with a slice of or 2 of bacon and slather with this burger sauce…

1/2 cup mayonnaise
1 tablespoon ketchup
1 tablespoon yellow mustard
1 tablespoon dill pickle relish
1/4 teaspoon garlic powder
1/4 teaspoon paprika
Pinch cayenne pepper

Combine all the ingredients in a bowl. Mix well. Refrigerate covered for a few hours to blend the flavors.


There’s no problem with your bird, she said to me
Just go low and slow to cook it perfectly
A few choice seasonings end up deliciously
There must be 50 ways to roast your chicken…
There’s nothing better than a whole roasted chicken. Simply season it, pop it in the oven and go low and slow. No maintenance, and you’ve got a great bird in a couple of hours. 
Once you go with humanely raised pastured chicken, you’ll never go back to supermarket chicken again. The flavor is fantastic, and you’ll devour it right down to the bones, which you can use to make the best home-made chicken stock or soup you’ve ever had. Nothing goes to waste.
I roast at least one chicken every week, so to change it up, I’ve come up with many different rubs and sauces over the years. All of the rubs are sugar and gluten-free preparations. 
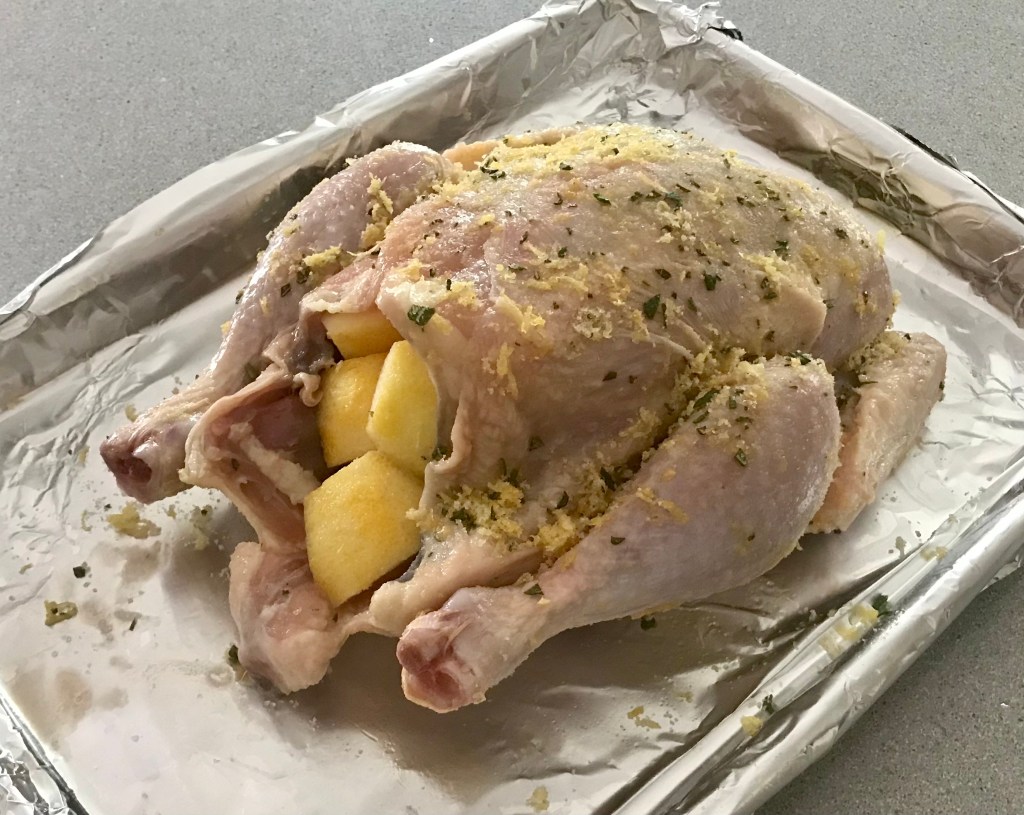
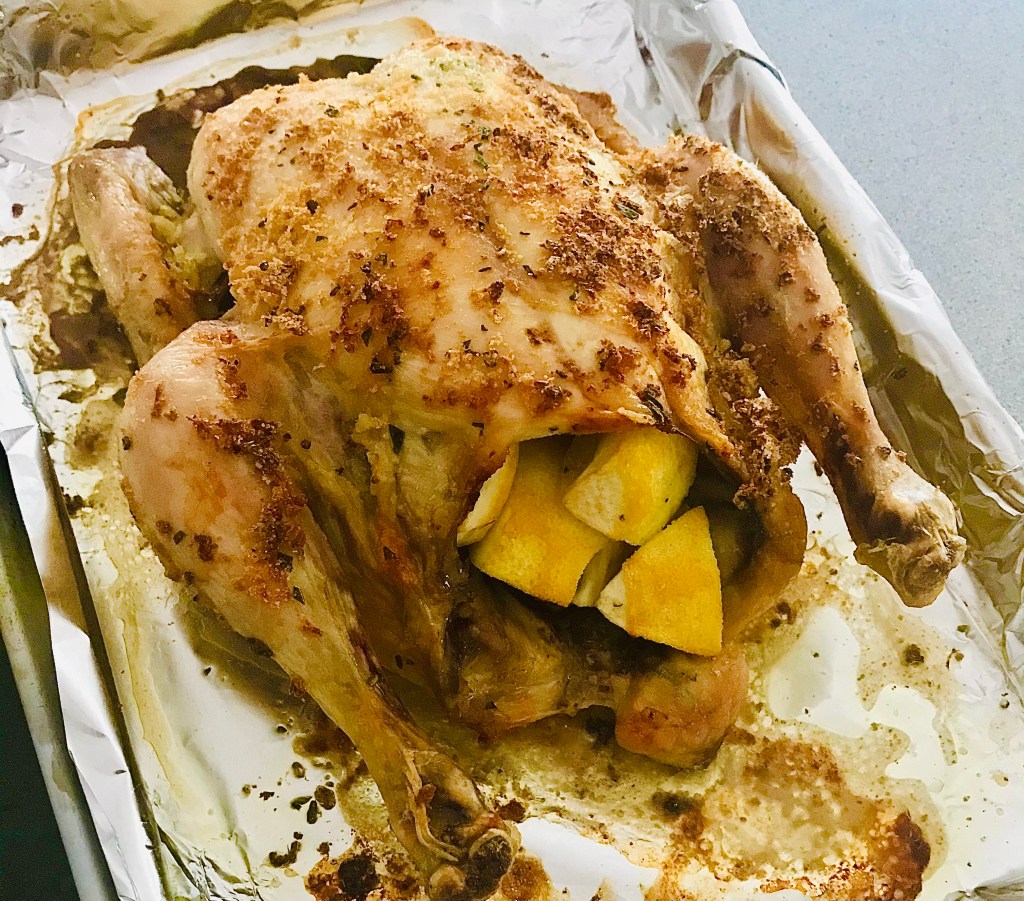
Chicken with Rosemary and Lemon
This image has an empty alt attribute; its file name is 4e73e740-e6a1-492e-ab13-a58dc33e4a8b.jpeg
The lemon serves double-duty in this dish. You use the zest to season the outside skin, then you place the remaining cut up pieces inside the carcass to flavor from the inside out.
1 tablespoon finely chopped fresh rosemary
1 teaspoon granulated garlic
2 teaspoons salt
zest from 2 lemons, using a micro plane zester, the leftover lemons quartered
1/2 teaspoon black pepper
This image has an empty alt attribute; its file name is b9ca141d-4a3f-4499-b552-3579d061fc80.jpeg
In a bowl, combine the rosemary, garlic, salt, lemon zest, and pepper. 
Thaw a bird, remove the giblets, and rub it all over with olive oil. Shove the quartered lemon pieces into the carcass of the bird. Season the bird inside and out with the rosemary seasoning mix.
Place the bird on a pan lined with non-stick aluminum foil in a pre-heated 450-degree oven. Cook for 10 minutes at this temperature, then reduce to 275 degrees and cook low and slow until done.
Tarragon Chicken
I love the taste of chicken seasoned with tarragon. Careful with this, or you will accidentally devour your fingers!
1 tablespoon dried tarragon, crumbled into a powder
1 teaspoon garlic salt
1 teaspoon salt
1/2 teaspoon black pepper
olive oil
In a bowl, combine the tarragon, garlic salt, salt and pepper.
Thaw a bird, remove the giblets, and rub it all over with olive oil. Season the bird inside and out with the seasoning mix.
Place the bird on a pan lined with non-stick aluminum foil in a pre-heated 450-degree oven. Cook for 10 minutes at this temperature, then reduce to 275 degrees and cook low and slow until done.
Italian Chicken
FullSizeRender
The darker color of the bird comes from rubbing it first with balsamic vinegar, then olive oil, before coating it with Italian seasonings. Don’t use the fancy, expensive balsamic. The bottles that go for about 9 bucks in the supermarket work well for this recipe.
Balsamic vinegar
Olive oil
1 tablespoon salt
1 tablespoon parsley
1 teaspoon oregano
1 teaspoon pepper
1 teaspoon granulated onion
1/2 teaspoon granulated garlic
Thaw a bird, remove the giblets, and rub it all over with the balsamic vinegar. Then rub it all over with the olive oil. Season the bird inside and out with the seasoning mix.
Place the bird on a pan lined with non-stick aluminum foil in a pre-heated 450-degree oven. Cook for 10 minutes at this temperature, then reduce to 275 degrees and cook low and slow until done.
My Grandma’s Chicken
My grandmother would cook chicken thighs low and slow all Saturday morning, knowing that I was coming over for lunch after Lithuanian school. The meat just fell off the bone, and I couldn’t stop eating it. This recipe is so simple and works just as well for a whole bird. Every time I make this, I think about those days at my grandmother’s house.
Lawry’s Seasoned salt
Olive oil
Thaw a bird, remove the giblets, and rub it all over with olive oil. Season the bird inside and out with the Lawry’s Seasoned salt.
Place the bird on a pan lined with non-stick aluminum foil in a pre-heated 450-degree oven. Cook for 10 minutes at this temperature, then reduce to 275 degrees and cook until done.
If you’re using chicken thighs, like my grandmother did, make sure they have the skin on and the bone in.

A LOOK AT GMO’S

Posted: May 10, 2024 in beef, Carnivore!, chicken, Food, pork
Tags: , , , , ,

The controversy over the positives and negatives of GMO’s continues, and I found an old blog from many years ago that I think is worth repeating. I think people that don’t think GMO’s are a bad deal probably don’t completely understand the situation.

My friends at FireFly Farms in Stonington, Connecticut, understood GMO’s better than most. Family owned and certified humane, they raised heritage breeds of pork, pastured chickens, and rare cattle.

Max Mule, by Kelly Milukas

Max Mule, by Kelly Milukas

This was a post from the past on FireFly owner Van Brown’s Facebook page. I’m reprinting with his permission. It’s simple and to the point.

Hi everyone.

I have been thinking about the debate on GMO’s and labeling.

A lot.

Let’s imagine a world where there are two types of pudding cups.

The Blue Pudding Cup definitely will not hurt your kid.

The corporation that makes The Red Pudding Cup states that all the negative tests about The Red Pudding Cup are wrong and they have made lots of tests themselves showing that The Red Pudding cup is okay.

You know The Blue Pudding Cup is safe. There are tests both ways, remembering that many of the tests were funded by The Red Pudding Cup Corporation, so the best you can know is The Red Pudding Cup pudding will probably not hurt your kid. At least according to The Red Pudding Cup Corporation.

Which pudding cup would you buy to feed to your child?

One last thought…

Would it be okay for The Red Pudding cup to put their pudding into a Blue Pudding Cup so no one would know which type of pudding they are feeding their children… your children?
Van

Making spinach pizza dough, as featured in a previous blog, was a fun and tasty recipe idea. But I still had some spinach left over. So I decided to add it to my Chicken Rollatini recipe, and it was delicious!

Chicken Rollatini was one of the first dishes I learned how to make back in my teenage days on Long Island, working at a local Italian restaurant called Pizza City East. (The original Pizza City was in Ozone Park, Queens.) It was a simple dish: a chicken breast rolled up with prosciutto and mozzarella, and baked in a mushroom cream sauce. My version these days substitutes ham for the prosciutto, provolone for the mozzarella, and an Alfredo-like sauce instead of  the mushroom cream sauce.

This time I added the frozen spinach to the mix, and I have to say, I think I’ll always cook it this way from now on.

4 chicken breasts cut lengthwise to make 8 thin breasts, about 2 pounds
8 slices sliced ham
8 slices of provolone cheese
6 oz. frozen spinach, finely chopped

Place the chopped spinach in a bowl and add granulated garlic and oregano to taste. Set it aside.

Remove the chicken tender portion of the chicken breasts and set those aside for another day.
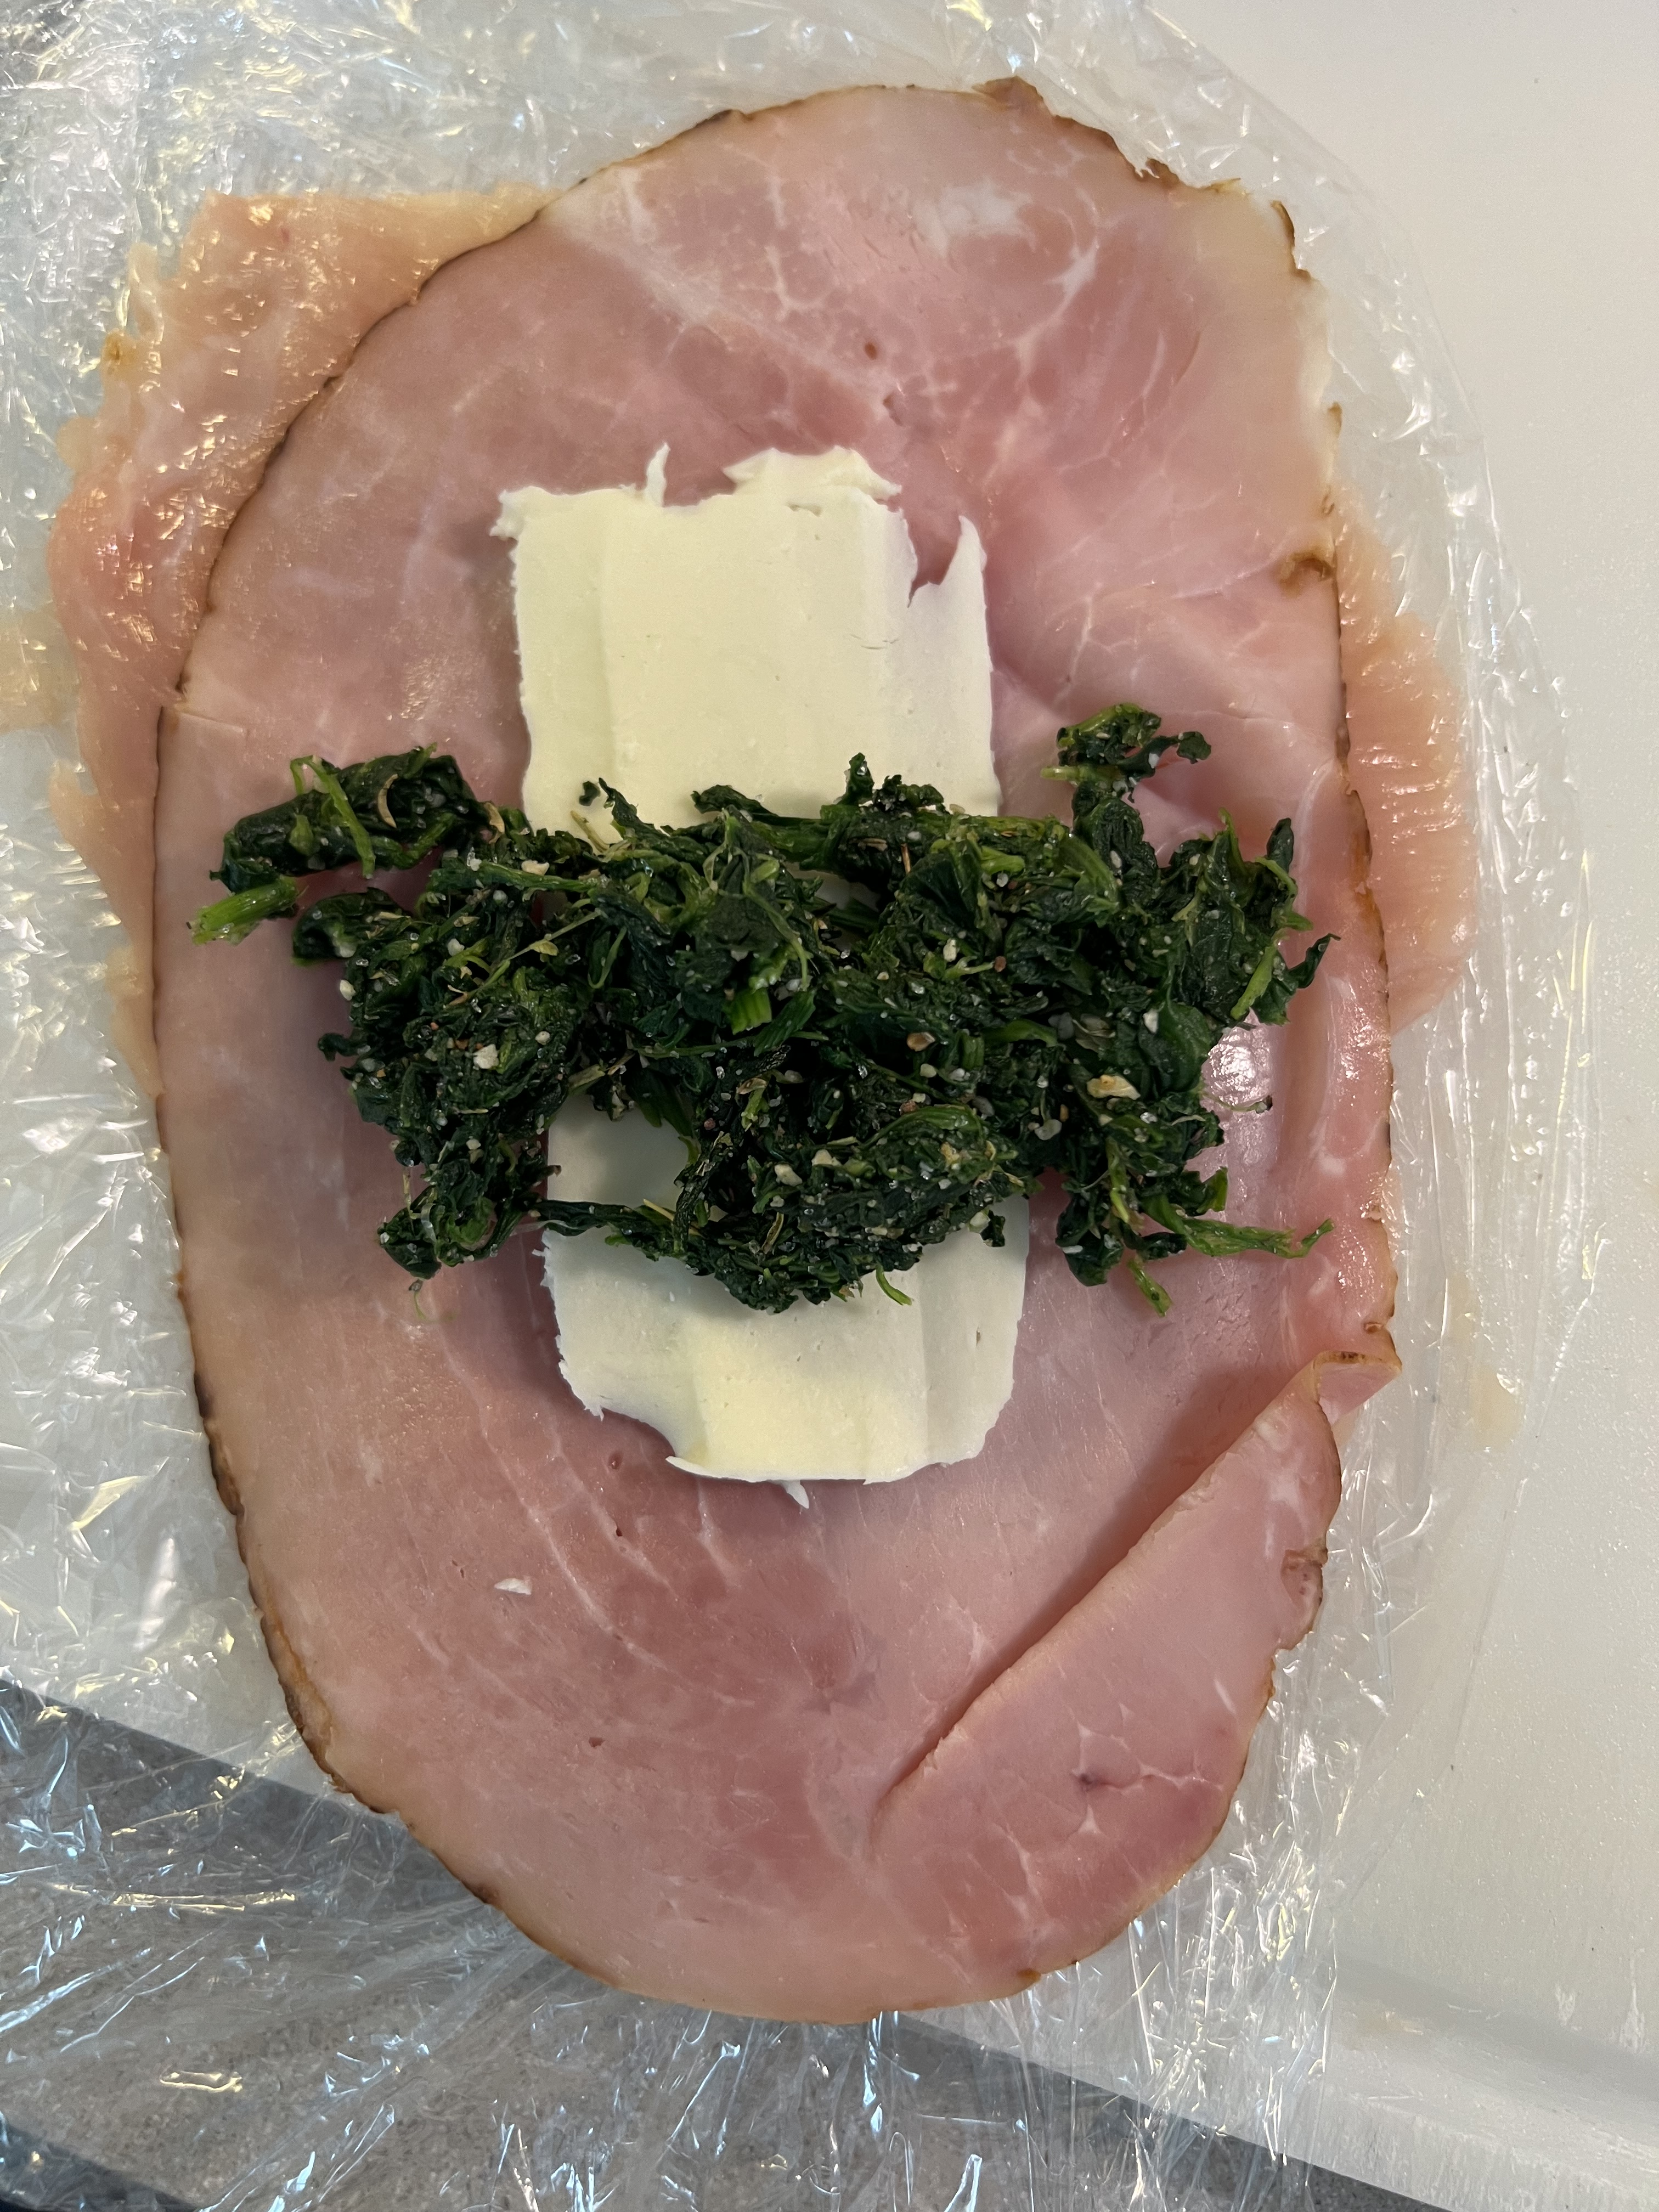
I usually don’t like to pound out my chicken breasts. I like the texture of “real meat.” So I take a large breast, and slice it lengthwise to make 2 thinner breasts. I lay the breast down on the cutting board, add a slice of ham, then a slice of provolone, (and this time, some of the spinach mix), and carefully roll it up, securing it with toothpicks, if necessary. Place the rollatinis on a baking sheet. Set aside, preferably in the fridge, until ready to cook.

The addition of spinach, this time, to the old recipe.

Rolled and ready!

1/2 cup breadcrumbs
1 teaspoon parsley
1/2 teaspoon oregano
1/2 teaspoon salt
1/4 teaspoon pepper
1/4 teaspoon granulated onion
1/4 teaspoon granulated garlic
Combine these ingredients in a bowl. Set it aside.
2 carrots
2 celery stalks
1/2 medium onion
Olive oil
Peel and chop the carrots into quarters. Peel and chop the onion in half. Chop the celery into quarters as well. Place all the vegetables on a sheet pan and drizzle olive oil over the top, tossing them in the oil. Roast the vegetables in a 400° oven until caramelized, and the carrots are fork-tender, about 20 minutes. Remove the sheet pan from the oven and let the vegetables cool. Once the veggies have cooled, chop them finely with a knife or food processor. Set them aside.
3 cups your favorite rice, cooked
Cook the rice according to package directions. Once the rice is cooked, mix it with the chopped carrots, parsnips, celery and onion. Set it aside.
1 cup cream or half-and-half
3 tablespoons butter
1/2 cup freshly grated Parmigiano Reggiano
salt and pepper
For the Alfredo-like sauce, heat a saucepan over medium heat, melting the butter and then adding the cream or half-and-half. Once it’s warmed through, add the cheese and whisk until it has melted and the sauce is smooth. Season with salt and pepper. Set it aside, to re-warm later.
Take the pan of rollatinis out of the fridge to warm to room temperature, and reduce the heat of the oven to 350°.
Drizzle a little olive oil over the top of the rollatinis and rub it in. Sprinkle the breadcrumb mixture over the top, pressing them into the chicken, and bake them for 30-45 minutes, until the chicken has cooked through.
To serve, remove the chicken rollatinis from the pan and plate them on a bed of arugula (optional) with the rice on the side. (Be sure to remove the toothpicks.) Serve with the sauce.

Brining, the process of letting a hunk of protein soak in a salt solution for a few hours, is a great way to add flavor and moisture to any cut of meat. I brine these wings for 3 hours before using a sweet and spicy rub. They can be grilled or roasted in the oven.


image

The brine…

1/2 cup Kosher salt
3 tablespoons light brown sugar
1 teaspoon whole black peppercorns
1 whole bay leaf
2 quarts water

Combine all ingredients in a saucepan and heat until the sugar and salt dissolve. Remove it from the heat, and let it cool to room temperature.

The rub…

1/4 cup light brown sugar
1/4 cup granulated sugar
1/4 cup sweet paprika
1 tablespoon Kosher salt
1 tablespoon granulated onion
2 teaspoons black pepper
1 teaspoon dried thyme
1 teaspoon dry mustard
1 teaspoon ground ginger
1 teaspoon cayenne pepper

Combine all the ingredients in a bowl.

Place 3 lbs. of chicken wings in a Ziploc bag and pour the cooled brine into the bag. Place the bag in a bowl to prevent leaks and keep it at room temp for 3 hours. I wouldn’t brine it longer than that, or it will get really salty.


After 3 hours, remove the chicken from the brine and dry the wings with paper towels. Discard the brine.

Place the chicken pieces in a large bowl and sprinkle them with 1/3 cup of the rub, tossing to coat the chicken well. Place the bowl with the chicken in the fridge until you’re ready to cook.


About 30 minutes before cooking, remove the bowl from the fridge and let the chicken come to room temperature.

Pre-heat the oven to 350 or light a grill.

Toss the chicken with some more of the rub, if you like, then place the pieces on a sheet pan lined with non-stick aluminum foil.

Bake at 350 for 30 minutes or until done. Lower the oven temperature if it starts to burn.

If you’re grilling, cook the wings over medium heat, turning them frequently to prevent burning. Cook until the wings are done.


It’s been over a year since I posted this. Inspired by a recent conversation I had with a friend, I decided to share it again…

It’s never a healthy option to eat fast food. Michael Pollan said it best: “It’s not food if it arrived through the window of your car.”

A few years ago, a guy who claimed to be the nephew of Colonel Sanders, revealed the 11 secret herbs and spices that made KFC‘s original recipe chicken a worldwide success. He said he worked for his uncle for many years and had to make huge batches of the seasoning mix.

For me, KFC is like crack. Although I’m a big proponent of grass-fed this and pastured that, my kryptonite is KFC‘s original recipe chicken. There’s a KFC right next door to a local Home Depot in my area and my car literally drives itself to the pick-up window…I can’t help it. I justify the consumption of this heavenly grease by asking for no sides–no biscuit, no nothing. I get one breast and one thigh, and I drive off, steering my car with my knees as I indulge in my dirty secret, the hot grease dripping down my chin, a roll of paper towels at my side.

Making the KFC chicken recipe at home means I do have some control over product quality. I can use pastured or organic chicken. I can use clean oil. I don’t have the fancy pressure fryer they use at KFC, but I can use the healthier option of oven-frying. That means I fry my chicken in oil until golden brown, then finish the cooking process in the oven.

I have to say, the recipe really works! Maybe if I placed the real KFC side-by-side with my home-made chicken, I’d notice a big difference. But my brain said it was pretty damn close and absolutely delicious! If I could change one thing, I would use smaller chicken pieces next time. I used large pieces and the meat-to-breading ratio was off. Though it was mighty tasty, I was craving more breading per bite.

The recipe calls for all-purpose flour, but if you follow a gluten-free lifestyle, using Cup4Cup GF flour works just as well.

2 cups all-purpose flour
3 tablespoons paprika
1 tablespoon celery salt
1 tablespoon dried mustard
1 tablespoon garlic salt
1 tablespoon ground ginger
2 teaspoons black pepper
1/2 teaspoon white pepper
1 1/2 teaspoons thyme
1 1/2 teaspoons basil
1 1/2 teaspoons oregano
1 teaspoon salt
1 cup milk
1 egg
5 lbs. chicken pieces…your choice
oil, for frying

Combine the flour and the “11 herbs and spices” in a bowl. Mix well.

In another bowl, whisk together the milk and the egg. Add the chicken pieces to this bowl and let the chicken soak in it for 10 minutes.

Pre-heat the oven to 350 degrees.

Pour a couple of inches of the oil into a pan with high sides and heat it to 340 degrees, using a thermometer. Don’t fill it with too much oil, because oil expands when hot and it could spill over.

Take the chicken pieces out of the milk and egg mixture and coat them with the seasoning mix one at a time, making sure you coat them well. Carefully place the chicken in the hot oil. Don’t overcrowd the pan…work in small batches. Too much chicken could cause the oil to spill over the top.

Fry the chicken pieces just until golden…no need to cook them all the way through. Place the pieces on a baking sheet lined with non-stick aluminum foil. When all the chicken has been fried, place the baking sheet in the oven and cook until the chicken pieces reach an internal temperature of at least 160 degrees.

Make a lot! Leftovers are great, and they re-heat really well in the oven! (Don’t use a microwave…the oven is best.)