Archive for the ‘Food’ Category

These 2 recipes are great side dishes for any occasion, and they’re tasty by themselves, or as an appetizer. Feel free to substitute to suit your needs. If you don’t like feta cheese, try Gruyère, smoked gouda, or even mozzarella. Need it to be gluten-free? Use GF breadcrumbs. Don’t have shallots? Use onions or scallions. Don’t like mushrooms? Okay…I can’t help you there…


1 package large white or brown mushrooms
olive oil
1/2 shallot, finely chopped
1 clove garlic, through a press
1 tablespoon fresh thyme, finely chopped
pinch of red pepper flakes
salt and pepper
fresh feta cheese, cut into small cubes
bread crumbs
1 tablespoon fresh parsley, finely chopped

Pre-heat the oven to 400 degrees.

Rinse the mushrooms in cold water to clean them. Remove the stems of the mushrooms and set them aside. Rub the mushroom caps with olive oil and place them on a baking sheet, open side-down, in a 400-degree oven, for a few minutes.

In a pan, sauté the shallot and garlic in a little olive oil. Chop the mushroom stems finely and add them to the pan. Season well with the salt and pepper. Add the thyme and pepper flakes. Set the pan aside, off the heat.

Reduce the oven temp to 350 degrees after removing the mushroom caps. Flip the mushroom caps over so that they look like little bowls. Take a cube of cheese and place one in each mushroom. Top each with the sautéed shallot mixture. Sprinkle breadcrumbs on top and sprinkle parsley over that.

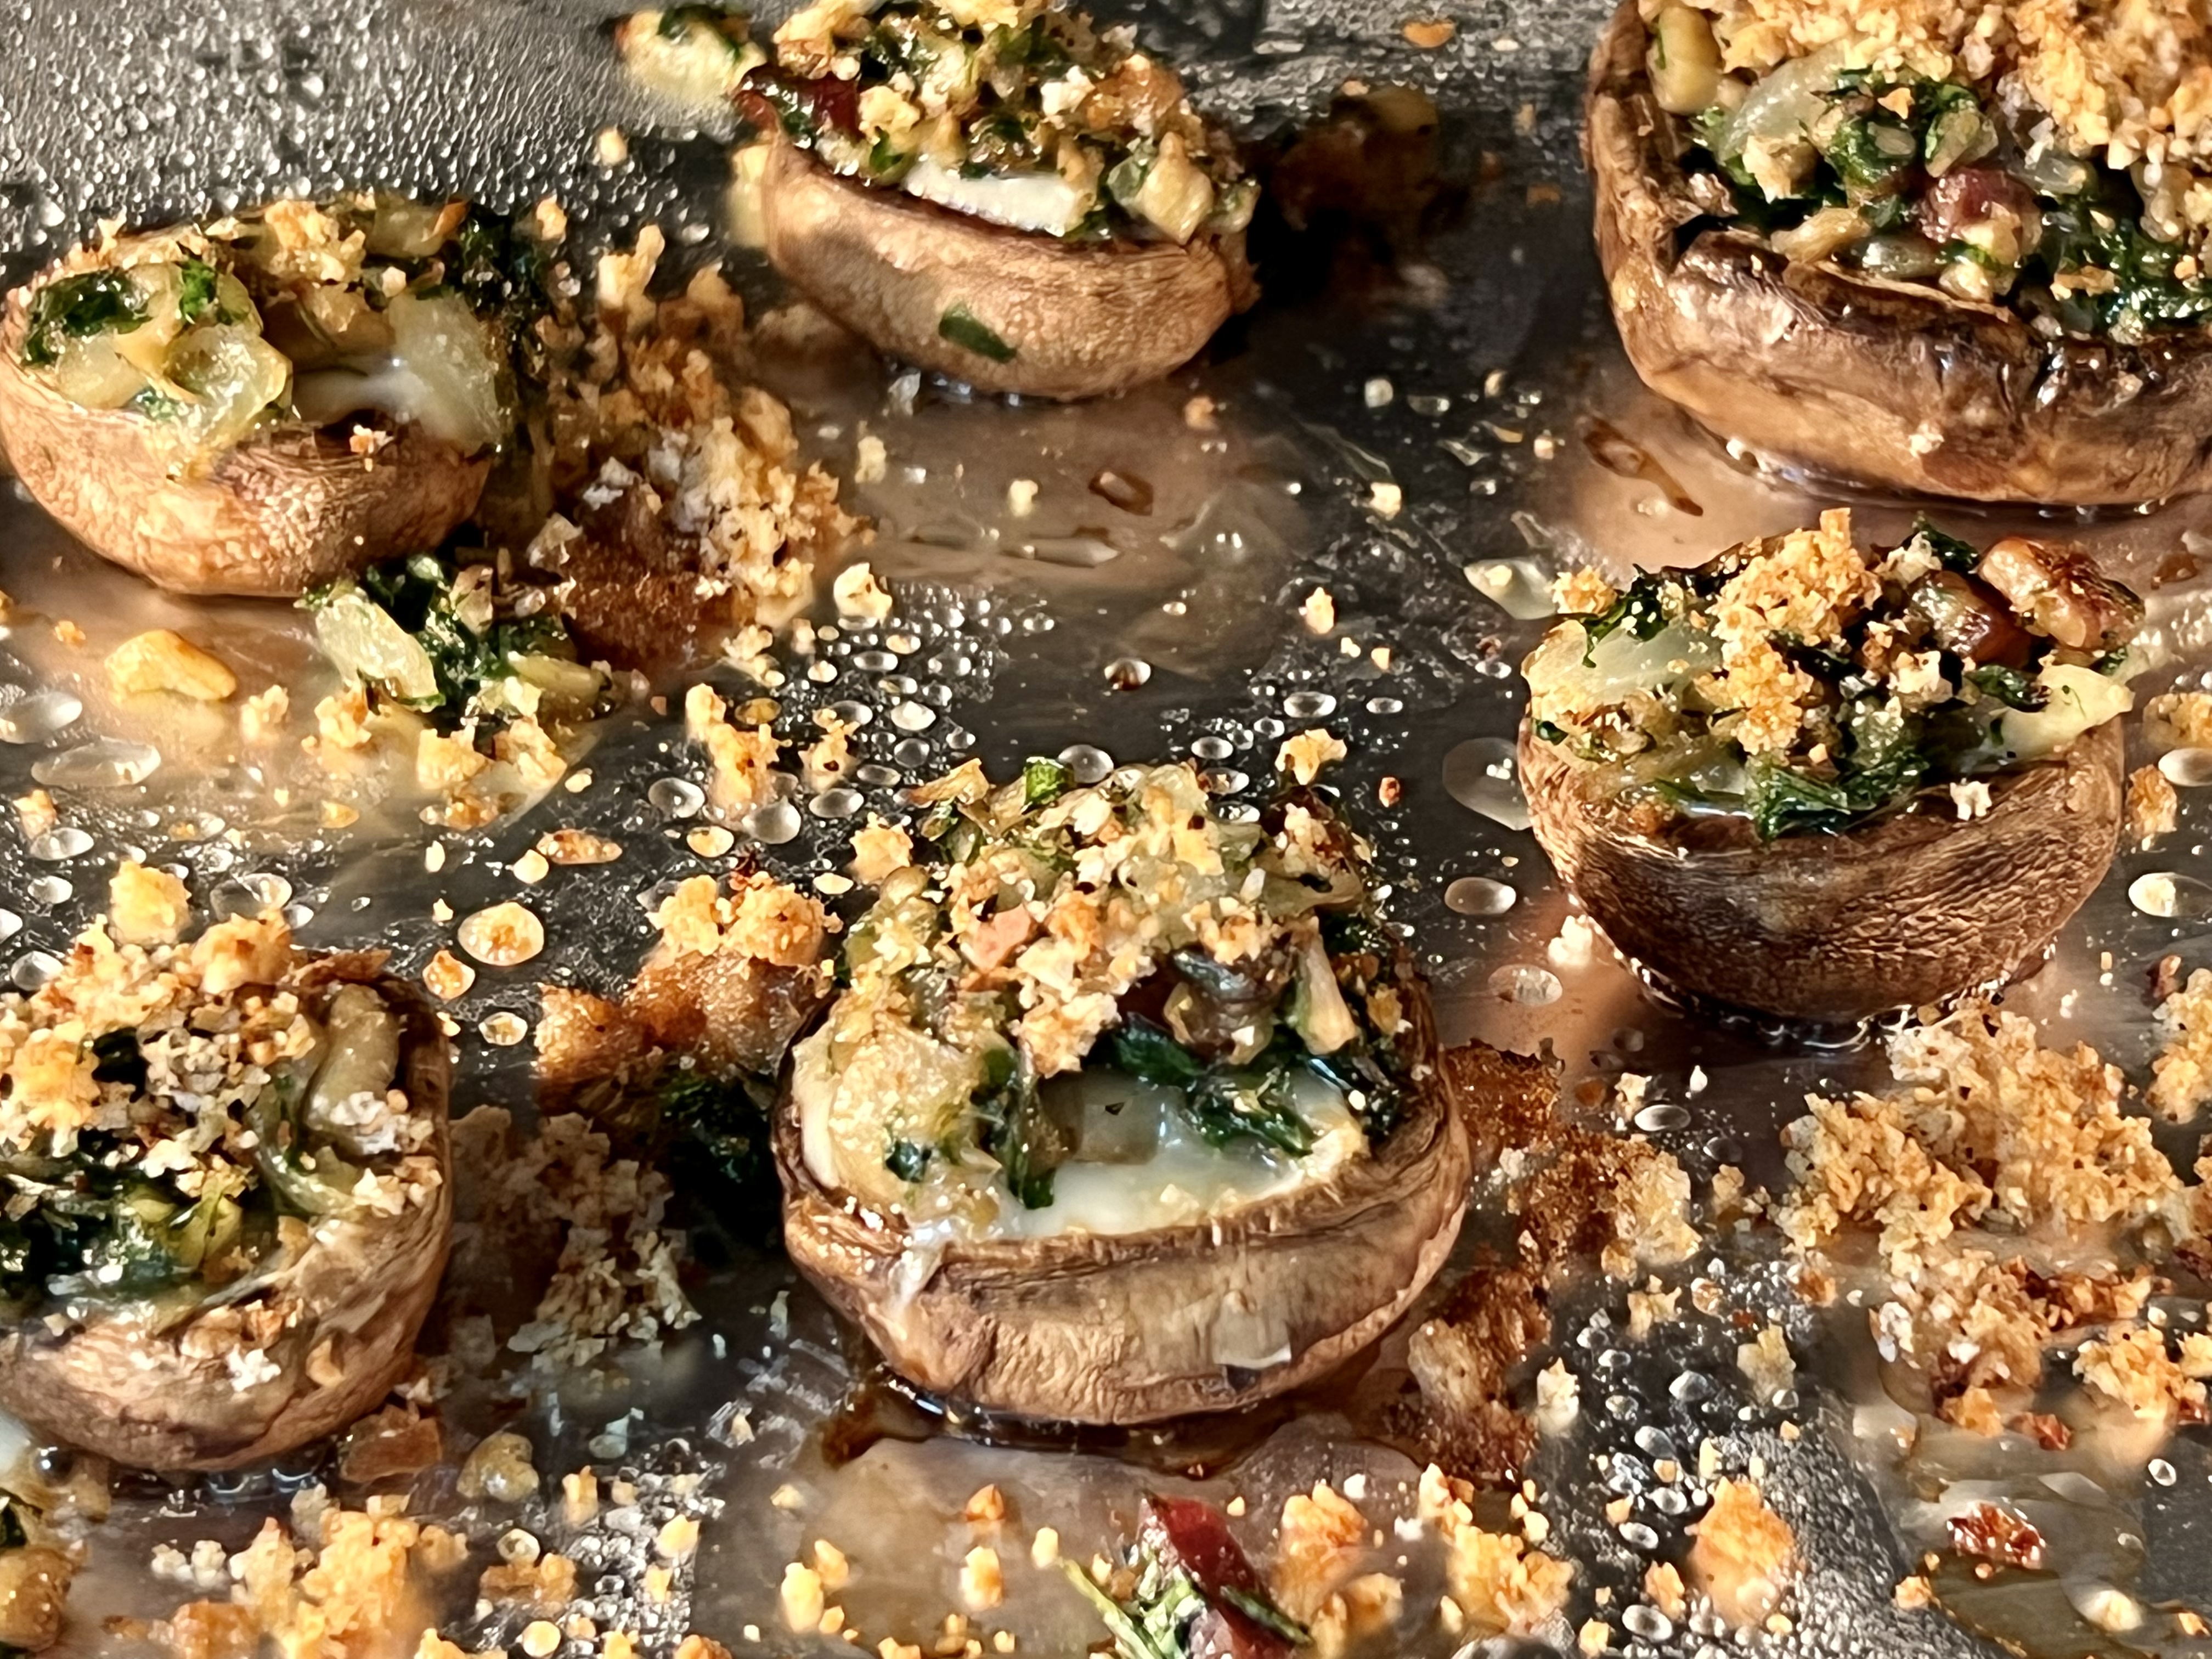
Return the baking sheet to the oven, cooking the mushrooms until they are lightly golden in color, and the cheese has melted.

image


Mushroom myth: Soaking mushrooms in cold water makes them mushy. Not true! Mushrooms do not soak up any water when left to soak for even 30 minutes. So use your mushroom brush…use your kitchen towel…whatever you like. But I prefer to get them clean simply with cold water.


Here’s another recipe…


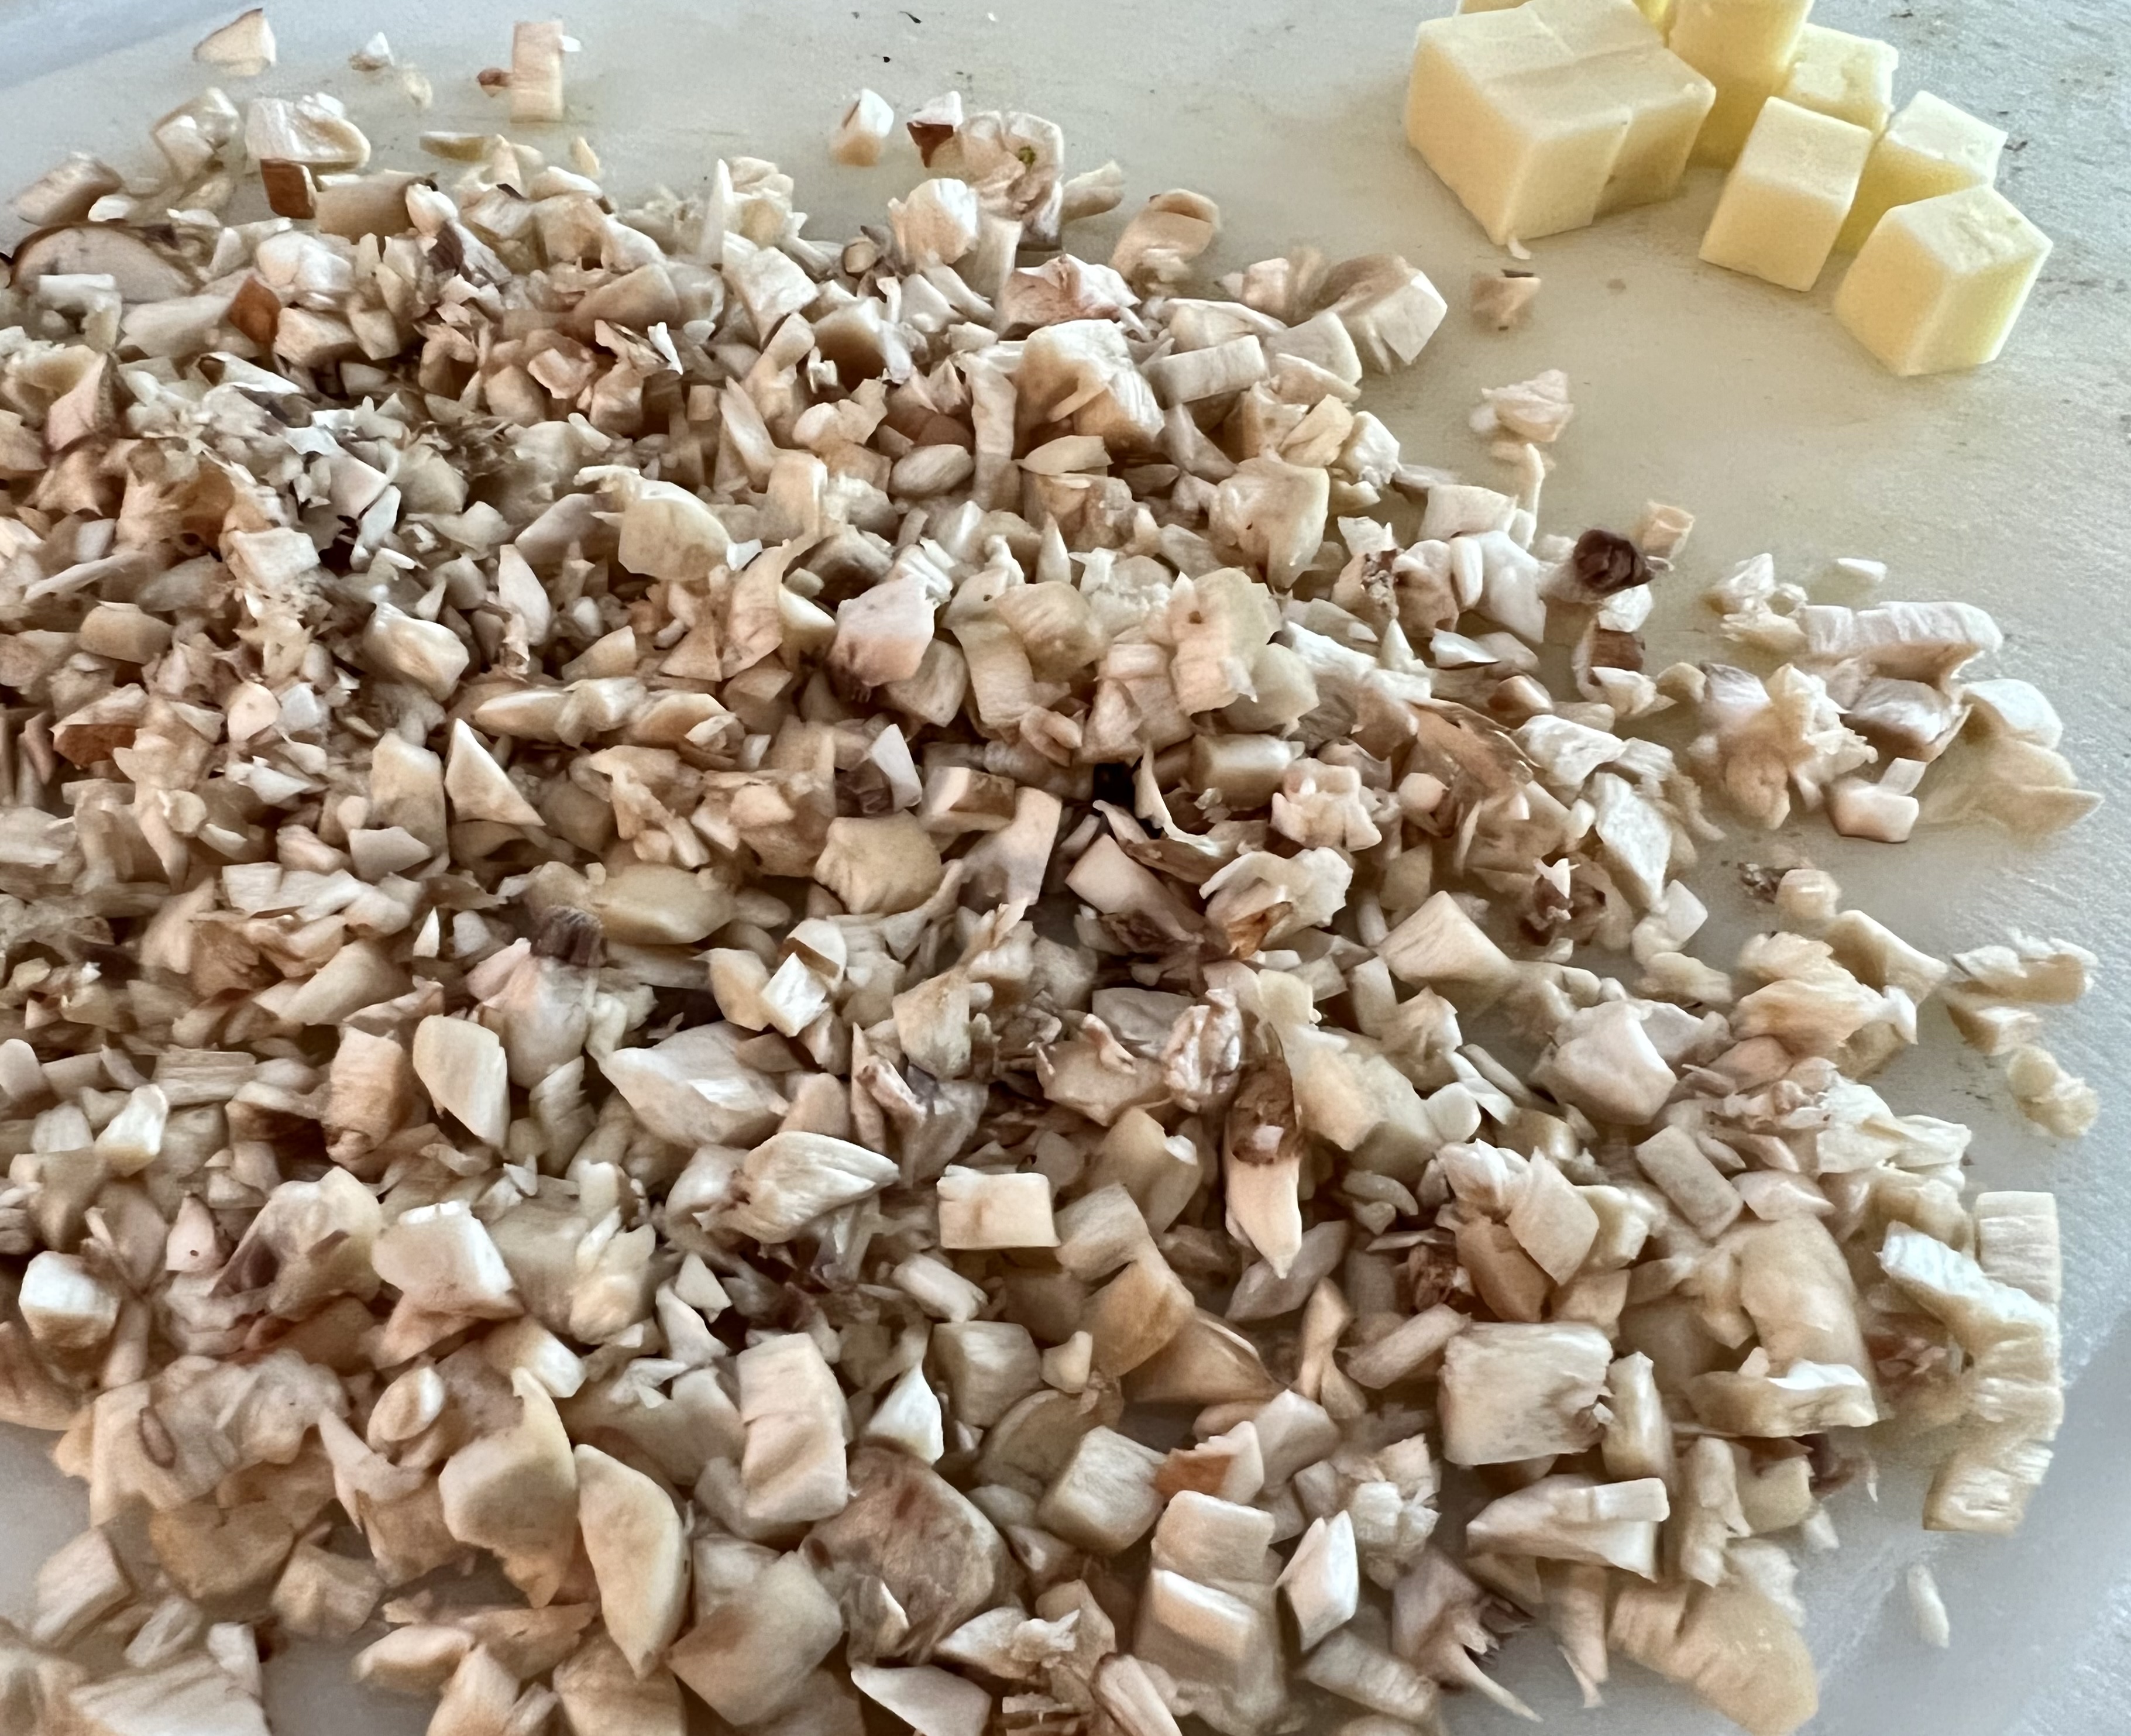
Chopped mushroom stems and cubed cheddar, ready to go.

1 package white or brown mushrooms
olive oil
1/4 of an onion, minced
1 clove of garlic, through a press
1 piece of cooked bacon, finely chopped
1 cup of baby arugula
salt and pepper
mild cheddar cheese, cubed
bread crumbs


The cooking directions are similar to the recipe above…

Pre-heat the oven to 400 degrees.

Rinse the mushrooms in cold water to clean them. Remove the stems of the mushrooms and set them aside. Rub the mushroom caps with olive oil and place them on a baking sheet, open side-down, in a 400-degree oven for a few minutes.

In a pan, sauté the onion and garlic in a little olive oil. Add the bacon. Chop the mushroom stems finely and add them to the pan. Season well with the salt and pepper. Add the arugula and let it wilt until it’s soft. Set the pan aside, off the heat.


Sautéed mushroom mix, ready to go.

Reduce the oven temp to 350 degrees after removing the mushroom caps. Flip the mushroom caps over so that they look like little bowls. Cut the cheddar cheese into small cubes and place one in each mushroom. Top each with the sautéed onion/garlic/bacon/arugula mixture. Sprinkle the breadcrumbs on top.


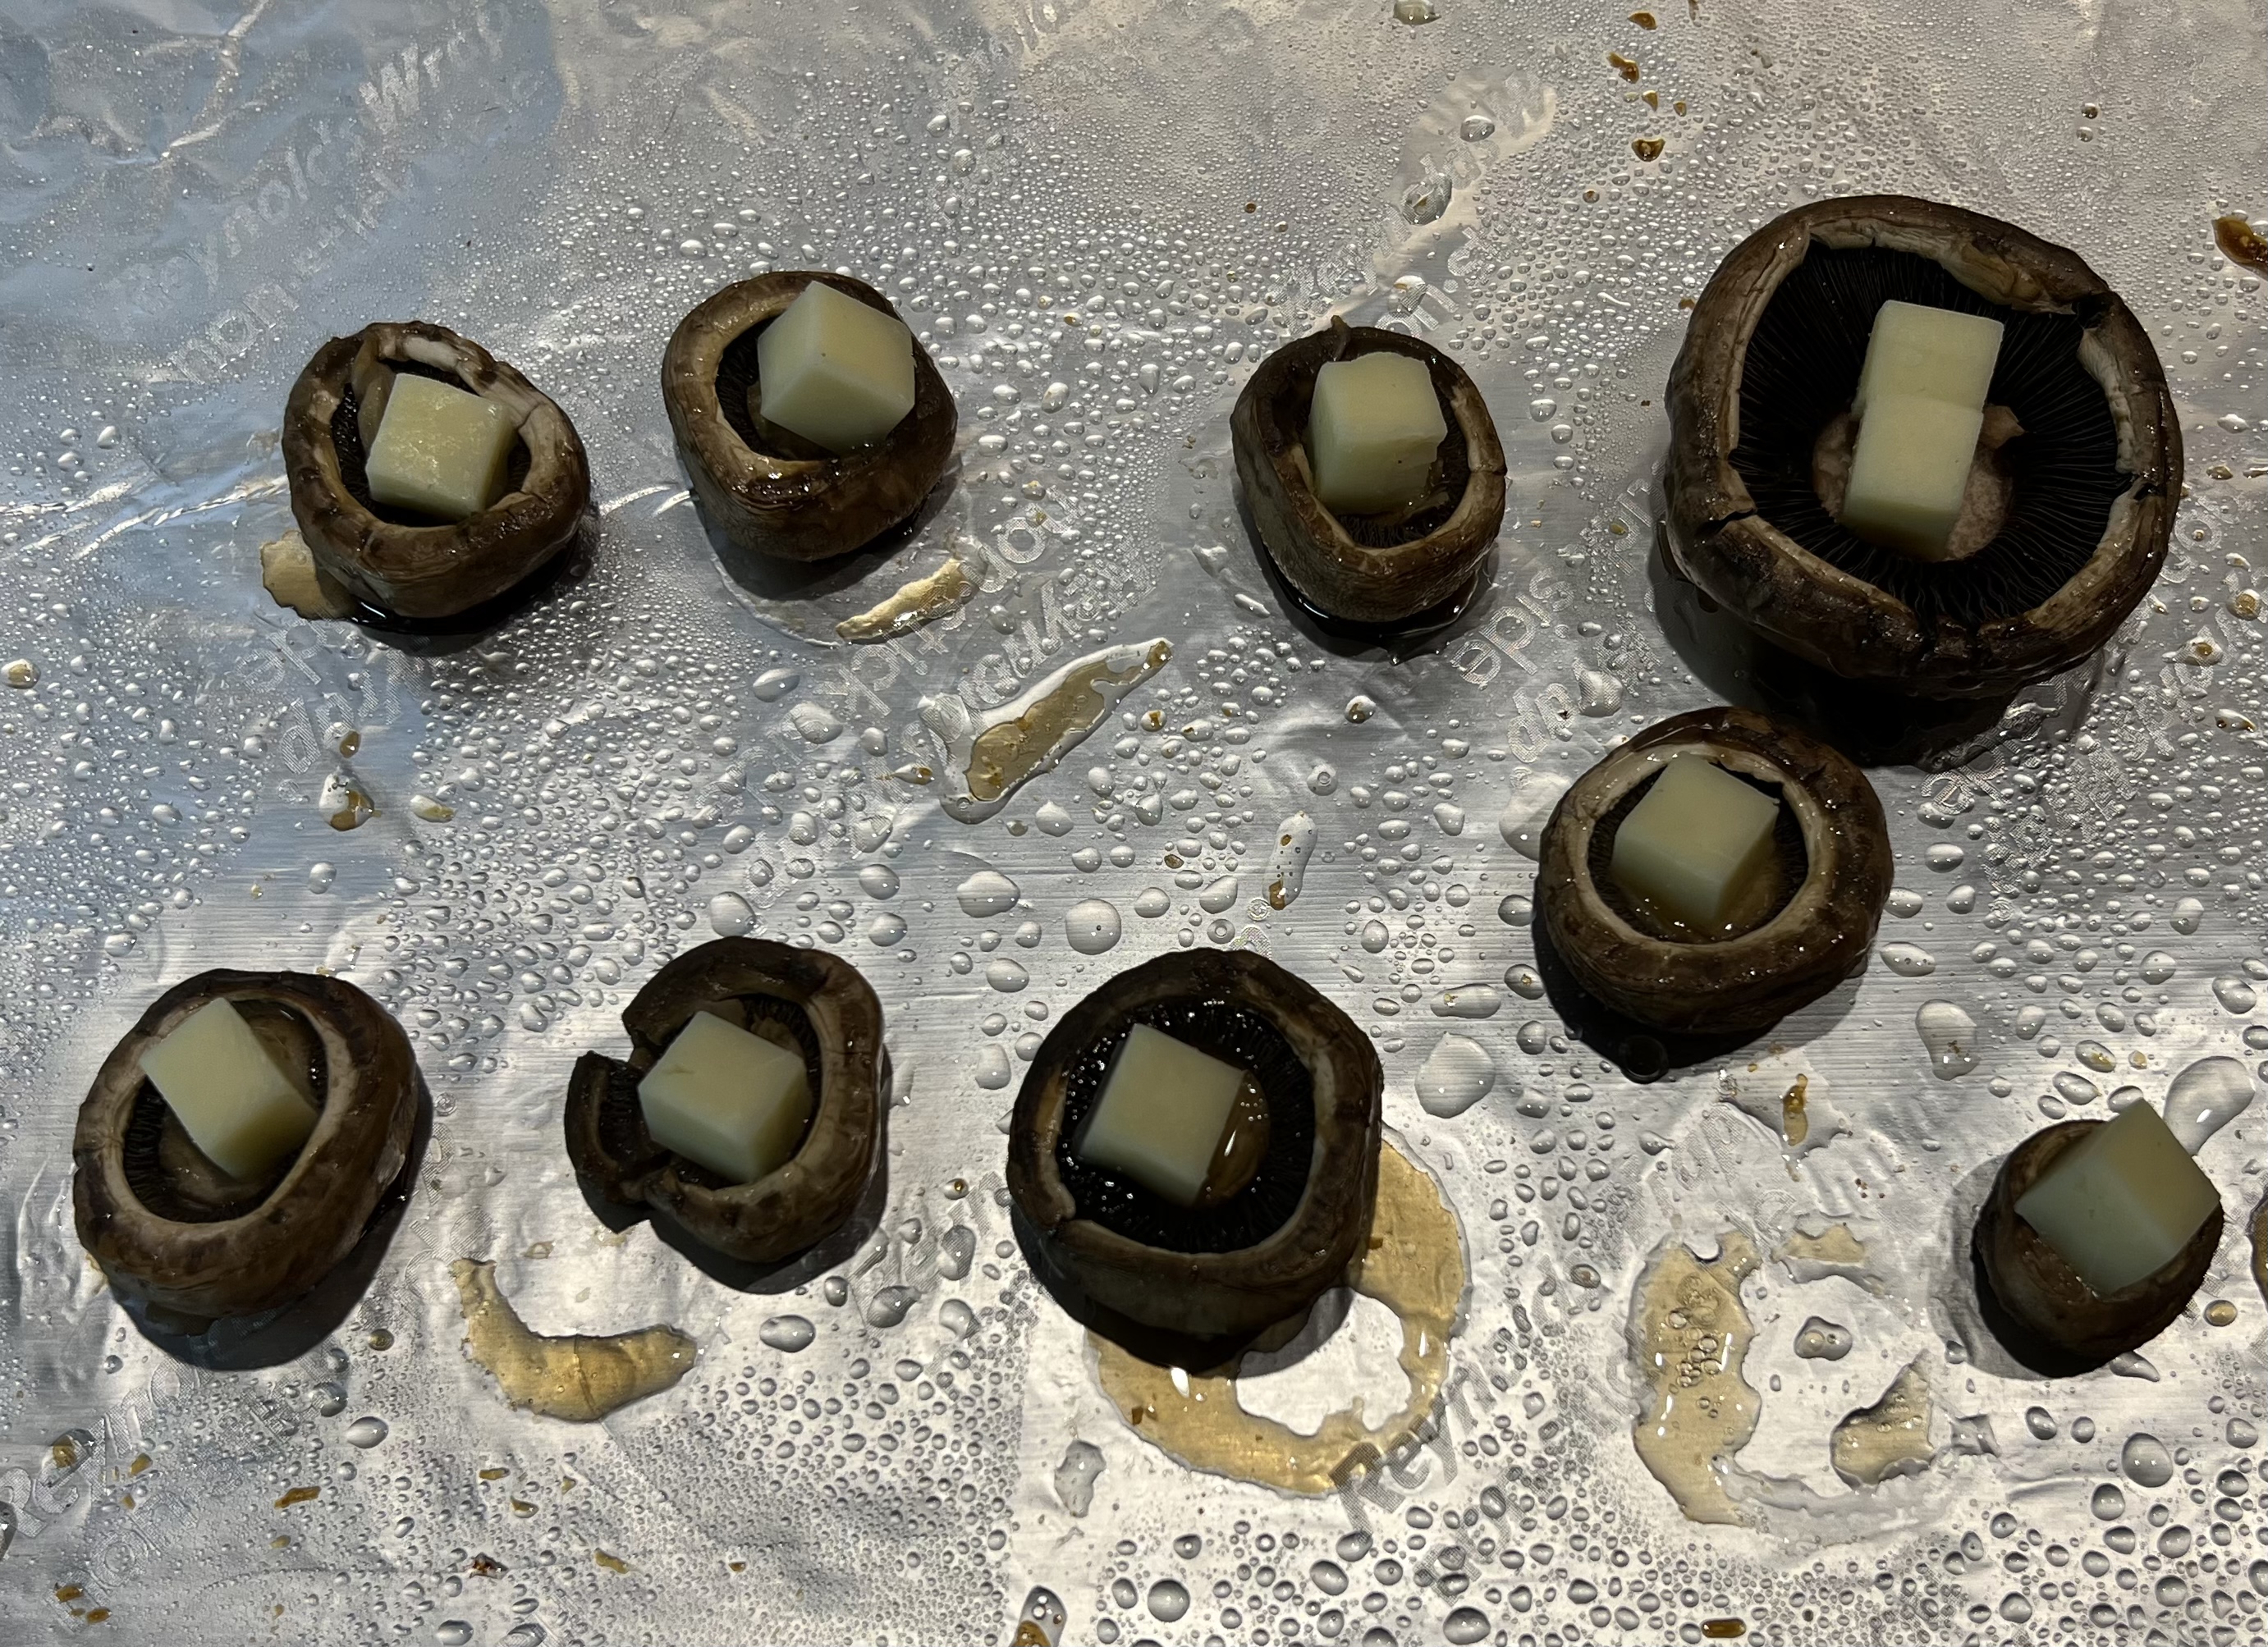
The cubes of cheddar fit inside the caps.


Return the baking sheet to the oven, cooking the mushrooms until they are lightly golden in color, and the cheese has melted.


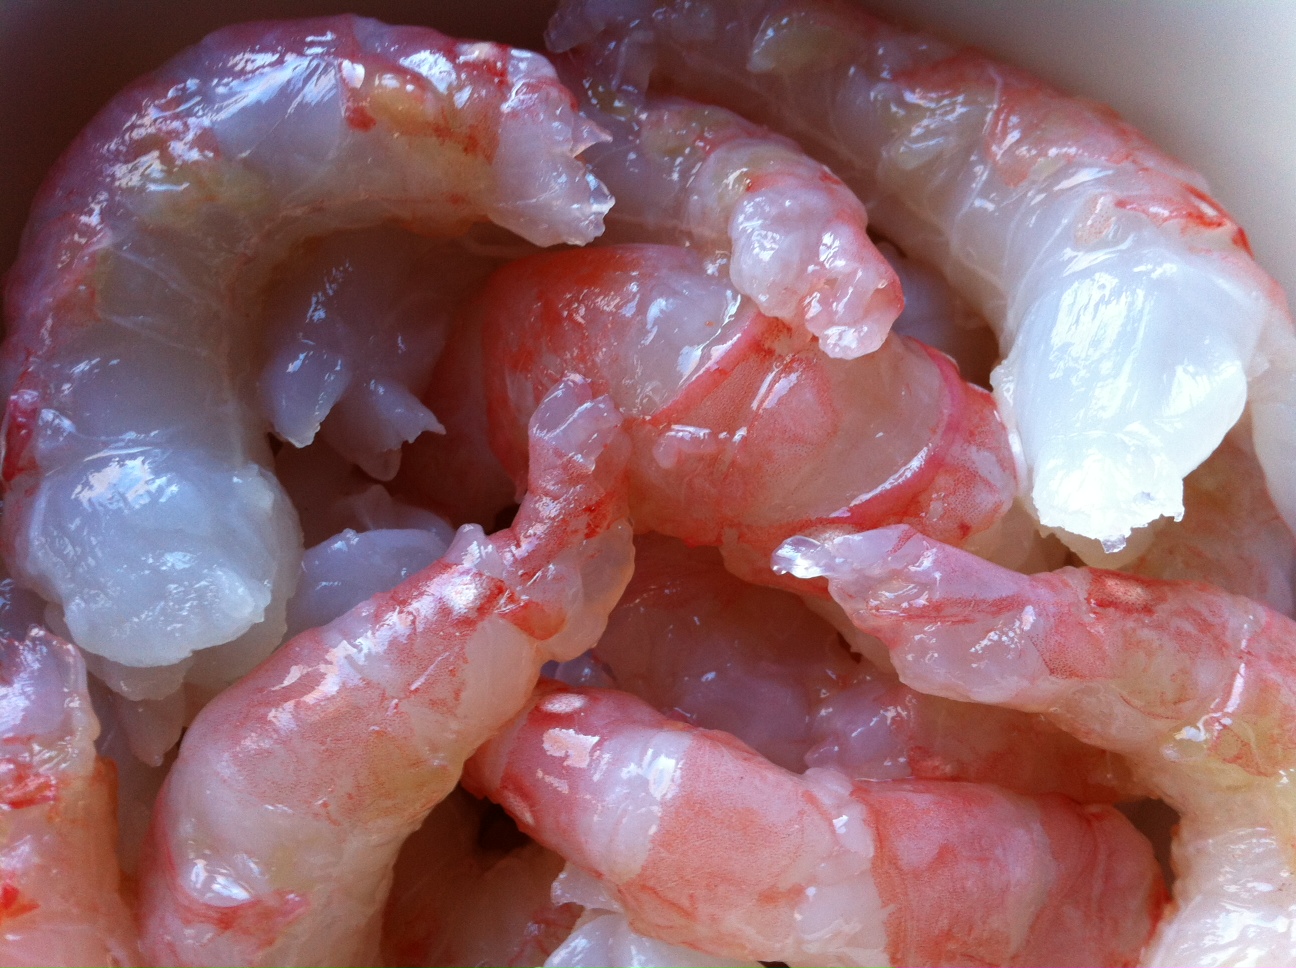
This is not your average shrimp! Found in the Pacific, from Southern California all the way up to Alaska, as well as Japan and Korea, these beauties, identified by the white spots on the sides of their first and fifth abdominal segments, live up to eleven years.

And here’s an interesting note: each spot prawn (or spot shrimp) spawns once as a male and one or more time as a female!


prawns 1


Having read so much about them, I ordered a pound and decided that I would get full use of the shrimp by peeling them and making an intensely flavored sauce out of the shells.

Peeling and de-veining was easy: the shells slipped right off the shrimp, and they were so beautifully clean, their were no veins to remove!

If you can’t get  hold of Wild Pacific spot prawns, shrimp or lobster will certainly do. Just remember to ask your fishmonger for wild-caught American shrimp, and not that horrible farmed stuff from Asia. If he doesn’t have it, shop elsewhere.


prawns 2


For the stock:

1 lb. wild Pacific spot prawns, thawed, peeled, and de-veined. Save the shells and container water, if any.
1 tablespoon extra virgin olive oil
1/2 carrot
1/2 celery stalk
1/4 onion
1 smashed clove garlic
4 whole peppercorns
2 teaspoons ketchup
1/2 sprig rosemary
1/2 sprig thyme
6 cups water


For the shrimp:

1/4 teaspoon salt
1/4 teaspoon freshly ground black pepper
1/4 teaspoon sugar
4 Tablespoons butter, room temperature
1 Tablespoon extra virgin olive oil


The final touch:

1 Tablespoon extra virgin olive oil
1 shallot, finely chopped
2 garlic cloves, pushed through a garlic press
2 Tablespoons butter, room temperature
1/8 cup fresh chives or scallions, finely chopped


1 lb. pasta


For the stock:

Peel and de-vein the shrimp. Keep the peeled shrimp in the fridge, covered.

In a pot, heat the olive oil and add the carrot, celery, onion, garlic, peppercorns, ketchup, rosemary, thyme and shrimp shells. Sauté them for a few minutes to get the flavors going. Add the container water, if any, and 6 cups of water. Bring it to a boil and let it simmer for 2 hours.

Strain the solids out and discard them. Place the stock in a smaller pot, and continue reducing it until about 1 cup of the stock remains.

Boil the pasta in well-salted water and remove it from the water before the al dente stage. (It will cook more later.) Strain it and set it aside.


For the shrimp:

Combine the salt, pepper and sugar with the prawns in a bowl and toss to coat them evenly.

In a large sauté pan, heat the butter and olive oil on medium-high heat. Add the shrimp and cook them until lightly caramelized and almost cooked all the way through. Do not overcook them! Set them aside.


The final touch:

In the same large sauté pan that you cooked the shrimp, heat 1 tablespoon of olive oil and add the shallot. Sauté for 1 minute, then add the garlic. Sauté for 2 more minutes, then add some of the stock, the shrimp, the pasta, and the butter, and mix well. If it’s dry, add more of the stock until the pasta is coated, but not dripping. Add salt and pepper to taste. Garnish with the chives.


prawns 3

Serve immediately!


My daughter and I recently had our quarterly “fodder/dodder dinner” at our Providence Capital Grille. Their signature cocktail, the Stoli Doli, reminded me it was time to make a new batch of what I like to think is an upgraded version: my Velvet Elvis.

A Stoli Doli is simply Stoli vodka that has been infused with fresh pineapple. If you sit at the bar at the Capital Grille, you won’t be able to miss the very large jar of freshly-cut pineapple pieces swimming in vodka. They literally pour it “from the tap,” and serve it straight up, like a martini, or on the rocks. It’s delicious, and I’ve certainly had my share of them.

I decided to make my own at home one day, to serve to my friends at an upcoming party. But to my disappointment, I didn’t have any Stoli vodka in the house. (An embarrassment to most Lithuanians.) But…I found a bottle of Stoli Vanil, the vanilla-flavored vodka, and it was a real game-changer! I used that instead of regular Stoli and I came up with a sweeter, smoother drink that is now legendary among my friends.

VELVET ELVIS

2 ripe, sweet pineapples, peeled, cored, and sliced
1.75ml Stoli Vanil

Find a gallon-sized glass jar with a lid. Peel, core and slice the pineapples and drop the pieces in the jar. Pour the vodka in, mix well, and seal the jar. Keep it at room temperature for 7–10 days, giving it a gentle shake every day.

After 7–10 days (don’t worry…a little longer won’t hurt anything), strain it, squeezing the pineapple pieces to get every bit of liquid out. Discard the pineapple pieces. (As much as you might think they would be fun to munch, they’ve given up all their flavor to the cocktail, and taste terrible!)

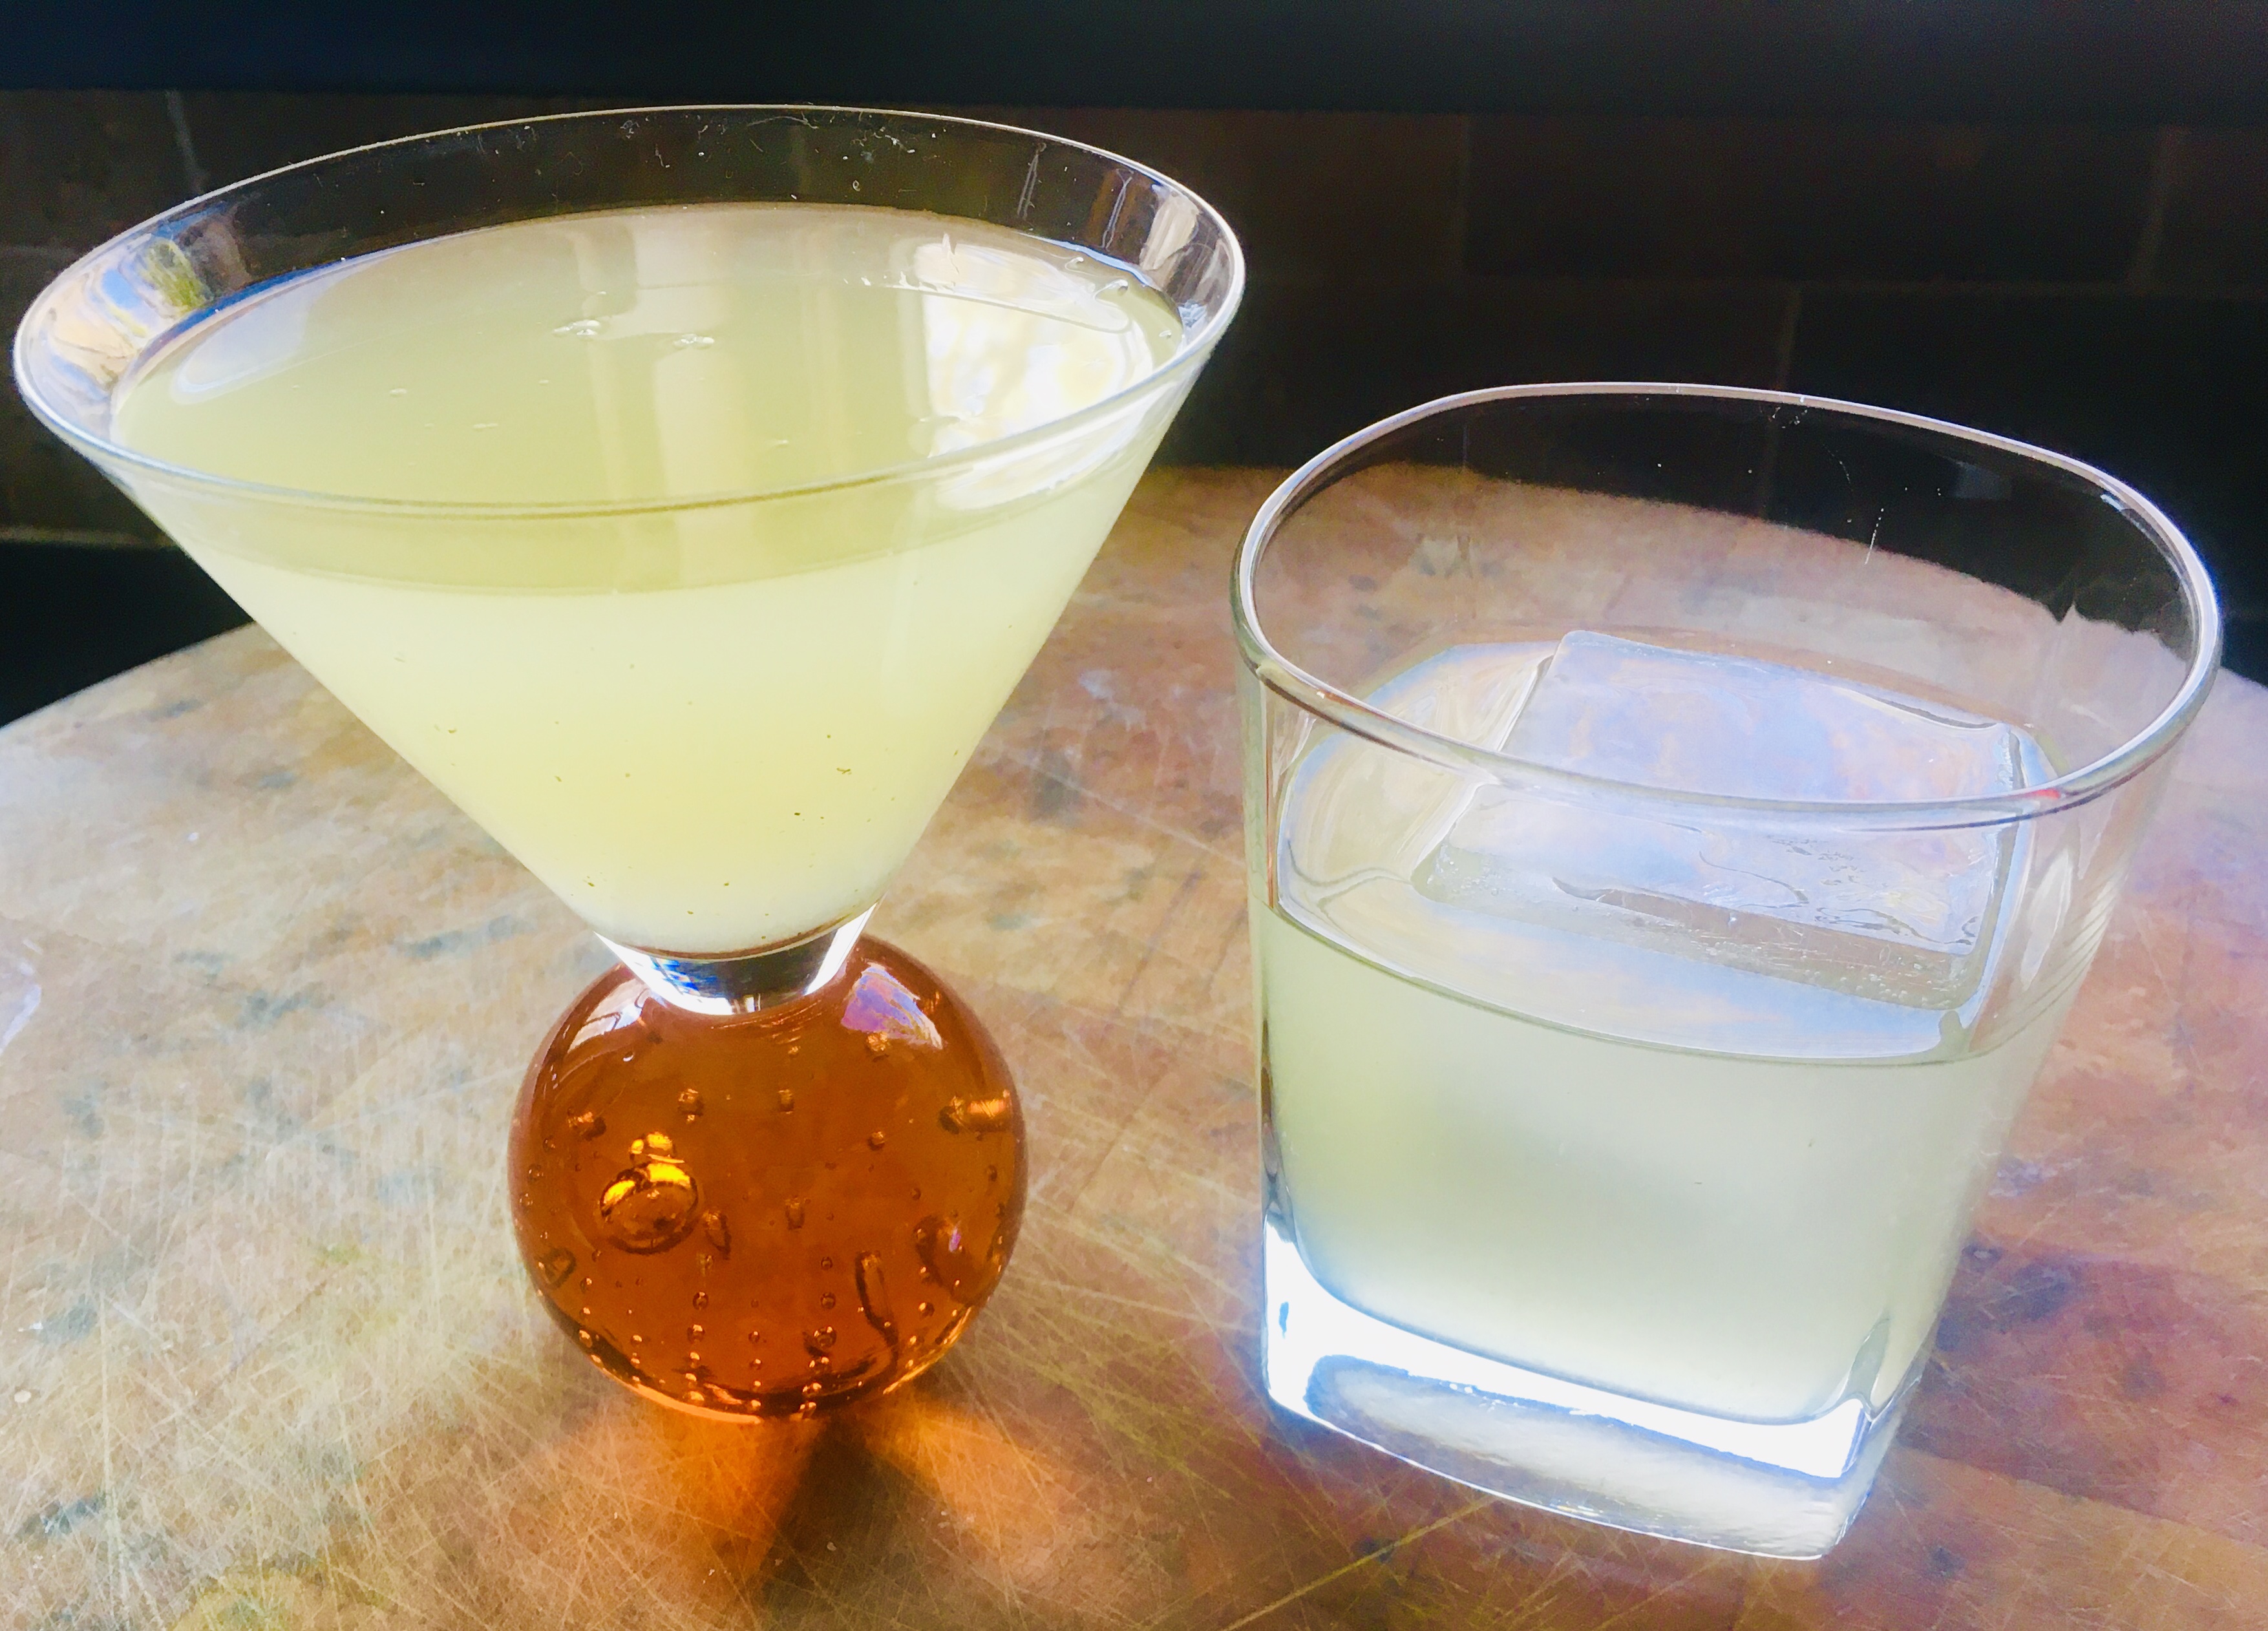
Keep the Velvet Elvis refrigerated. Serve with rocks (or 1 big rock!), or shaken and poured into a martini glass.

As a martini, or on the rocks!

Since it’s Memorial Day weekend, a grilling blog is in order. And in case of rain, this works indoors as well.

I rarely order beef at a restaurant, because I can usually make a better steak at home. For one thing, I use humanely raised grass-fed beef, something few restaurants offer. And I can cook it for less than a third of the price of a steakhouse. Granted, most steakhouses dry-age their beef, a time-consuming process of taking slabs of beef and keeping them in a fridge for weeks until a certain amount of moisture is sucked out of the meat, intensifying the flavor. I’ve done that at home in my fridge, but it takes a lot of time and effort.

There is one steak that I couldn’t match for the longest time, and that was the Capital Grille’s bone-in Kona crusted dry-aged NY strip. I would have dreams about that steak! It was time to find a way to make something that would satisfy my craving for that amazing steak at home.

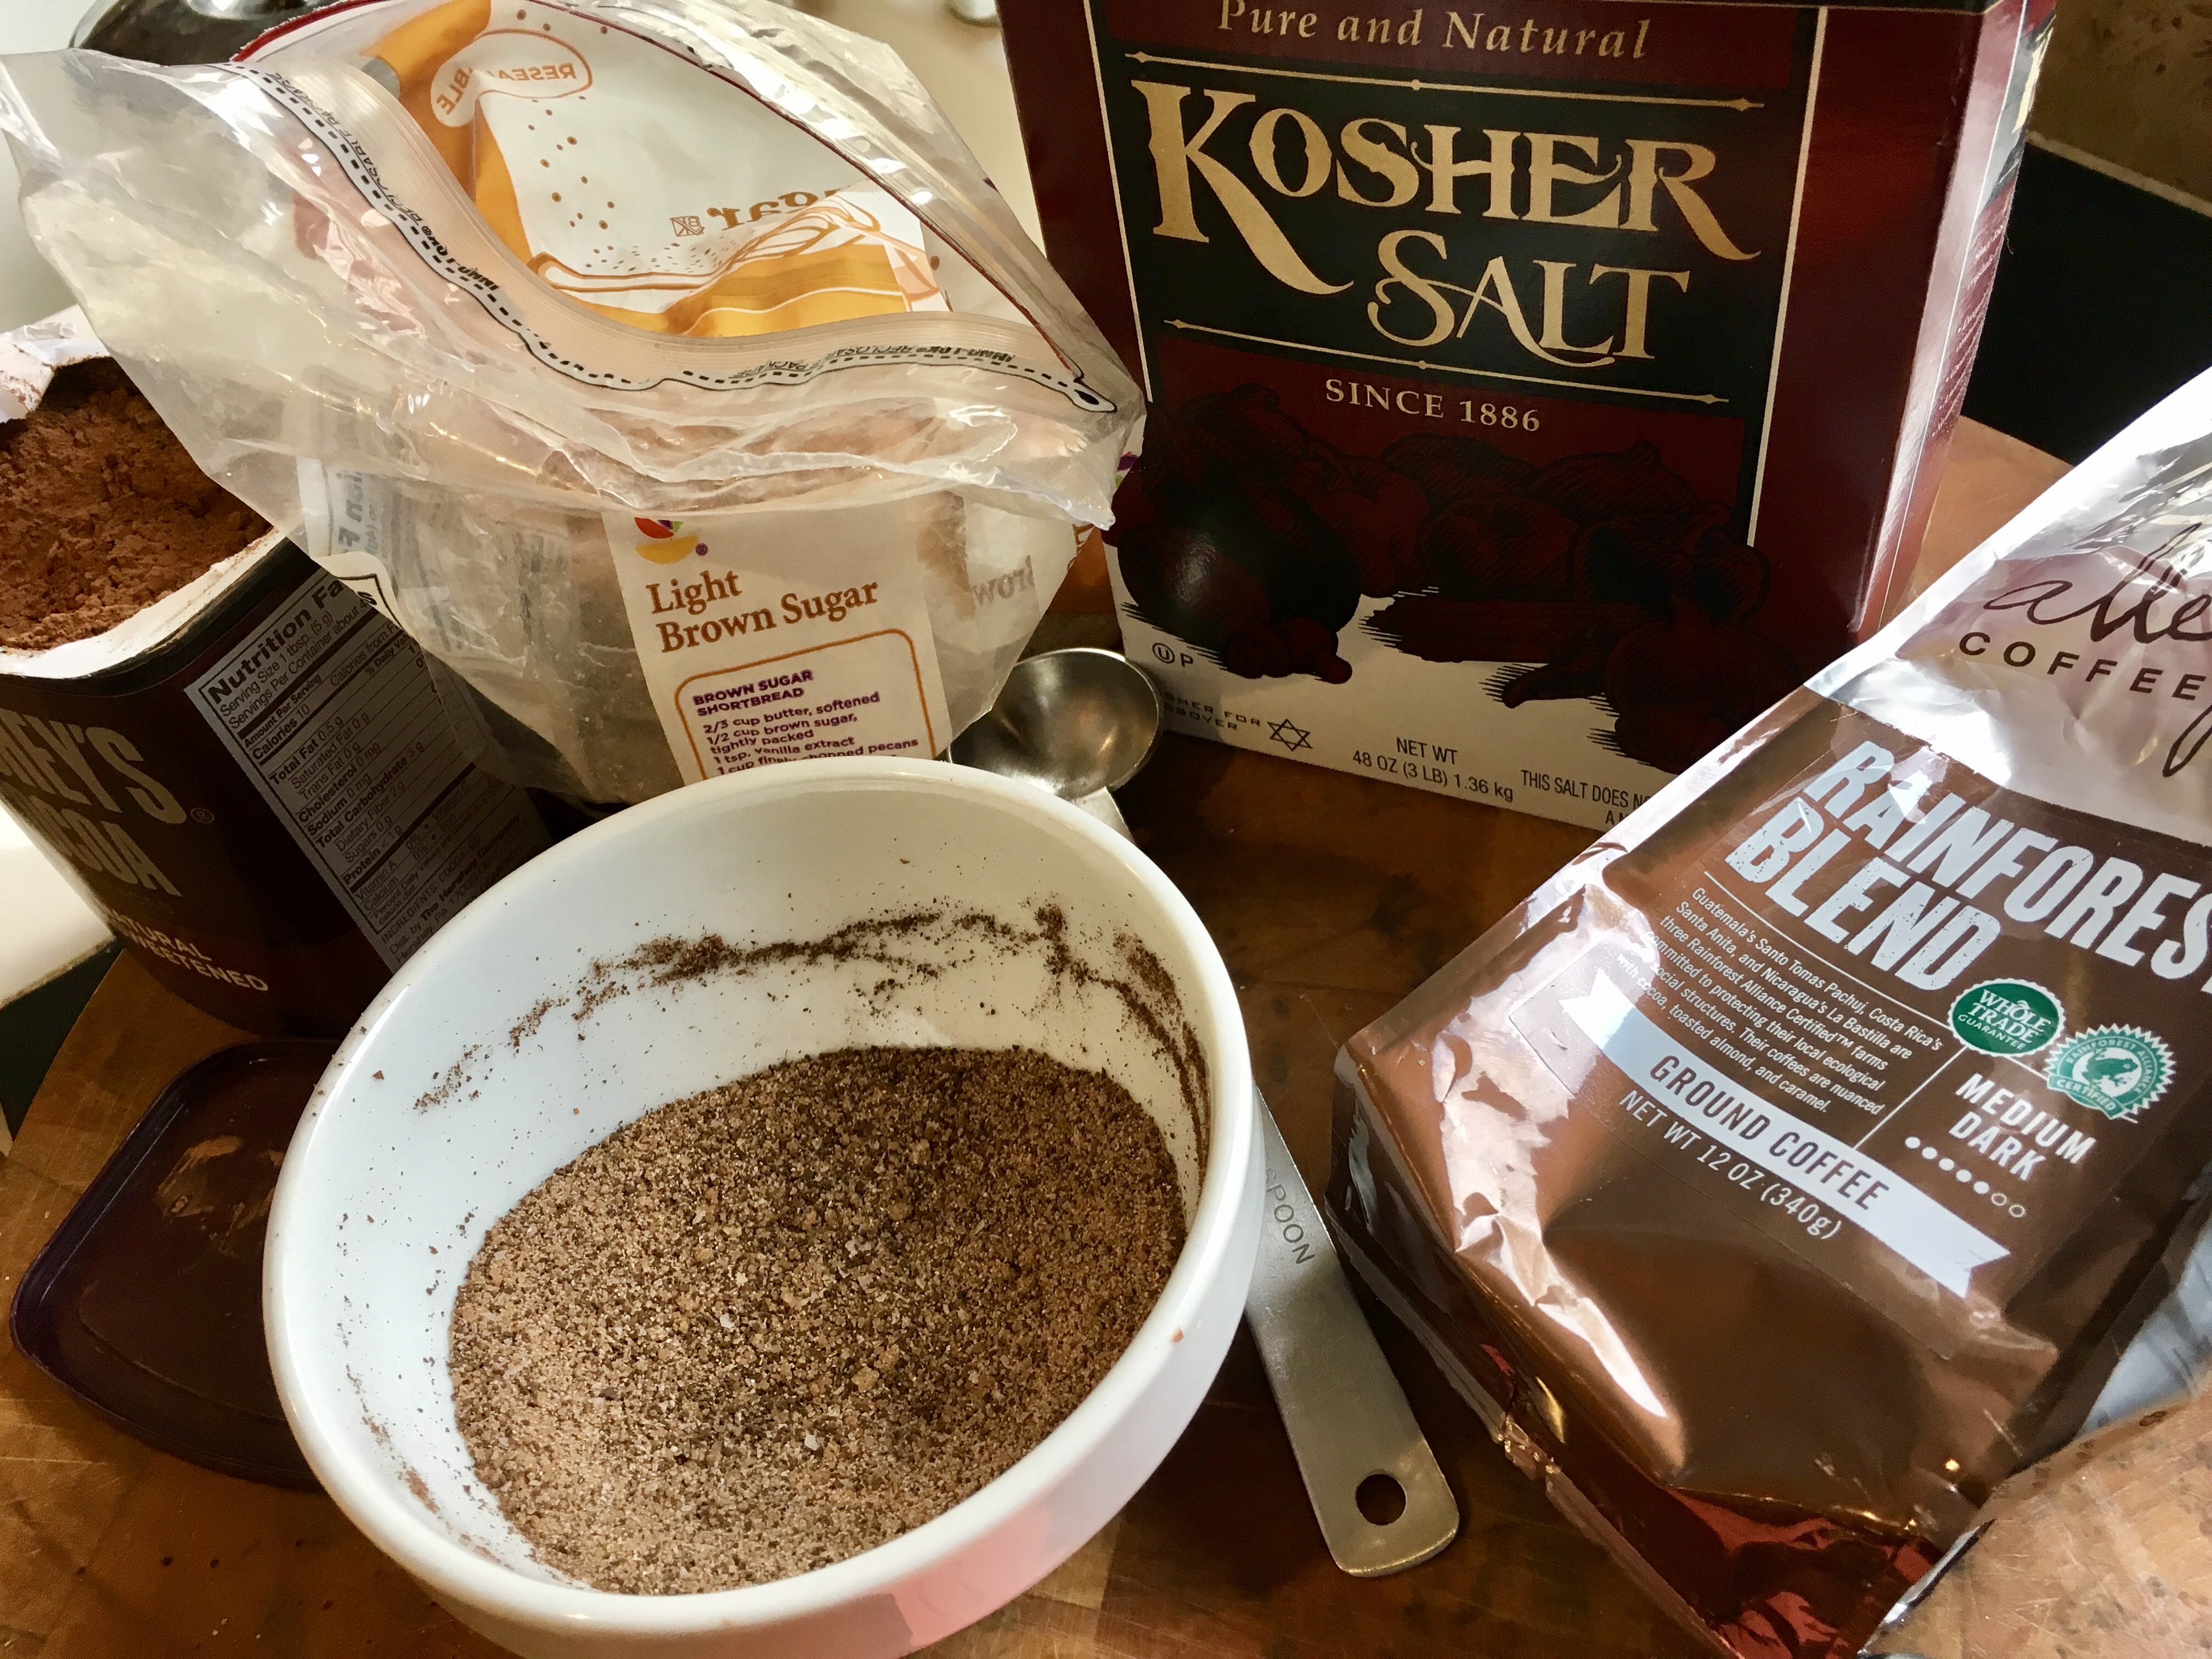
Looking at a variety of coffee rub recipes on-line, I started the slow and steady process of combining ingredients in just the right proportions, tasting as I went. What I came up with really accentuated the flavor of the beef I was cooking, better than I had imagined!


img_0100

3 tablespoons brown sugar
1 tablespoon Kosher salt
1 tablespoon ground coffee (use your favorite)
1 teaspoon granulated garlic
1 teaspoon granulated onion
1 teaspoon unsweetened cocoa powder


Combine the ingredients, mixing well, and keep them in a tightly sealed container at room temperature.

The secret ingredients are the brown sugar and the cocoa. The brown sugar gives the steak a caramelized crust when cooking, and the cocoa rounds out the flavors and gives the beef an extra “umph!”

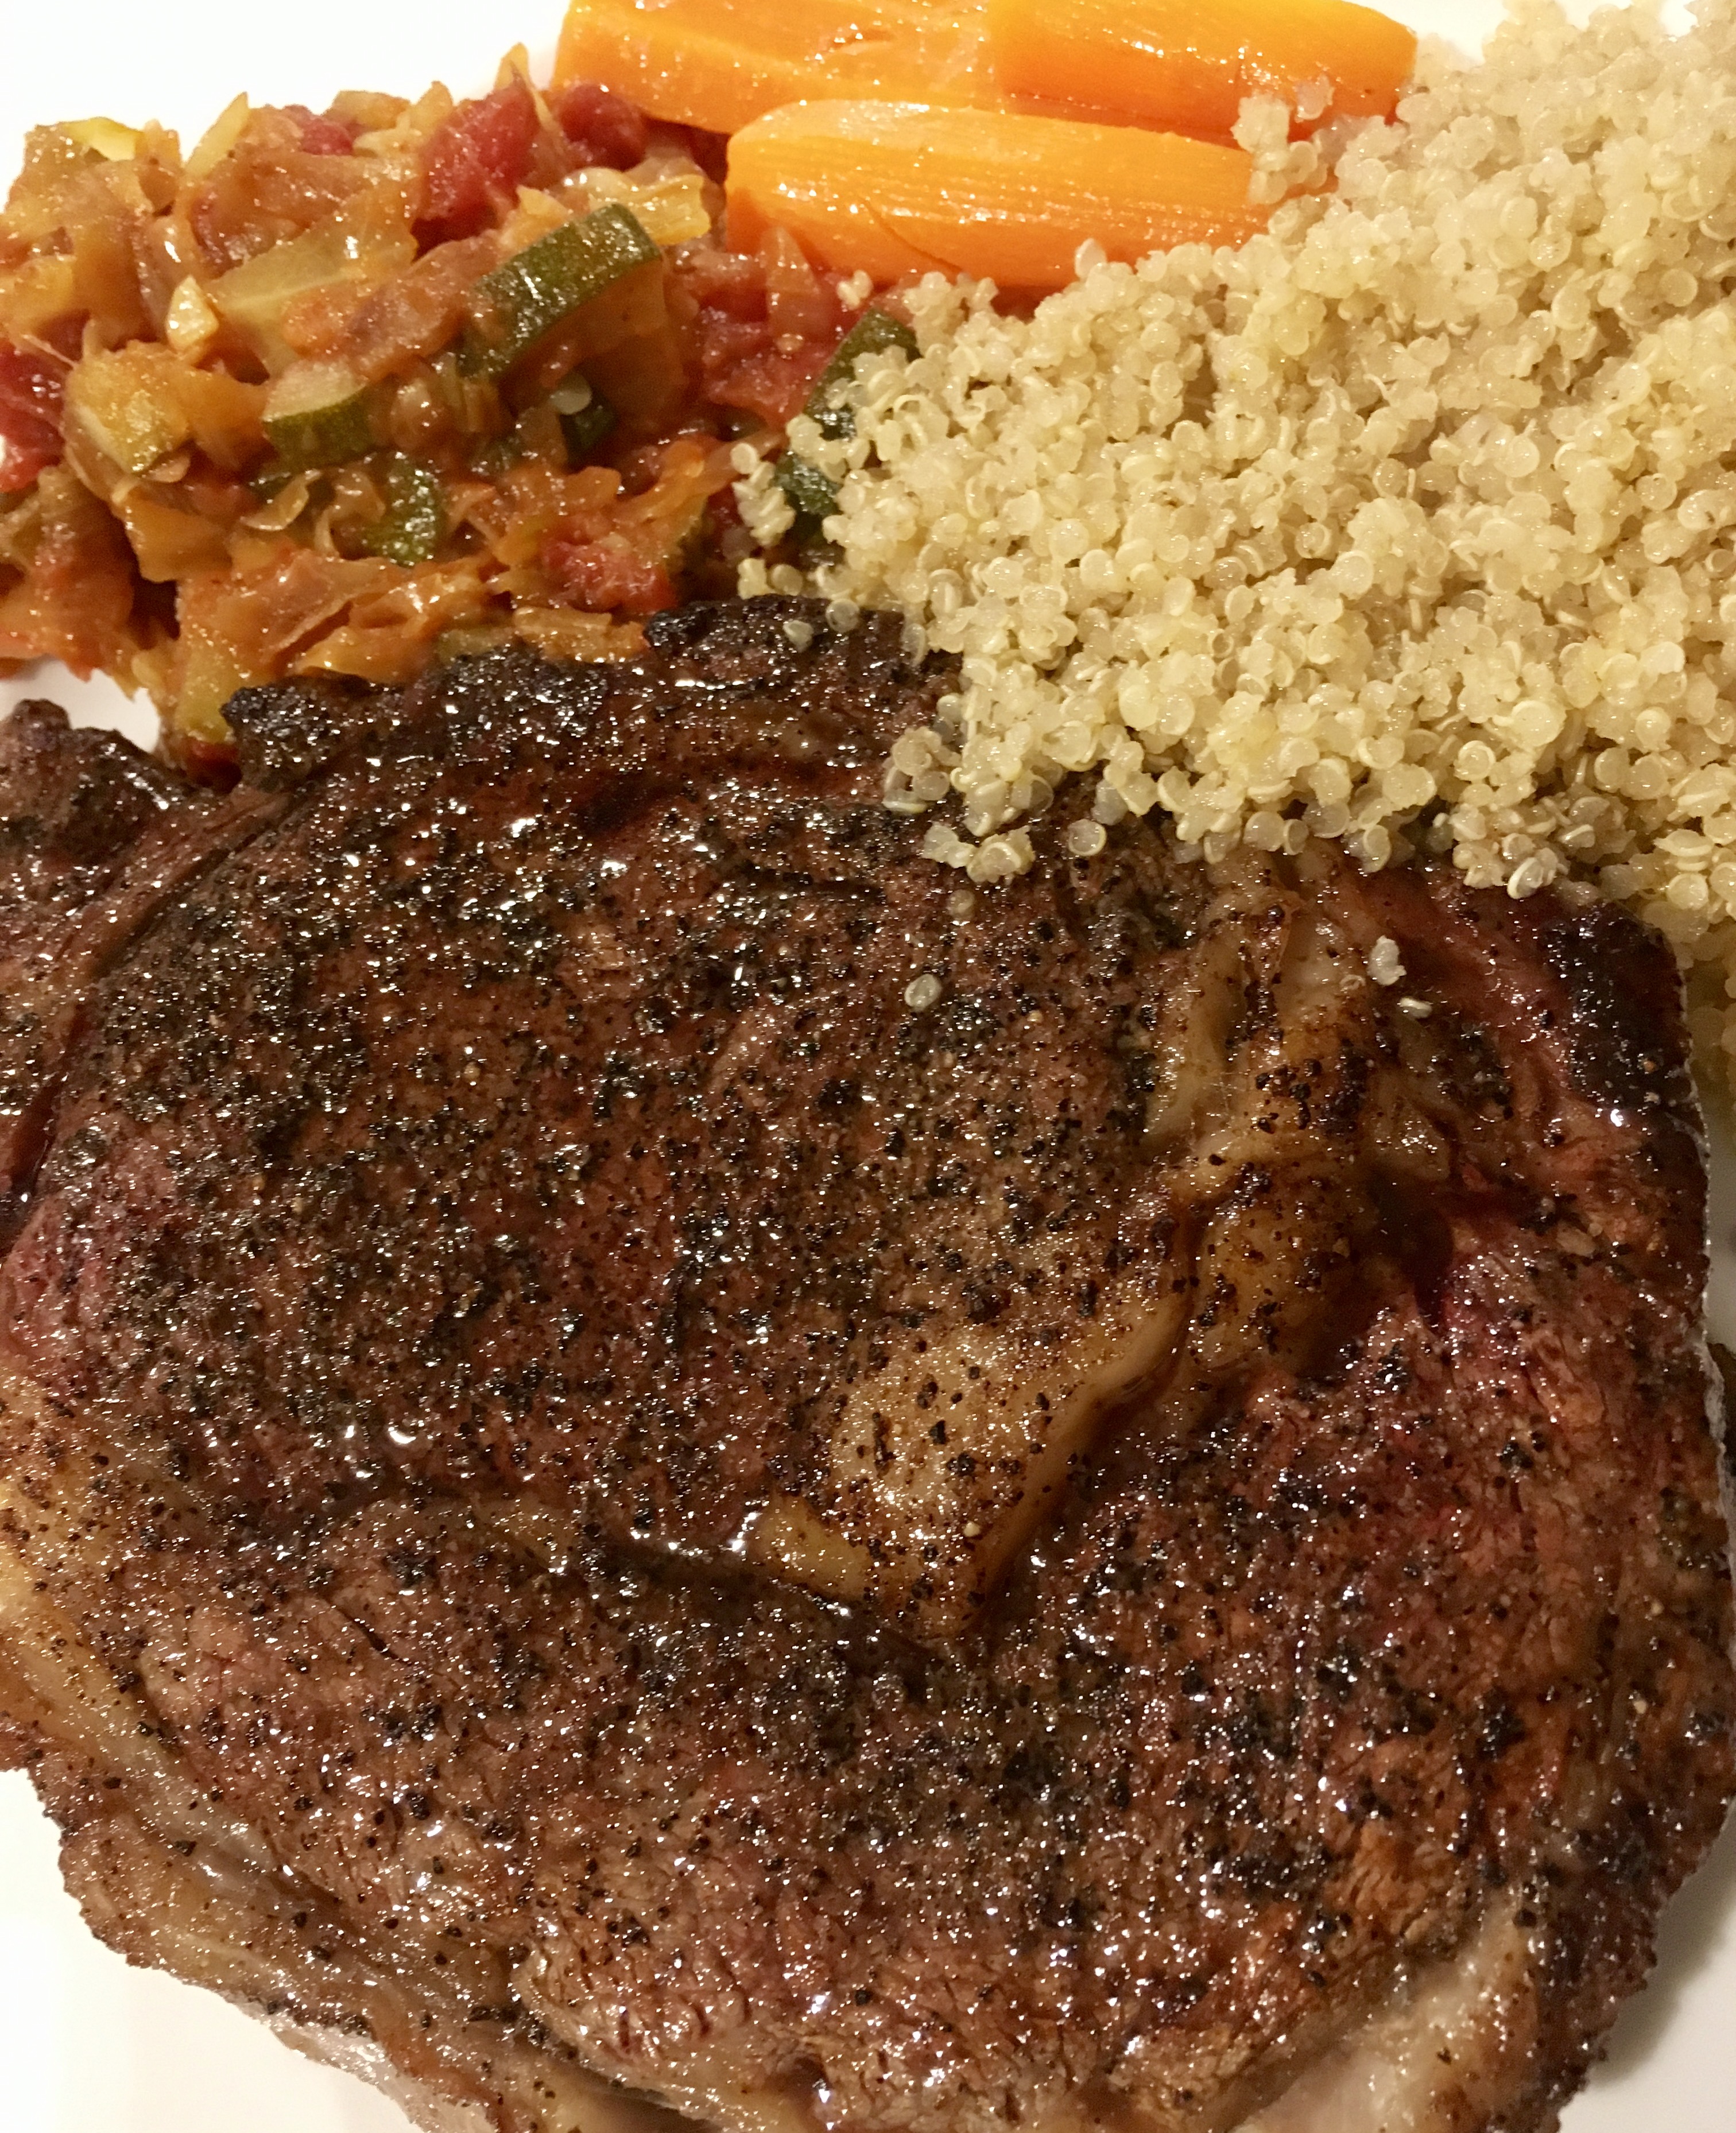
When using, sprinkle the seasoning liberally on both sides of the steak before cooking. When cooking indoors, I like to add bacon fat to a hot cast iron skillet, searing the steak on all sides, and then finishing it in the oven. But let’s face it: nothing beats the grill!


img_0104

These pancakes, based on a recipe from chef April Bloomfield (The Spotted Pig and The Breslin in NYC), are made from fresh homemade ricotta cheese. Light as air…and really delicious! I’ve made a few batches of fresh ricotta cheese in my day, but when the family has a craving for these pancakes at the last minute, a good-quality store-bought ricotta cheese will do.


1 1/2 cups all-purpose flour (I use Cup4Cup GF flour if I want to make these gluten-free)
1/4 cup yellow cornmeal
2 tablespoons sugar
1/2 teaspoon salt
1/2 teaspoon baking powder
1/2 teaspoon baking soda
2 cups milk
2 large eggs, separated
1/2 cup fresh ricotta


In a large bowl, combine the flour, cornmeal, sugar, salt, baking powder and baking soda. In another large bowl, whisk together the milk, ricotta,  and egg yolks. Fold the wet ingredients into the dry ingredients.

In a large stainless steel bowl, whisk the egg whites until they are stiff, but not dry. Fold gently into the batter.

Spray a non-stick griddle with a little cooking spray and drop about 1/4 cup of batter per pancake. Cook over medium heat for about 2 minutes per side, until golden and fluffy.

pancake

These days, there’s a day for everything, but who knew that May 10th is National Shrimp Day?

Any excuse to make shrimp scampi is a good one, as far as I’m concerned!

I love shrimp scampi, and had the need to satisfy my cravings the other day. But what started as a simple scampi recipe, turned into something a bit more. I may never make scampi the same way again!

image

1 lb. wild-caught American shrimp, peeled and de-veined
4 tablespoons butter
4 tablespoons olive oil
2 teaspoons parsley
1 teaspoon garlic salt
1 teaspoon oregano
1/2 teaspoon granulated onion
1/4 teaspoon black pepper
3 tablespoons Spirgučiai (see below)
1/2 lb. fresh mozzarella, sliced
oregano, for sprinkling

Thaw the shrimp under cold water. Place them in a colander to drain.

Spirgučiai is a Lithuanian favorite: chopped bacon and onions, fried until crisp and usually sprinkled over anything and everything in Lithuanian cooking. I always have some in my fridge, already prepared and just waiting to be used.

In a saucepan on medium heat, combine the butter, olive oil, parsley, garlic salt, oregano, onion, pepper and Spirgučiai.  Heat only until everything melts and combines. Don’t let it burn. (If you don’t have Spirgučiai, all you need to do is take a couple of slices of bacon, chop them up, and fry them in a pan until crisp. Keep the bacon and the fat in the pan and then add the butter, olive oil, parsley, garlic salt, oregano, onion and pepper.)

In a small sheet pan lined with foil, lay the shrimp in a single layer and cook them halfway in a pre-heated 400-degree oven to remove the moisture from the shrimp.

Take the pan out of the oven, and drain off the moisture, if any. Pour the butter mix from the saucepan all over the shrimp and toss to coat. Return the shrimp to the oven for a few minutes, until they’ve heated through and are almost completely cooked. (Careful: never over-cook shrimp!)

Take the pan out of the oven, and place pieces of mozzarella on top, garnishing with a little oregano. Set the oven on broil and cook until the cheese has melted.

Slice with a spatula and serve on top of pasta, making sure you get some of that buttery scampi sauce.

image

As a low-carb option, you can serve this on broccoli or roasted spaghetti squash.

Great fried shrimp is like sea candy…you just can’t get enough. This recipe is easy and really delicious. I never use anything but wild-caught American shrimp!

This recipe can easily be made gluten-free by substituting the all-purpose flour with GF flour.

image

1 lb. wild-caught USA shrimp, peeled and deveined
1/2 cup all-purpose flour
1/2 cup yellow corn meal
2 tablespoons Paul Prudhomme Seafood Magic seasoning
1 teaspoon sea salt
1 raw egg, scrambled
avocado oil for frying

image

Combine the flour, corn meal, Prudhomme seasoning (see below) and salt in a bowl. Set it aside.

Scramble the egg in another bowl and set it aside.

Peel and de-vein the shrimp. Remove the entire shell, or leave the tip of the tail, depending on your preference.

Heat a pan with an inch of the oil. When it reaches 325 degrees, it’s ready for frying.

Dip the shrimp in the egg, and shake off any excess. Then toss the shrimp in the flour mixture, shaking off any excess. Carefully place the shrimp in the pan of oil.

Cook the shrimp for about 45 seconds, flip them over, and cook for another 45 seconds, until they’re golden brown. Don’t crowd the pan and never over-cook shrimp!

Drain them on paper towels and serve immediately!

The shrimp are delicious by themselves, but here’s an easy remoulade to make along with them…

1 cup mayo (I like Hellman’s)
1/4 cup mustard (I like Gulden’s)
1/4 teaspoon granulated garlic
1 tablespoon dill pickle relish
1/2 teaspoon Frank’s Red Hot
Pinch cayenne pepper
1/2 teaspoon salt
1/4 teaspoon white pepper

Combine the ingredients and keep in the fridge until ready to use.

It’s a bit of a cheat, but I find the Paul Prudhomme Seafood Magic seasoning has great flavor and works really well for this. I also use it on fish: simply pan sauté a filet in butter, and sprinkle on the seasoning. I originally started with the small jar found in most supermarkets, but then quickly graduated to the jumbo size can found online! And, by the way, it is gluten-free.

If you want to make your own seafood seasoning, a combination of salt, pepper, garlic powder, onion powder, paprika and cayenne will get you a result that’s pretty close to the Prudhomme seasoning.

My buddy, Lee, is in Maine right now, enjoying the limited season of freshly caught scallops. It inspired me to post this blog…
Here in Rhode Island, we have access to amazing seafood year-round. My friend Gary, is a lobster man. My neighbor farms oysters. And for anything else, I go to my friends’ farms: Simmons Organic Farm in Middletown, RI and Wishing Stone Organic Farm and Sweet & Salty Farm, both in Little Compton, RI…great places for veggies, bakery goods, pastured meats, yogurt, cheese, and more.
I was on a mission to find fresh mussels the other day, and in the process, stumbled upon fresh bay scallops, piled high on ice at a local farmers’ market. Unlike like the larger sea scallops or bomster scallops, bay scallops are small and sweet, about the size of a mini-marshmallow…hard to find and my absolute favorites.
 image
As far as I’m concerned, there is no better way to eat a fresh scallop than right out of the shell with just a little marinade on top, popping these beauties into my mouth literally as they’re still pulsing on the shell.
Scallops are a bit trickier to open and clean than clams or oysters (at least for me) but all it took was a little practice while sipping a Stoli Elit martini and I got the hang of it in no time.
There are two marinades that I use when serving up raw scallops. The acidity in these marinades will cook the scallop a little, like in ceviche, though eating them raw is perfectly fine if they’re super-fresh.
“MILLS TAVERN” MARINADE
The first place I ever had a raw scallop was at Mills Tavern, a highly rated restaurant in Providence, RI. Freshly shucked scallops (in large flat shells) were served on ice with a tangy red marinade. I never got the recipe from the restaurant, but this is my version of that marinade.
3 tablespoons rice vinegar
2 tablespoons Grenadine
1/2 teaspoon fresh finely grated ginger
2 teaspoons finely chopped scallions
 Combine all the ingredients and chill before using.
A trick I learned from the folks at Wishing Stone Farm, where they grow their own ginger roots: keep the ginger stored in the freezer in a tightly sealed bag. Most of us don’t use ginger all that much, but we want fresh ginger when the recipe calls for it. By wrapping it tightly in plastic and storing it in the freezer, it’s ready to use any time. Simply take the ginger root out, and grate it finely–no need to peel the skin–while it’s still frozen. It will be almost powder like, and it will blend beautifully into any recipe you’re using. Then just put the rest back in the freezer.
 image
ALZ CEVICHE MARINADE
My marinade is closer to a basic ceviche, using 3 kinds of citrus and some Asian flavors.
1/4 cup freshly squeezed orange juice
1 1/2 tablespoons freshly squeezed lemon juice
1 1/2 tablespoons freshly squeezed lime juice
2 tablespoons soy sauce
1 tablespoon + 1 teaspoon peanut oil
1/2 teaspoon honey
1 1/2 teaspoons fresh finely grated ginger
2 tablespoons finely chopped scallion
2 small dried chili peppers, finely chopped
 Combine all the ingredients and chill before using.

image


Both marinades are gluten-free, as long as you use GF soy sauce. La Choy is an easy-to-find brand.


I recently returned from a trip to New Orleans, where I had oysters every which way: Bienville, Rockefeller, char-grilled, baked, and, of course, raw. But here in New England, we’re pretty proud of our oysters, and Rhode Island alone, we’ve got a wide variety to choose from. And we don’t just buy ’em and slurp ’em down: we go out and dig our own…and we have a different buck-a-shuck oyster bar to go to for any given day of the week.


oysters

Fresh oysters deserve an amazing cocktail sauce, and my recipe kicks butt: lots of horseradish, lots of flavor, and a secret ingredient: vodka. Not only does it give it a kick, it keeps it from freezing solid, so I can keep the cocktail sauce in the freezer until I need it. Then, I just scoop it out like sorbet.

2 cups ketchup
4 tablespoons prepared horseradish
1 tablespoon fresh lemon juice
1 teaspoon Worcestershire sauce
1/2 teaspoon Frank’s Red Hot, or other hot pepper sauce
5 grinds of fresh black pepper
1/4 teaspoon salt
1 teaspoon good quality vodka, like Tito’s

Combine all the ingredients. Store in a tight plastic container in the freezer.


Fresh shucked oysters with pickled red onion ice.

Freshly shucked oysters with pickled red onion ice.


When I’m in Portland, Maine, I visit one of the best oyster bars in the country: Eventide. Besides some wickedly creative dishes, they consistently have a fantastic variety of fresh oysters to choose from. And they offer a variety of “accoutrements” to go with them: anything from a red wine mignonette to kimchee ice. My favorite is the pickled red onion ice. All you need is a shot glass with a freshly shucked oyster inside, a half-shot of chilled vodka on top, and some pickled red onion ice, and you’ve got the best oyster shooter on planet Earth. I even suggested the shooter to the manager at Eventide. It has yet to make it to the menu. (But I remain hopeful!)


An oyster shooter with pickled red onion shaved ice. Bottoms up!

An oyster shooter with pickled red onion ice. Bottoms up!


I’ve managed to come up with a pretty good version of the pickled red onion ice at home, and I serve it alongside my cocktail sauce.

2 large red onions
1 tablespoon sugar
3 tablespoons apple cider vinegar


Peel and quarter the onions. Drop them in a medium-sized pot and cover with about a quart of water. Bring it to a boil and cook it down until it has reduced to a cup of concentrated onion water after straining.

Bring the strained onion water back to the stove, and on medium heat, add the sugar and vinegar, stirring. When the sugar dissolves, remove it from the heat and let it cool to room temperature before pouring it into a container and placing it in the freezer.

When it’s time to eat oysters, remove the block of red onion ice from its container, and, using a fine cheese grater, shave the ice over the top of the freshly shucked oysters and devour immediately! (It melts quickly.)


fullsizerender-5


KOHL-SLAW

Posted: April 13, 2022 in Food, garden, Recipes
Tags: , , , , ,

Kohlrabi is probably one of the most misunderstood vegetables around. Most people don’t know what to do with them. Kohlrabi is a member of the cabbage family and can be eaten raw as well as cooked.

For me, the real joy of kohlrabi is biting into a crunchy, sweet, freshly picked and peeled bulb right out of the garden. Unfortunately, much of the kohlrabi you find in a supermarket (or even a farm stand) is grown larger than a tennis ball, making it tough, woody and dry…and they usually remove all the leaves, which are delicious.

I just sowed the kohlrabi seeds in my garden, and I can’t wait for the harvest! When it’s that fresh, I make a slaw out of the leaves as well as the bulb. I use my Awesomesauce recipe as the dressing.

FullSizeRender (10)


2 kohlrabi bulbs with leaves, de-stemmed
1 carrot, peeled
Awesomesauce:
1/2 cup mayonnaise
1 tablespoon ketchup
1 tablespoon yellow mustard
1 tablespoon dill pickle relish
1/4 teaspoon garlic powder
1/4 teaspoon paprika
Pinch cayenne pepper

Combine the Awesomesauce ingredients in a bowl and keep it in the fridge.

Wash the veggies thoroughly before using. Pull the leaves off the kohlrabi bulb, and remove the stems. Grab a bunch of leaves at a time, roll them up tightly, and slice as thinly as you can into thin ribbons. Place them in a bowl. Do this with all the leaves.

Peel the thick skin off the kohlrabi bulb and slice it as thinly as you can. Then take the slices and cut thin sticks out of them. Toss those into the bowl.

I like to peel the carrot with a veggie peeler, then finely chop the slices. Toss ’em into the bowl.

Add Awesomesauce to taste and toss well.

FullSizeRender (9)

Cover and refrigerate, letting the flavors blend for a couple of hours before serving.