I’m always looking for a new way to enjoy chicken, and I found a chicken wing recipe that sounded pretty good…but it needed a few special tweaks to make it my own.


Sweet, a bit spicy, and incredibly delicious, you can’t stop eating these wings once you get started!

My next project will be to cut up a whole chicken and use this amazing glaze on an entire bird!

3 lbs. chicken wings
1/2 cup ketchup
1/2 cup unseasoned rice vinegar
1/4 cup soy sauce
2 tablespoons honey
1 tablespoon Chinese chili garlic sauce
salt and pepper
chopped scallions
white sesame seeds
chopped cilantro (optional)


To make the glaze, combine the ketchup, rice vinegar, soy sauce, honey, and chili garlic sauce in a sauce pan. Simmer it over medium heat, reducing the sauce by half. Set it aside.

Pre-heat the oven to 350 degrees.

Season the chicken wings with oil, salt and pepper. Spread them out on a sheet pan lined with non-stick foil and bake them until done, about 30 minutes.

Remove the chicken from the sheet pan and place them in a large bowl. Raise the oven temperature to 400. Pour off any fat or liquid from the sheet pan and discard it.


Add the glaze to the bowl with the chicken and toss the wings in it until they are really nicely coated. Then return the wings to the sheet pan.


Bake for another 5 to 10 minutes, until you just start seeing a little char on the edges of the wings.


Plate the wings and top them with the scallions, sesame seeds, and cilantro.


MAPLE CORN BREAD

Posted: August 23, 2023 in Uncategorized

I’ve been substituting maple syrup for honey in a variety of recipes lately, and I found that I prefer it. Doesn’t matter if it’s in a barbecue sauce, a marinade, or, in this case, cornbread. Pure maple syrup just makes the recipe better!


1 cup yellow corn meal
1 cup all-purpose flour (gluten-free flour works great, too)
1/2 cup sugar
1 tablespoon baking powder
1 teaspoon salt
1 cup milk
2 large eggs, beaten
1/2 stick unsalted butter, melted
1/4 teaspoon vanilla extract
1/4 cup real maple syrup

Preheat the oven to 400 degrees.

In a bowl, combine the corn meal, flour, sugar, baking powder and salt. Mix them together well.

In a separate bowl, combine the milk, eggs, butter, vanilla and maple syrup.

Add the wet ingredients to the dry, and stir them together until they’re just blended. Don’t overmix.

Grease an 8 x 8 pan with oil (I used avocado oil), and pour the batter into it.

Bake for 25 to 30 minutes, until golden brown.

To make this corn bread gluten-free, simply substitute a GF flour for the all-purpose flour. I used Bob’s Red Mill Gluten-Free 1 to 1 Baking Flour with great results.

And to reduce the dairy, oat milk is a good substitute for the milk. (But quite honestly, whole milk really adds to the richness and moisture of the corn bread.)

I even baked this once without the eggs (not on purpose!) and it came out a bit drier, but still really flavorful.

As I’ve mentioned previously, I love the Kona-crusted NY strip at the Capital Grille, so much so that it inspired me to make a coffee rub of my own. I’ve been using it on steaks and burgers for years. But recently, I used it on a slow-smoked pork shoulder for the first time, and it was fantastic!

I used a smaller pork shoulder, about 6 lbs., and smoked it for about 12 hours. Obviously, if you use a larger hunka meat, you’ll need more time. I prefer a bone-in shoulder over boneless. I think it gives greater flavor.

Rubbed and ready to smoke!

My coffee rub is easy to make, and I usually make a lot of it at once, since it stores well.

3 tablespoons brown sugar
1 tablespoon Kosher salt
1 tablespoon ground coffee (use your favorite)
1 teaspoon granulated garlic
1 teaspoon granulated onion
1 teaspoon unsweetened cocoa powder

I mix all the ingredients well, then rub generously on the pork shoulder before placing it a 250-degree smoker for about 12 hours. I use an electric smoker, which allows me to set the temperature and forget it, with the exception of occasionally adding hickory chips. I love just a hint of smokiness…I don’t want the rub to be overpowered by the smoke.

Perfectly smoked, with the bone easily sliding out of the shoulder.

The brown sugar in the coffee rub creates a beautiful crust on the meat, which goes really well with the pork and the barbecue sauce I make.

The barbecue sauce uses much-needed vinegar. It cuts through the rich fattiness of the pork, and is absolutely delicious.

2 cups ketchup
3/4 cup water
6 tablespoons cider vinegar
6 tablespoons white vinegar
6 tablespoons brown sugar
3 tablespoons Worcestershire sauce
1 tablespoon chili powder
2 teaspoons salt
2 teaspoons black pepper
1 1/2 teaspoons cumin

Mix all the ingredients in a saucepan and simmer until the flavors have blended, about 20 minutes. Remove from heat and cool to room temp. If you store it in an airtight container in the fridge, it’ll stay good for a few months.

A beautifully smoked pork shoulder, amazing barbecue sauce…what more do you need for an amazing pulled pork sandwich except a toasted brioche bun and perhaps some of my world-famous home fries on the side?

The home fries? That recipe is for another blog!

TUNA TARTARE

Posted: August 17, 2023 in Uncategorized
Tags: , , , , , ,

For me, the only way to eat tuna is raw, and not just sushi or sashimi. I’m not  a fan of what most restaurants do: serving tuna seared on the outside and rare on the inside. You can tell the quality of the tuna just isn’t there. It usually needs to be drowned in soy sauce to have any taste at all.

So getting my tuna fix often means I’ve got to prepare something at home.

If you’re paranoid about parasites, tuna is probably the safest fish to eat raw. I buy my tuna wild-caught and frozen from reputable sources. Occasionally, I’m lucky enough to buy it fresh from the fisherman, but that is a rare treat.

Technically, fish needs to be frozen at a temperature of -4°F (-20°C) or below for 7 days, for parasites to be killed. In the United States, this is required by law of all fish served at sushi restaurants, with tuna being the only exception.

Most marinades or ceviches use lemon or lime. I enjoy the freshness of grapefruit, and it really works here. This recipe was literally created by opening my fridge and pantry, and grabbing whatever looked good.


fullsizerender-10

1 lb. excellent quality raw tuna
juice of 1 grapefruit
1 teaspoon grapefruit zest
2 teaspoons low-salt soy sauce
1/2 teaspoon wasabi powder
1/2 teaspoon hot pepper sauce (I use Frank’s Red Hot)
1/2 teaspoon black pepper
1/2 teaspoon sesame oil
1/4 teaspoon sea salt (I use Fleur de Sel)
1 tablespoon chopped scallions, green part only
sesame seeds (optional)
cubed avocado or plain guacamole


If I’m starting with frozen tuna, I allow it to thaw just enough so I can cut it into small cubes easily. I place the cut tuna on paper towels to soak up excess moisture, and keep it in the fridge.

In a bowl, I combine all the other ingredients, except the sesame seeds and avocado. I add the tuna to the bowl, and mix everything carefully, putting it back in the fridge to marinate for an hour.

When I’m ready to serve, I place the tuna on a plate. (If it’s very runny, I use a slotted spoon.) I top it with a sprinkling of sesame seeds and serve with fresh cubed avocado, or even plain guacamole.


fullsizerender-6


My daughter and I recently had our quarterly “fodder/dodder dinner” at our Providence Capital Grille. Their signature cocktail, the Stoli Doli, reminded me it was time to make a new batch of what I like to think is an upgraded version: my Velvet Elvis.


A Stoli Doli is simply Stoli vodka that has been infused with fresh pineapple. If you sit at the bar at the Capital Grille, you won’t be able to miss the very large jar of freshly-cut pineapple pieces swimming in vodka. They literally pour it “from the tap,” and serve it straight up, like a martini, or on the rocks. It’s delicious, and I’ve certainly had my share of them.

I decided to make my own at home one day, to serve to my friends at an upcoming party. But to my disappointment, I didn’t have any Stoli vodka in the house. (An embarrassment to most Lithuanians.) But…I found a bottle of Stoli Vanil, the vanilla-flavored vodka, and it was a real game-changer! I used that instead of regular Stoli and I came up with a sweeter, smoother drink that is now legendary among my friends.


VELVET ELVIS

2 ripe, sweet pineapples, peeled, cored, and sliced
1.75ml Stoli Vanil

Find a gallon-sized glass jar with a lid. Peel, core and slice the pineapples and drop the pieces in the jar. Pour the vodka in, mix well, and seal the jar. Keep it at room temperature for 7–10 days, giving it a gentle shake every day.

After 7–10 days (don’t worry…a little longer won’t hurt anything), strain it, squeezing the pineapple pieces to get every bit of liquid out. Discard the pineapple pieces. (As much as you might think they would be fun to munch, they’ve given up all their flavor to the cocktail, and taste terrible!)

Keep the Velvet Elvis refrigerated. Serve with rocks (or 1 big rock!), or shaken and poured into a martini glass.


As a martini, or on the rocks!

GREAT ONION RINGS AT HOME

Posted: August 10, 2023 in Food, frying, Recipes
Tags: , , ,
If you look online, there are a  million ways to make onion rings. So, in doing my research, my first step was to decide how I wanted them. Did I want a big, thick batter? Or something extremely light? Or something somewhere in the middle?
I’m not a fan of onion rings that have more batter than onion. After looking through dozens of recipes, I finally came up with one on my own that really satisfied my craving for onion and also a craving for a great crunch.
The set-up requires four trays, and lots of messy dunking before it goes into the oil. But it’s all worth it in the end!
I have a deep fryer, but the basket in it is small, so I can’t fry as many onion rings at one time as I’d like. So using a larger pan with a shallow pool of oil was the answer: it allowed for more onion rings to be fried in a single batch.
Onions, sliced about 1/4″ wide (I like using Vidalias)


In the first pan..
2 raw eggs, scrambled
In the second pan…
1 cup self-rising flour
In the third pan…
2 more raw eggs, scrambled
In the fourth pan…
2 cups fine breadcrumbs
1 teaspoon salt
1 teaspoon granulated onion
1 teaspoon granulated garlic
pinch of dried oregano (optional)
I like to fry with peanut oil or grapeseed oil, so I pour an inch or two into a large pan and heat it to 340°, using a thermometer.
I peel the onions and cut them into quarter-inch wide slices, breaking them up into rings. (If a couple of rings of onion stick together to form a thicker ring, I don’t have a problem with that!)
Once that’s done, the procedure is really simple: dunk the onion rings in the first pan with the egg, coating them well. Then dunk them into the second tray with the self-rising flour, shaking off any excess. Then dunk them into the third tray with the egg, making sure it’s completely coated. And finally, dunk them into the fourth tray with the seasoned breadcrumbs, again, shaking off any excess.
Drop the onion rings into the hot oil and be sure to flip them so they cook on both sides. Cook until they’re golden brown. Place them on a sheet pan with a metal rack to cool.

I experimented with three variations. The top brown ones follow my recipe. The ring on the bottom right is dipped in egg and the flour mix only. The ring on the bottom left is dipped in egg, then the flour mix, back to the egg, and the flour mix again. The breadcrumb procedure is still my favorite way to go. Great crunch!

The price of lobster has skyrocketed. But sometimes, you can find a sale. That’s the time to treat yourself!

Nothing says summer here in New England like a lobster roll. It’s certainly easy to go to a clam shack or seafood restaurant to get one, but nothing beats making one yourself.


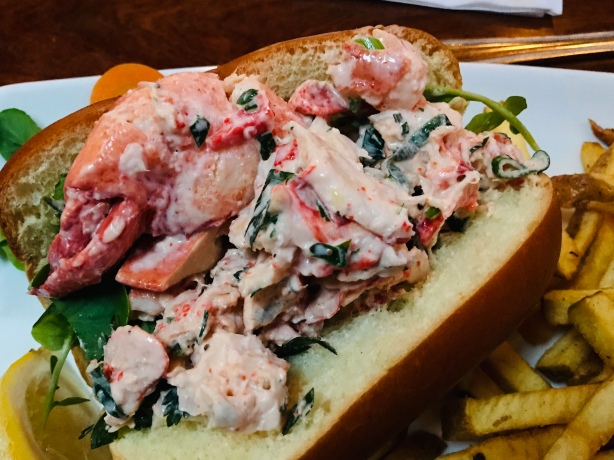
The lobster roll at one of my favorite restaurants: The Back Eddy in Westport, Massachusetts. Delicious and fresh. But it breaks one of my cardinal rules about lobster rolls. (Go to the bottom of the page.)


When I make my own lobster rolls, freshness is key. I always start with live lobsters.


A view of the Sakonnet River from the back of Gary's lobster boat, the Edna Mae

A view of the Sakonnet River, here in Rhode Island.


Once you’ve bought your live lobster, the next step is to cook it right. Some people steam and some people boil. I’ve always been a boiler myself. I fill a large pot half-way with water and add sea salt. I bring it to a rolling boil before the lobsters go in. And then I do the math…

I boil my lobsters for 10 minutes for the first pound. I add 3 minutes per pound for each additional pound thereafter. For example, a 2-pound lobster should boil for 13 minutes and a 1 1/2-pound lobster should boil for 11 1/2 minutes. And if I’m boiling more than one lobster, the same rule applies: 3 2-lb. lobsters = 6 pounds. So 10 minutes for the first pound, plus 3 minutes x 5 for each extra pound (that’s 15) for a total of 25 minutes. (These times are for hard shell lobsters. I reduce the boiling time by 3 minutes if I’m cooking soft-shell lobsters.)

Remember, you’re going by total weight of all the lobsters, because the more you have, the longer it takes the water to return to the boil once you put them in.

A lobster boil is where you really see what your stove is made of. If you’ve got gas, you should have no problem. But many modern electric stoves are absolutely awful when it comes to cranking out enough heat to boil large quantities of water quickly. If yours is like this, you might want to go with steaming instead of boiling.


Lobster catch LTL


A larger lobster is not always better. My uncle used to buy the largest lobster he could find, and it was impressive when he placed at the center of the dinner table. But the meat was like rubber. And personally, I felt bad for the old lobster that made it that far in life. His last days should’ve be in the ocean, not on a plate.

My maximum lobster size is 2 lbs. At that weight, you have the perfect ratio of meat-to-shell…with lots of delicious meat that is still sweet and tender.

After the lobsters have been removed from the pot and have cooled for a few minutes, I get to work: cracking the claws and tail and removing every bit of beautiful meat I can find. Lobster lovers will tell you that the legs have some meat in them and that the tomalley (the green liver and pancreas) and roe (eggs) are delicacies not to be missed. For the purpose of making lobster salad, I don’t use these parts. But I do save the tomalley and roe for a separate treat…and I save all the legs and cleaned empty shells for lobster stock.

Cleaning lobster legs is easy: simply remove all the legs from the body and place them flat on a cutting board. Grab a rolling pin, and one at a time, roll the pin over the lobster legs, starting at the claw end and working your way up. Like a tube of toothpaste, the meat will squeeze right out of the leg!


Lobster roll LTL


Now for the important stuff. What goes in a lobster roll, and more importantly, what doesn’t… I have very strong opinions in this matter.

First, there should NEVER be anything green in a lobster roll! No celery, no pickle, and it certainly shouldn’t be sitting on a bed of lettuce! Nothing should be crunchy in a lobster roll! The magic is in the texture of the perfectly cooked lobster meat. Don’t mess with it!

NO paprika or Old Bay seasoning!

A pinch of celery salt? Yes!

Mayonnaise? Only Hellman’s!

White pepper, not black, and just a touch.

Salt? A pinch of Fleur de Sel.

And the secret weapon to bring out all the flavors: the tiniest squeeze of fresh lemon juice…not enough to give it lemon flavor…just to brighten the taste.

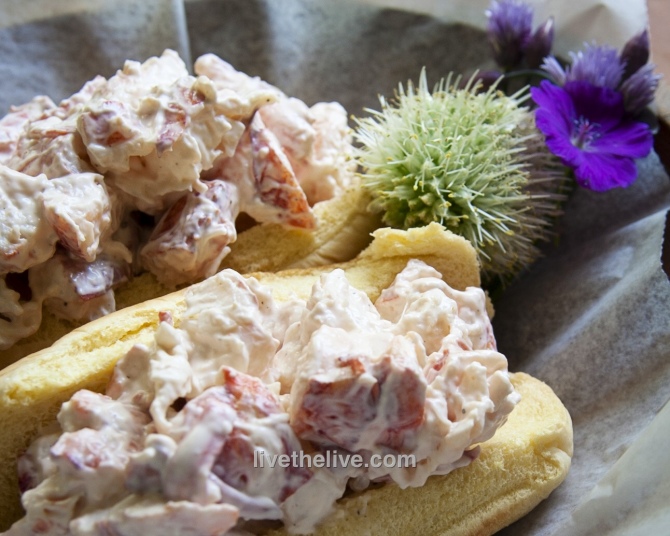
As for the roll, you can’t go wrong with Martin’s potato long rolls: soft and squishy straight out of the bag, or for extra decadence: lightly grilled with a little melted salted butter brushed on.


I love watermelon margaritas, especially when they’re made with the sweetness of fresh watermelons.


All you need.


Many recipes add a lot of sugar: sugar on the rim of the glass as well as sugar in the margarita itself. I think that a ripe watermelon and the Cointreau add enough sweetness, so I leave any extra sugar out of my recipe.


4 cups cubed, seeded watermelon
4 oz. (or more!) tequila (I like Patron silver)
3 tablespoons fresh squeezed lime juice
1 oz. orange liqueur (I like Cointreau)


Combine the watermelon, tequila, lime juice, and orange liqueur in a blender. Process until it’s smooth. (If I wanted to strain the watermelon juice before making the cocktail, I’d put it in the blender by itself first, whizz it up, then strain. But I’m totally OK with making this as easy as possible. Everything in the blender all at once!)

Pour it into margarita glasses filled with ice. Garnish with a lime wedge.


Watermelon margarita, aerial view. (No drone required.)


BEET AND QUINOA SALAD

Posted: August 1, 2023 in beets, Food, Recipes
Tags: , , , ,

Why was it that I could only find a great beet salad in a restaurant? Was there some secret to making one? Well, after some experimentation, I came up with a beet salad that I really enjoy…and it’s easy to put together ahead of time if you have guests coming over for dinner.

Sometimes I skip the arugula and just go for a bowl like this…

2 cups cooked quinoa
1/2 lb. beets, cooked and sliced
1/2 cup extra virgin olive oil
1/2 cup red wine vinegar
1 teaspoon sugar
1/2 clove garlic, through a press
1/2 teaspoon salt
1/4 teaspoon ground black pepper
1 scallion, finely minced
2 cups baby arugula (optional)
5 oz. feta cheese, crumbled

Prepare the quinoa according to the package instructions. I like to substitute half of the water with homemade chicken stock.

While the quinoa is cooking, combine the olive oil, vinegar, sugar, garlic, salt and pepper in a separate bowl.

Once the quinoa has cooked, place it in a bowl and add half of the dressing, mixing gently with a fork to fluff up the quinoa. Place it in the fridge to cool completely.

I like to use the product LoveBeets, available in any supermarket. The beets come fully cooked and peeled, ready to slice.

Chop the beets to the size you like and place them in the bowl of quinoa. Add the scallions, arugula and cheese. Toss to combine.

When the mixture has cooled down, give it a taste and add more of the dressing if needed. This tastes great at room temperature as well.

EASY FRIED GULF SHRIMP

Posted: July 29, 2023 in Uncategorized

I love fried shrimp. It’s like seafood candy. And I’ve got a really easy method of making it.

For me, the secret to great fried shrimp is a light batter. I’m not crazy about the heavy, almost pancake mix-like batter that is used in some restaurants for shrimp or onion rings.

As I looked through many recipes, I found that the secret to a lighter batter is rice flour. I didn’t have any in my cupboard per se, but then I found a bag of Bob’ Red Mill Gluten_free 1 to 1 Baking Flour, which turns out to be mostly rice flour. I decided I would use that, scooping a couple of cups of it into a bowl.

My go-to seafood seasoning is Chef Paul Prudhomme Seafood Magic. I added a couple of tablespoons of that to the flour, and mixed it well.

In a separate bowl, I scrambled two eggs.

I use only wild-caught American shrimp, never the nasty stuff from Asia. Thawing the shrimp is simply a matter of placing the frozen shrimp in a bowl, and covering them with cold water (never warm) and in a couple of hours, they’ve thawed out. Then I drain the bowl, and dry the shrimp with paper towels.

In a pan on the stove, I have about an inch of grapeseed or avocado oil, heating it to about 325°, using a thermometer to check.

Cooking in batches, I put about a dozen shrimp into the eggs, coating them well, then transferring them to the flour mixture, coating them well again, and shaking off the excess. Then I carefully put them in the hot oil. About 30 to 45 seconds on each side is all the shrimp needs to be perfectly cooked. I drain them on paper towels, and they are ready to eat!

I love a little remoulade sauce to go with my fried shrimp, so I grab some mayo and Dijon mustard, and mix them in a bowl to my desired ratio. (Sometimes I like a lot of mustard…other times, not so much.) To this, I add another great “cheat:” Tony Chachere’s Original Creole Seasoning–again–to taste.

Now I’m ready to eat!