I’ve seen the Southern Cross for the third time. That’s it on the right… Kind of looks like a kite. The two stars on the left are Alpha Centauri and Beta Centauri.
I’ve seen the Southern Cross for the third time. That’s it on the right… Kind of looks like a kite. The two stars on the left are Alpha Centauri and Beta Centauri.
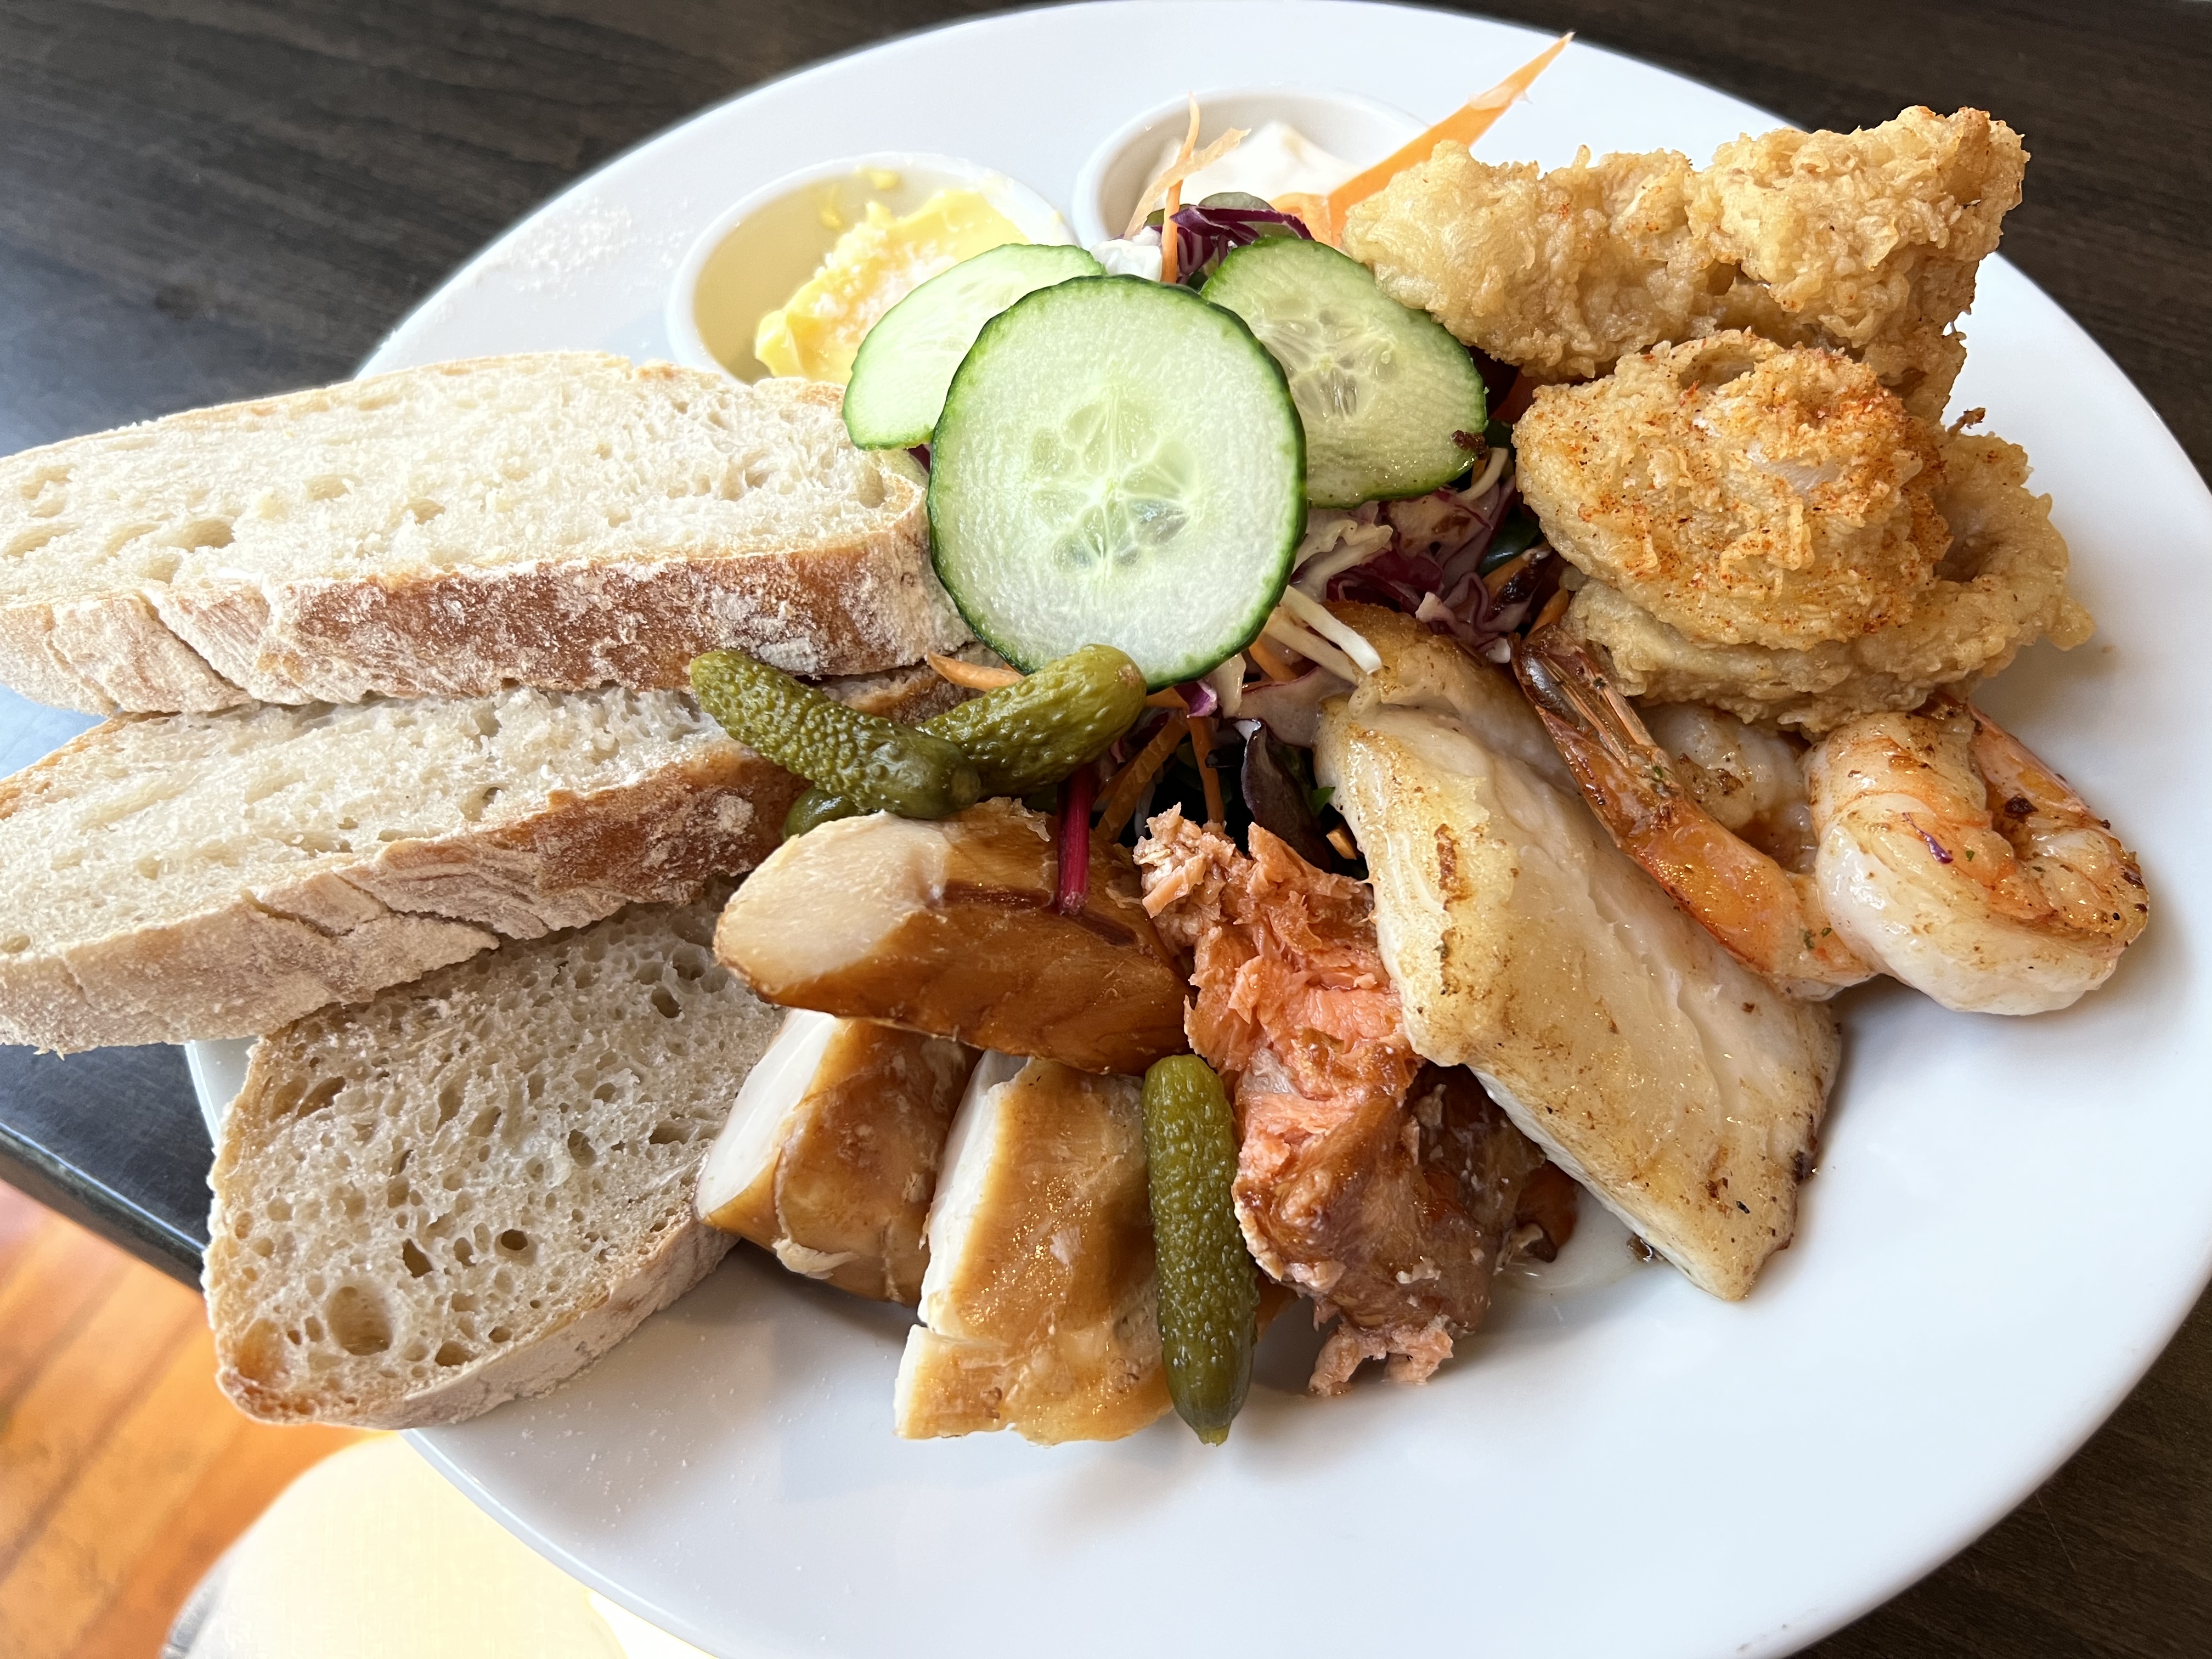
Fish plate…2 kinds of smoked fish: salmon and warehou. Grilled tarakihi. Garlic prawns. Crispy calamari. Cornichons, caper mayo, salad and ciabatta bread. I will have this again!

On the road today, I saw a homemade hobbit house. The “real ones” are on the north island. But I like this one.

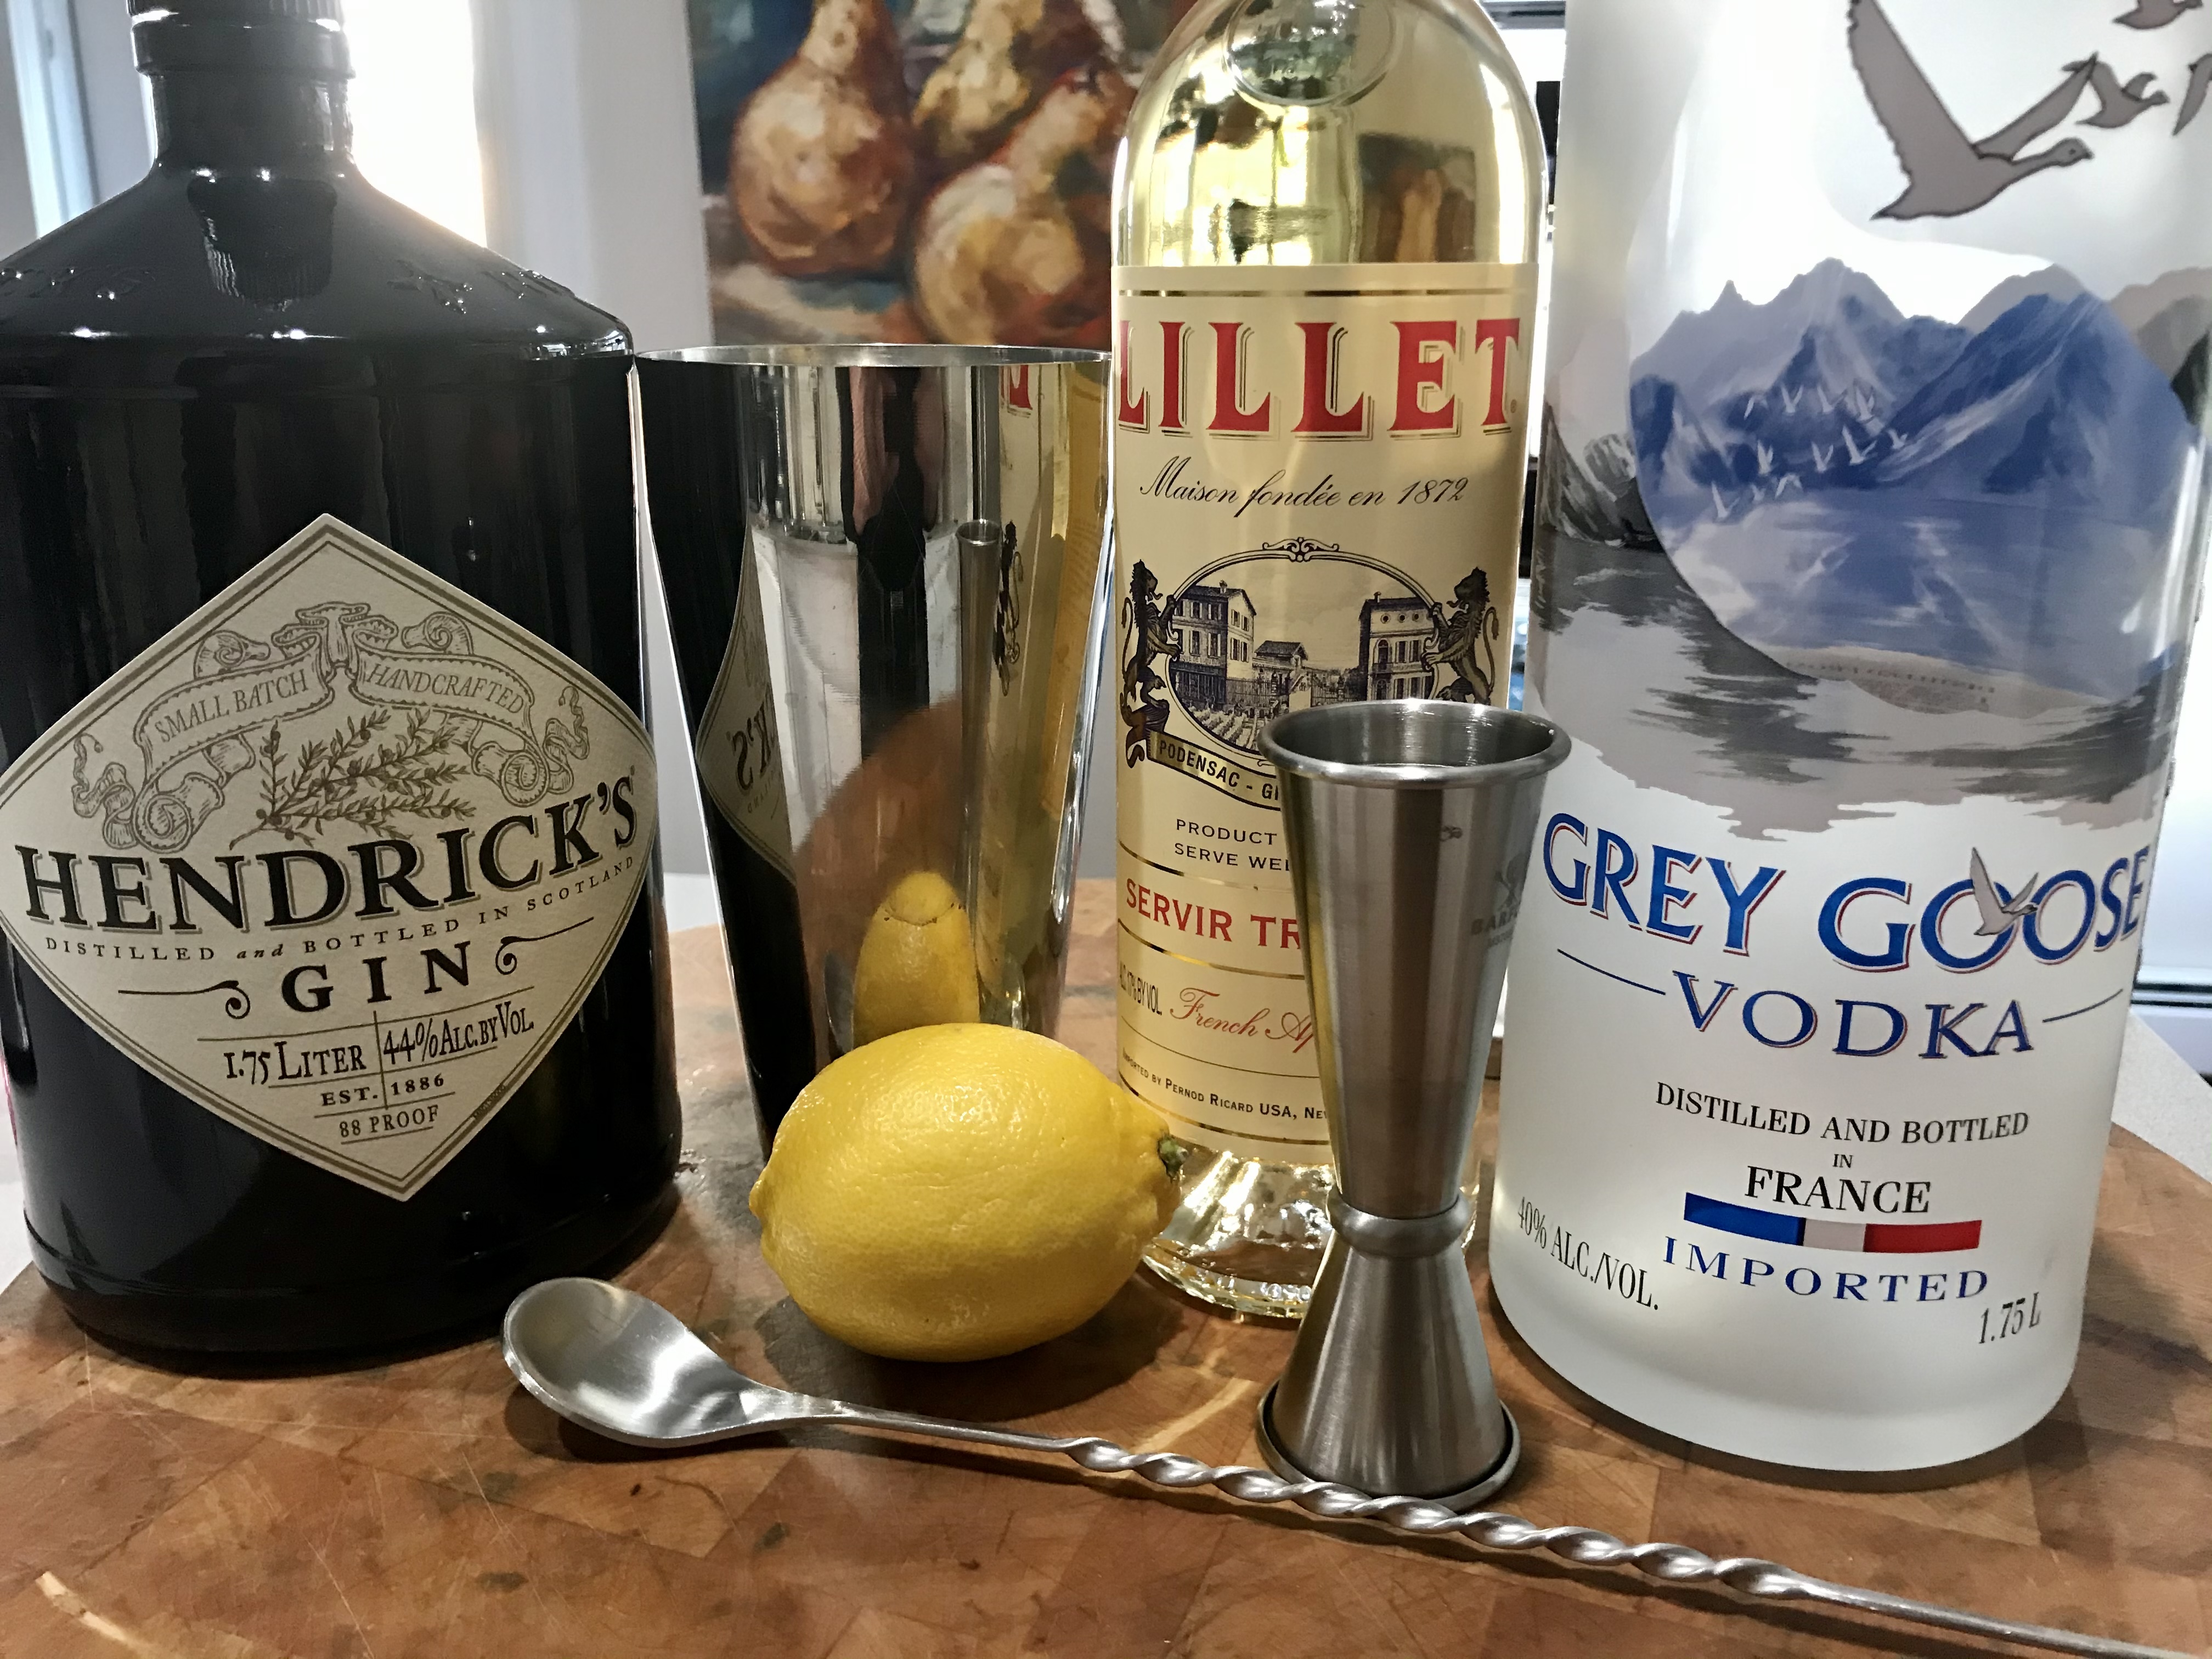
My last recipe post for a while, as I head off on a journey to try some New Zealand oysters…as well as a lot of other seafood!
My dog, Fellow, turned 13 on November 5th. He stood by me in the kitchen while I created this dish, so I decided to name it after him.

The original Oysters Rockefeller recipe is a closely guarded secret, created in 1899 at the famous New Orleans restaurant Antoine’s. Jules Alciatore, the son of founder Antoine Alciatore, developed the dish when they had a shortage of escargot, substituting locally available oysters. Antoine’s is still the only place in the world where you can be served the original Oysters Rockefeller recipe.

Antoine’s is the oldest restaurant in New Orleans.
If you Google “Oysters Rockefeller,” you’ll find hundreds of recipes that claim to be the real thing, or close to it. But here’s the catch: most of them use spinach in the dish, and the folks at Antoine’s insist there was never any spinach used in the original recipe. So, before attempting my own version, I decided I would leave spinach out of my recipe…and I like it better that way.

The original Oysters Rockefeller served at Antoine’s. I have to say I wasn’t all that impressed with it.
My version, my Oysters Rock-a-Fellow, is cheesier and gooier than the original. I use large, meatie oysters like Wellfleets from Cape Cod or local Rhode Island oysters. And, as you’ll see below, I can make the cheese portion of this dish the day before, saving myself a lot of time on the day I want to serve it.
So, if you’re doing this the day of…start here. If you’re doing it the day before, start with the cheese mix below, then come back to the oysters the next day.
Scrub the oysters under cold water to get them clean.
Here’s how I make opening the oysters easier. (Plus the hot water cleans the oyster shells nicely.)
In a large pot, pour in enough cold water to fill the pot about halfway. Turn the heat on high and bring the pot to a boil.
The moment you reach a boil, turn the heat to medium and drop in 6 oysters, letting them bathe in the liquid for only 30 seconds. Scoop them out with a slotted spoon and place them in a bowl to cool. If the oysters open, they’ve been in there too long! You want them to stay closed. Do the same with the rest of the oysters, 6 at a time. Once all the oysters have had their 30 seconds, move the oyster bowl to a cutting board. Discard the liquid in the pot.
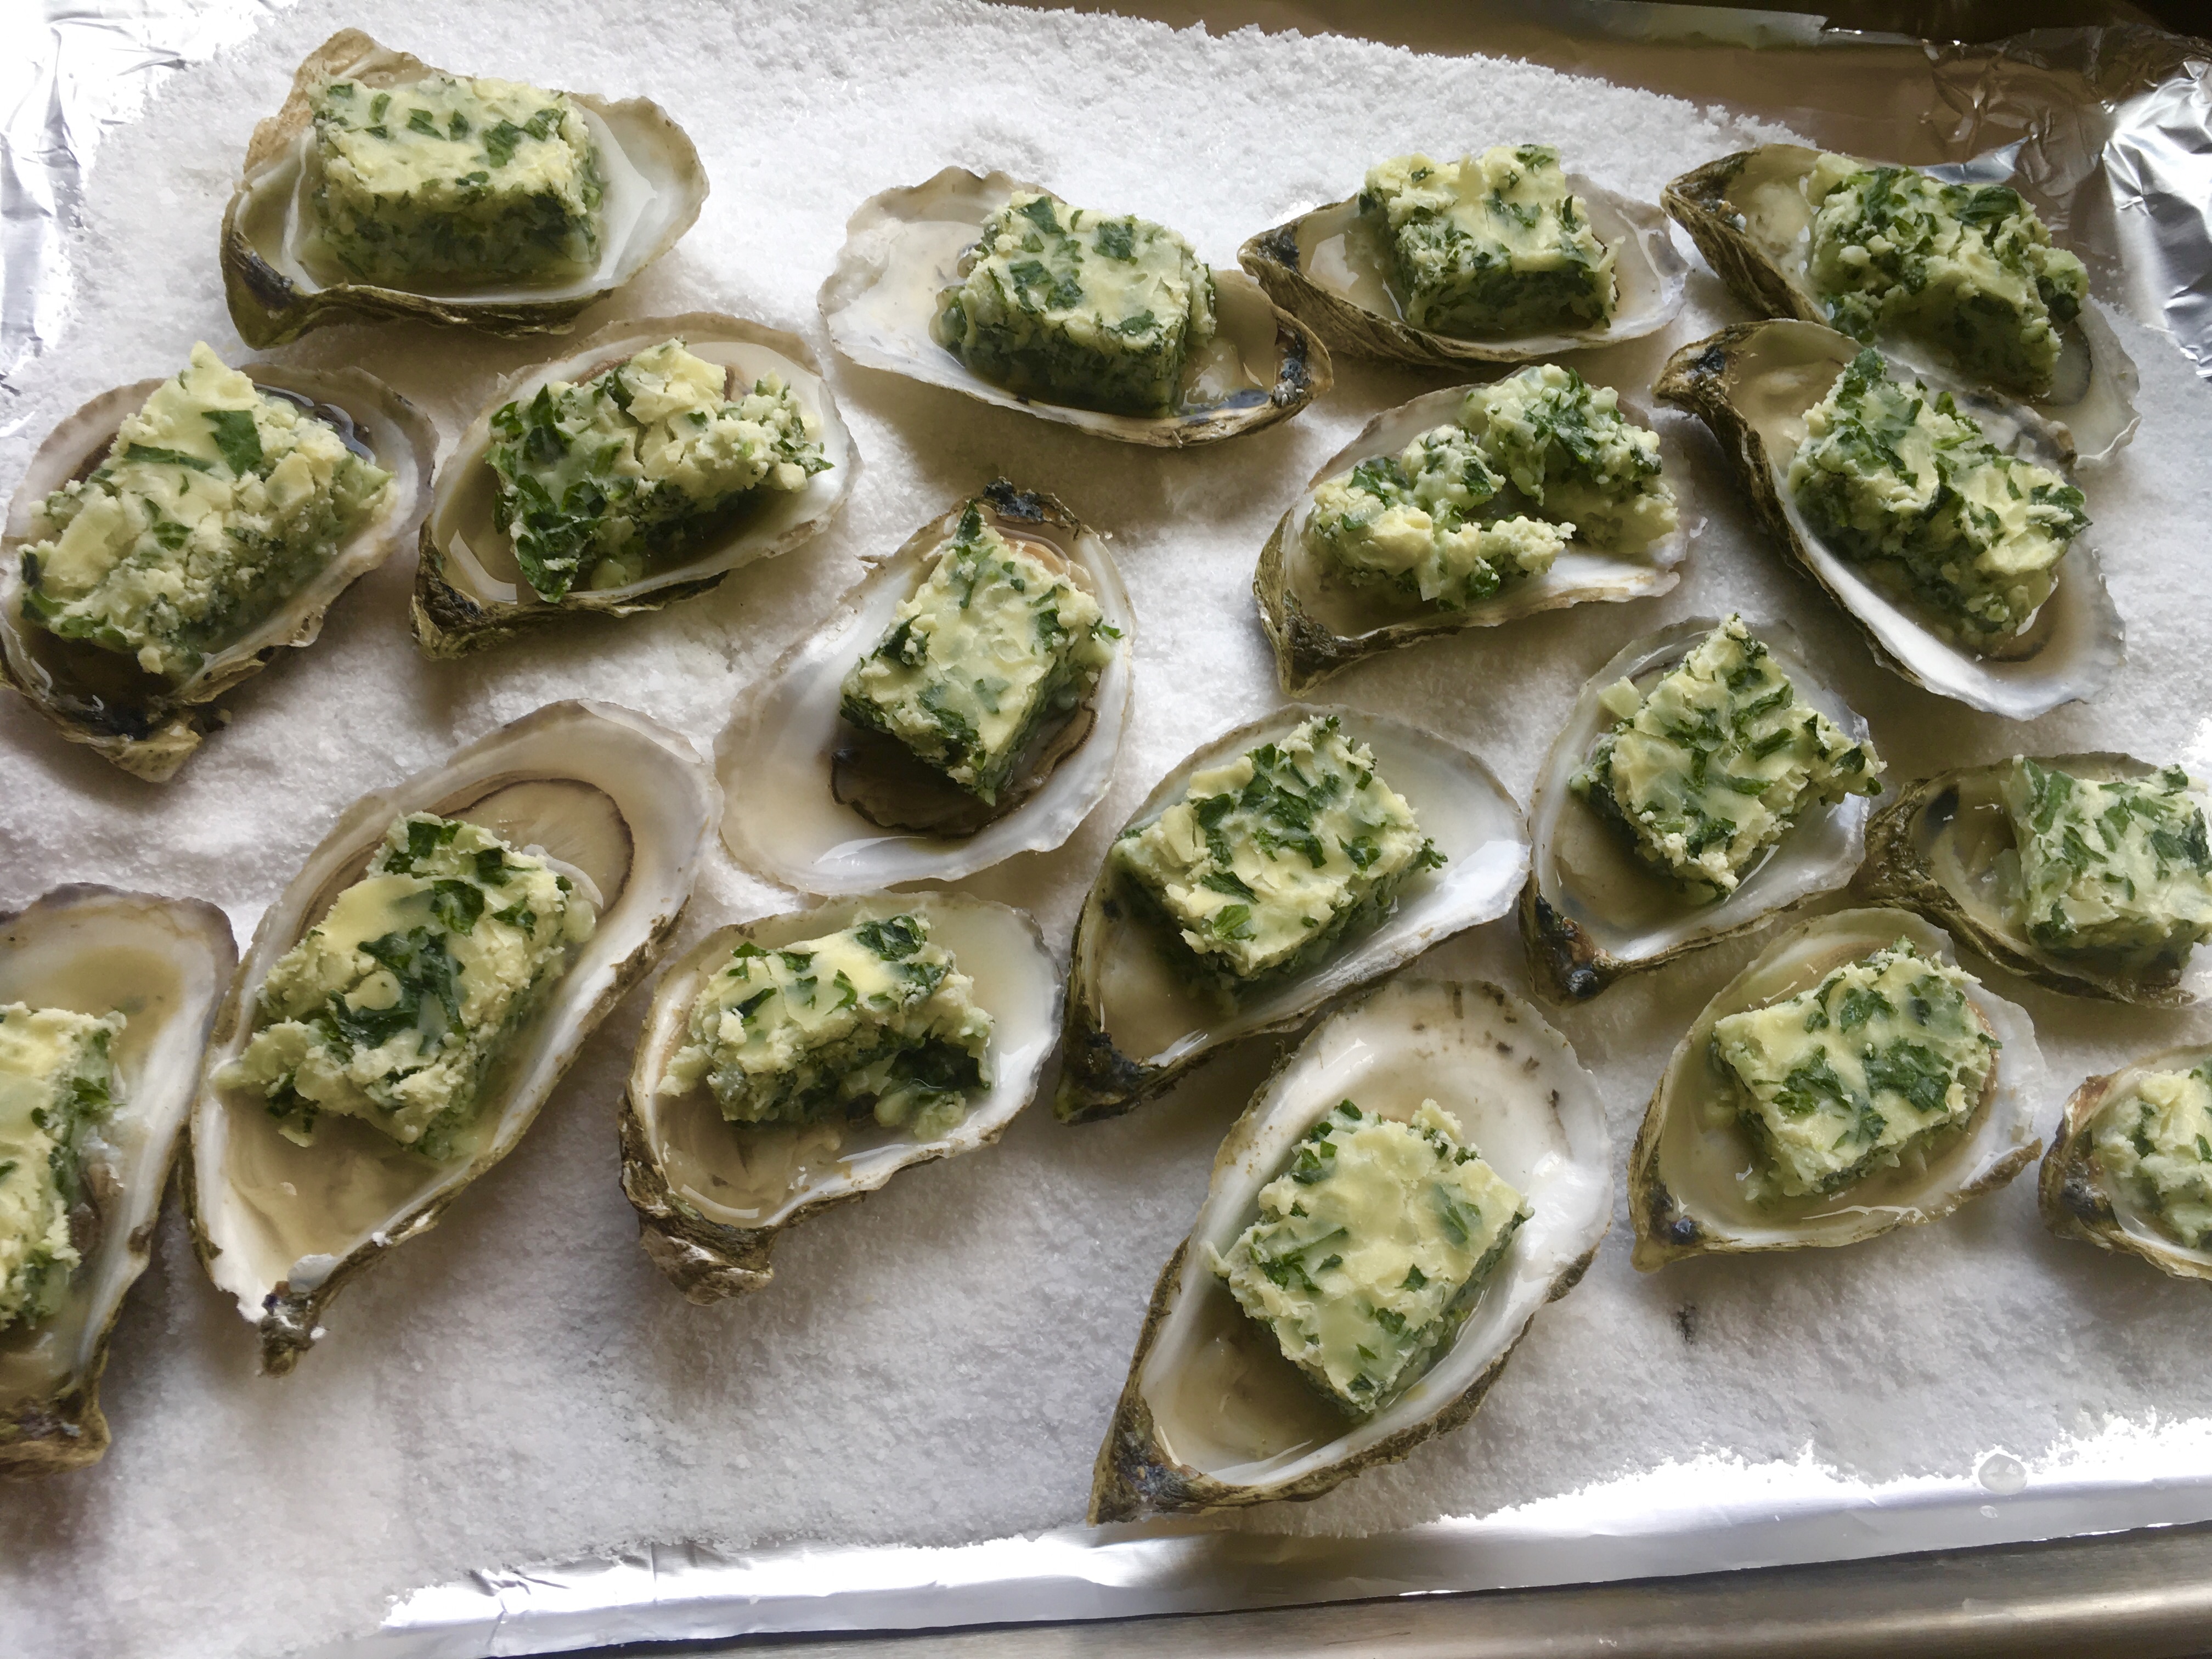
Pour Kosher salt onto a large sheet pan lined with foil.
Once the oysters have cooled enough for you to handle, carefully remove the top shell off each one (there are plenty of videos on You Tube to show you how this is done if you need help), discarding it, and lay the oysters on the bed of salt in the sheet pan, trying not to spill any of the precious oyster liquor inside. The salt holds the oysters in place.

Salt holds the oysters perfectly in place.
Pre-heat the oven to 425 degrees.
In a sauce pan, melt the butter and then add the onion and garlic. Saute until the onion is translucent.
Add the milk, season with salt and pepper, and then add the arugula a little at a time, letting it wilt before adding more. Use all the arugula.
Once all the arugula is in the saucepan, sprinkle the cheese in a bit at a time, letting it melt, until you’ve used all the cheese: the cheddar and then the mozzarella.
Pour the gooey cheese mix into a lasagna pan, smooth it out with a spatula, and place it in the fridge to cool.

You can do this all the day before, because the cheese mix hardens and becomes easy to cut into cubes with a sharp knife.

Then simply place a cube of the cheese mix on each oyster…
…sprinkle a little bread crumb on top…

…and bake in the 425-degree oven for about 8–10 minutes until they’re golden and bubbly.

Whoever said that cheese and seafood don’t go together, never tried this!
This dish can be gluten-free if you use gluten-free breadcrumbs. I buy Udi’s gluten-free frozen bread for my breadcrumbs. I take the loaf, toast the slices, then put them through the food processor. The taste is far better than buying pre-made GF breadcrumbs. I use regular breadcrumbs if I don’t need to worry about gluten.
Spaghetti alla Carbonara and Fettuccine Alfredo are my daughter’s two favorite pasta dishes. When she couldn’t decide which one she wanted for dinner one night, I decided that she’d get both! (Yes, I spoil her rotten!)

The addition of chicken and peas made for a more balanced plate. This is now one of my go-to dishes when guests arrive, since many parts can be prepared ahead of time.
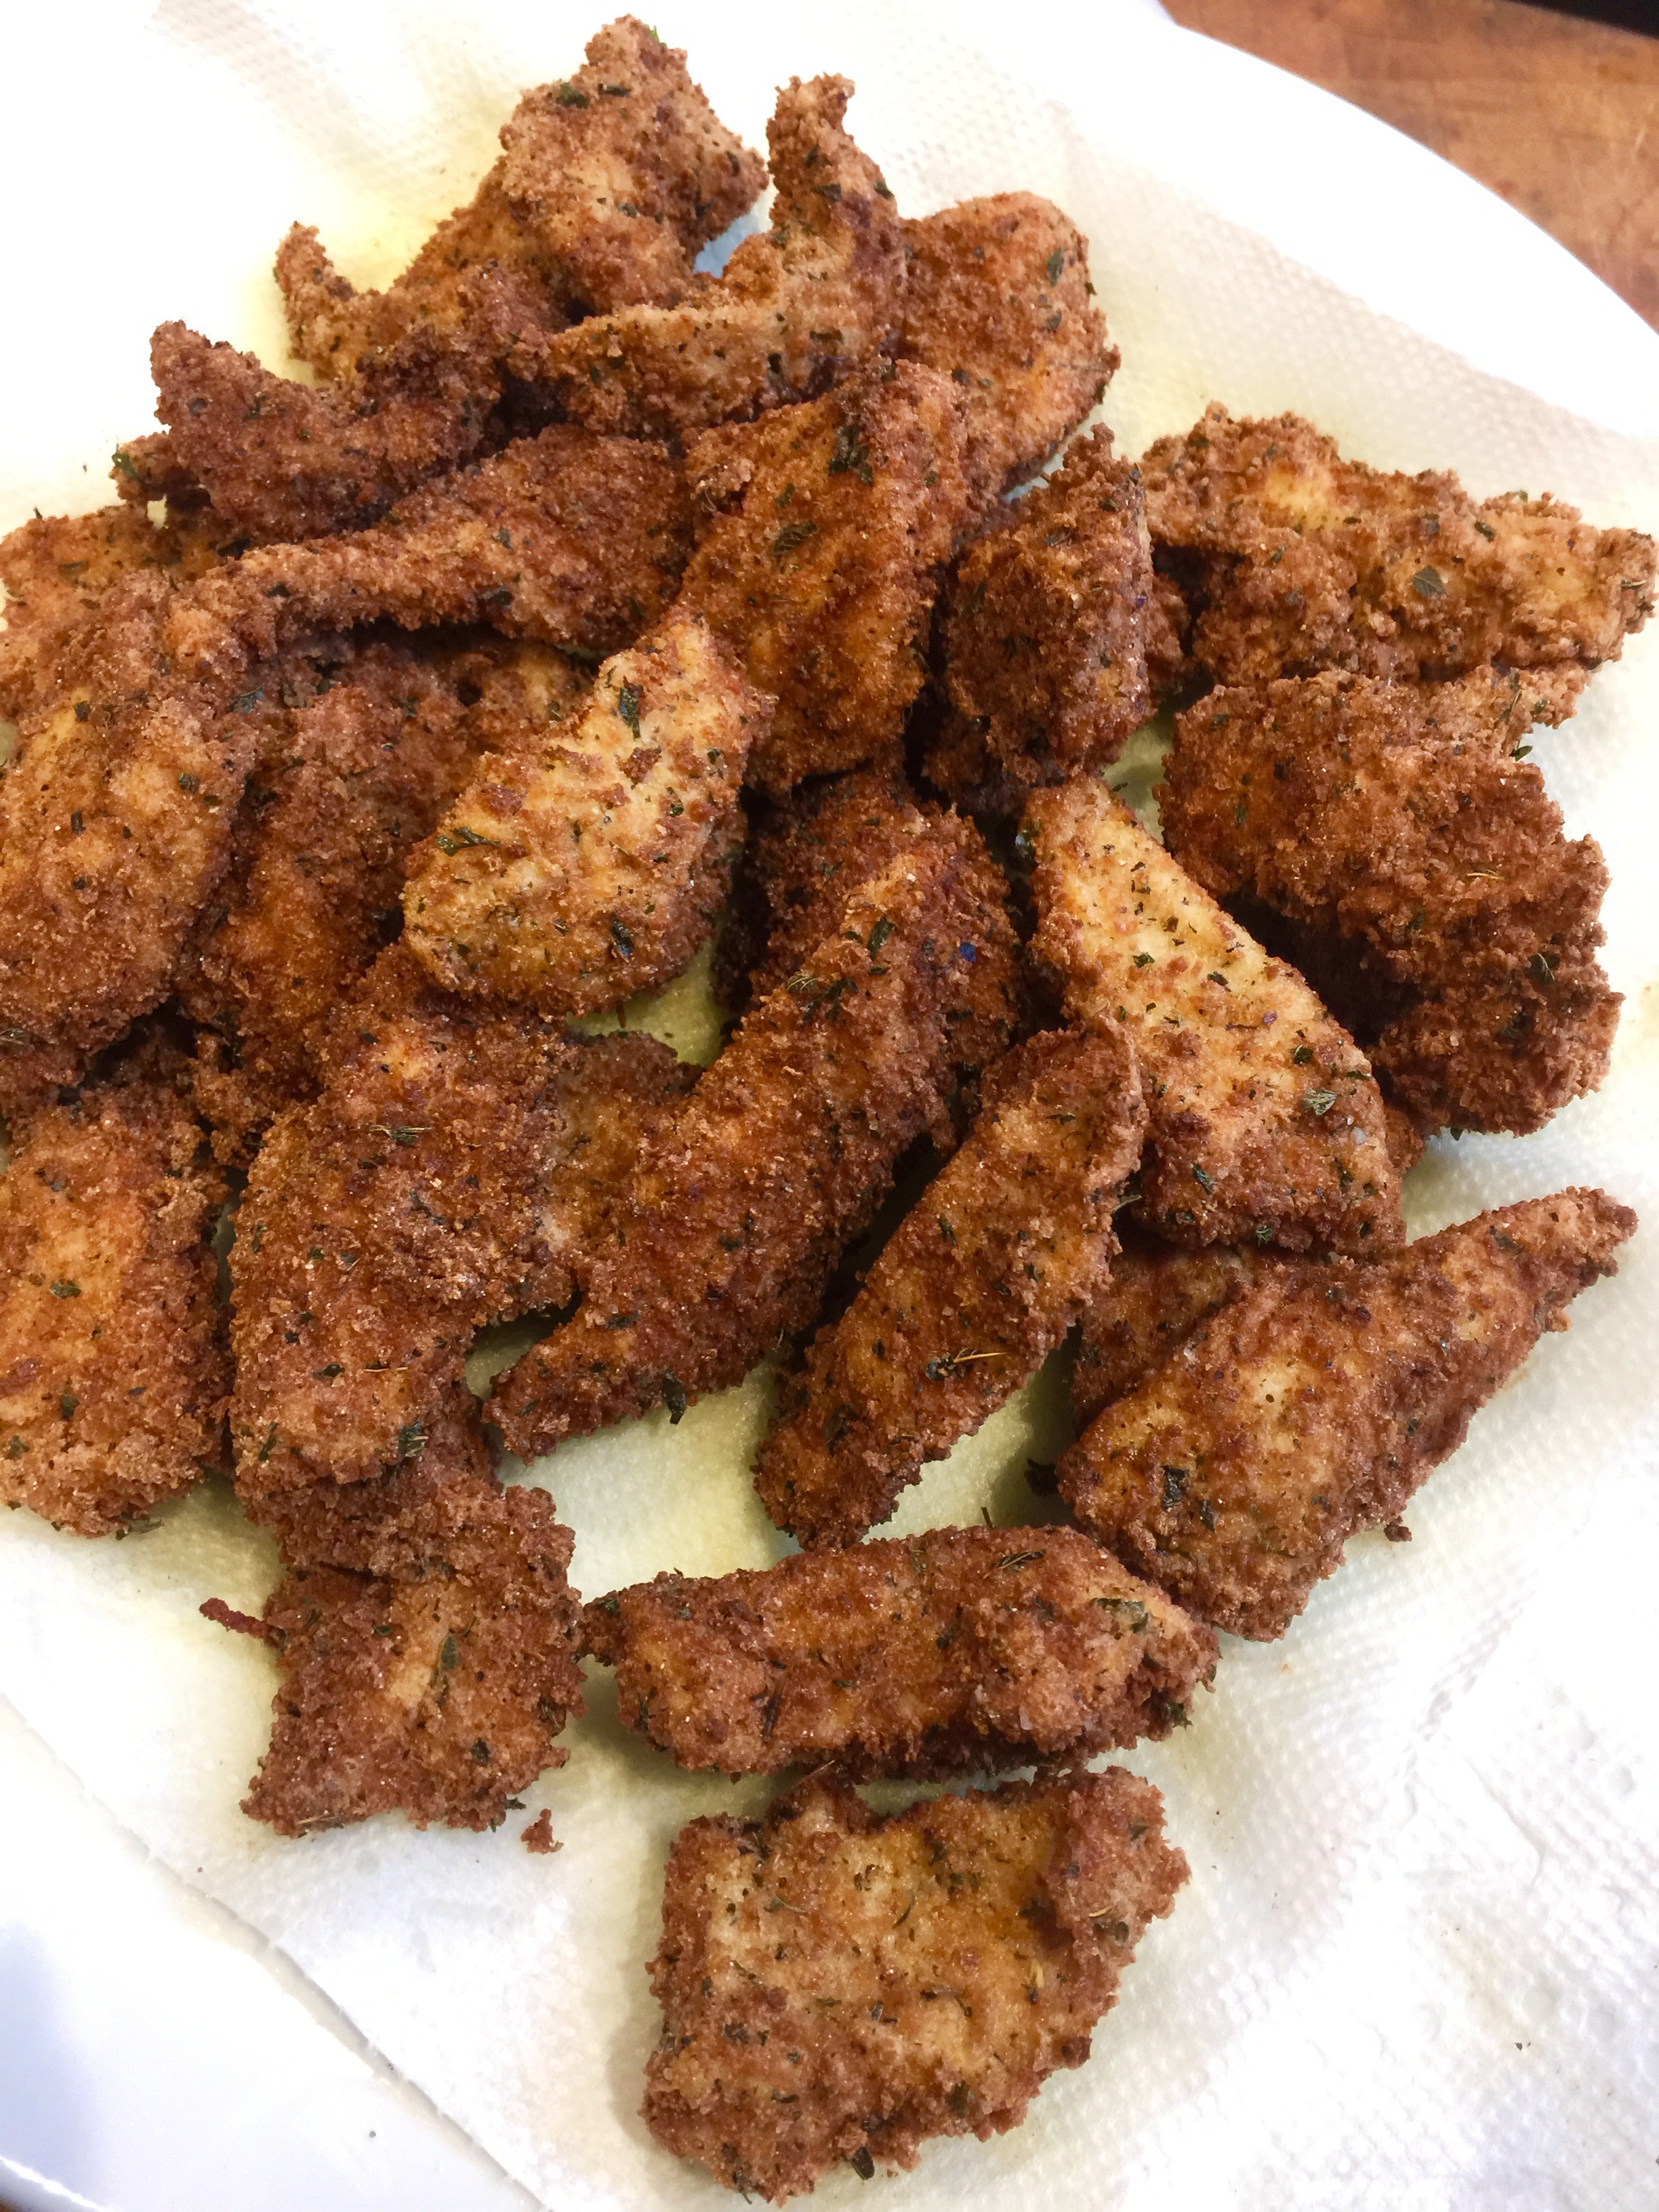
Start with the chicken…
The breading for the chicken is bread that I’ve toasted, crumbled and put into a food processor to make breadcrumbs. I get a lot more flavor this way than using store-bought breadcrumbs from a can. I add flour to it to lighten it up.
For a gluten-free version, I buy Udi’s gluten-free bread, toast it, and put it in the food processor to make delicious GF breadcrumbs. Then I add it in the same proportions as listed in this recipe with GF flour.
Scramble the egg in a bowl. Cut the chicken into pieces, and add them to the egg, making sure they get evenly coated. Set aside.
In another bowl, combine the bread crumbs, flour, parsley, oregano, basil, garlic, onion, salt and pepper. Set aside.
Fill a pan with about an inch of olive oil. Heat to medium-high, for frying.
In batches not to overcrowd the pan, take the chicken pieces out of the egg and toss them in the bread crumb mixture, shaking off the excess. Place them carefully in the hot oil and fry on both sides until golden. Since they’re small pieces, they should cook all the way through easily. Drain on a plate covered with paper towels. Do this with all the chicken and set it aside. Try not to eat it all before you make the rest of the dish! (This chicken can also be eaten as is–these are my daughter’s favorite nuggets–or used with tomato sauce and mozzarella cheese to make a delicious chicken parmigiana.)

The carbonara factor…
Many recipes for Spaghetti alla Carbonara use pancetta or bacon. But the original recipe calls for guanciale: cured (but not smoked) pig jowls, or cheeks. It’s easy enough to find in a good Italian food store, but I cure my own. I buy raw heritage Berkshire pork jowls from a farm that raises the pigs humanely, and cure the jowls for about 3 weeks in a combination of salt, pepper and fresh thyme leaves. Then I rinse them, pat them dry, and cut them into portion-sized pieces, wrapping them individually and freezing until I need them. It’s a lot of work, but to me, totally worth it.
If the guanciale is frozen, let it thaw just a little, then cut it into the smallest cubes you can manage. Place it in a pan and cook them until they’ve browned and crisped beautifully. Keep an eye on the pan, as guanciale can burn easily. Use the fried meat bits for this recipe and save the fat for flavoring a future dish! Set it aside.
The Alfredo sauce…
Despite what you get in crappy restaurants like Olive Garden, Alfredo sauce should not be runny or soupy. It should cling to the pasta and be rich in flavor. My Alfredo sauce is based on a recipe from the legendary Italian cookbook author, Marcella Hazan.
Put 2/3 of the cream and all the butter in a large saucepan that will later accommodate all the pasta. Simmer over medium heat for less than a minute, until the butter and cream have thickened a bit. Turn off the heat.
Drop the pasta in a bowl of boiling salted water. (Use gluten-free pasta, if you like.) If the pasta is fresh, it will take just seconds. If it’s dry, it will take a few minutes. (Gluten-free pasta takes a little longer.) Either way, you want to cook the pasta even firmer than al dente, because it will finish cooking in the pan with the butter and cream. Drain the pasta immediately when it reaches that firm stage, and transfer it to the pan with the butter and cream, tossing the pasta gently for a few seconds to coat.

Turn the heat under the saucepan with the pasta on low, and add the rest of the cream, all the Parmigiano Reggiano, and a bit of pepper (no salt because there’s plenty in the guanciale and cheese.) Toss briefly until the sauce has thickened and the pasta is well-coated.
At this point, you don’t want the pasta to get too dry, so you add…
…tossing gently to warm them through. Also add the cooked guanciale at this time.

With or without chicken, it’s delicious!
Plate the pasta in a bowl or dish and serve the chicken alongside.
For my family, a Caesar salad is the only salad to serve on special occasions. But it all starts with a little history…
If someone told me that the classic Caesar salad was invented in Tijuana, Mexico, I’d say they were crazy. But that’s one bizarre truth in the creation of one of the world’s most iconic salads.
Famous restaurateur, Caesar Cardini, ran a restaurant in San Diego back in the early 1900’s. But when Prohibition hit the states, he opened another location in Mexico…Tijuana, to be exact, luring many of the day’s Hollywood stars across the border. They could gamble in Mexico, and they could feast on food and alcohol at Cardini’s.
The story goes that one July 4th, they were running out of food, and thinking quickly, Cardini created a salad at the spur of the moment, using only the ingredients he could find in the kitchen. Having the chef assemble the salad tableside meant it came with a grand performance, and word quickly spread of the incredible “Caesar salad.” (Cardini named it after himself.) Cardini’s is still at its original Tijuana location, and they serve thousands of Caesar salads, with a flamboyant tableside show, to tourists.
Though Cardini didn’t believe anchovies should be in his salad (they say Worcestershire was used instead), anchovies were eventually added when his brother, Alex, tweaked the recipe years later. (The Worcestershire was removed.)
It needs to be said that raw egg yolks are used in Caesar salad, and if you’re not comfortable using them because of salmonella concerns, you shouldn’t. Sometimes coddled eggs (slightly boiled) are used. Some stores, though not many, sell pasteurized eggs in the shell. I haven’t had a chance to use them–or even find them. And now you can get liquid eggs, whole eggs that have been pasteurized and come in a carton. The problem is that you only need the yolks, and you can’t separate them from the whites. (Nonetheless, I gave it a shot and it wasn’t half bad. But far from the perfection of using real yolks. See the bottom of this blog.)
For many, including myself, it ain’t a Caesar without raw egg, so I’m willing to take my chances.
This Caesar recipe remains the best I’ve ever had.

The ingredients.
The first really important ingredient to get is a wooden bowl. No other bowl will do. We have an old wooden bowl at home with almost mystical properties that is used for nothing but our Caesar salad, and I have to say that it makes all the difference in the world.
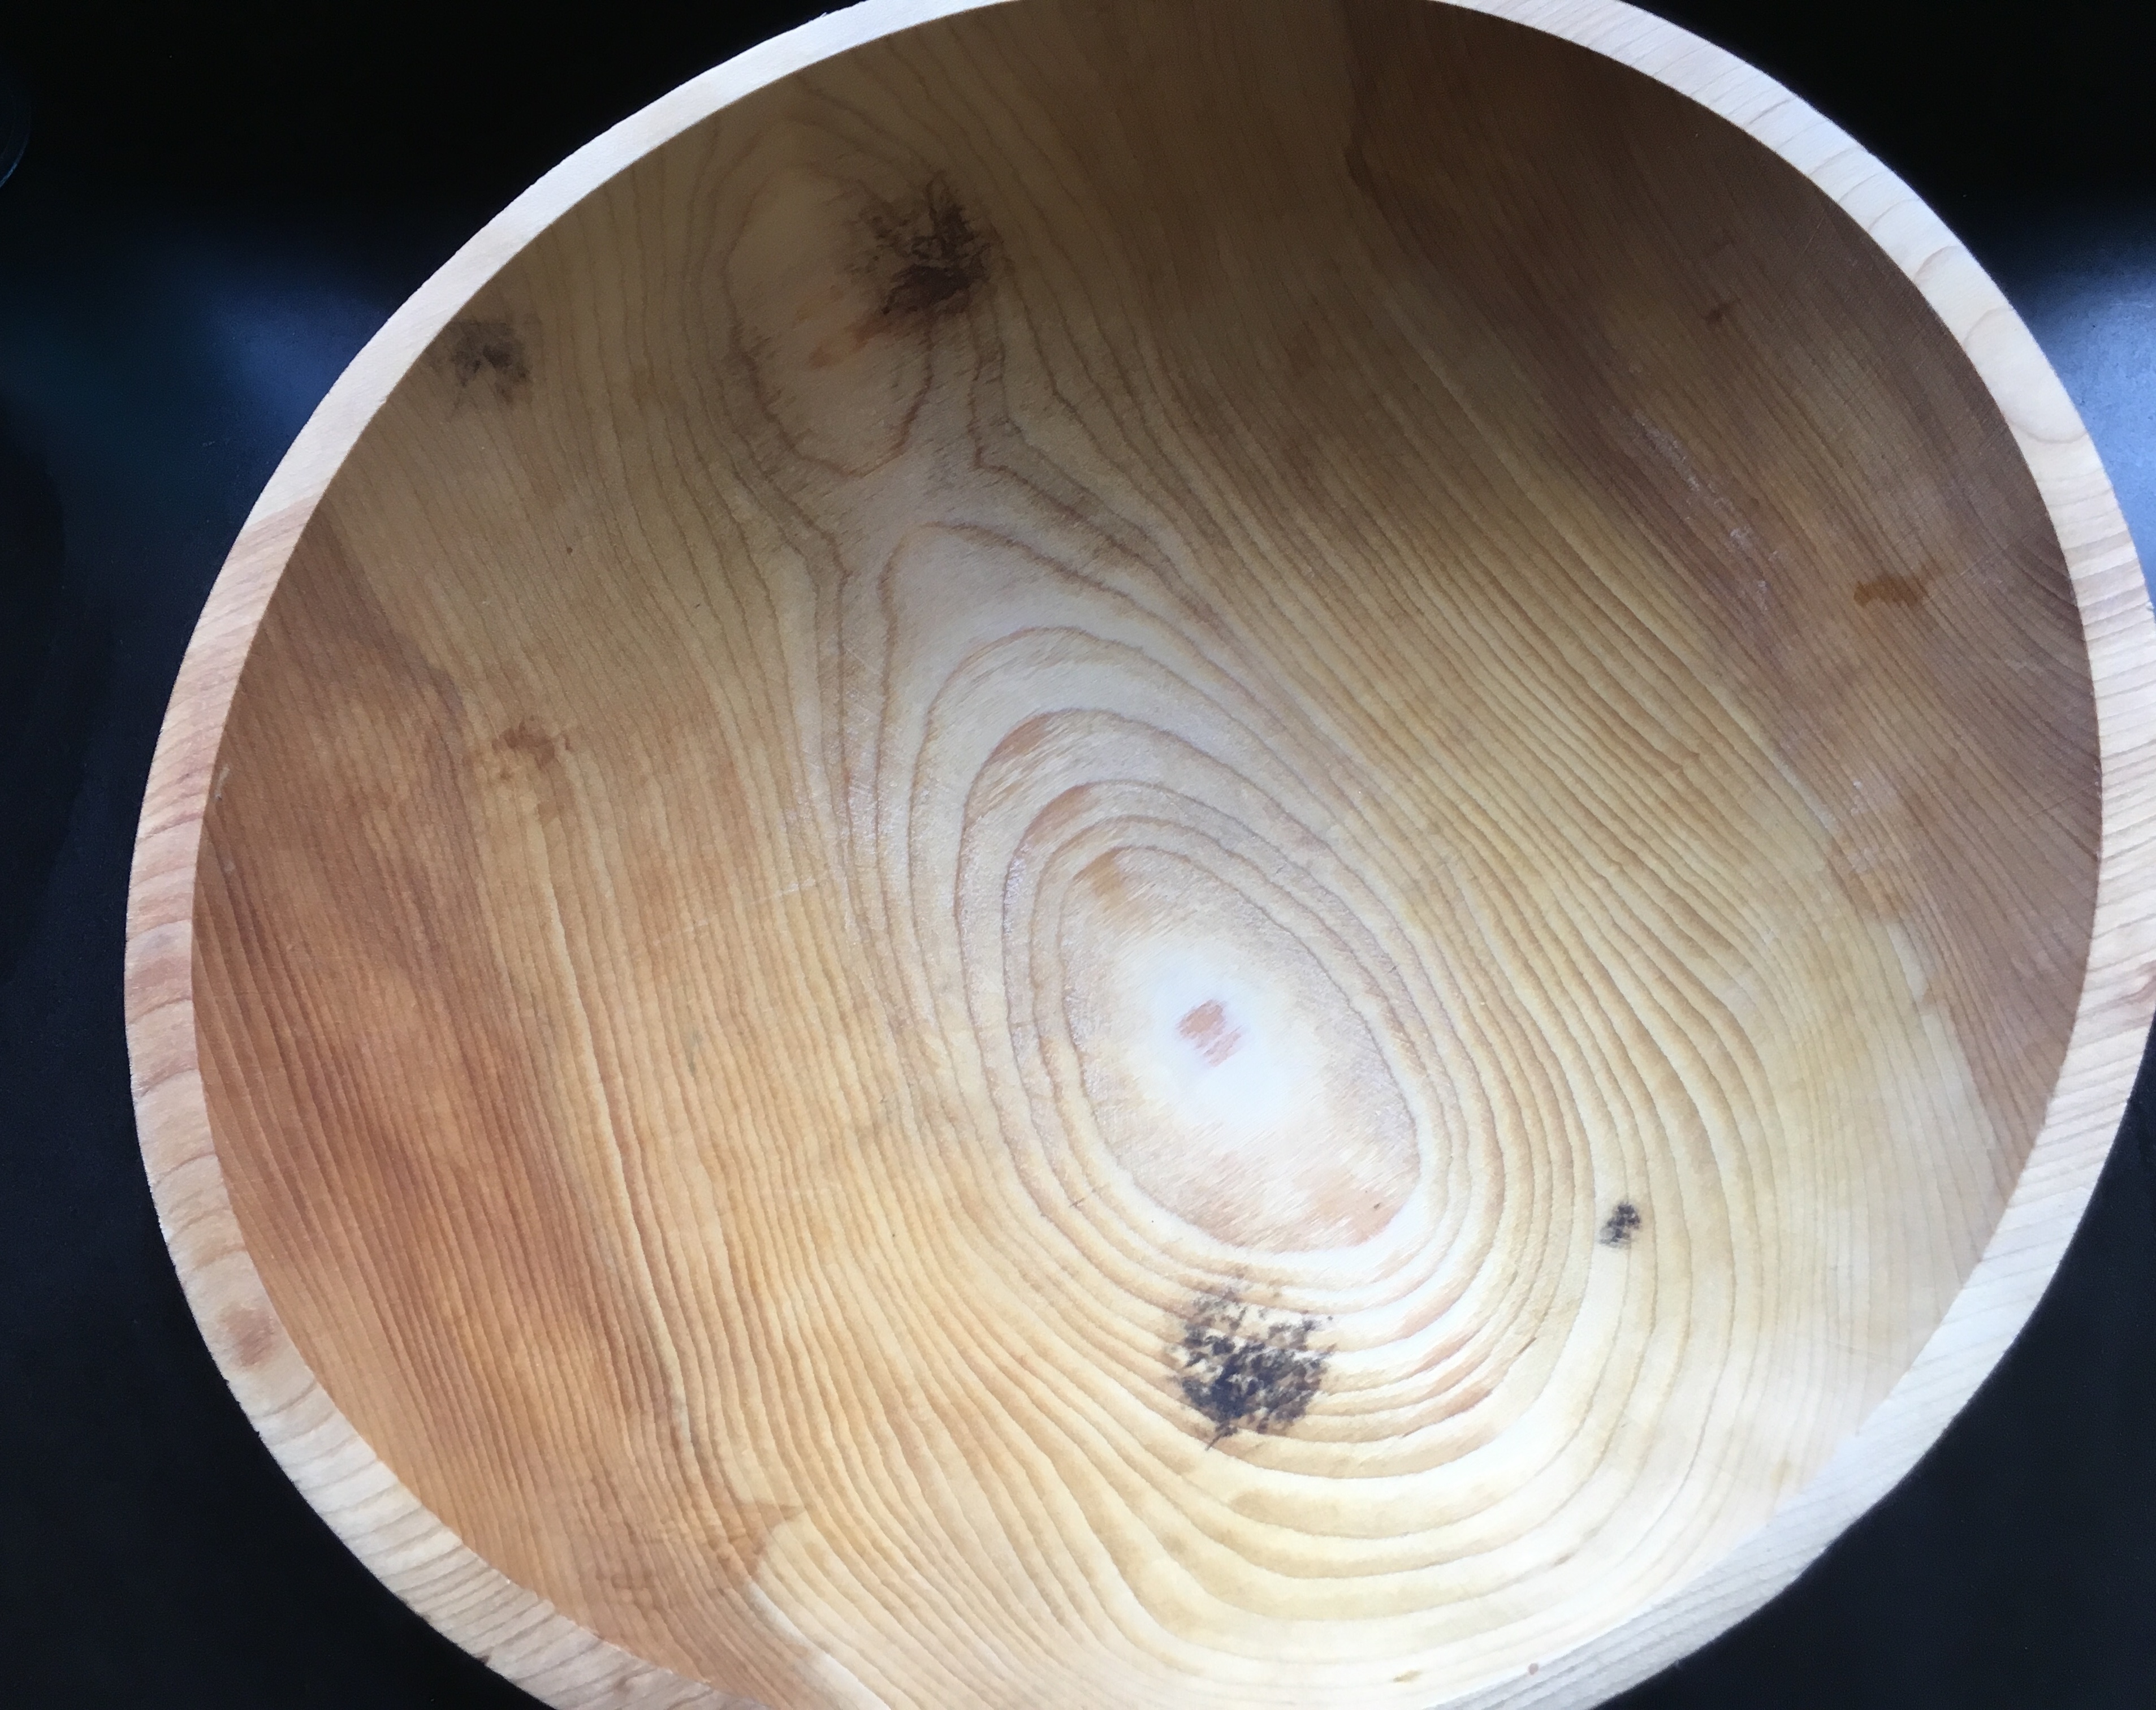
The mystical wooden bowl. Years of Caesar salads have given it a special seasoning.
Once you have the bowl, what matters most is the freshest, best quality ingredients you can find: farm-fresh eggs, not supermarket ones…Parmigiano Reggiano, not generic Parmesan. The best quality extra virgin olive oil. Fresh lemon juice. Freshly cracked black pepper. High-quality anchovies. And organic Romaine lettuce. (Organic bibb or leaf lettuces make great substitutes.)
After that, it’s all about the love.

The process begins…
Place the egg yolks in the wooden bowl and whisk them until well mixed.
While whisking the yolks, pour the olive oil in the bowl VERY SLOWLY, whisking all the time, never stopping. Keep pouring the olive oil slowly until you’ve whisked all of it into the eggs and you get a beautiful emulsion.
Keep whisking and add the Dijon mustard, then the black pepper. You might need someone to hold the bowl for you as you whisk. Or…place a wet kitchen towel under the bowl to stabilize it.
In a separate small bowl, mash the anchovies with a fork–even better, use a mortar and pestle, if you have one. Don’t leave any chunks. Slowly add the mashed anchovies to the wooden bowl, mixing them in with the whisk to combine the ingredients. You want them to dissolve completely in the dressing.
Once the dressing has reached its desired consistency, add the lemon juice and whisk some more.
When it’s all mixed together, dip a finger in the dressing and give it a taste. Does it need more lemon juice to cut the oil? Slice a second lemon and add a little. Taste again. Enough black pepper? There should be enough salt from the anchovies and the cheese is still to come.
If you think you’ve “got it,” sprinkle in the Parmigiano Reggiano, whisking slowly. Then add the Romaine leaves to the salad bowl and toss gently to coat the lettuce.
When serving, top each salad serving with a little more cheese. Extra anchovies are optional.

If you’re saying “where’s the garlic?” …you’re right. Every good Caesar needs some. This recipe would use about 1 teaspoon of fresh, finely chopped garlic, added after the mustard. If I’m cooking alone, I always add the garlic. But we have people in our household that are allergic to garlic, so when family is here, we leave it out. The flavors of the dressing are so deliciously intense, you’ll be surprised how good it is without it!
Recently, I came across a recipe that is not a traditional Caesar, but is close enough for rock ‘n’ roll. It has several ingredients that a true Caesar wouldn’t include, like bacon and hard-boiled eggs, but there’s no denying it’s absolutely delicious, especially when you toast the croutons in the bacon fat!
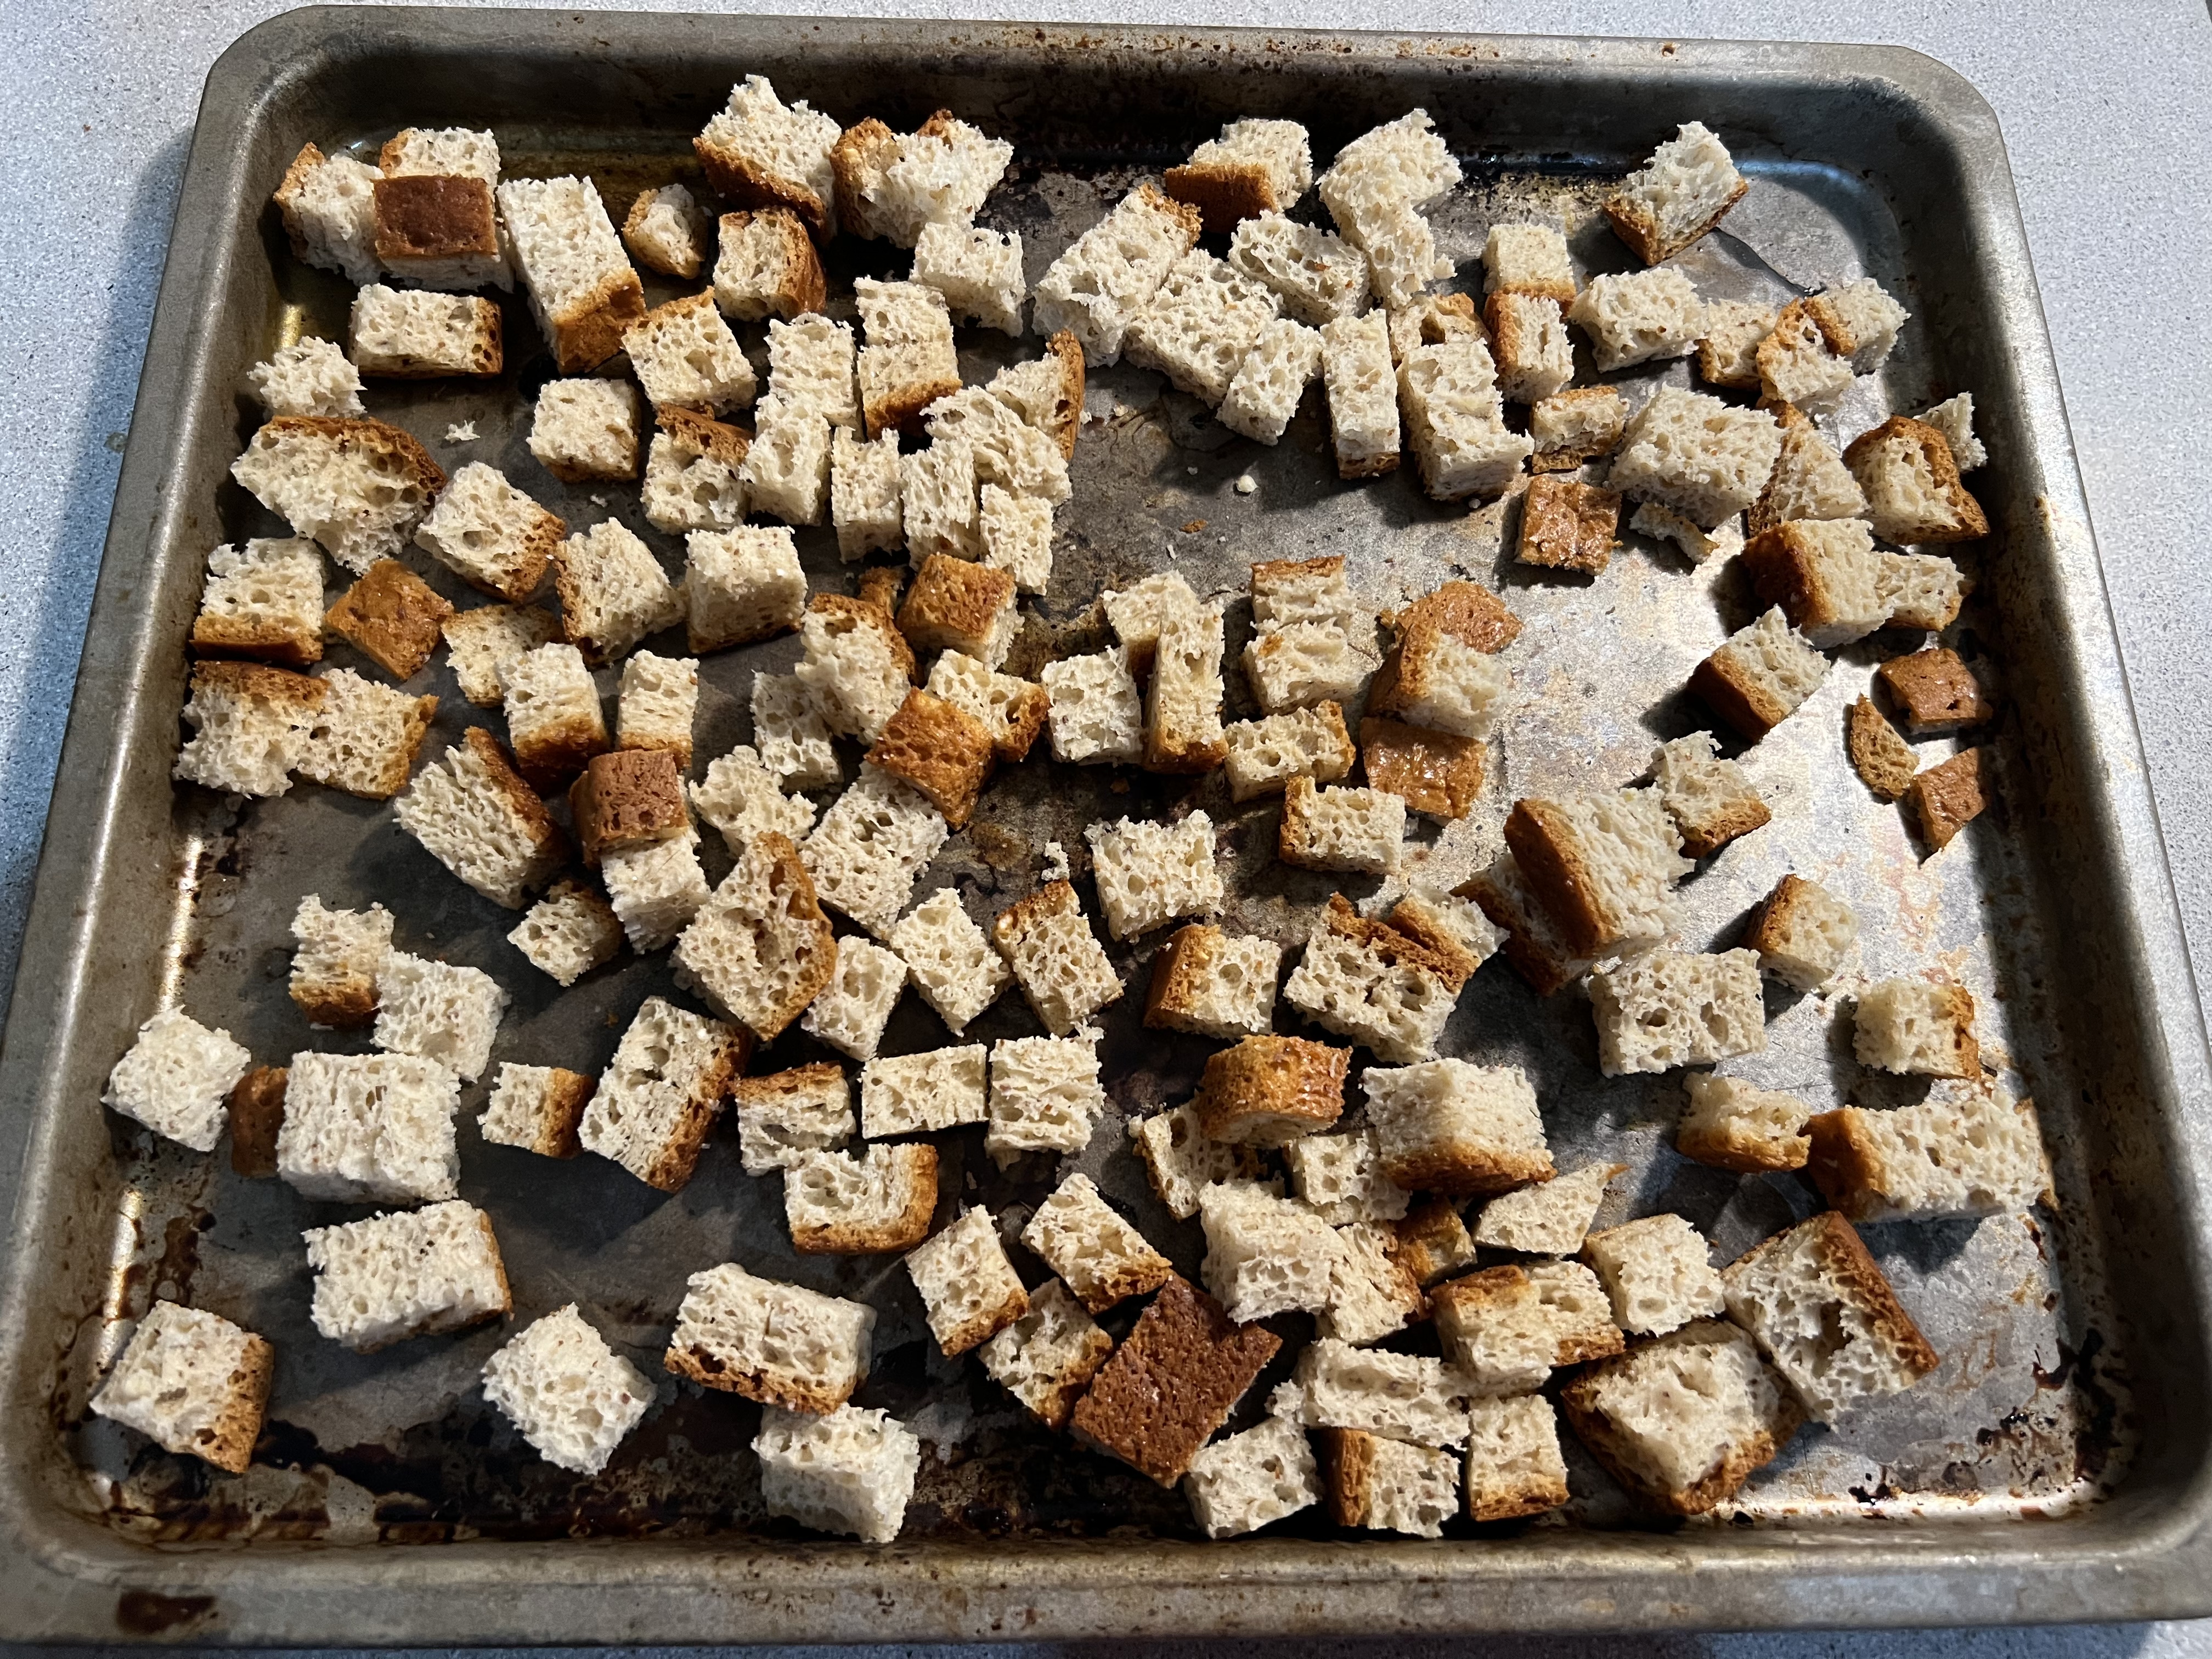
Since the bread is the only non-gluten-free ingredient in the salad, if you want it to be gluten-free, just use GF bread, or skip it altogether. Chop the bread for croutons into small cubes. Set it aside.
Fry up half a pound of bacon, leaving the fat in the pan. Make sure the bacon is crispy. Chop it up and place it in a bowl on paper towels. Set it aside.

Spread the bread cubes in a single layer on a sheet pan in a convection oven and bake it at a low temperature, 150° or so, until it’s brown and toasted, tossing the cubes around every 10 minutes. Remove it from the oven and set it aside.
Take the pan with the bacon fat and heat it. Add the garlic. Fry the garlic for a few seconds, then add the croutons and toss them around until they’re cooked and the bacon fat has been absorbed. Remove the pan from the heat and place the croutons in a separate bowl.
Chop up the lettuce and place it in a large bowl. Set it aside.
Chop up the two hard-boiled egg yolks and placed them in a large wooden bowl, big enough for the salad. Add the juice of half a lemon, the Dijon mustard, and the capers.
Using a fork, squish the anchovy fillets on a cutting board into a paste and add them to the bowl.
Whisk everything together for a minute, then slowly add the olive oil in a tiny stream as you continue whisking, until you get the consistency of the dressing that you like. Season with salt and pepper. Add the grated Parmigiano Reggiano. Whisk again.

Add lettuce to the dressing and toss with tongs. Then add the croutons and bacon bits to the salad and toss one last time.

Not a true Caesar, but delicious…and because hard-boiled egg yolks are used, there are no salmonella concerns.
I think I spent half of my childhood in the kitchen, watching my Mom and grandmother make koldūnai (kohl-doo-nayh), the Lithuanian version of a pierogi, by hand, at lightning speed. They would roll a simple dough into a log about 1″ in diameter, then cut it into 1″ pieces, twirling each piece between their fingers to make a flat pancake, filling each with a small spoonful of meat or mushrooms, then folding it over, crimping the edges to make a crescent-shaped dumpling. It blew my mind that they could crank out over a hundred of these little masterpieces in no time, placing them on a cookie sheet and freezing them until it was time to cook.

One of the main reasons why I prefer Lithuanian koldūnai over the basic Polish pierogi is the filling. For me, standard pierogi fillings like potatoes, cheese, and sauerkraut just don’t cut it. My Mom would mix ground beef with chopped onions sautéed in butter, a couple of eggs, and milk crackers soaked in milk. She’d add salt and pepper, then spoon that beautiful beef blend into her koldūnai.
The other delicious stuffing, usually reserved for special holidays like Christmas Eve and Easter, was made from mushrooms. Italy may lay claim to the porcini, but the fact of the matter is, Lithuania is bolete heaven. (We call them baravykai.)
When they’re dried and rehydrated, their incredible flavor is so intense, you don’t need many of them to flavor a large amount of regular button mushrooms. We’d get our dried boletes from relatives in Lithuania every year. Mom would place a handful in some boiling water and let them steep until they swelled up and could easily be chopped and added to the other mushrooms. She’d then pour the mushroom liquid into the pan as well, not wasting a bit of that magical porcini flavor. The mushrooms were simply sautéed in butter, cooled, and then used to fill the koldūnai.

I found that my Mom’s log method was too much work. I roll the dough out into a sheet with a rolling pin, then cut circles with a glass. Yes, that’s mac-and-cheese up front!
A few years ago, I decided it was time to try my hand at making koldūnai. As I recall, my Mom simply mixed water with flour to make the dough, kneaded it into a log, and off she went. I decided to go with the rolling pin and glass cutting method, because I found it to be a bit easier creating more uniform koldūnai.
The biggest challenges I had making koldūnai was my own clumsiness and lack of experience. Once I got the hang of it, things moved along steadily, and it didn’t take long for me to make a decent batch–not all perfect, but not bad for a first try.
My recipe follows. If you’re on a gluten-free diet, have no fear! That recipe is at the bottom of the blog.
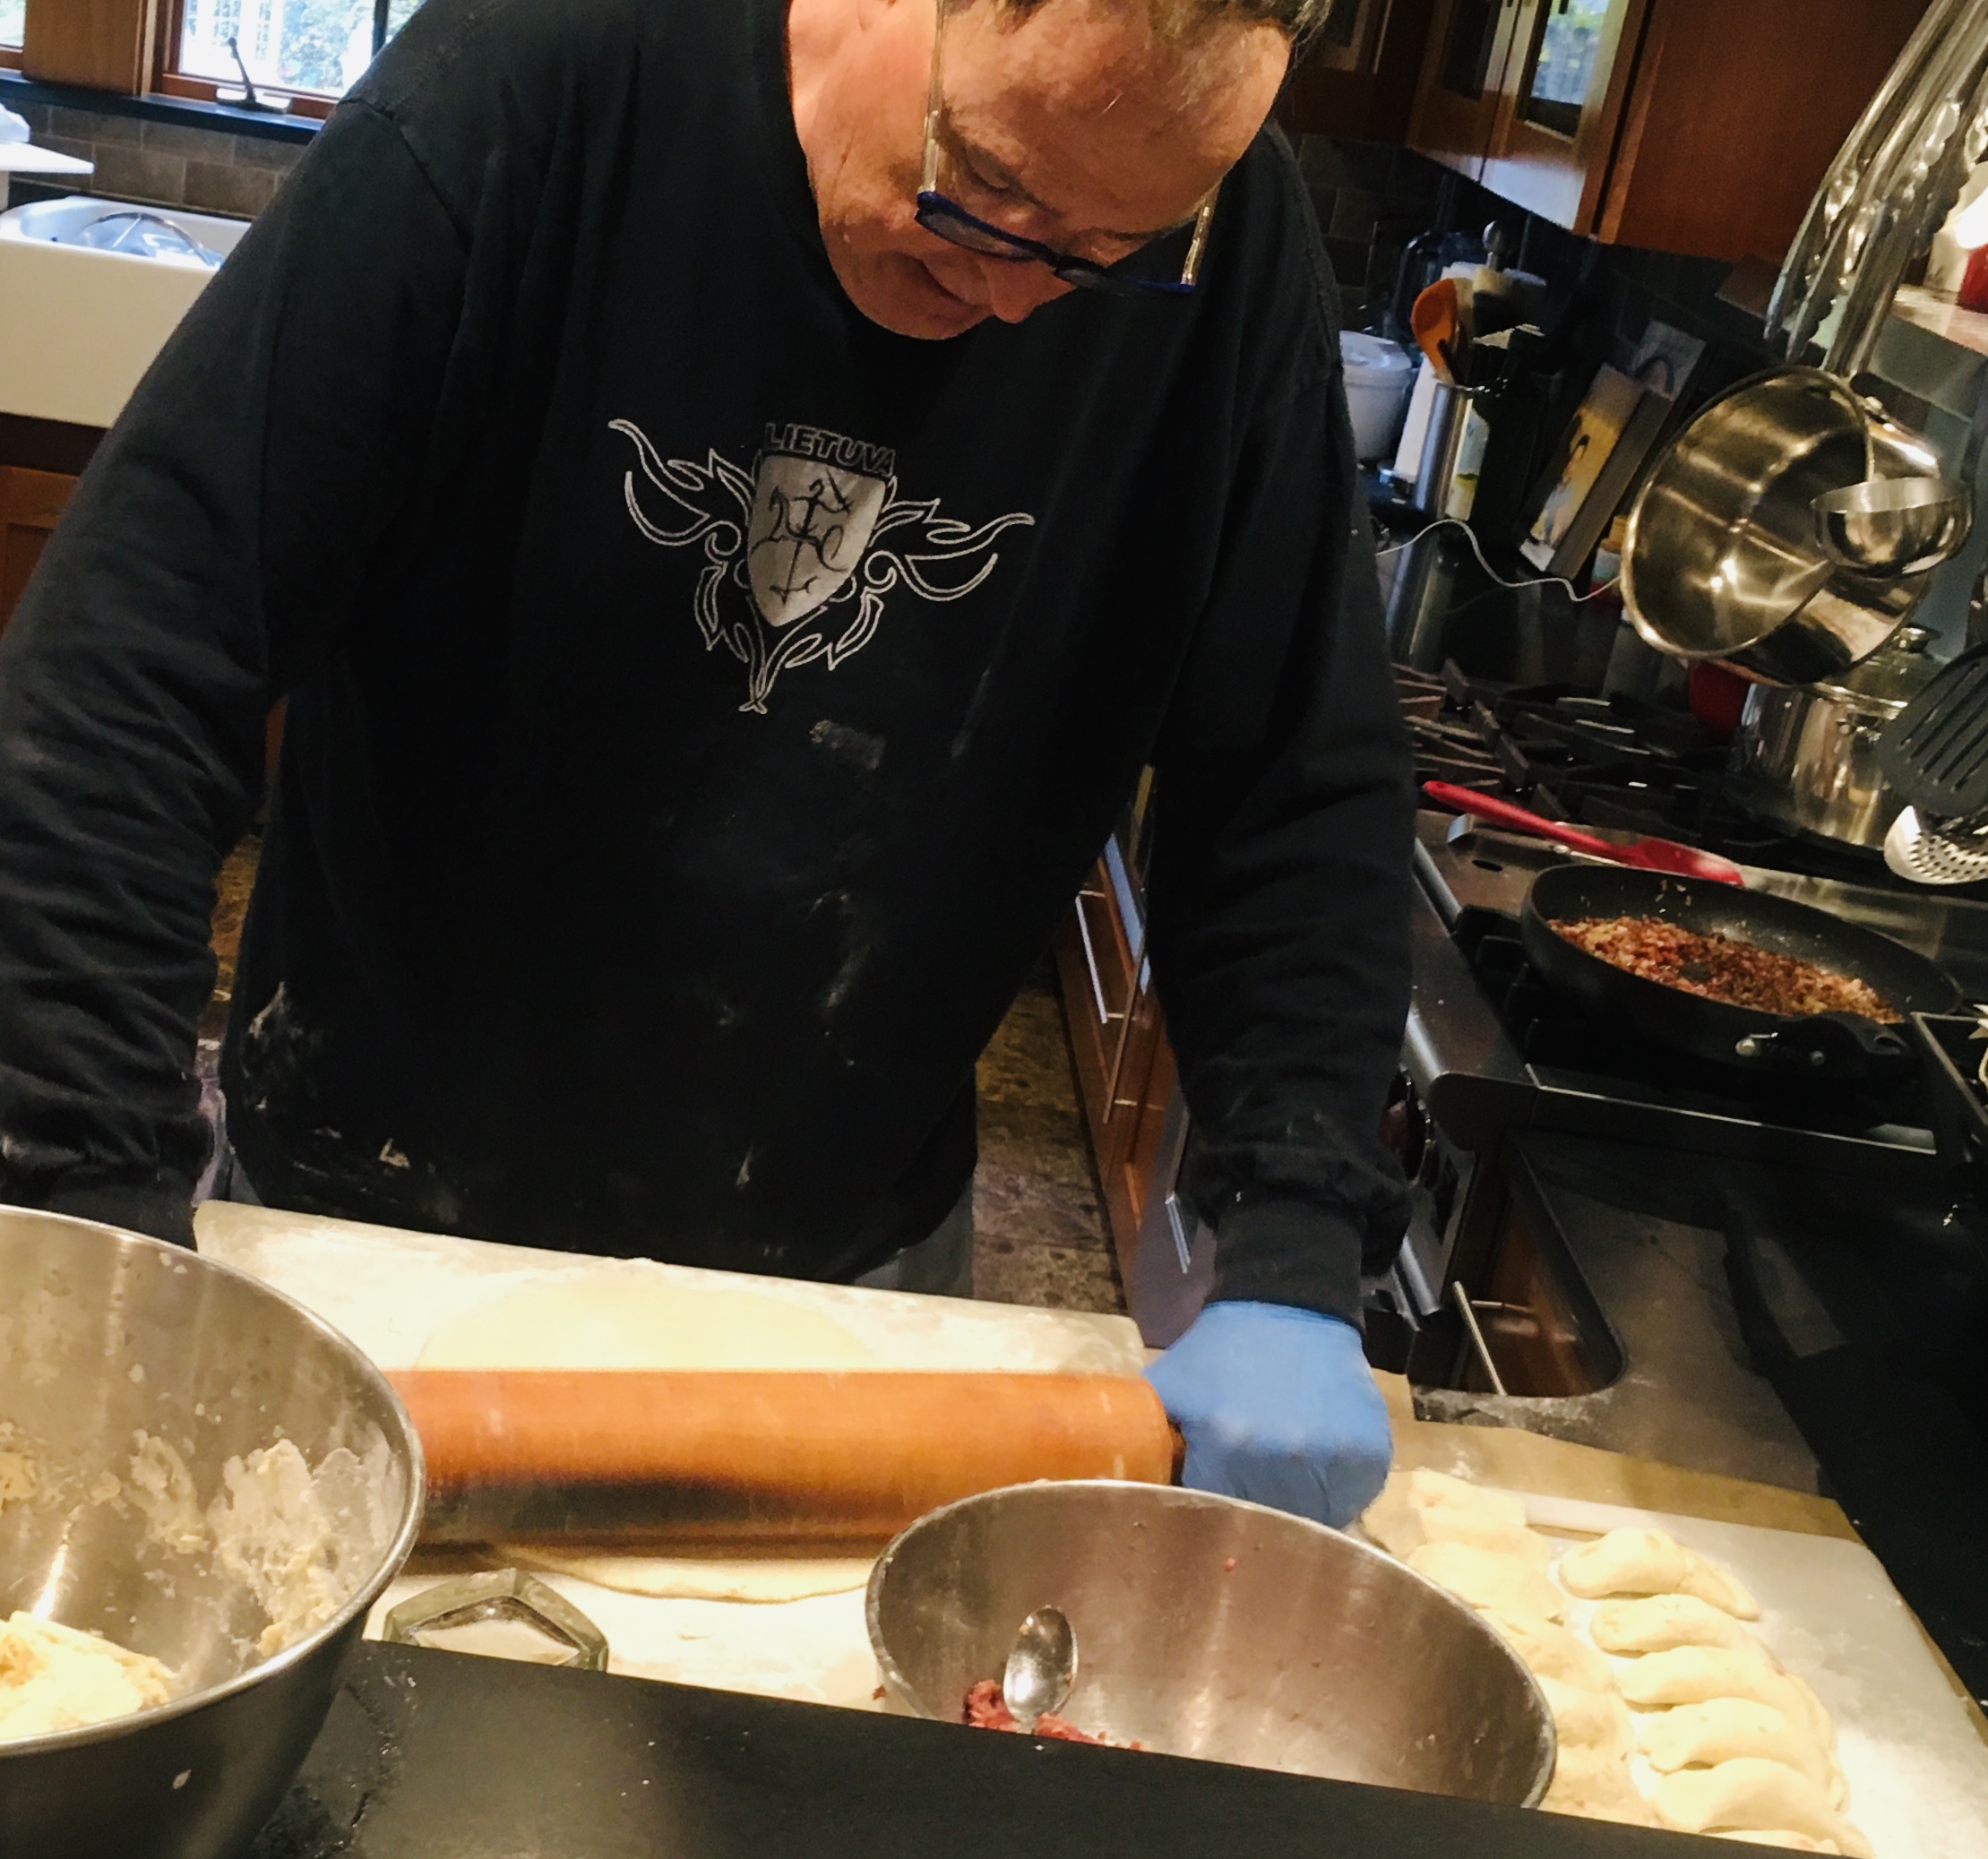
The rolling pin method.
This time around, I made four kinds of koldūnai: traditional (ground beef as well as mushroom) and non-traditional (mac & cheese and pulled pork.) Patty’s Pierogis, a restaurant in nearby Fall River, Massachusetts, and featured on Food Network’s “Diners, Drive-Ins and Dives,” is where my daughter first had mac & cheese pierogis. She was instantly hooked and begs for them every year.
Here’s my beef recipe…
Finely chop the onion and sauté it in the butter until translucent. Let it cool, then add it to 1 lb. of thawed ground beef. Add the egg and the breadcrumbs. Season with salt and pepper. Mix the ingredients thoroughly and keep the meat in the fridge until you’re ready to use it.
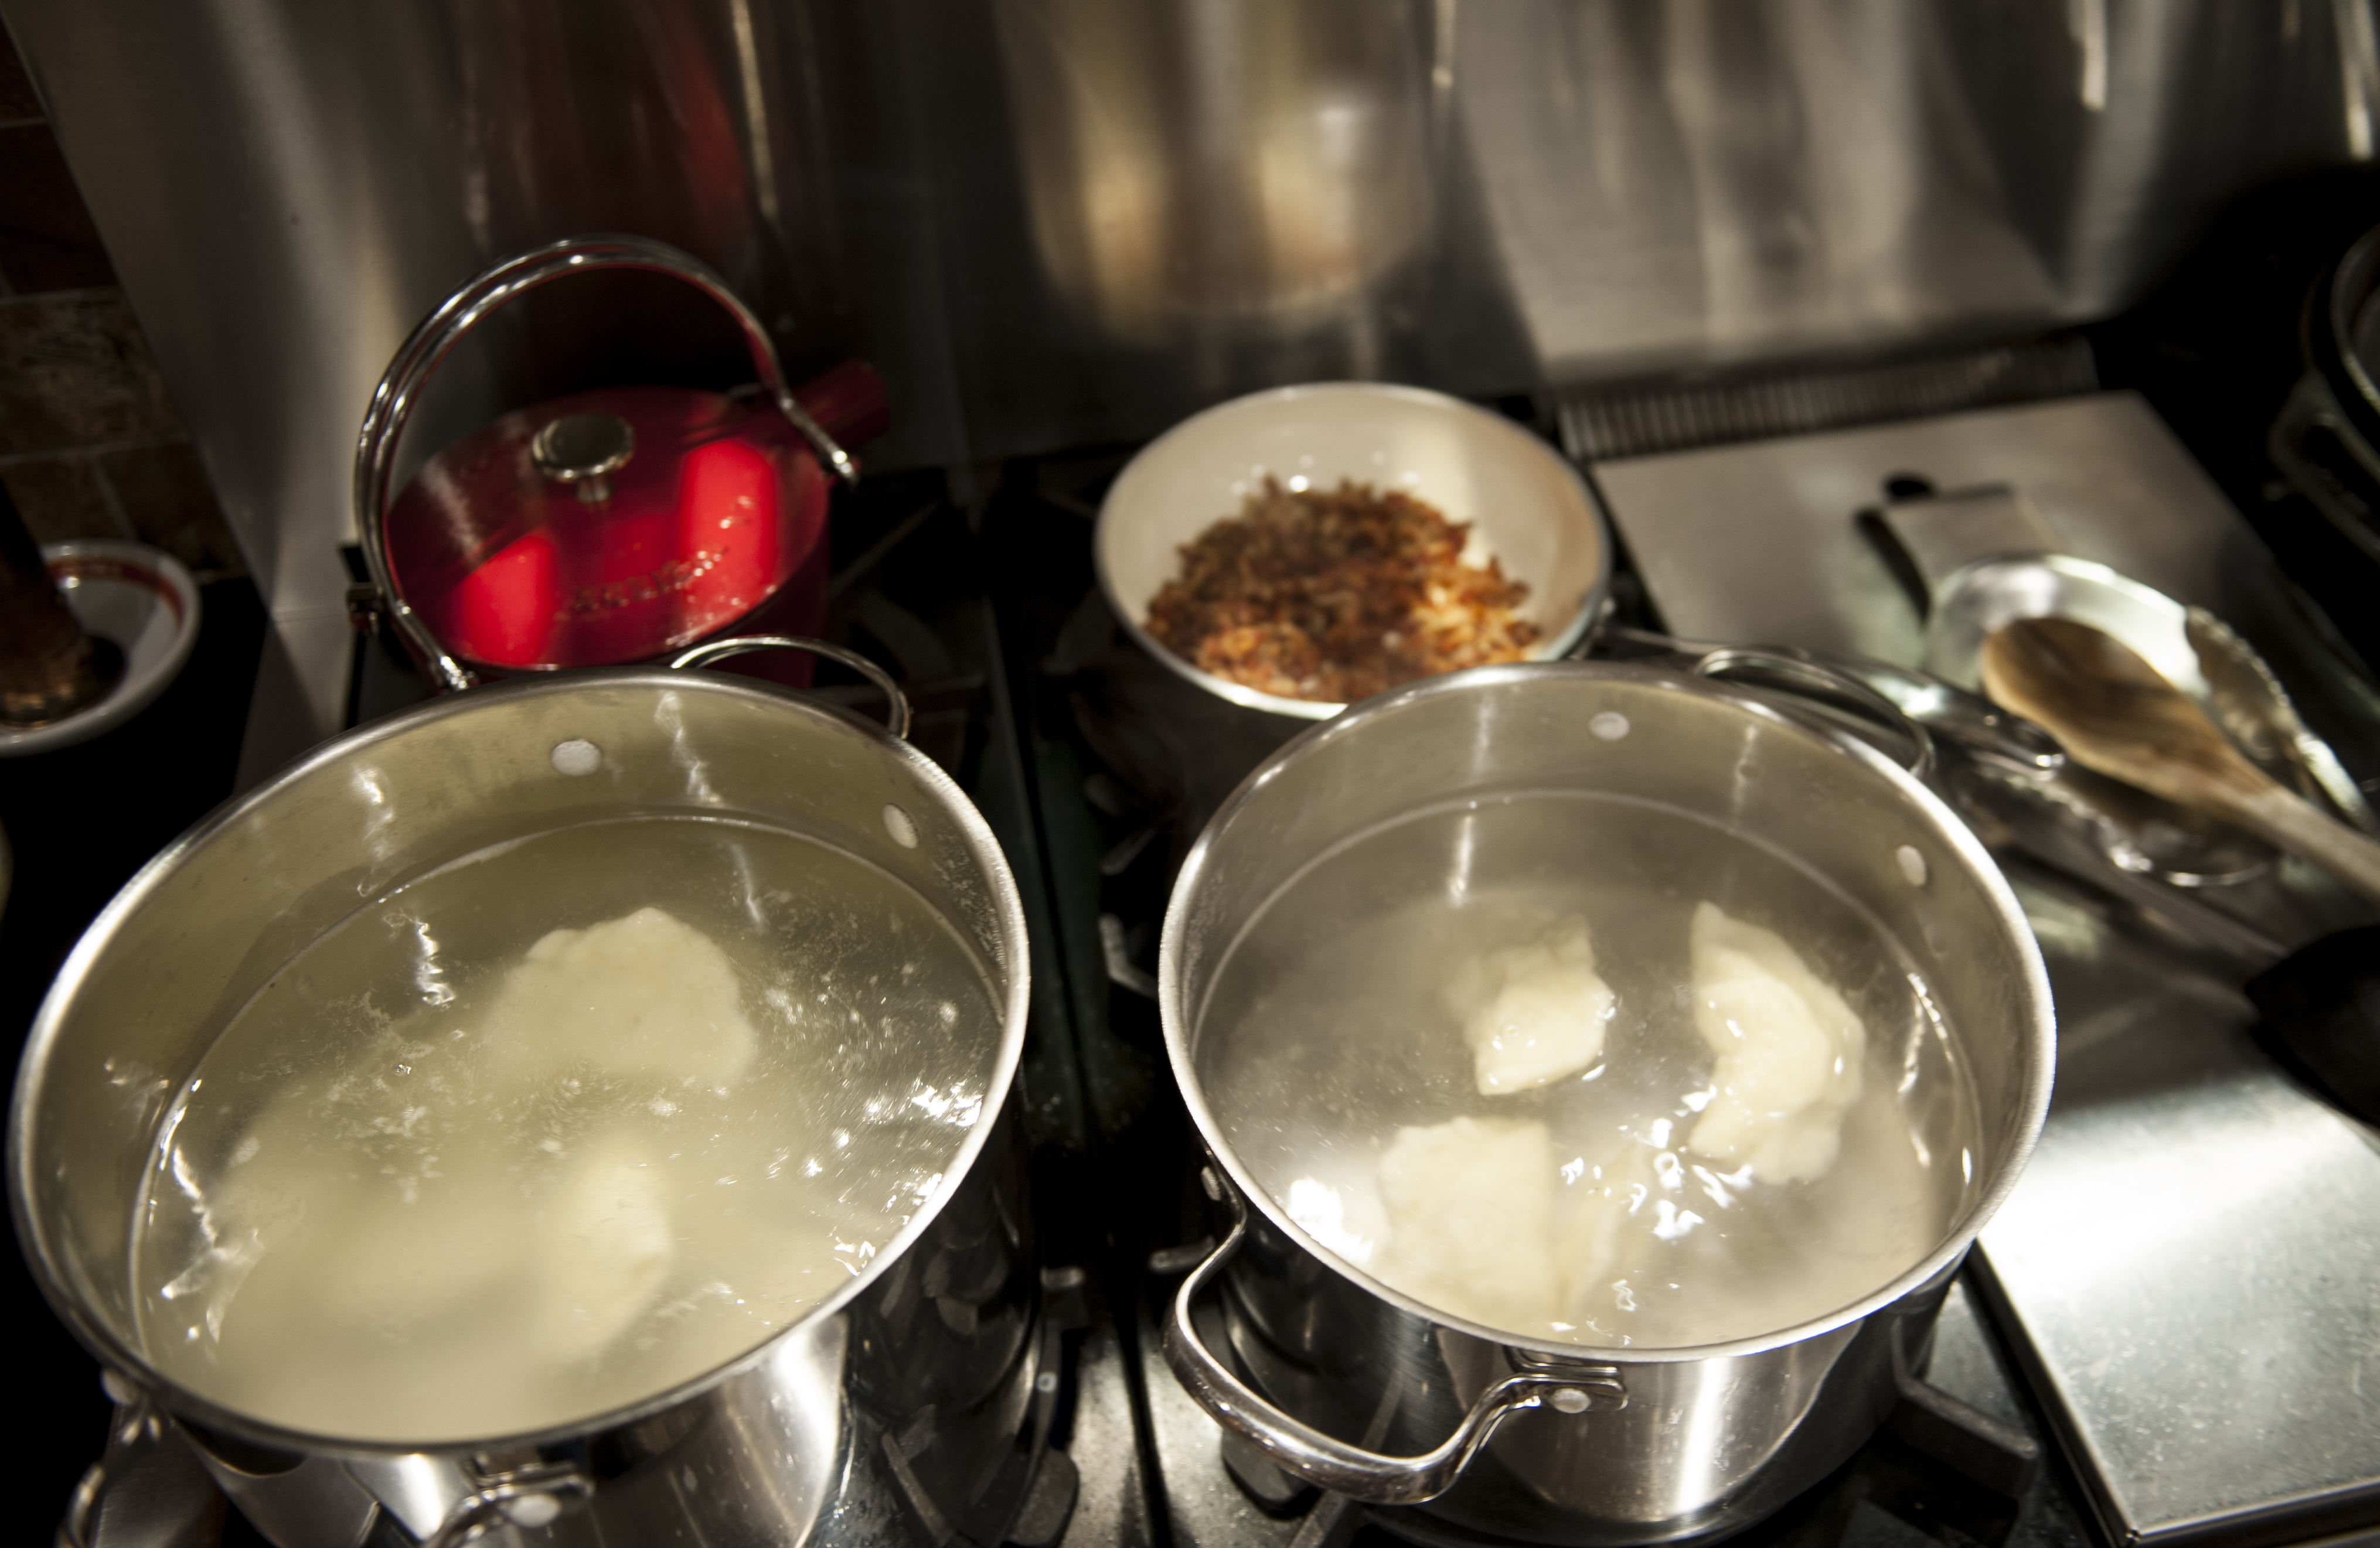
Two pots of boiling salted water: one for the meat-filled koldūnai, and one for the mac-and-cheese filled koldūnai…so I don’t get ’em mixed up!
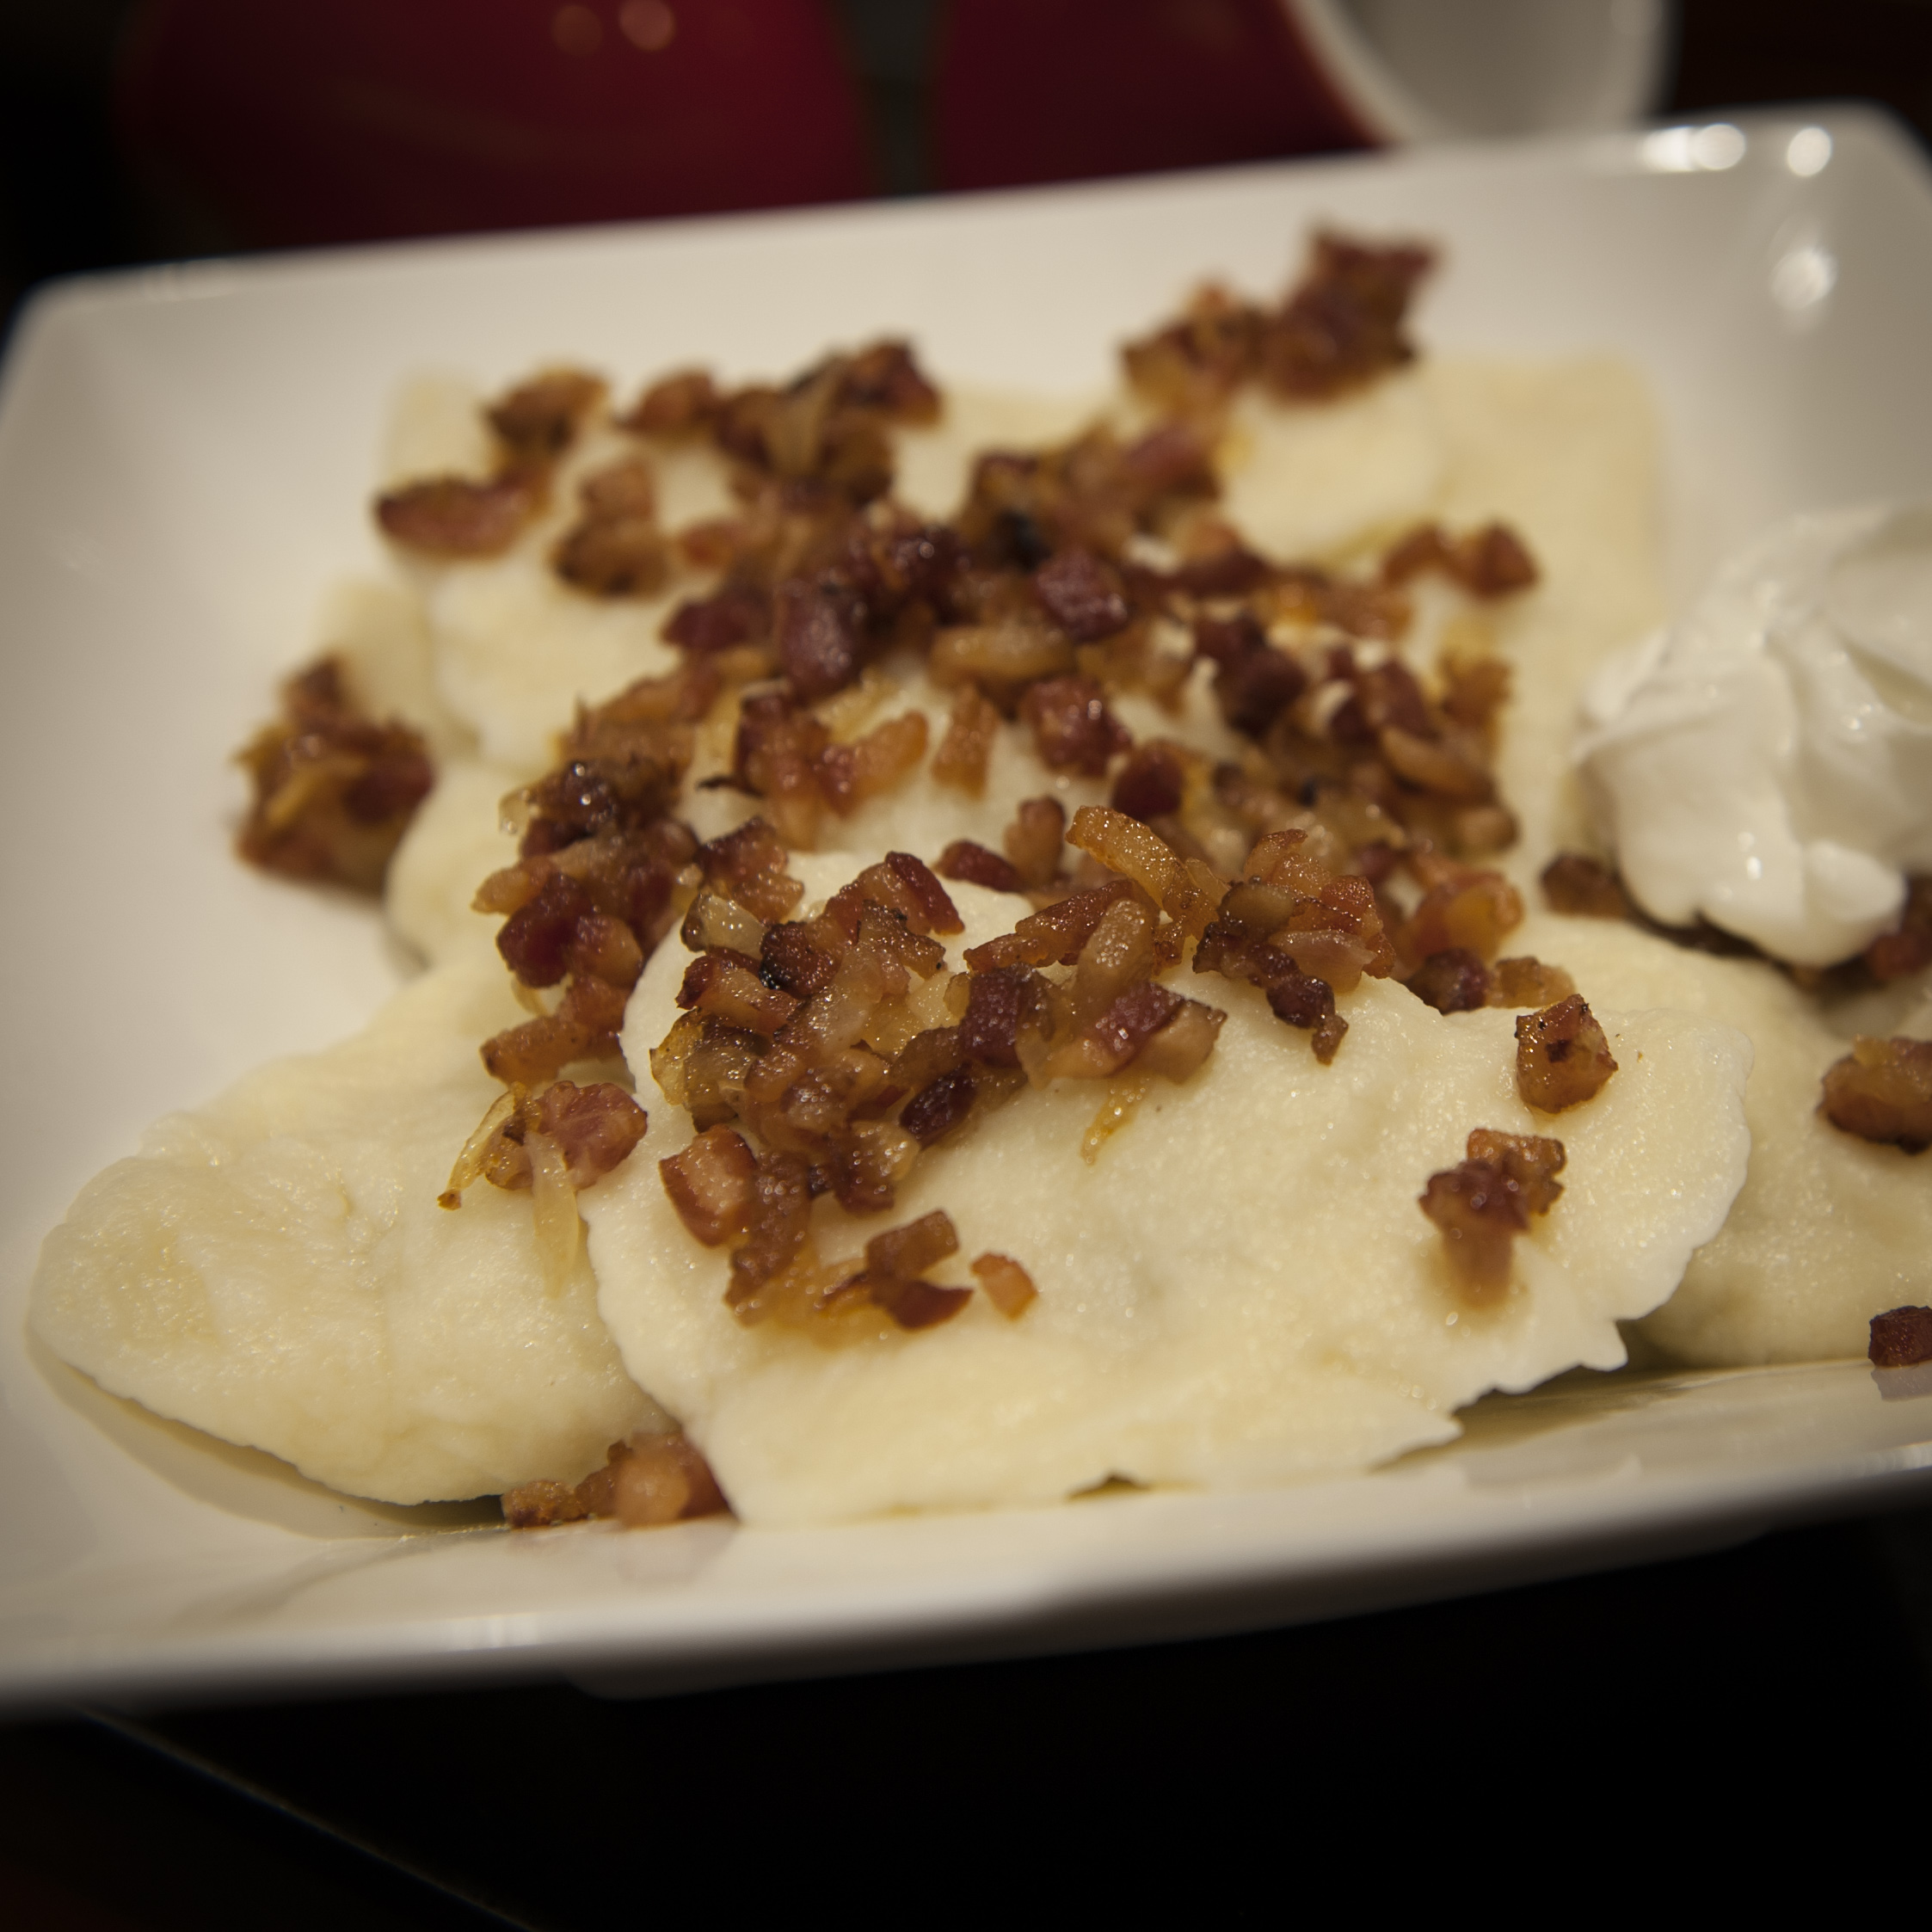
In my childhood home, you cannot possibly serve koldūnai without sour cream on the side and without spirgučiai (spir-guh-chay), chopped and fried bacon and onions, that are sprinkled on top.
In a large pan, fry the chopped bacon until it’s almost crisp. Never drain the fat! Add the chopped onions and cook until they are soft. Set aside. (My Mom always kept a stash of spirgučiai in a container in the fridge, and sprinkled them on anything and everything.)
Making the dough is simple.
I don’t use salt in the dough because I boil the koldūnai in salted water later.
Combine the ingredients in a bowl, mixing with your hands. Keep adding flour in small amounts until the dough isn’t wet and sticky. When it forms a nice ball, remove it from the bowl and place it on a floured surface and knead it a bit more. Cut the ball into quarters, and work with these smaller pieces of dough.
For the rolling-pin method, roll each quarter out until the dough is about 1/8″ thick. Cut circles out of the dough using a cookie cutter, rocks glass, or whatever else you have handy. Add about a teaspoonful of filling in the center of the dough (a melon baller works great), then fold the edges over and pinch them with your fingers. Flip it over and pinch again, making sure none of the filling seeps out. A tight edge means the koldūnai won’t break open when you put them in boiling water.
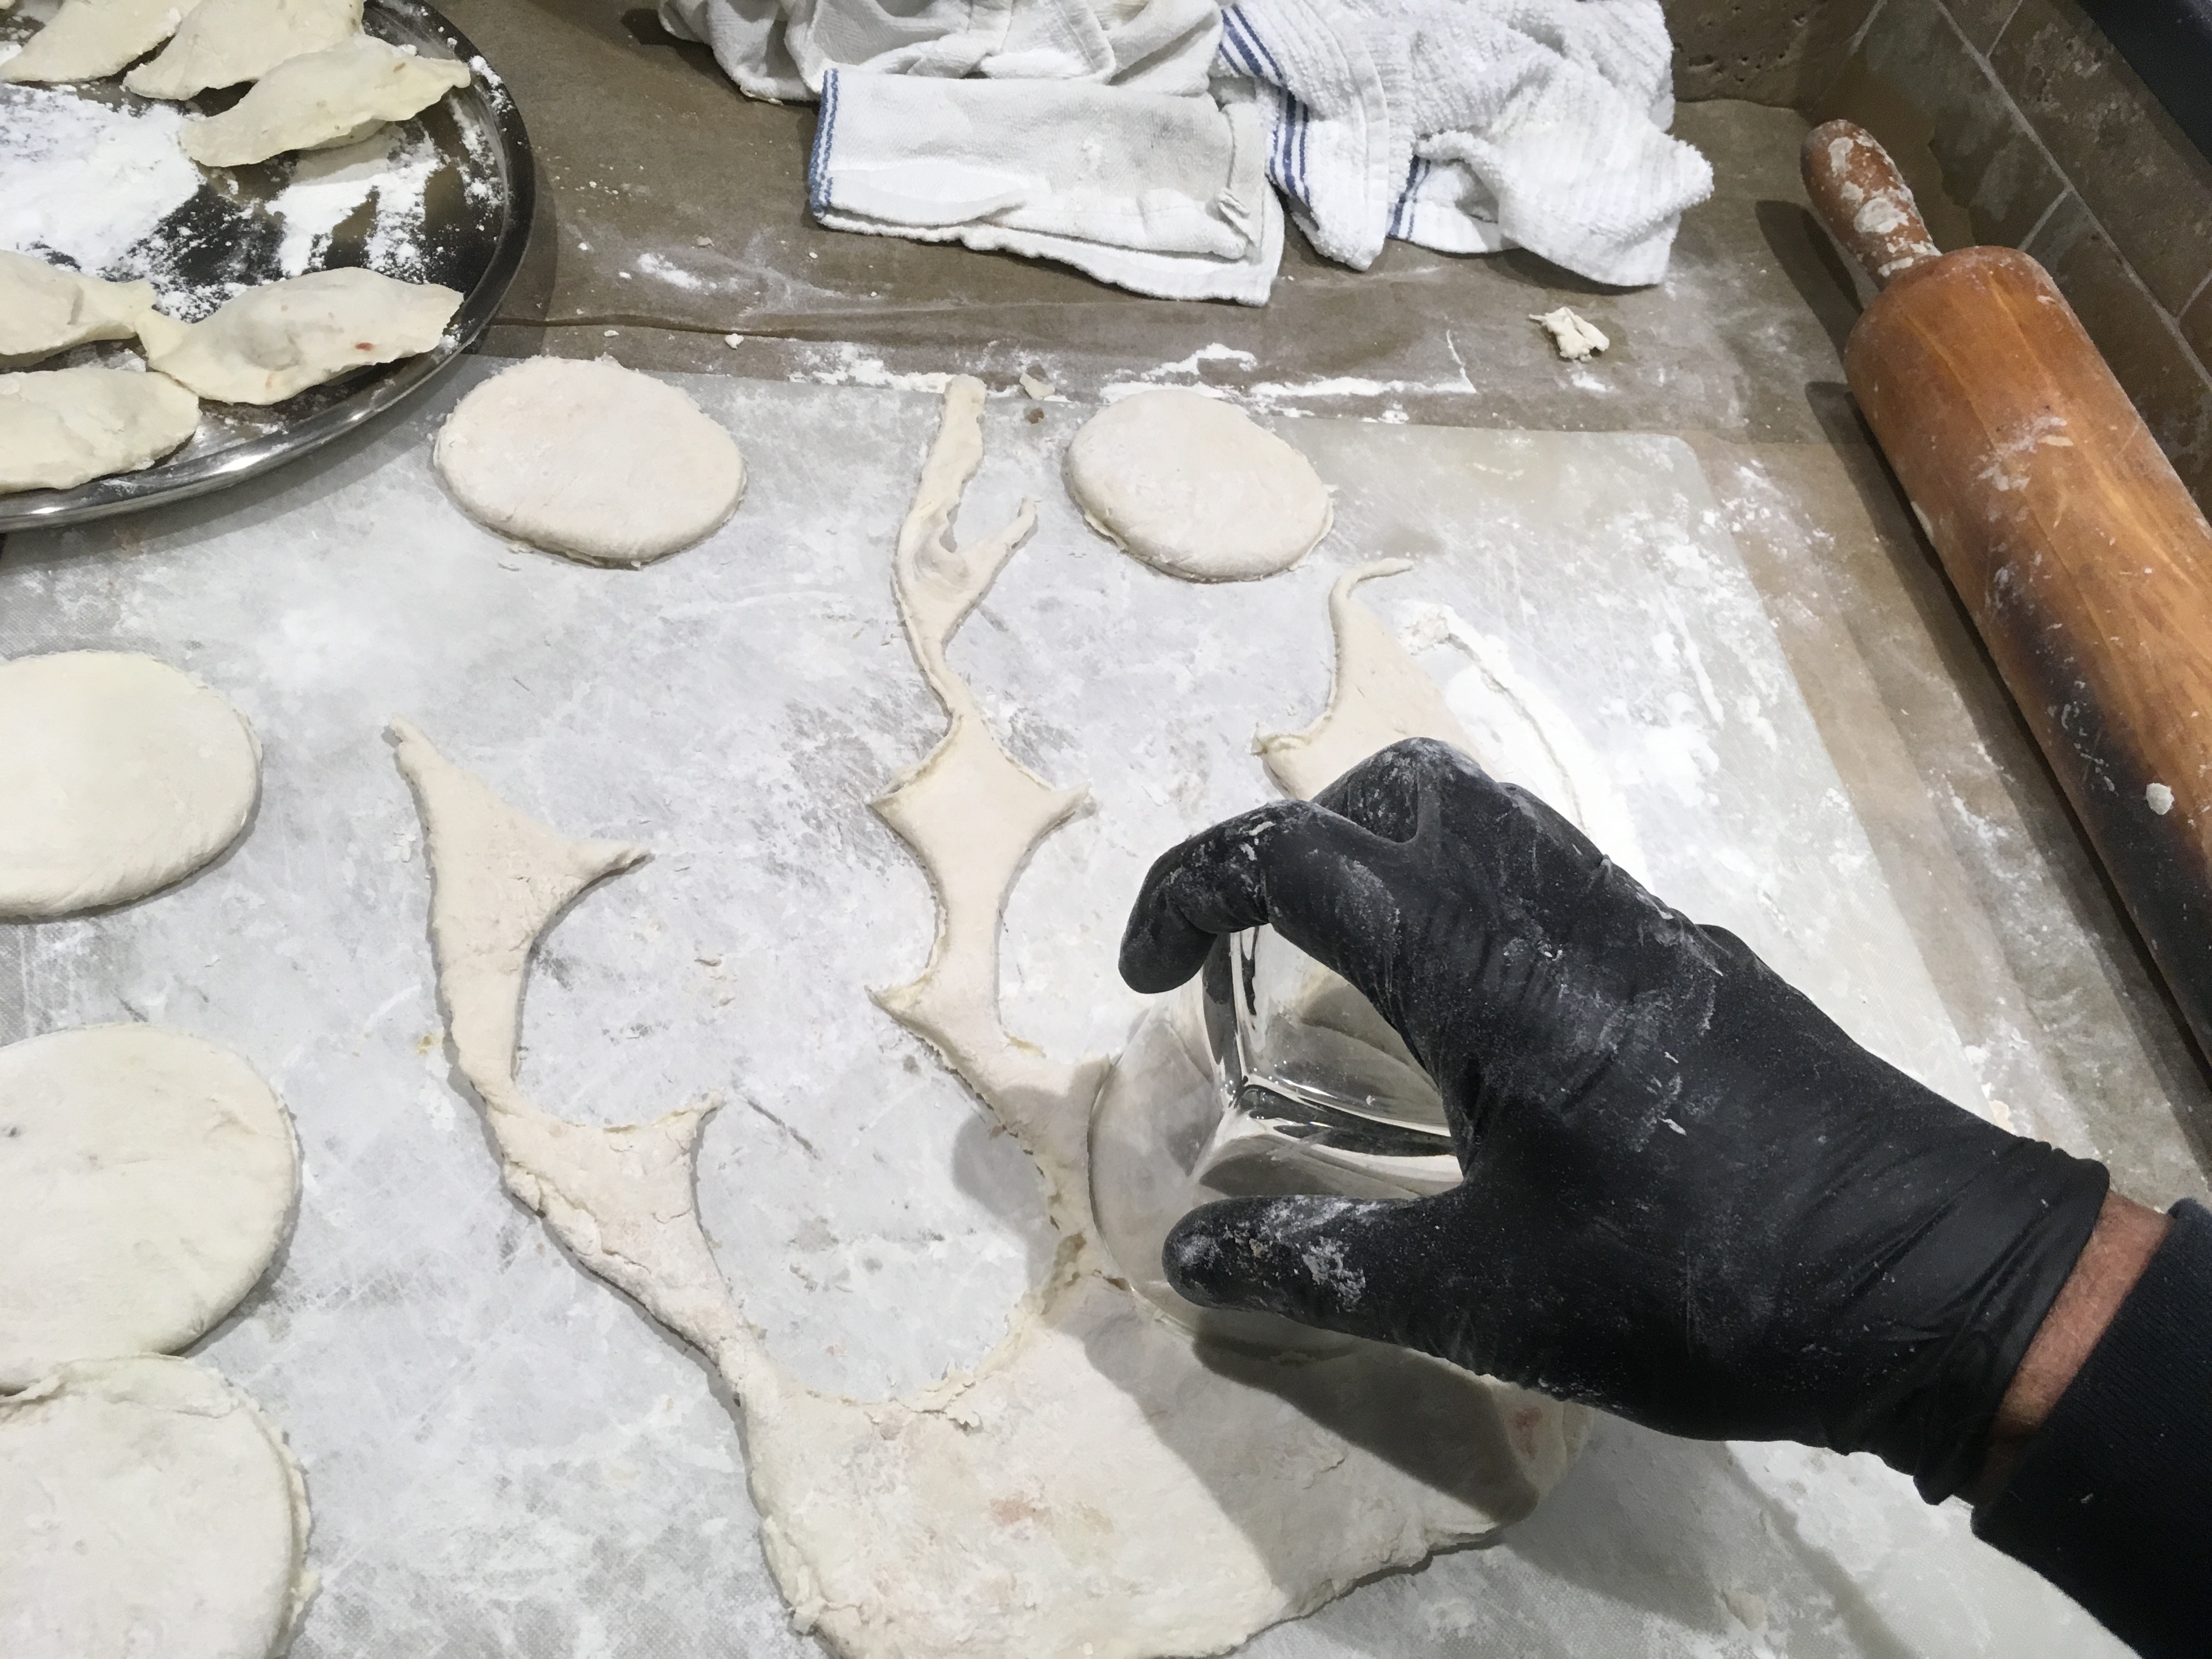
Who knew a rocks glass had more uses than just to hold a great Manhattan?
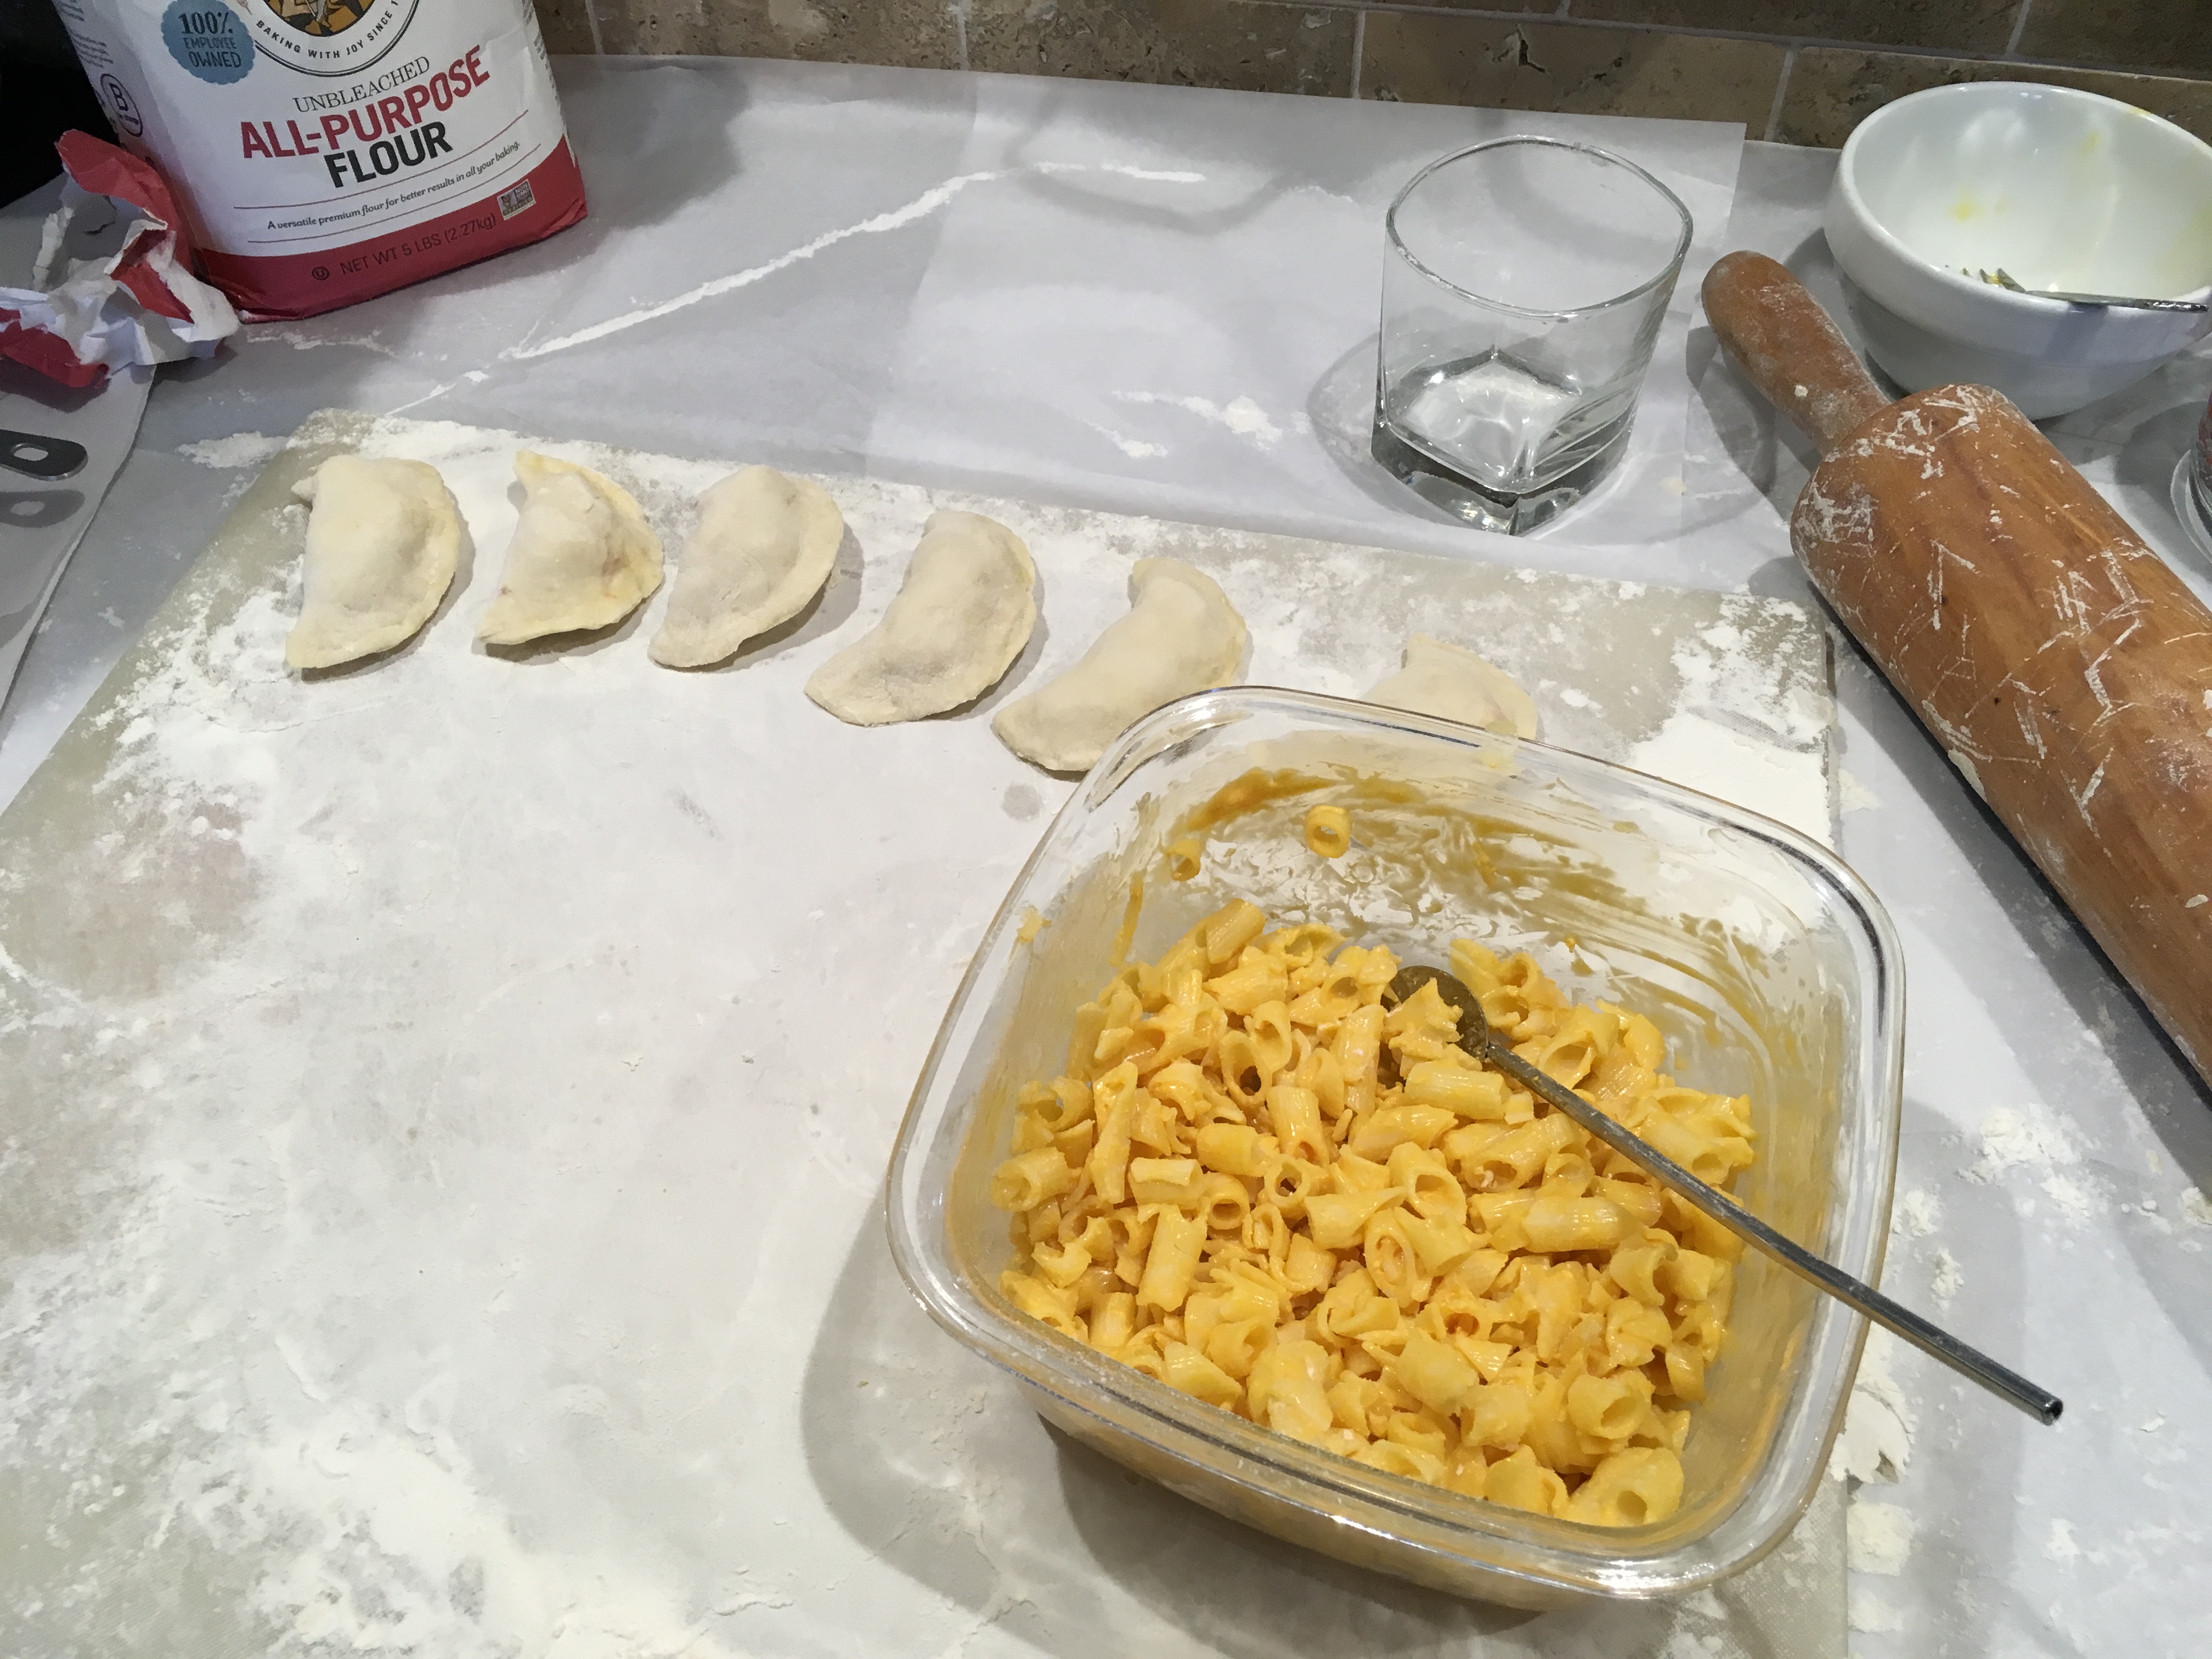
Some stuffed with mac and cheese!
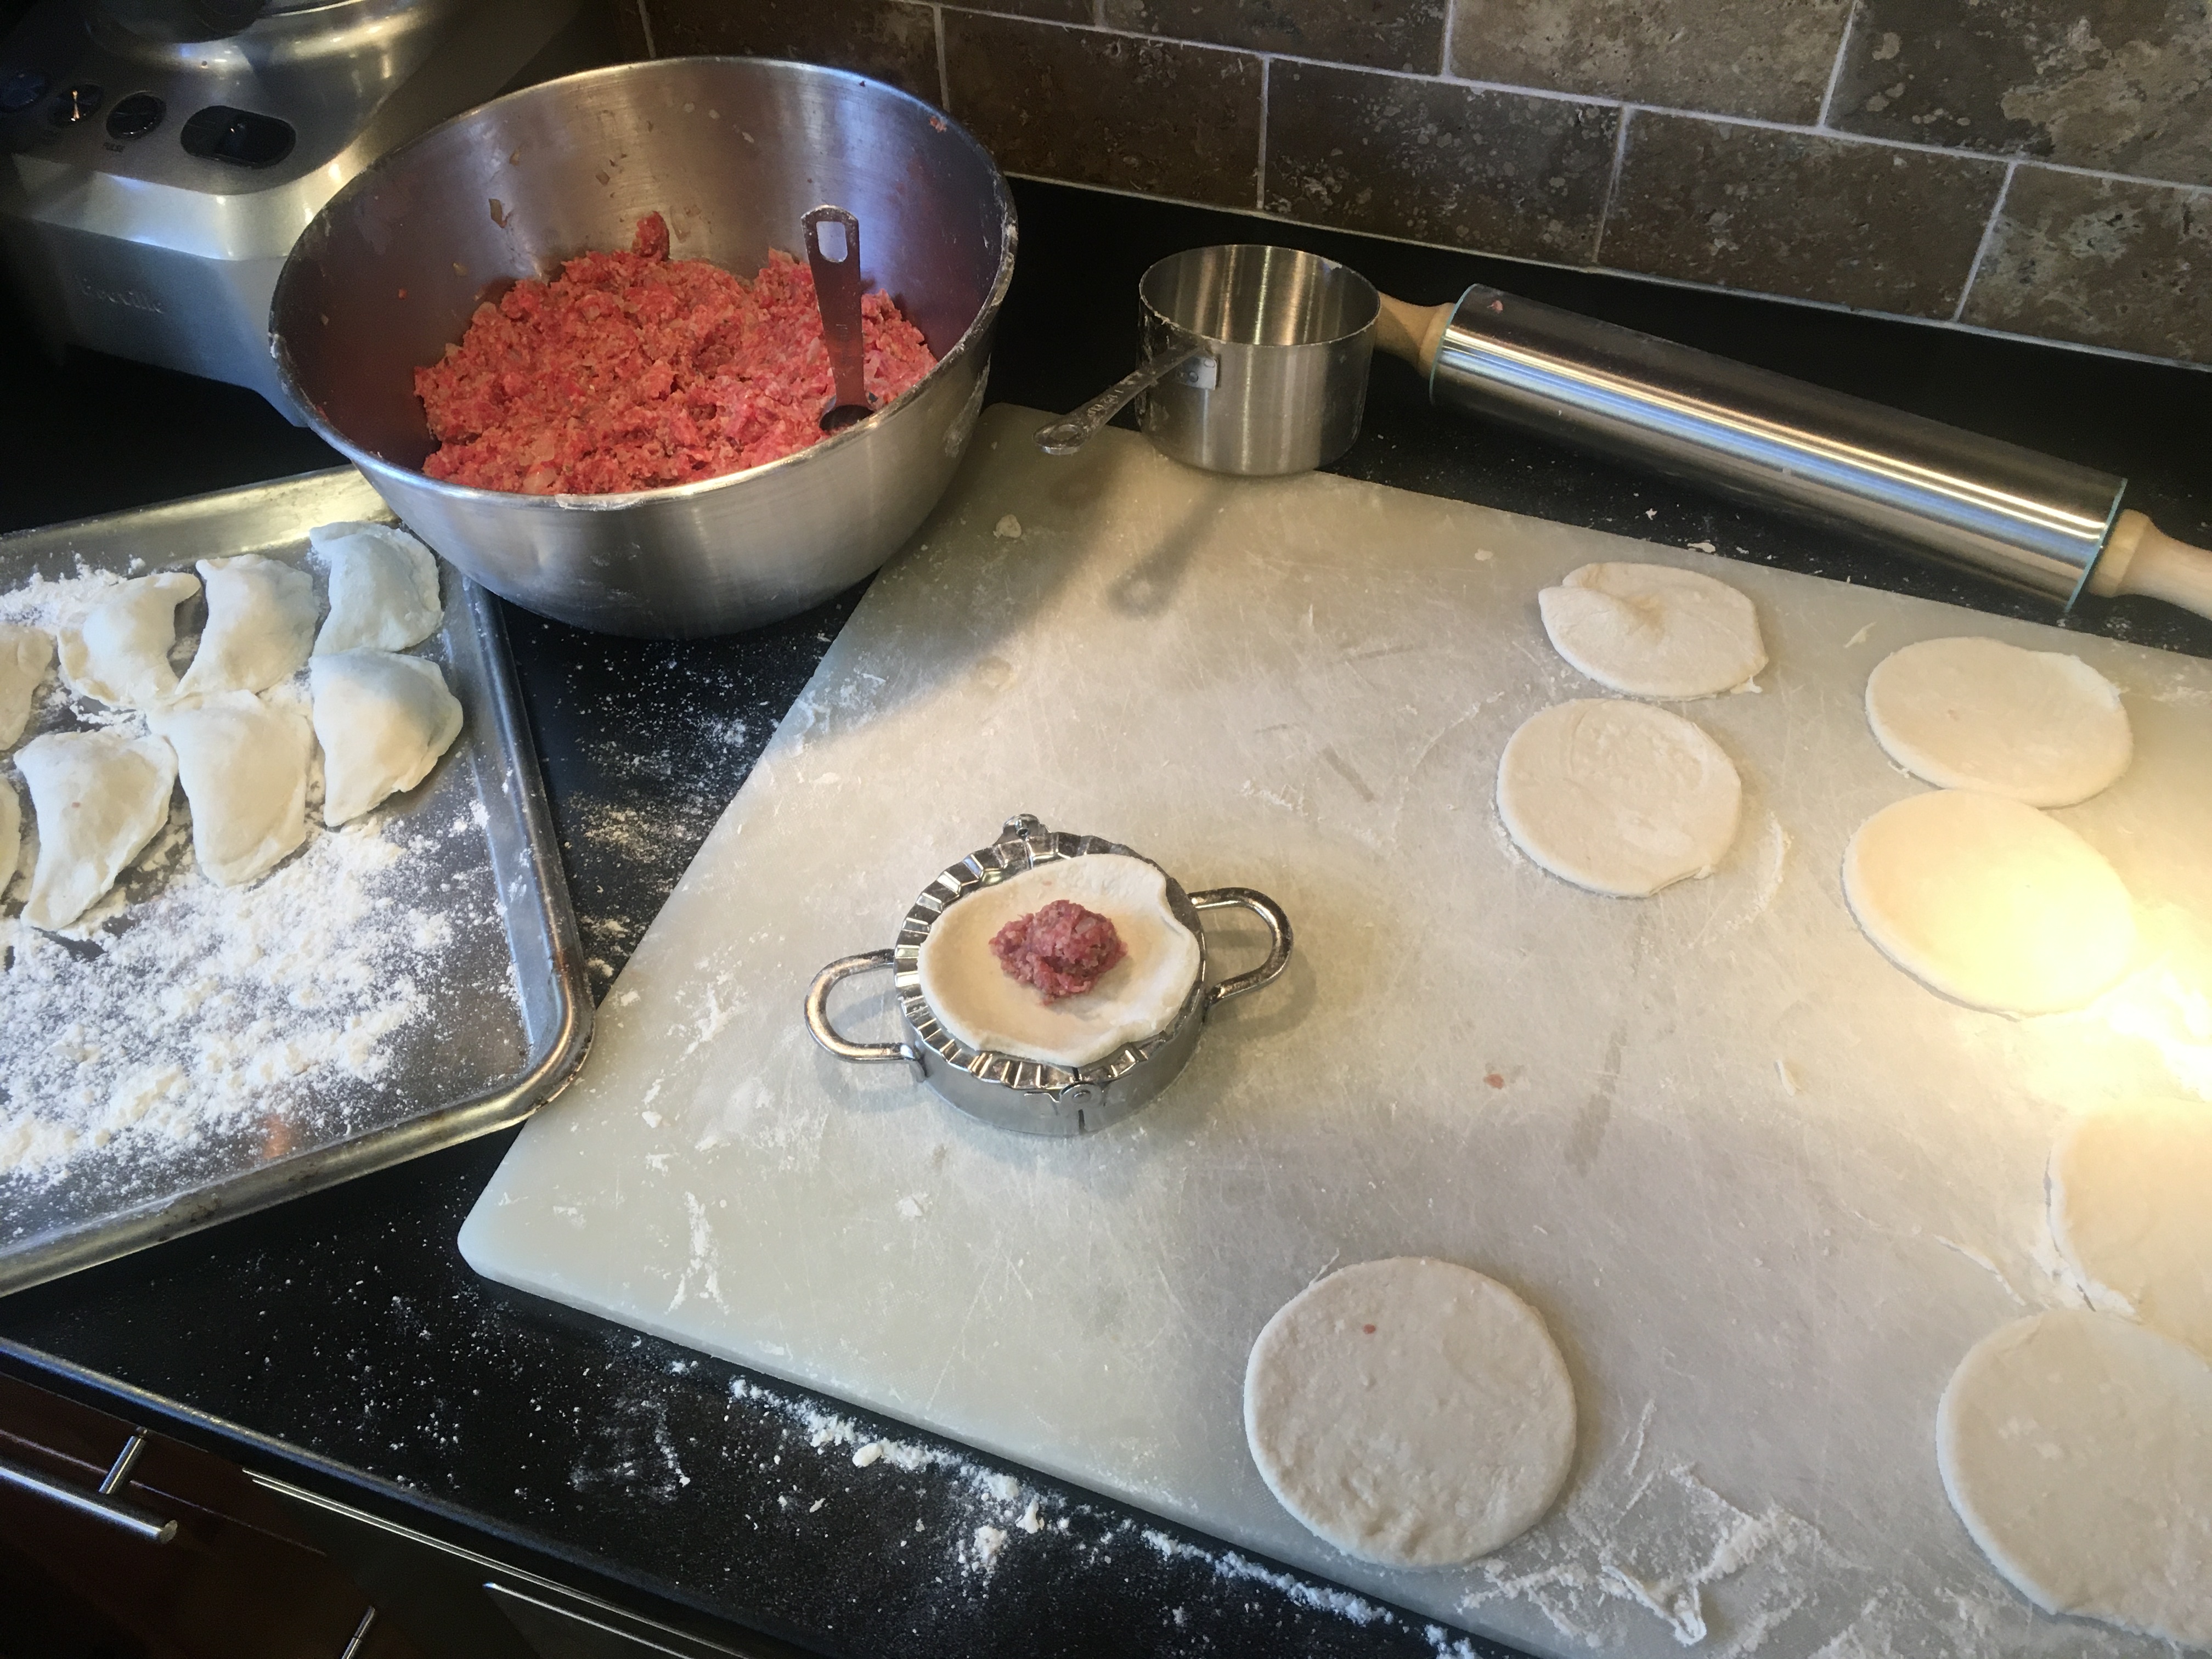
I recently discovered these “pierogi makers.” You lay the dough in them, add your filling, and then close them. They automatically crimp the edges for you. They work pretty well…sometimes. It’s faster with the traditional method.

I always double-check the crimped edges, because your koldūnai will fall apart in the boiling water if you don’t seal them well!
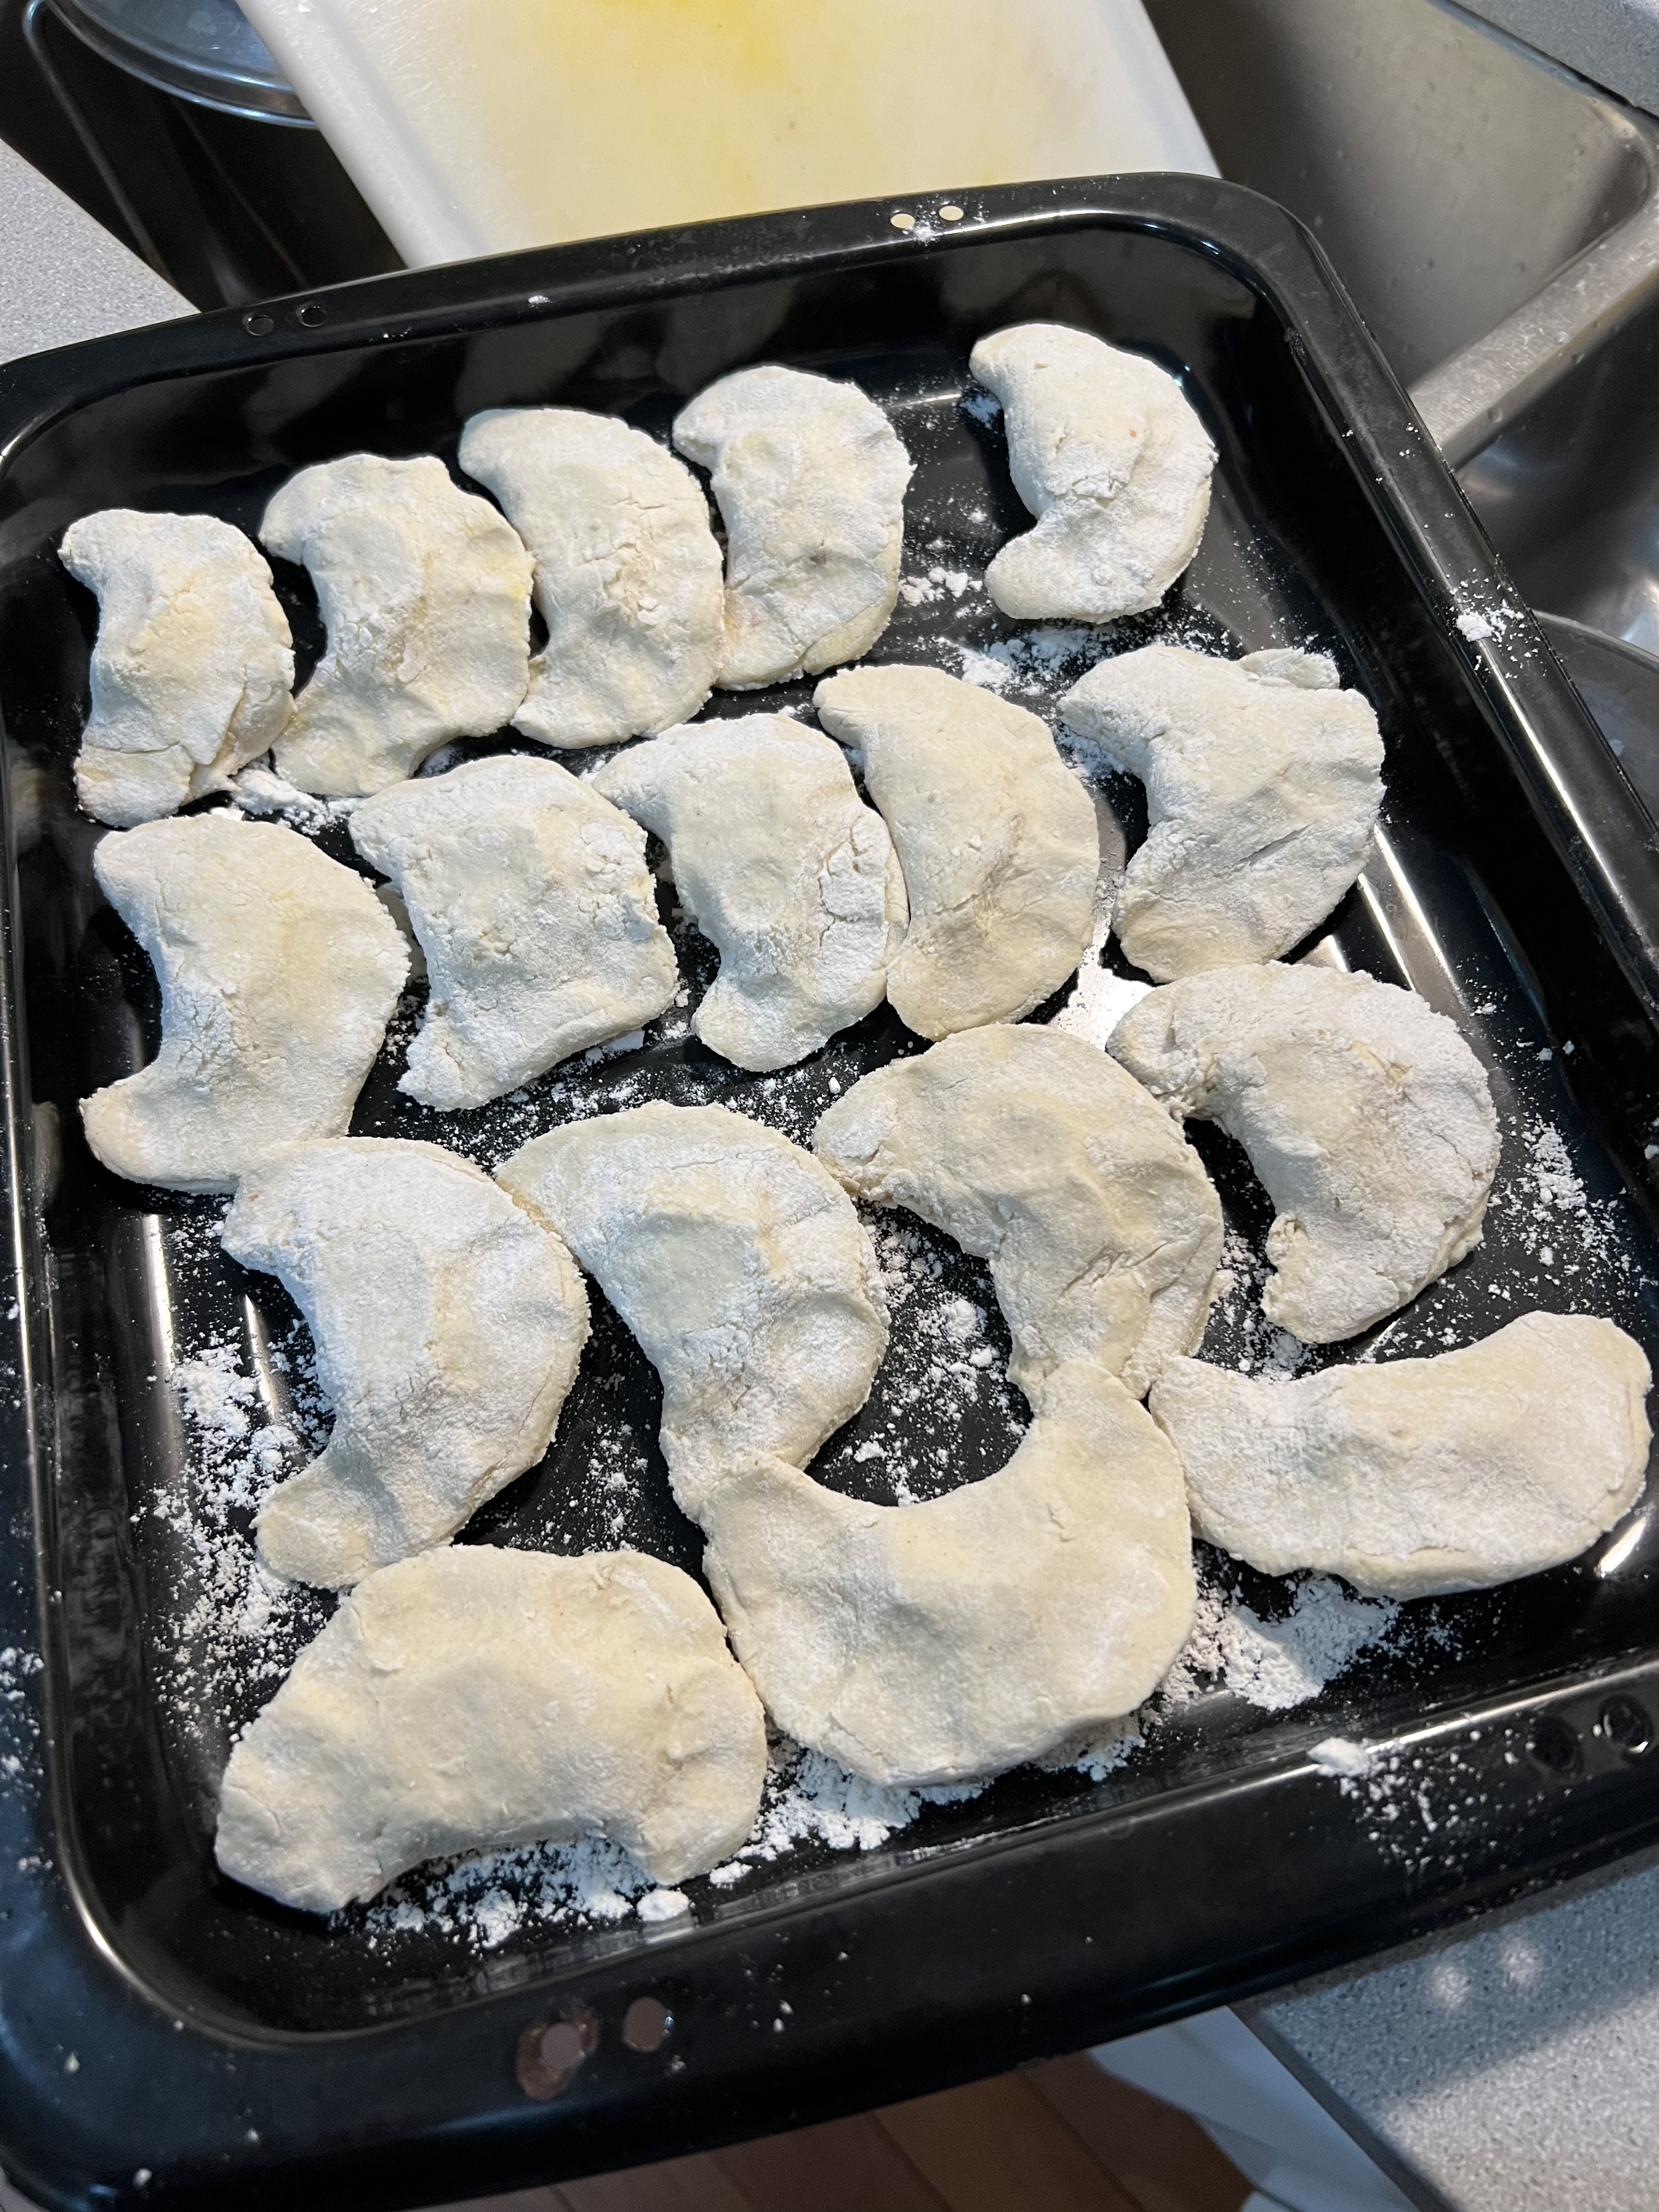
Place the koldūnai on a sheet pan dusted with flour, and when you’re done, place the sheet pan in the freezer.

Ready for the freezer!
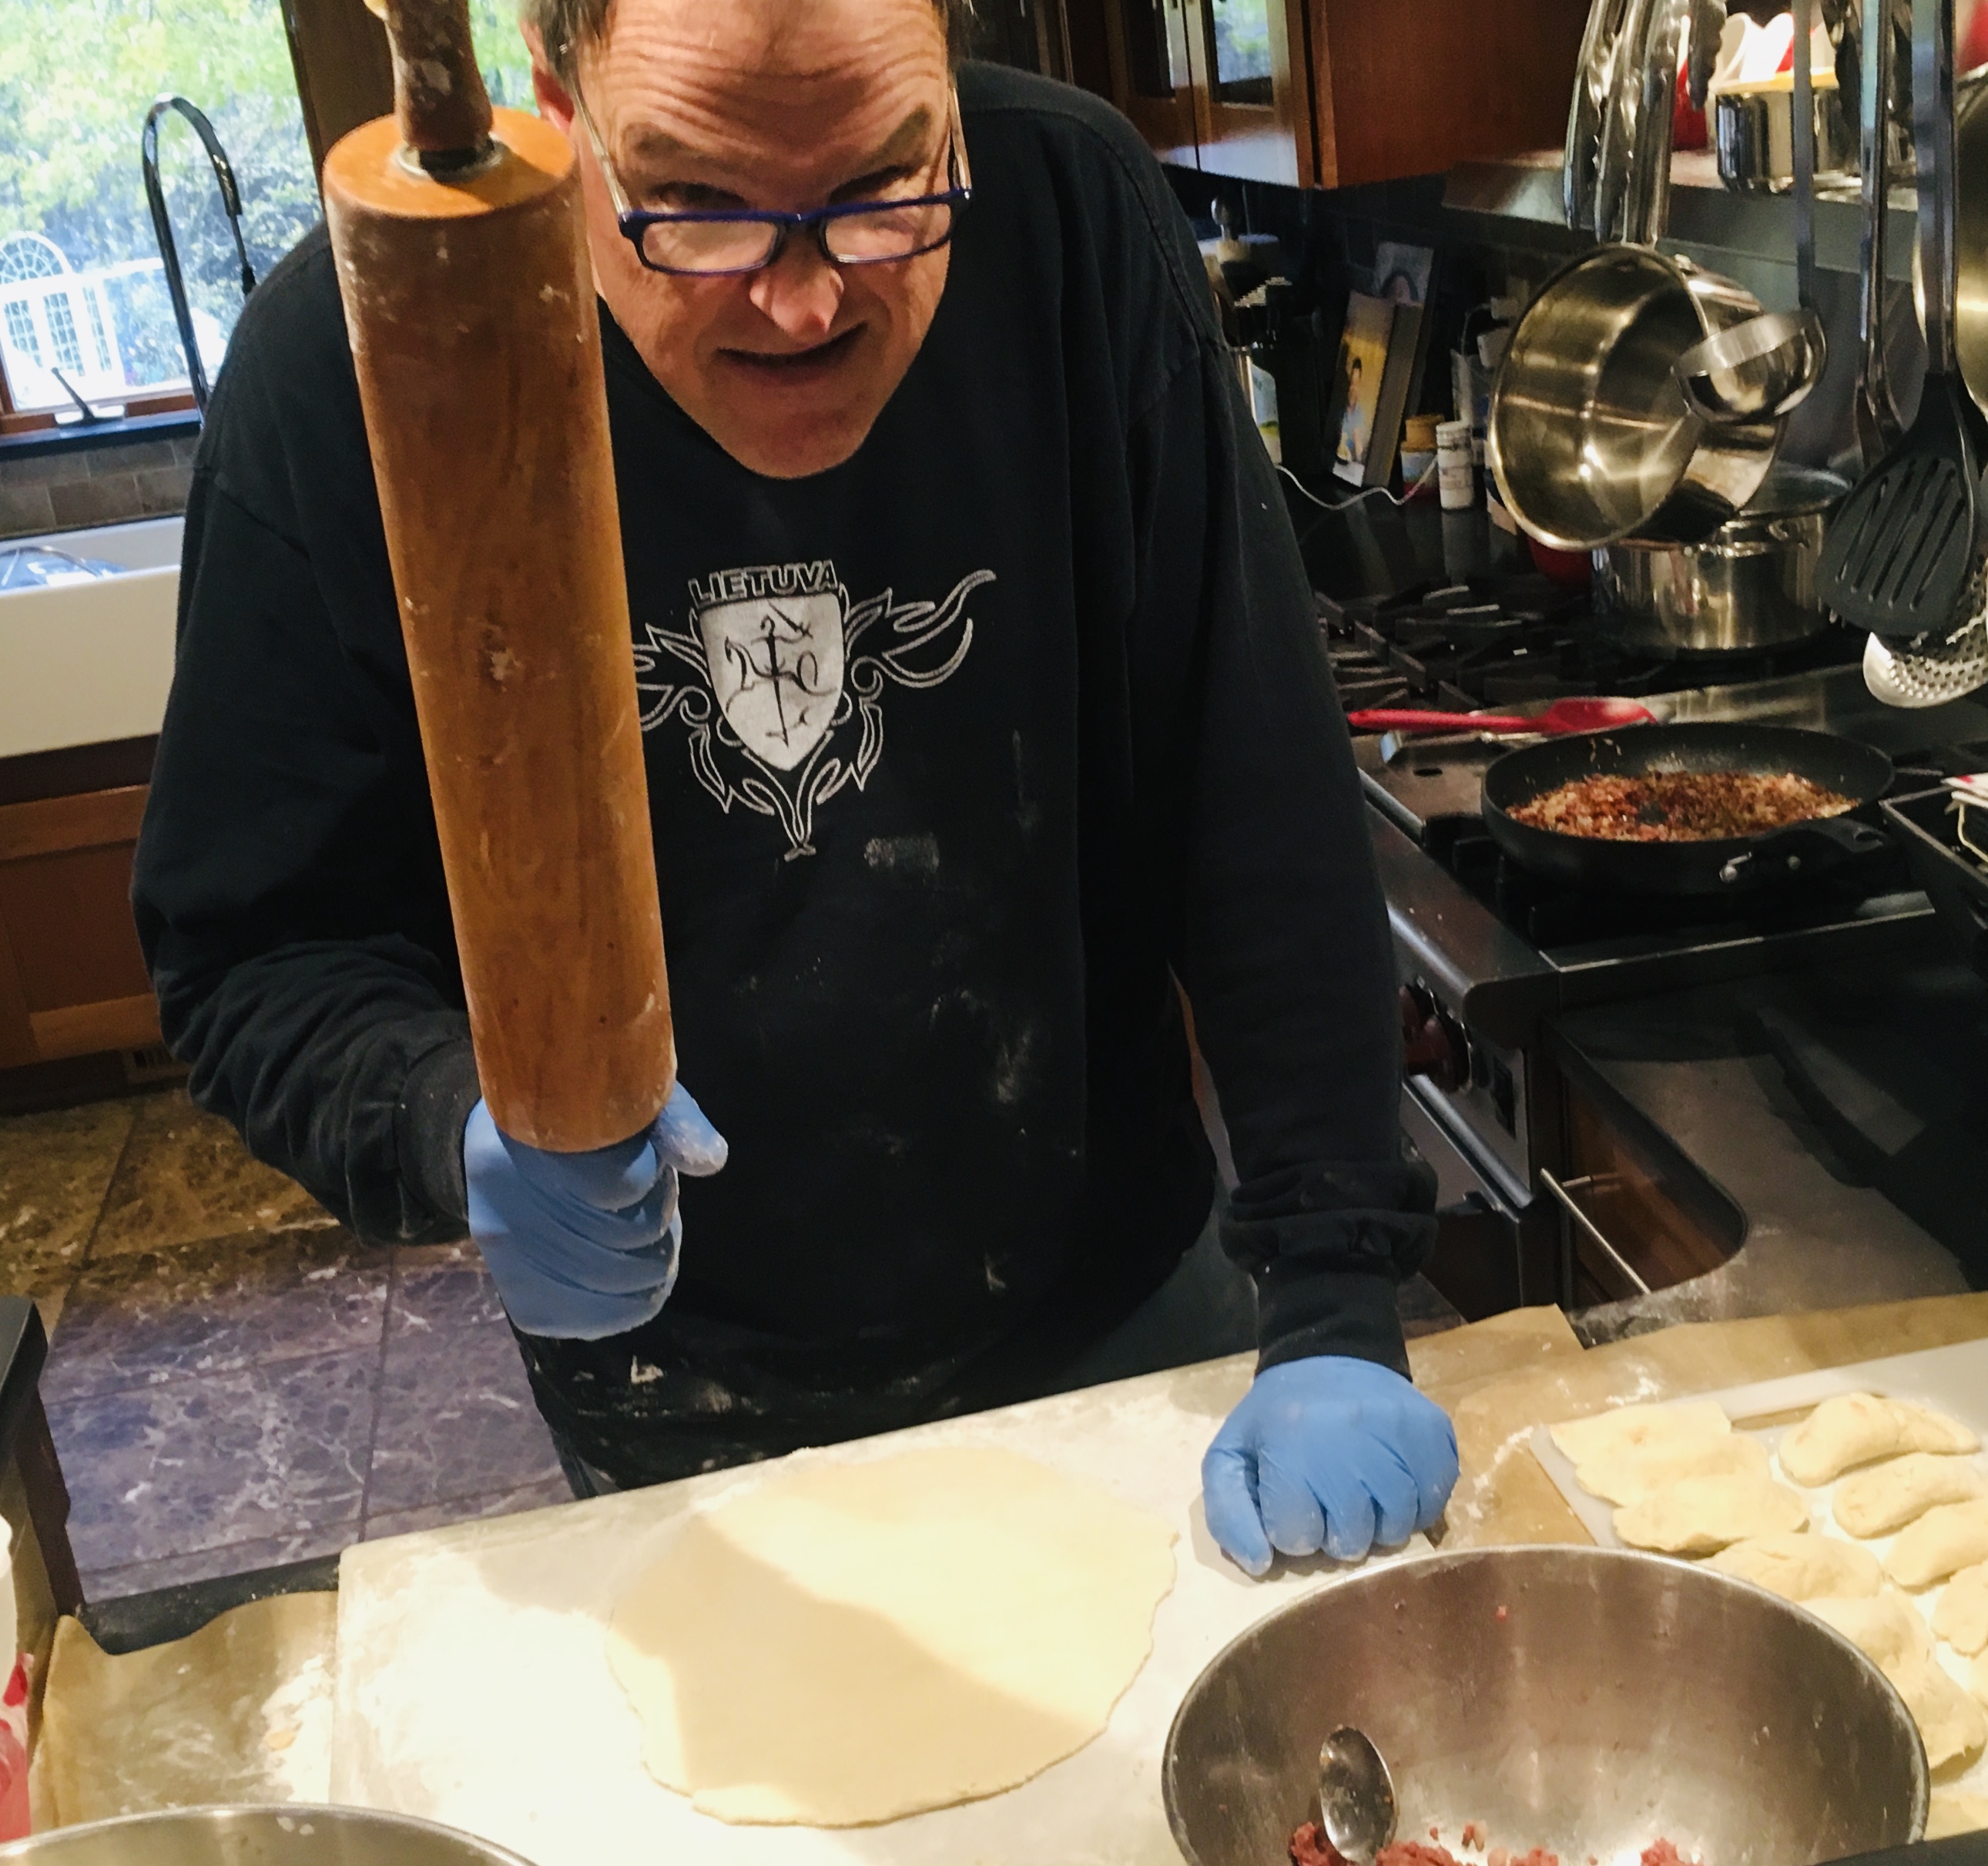
Sometimes the chef gets punchy after making koldūnai all day long!
Get a large pot of salted water boiling. Drop the koldūnai in gently, being careful not to overcrowd them. If the dough is thin, the koldūnai will be ready when they float up to the surface. A thicker dough will need longer cooking. The best way to know if they’re done is by taking one out, cutting it open and having a look (and taste!)
When plating, sprinkle generously with spirgučiai, and serve with sour cream on the side.
If you need to go gluten-free…good news! You can still have your koldūnai! The mushroom filling is already gluten-free. For the breadcrumbs in the beef filling, I take slices of Udi GF bread, toast them, and zap them in a food processor. Excellent breadcrumbs! And I use store-bought GF mac-and-cheese.

GF Mac and cheese, with a little extra cheddar.
For a rustic dough, this recipe works great. (Thanks to my sister, who shared it with me.)

Excellent GF flours.
Combine the flour and salt in a bowl. Add the eggs and mix. (I use my hands for this.) Slowly add water to the dough until it pulls from the sides of the bowl and makes a nice ball of dough. I cut the dough in half and use a well-floured rolling pin to roll it flat.

The finished product! The rice flour gives it a darker, grainier texture. A more rustic taste, but still delicious!
A newer, less rustic gluten-free version here…
These are also gluten-free, but I used a different recipe and a different brand of flour. I mixed 2 cups of King Arthur GF flour with one cup of water and 1 teaspoon of xanthan gum. Then I added more flour or water, depending what was needed, to get the right consistency. A very easy to work with dough!
Chicken Rollatini was one of the first dishes I learned how to make back in my teenage days on Long Island, working at a local Italian restaurant called Pizza City East. (The original Pizza City was in Ozone Park, Queens.) It was a simple dish: a chicken breast rolled up with prosciutto and mozzarella, and baked in a mushroom cream sauce. My version these days substitutes ham for the prosciutto, provolone for the mozzarella, and an Alfredo-like sauce instead of the mushroom cream sauce.


Rolled and ready!