Let’s not talk diets right now. Let’s talk about what is probably the greatest invention since pizza itself: stuffed crust pizza.

I mean: first, there was the simple margarita pizza. Then someone thought of “extra cheese.” After that, where could we go? And then, someone who in my mind deserved the Nobel Prize for Food, came up with stuffed crust pizza. Originally the brainchild of Pizza Hut, it boldly put cheese where no cheese had gone before.


So for me, since I love to make my own pizzas, the next step was to figure out a way to make stuffed crust pizza at home. Turns out it wasn’t really that difficult.

If you’re not into going through the hassle of making your own dough, most supermarkets have pre-made pizza dough balls in the refrigerated section. Grab a couple of them, and save yourself some time and effort. (If you want to make the dough from scratch, see my recipe at the bottom of this blog.)

Same thing with the sauce: I prefer to make my own from real San Marzano tomatoes, but if you have a brand of jarred sauce you like, use that.

The rest is pretty straightforward: cheese!!


Let’s get started…

You bought or made the dough. If you bought two balls, you rolled them together to make one larger one. You poured a little olive oil in a bowl, and placed the ball of dough in that, covering with a clean towel, to let the dough rise for a few hours.

After a few hours, you punch the dough down to get rid of the air bubbles, and roll it into a ball again, putting it back in the bowl, covered, to rest for another hour or so.

Preheat the oven to 500 or it’s hottest temperature, with a pizza stone on the middle rack.

Now the dough is ready to work. Place your pizza peel on the counter you’re working on. Sprinkle the peel with a large-grained flour, like corn meal or semolina. (That acts like little ball-bearings to let the dough slide off easily.) On top of the pizza peel, stretch the dough out to a size that will be about 2 or 3 inches bigger in diameter than the peel or pizza stone you have in the oven.


Made the mistake of stretching the dough out on the counter rather than the peel, which made it hard to lift. Perhaps it was the influence of the bourbon in the background! I fixed the problem later. (I kept the bourbon.)


Buy a firm mozzarella that slices nicely into sticks. (If you use fresh mozzarella, it will get mushy in the crust.) Cut it into pieces the size of the average mozzarella stick. 


Place the sticks of mozzarella around the dough in a circle, about an inch away from the edge.


Now fold the dough over the mozzarella sticks. You might need a touch of water to make the dough stick to itself.


Now make your pizza like you normally would. Sauce it…


Cheese it…


Add toppings…


And bake!


You can never have too much cheese!


If you want to make your own pizza dough, here’s my recipe…

The key ingredient is 00 flour, and it can be found in specialty stores,  or online. Ratios for this recipe depend on the humidity in my kitchen on any given day.

4–5 cups 00 flour
1 cup tepid water (100 to 110 degrees)
1 tablespoon salt
1 tablespoon active dry yeast
a squirt of extra virgin olive oil

I mix all the dry ingredients in the bowl of a stand mixer, then slowly add the water as it mixes. After the ingredients are well mixed, and the dough pulls from the side of the bowl, I remove it to a floured board, where I knead the dough by hand for another 5 minutes, until it is smooth and elastic, shaping it into a ball. I rub a little olive oil over the ball of dough, place it in a bowl covered with plastic wrap or a clean towel, and let it rise at room temp for 2 hours, punching it down after that. I roll it back into a ball again, and let is rise, covered, for at least another hour.


True: the inspiration behind this dish was a conversation I had with friends, talking about our early childhood days. Someone brought up the name Shari Lewis, and her famous puppet Lamb Chop. Next thing I knew, I was grilling the critter in my yard.

This is a great grilled lamb recipe that works best if you marinate it ahead of time, but it’s not absolutely necessary. Cook it indoors or outside on the grill. I use grapefruit zest and juice in the recipe, but any citrus you like will work.

American lamb is different from lamb raised in New Zealand or Australia. If you like a milder flavor, go with the American lamb. Lamb from New Zealand and Australia is entirely grass-fed, making for a stronger “gamier” flavor but a healthier cut of meat, as all grass-fed meat products are.


L2


6–8 small lamb chops
1/4 cup brown mustard (I like Gulden’s)
Zest of 1 grapefruit
1 tablespoon grapefruit juice
1 tablespoon honey
1 teaspoon garlic salt
1/4 teaspoon black pepper
1/4 teaspoon dried thyme


In a bowl, combine the mustard, grapefruit zest and juice, honey, garlic salt, pepper, and thyme. Mix well.

Place the lamb pieces in a  Ziploc bag and pour the marinade in, sealing the bag well. Squish the bag around gently to make sure the marinade makes contact with all the meat surfaces. Marinate at least 1 hour at room temperature, or longer in the fridge.

Pre-heat a hardwood charcoal grill…or if cooking indoors, pre-heat the oven to 350, and on the stove top, heat an oven-proof pan (cast iron is best) with a little pork fat or oil.

After marinating, remove the lamb pieces from the bag and save the marinade to baste with while cooking. (Don’t use the marinade uncooked, since it made contact with raw meat.)

On the grill: Grill the lamb on all sides first, then start brushing the marinade on them, flipping them, brushing again, and grilling. Keep doing this until you’ve used up all the marinade and the lamb is cooked to proper doneness. Don’t overcook it!

In the pan: Sear the lamb on all sides, then brush all sides with the marinade. Place the lamb in the oven to finish cooking, making sure you don’t overcook it. Let it rest before serving.


image

TIME TO DIET AGAIN!

Posted: January 5, 2021 in Uncategorized
Tags: , , ,
“You’ll never out-exercise a bad diet.”
That’s not my quote…but it’s absolutely true.
For me, the start of a new year usually means the start of a diet. I cook more and allow myself to eat more over the holidays, knowing that I’ll be going on a diet in the new year, so I probably make it even worse for myself! In any case, this is a diet that I stuck with last year, and lost a total of 25 pounds. I gained a few back over the holidays, but if I hunker down again like I did last year, I have no doubt I will once again achieve my goals.
My incentive last year was a planned trip to St. John in the USVI in April with my daughter. Although I reached my target weight, the trip was postponed due to Covid until November. And then in November, with the virus raging as much as ever, we had to completely cancel our trip. Here’s hoping that we get a chance to travel in 2021.

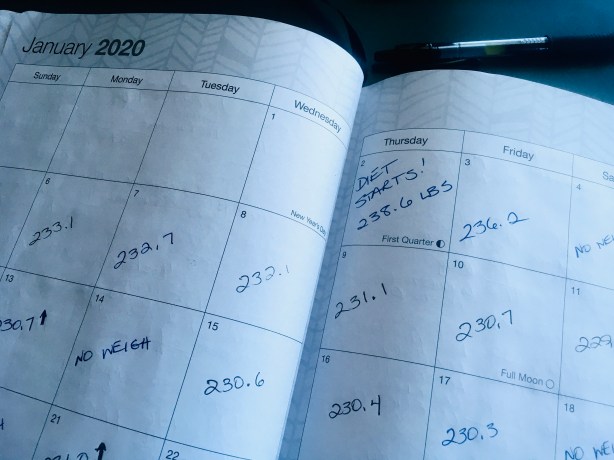
I started last year at 238. I got down to 213! But the key was to write everything down: my weight, and exactly what I ate. It takes determination, but it works.


After seeing my blog posts featuring ribs, pastas with cheese, huge roasts, and cheesecake, I had several friends ask me how I didn’t weigh 500 pounds! My answer was simple: I cook everything. I just don’t eat everything. That’s what this diet is all about. I might cook a large portion, but I eat a small amount of it, portion out the rest of it, and put it in my freezer for another day. I also share it with family and friends, who are more than happy to oblige!
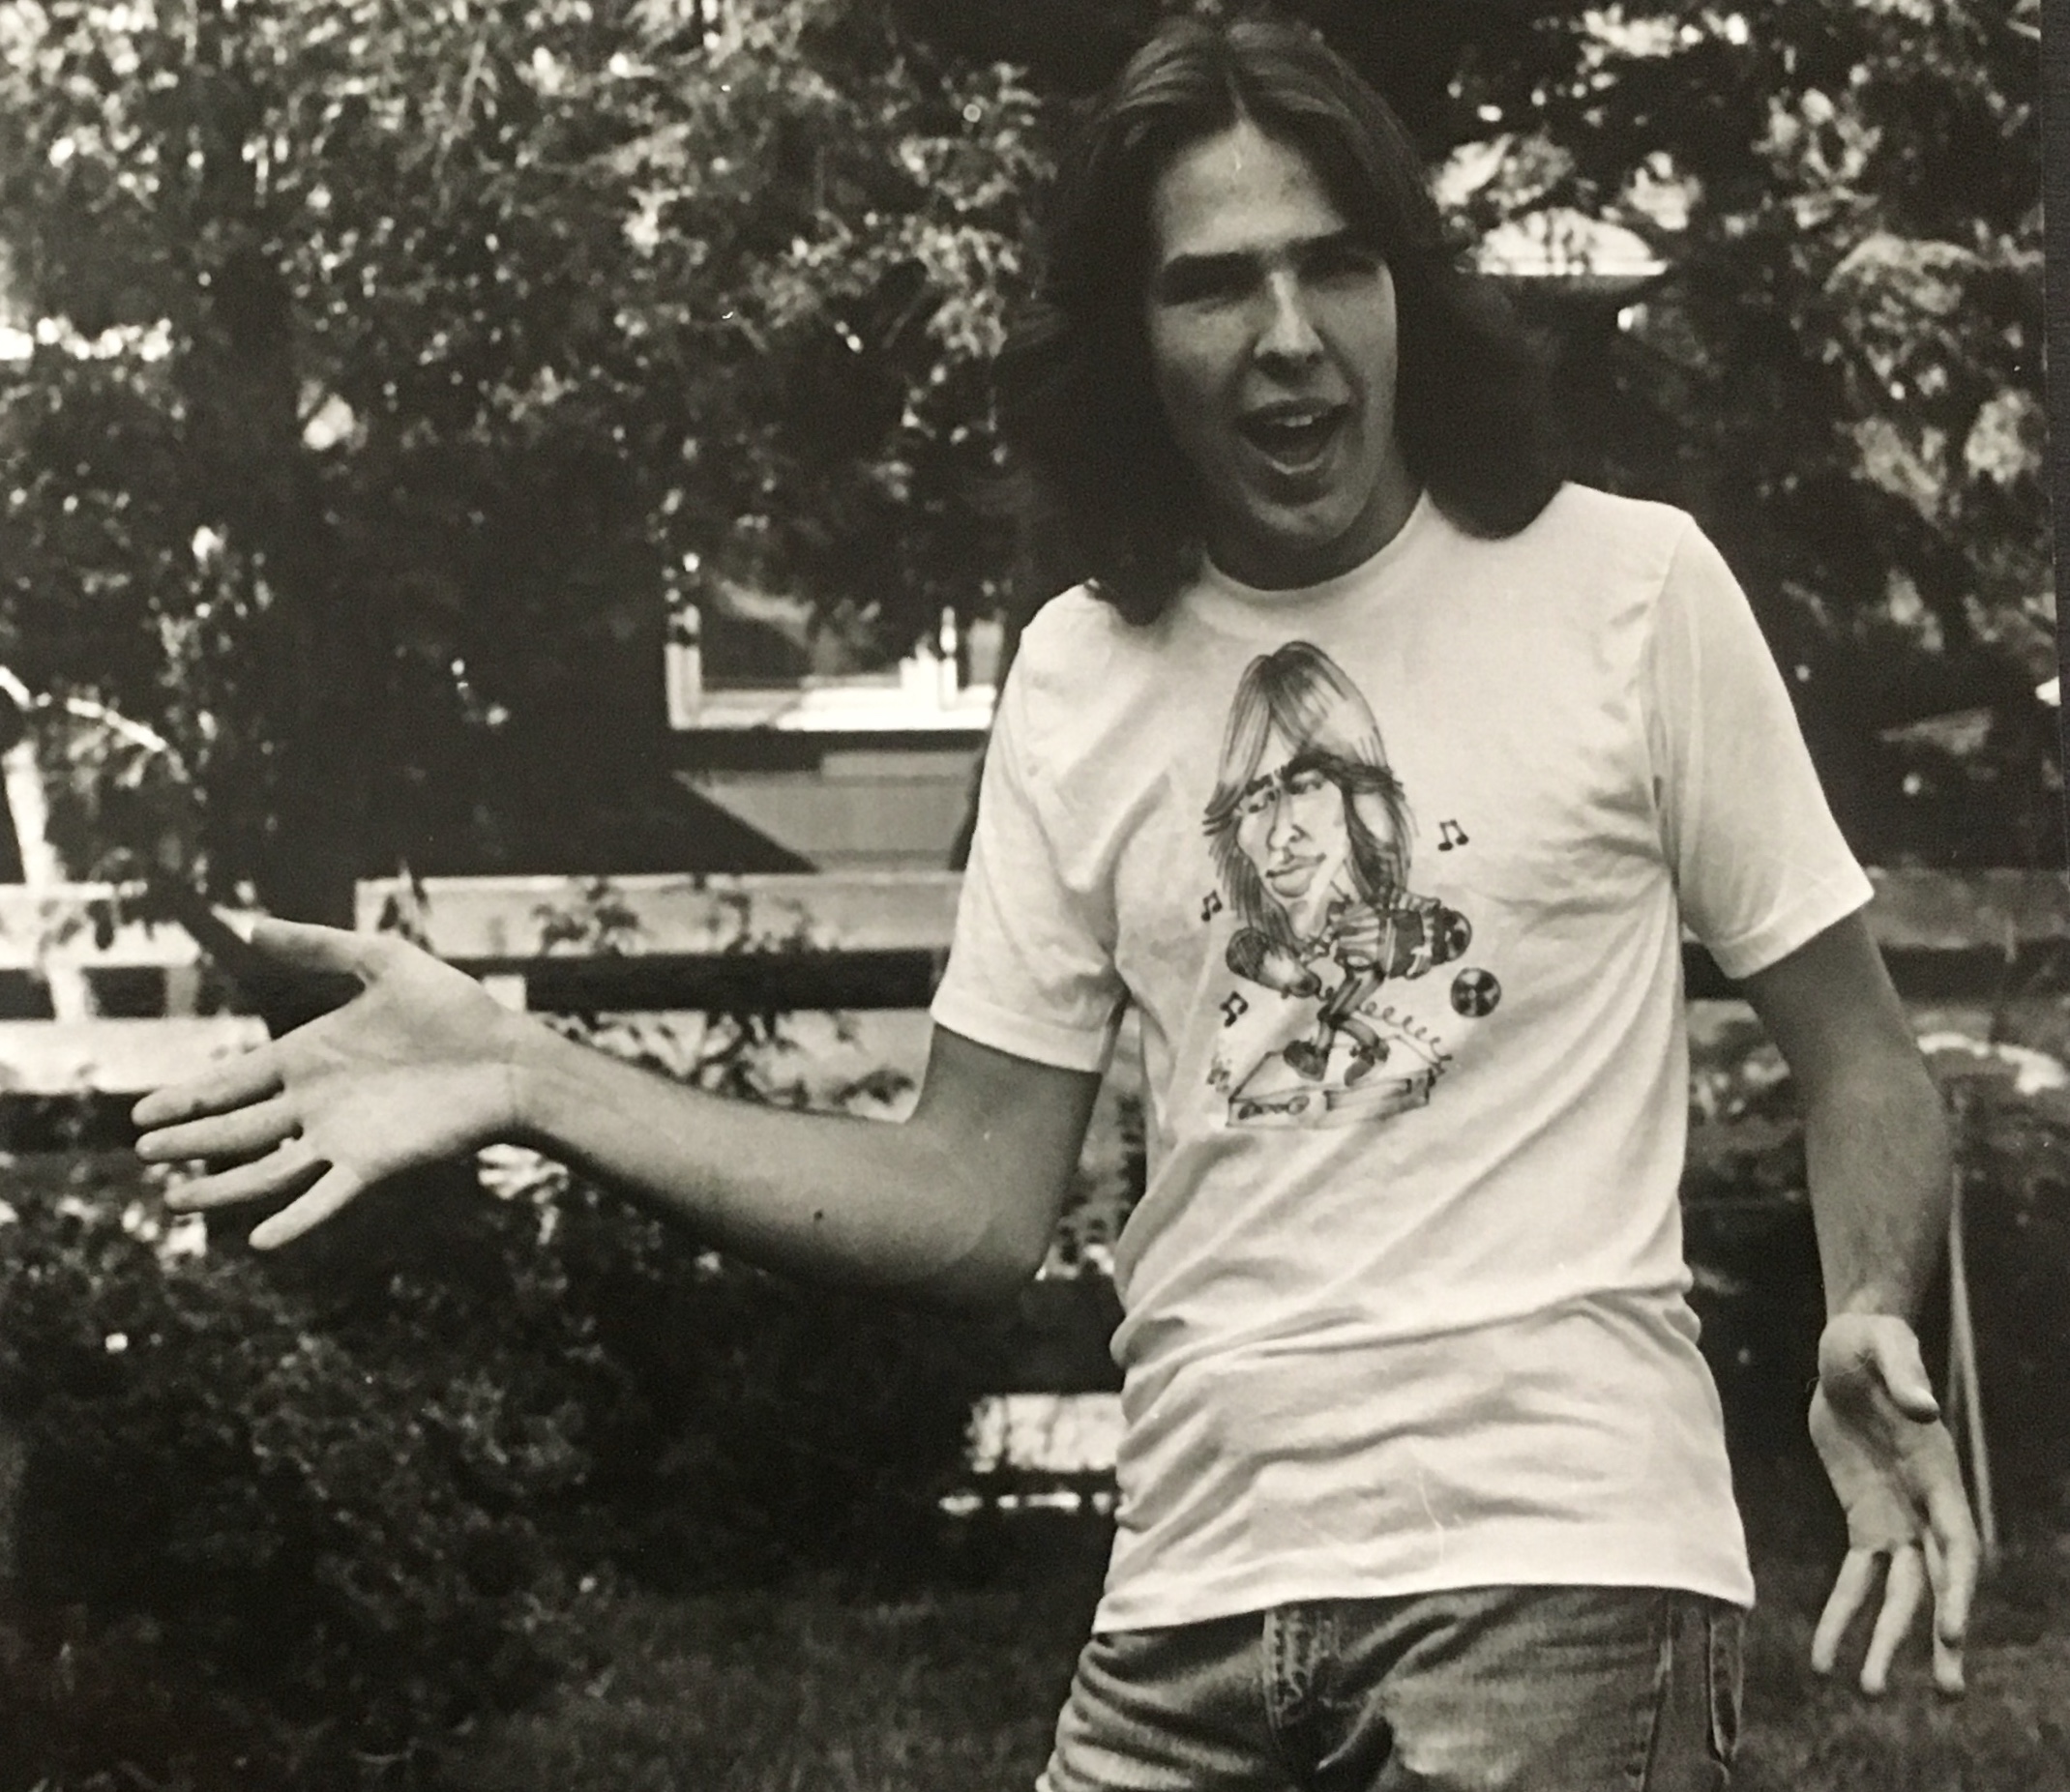
When I was young, I was rail thin and could eat anything I wanted without gaining a pound. When I got older, my metabolism slowed down, but my love of food did not–in fact, it probably increased, as I learned how to cook really well.

OMG…that was one skinny dude!


Now, here I am, writing a food blog. I travel for food. I plan six meals ahead at any given time. I’ll be 63 in March, and I have a 14-year-old daughter. Do the math, and you’ll realize, like I did, that I need to take care of myself to be around for as many of her upcoming life events as possible.

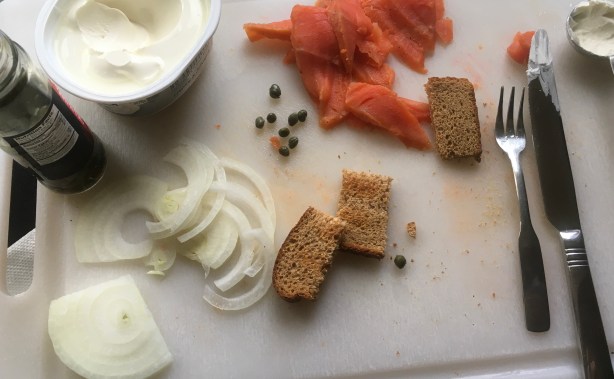
My version of lox and bagels: home-cured wild-caught Alaskan salmon, whipped cream cheese (fewer calories), onions, capers, and toast pieces. Lots of tasty bites here. (A sliced, hard-boiled egg would only add 78 calories.)

There are a million diets out there, and everybody claims they have the secret to weight loss. But no matter what diet you’re on, what it really boils down to is the simple mathematical equation of calories in…versus calories out.
My buddy, Lee, a PhD in chemistry, and someone that dropped 50 pounds a couple of years ago, told me about an article written by an engineer that lays out the basics. You can find it here:
As he states, losing weight is simply thermodynamics: you need to eat less calories than your body burns every day. If you do that, you will lose weight.

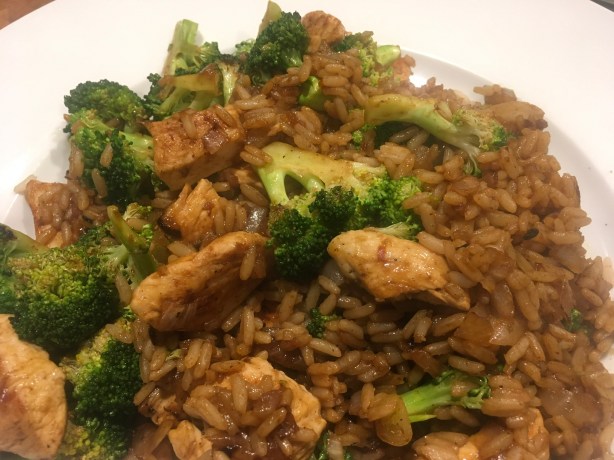
My stir-fry has chicken breast, broccoli, white rice (Uncle Ben’s), some onion, and my “Chinese Mix” of flavors: soy sauce, hoisin sauce, chili garlic sauce, and sesame oil. My trick to add flavor to the rice without calories is to add beef bouillon when I cook it. (I use Better Than Bouillon.)


There is a way to find out approximately how many calories a day your body uses to maintain its weight. It’s called the basal metabolic rate, or BMR. In my case, I need about 2500 calories per day to maintain my weight. So, like my friend Lee, I chose a diet where I eat no more than 1500 calories daily…a deficit of 1000 calories per day.
At the end of 7 days, I have eaten 7000 fewer calories than my body uses. Since about 3500 calories make 1 pound, I should be losing 2 pounds per week, according to this math.
Now, there are many variables to this, but basically this thought process holds true.
And the best part is: is doesn’t matter what I eat. If I want to eat bean sprouts, great. If I want Taco Bell, fine. As long as I don’t go over 1500 calories a day, it doesn’t matter what I put in my gut. This is really helpful for people like me, who get bored of eating the same old stuff day after day–a sure-fire way to give up on a diet. Carbs, fats, meat, dairy–even alcohol…all OK within reason.

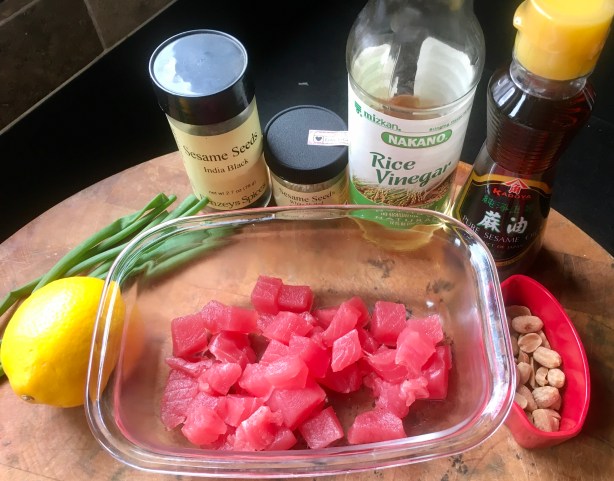
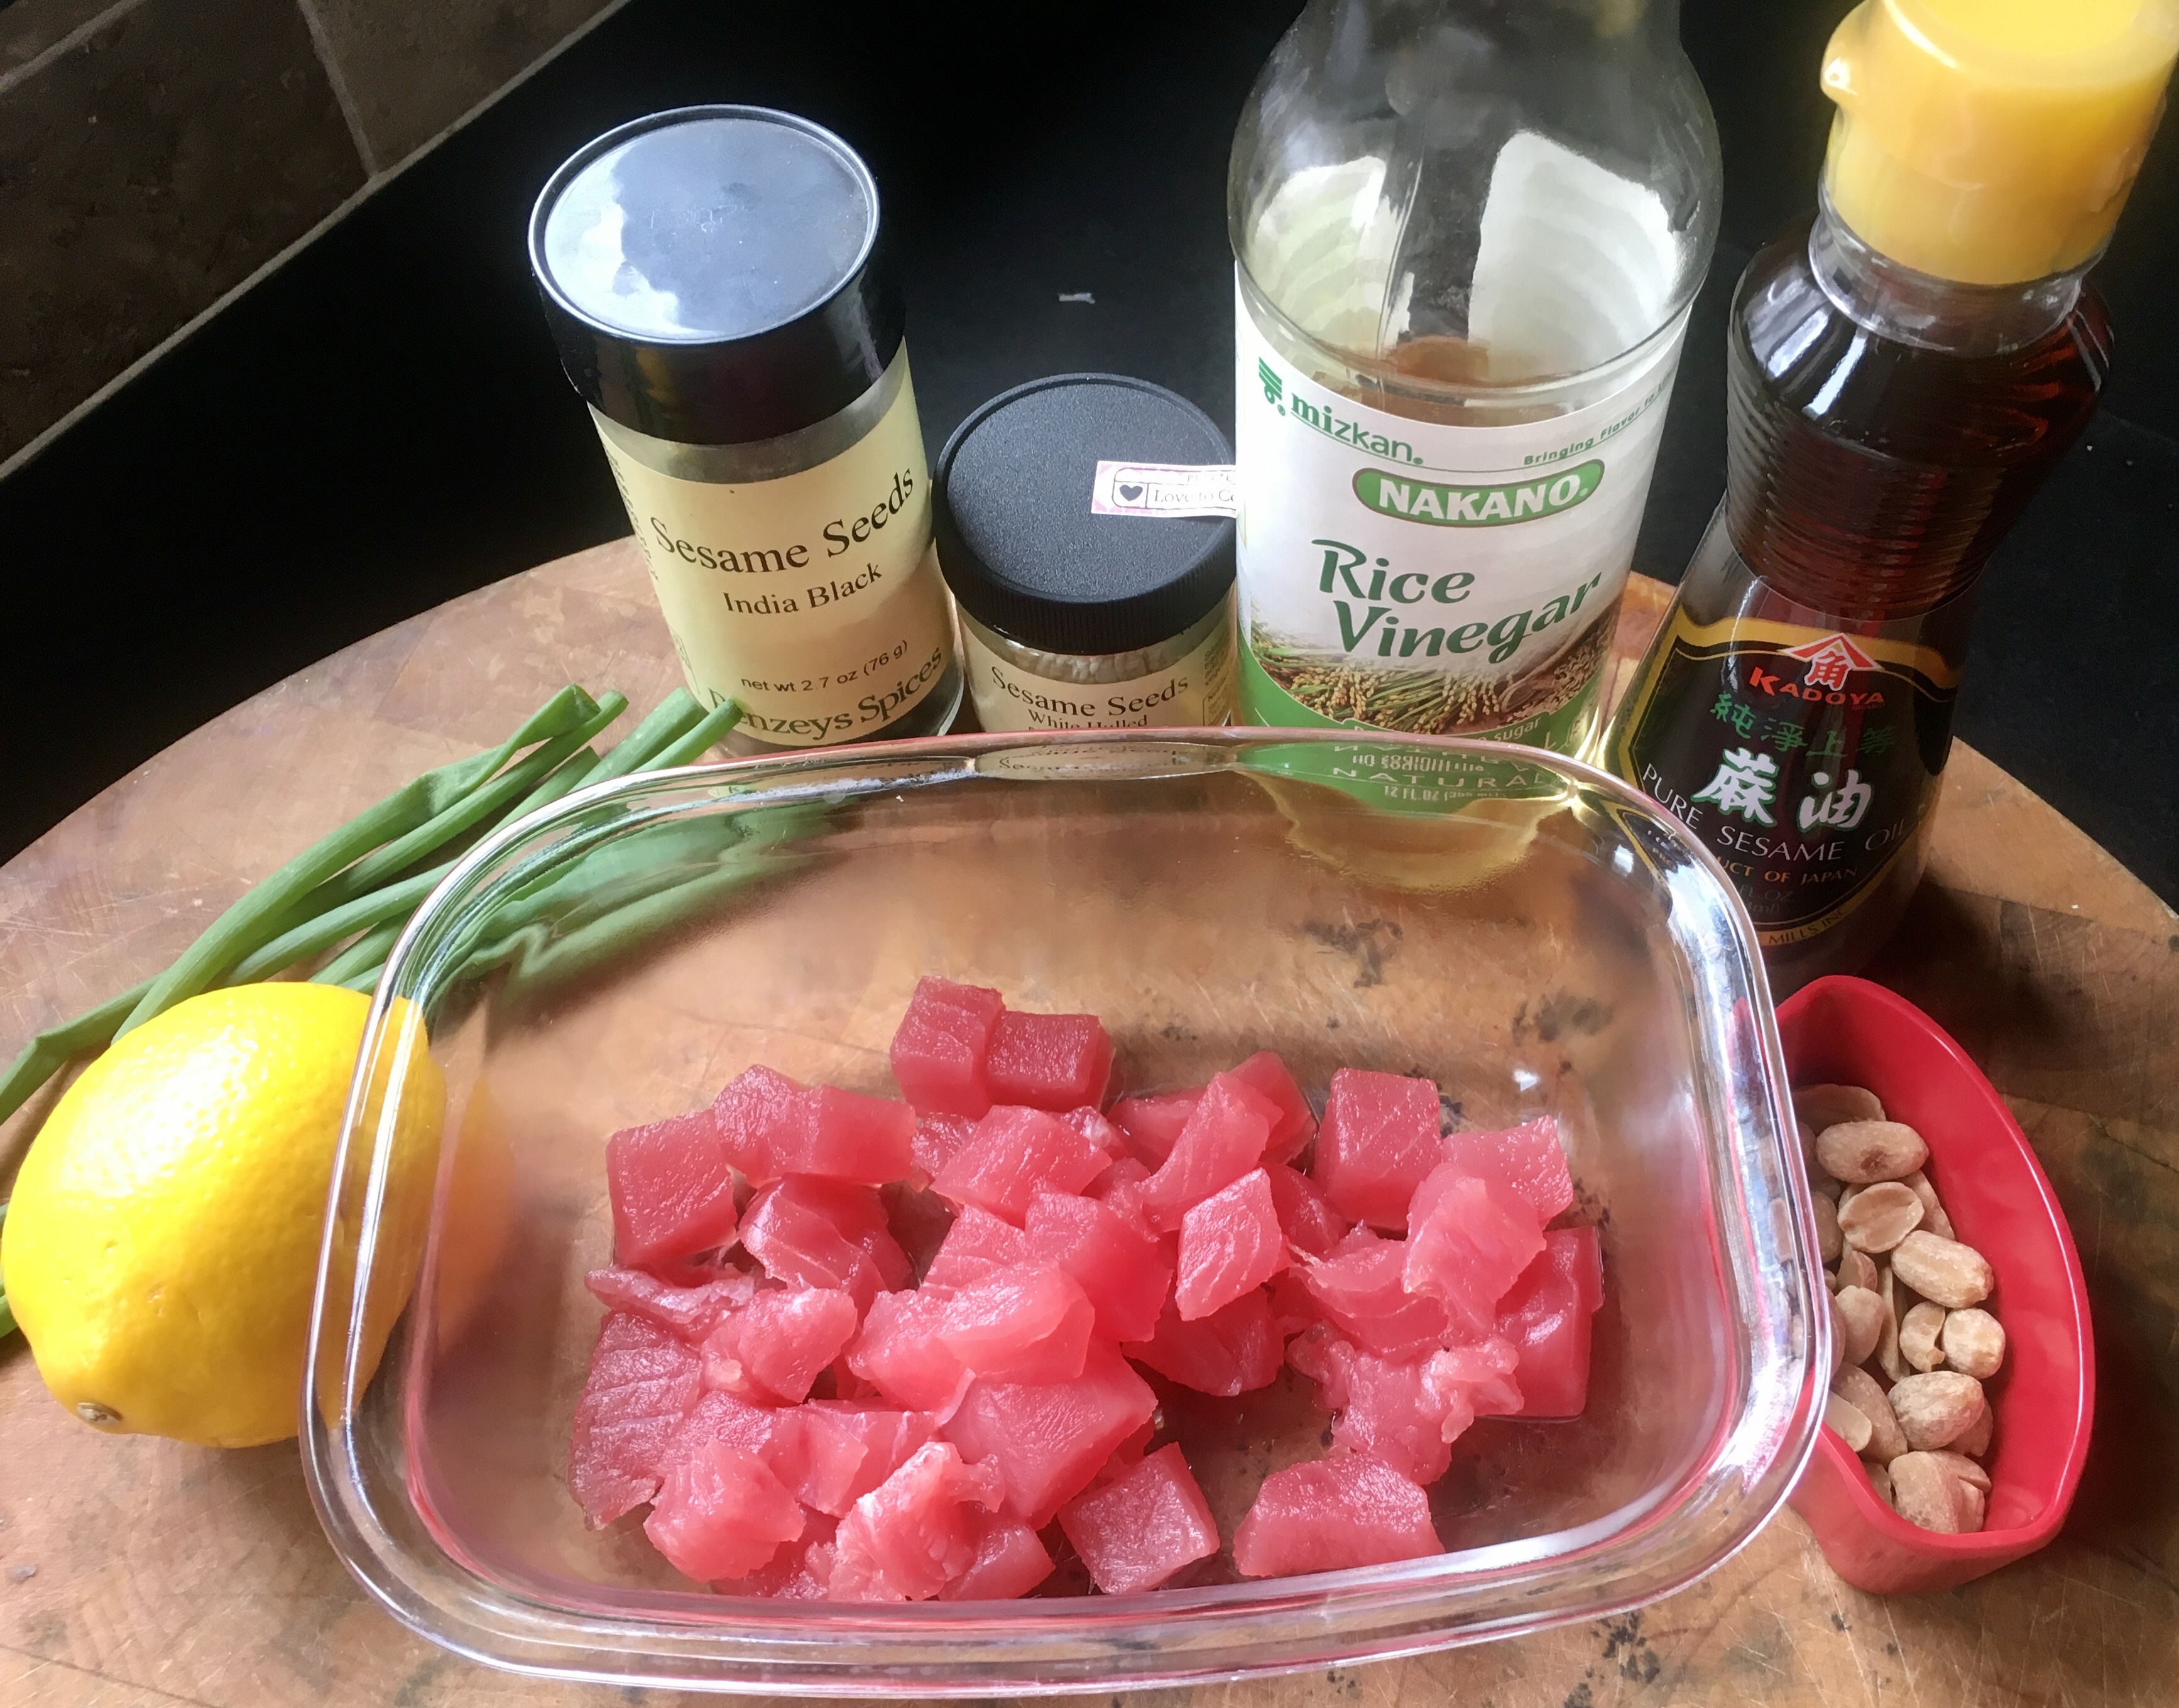
Fish is an excellent source of protein, and I never ate enough of it. Now, I make a bowl of tuna poke pretty often, and it’s absolutely delicious!


My buddy, Lee, is a diabetic, and stays away from carbs. He eats lean meats, seafood, and vegetables. That’s how he lost his 50 pounds. His son, on the other hand, lost weight by eating mostly fast food, but still counting the calories and not eating more than 1500 of them per day. He also lost 50 pounds.
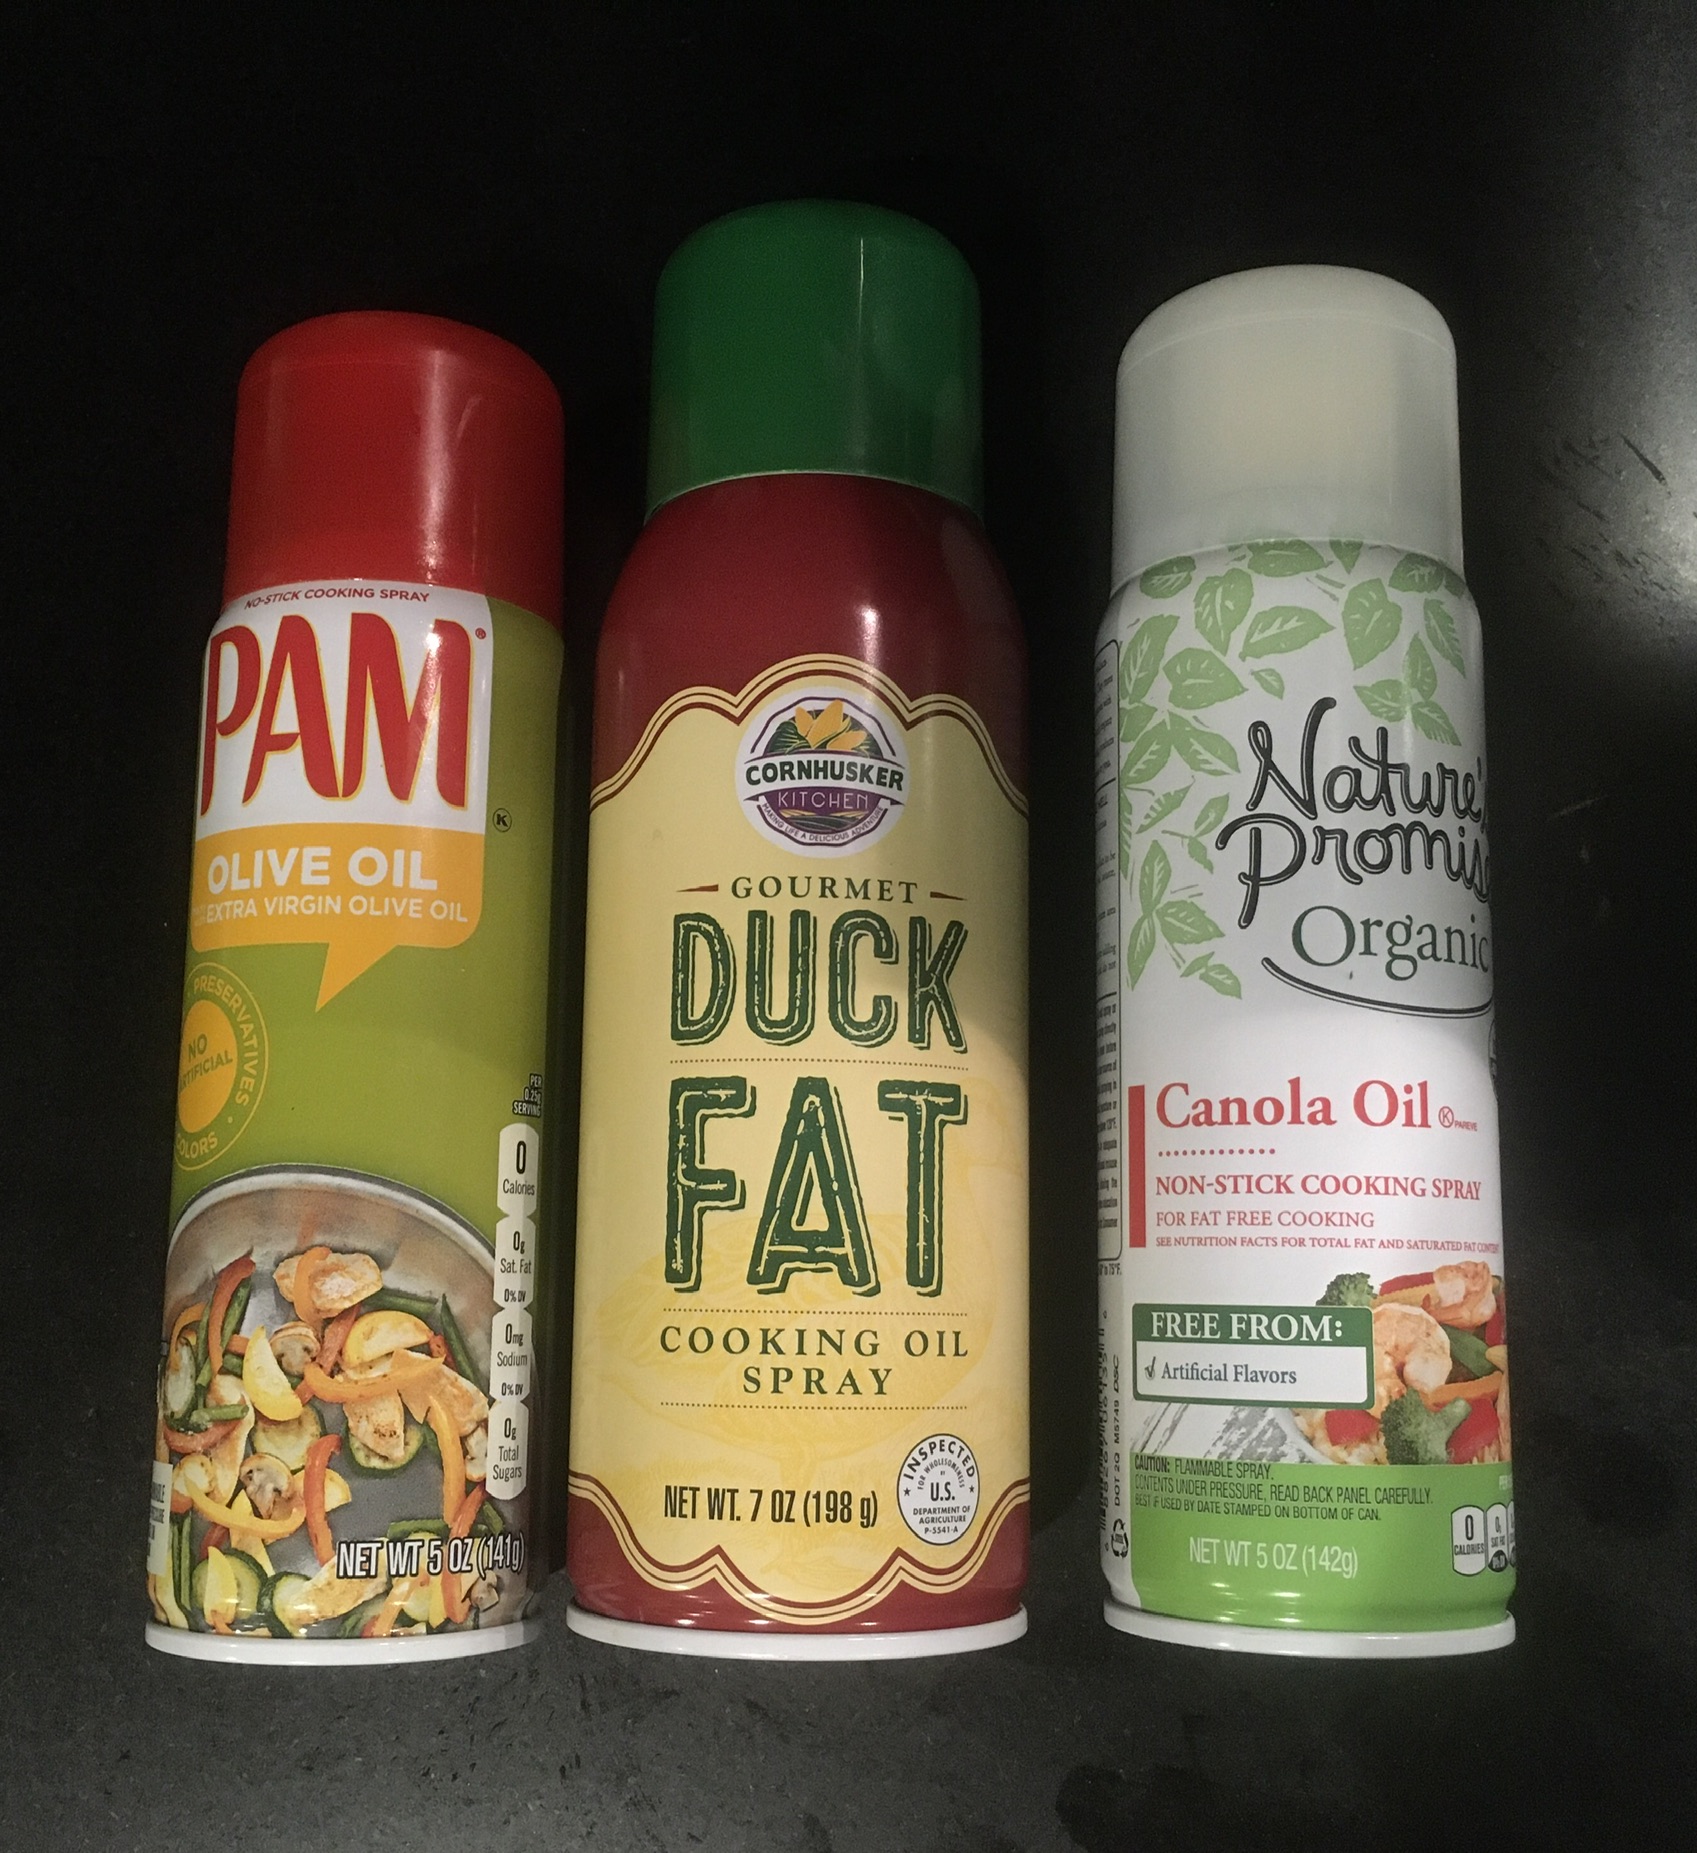
I’m not a big junk food person. I don’t buy cookies, cakes or chips. Ice cream (my kryptonite) is a rare treat. I don’t put sugar in my coffee, and I don’t drink juices or soda. And I don’t like beer! But my biggest weight-gain mistake was thinking I could use unlimited amounts of so-called “healthy fats” in my recipes. I was pouring olive oil over everything…spreading pork leaf lard everywhere…and buttering my butter! Now I measure everything, drastically reducing my fats, and I can’t believe how many calories I’m saving!

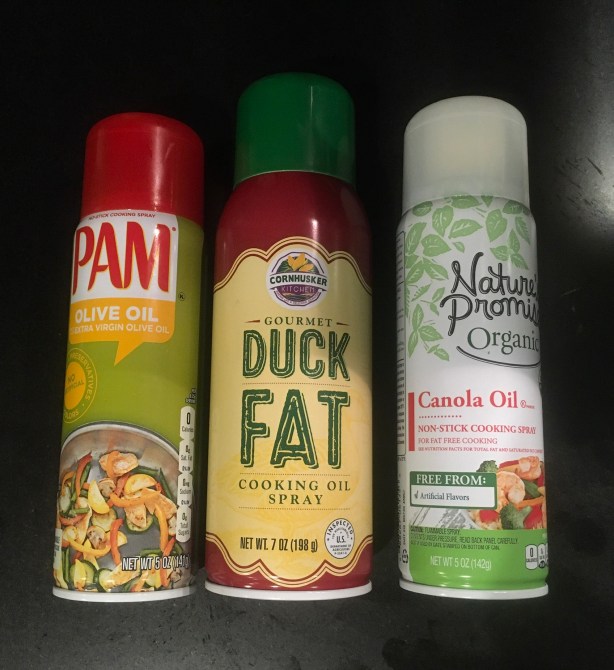
Sprays can be extremely helpful in keeping your calories low. Just be careful: they say “zero calories,” but that doesn’t mean you can spray a ton in your pan! Regulations allow them to say “zero” if a single serving is less than 1 calorie. That’s why a single serving here is a spray of about 1/5 of a second! (Seriously!)


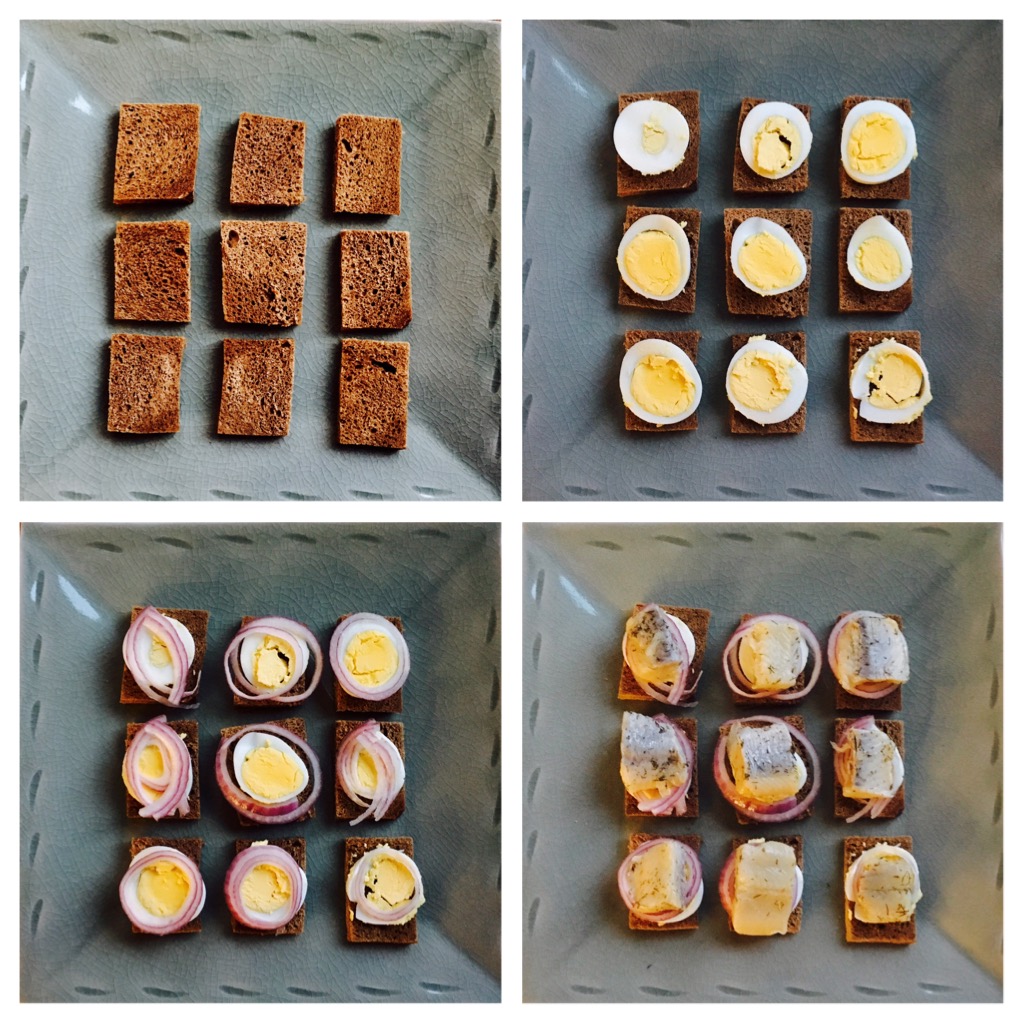
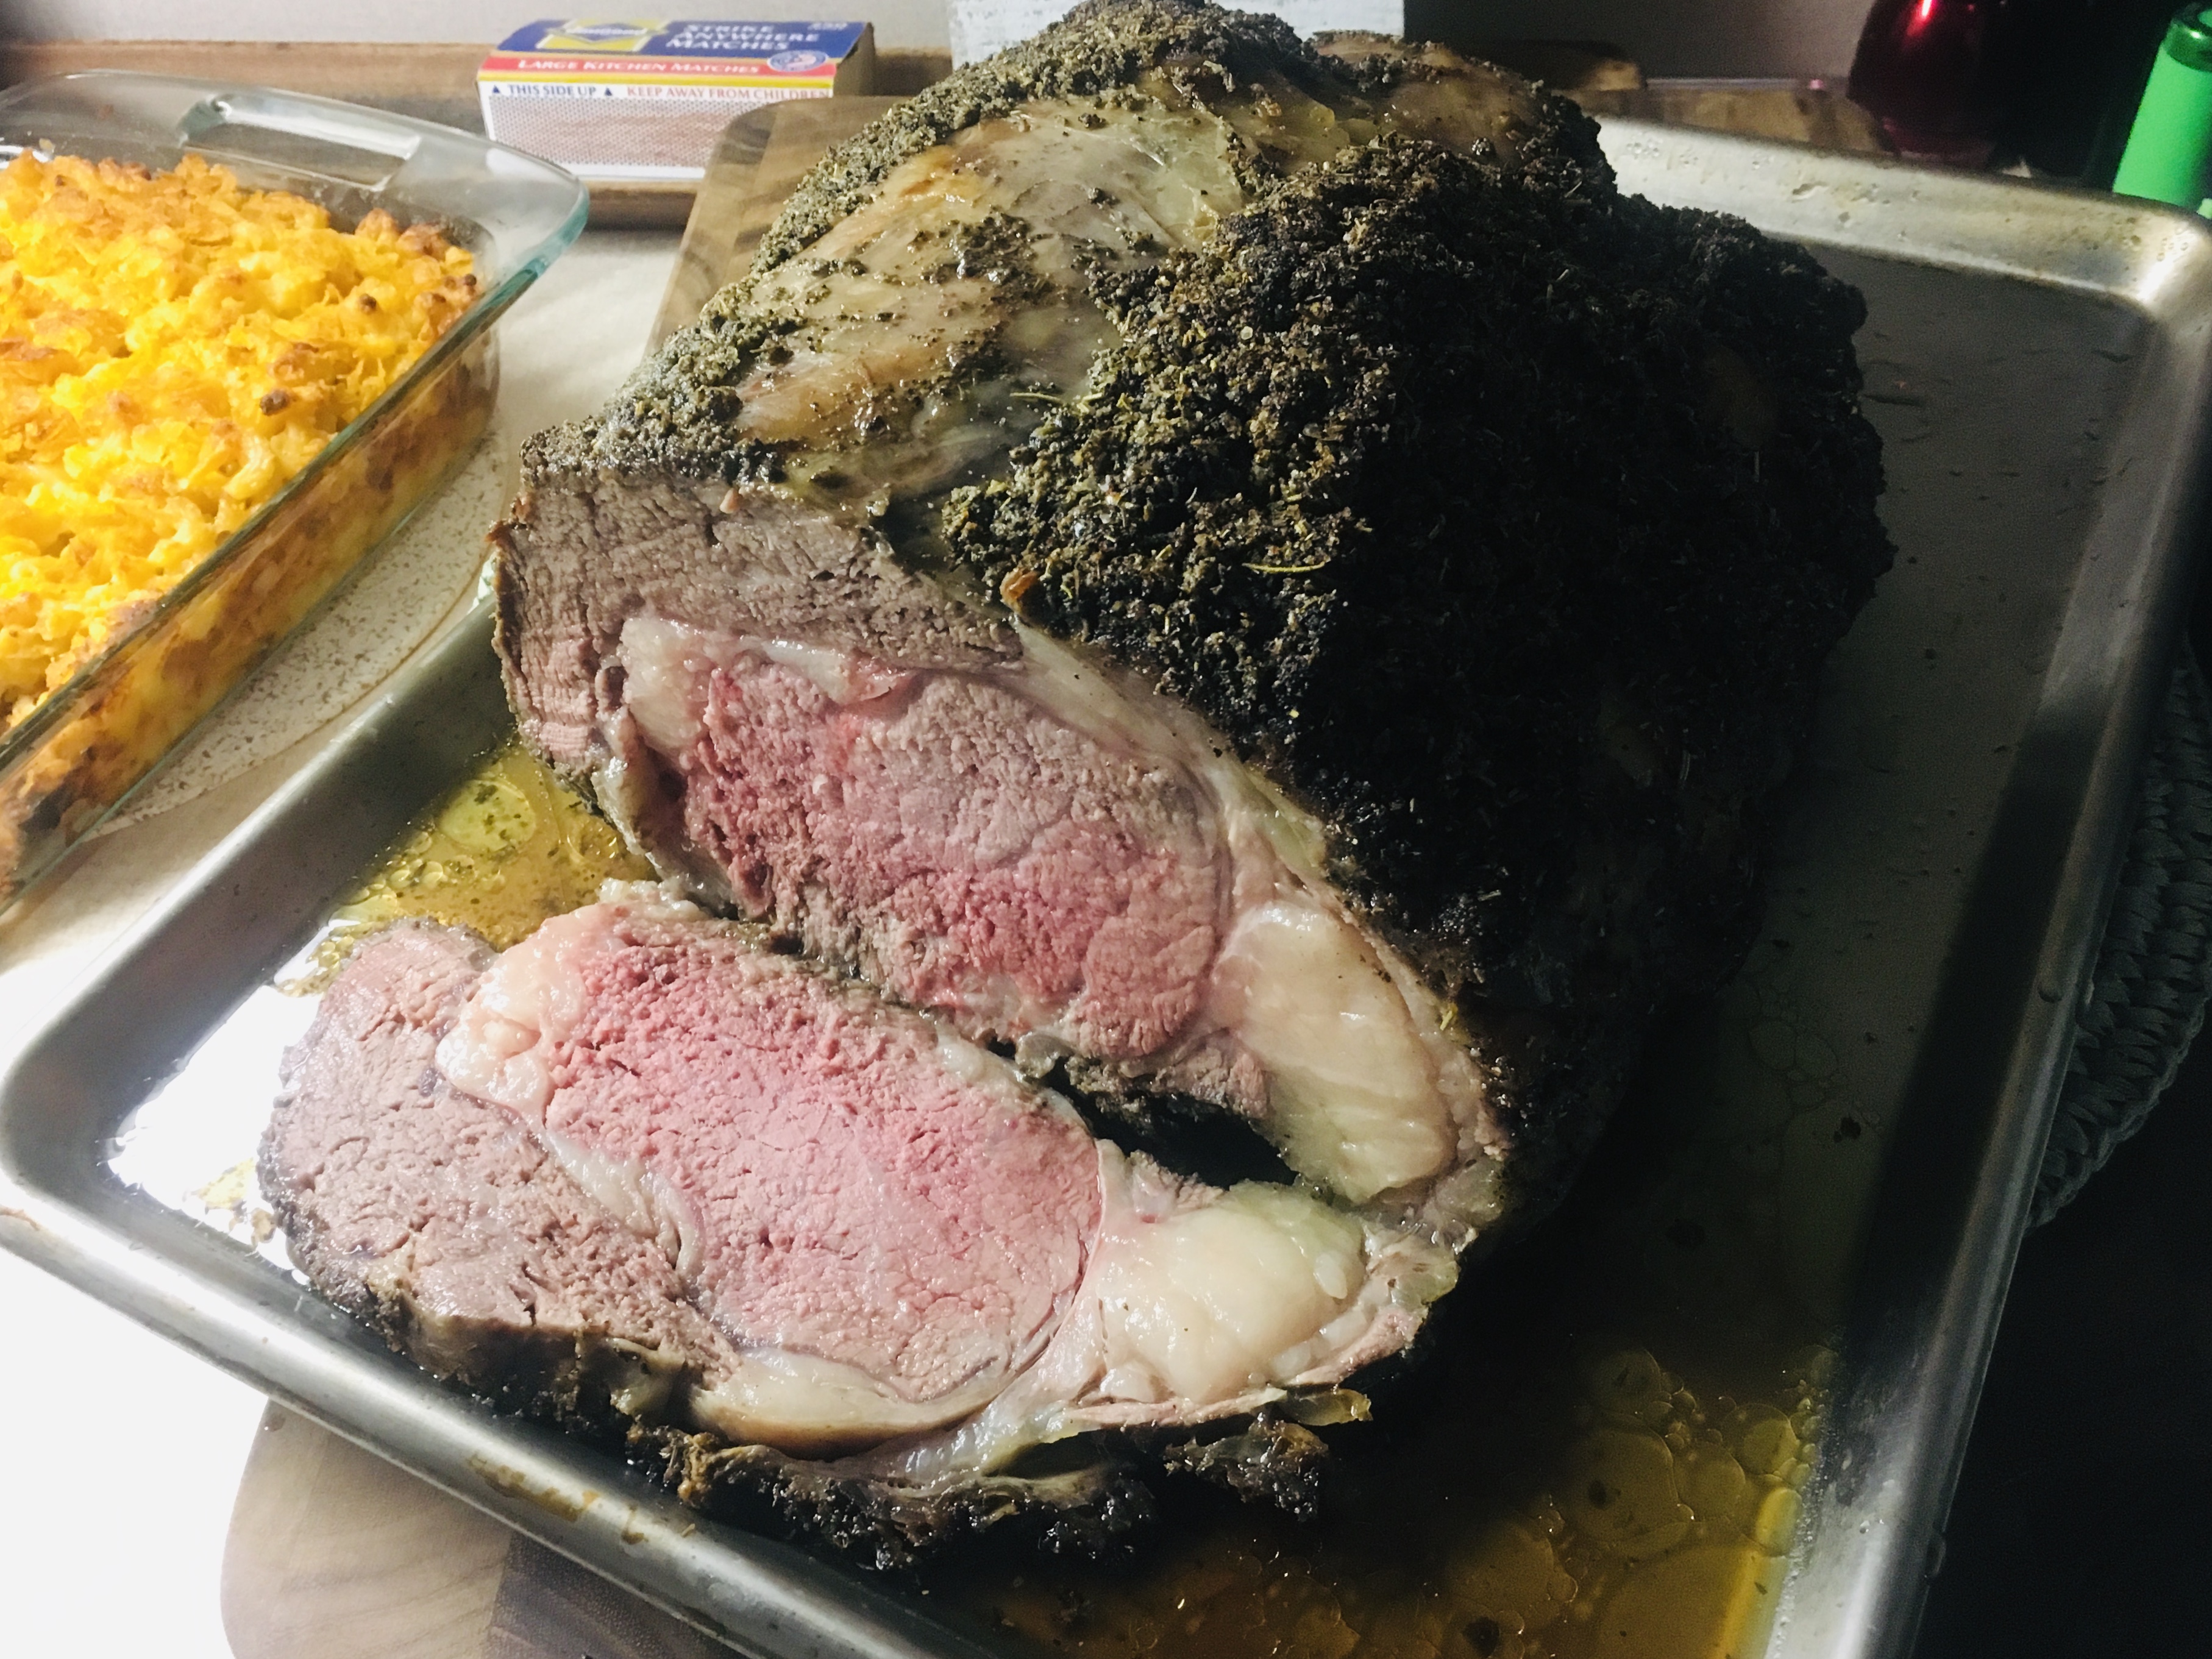
Portion control is essential. I’ve found that I really don’t have to change many of my recipes in this livethelive blog, which is all the food I love. I just have to control my portion sizes. For example, a ribeye may be a delicious source of protein, but it’s also loaded with fat. (That’s why it tastes so good!) So now I only eat a small, 4-ounce serving at mealtime, not the 12-ounce (or larger!) slab I was eating before.
Last year, when I started my 1500-calorie-a-day diet, I was bloated from alcohol, salt, fat, and simply eating too much rich food. But once the diet really started rolling, I could step on the bathroom scale and see the bloat was diminishing, and rather quickly. At this point, it’s easy to deceive yourself in thinking that this is “real weight,” when it’s not. It’s just your body reaching its natural plateau. But that’s OK. When you see the weight go down, even by a tenth of a pound a day, it gives you the incentive to continue.
After about a week of bloat loss, the real diet and weight loss began.
The human body is full of constant change. So even once I started and steadily maintained my 1500-calorie-a-day diet, Lee told me not to expect to be dropping 2 pounds per week like clockwork. Some weeks, my body will retain more water, perhaps from eating too much salt. Some days, I’ll go to the bathroom more, some less. My bathroom scale itself may be off by a little, too. So what I see when I step on the scale needs to be taken with a grain of salt (pardon the pun.) On any given day, my weight can actually be plus or minus 2 pounds (or more) of what my scale shows.

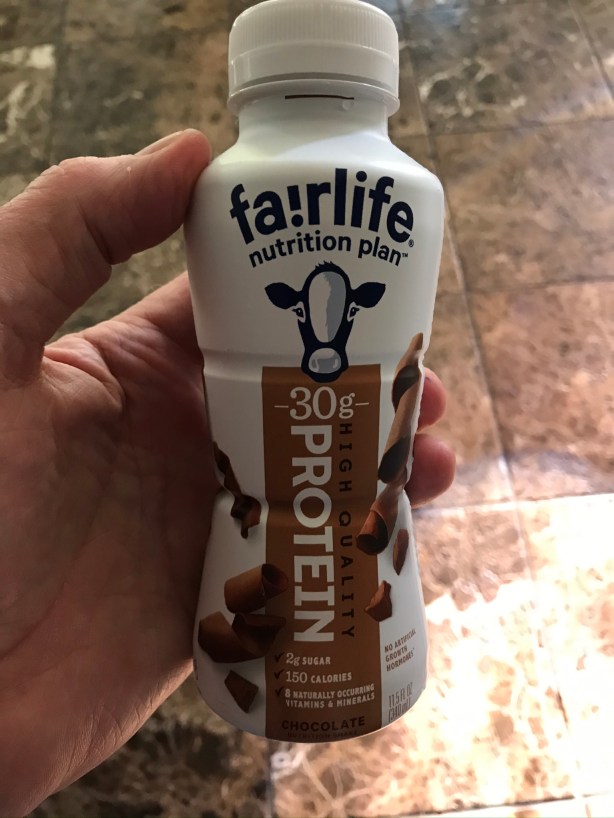
Find a protein drink or bar you like. It can really help when the cravings get bad. But make sure you choose one that is low in sugar!

The secret of this diet (or any other diet for that matter) is persistence. Don’t give up because your scale hasn’t moved. Your body is going through changes–big changes. And if you maintain your diet, you will see results eventually…the keyword being: eventually. Over the course of a month or two, you will see significant results.
The secret for me is to find the food I like and then eat it in reasonable quantities. Variety is also really important, or I’ll get bored and give up. Other than avoiding too much salt, I have few dietary restrictions. So I’m able to eat whatever I want within my calorie guidelines.
So as you read this blog this year, you’ll see that many of my recipes haven’t changed, with the exception, perhaps, of fats used in cooking, because that’s one of the top calorie culprits. It doesn’t matter if you’re using butter, bacon fat, or healthy olive oil, all fats have a lot of calories, whether they’re healthy or not.
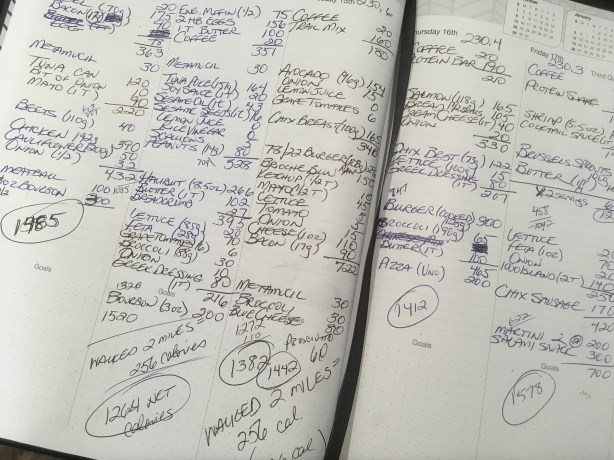
Another key to my diet’s success–and this is the one that everybody hates!–I write down every single morsel of food I eat every day, and then calculate how many calories that entails. Not everyone can be this anal, but I have no problem with it. Once I set my mind to it, it just comes naturally. I have a date book where I write my morning weight every day, and then everything I eat that day, with individual and total calorie counts. (Counting calories is easy, now that we all carry phones that let us simply Google that information.)
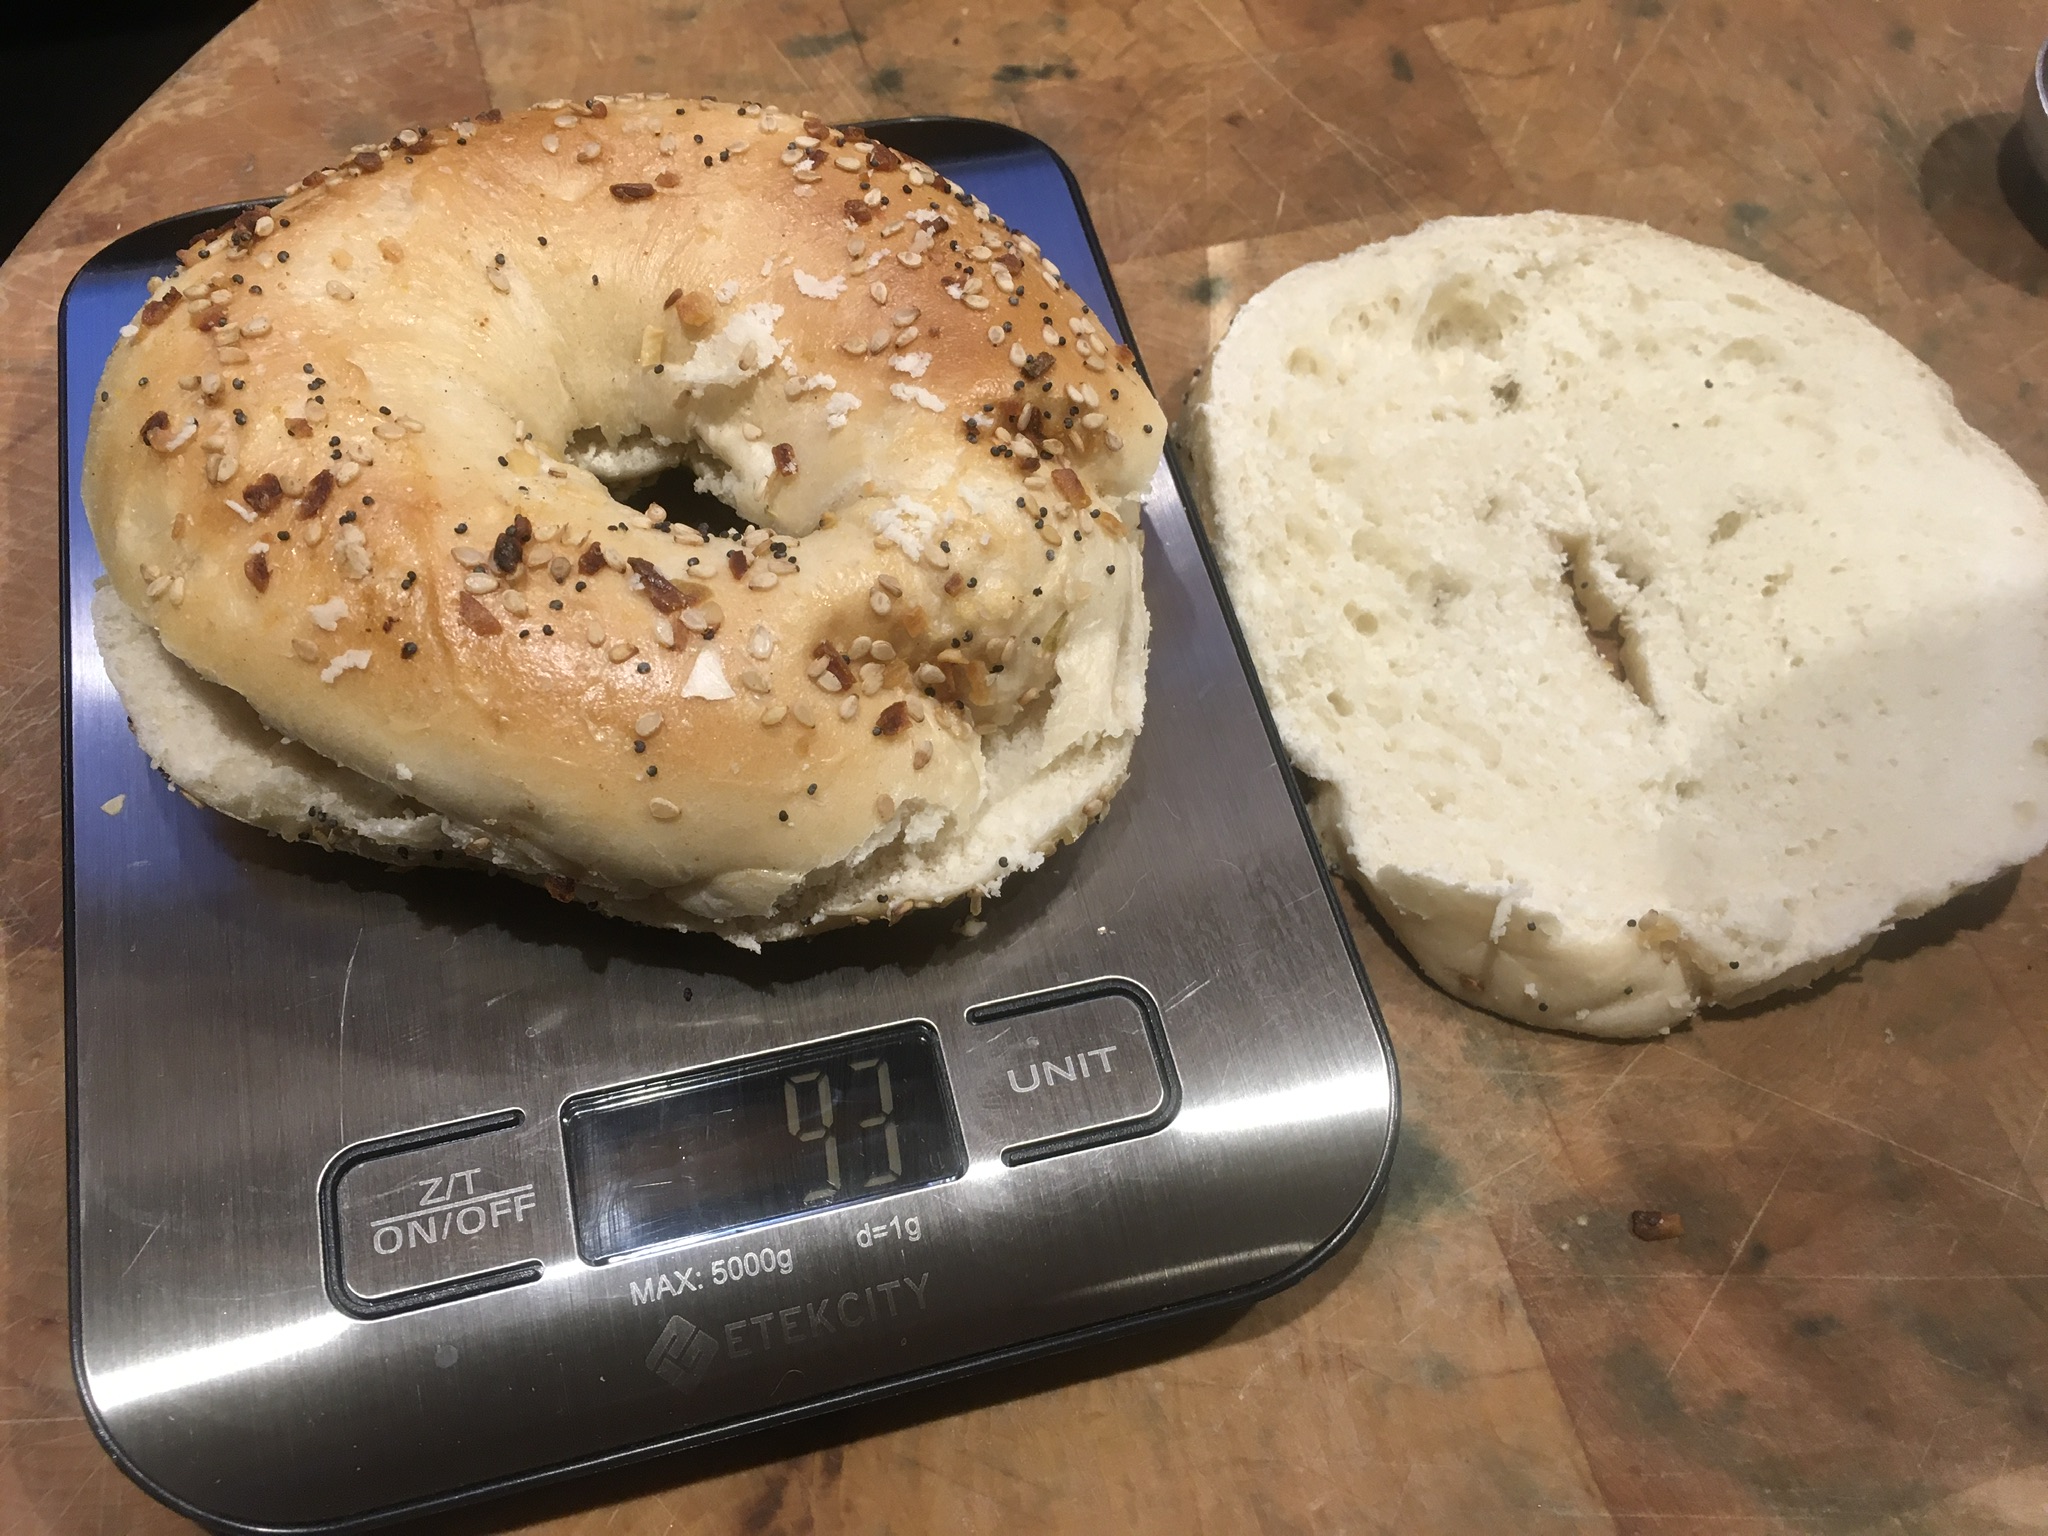
Using a simple digital kitchen scale (one that weighs ounces and grams) is KEY to making sure you’re not overeating. Buy one immediately! If you think you can simply eyeball measurements, you’ll find that you are WAY OFF!

Yes…I write it ALL down!


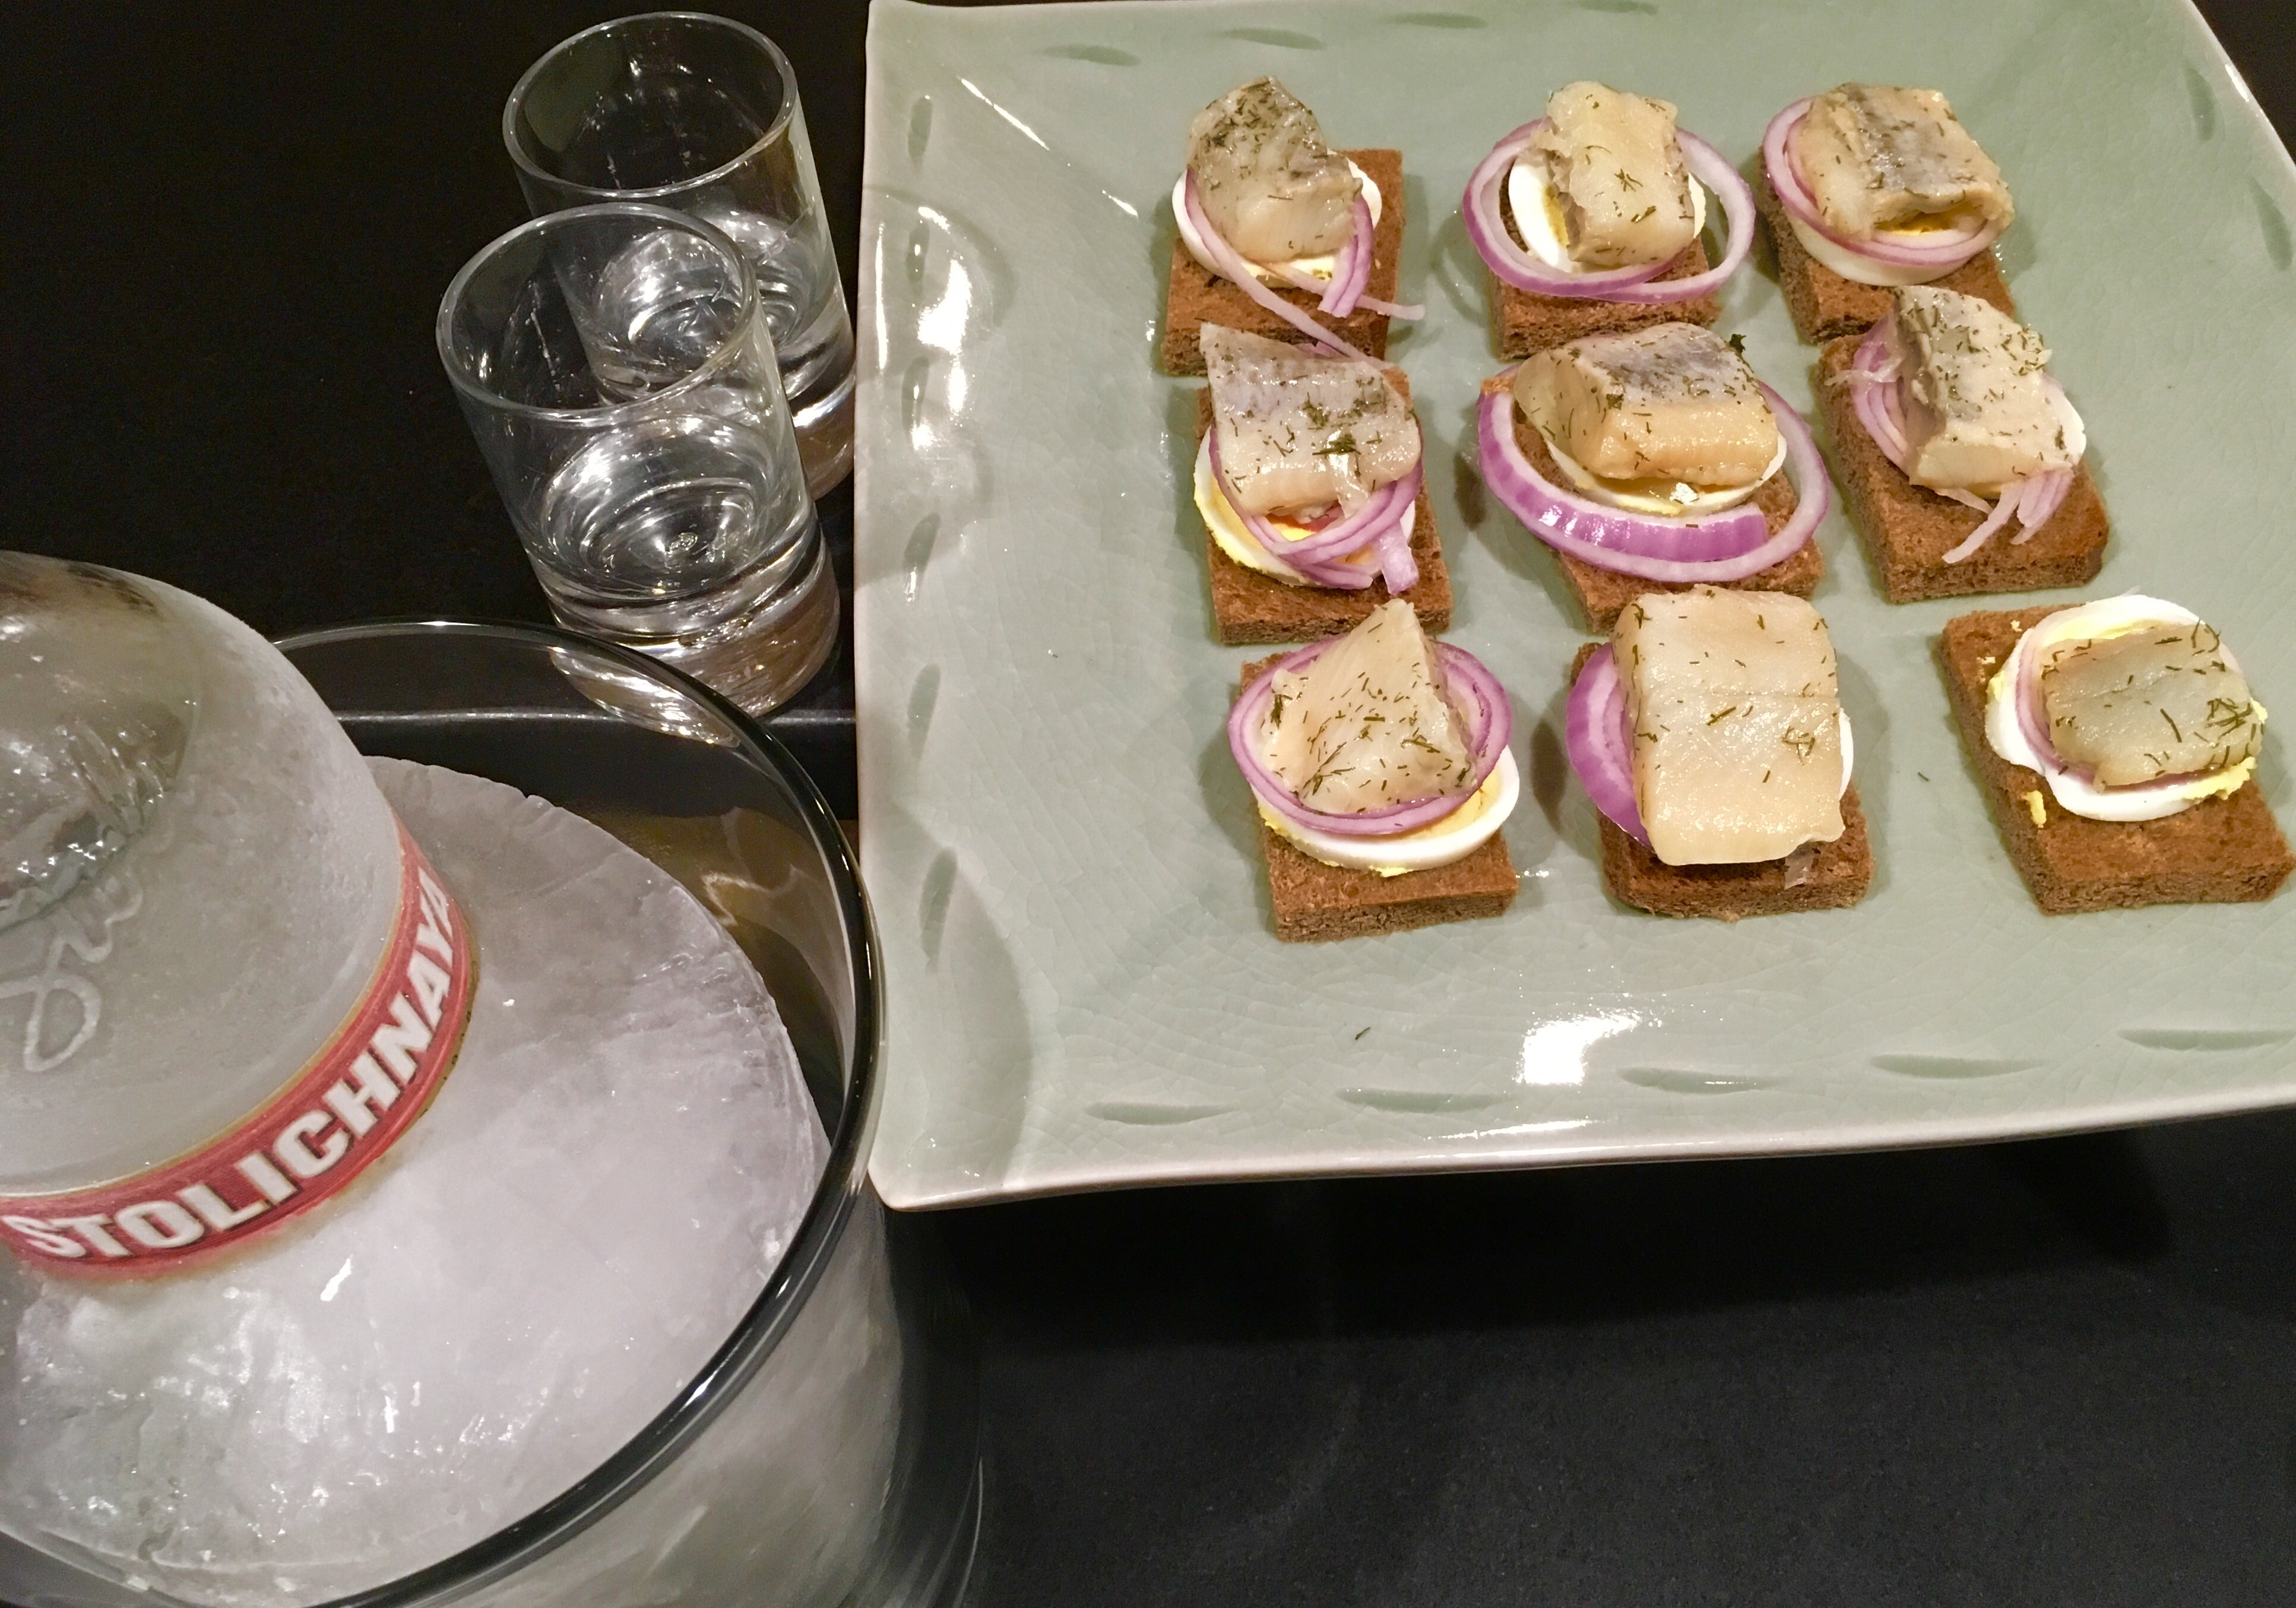
Fortunately for me, even alcohol can be included in this diet. That’s not to say that I’m boozing it up! I only allow myself alcoholic beverages on Friday and Saturday nights. At 100 calories for a 1.5 ounce shot of 80-proof booze, I can have 2 3-ounce martinis for a total of 400 calories (without olives.) Of course, that still counts in my 1500-calorie-a-day plan. So that means I have to eat less…which can get me a little loopy on weekends! But as long as I’m not driving, that’s not a problem! Drinking alcohol gives me the munchies…so I have to be very careful with that.

Having a seat at great bars, like the world-famous Bar Hemingway at the Ritz in Paris, is a passion of mine. My diet still allows me to sip a fine cocktail without guilt! I choose drinks that are low in sugar.

Follow this diet and you, too, will succeed. It doesn’t matter if you need to be gluten-free or not. It doesn’t matter if you’re avoiding carbs or not. It doesn’t matter if you’re vegan, vegetarian, or a total carnivore. Keto, Atkins, whatever. What matters is counting your total calories per day…and sticking to the diet every day…no cheating. No business lunch excuses, breakfast buffets, and 48-oz. steaks.
And no “rewarding” yourself with treats because “you did good” for a couple of days. Those things need to happen every few weeks, not every few days.
A great tip is to start by eating everything you love, even if it’s not really good for you, just in smaller quantities. Don’t eat real junk food, but worry about total calories first, not whether what you’re eating is “health food.” (Like my buddy, Lee’s, son who still lost weight eating Taco Bell.) Your first goal should be to limit calories. Get a feel for it. Then, as you get comfortable and progress, start making better and healthier food choices. Let’s be honest: anyone who starts a diet by chewing celery after a lifetime of steak and potatoes is going nowhere!
After I reached my goal weight last year, I went back to my daily intake of 2500 calories to maintain my new weight. (That’s still fewer calories than I was consuming every day before I started the diet, but after 1500 a day, it felt like I was cheating!)
What I learned with this diet, as I cooked healthier, measuring how much fat I put in a pan before frying…cutting my huge steaks into smaller pieces and trimming off the fat…was that I never want to go back to my old way of eating again. I can still eat anything I love…just less of it.

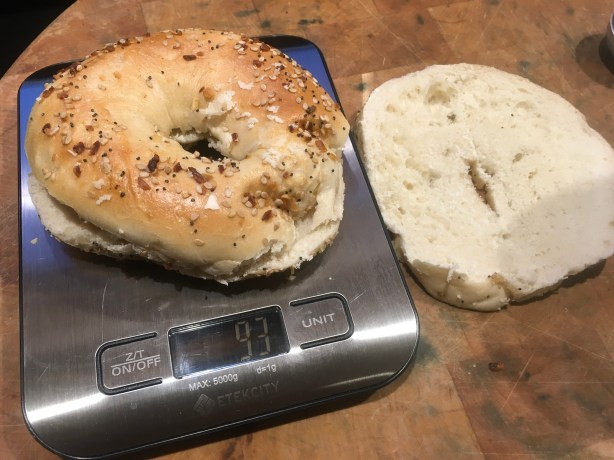
I cut the middle out of my bagel and weigh it!


That right there, after cooking, is 90 calories. Nothing brings the flavor like bacon!


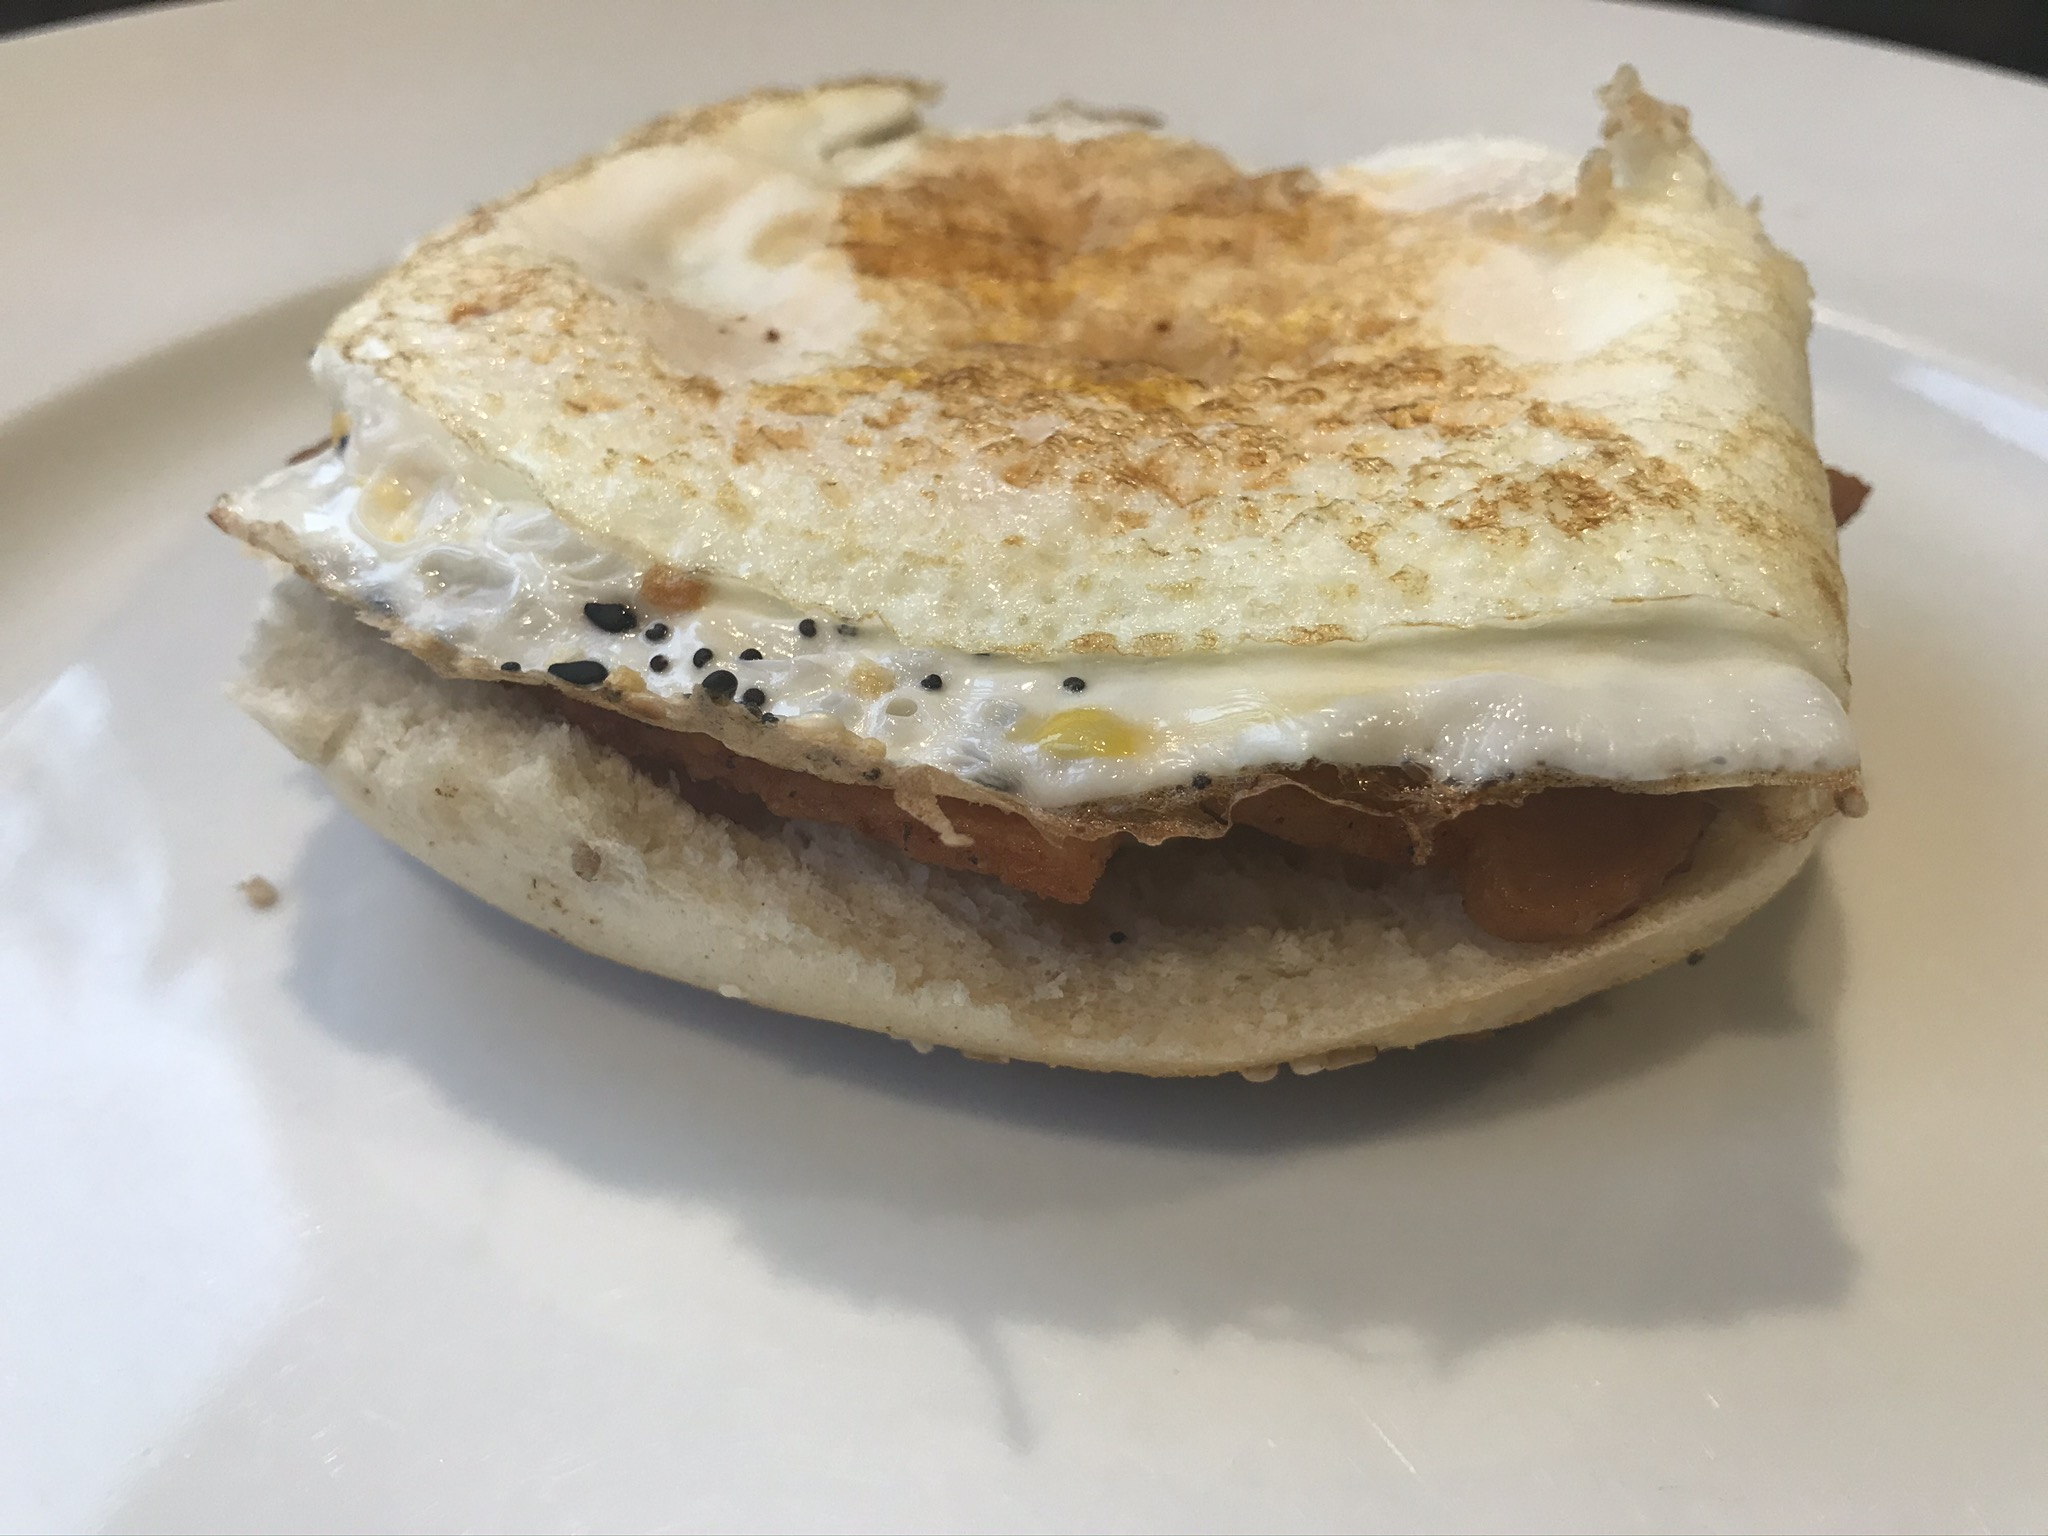
My breakfast sandwich: the bottom of an everything bagel, a strip of bacon, and a fried egg. 349 calories, including a tablespoon of butter! A sprinkle of everything bagel seasoning adds flavor and just a couple of calories.


WHAT I’VE FOUND….
Bad…
1 tablespoon of butter has 100 calories. I used to load my 400-calorie everything bagel with 300 calories of butter…and then I had breakfast! A tablespoon of whipped butter has only 50 calories, so I use that instead.
Same thing with mayonnaise. I love Hellman’s. But it’s got 90 calories per tablespoon. Enter Hellman’s Light: 35 calories and I can still indulge!
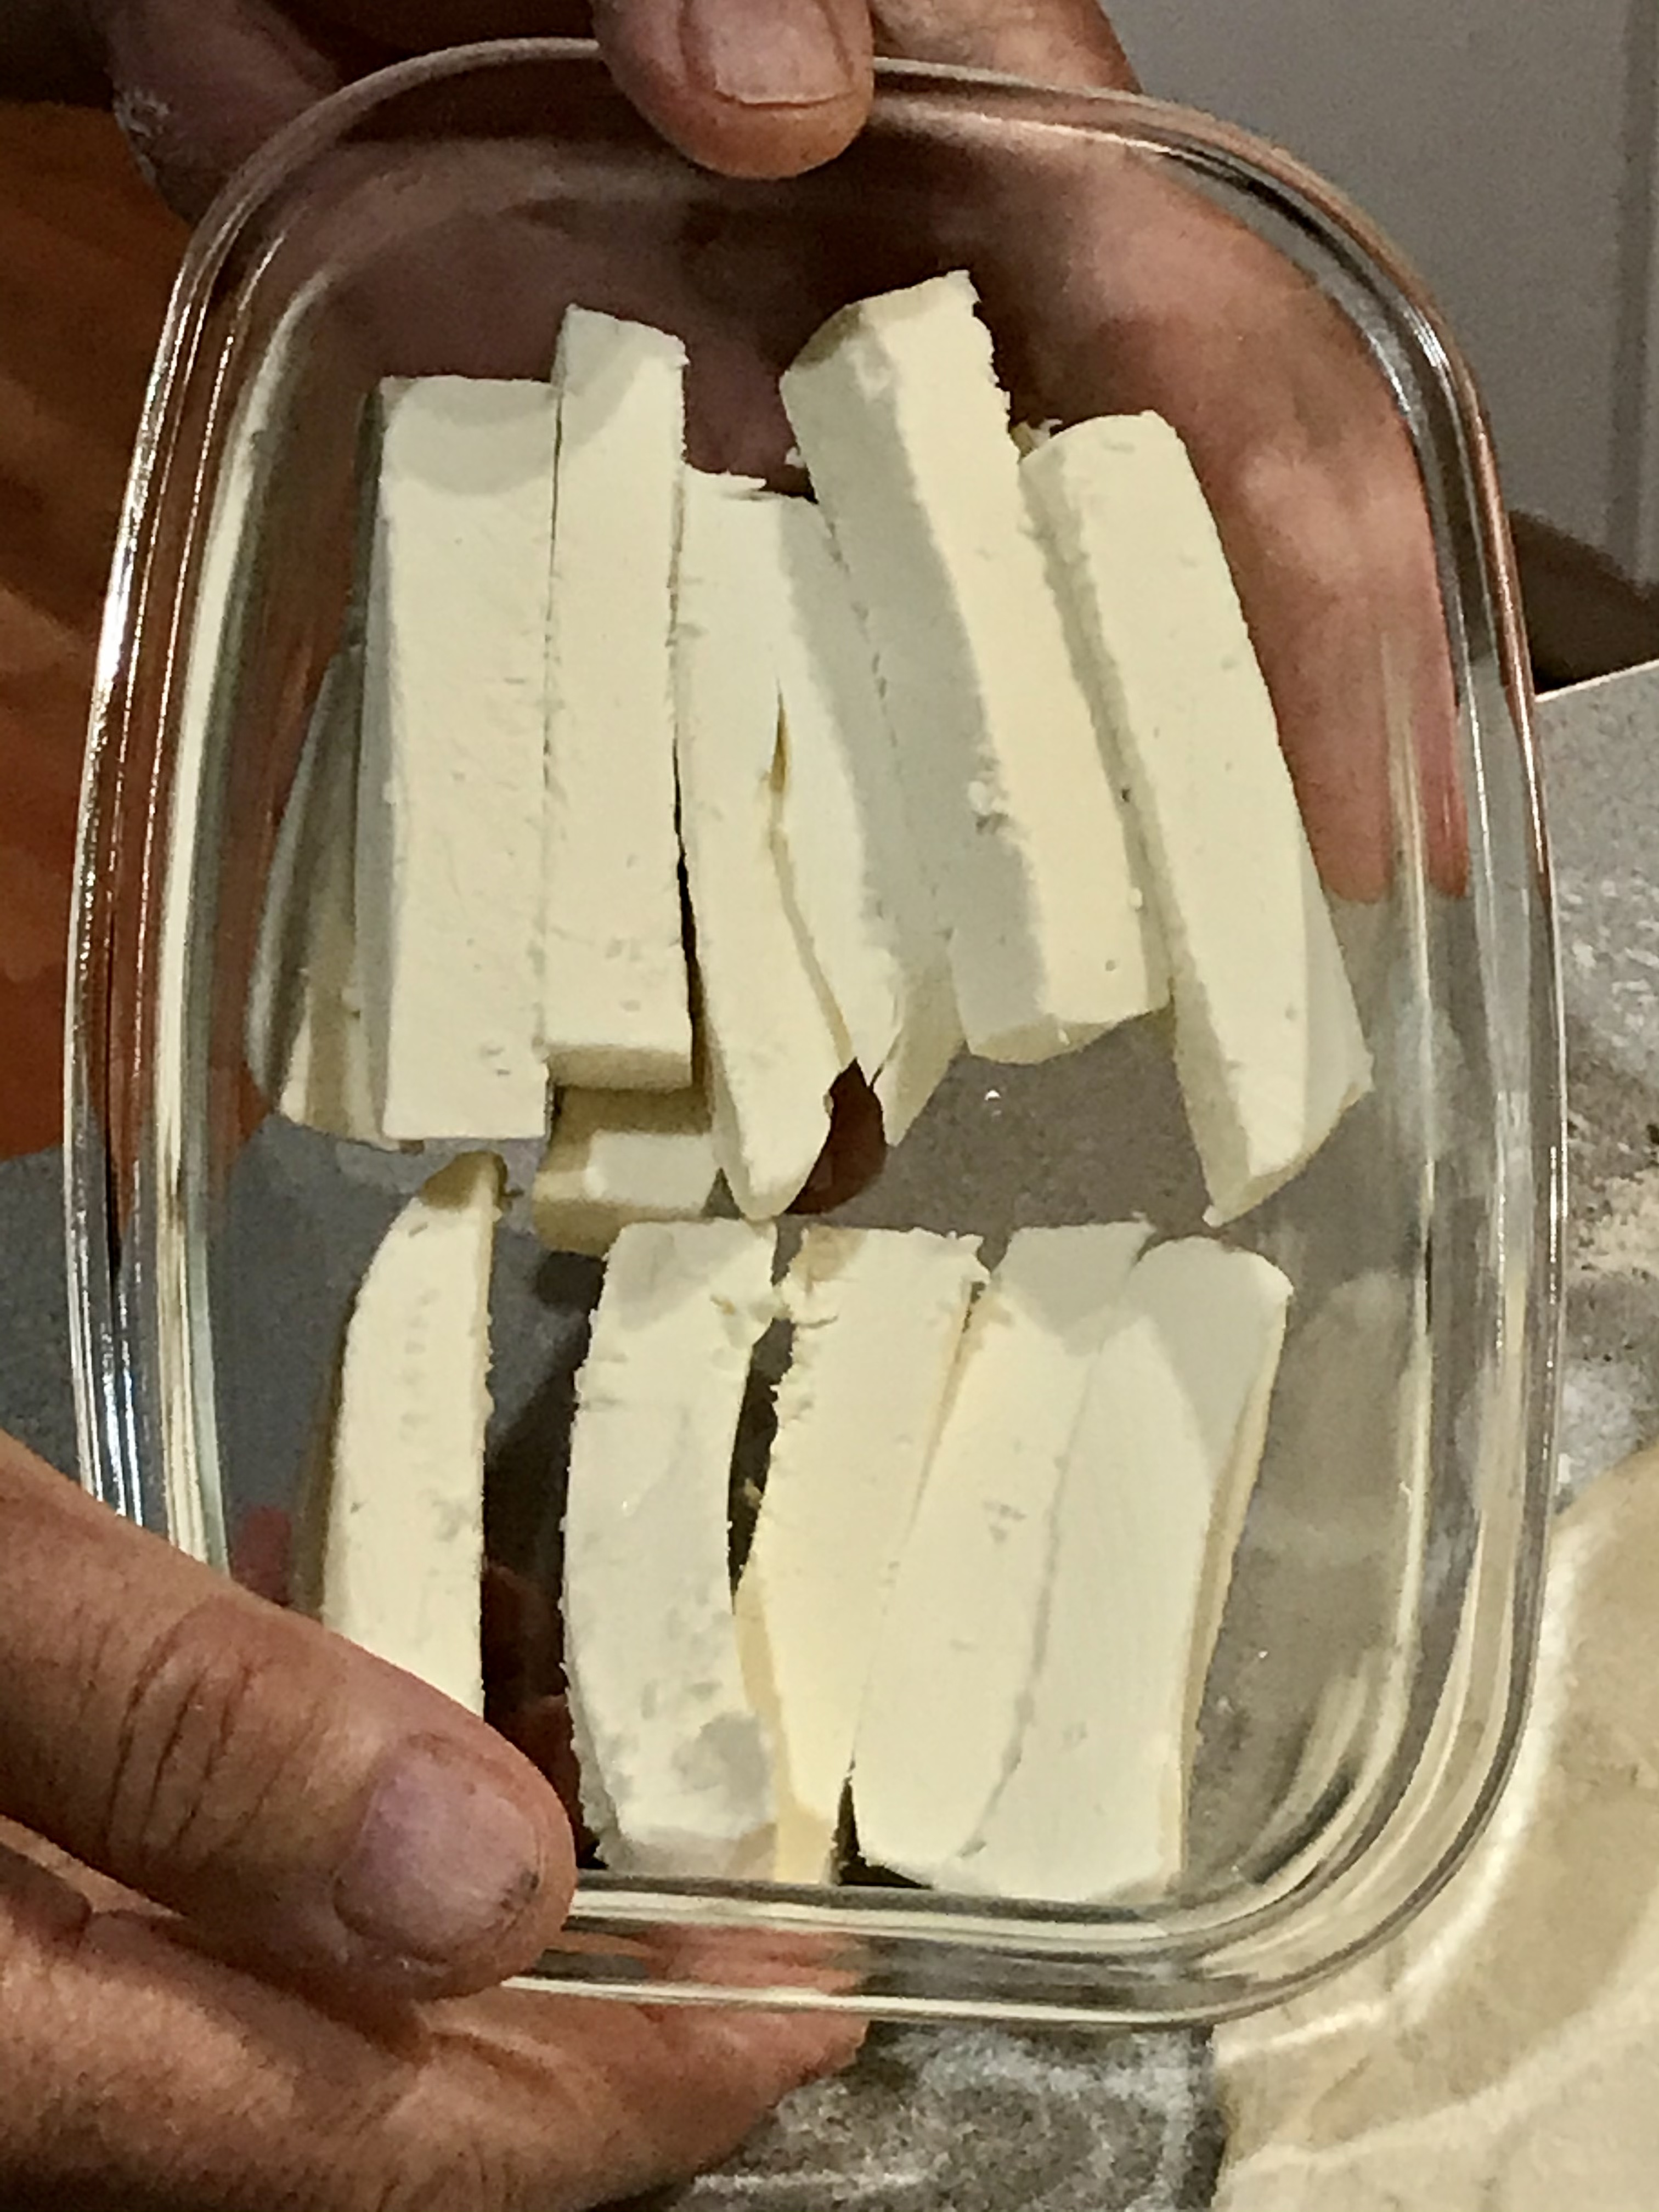
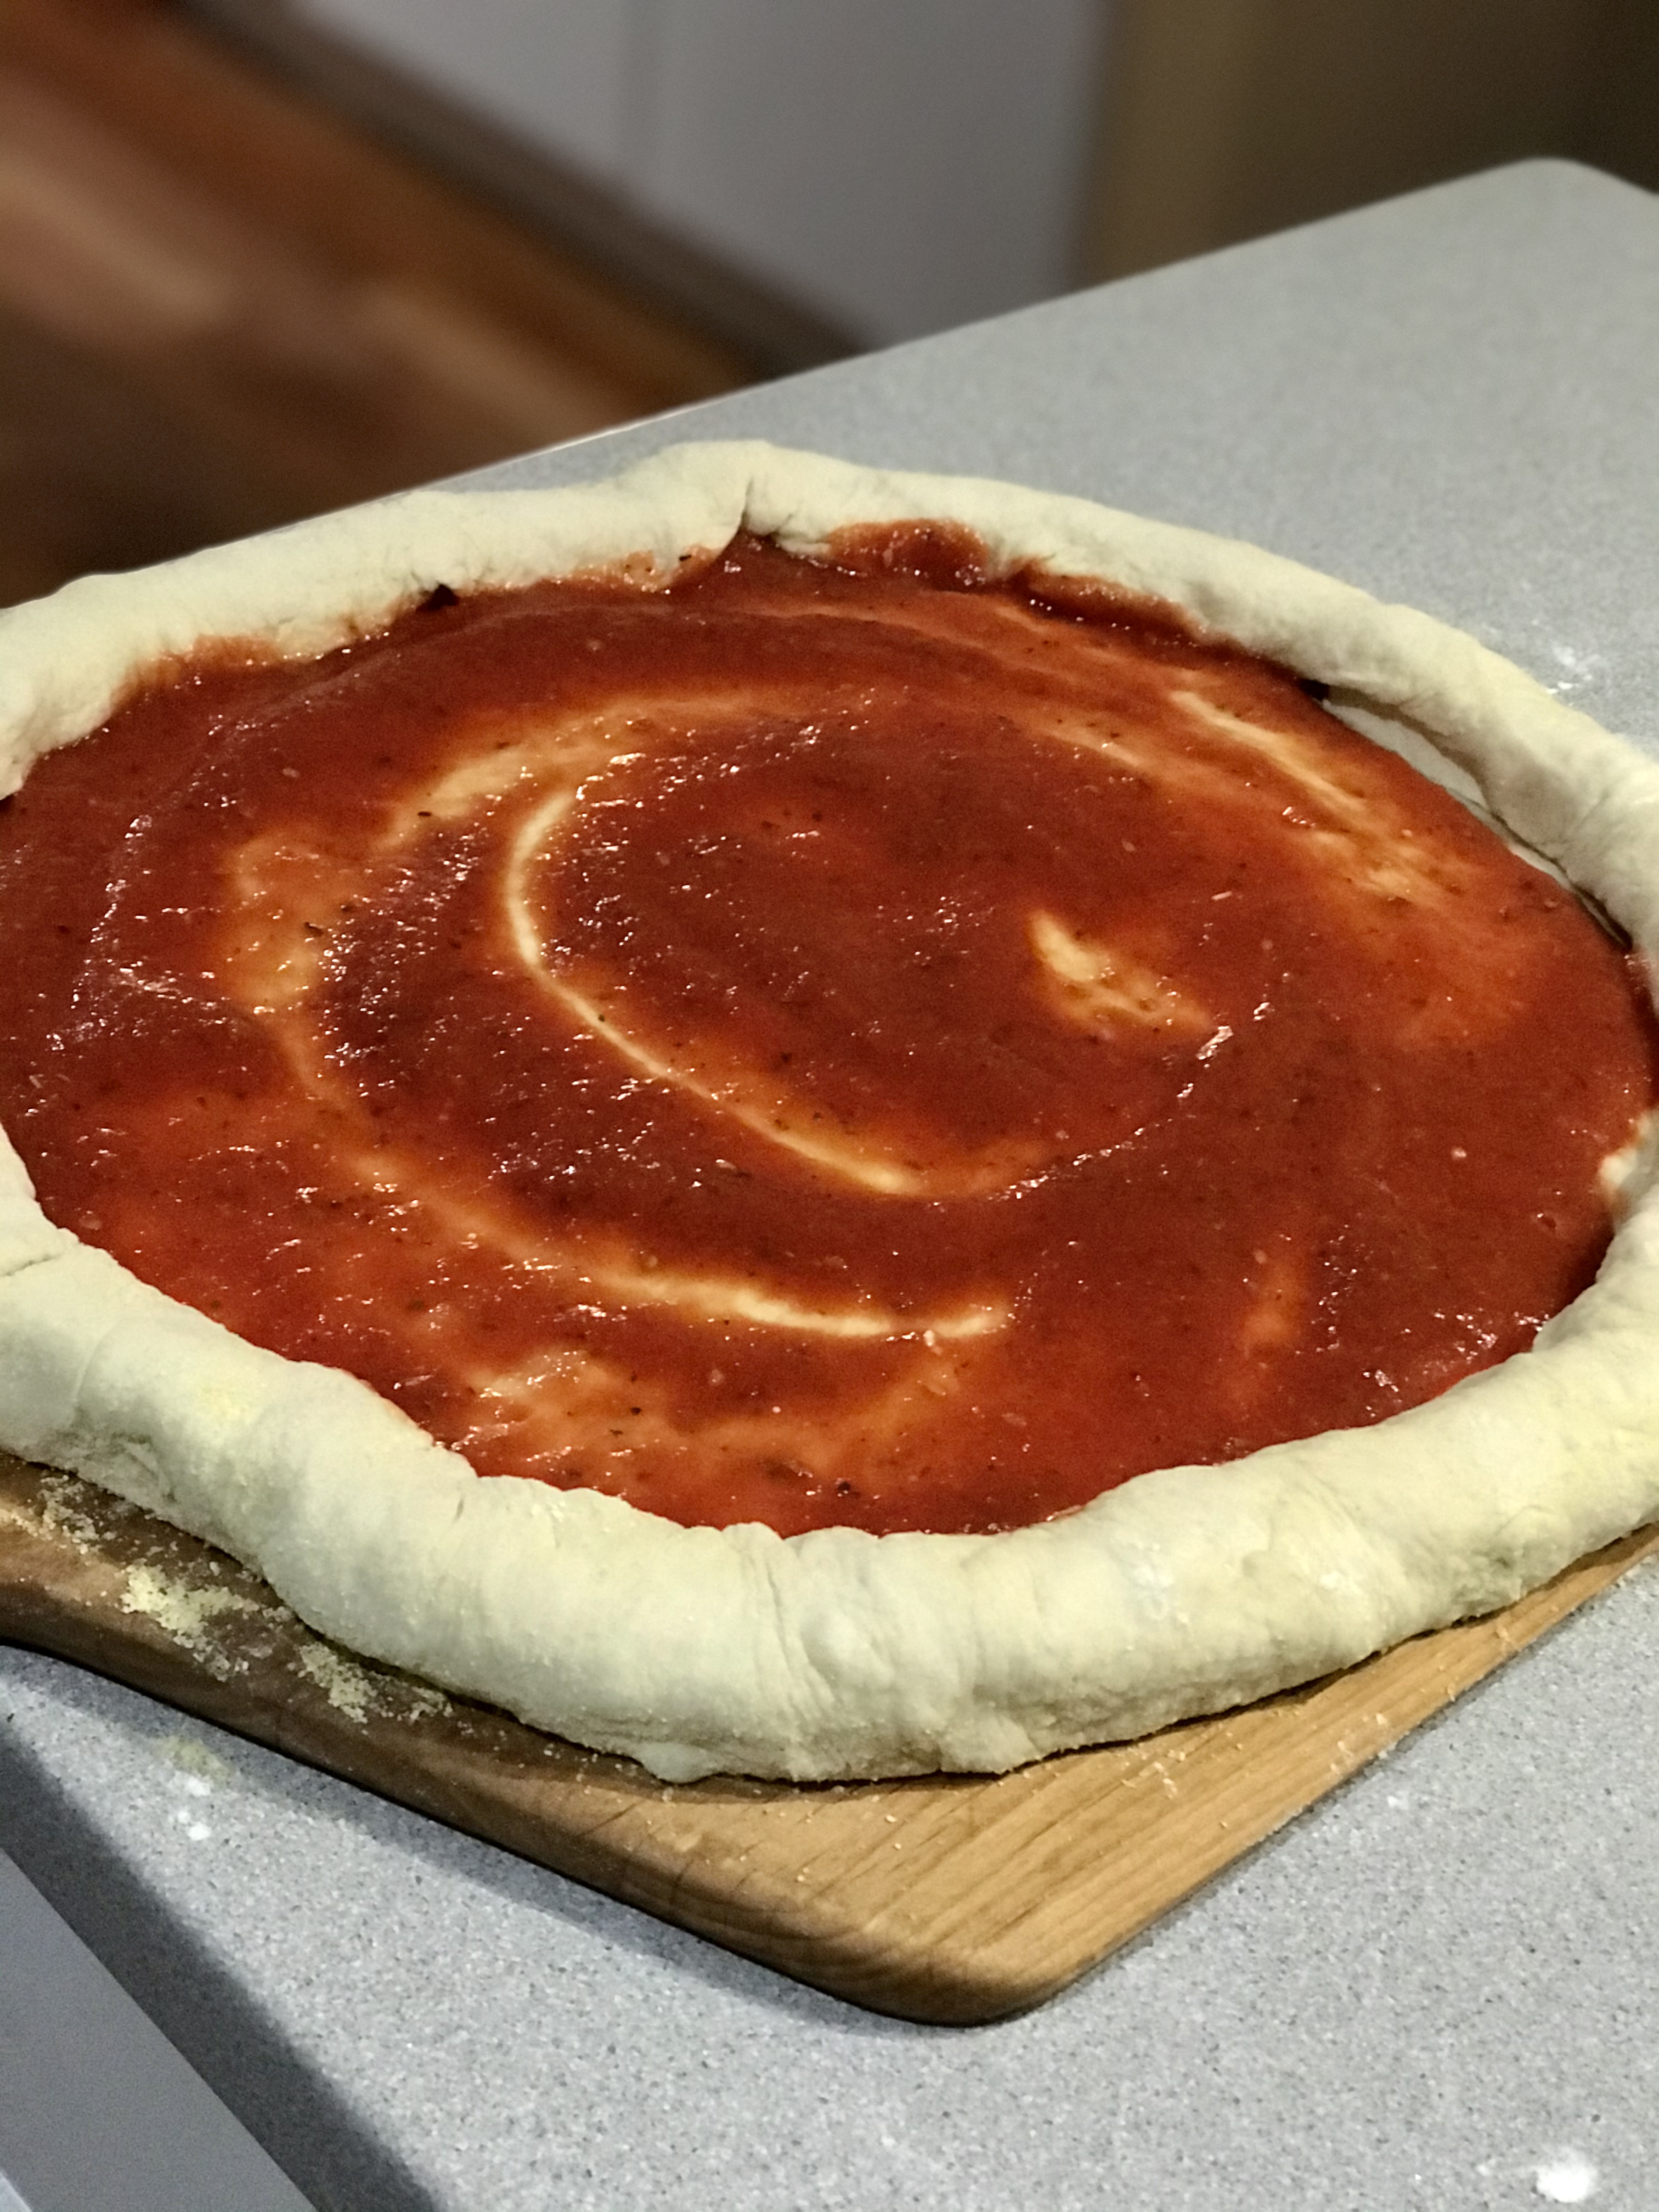
Cheese is not a dieter’s friend. It’s a calorie and salt nightmare. And light cheese tastes like crap. So I stick to small amounts of lower calorie cheeses, like feta (70 calories per ounce) or whipped cream cheese (40 calories per tablespoon), and save pizza and pasta dishes for very rare occasions.
Good…
Boiled Shrimp is our friend at just 80 calories for 4 ounces, and lots of protein. Shrimp cocktail makes you feel like you’re splurging, but it’s low in calories if you go easy on the cocktail sauce.
Lobster, too: super-low calorie. Just go easy on the butter!
Raw oysters: packed with protein and a ridiculously low amount of calories. Eat all you want!
A hard-boiled egg, which I love, is just 78 calories…an excellent protein bomb that fills you up. (And don’t worry about the cholesterol unless you’re eating a dozen a day!)
You can still have bacon! My thick-cut bacon is 90 calories a slice after frying. Now I have one slice for breakfast instead of six! (Read the package.)
A diet saves you money! I can’t believe how much less food I buy at the supermarket! Sure, I’m buying more veggies, but a steak that used to be one meal is now three! As a nation, Americans eat way too much food, and what we eat is mostly unhealthy. A diet that focuses on veggies and lean proteins is good for any body. Michael Pollan’s quote is more valuable now than ever: “Eat food, not too much, mostly plants.”
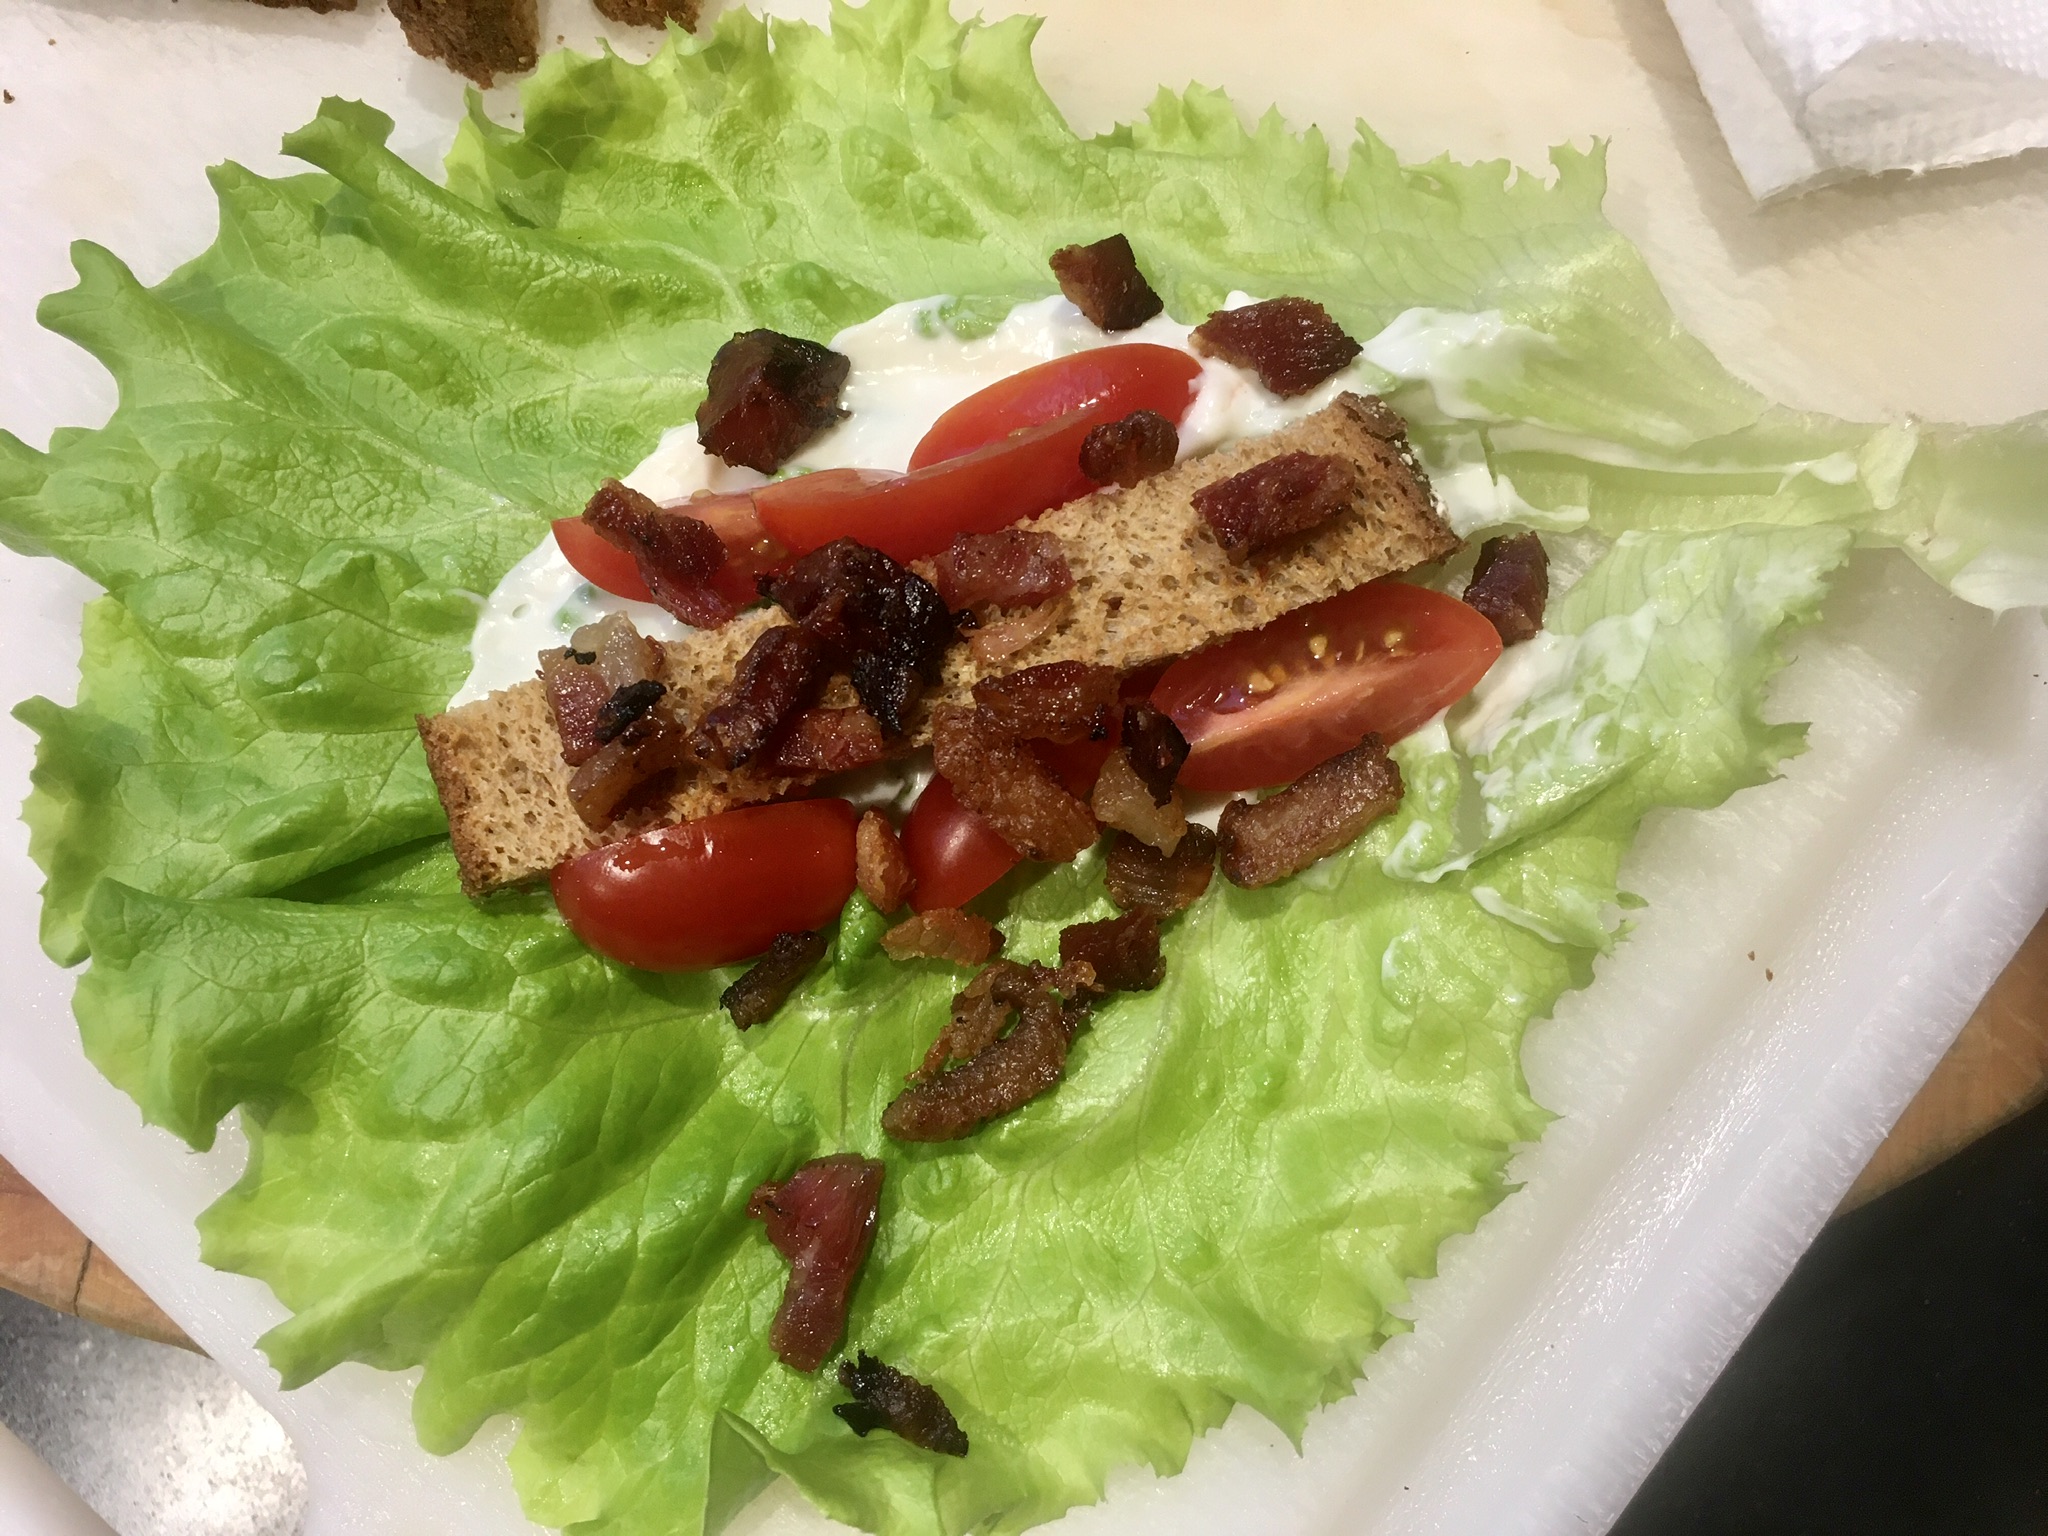
A successful diet is all about being creative. I can’t have a BLT in the usual sense anymore, and that’s my all-time favorite sandwich. But I can have BLT lettuce wraps that drastically cut the calories and still satisfy my cravings.

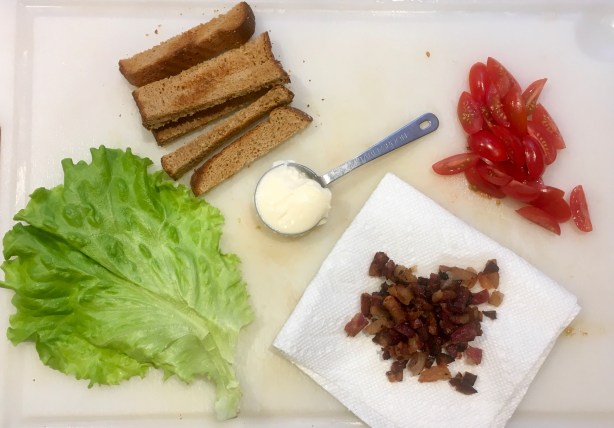
My BLT. Limiting the bacon and mayo makes it diet-friendly.


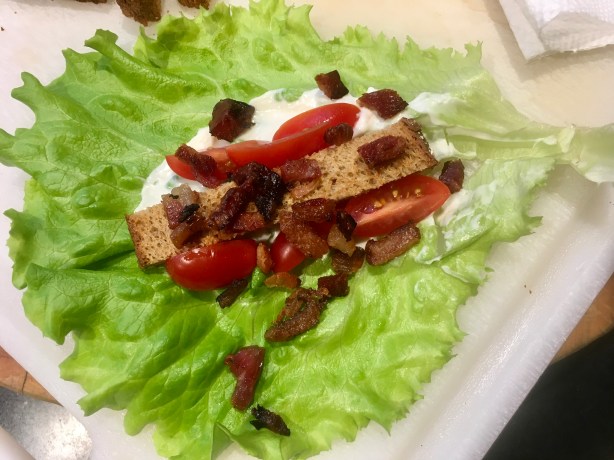
Adding that strip of toasted bread really adds to the flavor and texture!

Of course, any exercise you do in addition to this diet is only a bonus. If you use a treadmill or stationary bike, the digital readout will accurately tell you just how many calories you’ve burned. You can subtract that from your daily calorie count. But, that being said, one of the biggest diet mistakes people make is to over-estimate how many calories they’ve burned during exercise.  If you’re guessing…you’re WRONG! Guaranteed, you burned FAR LESS than you think you did!
I know the health clubs may not want me to say this, but you DON’T have to exercise to lose weight. Reducing your caloric intake alone–if you reduce it enough and for long enough–WILL make you lose weight. Exercise alone WILL NOT.
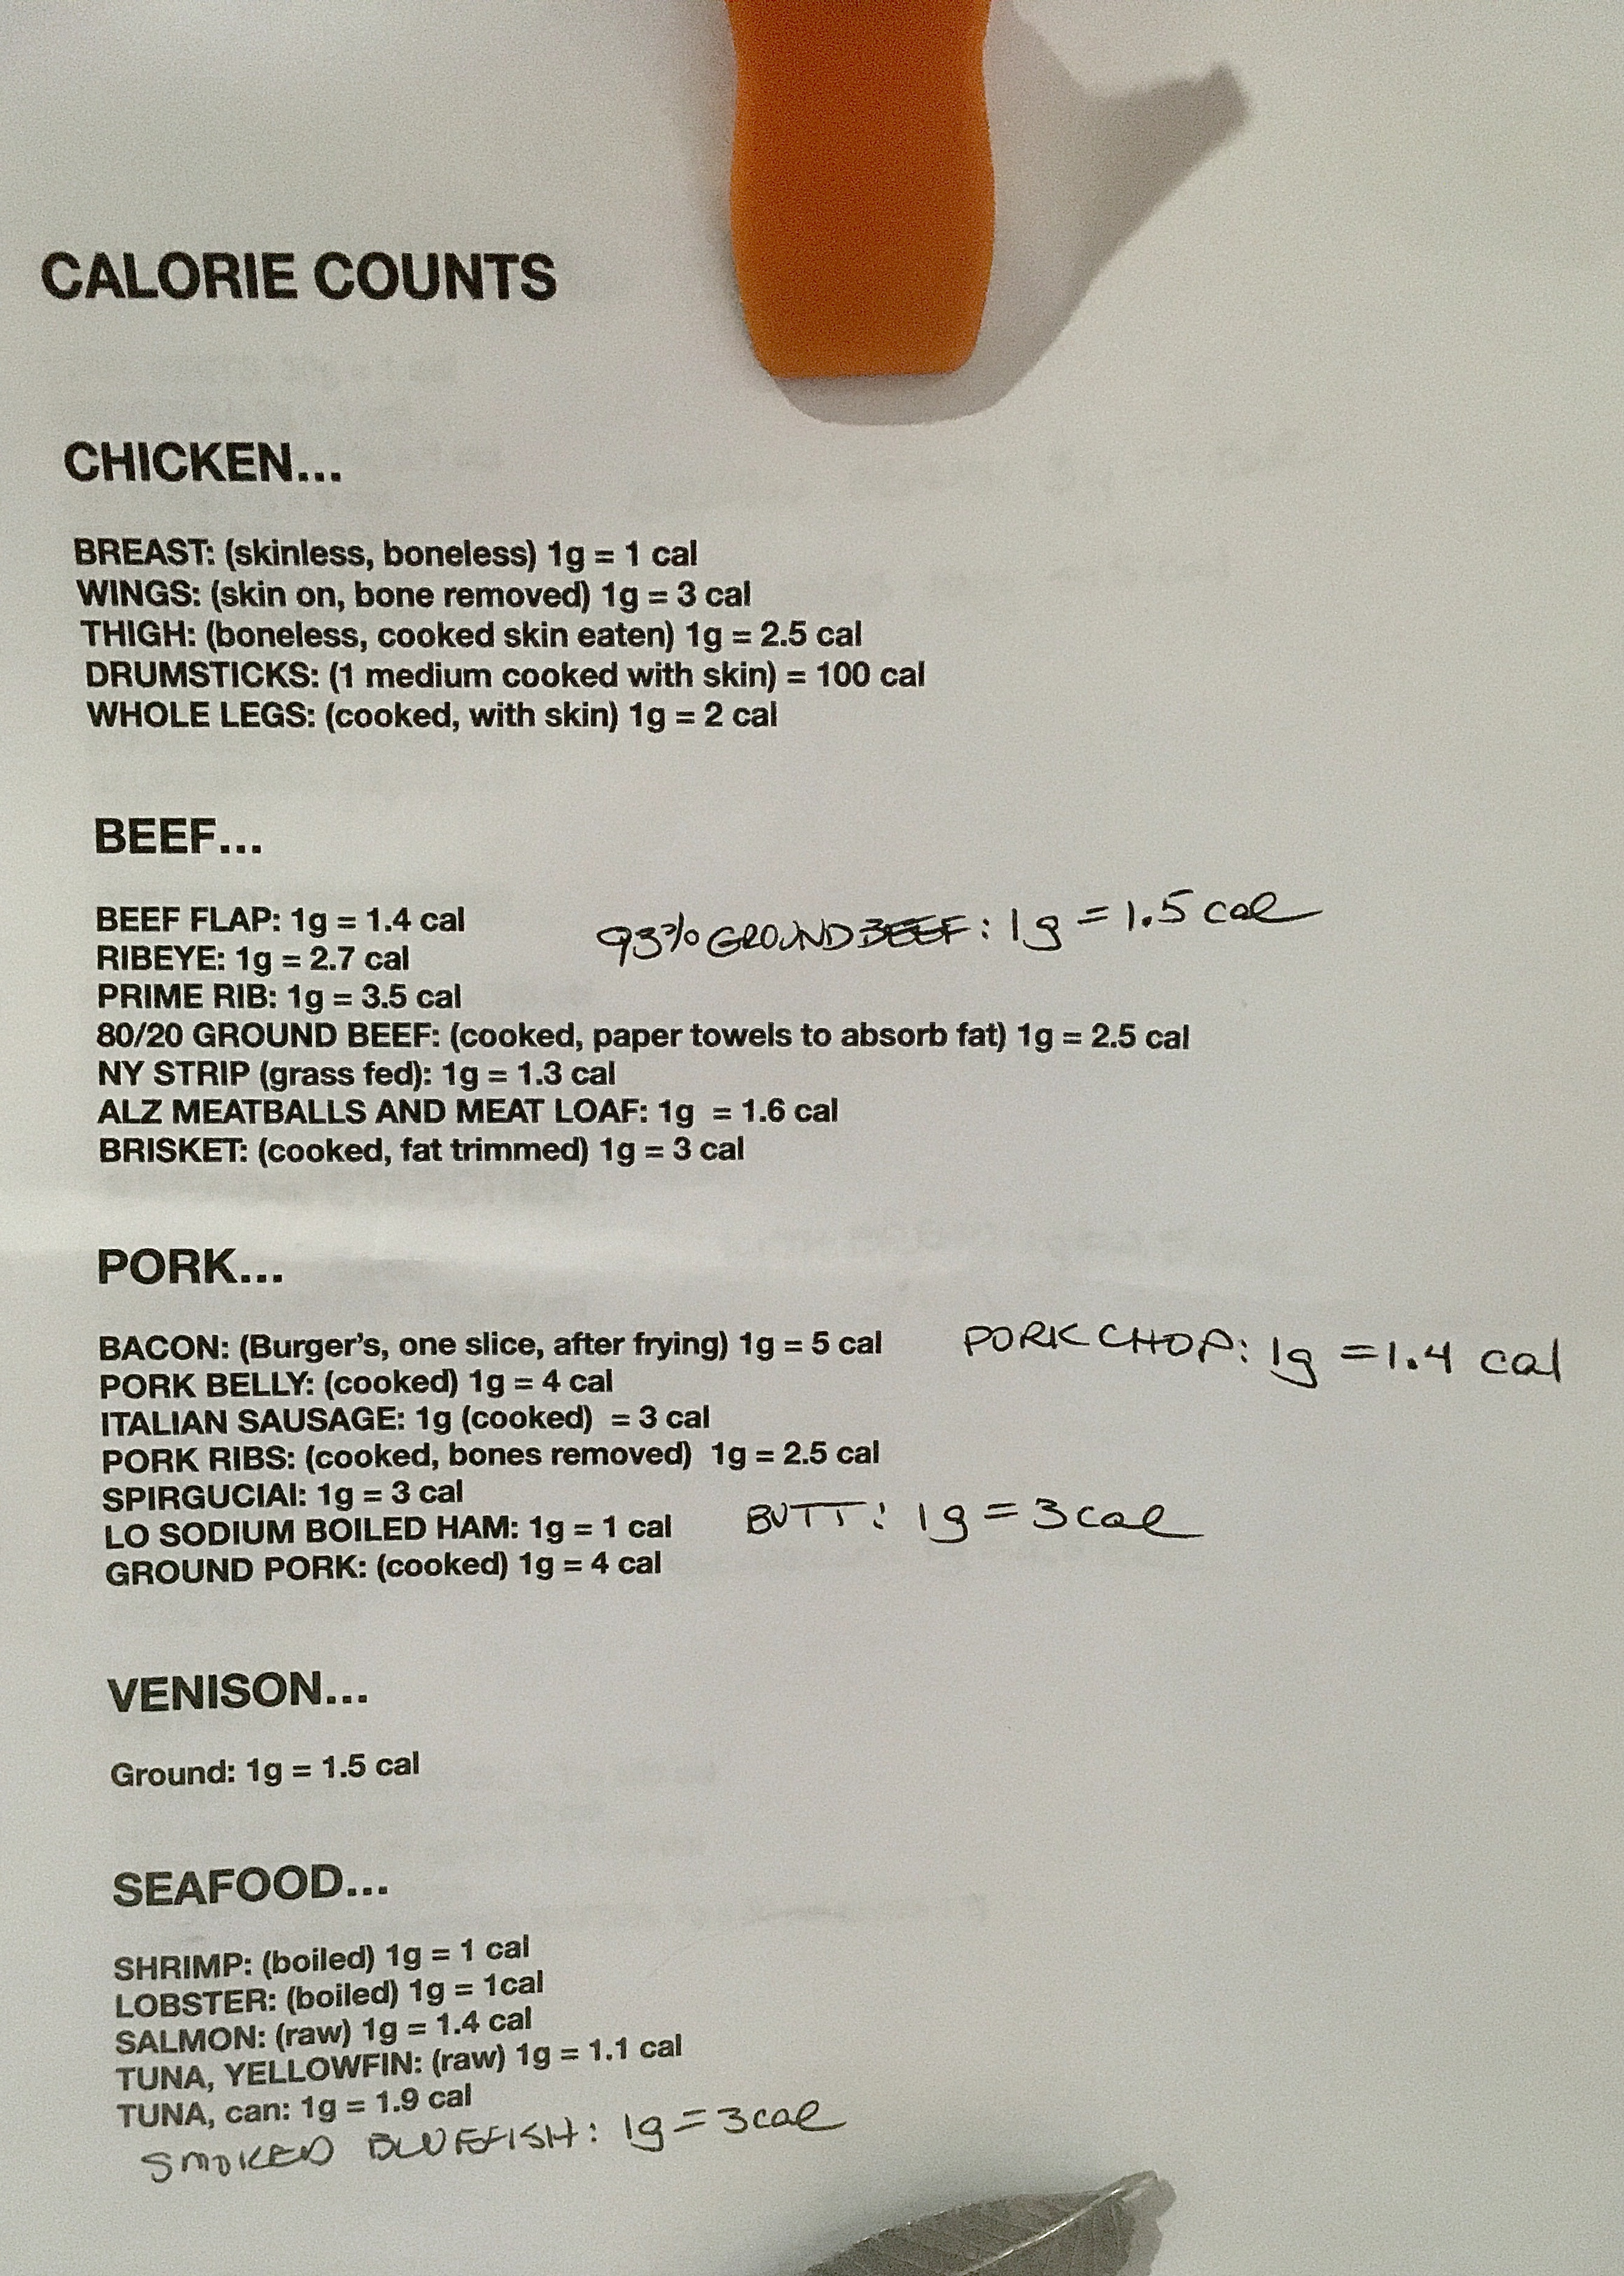
Here are my calorie charts from last year. You may not like all the foods I’ve got listed here, but I think it’s a good start. As I mentioned earlier, you can pretty much Google the calorie count of any food. That’s basically what I did….and I read a lot of labels!
One last tip: There will be times where the bathroom scale will be teasing you, taunting you: where your weight won’t budge for several days at a time. Don’t let this get to you! Your body is still changing for the better! This is where you need to be strong! Keep doing the right thing, and you will see that at the end of a couple of months, when you chart your progress, you really did lose almost 2 pounds a week.
I did it last year! I’m gonna do it again! So can you!

Al Forno in Providence, RI, is a legendary Italian restaurant that was established in 1980 and has graced the pages of many a food magazine ever since. Chefs Johanne Killeen and George Germon made it a culinary destination, creating dishes that many have copied, but never equaled. 

One of those creations was the grilled pizza. These days, you can find grilled pizzas just about anywhere in the country, but it was Al Forno that started it all.

Sadly, George Germon passed away in 2015, but the restaurant continues, despite only being open for takeout these days, due to the pandemic. And although the menu offers a wide variety of dishes for takeout, the one my daughter and I crave–that isn’t on the menu–is their 5-cheese pasta dish. It’s not baked ziti. It’s not lasagna. It’s something way beyond.


Taking the recipe from one of Johanne and George’s cookbooks, my daughter and I decided that we would re-create this magical dish at home as best we could.

One element obviously missing in our home is a wood-fired oven, something Al Forno uses with every dish. (I’ll be able to tackle that end of the recipe in a few months, when my Ooni wood-burning pizza oven arrives.)

And looking at their list of 5 cheeses (mozzarella, Pecorino Romano, fontina, ricotta and gorgonzola), I found that gorgonzola was a bit of a surprise. Having had the 5-cheese pasta dish at least 4 times at Al Forno, I never detected even a hint of blue cheese. In fact, if I would have, I don’t think I would’ve ordered it again. So we chose to remove the gorgonzola and add another favorite, sharp provolone, instead. It turned out to be an excellent choice.

Other than that, we stayed true to the recipe, using shell pasta because that’s what we always got at the restaurant.

2 cups heavy cream
1 cup chopped canned tomatoes in heavy puree (San Marzano’s, if you can get ’em)
4 oz. thinly sliced mozzarella cheese
1.5 oz. grated Pecorino Romano cheese
1.5 oz. coarsely shredded Fontina cheese
1.5 oz. grated Provolone cheese
2 tablespoons ricotta cheese
3/4 teaspoon Kosher salt, plus more for the pasta water
6 fresh basil leaves, coarsely chopped
1 lb. conchiglie (medium shell) pasta
4 tablespoons unsalted butter, sliced thinly
Shavings of raw scallion for garnish (optional)


Preheat the oven to 500°, or as close to it as your oven will get.

Bring a large pot of salted water to a boil.

In a mixing bowl, combine all the ingredients except the pasta and the butter. Stir well to combine.


Drop the pasta in the boiling water and parboil it for about 4 minutes. Drain it in a colander and add it to the ingredients in the mixing bowl. Combine it well.


Divide the pasta mixture into small ceramic dishes, or just use one large baking dish. You want it to sit in a relatively shallow 1-inch layer.


Dot the top of the dish with the butter, and bake it until it’s bubbly and brown, about 7 to 10 minutes at 500…a little longer at lower temperatures.


Funny how help arrives when it’s all about pasta and cheese!


It’s the creamiest, cheesiest pasta dish you’ll ever have…and everyone will fight over those little charred pasta shells!


Optional: When I ordered this dish at Al Forno, they would top it with thin shavings of raw scallion on top. I loved that touch and do that at home as well.


If you watch as much Food Network and Cooking Channel as I do, you’ve probably heard of Big Bob Gibson’s Bar-B-Q in Decatur, Alabama. Smokin’ and grillin’ since 1925, they put the now-famous Alabama white sauce on the map. They would smoke whole birds, then dunk the entire bird in a bucket of white sauce before returning them to the smoker to cook some more. And then they’d serve more of the precious white sauce on the side as you tore into the most amazing chicken you’ve ever had.


I lived in Mobile, Alabama about 30 years ago. Never made it to Decatur. Probably never will. So it was time for me to try to recreate the magic at home. I think I did pretty well.

If you Google “Alabama white sauce,” you’ll get dozens of versions, each, I’m sure, pretty similar and pretty good. I did just that, and then tweaked it to make it my own.

I don’t smoke the birds. I simply season them with salt and pepper, and roast them in a convection oven at 350. When they’re almost done, I brush the chicken all over very liberally with my white sauce…bottom of the bird, too. Then it goes back in the oven for a little bit more.


Parts work as well as whole birds. I love using leg quarters for this recipe.


1 cup mayonnaise
4 tablespoons buttermilk
4 tablespoons white vinegar
2 teaspoons Dijon mustard
1 teaspoon ground black pepper
1 teaspoon granulated garlic
1 teaspoon granulated onion
1/2 teaspoon salt
1/2 teaspoon sugar

Combine all the ingredients and mix well. I like to keep it in a container with a lid so I can shake it up before using it.

Preheat the oven to 350.

I like to roast a whole bird, though parts work just as well. If I’m roasting a whole bird, I like to spatchcock the bird so that it cooks evenly. 

(Aside from the fact that it sounds dirty, spatchcocking simply means removing the back bone of the bird so you can open it up and press it flat onto the roasting pan.)


A spatchcocked bird.


It’s relatively easy to do, especially if you have poultry shears. You just flip the bird upside down, and cut all the way up on either side of the back bone.

Be sure to save the backbone for chicken stock. If you’re like me and you pay extra for really good quality humanely raised chicken, every little bit needs to be saved and utilized to get the most bang for your buck.

I recently discovered a brand called Cook’s Venture. They sell an uncommon variety of bird that is pasture-raised and grows slowly, producing delicious meat. The TLC required to raise these birds comes with a price, but to me they are worth it.


I line a baking tray with foil, salt and pepper my bird all over, and place it on the baking tray and into the 350-degree oven. It takes a little less than an hour for a 4-lb. bird, but before it’s completely cooked through, I pull it out of the oven and brush on all sides with my Alabama white sauce.


Then it goes back into the oven for about 10 minutes.

The result is a tender and juicy bird, unlike any you’ve had before.


And save some of that white sauce to dip in while you’re eating!


Julia Child was my first guide for many of the dishes that I still make today. My Mom and I would watch “The French Chef” on WNET, Channel 13, our PBS station back home in New York.  Later, I’d start buying Julia’s cookbooks, and I was lucky enough to not only interview her, but meet her just a few years before she passed away. She was a lovely, down-to-earth lady, and someone I’ll never forget.


The classic rustic galette was the first dessert I learned how to bake, straight from the pages of “Baking with Julia.” I generally stayed away from desserts because they required a lot of exact measurements, and that just wasn’t my style of cooking. So when I saw that this rustic galette required none of those things, and yet tasted absolutely delicious, I realized I had found my dessert! And the galette was versatile: I could use whatever ripe fruit I could get my hands on, so it became a dessert that changed with the seasons.


Making one large galette, I found that using my pizza peel was a great way to slide it in and out of the oven easily.


3 tablespoons sour cream
1/3 cup ice water
1 cup all-purpose flour
1/4 cup yellow cornmeal
1 teaspoon sugar
1/2 teaspoon salt
7 tablespoons cold unsalted butter, cut into about 8 pieces
1 1/2 cups mixed fresh berries or cut-up peeled fruit (I used apples)
1 tablespoon plus 1 teaspoon sugar
1 tablespoon cold, unsalted butter


I stirred the sour cream and 1/3 cup ice water together in a bowl and set it aside.

I put the flour, cornmeal, sugar, and salt in the bowl of a food processor fitted with the metal blade and pulsed it to combine.

I dropped the butter pieces into the processor and pulsed 8 to 10 times, or until the mixture was speckled with pieces of butter about the size of a pea. Then, with the machine running, I added the sour cream mixture and processed just until the dough formed soft, moist curds.

The original recipe says to divide the dough in half, pressing each into a disk. This time, I chose to make one large disc, which I wrapped and chilled in the fridge overnight.

I positioned a rack in the lower third of the oven, slid in my pizza stone, and pre-heated the oven to 400.

I spread the apples (or whatever fruit is desired) over the dough, leaving a 2 to 3-inch border. I sprinkled 1 tablespoon of the sugar over the fruit. (A pinch of cinnamon with the apples didn’t hurt, too!) I cut the butter into slivers and scattered it onto the fruit. I carefully folded the uncovered border of the dough over the filling, allowing it to fold naturally onto itself as I lifted it and worked around the galette. It’s supposed to look rustic, so no sweat if it doesn’t look perfect.

Then I dipped a pastry brush in water, lightly brushing the edge of the crust with it, then sprinkling the remaining teaspoon of sugar onto the crust.

Because I chose to make one large galette, I dusted my trusty pizza peel with corn flour, and built the galette on that, sliding it onto the pizza stone that I heated up in my 400-degree oven.


I baked the galette for 35 to 40 minutes, until it was golden and crisp. I moved the baking sheet to a cooling rack and let the galette cool for 10 minutes. I like to serve it warm with fresh whipped cream on the side.

Baking on the pizza stone.


TIP: I’ve found that despite keeping the butter cold and using ice water, sometimes my dough doesn’t want to cooperate, and I don’t get the pea-sized curds when I’ve added the butter to the processor. Also, when I add the sour cream/water mixture, I often don’t get that ball of dough I’m hoping for.

No worries: I simply scrape the dough out of the processor bowl onto a floured surface, and I knead it gently into a disc. It will be really floppy and mushy sometimes. That’s OK. I just wrap it in plastic and place it in the fridge overnight.

The next day, the dough has firmed up, and I can roll it flat with a rolling pin on a well-floured surface to keep it from sticking. That’s why I like the pizza peel idea so much: I dust it really well with corn meal, which acts like little ball-bearings, build the galette right on top of it. The corn meal keeps the surface slippery so the dough slides right off the peel and into the oven.


When I first told my friends that I grew up in a Lithuanian family, that we only spoke Lithuanian at the dinner table, that I went to Lithuanian Saturday school for 8 years, that I was a Lithuanian boy scout…they looked at me with a bit of disbelief. On the surface, I looked just like any other American-born kid that grew up in the suburbs. But the home life was vastly different.

Few things were stranger to my friends than the food we ate. While all my “American” friends had PB&J’s for lunch, I had a liverwurst sandwich on dark Lithuanian bread. While my friends struggled with broccoli, I was force-fed beets. And while my friends ate macaroni with jarred tomato sauce, my Mom served us macaroni with sour cream and butter. (Nobody called it pasta back then.)


img_0048


Few things prove you are a true Lithuanian more than an appetite for herring. (Silke (sil-keh) in Lithuanian.) I loved it at an early age. Didn’t matter if it was in a cream sauce with onions, in a tomato casserole with chopped boletes, or perhaps my favorite: an appetizer my Mom prepared only twice a year when my Dad’s buddies came over to play rounds of bridge all night.

Years later, when I was just out of college and in my first years of radio, I shared an apartment with my college buddy, Don. One evening, I prepared this dish for him when he came home from work. We both had the next day off (smart move, considering he vodka!) and I explained to him my family history behind this strange-looking appetizer. (I don’t think he’d ever had herring before.) Though it looked bizarre, he knew he had to trust me when it came to food, and he popped one of those bites into his mouth. I could see he wasn’t sure whether he liked it or not…a moment of many sensations hitting him all at once…confusion in his eyes…do I spit it out or swallow it?…so I poured him the vodka. He swallowed the food…took a shot of the vodka…and instantly had a moment of clarity. It all came together. It was indeed magical. I’ll never forget that look on his face!


There are a few basic ingredients that make this appetizer work…

First and foremost, you need a bottle of good vodka in the freezer. Despite their lack of love for anything Russian, Lithuanians knew a good vodka when they saw one, and Stolichnaya has been the favorite for many years. Even now, with hundreds of vodkas to choose from, I still go to the red-labeled Stoli bottle for this dish. I find a space in the freezer…jam that bottle in there…and let it get nice and cold.

Obviously, good quality herring is essential. Though I can get them fresh when I’m back home on Long Island, the usual choice is from a jar. For me, there’s no better quality than Acme products out of Brooklyn, NY. (If you saw the episode of “Bizarre Foods America” with Andrew Zimmern where he visited a salmon processing plant in Brooklyn, that was Acme Smoked Fish.) You can find them in many supermarkets. The excellent Blue Hill Bay herring in dill sauce is an Acme product and can be found at Whole Foods.

Next: hard-boiled eggs that have cooled in the fridge. Get out the old egg slicer that’s been sitting in the kitchen  drawer for the last decade and use it for this appetizer.

Red onion, sliced thin. How much you use is up to you. But it’s gotta be red and it’s gotta be raw.

And finally, Lithuanian bread. Yes, there is such a thing. It’s easy to find in most Polish or German food stores in the New York area. I buy a loaf when I’m home and then keep it in the freezer to enjoy throughout the year. Lithuanian bread is like the lovechild of rye bread and pumpernickel, so either one of those will work in a pinch.

img_0051


To make the appetizer, simply place a small piece of Lithuanian bread, about 1 1/2″ square, on a plate. Place a slice of hard-boiled egg on top of it. On top of that, some red onion. Then finally, a piece of herring.


img_0046


Pop the whole thing in your mouth, and wash it down with a small amount of frozen vodka. No shots–this isn’t a frat house. Besides, you won’t make it to the end of dinner. Then again, you may not care at that point!

I never learned how to play bridge, but I’m sure my Dad would be proud that I remembered this treat.

This is a great way to impress your guests at a holiday dinner or any big celebration.

Buying a large roast is not an inexpensive proposition, so I wanted to be as sure as possible that it was going to come out right. I got to work, researching recipes online and watching every You Tube video I could find. Every chef and home cook had their own ideas of spices and rubs, but the basic methodology was the same: start the roast at very high heat to form a delicious crust on the meat, then bring the oven temperature down and cook it more slowly to bring the roast to a perfect medium rare.

A big 10-lb. roast is going to cost around 150 bucks, so the first step is simple: don’t skimp by buying a cheap cut of meat. You will absolutely regret it. Get the best meat you can afford. The reward you’ll get when you slice it in front of the family, with all those “oohs and ahhhs” will totally be worth it!


A perfectly cooked, perfectly delicious roast!


The second step is simple but very important: make sure the roast is at room temperature before cooking, and make sure the oven is really pre-heated properly to the right temperature before you put the roast in it. A cold roast will cook unevenly, and you won’t get that beautiful pink all the way through the meat when you slice it. It’ll be raw on the inside and overcooked on the outside. Take the roast out of the fridge for a good 2 hours before cooking…and if it’s frozen, back-time the heck out of it so that it’s truly thawed!

You can already see that back-timing is going to play an important part in a perfect roast. So, for example, if you want to be serving at 7PM, you need a half-hour (at least) for the meat to rest after cooking…about 2 hours of cooking time…and about 2 hours of bringing the roast to room temperature….give or take. Oven temperature settings vary, and roasts can be uneven. You’ll have to keep an eye on this thing.

That brings us to monitoring the temperature. If you have a meat thermometer, you’ll need to jab the roast a couple of times during the cooking process to know what temperature you’re at. I don’t like this method, because it means you’re pulling the roast out of the oven, dropping the oven temperature each time, and jabbing the meat, which releases juices every time you pull the thermometer out. I suggest investing in a probe that goes in the roast from the very beginning, and stays in the roast through the whole cooking process, monitoring the temperature the entire time. When the roast hits the perfect temperature of about 115 degrees, it beeps and lets you know it’s time to remove it from the oven. It’s practically foolproof.


My old-school monitoring system. I had it set for 120 degrees, but actually pulled the roast out at 115.


The monitor that I have is old-school, but it still works like a charm. I use it at Thanksgiving to get perfectly roasted turkeys on a Weber grill, and it works great here as well. The probe goes into the meat, and it’s connected to a transmitter. It also has a receiver that can be as far away as 100 feet from the roast, and it will signal you when the desired temperature has been reached. That means you don’t have to stare at the roast all the time. You don’t have to open the oven door all the time. You can actually enjoy a cocktail in the company of your guests or family while the meat cooks.

Other monitors are totally wireless. You stick a probe in the roast, and it calls your cell phone when the meat is done. Pretty cool. Amazon’s got whatever you need.

2 onions
3 carrots
3 stalks of celery

When it’s time to remove the roast from the fridge to bring it to room temperature, roughly chop the onions, carrots and celery and place them on the bottom of a roasting pan. Lay the roast on top.

The rub that you use on your roast is really a matter of what you like. Use the herbs and seasonings you love, and you can’t go wrong. Here’s my recipe for a 10 to 12-pound roast…

1/2 cup olive oil
1/4 cup Kosher salt
2 tablespoons black pepper
2 tablespoons granulated garlic
2 tablespoons granulated onion
2 tablespoons dried oregano
2 tablespoons dried thyme
2 tablespoons rosemary, finely chopped

Combine these ingredients in a bowl. You want it to be like a paste or wet sand. If it’s too dry, add a little more olive oil. Dried oregano and thyme are usually fine the way they are, but because rosemary can be hard like pine needles, I either chop them really fine or I put them in a spice grinder. I have a small rosemary plant growing indoors by my window, so the needles are soft and wonderfully fragrant when I chop them up.


Seasoned and ready to cook!


Rub the seasonings all over the roast, making sure you get the bottom and the sides as well. Use it all up! You might think it’s too much salt, but remember: it’s a big hunka meat. Some of the seasonings will fall off. Be fearless!

To flavor the meat while cooking, I add a cup of red wine (optional) and 2 cups of beef or chicken stock in the pan with the vegetables. (In some cases, after the roast is cooked, you can use the juices at the bottom of the pan to make gravy. But give it a taste first. If you use a lot of salt on your roast, the juices could be too salty to use in your gravy. Gravy or not, a classic horseradish cream sauce on the side is a great choice. (The recipe is below.)

About a half-hour before you want to start cooking, pre-heat the oven to 450 degrees. You really want it hot to start. Roast the meat at 450 for 20 minutes, then turn down the heat to 325 degrees.

This is where many recipes tell you to calculate how much more to cook based on the size of the roast, etc. If you’ve got a probe in the roast, you can see exactly how the temperature changes over time. If you decide that you’re going to “wing it,” you can go by the general math of 15 minutes per pound of meat, including that first 20 minutes. So, if you have a 10-pound roast, multiply that by 15 and you get 150 minutes. Subtract the first 20 minutes from that, and you need to cook the roast another 130 minutes at 325 degrees. This is by no means a guarantee of success, but a very general guideline.

If you have a standard meat thermometer, you know that you can safely leave the roast in the oven at least an hour before taking the first temperature reading. Then play it by ear. (Like I said, you don’t want to be opening the oven door and poking the meat all the time.)

Although I had my probe set at 120 degrees, I took the meat out at 115, removing the roast from the pan, and placing it on a cutting board (or another clean pan.) Then I wrapped the roast with foil, and covered the foil with a clean bath towel, keeping all the heat in, letting the meat rest for AT LEAST 30 minutes. The meat inside continued to cook and reached a temperature of 130 degrees before it started to slowly cool down. (If you leave the probe in while the meat is wrapped, you’ll actually see the temperature rise.)

After at least 30 minutes of resting, I unwrapped the roast and started slicing!

This is where you can pour off all the pan drippings and make a sauce if your spice mix wasn’t too salty or strong. As I mentioned, the classic horseradish cream sauce is great to serve with it…

1 cup sour cream
1/2 cup mayonnaise
6 tablespoons prepared horseradish (more if you like it!)
the juice of 2 lemons
1 tablespoon Worcestershire sauce

Combine all the ingredients, mixing well. Keep this refrigerated until it’s ready to serve.


A previous family dinner with mac & cheese, salad, the amazing rib roast and lobsters from Sakonnet Lobster in Little Compton, RI!

This is my version of a holiday drink I was introduced to by my mother-in-law from the Upper Peninsula of Michigan.

This classic is loaded with sugar. But then…so is everything else around the holidays!

Whiskey slush

9 cups water
2 cups sugar
4 “Constant Comment” tea bags
12 oz. frozen OJ concentrate
12 oz. frozen lemonade concentrate
2 cups whiskey (I use Crown Royal)
7-Up or Sprite

Boil the water and sugar, making sure the sugar dissolves. Turn off the heat and steep the tea bags in the liquid for 10 minutes. Discard the tea bags.

Add the OJ, lemonade and whiskey. Mix well, then pour it all into a freezeable container with a lid. Freeze.

To serve: Scoop the slush out of the container (it doesn’t freeze solid) and mix in a tall glass with 7-Up.

Let’s face it: there’s no such thing as healthy eggnog. This recipe is delicious but is also a heart attack in a glass. I post it every year because my friends just love it.

My buddy, Rick Sammarco, a wicked talented bartender, credits his father, Al, for this eggnog. The original recipe calls for a lot more of everything. I’ve cut it down to a “more reasonable” size.

A word about salmonella: If you’re concerned about it, you need to decide what works for you. Some recipes tell you to make your eggnog weeks in advance to “sterilize” the drink with all the booze you’ve added to it. I’m not sure that really works. As for me, I use raw eggs in my Caesar salad dressing and in other recipes, so I’m willing to risk it here.

If you’re lucky, some stores–(though very few of them, and none near me)–sell pasteurized eggs. They say the taste is a bit funky, but that it does remove the salmonella.


eggnog


1.5 quarts vanilla ice cream (I use Breyer’s)
1 pint half & half
15 whole eggs (raw)
½ teaspoon vanilla extract
1/4 teaspoon cinnamon
1/4 teaspoon nutmeg
At least 3/8 cup of each:
spiced rum (I use Captain Morgan)
whiskey (I use Crown Royal)
brandy (I use E&J)


Let the ice cream soften 1 day in the fridge. Mix the ice cream, eggs, vanilla, half-and-half in a blender.

Add the spices and liquor. Blend until it’s frothy.

Taste, and add more cinnamon and nutmeg if you like.

After it’s fully blended, let it sit in the fridge, covered, for at least 12-24 hours for the flavors to blend. Even longer is better.