Posts Tagged ‘food’

This was my most popular blog post of 2012. Thought I’d re-run it here this week…


Food magazines and cooking shows are pretty obvious places to be inspired by new recipes from common ingredients. But I’ve found inspiration from some strange places, including old TV sitcoms. I had some nice thick pork chops thawed, and I was trying to think of something new to do with them. The classic “pork chops and applesauce” episode of The Brady Bunch was on TV that afternoon. I looked in the pantry, found a small container of my daughter’s applesauce, and came up with this recipe.

The applesauce and honey creates a tasty crust.

pork chop 2
Ingredients:

2 nice, thick cut pastured pork chops
1 small tub (4oz) unsweetened apple sauce
1 tablespoon fresh sage, finely chopped

A few sprigs of fresh thyme–leaves only–finely chopped

1 teaspoon honey

1 teaspoon salt
1/2 teaspoon granulated garlic
1/4 teaspoon fresh cracked black pepper

In a small bowl, combine everything but the pork chops.

Smear this applesauce mix all over the pork chops, place in a non-reactive covered container in the fridge, and let it marinate overnight.

The next day, make sure all the gooey applesauce mix gets re-smeared on the chops. You want it nice and thick on the meat.

On the stove, heat an oven-proof pan. Use a little olive oil. Place the chops in the pan gooey side down, then re-smear with any leftover applesauce on what is now the top side. Let the first side sear to a golden brown before flipping the chops over. Once you’ve flipped the chops, place in a pre-heated 350-degree oven. Cook the pork chops until just pink. (It’s no longer necessary to cook pork to death like our parents used to do.)

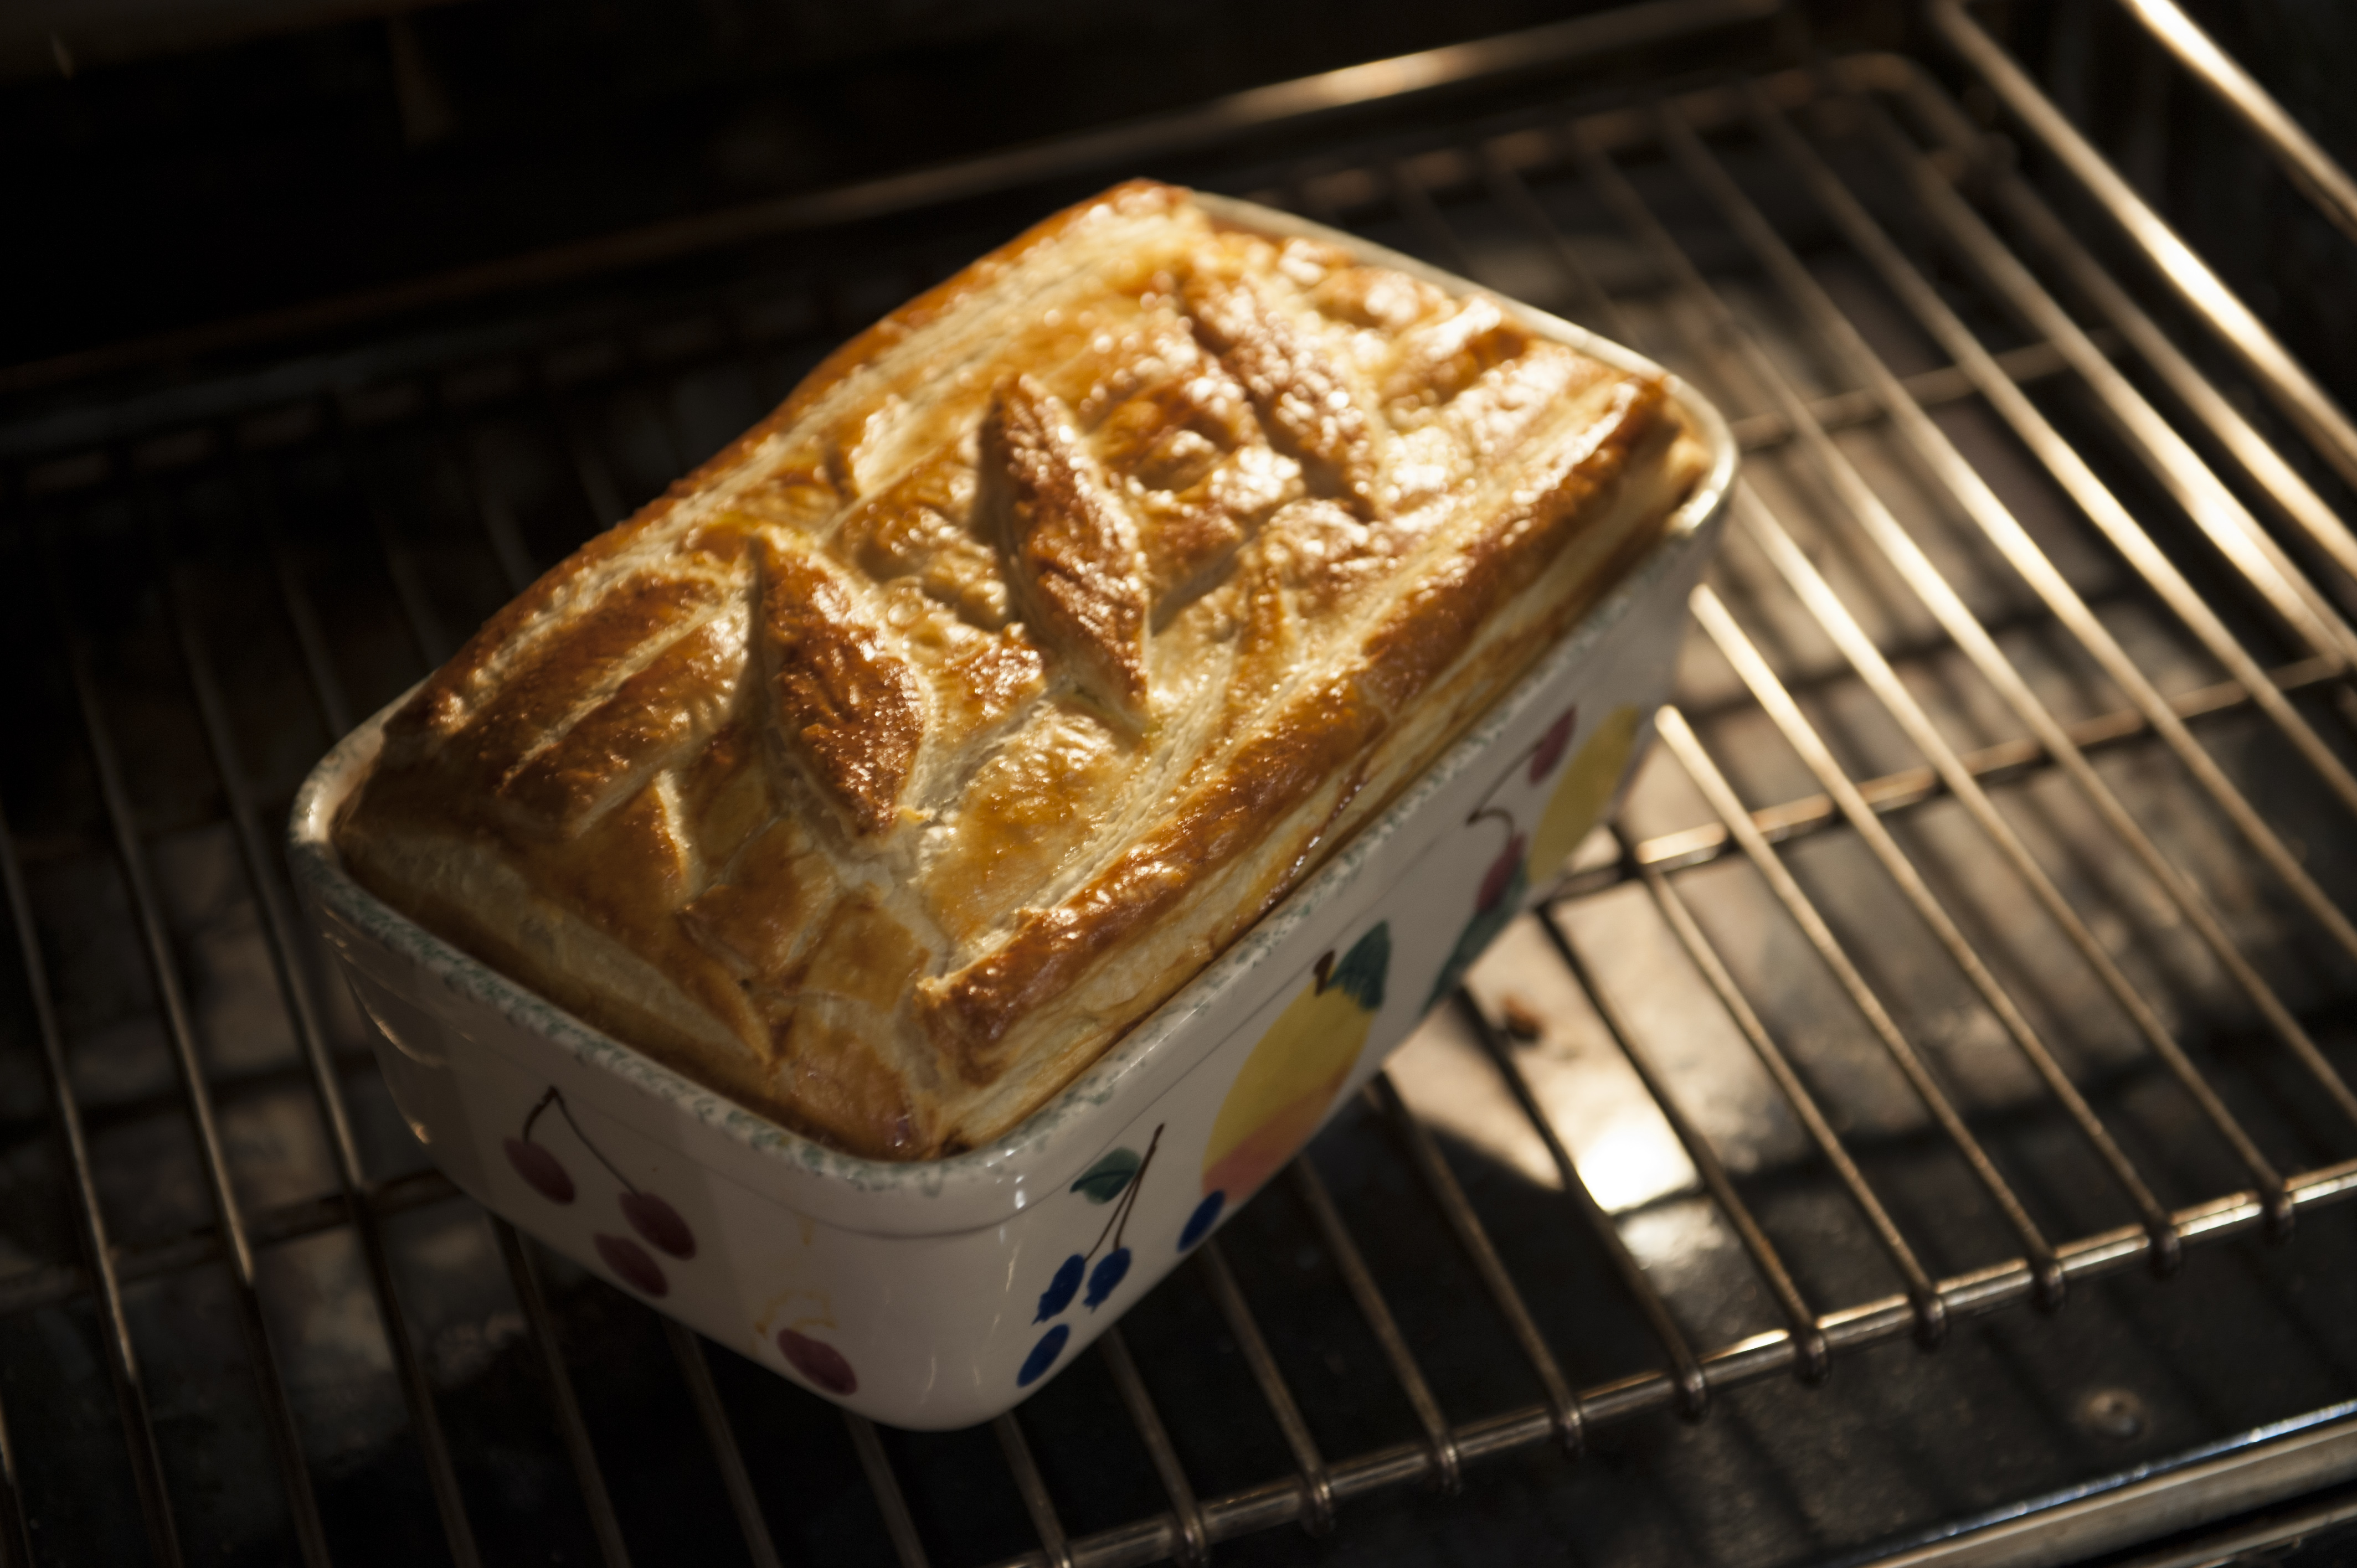
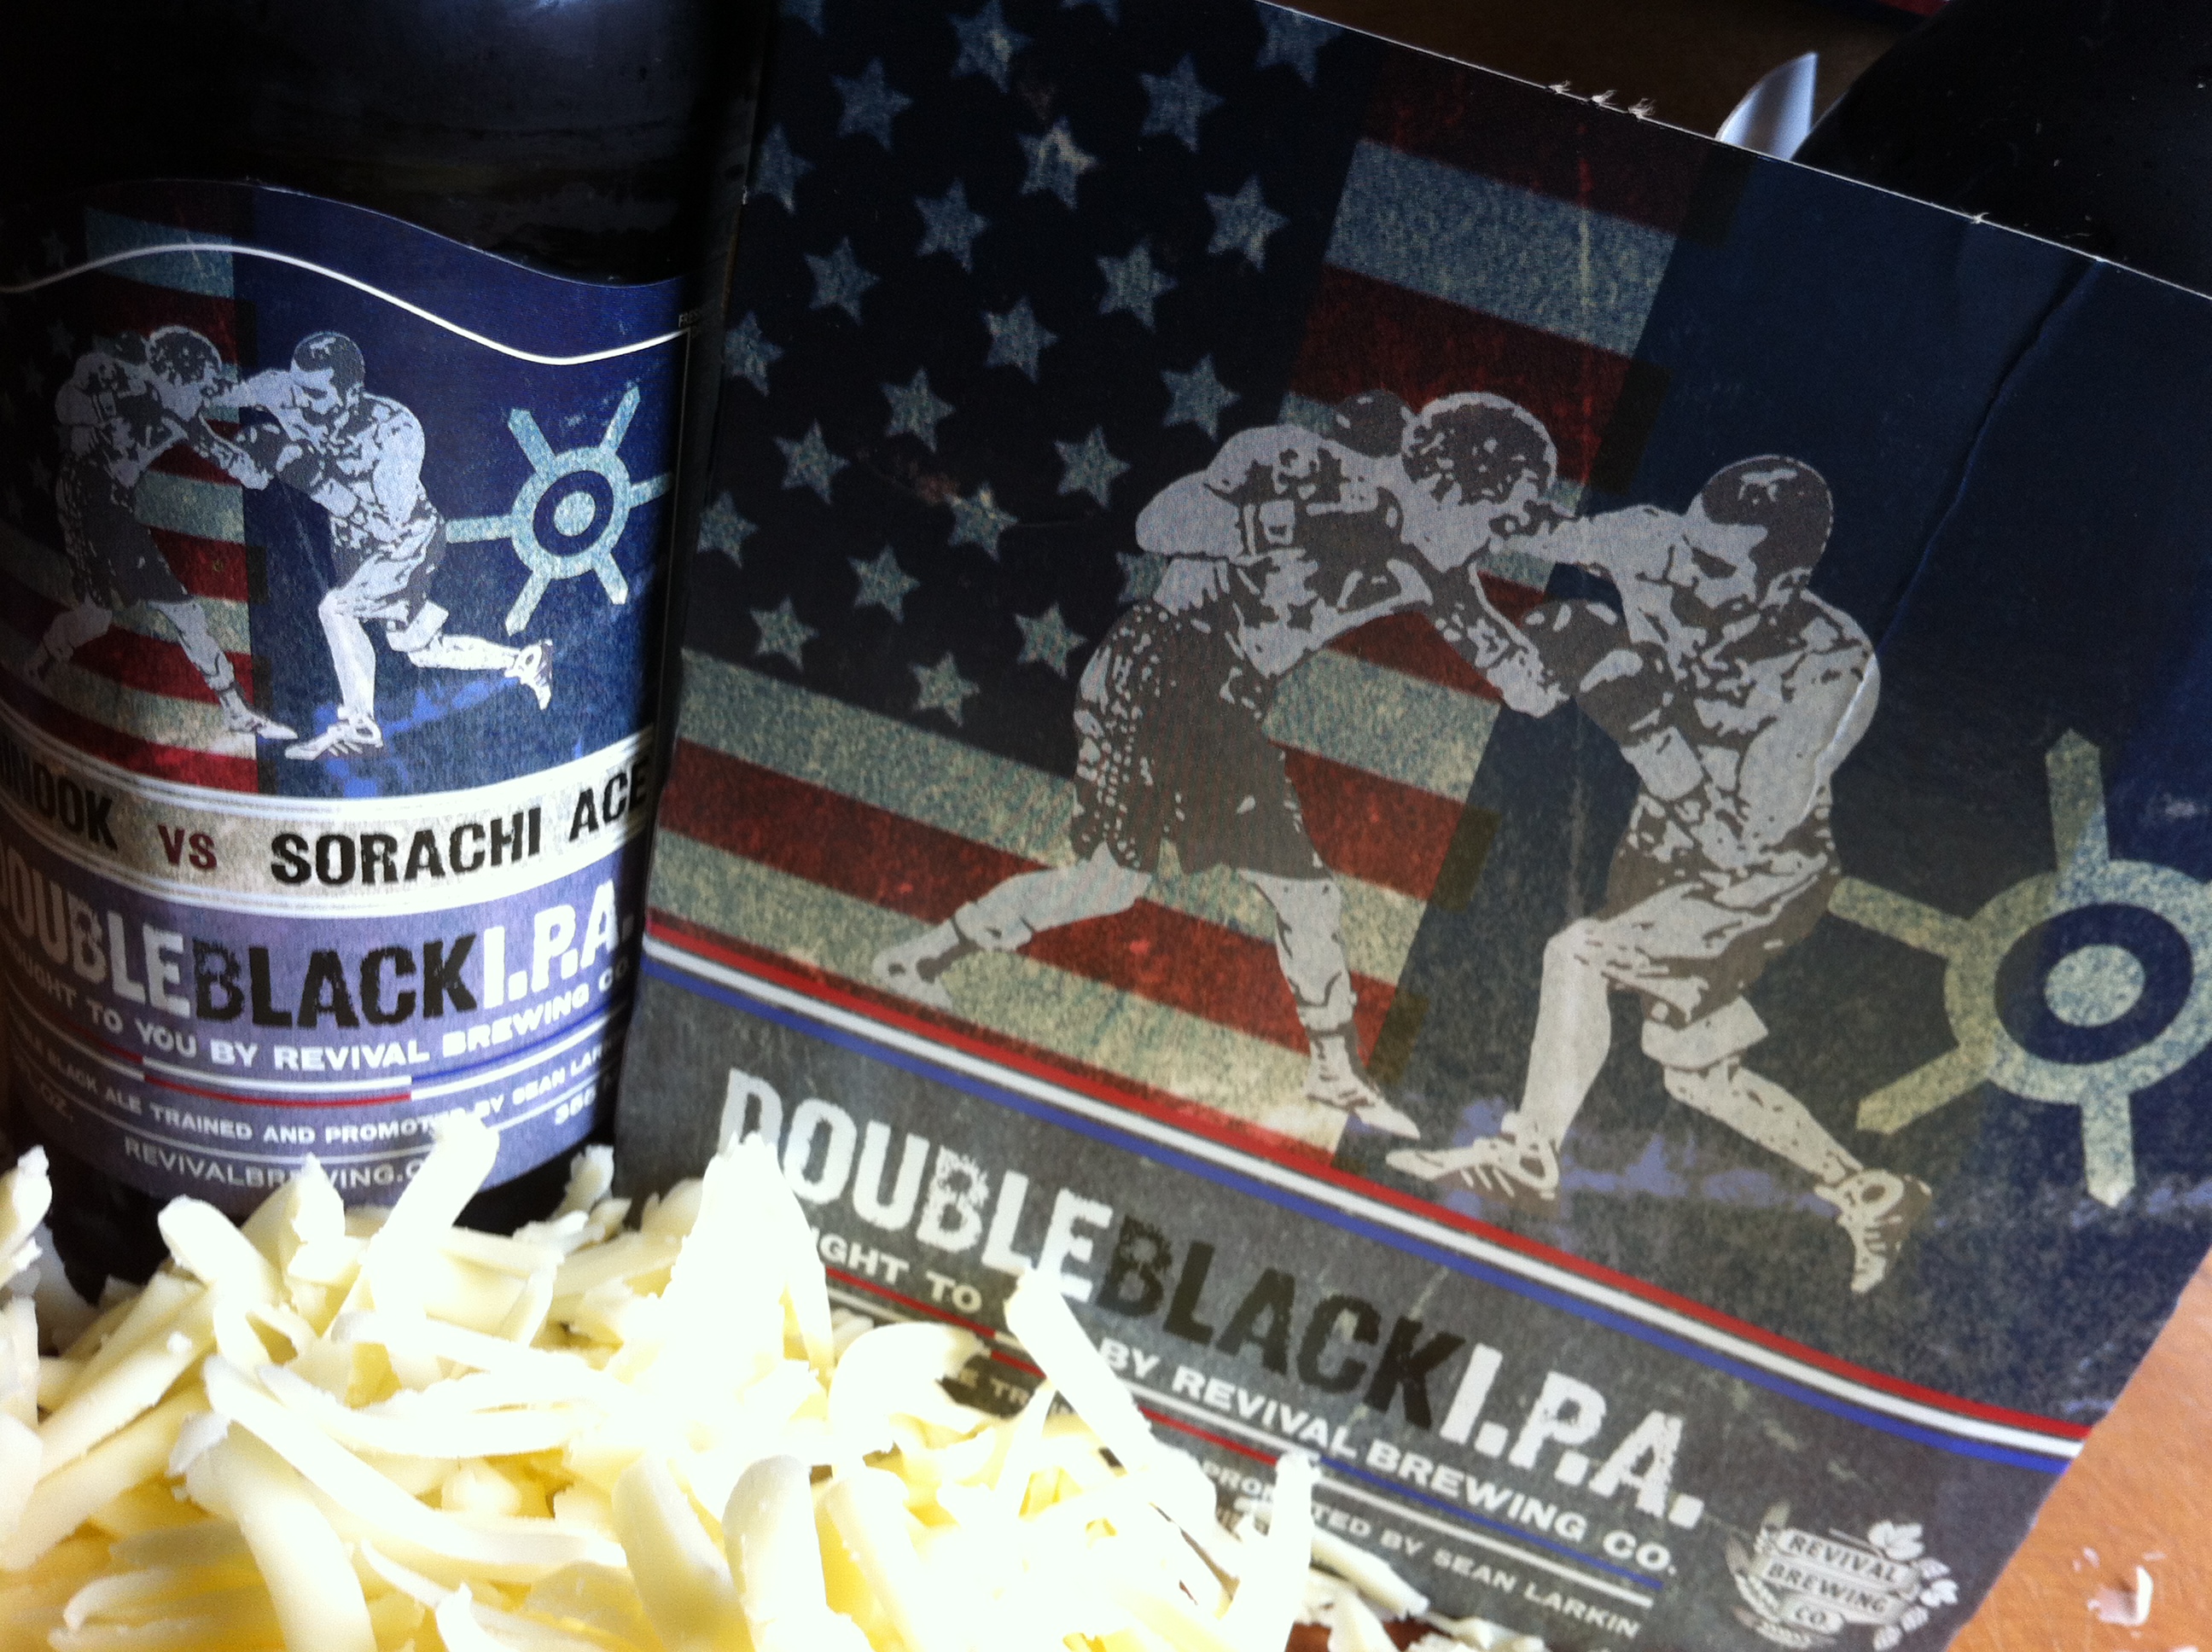
This is a great dish that was inspired by chef Jamie Oliver and his “Jamie at Home” cookbook. A couple of years ago, when I received a shipment of venison from my father-in-law, an avid hunter that lives in the Upper Peninsula of Michigan, I knew that although I could certainly use beef for this dish, it would be absolutely stellar with venison. And though the original recipe calls for Guinness, I knew that I couldn’t miss with my latest favorite local brew from my buddy Sean Larkin of Revival Brewing Co: his Double Black IPA…


beer pix

DOUBLE BLACK I.P.A. VENISON STEW WITH PUFF PASTRY


Ingredients:

Olive oil
3 red onions, peeled and chopped
3 cloves of garlic, peeled and chopped
3 Tablespoons butter, plus extra
3 carrots, peeled and chopped
3 celery stalks, trimmed and chopped
10 oz baby bella mushrooms, chopped
3 lbs venison, cut into 3/4″ cubes
A few sprigs of fresh rosemary, leaves picked and chopped
Sea salt and black pepper
2 bottles (24 oz) Revival Brewing Company Double Black IPA, with a swig for the cook
3 Tablespoons flour
12 oz freshly grated cheddar cheese
1 1/2 pounds store-bought puff pastry (all butter is best)
1 large egg, beaten


_DSC0404

Preheat the oven to 375.
In a large ovenproof pan, heat a few tablespoons of the olive oil. Add the onions and fry gently for about 10 minutes. Turn the heat up and add the garlic, butter, carrots, celery and mushrooms. Stir well, then add venison, rosemary, a pinch of salt and about a teaspoon of pepper.
Fry on high for about 4 minutes, then add the beer, making sure you take a swig for,luck! Stir in the flour and add just enough water to cover. Bring to a simmer, cover the pan with a lid or foil, and place in the preheated oven for about 1 1/2 hours.
Remove after 1 1/2 hours and stir. Put it back in the oven and cook another hour, until the meat is cooked and the stew is rich, dark and thick. If it’s still liquidy, place the pan on the stove top and reduce until the sauce thickens. (You don’t want a soupy stew or you’ll get soggy puff pastry later on.) Remove the pan from the heat and stir in half the cheese. Season with salt and pepper to taste and set aside to cool.
Depending on whether your puff pastry comes in sheets or a block, you’ll need to use a rolling pin to get it into sheets about 1/8″ thick. Butter a good-sized pie dish or an ovenproof terrine. Line the dish with the sheets of pastry, letting the pastry hang over the sides. Pour in the stew, even it out with a spatula, and add the rest of the grated cheese on top.
Use another 1/8″ thick sheet of pastry (or a couple if they’re not wide enough) to cover the top of the pie dish. Lightly crisscross the top with a knife, then fold over the overhanging pieces of pastry over the lid, making it look nice and rustic. Don’t cut or throw any of the pastry away! Use as much as you can, since everyone will want some.
Brush the top with the beaten egg and then bake the pie on the bottom of the oven for about 45 minutes, until the pastry has cooked, and it’s beautifully puffed and golden.
Serve with a side of peas.

_DSC0418

HONEY GLAZED CHICKEN WINGS

Posted: February 17, 2013 in chicken, Recipes, wings
Tags: , , , ,

I can’t get enough of chicken, and I cook it at least a couple of times a week. So I have to keep coming up with new flavors to challenge my tastebuds as well as myself. Previous posts have included Cantonese Chicken (https://livethelive.com/2013/01/11/cantonese-chicken/), Asian-style chicken wings (https://livethelive.com/2012/11/01/asian-style-chicken-wings/), and oven fried chicken wings (https://livethelive.com/2012/12/05/oven-fried-chicken-wings/).

This time around, it’s a honey glaze with hints of ginger that couldn’t be simpler. Feel free to use any chicken parts you like. Even a whole roasted chicken would work with this recipe. And choosing the right bird, a pasture-raised chicken like the ones I get from my friends at FireFly Farms in Stonington, CT (http://www.facebook.com/pages/FireFly-Farms/242699329121278) makes all the difference.

honey glazed chicken


Ingredients


4 lbs chicken wings

1/2 cup honey

1/2 cup water

1/4 cup soy sauce

1/4 cup apple cider vinegar

2 Tablespoons sesame oil

1 teaspoon cayenne pepper sauce, like Frank’s Red Hot

1/2 teaspoon fresh ginger, minced

1/4 cup onion, minced

1 Tablespoon garlic, minced

1 cup chicken stock, preferably homemade


Thaw chicken wings and place in a Ziploc bag.

In a separate bowl, whisk together all the other ingredients, except chicken stock, to make a marinade. Pour this marinade into the Ziploc with the chicken and seal, squeezing the air out of the bag. Squish the bag around so that the marinade thoroughly covers all of the chicken wings. Place the bag in the fridge to marinate for about 4 hours, squishing it around every hour.

Preheat the oven to 325.

Carefully pour out the marinade into a saucepan, adding the chicken stock, and reduce until it becomes a thick, gooey glaze. Be careful not to burn the sugars in the honey. Honey can also foam up and overflow if you’re not watching it.

Remove the chicken pieces from the bag and place them on a baking sheet covered with non-stick aluminum foil. Bake for about 30 minutes.

The reduced marinade glaze should be ready right around the time the chicken has cooked for 30 minutes or so. Brush the glaze on to the chicken, and place back in the oven to cook 15 more minutes.


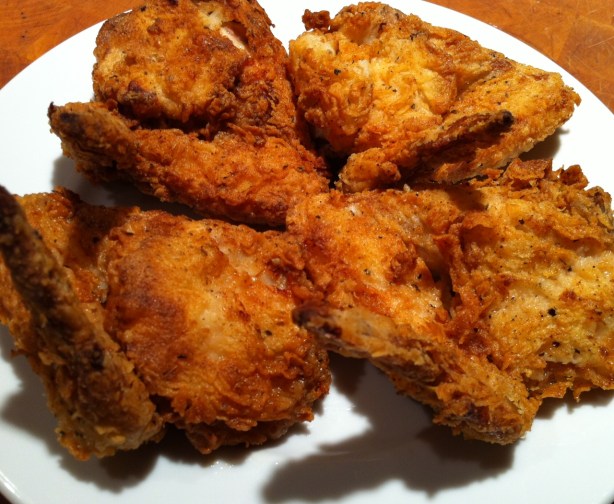
I love fried chicken. And despite what most people think, fried food is really not that bad for you if you fry it properly. Use clean oil every time, and get the oil to the right temperature: two key factors that will result in crispy chicken that isn’t bogged down with grease. But frying also means you have to stand over the chicken and watch it all the time…especially a pain in the butt if you’ve got guests and you’re making a lot of chicken! What makes this recipe great is that you get all the benefits of a crispy fried chicken without all the grease and without standing watch over it the whole time.

You can use chicken wings or any chicken parts for this recipe. Either way, I fry the chicken until it just turns golden brown and then bake it in the oven.

Ingredients:

10 lbs large chicken wings or chicken pieces

Vegetable oil, for frying

For soaking:

1 quart buttermilk

2 teaspoons Frank’s Red Hot, or other hot sauce

For the seasoned flour:

1 ½ cups all purpose flour

½ cup whole wheat flour

1 Tablespoon sea salt

1 teaspoon freshly ground black pepper

1 teaspoon paprika

1 teaspoon granulated garlic

1 teaspoon onion powder

1 teaspoon basil

1 teaspoon oregano

Open the bottle or carton of buttermilk and add 2 teaspoons of hot sauce. Close container and shake to combine. Place chicken pieces in a bowl and cover with buttermilk, letting the chicken soak in it for at least several hours or overnight.

Chicken soaking in buttermilk/hot sauce mixture overnight.

Pre-heat oven to 350 degrees.

Combine all purpose and whole wheat flours in a bowl. Add salt, pepper, paprika, granulated garlic, onion powder, basil and oregano. Mix well.

After chicken has soaked in the buttermilk, remove the pieces one at a time, leaving the buttermilk on them as you toss the pieces into the seasoned flour. Set pieces aside on a metal baking rack placed on a sheet pan.

Pour the vegetable oil into a large heavy-bottomed stock pot to a depth of 1-inch. Heat the oil to 360 degrees on a thermometer.

From the buttermilk, to the breadcrumb mixture, to the oil.

From the buttermilk, to the breadcrumb mixture, to the oil.

Working in batches, place the chicken pieces in the oil, being careful not to overcrowd them. Fry the chicken until it is golden brown on both sides, then place each piece back on the metal baking rack set on the sheet pan.

Once all the chicken has been fried, place the sheet pan in the oven for 30 to 40 minutes, until fully cooked and crispy.

fried chix

Feast!

MAKIN’ BACON!

Posted: December 1, 2012 in bacon, Food, pork, smoking, Uncategorized
Tags: , , , , ,

There are few foods as magical as bacon. Add bacon to just about any dish you’re preparing, and it elevates it to incredible new heights of flavor. The BLT is possibly the greatest sandwich ever invented: just a few simple, fresh ingredients, when placed together, transforming into one of the most amazing treats on planet Earth.

And it all depends on the bacon.

For so many years, I’ve bought my bacon on line from Burger’s Smokehouse, a family run business in Missouri that not only sells some of the best bacon I’ve ever had (get the thick-sliced country bacon—my favorite), but also smoked turkeys, pork, beef, chicken and more. The prices are very fair and they include shipping, so you know exactly what it’s going to cost you right from the start. (www.smokehouse.com)

But it was time to take the next step: I had to make my own bacon!

My favorite source of heritage breeds of pork, pasture-raised with tender loving care, is Caw Caw Creek, based out of North Carolina. They raise only a handful of pigs in an area that other pig farms would jam in hundreds. The pigs are allowed to roam freely and forage for their food. And as a result, the pork is some of the most flavorful you will find anywhere. (www.cawcawcreek.com) Tell Emile I sent you.

Bacon comes from the pork belly. So I bought a couple slabs from Caw Caw Creek, and followed the simple curing techniques outlined in a great book about making all kinds of prepared meats (sausages, salamis, and of course, bacon): “Charcuterie,” by Michael Ruhlman and Brian Polcyn.

If there is a skin on the belly, I choose to remove it before curing, but that’s a personal preference. I don’t eat it, so why have it? And it’s so thick, it blocks the cure.

To cure bacon, all you really need is some salt, some sugar, a little pepper, and what they in the curing biz call “pink salt,” which is not to be confused with salt that happens to be pink, like you would find in a basic spice catalog. Pink salt is bright pink—to let you know that this is special salt that should only be used in small quantities for curing. And the reason for that is because it contains nitrites. Nitrites delay the spoilage of the meat, and help preserve the flavors of spices and smoke. That’s good. But nitrites can break down into nitrosamines, which have been known to cause cancer in lab animals. But let’s face it: you would need to eat a ton of cured meat to really worry about this.

Once you rub the pork belly with the salt and sugar mixture, place it in a Ziploc bag, squeeze the air out of it, and seal it well. Place in the fridge for about a week, flipping it over a few times to let gravity do its work. You’ll see that the salt will draw moisture out of the meat and form a brine. This brine will continue to cure your pork belly, so leave it in there.
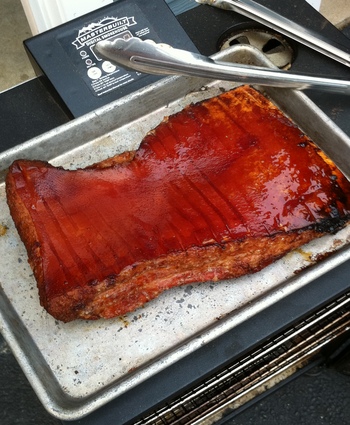
Once the pork belly has been cured, wash the brine off the meat, pat dry with paper towels. Now it’s time to cook. You can simply cook the pork belly at 200 degrees for about 2 hours, until the internal temperature reaches 160 degrees, or do what I did: place the pork belly in a digital smoker, cooking it at 200 degrees for 1 hour, then adding hickory chips and smoking it at 200 degrees for another hour.

That’s it. You have achieved bacon!

Bacon, straight out of the smoker.

Bacon, straight out of the smoker.

Let me tell you…that first slice you cut off that bacon and toss in a pan to lightly fry for a few moments will be the best bite of bacon you have ever had in your life!
The reward is so worth the effort. If you don’t want to bother going online to buy your pork, simply go to your favorite butcher and ask for pork belly. It’s usually available. And if you’re making one slab of bacon, why not make it three or four? It freezes well. And…you will eat it. You know you will!


Sliced, and ready for frying.

Sliced, and ready for frying.


On Thanksgiving morning, we did what we weren’t supposed to do: woke up late and arrived just 20 minutes before the Macy’s parade started, huddled in the crowd just in front of Radio City Music Hall.

As fate would have it, a police barrier was opened up to the public–kids had the first row–with adults behind them. Our 5-year-old daughter got right up front, and my wife snagged a photo of Iron Chef Geoffrey Zakarian on the Food Network float. (I was a few rows back, taking family videos of the event.)

My advice if you ever plan on going to New York City for Thanksgiving: skip the blowing up of the balloons the night before. It is a madhouse that wraps around a half a dozen city blocks and once you are in, there is no way out until the very end. If you’re claustrophobic, or have a sick or tired kid, you are absolutely screwed. The police show no mercy because they’ve heard every excuse you can think of a thousand times before. Can’t say that I blame them.

We found a way out by heading down to the subway station below the American Museum of Natural History (where all this takes place) and came up the other side of the street out of another subway entrance.

As for Thanksgiving Day and the Macy’s parade: the weather was perfect and our daughter had a great time. We’ve done the parade once. And now we’re done!

Geoffrey Zakarian on the Food Network float.

On Thanksgiving night, we had our dinner at Zakarian’s restaurant, The National, located on the first floor of The Benjamin, our hotel for the weekend. Unfortunately, like many restaurants owned by Iron Chefs (Bobby Flay a prime example), the menus don’t reflect the creativity that you see on Food Network’s “Iron Chef America” show. Our meal was a prix fixe dinner that featured steak. And although it was beautifully cooked…it was steak. I can get that anywhere.

What did shine was the service. The manager, Noble, made sure that we were happy with our wine selection and that our 5-year-old daughter was offered something other than the adult prix fixe menu. And when our choice of a white Rioja tasted off, he quickly brought a bottle of another variety that absolutely hit the spot. As we were waiting for our table on that very busy night, a busboy saw that our little girl was hungry, so he brought over some bread, butter and jelly, and gave her a seat at a small table to enjoy  it while waiting. Excellent service.

Not that I’m an Iron Chef stalker, but the next night, we had dinner at Restaurant Marc Forgione, located in the Tribeca neighborhood of Manhattan. Everything about this restaurant told us we were in the capable hands of a creative master. The restaurant was beautiful. Our server, Brad: friendly and totally professional. And the food: absolutely amazing. Appetizers consisted of chili lobster on Texas toast, with a sauce so good, you wanted to soak every bit up with that thick bread. Kampachi tartare with avocado, Schechuan buttoms, toasted pine nuts and Saratoga chips to scoop with: rich and smooth. A that-day creation of trout on a cedar plank was out of this world. A main course of perfectly cooked squab, bacon, brussels sprouts was real cold weather comfort food. And the most challenging meal for me: the veal tenderloin with Boudin noir, a pork blood sausage that was really intense. But hey, I didn’t come here to have my hand held. I came here to get slapped around a bit! And that’s exactly what this dish did.

Desserts were equally incredible, my favorite combining my two favorite desserts, bread pudding and pecan pie, into one amazing sweet, gooey treat.

And unlike other high-end restaurants, there was no problem when we requested something simple for our fussy daughter’s meal. A plate of home-made pasta with butter and cheese arrived at the table, and my daughter called it “the best ever.”

Marc Forgione the restaurant was only half the story. Marc Forgione the chef was a really cool guy who stepped out of the kitchen often, checking on tables to make sure people were satisfied with their meals. We had a table right near the open kitchen door, so we saw him and his staff at work during our entire meal. And when my daughter handed him a drawing she made of him in his kitchen, he offered to give us a tour. We grabbed that opportunity in a heartbeat! He came back to our table several times more, just to see how we were doing. Great guy. Great talent. Great restaurant.

With Iron Chef Marc Forgione in his kitchen.

Almost 95% of all shrimp sold in the United States comes from farmed shrimp in countries like China, Thailand, Vietnam and India…as well as Latin America. The stuff you buy at the supermarket comes frozen (since shrimp is highly perishable) and then is thawed out and placed on ice to make the display look nice. But the shrimp you’re getting is not “fresh” (unless you’re lucky enough to get some wild caught local shrimp) and it’s from countries where the methods of farming are questionable at best.
Shrimp farming in Asia and Latin America is destroying mangrove forests and because of that, coastal villages as well. Disease is commonplace in shrimp farms, so they’re pumped full of antibiotics and pesticides.
Imported wild shrimp are also a problem because of bycatch. For every pound of wild shrimp caught, several pounds of other animals such as turtles die needlessly in the trawler nets.
Wild American shrimp is the best way to go for your health and the environment. American shrimp fishermen are required by law to reduce bycatch. For example, they’re required to use Turtle Exclusion Devices to stop turtles from being caught in their nets.
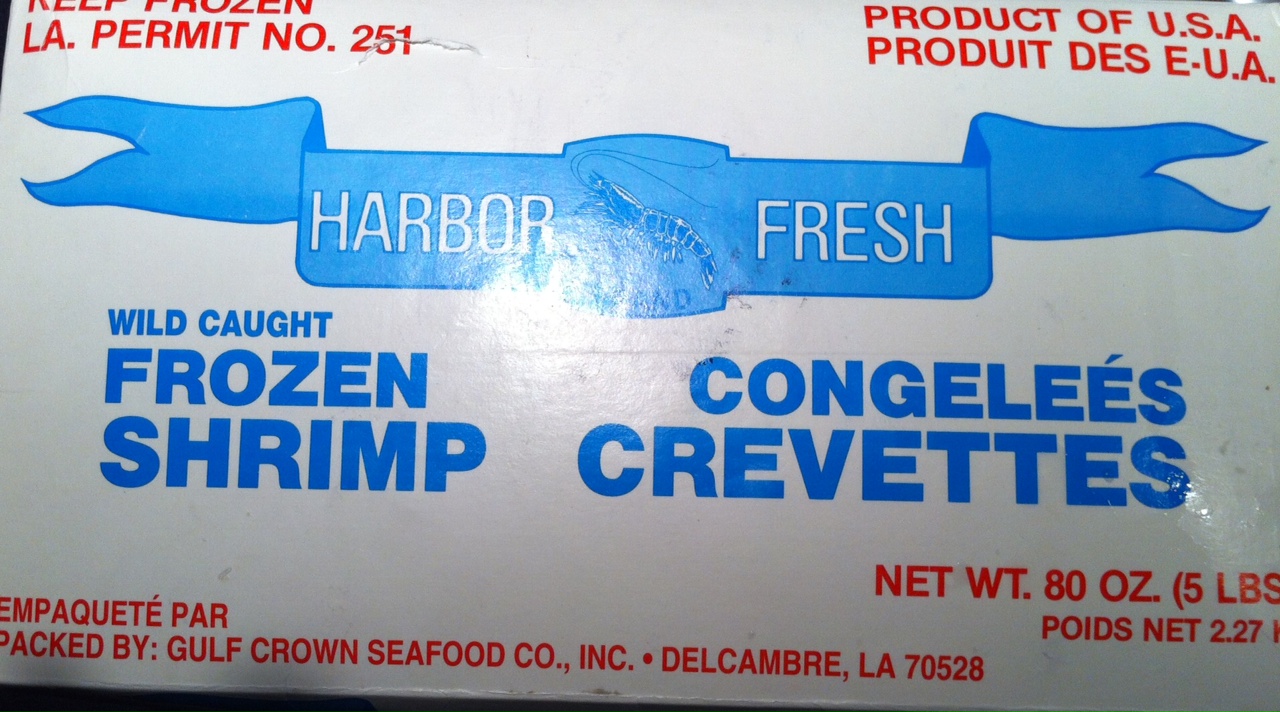
I stopped eating tiger shrimp and other farmed shrimp from foreign countries a long time ago because I found a source of shrimp that not only delivers to my door, but offers me that shrimp at competetive pricing even with the shipping! And best of all, it is wild caught in American waters. I’m supporting the lives of shrimp men along the Gulf of Mexico, not some foreign country that doesn’t give a rat’s ass about the environment, the shrimp they raise in it, or my family’s well-being.

The real deal, usually sold in 5 lb boxes.

And on top of everything else, wild caught American shrimp tastes better. And why shouldn’t it? The shrimp are eating their natural foods found in the wild…not some pellets thrown at them that contaminate the water around them, not to mention the shrimp themselves.
My favorite website for wild caught American gulf shrimp is www.cajungrocer.com. I have been ordering my favorite Cajun foods, like Turduckens and alligator sausage, from these people for many years, but they also sell shrimp and live crawfish (in season.)
Don’t cheat yourself, your friends or your family out of something really special. Wild caught American gulf shrimp costs the same, supports our economy, is better for you and tastes better.
The basics of this recipe come from my friend, Lee, a chemist in New Jersey who also enjoys creating in the kitchen. What I found interesting about his recipe was the touch of sugar that doesn’t really add sweetness but rather helps create the light, tasty caramelized crust that forms on the shrimp when you sear it. I tweaked a few things in this recipe, but the essence of it remains the same.

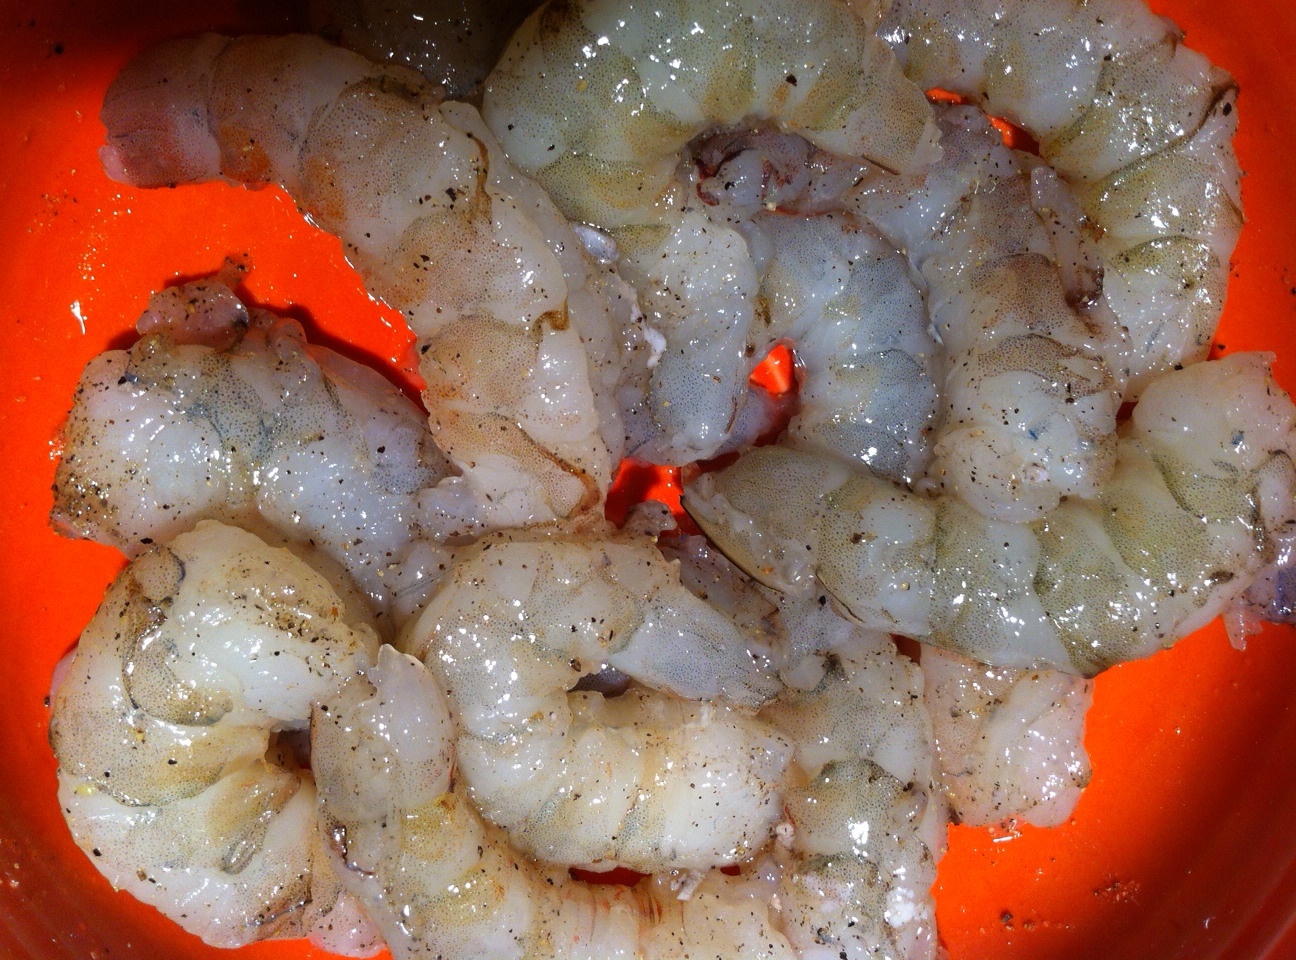
Seasoned shrtimp.

Ingredients:
1 pound large peeled and deveined wild-caught American shrimp
Salt
Freshly ground pepper
Sugar
4 Tablespoons softened butter
1 clove of garlic, squeezed through a press
1 Tablespoon freshly squeezed lemon juice
2 Tablespoons chopped parsley
1 teaspoon oregano
Extra Virgin olive oil
Toss shrimp, 1/4 teaspoon salt, 1/4 teaspoon pepper, and 1/4 teaspoon sugar in a bowl.
In a separate bowl, mash butter with a fork, folding in the garlic. Add the lemon juice, parsley, oregano, and 1/4 teaspoon salt.
Heat a Tablespoon of olive oil in a large skillet over high heat. Add half the shrimp in a single layer to the pan and cook at high heat until caramelized on one side, about 1 minute. Flip shrimp over with tongs and cook for another 30 seconds. Do not overcook.
Remove cooked shrimp to a covered bowl and similarly sear the other half of the shrimp, then return other half of the shrimp back to the skillet. Turn down the heat to medium and add the butter/garlic/lemon/parsley/oregano/salt mixture, occasionally tossing shrimp around in the pan to evenly coat them with the glaze.
If serving over pasta, increase the amount of butter and olive oil to just lightly coat the pasta. Toss cooked pasta into the pan of shrimp to combine.
I like to season lightly at the end with a tiny pinch of Fleur de Sel. Serve immediately.
Portland, Maine has quickly become the most foodie-intense city in the northeast. Block for block, this waterfront town features anything you crave, from incredible James Beard nominated four-star restaurants like Fore Street, to legendary brewpubs like Gritty’s, to famous seafood dives like J’s.  It’s a town I look forward to visiting anytime I can, and I get there 2 or 3 times every year.
Located on the waterfront, across from the classic Harbor Fish Market (a great place to buy fresh lobster, Maine shrimp and crab and lots more), the Porthole has been serving amazing grub in Portland for many years.
The indoor seating area has hardly changed since the beginning, with the exception of a Guy Fiere Food Network poster proudly displayed on the wall, signifying that “Diners, Drive-Ins and Dives” did indeed pay these people a visit.
The outdoor deck, however, is somewhat new, say, 10 or so years old, connecting to the outdoor deck of the Comedy Connection next door, and certainly handling the overspill of drinkers that come to Portland to party.
I was here for breakfast recently, and the food is definitely “I got a hangover” greasy…but that’s not a bad thing! My daughter had French toast. (It comes with a bourbon maple syrup, but we got her the regular kind.) My wife had the home-made hash featuring beef brisket. And I enjoyed and incredible Porthole Classic Breakfast Sandwich featuring cheddar scrambled eggs, crispy pork belly, kimchi and scallions. We washed our meal down with Bloody Marys and Captain and Cokes.
Now that’s a breakfast!!!

I know a lot of people are tempted to buy the turkey deep fryer this time of year, especially now that there’s an electric home turkey fryer that seems to make the job a lot easier and safer. (I’m still not OK with frying turkeys indoors, no matter how safe they say it is.)

The concept of a deep-fried turkey sounds pretty cool. And if you do it right, it tastes pretty good. I’ve had my share of fried turkeys when I lived in Alabama many years ago. But for me, it’s just too much damn work: finding a safe spot in the yard to blast the propane-fueled fryer so that you don’t burn your house down, standing outside and freezing your ass off while it fries, and then disposing of gallons of used oil at the end of it all. And making sure the oil is at the right temperature so you don’t get a scorched turkey on the outside and raw turkey on the inside.

So here’s what I do: I cook the turkey in my good old Weber grill. The standard Weber grill allows you to cook up to a 15 lb. turkey–big enough for my purposes–and it comes out crispy, smokey and delicious. If you’re afraid to try this for the first time at Thanksgiving when it really matters, wait a few months and buy a turkey when you have the craving and try it out.

The charcoal chimney with hot coals awaits.

Although I’ve stopped using charcoal briquettes a long time ago, and now strictly use natural hardwood charcoal, this recipe works best with Kingsford. The idea is for the coals to cook slowly and evenly. And never use lighter fluid…always start your fire with a few pieces of crumbled newspaper under a charcoal chimney.

Needed:

Weber grill, with the dome top

Kingsford charcoal briquettes (do not use Match Lite or other pre-soaked briquettes)

Heavy duty aluminum pan (disposable)


Ingredients:

Whole turkey, up to 15 lbs, thawed and previously brined (see my blog about brining a turkey)

Olive oil (to rub on turkey)

2 yellow onions, chopped

4 stalks of celery, chopped

½ lb (2 sticks) of unsalted butter, melted

1 tablespoon granulated garlic

1 tablespoon onion powder

2 tablespoons salt

1 tablespoon pepper

Spreading the coals away from the center of the grill.

If you want stuffing, make it separately and cook it separately.

Light 8 to 10 lbs of charcoal in the grill…depending on the size of the turkey and how cold it is outside.

Remove the giblets from the turkey. Place the bird in the aluminum pan.

In a small bowl, mix granulated garlic, onion powder, salt and pepper Add any other seasonings you like.

Coarsely chop onions and celery. Place in a another bowl. Mix with the melted butter and 1/3 of the salt/pepper/garlic powder mixture. Place a small handful of this “stuffing” mixture in the neck cavity of the turkey. Place the rest in the body cavity (where the stuffing would usually go.) You can fasten the bird with turkey skewers if you like. This “stuffing” is strictly to flavor the turkey…you don’t eat it!

The rubbed, stuffed and seasoned bird.

Rub the outside of the entire turkey with the olive oil and sprinkle the rest of the garlic/onion/salt/pepper mixture on the outside of the bird. Make sure you get the whole bird…on the bottom as well.

When the coals in the grill have ashed over, spread them to the outside edges of the Weber equally. Put the cooking grill rack in place. Place the aluminum pan with the turkey in the center of the grill, keeping it away from the direct heat of the coals. If using a a meat thermometer, insert the probe into the thickest part of the breast, being careful not to hit the bone. Place the lid on the grill. (You may need to bend your pan a bit.) Open the vents on the bottom of the Weber as well as the lid. Important to get air circulating!

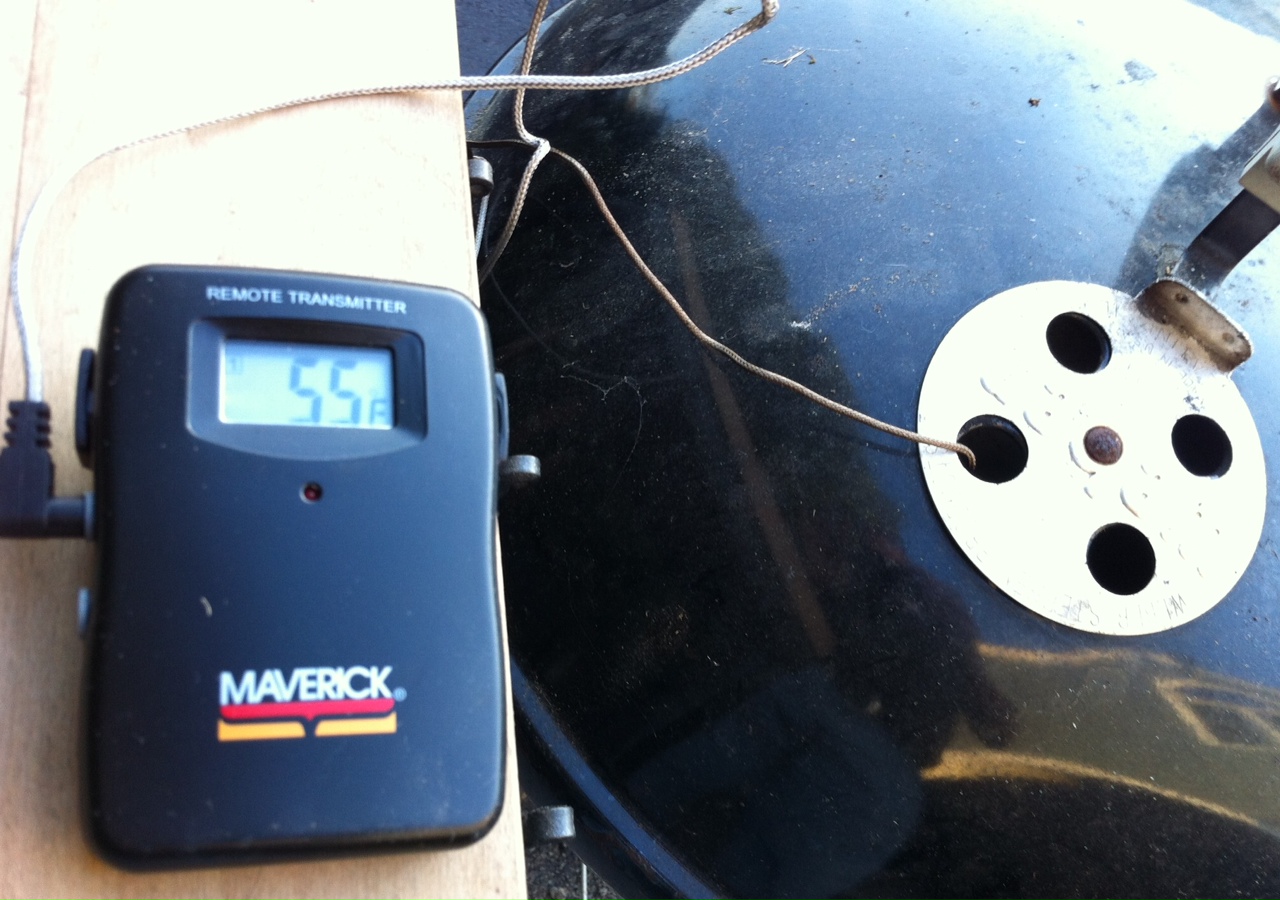
My meat thermometer calls me from as far as 100 feet away when the turkey reaches the optimum temperature that I pre-set. Time for a drink!

No basting is necessary.

Now here’s the tough part: DO NOT OPEN THE GRILL TO CHECK ON THE TURKEY! (If you must look, shine a flashlight into the vent holes on the lid to take a peek at the pop-up timer, if there is one.) The whole point is to keep the heat inside the kettle. You’ll know your turkey is done when no more smoke or heat rises from the grill, and the turkey inside stops making sizzling noises.

Remove the turkey and let it rest at least 15 minutes before carving.

Beautifully grilled, cooked to 180 degrees in less than 2 hours!

BRINING A TURKEY

Posted: November 10, 2012 in brining, Food, marinade, turkey
Tags: , , , ,

Brining is a simple process of soaking a hunk of protein in a flavored salt solution for a period of time before cooking, resulting in a much more juicy and flavorful final product.

It’s basic high school science: the brine has a greater concentration of salt and water than the molecules of the protein (in this case, a turkey) that is soaking in it. By simple diffusion, the protein molecules suck up the salty water and retain it. When you cook the meat, some of the water evaporates, but the meat still contains far more moisture in it than it would have without the brine soaking, and the end result is a moister, simply delicious bird.

Some people use giant syringes to inject their turkeys with crazy solutions, but I think that the old way is still the best way when it comes to brining. Get a big pot, fill it with the brine, and soak the bird in it. Done.

Here’s my tried-and-true turkey brining recipe. Once the brining is done, you can cook the turkey whatever way you like best. I use a method where I grill it inside a Weber grill with charcoal. It comes out smokey and absolutely amazing. I’ll have that info in the next blog.

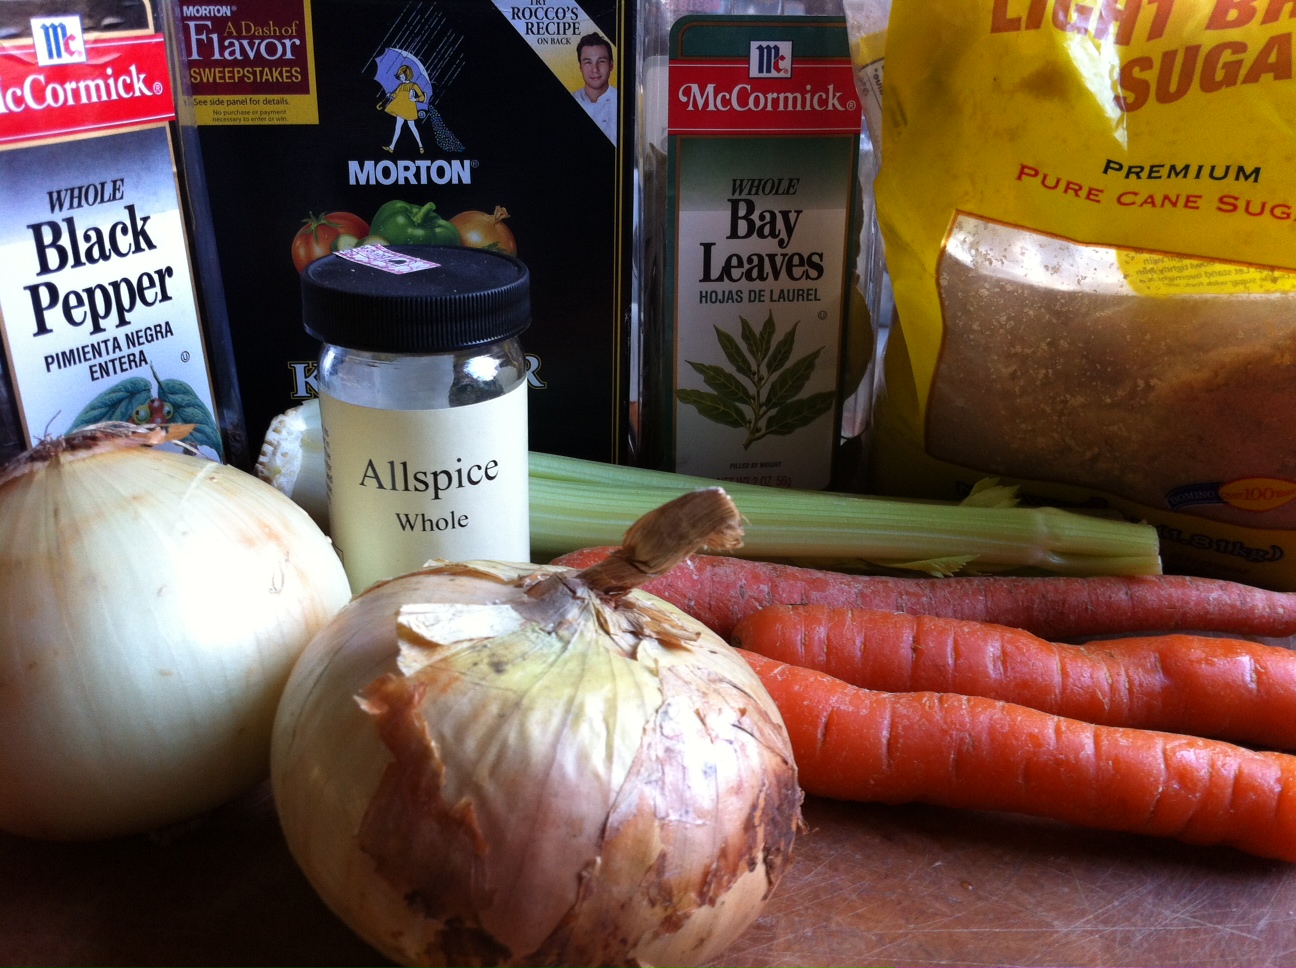
Brine Ingredients:

1 gallon of water
2 onions
3 carrots
3 stalks celery
1 cup kosher salt
1 tablespoon black peppercorns
1/2 cup light brown sugar
1.5 teaspoons whole allspice
4 bay leaves
1 gallon of ice water
14–15 lb turkey, thawed

Pour first gallon of water in a large pot. Quarter the onions, carrots and celery (no need to peel them) and add to the water. Add all the other ingredients, except ice water and turkey.

Let the pot come to a boil for a few minutes. Remove from heat and let brine cool down to room temperature.

Remove giblets from turkey and place the bird in a container just big enough to hold it and 2 gallons of liquid.

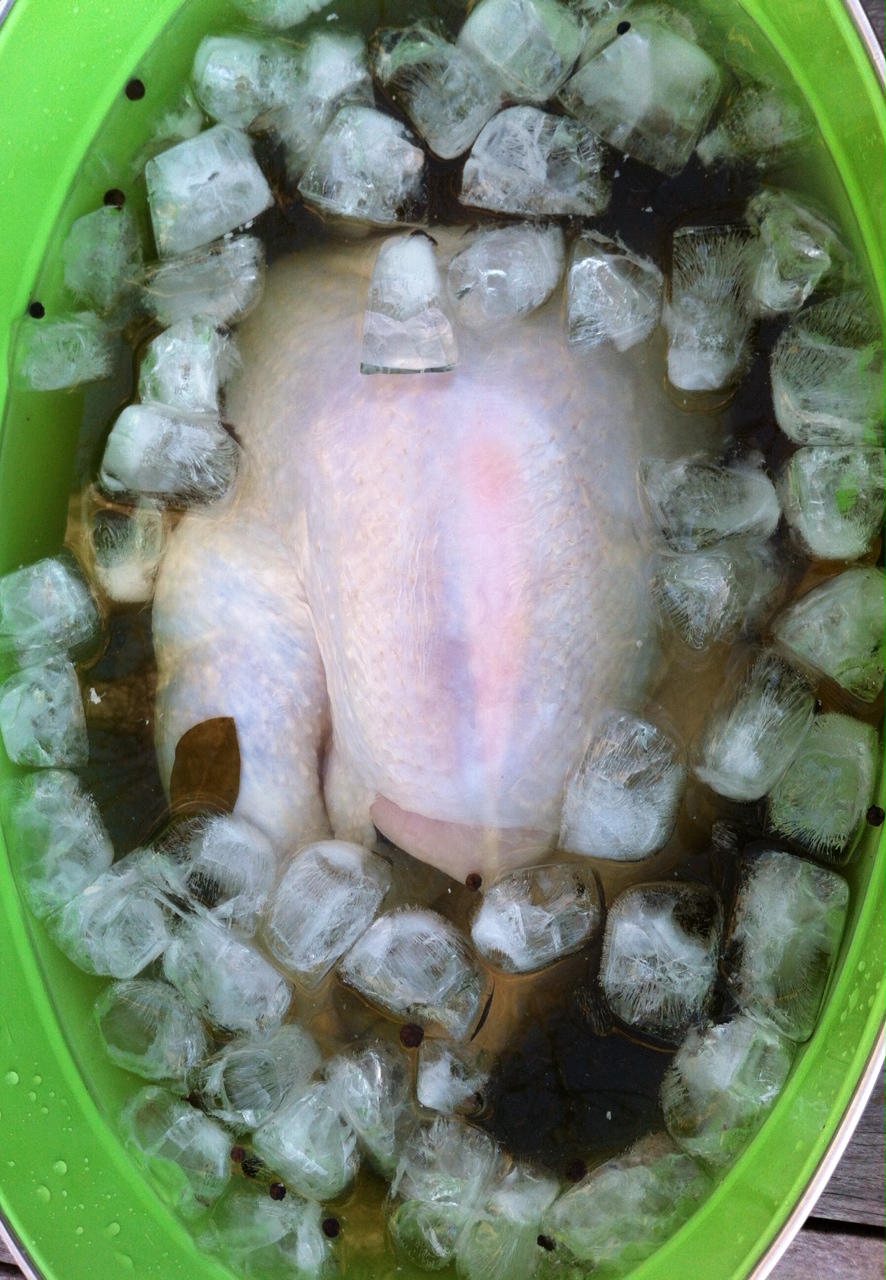
Pour the now-cooled brine over the turkey, then pour in the gallon of ice water.

Make sure the turkey doesn’t float up by placing a plate on top. Put turkey container in fridge for 5 to 8 hours, flipping the turkey over in the container halfway through.

Drain turkey, pat dry with paper towels, and then cook using your favorite recipe.

Next time: cooking your turkey on a Weber grill in a fraction of the time.