Author Archive

There’s a wonderful Italian roasted meat dish called Porchetta (por-ketta). Though there are many ways to prepare it, the classic version consists of a pork belly that is seasoned and then wrapped around a pork loin. The meat is tied, then roasted slowly for hours, basted with wine and the meat juices until the pork is cooked and the outside skin is crackly and crispy. Then it’s sliced like a log and served as a sandwich or a main dish. It’s absolutely fantastic! (If you’re in New York City, go to the small restaurant called  Porchetta on the lower east side and taste this porky awesomeness the way it was meant to be.)

I recently purchased a beautiful hunk of grass-fed beef brisket from Pat’s Pastured, a wonderful farm here in Rhode Island.  I decided to watch the You Tube series “BBQ with Franklin” starring the lord of brisket himself, Aaron Franklin of Franklin’s Barbecue in Austin, Texas, to learn how to properly smoke it. What I learned was that the hunk of brisket Franklin was using was a bit smaller but much thicker (5 to 6 inches) and fattier than the really large but thin piece (about 1 1/2 inches) that I had purchased. If I was going to use Franklin’s method of smoking this thing, it would totally dry out.

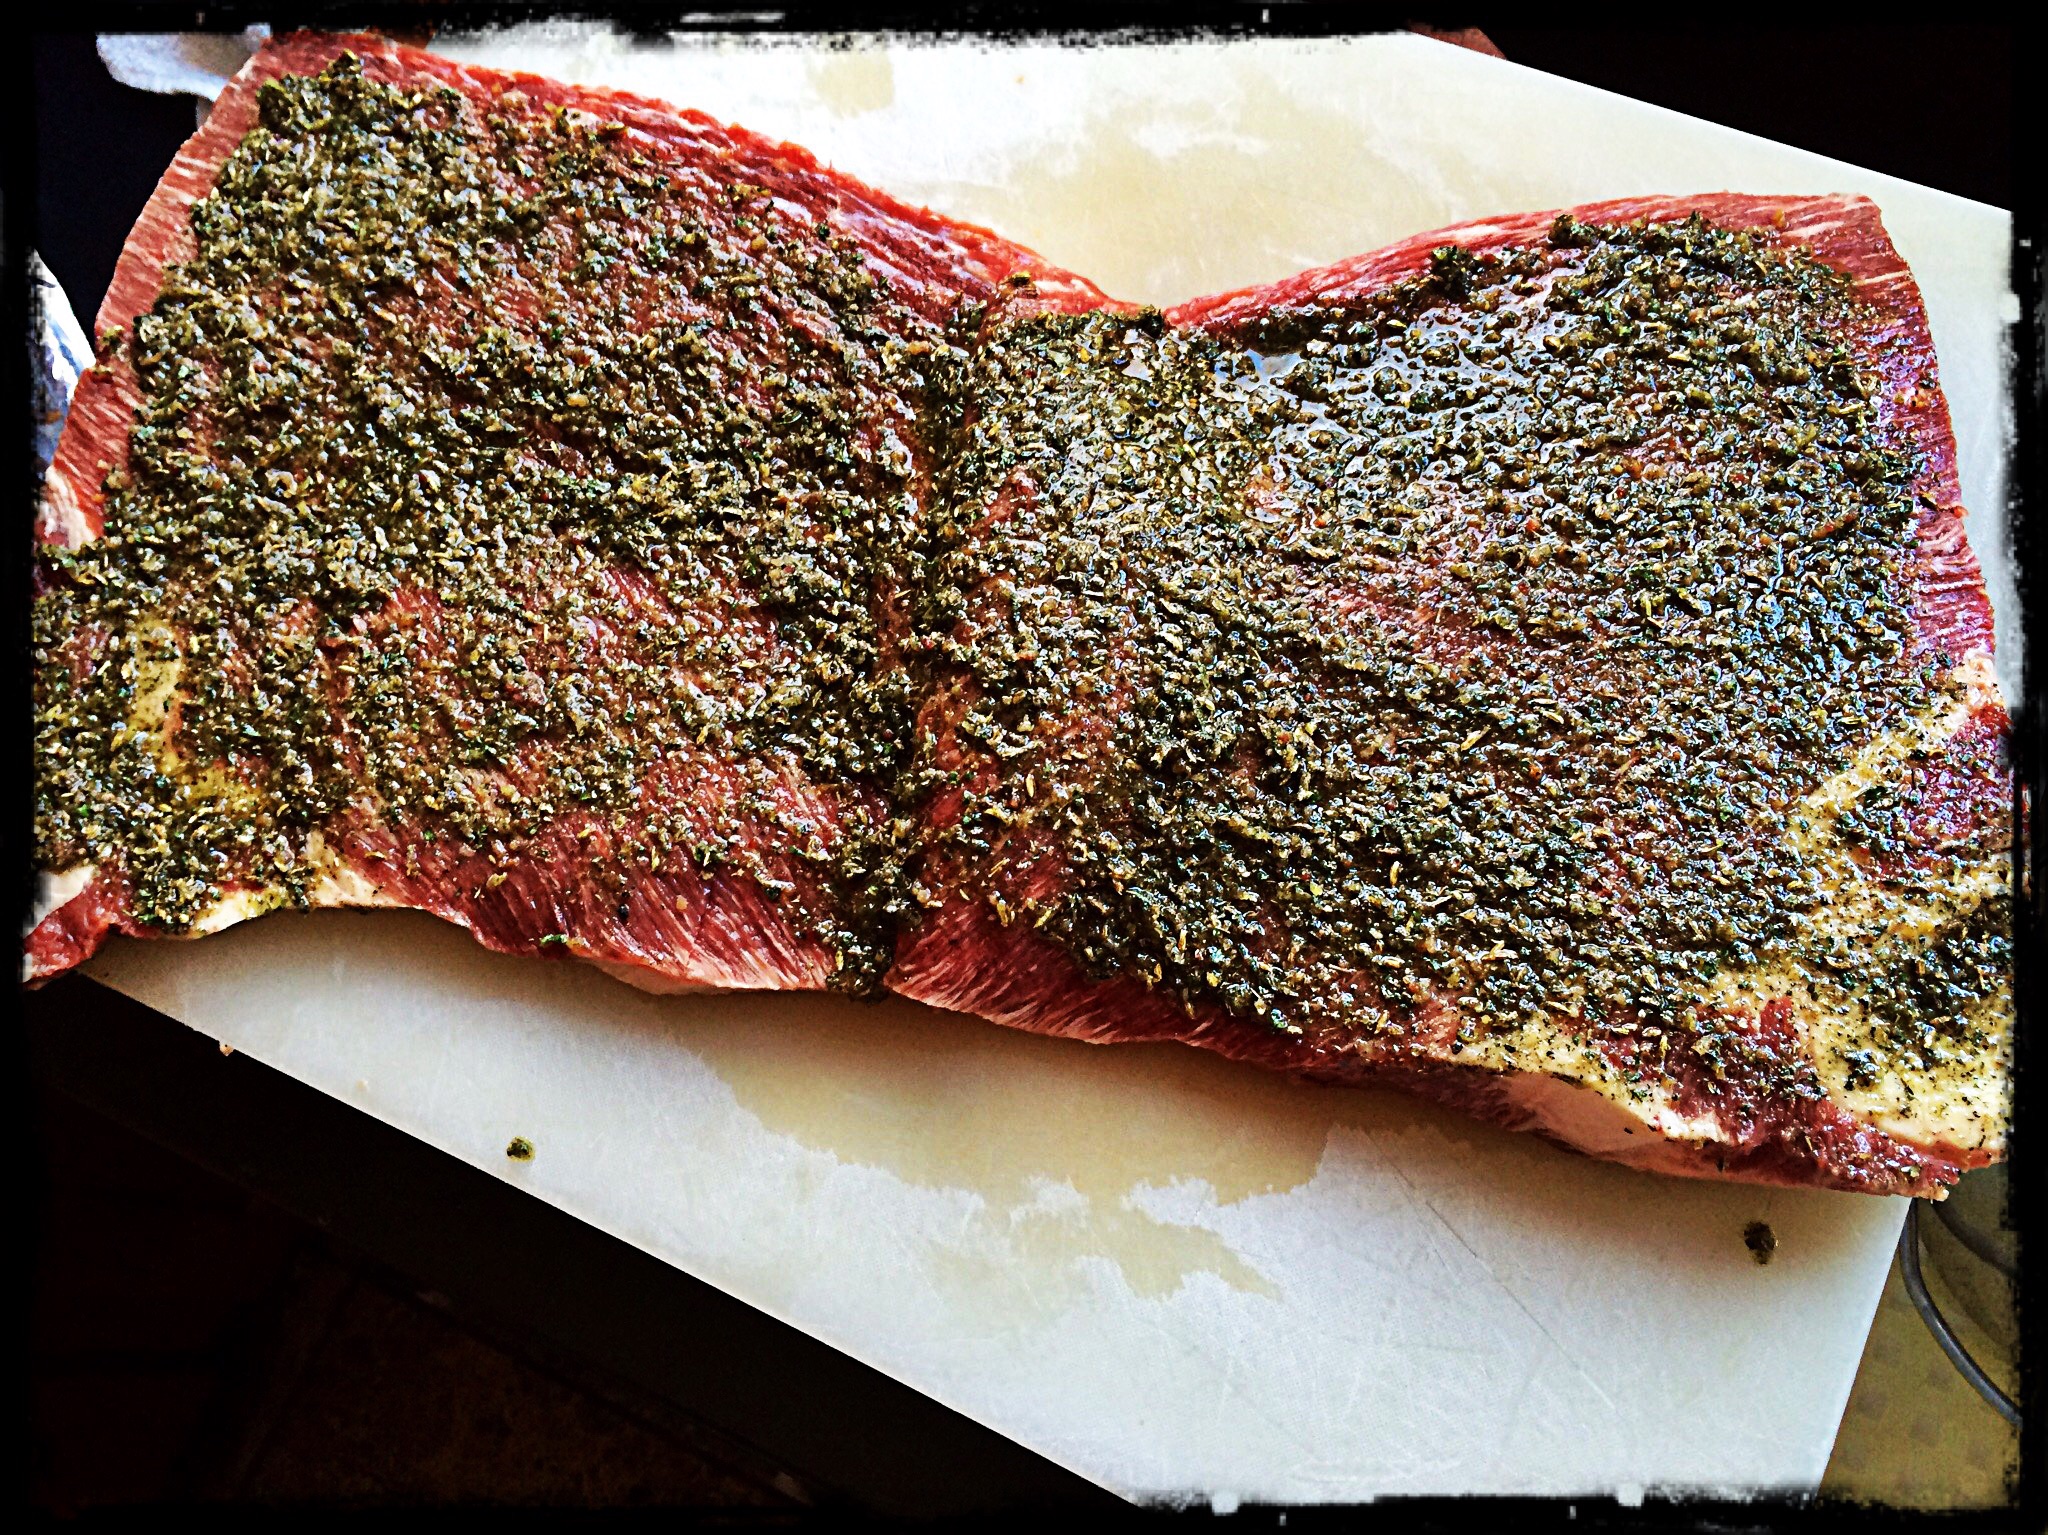
Then I said to myself: “What if I cook it like Porchetta?” I searched through a dozen Porchetta recipes and used whatever herbs and spices I liked to make my own special seasoning for this slab of meat I now re-named “Brisketta.” For the most part, I used common ingredients in Italian cooking, but I added toasted fennel seeds, an ingredient in Porchetta, as a tip of the hat to that classic dish.

image

I flipped the brisket fat-side-down on my cutting board and carefully sliced it down the middle horizontally to make two large–even thinner–slabs of meat. The bottom half, with the fatty side of the brisket, would eventually be my outside layer. The top half would be my inside layer.
image

I took the top half and slathered some of my seasonings on it. Then I rolled it up into a log as tightly as I could. I slathered more of my seasonings onto the bottom half of the brisket, the rolled it around the first log as tightly as I could, so that the fattiest side of the brisket would now be on the outside of this large meat log. I seasoned the fatty side with any leftover seasonings I had.

Now, rather than having a piece of meat that was only 1 1/2″ thick, I had a meat log that was 6″ thick. Much easier to cook and control. I tied the meat log up tightly with butchers’ twine and let it rest in my fridge overnight.

image

The next day, I removed the meat log from the fridge and let it sit on the counter for an hour, so that it would come back up to room temperature. Meanwhile, I started my digital smoker (an electric one), setting the temperature at 250 degrees. I placed the meat log on a rack in my smoker, and a bowl of water on another rack to help keep it moist during the cooking process. I closed the smoker door, and then cooked it low and slow for about 4 1/2 hours. My smoker has a side chute that lets me drop wood chips inside, and I used slivers of oak to add some smoke. (I decided that a wood like hickory, though one of my favorites to use when smoking, would overpower the subtle seasonings I used.)
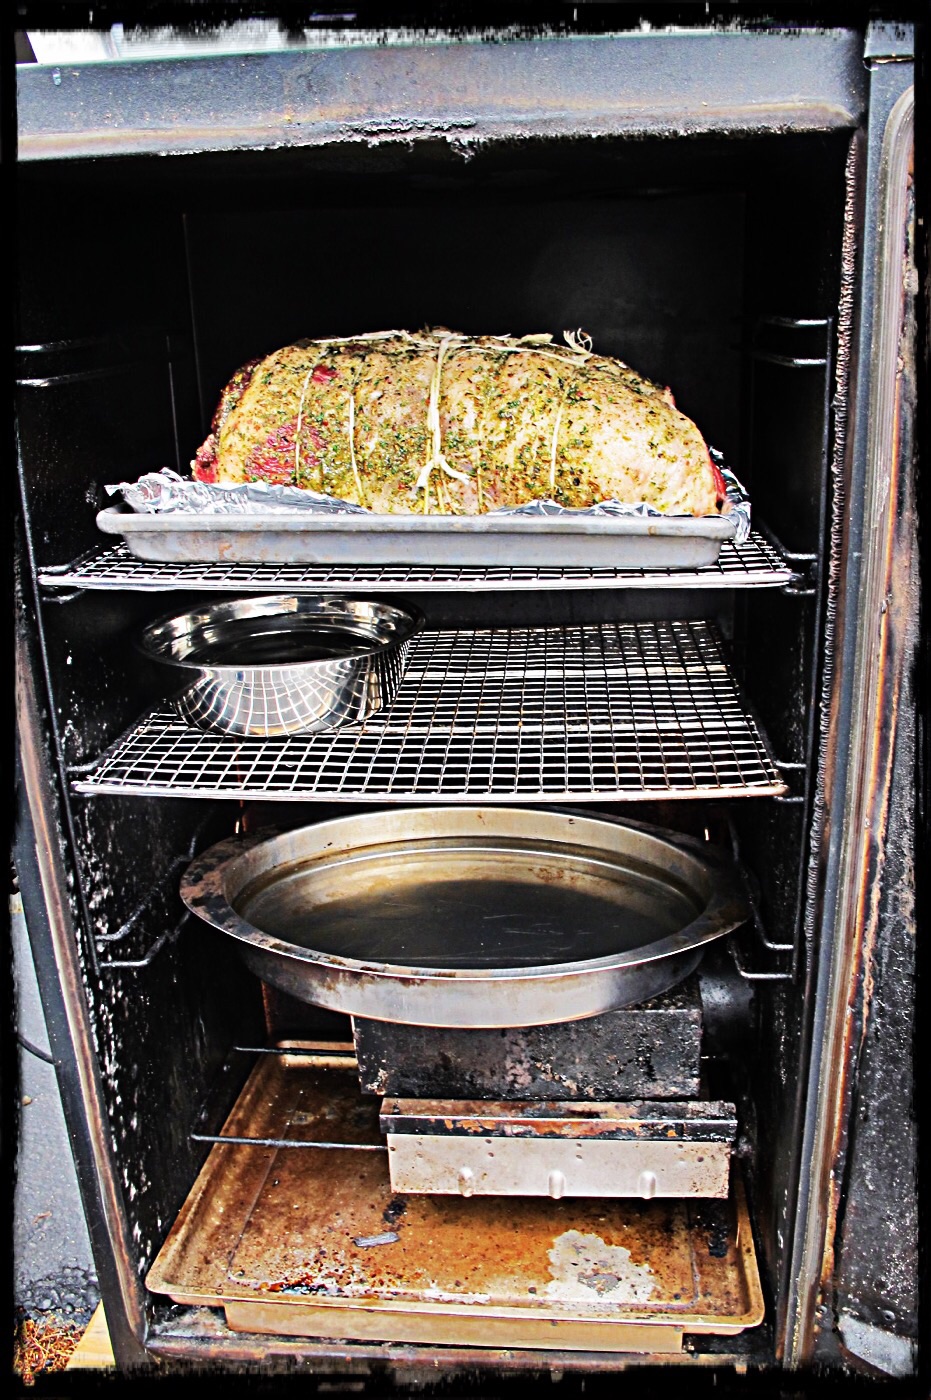
I removed the meat log from the pan and put it directly onto the grate before cooking.

I removed the meat log from the pan and put it directly onto the grate before cooking.


After 4 1/2 hours, I removed the Brisketta from the smoker and tented it with foil, letting it rest for an hour before slicing it.

image

7 lbs. beef brisket
1 tablespoon fennel seed, toasted and cooled
5–3″ strips of bacon, cooked and cooled
2 tablespoons oregano
2 tablespoons parsley
2 teaspoons basil
2 tablespoons salt
1 teaspoon pepper
2 teaspoons granulated onion
1 teaspoon granulated garlic
Grated zest of 2 lemons
1/2 cup olive oil

Pour the fennel seed in a hot, dry pan on the stove. Toast the seeds until they release their aroma, but don’t let them burn. Set aside to cool.

Crumble the bacon strips and place in the bowl of a food processor. Add the cooled fennel seeds, oregano, parsley, basil, salt, pepper, onion, garlic, and lemon zest.

Run the food processor and slowly pour in the olive oil, until you have a paste much like pesto.

Slice the brisket in half horizontally. Save the piece with the fatty side for last, because this is the piece that will wrap around the others, with the fatty side out. Smear the rub on the first piece of brisket and roll it tightly into a log. Smear the rub on the second piece of brisket and wrap it around the first piece, making sure the fatty side is on the outside.

Once you’ve rolled both pieces into a single meat log, scored the fatty exterior with a knife and rub any leftover seasoning paste onto it. If you have none left, simply season with salt and pepper.

Tie the meat log tightly with butchers’ twine, tucking in all loose ends.

At this point, you can place the meat log in the fridge until ready to cook, remembering to remove it at least an hour before cooking so that it comes back to room temperature.

Pre-heat an oven or smoker at 250 degrees. Place the meat log directly on the grate, with a pan underneath to catch the dripping fat. Place a bowl of water in there as well, to keep the meat moist while it cooks. Cook for 4 1/2 hours, or until the interior temperature reaches 130 degrees. Let it rest an hour before slicing…if you can wait that long!
BAD BOTTLED WATER

Posted: April 8, 2015 in Drinks, Food
Tags: , , , , ,
With the weather finally getting warmer, see if this scenario is familiar to you: We’re going on a family drive. My wife says to put some bottles of water in the car. We go on the drive and drink some of the water, leaving the remaining bottles in the car where it gets hot. My wife tells me to throw out those water bottles, because they’re “bad.” Repeat with every trip.
She’s right in one sense. The heat probably has compromised the water in the bottles, leaching nasty stuff from the plastic. But that didn’t happen in my car. That happened before we even bought the water!
image
The long trip for a plastic water bottle, from a natural spring (or a tap, where most bottled water comes from) to your hands, is not refrigerated. The bottles are filled and sealed. They’re put on pallets. And they are shipped in a hot truck to a warehouse, where they are stored (un-refrigerated) until they are delivered (via hot truck) to a regional warehouse, where it is stored (un-refrigerated) until it is delivered (via hot truck) to your local store, where it is held on the loading dock in the blazing sun until it can be stored in the back un-refrigerated, then brought out to the storefront where you buy it and put it in your hot car until you get home.
And the trip is even longer for water that comes from overseas: stored in the cargo holds of ships, left sitting out on docks, etc.
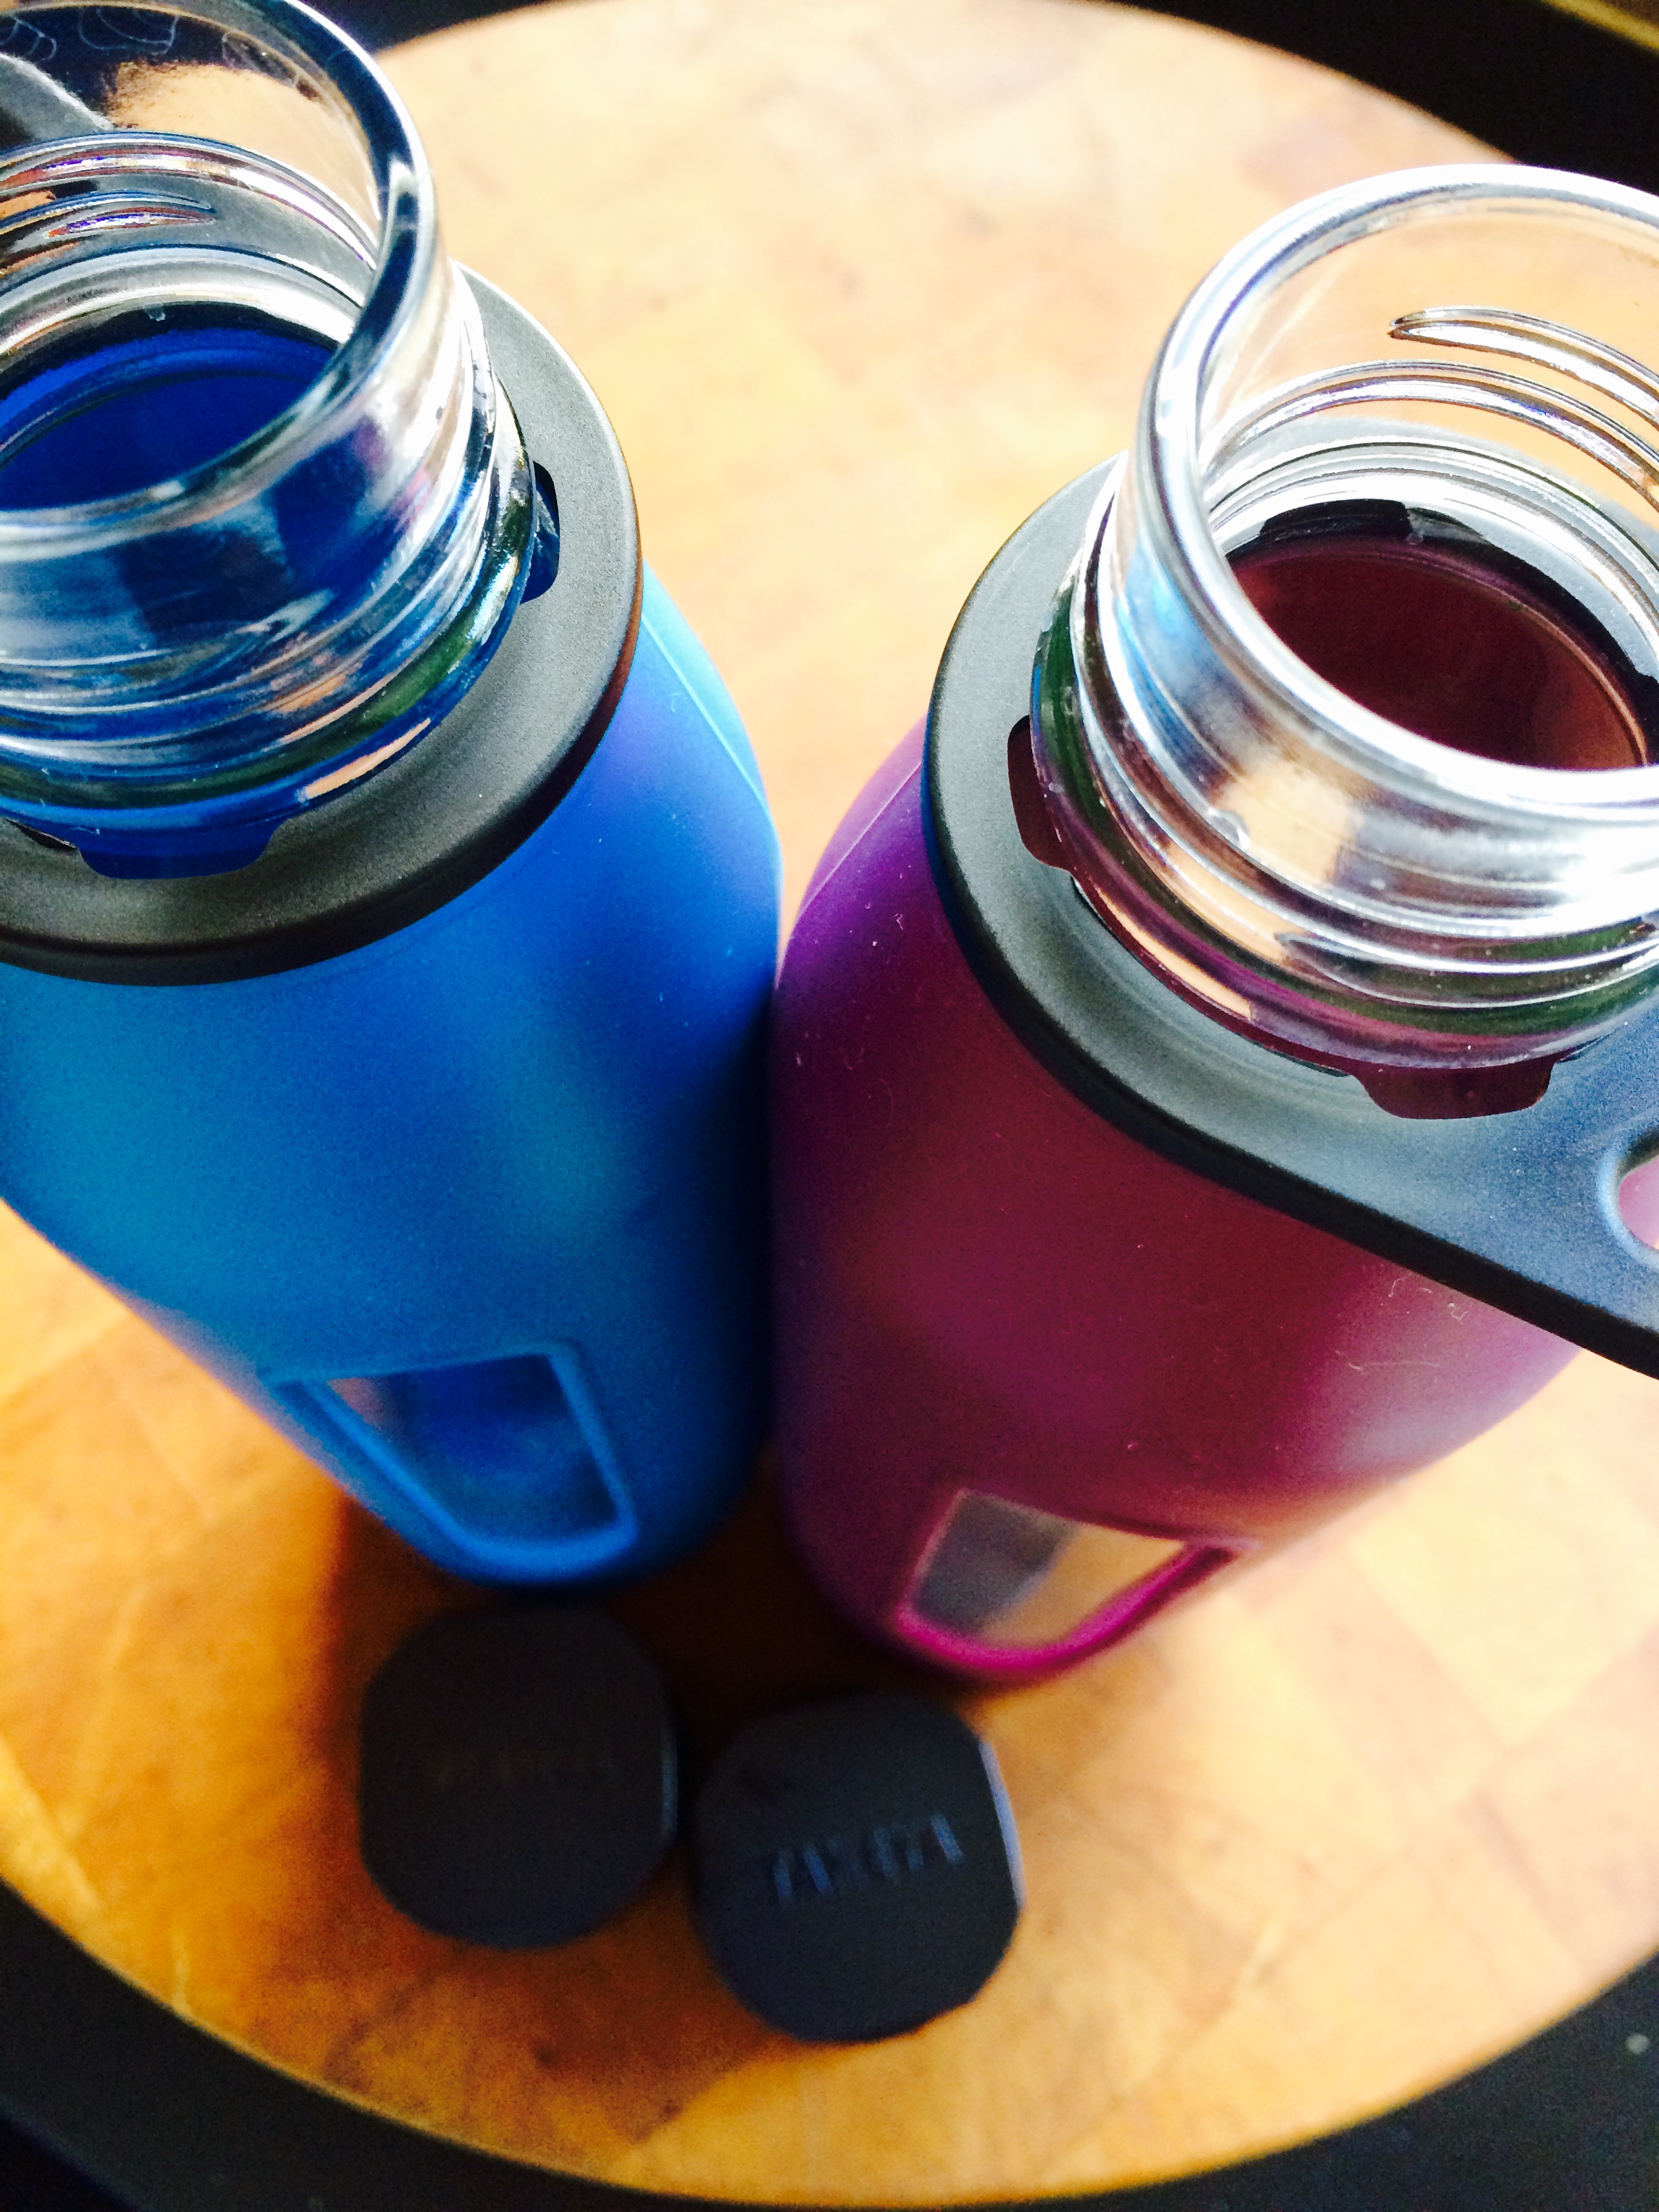
The answer for your health as well as the environment is simple: stop buying drinking water in plastic bottles! Sure, you can buy water in BPA-free plastic, but now there’s evidence that BPA substitutes are just as bad for your health as BPA. The better answer is to buy a filter, if you don’t already have one in your sink or fridge, and bring your own water with you in a stainless steel or glass container. My container of choice is a glass bottle with a protective silicone sleeve. It’s called Takeya and you can find it at Amazon.
FullSizeRender
In addition to the heat factor, bottled water is bad for other reasons: you don’t know how old the water is…and you don’t know the treatment process used to disinfect the water. Most municipal water sources, which supply most bottled water manufacturers, use a chlorine treatment of the water to disinfect it. Unfortunately, chlorine disinfection produces what’s called disinfection-by-products or DBPs in the water. Some DBPs have been shown to increase the risk of cancer and other illnesses.
We’re supposed to be drinking more water because it’s good for us, right? I’m going to start by drink better water.

Besides a ham, lamb is the classic Easter dish. And there’s no better way to prepare it than on the grill. Many people are turned off by lamb because somewhere in their past, they had a horribly cooked piece of meat that ruined it for the rest of their lives. Don’t be sheepish! Try lamb again!

If you think lamb is too “gamey,” buy American lamb over New Zealand or Australian lamb. Although the animals are mostly pasture-raised, most American lamb is larger and grain finished, which results in a milder flavor. Unfortunately, like with non grass-fed American beef, this also results in a larger, fattier animal, and a less healthy cut of meat.

I prefer 100% grass-fed lamb. You can find it from the US, but most often it comes from New Zealand. Having been to the country, I can tell you that the quality is unmatched and the grasslands in New Zealand are the most beautiful I’ve ever seen. New Zealand lamb is smaller and is slaughtered at a younger age than American lamb, making it very tender. In New Zealand, as well as many other countries, only an animal under 12 months of age and without incisors can be called “lamb.” No such labeling is required in the United States.

I love the baby lamb chops that look like miniature porterhouse steaks. You can find them in any supermarket. Here’s an easy recipe that I served at a party in my home for 40 people, many of whom claimed they didn’t like lamb or never had it before. By the end of dinner, the chops were gone!

lamb LTL


8 small lamb chops
½ cup olive oil
¼ cup balsamic vinegar
2 cloves garlic, through a garlic press
1 tablespoon fresh rosemary, chopped
1 tablespoon honey
2 teaspoons Dijon mustard
1 teaspoon dried oregano
Salt and pepper

Place the lamb meat in a plastic bag. In a bowl, combine all the ingredients for the marinade and pour over the lamb. Seal the bag and squish it around so that the marinade reaches every part of the chops. I leave it at room temp if marinating for a few hours…or in the fridge if overnight.

Before grilling, take the lamb out of the fridge and let it come back to room temperature.

Pre-heat your barbecue grill. Grill the lamb until it’s done. That means cooked no more than medium. Don’t cook it to death! If you can’t get to a grill, place the lamb chops in an oven-proof pan (cast iron is always best) and sear on all sides. Then place the pan in a 350-degree oven to cook all the way through.


There’s no problem with your bird, she said to me
Just go low and slow to cook it perfectly
A few choice seasonings end up deliciously
There must be 50 ways to roast your chicken…
There’s nothing better than a whole roasted chicken. Simply season it, pop it in the oven and go low and slow. No maintenance, and you’ve got a great bird in a couple of hours. And it works with any side dish.
Once you go with humanely raised pastured chicken, you’ll never go back to supermarket chicken again. The flavor is fantastic, and you’ll devour it right down to the bones, which you can then use to make the best home made chicken stock or soup you’ve ever had. Nothing goes to waste.
I roast at least one chicken every week, so to change it up, I’ve come up with many different rubs and sauces over the years. All of the rubs are sugar and gluten-free preparations. The sauces may have one or both.
Chicken with Rosemary and Lemon
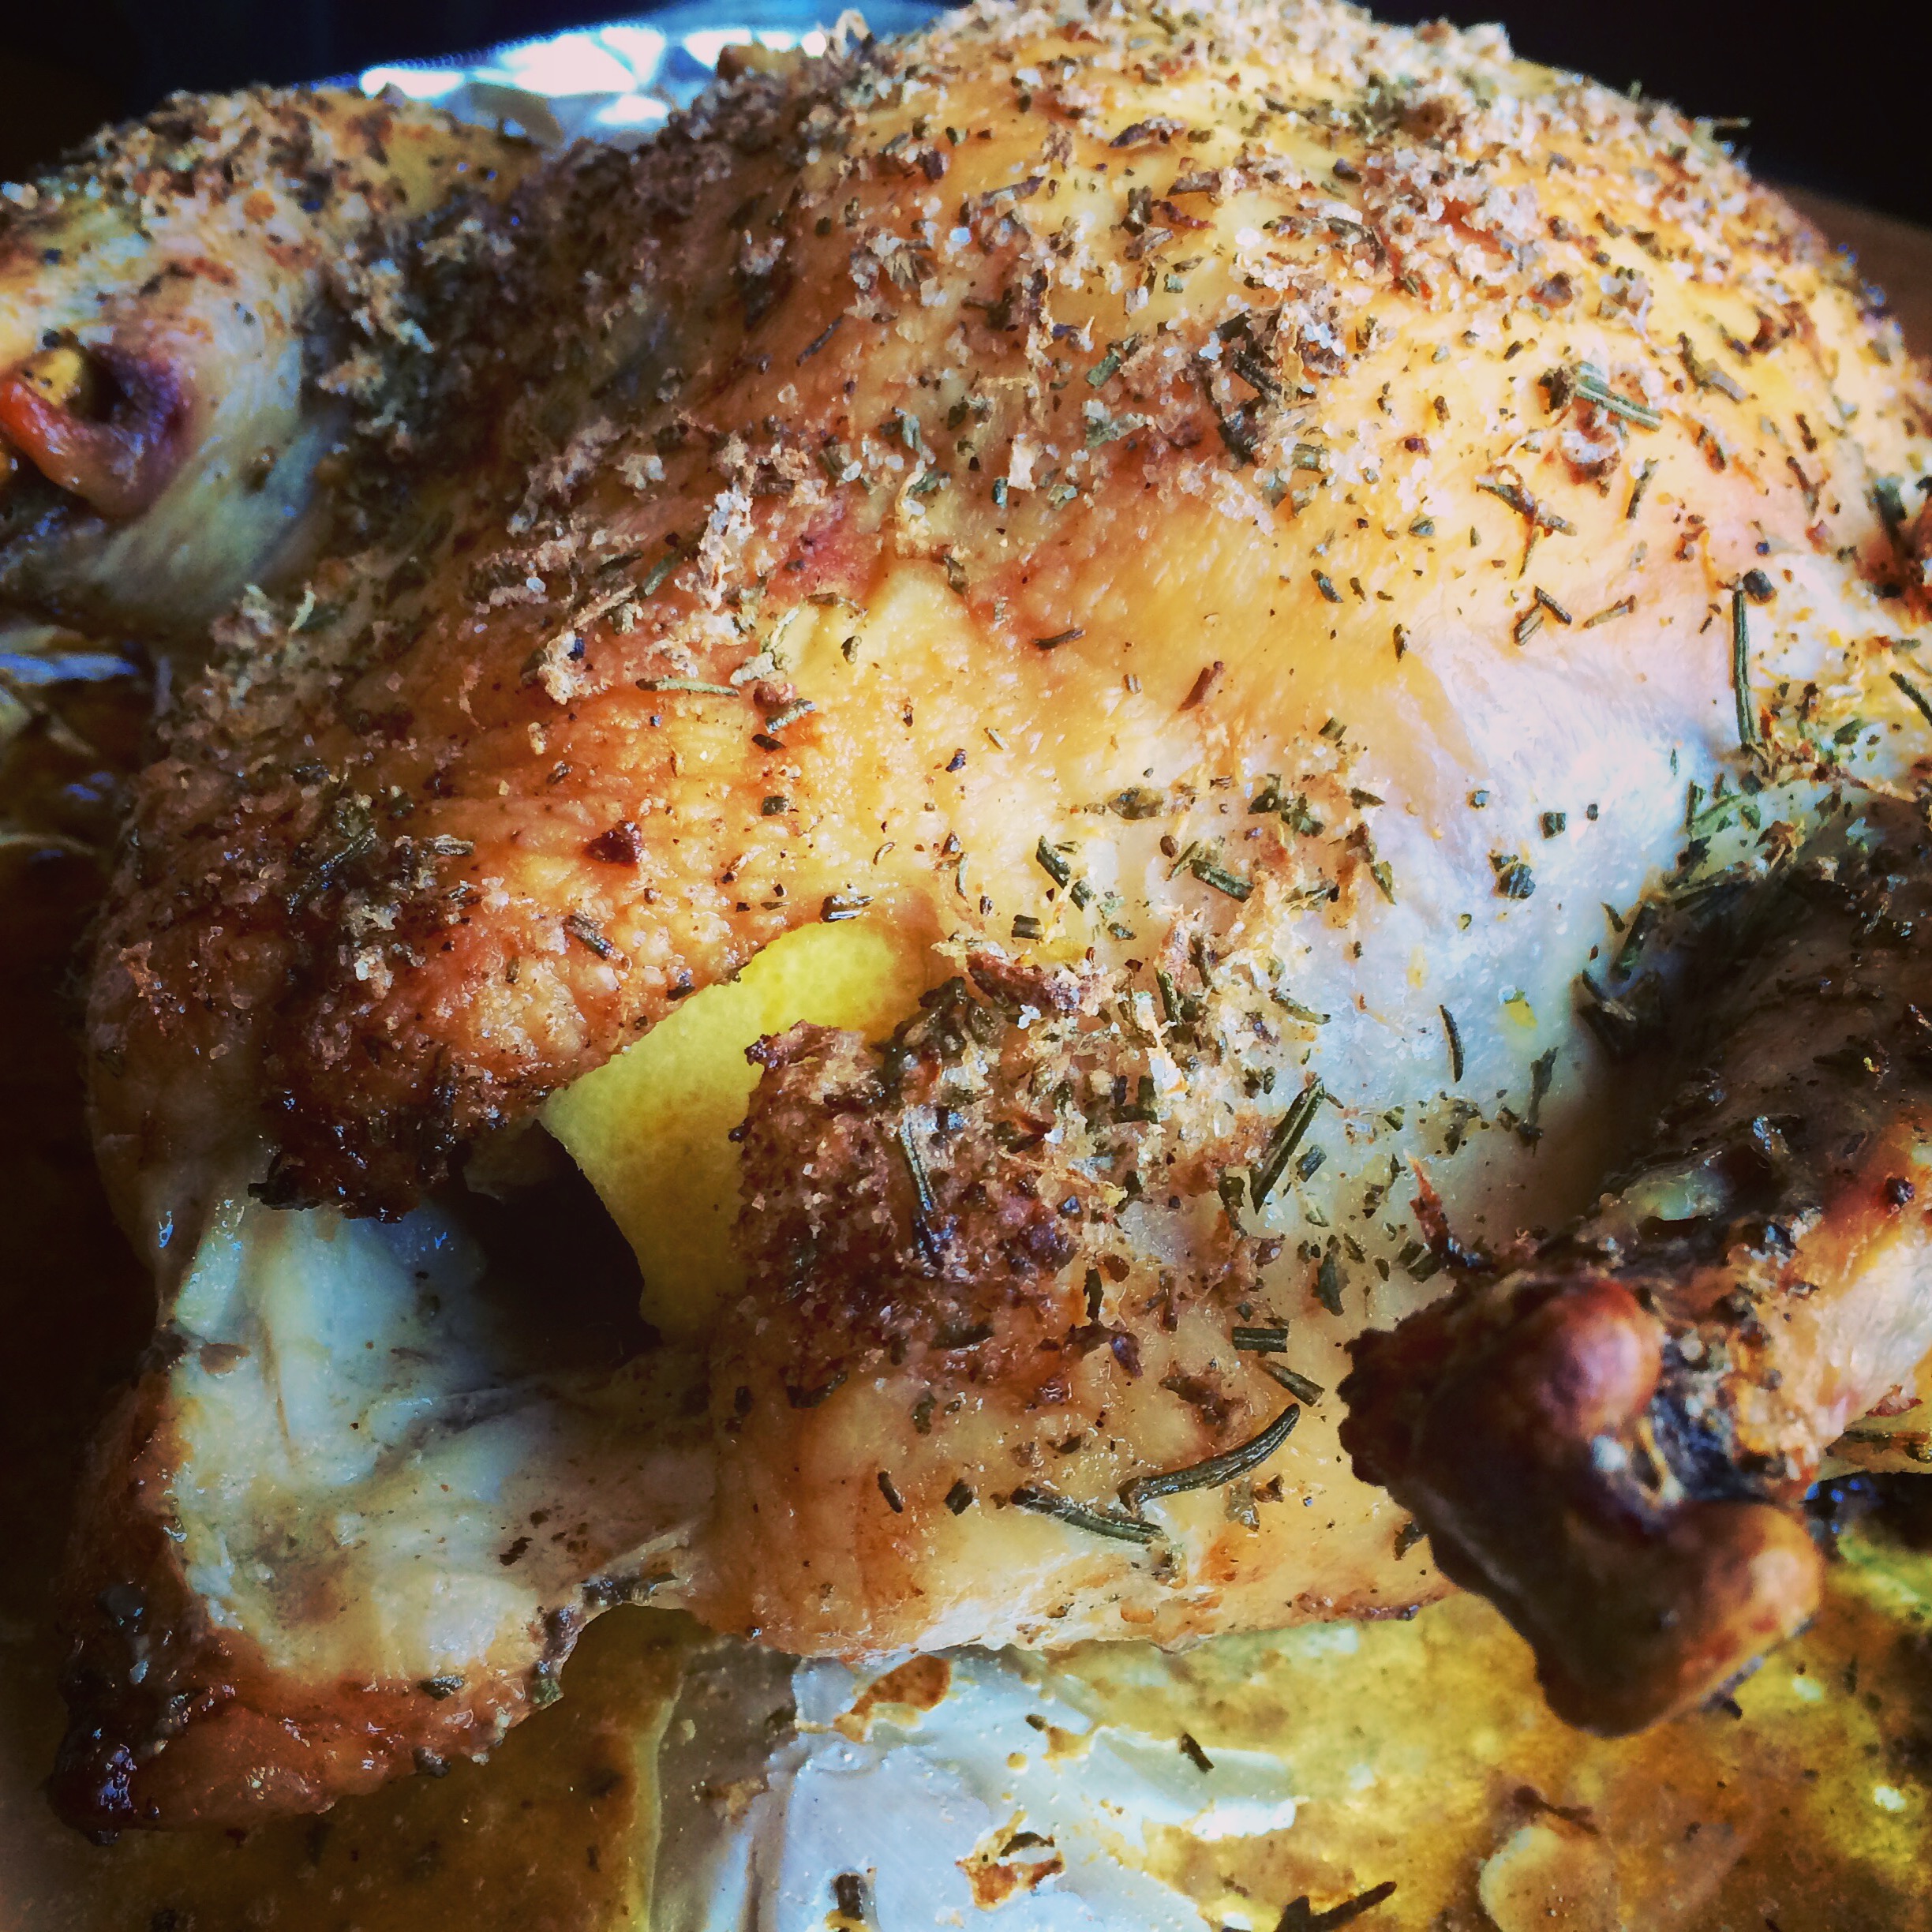
 IMG_9146
The lemon serves double-duty in this dish. You use the zest to season the outside skin, then you place the remaining cut up pieces inside the carcass to flavor from the inside out.
1 tablespoon finely chopped fresh rosemary
1 teaspoon granulated garlic
2 teaspoons salt
zest from 2 lemons, using a micro plane zester, the leftover lemons quartered
1/2 teaspoon black pepper
In a bowl, combine the rosemary, garlic, salt, lemon zest, and pepper. 
Thaw a bird, remove the giblets, and rub it all over with olive oil. Shove the quartered lemon pieces into the carcass of the bird. Season the bird inside and out with the rosemary seasoning mix.
Place the bird on a pan lined with non-stick aluminum foil in a pre-heated 450-degree oven. Cook for 10 minutes at this temperature, then reduce to 275 degrees and cook low and slow until done.
Tarragon Chicken
I love the taste of chicken seasoned with tarragon. Careful with this, or you will accidentally devour your fingers!
1 tablespoon dried tarragon, crumbled into a powder
1 teaspoon garlic salt
1 teaspoon salt
1/2 teaspoon black pepper
olive oil
In a bowl, combine the tarragon, garlic salt, salt and pepper.
Thaw a bird, remove the giblets, and rub it all over with olive oil. Season the bird inside and out with the seasoning mix.
Place the bird on a pan lined with non-stick aluminum foil in a pre-heated 450-degree oven. Cook for 10 minutes at this temperature, then reduce to 275 degrees and cook low and slow until done.
Italian Chicken
FullSizeRender
The darker color of the bird comes from rubbing it first with balsamic vinegar, then olive oil, before coating it with Italian seasonings. Don’t use the fancy, expensive balsamic. The bottles that go for about 9 bucks in the supermarket work well for this recipe.
Balsamic vinegar
Olive oil
1 tablespoon salt
1 tablespoon parsley
1 teaspoon oregano
1 teaspoon pepper
1 teaspoon granulated onion
1/2 teaspoon granulated garlic
Thaw a bird, remove the giblets, and rub it all over with the balsamic vinegar. Then rub it all over with the olive oil. Season the bird inside and out with the seasoning mix.
Place the bird on a pan lined with non-stick aluminum foil in a pre-heated 450-degree oven. Cook for 10 minutes at this temperature, then reduce to 275 degrees and cook low and slow until done.
My Grandma’s Chicken
My grandmother would cook chicken thighs low and slow all Saturday morning, knowing that I was coming over for lunch after Lithuanian school. The meat just fell off the bone, and I couldn’t stop eating it. This recipe is so simple and works just as well for a whole bird. Every time I make this, I think about those days at my grandmother’s house.
Lawry’s Seasoned salt
Olive oil
Thaw a bird, remove the giblets, and rub it all over with olive oil. Season the bird inside and out with the Lawry’s Seasoned salt.
Place the bird on a pan lined with non-stick aluminum foil in a pre-heated 450-degree oven. Cook for 10 minutes at this temperature, then reduce to 275 degrees and cook until done.
If you’re using chicken thighs, like my grandmother did, make sure they have the skin on and the bone in.

DIY TACO SEASONING

Posted: March 30, 2015 in beets, Food, morocco, Recipes, taco
Tags: , , , ,

It’s so easy to make taco seasoning at home, so why would you buy the spice factory floor sweepings that they use for packaged taco seasoning sold in supermarkets? I’m not a huge fan of Mexican cuisine, but every once in a while, I crave a good taco. My tacos don’t resemble most, but that’s OK. It’s all about making it your own.


1 teaspoon granulated garlic
1 teaspoon onion powder
1/4 teaspoon crushed pepper flakes
1 teaspoon dried Mexican oregano
1 teaspoon paprika
2 teaspoons ground cumin
1 teaspoon sea salt
1 teaspoon black pepper
1 Spanish onion, finely chopped
olive oil
2 lbs. grass-fed ground beef

Combine all the spice ingredients in a bowl.

Saute the onions in a bit of olive oil until translucent. Add the beef and saute until cooked, mixing in the spice mixture a little at a time until you’ve used it all.

You can also mix the spices with 1 cup of flour and use it to season chicken before frying…or mix the seasoning with strips of chicken breast or beef for fajitas.

My tacos are a bit unusual. Although I use a soft flour tortilla and my seasoned and cooked ground beef, I use my Awesomesauce  and roasted golden beets. Recipe here: http://wp.me/p1c1Nl-gT

Tacos with roasted golden beets, baby Romaine salad mix, and Awesomesauce

Tacos with roasted golden beets, baby Romaine salad mix, and Awesomesauce

For the beets: I wash the beets and quarter them, cutting the top and bottom off but leaving the skin. I place them in a sheet of aluminum foil, and sprinkle with salt, pepper and olive oil. I combine the ingredients to coat the beets, wrap the foil tightly into a package, and roast in a 400-degree oven for 1 hour. After roasting and the beets have cooled a bit, I slice them into smaller pieces for the tacos.

Slices of avocado go really well with this, too!

image

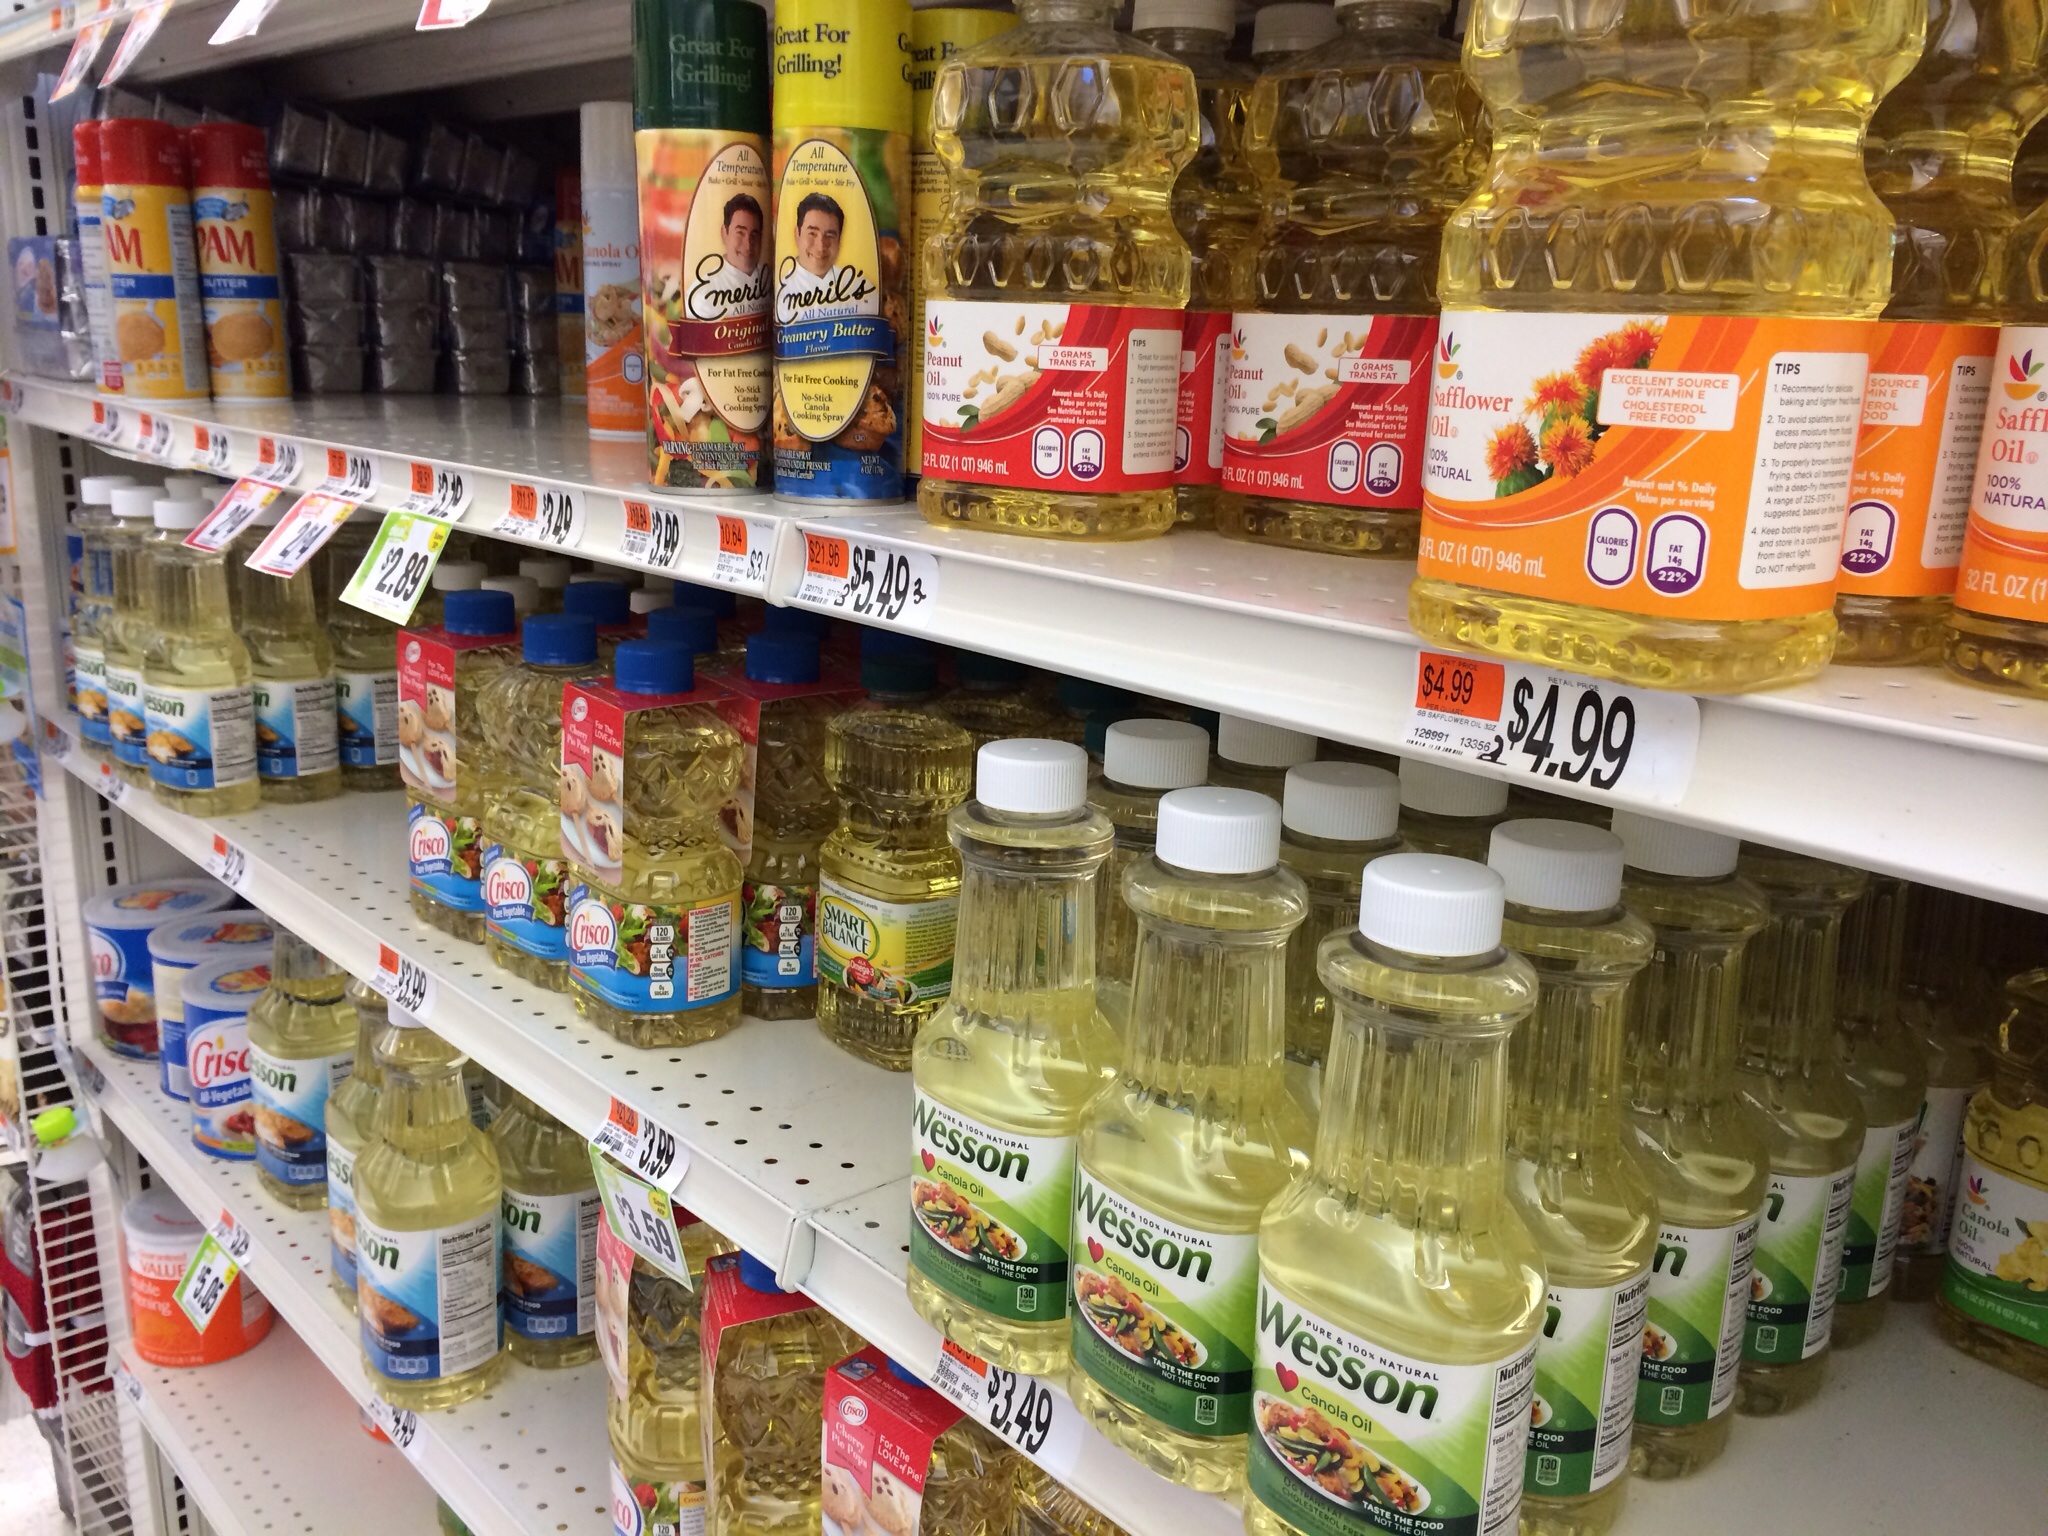
There is a huge battle going on about the safety of canola oil. Canola oil is made with genetically modified seeds which are doused with Monsanto’s Round-Up, so if you’re trying to avoid GMO’s and possible carcinogens in your family’s diet, you have one choice: stop using canola oil.

Canola gets its name from “Canada” and ‘Oil.” There is no “canola plant.” There is, however, something called rapeseed, which canola oil comes from. The “rape” comes from the latin “rapum,” which means “turnip,” but you can see how something called rapeseed oil wouldn’t work with the public. So: Canola it became.

Rapeseed plants have been grown for thousands of years, not for edible oils, but for lamp oils and lubricants. The presence of erucic acid, some nasty stuff that nobody really wants to eat, made it unsafe for human consumption. Rapeseed oil was in high demand during World War II for its industrial applications. After the war, the demand for rapeseed oil diminished, and it was only in the 1970’s that scientists were able to wean out the erucic acid out of rapeseed to make canola, but they had to use nasty compounds like hexane to do it. (Hexane is used as a solvent and cleaning agent in other applications, and has a long list of side effects according to the EPA: http://www.epa.gov/airtoxics/hlthef/hexane.html.)

It was in 1998 that the GMO was born when scientists developed a strain of rapeseed that could withstand herbicides like Round-Up, which is what almost all of canola is made from today. Personally, I don’t want to eat any plant that can withstand (and certainly absorb)  herbicides and pesticides.

So what about the other oils out there? If you’re staying away from canola oil, the bad news is you need to stay away from these oils as well: soybean oil, corn oil, safflower oil, sunflower oil, and even peanut oil and grapeseed oil. Many use Round-Up ready seeds, and most are treated with hexane.

The best oils to cook with: coconut oil, avocado oil and pork lard (or leaf lard) from humane family farms for high-heat cooking, and butter and olive oil for low-to-medium heat. (Go for a local olive oil, if possible. There have been many false label issues with imported olive oils as well.)

Basically, what our grandparents used is what we should use. Go figure. Maybe that’s why most of my grandparents lived well into their 90’s.


MEATLOAF

Posted: March 24, 2015 in bacon, beef, Carnivore!, Food, pork, Recipes
Tags: , , , , ,

Few dishes scream out “comfort food” to me like meatloaf. My Mom’s meatloaf was awesome, and she’d cut a huge slab of it onto my plate, with fantastic butter-loaded Pennsylvania Dutch egg noodles on the side. I couldn’t stop eating it.

I never thought of making meatloaf when I moved away, because it gave my Mom something special to make for me when I came home to visit. She was thrilled that there was a dish she could make that I would devour every time, without hesitation. (The others were her roasted lamb and Lithuanian pierogis called koldūnai (kol-doon-ay).

But now that my Mom has moved into an assisted living facility where she can’t cook, I’ve had to take meatloaf matters into my own hands. I never got my Mom’s exact recipe. But I had an idea of what went into it, and so I gave it a shot.

The standard mix for meatloaf is one-third each ground beef, pork and veal. I went 50-50 on the beef and pork instead. And instead of layering slices of bacon on top as many people do, I used pre-cooked bacon that I chopped up and put inside the loaf.

image


1 lb. ground beef
1 lb. ground pork
1 packet Lipton onion soup mix
1/2 cup breadcrumbs
1/4 cup ketchup
4 strips of cooked bacon, chopped
2 eggs

Combine ingredients, form into a loaf and place in a loaf pan. Bake at 350 for about an hour.


If you’re not a fan of packaged ingredients like the Lipton onion soup mix, use this:

1 yellow onion, minced

1 teaspoon salt

1/2 teaspoon pepper

1/2 teaspoon garlic powder


Saute the onion in a little oil or pork fat until translucent. Let it cool, then mix in the salt, pepper and garlic. Add this mix to the other ingredients above.

The quality of gluten-free products, especially flours and pastas, has improved drastically over the last 5 years. Flavor-wise, it really has gotten to the point where you’d never know the difference between GF and wheat.

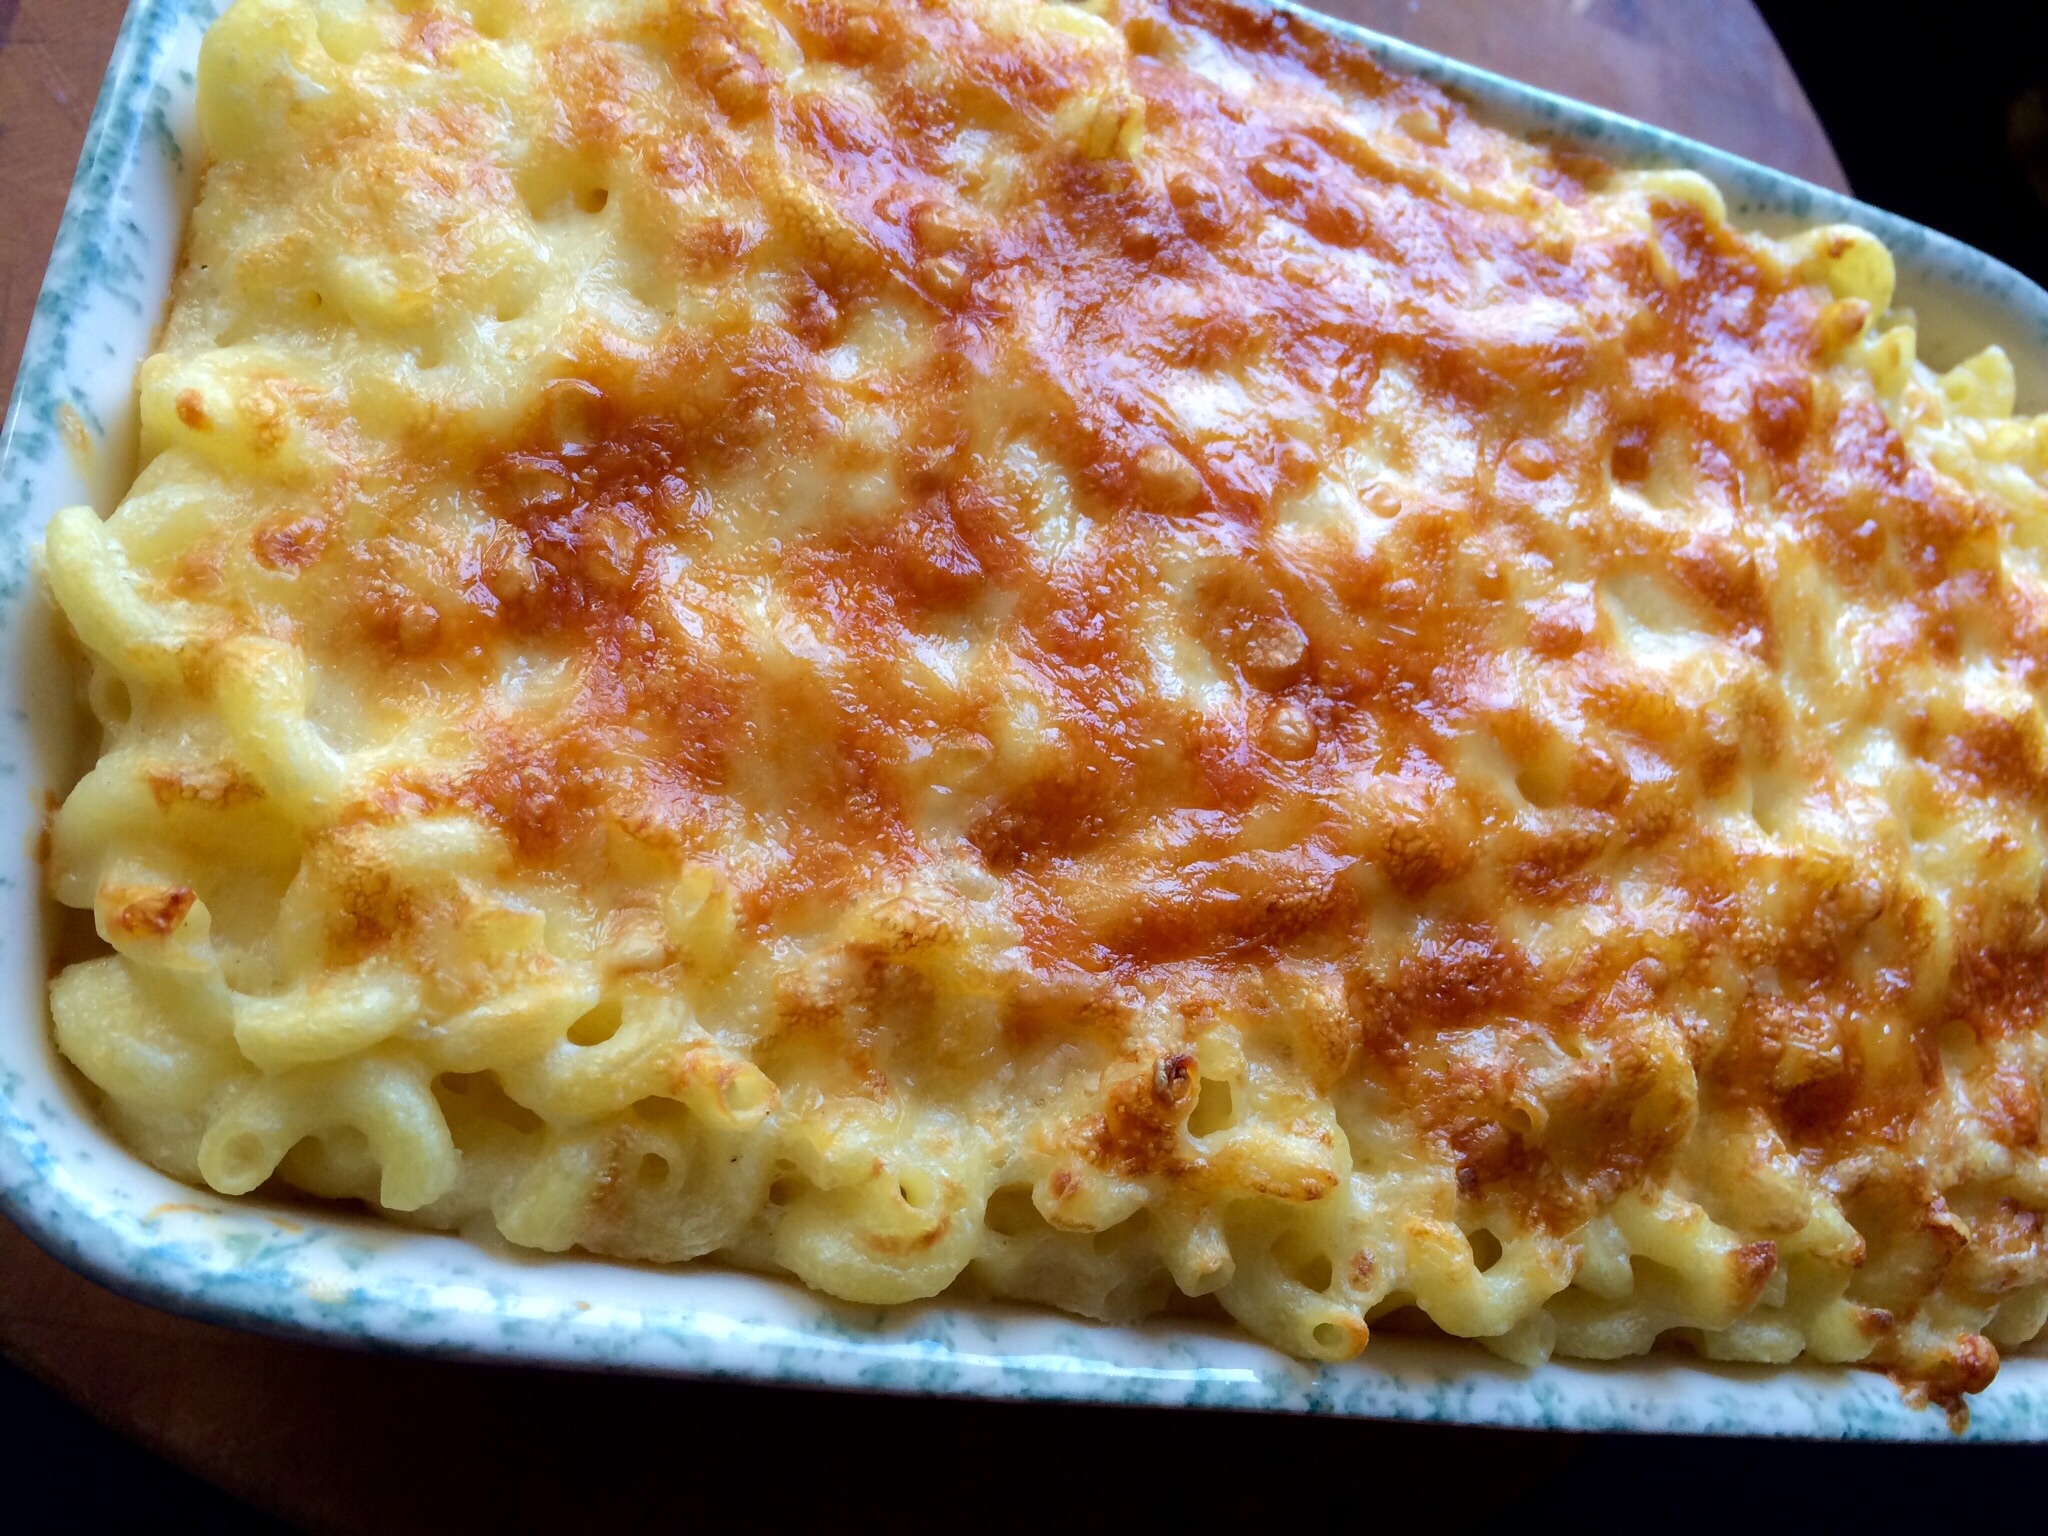
Baking breads, cakes and pizzas are still a challenge at times, but this mac and cheese recipe dares you to tell the difference.

image

2 boxes (12 oz. each) gluten-free elbow pasta

8 tablespoons (1 stick) unsalted butter

4 1/2 cups milk

1/2 cup gluten-free flour

2 teaspoons salt

1/4 teaspoon nutmeg

1/4 teaspoon black pepper

pinch of cayenne pepper

12 oz. grated sharp Cheddar cheese (about 4 1/2 cups)

8 oz. grated Gruyere cheese (about 2 cups)


Pre-heat the oven to 375 degrees.

Cook the pasta until a bit firmer than al dente.

Using a bit of the stick of butter, butter a 3-quart casserole dish.

Warm the milk in a saucepan over medium heat.

Place the remaining butter in a skillet with high sides and melt it over medium heat. When the butter bubbles, add the flour, whisking constantly. While whisking, add the hot milk, a little at a time. Whisk constantly, cooking about 5 minutes.

Remove from heat and stir in the salt, nutmeg, black pepper and cayenne. Then mix in 3 cups of the cheddar and 1 1/2 cups of the Gruyere. Stir in the cooked pasta.

Pour the mixture into the casserole dish, and sprinkle the remaining cheese on top.

Bake about 25 minutes, until golden.

image


March 18 is National Sloppy Joe Day.

My sandwich takes on a Mexican twist, using seasoned taco meat and a great barbecue sauce. Putting them together with a sprinkling of Mexican cheese on a bun with lettuce and tomato made for one sloppy but delicious sandwich!

sloppy jose


For the barbecue sauce…

2 cups ketchup

3/4 cup water

6 tablespoons cider vinegar

6 tablespoons white vinegar

6 tablespoons brown sugar

3 tablespoons Worcestershire sauce

1 tablespoon chili powder

2 teaspoons salt

2 teaspoons black pepper

1 1/2 teaspoons cumin


Mix all the ingredients in a saucepan and simmer until the flavors have blended, about 20 minutes. Remove from heat and cool to room temp. If you store it in an airtight container in the fridge, it’ll stay good for a few months.


For the seasoned taco meat…

1 teaspoon granulated garlic

1 teaspoon onion powder

1/4 teaspoon crushed pepper flakes

1 teaspoon dried Mexican oregano

1 teaspoon paprika

2 teaspoons ground cumin

1 teaspoon sea salt

1 teaspoon black pepper

1 Spanish onion, finely chopped

olive oil

2 lbs. grass-fed ground beef


Combine all the spice ingredients in a bowl.

Saute the onions in a bit of olive oil until translucent. Add the beef and saute until cooked, mixing in the spice mixture a little at a time until you’ve used it all.


For the sandwich…

Take some of the taco meat and place it in a small non-stick pan and heat on medium. Squirt in as much of the barbecue sauce as you like, mixing thoroughly. Sprinkle some grated Mexican cheese on top, mixing thoroughly and letting it all melt together into one warm, gooey mess. Throw it on a bun. Add lettuce, tomato, avocado slices, whatever you like!


1


I was recently asked by the Providence Art Club to come up with a cocktail for their first Founders Day celebration. One hundred glasses were raised to honor the founding fathers of the second oldest art club in the United States. (Founded in 1880.) The oldest art club is the Salmagundi Club in NYC, founded in 1871. However, the Providence Art Club holds the distinction of being the oldest art club in the United States that was founded by both men and women. (The Salmagundi Club started as an all-male club.)

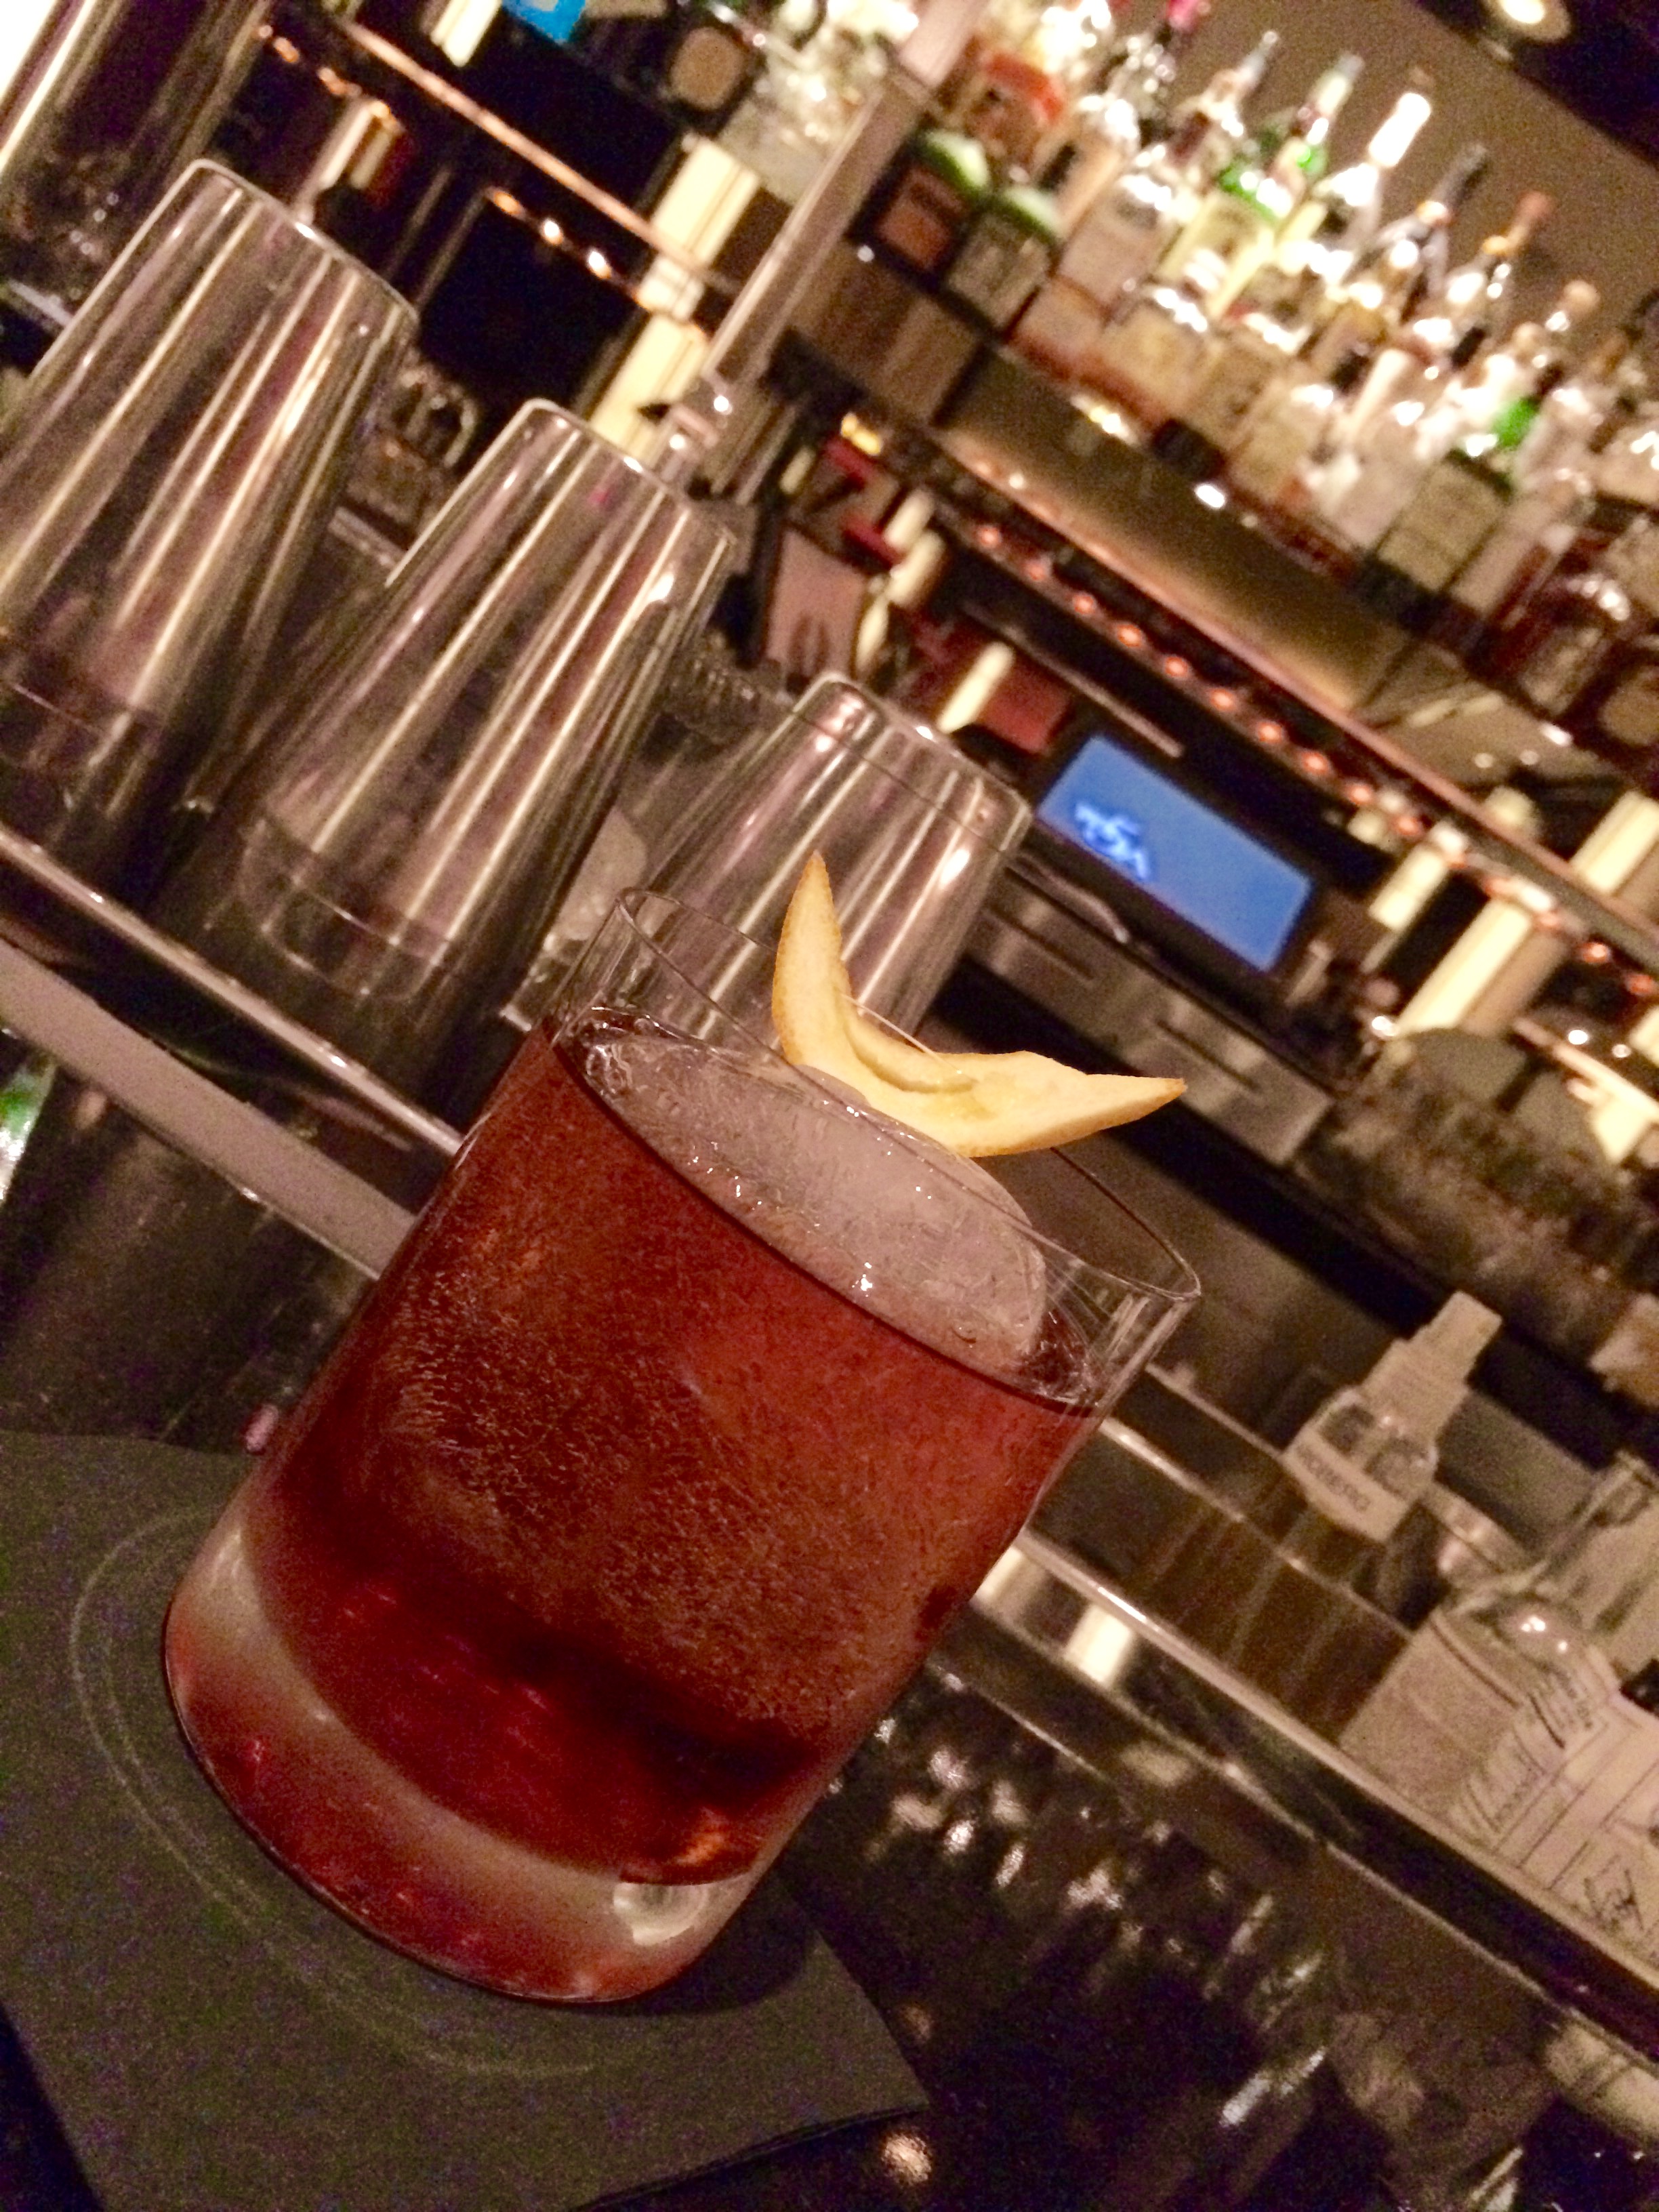
 Silhouette cocktail
My cocktail, The Silhouette, is a twist on the Boulevardier, which is a twist on the classic Negroni.

In a cocktail shaker with ice:

2 oz bourbon (I use Eagle Rare)
1 oz sweet vermouth (I use Antica Formula)
1/2 oz Campari
2 shakes orange bitters

Stir the ingredients with ice and then strain into a rocks glass with one large ice cube.

Garnish with an orange twist.