Good things come to those who wait. Risotto makes you wait!
When I recently made my slow-cooked braised beef short ribs, my daughter requested more than just a simple starch to go with it. One of her favorite dishes in the whole wide world is risotto, and though I’ve never made it before, I knew it wasn’t difficult…just time consuming. Well, a recent rainy Saturday was the perfect day to give it a try.
Like many great Italians dishes, risotto requires love. It requires patience. And it requires few ingredients, but they need to be the best quality ingredients you can get your hands on.
This dish is gluten-free, and vegetarian if you use vegetable stock. (It’s not vegan because of the butter and Parmigiano Reggiano.)
1 tablespoon unsalted butter 1 tablespoon olive oil 1/2 medium onion, chopped finely 4 cloves garlic, minced 1 cup Arborio rice (basmati is a good substitute) 1/4 cup dry white wine 4 cups chicken or vegetable stock, kept warm on the stove top (homemade is best) 3 tablespoons chopped fresh parsley 1 cup frozen peas 1 cup freshly grated Parmigiano Reggiano
In a large pan, heat the butter and olive oil over medium heat.
Add the onions and sauté them until they’re translucent. Add the garlic and sauté for 10 seconds.
Add the rice and stir really well, so that every bit of the rice gets coated with the butter and oil mixture. Add the wine, and stir gently, letting the rice absorb it.
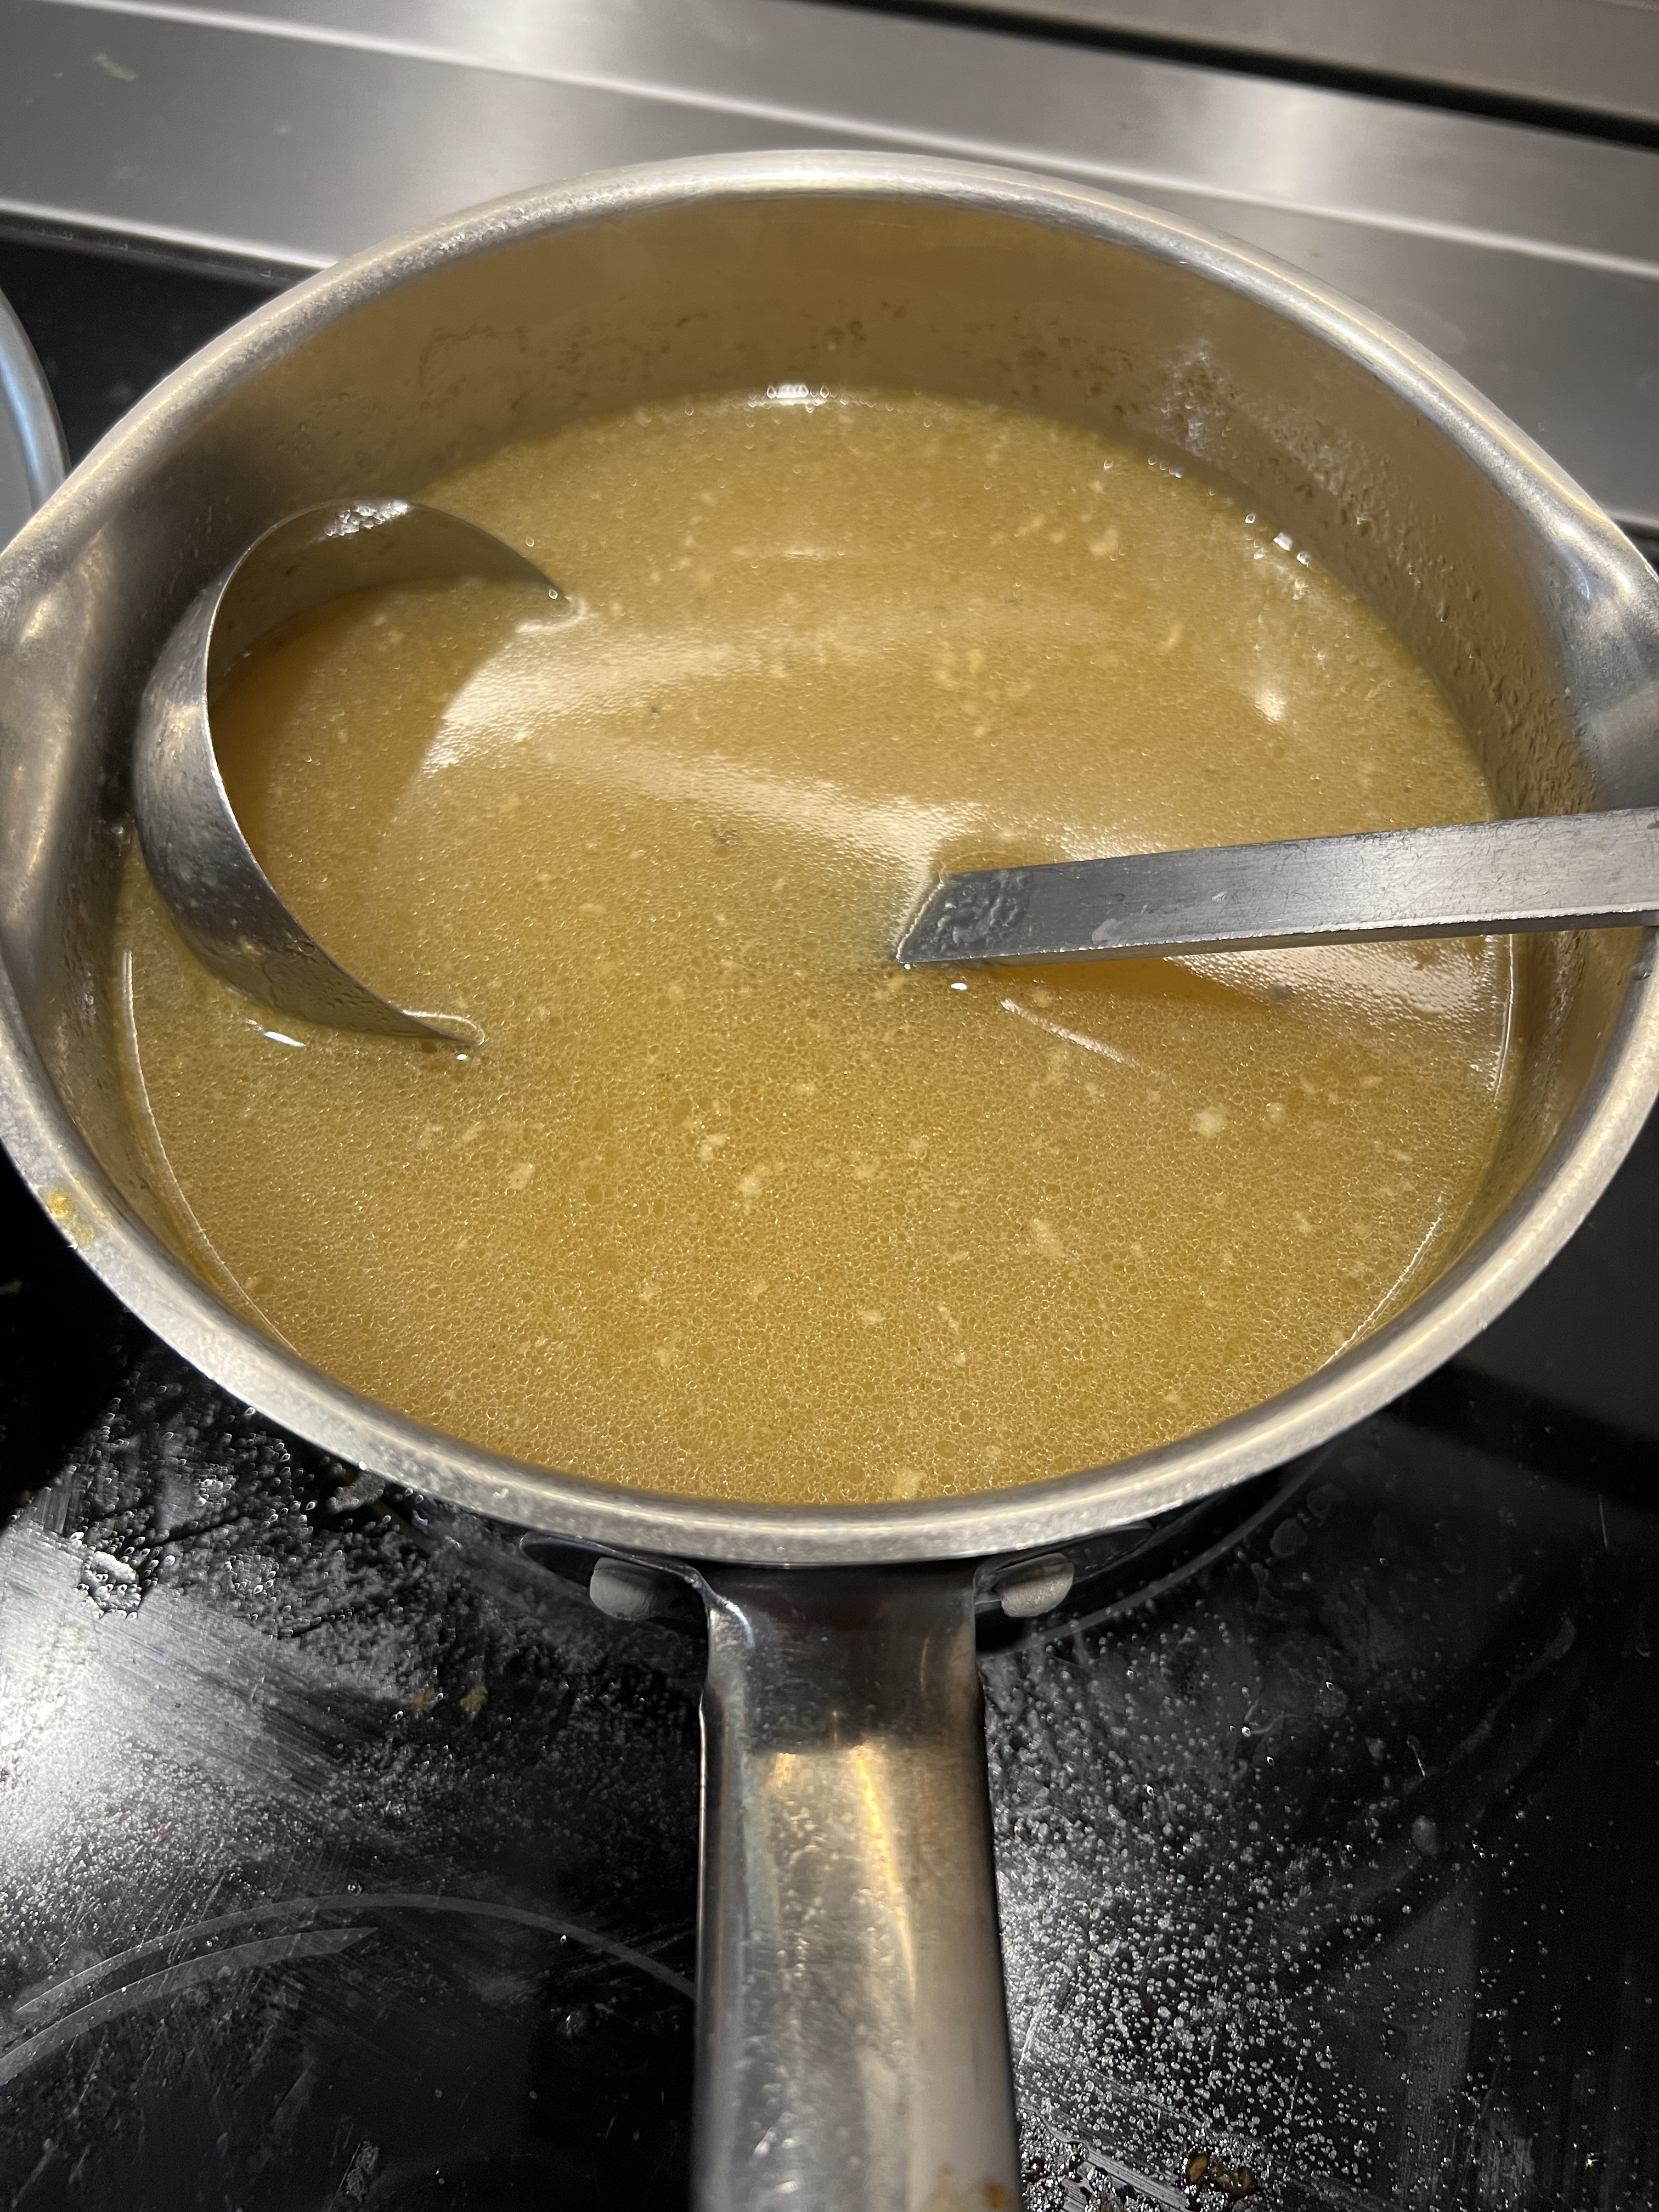
Homemade chicken stock really brings the flavor!
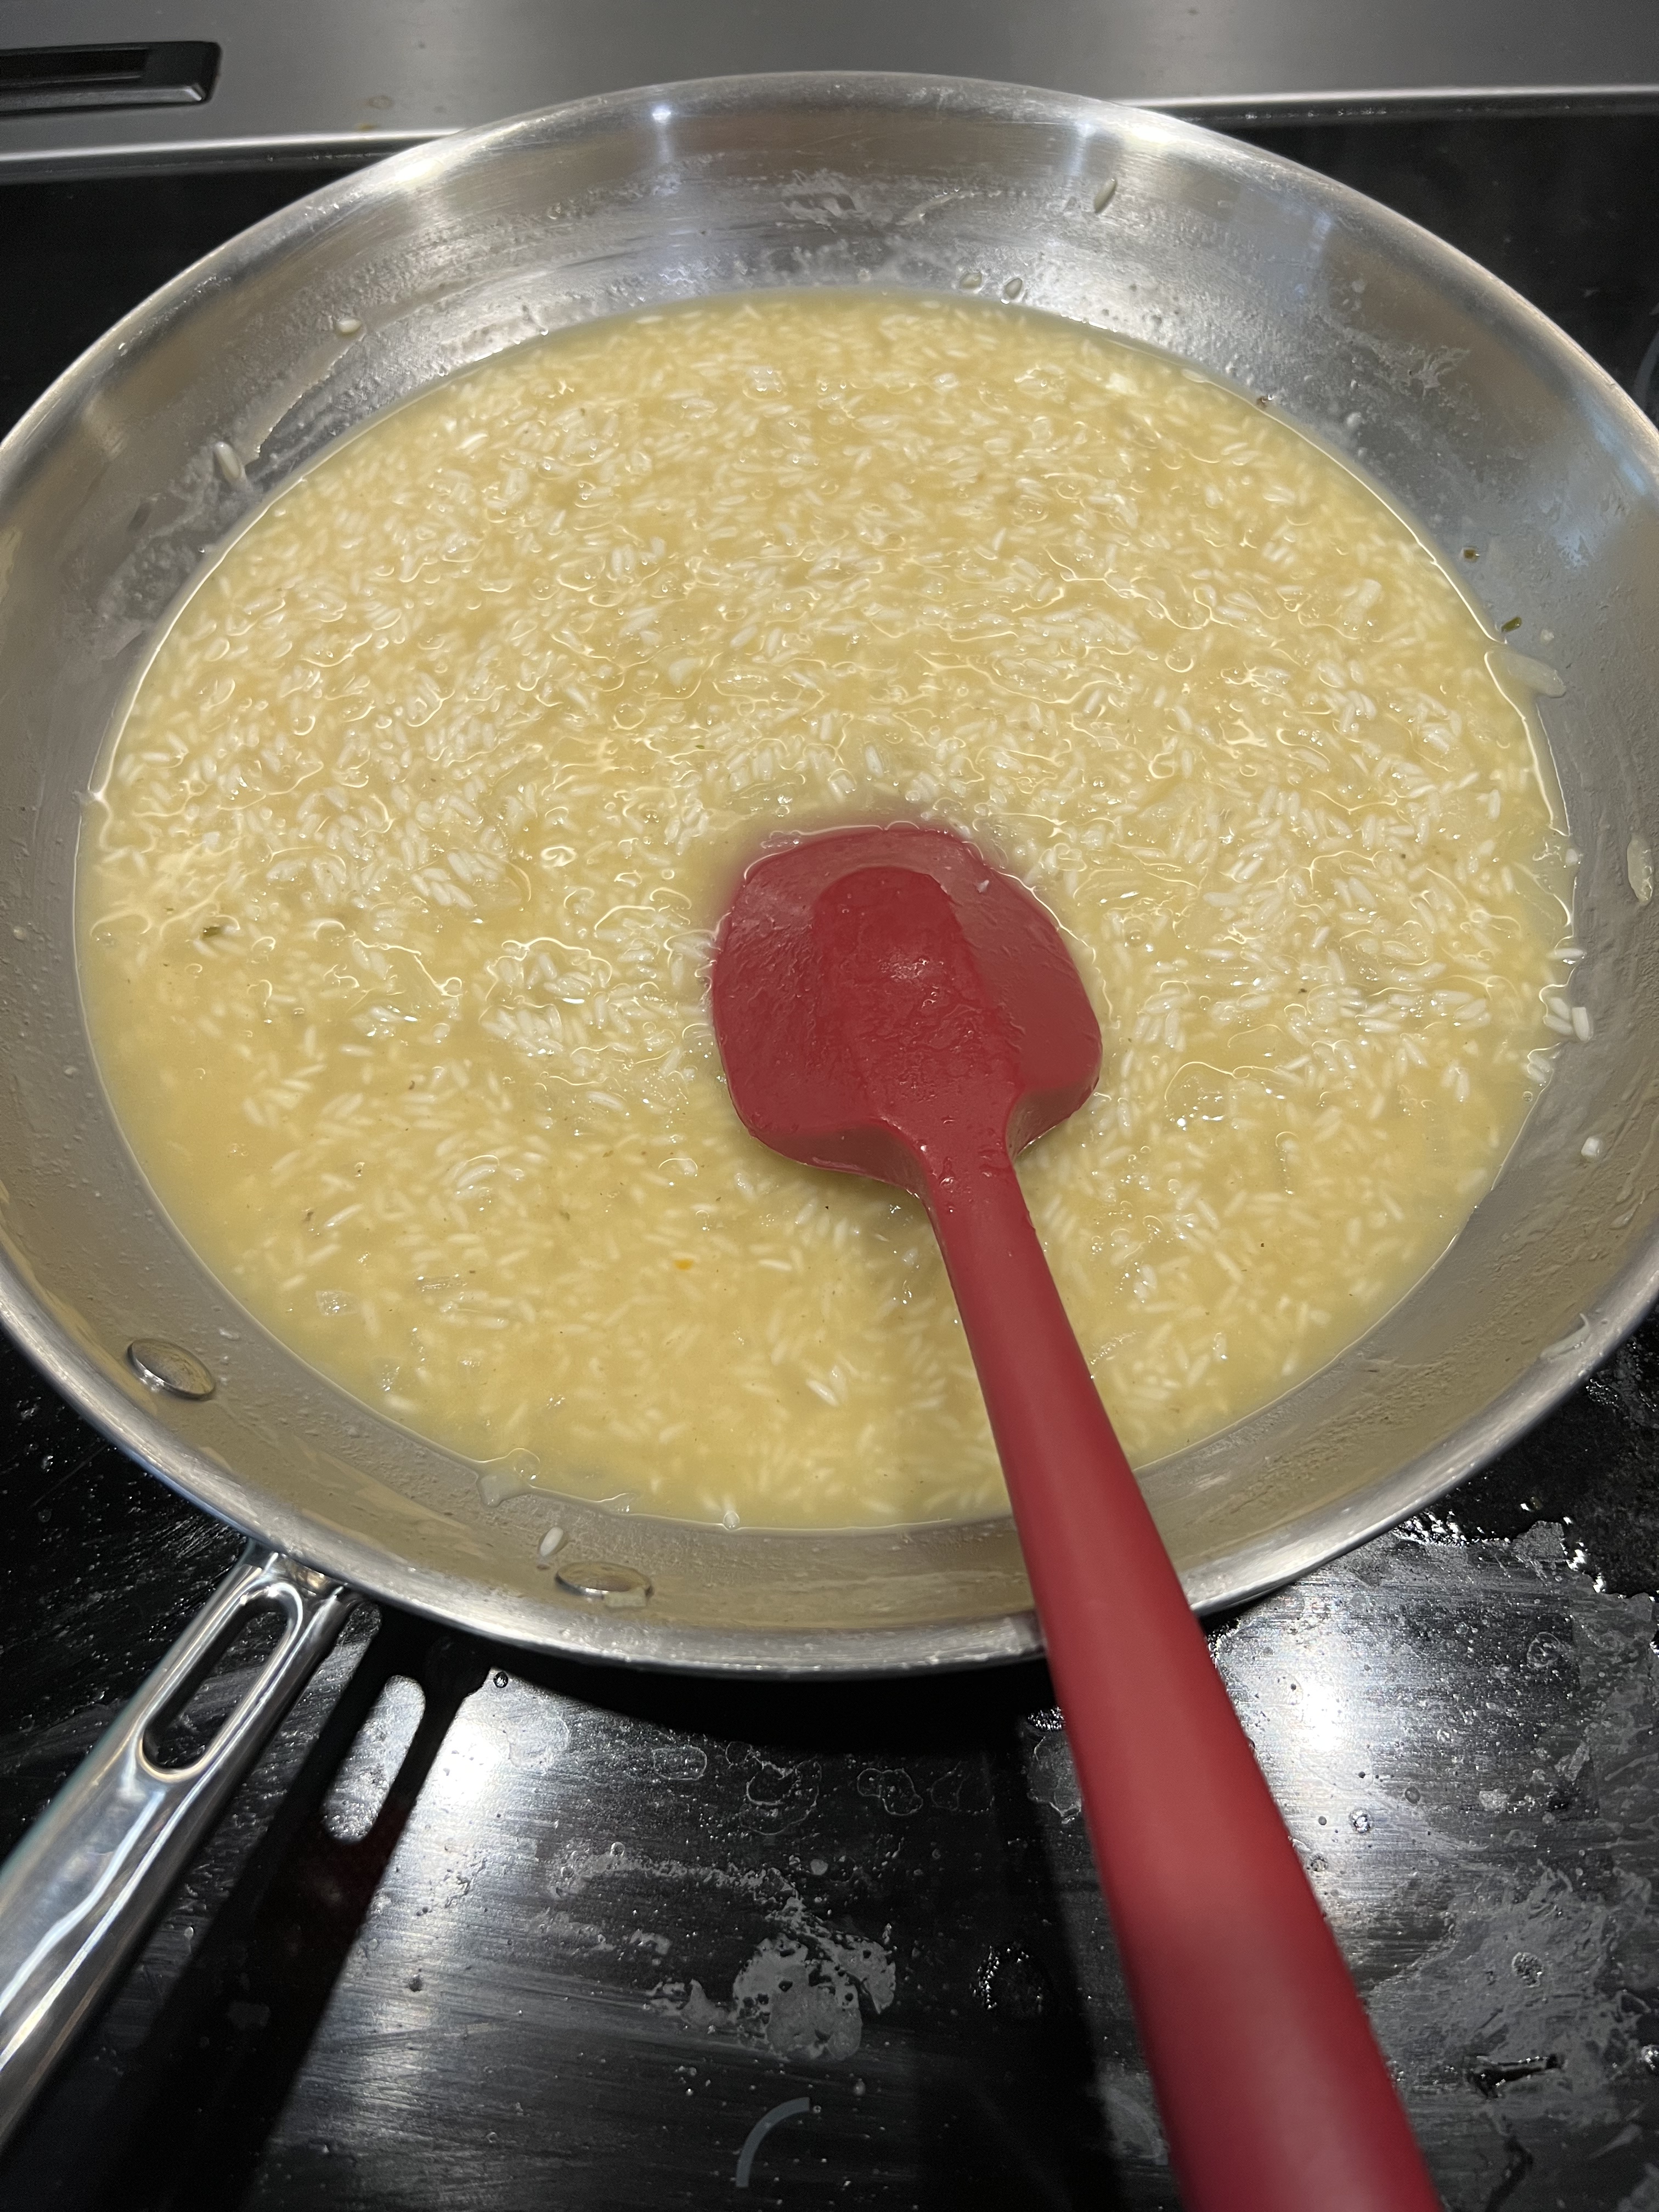
Add a ladle of the stock to the rice, stirring gently, letting it absorb all the stock. Only once the stock has been absorbed do you add another ladle of stock. Repeat this process until all the stock has been used and the rice has softened. This should take about 25 minutes, and you need to be standing there, stirring gently, the entire time.
Just before the last bit of stock has been absorbed, add the parsley and the peas.
Although beef short ribs can be an expensive dish at many a fine restaurant, the expense is not in the ingredients, but in the time it takes to prepare it. But it is definitely worth the effort!
I used grass-fed beef short ribs for my recipe, and I think it made a huge difference in taste. But use what you like, and can easily find. Short ribs can be extremely fatty. Although you want to keep some of the fat, remove any excess fat that will only make the final braising liquid taste greasy.
I didn’t have a Dutch oven, which is really the right tool for this recipe, so I seared my beef and cooked the veggies in a pan, and then transferred everything to a deeper oven-safe pot with a lid when it was time to cook.
In doing my research for this recipe, I found dozens of variations. I wound up going with a hybrid of two, both from Food Network chefs: Ann Burrell, and Robert Irvine. Burrell’s recipe was heavy on the wine, and used water. Irvine’s was heavy on stock, a little wine, and no water.
3 to 5 lbs. grass-fed beef short ribs, trimmed 3 large carrots (200g) 3 stalks celery (200g) 1 medium onion (200g) 3 cloves garlic Olive oil Bacon fat (optional) 1 can (6 oz.) tomato paste 2 cups red wine, like a Cabernet Sauvignon 3 cups chicken or beef stock (homemade is best) Kosher salt and pepper
About an hour before cooking, trim the beef short ribs and season them all over with Kosher salt. Set them aside.
Pre-heat the oven to 325.
Place the carrots, celery, onion and garlic in a food processor and process until you get something that resembles a paste. Right before searing the short ribs, re-season them with salt and pepper.
Heat a large pan on high, and when hot, add enough olive oil to coat the bottom. Sear the beef short ribs in the oil, making sure they’re nice and brown on all sides.
Set the beef aside in a bowl, pour out the fat in the pan, and replenish with new olive oil, (and some bacon fat if you have it and want to use it), just enough to coat the bottom of the pan.
Pour in the veggies from the food processor, season them with salt and pepper, and sauté them until they really caramelize. You want them to start taking on a brown color.
If the veggies start sticking to the pan, turn down the heat, but the stuff that sticks to the pan is full of flavor. Let that happen! It will all come off later when you deglaze with the wine.
You want those sticky brown bits!
Add the tomato paste and let it cook down for 5 minutes or so.
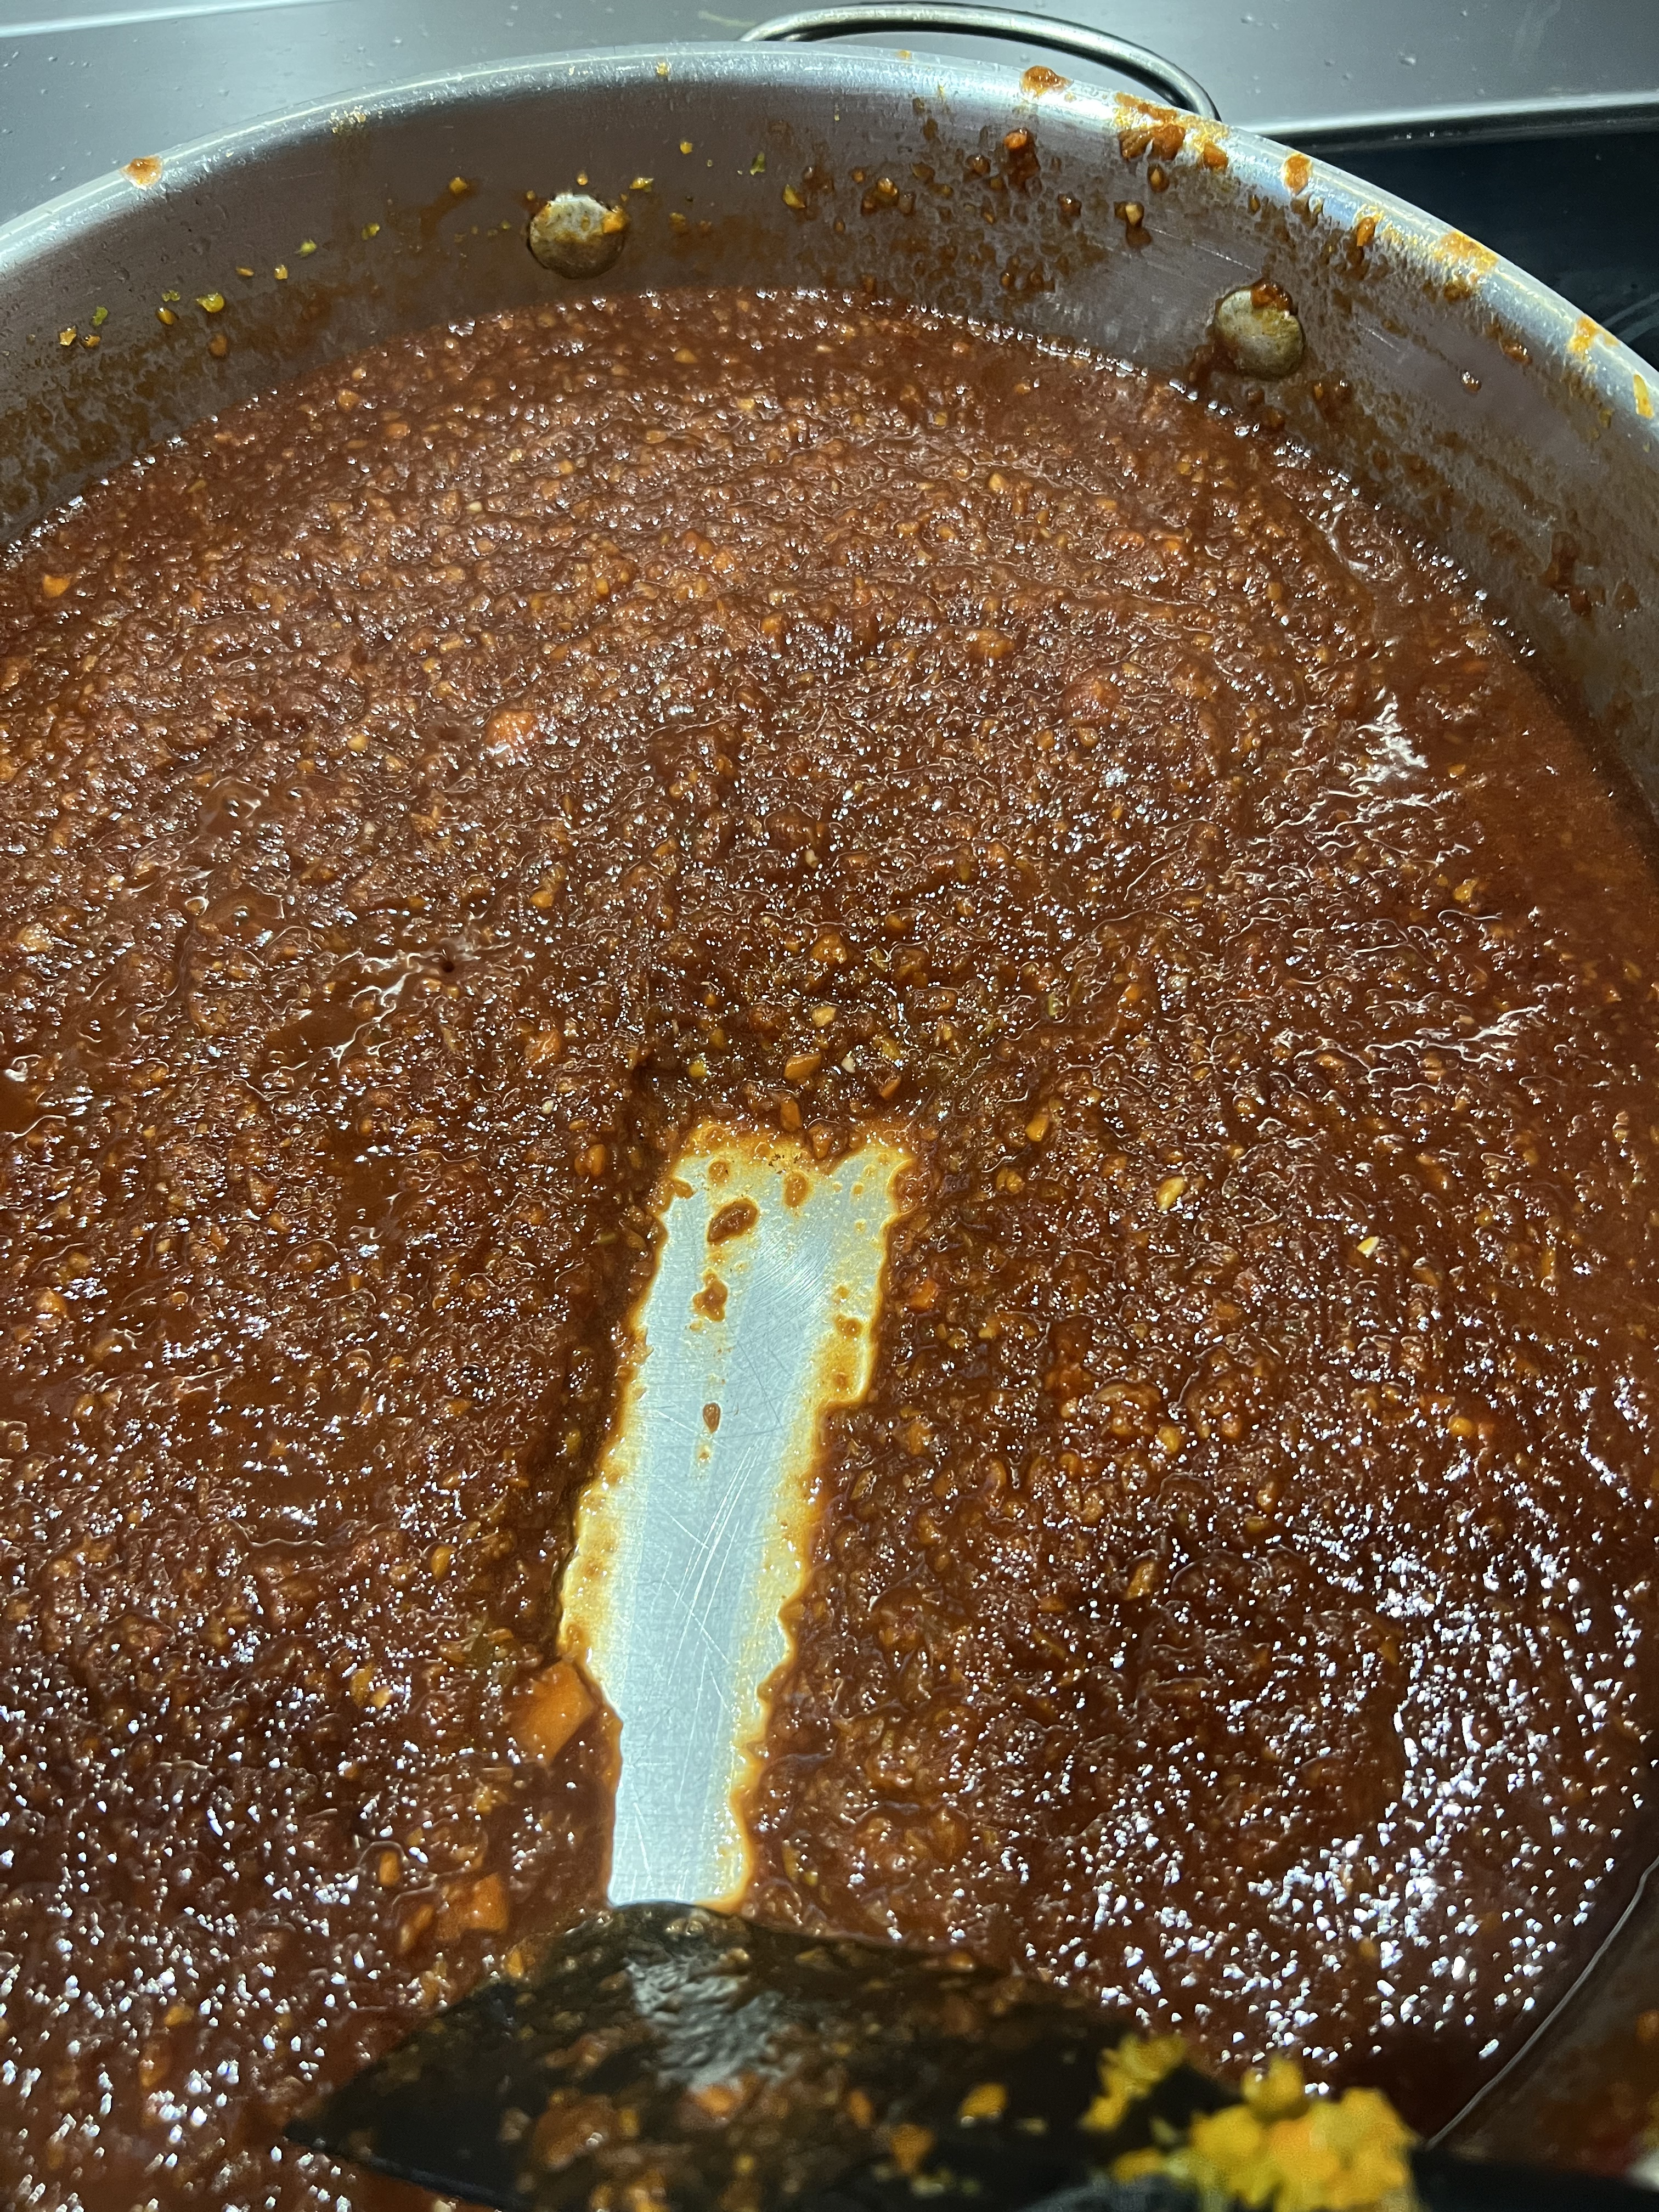
Add the red wine, and you’ll see how it deglazes the pan and cleans all those tasty brown bits off the bottom. Add the stock and continue stirring.
See how the wine cleans the bottom of the pan? It’s all about flavor!
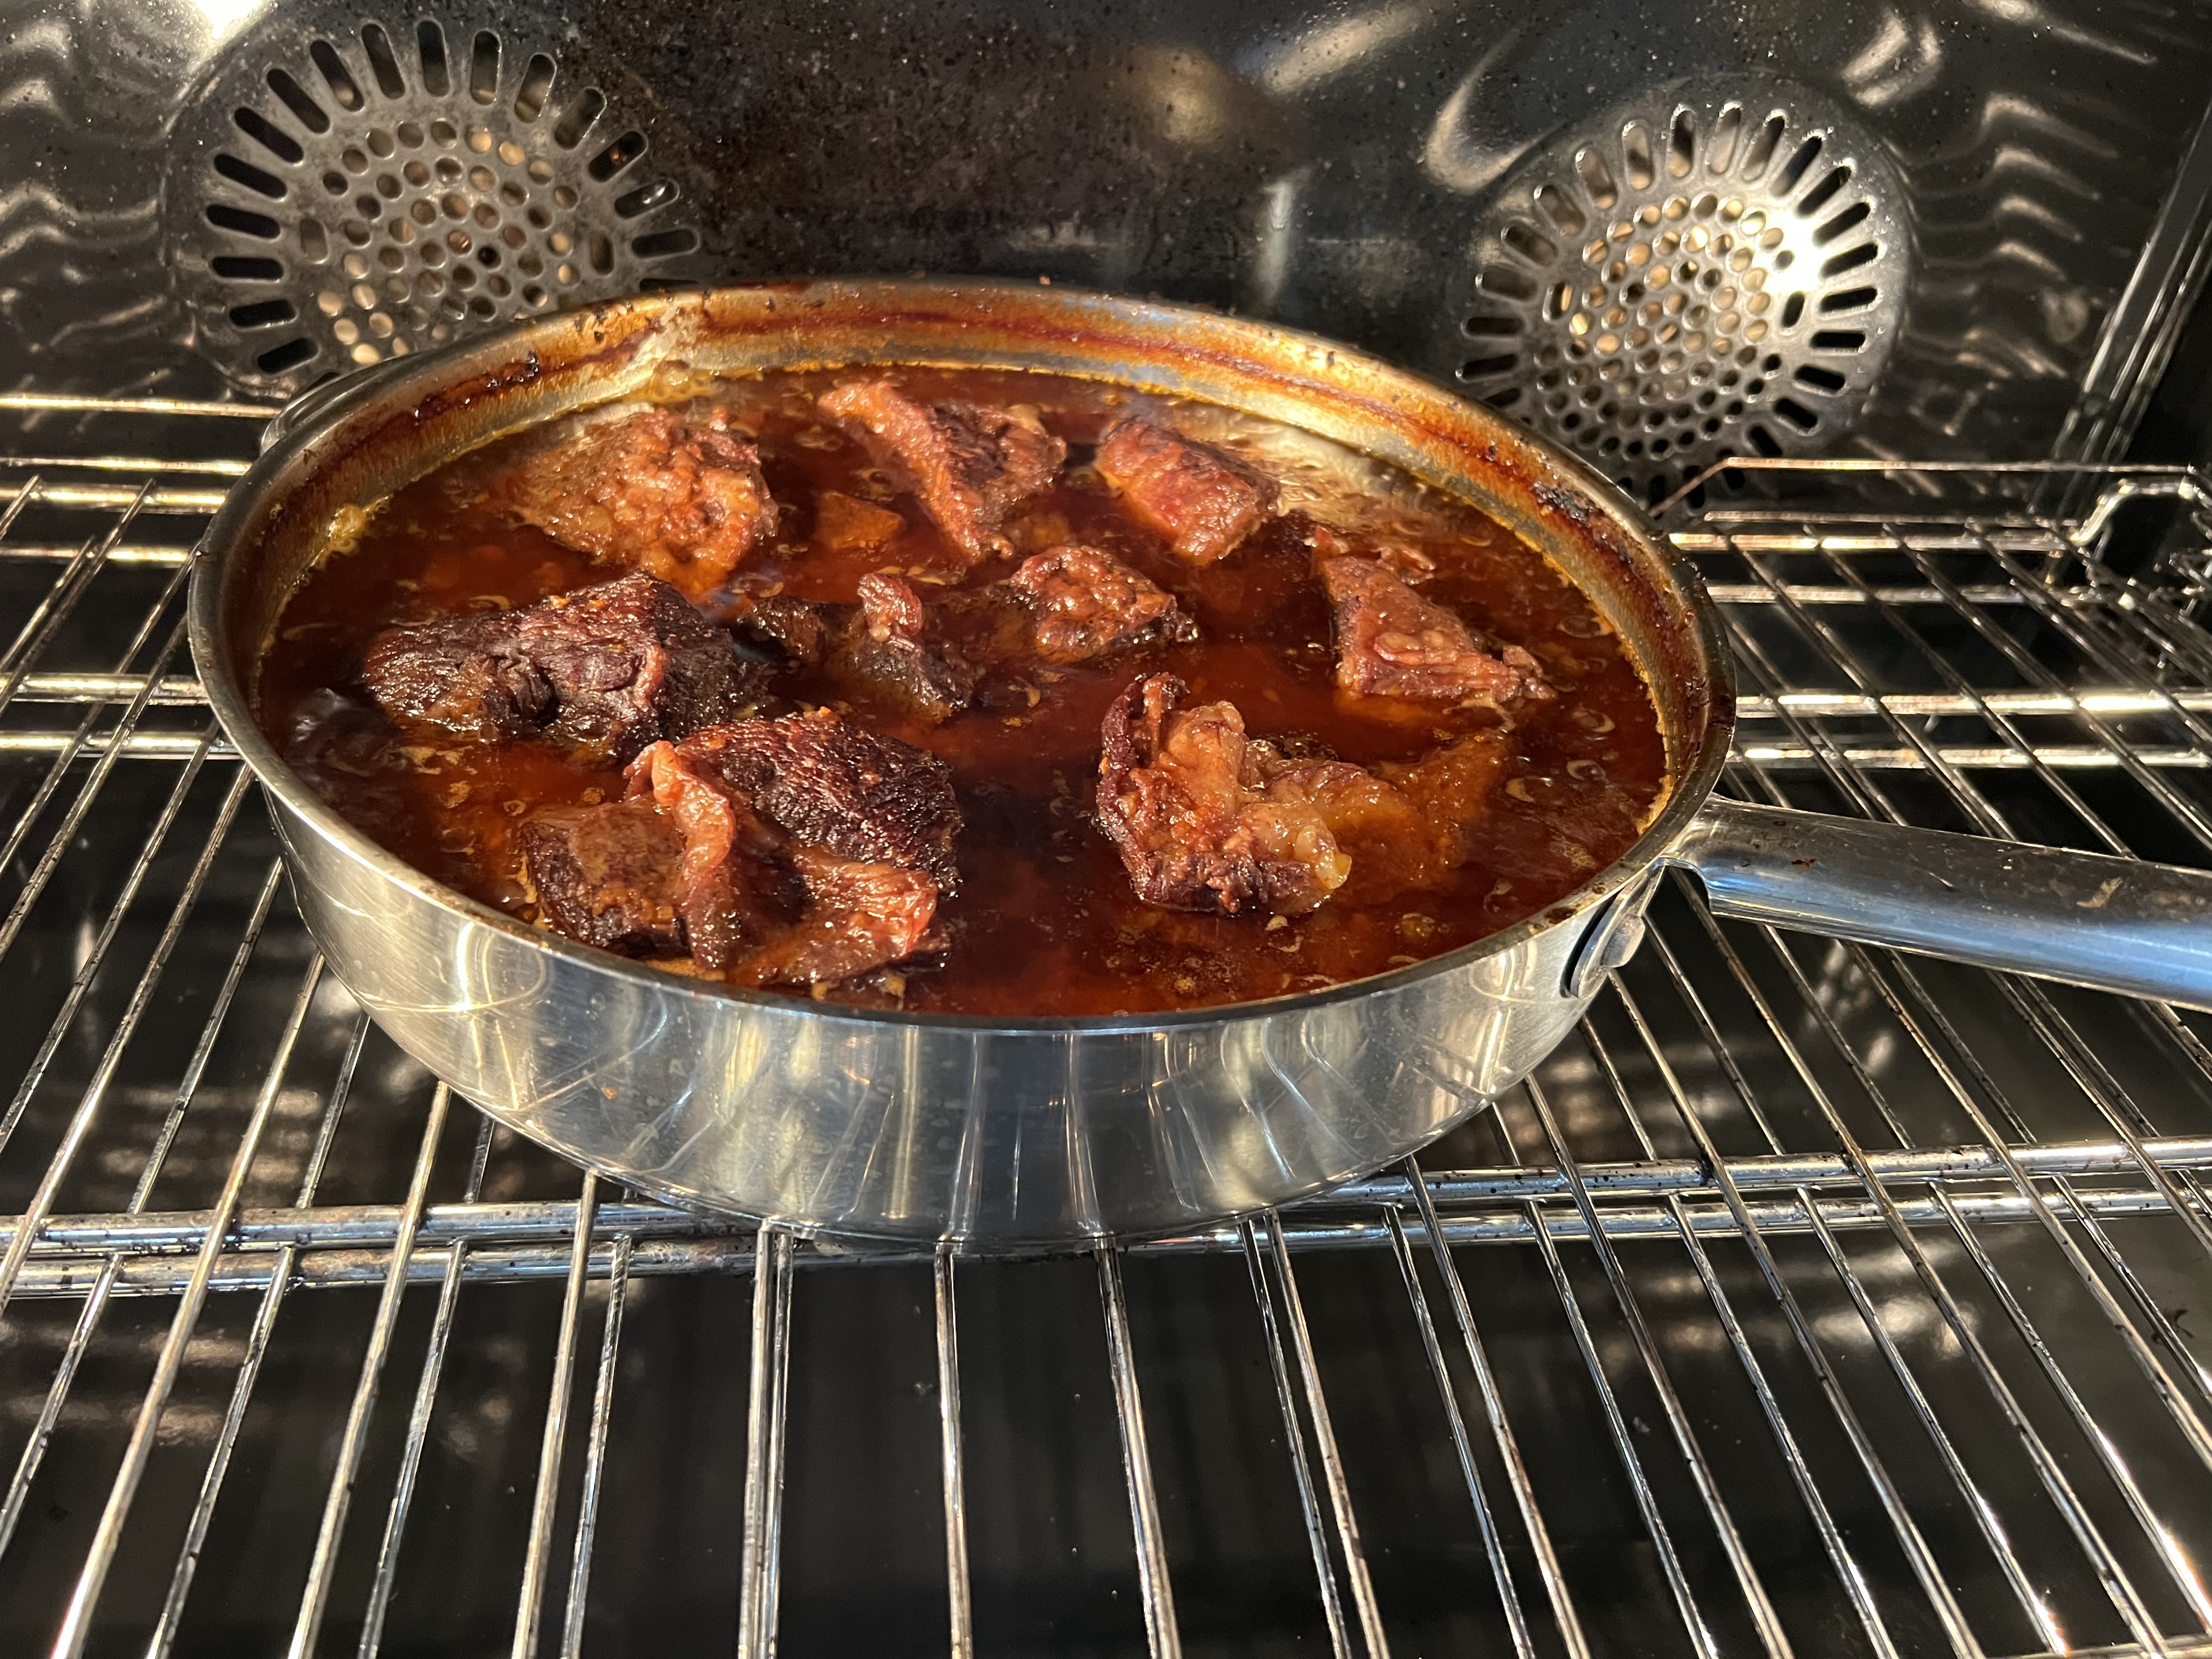
Place the beef short ribs (and any juices that may be in the bowl) into a Dutch oven or large oven-safe pot. Pour the pan with the veggie-wine-stock mix over the top. Add water if needed to cover the beef.
Cover the pot and place it in the middle of the oven. Cook for 3 hours, flipping the beef ribs once halfway through. Add water at the halfway point if it looks like the meat is exposed.
After 3 hours, remove the lid off the pot and cook for another 45 minutes to an hour. This allows the braising liquid to reduce and concentrate its flavors. You can turn the oven off at this point and just leave the pot in it until you’re ready to serve.
Serve with the braising liquid.
The risotto I made to go with it will be posted in another blog.
What can I say? I was craving both dishes, so I combined them. I figured: if I love each one of them, I’d be crazy over both together!
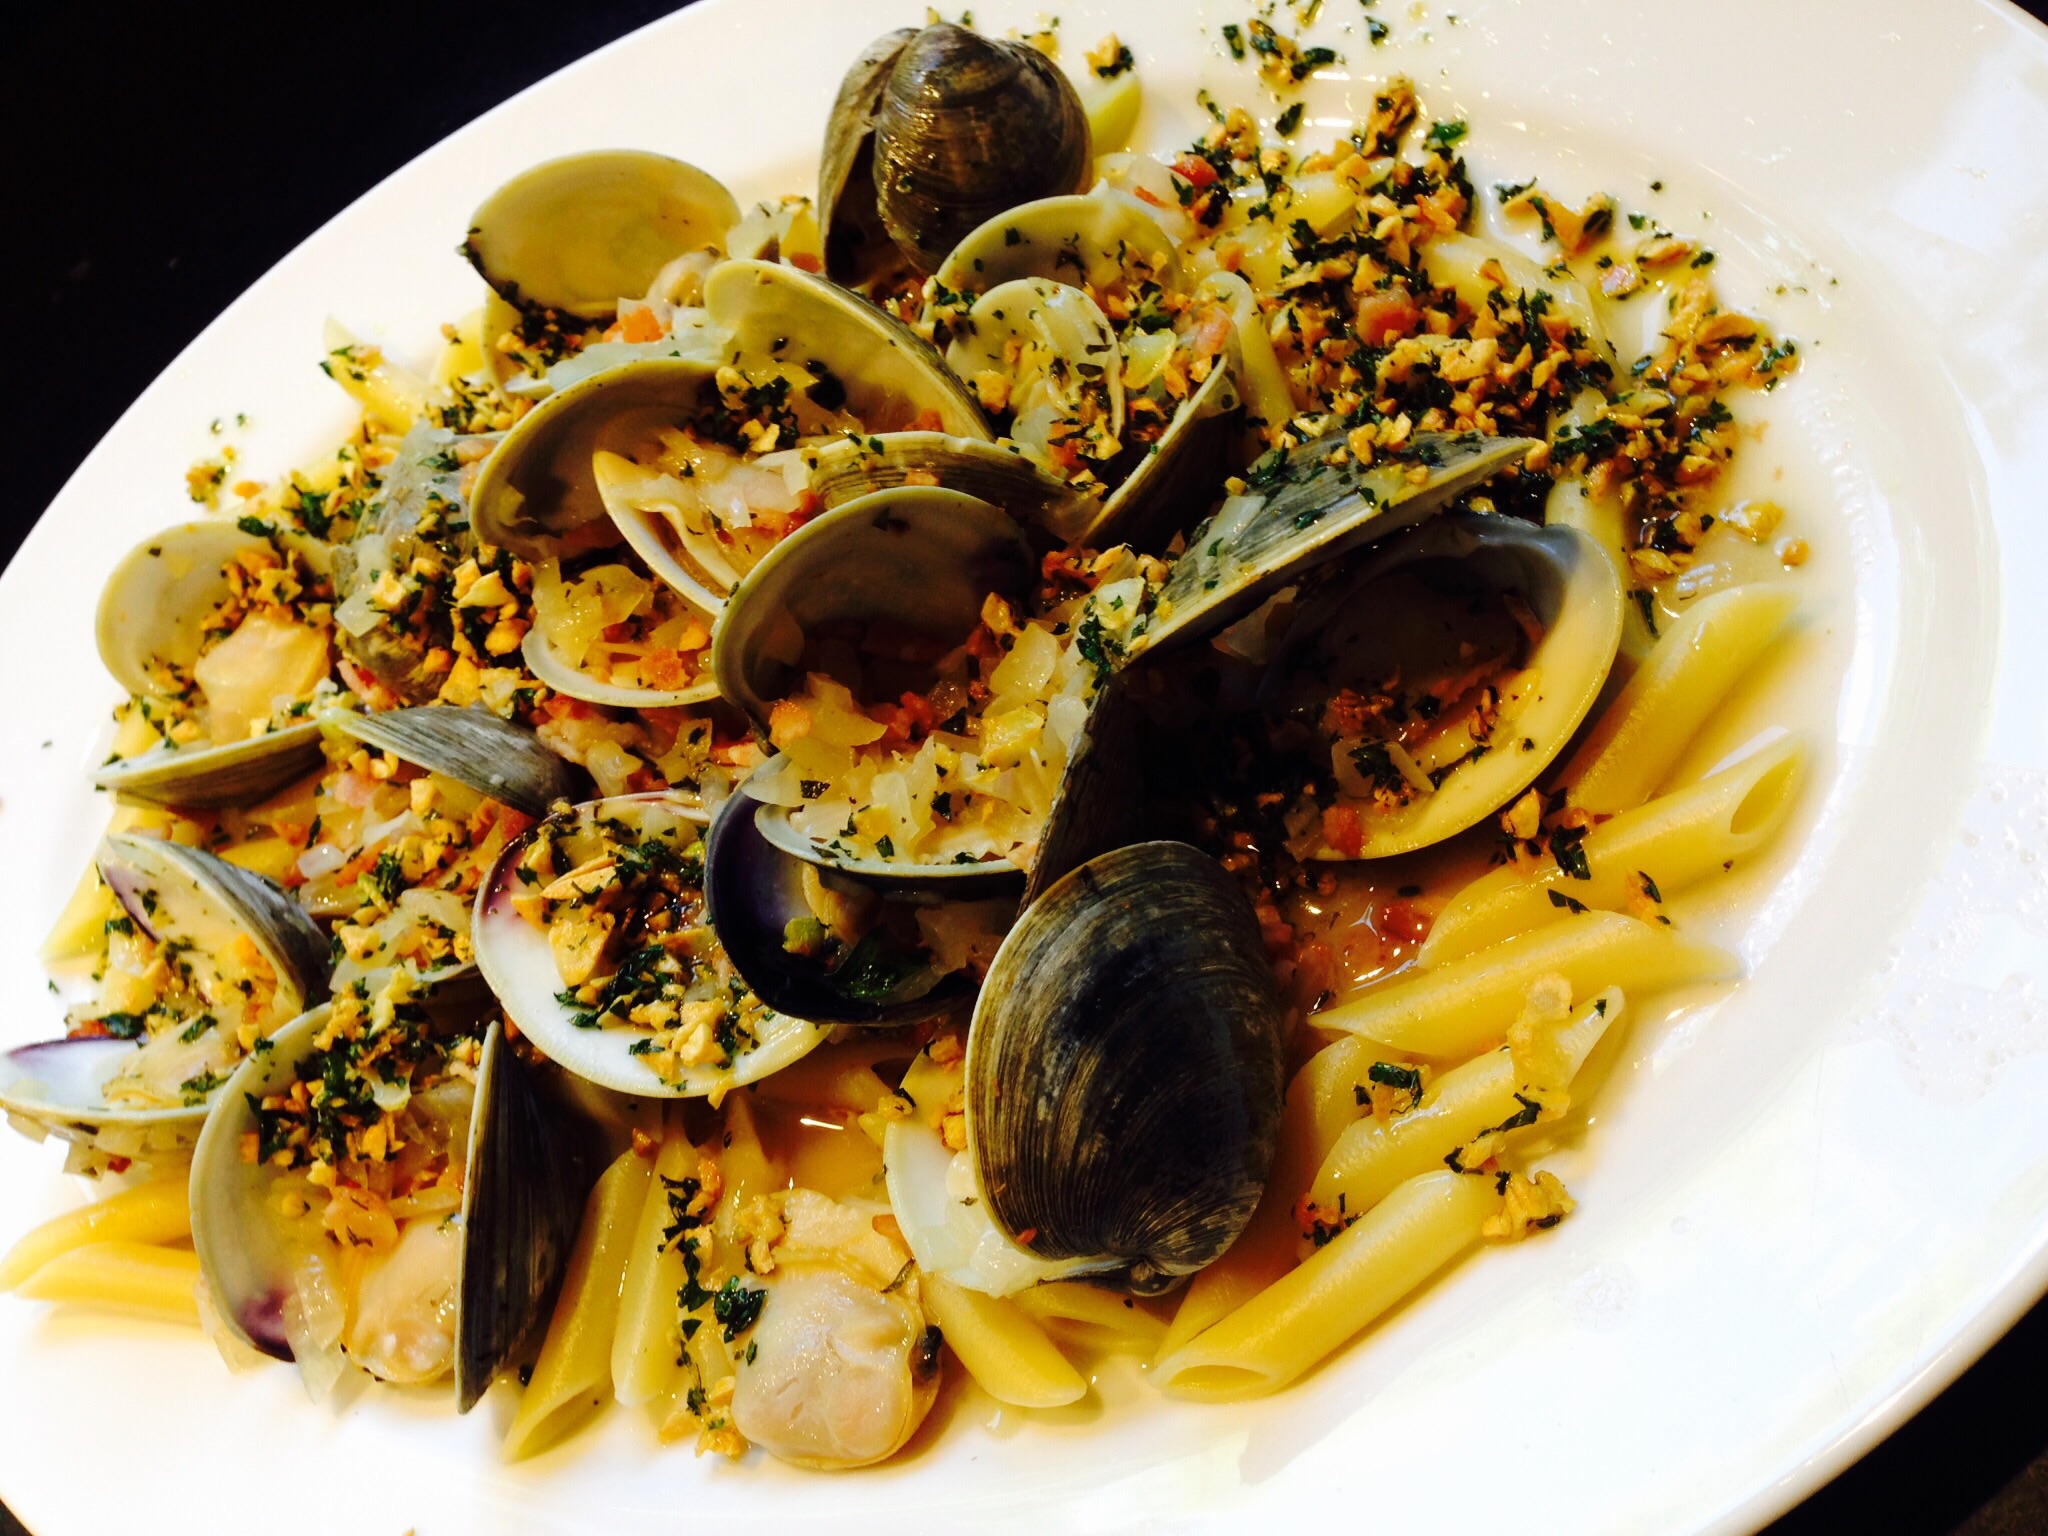
Pasta
1/4 lb. bacon, finely chopped
1 onion, finely chopped
18 small clams, washed and purged*
1 teaspoon fresh oregano, finely chopped
1/4 cup white wine
Good quality olive oil
6 large garlic cloves, finely chopped
1/4 cup fresh parsley, finely chopped
In a large pot, salt some water and bring it to a boil. Cook the pasta until al dente.
In the bottom of another large pot on medium-high heat, fry the bacon until it’s crisp. Add the onions and sauté them until they’re translucent. Add the clams, oregano and wine, and cover the pot with a lid. Reduce the heat to medium. The clams are cooked when they open. Discard any unopened clams.
In a frying pan, heat the olive oil to medium. Add the chopped garlic and fry it until just crispy. Toss in the parsley and stir it to combine.
Place the pasta in a bowl or plate. Pour the clams and juice over the pasta. Pour the fried garlic and oil all over the clams.
*Purging clams:Clams can be pretty sandy and gritty, so it’s important not only to scrub the outside of the shell, but to purge them as well. Clams should be stored in a bowl in the fridge with a wet dish towel over them, never in water. Once you’re ready to use them, fill a bowl with water and add salt (think salty like ocean water) and a tablespoon of corn meal. Mix this around, then add the clams and let them sit in this solution in the fridge for a couple of hours. The clams will purge (clean themselves) out. Discard the liquid and rinse the clams before cooking.
I’m on a Caribbean vacation, so I decided to get inspired.
I was craving a Boulevardier the other day, a favorite cocktail which is a twist on the classic Negroni. A Negroni features gin, Campari, and sweet vermouth. The Boulevardier substitutes whiskey or bourbon for the gin.
I thought that rum would work just as well as whiskey, so I googled “Rum Negroni.” Many listings called it just that: a Rum Negroni, but then I read a story about a bartender in New York City by the name of Joaquin Simo. In 2009, Simo worked at Pouring Ribbons, a well known cocktail bar, and he used Jamaican rum instead of gin in his Negroni. He called it a Kingston Negroni.
Well, I wanted to give the drink a cooler name than that, and besides, my recipe was ever so slightly different. It was time for me to come up with my own cocktail.
The standard Negroni is equal parts gin, Campari, and sweet vermouth…1:1:1. I like to make mine with a 2:1:1 ratio, doubling the amount of gin or whiskey—or in this case—rum. So, maybe, then, my drink isn’t a Negroni at all by definition, and it deserves a new name.
Since I’m using rum in my drink, my rum of choice being Mount Gay Eclipse from Barbados, I thought a Carribbean-based name would be appropriate.
And since the drink is red, my daughter suggested I look up a red fish native to the Caribbean and, lo and behold, the name “lucky grouper” popped up. Its real name is Red Hind, something I suppose you could get if you drank too many of these, but its nickname was “lucky grouper.”
There was also a red fan fish that went by the name of “Gorgonian flabellum,” but I think most people would have trouble pronouncing that even before they started drinking!
So TheLucky Grouper it is! And here’s how I make it. My sweet vermouth of choice is the legendary Antica Formula.
2 oz Mount Gay Eclipse rum 1 oz Campari 1 oz Carpano Antica Formula
Combine these over ice in a mixing glass and stir well. Strain into a rocks glass with a large cube. Garnish with an Amarena Fabbri cherry!
It’s a Leap Year! This weekend, have a sip of the infamous Leap Year Cocktail.
This special drink was created in 1928 by Harry Craddock, who worked at the American Bar in London at that time.
2 oz. gin (I use Hendrick’s)
1/2 oz. Grand Marnier
1/2 oz. sweet vermouth (I use Antica Formula)
1/4 oz. fresh lemon juice
Combine all the ingredients with ice in a cocktail shaker and shake vigorously for 30 seconds. Pour into a chilled martini glass and garnish with a twist of lemon.
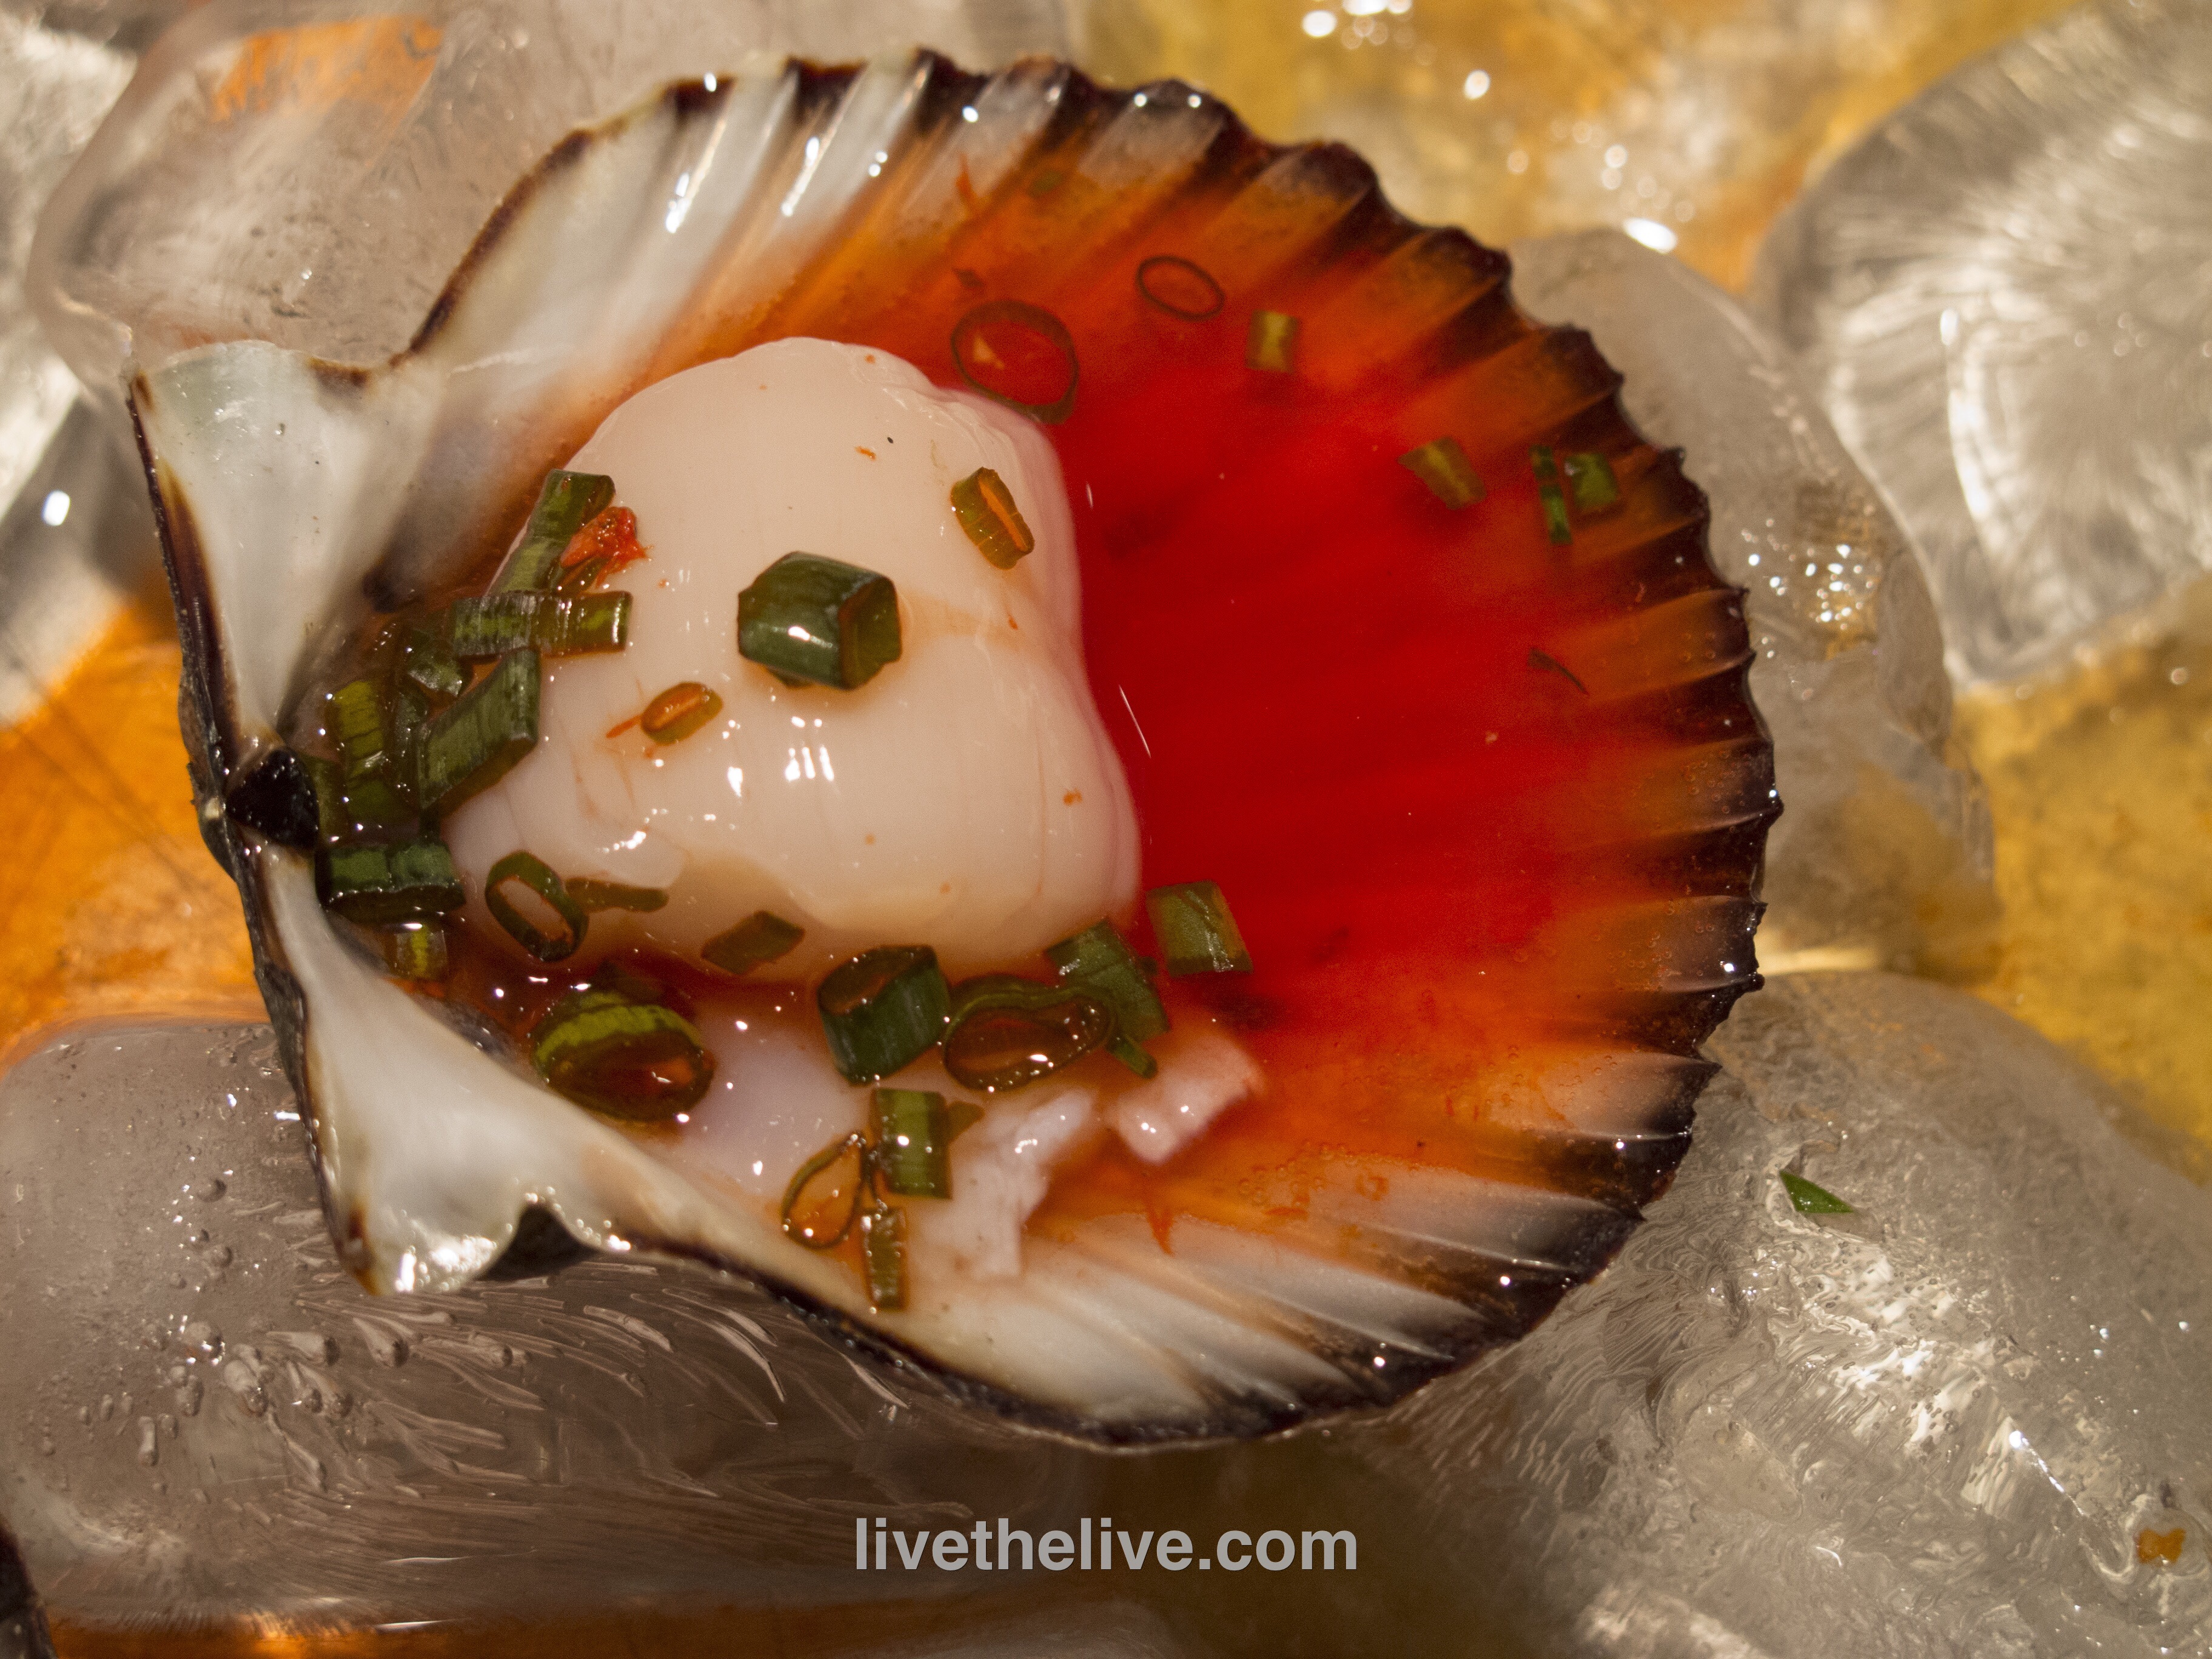
I was on a mission to find fresh mussels the other day, and in the process, stumbled upon fresh bay scallops, piled high on ice at a local farmers’ market. Unlike like the larger sea scallops or bomster scallops, bay scallops are small and sweet, about the size of a mini-marshmallow…hard to find and my absolute favorites.
As far as I’m concerned, there is no better way to eat a fresh scallop than right out of the shell with just a little marinade on top, popping these beauties into my mouth literally as they’re still pulsing on the shell.
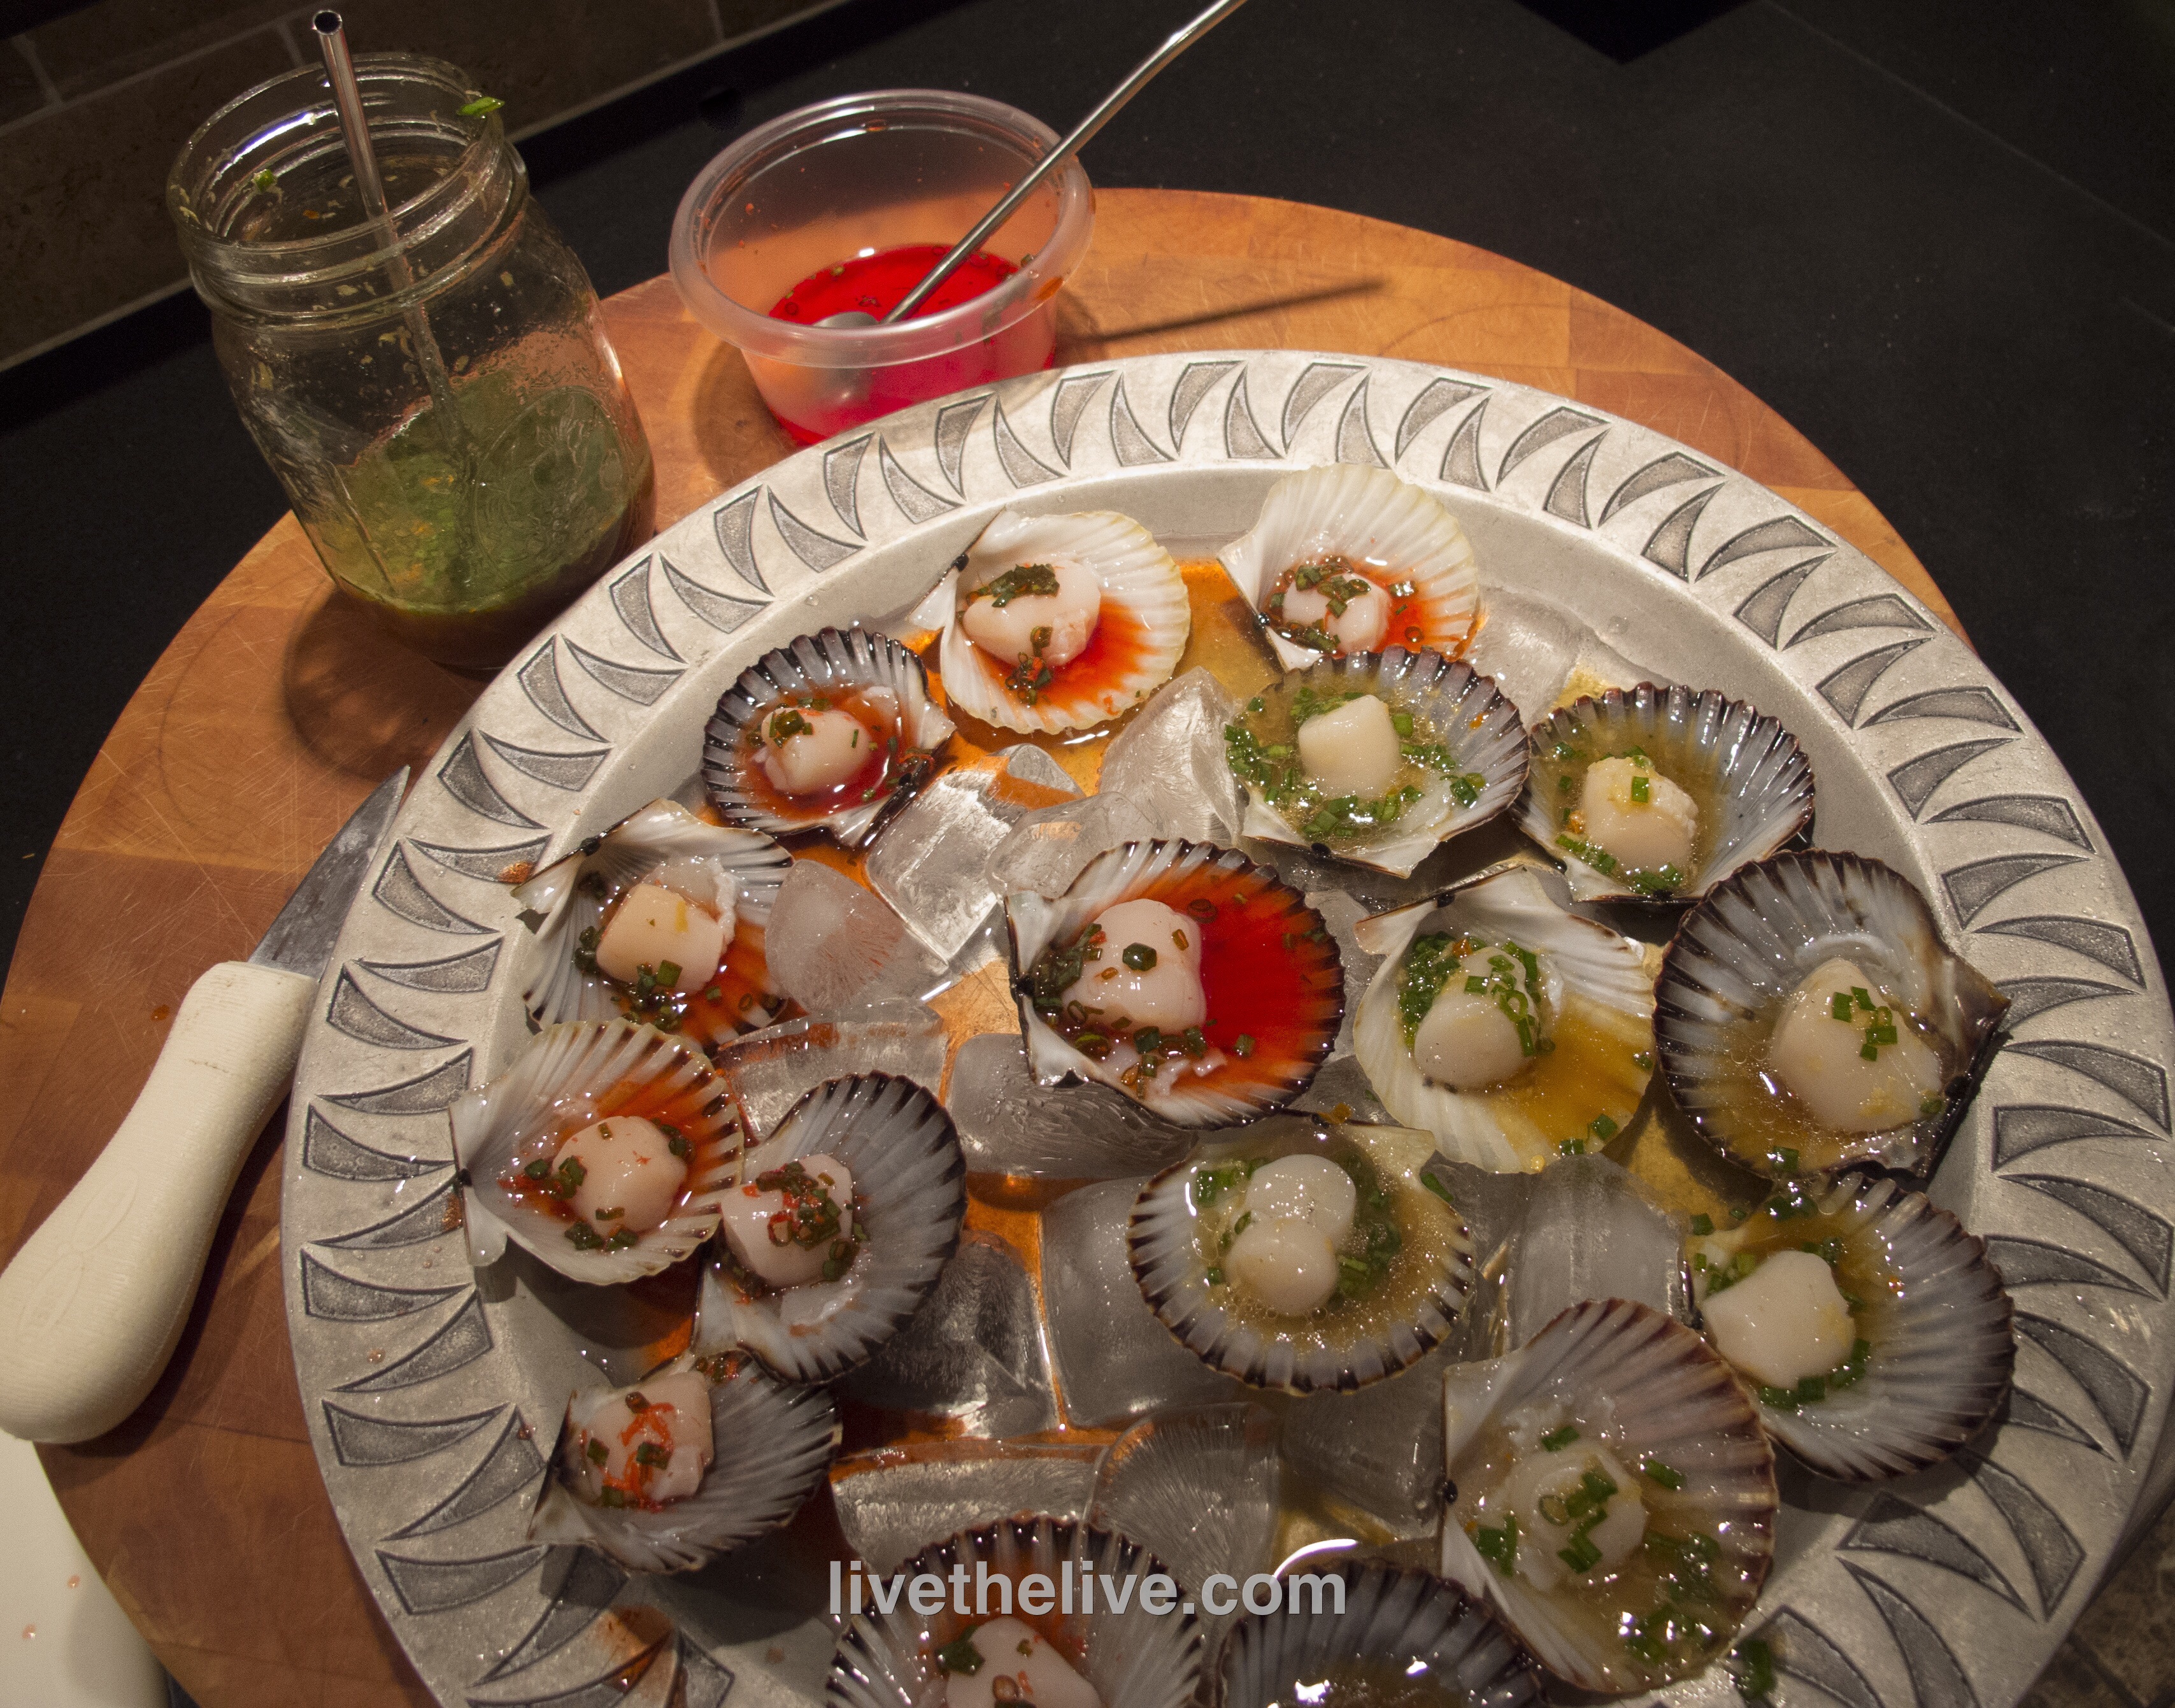
Scallops are a bit trickier to open and clean than clams or oysters (at least for me) but all it took was a little practice while sipping a Stoli Elit martini and I got the hang of it in no time.
There are two marinades that I use when serving up raw scallops. The acidity in these marinades will cook the scallop a little, like in ceviche, though eating them raw is perfectly fine if they’re super-fresh.
“MILLS TAVERN” MARINADE
The first place I ever had a raw scallop was at Mills Tavern, a highly rated restaurant in Providence, RI. Freshly shucked scallops (in large flat shells) were served on ice with a tangy red marinade. I never got the recipe from the restaurant, but this is my version of that marinade.
Combine all the ingredients and chill before using.
A trick I learned from the folks at Wishing Stone Farm, where they grow their own ginger roots: keep the ginger stored in the freezer in a tightly sealed bag. Most of us don’t use ginger all that much, but we want fresh ginger when the recipe calls for it. By wrapping it tightly in plastic and storing it in the freezer, it’s ready to use any time. Simply take the ginger root out, and grate it finely–no need to peel the skin–while it’s still frozen. It will be almost powder like, and it will blend beautifully into any recipe you’re using. Then just put the rest back in the freezer.
ALZ CEVICHE MARINADE
My marinade is closer to a basic ceviche, using 3 kinds of citrus and some Asian flavors.
1/4 cup freshly squeezed orange juice
1 1/2 tablespoons freshly squeezed lemon juice
1 1/2 tablespoons freshly squeezed lime juice
2 tablespoons soy sauce
1 tablespoon + 1 teaspoon peanut oil
1/2 teaspoon honey
1 1/2 teaspoons fresh finely grated ginger
2 tablespoons finely chopped scallion
2 small dried chili peppers, finely chopped
Combine all the ingredients and chill before using.
Both marinades are gluten-free, as long as you use GF soy sauce. La Choy is an easy-to-find gluten-free brand.
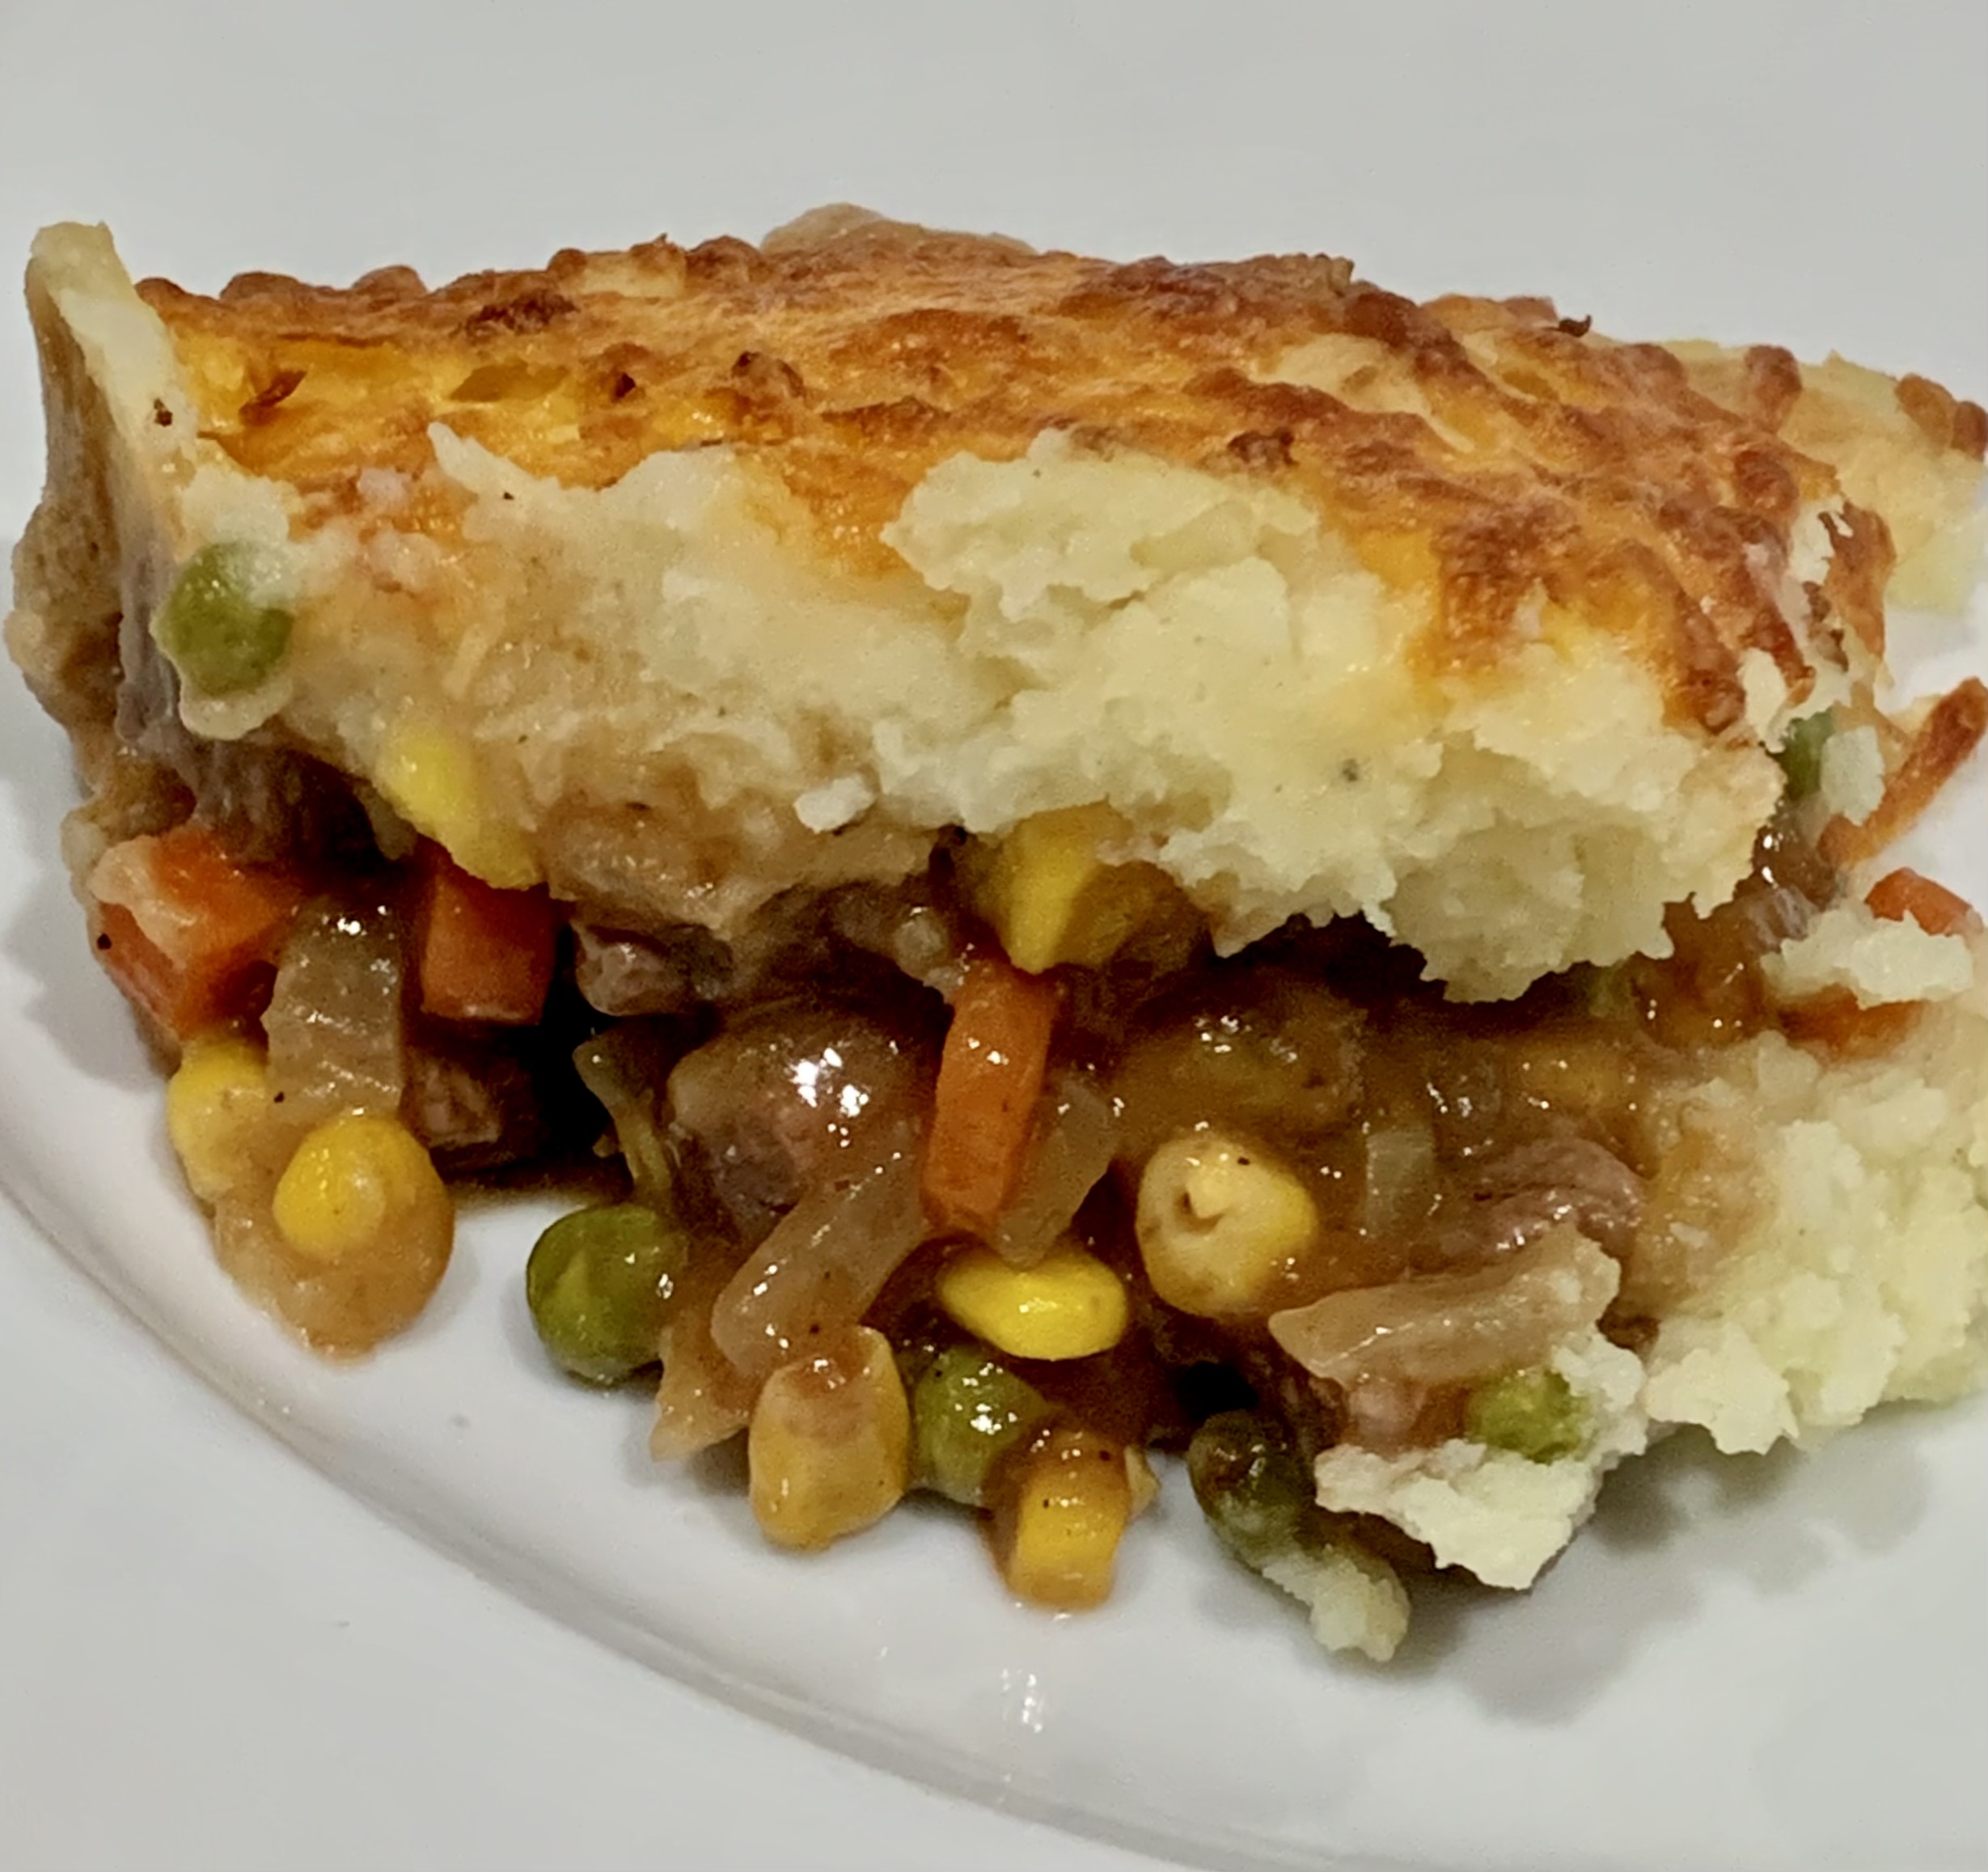
This cold weather always has me craving comfort food…and nothing says comfort more than Shepherds Pie!
To make this recipe, I used organic vegetables, organic grass-fed dairy products, grass-fed beef, pastured eggs, and homemade chicken stock. These extra efforts made a big difference to me, but use what you are most comfortable with and have easiest access to.
And although the basic recipe calls for beef, I’ve had great success using lamb and even venison.
If you’re on a gluten-free diet, the only gluten in this recipe is in the all-purpose flour. Using a GF flour, like Cup4Cup or Bob’s Red Mill 1 to 1 Baking Flour, does a great job of thickening without the gluten.
Potatoes are the classic ingredient in Shepherds pie, but I found that sweet potatoes are a fantastic substitute. (See the photos at the bottom of the blog.) Give either one a shot yourself, or be really bold and try a combination of the two! The procedure is the same either way…
2 oz. cheddar cheese
1 1/2 lbs. Russets(or sweet potatoes), peeled and cubed 1/4 cup half-and-half 2 oz. unsalted butter 3/4 teaspoon Kosher salt 1/4 teaspoon freshly ground black pepper 1 egg yolk
Grate the cheddar cheese. Set it aside for later.
Peel and cube the potatoes and place them in a pot of cold water. Bring it to a boil and cook the potatoes until they are fork-tender. While they are boiling, place the half-and-half and butter in a microwave safe bowl and zap them for 35 seconds to warm them up. Once the potatoes are done, drain them and place them back in the pot. Add the half-and-half and butter and mash really well. Add the salt and pepper and continue mashing. Finally, add the egg yolk, mixing quickly and thoroughly. Then set the potatoes aside.
The meat filling…
2 tablespoons bacon fat (or your favorite oil) 1 cup chopped onion 2 carrots, peeled and diced small 2 garlic cloves, minced 1 1/2 lbs. beef, cut into 1/2″ cubes 1 teaspoon Kosher salt 1/2 teaspoon freshly ground black pepper 2 tablespoons all-purpose flour 2 teaspoons tomato paste 1 cup chicken broth, preferably homemade 1 teaspoon Worcestershire sauce 2 teaspoons freshly chopped rosemary leaves 1 teaspoon freshly chopped thyme leaves 1/2 cup fresh or frozen corn 1/2 cup of fresh or frozen peas
Preheat the oven to 400°.
While the potatoes are cooking, prepare the meat filling.
Place the bacon fat or oil in a pan and set it on medium high heat. Add the onions and the carrots and cook until the onions are translucent. Add the garlic and stir. Add the beef and the salt and pepper and cook until the meat has browned nicely. Sprinkle the meat with the flour, and mix to combine, cooking for another minute. Add the tomato paste, chicken broth, Worcestershire sauce, rosemary and thyme, and stir to combine. Bring this to a boil, reduce it to a simmer, and cook it for about 10 minutes, until the sauce has thickened nicely.
Add the corn and the peas to the meat mixture, and then pour it all into a baking pan. ( I used a 9-inch round metal baking pan that was about 3 inches deep.)
Spread the mashed potatoes on top of the meat mixture. If you use the mashed potatoes all around the edges, it seals the meat mixture in, and prevents bubbling over and messing up your oven. A rubber spatula makes this job easy.
Place the pan on a parchment-lined baking sheet (to prevent spills), and in the oven to bake for 15 minutes.
After 15 minutes, remove the pan and sprinkle the grated cheddar cheese on top of the potatoes. Then return the pan to the oven for 10 more minutes, until the cheese has melted and created a beautiful golden crust on top.
Remove the pan from the oven, placed it on a wire rack, and let it cool at least 15 minutes before serving.
As I said earlier, sweet potatoes make a great substitute for regular potatoes. Give them a try!
This is one of my favorites because it not only tastes amazing, it freezes really well.
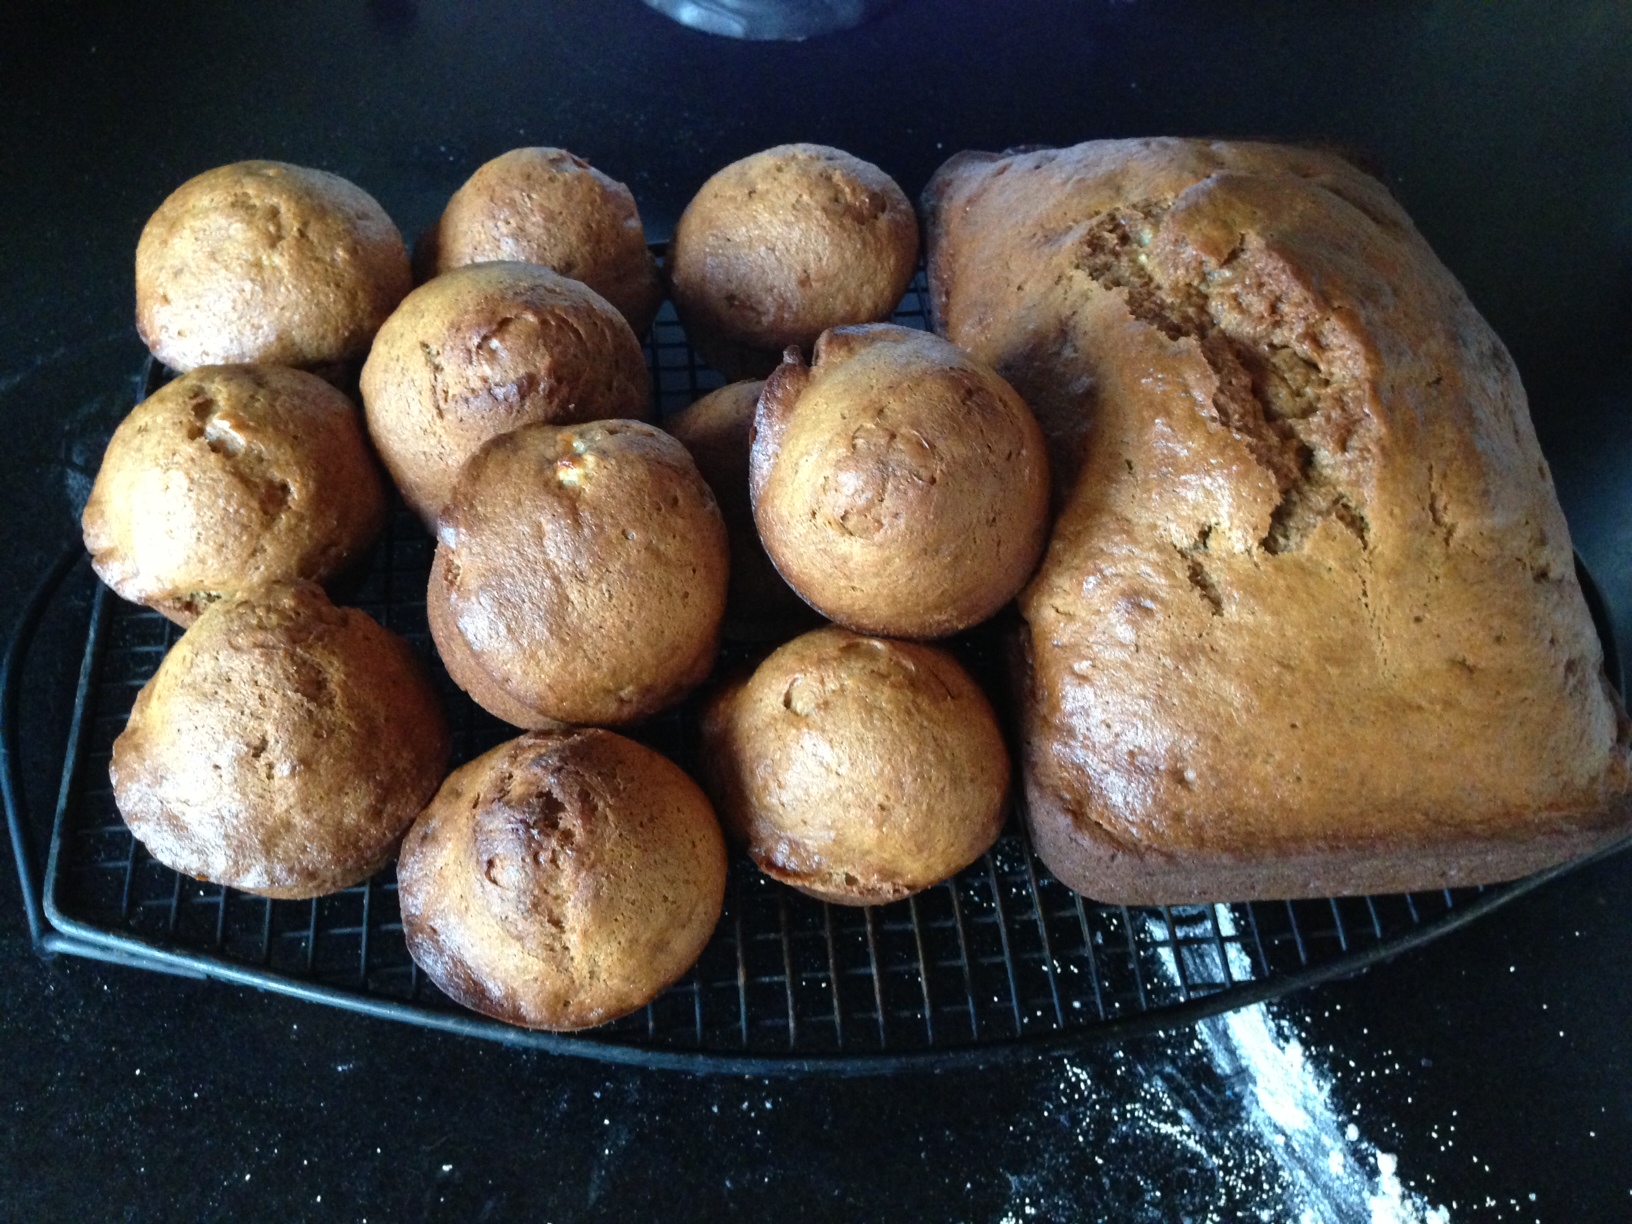
My original banana bread recipe blog is featured directly below. It’s awesome. But if you follow a gluten-free lifestyle, no worries. My gluten-free version of the recipe, at the bottom of the page, is so good, you won’t miss the wheat!
A gluten-free batch.
The original recipe…
What makes this banana bread special is that it uses whole wheat flour…less sugar…and no artificial extracts that make most banana breads taste like crap. It relies on very ripe bananas to give it its wonderful natural flavor.
It’s not always easy to get bananas to ripen exactly when you’re trying to make your banana bread recipe. So I buy a large bunch of bananas and let them get very ripe at room temperature. I then take 5 at a time (for this recipe), peel them, and place the bananas in a Ziploc bag in the freezer. When it’s time to make banana bread, I just pull one of those Ziplocs out of the freezer, let it thaw, and mash with a potato masher.
Since Roundup is a very common herbicide used on wheat, and its cancer-causing characteristics are widely known by now, I always use organic wheat for my baking recipes.
I use organic cane sugar instead of regular sugar when I have it. I don’t use vegetable oils, especially not canola, so I use healthier avocado oil or olive oil. Eggs are pastured when I can get ’em. Bananas are organic. And I rub the pans with coconut oil or I use an olive oil cooking spray.
3 cups all-purpose flour
1/2 cup whole wheat flour
2 tsp baking soda
1/2 tsp salt
1 1/4 cup sugar
3/4 cup vegetable oil
2 eggs
5 medium-sized bananas, peeled and mashed
2 tsp real vanilla extract
Cooking spray
Pre-heat the oven to 350 degrees.
Combine the all-purpose flour, whole wheat flour, baking soda and salt in a medium bowl. Set it aside. (For a less rustic bread, simply substitute more all purpose flour for the whole wheat flour.)
Combine the sugar and oil in a mixing bowl and mix at medium speed for 2 minutes. (I use the whisk attachment.) Add the eggs, one at a time. Beat until the mixture is light and lemon colored.
With the mixer running at low-speed, add the flour mixture alternately with the bananas, beginning and ending with the flour mixture. Blend well after each addition. Add the vanilla extract and blend some more to mix.
Pour the batter into 2 loaf pans that have been sprayed with cooking spray. Bake for 45 minutes or until a wooden pick inserted in the center comes out clean. Cool 15 minutes in the loaf pan on a wire rack. A bundt pan works as well.
Remove the loaves from the pans and let them cool completely on the wire rack before slicing.
The gluten-free recipe…
My go-to gluten-free flour is the brand called Cup 4 Cup. You can find it in most supermarkets. They also offer a more rustic version they call “Wholesome Flour,” which is made mostly of rice. I found that the two combined worked really well for a rustic, chewy texture much like whole wheat.
3 cups Cup4Cup all-purpose gluten-free flour
1 cup Cup4Cup Wholesome Flour
2 teaspoons baking soda
1/2 teaspoon salt
1 1/4 cup cane sugar
3/4 cup avocado or olive oil
2 eggs
5 medium-sized bananas, peeled and mashed
2 teaspoons real vanilla extract
coconut oil
Pre-heat the oven to 350 degrees.
Combine the flour, baking soda and salt in a bowl. Set aside.
Combine the sugar and oil in a mixing bowl and mix at medium speed for 2 minutes. (I use the whisk attachment.) Add the eggs, one at a time. Beat until the mixture is light and lemon colored.
With the mixer running at low-speed, add the flour mixture alternately with the bananas, beginning and ending with the flour mixture. Blend well after each addition. Add the vanilla extract and blend some more to mix.
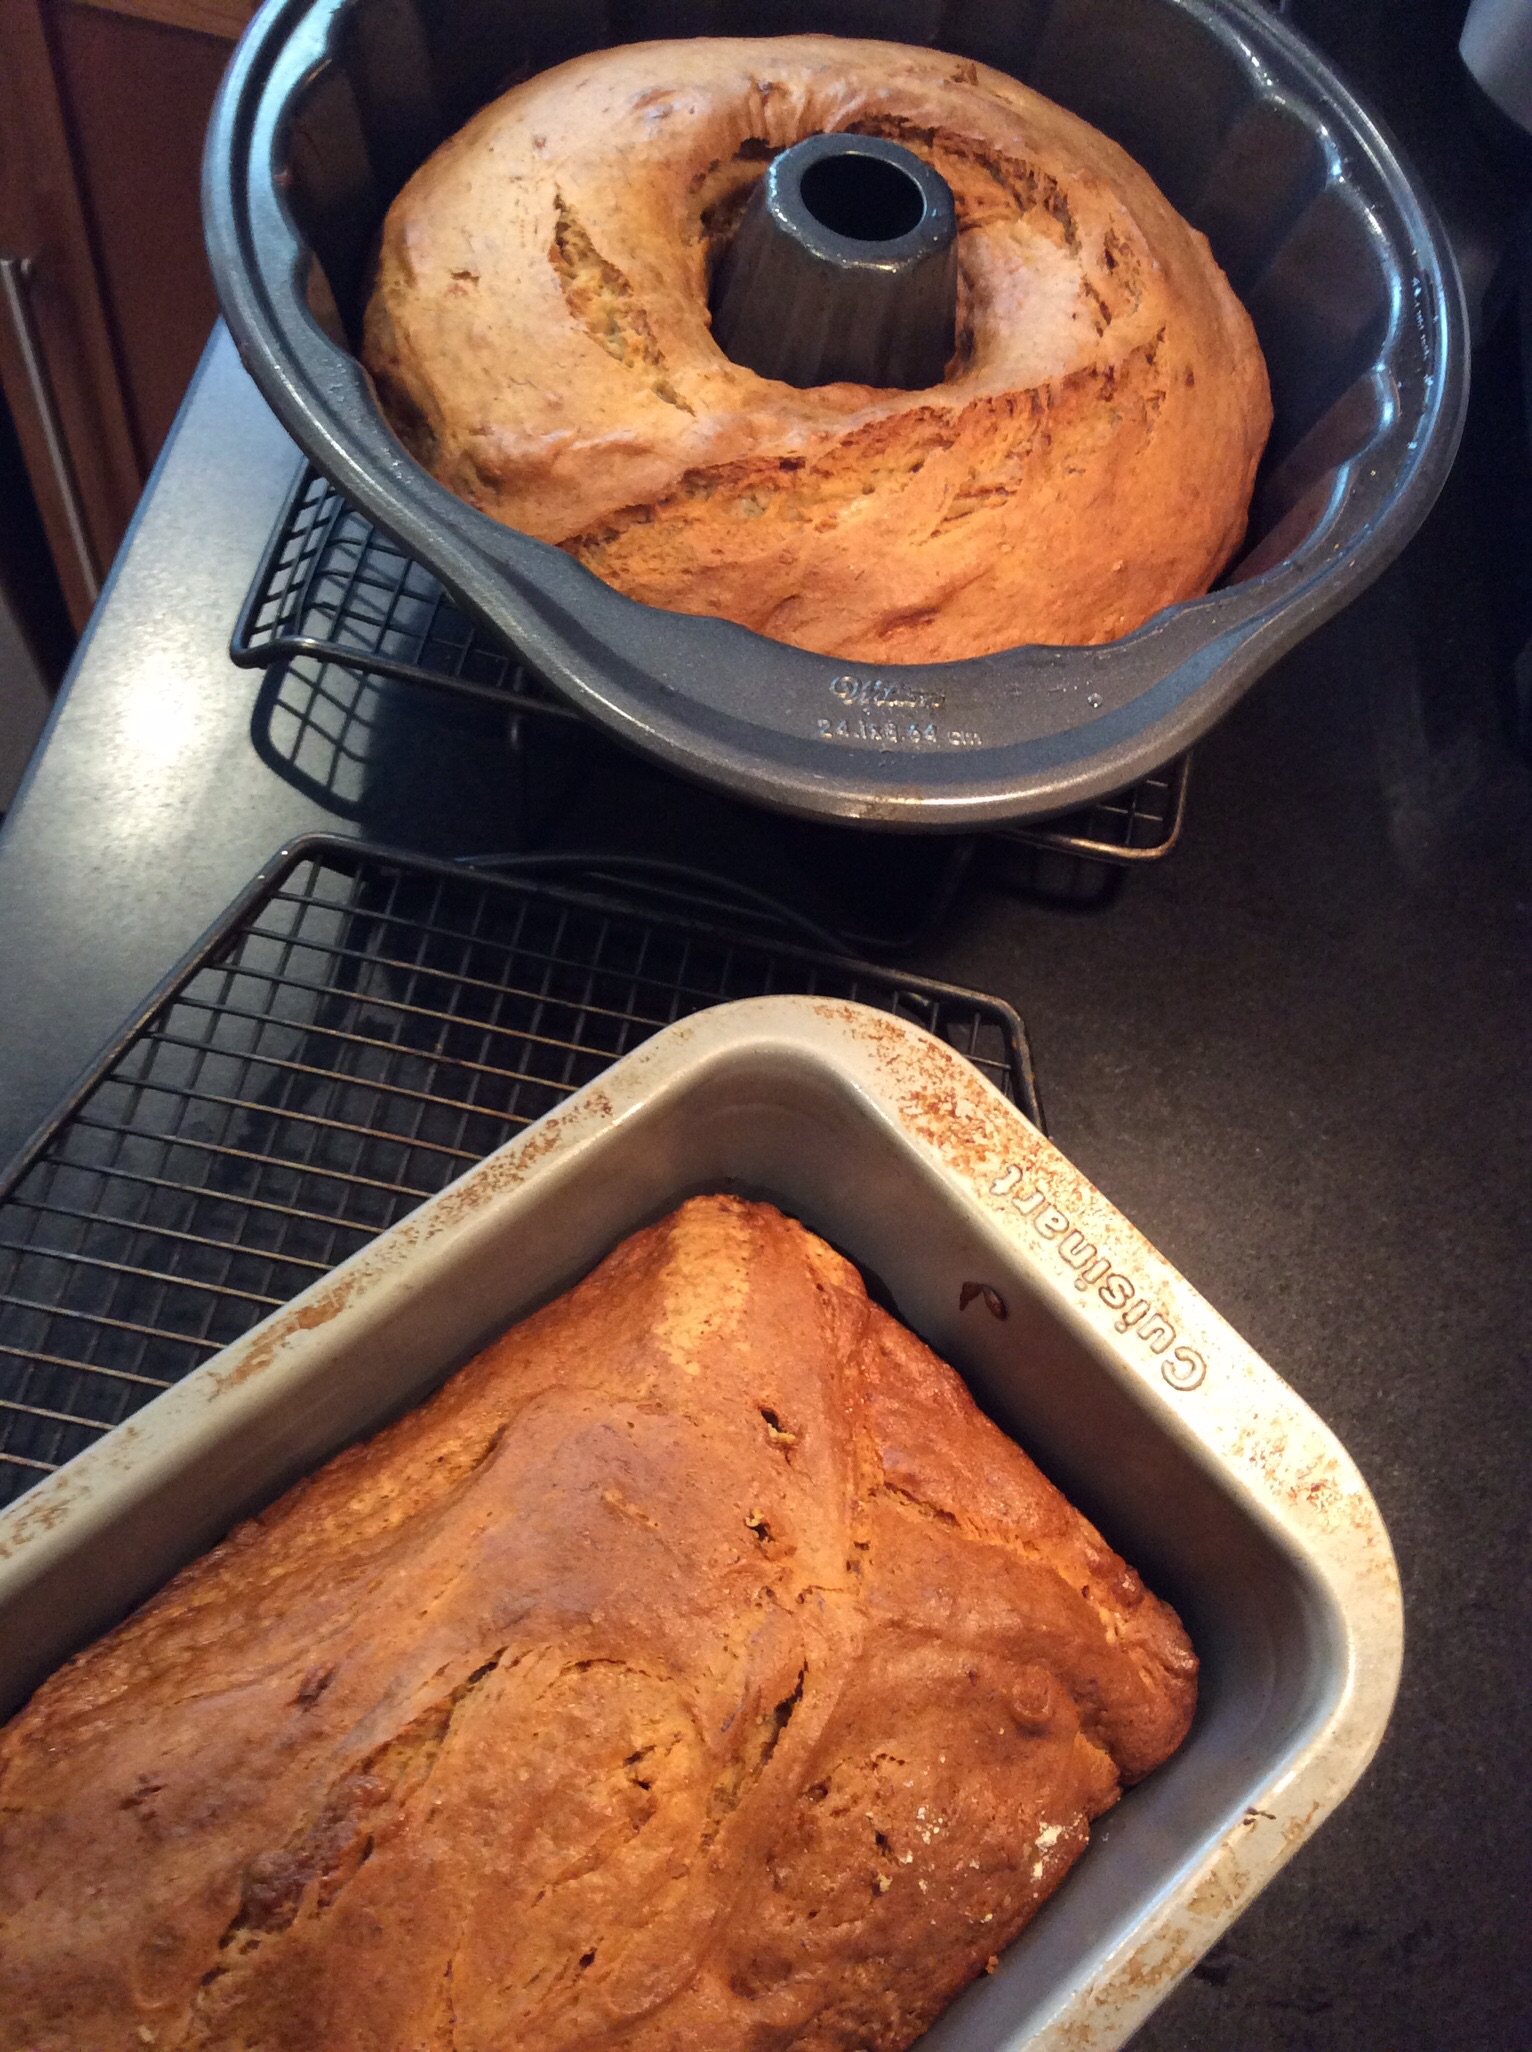
Pour the batter into 2 loaf pans or one large bundt pan that have been rubbed with the coconut oil. Bake for 45–60 minutes or until a wooden toothpick inserted in the center comes out clean. Cool 15 minutes in the pan on a wire rack.
Remove the bread from the pan and let it cool completely on the wire rack before slicing.
These shrimp burgers are not only delicious, they’re pretty low in calories. The key to success is to use raw shrimp, not cooked. (Overcooked shrimp is never a good thing.)
I always use wild-caught American shrimp, not that nasty stuff from Asia. I’ve found wild-caught American shrimp almost everywhere, from supermarkets to membership clubs, and for a great price. You just have to make a bit of an effort to read the packages.
For this recipe, you don’t need to spend extra money for large shrimp. You’ll be chopping them up anyway…and I think the smaller shrimp are tastier. (A white fish, like cod, is also a good substitute for the shrimp.)
These patties hold together pretty well without a lot of breadcrumbs because the shrimp that goes in the food processor becomes a sticky paste that holds everything together. At around 1 calorie per gram, shrimp is a dieter’s best friend.
This recipe can be made gluten-free simply by using GF breadcrumbs. I make my own by buying frozen GF bread, like Udi’s. I toast it, then put it in the food processor to make breadcrumbs. They’re delicious, and you’d never know they’re gluten free!
1 lb. thawed, peeled and deveined medium wild-caught American shrimp 1/3 cup breadcrumbs 1 tablespoon fresh-squeezed lemon juice 1/2 teaspoon sea salt 1/4 teaspoon granulated garlic 1/4 teaspoon freshly ground black pepper 1/2 small Vidalia onion or 1 scallion, finely chopped 1 large egg, lightly beaten Splash of cayenne pepper sauce, like Frank’s Red Hot, or a pinch of cayenne pepper (optional)
Oil, for frying
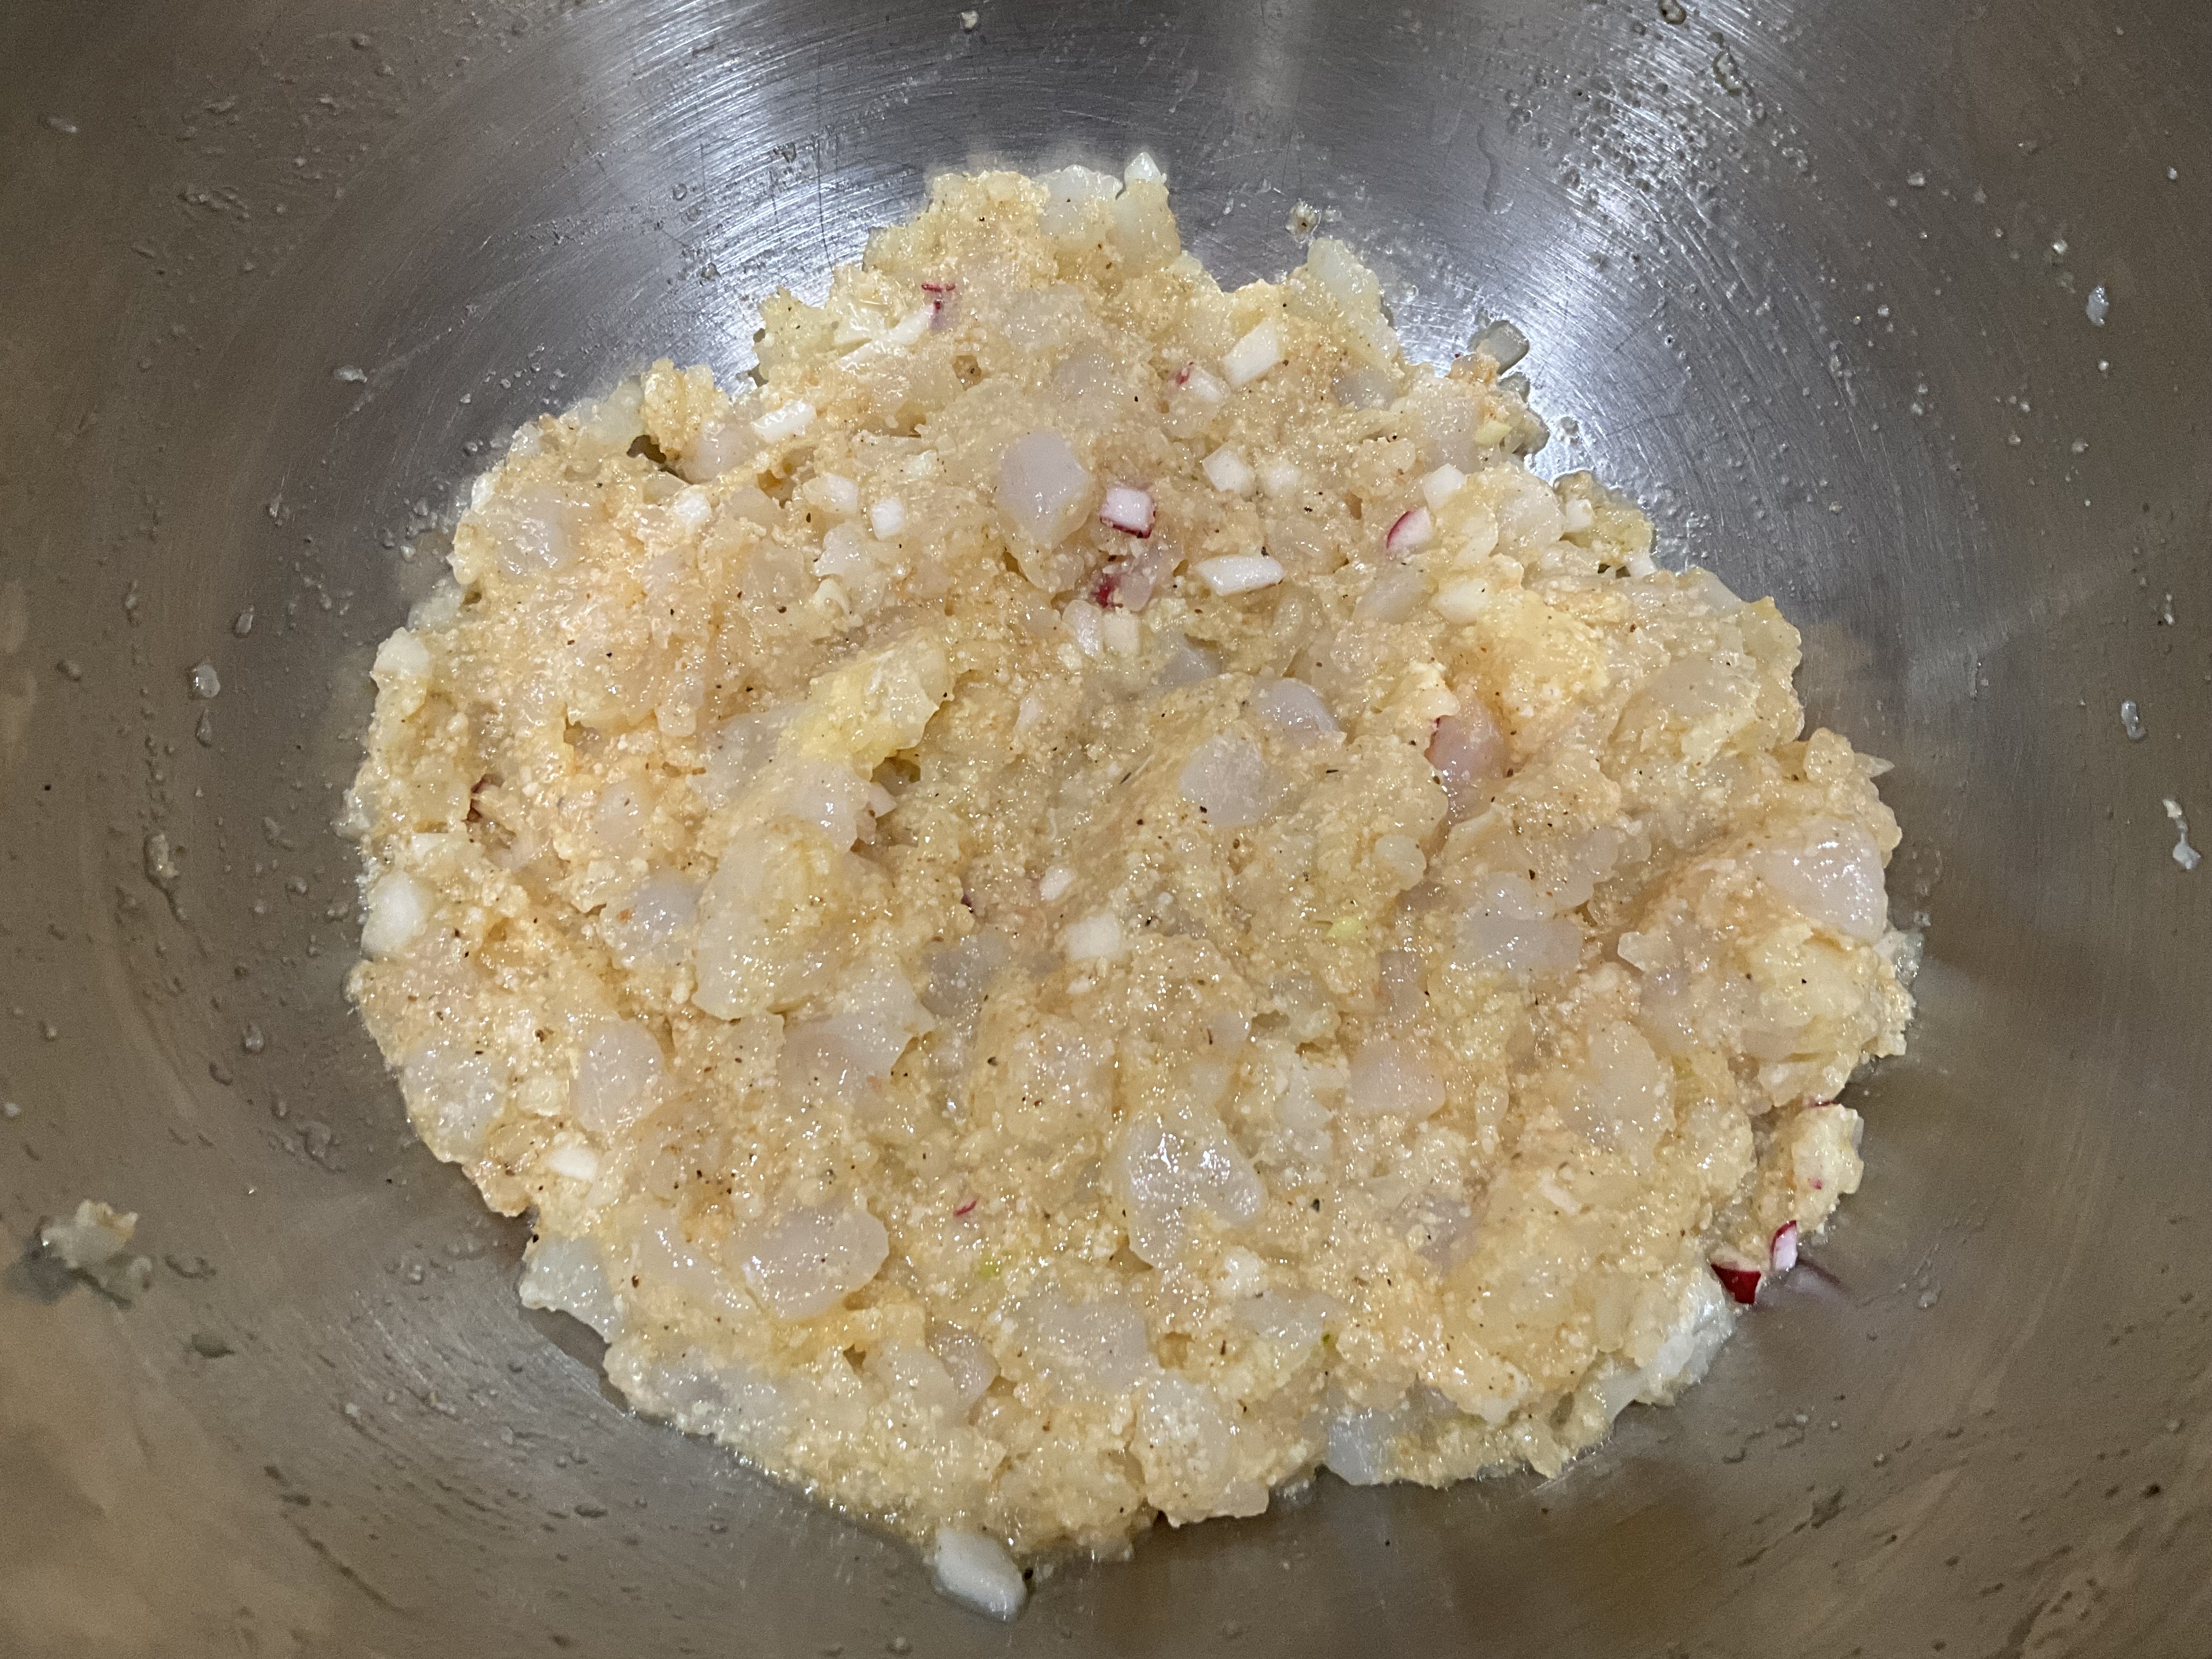
Coarsely chop half of the shrimp. Place the other half in a food processor, and pulse it until smooth.
Combine all the shrimp in a bowl with the breadcrumbs, lemon juice, salt, garlic, pepper, onion, egg and optional cayenne pepper sauce.
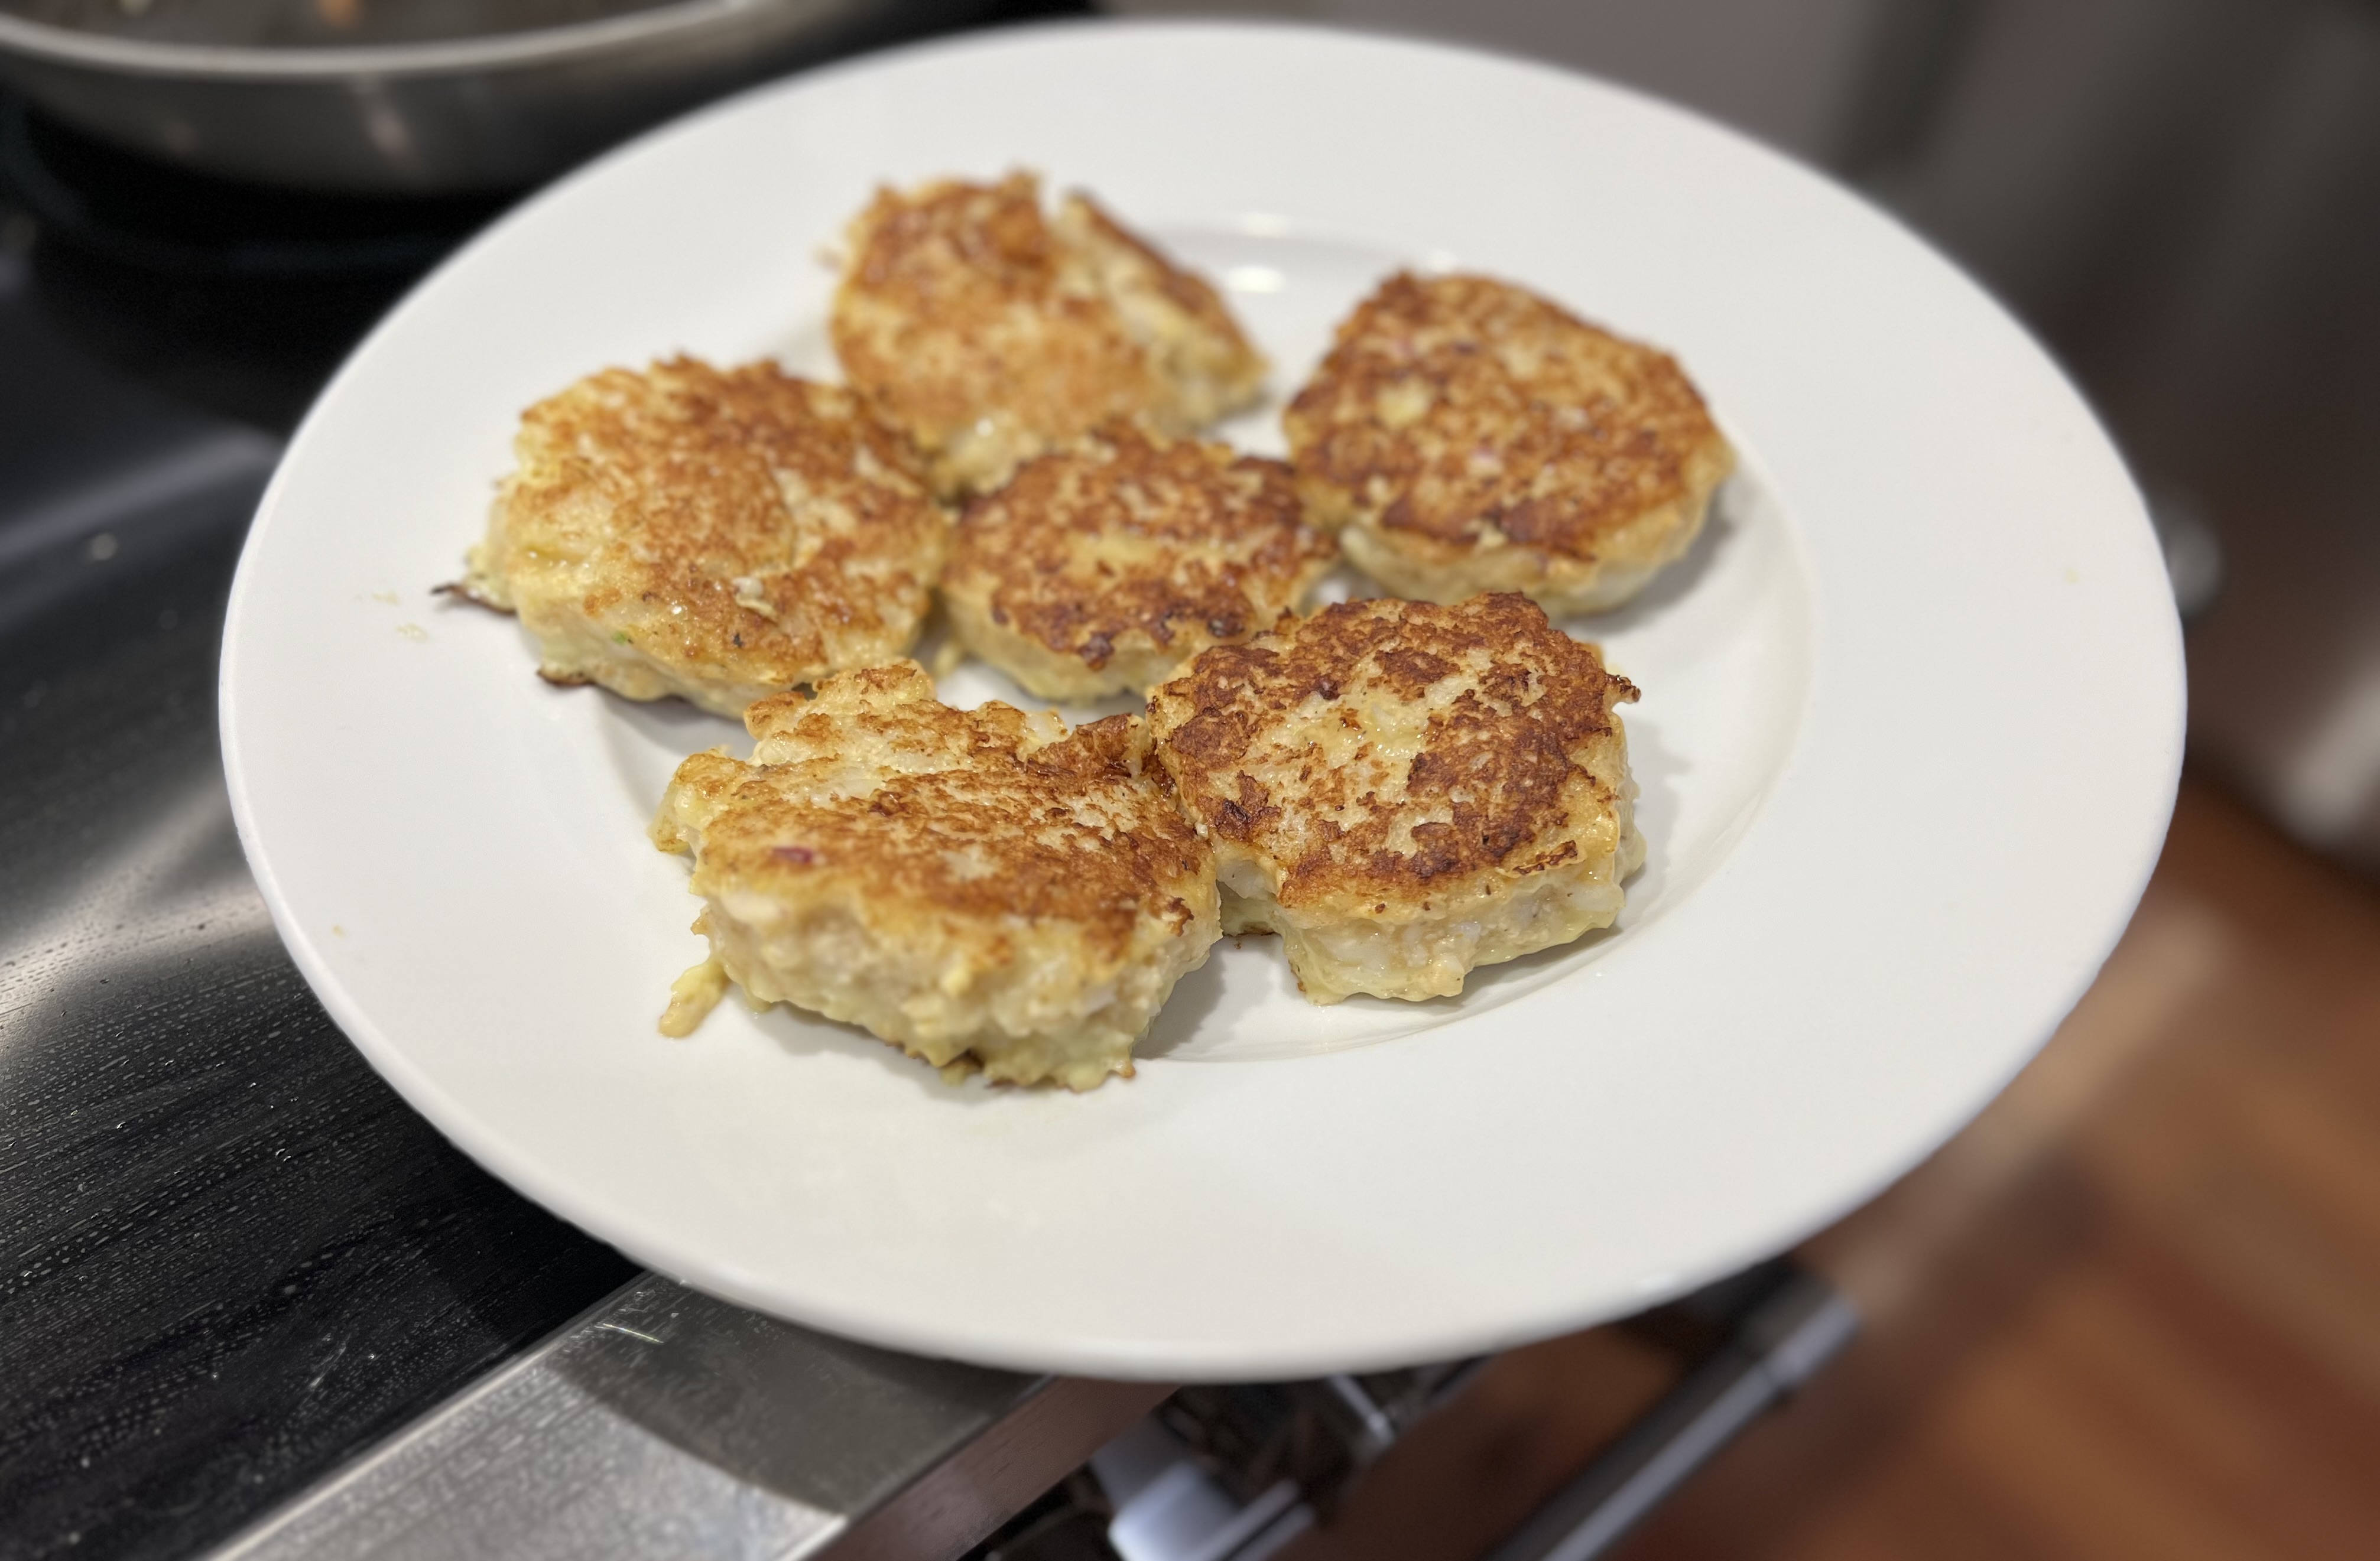
I had a few radishes, so I chopped them up and mixed them with the onion. (That’s what the little red flakes are.) But that’s just me!
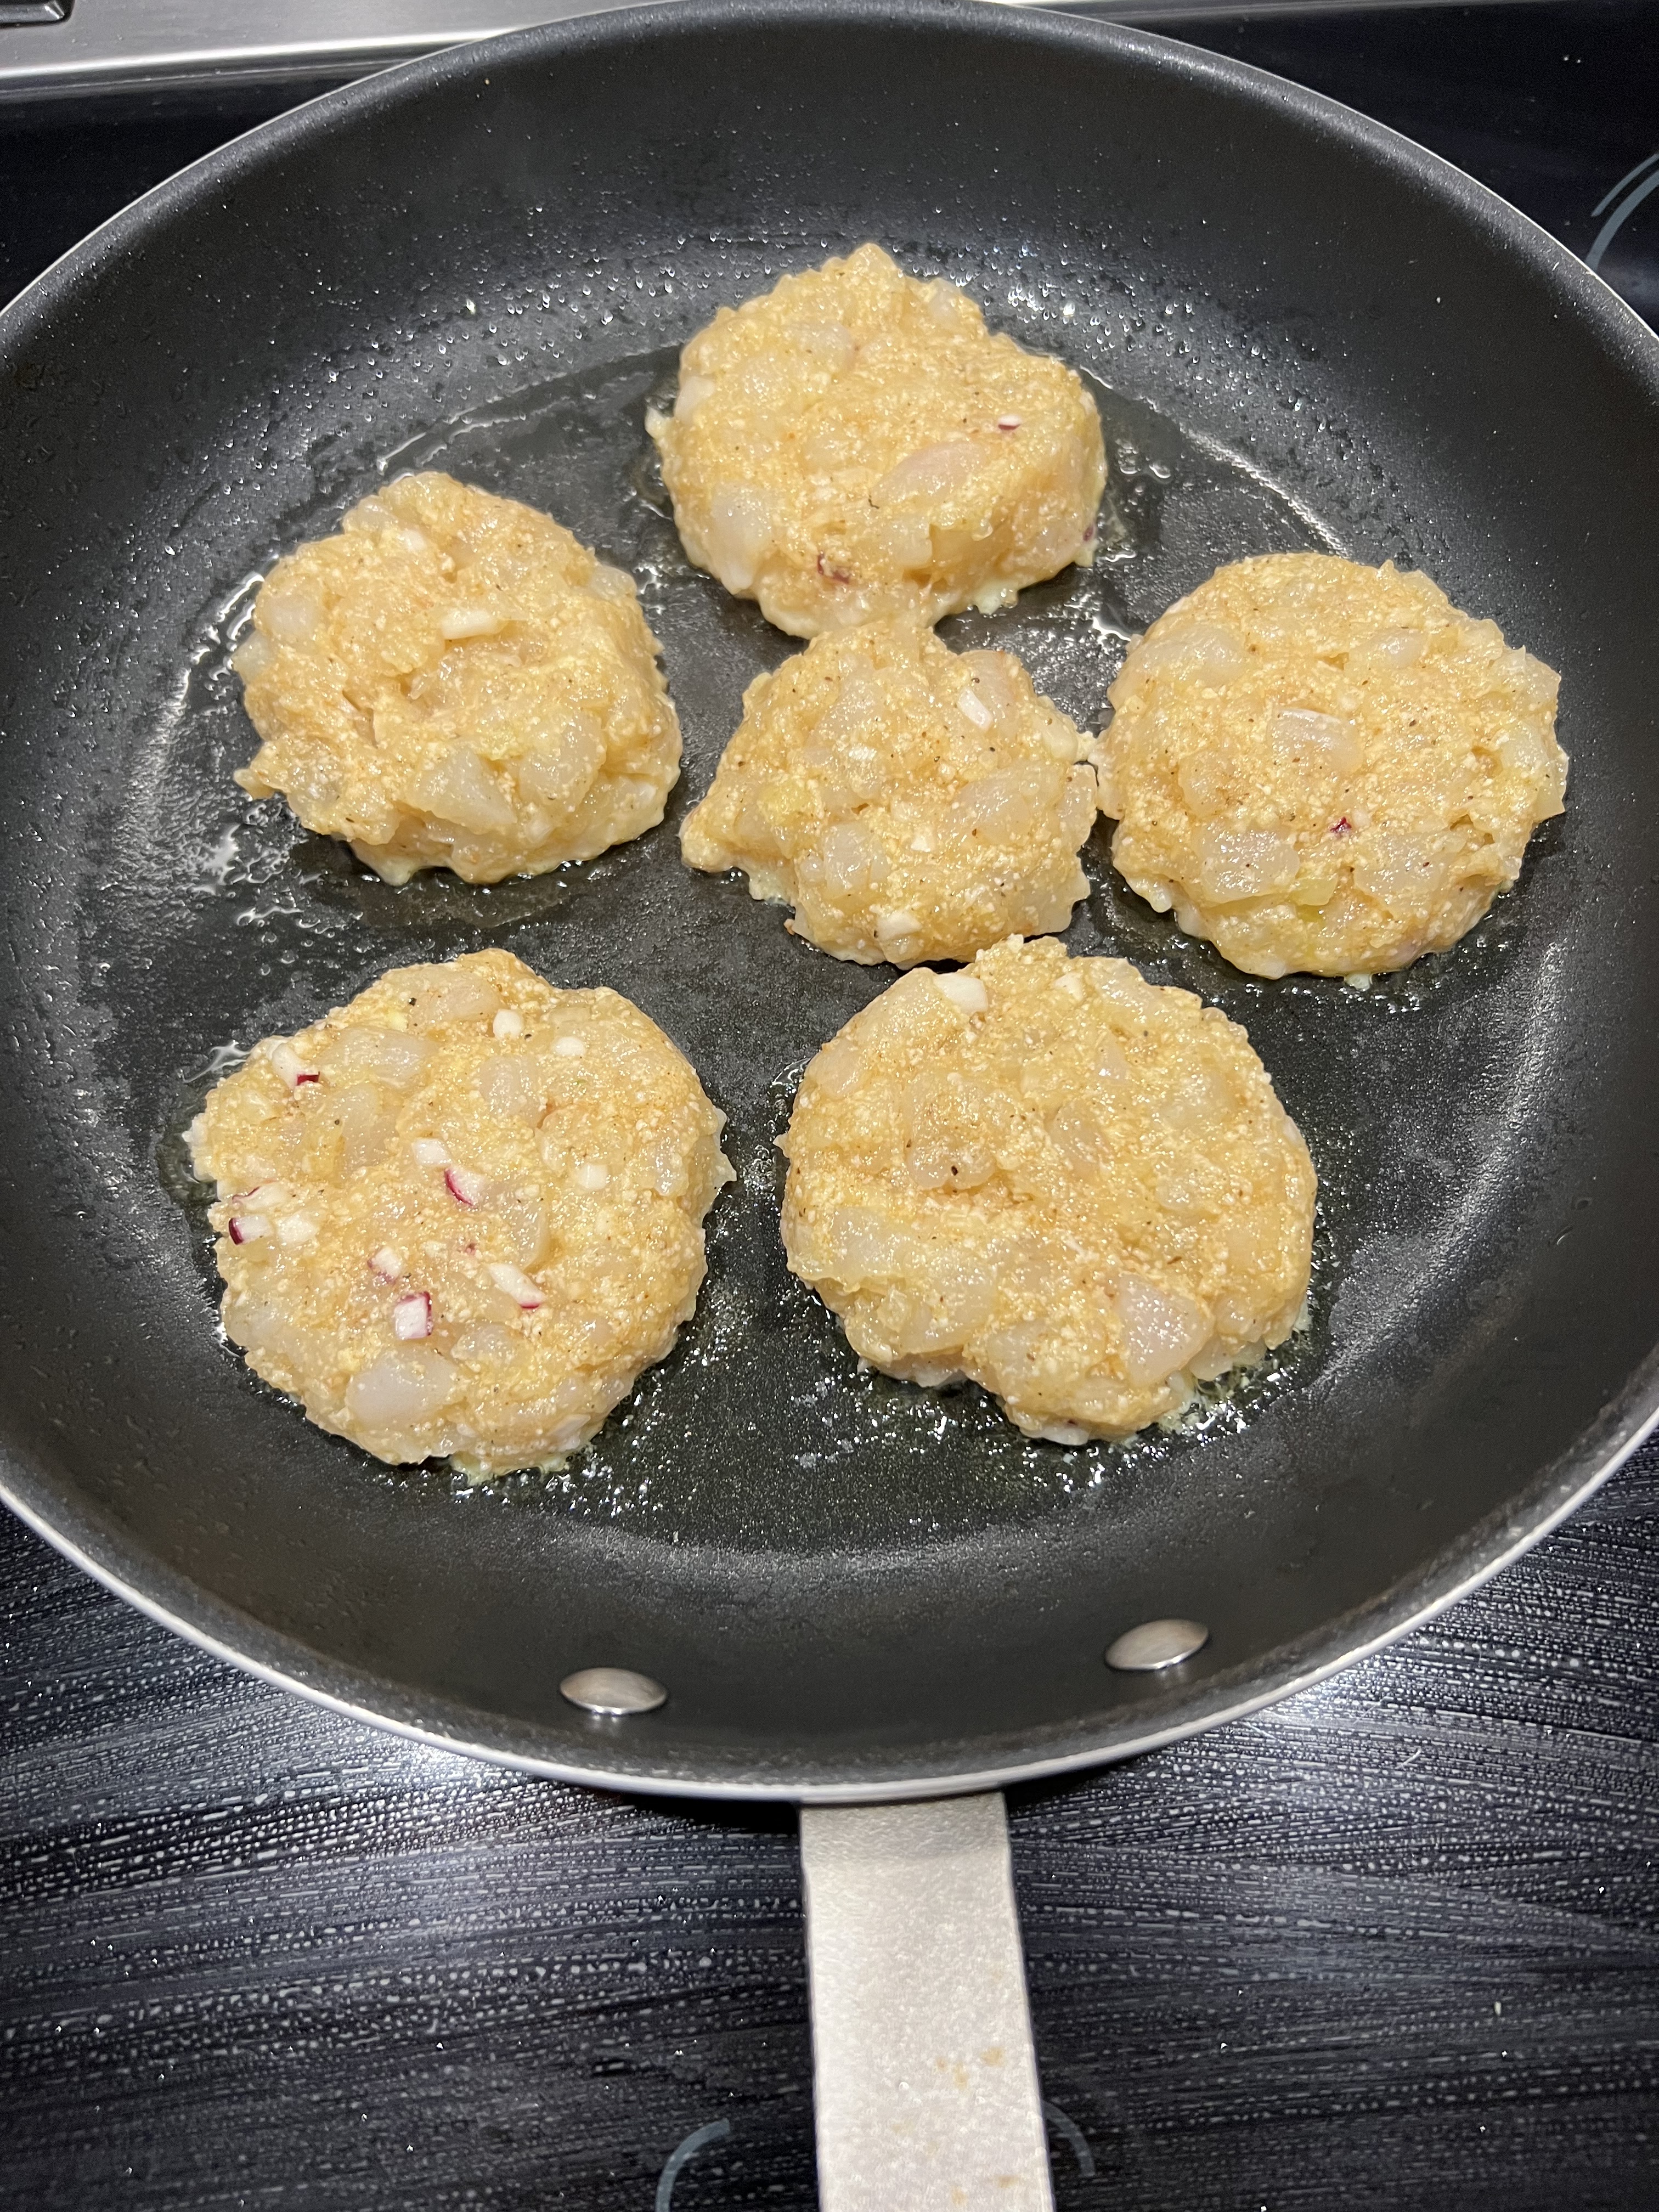
Refrigerate the mix for 10 minutes. Then remove it from the fridge and form the patties. (I like to use a 1/3 cup measure for this.) Once you’ve formed the patties, put them back in the fridge for another 10 minutes.
Heat the oil (I try to use as little as possible for calories’ sake) in a non-stick pan over medium-high heat. I like avocado oil, but use your favorite. And if you’re not on a diet, use 1/4 cup of oil to get a nice fry going. Carefully place the burgers in the pan (they’re fragile!) and cook them about 3 minutes per side.
Getting a good sear on the first side before flipping them will help hold them together. You don’t want to undercook the burgers, but you don’t want to overcook shrimp, either.
Sometimes a piece will break off. That’s OK!
I make a simple remoulade using 1 teaspoon Dijon mustard to 1 tablespoon mayonnaise. Another option is to combine mayo with some Old Bay seasoning.
It all started with a piece of Halloumi cheese my daughter and I had been keeping in the fridge for a couple of months. Halloumi is a Greek cheese used in saganaki, which is simply a dish of fried cheese. But it’s an absolute favorite starter of ours whenever we eat at a Greek restaurant.
I was already going to roast a slab of London Broil with potatoes, so I decided to use Greek-inspired seasonings. And then my daughter requested some tzatziki on the side. The meal was set!
The word “saganaki” means “little frying pan” in Greek, but it’s the name given to the dish of fried cheese, often flamed at the end with a little Ouzo (to the cheers of “Opa!” if you’re in a Greek restaurant.) Halloumi is the favorite cheese for saganaki, and it’s usually sliced and dipped in some egg, then tossed in semolina flour.
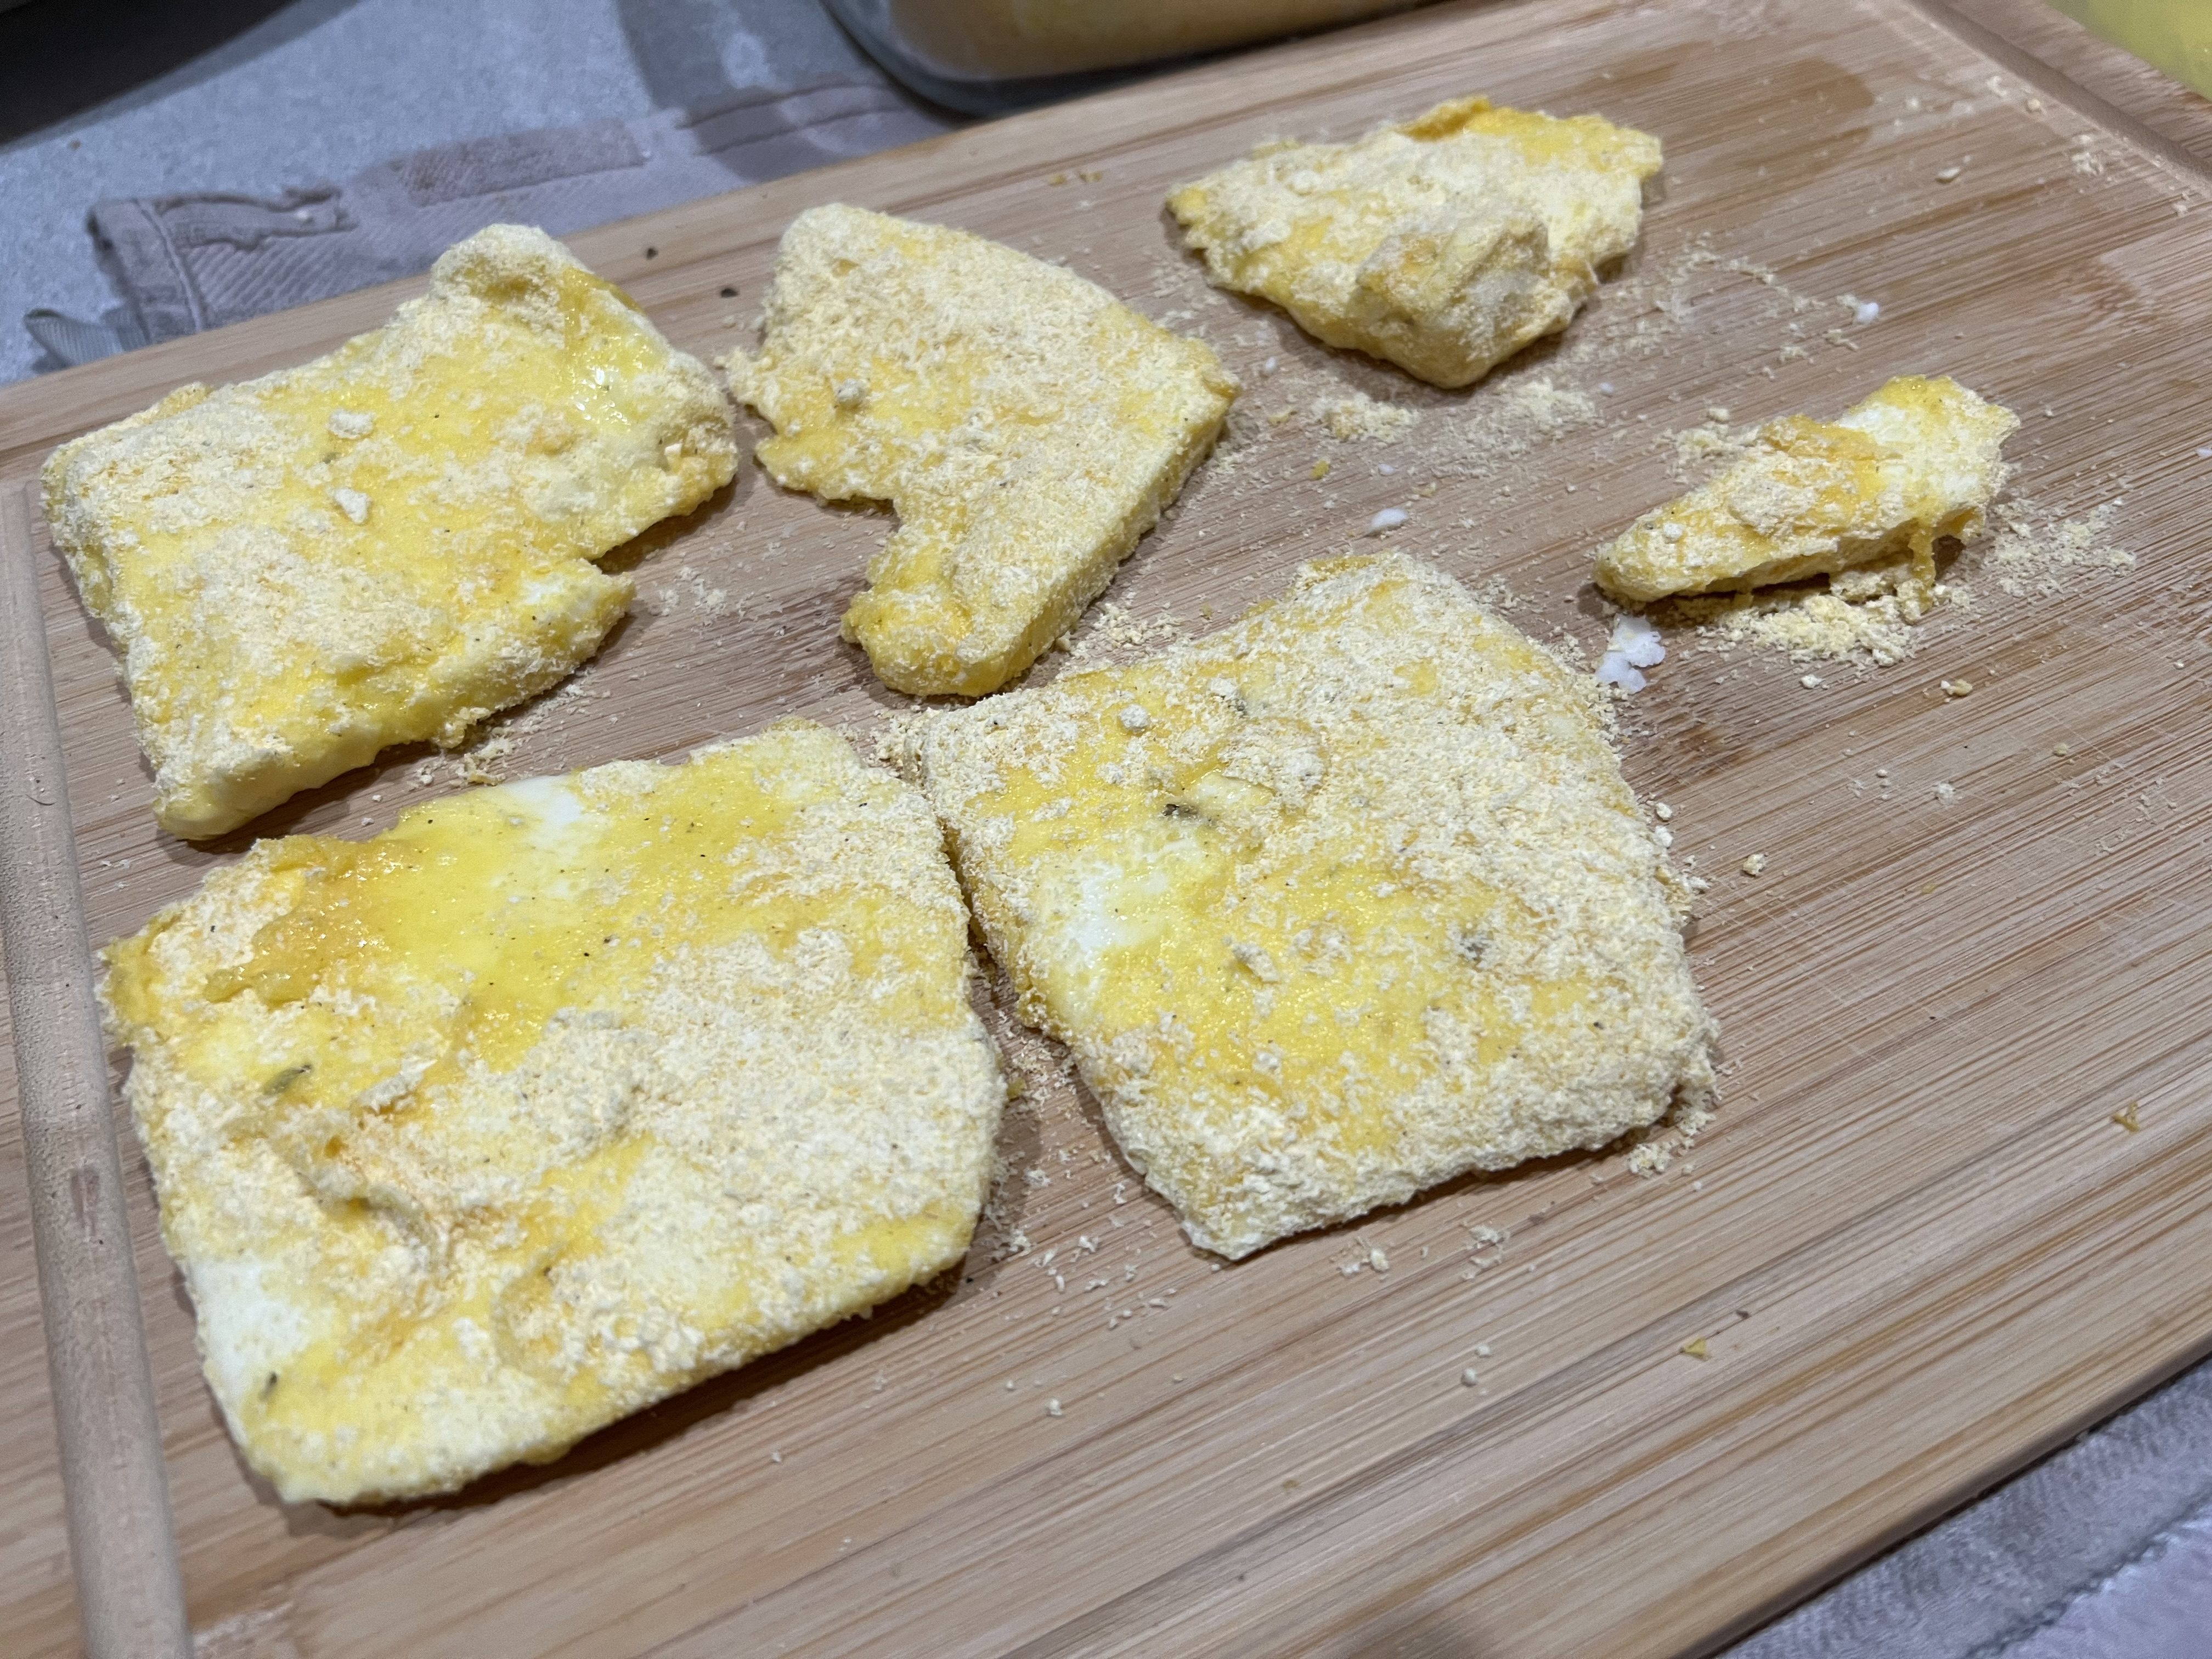
I didn’t have any semolina on hand, but I did have corn meal, so I milled it in my blender to give it a fine flour-like consistency, and placed it in a bowl, next to a bowl with an egg that I scrambled.
Dipped in egg and corn meal, and ready to go into the pan.
I dipped the cheese in a little scrambled egg, then the corn meal, shaking off any excess. I heated some grape seed oil in a pan, and placed the slices of cheese in the oil, flipping the cheese when it turned golden brown on the bottom.
Halloumi is a pretty dense cheese, so it didn’t get all gooey in the pan. I transferred it to a plate and we simply squeezed a little fresh lemon juice on it (no flames this time!) It was delicious!
I like to make tzatziki ahead of time, because I think it tastes better if the flavors are given time to mingle.
1 English cucumber, peeled 1 teaspoon Kosher salt, divided 3 garlic cloves, minced or through a garlic press 1 teaspoon white vinegar 1 tablespoon extra virgin olive oil 2 cups plain full-fat yogurt (Greek or non-Greek is OK) A handful of finely chopped fresh dill 1/4 teaspoon white pepper
I used a box grater to grate the cucumber. It releases a lot of water when you do this. I discarded the liquid. Then I added 1/2 a teaspoon of the salt to the cucumber, and let it sit in a sieve to drain for a few minutes. (The salt extracts even more moisture out of the cucumber.)
In a separate bowl, I combined all the other ingredients, including the other 1/2 teaspoon of salt.
Using a super-clean dish towel or cheese cloth, I placed the cucumber in the towel, and squeezed as much liquid out as I could. Then I added the cucumber to the rest of the ingredients in the bowl, and mixed well.
I stored the tzatziki in a covered bowl in the fridge until I was ready to use it.
I wasn’t expecting to “go Greek” when I bought the London Broil, but I made a simple marinade that worked really well.
1 tablespoon extra virgin olive oil 1 teaspoon red wine vinegar 1 teaspoon oregano 1 teaspoon Kosher salt 1/2 teaspoon fresh cracked black pepper
I place the London Broil in a baking pan. I combined the marinade ingredients and rubbed them all over the meat, letting it sit at room temperature for a couple of hours.
I preheated my oven to 400.
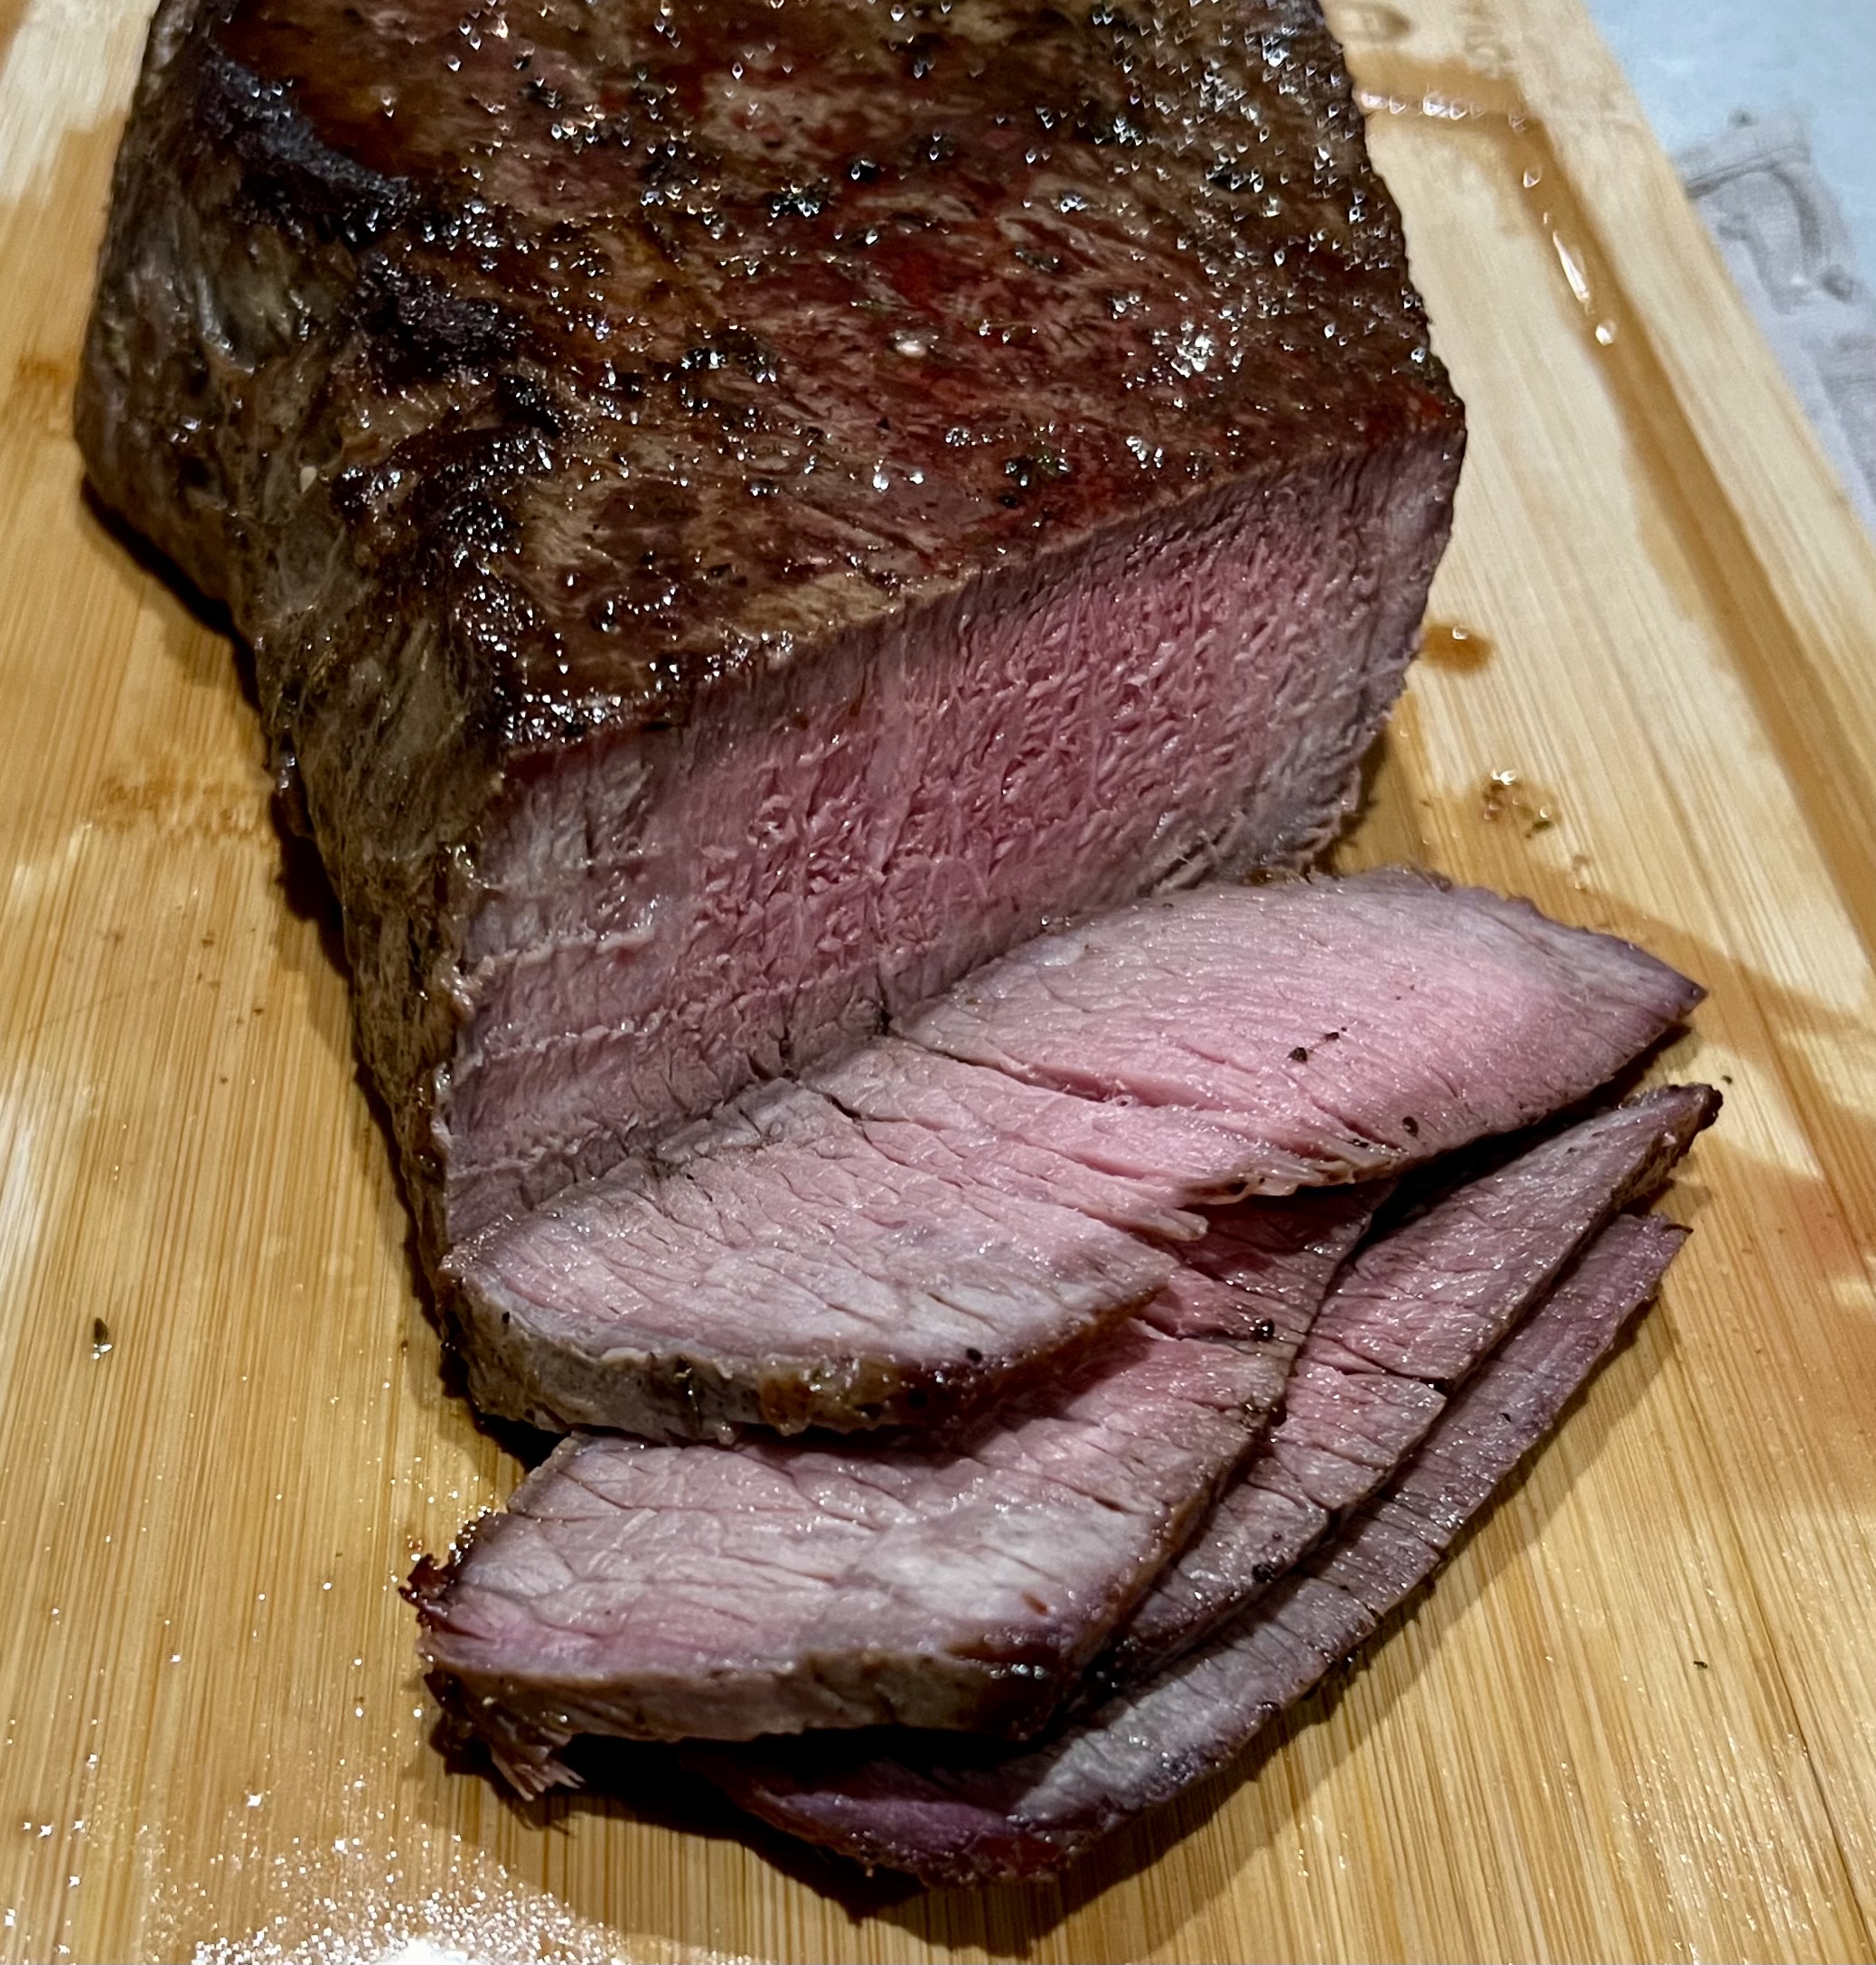
I added some fabulous pork leaf lard to a large hot carbon steel pan on the stovetop, and when the fat melted, I placed the London Broil in the pan, making sure it got a good, hard sear on all sides.
Once that was done, the pan went into the oven, and I kept an eye on it, flipping the meat once, and checking the temperature. Once the London Broil reached 120 degrees, I removed it from the oven and place it on a cutting board to rest.
Let’s not forget the potatoes! I takes about an hour form them to cook, so I back-timed it to be ready with the London Broil.
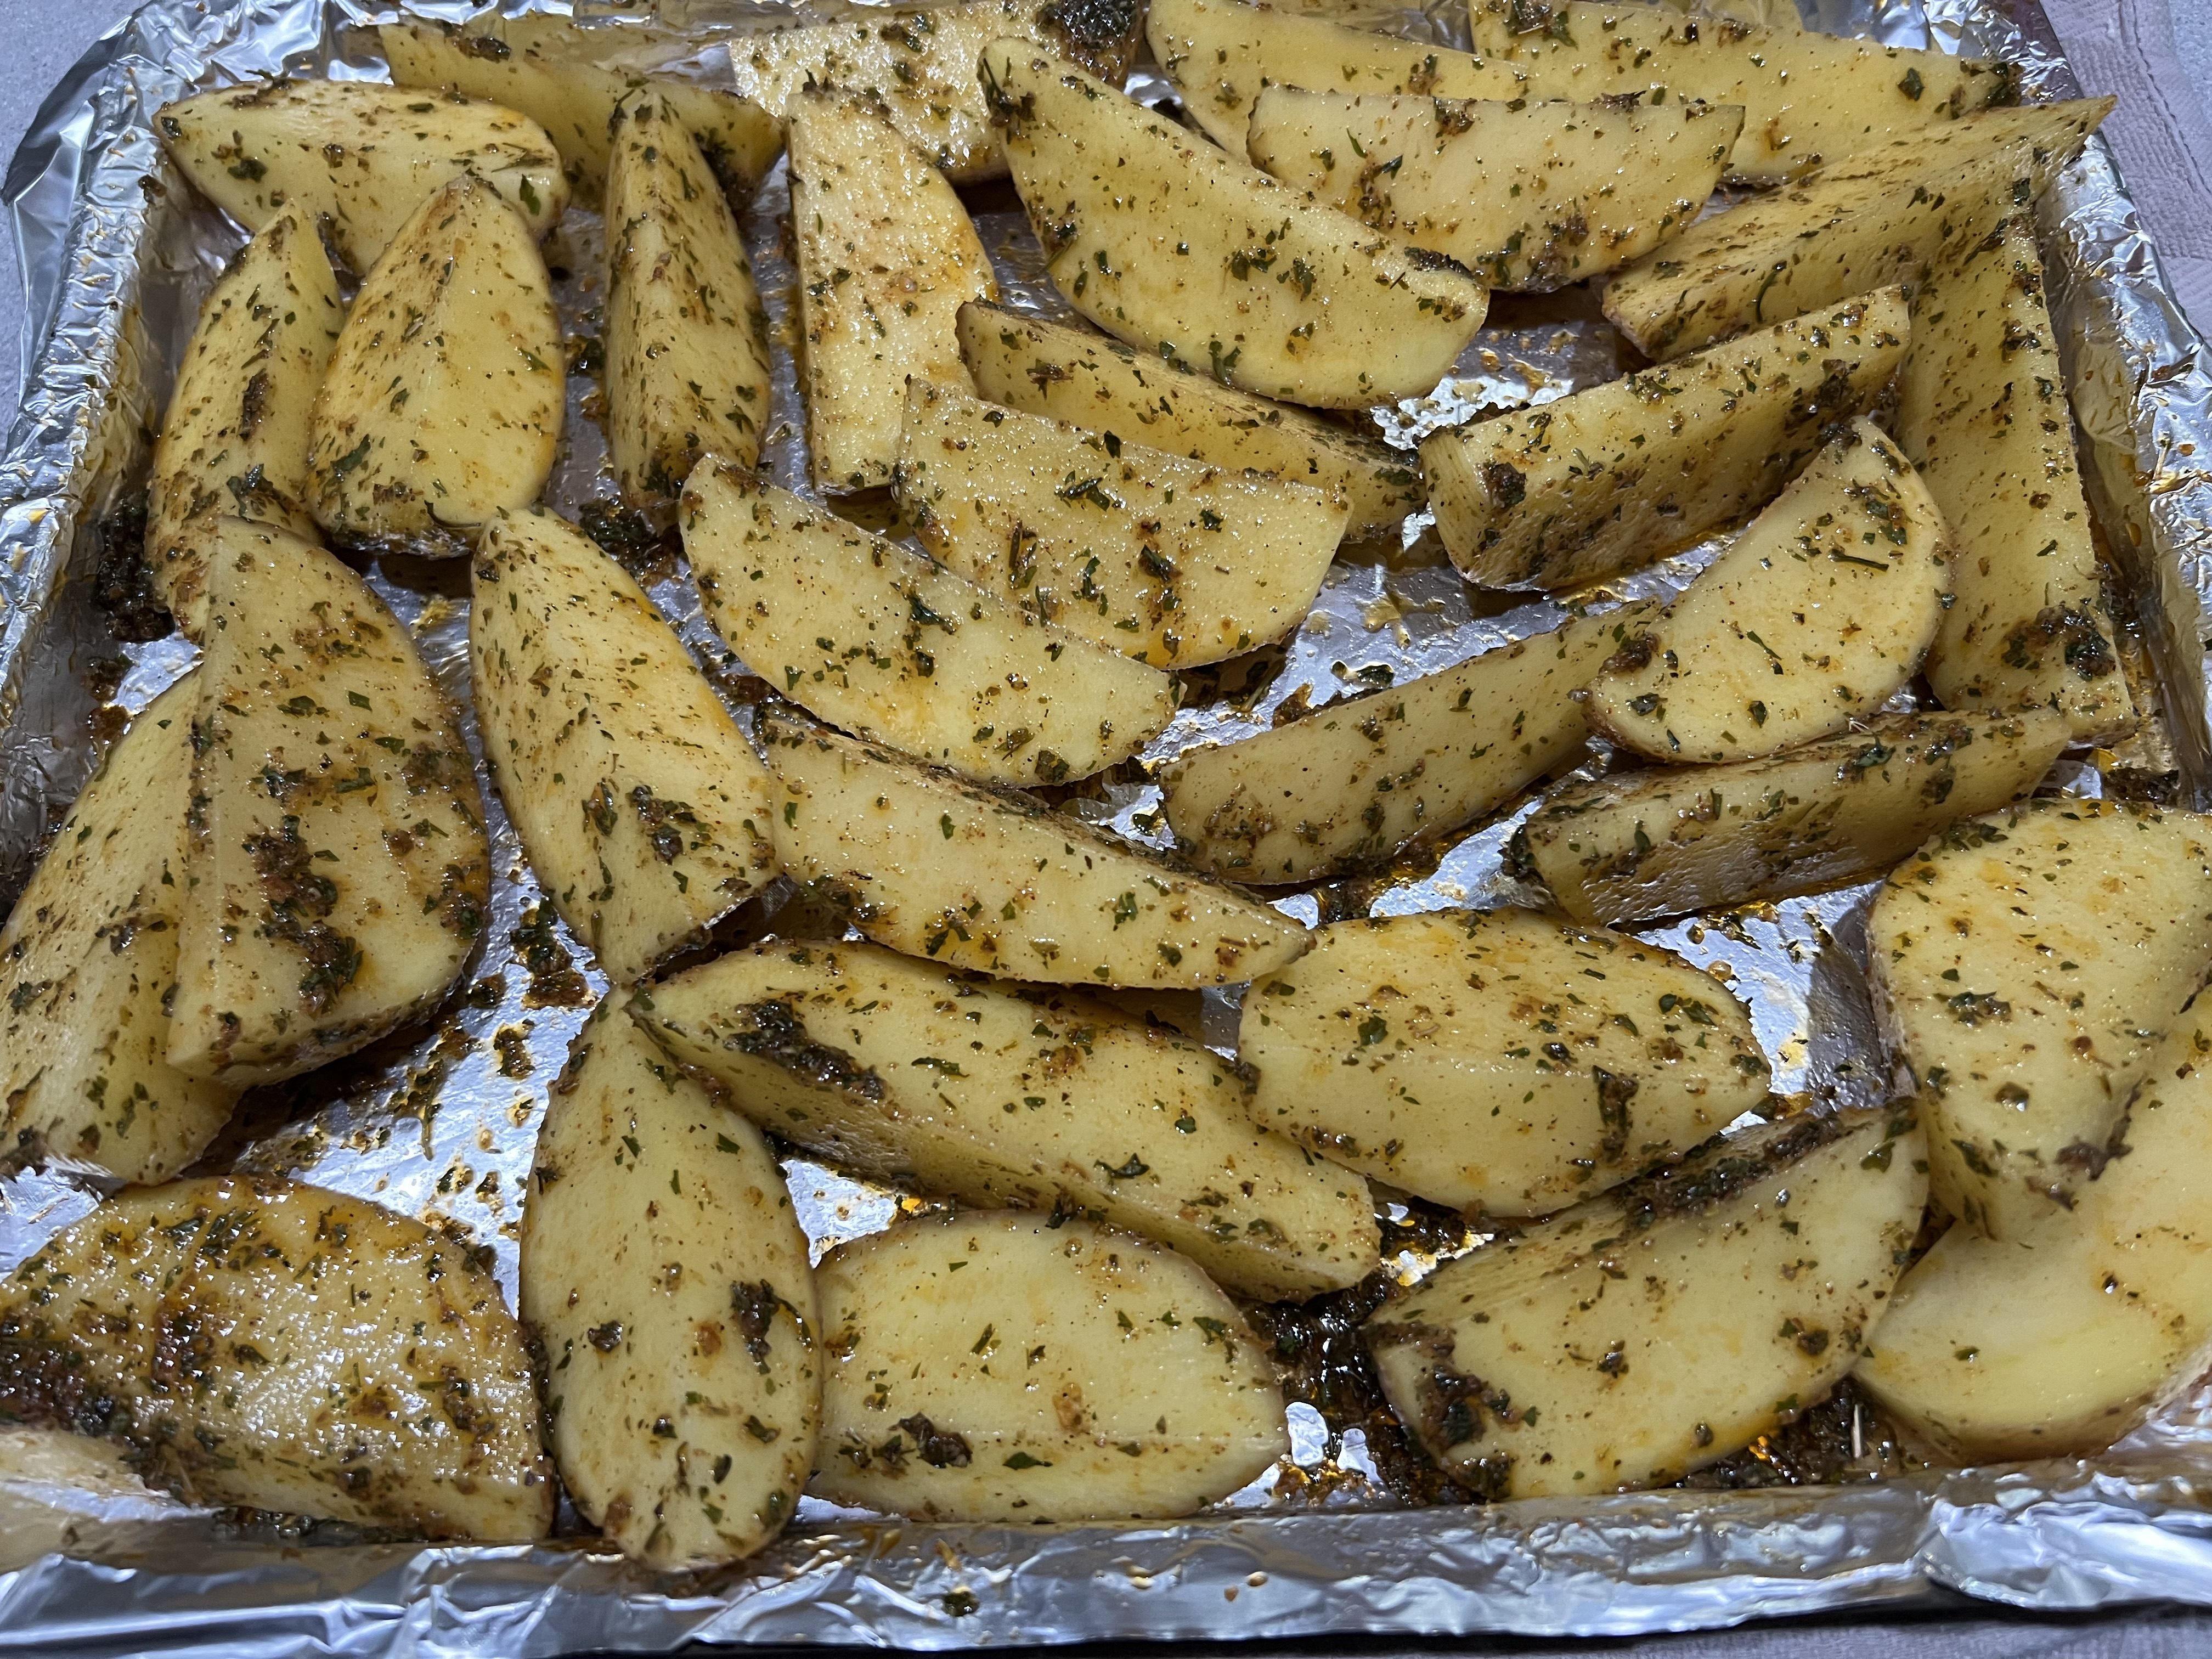
I washed the potatoes, peeling away any blemishes. Then I cut them into steak fries-size pieces and placed them in a bowl of cold water.
In a separate bowl, I combined all the other ingredients.
I preheated the oven to 375 degrees. (I used my toaster oven for this, since the big oven was being used for the London Broil.)
I drained the potatoes, then dried them with a clean towel. I placed them on a sheet pan, and added the seasoning ingredients, mixing really well with my hands. It’s messy, but you want every bit of potato to be covered with the oil and spices. Then I played the potato slices “on their backs,” sliced side up.
I baked them for 45–60 minutes, keeping an eye on them.
Had to have some veggies with this meal! I roasted a tray of cauliflower alongside the London Broil: I cut the cauliflower into bite-sized pieces and tossed them in salt, pepper, a little oil and Italian seasoning, and baked them at 400 for 30 minutes.