Author Archive

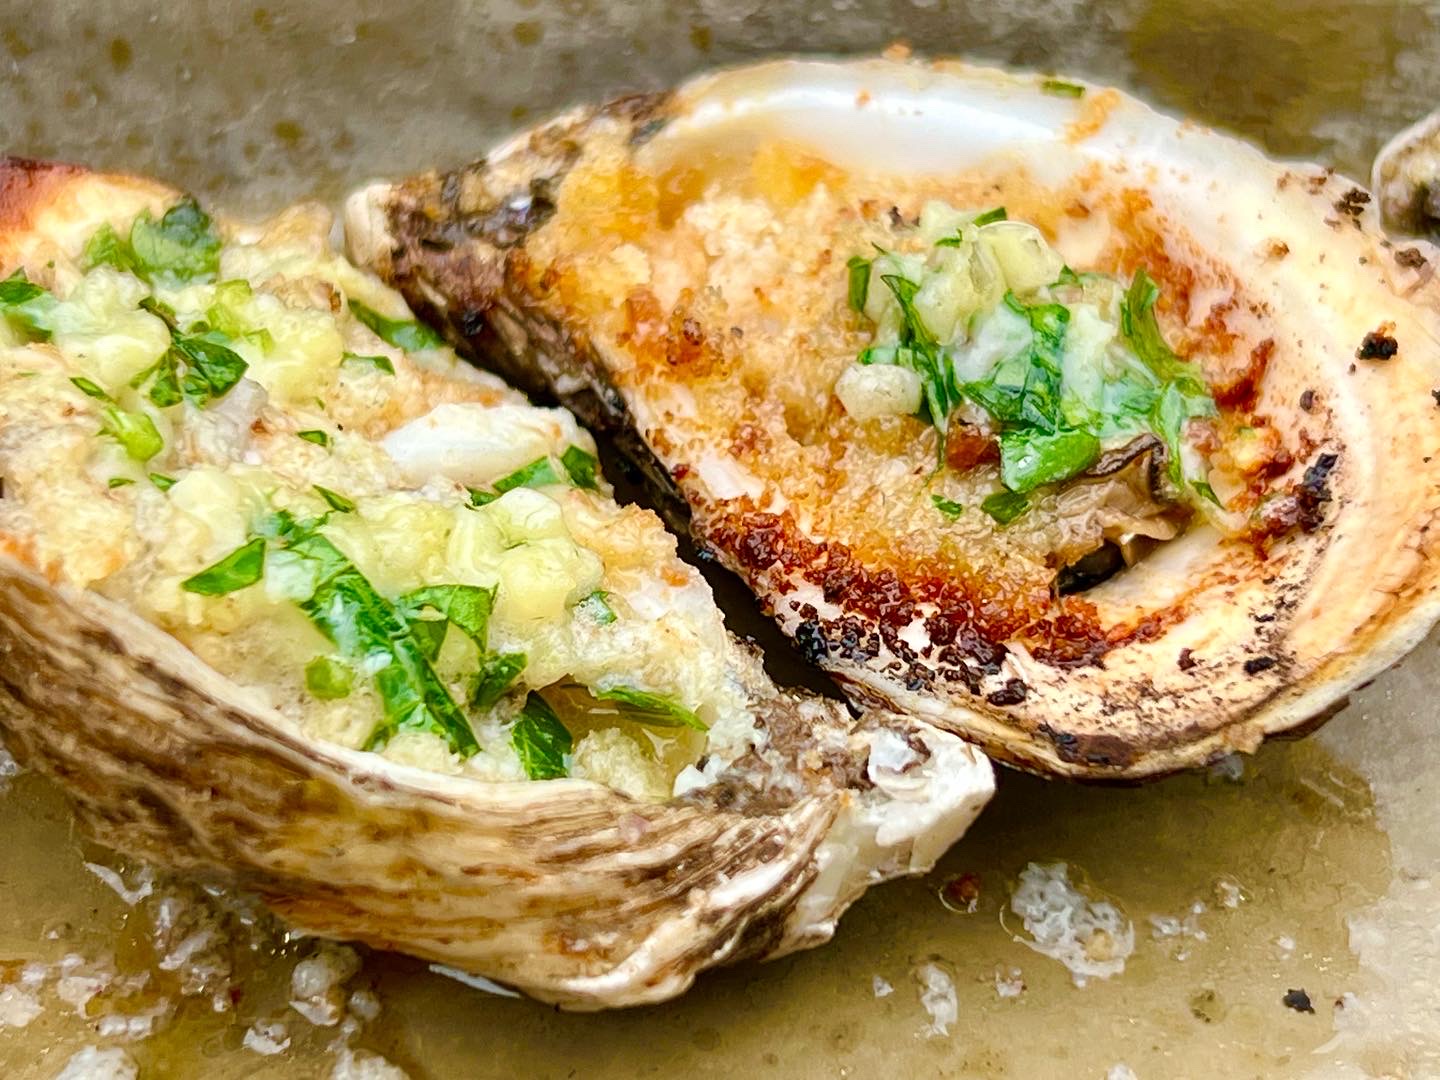
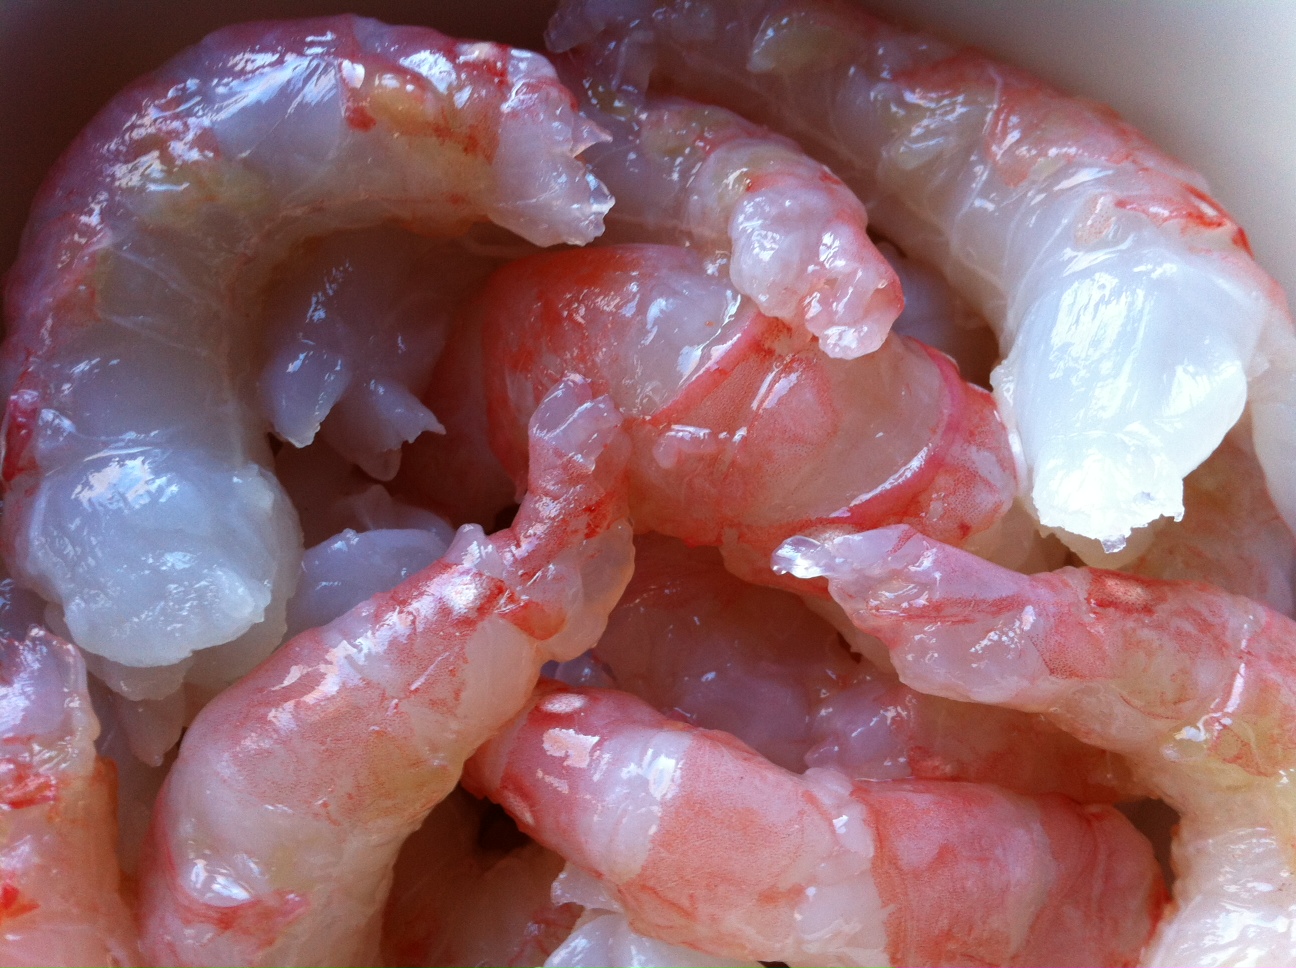
This is not your average shrimp! Found in the Pacific, from Southern California all the way up to Alaska, as well as Japan and Korea, these beauties, identified by the white spots on the sides of their first and fifth abdominal segments, live up to eleven years.

And here’s an interesting note: each spot prawn (or spot shrimp) spawns once as a male and one or more time as a female!


prawns 1


Having read so much about them, I ordered a pound and decided that I would get full use of the shrimp by peeling them and making an intensely flavored sauce out of the shells.

Peeling and de-veining was easy: the shells slipped right off the shrimp, and they were so beautifully clean, their were no veins to remove!

If you can’t get  hold of Wild Pacific spot prawns, shrimp or lobster will certainly do. Just remember to ask your fishmonger for wild-caught American shrimp, and not that horrible farmed stuff from Asia. If he doesn’t have it, shop elsewhere.


prawns 2


For the stock:

1 lb. wild Pacific spot prawns, thawed, peeled, and de-veined. Save the shells and container water, if any.
1 tablespoon extra virgin olive oil
1/2 carrot
1/2 celery stalk
1/4 onion
1 smashed clove garlic
4 whole peppercorns
2 teaspoons ketchup
1/2 sprig rosemary
1/2 sprig thyme
6 cups water


For the shrimp:

1/4 teaspoon salt
1/4 teaspoon freshly ground black pepper
1/4 teaspoon sugar
4 Tablespoons butter, room temperature
1 Tablespoon extra virgin olive oil


The final touch:

1 Tablespoon extra virgin olive oil
1 shallot, finely chopped
2 garlic cloves, pushed through a garlic press
2 Tablespoons butter, room temperature
1/8 cup fresh chives or scallions, finely chopped


1 lb. pasta


For the stock:

Peel and de-vein the shrimp. Keep the peeled shrimp in the fridge, covered.

In a pot, heat the olive oil and add the carrot, celery, onion, garlic, peppercorns, ketchup, rosemary, thyme and shrimp shells. Sauté them for a few minutes to get the flavors going. Add the container water, if any, and 6 cups of water. Bring it to a boil and let it simmer for 2 hours.

Strain the solids out and discard them. Place the stock in a smaller pot, and continue reducing it until about 1 cup of the stock remains.

Boil the pasta in well-salted water and remove it from the water before the al dente stage. (It will cook more later.) Strain it and set it aside.


For the shrimp:

Combine the salt, pepper and sugar with the prawns in a bowl and toss to coat them evenly.

In a large sauté pan, heat the butter and olive oil on medium-high heat. Add the shrimp and cook them until lightly caramelized and almost cooked all the way through. Do not overcook them! Set them aside.


The final touch:

In the same large sauté pan that you cooked the shrimp, heat 1 tablespoon of olive oil and add the shallot. Sauté for 1 minute, then add the garlic. Sauté for 2 more minutes, then add some of the stock, the shrimp, the pasta, and the butter, and mix well. If it’s dry, add more of the stock until the pasta is coated, but not dripping. Add salt and pepper to taste. Garnish with the chives.


prawns 3

Serve immediately!


My daughter and I recently had our quarterly “fodder/dodder dinner” at our Providence Capital Grille. Their signature cocktail, the Stoli Doli, reminded me it was time to make a new batch of what I like to think is an upgraded version: my Velvet Elvis.

A Stoli Doli is simply Stoli vodka that has been infused with fresh pineapple. If you sit at the bar at the Capital Grille, you won’t be able to miss the very large jar of freshly-cut pineapple pieces swimming in vodka. They literally pour it “from the tap,” and serve it straight up, like a martini, or on the rocks. It’s delicious, and I’ve certainly had my share of them.

I decided to make my own at home one day, to serve to my friends at an upcoming party. But to my disappointment, I didn’t have any Stoli vodka in the house. (An embarrassment to most Lithuanians.) But…I found a bottle of Stoli Vanil, the vanilla-flavored vodka, and it was a real game-changer! I used that instead of regular Stoli and I came up with a sweeter, smoother drink that is now legendary among my friends.

VELVET ELVIS

2 ripe, sweet pineapples, peeled, cored, and sliced
1.75ml Stoli Vanil

Find a gallon-sized glass jar with a lid. Peel, core and slice the pineapples and drop the pieces in the jar. Pour the vodka in, mix well, and seal the jar. Keep it at room temperature for 7–10 days, giving it a gentle shake every day.

After 7–10 days (don’t worry…a little longer won’t hurt anything), strain it, squeezing the pineapple pieces to get every bit of liquid out. Discard the pineapple pieces. (As much as you might think they would be fun to munch, they’ve given up all their flavor to the cocktail, and taste terrible!)

Keep the Velvet Elvis refrigerated. Serve with rocks (or 1 big rock!), or shaken and poured into a martini glass.

As a martini, or on the rocks!

Since it’s Memorial Day weekend, a grilling blog is in order. And in case of rain, this works indoors as well.

I rarely order beef at a restaurant, because I can usually make a better steak at home. For one thing, I use humanely raised grass-fed beef, something few restaurants offer. And I can cook it for less than a third of the price of a steakhouse. Granted, most steakhouses dry-age their beef, a time-consuming process of taking slabs of beef and keeping them in a fridge for weeks until a certain amount of moisture is sucked out of the meat, intensifying the flavor. I’ve done that at home in my fridge, but it takes a lot of time and effort.

There is one steak that I couldn’t match for the longest time, and that was the Capital Grille’s bone-in Kona crusted dry-aged NY strip. I would have dreams about that steak! It was time to find a way to make something that would satisfy my craving for that amazing steak at home.

Looking at a variety of coffee rub recipes on-line, I started the slow and steady process of combining ingredients in just the right proportions, tasting as I went. What I came up with really accentuated the flavor of the beef I was cooking, better than I had imagined!


img_0100

3 tablespoons brown sugar
1 tablespoon Kosher salt
1 tablespoon ground coffee (use your favorite)
1 teaspoon granulated garlic
1 teaspoon granulated onion
1 teaspoon unsweetened cocoa powder


Combine the ingredients, mixing well, and keep them in a tightly sealed container at room temperature.

The secret ingredients are the brown sugar and the cocoa. The brown sugar gives the steak a caramelized crust when cooking, and the cocoa rounds out the flavors and gives the beef an extra “umph!”

When using, sprinkle the seasoning liberally on both sides of the steak before cooking. When cooking indoors, I like to add bacon fat to a hot cast iron skillet, searing the steak on all sides, and then finishing it in the oven. But let’s face it: nothing beats the grill!


img_0104

ASIAN-STYLE ROASTED PORK

Posted: May 26, 2022 in Uncategorized

I love pulled pork, or pork roast…cuts that use inexpensive, fatty cuts of meat that are full of flavor as long as you roast them low and slow.


A very special cut of pork!

I recently received a gift of a very fancy cut of pork: Spanish Iberico, where the pigs roam freely, feasting on acorns. It’s some of the best pork you can buy.

But even with a much less expensive cut of pork, like a pork shoulder, you can achieve some delicious results as long as you give it time: time for the marinade to get absorbed into the meat, and time for the meat to cook slowly at a low temperature. Low and slow is key to melting the fat and gristle, and making the meat as tender as it can be.

The pork, before marinating.

Just like with a basic pulled pork recipe, the spices you use make all the difference. I usually make a spice rub that I generously rub all over a pork shoulder when I’m preparing pulled pork. Then it goes in the smoker for as much as 10 hours, depending on the size of the shoulder.

In this case, I’m using a marinade, which needs to be absorbed into the meat. So if I was using a larger cut, I would butterfly it, and marinate it that way. The Iberico pork that I used in this recipe was under 2 pounds, so I left it whole.

I combine all the marinade ingredients into a bowl…

3 tablespoons Chinese Five Spice powder
3 tablespoons soy sauce
2 tablespoons hoisin sauce
2 tablespoons maple syrup
1 tablespoon Chinese chili garlic sauce
1 tablespoon rice vinegar (same thing as rice wine vinegar)
1/2 an onion, chopped
3 garlic cloves, chopped (optional)


Once the piece of pork has been trimmed of any obvious hanging fat (remember, you don’t need to butcher the meat…the fat and gristle will melt while cooking and add flavor), place in a Ziplock-type freezer bag, and pour in the marinade. Squish the bag around carefully, to make the marinade makes good contact with the meat. Place the bag in a bowl (to prevent accidents) and place the bowl in the fridge overnight. Squish the bag around every few hours.


Pre-heat the oven to 275 degrees. Use a baking pan large enough to hold the roast.

Remove the roast from the marinade, and wrap it in aluminum foil. Place the foil on the baking pan and into the oven. The amount of time you cook the pork will depend on the size of the roast, so use a thermometer to check if the meat is ready. My roast was ready in less than 2 hours, but it was a small one.


Halfway through cooking, while I was checking the temperature, I opened the foil and basted the roast with some of the marinade. Then I re-wrapped it, and placed it back in the oven.


I save the marinade to brush on the roast halfway through the cooking process. I could also use it as a dipping sauce when serving, but if I did that, it’s important to place the marinade in a saucepan and bring it to a boil to kill all germs! Remember, that marinade was swimming around raw pork! Once it has boiled for a bit, you can set it aside to cool to room temperature.


Done!


Pork should be cooked to a temperature of 160 degrees, so I remove it from the oven at 150 degrees, knowing the temperature will still rise as the meat rests.


Let the meat rest for at least 30 minutes.


These pancakes, based on a recipe from chef April Bloomfield (The Spotted Pig and The Breslin in NYC), are made from fresh homemade ricotta cheese. Light as air…and really delicious! I’ve made a few batches of fresh ricotta cheese in my day, but when the family has a craving for these pancakes at the last minute, a good-quality store-bought ricotta cheese will do.


1 1/2 cups all-purpose flour (I use Cup4Cup GF flour if I want to make these gluten-free)
1/4 cup yellow cornmeal
2 tablespoons sugar
1/2 teaspoon salt
1/2 teaspoon baking powder
1/2 teaspoon baking soda
2 cups milk
2 large eggs, separated
1/2 cup fresh ricotta


In a large bowl, combine the flour, cornmeal, sugar, salt, baking powder and baking soda. In another large bowl, whisk together the milk, ricotta,  and egg yolks. Fold the wet ingredients into the dry ingredients.

In a large stainless steel bowl, whisk the egg whites until they are stiff, but not dry. Fold gently into the batter.

Spray a non-stick griddle with a little cooking spray and drop about 1/4 cup of batter per pancake. Cook over medium heat for about 2 minutes per side, until golden and fluffy.

pancake

CHAR-GRILLED OYSTERS

Posted: May 19, 2022 in Uncategorized

I recently visited New Orleans, and it was great to see that many of the old food destinations were still there: the Napoleon House, Café Dumonde, Acme Oyster House, and across the street from it: Felix‘s Oyster House.

My friend, Rick, saw that I was in NOLA, and told me I had to try the char-grilled oysters at Felix‘s. He hadn’t been there, but he read a lot about them and they were supposed to be amazing.  Well, that’s all the encouragement I needed, and I made a beeline to Felix’s that very day.


I was not disappointed!

When you think about it, it’s no great culinary feat to grill an oyster. But yet, I never thought of doing it on my own. The dozen oysters I devoured that day were buttery, garlicky, with a hint of char and smoke that made them absolutely delicious, quite easily the best oysters I’ve ever had in my life.

I knew that as soon as I came home from this trip, I would have to try to make these myself. I have to say I came pretty darn close!

If you don’t use a charcoal or wood fire to make these, you’re simply leaving out one of the most important ingredients to the entire recipe. A gas grill or a kitchen stove can cook an oyster, but the only way you can take it to the next level is by putting it on open flame, a wood-burning flame.

This recipe is good for about a dozen oysters.

The first step is to get your hardwood charcoal fire started. I use a charcoal chimney and newspaper–never any lighter fluid.

Once the coals are lit, head to the kitchen…


4 tablespoons salted butter
2 tablespoons minced garlic
2 tablespoons fresh Italian parsley, finely chopped
2 tablespoons Parmesan cheese, grated (I use Parmigiano Reggiano)
4 tablespoons breadcrumbs


Combine the butter, garlic, parsley, and cheese in a sauté pan over medium heat. All you’re looking to do is to melt the butter, so once it’s melted, take the pan off the heat and this mix is ready to use.

Shuck your dozen oysters. Remember: they will shrink a little bit while cooking, so don’t be afraid to go for bigger ones.

Lay the opened oysters in a pan, carefully trying to preserve as much of the oyster liquor (liquid) in each shell as possible.

When the hardwood charcoal has heated up, and you’ve spread the coals evenly on your grill, you are ready to cook the oysters. You want the grill to be hot.

You don’t need to put the oysters directly on the hardwood charcoal. Putting a grill over the coals is fine, and it keeps the oyster shells from tipping over.


Before placing the oysters on the grill, sprinkle each one with some of the breadcrumbs. Then place the oysters on the grill, being careful not to burn your hands! 


Using a spoon, pour some of the butter mixture into each oyster shell. It will flame up! That’s OK. Use up the entire butter mixture for all 12 oysters.


The oysters are ready when you see that golden brown color all around the edges of the oyster shell, when most of the liquid in the shell has evaporated. Don’t let them dry out completely.


Using tongs, remove the oysters from the flame and enjoy! Just be careful…they can be lava hot!


Chicken thighs are the best: their fat content makes them perfect for the grill because they don’t dry out like chicken breasts do. And I always leave the skin on for extra crispy flavor. I bought a package of chicken thighs the other day and decided to go Asian with my flavors, baking them in the oven so that they cook evenly, and then finishing them off on the grill to get that delicious smokey flavor and char.

I marinated the chicken thighs in the sauce for several hours before cooking. If you have the opportunity to marinate them overnight in the fridge, that’s even better. Just remember that if you want to use the marinade as a dipping sauce later on, divide it in half from the very beginning. Use half to marinate the chicken, and save the other half for later. If any of the marinade touches raw chicken, you can’t use it as a dipping sauce. (Salmonella!) So keep them separated.


3/4 cup ketchup
1/2 cup soy sauce
1/2 cup hoisin sauce
1/2 cup maple syrup
1/4 cup Chinese chili garlic sauce
1/4 cup brown sugar
1 tablespoon rice vinegar
2 garlic cloves, minced

Combine all the ingredients in a bowl, mixing well. Use half of it to marinate the chicken, and save the other half for dipping sauce or brushing on to the chicken later.


The Bell & Evans chicken thighs that I bought came in a package that works perfectly for marinating. One less thing to clean up!

If you’re cooking the same day, let the chicken marinate at room temperature for three hours. If you’re marinating overnight in the fridge, let the chicken come to room temperature before cooking.


Preheat the oven to 325°.

Cooked. Now they go to the broiler or the grill.


Place the chicken thighs on a sheet pan and bake until they are cooked through.…but not overcooked. If you’re not using the grill, place them under the broiler and watch them carefully, as the sugars in the marinade could burn. Give them some nice char.


If you’re using the grill, light a fire and spread the coals so that you have a medium-hot flame. Grill the chicken thighs until they have a beautiful char on them, being careful not to burn them. Brush more of the marinade on them as they cook, if you like.


Serve the chicken thighs with the dipping sauce on the side.

If I asked you to name a cocktail that defines New Orleans, you might say The Hurricane. After all, it’s a tourist favorite at the famous Pat O’Brien’s on Bourbon Street.

But the official cocktail of New Orleans is the Sazerac, a potent concoction that was created early in the 19th century by Antoine Amédée Peychaud, a Creole apothecary who emigrated to New Orleans from the West Indies and set up shop in the French Quarter. He was known to dispense a proprietary mix of aromatic bitters from an old family recipe, now famously known as Peychaud’s bitters.

Sazerac ingredients.

Around 1850, Sewell T. Taylor sold his New Orleans bar, the Merchants Exchange Coffee House, to become an importer of spirits, and he began to import a brand of cognac named Sazerac-de-Forge et Fils. Meanwhile, Aaron Bird assumed proprietorship of the Merchants Exchange and changed its name to Sazerac Coffee House

Legend has it that Bird began serving the “Sazerac Cocktail,” made with Sazerac cognac imported by Taylor, and allegedly with bitters being made by the local apothecary, Antoine Amedie Peychaud. The Sazerac Coffee House subsequently changed hands several times, until around 1870, when Thomas Handy became its proprietor. It is around this time that the primary ingredient in a Sazerac changed from cognac to rye whiskey, due to the phylloxera epidemic in Europe that devastated the vineyards of France.

At some point before his death in 1889, Handy recorded the recipe for the cocktail, which made its first printed appearance in William T. Boothby’s “The World’s Drinks and How to Mix Them” in 1908, although his recipe calls for Selner bitters, not Peychaud’s. After absinthe was banned in the United States in 1912, it was replaced by various anise-flavored liqueurs, most notably the locally produced Herbsaint, which first appeared in 1934.

In March 2008, Louisiana state senator Edwin R. Murray filed Senate Bill 6 designating the Sazerac as Louisiana’s official state cocktail. The bill was defeated on April 8, 2008. But, after further debate, on June 23, 2008, the Louisiana Legislature agreed to proclaim the Sazerac as New Orleans’ official cocktail.

The Sazerac, served at the Sazerac Bar in New Orleans.

It’s always more fun when someone makes your drink for you!

Peychaud’s bitters are now owned by the Buffalo Trace distillery, home of many a fine bourbon, and also the makers of Sazerac rye, a registered trademark. So the Sazerac Bar has to pay a fee to use the name. That also explains why they use Sazerac rye in their version of this classic cocktail.

But like many popular drinks, everybody has their own version of a Sazerac. In fact, if you Google the drink, you’ll find dozens of versions: with cognac, rye, or bourbon (or even a combination)…with a sugar cube or simple syrup…and with a variety of absinthes.

Note: you can buy simple syrup–I prefer it in this recipe over sugar cubes–but it’s easy to make at home. Simply combine a cup of sugar with a cup of water in a saucepan and heat it until all the sugar dissolves. I keep my simple syrup in the fridge in a sealed container.


2 oz. rye whiskey (I use Old Overholt )
1/2 oz. simple syrup
3 dashes Peychaud’s bitters
Absinthe, to rinse, about 1/4 oz. (I use Herbsaint)
garnish lemon peel

Add ice to a rocks glass to chill it. (I also put it in the freezer.)

While it’s chilling, get a cocktail mixing glass, add some ice, and combine the rye, simple syrup, and the bitters, and stir. (Thirty times, according to tradition.)

Take the rocks glass out of the freezer, pour the ice out, and pour the Herbsaint into the glass, swirling it around to coat the glass, then pouring out the excess.

Strain the mix of rye, simple syrup, and bitters into the rocks glass with the Herbsaint.

Run a lemon peel around the rim of the glass and garnish with it.

For me, rye, specifically Old Overholt, is the down-and-dirty way to go. After all, this is not a kiddy drink. A few sips, and you’re feeling no pain.

A Sazerac at the Napoleon House in New Orleans.

Though sipping a Sazerac in New Orleans is an amazing experience in itself, and I’ve had it at the Sazerac Bar as well as the Napoleon House and other bars in NOLA…perhaps my craziest Sazerac experience happened at the famous White Horse Tavern in New York City, the Big Apple’s second oldest continuously running bar. (It opened in 1880.) I think this is where I was told to use Old Overholt in my Sazerac, and have ever since.

Dylan Thomas was a regular there, and other celebrities, like Norman Mailer, Jim Morrison, Bob Dylan, and Hunter S. Thompson also had drinks there. So it’s probably not surprising that my buddy, Lee, and I overindulged on Sazeracs at this historic tavern.

It was a very cold winter’s night in the late 1980’s–a blizzard, in fact–and we decided to go out drinking in the city, because I was back home in New York on holiday vacation from Alabama, where I was working at the time. We had more than our share of Sazeracs, when we decided we would walk to a new eatery called the Gulf Coast, located on the west side. (All we knew was that the restaurant was about 10 blocks from where we were, but after 4 Sazeracs, “where we were” was questionable, to say the least.)

Now, this was before the internet–before cell phones–before Uber–and no cabs were running (because it was a blizzard, after all)–so we decided we would walk! Not the smartest thing we’ve ever done. It only took a few blocks for us to realize, even in our drunken stupor, that we made a very bad choice! We were certain that we would be found, huddled and frozen in an alley somewhere, only after the spring thaw.

The storm was so bad, we couldn’t even find our way back to the bar. Miraculously, somehow, we did make it to the Gulf Coast, and we lived to tell the tale.

As Homer Simpson once said: “To alcohol…the cause of, and cure for, all of life’s problems!”

Sazeracs. Try your first one at home. Or take an Uber!

These days, there’s a day for everything, but who knew that May 10th is National Shrimp Day?

Any excuse to make shrimp scampi is a good one, as far as I’m concerned!

I love shrimp scampi, and had the need to satisfy my cravings the other day. But what started as a simple scampi recipe, turned into something a bit more. I may never make scampi the same way again!

image

1 lb. wild-caught American shrimp, peeled and de-veined
4 tablespoons butter
4 tablespoons olive oil
2 teaspoons parsley
1 teaspoon garlic salt
1 teaspoon oregano
1/2 teaspoon granulated onion
1/4 teaspoon black pepper
3 tablespoons Spirgučiai (see below)
1/2 lb. fresh mozzarella, sliced
oregano, for sprinkling

Thaw the shrimp under cold water. Place them in a colander to drain.

Spirgučiai is a Lithuanian favorite: chopped bacon and onions, fried until crisp and usually sprinkled over anything and everything in Lithuanian cooking. I always have some in my fridge, already prepared and just waiting to be used.

In a saucepan on medium heat, combine the butter, olive oil, parsley, garlic salt, oregano, onion, pepper and Spirgučiai.  Heat only until everything melts and combines. Don’t let it burn. (If you don’t have Spirgučiai, all you need to do is take a couple of slices of bacon, chop them up, and fry them in a pan until crisp. Keep the bacon and the fat in the pan and then add the butter, olive oil, parsley, garlic salt, oregano, onion and pepper.)

In a small sheet pan lined with foil, lay the shrimp in a single layer and cook them halfway in a pre-heated 400-degree oven to remove the moisture from the shrimp.

Take the pan out of the oven, and drain off the moisture, if any. Pour the butter mix from the saucepan all over the shrimp and toss to coat. Return the shrimp to the oven for a few minutes, until they’ve heated through and are almost completely cooked. (Careful: never over-cook shrimp!)

Take the pan out of the oven, and place pieces of mozzarella on top, garnishing with a little oregano. Set the oven on broil and cook until the cheese has melted.

Slice with a spatula and serve on top of pasta, making sure you get some of that buttery scampi sauce.

image

As a low-carb option, you can serve this on broccoli or roasted spaghetti squash.

The 148th running of the Kentucky Derby is today, Saturday, May 7th, 2022, and although I’m not a big horse racing fan, I am a huge fan of the official drink: the Mint Julep!

The Mint Julep is such a perfect, classic and historic bourbon drink, it seems silly to wait until Derby Day to have one. Of course, as any aficionado of spirits will tell you, there are as many right ways as wrong ways of making one.

The first step in my Mint Julep is making the simple syrup. Learning from one of my old radio buddies, my pal Rick O’B, I infuse mint into my simple syrup to take my cocktail to the next level. I use the standard ratio of 1 cup of clean, filtered water to 1 cup of sugar, using an organic product like Woodstock Farms Organic Pure Cane Sugar. I place the sugar and water in a saucepan and heat until just boiling. I’ve found that it needs to reach this stage for the sugar to really dissolve. As soon as it starts to boil, I remove the saucepan from the heat, and throw in a handful of freshly picked mint leaves, stirring to make sure the mint gets in there, and then I leave the saucepan to cool to room temperature. Once it’s at room temp, I strain the simple syrup into a bottle with a tight sealing lid, and place it in the refrigerator to cool. It will keep for about a week.

An equally important ingredient for a perfect Mint Julep is the ice: specifically, crushed ice from clean, filtered water. Don’t even think of using tap water for any cocktail much less this one. Why ruin an expensive bottle of bourbon by going cheap on the ice? I make my own ice cubes, then put them in an untreated canvas ice bag and bash them with a mallet to the perfect crushed size. Untreated canvas bags for crushing ice can be purchased online from bar supply companies for about $30. I got an untreated canvas tool bag (the exact same shape and size) at Home Depot for 3 bucks.

Da bag.

The next step is a little tougher: which bourbon to choose. The explosion of choices on the bourbon market has made it all but impossible for the average imbiber to know which bourbon is best for their tastes. If you’re a beginner, I suggest you go to a trusted bartender and explain that you’re new to the bourbon world, and could you have the tiniest of tastes and sniffs of what he’s got at his bar. Chances are, you’ll get a sampling of some of the better known brands: Maker’s Mark, Woodford Reserve, perhaps Buffalo Trace or Bulleit, and the standard Jim Beam. This is a very good start. If you have deeper pockets, go to the manager of a trusted higher-end liquor store and explain that you’ve had all the rest, now what does he think is the best? (Also, hinting to wife and friends that “I’m trying new bourbons” around your birthday or Father’s Day inevitably gets you a few bottles as well!)

My go-to bourbon for Mint Juleps is the very affordable Eagle Rare 10-year-old at $32.99 a bottle…and you can never go wrong with the classic Maker’s Mark. It’s always on sale around Derby Day.

Finally, a Mint Julep needs a metal–not glass– Julep cup. Made of pewter or aluminum, it frosts on the outside as you stir your drink, keeping your beverage ice-cold on even the hottest of days.

3 oz. bourbon
1 oz. mint-infused simple syrup
crushed ice
Julep cup
Fresh mint for garnish

Crush the ice and pack it into the Julep cup, even letting it dome slightly over the top. Don’t worry…the alcohol will melt it.

I like to add 1.5 ounces of bourbon, then the ounce of simple syrup, then another 1.5 ounces of bourbon on top. Break off a few mint leaves from the stem and push them into the ice. Using a long spoon, stir the drink well. A beautiful layer of frost will form on the outside of the cup. Add more ice, if necessary, and garnish with a sprig of mint.

A nice selection of bourbons. This is an old photo: that Pappy Van Winkle is long gone…but I saved the bottle!