Archive for the ‘Food’ Category

PRETZEL BREAD

Posted: March 29, 2024 in Food, Recipes, Uncategorized
Tags: , , , ,

As much as I’m a fan of sourdough–or any great bread for that matter–pretzel bread has a special place in my heart.

I found a pretzel bread recipe that uses baking soda, a much milder and safer alkaline alternative to lye (which is what many bakeries use) an ingredient that I could safely pour down my drain after using.


image


½ cup water
½ cup milk
2 tablespoons butter, softened
3 cups all-purpose flour
2 tablespoons brown sugar
1 tablespoon yeast
2 teaspoons salt
1 egg, separated
Cooking spray
¾ cup baking soda
Kosher salt or pretzel salt for sprinkling

Combine the water, milk and butter in a glass container and microwave it about 45 seconds to melt the butter and warm the milk. Set it aside.

In a mixing bowl, combine the flour, brown sugar, yeast, salt and egg yolk. Slowly add the milk mixture and mix until the dough comes together. If it seems too dry, add small amounts of water. Knead the dough until it is smooth and springy, about 5 minutes.

Place the dough in a bowl sprayed with cooking spray. Flip it over so all sides get oiled, and then wrap the bowl with plastic wrap. Place it in a warm place until the dough has doubled in size, about an hour.

Pre-heat the oven to 375 degrees.

Turn out the risen dough on a floured surface and divide it into equal pieces. You can make 15 small slider-sized buns, 8 burger buns, 8 hot dog buns or any other shape you like. Once all the pieces have been rolled, cover them with a clean dish towel and set them aside to rest.

While the dough is resting, heat about 12 cups of water in a large pot. When it comes to a gentle boil, carefully pour the baking soda into it. It will foam and bubble vigorously.

Add the rested pieces of dough to the simmering water and poach them for about 30 seconds and then flip them over for another 30 seconds. Don’t overcrowd the pot; you need to do this in batches.

With a slotted spoon or spatula, lift the poached buns onto a Silpat baking sheet (or a baking sheet sprayed with oil, then sprinkled with cornmeal.)

Froth the egg white with a fork, then brush each bun with the egg white.

Using a sharp knife, make a few slits on the top of the buns, about ¼-inch deep. Sprinkle them with Kosher salt, then bake for 20 minutes until they’re golden brown.

Almost 95% of all shrimp sold in the United States comes from farmed shrimp in countries like China, Thailand, Vietnam and India…as well as Latin America. The stuff you buy at the supermarket comes frozen (since shrimp is highly perishable) and then is thawed out and placed on ice to make the display look nice. But the shrimp you’re getting is not “fresh” (unless you’re lucky enough to get some wild caught local shrimp) and it’s from countries where the methods of farming are questionable at best.
Shrimp farming in Asia and Latin America is destroying mangrove forests and because of that, coastal villages as well. Disease is commonplace in shrimp farms, so they’re pumped full of antibiotics and pesticides. Slavery is common in the Asian shrimp business, and there even have been accounts of shrimp injected with jelly to plump them up for buyers. Just. Don’t. Buy. Them.
Imported wild shrimp are also a problem because of bycatch. For every pound of wild shrimp caught, several pounds of other animals such as turtles die needlessly in the trawler nets.
Wild American shrimp is the best way to go for your health and the environment. American shrimp fishermen are required by law to reduce bycatch. For example, they’re required to use Turtle Exclusion Devices to stop turtles from being caught in their nets.
I stopped eating tiger shrimp and other farmed shrimp from foreign countries a long time ago, because wild-caught American shrimp from the Gulf of Mexico, the Carolinas, or the Florida Keys is readily available at supermarkets and membership stores where I live…and the price is right.
And on top of everything else, wild caught American shrimp tastes better. And why shouldn’t it? The shrimp are eating their natural foods found in the wild…not some pellets thrown at them that contaminate the water around them, not to mention the shrimp themselves.
Before I could find shrimp locally, I used to order it in 5 lb. frozen boxes online, and even with shipping, the price was affordable. My favorite website for wild caught American gulf shrimp was www.cajungrocer.com. I’ve also ordered my favorite Cajun foods, like Turduckens and alligator sausage, from these people for many years.
The basics of this recipe come from my friend, Lee, a chemist who also enjoys creating in the kitchen. What I found interesting about his recipe was the touch of sugar that doesn’t really add sweetness but rather helps create the light, tasty caramelized crust that forms on the shrimp when you sear it. I tweaked a few things in this recipe, but the essence of it remains the same.

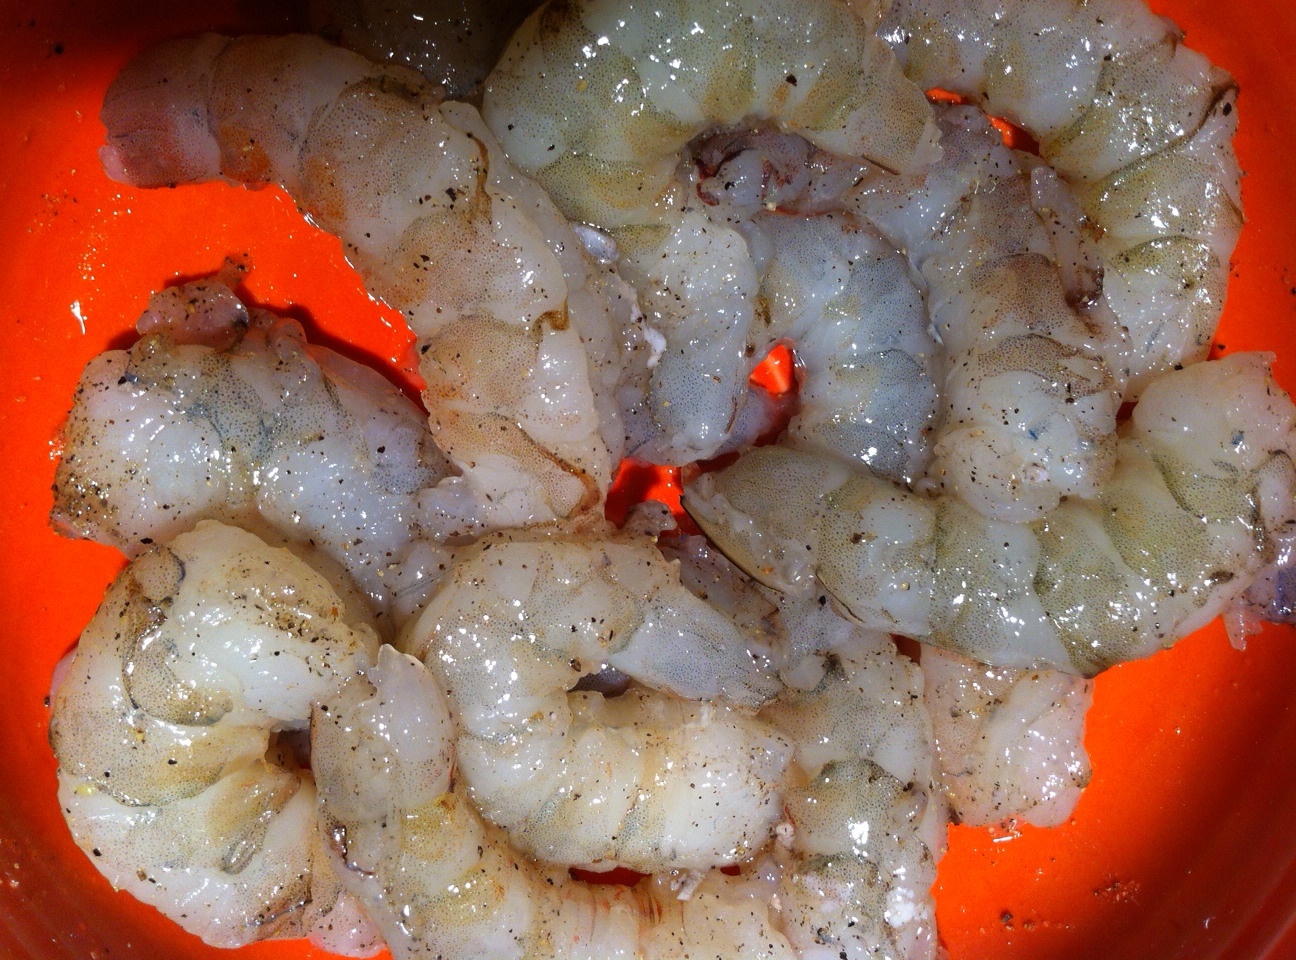
Seasoned shrtimp.

1 pound large peeled and deveined wild-caught American shrimp
Salt
Freshly ground pepper
Sugar
4 tablespoons softened butter
1 clove of garlic, squeezed through a press
1 tablespoon freshly squeezed lemon juice
2 tablespoons chopped parsley
1 teaspoon oregano
Extra Virgin olive oil
Toss the shrimp, 1/4 teaspoon salt, 1/4 teaspoon pepper, and 1/4 teaspoon sugar in a bowl.
In a separate bowl, mash the butter with a fork, folding in the garlic. Add the lemon juice, parsley, oregano, and 1/4 teaspoon salt.
Heat a tablespoon of olive oil in a large skillet over high heat. Add half the shrimp in a single layer to the pan and cook at high heat until they’re caramelized on one side, about 1 minute. Flip the shrimp over and cook them for another 30 seconds. Don’t overcook them!
Remove the cooked shrimp to a covered bowl and similarly sear the other half of the shrimp, then return the first half of the shrimp back to the skillet. Turn down the heat to medium and add the butter/garlic/lemon/parsley/oregano/salt mixture, occasionally tossing the shrimp around in the pan to evenly coat them with the glaze.
If you’re serving the shrimp over pasta, increase the amount of butter and olive oil to just lightly coat the pasta. Toss the cooked pasta into the pan of shrimp to combine.
I like to season lightly at the end with a tiny pinch of Fleur de Sel. Serve immediately.

It’s been over a year since I posted this. Inspired by a recent conversation I had with a friend, I decided to share it again…

It’s never a healthy option to eat fast food. Michael Pollan said it best: “It’s not food if it arrived through the window of your car.”

A few years ago, a guy who claimed to be the nephew of Colonel Sanders, revealed the 11 secret herbs and spices that made KFC‘s original recipe chicken a worldwide success. He said he worked for his uncle for many years and had to make huge batches of the seasoning mix.

For me, KFC is like crack. Although I’m a big proponent of grass-fed this and pastured that, my kryptonite is KFC‘s original recipe chicken. There’s a KFC right next door to a local Home Depot in my area and my car literally drives itself to the pick-up window…I can’t help it. I justify the consumption of this heavenly grease by asking for no sides–no biscuit, no nothing. I get one breast and one thigh, and I drive off, steering my car with my knees as I indulge in my dirty secret, the hot grease dripping down my chin, a roll of paper towels at my side.

Making the KFC chicken recipe at home means I do have some control over product quality. I can use pastured or organic chicken. I can use clean oil. I don’t have the fancy pressure fryer they use at KFC, but I can use the healthier option of oven-frying. That means I fry my chicken in oil until golden brown, then finish the cooking process in the oven.

I have to say, the recipe really works! Maybe if I placed the real KFC side-by-side with my home-made chicken, I’d notice a big difference. But my brain said it was pretty damn close and absolutely delicious! If I could change one thing, I would use smaller chicken pieces next time. I used large pieces and the meat-to-breading ratio was off. Though it was mighty tasty, I was craving more breading per bite.

The recipe calls for all-purpose flour, but if you follow a gluten-free lifestyle, using Cup4Cup GF flour works just as well.

2 cups all-purpose flour
3 tablespoons paprika
1 tablespoon celery salt
1 tablespoon dried mustard
1 tablespoon garlic salt
1 tablespoon ground ginger
2 teaspoons black pepper
1/2 teaspoon white pepper
1 1/2 teaspoons thyme
1 1/2 teaspoons basil
1 1/2 teaspoons oregano
1 teaspoon salt
1 cup milk
1 egg
5 lbs. chicken pieces…your choice
oil, for frying

Combine the flour and the “11 herbs and spices” in a bowl. Mix well.

In another bowl, whisk together the milk and the egg. Add the chicken pieces to this bowl and let the chicken soak in it for 10 minutes.

Pre-heat the oven to 350 degrees.

Pour a couple of inches of the oil into a pan with high sides and heat it to 340 degrees, using a thermometer. Don’t fill it with too much oil, because oil expands when hot and it could spill over.

Take the chicken pieces out of the milk and egg mixture and coat them with the seasoning mix one at a time, making sure you coat them well. Carefully place the chicken in the hot oil. Don’t overcrowd the pan…work in small batches. Too much chicken could cause the oil to spill over the top.

Fry the chicken pieces just until golden…no need to cook them all the way through. Place the pieces on a baking sheet lined with non-stick aluminum foil. When all the chicken has been fried, place the baking sheet in the oven and cook until the chicken pieces reach an internal temperature of at least 160 degrees.

Make a lot! Leftovers are great, and they re-heat really well in the oven! (Don’t use a microwave…the oven is best.)


I love these ribs. They’re one of the the first recipes I ever tried, and still one of my favorites. I’ll be making them again this weekend!
 
I like making these because you don’t need a grill or a smoker. They’re gooey, sweet and absolutely delicious!
 
 
 image
 
¾ cup soy sauce
 1/4 cup hoisin sauce
5 lbs. pork ribs
Zest and juice of 1 lemon
2 whole star anise
2 cinnamon sticks (3”)
1/2 cup honey
4 cups chicken broth
 
Mix the soy sauce and the hoisin in a bowl, and set it aside. These are the marinade ingredients.
 
If the ribs are large, cut them into individual pieces. If they’re smaller, cluster 2 or 3 ribs together. Place them in a large pot. Cover them with water and bring it to a boil. Boil for 5 minutes. Drain the water.
 
Place the warm ribs on a baking sheet lined with non-stick aluminum foil or with a rack and brush them with the marinade. Let them sit for 10 minutes.
 
Pre-heat the oven to 350 degrees. Bake the ribs on the baking sheet for 30 minutes.
 
While the ribs are baking, start the sauce in a large non-stick pan or pot that will hold all the ribs: combine the lemon zest and juice, star anise, cinnamon sticks, honey and chicken broth. Bring it to a boil, then reduce it to a simmer.
 
When the ribs have finished baking, add them to the sauce pot and simmer on low (covered) for at least 15 minutes or until the rib meat is tender.
 
Turn the heat on high, uncover the pot and cook until the sauce is reduced to a glaze that coats the ribs. Be sure to reduce the heat as the sauce thickens or the sugars in the honey will burn! When the ribs are sticky and gooey, they’re ready.
 
Substituting grapefruit for the lemon works really well. And I like to switch the honey for maple syrup! 


I missed posting my annual corned beef prep for St. Patty’s Day, but who says you have to only eat corned beef once a year? After all, corned beef isn’t really an authentic Irish dish.

The phrase “corned beef” was coined by the British. Although the Irish were known for their corned beef throughout Europe in the 17th century, beef was far too expensive for the Irish themselves to eat and all of it was exported to other countries. Owning a cow in Ireland was a sign of wealth, and the Irish used theirs for dairy products, not beef.

The Irish ate pork, and a lot of it, because it was cheap to raise pigs, and they traditionally prepared something like Canadian bacon to celebrate St. Patrick’s Day in Ireland.

In the 1900’s, when the Irish came to America, both beef and salt were more affordable, and the Irish, who lived in poor, tight-knit communities, often next to Jewish communities, bought much of their beef from Kosher butchers. And so many of the Irish learned how to corn their beef using Jewish techniques, but adding cabbage and potatoes to the mix. That’s what we have today.

It takes about 3 weeks to make corned beef. Doing it yourself is not difficult. It just takes time.

Corned beef has nothing to do with corn. ‘Corning’ is a technique for preserving raw meats for long periods by soaking it in a salt brine. This method was used in England before the days of commercial refrigeration. Back then, the large salt kernels used in the brine were called “corns.”

Brining is a time-honored way of preserving meat and it prevents bacteria from growing. Both pastrami and corned beef are made by this method. Both start with a brisket of beef. Corned beef is then cooked–usually boiled–and served. Pastrami is made when the brined meat is rubbed with more spices and then smoked to add extra flavor. So corned beef and pastrami are the same meat, just treated differently.

Saltpeter is an ingredient that has been used in brining beef for years. It adds the traditional pink coloring to the corned beef and pastrami meat, a bit more appetizing than the gray color it tends to have if you don’t use it.

Saltpeter can also contain carcinogens, so there’s always talk of avoiding it. It’s found in pink curing salt, which is used in small amounts during the curing process. (Not to be confused with Himalayan pink salt, which is just plain salt.) Since I only make my corned beef once a year, I’m OK with it either way. The general rule of thumb is only 1 teaspoon pink curing salt per 5 pounds of meat.

I get grass-fed brisket in 10-pound slabs, but use whatever size you find comfortable. Just don’t go too small, or the brine will make that tiny piece of meat extremely salty.


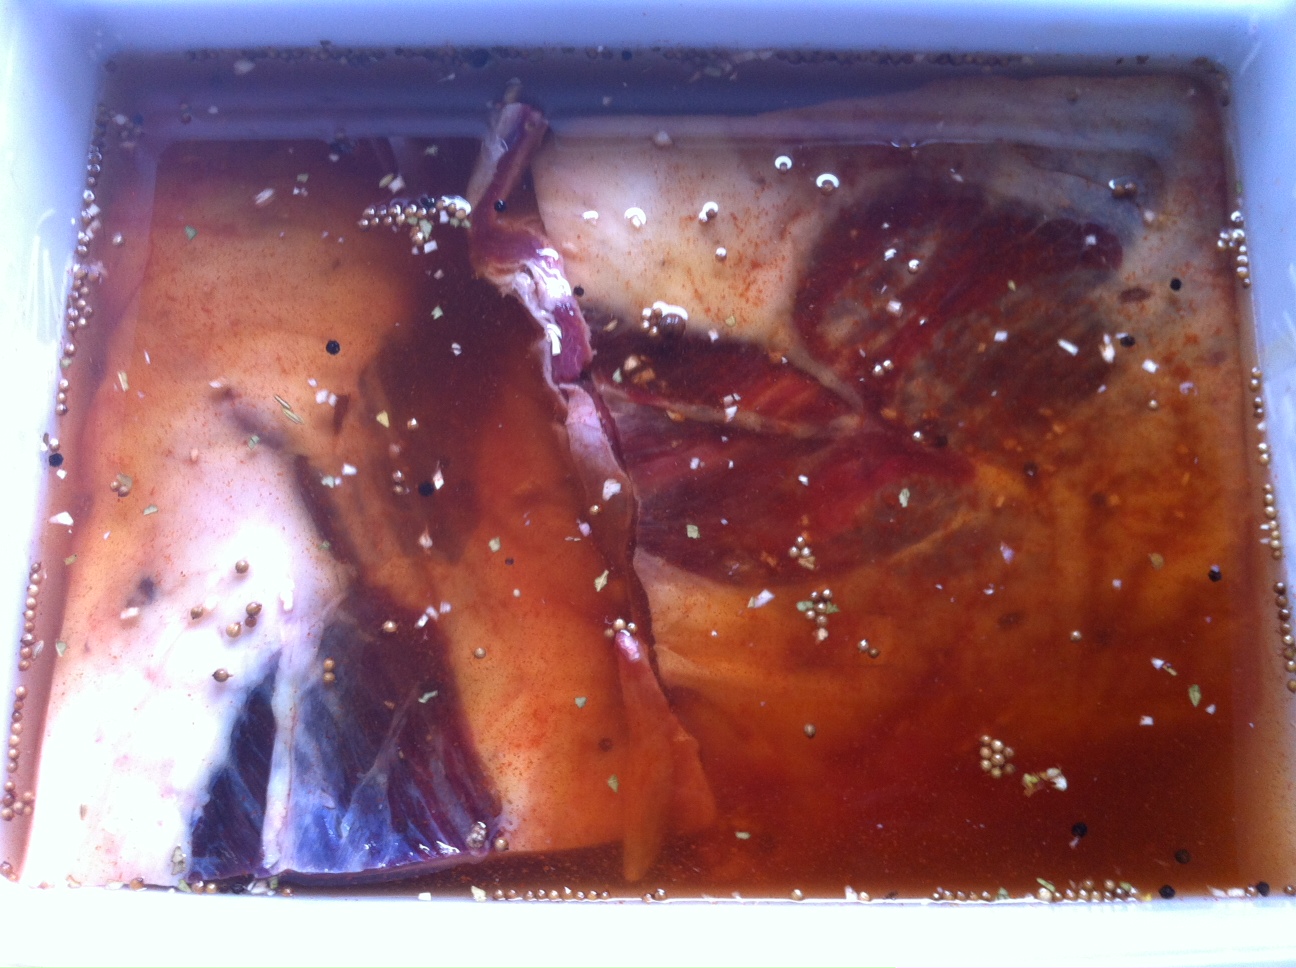
Brining the beef brisket

Brining the beef brisket

Step one: corned beef…

beef brisket (about 8-10 pounds)
2 teaspoons paprika
1/4 cup warm water
3 cloves of minced garlic
2 tablespoons sugar
1 tablespoon mixed pickling spices
3/4 cup salt
1 teaspoon pink curing salt (optional)
2 quarts water

Place the brisket in a large container made of non-reactive material, like glass or plastic.

In the 1/4 cup of warm water, dissolve the sugar, minced cloves, paprika and pickling spices.

Dissolve the 3/4 cup of salt (and optional teaspoon of pink curing salt) in the 2 quarts of water. Pour in the sugar/garlic/paprika/pickling spices mix and stir everything together. Pour the mixture over the meat in the container. Make sure the meat is totally beneath the surface of the liquid. (You may need to weigh it down to do this. I place a couple of plates on top, which pushes the meat down into the brine.) If there’s just not enough liquid, double the recipe, leaving out the pink salt the second time. Cover the container.

Refrigerate the container and its contents for 3 weeks, turning the meat once or twice per week. At the end of the third week, remove the container from the refrigerator and take out the meat. Soak the meat in several changes of fresh cold water over a period of 12 hours to remove the excess salt. I add ice to the water to keep the meat cold.

At this point, if you want corned beef, most people boil it.

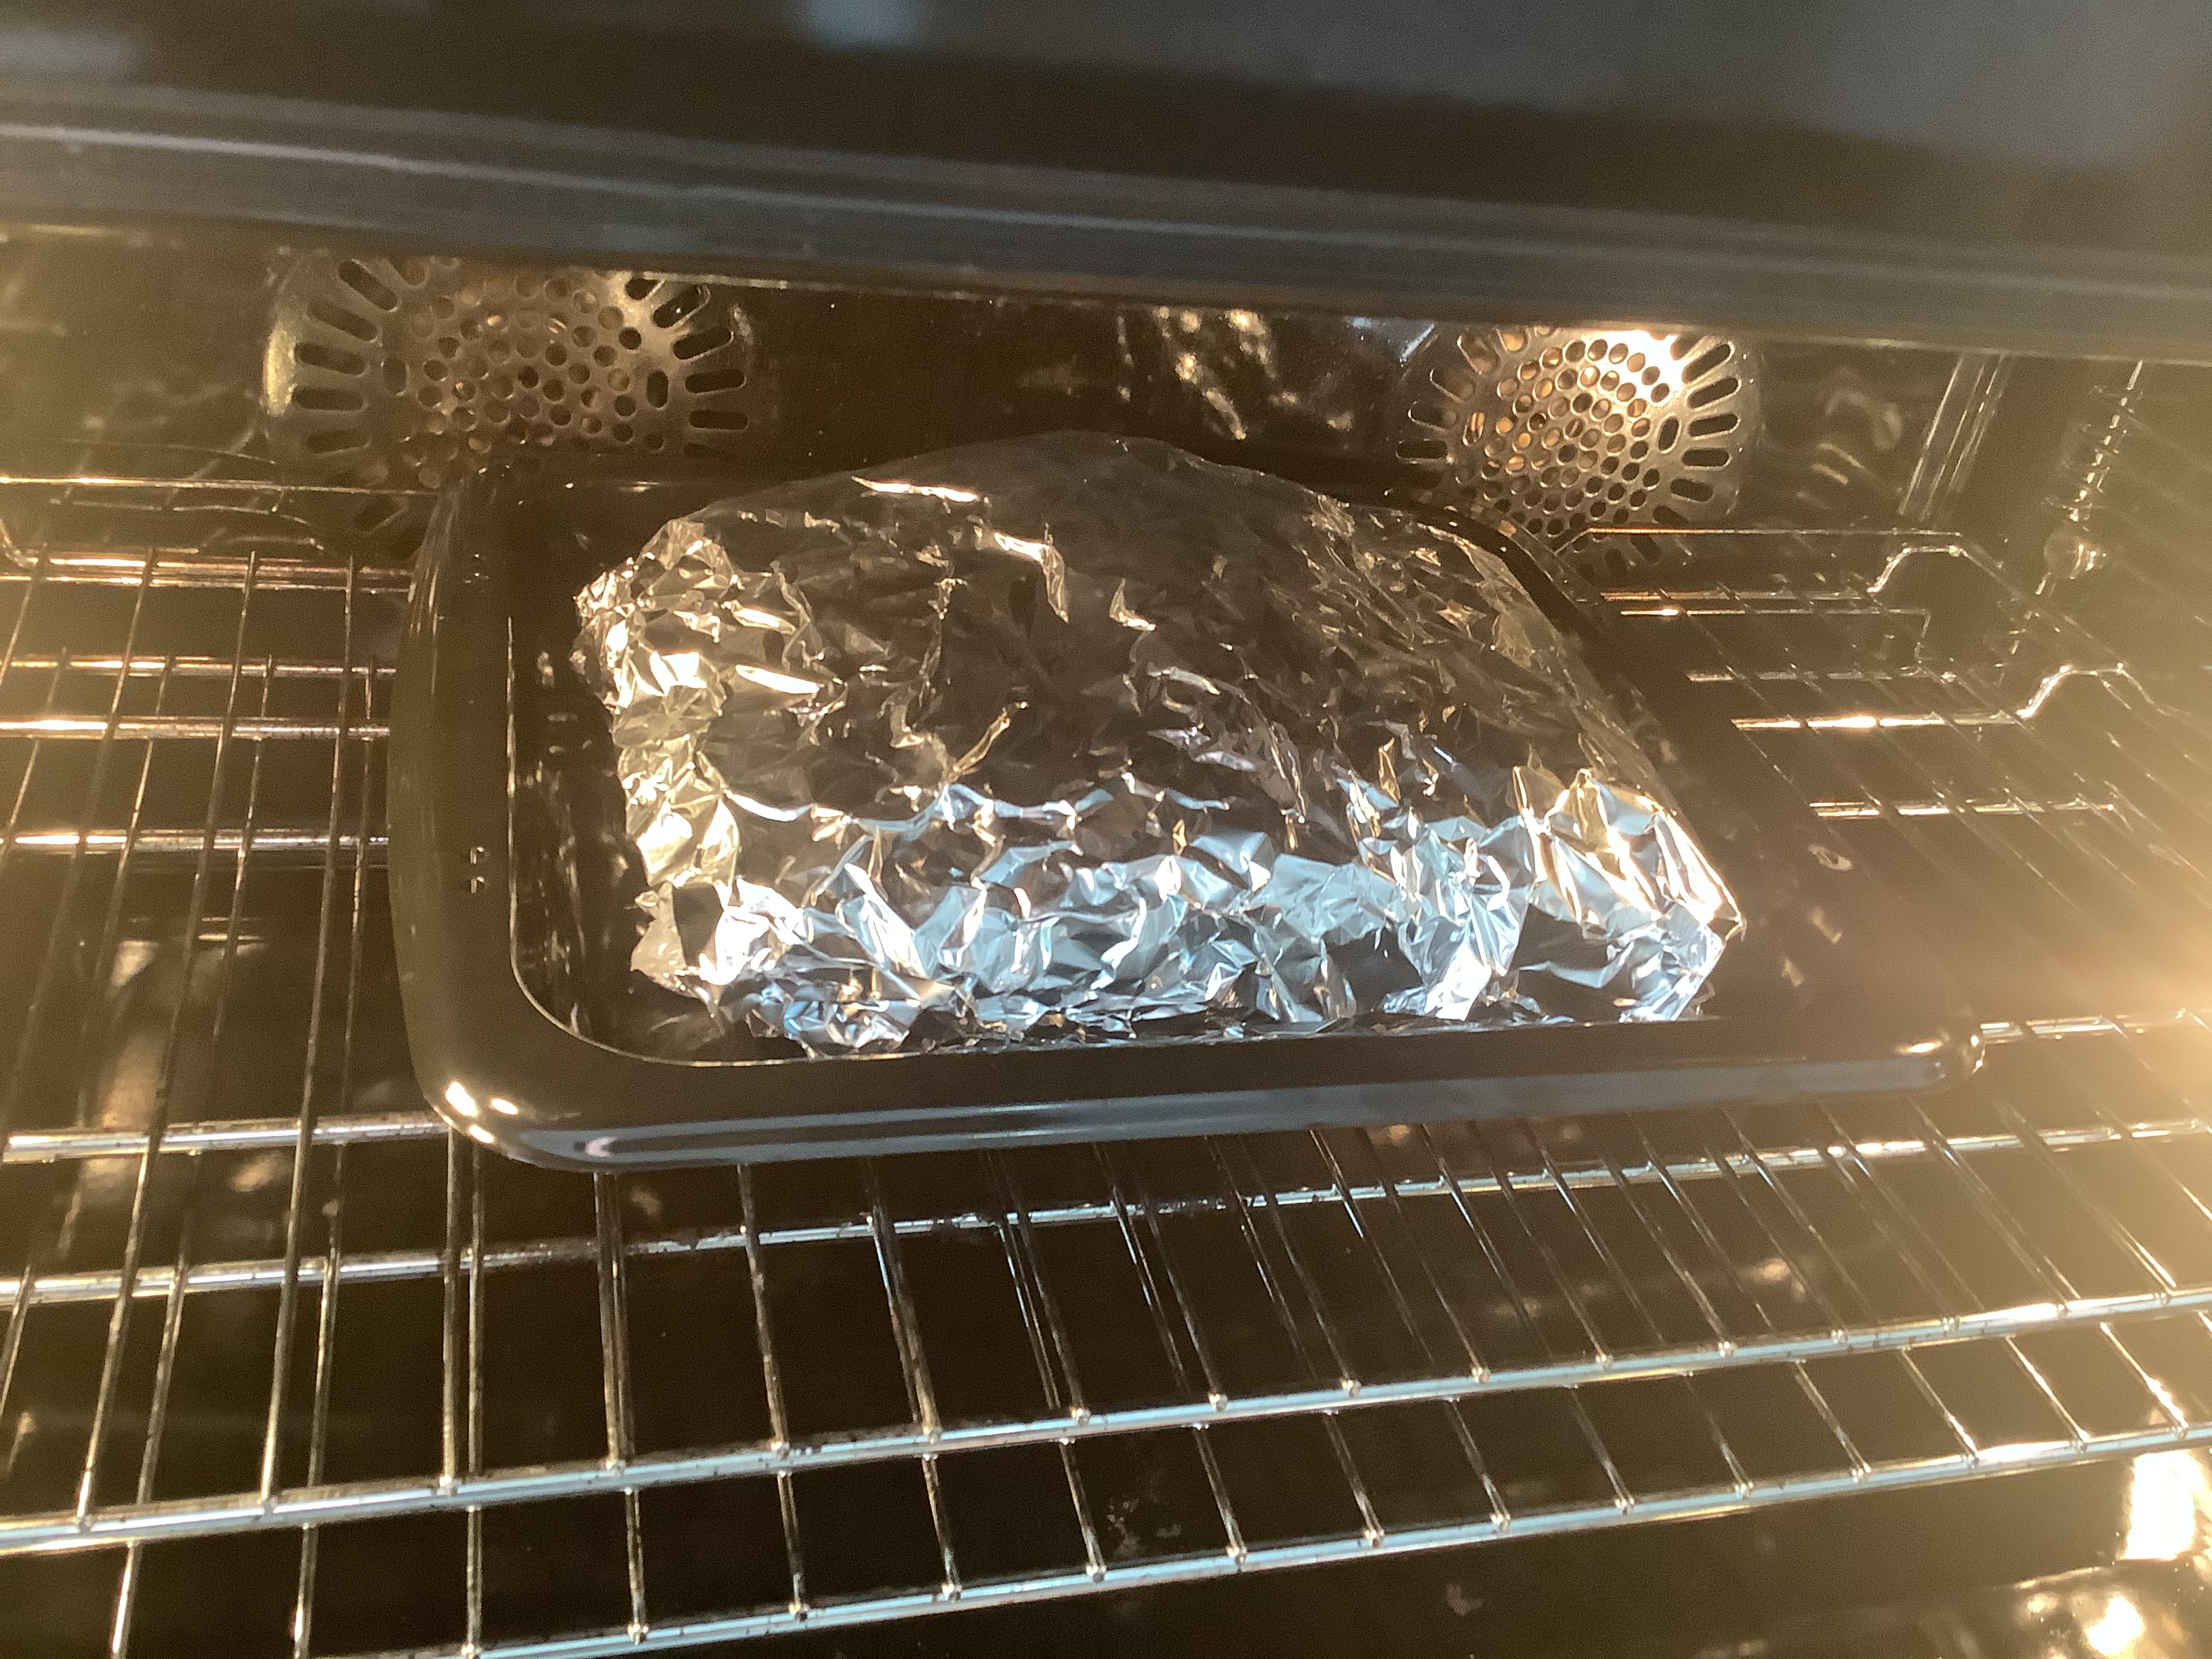
I prefer to lay some aluminum foil down on a sheet pan. Then I coarsely chop carrots, onions, and celery, placing them in a single layer on the foil. Then I lay my brisket on top of the veggies, and wrap the meat tightly in the foil. I place the baking pan in a pre-heated 350 degree oven and cook for about 3 1/2 hours. (That’s for an 8-pound slab of meat. The cooking time will be less for a smaller cut.)

If you want to make pastrami, there are more steps to take…

Step two: making Pastrami…

pastrami

Brined and rinsed corned beef brisket from above recipe, patted dry with paper towels
1/4 cup Kosher salt
1/4 cup paprika
3 tablespoons coriander seeds
2 tablespoons black peppercorns
2 tablespoons yellow mustard seeds
1 tablespoon white peppercorns
3 tablespoons brown sugar
1 tablespoon granulated garlic

Combine the coriander seeds, black and white peppercorns and mustard seeds in a spice grinder and grind them coarsely. Place them in a bowl. Add the salt, paprika, brown sugar and granulated garlic. Mix well.

Rub the mix into the corned beef well, covering all sides.

Heat your smoker to 225 degrees and smoke the meat for several hours. (My wood of choice is always hickory.) When the internal temperature of the meat has reached 165 degrees, it’s done. It isn’t necessary to smoke pastrami as long as you would a regular brisket because the long brining time makes the meat more tender, and you’ll be steaming it next.

It is very important that absolutely everything that comes in contact with the meat is very clean. (This includes your hands.) Also, make very sure that every inch of the meat reaches the 165 degrees before it is removed from the smoker. The corned beef is now pastrami.

Delis that serve pastrami go one step further: they steam the meat so that it becomes incredibly tender and easy to slice. I place a baking pan with boiling water in the center of a 350° oven. I put a grate on top of it, placing the pastrami on top of the grate. Then I invert a bowl over the pastrami to keep the steam in. I will cook it this way for at least an hour to steam the meat before slicing and serving.

What can I say? I was craving both dishes, so I combined them. I figured: if I love each one of them, I’d be crazy over both together!


image


Pasta
1/4 lb. bacon, finely chopped
1 onion, finely chopped
18 small clams, washed and purged*
1 teaspoon fresh oregano, finely chopped
1/4 cup white wine
Good quality olive oil
6 large garlic cloves, finely chopped
1/4 cup fresh parsley, finely chopped


In a large pot, salt some water and bring it to a boil. Cook the pasta until al dente.

In the bottom of another large pot on medium-high heat, fry the bacon until it’s crisp. Add the onions and sauté them until they’re translucent. Add the clams, oregano and wine, and cover the pot with a lid. Reduce the heat to medium. The clams are cooked when they open. Discard any unopened clams.

In a frying pan, heat the olive oil to medium. Add the chopped garlic and fry it until just crispy. Toss in the parsley and stir it to combine.

Place the pasta in a bowl or plate. Pour the clams and juice over the pasta. Pour the fried garlic and oil all over the clams.


*Purging clams: Clams can be pretty sandy and gritty, so it’s important not only to scrub the outside of the shell, but to purge them as well. Clams should be stored in a bowl in the fridge with a wet dish towel over them, never in water. Once you’re ready to use them, fill a bowl with water and add salt (think salty like ocean water) and a tablespoon of corn meal. Mix this around, then add the clams and let them sit in this solution in the fridge for a couple of hours. The clams will purge (clean themselves) out. Discard the liquid and rinse the clams before cooking.

It’s a Leap Year! This weekend, have a sip of the infamous Leap Year Cocktail.

This special drink was created in 1928 by Harry Craddock, who worked at the American Bar in London at that time.

FullSizeRender (2)


2 oz. gin (I use Hendrick’s)
1/2 oz. Grand Marnier
1/2 oz. sweet vermouth (I use Antica Formula)
1/4 oz. fresh lemon juice


Combine all the ingredients with ice in a cocktail shaker and shake vigorously for 30 seconds. Pour into a chilled martini glass and garnish with a twist of lemon.

Cheers!

I was on a mission to find fresh mussels the other day, and in the process, stumbled upon fresh bay scallops, piled high on ice at a local farmers’ market. Unlike like the larger sea scallops or bomster scallops, bay scallops are small and sweet, about the size of a mini-marshmallow…hard to find and my absolute favorites.
 image
As far as I’m concerned, there is no better way to eat a fresh scallop than right out of the shell with just a little marinade on top, popping these beauties into my mouth literally as they’re still pulsing on the shell.
Scallops are a bit trickier to open and clean than clams or oysters (at least for me) but all it took was a little practice while sipping a Stoli Elit martini and I got the hang of it in no time.
There are two marinades that I use when serving up raw scallops. The acidity in these marinades will cook the scallop a little, like in ceviche, though eating them raw is perfectly fine if they’re super-fresh.
“MILLS TAVERN” MARINADE
The first place I ever had a raw scallop was at Mills Tavern, a highly rated restaurant in Providence, RI. Freshly shucked scallops (in large flat shells) were served on ice with a tangy red marinade. I never got the recipe from the restaurant, but this is my version of that marinade.
3 tablespoons rice vinegar
2 tablespoons Grenadine
1/2 teaspoon fresh finely grated ginger
2 teaspoons finely chopped scallions
 Combine all the ingredients and chill before using.
A trick I learned from the folks at Wishing Stone Farm, where they grow their own ginger roots: keep the ginger stored in the freezer in a tightly sealed bag. Most of us don’t use ginger all that much, but we want fresh ginger when the recipe calls for it. By wrapping it tightly in plastic and storing it in the freezer, it’s ready to use any time. Simply take the ginger root out, and grate it finely–no need to peel the skin–while it’s still frozen. It will be almost powder like, and it will blend beautifully into any recipe you’re using. Then just put the rest back in the freezer.
 image
ALZ CEVICHE MARINADE
My marinade is closer to a basic ceviche, using 3 kinds of citrus and some Asian flavors.
1/4 cup freshly squeezed orange juice
1 1/2 tablespoons freshly squeezed lemon juice
1 1/2 tablespoons freshly squeezed lime juice
2 tablespoons soy sauce
1 tablespoon + 1 teaspoon peanut oil
1/2 teaspoon honey
1 1/2 teaspoons fresh finely grated ginger
2 tablespoons finely chopped scallion
2 small dried chili peppers, finely chopped
 Combine all the ingredients and chill before using.

image


Both marinades are gluten-free, as long as you use GF soy sauce. La Choy is an easy-to-find gluten-free brand.


It’s National Banana Bread Day!

This is one of my favorites because it not only tastes amazing, it freezes really well.

My original banana bread recipe blog is featured directly below. It’s awesome. But if you follow a gluten-free lifestyle, no worries. My gluten-free version of the recipe, at the bottom of the page, is so good, you won’t miss the wheat!

A gluten-free batch.

The original recipe…

What makes this banana bread special is that it uses whole wheat flour…less sugar…and no artificial extracts that make most banana breads taste like crap. It relies on very ripe bananas to give it its wonderful natural flavor.

It’s not always easy to get bananas to ripen exactly when you’re trying to make your banana bread recipe. So I buy a large bunch of bananas and let them get very ripe at room temperature. I then take 5 at a time (for this recipe), peel them, and place the bananas in a Ziploc bag in the freezer. When it’s time to make banana bread, I just pull one of those Ziplocs out of the freezer, let it thaw, and mash with a potato masher.

Since Roundup is a very common herbicide used on wheat, and its cancer-causing characteristics are widely known by now, I always use organic wheat for my baking recipes.

I use organic cane sugar instead of regular sugar when I have it. I don’t use vegetable oils, especially not canola, so I use healthier avocado oil or olive oil. Eggs are pastured when I can get ’em. Bananas are organic. And I rub the pans with coconut oil or I use an olive oil cooking spray.

Nana bread blog

3 cups all-purpose flour
1/2 cup whole wheat flour
2 tsp baking soda
1/2 tsp salt
1 1/4 cup sugar
3/4 cup vegetable oil
2 eggs
5 medium-sized bananas, peeled and mashed
2 tsp real vanilla extract
Cooking spray

Pre-heat the oven to 350 degrees.

Combine the all-purpose flour, whole wheat flour, baking soda and salt in a medium bowl. Set it aside. (For a less rustic bread, simply substitute more all purpose flour for the whole wheat flour.)

Combine the sugar and oil in a mixing bowl and mix at medium speed for 2 minutes. (I use the whisk attachment.) Add the eggs, one at a time. Beat until the mixture is light and lemon colored.

With the mixer running at low-speed, add the flour mixture alternately with the bananas, beginning and ending with the flour mixture. Blend well after each addition. Add the vanilla extract and blend some more to mix.

Pour the batter into 2 loaf pans that have been sprayed with cooking spray. Bake for 45 minutes or until a wooden pick inserted in the center comes out clean. Cool 15 minutes in the loaf pan on a wire rack. A bundt pan works as well.

Remove the loaves from the pans and let them cool completely on the wire rack before slicing.

image

The gluten-free recipe…

My go-to gluten-free flour is the brand called Cup 4 Cup. You can find it in most supermarkets. They also offer a more rustic version they call “Wholesome Flour,” which is made mostly of rice. I found that the two combined worked really well for a rustic, chewy texture much like whole wheat.

image

3 cups Cup4Cup all-purpose gluten-free flour
1 cup Cup4Cup Wholesome Flour
2 teaspoons baking soda
1/2 teaspoon salt
1 1/4 cup cane sugar
3/4 cup avocado or olive oil
2 eggs
5 medium-sized bananas, peeled and mashed
2 teaspoons real vanilla extract
coconut oil

Pre-heat the oven to 350 degrees.

Combine the flour, baking soda and salt in a bowl. Set aside.

Combine the sugar and oil in a mixing bowl and mix at medium speed for 2 minutes. (I use the whisk attachment.) Add the eggs, one at a time. Beat until the mixture is light and lemon colored.

With the mixer running at low-speed, add the flour mixture alternately with the bananas, beginning and ending with the flour mixture. Blend well after each addition. Add the vanilla extract and blend some more to mix.

Pour the batter into 2 loaf pans or one large bundt pan that have been rubbed with the coconut oil. Bake for 45–60 minutes or until a wooden toothpick inserted in the center comes out clean. Cool 15 minutes in the pan on a wire rack.

Remove the bread from the pan and let it cool completely on the wire rack before slicing.

Gluten-free and delicious!

A few years ago, we were invited to a very cool retro summer party: cocktails and appetizers from the 60’s, and everyone contributed to the music by bringing in their favorite songs on vinyl.

We were also asked to contribute to the apps, so I brought waffle chips with clam dip.


image

2 8-oz. packages cream cheese, softened
3 6-oz. cans of chopped clams, drained, liquid reserved from one can
1 tablespoon fresh lemon juice
2 teaspoons Worcestershire sauce
1/2 teaspoon salt
1/4 teaspoon black pepper

Combine all the ingredients, except the clam liquid, in a bowl and mix them well with a fork.

Add 1 tablespoon of the clam liquid and mix well. Keep adding the clam liquid until the dip reaches a consistency you like.

Serve with the potato chips.


image