Archive for the ‘Food’ Category

Inspired by an episode of “Good Eats, the Return” with Alton Brown, I was craving poke big time. I had almost all the ingredients…..sort of.
Alton prepared tuna. I had salmon.
Alton used white soy sauce. I had dark.
Alton used chopped macadamia nuts. I had cashews.
Alton used yuzu juice. I had a lemon.
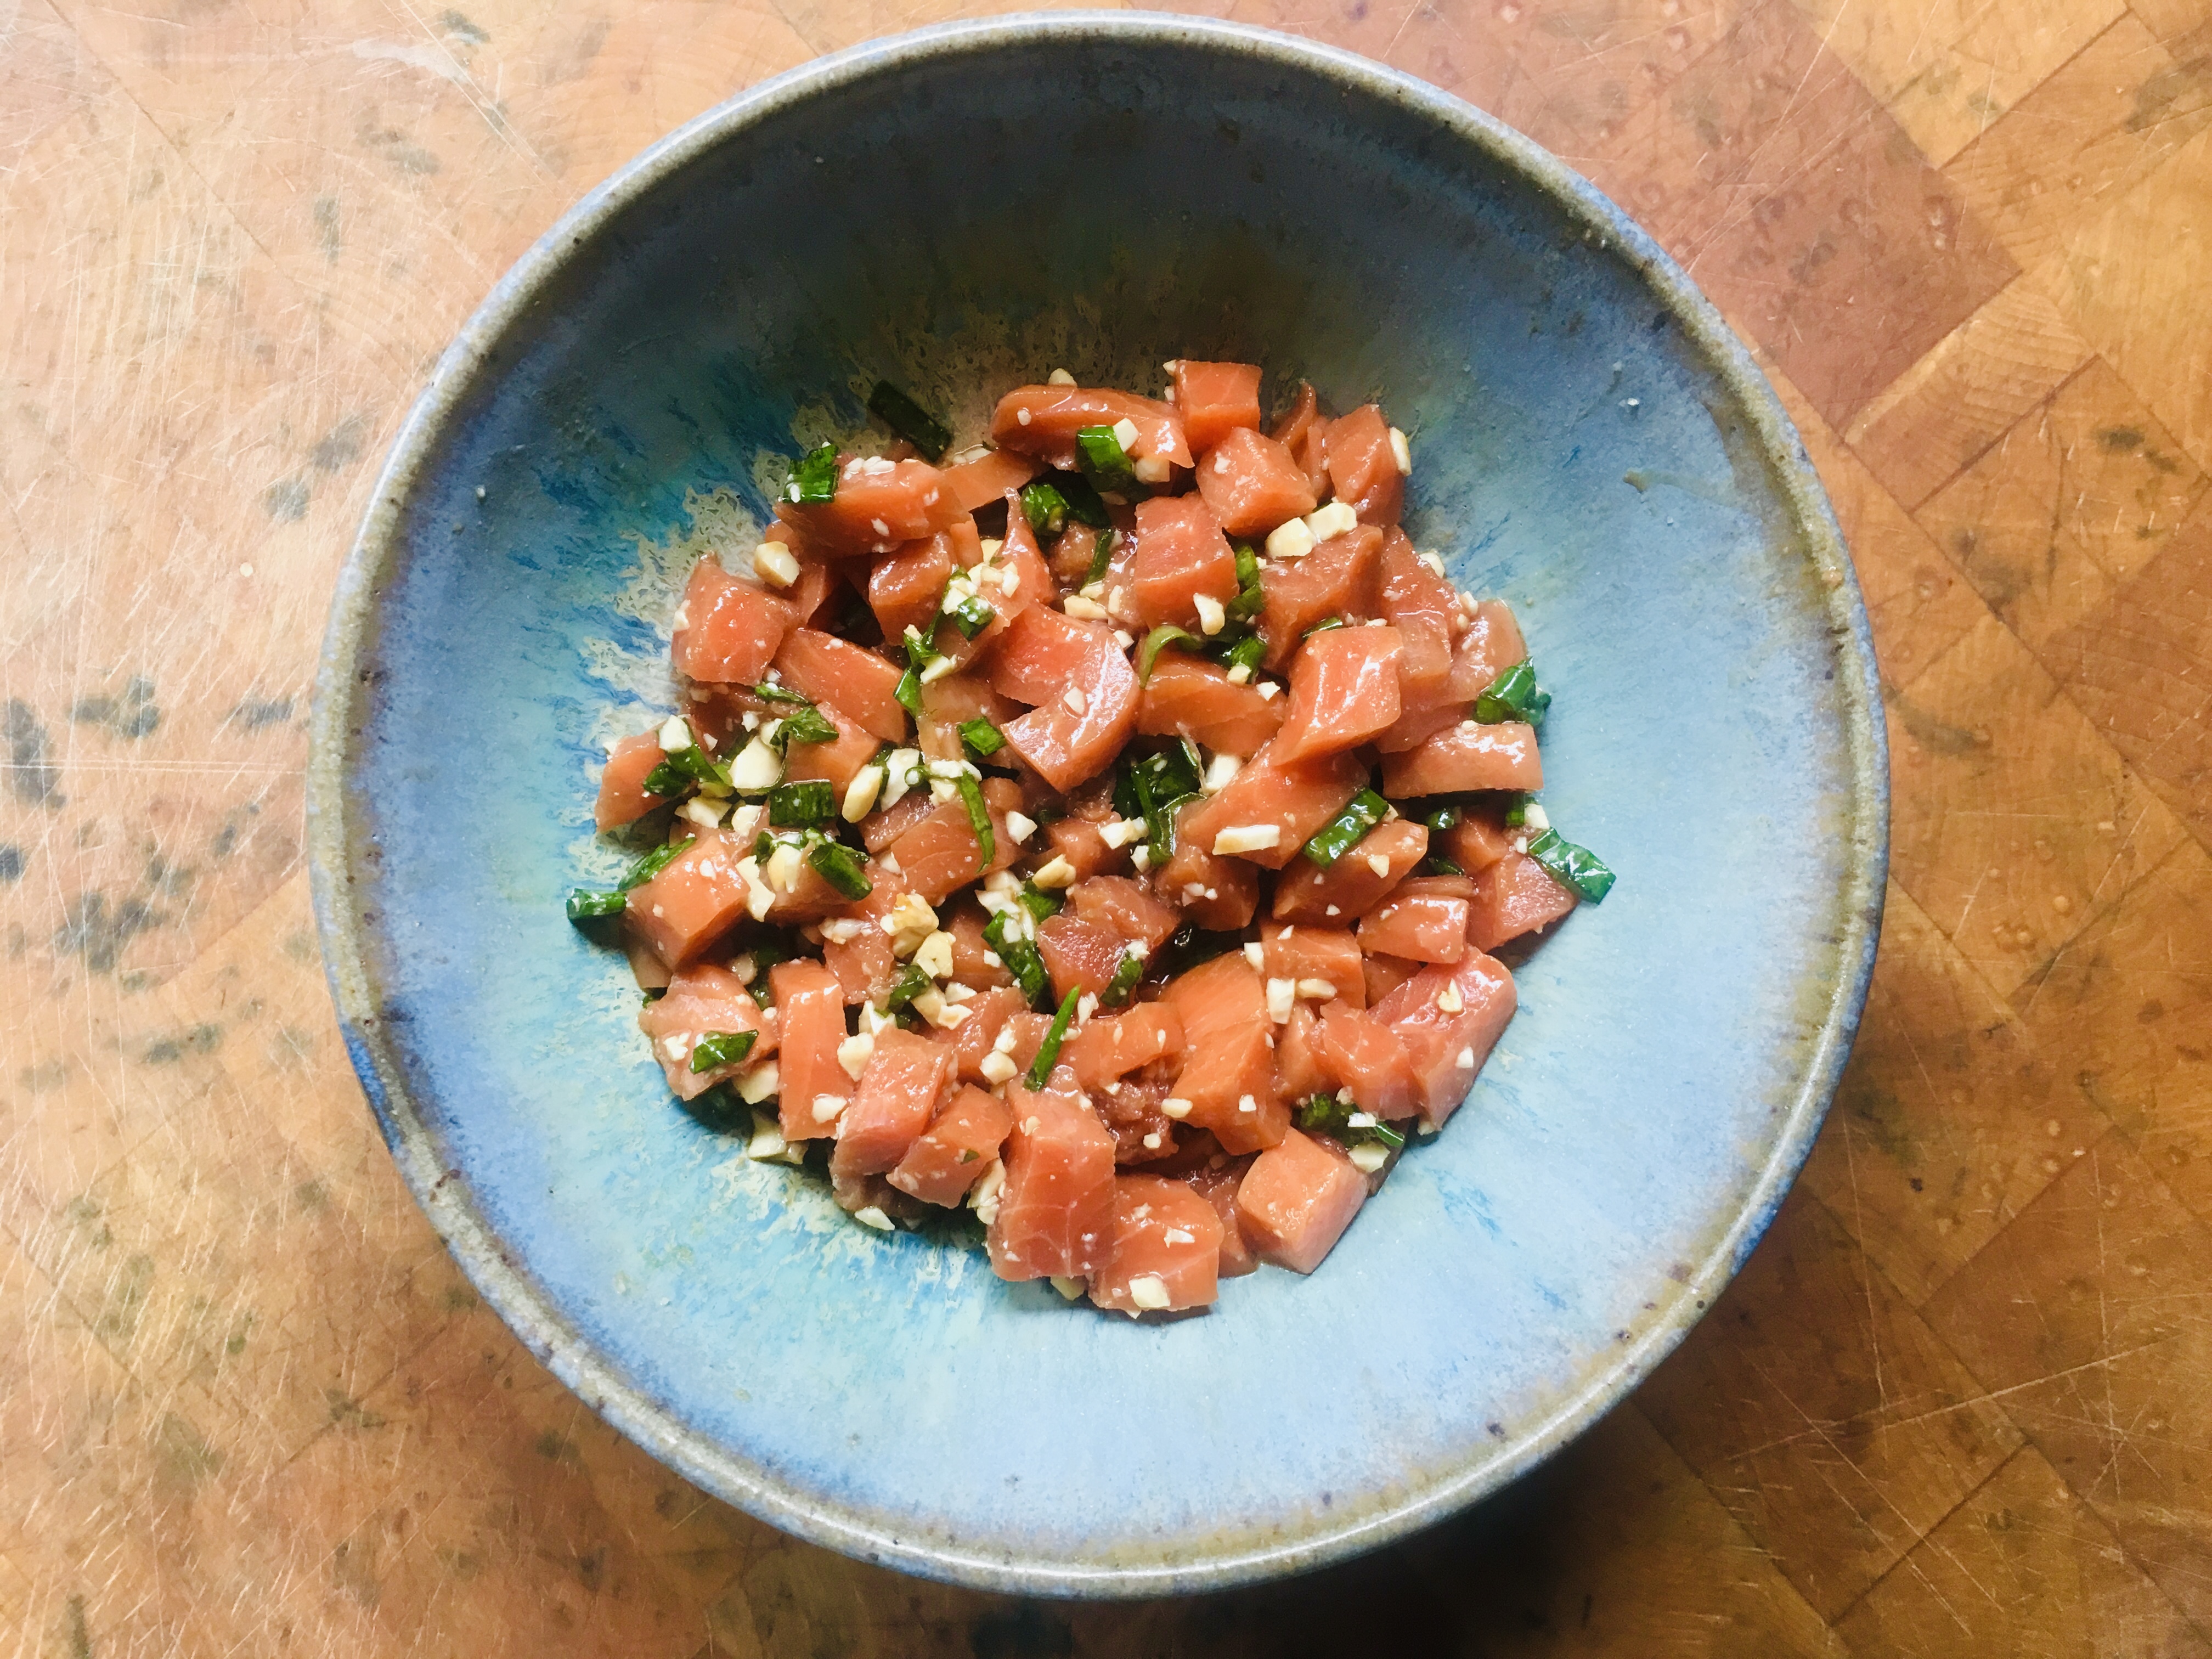
None of my ingredients were that drastically different, really, and when I combined them, I found that I had prepared one helluva poke indeed! (Poke, pronounced PO-keh, means “chopped into pieces” in Hawaiian.)
I used 6.5 ounces of salmon because I had a nice, big 26-oz. filet that I cut into 4 pieces.  Up to 8 ounces of fish will do fine with this recipe. And tuna would be just as tasty as salmon here.
If you’re going to go through the trouble of making poke—and for that matter, eating it—the freshness and quality of the fish is extremely important. I never eat farmed salmon (anything labeled Atlantic salmon is farmed.) It’s amazing how many so-called fine sushi restaurants serve Atlantic salmon. You can tell it’s farmed by the weird white and orange zebra stripes on the flesh of the fish. Farmed salmon would look gray if it wasn’t for the fact that farmers feed them pellets to change the color of their flesh to a more appealing orange.
Wild-caught salmon is just that: caught off the coast of the Pacific Northwest or Alaska, they feed on their all natural diet of shrimp, krill, and small fish…not food pellets and antibiotics. The salmon flesh is a beautiful natural bright orange, thanks to a shrimp-heavy diet. And the flavor is beyond compare.
I get my wild-caught salmon on line, shipped frozen from reputable distributors like Wild Alaska Salmon and Seafood. I cut the salmon into usable pieces while it’s still frozen, then re-wrap the pieces carefully and put them back in the freezer. When it’s time to eat, I move the salmon from the freezer to the fridge, letting it thaw overnight.
6.5 ounces wild-caught Alaskan salmon, in the refrigerator (thawed, if previously frozen)
1 tablespoon soy sauce
2 teaspoons untoasted sesame oil
1 teaspoon rice vinegar
1/2 teaspoon fresh lemon juice
1/3 cup chopped raw cashews
One scallion, green and white parts finely chopped
Keep the salmon in the refrigerator until the very last moment.
In a bowl, combine the soy sauce, sesame oil, rice vinegar, and lemon juice. Whisk them together.
Chop the cashews and add them to the bowl, mixing them in.
Cut the root ends off the scallions, chop the green and white parts finely, and add them to the bowl, mixing them in.
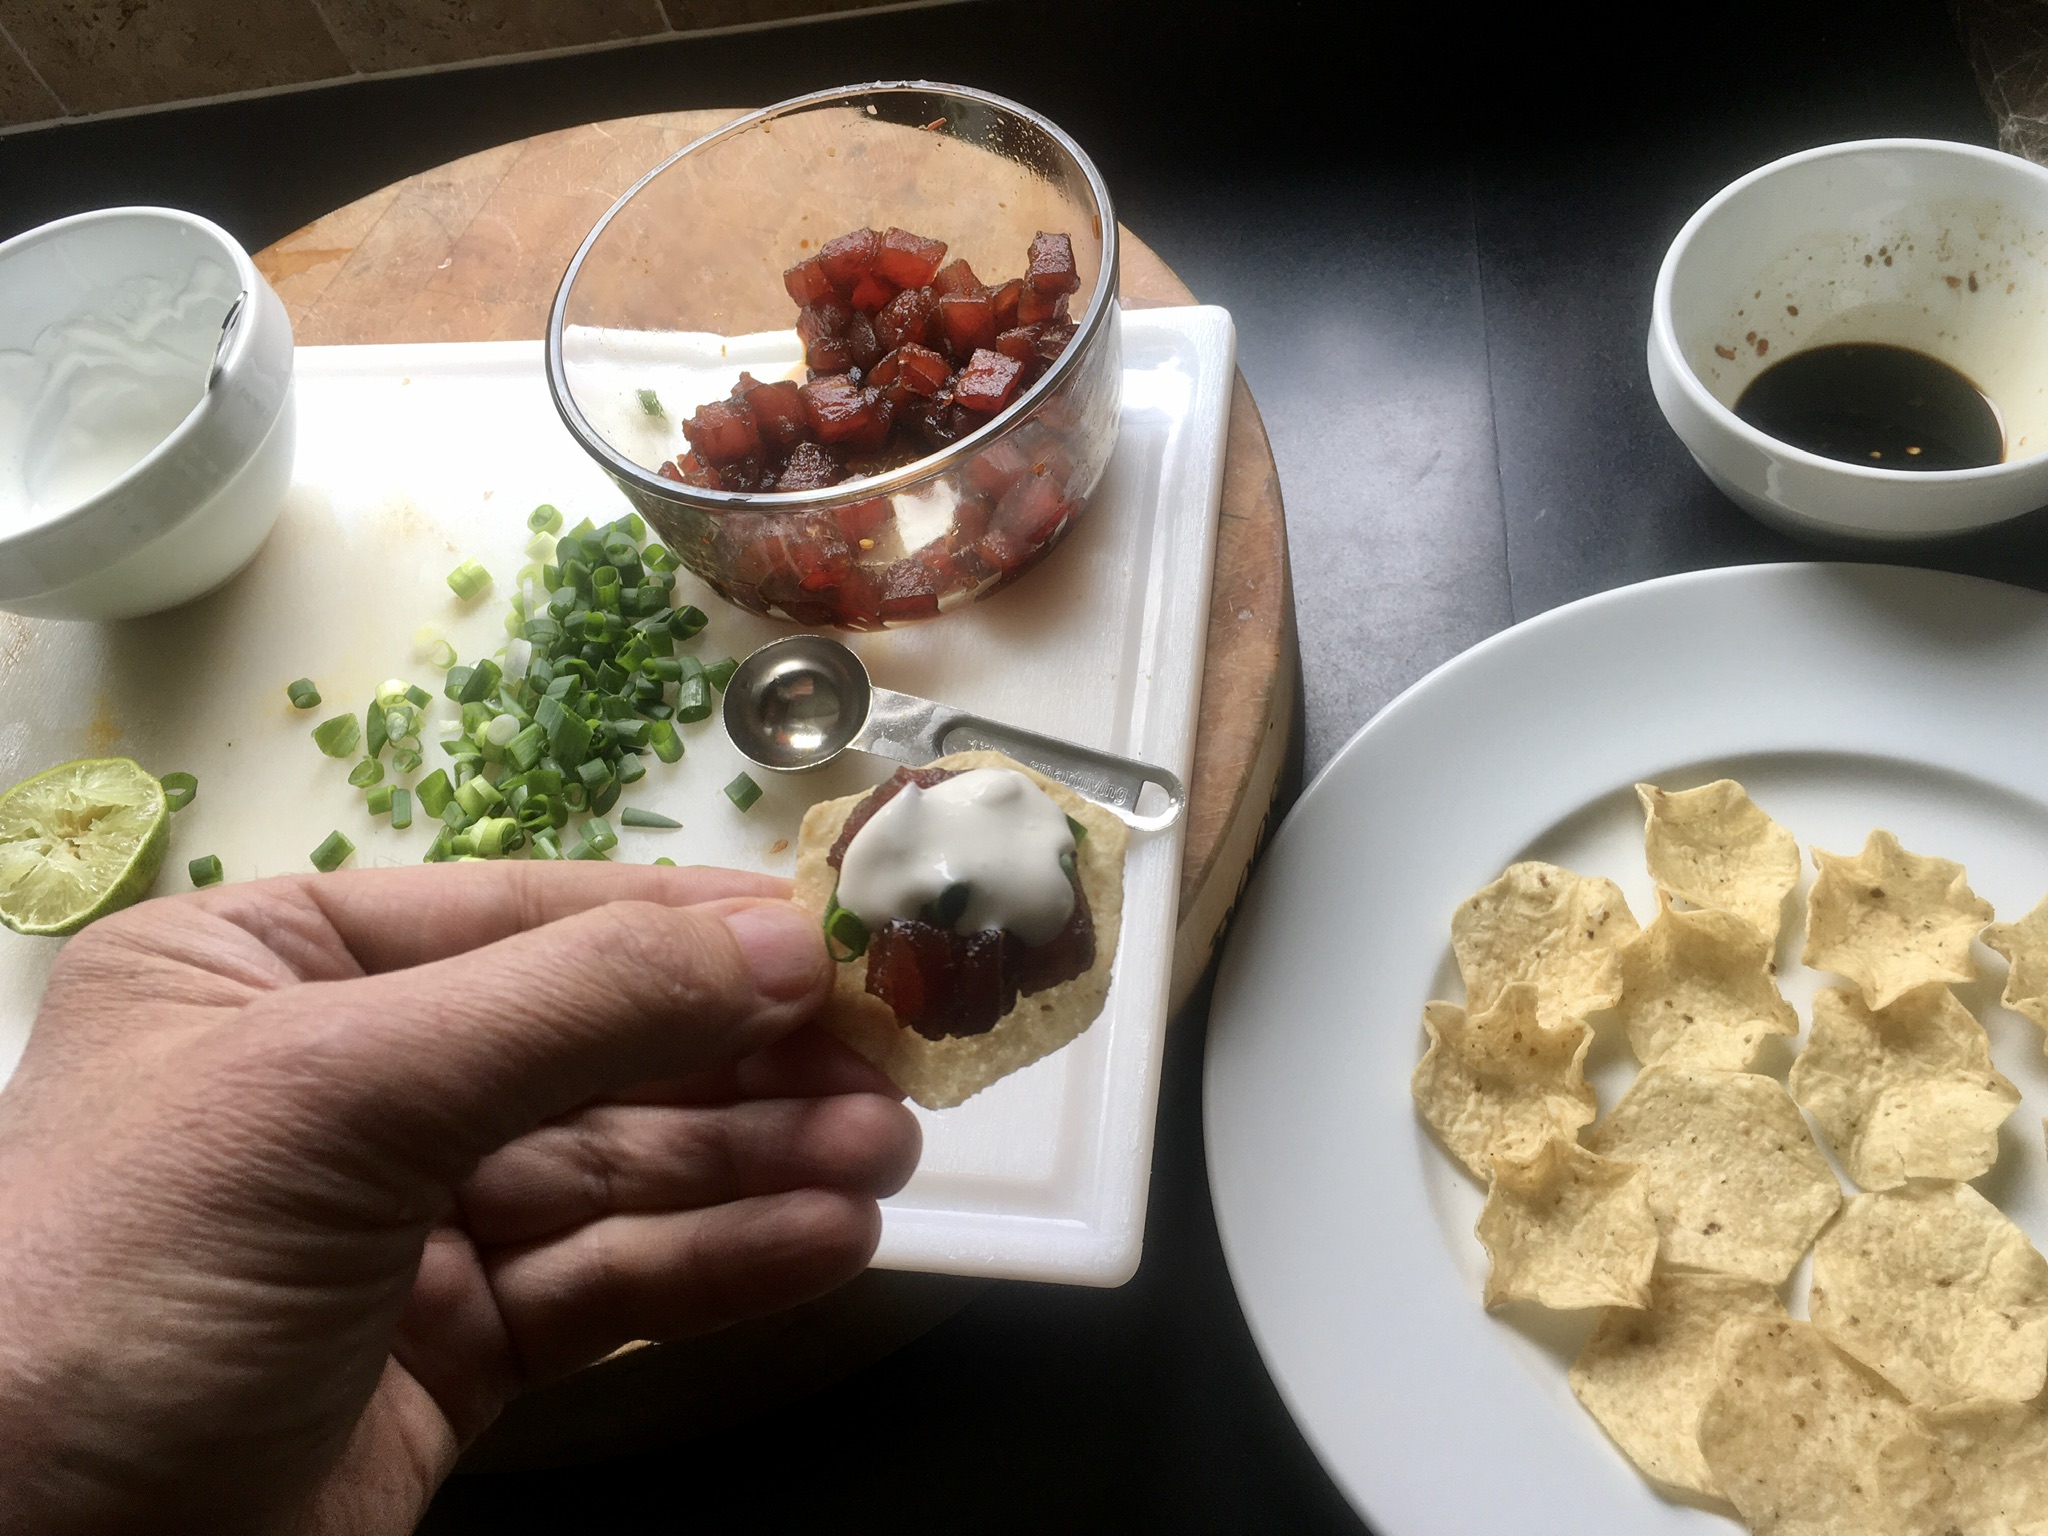
Remove the salmon from the fridge, and remove the skin if it is still on the fish. Cut the fish into half-inch cubes. Add the salmon to the bowl and gently mix all the ingredients together. (You don’t want to break up the fish.)
Let it sit for 10 to 15 minutes, if you can wait that long!
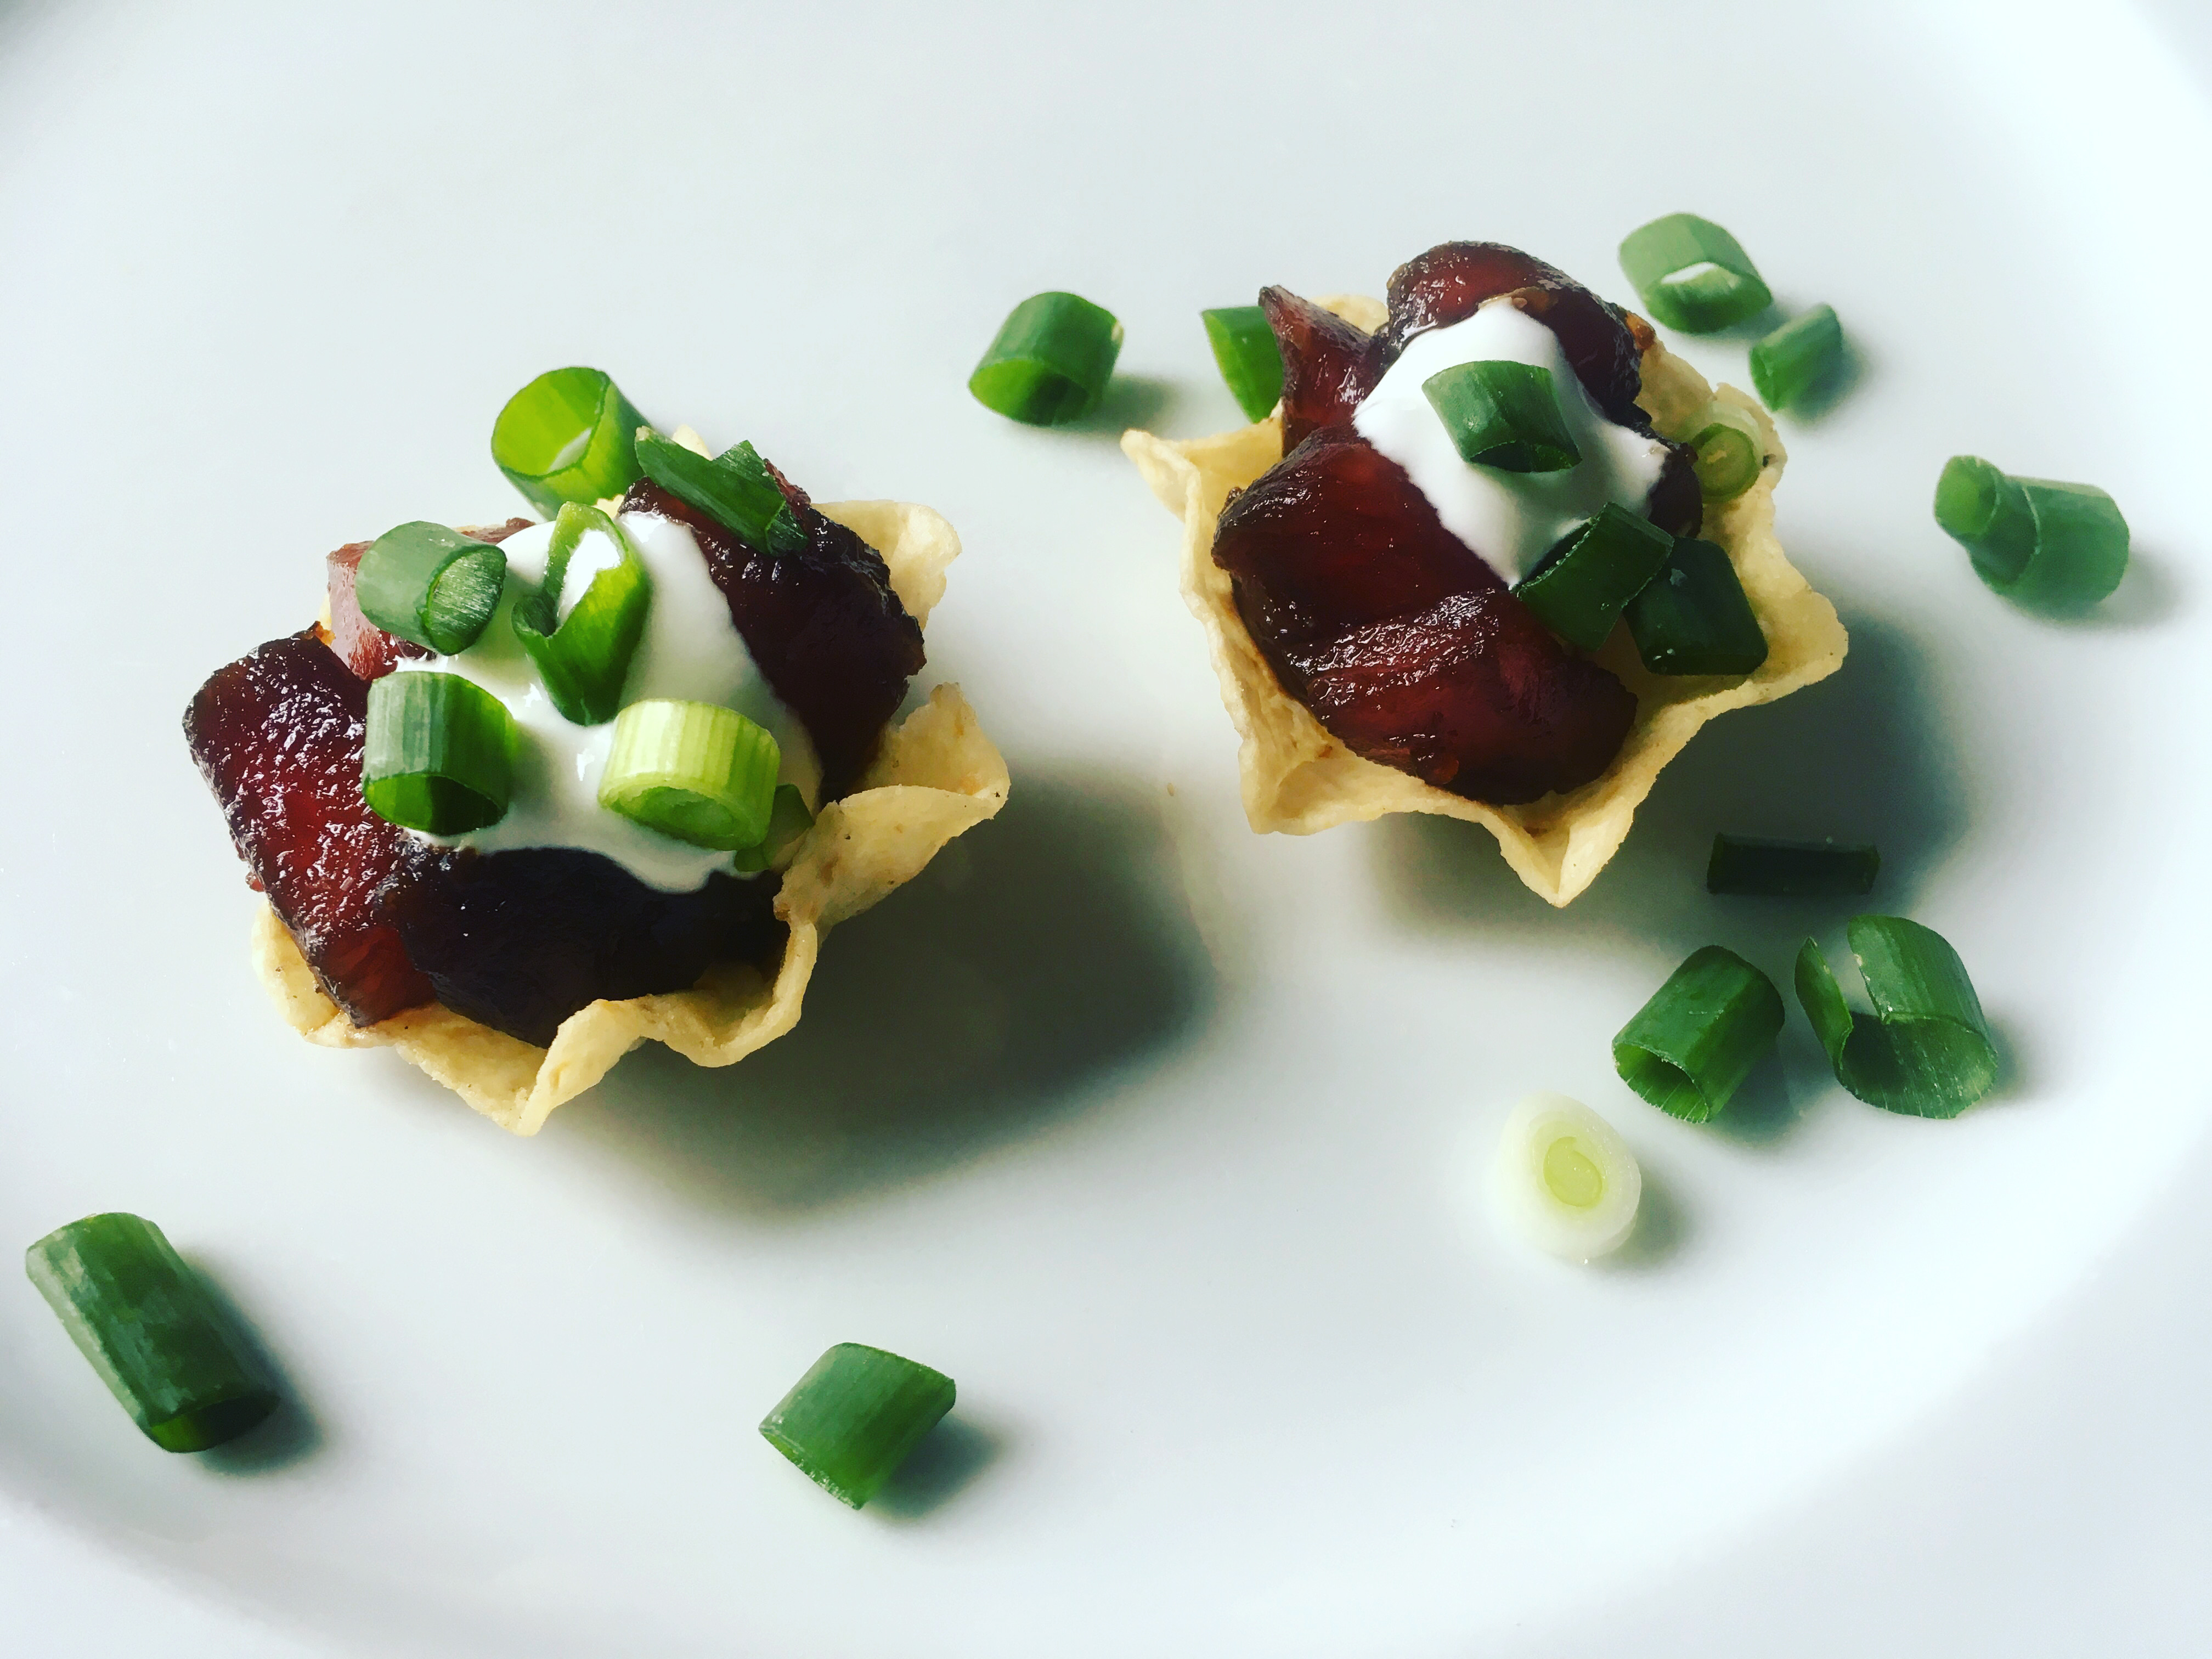
Time to eat!

GREAT ONION RINGS AT HOME

Posted: August 20, 2021 in Food, frying, Recipes
Tags: , , ,
If you look online, there are a  million ways to make onion rings. So, in doing my research, my first step was to decide how I wanted them. Did I want a big, thick batter? Or something extremely light? Or something somewhere in the middle?
I’m not a fan of onion rings that have more batter than onion. After looking through dozens of recipes, I finally came up with one on my own that really satisfied my craving for onion and also a craving for a great crunch.
The set-up requires four trays, and lots of messy dunking before it goes into the oil. But it’s all worth it in the end!
I have a deep fryer, but the basket in it is small, so I can’t fry as many onion rings at one time as I’d like. So using a larger pan with a shallow pool of oil was the answer: it allowed for more onion rings to be fried in a single batch.
Onions, sliced about 1/4″ wide (I like using Vidalias)


In the first pan..
2 raw eggs, scrambled
In the second pan…
1 cup self-rising flour
In the third pan…
2 more raw eggs, scrambled
In the fourth pan…
2 cups fine breadcrumbs
1 teaspoon salt
1 teaspoon granulated onion
1 teaspoon granulated garlic
pinch of dried oregano (optional)
I like to fry with peanut oil, so I pour an inch or two into a large pan and heat it to 340°, using a thermometer.
I peel the onions and cut them into quarter-inch wide slices, breaking them up into rings. (If a couple of rings of onion stick together to form a thicker ring, I don’t have a problem with that!)
Once that’s done, the procedure is really simple: dunk the onion rings in the first pan with the egg, coating them well. Then dunk them into the second tray with the self-rising flour, shaking off any excess. Then dunk them into the third tray with the egg, making sure it’s completely coated. And finally, dunk them into the fourth tray with the seasoned breadcrumbs, again, shaking off any excess.
Drop the onion rings into the hot oil and be sure to flip them so they cook on both sides. Cook until they’re golden brown. Place them on a sheet pan with a metal rack to cool.

I experimented with three variations. The top brown ones follow my recipe. The ring on the bottom right is dipped in egg and the flour mix only. The ring on the bottom left is dipped in egg, then the flour mix, back to the egg, and the flour mix again. The breadcrumb procedure is still my favorite way to go. Great crunch!

This is a great side dish for any special occasion. And you can substitute to suit your needs. Goat cheese not your speed? Try Gruyère, smoked gouda, or even mozzarella. Need it to be gluten-free? Use GF breadcrumbs. Don’t like mushrooms? Okay…I can’t help you there…

image

1 package large white mushrooms
olive oil
1/2 shallot, finely chopped
1 clove garlic, through a press
1 tablespoon fresh thyme, finely chopped
pinch of red pepper flakes
salt and pepper
fresh goat cheese
bread crumbs
1 tablespoon fresh parsley, finely chopped

Pre-heat the oven to 400 degrees.

Rinse the mushrooms in cold water to clean them. Remove the stems of the mushrooms and set them aside. Rub the mushroom caps with olive oil and place them on a baking sheet, open side-down, in a 400-degree oven for a few minutes.

In a pan, sauté the shallot and garlic in a little olive oil. Chop the mushroom stems finely and add them to the pan. Add the thyme and pepper flakes.

Reduce the oven temp to 350 degrees after removing the mushroom caps. Flip the mushroom caps over so that they look like little bowls. Break off a small piece of goat cheese and place it in each mushroom. Top each with the sautéed shallot mixture. Sprinkle breadcrumbs on top and sprinkle parsley over that.

Return the baking sheet to the oven, cooking the mushrooms until they are lightly golden in color, and the cheese has melted.

image

Mushroom myth: Soaking mushrooms in cold water makes them mushy. Not true! Mushrooms do not soak up any water when left to soak for even 30 minutes. So use your mushroom brush…use your kitchen towel…whatever you like. But I prefer to get them clean simply with cold water.

The definition of a consomme is: “a clear soup made with concentrated stock.” I might add “mind-blowing” to that sentence, especially with this recipe. The key to success– and this is crucial–is to use absolutely garden-fresh, in-season ingredients. If you try this with greenhouse or supermarket tomatoes, you’re just wasting your time.

FullSizeRender (9)

4 1/2 lbs. of fresh garden tomatoes (my favorite is the heirloom: Brandywine)
1 large bunch of fresh basil, leaves and stems
1 2-inch piece of fresh horseradish, peeled
1 clove of garlic, peeled
1 tablespoon white wine vinegar (I use Alessi)
2 oz. vodka (I use Tito’s)
sea salt and pepper

Remove the core of the tomatoes, but leave everything else, including seeds and skin.

Put all the tomatoes, basil, horseradish, garlic, vinegar and vodka in a blender or food processor. You might need to do this in batches if your equipment can’t handle it all.

Process until you get a kind of slush.

Line a mixing bowl with a double layer of cheesecloth and pour the tomato slush mixture into it. Gather up the corners of the cheesecloth carefully, and tie them securely so you can lift the bundle up by the knot. Hang the bundle from a hook over a clean bowl in the fridge so that it catches the liquid that drips out, and leave the whole thing in there overnight. The liquid that drips out will be clear.

Cheesecloth bundle dripping overnight in the fridge.

Cheesecloth bundle dripping overnight in the fridge.

To serve, chill bowls (or in this case: the sipping glasses) in the fridge. When you’re ready to serve, ladle out the consomme and garnish each with a tiny basil leaf. A drop of excellent quality olive oil is optional.

Synthetic cheesecloth apparatus. The real thing works better.

Synthetic cheesecloth apparatus. The real thing works better.

I tried using a synthetic cheesecloth for this recipe, and I found that it doesn’t filter out enough of the solids to make a clear consomme. You could use it along with real cheesecloth, just to use the stand, or just hang it all in real cheesecloth, as described in this recipe.

When it’s done right, gazpacho is one of the most delicious summer soups you’ll ever have. The secret, of course, is using super-fresh veggies. That’s why I crave it at the first sign of a vine-ripened tomato in my garden or a local farm stand. When my tomato plants have dozens of ripening fruits on them every day, I eat some in salads…I make tomato sauce with others…but the reddest and ripest become gazpacho!

I never make this out of season, and I’m always wary of restaurants that do! Very often, they’ll try to hide the taste of older veggies by adding too much salt or lots of spice.

The consistency of gazpacho is a personal preference. I like mine a bit chewy…not chunky like salsa, but not watery like soup…somewhere in between the two is perfection.

All the work is pretty much in the slicing, peeling and chopping…so I do it carefully.

1 large Vidalia onion, peeled and roughly chopped
1 carrot, peeled and roughly chopped
5 large tomatoes, peeled, seeded, and roughly chopped
2 medium cucumbers, peeled, seeded, and roughly chopped
6 sprigs of flat-leaf parsley
1/2 cup olives, drained  (I like kalamatas)
1/2 cup good quality extra virgin olive oil
Juice of 1/2 a large lemon
3 tablespoons white vinegar
Sea salt and freshly cracked black pepper

An easy way to peel tomatoes is to turn them upside down and make an X with a knife, puncturing the skin. Drop the tomatoes in boiling water for about 30 seconds, and the skin will start peeling away from the meat. Scoop the tomatoes out of the water, and immediately drop them into a bowl of ice water, letting them cool for 5 minutes. The skin will peel right off. Cut the tomatoes in half and (over the sink!) gently press your thumbs into the seed compartments, popping them out. Give the tomato a little shake to remove any last seeds, and it’s ready to be chopped.

Make an X, then drop the tomatoes in boiling water for 30 seconds.

While the tomatoes are cooling, you can peel and chop the other veggies.

Peel and roughly chop the onion and carrot, and place them in a food processor. Let it run for about 10 seconds.

Add the peeled and seeded tomatoes, the peeled and seeded cucumbers, and the sprigs of parsley and continue processing.

Add the olives, olive oil, lemon juice, vinegar, sea salt and black pepper.

Process until the veggies are finely chopped, and you’ve got a soup. Store it in the fridge for at least one hour to chill before serving.

Garnish with a sprig of parsley and a sprinkle of Fleur de Sel or other tasty finishing salt.

I’ve served this to visiting friends often, and received many requests for the recipe. It requires a bit of setting up, but you can put it together right before serving to your guests…or yourself.

I use sushi-grade tuna for this dish, which is easily found online. It comes in 4-ounce packages, which is the perfect size for a single recipe. I buy them in quantity (it’s cheaper that way), and keep them in the freezer. You can also find tuna in small frozen “bricks” at Whole Foods or similar higher-end supermarkets. They might even have some fresh, in season.

It’s important you know where your tuna comes from, and if it was handled properly. If you go to a reputable seafood market, that shouldn’t be a problem.

If you’re concerned about parasites in raw fish, buying the bricks that have been in the deep-freeze is the way to go. And when it comes to mercury, the smaller the fish, the better. So if this is a concern, opt for ahi (also called yellowfin) tuna.

The topping…
¼ cup sour cream
1 tablespoon fresh squeezed lime juice
The marinade…
6 tablespoons soy sauce
1/2 teaspoon chili garlic sauce
Other Ingredients…
½ lb. sushi grade raw tuna, chopped into ¼-inch cubes
Tortilla chips, regular or the little bowls
Finely chopped scallions

Combine the topping ingredients in a bowl, and place it in the fridge.

Mix the marinade ingredients in a separate bowl and set it aside.

Chop the tuna into ¼-inch cubes, and if it looks wet, place it on some paper towels to absorb the excess moisture. (It can release quite a bit of moisture if it was frozen…you don’t want it watery before you marinate it.)

Marinate the tuna in the soy/chili garlic mix for just 10 minutes, then pour off the excess. (It will be really salty if you let marinate any longer.) Keep it in the fridge as well.

Finely chop the scallions.

Just before serving, take a tortilla chip or little bowl, place 1 tablespoon of the tuna on top, top this with ½ teaspoon of the sour cream mixture, and then garnish it with the finely chopped scallions.

Serve them immediately, and eat these quickly, before the tuna makes the tortilla soggy!

I don’t have the patience to boil Mason jars and lids and all that crap. But I love me my pickles, especially when this year’s garden is cranking out cucumbers in record numbers!

This is such an easy way to make great pickles, it’s almost unbelievable…and no water is needed! The salt extracts just enough moisture, like when curing meat, to make it work. This method works great if you want fresh pickles to eat immediately, but if you want to keep them for longer periods of time, you’ll have to go back to the old tried-and-true methods.

Fortunately for me, I devour these pickles as soon as they’re ready!

I originally used a plastic bag for this, but I found that using a plastic container keeps the pickles aligned better and it’s less messy.

pickles

fresh cucumbers
sea salt
a handful of fresh dill
a couple of cloves of garlic, thinly sliced

Get a resealable plastic container.

Cut the ends off the cucumbers and then slice them lengthwise, in half or in quarters. Lay them neatly next to each other in one layer in the container, skin-side down. Sprinkle the sea salt over the cucumbers. Sprinkle some of the chopped garlic on top. Then, tear off some fresh dill and lay it to cover the pickles.

You should be able to get a second row of pickles on top of the first, again sprinkling with the salt, garlic, and topping with dill.

Placing the lid on the container, squeeze out as much air out of the container as you can.

Put the container in the fridge overnight. Making sure the lid is tightly sealed on the container, flip it over every few hours. (I always put a plate underneath it when it’s upside down in case it leaks a little.)

The pickles will be ready to eat the next day, but they’re even better after 48 hours.

It seems like the popularity of shishito peppers has exploded overnight. Once a rare treat that I could only get on the menu at one of my favorite Boston restaurants, Toro, now they’re everywhere: farmers markets, bistro and pub menus, and of course…my own garden!

Shishito peppers are mostly mild…but you can get hold of a spicy one every 10 peppers or so…kind of a Russian pepper roulette!

Shishitos straight from the garden!

Shishitos are incredibly easy to grow…just like any other pepper. They love a full day’s worth of sun, and lots of fertilizer. If you have success growing tomatoes, shishitos should be on your list. Plus, they’re really quite prolific: it’s not uncommon to find a couple dozen peppers growing on each plant!

Shishitos are also easy to prepare, and take just minutes. Ideally, if you’ve already got a charcoal grill going, you’re almost there. Simply place the shishitos in a bowl and drizzle in a little olive oil. Toss the peppers to coat, and place them directly on the ashed-over coals of the fire. Work quickly turning them over with tongs. You want them to blister, but you don’t want them to burn! They’ll pop, deflate, and get soft. That’s when they’re ready. Simply place them on a serving plate, and sprinkle some really good sea salt (I like Fleur de Sel) over them while they’re still hot.

If you don’t have the time for a charcoal grill, you can still prepare delicious shishitos by placing them in a pan. Sprinkle in a little olive oil, and toss them around to coat them. Turn the burner on high, and cook the shishitos until they’re blistered, but not burned. Cook them on all sides, carefully flipping them over with tongs. Like on the charcoal, they will pop, deflate and get soft. Transfer them to a serving plate and sprinkle immediately with salt.

To enjoy shishitos, you simply grab them by the stem and bite!

I came up with this crunchy appetizer a few years ago, when I needed a tasty bite for one of our summer parties. I wanted something fresh that highlighted the veggies of the season, so when I spotted these baby bell peppers in the supermarket, I got the idea. I get requests for the recipe every year. 

image

Baby bell peppers
6 ears fresh corn, removed from the cob…or organic frozen corn
1/2 Vidalia onion, peeled, quartered, grilled, chopped
1 cup mayonnaise
1 teaspoon hot pepper sauce (I use Frank’s Red Hot)
6 oz. feta cheese or Queso Fresco, crumbled
Juice of 1 lime
Pinch of white pepper
1 tablespoon fresh parsley, finely chopped

image

Cut the corn kernels from the ears, and sauté them very briefly in a little olive oil. Place them in a bowl and let them cool.

Peel and quarter the Vidalia onion, and throw it on a hot grill with a little olive oil to get some nice grill marks on it, leaving the onion still crispy, not soft. If you’re cooking indoors, throw the quartered onion in a hot pan with a little olive oil, and cook it until you get some brown marks on it. Remove it, let cool, then place it in a food processor and pulse it until the onion is chopped into small bits, just smaller than the corn kernels. Add the onions to the corn.

In a separate small bowl, combine the mayonnaise and the Frank’s Red Hot. Pour in the crumbled cheese and mix well. Pour this into the corn and onion bowl and mix well.

Add the lime juice, white pepper and parsley to the bowl and mix well again.

Cut the baby bell peppers in half lengthwise, and remove the seeds and membrane. Stuff the peppers with the corn mixture and garnish with cilantro or parsley.

If you’re preparing this ahead of time, refrigerate the stuffed peppers until you’re ready to eat, but allow some time for them to warm up to a cool, not cold, temperature.

I love shrimp scampi, and had the need to satisfy my cravings the other day. But what started as a simple scampi recipe, turned into something a bit more. I may never make scampi the same way again!


image

1 lb. wild-caught American shrimp, peeled and de-veined
4 tablespoons butter
4 tablespoons olive oil
2 teaspoons parsley
1 teaspoon garlic salt
1 teaspoon oregano
1/2 teaspoon granulated onion
1/4 teaspoon black pepper
3 tablespoons Spirgučiai (see below)
1/2 lb. fresh mozzarella, sliced
oregano, for sprinkling


Thaw the shrimp under cold water. Place in a colander to drain.

Spirgučiai is a Lithuanian favorite: chopped bacon and onions, fried until crisp and usually sprinkled over anything and everything in Lithuanian cooking. I always have some in my fridge, already prepared and just waiting to be used.

In a saucepan on medium heat, combine the butter, olive oil, parsley, garlic salt, oregano, onion, pepper and Spirgučiai.  Heat only until everything melts and combines. Don’t let it burn. (If you don’t have Spirgučiai, all you need to do is take a couple of slices of bacon, chop them up, and fry them in a pan until crisp. Keep the bacon and the fat in the pan and then add the butter, olive oil, parsley, garlic salt, oregano, onion and pepper.)

In a small sheet pan lined with foil, lay the shrimp in a single layer and cook them halfway in a pre-heated 400-degree oven to remove the moisture from the shrimp.

Take the pan out of the oven, and drain off the moisture, if any. Pour the butter mix from the saucepan all over the shrimp and toss to coat. Return the shrimp to the oven for a few minutes, until they’ve heated through and are almost completely cooked. (Careful: never over-cook shrimp!)

Take the pan out of the oven, and place pieces of mozzarella on top, garnishing with a little oregano. Set the oven on broil and cook until the cheese has melted.

Slice with a spatula and serve on top of pasta, making sure you get some of that buttery scampi sauce.


image

As a low-carb option, you can serve this on broccoli or roasted spaghetti squash.