Archive for the ‘Recipes’ Category

I know that winter has only started. But I’m cold, dammit, and I’m thinking about the Caribbean!

One of the tastiest rum drinks you can make, and one that certainly brings you back to the Caribbean—or at least makes you feel like you’ve been there—is the legendary Painkiller. It was invented on the tiny island of Jost Van Dyke in the British Virgin Islands, at the famous Soggy Dollar Bar. Located on White Bay, a stretch of the whitest most beautiful sand in the Caribbean, surrounded by beautiful turquoise waters, there is no dock. You have to anchor your boat offshore and swim…hence the name: the Soggy Dollar.

SOGGY1

Daphne Henderson was the owner of the Soggy Dollar years ago, and she is credited for inventing the Painkiller, which used Pusser’s rum, a British rum that is readily available here in the United States. Charles Tobias, a businessman that received permission from the British Royal Navy to commercialize Pusser’s rum in 1980, tasted the Painkiller and realized the potential of this amazing drink. He took some Painkillers home to the island of Tortola, where he experimented in recreating that drink, coming up with what he thought was something that was as good as—if not better than—the original. He called it the Pusser’s Painkiller.

Tobias never found out what Daphne Henderson’s original recipe was, but when he brought his own Pusser’s Painkillers back to the Soggy Dollar, and had a tasting battle between the two recipes, his recipe apparently won 10 out of 10 times. With 4 Pusser’s bars and restaurants in the Caribbean and 2 more in the states, Tobias quickly made the Pusser’s Painkiller the signature drink of these now-famous establishments…and perhaps the most popular drink among the sailing community in the US, Caribbean and West Indies.

The drink itself is simple…

PUSSER’S PAINKILLER

4 parts pineapple juice

1 part cream of coconut

1 part orange juice

Combine these 3 ingredients, with lots of fresh grated nutmeg in a glass with ice. How much Pusser’s rum you use depends on how hammered you want to get! A Pusser’s #2 uses 2 parts rum…a Pusser’s #3 uses 3 parts rum…and a Pusser’s #4 uses 4 parts rum!

I’ve had several Pusser’s #4’s back in the day when there was a Pusser’s bar on the island of St John in the USVI many years ago. I’ve also sampled them in the BVI at the 2 Pusser’s locations on Tortola.  But I still prefer going back to Jost Van Dyke and knocking back a few at the place where the Painkiller was born, the greatest beach bar on planet Earth: The Soggy Dollar Bar.

I don’t know when I’ll get a chance to go back. But my bathing suit is already packed.

SOGGY2

Thanks to my buddy, Dr Chezwick, for the photos. No children were harmed during this catamaran trip.

I love fried chicken. And despite what most people think, fried food is really not that bad for you if you fry it properly. Use clean oil every time, and get the oil to the right temperature: two key factors that will result in crispy chicken that isn’t bogged down with grease. But frying also means you have to stand over the chicken and watch it all the time…especially a pain in the butt if you’ve got guests and you’re making a lot of chicken! What makes this recipe great is that you get all the benefits of a crispy fried chicken without all the grease and without standing watch over it the whole time.

You can use chicken wings or any chicken parts for this recipe. Either way, I fry the chicken until it just turns golden brown and then bake it in the oven.

Ingredients:

10 lbs large chicken wings or chicken pieces

Vegetable oil, for frying

For soaking:

1 quart buttermilk

2 teaspoons Frank’s Red Hot, or other hot sauce

For the seasoned flour:

1 ½ cups all purpose flour

½ cup whole wheat flour

1 Tablespoon sea salt

1 teaspoon freshly ground black pepper

1 teaspoon paprika

1 teaspoon granulated garlic

1 teaspoon onion powder

1 teaspoon basil

1 teaspoon oregano

Open the bottle or carton of buttermilk and add 2 teaspoons of hot sauce. Close container and shake to combine. Place chicken pieces in a bowl and cover with buttermilk, letting the chicken soak in it for at least several hours or overnight.

Chicken soaking in buttermilk/hot sauce mixture overnight.

Pre-heat oven to 350 degrees.

Combine all purpose and whole wheat flours in a bowl. Add salt, pepper, paprika, granulated garlic, onion powder, basil and oregano. Mix well.

After chicken has soaked in the buttermilk, remove the pieces one at a time, leaving the buttermilk on them as you toss the pieces into the seasoned flour. Set pieces aside on a metal baking rack placed on a sheet pan.

Pour the vegetable oil into a large heavy-bottomed stock pot to a depth of 1-inch. Heat the oil to 360 degrees on a thermometer.

From the buttermilk, to the breadcrumb mixture, to the oil.

From the buttermilk, to the breadcrumb mixture, to the oil.

Working in batches, place the chicken pieces in the oil, being careful not to overcrowd them. Fry the chicken until it is golden brown on both sides, then place each piece back on the metal baking rack set on the sheet pan.

Once all the chicken has been fried, place the sheet pan in the oven for 30 to 40 minutes, until fully cooked and crispy.

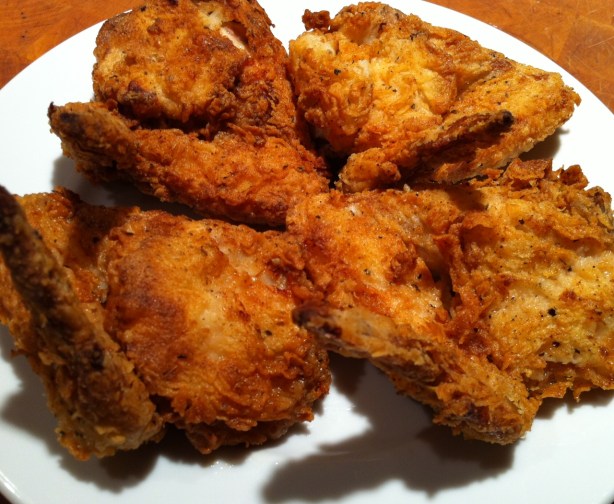
fried chix

Feast!

Almost 95% of all shrimp sold in the United States comes from farmed shrimp in countries like China, Thailand, Vietnam and India…as well as Latin America. The stuff you buy at the supermarket comes frozen (since shrimp is highly perishable) and then is thawed out and placed on ice to make the display look nice. But the shrimp you’re getting is not “fresh” (unless you’re lucky enough to get some wild caught local shrimp) and it’s from countries where the methods of farming are questionable at best.
Shrimp farming in Asia and Latin America is destroying mangrove forests and because of that, coastal villages as well. Disease is commonplace in shrimp farms, so they’re pumped full of antibiotics and pesticides.
Imported wild shrimp are also a problem because of bycatch. For every pound of wild shrimp caught, several pounds of other animals such as turtles die needlessly in the trawler nets.
Wild American shrimp is the best way to go for your health and the environment. American shrimp fishermen are required by law to reduce bycatch. For example, they’re required to use Turtle Exclusion Devices to stop turtles from being caught in their nets.
I stopped eating tiger shrimp and other farmed shrimp from foreign countries a long time ago because I found a source of shrimp that not only delivers to my door, but offers me that shrimp at competetive pricing even with the shipping! And best of all, it is wild caught in American waters. I’m supporting the lives of shrimp men along the Gulf of Mexico, not some foreign country that doesn’t give a rat’s ass about the environment, the shrimp they raise in it, or my family’s well-being.

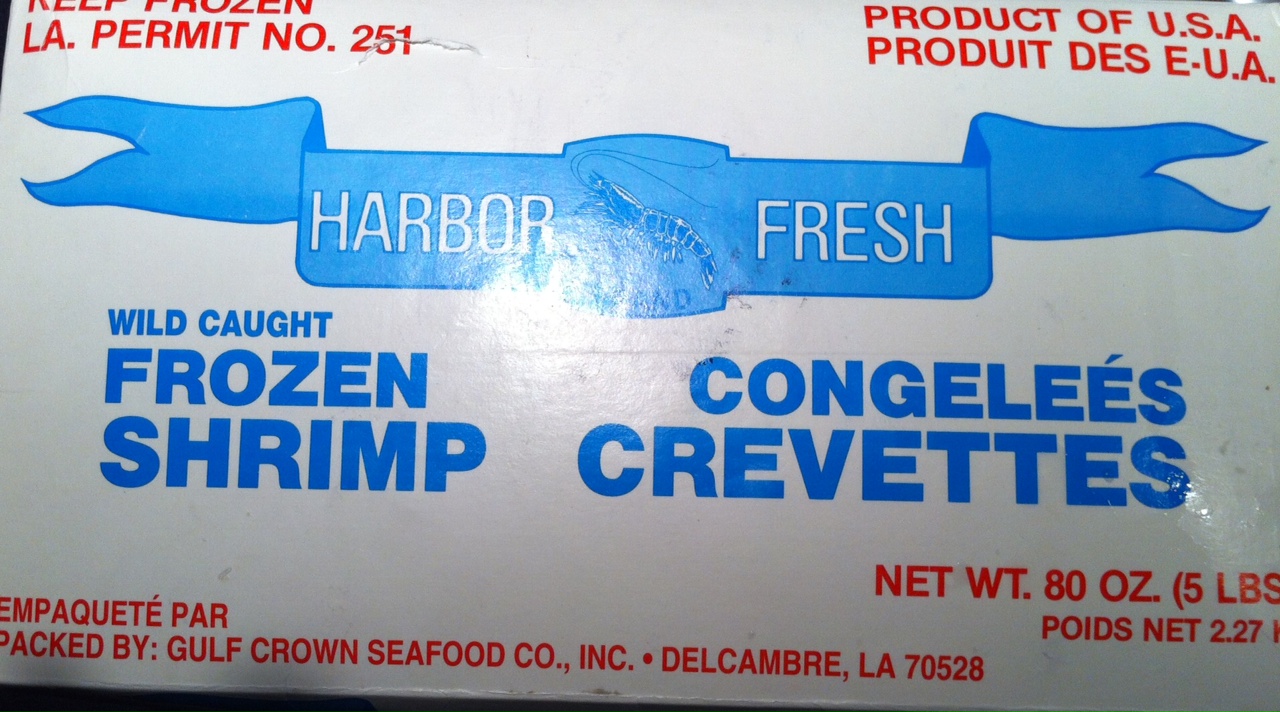
The real deal, usually sold in 5 lb boxes.

And on top of everything else, wild caught American shrimp tastes better. And why shouldn’t it? The shrimp are eating their natural foods found in the wild…not some pellets thrown at them that contaminate the water around them, not to mention the shrimp themselves.
My favorite website for wild caught American gulf shrimp is www.cajungrocer.com. I have been ordering my favorite Cajun foods, like Turduckens and alligator sausage, from these people for many years, but they also sell shrimp and live crawfish (in season.)
Don’t cheat yourself, your friends or your family out of something really special. Wild caught American gulf shrimp costs the same, supports our economy, is better for you and tastes better.
The basics of this recipe come from my friend, Lee, a chemist in New Jersey who also enjoys creating in the kitchen. What I found interesting about his recipe was the touch of sugar that doesn’t really add sweetness but rather helps create the light, tasty caramelized crust that forms on the shrimp when you sear it. I tweaked a few things in this recipe, but the essence of it remains the same.

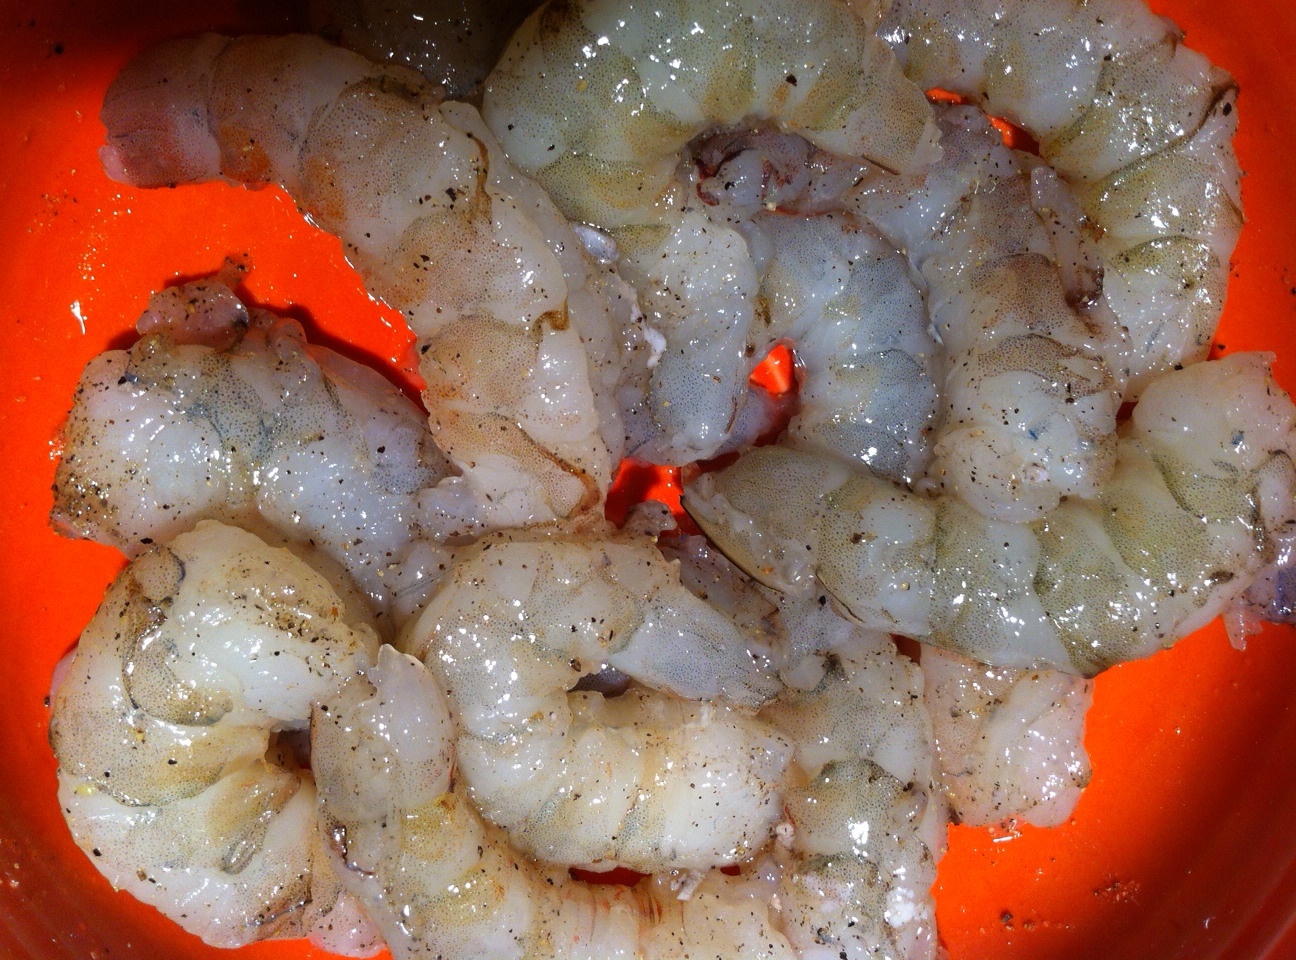
Seasoned shrtimp.

Ingredients:
1 pound large peeled and deveined wild-caught American shrimp
Salt
Freshly ground pepper
Sugar
4 Tablespoons softened butter
1 clove of garlic, squeezed through a press
1 Tablespoon freshly squeezed lemon juice
2 Tablespoons chopped parsley
1 teaspoon oregano
Extra Virgin olive oil
Toss shrimp, 1/4 teaspoon salt, 1/4 teaspoon pepper, and 1/4 teaspoon sugar in a bowl.
In a separate bowl, mash butter with a fork, folding in the garlic. Add the lemon juice, parsley, oregano, and 1/4 teaspoon salt.
Heat a Tablespoon of olive oil in a large skillet over high heat. Add half the shrimp in a single layer to the pan and cook at high heat until caramelized on one side, about 1 minute. Flip shrimp over with tongs and cook for another 30 seconds. Do not overcook.
Remove cooked shrimp to a covered bowl and similarly sear the other half of the shrimp, then return other half of the shrimp back to the skillet. Turn down the heat to medium and add the butter/garlic/lemon/parsley/oregano/salt mixture, occasionally tossing shrimp around in the pan to evenly coat them with the glaze.
If serving over pasta, increase the amount of butter and olive oil to just lightly coat the pasta. Toss cooked pasta into the pan of shrimp to combine.
I like to season lightly at the end with a tiny pinch of Fleur de Sel. Serve immediately.
The fact that I can’t remember a damn thing anymore has actually worked in my favor when it comes to getting recipe ideas from television. I can no longer get the exact ingredients down and so I wind up make stuff up as I go along. The end result: my own original take on a particular recipe.
A perfect example of that was a few months ago when I was watching Adam Richman’s Best Sandwich In America on the Travel Channel, which featured some of the most innovative sandwiches from around the country. I was particularly intrigued by the methods used by the folks at Faidley’s in Baltimore to make their famous crab cake sandwich. I jotted down what I thought they did (of course, they don’t reveal their recipe secrets) and I wound up creating the best crab cake I’ve ever made:
Alz Crab Cakes

1 pound crab meat
1/3 cup oyster crackers
1 teaspoon Old Bay seasoning
1/2 cup mayo/mustard blend

To make the mayo/mustard blend, combine 4 parts mayonnaise to 1 part mustard. You your favorite. I use Maiile Chablis mustard, but it’s only available in France. (See my previous blog about the Maille mustard shop in Paris.) However, Maille Dijon mustard is great, too. Set aside.

Take the oyster crackers and pulse them in a food processor until it resembles oatmeal…not too fine.

In a bowl, gently mix all the ingredients. With your hands, form small crab cake balls, like meatballs. Place on a tray lined with foil, and pop in the fridge for at least 15 minutes to set.
Heat oil in a pan to 375 degrees. Gently drop the crab cakes into the oil, and fry for only 10 to 15 seconds. Flip over, and fry 10 to 15 seconds more, just to form a light crust. Don’t over-fry or they will fall apart!

Drain crab cakes on paper towels and enjoy.

Any leftover mayo/mustard works great as a tartar dipping sauce, or a spread if you’re making a crab cake sandwich. Just finely chop some pickles, add a splash of Worcestershire and/or hot sauce, and mix with the mayo/mustard.

This recipe works equally well with a light, flaky fish, like cod. Combine mayo/mustard mix with Old Bay. Slather the fish in it, then roll the fish in the crumbs and fry in oil.


Don’t let the fact that your brain isn’t what it used to be get you down. Take advantage of it! You just might come up with an original recipe that blows the doors off anything you copy down word for word.

When you’ve had enough of Buffalo wings, try this Asian version. They are easy to make, and taste awesome. A nice change of pace from your usual wings. This recipe works well with larger chicken pieces, too.
Asian style chicken wings
10 lbs chicken wings, the larger the better
2 cups soy sauce
1 small can (6 oz) pineapple juice
1 cup brown sugar
1 tablespoon powdered onion
1 tablespoon granulated garlic
1 teaspoon Chinese five spice
a squirt of sesame oil
Salt and pepper
Mix all the marinade ingredients in a large Ziploc bag, shake to mix, and then add the chicken. Marinate in the fridge overnight, turning the bag once in a while to make sure everything gets an even coating of the marinade.
The next day, pour off the marinade and discard, remove chicken wings from the bag, place on a cookie sheet lined with foil, and bake at 325 degrees for about 30 minutes, until sizzling and done.
It’s a mouthful…but man, is it good!
I think buttermilk is overlooked by most people. If you gave the average person a quart of buttermilk, they wouldn’t know what to do with it. Most people have heard of regular buttermilk pancakes, or maybe the process of soaking chicken in buttermilk before breading and frying…but that’s about it.
I grew up in a Lithuanian household where buttermilk, like many other dairy products, was an everyday ingredient. From something as simple as a bowl of cold buttermilk with fried potatoes on the side (one of my Dad’s favorites), to a cold summer borscht, my Mom found different ways to use buttermilk on a regular basis.
The term “buttermilk” actually refers to several different dairy drinks. Originally, buttermilk was the liquid left behind after churning butter out of cream. Buttermilk can also be quickly soured milk, a common drink in warmer climates. In colder climates, the souring process doesn’t occur naturally, but it is often encouraged, commonly by placing bread in the milk to make it go sour faster. (My Mom did this all the time, using Lithuanian bread, a dark rye-like bread.) And then there’s cultured buttermilk, which is what most of us find on supermarket store shelves today. This is milk that has had lactic acid bacteria introduced into it.
I loved the taste of buttermilk–still do. Just give me a cold bowl, sprinkle a little finishing salt in it, and I’m good. But for those who don’t want their buttermilk straight, here’s a recipe that will knock your socks off, and wouldn’t be the same without this great, misunderstood ingredient.
Blueberry cornmeal buttermilk pancakes with lemon zest
1 cup all-purpose flour
1 1/2 cups stoneground yellow cornmeal
2 Tablespoons sugar
2 teaspoons baking powder
1/2 teaspoon baking soda
1/2 teaspoon salt
2 cups buttermilk
2 teaspoons grated lemon zest
1 large egg
3 Tablespoons melted unsalted butter, slightly cooled
1–2 teaspoons vegetable oil
1 cup fresh or frozen blueberries, preferably wild, rinsed and dried
Whisk flour, corn meal, sugar, baking powder, baking soda, and salt in a medium bowl
to combine.
In a separate bowl, whisk egg, lemon zest, and melted butter into buttermilk to combine.
Make a well in the center of the dry ingredients in the bowl. Pour in milk mixture and
whisk very gently until just combined. Do not over mix. A few lumps are OK.
Heat non-stick skillet over medium heat. Add 1 teaspoon oil and brush to coat skillet
bottom evenly. Pour 1/4 cup batter into 3 spots on skillet. Sprinkle 1 Tablespoon
blueberries over each pancake. Cook pancakes until large bubbles begin to appear,
about 1 1/2 to 2 minutes. Using thin, wide spatula, flip pancakes and cook until golden
brown on second side, 1 to 1 1/2 minutes longer.
Serve immediately.
Like hot dogs and Slim Jims, jerky is one of those “mystery meats” we love but don’t really know how it’s made or what part of the animal it comes from.
Really excellent beef jerky is a rare treat, and once you have it, you will never go back to that rancid, preservative-filled dog meat you find in a bag at the supermarket. And the best part is: it’s quite easy to make.
First, the meat: I like to shop around for a really good cut of London broil for my beef jerky. You can use cheaper cuts, but a nice, lean slab of London broil, sliced into 1/4″ pieces on a diagonal, against the grain, works really well. Remove all gristle and fat that may be on the meat before slicing.
Once you’ve done that, all you need to do is make the marinade, marinate the beef overnight, and then dry it the next day. It really is that easy.
Your final product will be a flavorful beef jerky that is so good, you’ll find it very hard to stop eating it…or to share it.
Marinated beef strips on the dehydrator.
Alz Beef Jerky
1 Tablespoon salt
1 1/2 Tablespoons granulated garlic
1 teaspoon black pepper
1 teaspoon fresh minced peeled ginger
2/3 cup brown sugar
1 cup Teriyaki sauce
1 cup soy sauce
8 lbs raw, lean beef, like London broil, cut into 1/4″ thick diagonal slices, against the grain of the meat
Mix all ingredients except meat in a large bowl. Place meat in a large Ziploc bag, pour marinade inside, seal, and refrigerate overnight. Squish the bag around once in a while, to make sure all meat surfaces make contact with the marinade. Keep the bag in a bowl to prevent any accidental spillage in your fridge!
The next day, pour off the marinade and discard. Using a food dehydrator or simply an oven at 140 degrees, dry the meat by laying strips on cookie sheets in a single layer. Drying could take several hours to half a day, depending on how dry and chewy you like your jerky.
Best you ever had!
Jerky stores really well in the freezer. I put small amounts into individual freezer bags, then place all of them in one large freezer bag. Thaw as needed.

Horseradish just doesn’t get the credit it deserves. A world without horseradish would mean boring Bloody Mary’s, cocktail sauces with no kick, and steaks and roast beef sandwiches just crying out for sauces and mayos with personality.

Horseradish is a perennial plant from the Brassicaceae family, which also includes mustard, wasabi, broccoli, and cabbage. It’s mainly grown for its white tapered root, which, when not disturbed, has little aroma. But when you cut or grate it, enzymes from the damaged plant cells release oils that give horseradish that wonderful pungent smell and flavor. It loses this pungency just as quickly, unless you store it in vinegar, which is why bottled or “prepared” horseradish is always found in a vinegar solution.

In the garden, horseradish can become invasive, meaning it will want to take over if you let it, but in my garden, it doesn’t get to do that because I regularly harvest a couple of roots for my kitchen.


Horseradish in the garden

Growing up in a Lithuanian family, there were very few spices ever used in cooking. Most of the food was pretty bland. Mom would salt food, but even black pepper was pretty rare. Peppers of any kind were never used–they never grew in Lithuania–so horseradish became the universal ingredient when a kick was needed. My grandfather loved it. I can still remember my grandfather crying his eyes out as he grated a freshly picked horseradish root from his garden. It was absolutely a labor of love. He would keep his grated horseradish in vinegar in the fridge, and then when dinner came around, it would quickly find its way to the table next to just about any meat my grandmother was cooking.

These days, with food processors in just about any kitchen, there’s no excuse not to use fresh horseradish. Your nasal passages and eyeballs are safe from being blown out.

Some of the basic applications for horseradish are still the best. The following recipes use prepared horseradish you easily find in the supermarket, but use fresh if you have it.


A freshly harvested horseradish root

For a simple horseradish mayo:

1/4 cup mayonnaise

2 Tablespoons prepared horseradish
Combine both ingredients in a bowl, cover with plastic, and refirgerate. Goes great on a roast beef sandwich.


For a fancier horseradish sauce that goes great on grilled salmon:

3/4 cup sour cream

1/4 cup mayonnaise

2 Tablespoons prepared horseradish

2 Tablespoons chopped fresh basil

1 Tablespoon fresh lemon juice

1 teaspoon soy sauce

Combine all ingredients in a bowl, cover with plastic, and place in fridge for a few hours for the flavors to blend.


Alz cocktail sauce

2 cups ketchup

4 Tablespoons prepared horseradish

1 Tablespoon fresh lemon juice

1 teaspoon Worcestershire sauce

½ teaspoon Tabasco

5 grinds of fresh black pepper

¼ teaspoon salt

1 teaspoon vodka

Combine all ingredients. Store in a tight plastic container in the freezer. Thanks to the vodka, my cocktail sauce never freezes solid, so just scoop out what you need and let it thaw.


ROASTING CHIOGGAS!

Posted: October 16, 2012 in beets, garden, Recipes
Tags: , ,


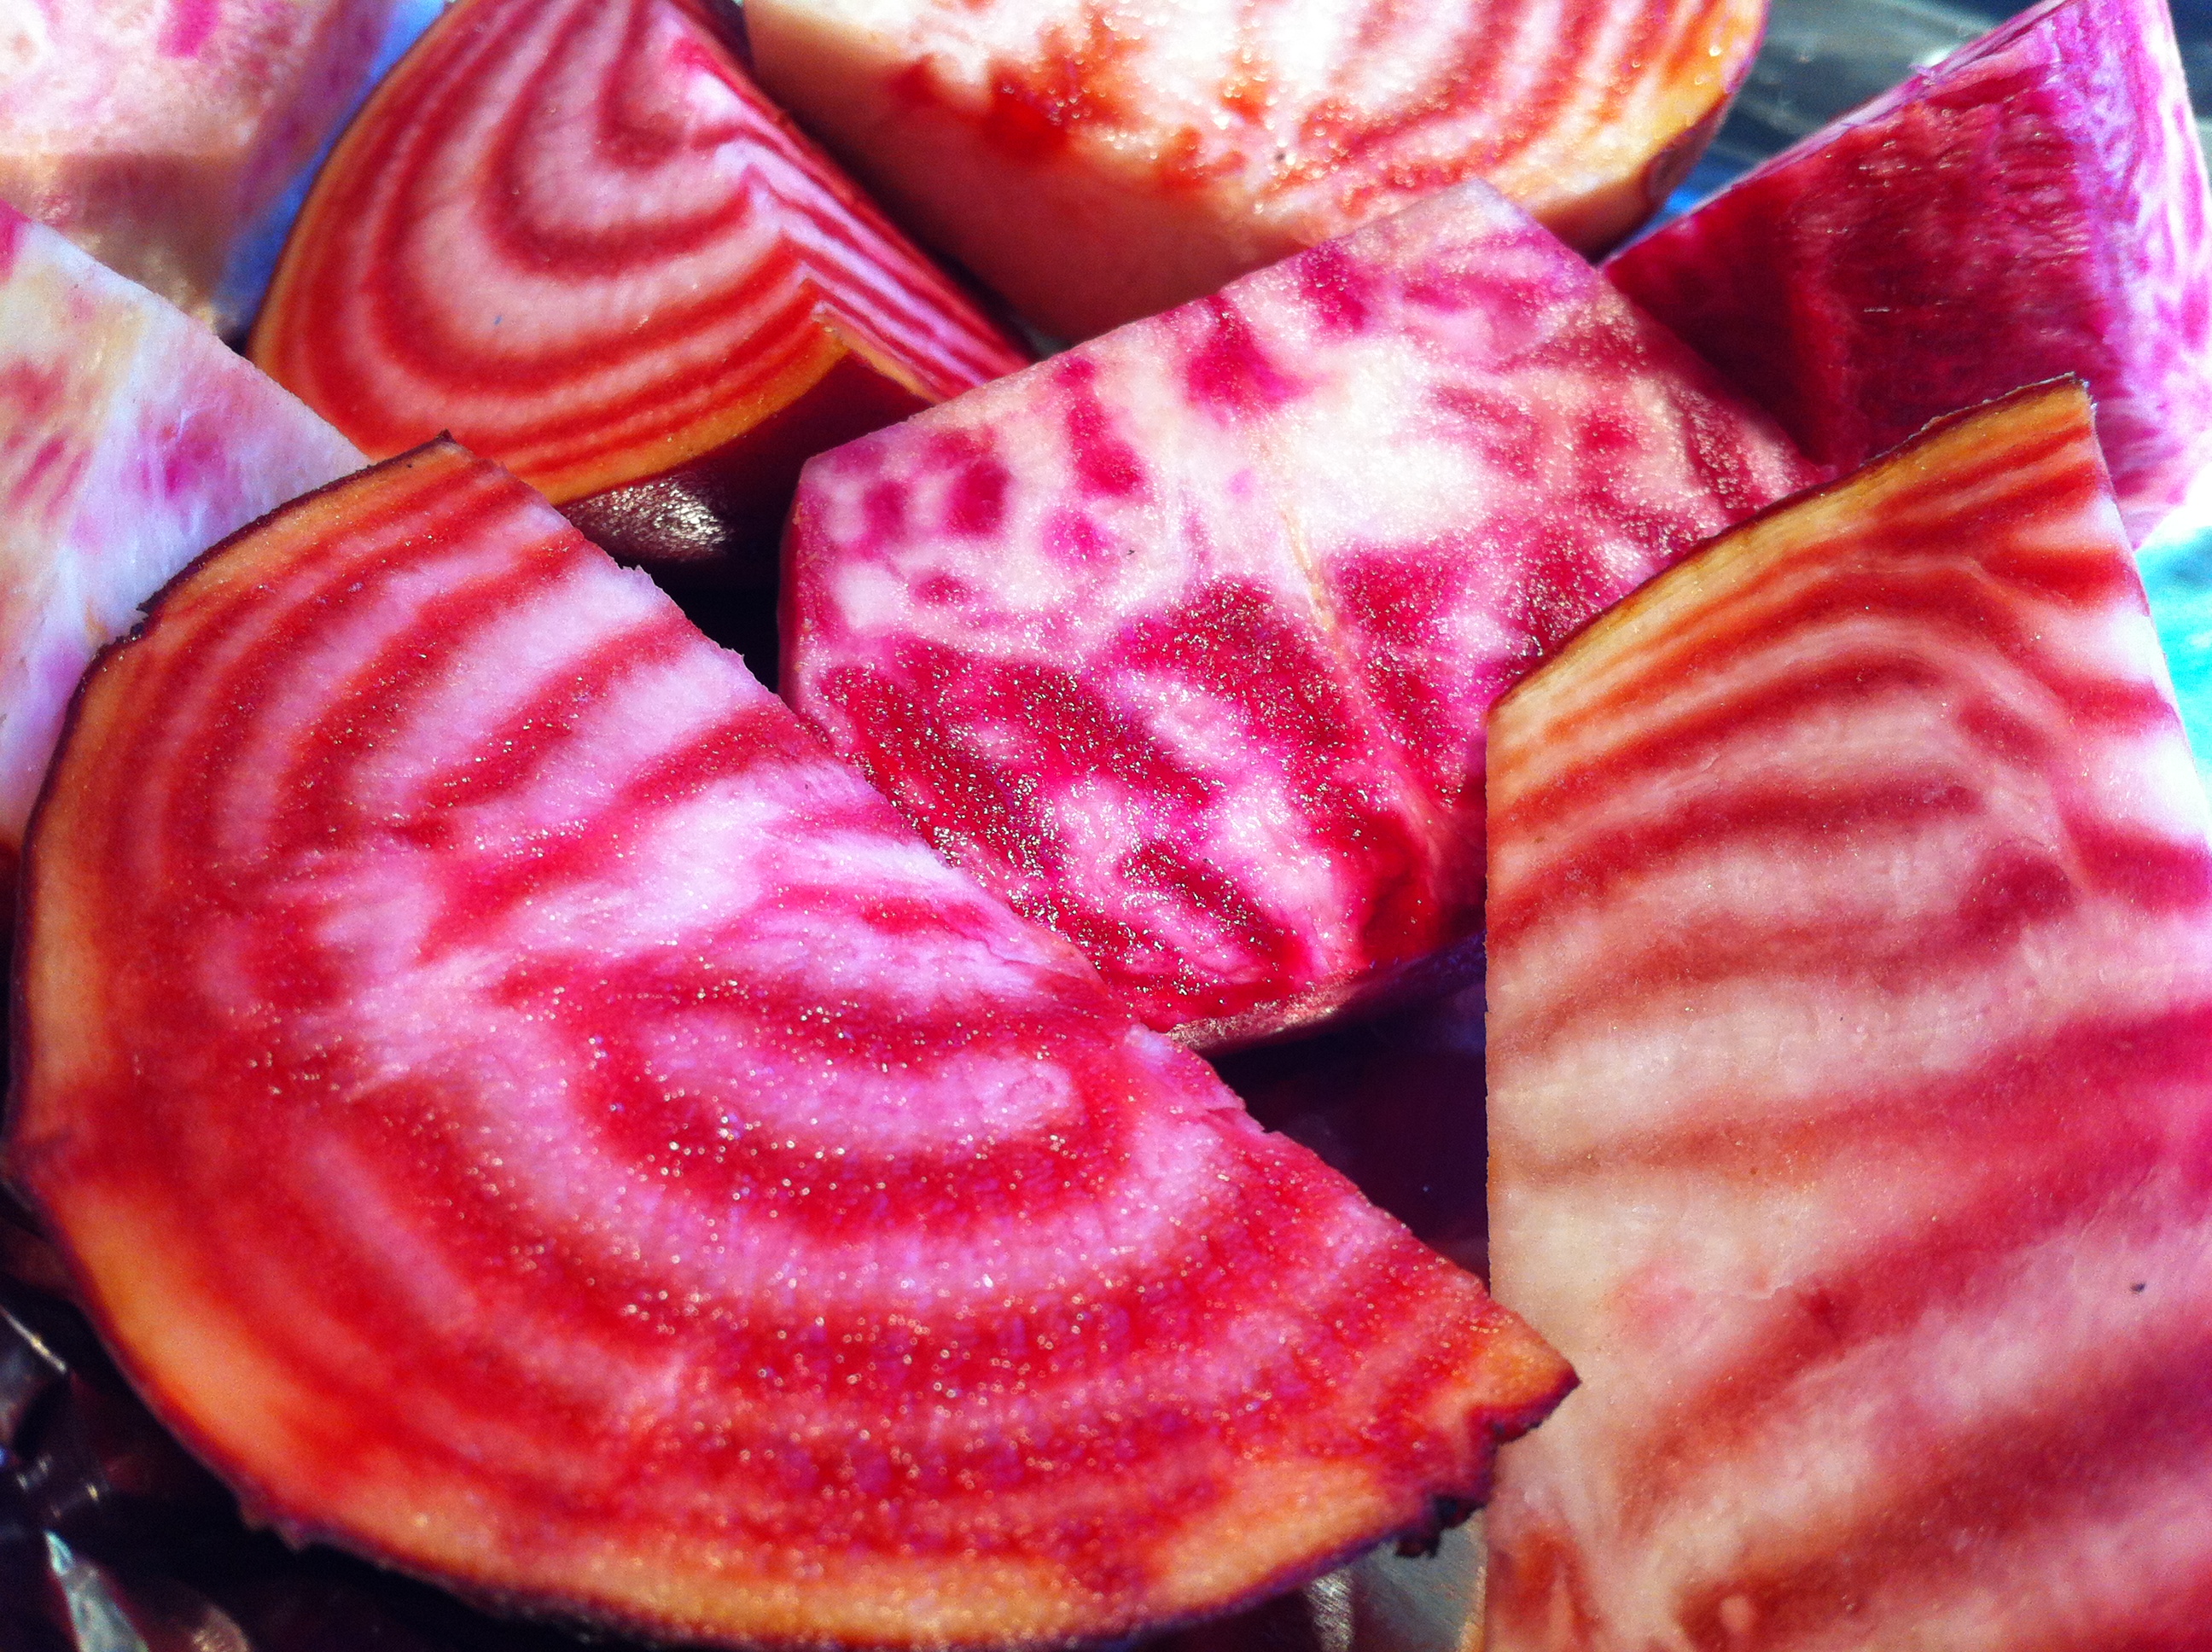
I love beets, but this variety I grow in my garden every year is special. They’re mild, they don’t bleed, the greens are delicious, and…look at ’em: they’re gorgeous! The variety is called Chiogga, and I highly recommend it in anyone’s veggie garden.

To roast, I simply wash the beets and cut them into smaller pieces. I place them on a sheet of aluminum foil, sprinkle with salt, pepper and a little EVOO, fold the foil over the beets to make a packet, and roast at 350 for about an hour or until they are fork-tender.

Sad to say, but despite the large Italian community we have here in Rhode Island, there is no truly excellent pizza to speak of. I suppose you could say “them’s fightin’ words!” but if it’s here, I haven’t found it yet.
So where is the excellent pizza? New York City, of course. OK…maybe I’m a bit prejudiced because I grew up there and worked in a variety of pizzerias in my younger days, but there is no doubt in my mind that if you want the best pizza (or bagel, for that matter), you have got to go to the Big Apple. Everything else is simply a bad copy.
It can be confusing in New York City as there are many different varieties of pizza to choose from, some much better than others. Brick oven pizzas abound, but there are pizza lovers who won’t settle for anything less than a pizza baked in a coal-fired oven. The extremely high heat of a coal-fired oven cooks the pizza in just a minute, and imparts a crusty, charred flavor you can’t get any other way. There are only about a dozen coal-fired pizzerias in Manhattan, and many of them have been around for over 100 years, so it’s definitely a matter of making a special trip to enjoy this style of pizza. (No new coal-fired pizzerias can be built in the city, due to more recent strict pollution control laws.)
There’s the traditional thin, round Neopolitan pie, and the thicker, square Sicilian pie. Regular mozzarella or mozzarella di bufala. Domestic or imported cheese?
Many choices, but always the same answer: it’s a matter of personal taste.
But when I heard through the pizza lovers’ grapevine that there was a “new” pizza out there, one that was gaining a cult following, I needed to know about it. And more importantly, I needed to taste it!
It’s called Pizza Montanara, and there are only a few pizzerias in New York City that serve it. The one I went to is called Pizzarte, on West 55th St, and I have to say that I have now discovered the ultimate pizza.
What makes Pizza Montanara so spectacular, quite simply, is that the dough is fried in oil before they put the sauce and cheese on it, and then it is baked in a wood burning oven. It is not greasy. In fact, the frying process, which lasts only a minute, puffs the dough up and creates a beautiful pillow-like softness that I have never experienced in a pizza before.
Pillowy goodness! Its rectangular shape is probably due to the fact that they fry it in a restaurant deep fryer.
The pizza was so good that once my wife and I ate the first pie, we ordered another. Then when it was time for us to drive home from New York, we stopped at Pizzarte and ordered two to go, which we devoured by the time we got to the Connecticut border!
The Montanara is a simple pizza margherita: dough, super-fresh tomato sauce, mozzarella di bufala, topped with a fresh basil leaf. But the frying process creates a magical treat that has got me drooling all over this blog as I write it.
It’s so good, that just a few days after returning from the city, I made my first attempt at creating a montanara pizza at home. My result: pretty successful! A little crunchier than Pizzarte’s montanara, but with a little tweaking, I may just get the hang of this thing!
A little rounder (I fried it in a pan) and I sprinkled oregano on top instead of the fresh basil leaf. But not a bad first attempt!
I’m going to back to Manhattan for Thanksgiving weekend, and pizza montanara is the first food on my list!