Archive for the ‘Uncategorized’ Category

Clam fritters, conch fritters, lobster fritters…I suppose you could fritter anything. But the first time I had them with mussels, I knew that I would never fritter my life away with any other!

It was a fall afternoon in Newport, Rhode Island, at the Newport Yachting Center’s annual Oyster Festival. We’re gorging on freshly shucked oysters and clams, boiled shrimp, and…what have we here? I had never heard of a mussel fritter before, but Wendy, the lovely lady behind the counter, convinced me that her secret recipe would knock my socks off. I took one bite, then another, then another…There was no turning back.

They couldn’t be easier to make, but it is crucial to have the right fritter batter. And that starts with a product called Drum Rock fritter mix. If you live in New England, you can find it in just about any seafood department at Whole Foods. If you live further away, you can check out their website (http://www.drumrockproducts.com/index.php) or try your luck with a local brand of fritter mix.

fritter ingredients


If you’re using fresh mussels, be sure to clean them well and remove the beards. Steam them in a pot over a small amount of water. As they open, they will release their flavorful juices and you want to save every drop of that broth for the fritters. Here in New England, frozen mussel meats are available in some seafood stores. All you need to do is thaw them, steam them saving the broth, and you’re ready to go.


Ingredients:


1 lb Drum Rock fritter mix

2 cups cooked mussel meats

1/2 cup mussel broth (saved from steaming mussels)

1/4 to 1/2 cup good quality beer, such as Sam Adams Boston Lager

Peanut oil for frying


Be sure to let the batter rest. If you're waiting for guests to arrive, just cover the batter bowl with a moist towel and it will keep for several hours at room temperature.

Be sure to let the batter rest. If you’re waiting for guests to arrive, just cover the batter bowl with a moist towel and it will keep for several hours at room temperature.


Steam mussel meats until just cooked. Remove mussel meats, and reserve 1/2 cup of the broth. Pulse mussel meats in a food processor, but leave chunky…or chop by hand.

Put Drum Rock fritter mix in a large bowl. Add mussel meats, mussel broth, and beer. Stir gently until just mixed. Let it sit for 10 to 15 minutes and do not stir again.

Using a thermometer, heat oil to 350 degrees, and using a small spoon or scoop, drop fritters in hot oil, turning gently, cooking 3 to 4 minutes until golden.

Drain on absorbent paper, and season with salt and pepper immediately. Serve right away!

IMG_3043


The perfect dipping sauce for these mussel fritters is made from two ingredients: mayonnaise and Ponzu sauce, which is a citrus-based soy sauce. Combine both ingredients in a bowl. How much you use of each is a matter of personal preference. I usually use a ratio of 4 parts mayo to 1 part Ponzu.


 

Here in New England, it’s time to seriously think about what to plant in your garden. I’ve already sowed peas, arugula, radishes, broccoli raab, and turnips back on St. Patrick’s Day. They can be sown in the garden now, as soon as the soil is workable. Simply, that means you take a handful of soil and squeeze it. If it stays in a hard, wet clump, it’s too wet and not ready. If it crumbles apart, get gardening!
That doesn’t give you a green light to plant all your veggies, however. Many need to wait until temperatures get much warmer.
I’m currently taking courses at the University of Rhode Island to get my certification as a URI Master Gardener. Gardening can be as simple or as complicated as you choose to make it, and if you’re starting out, the task of deciding where to put your garden may not seem like an easy one. It varies with every home, every yard. But there are some basic things to keep in mind, and all of it is common sense. Do you have any common sense? Good. Then you should be fine…
Greenhouse greens

Greenhouse greens

You want your garden to have all the benefits possible for the best chance of success. Just remember this easy acronym: LSSDA. OK, it’s not that easy, but I couldn’t figure out how to spell anything with those letters.
Location: You need to decide if your garden is going to be something you want to see every time you look out your window, or view from your deck as you smoke your cigar at the end of a satisfying gardening day…or something that is more practical than beautiful, and therefore something that you might want to have on a side of the house where it doesn’t block an already enjoyable view.
Sun: Where you put your garden must depend on the sun. You may think you have the perfect place for a garden bed, but if it doesn’t get a full day’s sun, you can pretty much forget about growing those amazing tomatoes you drool over when you go to the local farm stand. You can always shade your garden if there’s too much sun…it’s highly unlikely you’re going to set up a bank of klieg lights if you don’t have enough.
Size: In the beginning, this may be tougher than it seems. If you’ve got an old-fashioned garden envisioned in your mind, with long rows of veggies 2 or 3 feet away from each other, you’re going to need a huge space, which means huge work. If you go with the method that I suggest: small (8-foot by 4-foot) raised beds with intensive planting, not only are you going to need a lot less space, you’ll find that you’re requiring a lot less work to get the same results. I use the Square Foot Gardening method originated by Mel Bartholomew many years ago, and I’ve never had a reason to change. I get the most food in the least amount of space. (www.squarefootgardening.com)
Distance: This means the distance from all those tools and your water source. Sure, you may be pretty damn excited about your garden in the beginning, and you’ll happily drag water 400 feet to your remote garden location…until about June. Then you’ll start making every freaking excuse under the planet to avoid watering or working in your garden…and that kind of defeats the idea. Unless you have some motorized means of hauling all of your tools and buckets out there, try to locate your garden near a garage or shed and a water source so you spend more time in your garden and less time going back and forth to your garden.

Access: Make sure you pick a place that you can easily get to. If your garden requires that you go through an archway or similar structure, you may not be able to fit certain tools, bags of peat moss, wheelbarrows, or even your own fat ass at certain times.

These are the basics to setting up properly. I have 6 raised beds that measure 8-by-4 feet, giving me a total of only 192 square feet, and yet I grow more veggies in that space that my family of 3 can possibly eat. The idea is to get more vegetables per square foot of gardening space, not per plant. When you plant things closer and more intensely, you will get better results with less work and cost. And if you can time it so that you have new plants ready to take the place of those that have been harvested, you’ve got more harvests in even the shortest of seasons. But that’s a discussion for another time.

I JUST MET FRANKIE AVALON!

Posted: March 22, 2014 in Uncategorized

What a really nice guy !

20140322-002548.jpg

M.C.Spiedo is a new Italian restaurant in the Renaissance Hotel by the Boston waterfront. It’s a massive, over-the-top (as in a bit gaudy) establishment that features rustic food from Italy’s historic past, dating back to the Renaissance period of the 1400’s. You’ll find no tomato dishes here: tomatoes were introduced into Italy in the 1500’s. What you will find are rustic, flavorful spit-roasted meats, pastas with rich sauces, and robust flavors.

MCSpiedo

This is a huge departure for chefs Mark Gaier and Clark Frasier, who come from acclaimed Maine restaurants Arrows (which just celebrated its 25th anniversary)and MC Perkins Cove in Ogunquit. (They just announced that they are selling Arrows for $1.2 million.)

What’s in the name? The M.C. is from Marc and Clark, and Spiedo means a spit or skewer in Italian. Considering this is still a new restaurant, I was surprised that the two chefs were nowhere to be found on a recent Saturday night. Nonetheless, the staff seems to be knowledgeable, and our server, Daniel ,was eager to guide us through the many menu choices.

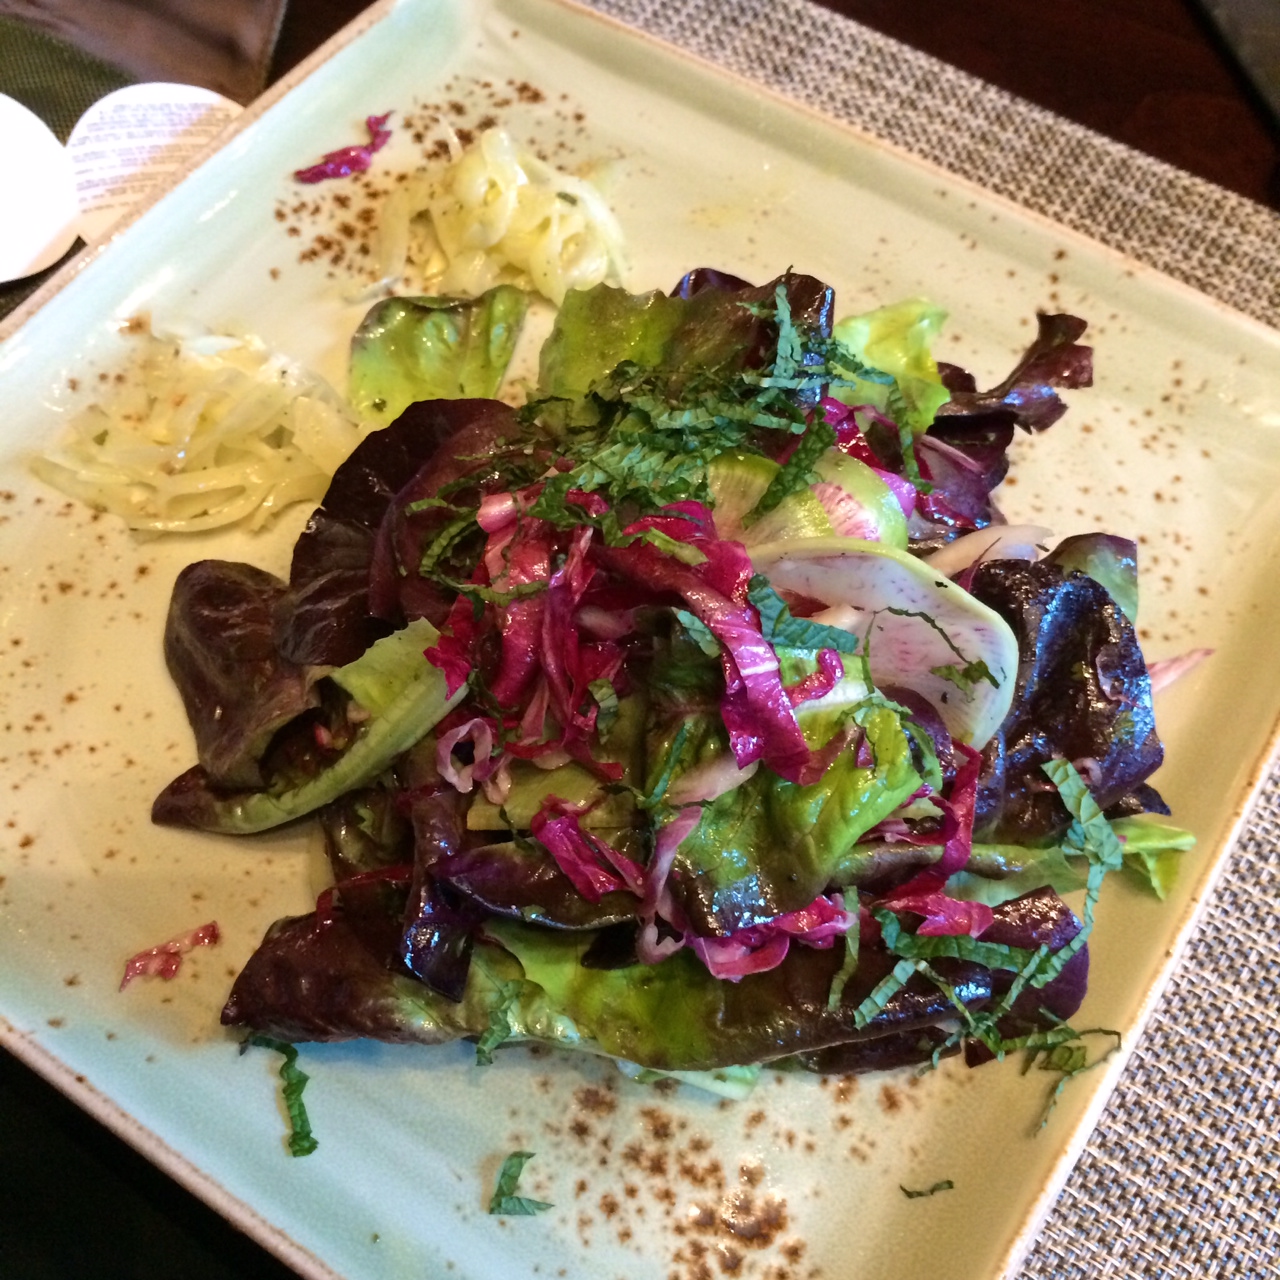
The Leonardo's Notebook Salad

The Leonardo’s Notebook Salad

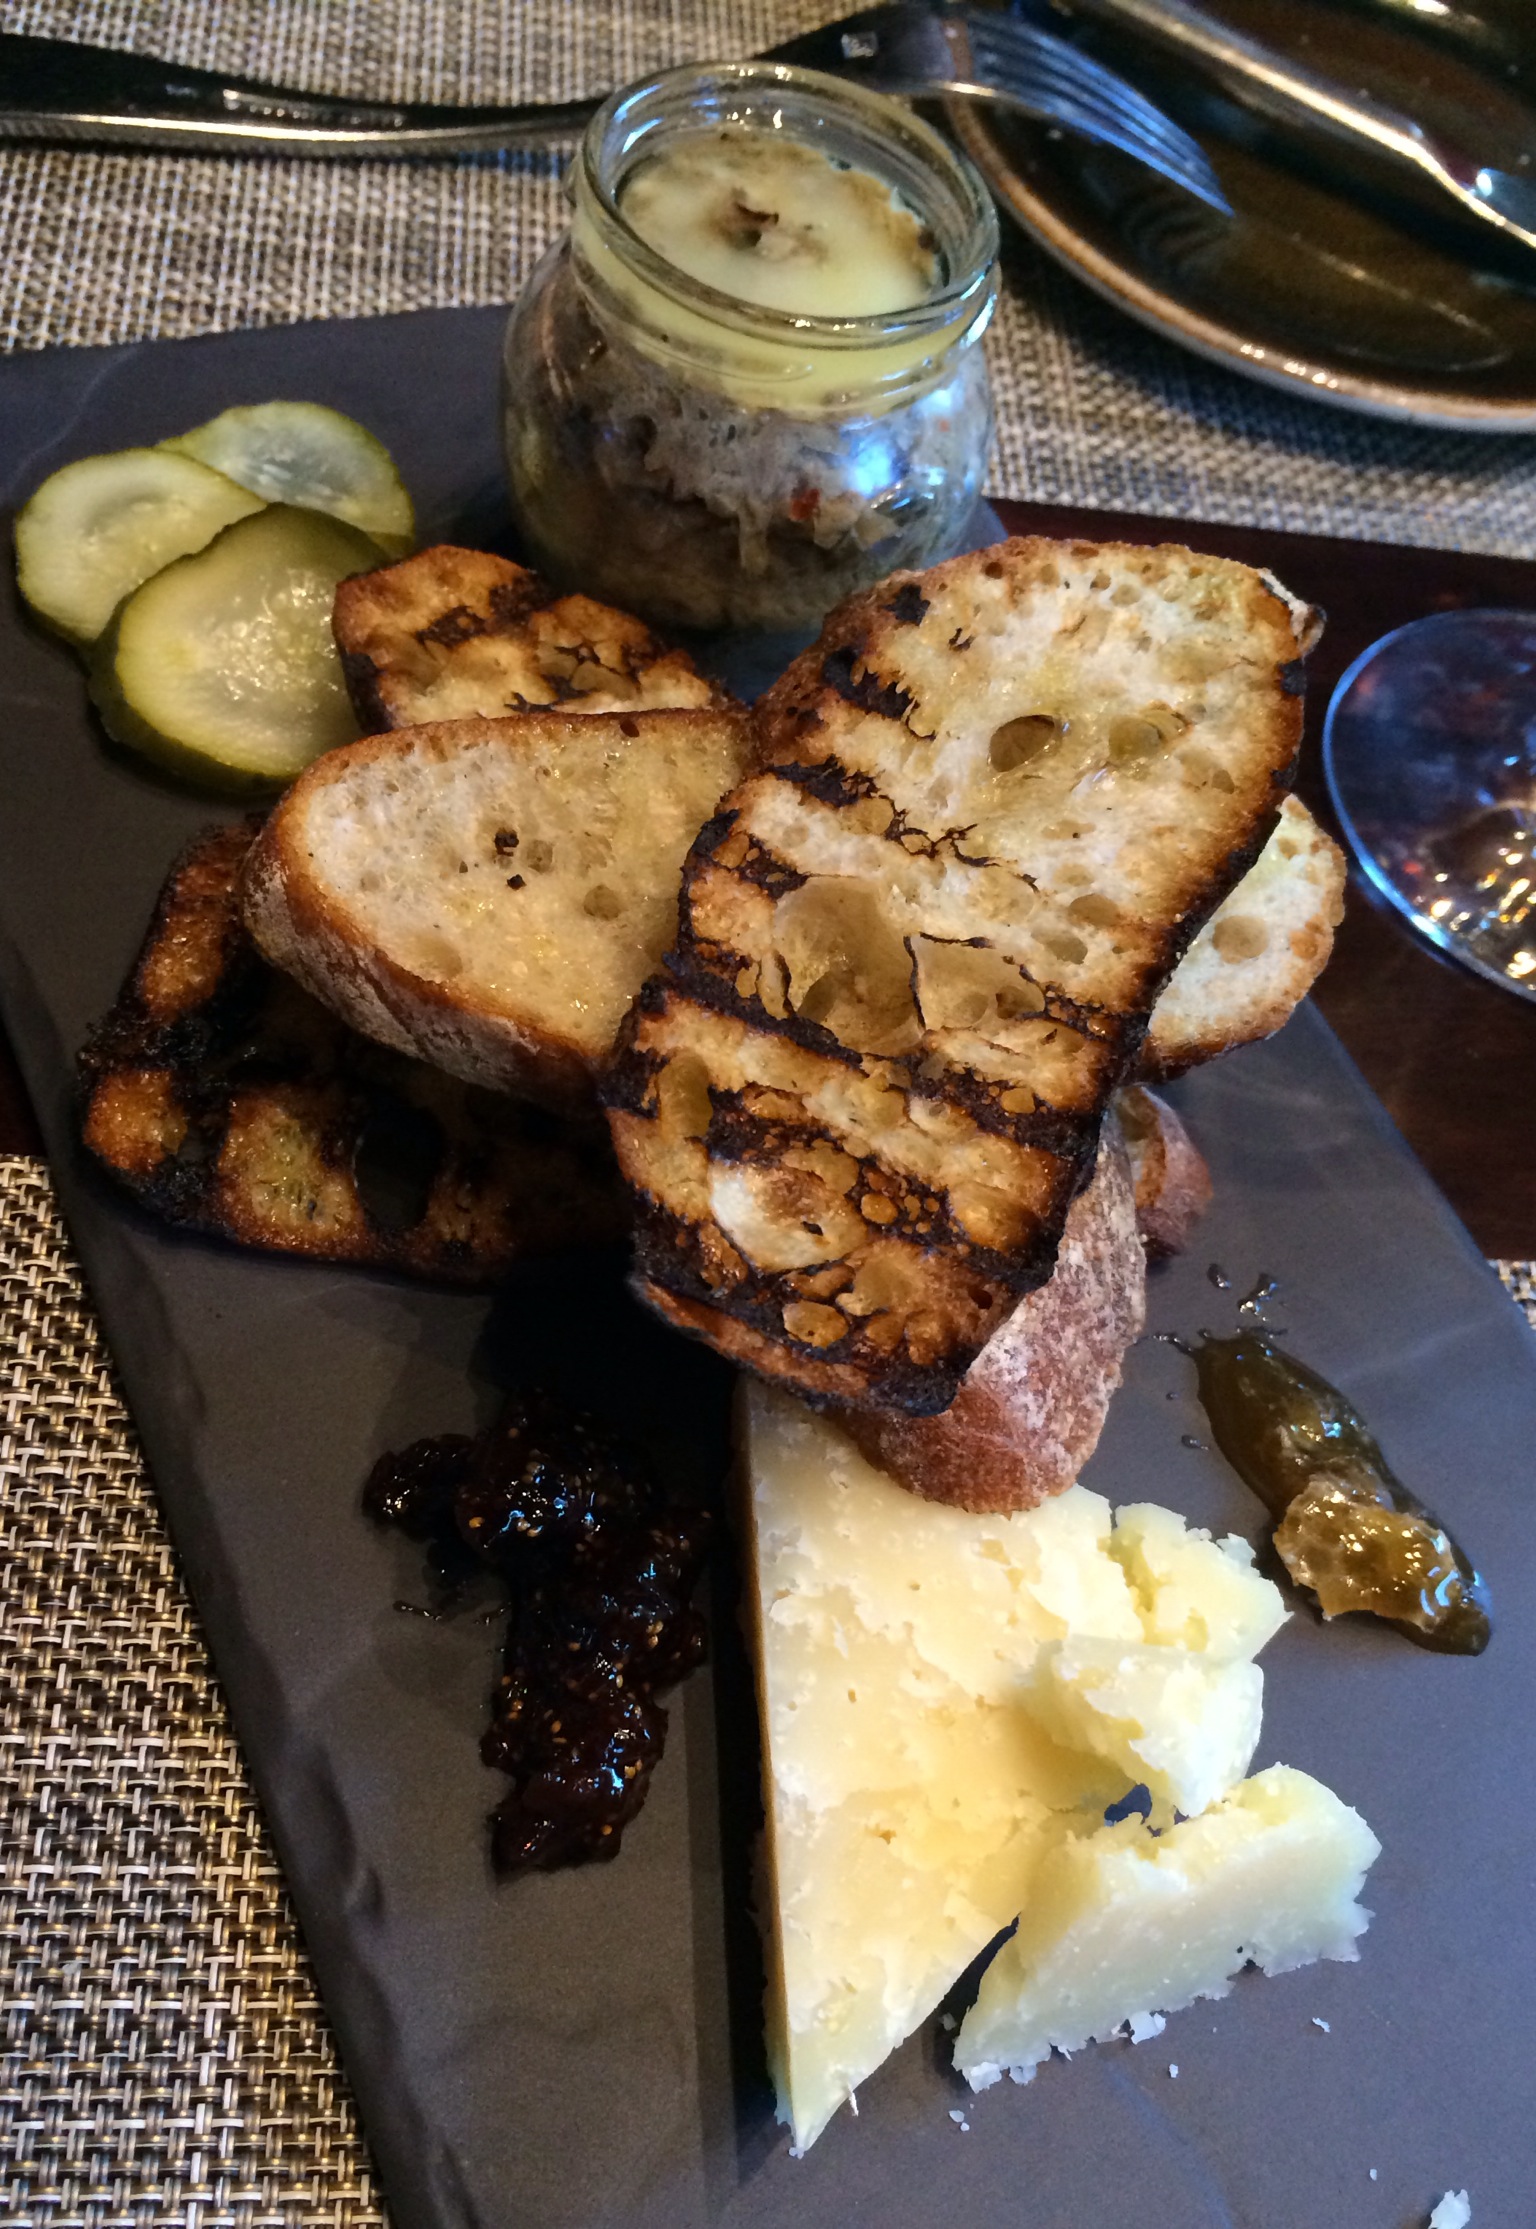
Leonardo’s Notebook Salad, with garlic, fennel, lettuces and herbs was delightfully fresh and thoroughly enjoyable. The house made burrata: fantastic…just not enough of it. The duck rillette was good, but unseasoned. However, the accompanying house made mustard and pickles remedied that. The Grand Tortellini and Meat Torta, a mile-high meat pie featuring more meat than you can imagine, is a must. It sells out every night. The spit-roasted pig with sausage and shelling bean macaroni would have been delicious had it not been for a VERY heavy amount of salt…so much that I had to mention it to our server, who promptly whisked it away, tasted it, agreed with us, consulted management, and returned with an apology and did not charge us for the dish.

Grand Tortellini and Meat Torta

Grand Tortellini and Meat Torta

Thankfully, there are 2 parts of M.C.Spiedo that don’t stick to the rules of only serving ingredients from Italy’s Renaissance period: the bar, where you can find many wonderful house specialty cocktails as well as a wine list with only Italian wines…and the kids menu, which is a welcome surprise to find in this kind of restaurant. My daughter loved the meatballs and the grilled cheese.

Duck rillette with house made pickles, mustard, and Fiore Sardo cheese

Duck rillette with house made pickles, mustard, and Fiore Sardo cheese

There are a few kinks to work out, but that’s to be expected from a new restaurant. And they’ve got to lighten up on the SALT. But I can see myself coming back to M.C. Spiedo for another enjoyable dining experience.

MC4

Freshly shucked oysters and clams call for an equally amazing cocktail sauce…and this sauce kicks butt! And it features a key ingredient that you might not expect: vodka. The small amount of vodka in the mix keeps the cocktail sauce from freezing solid when stored in the freezer. Just scoop out what you need, let it thaw, and put the rest back in the freezer.

cocktail sauce

Ingredients:

2 cups ketchup

4 Tablespoons prepared horseradish

1 Tablespoon fresh lemon juice

1 teaspoon Worcestershire sauce

1/2 teaspoon Tabasco or other hot pepper sauce

5 grinds of fresh black pepper

1/4 teaspoon salt

1 teaspoon good quality vodka, like Tito’s

Combine all ingredients. Store in a tight plastic container in the freezer.

I’ve never met a ceviche I didn’t like. Sometimes, nothing can stop a serious seafood craving like sushi, sashimi or ceviche. They require the freshest seafood and veggies you can get your hands on. And other than some fine chopping, they require little else.

The acid in citrus juices basically “cooks” the seafood in a process very similar to applying heat, but when I use shrimp in ceviche, I place them in some boiling salted water first…although very briefly.

Crazy colored shrimp, thanks to blood oranges.

Crazy colored shrimp, thanks to blood oranges.

Ingredients:

For the poaching liquid…

2 quarts water

1/4 cup salt

For the ceviche…

1 pound raw wild-caught American shrimp, peeled and deveined

juice of 2 lemons

juice of 2 limes

juice of 2 oranges (I had blood oranges this time)

1 cup diced seeded peeled cucumber

1/2 cup finely chopped red onion

pinch of red pepper flakes

1 cup diced seeded tomato

1 avocado, chopped into 1/2″ pieces

1 tablespoon roughly chopped cilantro leaves, plus more for garnish

1/4 cup extra virgin olive oil

1/4 teaspoon Fleur de Sel

Combine water and 1/4 cup salt in a saucepan and bring to a boil. Add shrimp and immediately turn off the heat. Let the shrimp sit for just a minute, drain and transfer to a bowl of ice and place in fridge to cool.

Remove cooled shrimp from fridge and drain. Chop shrimp into 1/2″ pieces and place in a medium non-reactive bowl. Add lemon, lime and orange juice. Stir in cucumber, onion and pepper flakes. Refrigerate for 1 hour.

Stir in the tomato, avocado, chopped cilantro, olive oil and Fleur de Sel into the shrimp mixture. Let stand at room temperature for 30 minutes before serving. Garnish with cilantro leaves, if desired.

St. Patrick’s Day is about 3 weeks away…just in time to make your own corned beef!

It takes about 3 weeks to make corned beef, but it’s not difficult to do. Doing it yourself gives you a better quality product than that nasty slab from the supermarket that is full of chemicals and preservatives.

Corned beef has nothing to do with corn. ‘Corning’ is a technique for preserving raw meats for long periods by soaking it in salt brine. This method was used before the days of commercial refrigeration. Back then, the large salt kernels used in the brine were called “corns.”

Brining is a time-honored way of preserving and it prevents bacteria from growing. Both pastrami and corned beef are made by this method. Both corned beef and pastrami usually start with a brisket of beef. Corned beef is then cooked–usually boiled–and served. Pastrami is made when the brined meat is rubbed  with more spices and smoked to add extra flavor. So corned beef and pastrami are the same meat, just treated differently.

Saltpeter is an ingredient that has been used in brining beef for years. It adds the traditional red coloring to the corned beef and pastrami meat. But since saltpeter can also contain carcinogens, I leave it out. The meat may not be the usual bright red color, but the flavor and texture of the meat will not be affected.

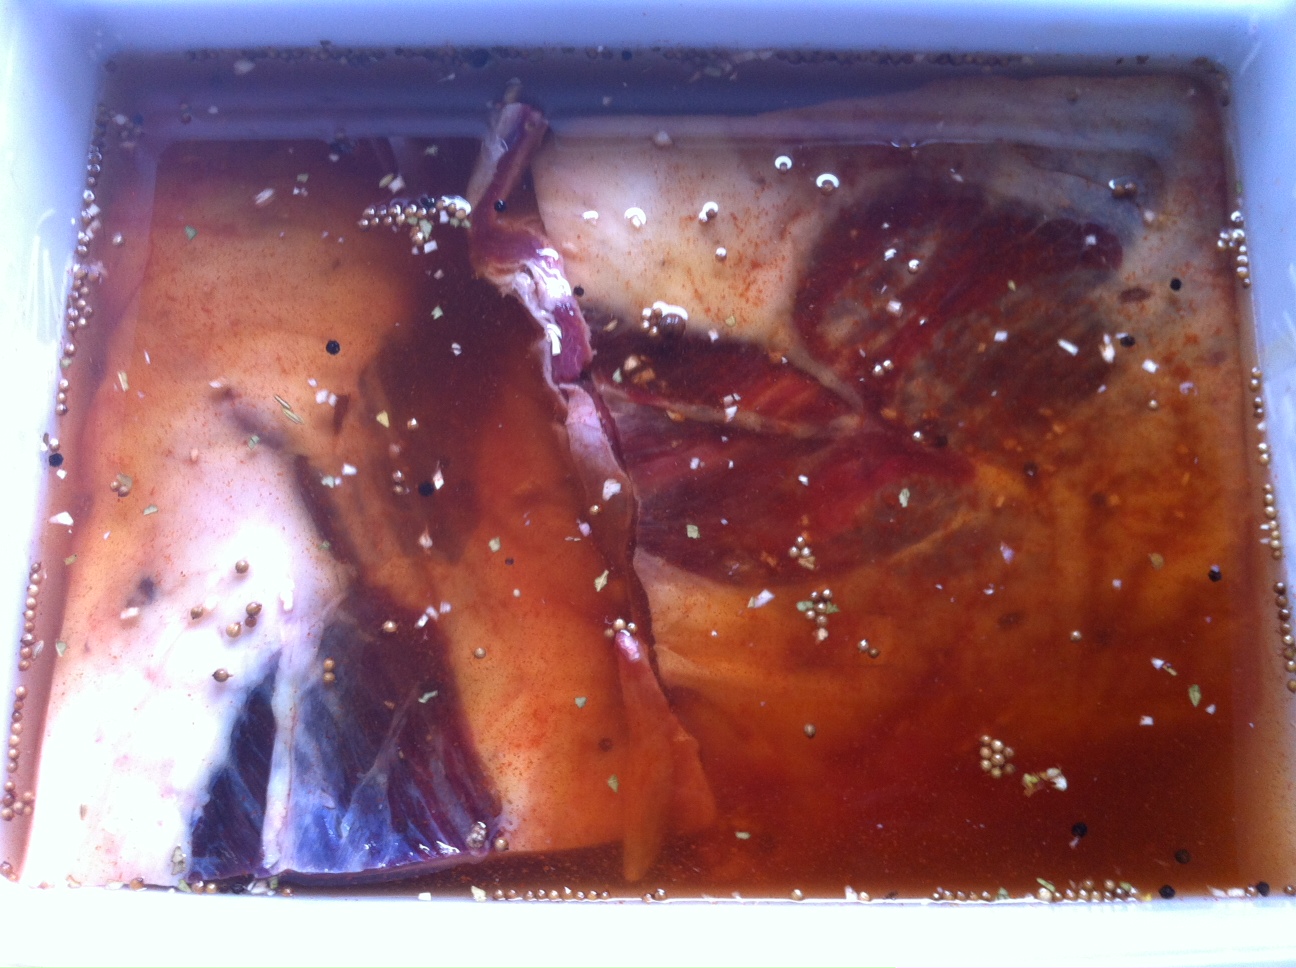
Brining the beef brisket

Brining the beef brisket

Step one: corned beef…

Ingredients:
beef brisket (about 8-10 pounds)
2 tsp. paprika
1/4 cup warm water
3 cloves of minced garlic
2 tablespoons sugar
1 tablespoon mixed pickling spices
3/4 cup salt
2 quarts water

Place the brisket in a large container made of non-reactive material, like glass or plastic.

In the 1/4 cup of warm water, dissolve the sugar, minced cloves, paprika and pickling spices.

Dissolve the 3/4 cup of salt in the 2 quarts of water. Pour in the sugar/garlic/paprika/pickling spices mix and stir everything together. Pour the mixture over the meat in the container. Make sure the meat is totally beneath the surface of the liquid. (You may need to weigh it down to do this.) Cover the container.

Refrigerate the container and contents for 3 weeks, turning the meat once or twice per week. At the end of the third week, remove the container from the refrigerator and take out the meat. Soak the meat in several changes of fresh cold water over a period of 24 hours to remove the excess salt.

At this point, if you want corned beef, prepare and cook it using your favorite recipe. But I’m all about the pastrami!

Step two: making Pastrami…

pastrami

Ingredients:

Brined and rinsed corned beef brisket from above recipe, patted dry with paper towels

1/4 cup Kosher salt

1/4 cup paprika

3 tablespoons coriander seeds

2 tablespoons black peppercorns

2 tablespoons yellow mustard seeds

1 tablespoon white peppercorns

3 tablespoons brown sugar

1 tablespoon granulated garlic

Combine coriander seeds, black and white peppercorns and mustard seeds in a spice grinder and grind coarsely. Place in a bowl. Add salt, paprika, brown sugar and granulated garlic. Mix well.

Rub the mix into the brisket well, covering all sides.

Heat smoker to 225 degrees and smoke for several hours using a less intense wood, like oak. When the internal temperature of the meat has reached 165 degrees, it’s done. It isn’t necessary to smoke pastrami as long as you would a regular brisket because the long brining time makes the meat tender.

It is very important that absolutely everything that comes in contact with the meat is very clean. (This includes your hands.) Also, make very sure that every inch of the meat reaches the 165 degrees before it is removed from the smoker. The corned beef is now pastrami.

The inspiration for this sauce was my attempt to replicate the “Shack Sauce” they use at Shake Shack , a high-end burger joint owned by restaurateur Danny Meyer. Since it opened in New York City’s Madison Square Park in 2004, Shake Shack has expanded to many other locations around the world.

I don’t know if I captured the Shack Sauce secret. But I do know that my Awesomesauce makes every cheeseburger I grill taste amazing. It’s also fantastic for shrimp, crab or lobster salad…a dip for veggies or boiled shrimp…a dressing for tacos…and great on salads.

Awesomesauce

Ingredients:

1/2 cup mayonnaise

1 Tablespoon ketchup

1 Tablespoon yellow mustard

1 tablespoon dill pickle relish

1/4 teaspoon garlic powder

1/4 teaspoon paprika

Pinch cayenne pepper

Combine all ingredients in a bowl. Refrigerate covered for a few hours to blend flavors.

I don’t exactly know when my love affair with bone marrow began, but suffice it to say that if I see it on a restaurant menu, I have to order it.
A 2 ounce serving of beef bone marrow has over 500 calories, so diet food it is not. But it has some calcium and “good” fats, especially if the cow was grass-fed.  Each 2 ounce serving has over 54 grams of fat, although most of it is unsaturated. How much protein it has depends on the marrow, but there are those carnivores out there that swear by bone marrow’s almost magical health food properties.
But whether it’s good for you or not, the main reason to eat bone marrow is taste. And I’ve found that when it comes to eating it, there are no gray areas…people either love it or are grossed out by it.
marrow
 
Bone marrow played a very important role in the development of mankind as a species. Long before we had the skills to hunt for our own food, about 2 million years ago, we feasted on the bones of fallen prey…or more accurately, what was inside the bones of fallen prey. A diet of fatty, high-calorie bone marrow meant that early man didn’t have to rely on the digestion of roughage alone to survive, and it allowed for the “luxury” of the development of larger brains.
Fast-forward to today, where the only critters that appreciate bone marrow are our dogs—if they’re lucky enough to get a bone—or foodies like us!
Aside from higher-end restaurants, bone marrow might be difficult to find at first. But you can certainly ask your local butcher for some—he’ll even cut them lengthwise or into short cylinders for you for easy access. I get mine online, with bones from grass-fed cows.

Cooking bone marrow couldn’t be simpler: a little salt and pepper, a drizzle of olive oil, then bake in a hot oven until bubbly and caramelized. Spread it on toast in the morning with your eggs, smear it on top of your steak instead of butter, or just scoop it right out of the bone.

High fructose corn syrup…agave…manufacturers of both would have you believe they are healthy alternatives to cane sugar. But are they? It’s a good time to know some facts…
sugar
I’m shocked at how many people think that agave nectar is a safe sugar alternative. Nothing could be further from the truth. Using words like “organic” and “all natural” on their labels, the producers of agave want you to think that you can pretty much squeeze this crap right into your mouth.
 
Agave nectar comes from the agave plant, the same plant that they make tequila out of. The glycemic index (amount of glucose) of agave sweeteners is low, and they are using this as a marketing tool to convince diabetics that it is a safe alternative to sugar. Problem is, although it has little glucose, it is almost 97% fructose, which is a sugar that is also very bad for your health…so much so that the American Diabetes Association has changed their mind about recommending agave as a sugar substitute. Agave sweeteners are highly processed sugars with big marketing money behind them. All the babble about “organic” and “natural” on the label really makes no difference if you process the hell out of the product afterwards. 
Why is fructose so bad for your health? In the old days, the only fructose we consumed was in our fruits and vegetables, and so the percentage in our diets was really low. But these days, with Americans guzzling unhealthy sodas and fruit and energy drinks full of high fructose corn syrup (and it being hidden inside many packaged and canned foods–just read the label), we consume far more than our bodies can handle. Here’s an interesting fact: the average weight of Americans has gone up steadily since the 1970’s, when high fructose corn syrup was first introduced, and has increased point-for-point as the amount of foods containing high fructose corn syrup have increased.
Some of the carbs we eat are made up of chains of glucose. If too much of it gets to the bloodstream, our blood sugar spikes and our body secretes insulin to regulate it. Not so with fructose. Fructose gets processed in the liver. When there’s too much fructose for the liver to handle, it changes it into fats and dumps it into our bloodstream as triglycerides and cholesterol. This is really bad because triglycerides and cholesterol cause heart disease. And fructose does not trigger the normal hormones that regulate your appetite: you don’t feel full. So guess what? You eat more!
The people who make high fructose corn syrup are spending millions in advertising, changing the name to “corn sugar,” to make it more acceptable to the public that has heard so many bad things about it. High fructose corn syrup is used in just about everything…and the reason why is simple: it’s cheap. (Farm subsidies for corn made that possible years ago and now we’re addicted.)
 
What about basic sugar? Cane sugar is half fructose, half glucose…about the same as high fructose corn syrup (which is 55%/45%)…but both are less than agave at 97% fructose.
 
I try to limit my family’s intake of cane sugar, honey, and maple syrup…and I totally avoid high fructose corn syrup and agave. I try to eat whole fruits and not gulp down juices, and I avoid juice concentrates and juice drinks or sports drinks.
 
So is the answer sugar substitutes and diet sodas? Uh, no. They have their own set of problems. Don’t get me started…