Author Archive

I have to give credit for this recipe where it’s due. Last year, we traveled to Washington, DC and one of our best dining experiences was at the Blue Duck Tavern, a stunning restaurant matched by its unique and beautifully prepared plates. It is the restaurant I recommend to any friends in the DC area, and one I would go back to in a heartbeat. One of the incredible appetizers I enjoyed was the roasted beef bone marrow, which had a delicious pretzel crumble on top. The moment I had a taste, I knew that I would have to recreate this for myself.

The amazing bone marrow plate at the Blue Duck Tavern in Washington, DC.


Bone marrow played an important role in the evolution of early man. Perhaps that’s why some of us still have that primitive craving for it.

Early man had small teeth and ate anything he could lay his hands on, especially meat. But he was no hunter. Attracted by circling vultures, he probably scavenged the leftovers from a big kill such as an antelope left in a tree by a leopard, or a large animal such as a wildebeest that had been slaughtered by lions.

Because meat is relatively easy to digest and rich in calories and nutrients, early man lost the need for the big intestines of apes and earlier hominids. This freed up energy for use by other organs. This surplus of energy seems to have been diverted to one organ in particular – the brain. But scavenging meat from under the noses of big cats is a risky business, so good scavengers needed to be smart. At this stage in our evolution, a big brain was associated with greater intellect. Big brains require lots of energy to operate: the human brain uses 20% of the body’s total energy production. The concentrated calories and nutrition found in meat was responsible for an increase in the brain size of early humans.

But around two million years ago, telltale cut marks on the surface of animal bones reveal that early humans were using crude stone tools to smash open the bones and extract the marrow. Stone tools allowed early man to get at a food source that no other creature was able to obtain – bone marrow. Bone marrow contains long chain fatty acids that are vital for brain growth and development. This helped further fuel the increase in brain size, allowing our ancestors to make more complex tools. Many historians believe that the blunt force required to break bones with tools to extract the bone marrow was a crucial ingredient in the development of the human hand, and the unique dexterity it has over that of apes.

Of course, these days, we can simply go to our butcher and ask them to slice some beef bones for us so that we can enjoy the marrow like our ancestors did. It’s much more civilized.

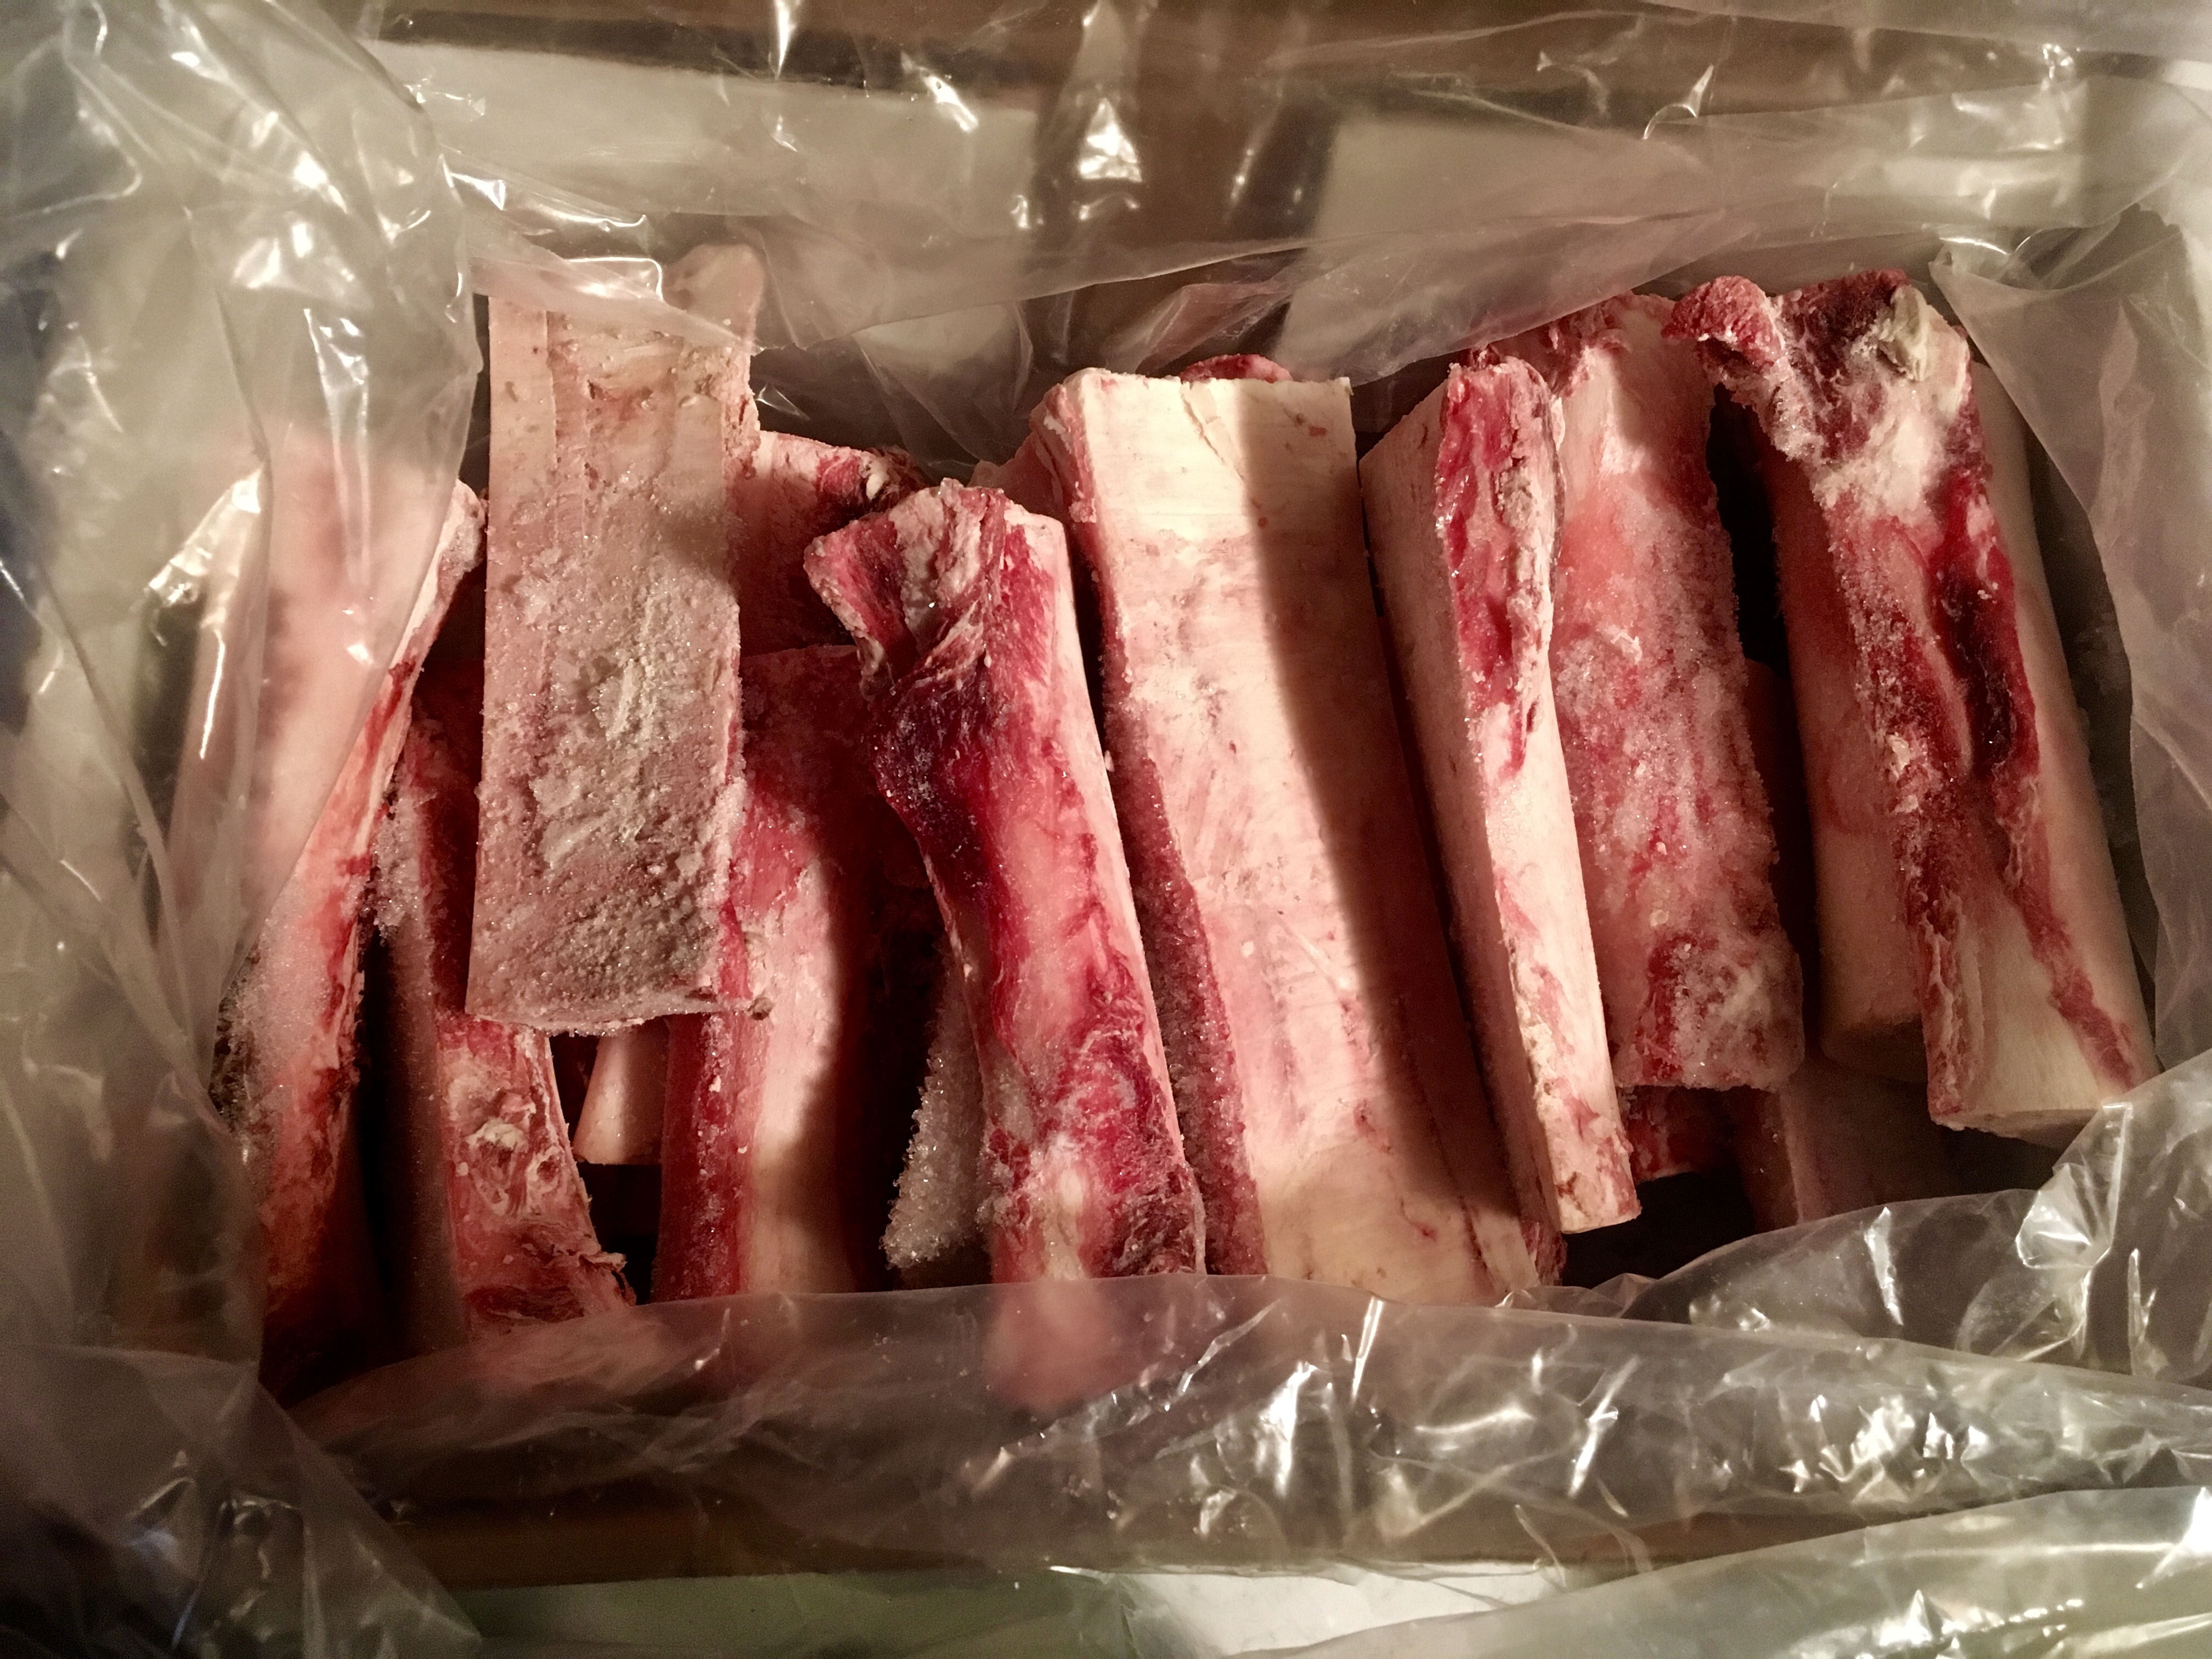
My box o’ frozen bones. I ordered about 25 lbs. of marrow bones from a grass-fed beef farm in Texas.


They key to roasting marrow bones properly is to keep an eye on them. The bones can go from frozen solid to blazing hot in no time, and that means the marrow can go beyond its rich, gelatinous perfection into a puddle of fat at the bottom of your pan in mere moments.


3 lbs. beef marrow bones (I like them sliced lengthwise)
3/4 cup finely ground salted pretzel sticks
1 teaspoon dried parsley flakes
1 teaspoon granulated onion
1/2 teaspoon granulated garlic
1/4 teaspoon black pepper
olive oil


I keep the beef bones frozen, moving them to the fridge until I’m ready to roast them.

Pre-heat the oven to 450 degrees.

Grind them up!

Place a handful of salted pretzel sticks in a food processor, and pulse them until the pretzels are ground fine. When you’ve got 3/4 cup of ground pretzel powder, move it to a bowl and add the parsley, onion, garlic and black pepper. No salt is needed if the pretzels are salted.


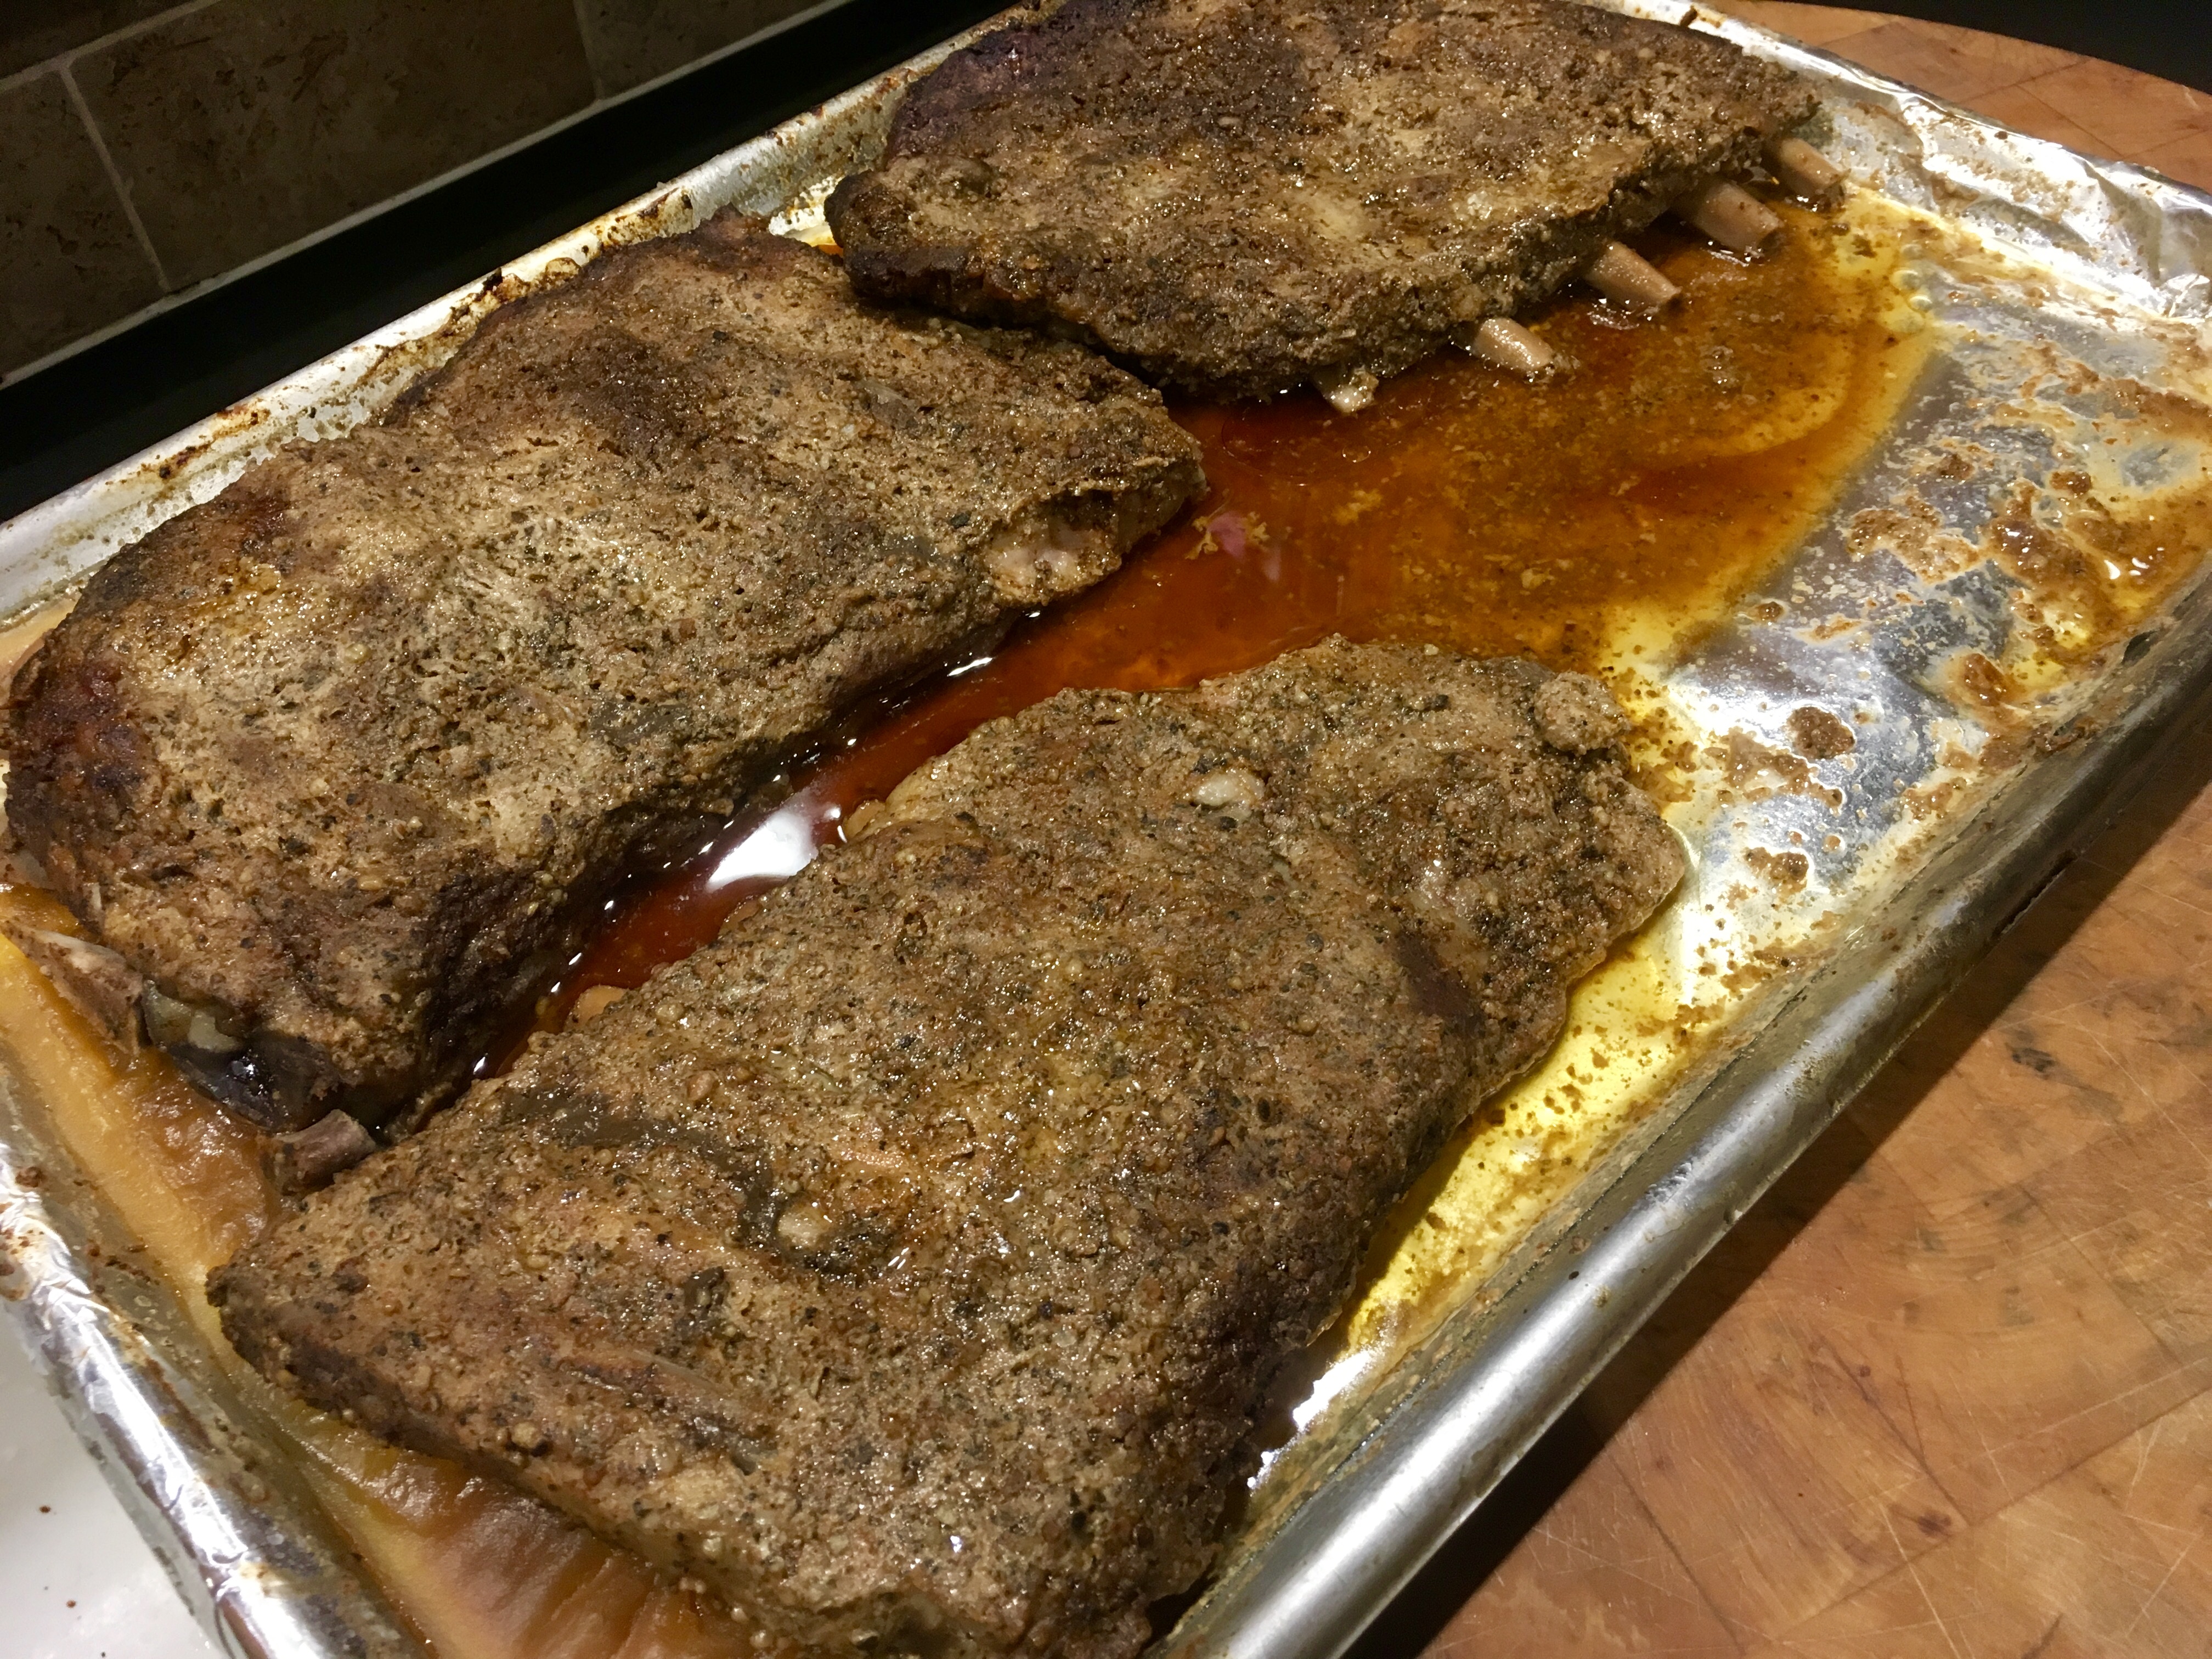
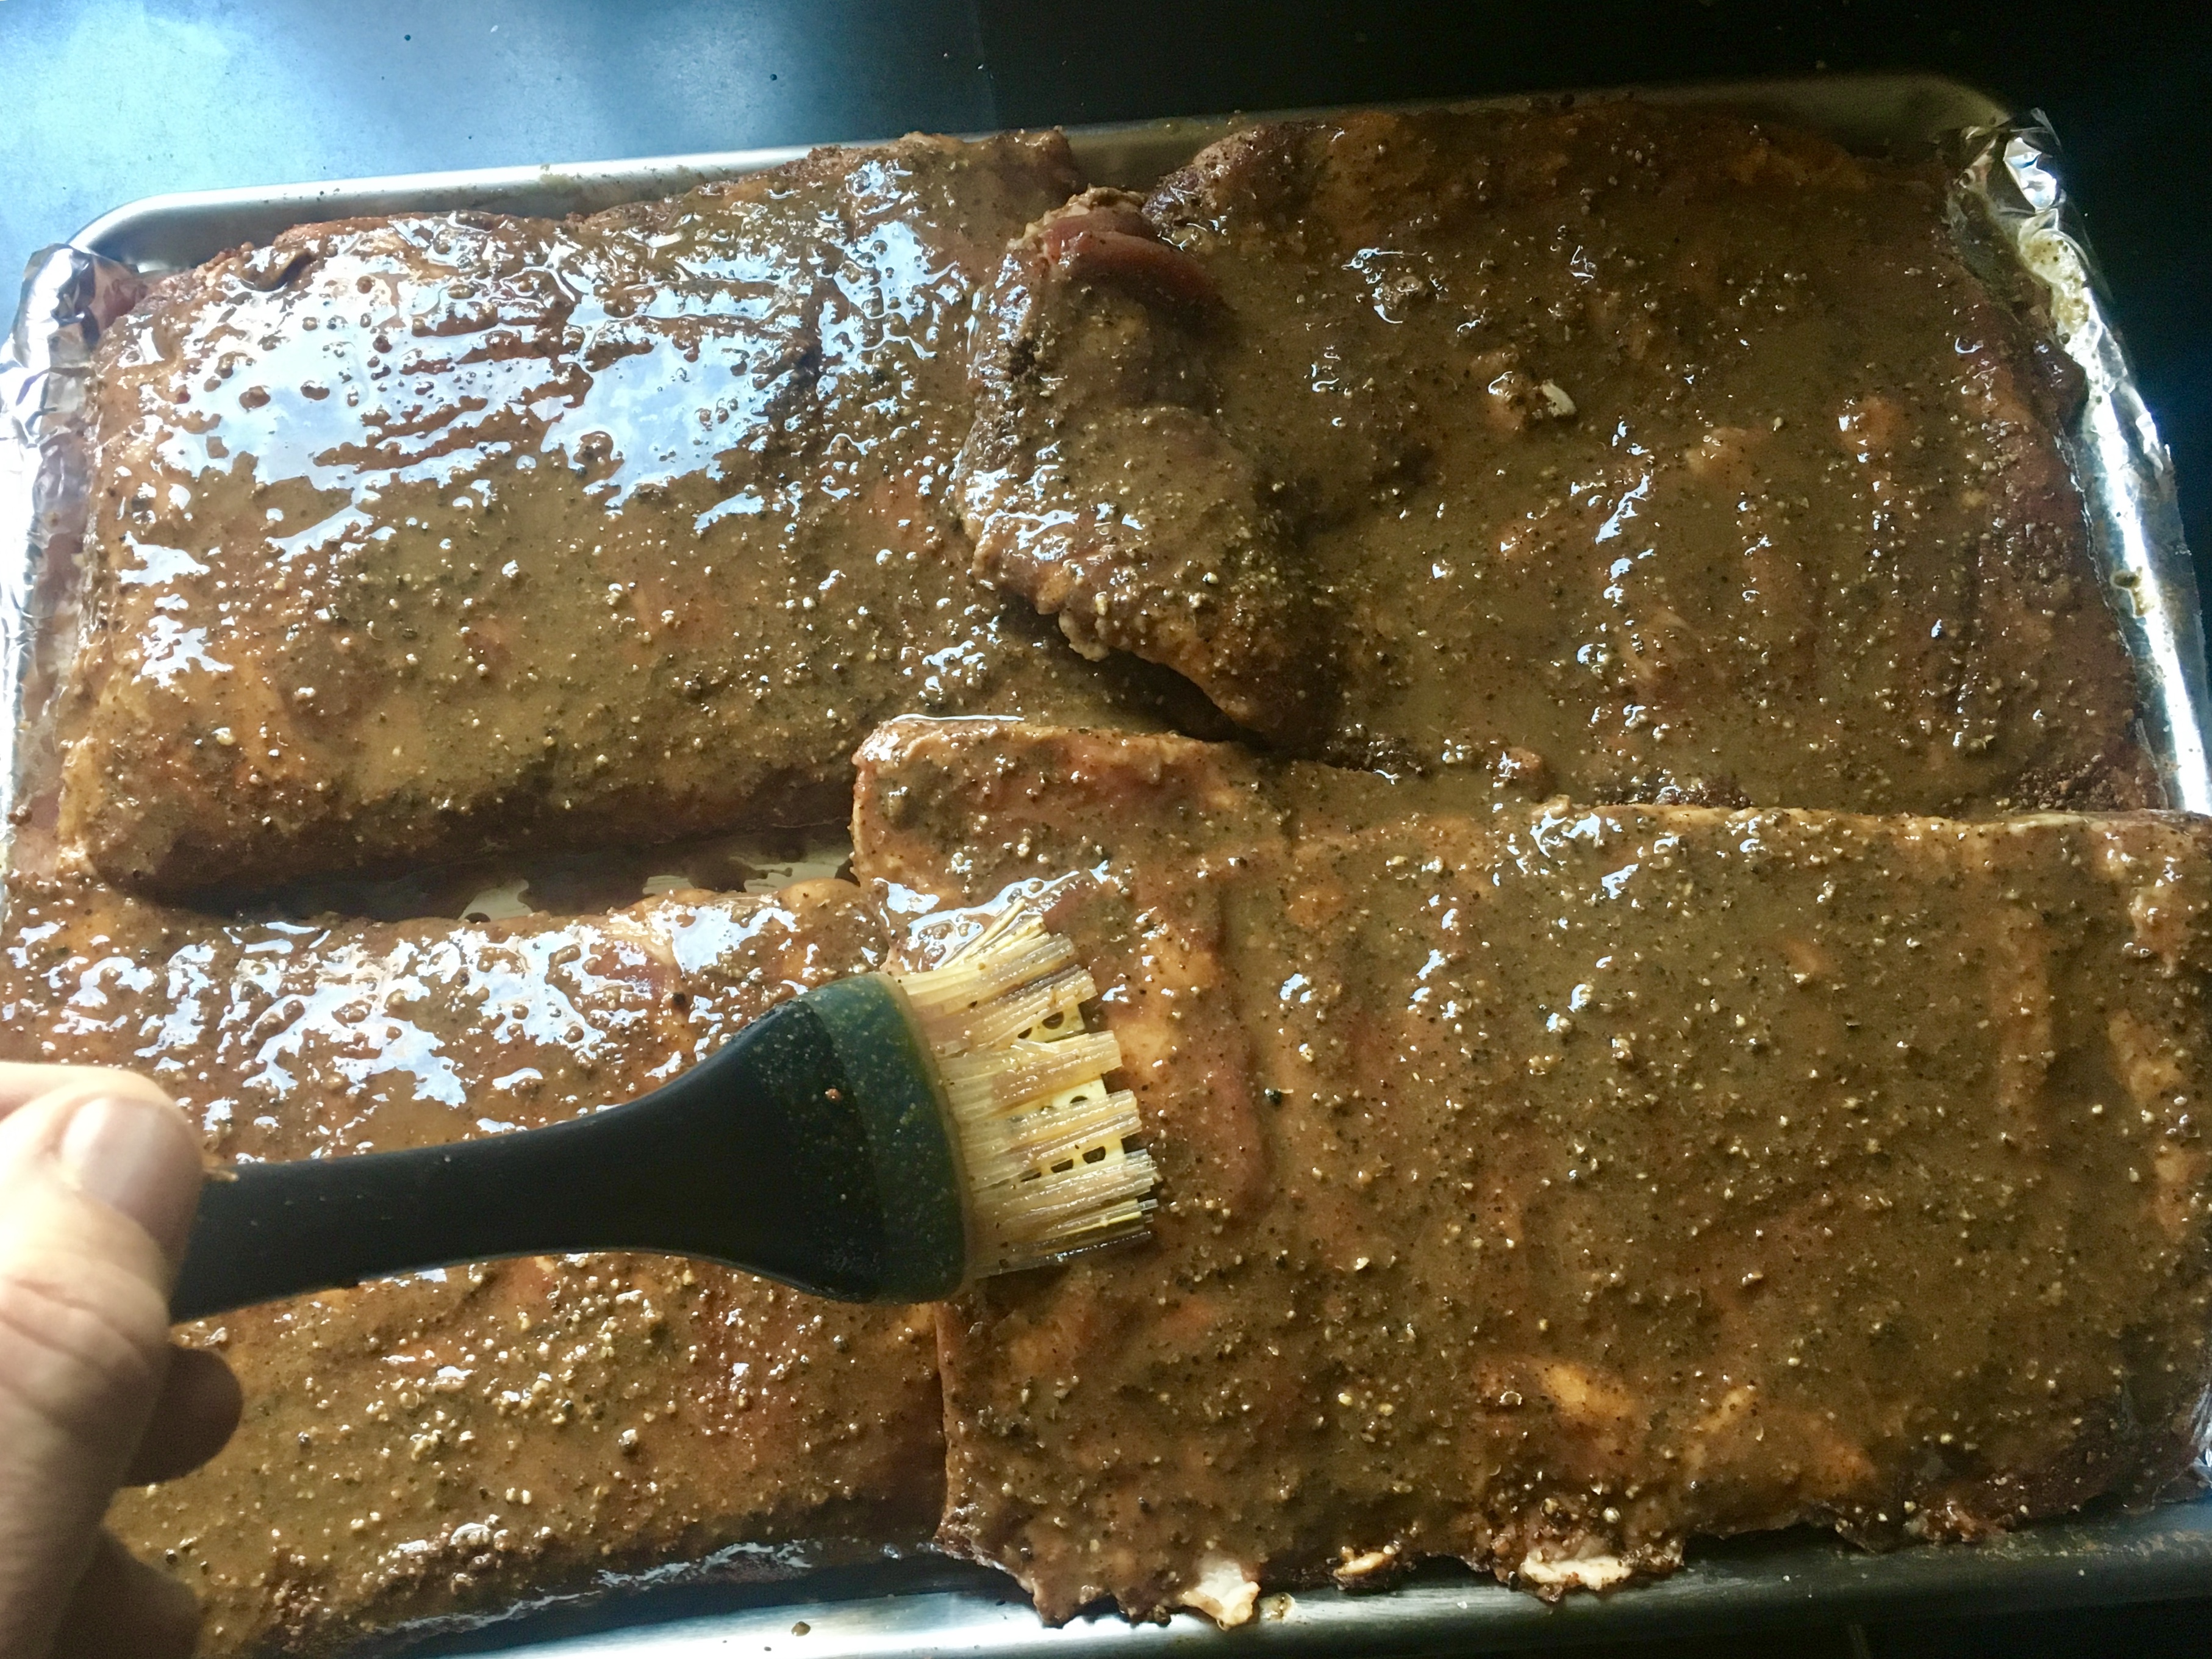
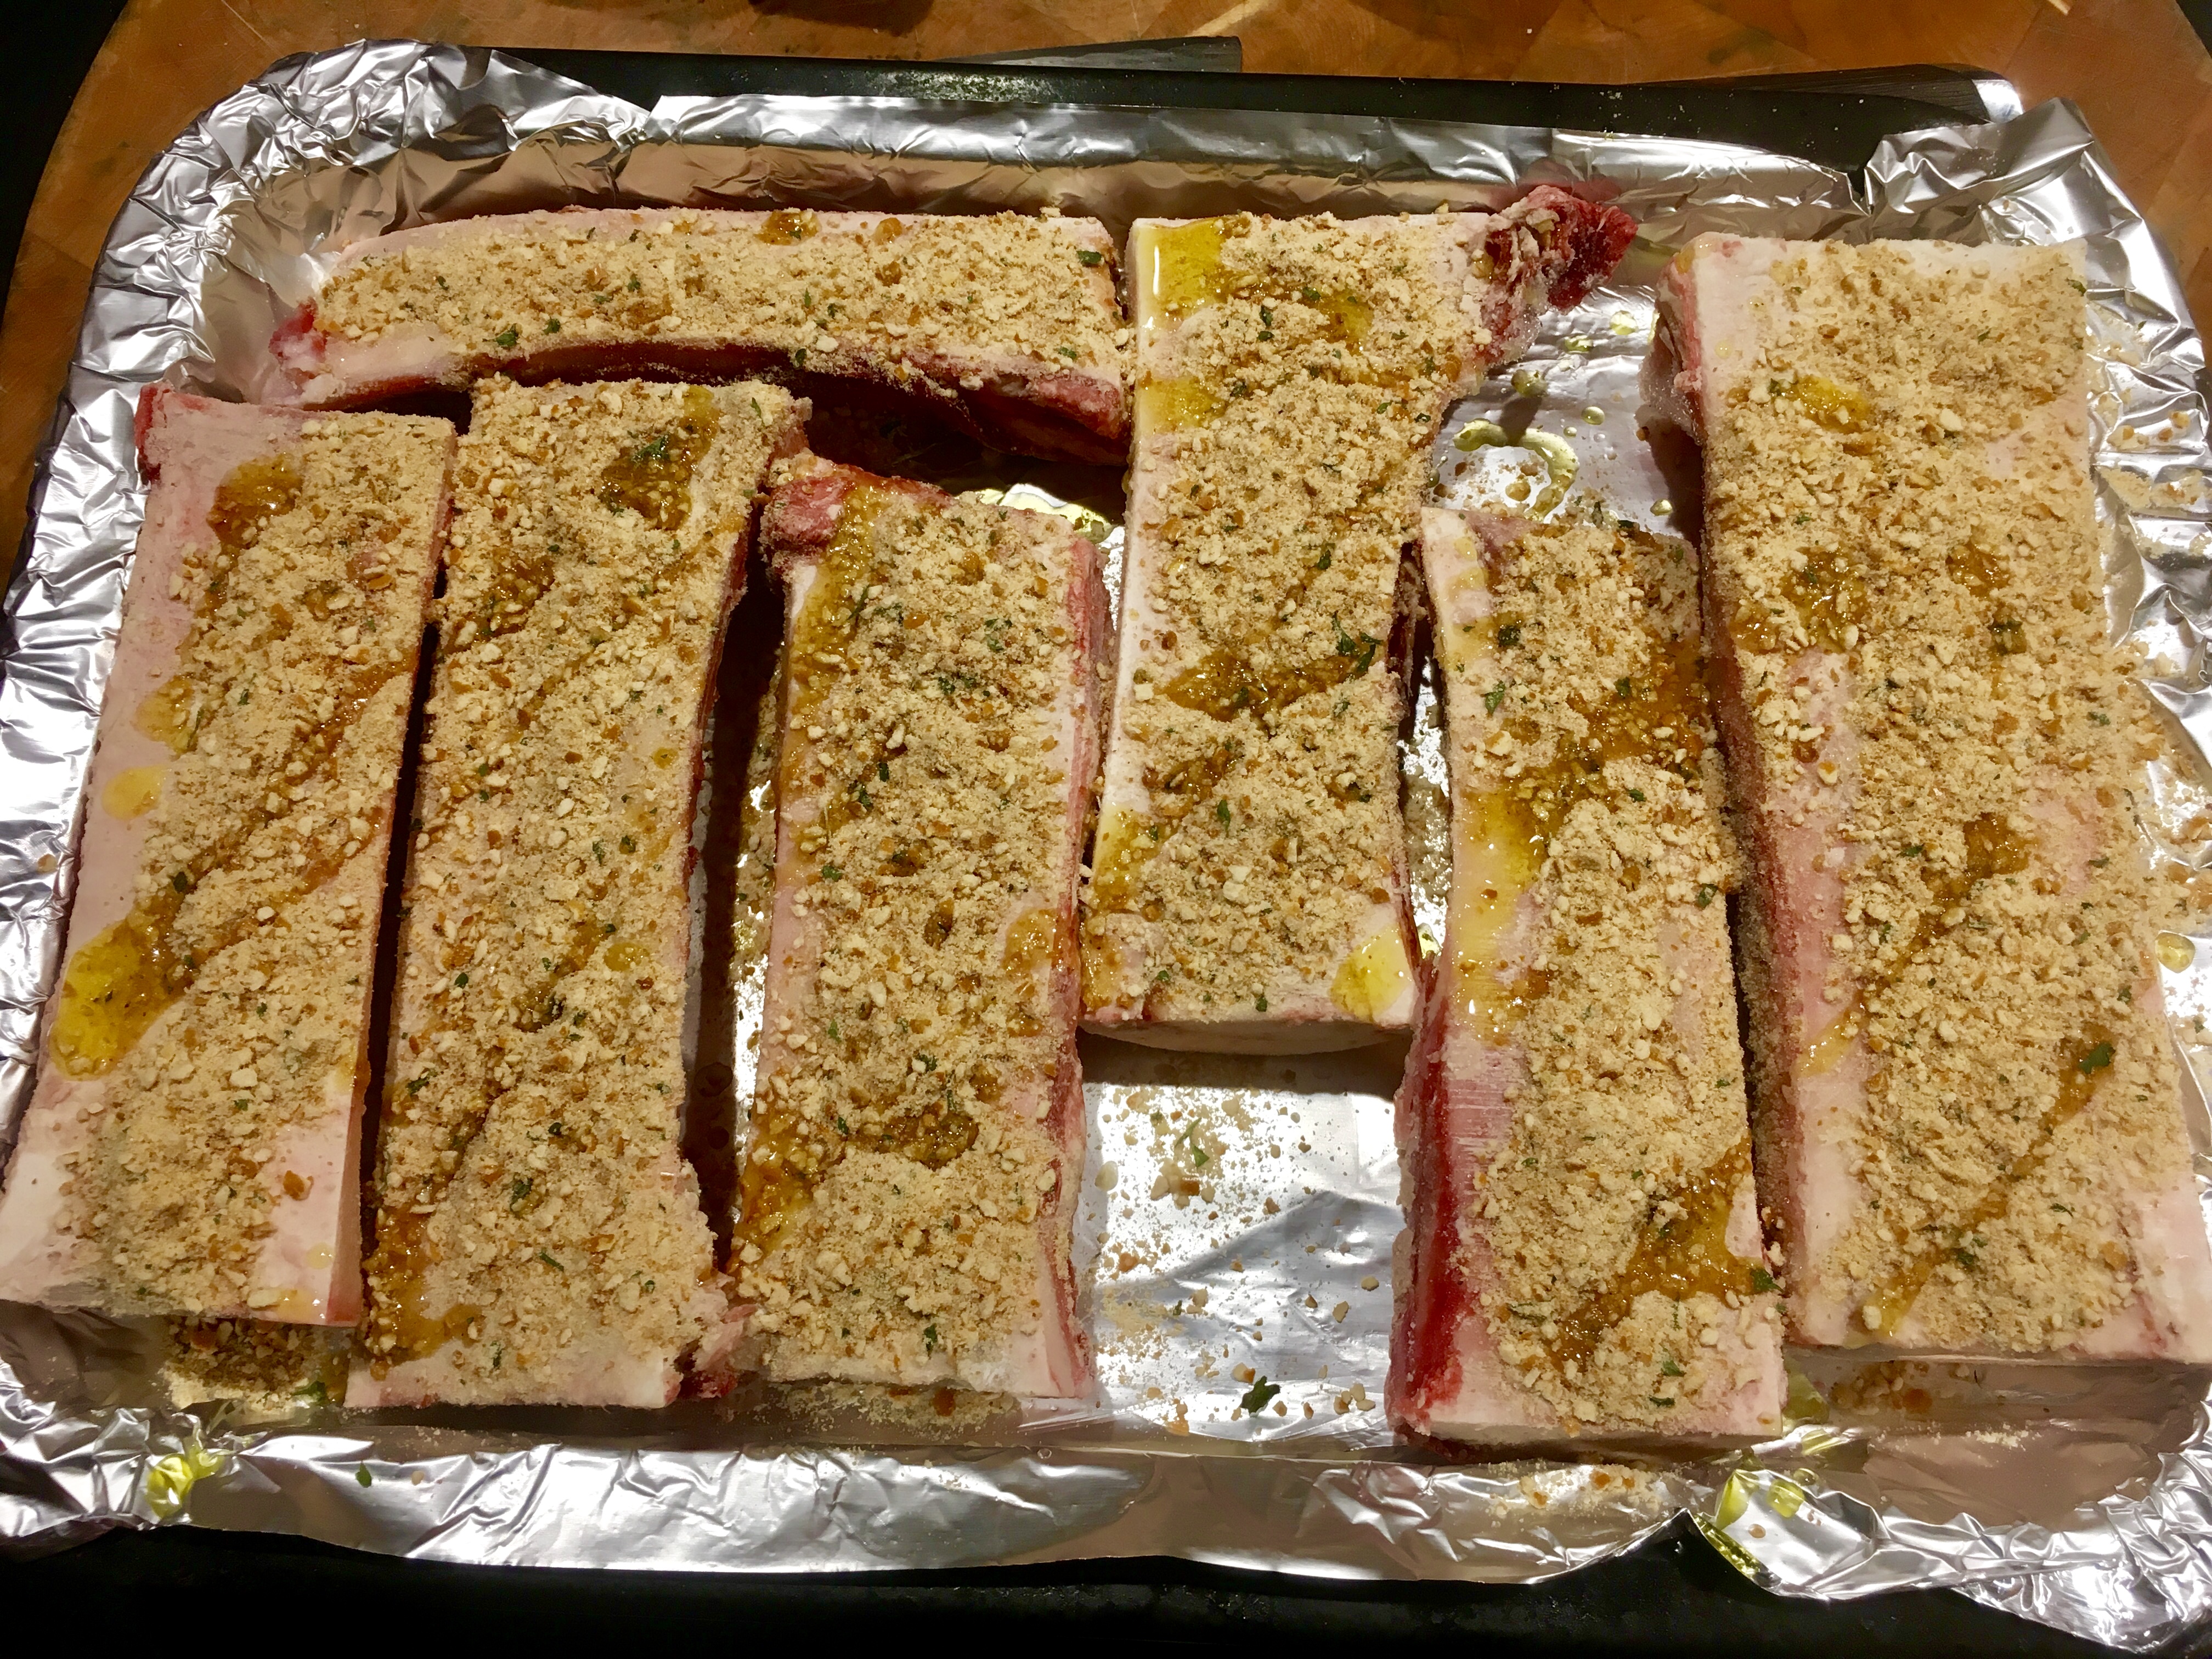
Lay the bones flat on a baking pan. If they wobble, place them on a layer of coarse salt to hold them steady. Sprinkle the pretzel mix on the bones, a little drizzle of olive oil on top, and place them in the oven.


Now you watch…there’s that one point where they go from “not quite yet” to perfection to “Oops! Too much!” …so be careful!
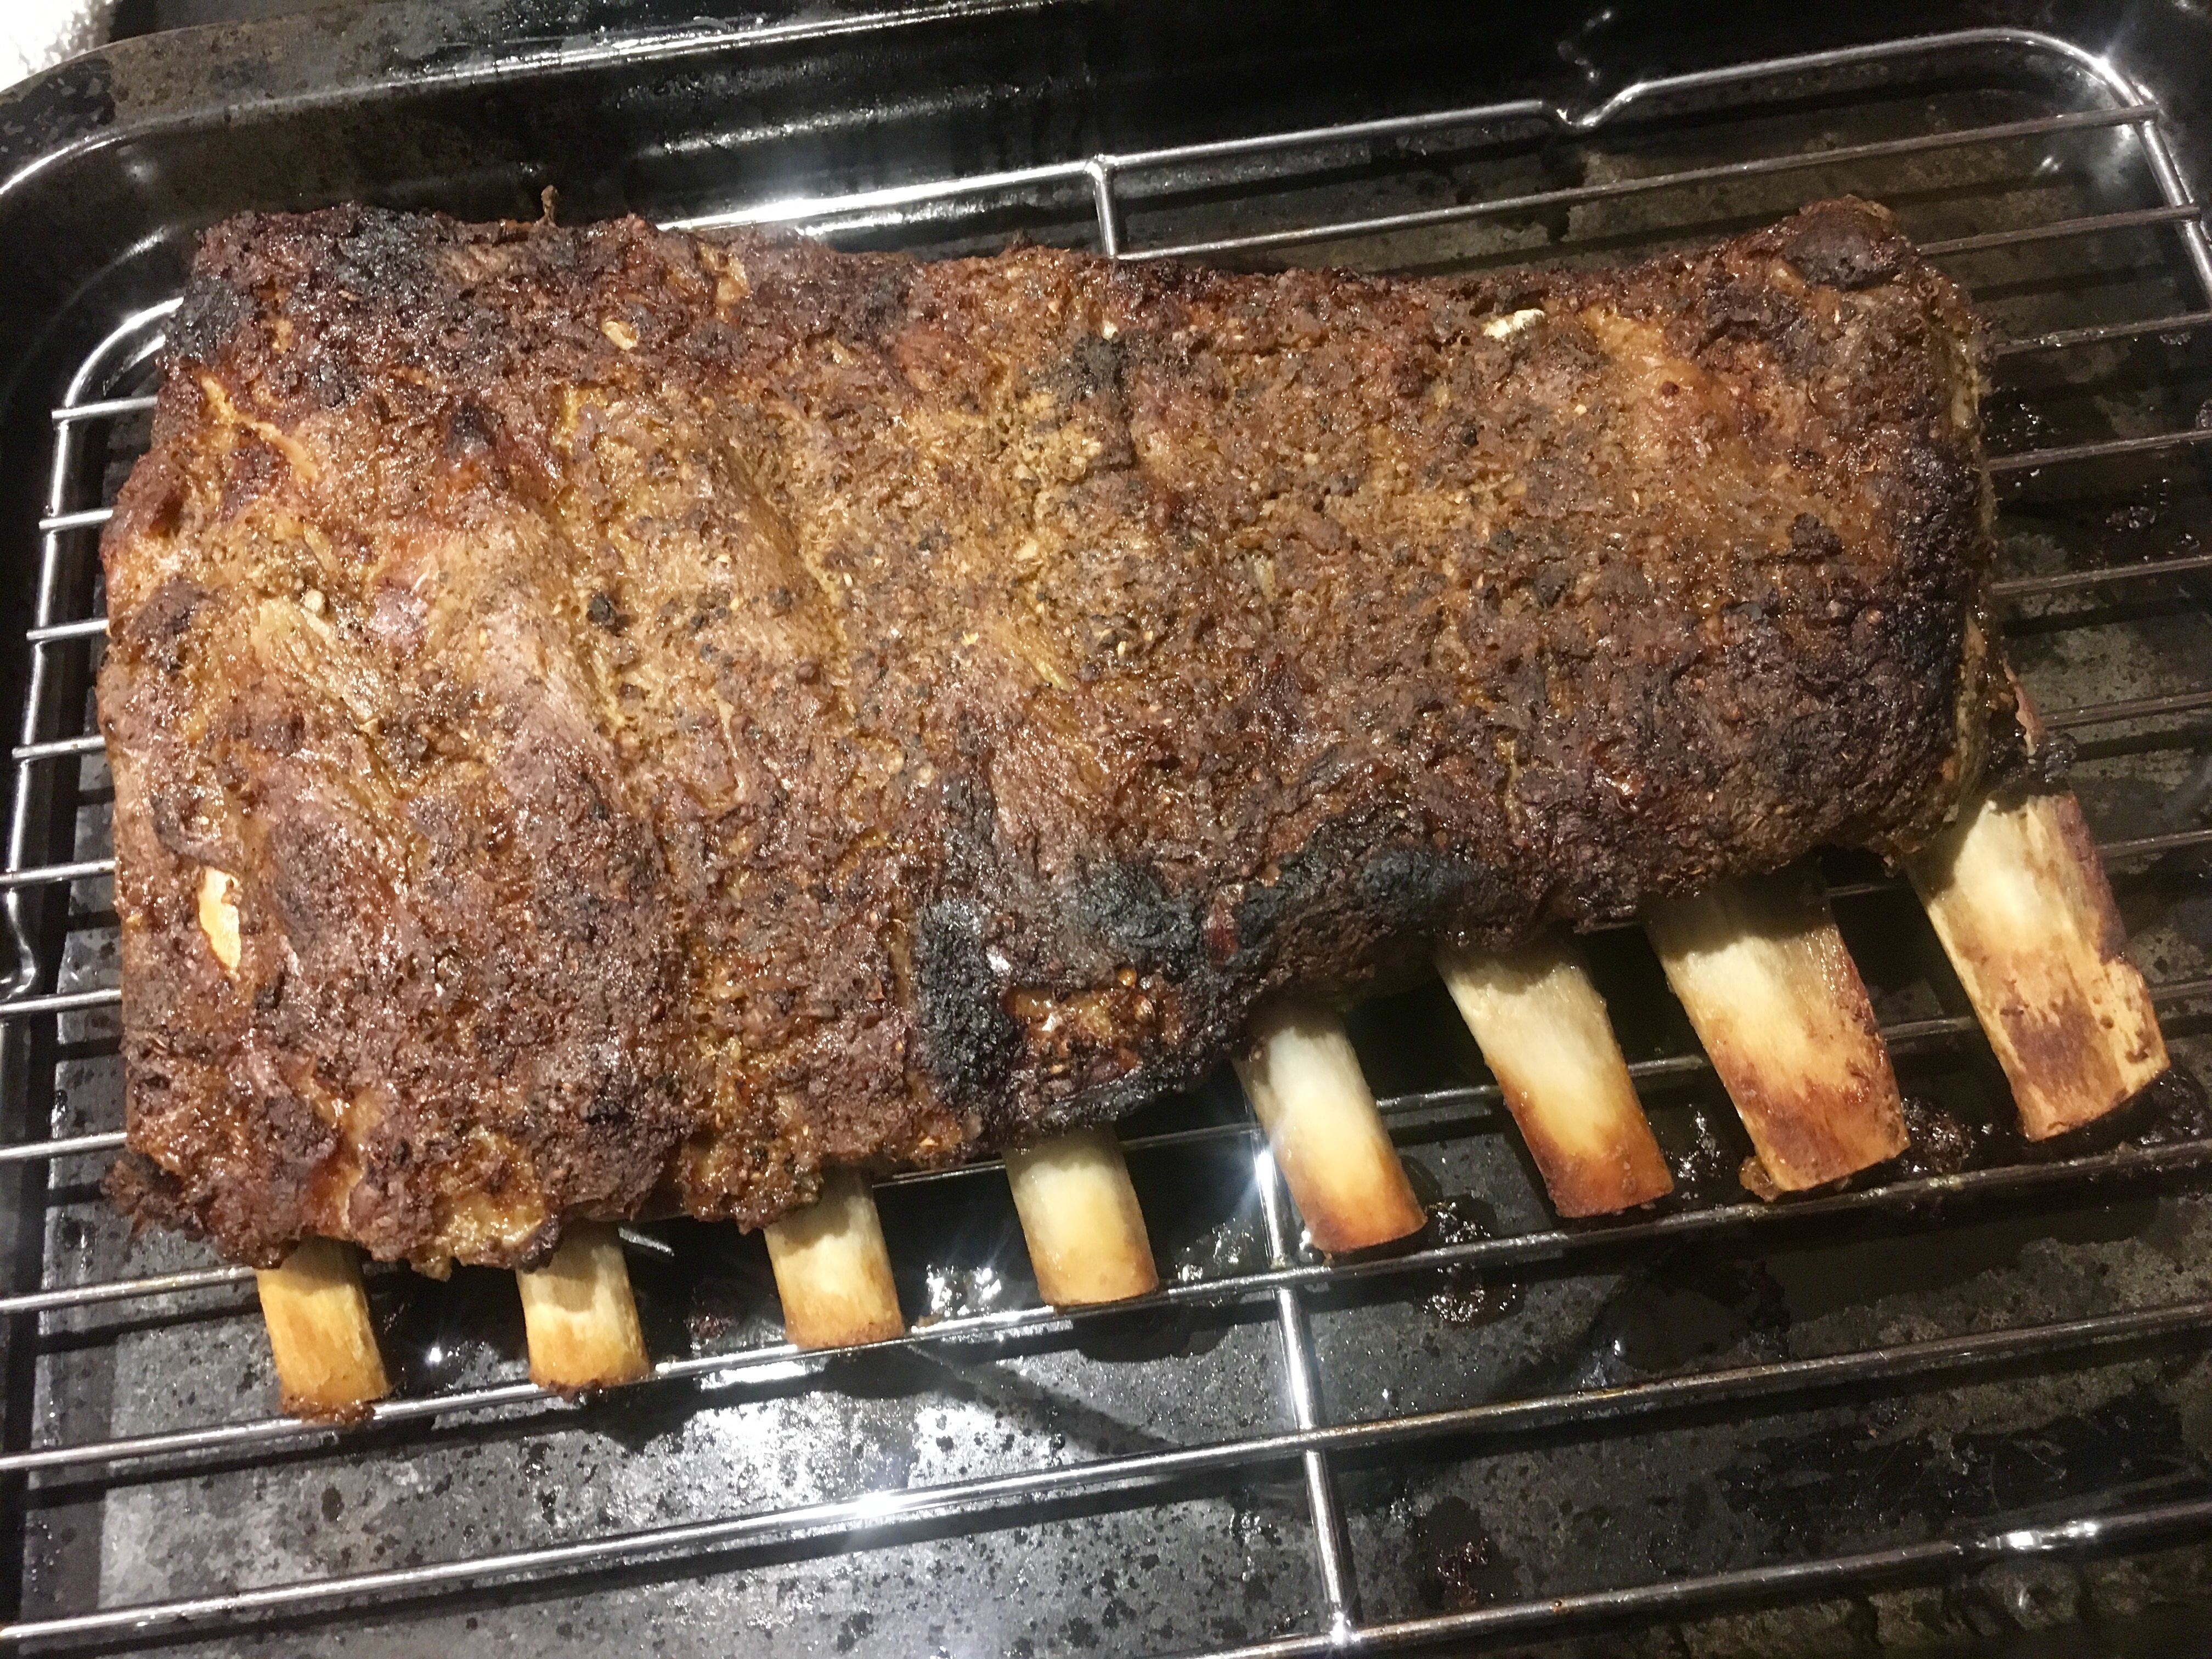
Perfection!


Some toasted bread on the side is all you need!


If you’re cooking gluten-free, try Snyder’s of Hanover GF pretzels. They are awesome…you’ll never know the difference.


As a teenager growing up on Long Island, I worked long hours at a local Italian restaurant called Pizza City East in Plainview. (The original Pizza City was in Ozone Park, Queens.) Though the pay sucked, I made some important friendships that have lasted to this day. I also learned many Italian cooking basics: how to open clams for red and white clam sauce, the secrets of great pizza dough, the art of a perfect espresso, and how to make massive quantities of baked ziti.

When I got older and I shared an apartment with my buddy, Don, we would regularly invite a large crowd of people over for a party, and a huge tray of baked ziti was an inexpensive and hugely popular way to feed a crowd that was doing some serious drinking.

The basic ingredients of baked ziti are the same as lasagna, the main difference being the wetness factor. If you make lasagna too wet, the thing will fall apart when you try to slice it. But baked ziti is meant to be sloppy, and it actually shines in its incredible gooiness!

My baked ziti consists of 2 sauces (a meat sauce and a bechamel sauce) and 4 cheeses (ricotta, mozzarella, provolone, and Parmigiano Reggiano) using pasta that is boiled much firmer than al dente. Technically, I like to use penne, not ziti. It’s firmer, and really works well with this recipe. And there are plenty of great pasta choices out there for gluten-free diets. Our favorite brand of GF pasta is Garofalo.


Gooey and delicious!

Meat Sauce…
1 small onion, finely chopped
1 small carrot, finely chopped
1 lb. grass-fed ground beef or pastured pork, or a combination of both
1 tablespoon dried parsley
2 teaspoons dried oregano
1 teaspoon dried basil
1 teaspoon salt
1/2 teaspoon black pepper
1 28-oz. can whole tomatoes
extra virgin olive oil for sautéing


Heat a tablespoon or 2 of olive oil in a large pan and sauté the onions until translucent. I finely chop the carrots by peeling them all the way down until there’s nothing but a pile of peeled pieces, then chopping them up so small, they almost melt into the sauce. Add the carrots and cook for 2 minutes. Add the beef (or pork) and cook the meat until it browns. Add the parsley, oregano, basil, salt and pepper and mix well.

Empty the can of tomatoes into a blender and blend it until smooth. Add this to the pan and mix well.

Cook the meat sauce for about 10 minutes, then remove it from the heat and set it aside.


Bechamel sauce…
3 tablespoons butter
3 tablespoon all-purpose flour (I use Cup4Cup flour to make it gluten-free)
1/2 teaspoon salt
1/4 teaspoon black pepper
2 cups 2% milk


Bechamel is a basic white sauce. It adds a wonderful creaminess to lasagna or baked ziti.

Melt the butter in a saucepan under medium heat. Add the flour and whisk until you’ve combined the butter and flour and have a light roux.

Add the milk, and keep whisking, making sure you don’t get any lumps in the sauce. Season with the salt and pepper.

Keep whisking until the sauce thickens. Once it does, remove it from the heat and set it aside.

Beautiful baked ziti!


12 oz. small pasta, like ziti or penne
4 slices provolone cheese (about 4 oz.)
ricotta cheese (about 8 oz.)
mozzarella cheese, shredded (about 8 oz.)
2 tablespoons freshly grated Parmigiano Reggiano


Pre-heat the oven to 350 degrees.

For baked ziti, use a deeper pan than you would for lasagna, about 4″ deep.

Take several large spoonfuls (about half) of the meat sauce and the béchamel sauce and mix them together in the pan.

Boil the pasta in a pot of salty boiling water until very firm…firmer than al dente. Drain the pasta and pour it into the pan with the sauces. Mix really well.

Tear the slices of provolone and add them to the pan, mixing them in. Mix in the ricotta cheese, and handful of the mozzarella, and all the Parmigiano Reggiano, stirring really well to get everything mixed together.

If there’s still room in the pan, keep adding equal parts meat sauce and béchamel sauce until you’ve used them up.

Smooth the top of the ziti mix flat with the back of a large spoon, then sprinkle the remaining mozzarella evenly over the top. Sprinkle a little oregano on top, and place the pan in the oven to bake for 30 minutes, or until the mozzarella on top is a beautiful golden brown.


Baked ziti, before baking.


The best mac and cheese ever: baked ziti!


Of course, when you’re cooking, there’s always someone hanging around to grab a taste of the baked ziti before it goes in the oven…


If there’s a dish that my Mom made all the time but I didn’t appreciate until I got older, this is it. Stuffed cabbage, cabbage rolls, or balandėliai, as we say in Lithuanian, was a staple in our home and one of my Dad’s favorite foods. 

I had seen my Mom make these beauties so often in my childhood, I didn’t even need to check online recipes out for guidance. That doesn’t mean I make them exactly like Mom, but my version came out pretty damn good. I think Mom would be proud.

As always, to keep this dish gluten-free, I simply toast some GF bread slices in the oven, then grind them in the food processor. Way better than buying pre-made GF breadcrumbs!

image


4 strips of bacon, chopped
1 yellow onion, finely chopped
1 teaspoon salt
1/2 teaspoon pepper
1/2 teaspoon granulated garlic
1 lb. ground grass-fed beef
1 lb. ground pastured pork
1/2 cup breadcrumbs
2 eggs
1 large head cabbage
1 pint homemade chicken, beef or veal stock
750 g diced tomatoes (1 Pomi container)
1 teaspoon thyme
1 teaspoon salt
1/2 teaspoon pepper
1/4 teaspoon granulated garlic
1/4 teaspoon granulated onion

Chop the bacon into small pieces and fry them until crisp. Finely chop the onion, and add it to the bacon and rendered fat in the pan, cooking until the onions are translucent. Add the salt, pepper and garlic. Mix well, and remove from the heat. Let it cool to room temperature.

In a large bowl, combine the beef, pork, breadcrumbs, eggs, and cooled bacon and onion mixture. Place it in the fridge to firm up.

Let a large pot of salted water come to a boil. Core the cabbage, leaving the leaves whole, and carefully immerse the head of cabbage into the hot water. Little by little, the outermost leaves of the cabbage will come off the head, and you can remove them with tongs, so you don’t burn yourself with the hot water. Set the leaves aside to cool, and continue doing this until you can no longer remove leaves from the remaining head of cabbage.

Remove the remaining head of cabbage from the hot water, and using your hands or a knife, break it into flat pieces. Line the bottom of a roasting pan with the pieces. These will keep the stuffed cabbage from burning and sticking to the bottom.

Time to roll the stuffed cabbage. Take the meat out of the fridge. Lay a cabbage leaf flat on the counter, and add some of the meat mixture inside. Roll the cabbage around the meat, folding the sides in as you go, much like a burrito. You might need to slice away the thickest part of the leaf stem to make rolling easier. Lay the stuffed cabbage in the roasting pan on top of the leftover cabbage pieces. (Unlike Mom, I don’t use toothpicks to hold the stuffed cabbage rolls together.)

Continue stuffing and rolling the cabbage leaves until you’ve got a pan full of them, shoulder-to-shoulder.

In a blender or whisked in a bowl, combine the stock, diced tomatoes, thyme, salt, pepper, garlic and onion. Pour this mixture over the top of the cabbage rolls in the roasting pan, covering them.


If you have leftover cabbage, you can place another layer of them on top. Otherwise, cover the roasting pan with foil and place in a pre-heated 350 degree oven. Cook for an hour.


After an hour, remove the foil and cook further for another 45–60 minutes.


image


OVERNIGHT OATS

Posted: February 4, 2019 in breakfast, Food, Recipes
Tags: , , , , , ,

The popularity of overnight oats seems to come and go. Now I’m finding more and more articles about it again. I suppose cooler weather makes us think of oatmeal, but to be honest, I’m not a fan of hot cereals. I wake up at 4AM for work every day, so to have something tasty and healthy already waiting for me, next to my carafe of iced coffee in my fridge, is awesome. This is my favorite way to get my oat fiber, and it’s absolutely delicious and simple to make.

Doing some research, I noticed that many overnight oats recipes contained almond milk, which some people think is a healthy alternative to regular milk. The reality of it is: it’s not…unless you make it yourself. (See how at the bottom of this blog.) Store-bought almond milk has little or no nutritional value–or almonds, for that matter. The same goes for soy milk: non-organic soy is often grown with Monsanto’s Roundup-ready products.

I happened to grow up as a kid that loved, and still loves, dairy, so I go for organic grass-fed milk. (The amount of fat in the milk is up to you. I use whole milk and add some water to it.) The chia seeds in the recipe add anti-oxidants and omega-3’s, but they’re optional if you don’t like their slippery texture. Cinnamon has some health benefits, too, but it’s mainly here for flavor. And I use frozen organic blueberries in this recipe, but any frozen or fresh organic berries (or sliced organic apples!) will work.


IMG_7103


1/2 cup rolled organic oats
1/2 cup organic blueberries, apples or other fruit
3/4 cup organic grass-fed milk (I use 1/2 cup whole milk and 1/4 cup water)
1 teaspoon chia seeds
2 teaspoons maple syrup (because…yum)
1/4 teaspoon cinnamon

Combine the ingredients in a container that seals tightly. Give it a good shake and refrigerate it overnight. Eat it the next morning.


How to make your own almond milk…

Start with raw, organic almonds. Take 1 cup of the almonds and place them in a Mason jar (no lid). Cover the almonds with water and let them soak overnight.

The next day, pour the water off, and place the almonds in a food processor. Add 2 cups fresh water and process the almonds on high for 2 minutes.

Strain the liquid through some cheese cloth, squeezing out as much liquid as you can, and you’ve got real almond milk! (Throw the solids into your compost pile.) Sweeten it, if you like.

It doesn’t keep for a long time, so make small batches, and keep them sealed in the fridge.

There’s still time to get all the ingredients that will make your Super Bowl party over the top!

Here are some links to my favorite recipes. All of them work really well when you want to feed a large group of hungry people, no matter what team they’re rooting for!

I’ve included classic chicken wing recipes, delicious ribs (without the need of a smoker or grill), classic Italian dishes, seafood and more.


CHICKEN WINGS AND DRUMSTICKS…

HONEY GLAZED CHICKEN WINGS

SPICY BRINED AND GRILLED CHICKEN WINGS

ASIAN STYLE CHICKEN WINGS

“MEXICAN” CHICKEN WINGS


PORK RIBS…

CHINESE STYLE HONEY RIBS FOR THE BIG GAME


BEEF RIBS…

KONA BEEF RIBS


SHRIMP COCKTAIL WITH SAUCE…

PERFECT SHRIMP COCKTAIL, FROM BOIL TO SAUCE


FRIED SHRIMP…

FANTASTIC FRIED SHRIMP


LASAGNA AND BAKED ZITI…

LASAGNA AND ITS COUSIN, BAKED ZITI


ASIAN NOODLES…GREAT HOT OR COLD

ASIAN NOODLES WITH PEANUT SAUCE


OYSTERS…

OYSTERS ROCK-A-FELLOW (IMPROVED!)


I really love the deep flavor of soy sauce and the sweetness of hoisin on poultry. Peking duck is the best example of this, but since I live in Rhode Island, I don’t get a chance to jump in the car and drive to Chinatown in Boston or New York at the drop of a hat. I had to come up with a plan B…and a good plan B!

I found it while looking through an old Chinese cookbook I had bought many years ago. Written by legendary NY Times food critic Craig Claiborne and Virginia Lee, “The Chinese Cookbook” has become my bible for all of my Asian dishes.

I use chicken instead of duck. It’s cheaper, easier to find, and I can easily buy a whole pasture-raised chicken from local farms here in Rhode Island. But it is just as delicious.

As long as you use gluten-free soy sauce and hoisin sauce (La Choy and Kikkoman make them and they’re found in just about any supermarket), this recipe is gluten-free.


Cantonese chicken


1 whole chicken, about 6 lbs., or 2 smaller chickens (pictured)
1 tablespoon peanut oil
1 tablespoon soy sauce
4 teaspoons Chinese five spice powder
2 teaspoons granulated garlic
2 teaspoons salt
1/2 teaspoon black pepper
6 tablespoons hoisin sauce
2 teaspoons sesame oil


Remove all the giblets from the chicken and discard. Rub the soy sauce first all over the chicken. (The chicken will absorb the flavors better if you do it before you rub the bird with the oil.) Then rub the peanut oil all over the chicken.

Combine the Chinese five spice, garlic, salt and pepper in a bowl. Season the entire chicken, including inside the cavity, with this mixture.

Pre-heat the oven to 325 degrees. Place the chicken in a pan lined with aluminum foil (cleanup will be easier) and bake.

Meanwhile, combine the hoisin sauce and sesame oil in a small bowl. When the chicken is about 15 minutes away from being done, brush it with the hoisin/sesame oil mixture. Cook it another 15 minutes until the chicken has a nice dark glaze. Don’t let it burn!

Let it rest about 15 minutes before carving.


Despite what many of the labels on the bottles say, there are really only two kinds of balsamic vinegar: the highly prized, DOP-regulated, aceto balsamico tradizionale (or traditional balsamic vinegar)—and everything else.


balsamic1


Much like the olive oil market, the world of balsamic vinegar has been so messed up and confused that what most of us consider to be balsamic vinegar really has nothing to do with the genuine article.

Aceto balsamico tradizionale is the pinnacle of all vinegars: produced by hand in small quantities using methods that are hundreds of years old, it has the consistency of maple syrup, and costs anywhere from $150 to $400 for a 3.4 ounce bottle.

That doesn’t mean there aren’t any good (even excellent) balsamic vinegars out there. It just means you have to do a lot of label reading to make sure you’re getting a good thing.

DOP stands for Denominazione de Origine Protetta, meaning food products whose origins are identifiable in the taste, texture or “perfume” of the product and produced in a specific region with all the ingredients coming from that region. This is all carefully overseen by the Italian government and it is a big deal when it comes to quality.

In order to bear the name aceto balsamico tradizionale, every aspect of its creation, from grape to bottle, is carefully regulated by DOP standards. The vinegar undergoes a lengthy transformation that takes a minimum of 12 years. To keep competition fair, each producer is allotted a specific number of bottles he can sell, which is indicated by a numbered tag on the bottle’s neck. Bottles from Modena are usually bulb-shaped, while bottles from Reggio nell’Emilia are bell-shaped. A red cap means the vinegar is at least 12 years old, while a vinegar that is 25 years of age or more has a gold cap.

Back in the 1980’s, when the balsamic vinegar craze hit the United States, many chefs looking for exotic ingredients in their dishes started using balsamic vinegar. It became an overnight sensation, and the demand was too great for these small handmade batch producers to handle. And so the market for inexpensive balsamic vinegars was born: vinegars that bear little resemblance to the real thing, using ingredients like cider or red wine vinegar, sugar and artificial coloring.

So can you buy a good vinegar if you don’t have wads of money to spend?

Well, the next step down from the top-shelf stuff is called aceto balsamico condimento—what we see in the stores as Balsamic Vinegar of Modena (although some are produced outside of Modena) and they average in price from $20 to $60 a bottle. They’re kept in less expensive wood barrels, and are aged less than 12 years.

And then there’s everything else.

Some simple tips on what to look for on the ingredients label: Since the really good stuff is very expensive and should never be cooked or reduced, look for high quality non-DOP balsamic vinegars. Look for those from Modena and Reggio nell’Emilia with Consorzio di Balsamico Condimento on the label to guarantee the age. Even if this stuff is too expensive for you, at the very least, make sure that “grape must” is the first ingredient on the label and that its acidity is not above 7 percent.

I recently found a bottle of balsamic vinegar under the brand name Modenaceti. A 16.9 oz. bottle goes for about 15 bucks on Amazon. Is it the good stuff? No, but  it’s great in a salad dressing or a marinade. The only ingredient listed is balsamic vinegar of Modena, and its acidity is 6%.


Here’s a really good and simple recipe you can make with this inexpensive vinegar…


PORT WINE/BALSAMIC VINEGAR STEAK SAUCE

½ cup port wine
½ cup balsamic vinegar
¼ cup red grapes, sliced lengthwise (optional)

Place the ingredients in a small sauce pan over medium-high heat and reduce by half. Use this sauce on steaks, burgers, etc.


Balsamic pork ribs are fantastic. I’ll have the recipe in my next blog.

Before our daughter was born, my wife and I traveled the world. We got engaged in Paris. We honeymooned in Thailand. We swam with dolphins in Moorea. We rode camels along the Mediterranean in Morocco. So when our daughter was born, many of our friends thought our traveling days would be over.

At the Kaikoura Lavender Farm, South Island, New Zealand


One of the biggest sources of inspiration for me, personally, was a moment on our honeymoon in Thailand. We left our luxurious resort on Koh Samui to spend a few days on a remote island called Koh Nang Yuan, a destination for adventurers and serious scuba divers.

While waiting for our ferry to arrive, a bunch of us were packed like sardines in a small area. Around the corner came a young man, carrying 2 very large duffel bags–clearly a scuba diver with all his gear. But a moment later, his wife appeared from around the corner, and she was pushing a baby in a stroller. She whispered something to her husband, and he unzipped one of the large duffel bags to reveal a huge stash of diapers! He pulled one out, handed it to his wife, and she headed toward the restroom.

In that moment I realized: you can travel with a kid…and you can still have the adventure of a lifetime! It changed my attitude toward travel forever.

Snorkeling in St. John, USVI


It’s understood that not everyone can do this. Traveling is expensive. We gladly trade material things (that fancy SUV will have to wait) so that we can share some amazing memories.

In the crown of the Statue of Liberty, NYC


By the age of 12, my daughter had traveled to France, Italy, Spain, Greece, Lithuania, England, New Zealand, Iceland, Canada and the Caribbean.

London, England


The first time our daughter’s feet touched salt water, it was as an infant in the Adriatic Sea in Puglia, Italy. The first time she had a steak, it was steak frites in Paris.

Mercado de San Miguel in Madrid, Spain


Though she didn’t always realize it, her travels gave her an incredible education. The people she met, the foods she (sometimes) ate, the places she saw that her friends would only read about. It has made her wise in ways we never could have expected.

A mountain top view of San Sebastian, Spain


Swimming with stingrays at Stingray City in the Cayman Islands


Sure, once in a while my wife and I still travel alone for a romantic getaway. But to see the world through our daughter’s eyes has been a real joy for us, especially now when I can share my love for music with her.

Hard Rock Cafe, Paris


Hot dogs in Reykjavik, Iceland


We have friends that tell us they can’t afford to travel the way we do. Then they blow thousands on a Disney vacation or cruise.

Washington, DC


Everyone needs to make that choice on their own, but we decided a long time ago that we’d skip places like Disney World for the real world.

Sharing an artsy moment with Mom in Santorini, Greece


…and a silly moment with Dad in Vilnius, Lithuania


Even local trips can make a tremendous difference in a child’s life.

Block Island, RI


Fishing off the coast of Cape Cod, Massachusetts.


Camping in the Berkshires, Massachusetts.


Rafting on the Kennebec River in The Forks, Maine


Never underestimate the power of travel! It’s not just great for the kid…it’s great for the whole family!


I love pastrami. I love ribs. So why can’t the two get along? (Using my best announcer voice): Well now they can!!

I’ve seen a few recipes that use pastrami ingredients on foods other than pastrami and I thought it could work with pork ribs as well. I was right. And for these ribs, you don’t need a smoker or anything like that. They bake in the oven, then get finished under a broiler for that tasty char that you always look for in a grilled rib.

There’s a 2-step process to making these ribs. First, you combine the rub ingredients and let the ribs hang out in the fridge overnight. Then you bake them and broil them the next day, brushing a special sauce on them.

I prefer St. Louis-style ribs because they cook more evenly and have lots of meat. I prefer a heritage breed like Berkshire pork (also known as kurobuta) because of it has fantastic flavor, “good” fat, and is humanely raised.

Time to get ribbin’…


1/4 cup freshly ground black pepper
1 tablespoon ground coriander
1 tablespoon light brown sugar
1 tablespoon mustard powder
1 tablespoon paprika
1/4 teaspoon cayenne pepper
1/4 cup distilled white vinegar
2 tablespoons salt
2 racks St. Louis-style pork spare ribs (about 5 lbs.), preferably Berkshire pork

To make the rub, combine the black pepper, coriander, brown sugar, mustard powder, paprika and cayenne in a bowl. Mix well. To grind larger amounts of pepper and other spices, I use a small coffee grinder that I keep just for spices. It does the job quickly and easily.

My spice grinder.


Cut the racks of ribs into halves, removing the skin on the back of the ribs that can make it tough. Brush both sides of the ribs with the white vinegar, and then season with the salt. Pat the ribs with the spice rub, and place them on a rimmed baking sheet. Place the baking sheet in the fridge for at least an hour. Overnight is better.

Vinegar, salt and then the spice rub.


Pre-heat the oven to 325. Transfer the ribs to a large roasting pan, or you can use the rimmed baking sheet. Place the ribs fatty side up, and add 1/2 cup of water to the pan. Cover the ribs with aluminum foil and bake them for about 2 hours.

After 2 hours, remove the ribs from the oven and let them sit at room temperature, still covered by the foil, for about 30 minutes.

Out of the oven and ready to be brushed with sauce.


1/4 cup Dijon mustard
3 tablespoons apple cider vinegar
3 tablespoons honey
2 tablespoon soy sauce

In a small bowl, combine the Dijon mustard, apple cider vinegar, honey and soy sauce. If the honey’s very thick, I place the glass jar (no lid) in the microwave for a few seconds to make it flow better. (Don’t do this if it’s in a plastic container, and don’t microwave for too long–honey will foam up and make a big mess!)

Pre-heat a broiler.


Brushing the ribs with the sauce.


Take the foil off the ribs and brush them with the sauce. Then place the ribs under the broiler until lightly charred, about 3 minutes. Slice into individual ribs or devour a slab at a time!

Charred and delicious!


It’s Wednesday. You’ve got time to go to the supermarket and buy what you need to make this recipe and the be the hero of the weekend. Seriously, it’s that good!
This is not only our family’s favorite pancake recipe, but it’s the one I always make when guests are spending the night. They are absolutely delicious–the pancakes, not the guests– (throw some bacon on the side and it’s great for hangovers!) and unlike any other pancakes you’ve had.
My wife maintains a gluten-free diet, so I needed to make changes in my original recipe, but my favorite go-to all-purpose GF flour, “Cup 4 Cup,” worked so well in this recipe, there was no difference in taste or texture. Now this is the only way we make ’em and no one notices the difference!
 image
1 cup all-purpose flour (or Cup 4 Cup original multi-purpose flour)
1 1/2 cups stone-ground yellow cornmeal
2 tablespoons organic cane sugar
2 teaspoons baking powder
1/2 teaspoon baking soda
1/2 teaspoon salt
2 cups buttermilk (or 1 1/2 cups milk and the juice of 1 large lemon)
zest of 1 organic lemon
1 large egg
3 tablespoons melted unsalted butter, slightly cooled
1–2 teaspoons avocado oil
1 cup fresh or frozen blueberries, preferably wild, rinsed and dried
Whisk the flour, corn meal, sugar, baking powder, baking soda, and salt in a medium bowl
to combine.
In a separate bowl, whisk the egg, lemon zest, and melted butter into the buttermilk to combine.
Make a well in the center of the dry ingredients in the bowl. Pour in the milk mixture and
whisk very gently until just combined. Do not over mix. A few lumps are OK.
Heat non-stick skillet over medium heat. Add 1 teaspoon of oil and use a brush to coat the skillet
bottom evenly. Pour 1/4 cup of the batter into 3 spots on the skillet. Sprinkle 1 tablespoon of the
blueberries over each pancake. Cook the pancakes until large bubbles begin to appear,
about 1 1/2 to 2 minutes. Using a thin, wide spatula, flip the pancakes and cook until they’re golden
brown on the other side, 1 to 1 1/2 minutes longer.
Chow down immediately!
image