Archive for the ‘frying’ Category


There’s no problem with your bird, she said to me
Just go low and slow to cook it perfectly
A few choice seasonings end up deliciously
There must be 50 ways to roast your chicken…
There’s nothing better than a whole roasted chicken. Simply season it, pop it in the oven and go low and slow. No maintenance, and you’ve got a great bird in a couple of hours. And it works with any side dish.
Once you go with humanely raised pastured chicken, you’ll never go back to supermarket chicken again. The flavor is fantastic, and you’ll devour it right down to the bones, which you can then use to make the best home made chicken stock or soup you’ve ever had. Nothing goes to waste.
I roast at least one chicken every week, so to change it up, I’ve come up with many different rubs and sauces over the years. All of the rubs are sugar and gluten-free preparations. The sauces may have one or both.
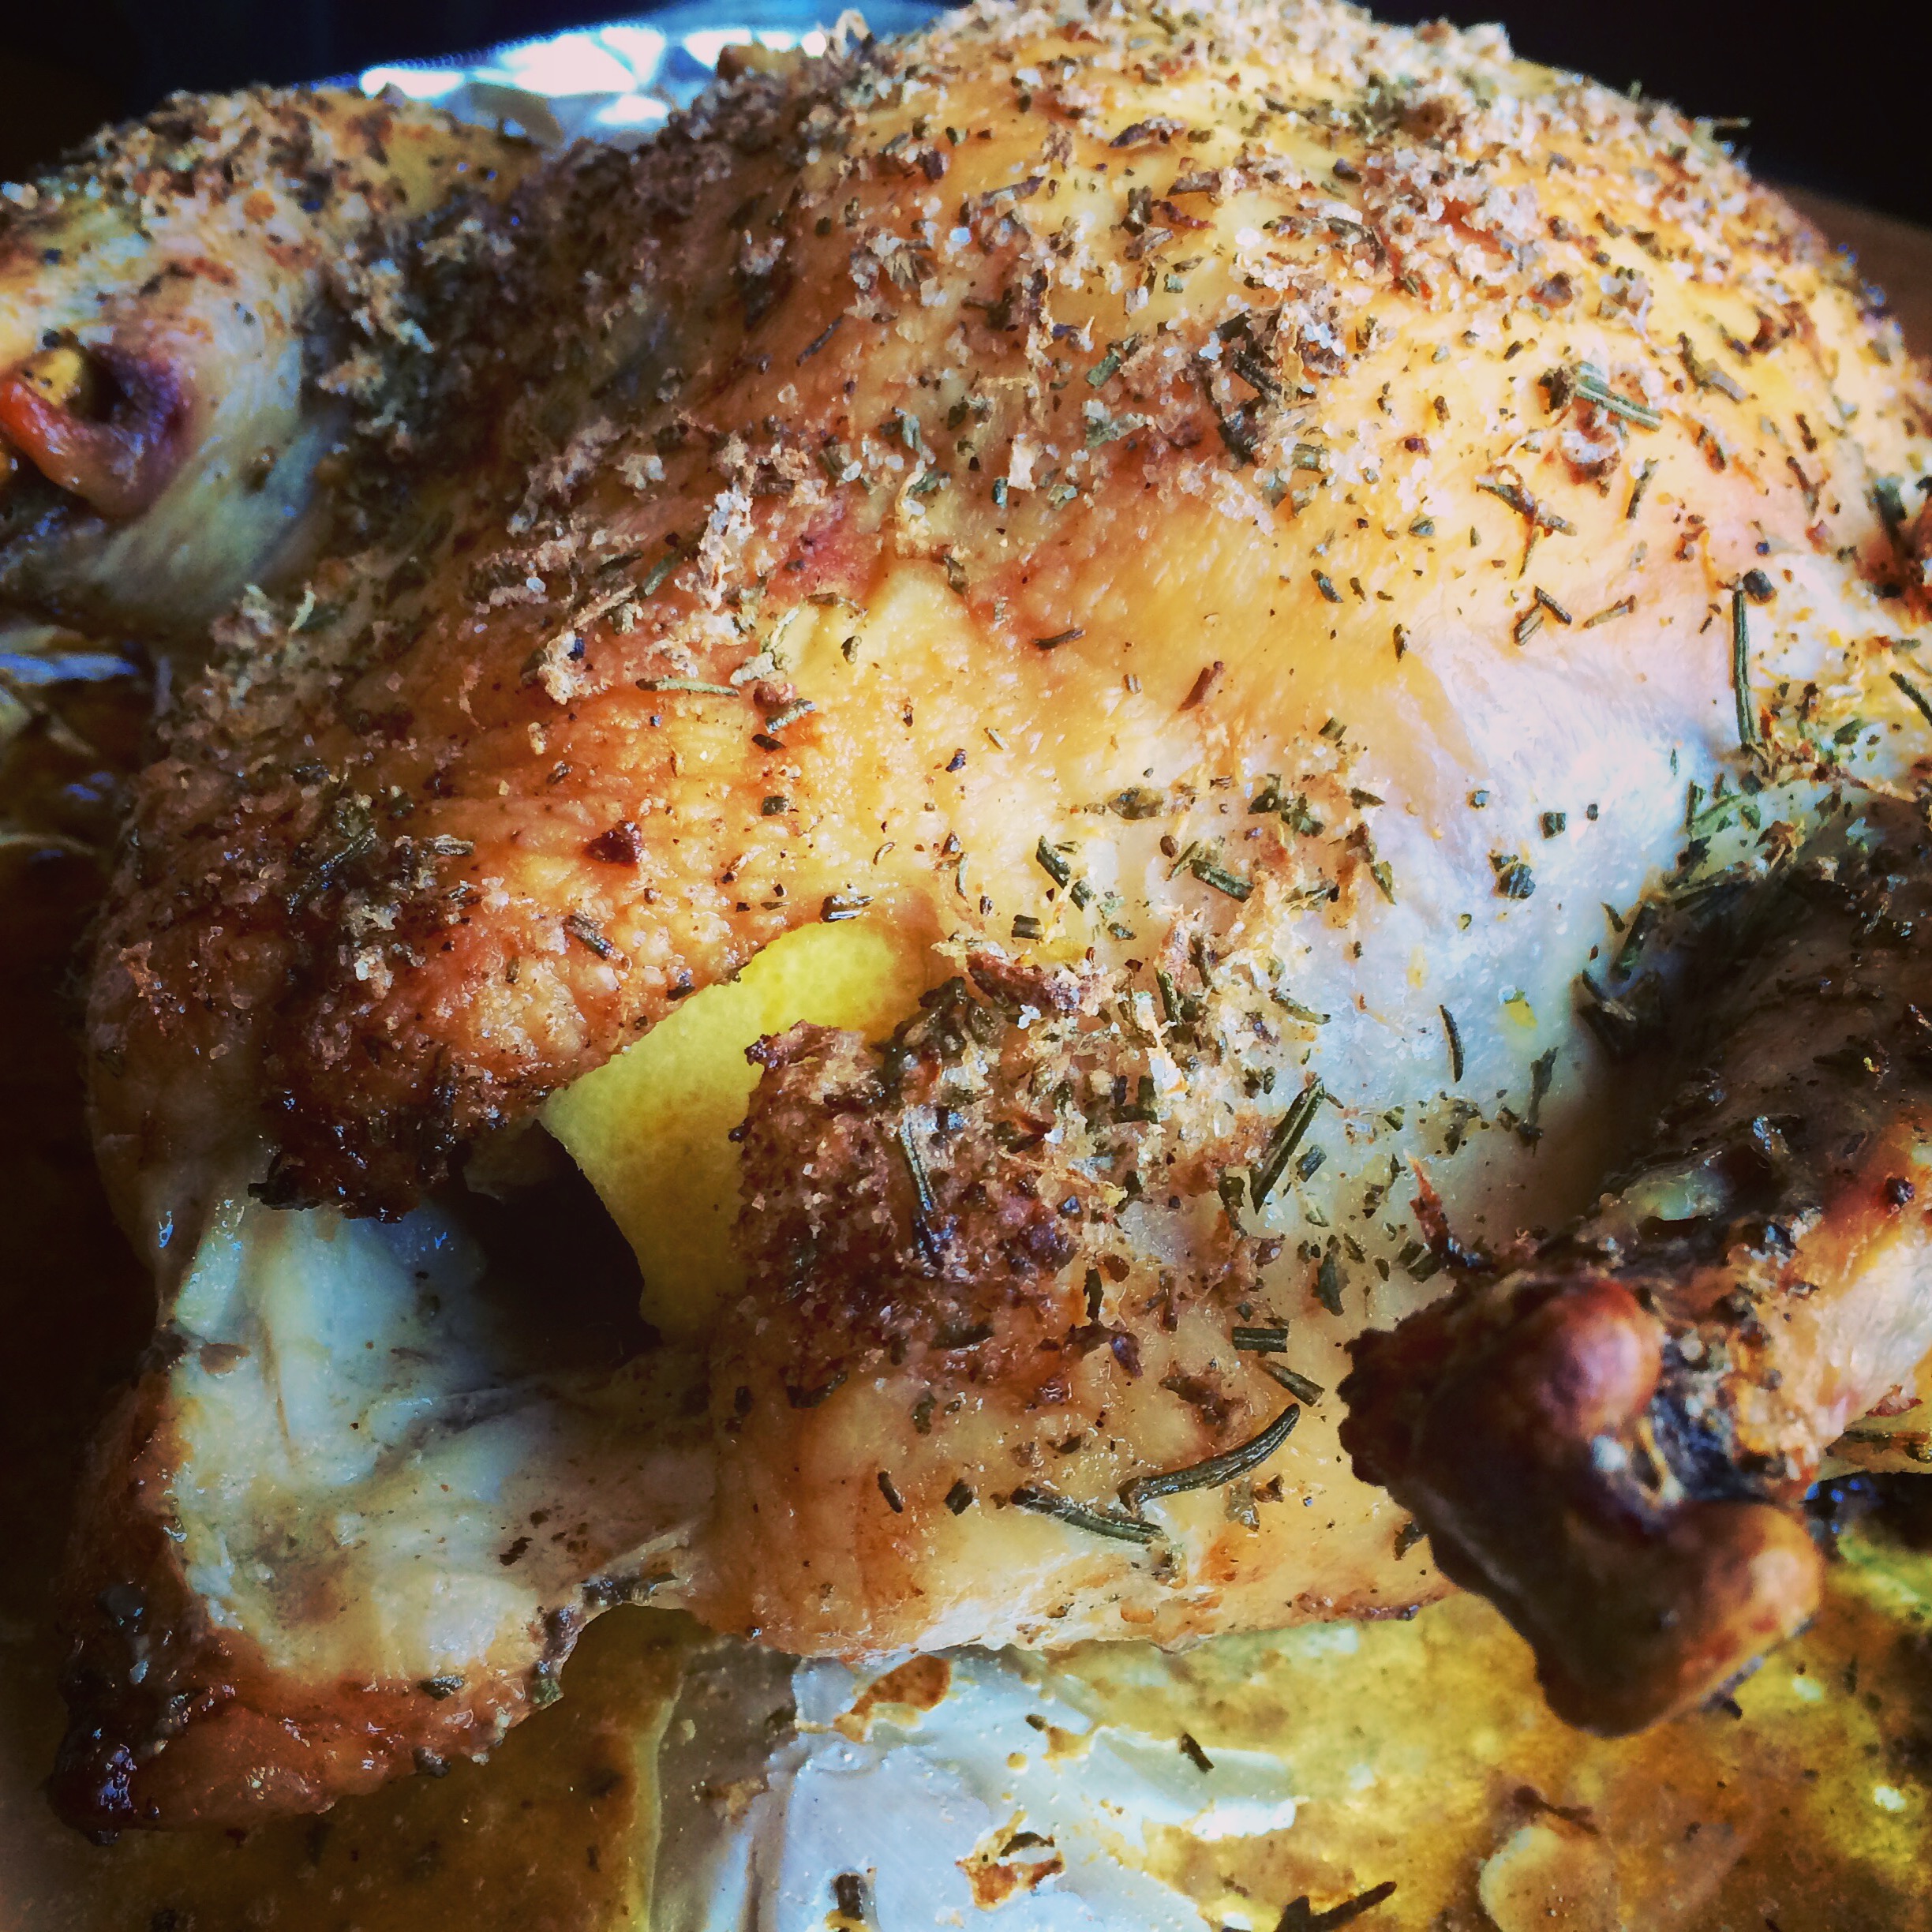
Chicken with Rosemary and Lemon
 IMG_9146
The lemon serves double-duty in this dish. You use the zest to season the outside skin, then you place the remaining cut up pieces inside the carcass to flavor from the inside out.
1 tablespoon finely chopped fresh rosemary
1 teaspoon granulated garlic
2 teaspoons salt
zest from 2 lemons, using a micro plane zester, the leftover lemons quartered
1/2 teaspoon black pepper
In a bowl, combine the rosemary, garlic, salt, lemon zest, and pepper. 
Thaw a bird, remove the giblets, and rub it all over with olive oil. Shove the quartered lemon pieces into the carcass of the bird. Season the bird inside and out with the rosemary seasoning mix.
Place the bird on a pan lined with non-stick aluminum foil in a pre-heated 450-degree oven. Cook for 10 minutes at this temperature, then reduce to 275 degrees and cook low and slow until done.
Tarragon Chicken
I love the taste of chicken seasoned with tarragon. Careful with this, or you will accidentally devour your fingers!
1 tablespoon dried tarragon, crumbled into a powder
1 teaspoon garlic salt
1 teaspoon salt
1/2 teaspoon black pepper
olive oil
In a bowl, combine the tarragon, garlic salt, salt and pepper.
Thaw a bird, remove the giblets, and rub it all over with olive oil. Season the bird inside and out with the seasoning mix.
Place the bird on a pan lined with non-stick aluminum foil in a pre-heated 450-degree oven. Cook for 10 minutes at this temperature, then reduce to 275 degrees and cook low and slow until done.
Italian Chicken
FullSizeRender
The darker color of the bird comes from rubbing it first with balsamic vinegar, then olive oil, before coating it with Italian seasonings. Don’t use the fancy, expensive balsamic. The bottles that go for about 9 bucks in the supermarket work well for this recipe.
Balsamic vinegar
Olive oil
1 tablespoon salt
1 tablespoon parsley
1 teaspoon oregano
1 teaspoon pepper
1 teaspoon granulated onion
1/2 teaspoon granulated garlic
Thaw a bird, remove the giblets, and rub it all over with the balsamic vinegar. Then rub it all over with the olive oil. Season the bird inside and out with the seasoning mix.
Place the bird on a pan lined with non-stick aluminum foil in a pre-heated 450-degree oven. Cook for 10 minutes at this temperature, then reduce to 275 degrees and cook low and slow until done.
My Grandma’s Chicken
My grandmother would cook chicken thighs low and slow all Saturday morning, knowing that I was coming over for lunch after Lithuanian school. The meat just fell off the bone, and I couldn’t stop eating it. This recipe is so simple and works just as well for a whole bird. Every time I make this, I think about those days at my grandmother’s house.
Lawry’s Seasoned salt
Olive oil
Thaw a bird, remove the giblets, and rub it all over with olive oil. Season the bird inside and out with the Lawry’s Seasoned salt.
Place the bird on a pan lined with non-stick aluminum foil in a pre-heated 450-degree oven. Cook for 10 minutes at this temperature, then reduce to 275 degrees and cook until done.
If you’re using chicken thighs, like my grandmother did, make sure they have the skin on and the bone in.

image

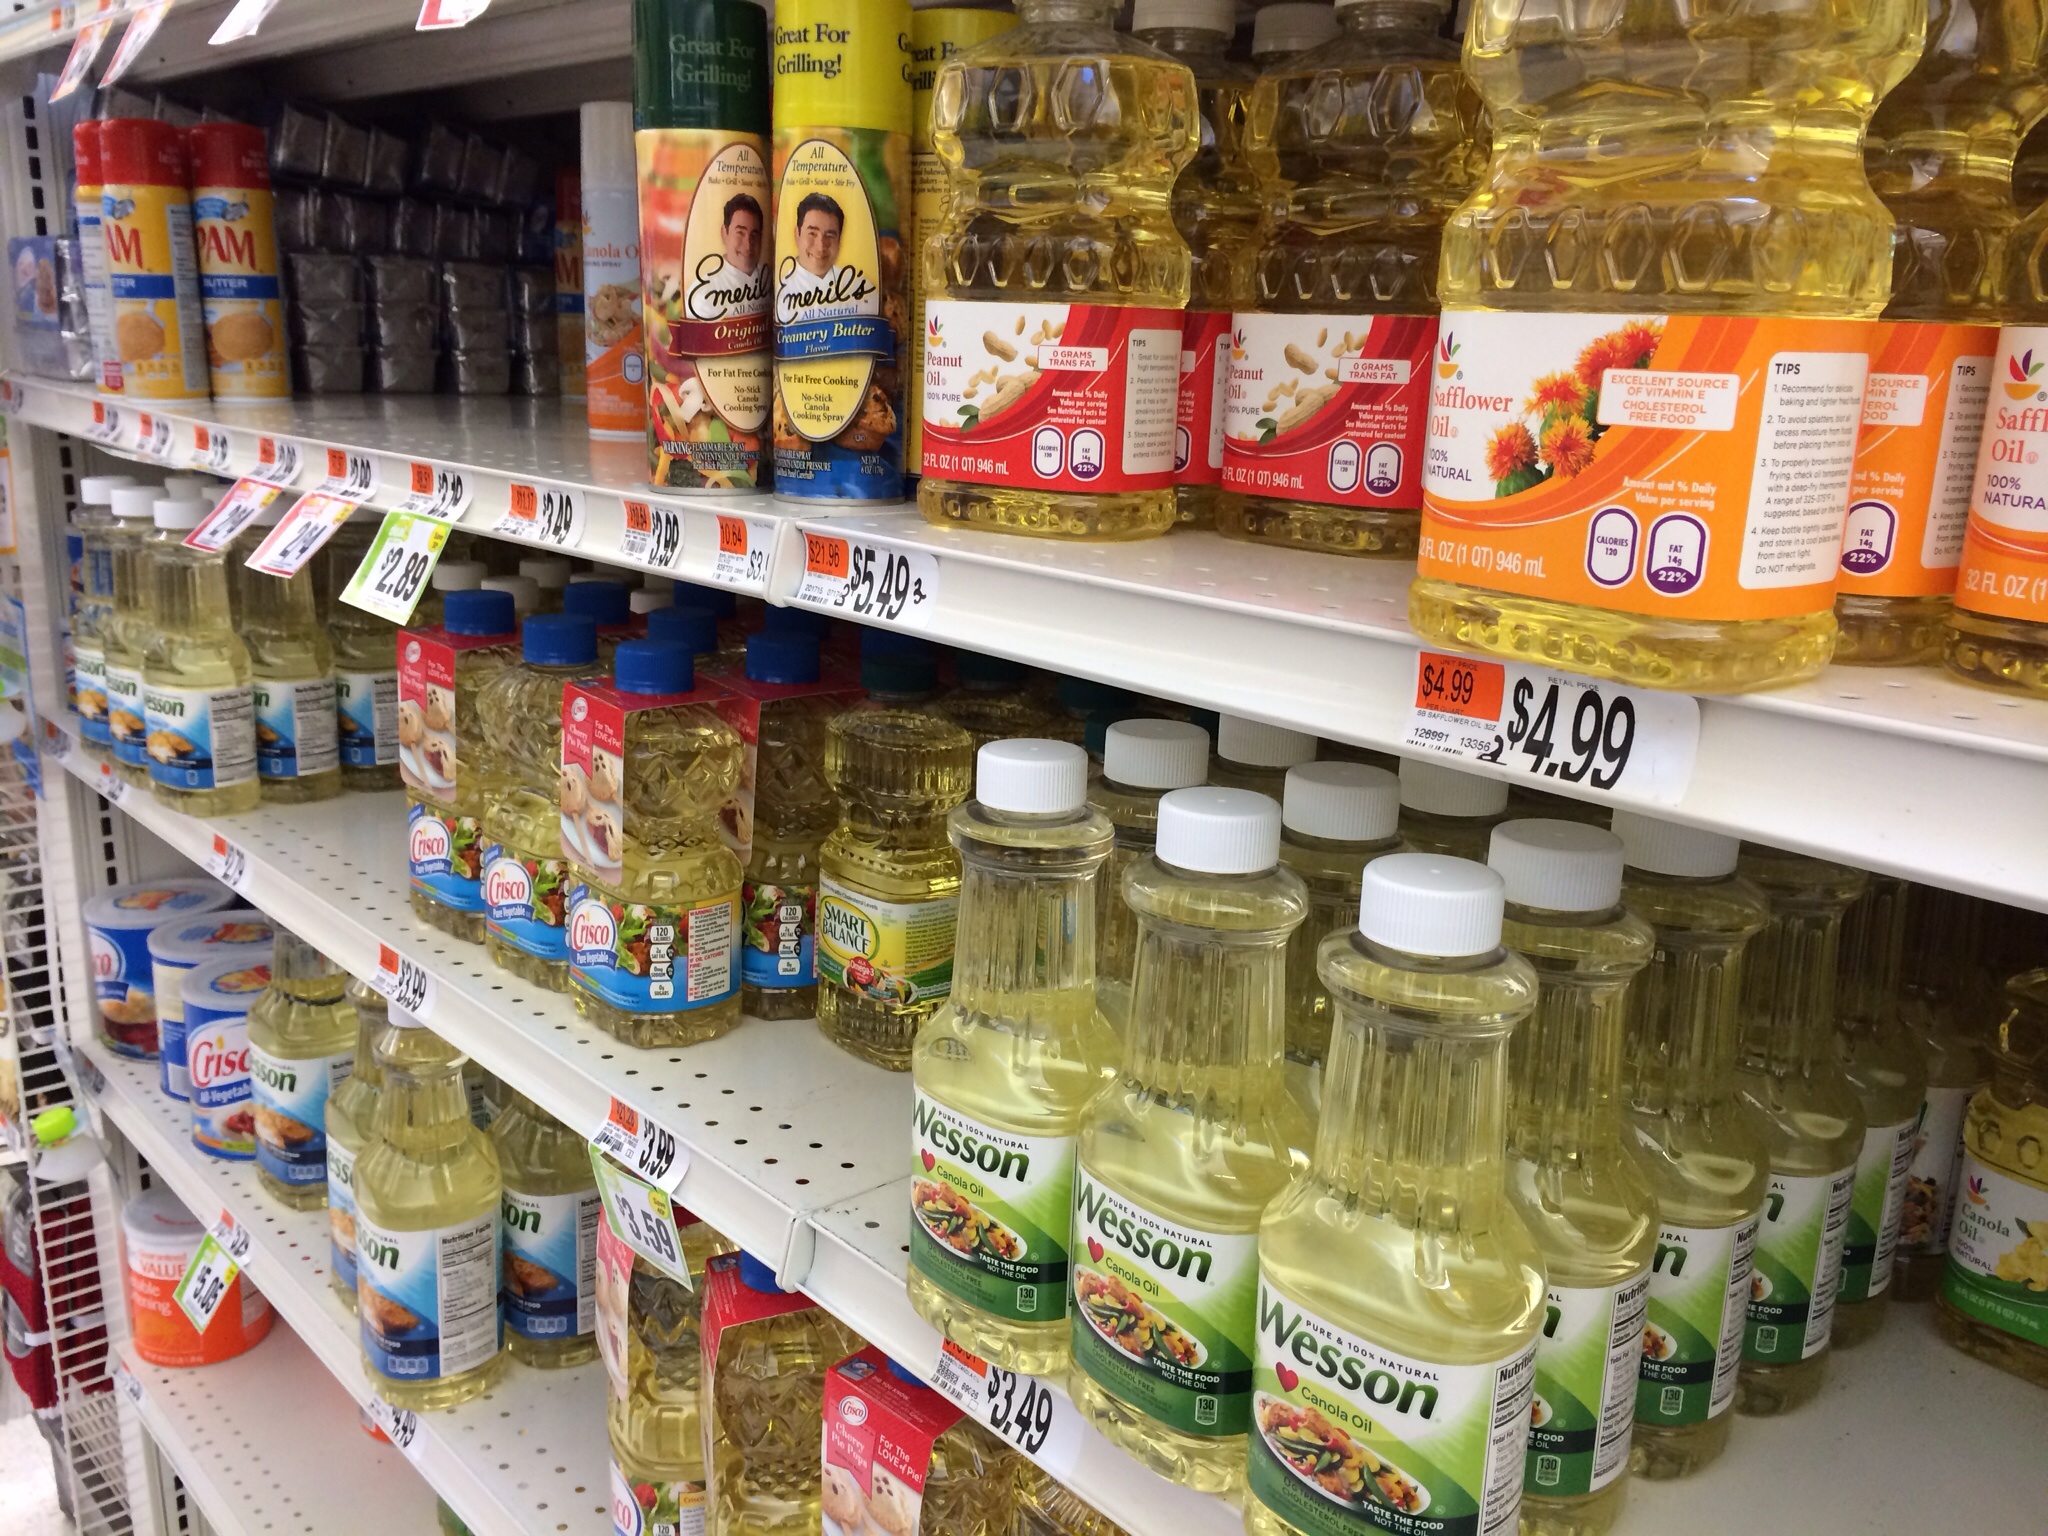
There is a huge battle going on about the safety of canola oil. Canola oil is made with genetically modified seeds which are doused with Monsanto’s Round-Up, so if you’re trying to avoid GMO’s and possible carcinogens in your family’s diet, you have one choice: stop using canola oil.

Canola gets its name from “Canada” and ‘Oil.” There is no “canola plant.” There is, however, something called rapeseed, which canola oil comes from. The “rape” comes from the latin “rapum,” which means “turnip,” but you can see how something called rapeseed oil wouldn’t work with the public. So: Canola it became.

Rapeseed plants have been grown for thousands of years, not for edible oils, but for lamp oils and lubricants. The presence of erucic acid, some nasty stuff that nobody really wants to eat, made it unsafe for human consumption. Rapeseed oil was in high demand during World War II for its industrial applications. After the war, the demand for rapeseed oil diminished, and it was only in the 1970’s that scientists were able to wean out the erucic acid out of rapeseed to make canola, but they had to use nasty compounds like hexane to do it. (Hexane is used as a solvent and cleaning agent in other applications, and has a long list of side effects according to the EPA: http://www.epa.gov/airtoxics/hlthef/hexane.html.)

It was in 1998 that the GMO was born when scientists developed a strain of rapeseed that could withstand herbicides like Round-Up, which is what almost all of canola is made from today. Personally, I don’t want to eat any plant that can withstand (and certainly absorb)  herbicides and pesticides.

So what about the other oils out there? If you’re staying away from canola oil, the bad news is you need to stay away from these oils as well: soybean oil, corn oil, safflower oil, sunflower oil, and even peanut oil and grapeseed oil. Many use Round-Up ready seeds, and most are treated with hexane.

The best oils to cook with: coconut oil, avocado oil and pork lard (or leaf lard) from humane family farms for high-heat cooking, and butter and olive oil for low-to-medium heat. (Go for a local olive oil, if possible. There have been many false label issues with imported olive oils as well.)

Basically, what our grandparents used is what we should use. Go figure. Maybe that’s why most of my grandparents lived well into their 90’s.


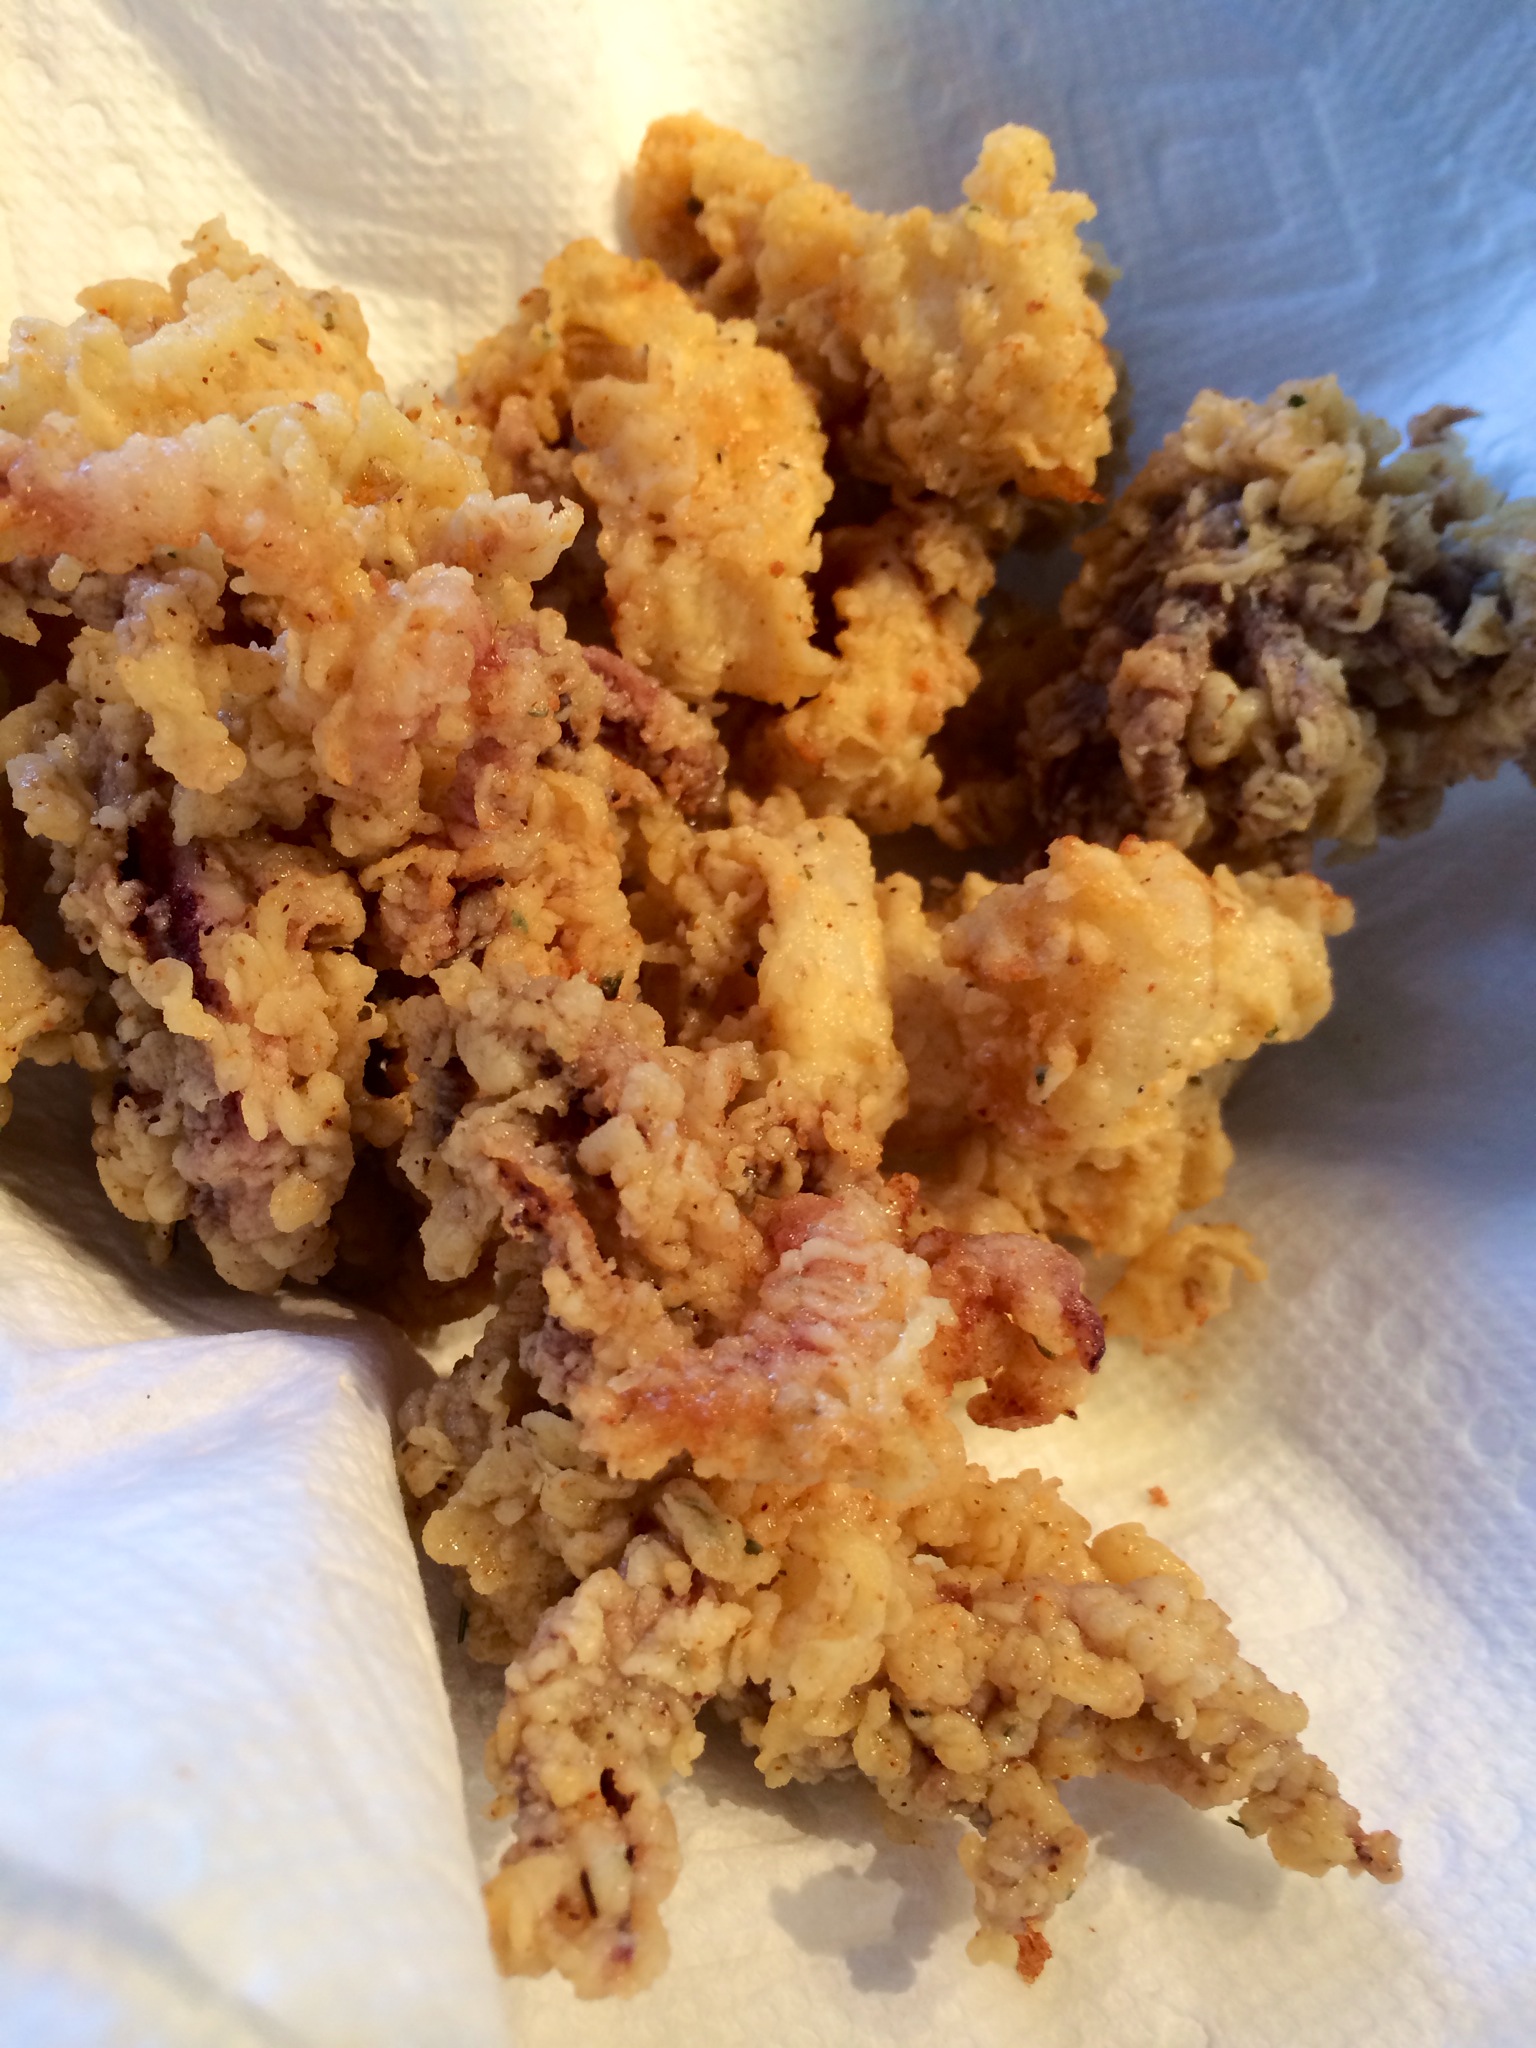
Calamari is the official appetizer of the state of Rhode Island. And for good reason. Squid means big business, and what we catch in Rhode Island accounts for up to 50% of the east coast’s quota every year! Squid have a lifespan of 12 to 18 months, reproduce twice a year, and can be caught year-round, with very few catch limitations, making it lucrative for fishermen.

Great fried calamari is an art form. It may seem like a simple dish, but to make it light and crispy, you need to be on your game. That’s why it can be a real hit-or-miss item on most restaurant menus. And there’s nothing worse than getting what would have been a great plate of calamari had the chef not decided to pour sauce all over it, turning the crispy cephalopod into mush.

What makes great fried calamari are three basic elements: it needs to be wild caught in the US (preferably Rhode Island!) and properly cleaned…it needs to be fried at the right temperature for the right amount of time so that it’s perfectly cooked and not greasy…and the coating needs to be light and crispy.

calamari


1 lb. wild caught cleaned squid (thaw if frozen)

1 cup flour (I use gluten-free these days)

1 teaspoon dried oregano

1  teaspoon paprika

1 teaspoon dried parsley

1/2 teaspoon granulated garlic

1 1/2 teaspoons salt

1/2 teaspoon black pepper

1 cup milk

1 large egg

oil, for frying (I use avocado oil)

Thaw the squid and slice into bite-sized rings. In a bowl, whisk the milk and the egg together. Toss in all the squid pieces into the bowl to coat. Place the bowl in the fridge for at least 15 minutes.

In another bowl, combine flour, oregano, paprika, parsley, garlic, salt and pepper. Set aside.

Fill a large pan halfway with oil…or use a deep fryer if you have one. Heat the oil to 350 degrees.

Working in small batches, remove the squid from the milk and egg mixture, let some of it drip off, then place the squid in the flour mixture and toss to coat. Shake off any excess flour and place immediately into the hot oil. Fry until golden brown, about 4 minutes. Serve immediately with tartare sauce, tomato sauce, hot peppers, whatever you like. (But keep the sauces on the side for dipping.)

About the oil: I cook almost exclusively with olive oil. But for hot frying like this recipe requires, I go with avocado oil, which can take higher temperatures.

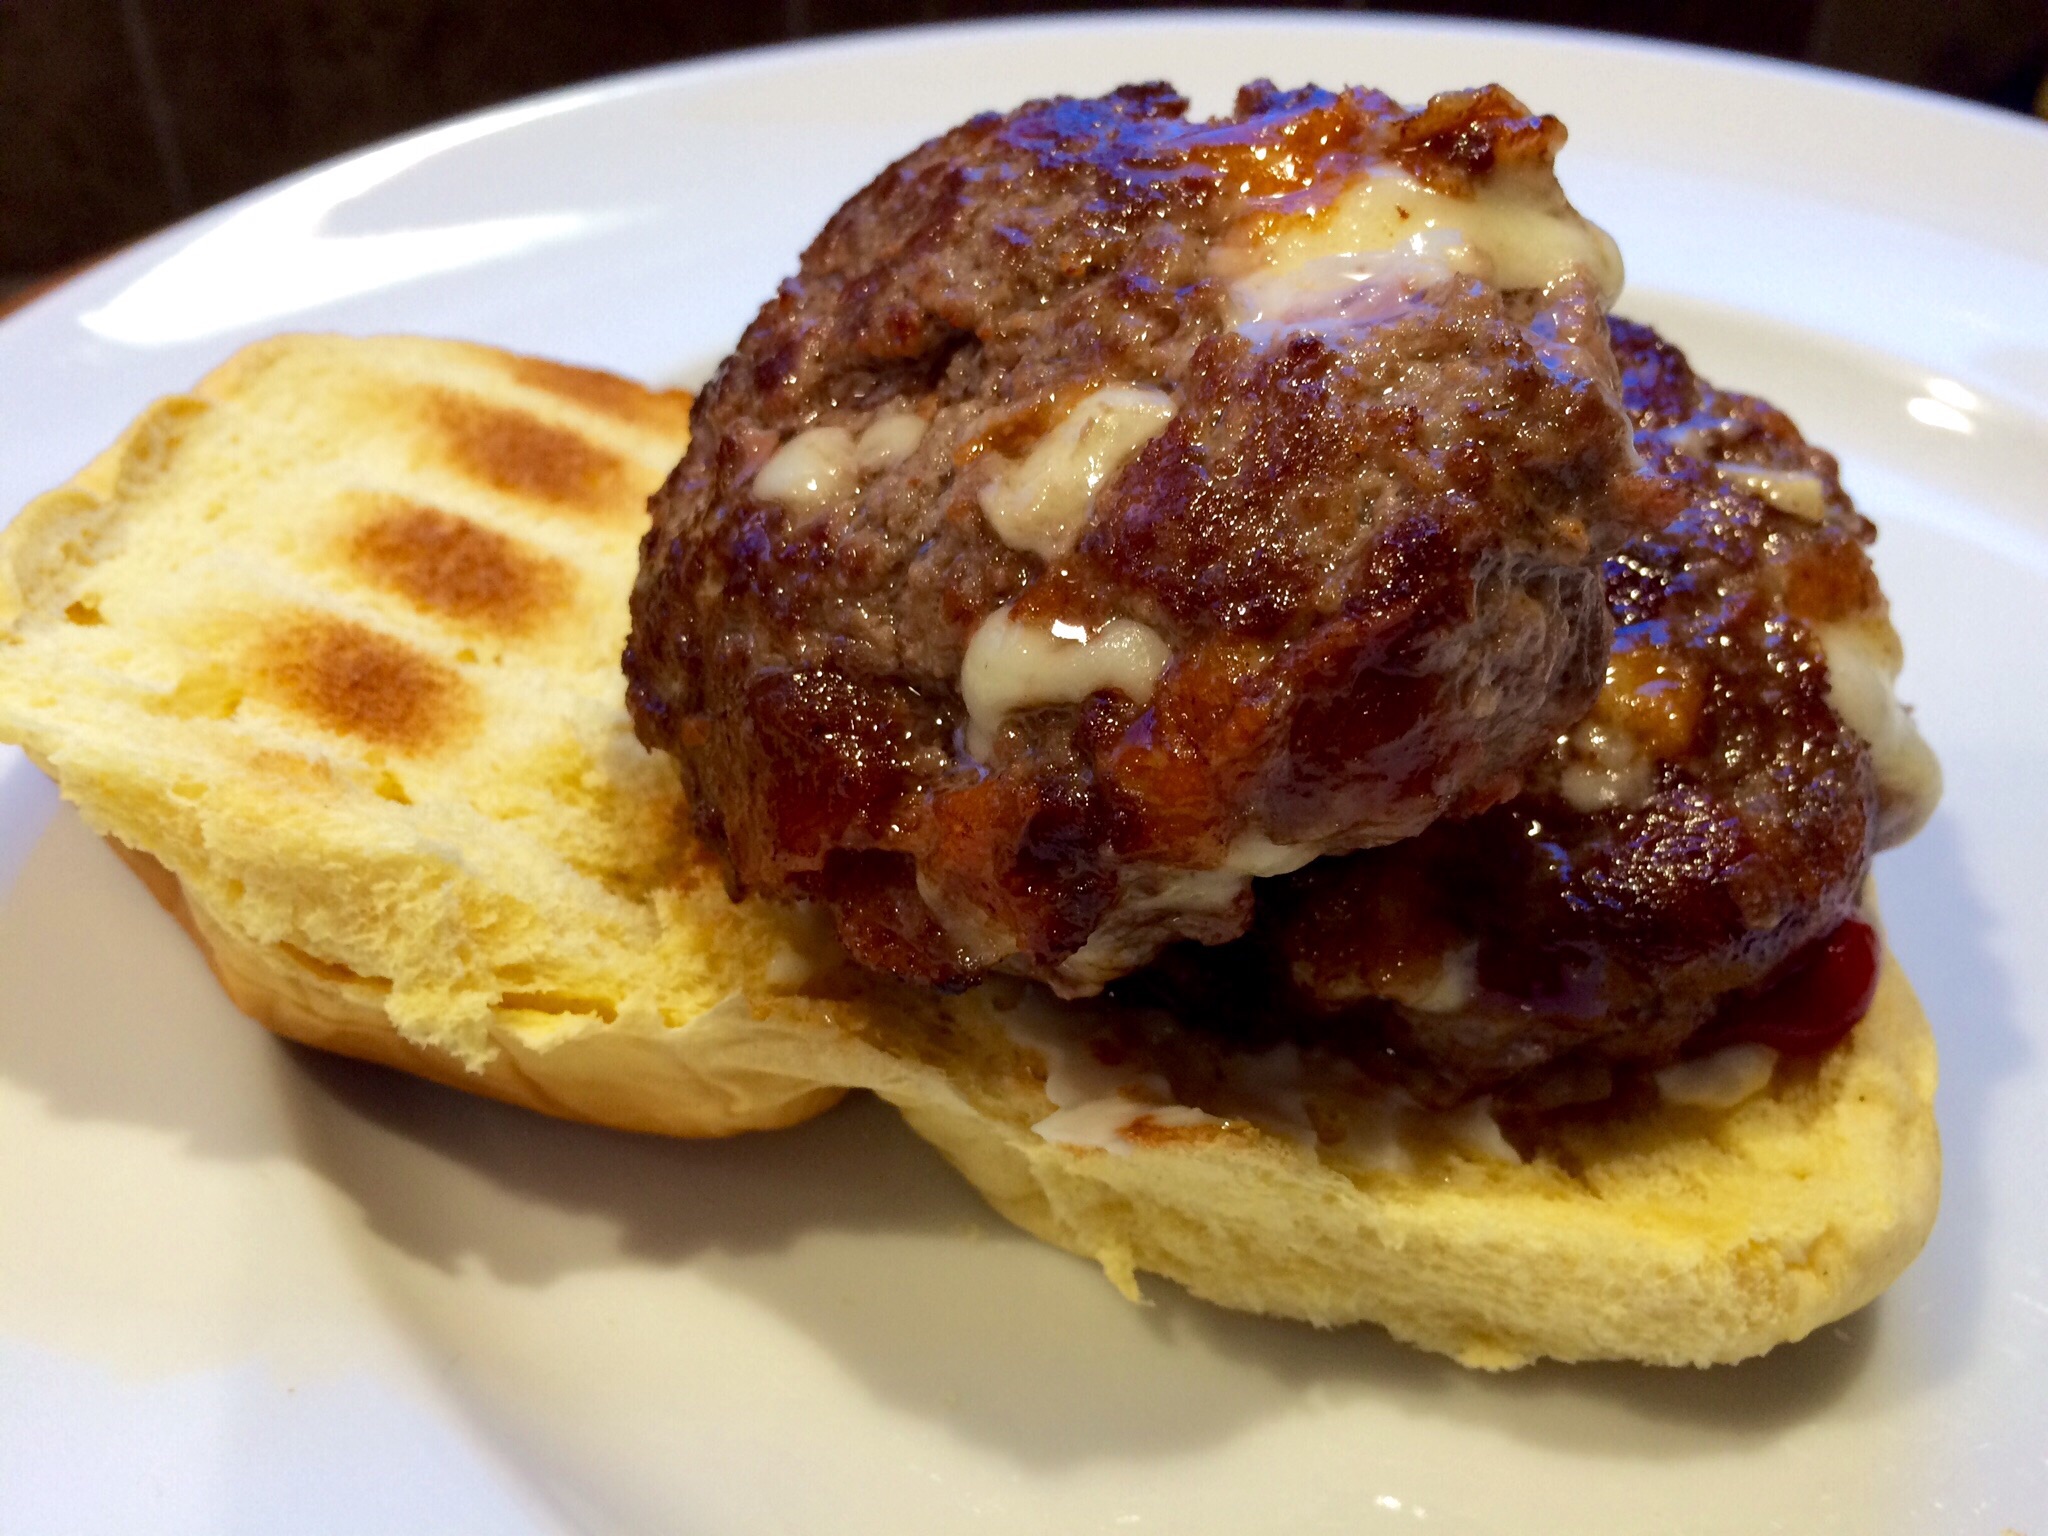
Not a very complex idea. I just put the stuff that’s usually on the outside, on the inside of my burgers. Why? Why not?

If I’m making bacon cheeseburgers to bring to a barbecue, even if it’s on my back deck, instead of bringing a package of bacon and a package of cheese and a stack of burgers, I’ve got all the ingredients conveniently in the patties. And as the burgers cook, the fat from the bacon and the gooey cheese melt and combine with the burger meat to make a really tasty and moist burger.

I make 2 lbs. of burgers at a time, using 1 lb. of ground grass-fed beef and 1 lb. of pastured ground veal. For the sake of this recipe, we’ll just call it beef.

image

2 lbs. ground beef

1/2 cup sharp cheddar cheese, cut into 1/4″ cubes

1/2 lb. bacon, cooked crisp, cooled and crumbled

garlic salt

avocado oil or pork fat


In a bowl, combine the beef, the cheese and the bacon, mixing well so that all the ingredients are evenly incorporated.

Form the beef into 1/4 lb. patties. Refrigerate them until you’re ready to cook to firm them up.

Heat a cast iron skillet and add a drop of oil or pork fat. Place the burgers in the hot skillet to sear and sprinkle with the garlic salt. When browned, flip the burgers and place the skillet in a 350-degree oven to finish cooking.
image


I learned most of my Cajun dishes from the cookbooks of one of the masters: chef Paul Prudhomme. Sometimes, I’d use some of his great seasoning ideas in my own dishes. This was one of them. I would cook huge batches of these chicken breasts for my Mardi Gras parties and there would never be any leftovers! Don’t wait for Fat Tuesday to come around again to make these yourself.

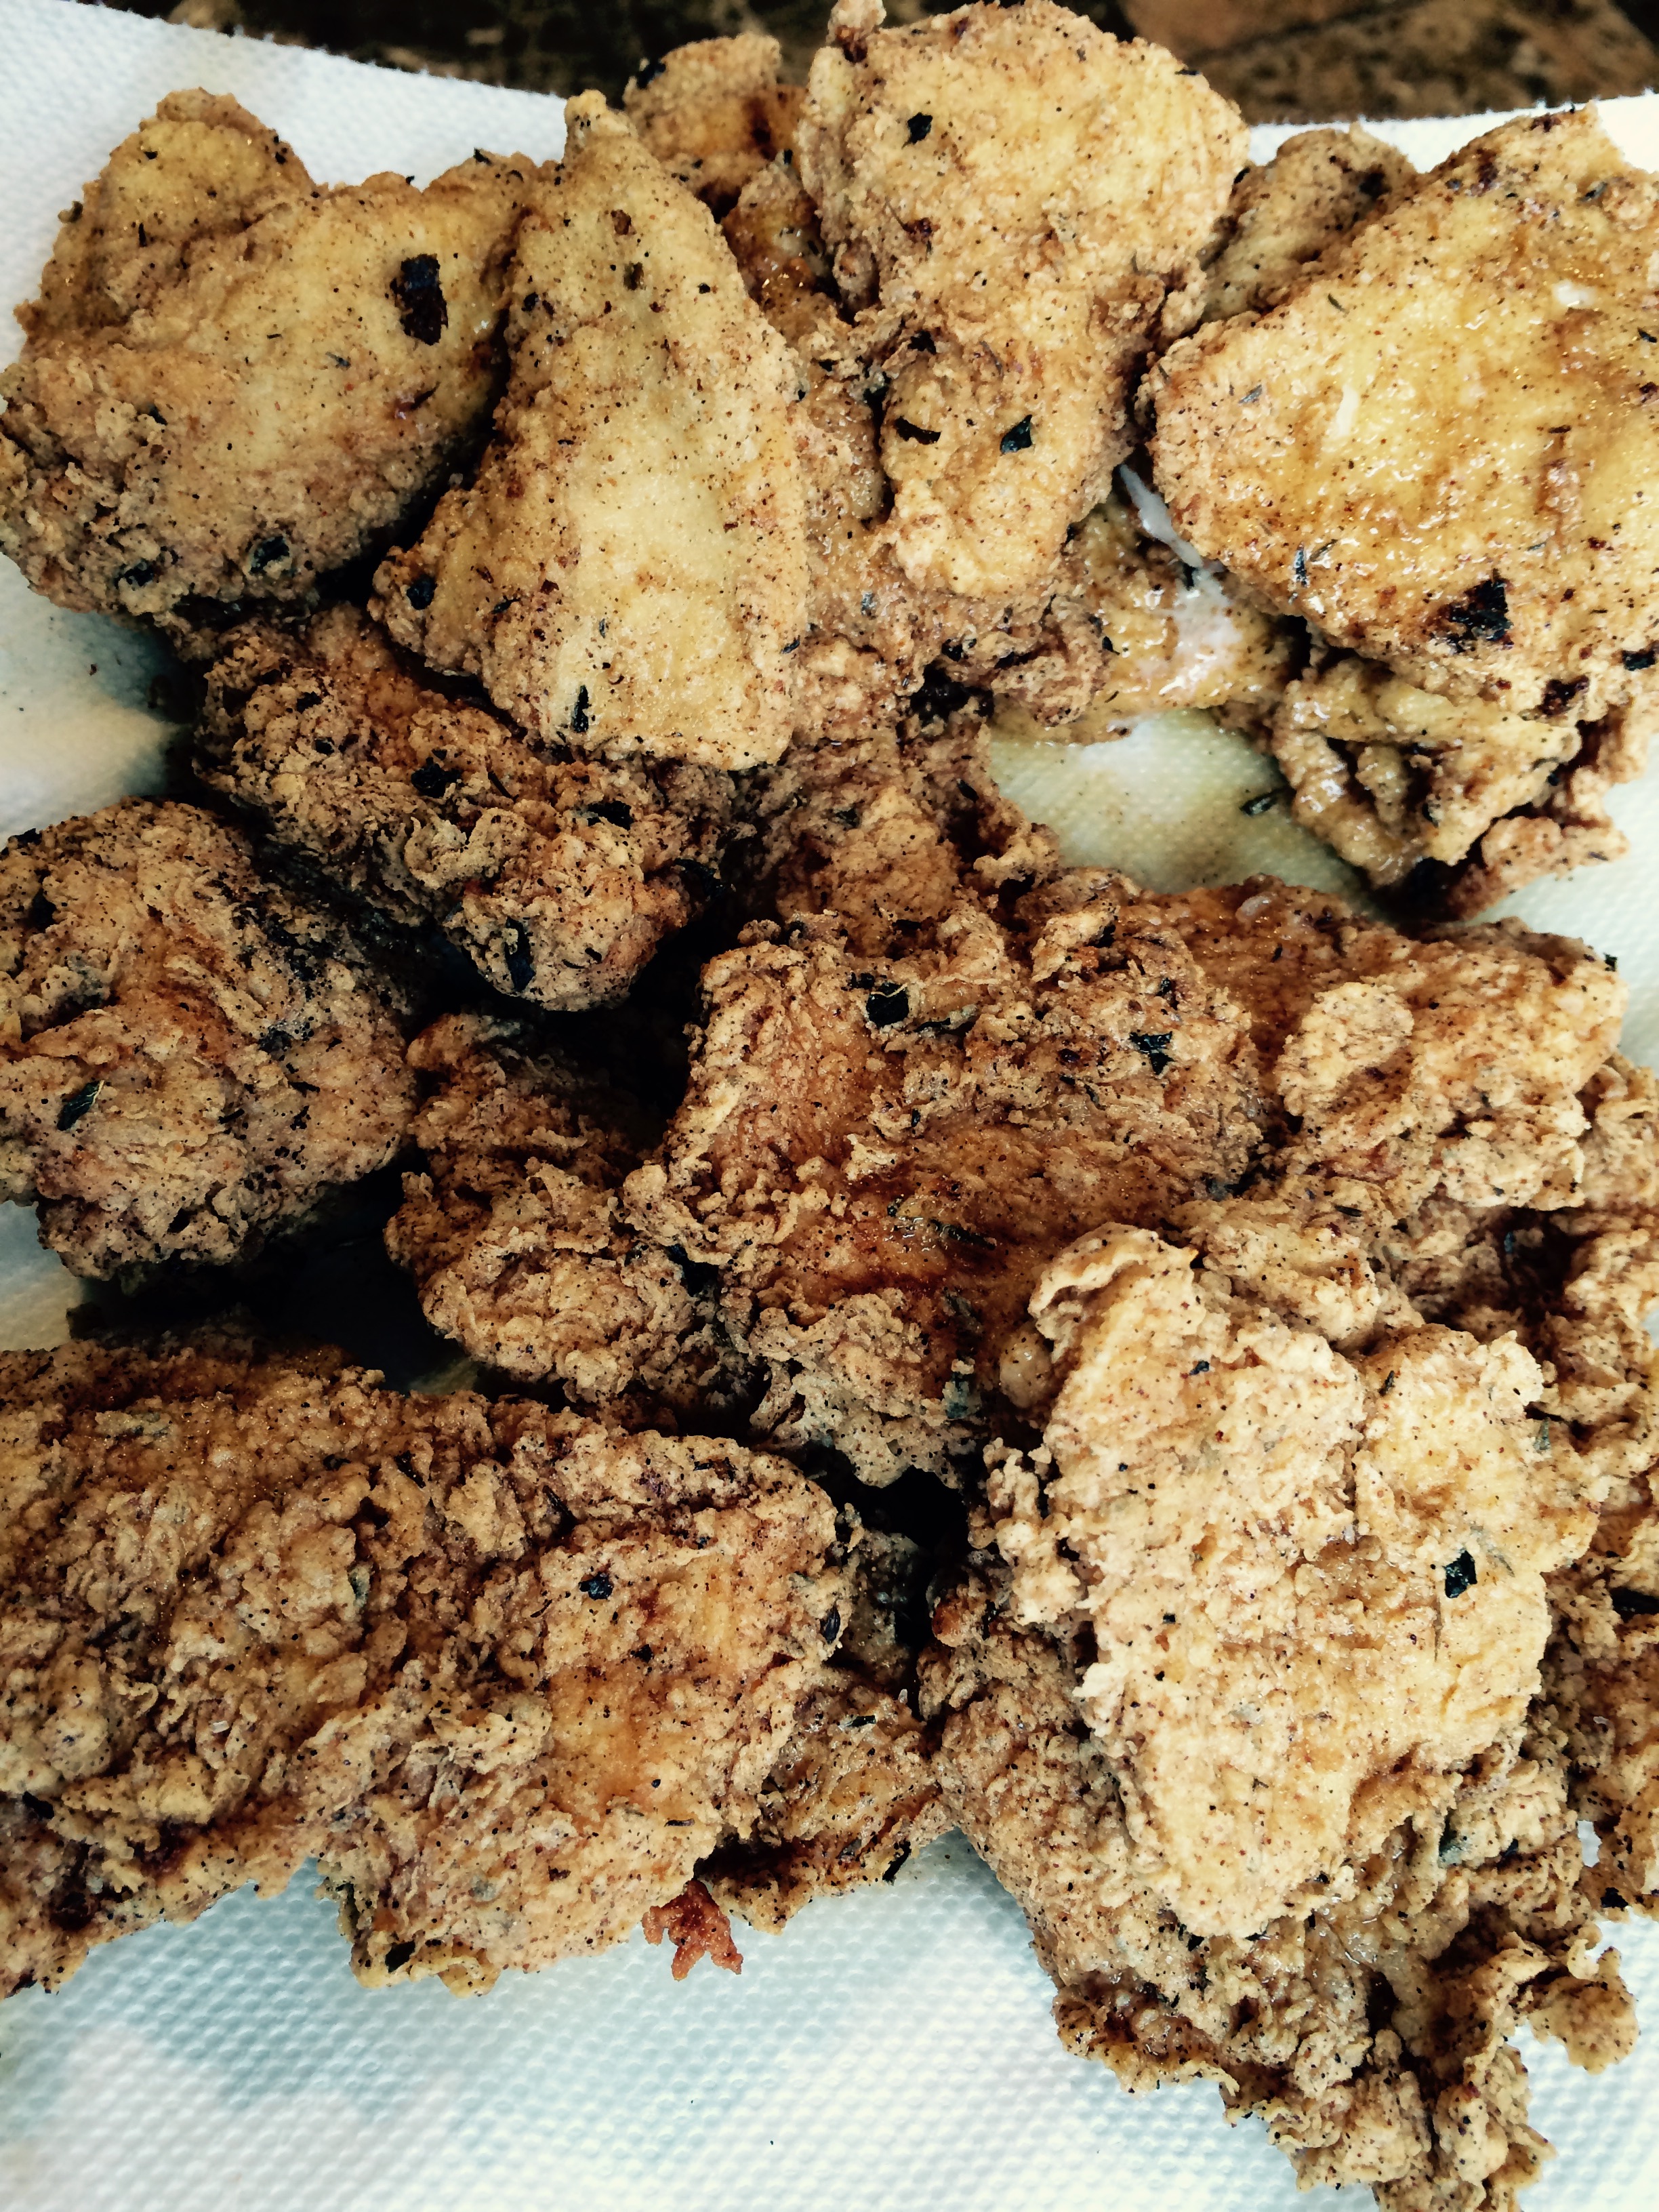
Double-dipping in the seasoning mix is a messy step, but it makes them extra crunchy and flavorful.

Single-dipped breasts are at the top. The extra crunchy double-dipped are at the bottom.

Single-dipped breasts are at the top. The extra crunchy double-dipped are at the bottom.


1 cup all-purpose flour

1 tablespoon salt

1 1/2 teaspoons sweet paprika

1 teaspoon granulated onion

1 teaspoon granulated garlic

1 teaspoon basil

1/2 teaspoon white pepper

1/2 teaspoon cayenne pepper

1/2 teaspoon black pepper

1/2 teaspoon dried thyme

1/2 teaspoon gumbo file (file powder), optional


2 pounds boneless, skinless chicken tenders or breasts

3 eggs

oil for frying (I like using avocado oil and some pork fat for flavor)


Cut the chicken breasts into manageable pieces. If they’re thick, slice them horizontally to make two thinner breasts. A thick piece of chicken won’t cook all the way through.

Combine the flour, salt, paprika, onion, garlic, basil, white pepper, cayenne, black pepper, thyme and gumbo file in a bowl. Mix well.

In another bowl, crack and scramble the eggs.

Single dip: Dip the chicken in the egg and then the flour mixture. Shake off an excess and place in a pan with oil that has been heated to 350 degrees on a thermometer.  Fry until it’s cooked all the way through. Drain on paper towels.

Double-dip: Dip the chicken pieces in the egg, then the seasoning mix, then the egg, then back in the seasoning mix and place directly in a pan with oil heated to 350 degrees on a thermometer. Fry the chicken until it’s cooked all the way through and golden brown. Drain on paper towels.


If you need to feed a crowd, just double or triple the recipe. I used to make a 10x batch for my Mardi Gras parties!

This recipe is gluten-free if you substitute GF flour for the all-purpose flour.


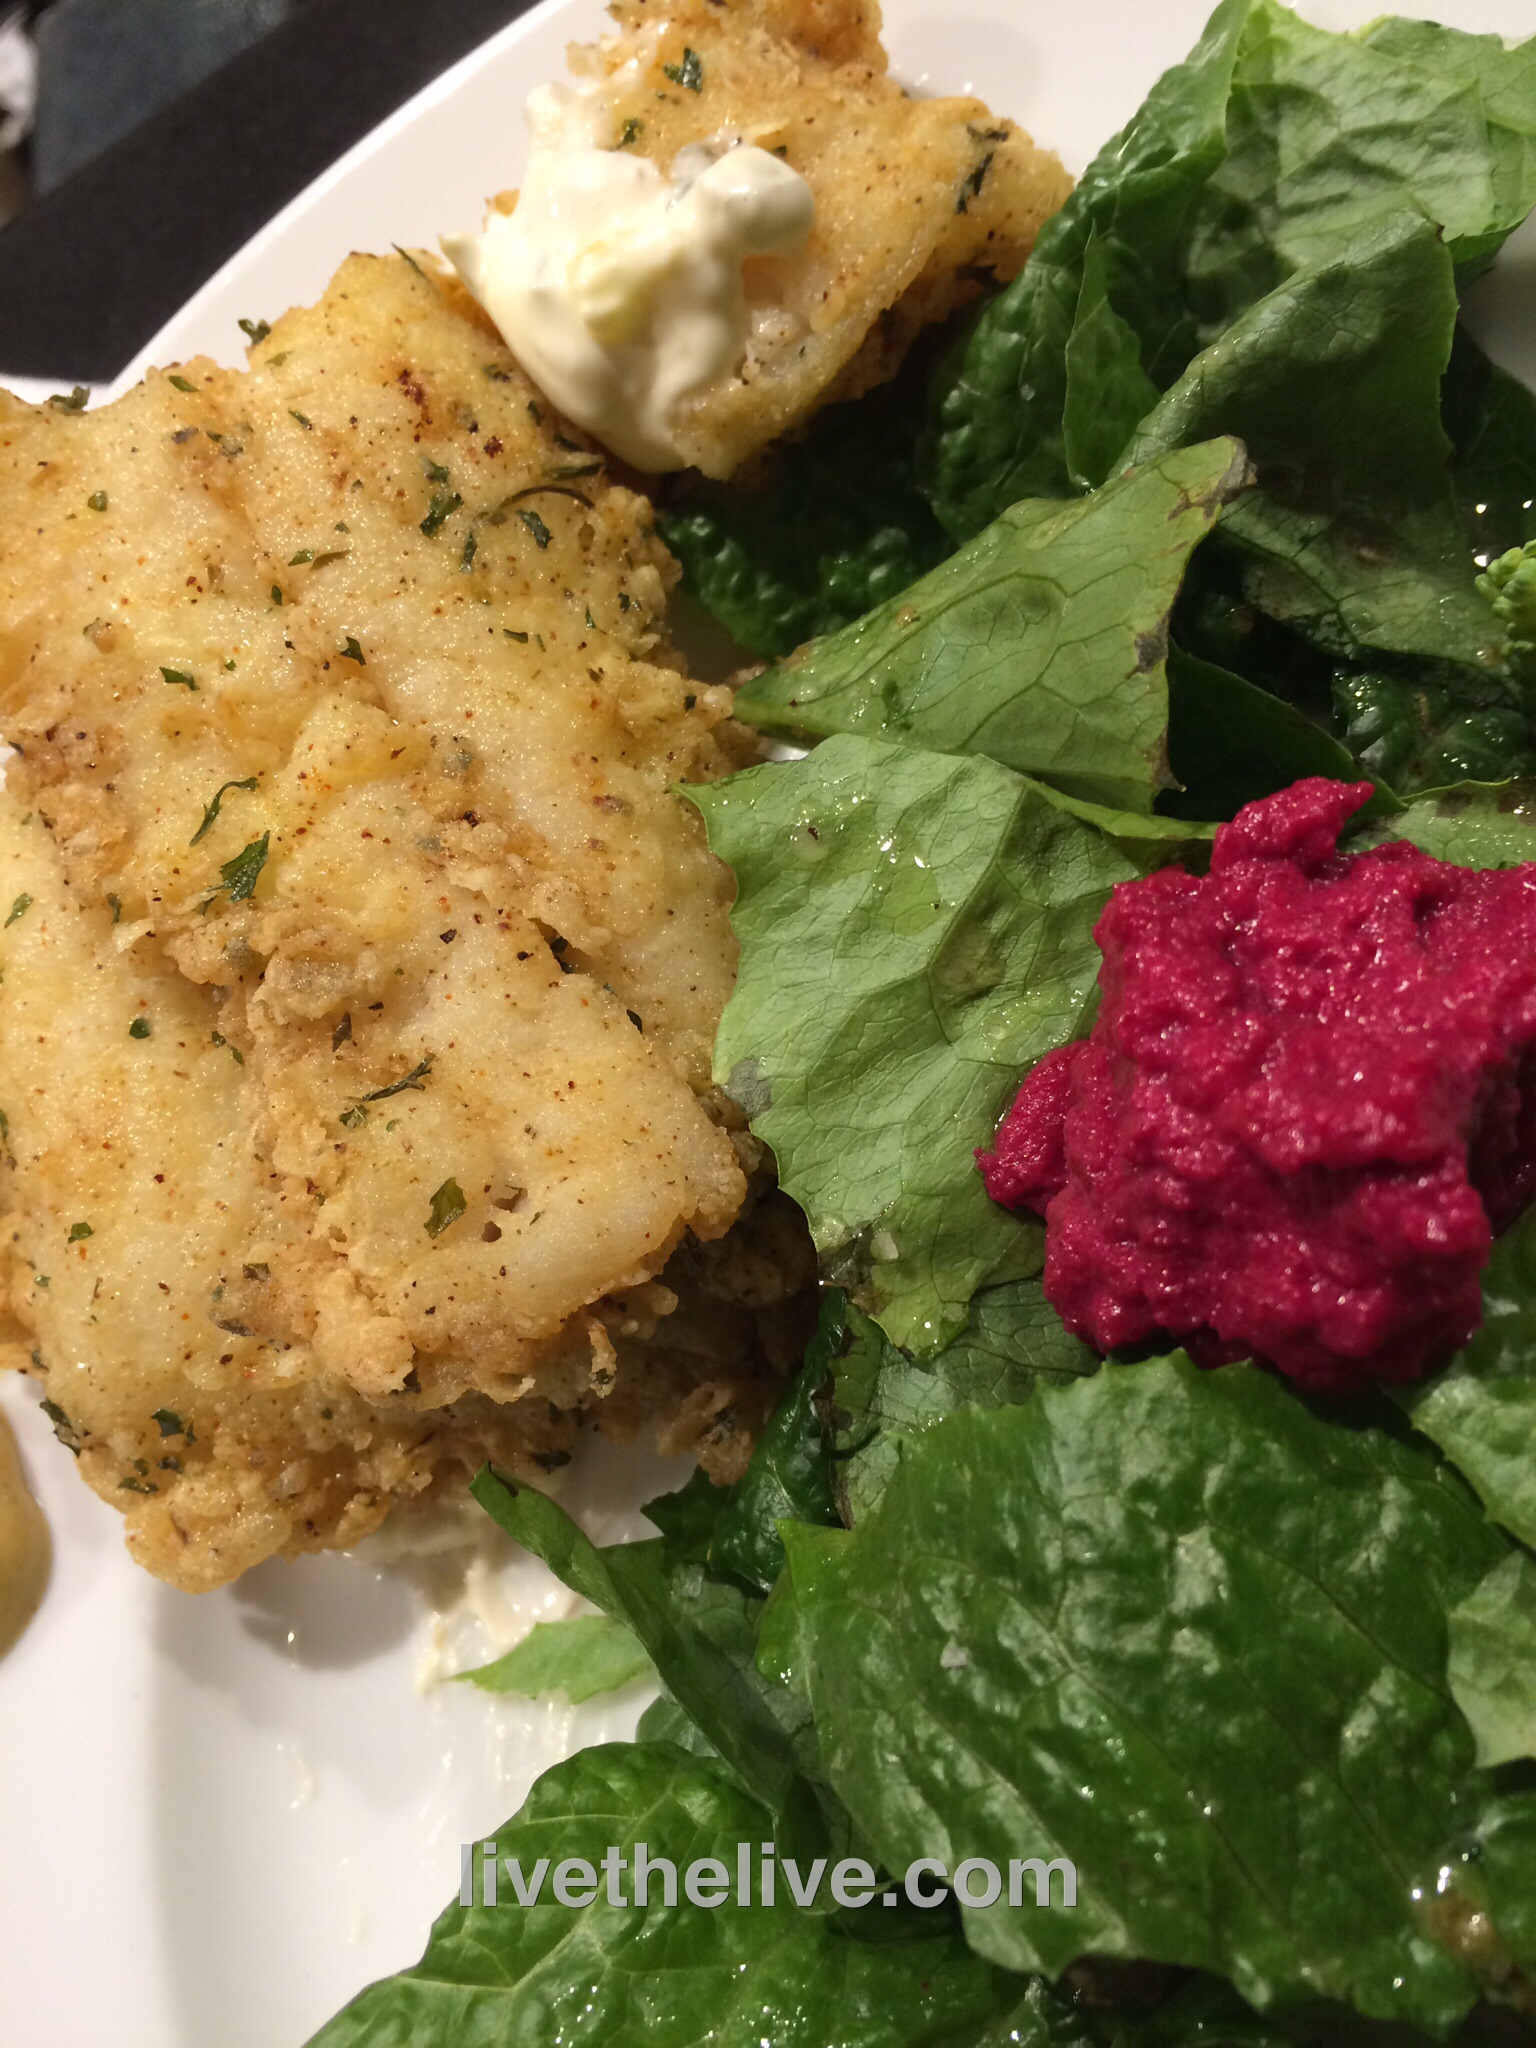
It’s always a challenge when you’re on a diet. I’m going no alcohol and low-carb to lose some weight. (Down 6 lbs. in 5 days so far.) My wife needs to include gluten-free food in her diet, though she can have a few carbs. Fish is a great source of protein, and we love it sauteed in a little butter and olive oil with Paul Prudhomme’s Seafood Magic seasoning on it. But let’s face it, that gets old after a while, and we all know there’s nothing tastier than fried fish.

Rather than using a heavy beer batter like I used to do (damn good and easy to do:http://wp.me/p1c1Nl-en), I came up with a very light gluten-free-flour-based seasoning that gave the fresh-caught local fish we bought incredible flavor and crunch without a carb overload and without gluten. Damn good, and I have to say, you’d never know the difference.

There are many gluten-free flours out there now, and all you need to do is substitute them cup-for-cup in any recipe you have. I’ve tried Bob’s Red Mill (OK), King Arthur (better), and Pamela’s (very good–what I used for this recipe.) I’ve just ordered the latest: Cup 4 Cup, created by chefs that include the famous Thomas Keller, which we tasted at Mario Batali’s Del Posto restaurant in New York City recently. They have about 12 different pasta dishes on their menu, and each one has a gluten-free option using the Cup 4 Cup flour. They were fantastic!

image


1 cup flour (all-purpose or gluten-free)

2 teaspoons salt

1/2 teaspoon pepper

1 tablespoon dried parsley

1 teaspoon oregano

1 teaspoon granulated onion

1/2 teaspoon granulated garlic

1 teaspoon paprika

2 eggs

fresh locally caught fish fillets of your choice (I used fluke and ocean perch)

Organic GMO-free canola oil or avocado oil for frying


In a flat bowl you will use to dredge the fish fillets, combine the flour, salt and pepper, parsley, oregano, granulated onion and garlic, and paprika.

In a separate flat bowl, scramble the 2 eggs.

Pour about 1/2″ of the oil in a pan and heat to medium-high heat.

Dip the fish fillets first in the eggs, coating well. Then dredge in the flour mixture, pressing down on both sides, so the flour mixture really sticks to the fish. Then shake the fillet lightly to remove the excess flour and gently lay the fillet in the hot oil. Fry until golden.

We made a quick and delicious tartare sauce using mayonnaise, dill pickle relish and Maille sauterne mustard.


Despite the large Italian community we have here in southern New England, there’s no exceptional pizza to speak of. I suppose you could say “them’s fightin’ words!” but if it’s here, I haven’t found it yet. (Fellini Pizza is about the best in Providence…and New Bedford’s Brick makes a good pie.)


So where is the excellent pizza? New York City, of course. OK…maybe I’m prejudiced because I’m a Brooklyn boy, and worked in a variety of pizzerias in my younger days, but there’s no doubt in my mind that if you want the best pizza–or bagel, for that matter–you’ve got to go to the Big Apple. (Even “Frank Pepe’s” in New Haven, CT is a mere stop on the way to the real deal.)


Pizza in NYC can be confusing as there are many different varieties to choose from. Brick oven pizzas abound, but there are pizza lovers who won’t settle for anything less than a pizza baked in a coal-fired oven. The extremely high heat of a coal-fired oven cooks the pizza in just a minute, and imparts a crusty, charred flavor you can’t get any other way. There are only about a dozen coal-fired pizzerias in New York City, and many of them have been around for 100 years or more, so it’s definitely a matter of making a special trip to enjoy this style of pizza.


Plenty of good, basic pizza, too: the traditional thin, round Neopolitan pie, and the thicker, square Sicilian pie, baked in that Blodgett pizza oven we all knew in our early pizza-making days.


So several years ago, when I heard through the pizza lovers’ grapevine that a “new” pizza was out there, one that was gaining a cult following, I needed to know about it. And more importantly, I needed to taste it!


It’s called Pizza Montanara, and there’s only a few pizzerias in New York City that serve it. The one I go to without fail is PizzArte, on West 55th, and I have to say it’s the ultimate pizza.


What makes Pizza Montanara so spectacular, quite simply, is that the dough is fried in oil before they put the sauce and cheese on it, and then they cook it in a wood burning oven. It is not greasy. The frying process, which lasts only a minute, puffs the dough up and creates a beautiful pillow-like softness that I’ve never experienced in a pizza before. Imagine a pizza cloud and you’ve got Pizza Montanara.

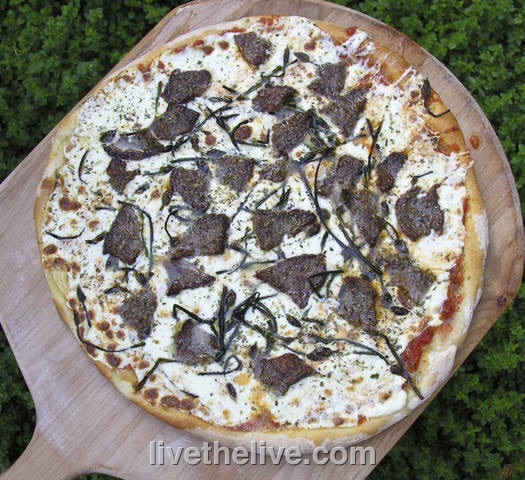
My signature pizza: marinated beef tenderloin with chive blossoms. Not Pizza Montanara, but not bad!

My signature pizza: marinated beef tenderloin with chive blossoms. Not Pizza Montanara, but not bad!


I’ve made Pizza Montanara at home, with some success. I poured a few inches of olive oil in a large skillet, stretched my dough into a small pie, and gently floated it into the pan. Using a spatula and tongs, I was able to flip the fried dough over after about 30 seconds, then removed it from the pan after another 30 seconds. It was golden and puffy. I quickly sauced and cheesed it and in the oven it went. But it’s a messy process I’d rather leave to the pros.


I’ll be “living the live” in New York City this weekend. PizzArte already on the list for Friday night. Looks for the photos. I can’t think of anything better than an amazing Pizza Montanara before I go on my no-carb diet next week!

On our recent trip to Spain, croquettes were served in just about every restaurant we went to. My 7-year-old daughter fell in love with them, and they became the “chicken nugget” of our trip: the go-to kid food we knew we’d always find on the kids menu.

image

Once we got home to the States, I started looking for them and only found them on-line, not in stores. And since they’re shipped frozen, it required a large purchase: a major hassle to buy them.

Luckily, I found a great recipe in Saveur magazine, and decided to try it out. I was a bit clumsy at making them at first–they do need a bit of finesse–but by the end of the batch, I got the hang of it.

image


Ingredients:


2 lbs potatoes, peeled and cut into 1″ cubes

4 tablespoons unsalted butter

1 onion, minced

1/4 to 1/2 cup heavy cream

6 oz cheddar cheese, grated

6 oz ham, finely chopped

salt and pepper

1 cup all-purpose flour

2 eggs

2 cups Panko breadcrumbs

avocado oil (or vegetable oil–for frying)


image

Peel the potatoes, cut them into 1″ cubes and boil them in salted water until tender. Drain and set them aside.

Melt the butter in the same pot the potatoes were in, then add the onions and saute until translucent. Put the potatoes back in the pot and add 1/4 cup of the heavy cream. Mash the potatoes with a potato masher until smooth. Add more cream, if needed.

Add the cheese and mix until it has melted in. Add the ham and mix again. Season with salt and pepper.

Pour the contents of the pot into a metal bowl and place in the freezer to cool, stirring every 10 minutes until the mashed potato mix is cold, but not frozen.

Line up three bowls: flour in the first bowl, eggs (scrambled) in the second bowl, Panko in the third.

Remove the mashed potato mix from the freezer, and with floured hands, grab enough to gently roll a small meatball in your hands. (I’ve found that starting with a round shape makes it easier to work with.)

Roll the ball in the flour, then the egg, then drop in the Panko and roll again. With the ball in your hand, gently squeeze into a tubular shape, and then place it on a sheet pan lined with non-stick aluminum foil. Continue with the rest of the potato mixture. (You may need to add another egg or two if you run out.)

Once you’ve rolled all the croquettes, place them back in the freezer for 20 minutes to firm up. (I use a sheet pan lined with non-stick aluminum foil.)

Heat a pan with 2″ of oil to 350 degrees. Remove the croquettes from the freezer, and working in small batches, fry them until golden brown. Place on paper towels, and quickly season lightly with salt while hot, if desired.

image


The croquettes freeze really well, so this batch goes a long way. Once they’ve been fried, let them cool completely to room temp. Place them in Ziploc freezer bags and store in the freezer. When it’s time to cook them, let them thaw for about 15 minutes, then place in a pre-heated 325 degree oven for another 15 minutes.


December 2nd is National Fritters Day!

Clam fritters, conch fritters, lobster fritters…I suppose you could fritter anything. But the first time I had them with mussels, I knew that I would never fritter my life away with any other!

It was a fall afternoon in Newport, Rhode Island, at the Newport Yachting Center’s annual Oyster Festival. We’re gorging on freshly shucked oysters and clams, boiled shrimp, and…what have we here? I had never heard of a mussel fritter before, but Wendy, the lovely lady behind the counter, convinced me that her secret recipe would knock my socks off. I took one bite, then another, then another…there was no turning back.

They couldn’t be easier to make, but it is crucial to have the right fritter batter. Here in Rhode Island, that starts with a product called Drum Rock fritter mix.

fritter ingredients


If you’re using fresh mussels, be sure to clean them well and remove the beards. Steam them in a pot over a small amount of water. As they open, they will release their flavorful juices and you want to save every drop of that broth for the fritters. Here in New England, frozen mussel meats are available in some seafood stores. All you need to do is thaw them, steam them saving the broth, and you’re ready to go.


Ingredients:


1 lb Drum Rock fritter mix (or other brand)

2 cups cooked mussel meats

1/2 cup mussel broth (saved from steaming mussels)

1/4 to 1/2 cup good quality beer, such as Sam Adams Boston Lager

Peanut oil for frying


Be sure to let the batter rest. If you're waiting for guests to arrive, just cover the batter bowl with a moist towel and it will keep for several hours at room temperature.

Be sure to let the batter rest. If you’re waiting for guests to arrive, just cover the batter bowl with a moist towel and it will keep for several hours at room temperature.


Steam mussel meats until just cooked. Remove mussel meats, and reserve 1/2 cup of the broth. Pulse mussel meats in a food processor, but leave chunky…or chop by hand.

Put fritter mix in a large bowl. Add mussel meats, mussel broth, and beer. Stir gently until just mixed. Let it sit for 10 to 15 minutes and do not stir again.

Using a thermometer, heat oil to 350 degrees, and using a small spoon or scoop, drop fritters in hot oil, turning gently, cooking 3 to 4 minutes until golden.

Drain on absorbent paper, and season with salt and pepper immediately. Serve right away!

IMG_3043


The perfect dipping sauce for these mussel fritters is made from two ingredients: mayonnaise and Ponzu sauce, which is a citrus-based soy sauce. Combine both ingredients in a bowl. How much you use of each is a matter of personal preference. I usually use a ratio of 4 parts mayo to 1 part Ponzu.


Well, that’s what I call it. Sometimes the most interesting creations happen by accident, and this is one of them.

My plan was to make my Chinese Style Honey Ribs (http://wp.me/p1c1Nl-i7) for dinner. But I accidentally took a slab of pork belly out of the freezer instead. I only realized my mistake when I thawed it and started cooking it, so I decided to continue the process with the pork belly instead. The results were pretty damn tasty.

image


 Ingredients:
Marinade: ¾ cup light soy sauce
                     6 Tablespoons hoisin sauce
5 lbs pork belly
Zest and juice of 1 lemon
2 whole star anise
2 cinnamon sticks (3”)
1/2 cup honey
4 cups chicken broth
image
Mix marinade ingredients. Set aside.
Cut the pork belly into pieces that are about 3 inches square. Place in a large pot. Cover with water and bring to a boil. Boil for 5 minutes. Drain.
Place pork belly on a sheet pan with a rack and coat with marinade. Let sit for 10 minutes.
Pre-heat oven to 350 degrees. Bake pork belly pieces on foil-lined sheet pan for 30 minutes.
While the pork belly is baking, start sauce in a large non-stick pan or pot: combine lemon zest and juice, star anise, cinnamon sticks, honey and chicken broth. Bring to a boil, then reduce to a simmer.
When the pork belly pieces have finished baking, add them to the sauce pot and simmer (covered) for at least 15 minutes or until meat is tender.
Turn heat on high, uncover pot and cook until the sauce is reduced to a glaze that coats the ribs. Reduce heat as sauce thickens to avoid sugars in honey from burning. When the pieces are sticky and gooey, they are ready!
Let a piece of pork belly cool…then slice to desired thickness and fry like regular bacon. Makes an amazing omelet!
image