I’m on a Caribbean vacation, so I decided to get inspired.
I was craving a Boulevardier the other day, a favorite cocktail which is a twist on the classic Negroni. A Negroni features gin, Campari, and sweet vermouth. The Boulevardier substitutes whiskey or bourbon for the gin.
I thought that rum would work just as well as whiskey, so I googled “Rum Negroni.” Many listings called it just that: a Rum Negroni, but then I read a story about a bartender in New York City by the name of Joaquin Simo. In 2009, Simo worked at Pouring Ribbons, a well known cocktail bar, and he used Jamaican rum instead of gin in his Negroni. He called it a Kingston Negroni.
Well, I wanted to give the drink a cooler name than that, and besides, my recipe was ever so slightly different. It was time for me to come up with my own cocktail.
The standard Negroni is equal parts gin, Campari, and sweet vermouth…1:1:1. I like to make mine with a 2:1:1 ratio, doubling the amount of gin or whiskey—or in this case—rum. So, maybe, then, my drink isn’t a Negroni at all by definition, and it deserves a new name.
Since I’m using rum in my drink, my rum of choice being Mount Gay Eclipse from Barbados, I thought a Carribbean-based name would be appropriate.
And since the drink is red, my daughter suggested I look up a red fish native to the Caribbean and, lo and behold, the name “lucky grouper” popped up. Its real name is Red Hind, something I suppose you could get if you drank too many of these, but its nickname was “lucky grouper.”
There was also a red fan fish that went by the name of “Gorgonian flabellum,” but I think most people would have trouble pronouncing that even before they started drinking!
So TheLucky Grouper it is! And here’s how I make it. My sweet vermouth of choice is the legendary Antica Formula.
2 oz Mount Gay Eclipse rum 1 oz Campari 1 oz Carpano Antica Formula
Combine these over ice in a mixing glass and stir well. Strain into a rocks glass with a large cube. Garnish with an Amarena Fabbri cherry!
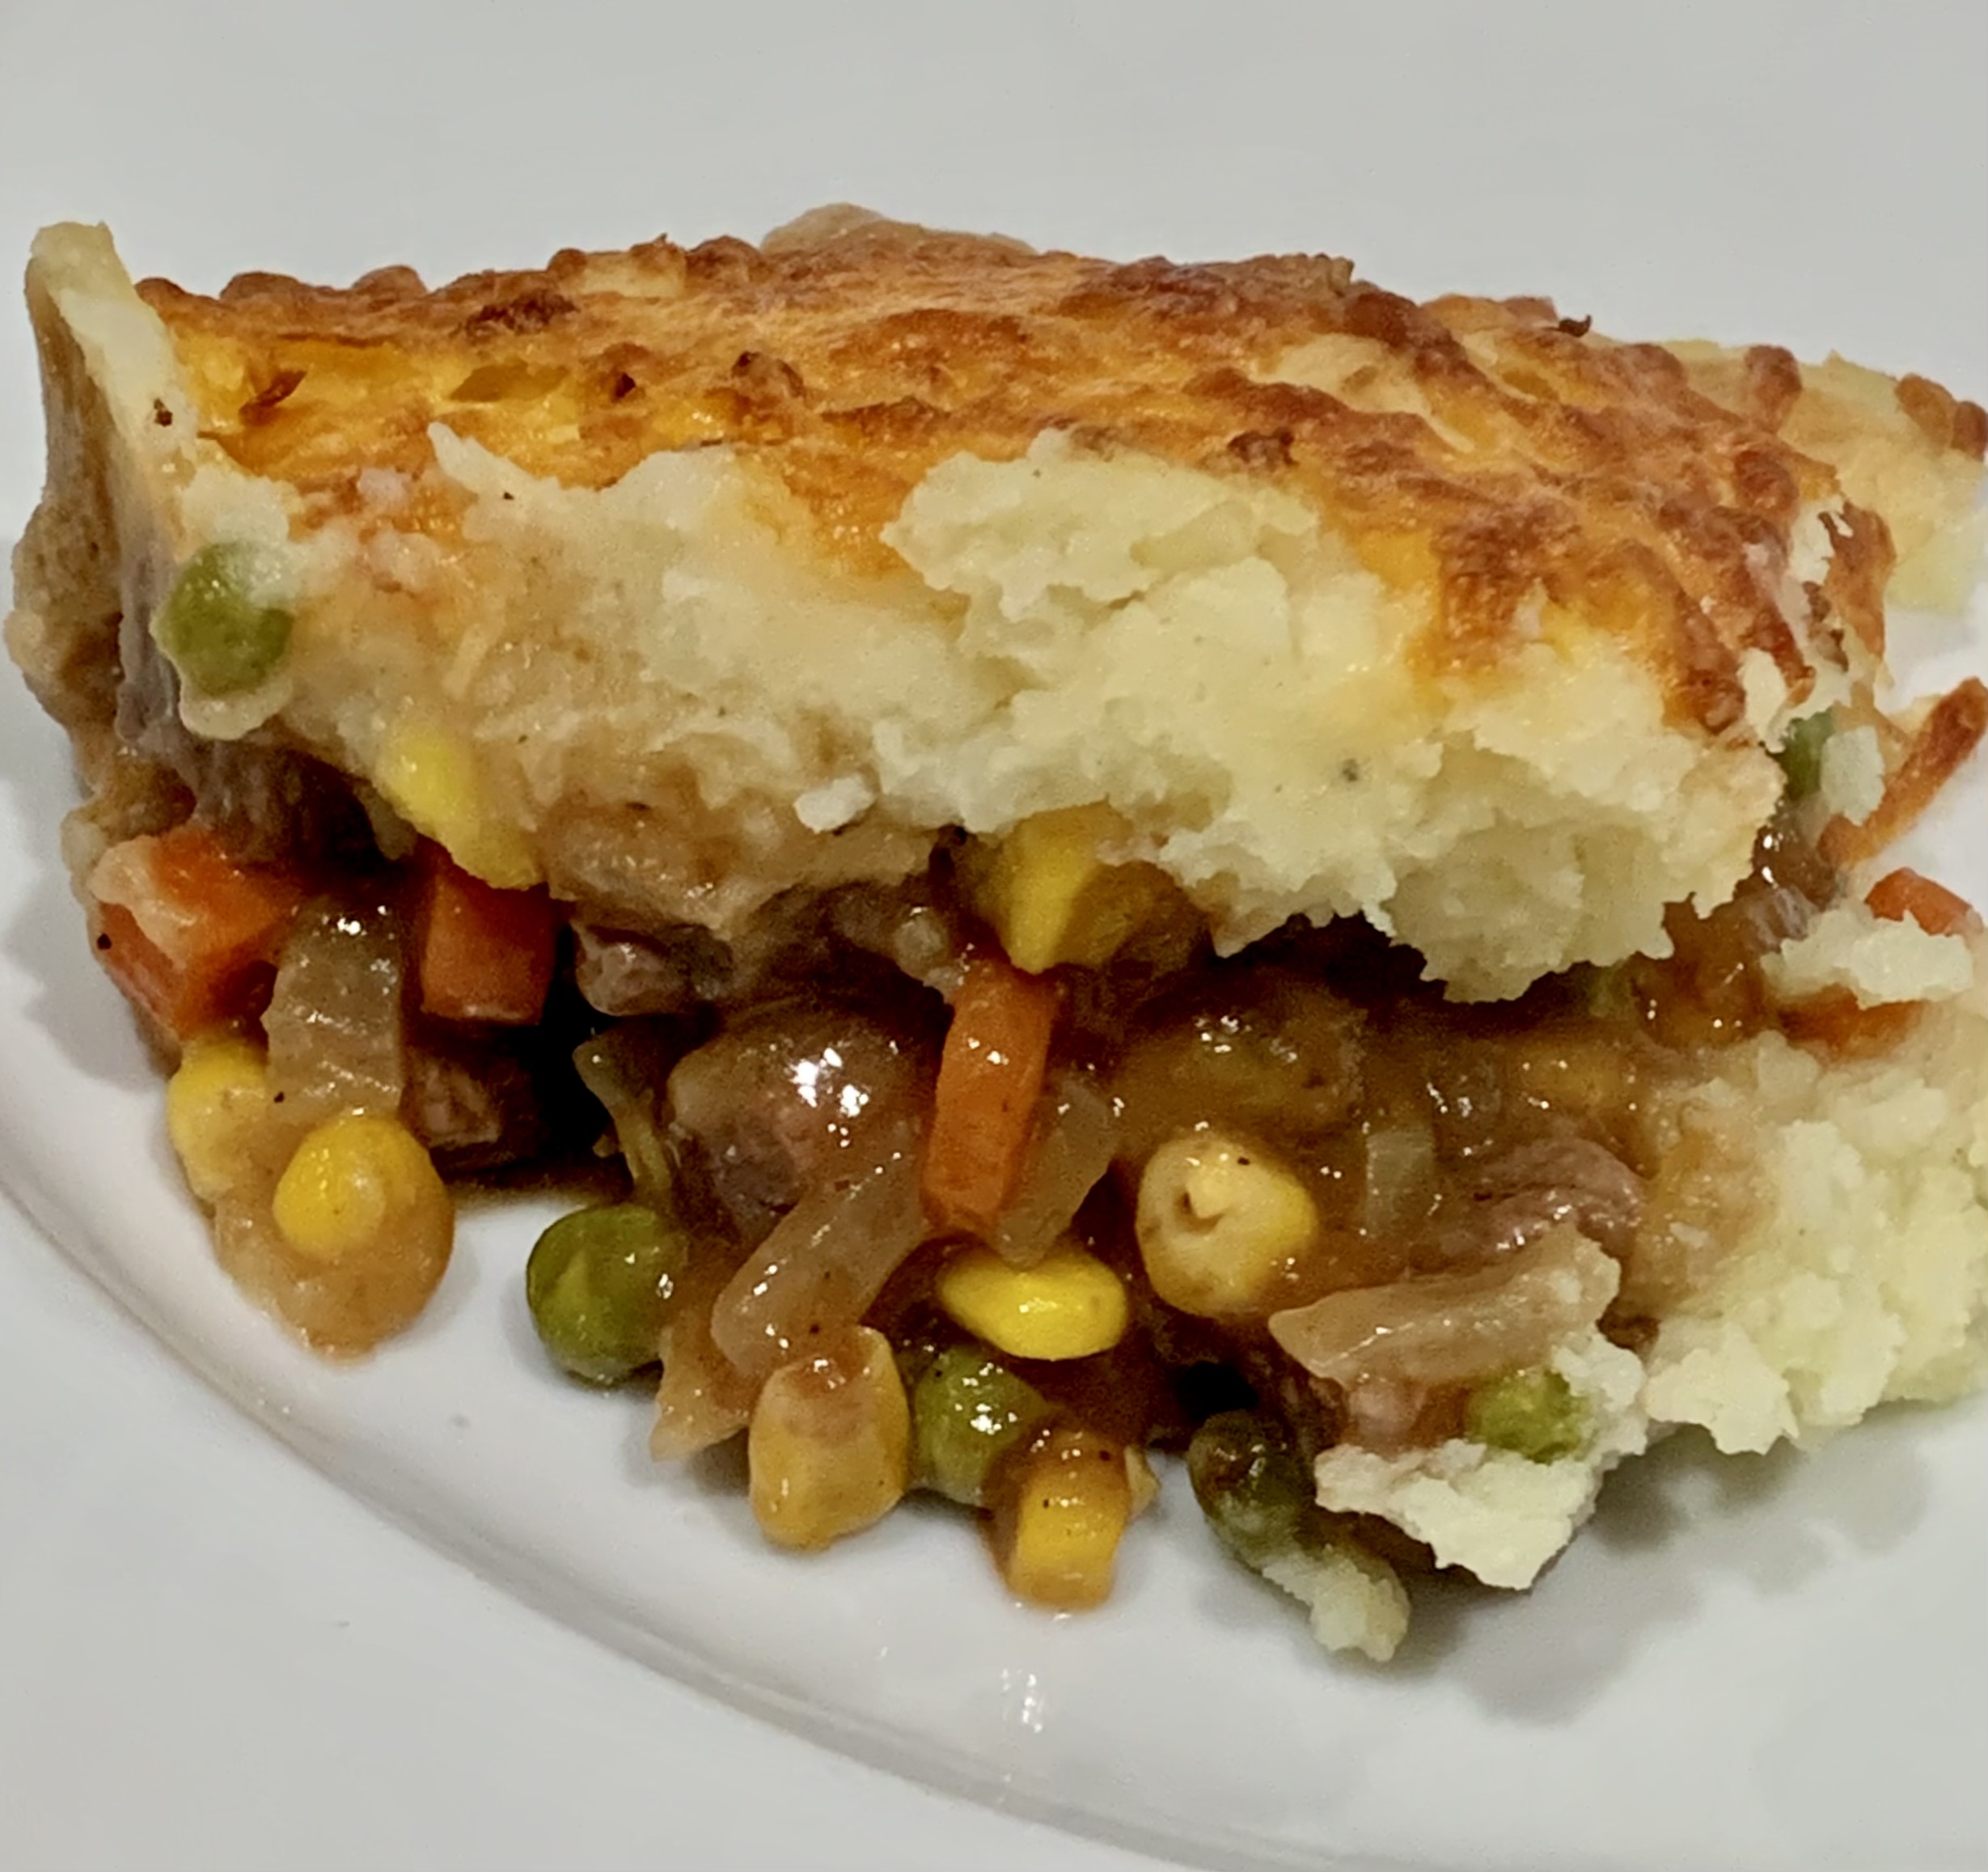
This cold weather always has me craving comfort food…and nothing says comfort more than Shepherds Pie!
To make this recipe, I used organic vegetables, organic grass-fed dairy products, grass-fed beef, pastured eggs, and homemade chicken stock. These extra efforts made a big difference to me, but use what you are most comfortable with and have easiest access to.
And although the basic recipe calls for beef, I’ve had great success using lamb and even venison.
If you’re on a gluten-free diet, the only gluten in this recipe is in the all-purpose flour. Using a GF flour, like Cup4Cup or Bob’s Red Mill 1 to 1 Baking Flour, does a great job of thickening without the gluten.
Potatoes are the classic ingredient in Shepherds pie, but I found that sweet potatoes are a fantastic substitute. (See the photos at the bottom of the blog.) Give either one a shot yourself, or be really bold and try a combination of the two! The procedure is the same either way…
2 oz. cheddar cheese
1 1/2 lbs. Russets(or sweet potatoes), peeled and cubed 1/4 cup half-and-half 2 oz. unsalted butter 3/4 teaspoon Kosher salt 1/4 teaspoon freshly ground black pepper 1 egg yolk
Grate the cheddar cheese. Set it aside for later.
Peel and cube the potatoes and place them in a pot of cold water. Bring it to a boil and cook the potatoes until they are fork-tender. While they are boiling, place the half-and-half and butter in a microwave safe bowl and zap them for 35 seconds to warm them up. Once the potatoes are done, drain them and place them back in the pot. Add the half-and-half and butter and mash really well. Add the salt and pepper and continue mashing. Finally, add the egg yolk, mixing quickly and thoroughly. Then set the potatoes aside.
The meat filling…
2 tablespoons bacon fat (or your favorite oil) 1 cup chopped onion 2 carrots, peeled and diced small 2 garlic cloves, minced 1 1/2 lbs. beef, cut into 1/2″ cubes 1 teaspoon Kosher salt 1/2 teaspoon freshly ground black pepper 2 tablespoons all-purpose flour 2 teaspoons tomato paste 1 cup chicken broth, preferably homemade 1 teaspoon Worcestershire sauce 2 teaspoons freshly chopped rosemary leaves 1 teaspoon freshly chopped thyme leaves 1/2 cup fresh or frozen corn 1/2 cup of fresh or frozen peas
Preheat the oven to 400°.
While the potatoes are cooking, prepare the meat filling.
Place the bacon fat or oil in a pan and set it on medium high heat. Add the onions and the carrots and cook until the onions are translucent. Add the garlic and stir. Add the beef and the salt and pepper and cook until the meat has browned nicely. Sprinkle the meat with the flour, and mix to combine, cooking for another minute. Add the tomato paste, chicken broth, Worcestershire sauce, rosemary and thyme, and stir to combine. Bring this to a boil, reduce it to a simmer, and cook it for about 10 minutes, until the sauce has thickened nicely.
Add the corn and the peas to the meat mixture, and then pour it all into a baking pan. ( I used a 9-inch round metal baking pan that was about 3 inches deep.)
Spread the mashed potatoes on top of the meat mixture. If you use the mashed potatoes all around the edges, it seals the meat mixture in, and prevents bubbling over and messing up your oven. A rubber spatula makes this job easy.
Place the pan on a parchment-lined baking sheet (to prevent spills), and in the oven to bake for 15 minutes.
After 15 minutes, remove the pan and sprinkle the grated cheddar cheese on top of the potatoes. Then return the pan to the oven for 10 more minutes, until the cheese has melted and created a beautiful golden crust on top.
Remove the pan from the oven, placed it on a wire rack, and let it cool at least 15 minutes before serving.
As I said earlier, sweet potatoes make a great substitute for regular potatoes. Give them a try!
These shrimp burgers are not only delicious, they’re pretty low in calories. The key to success is to use raw shrimp, not cooked. (Overcooked shrimp is never a good thing.)
I always use wild-caught American shrimp, not that nasty stuff from Asia. I’ve found wild-caught American shrimp almost everywhere, from supermarkets to membership clubs, and for a great price. You just have to make a bit of an effort to read the packages.
For this recipe, you don’t need to spend extra money for large shrimp. You’ll be chopping them up anyway…and I think the smaller shrimp are tastier. (A white fish, like cod, is also a good substitute for the shrimp.)
These patties hold together pretty well without a lot of breadcrumbs because the shrimp that goes in the food processor becomes a sticky paste that holds everything together. At around 1 calorie per gram, shrimp is a dieter’s best friend.
This recipe can be made gluten-free simply by using GF breadcrumbs. I make my own by buying frozen GF bread, like Udi’s. I toast it, then put it in the food processor to make breadcrumbs. They’re delicious, and you’d never know they’re gluten free!
1 lb. thawed, peeled and deveined medium wild-caught American shrimp 1/3 cup breadcrumbs 1 tablespoon fresh-squeezed lemon juice 1/2 teaspoon sea salt 1/4 teaspoon granulated garlic 1/4 teaspoon freshly ground black pepper 1/2 small Vidalia onion or 1 scallion, finely chopped 1 large egg, lightly beaten Splash of cayenne pepper sauce, like Frank’s Red Hot, or a pinch of cayenne pepper (optional)
Oil, for frying
Coarsely chop half of the shrimp. Place the other half in a food processor, and pulse it until smooth.
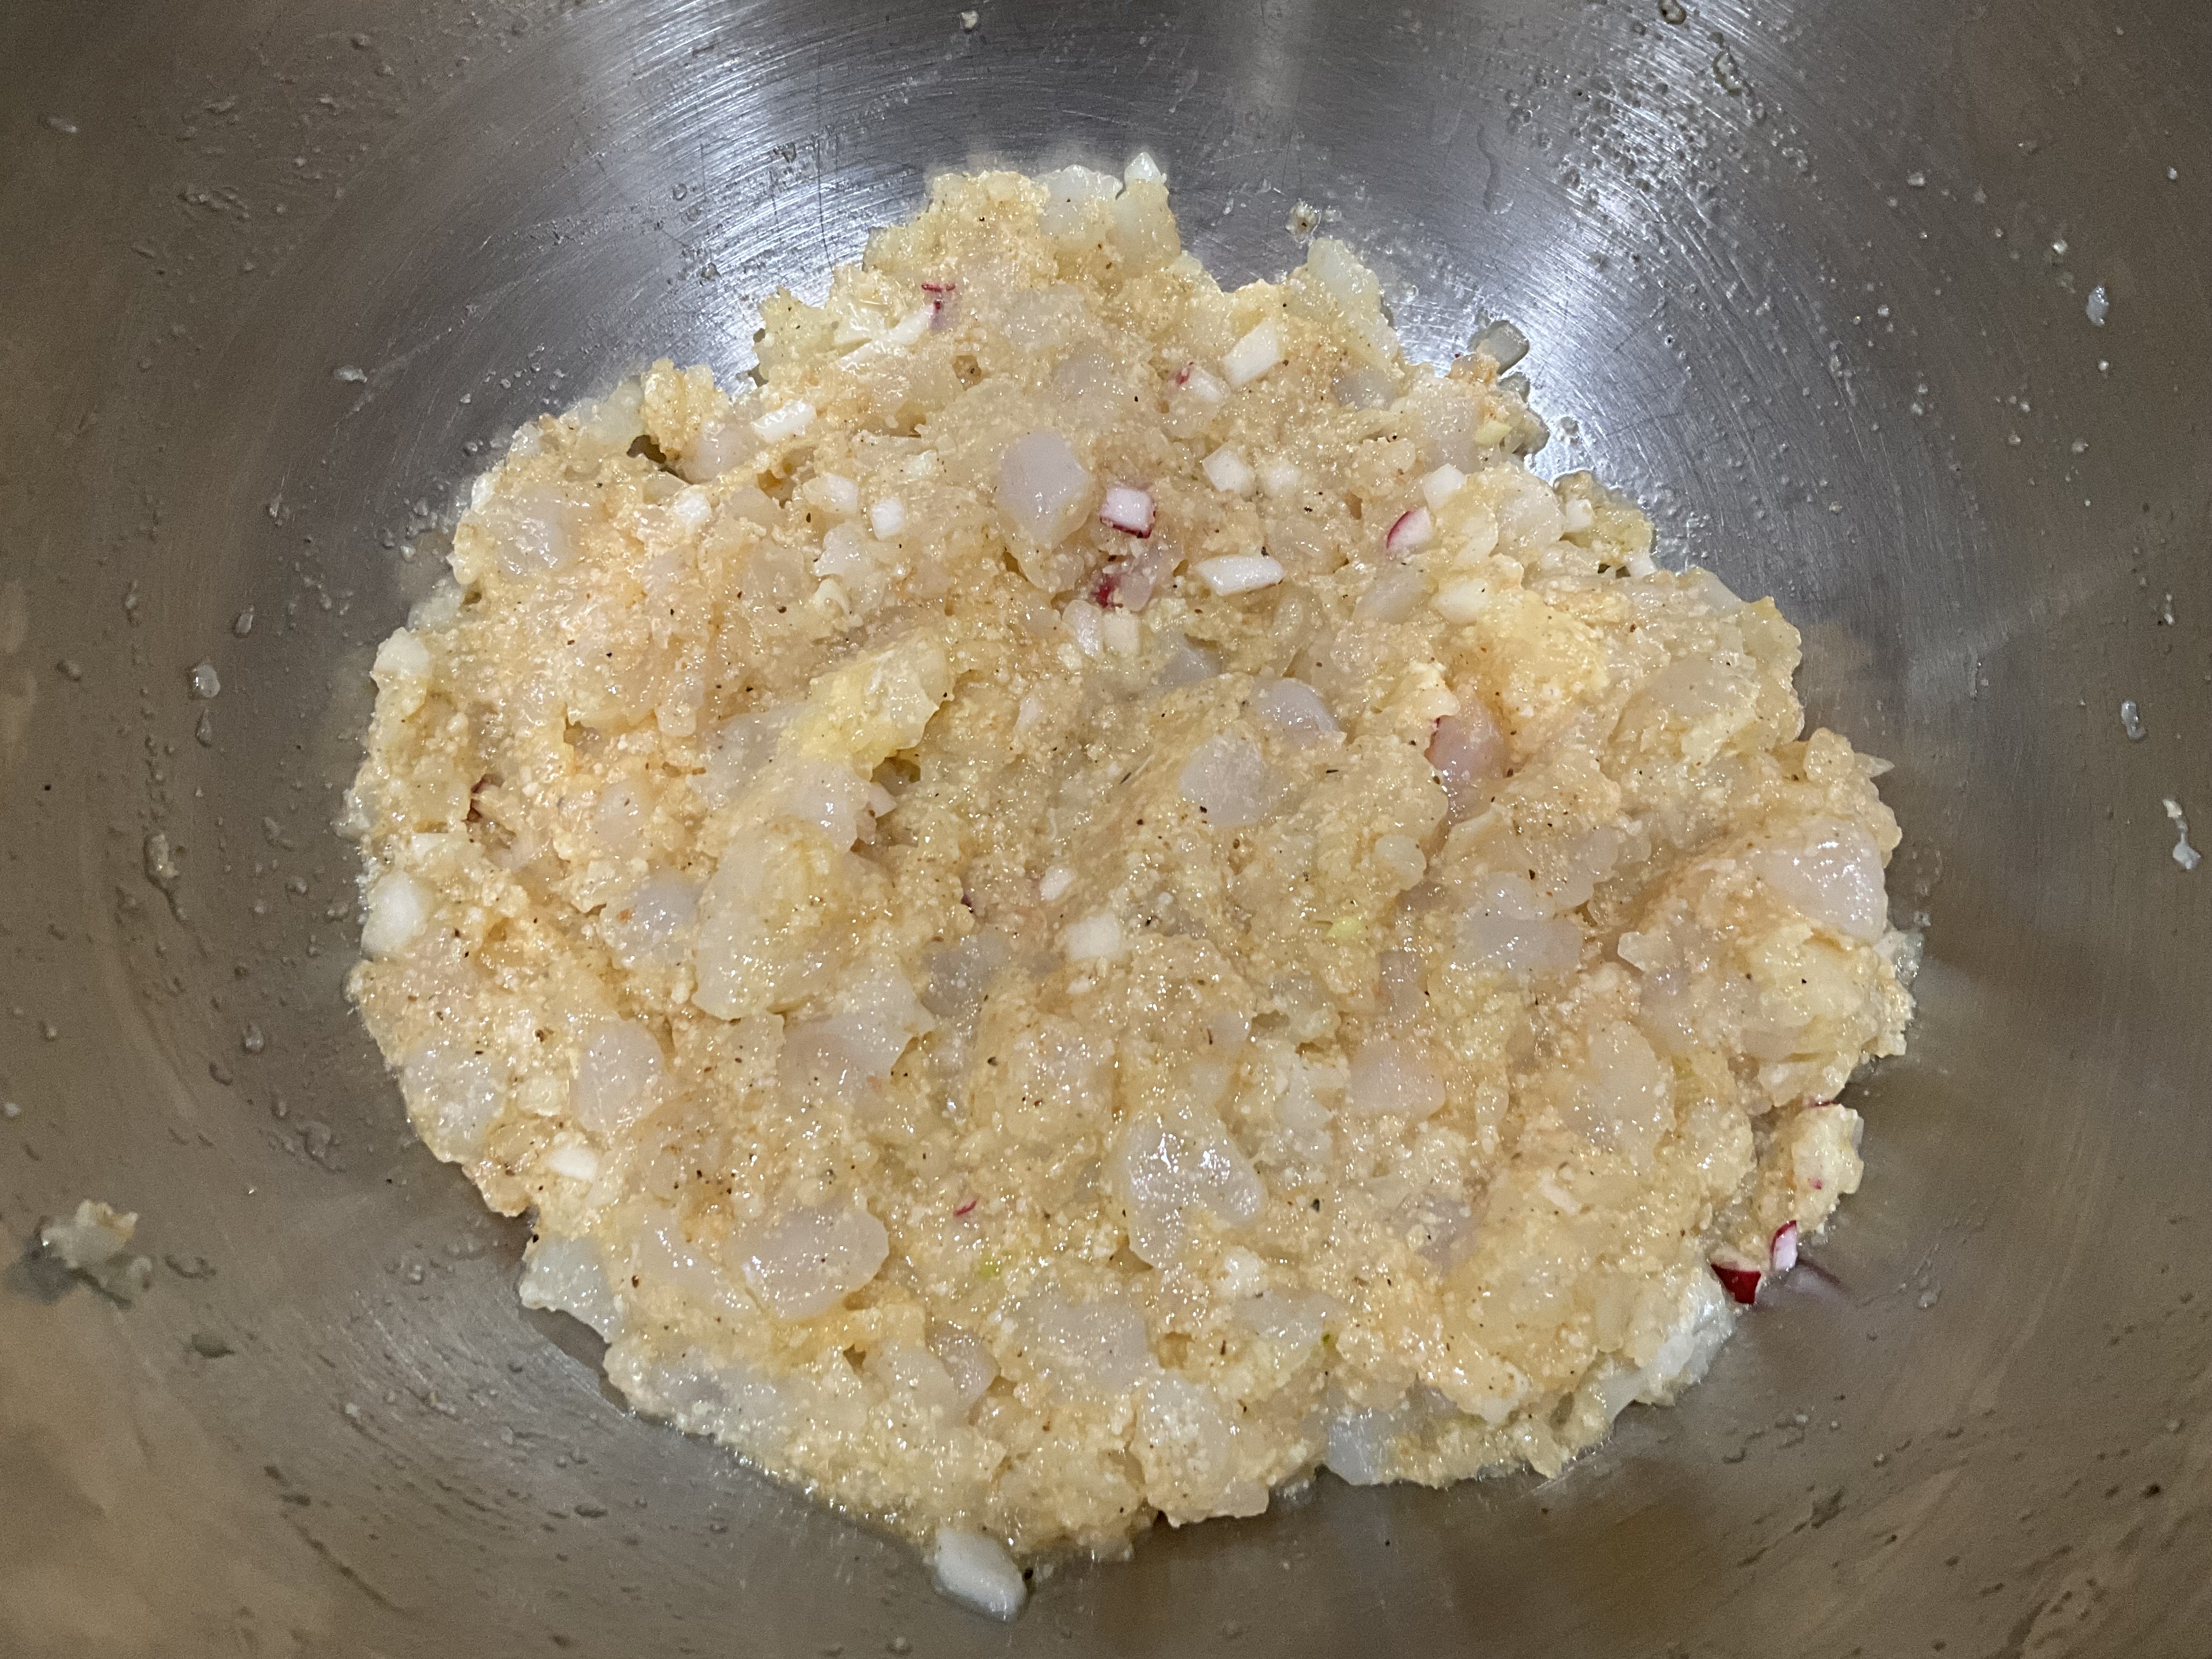
Combine all the shrimp in a bowl with the breadcrumbs, lemon juice, salt, garlic, pepper, onion, egg and optional cayenne pepper sauce.
I had a few radishes, so I chopped them up and mixed them with the onion. (That’s what the little red flakes are.) But that’s just me!
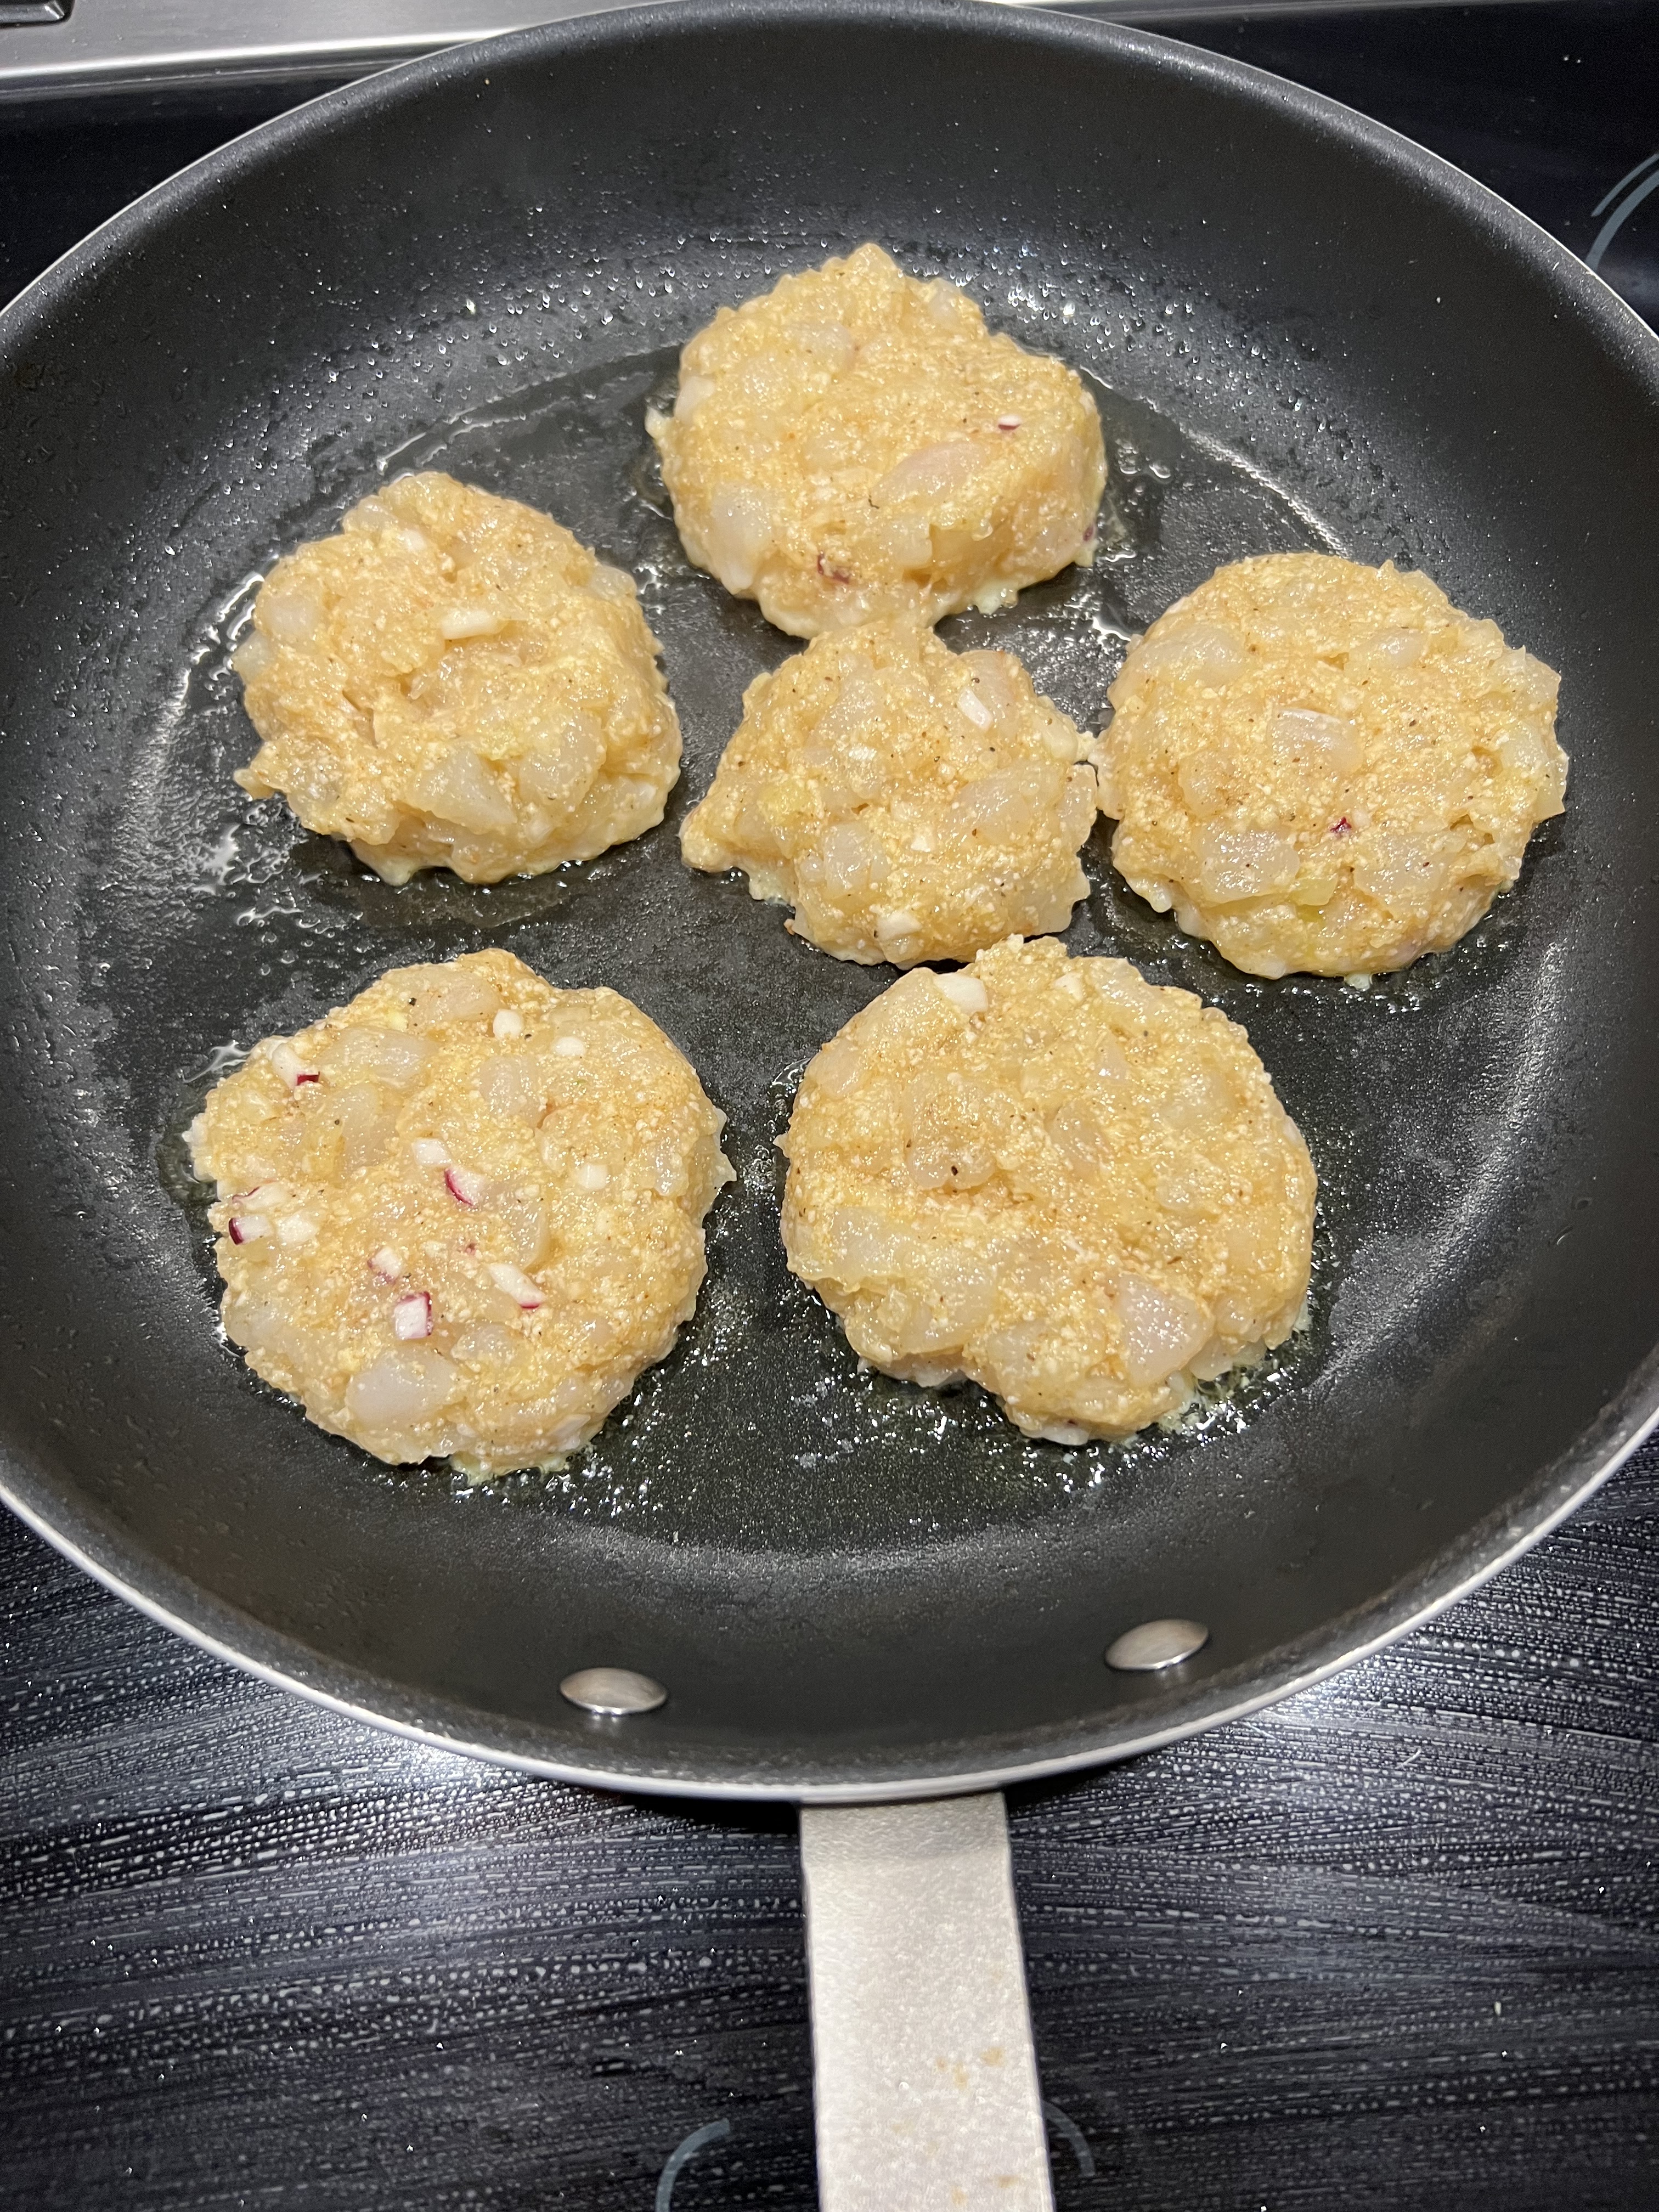
Refrigerate the mix for 10 minutes. Then remove it from the fridge and form the patties. (I like to use a 1/3 cup measure for this.) Once you’ve formed the patties, put them back in the fridge for another 10 minutes.
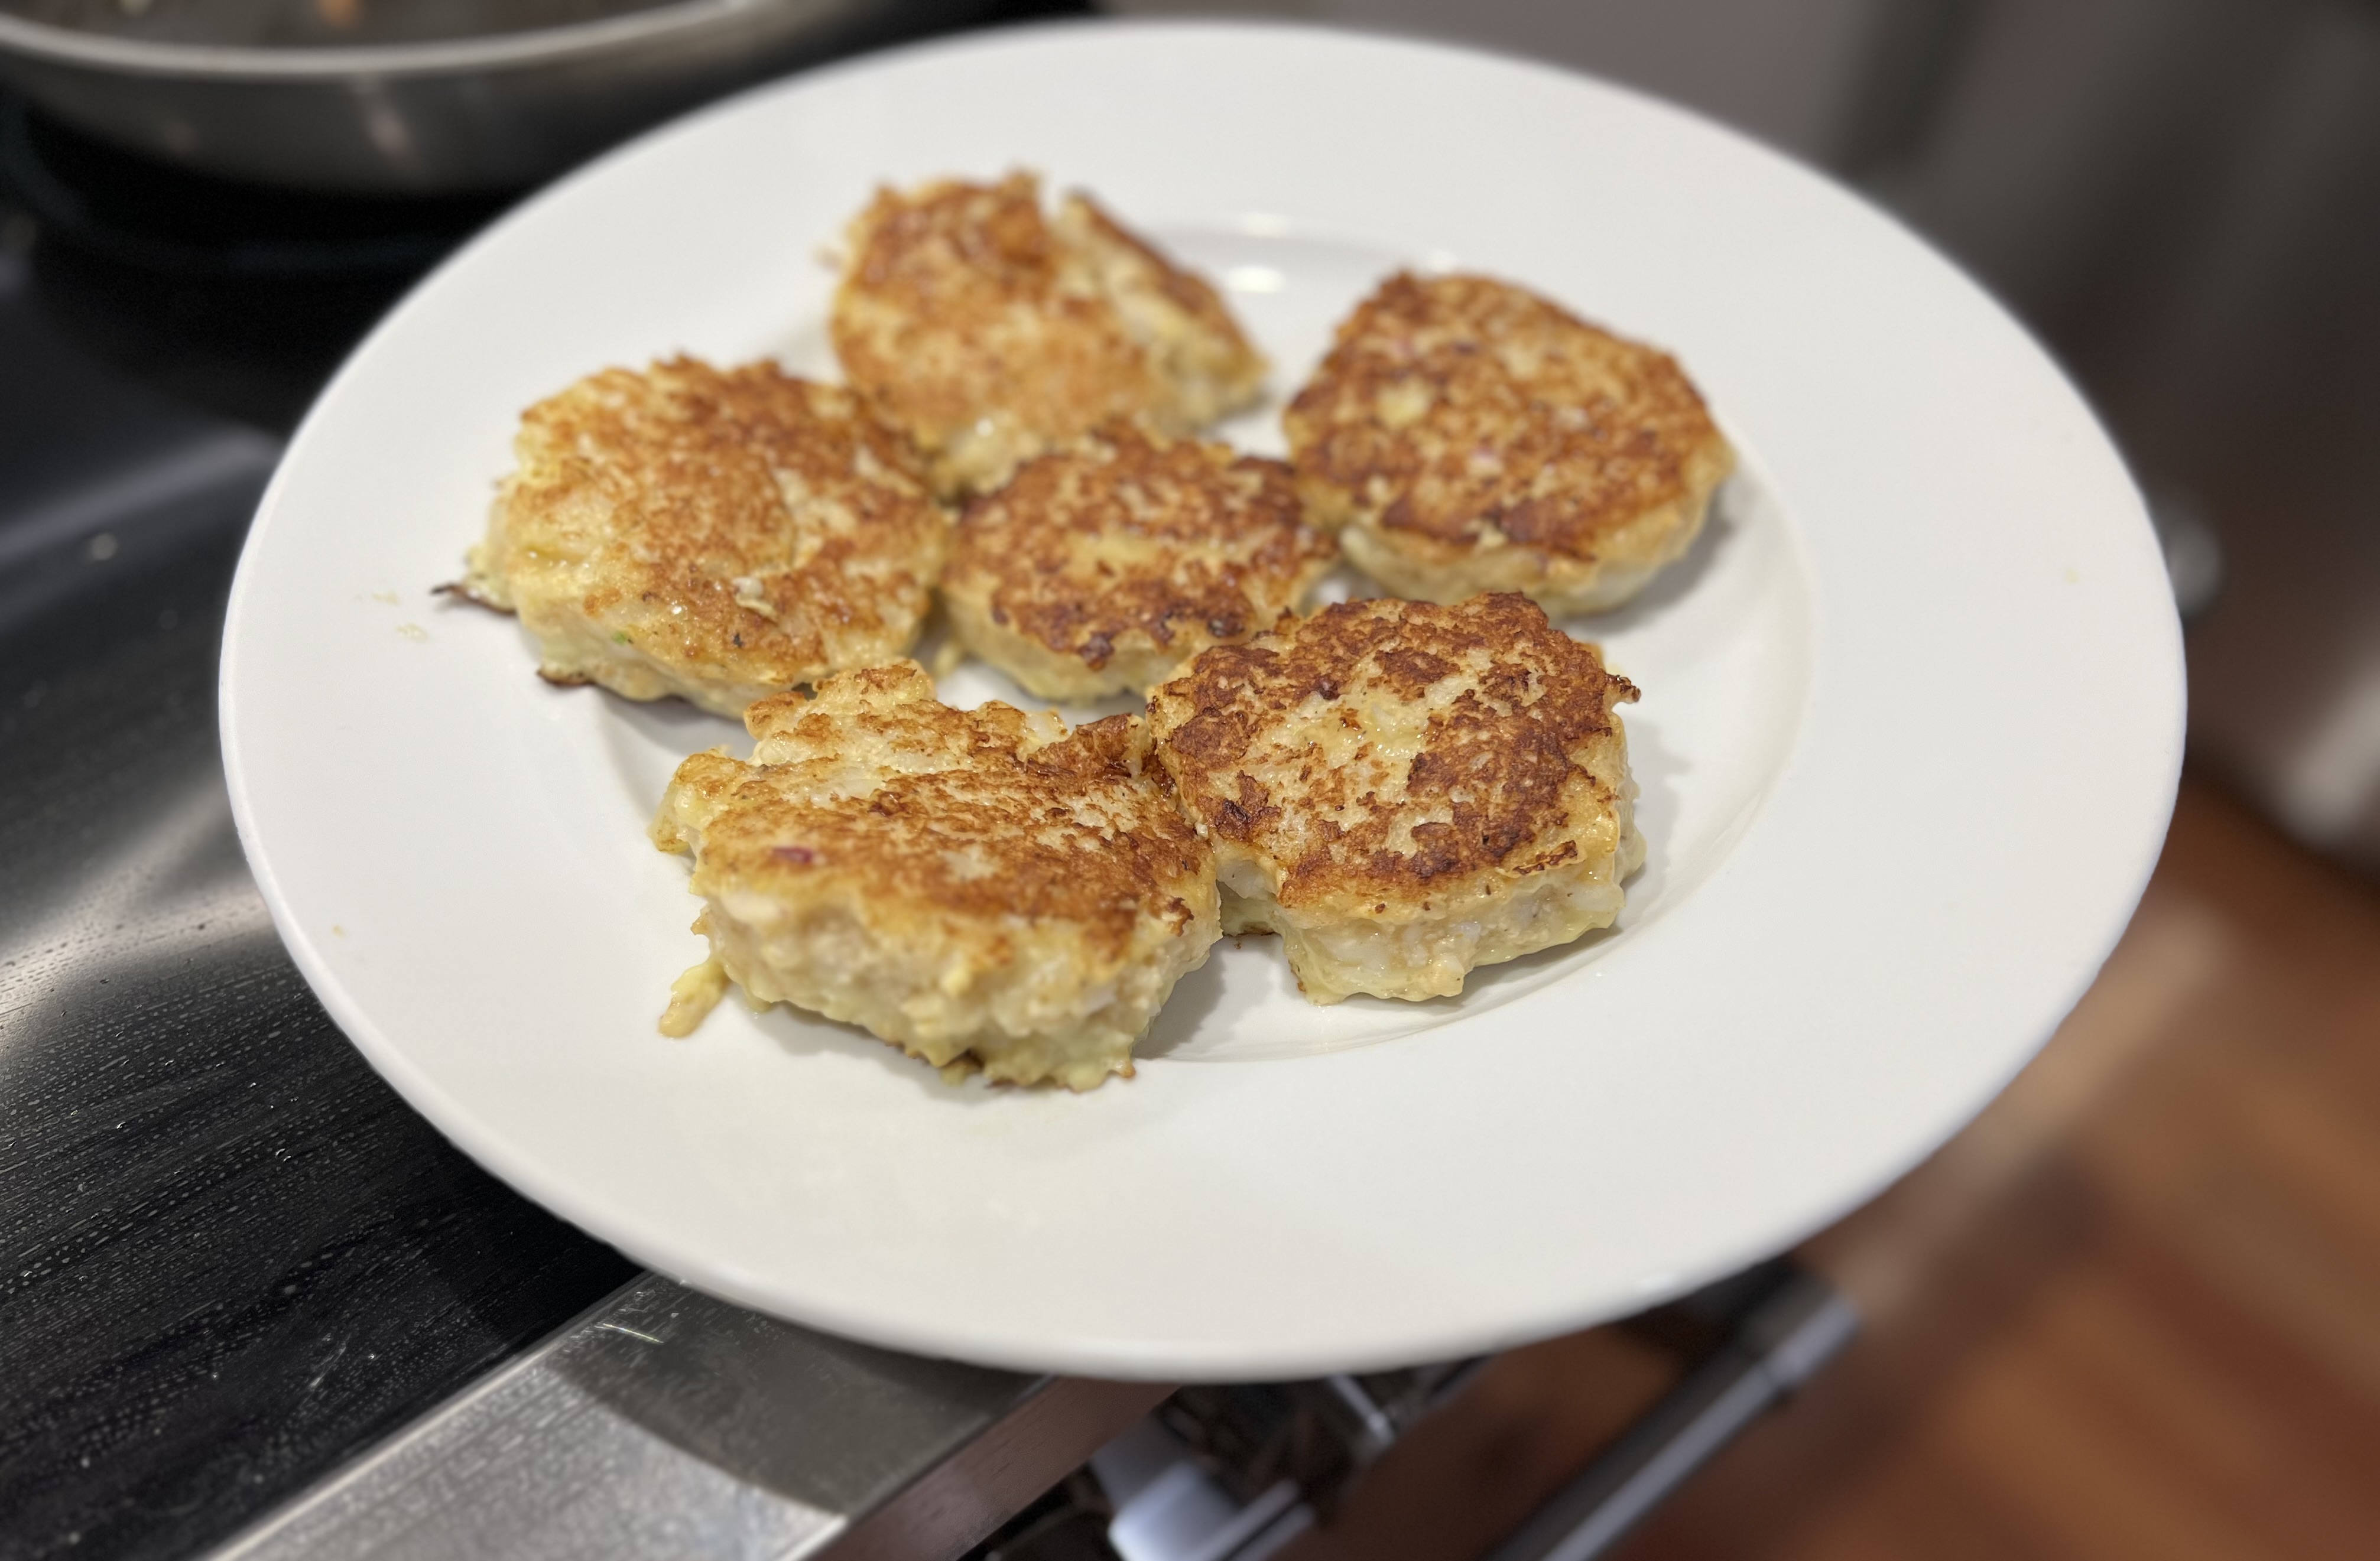
Heat the oil (I try to use as little as possible for calories’ sake) in a non-stick pan over medium-high heat. I like avocado oil, but use your favorite. And if you’re not on a diet, use 1/4 cup of oil to get a nice fry going. Carefully place the burgers in the pan (they’re fragile!) and cook them about 3 minutes per side.
Getting a good sear on the first side before flipping them will help hold them together. You don’t want to undercook the burgers, but you don’t want to overcook shrimp, either.
Sometimes a piece will break off. That’s OK!
I make a simple remoulade using 1 teaspoon Dijon mustard to 1 tablespoon mayonnaise. Another option is to combine mayo with some Old Bay seasoning.
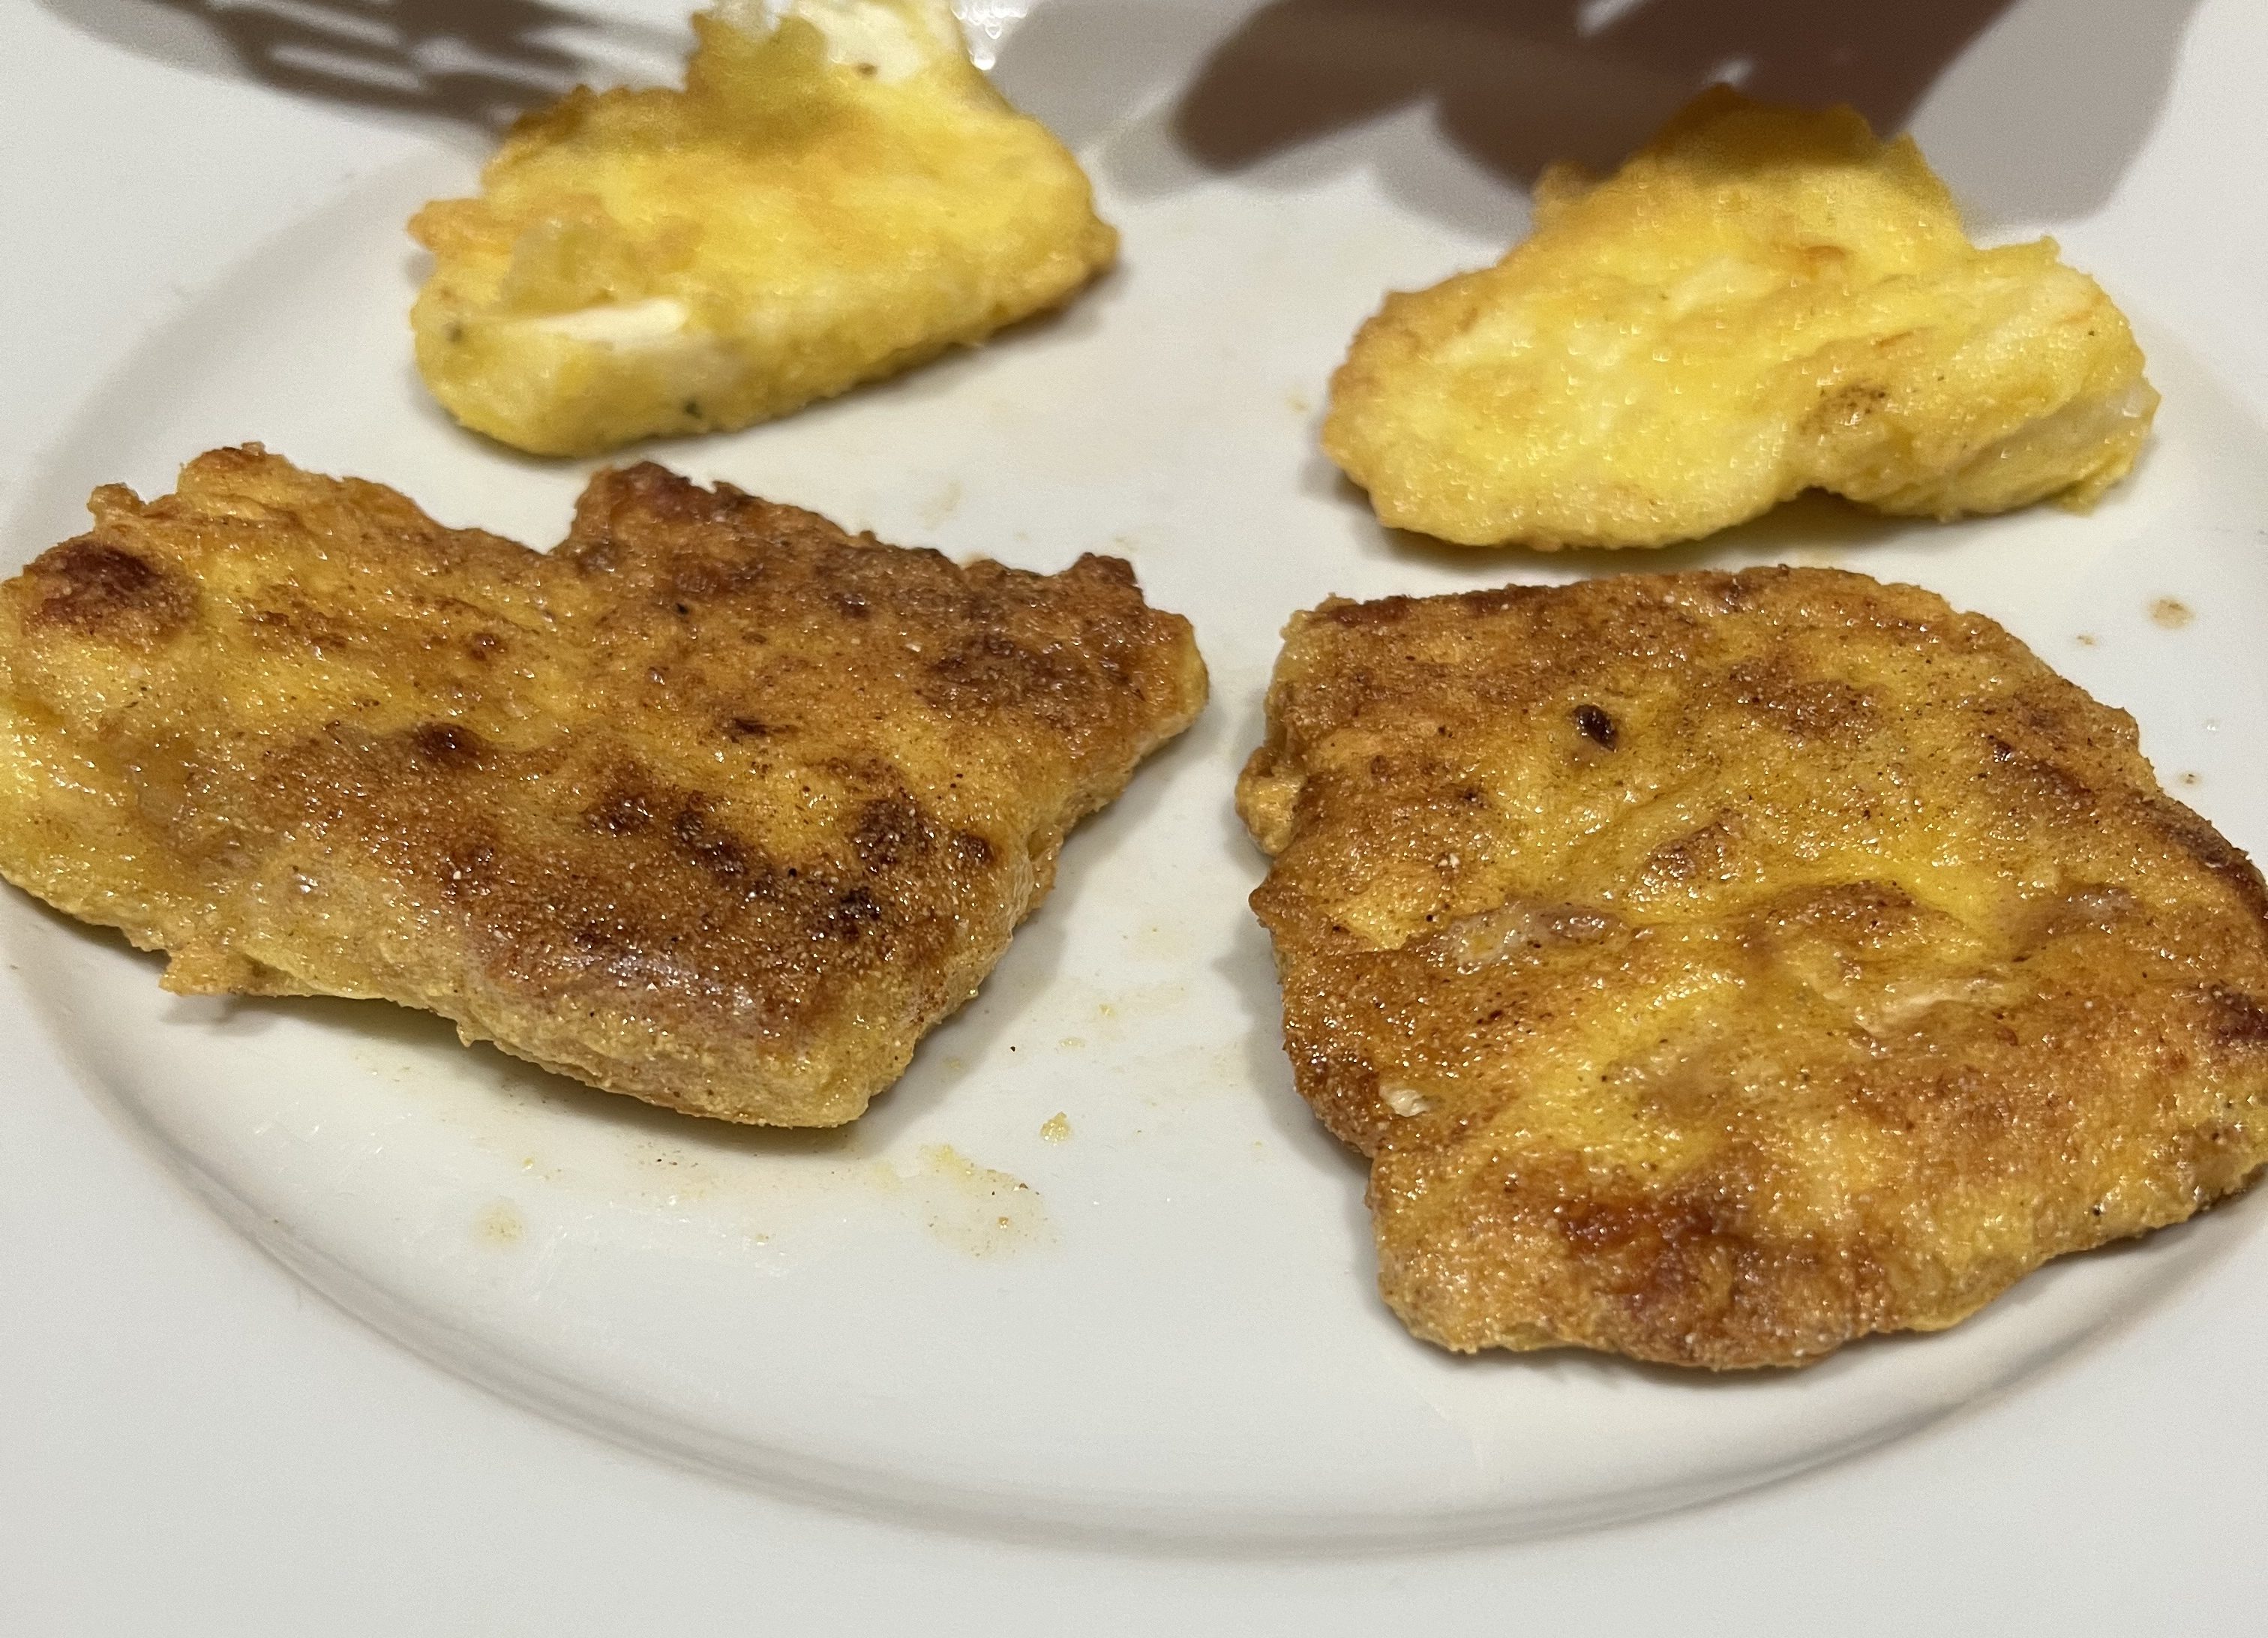
It all started with a piece of Halloumi cheese my daughter and I had been keeping in the fridge for a couple of months. Halloumi is a Greek cheese used in saganaki, which is simply a dish of fried cheese. But it’s an absolute favorite starter of ours whenever we eat at a Greek restaurant.
I was already going to roast a slab of London Broil with potatoes, so I decided to use Greek-inspired seasonings. And then my daughter requested some tzatziki on the side. The meal was set!
The word “saganaki” means “little frying pan” in Greek, but it’s the name given to the dish of fried cheese, often flamed at the end with a little Ouzo (to the cheers of “Opa!” if you’re in a Greek restaurant.) Halloumi is the favorite cheese for saganaki, and it’s usually sliced and dipped in some egg, then tossed in semolina flour.
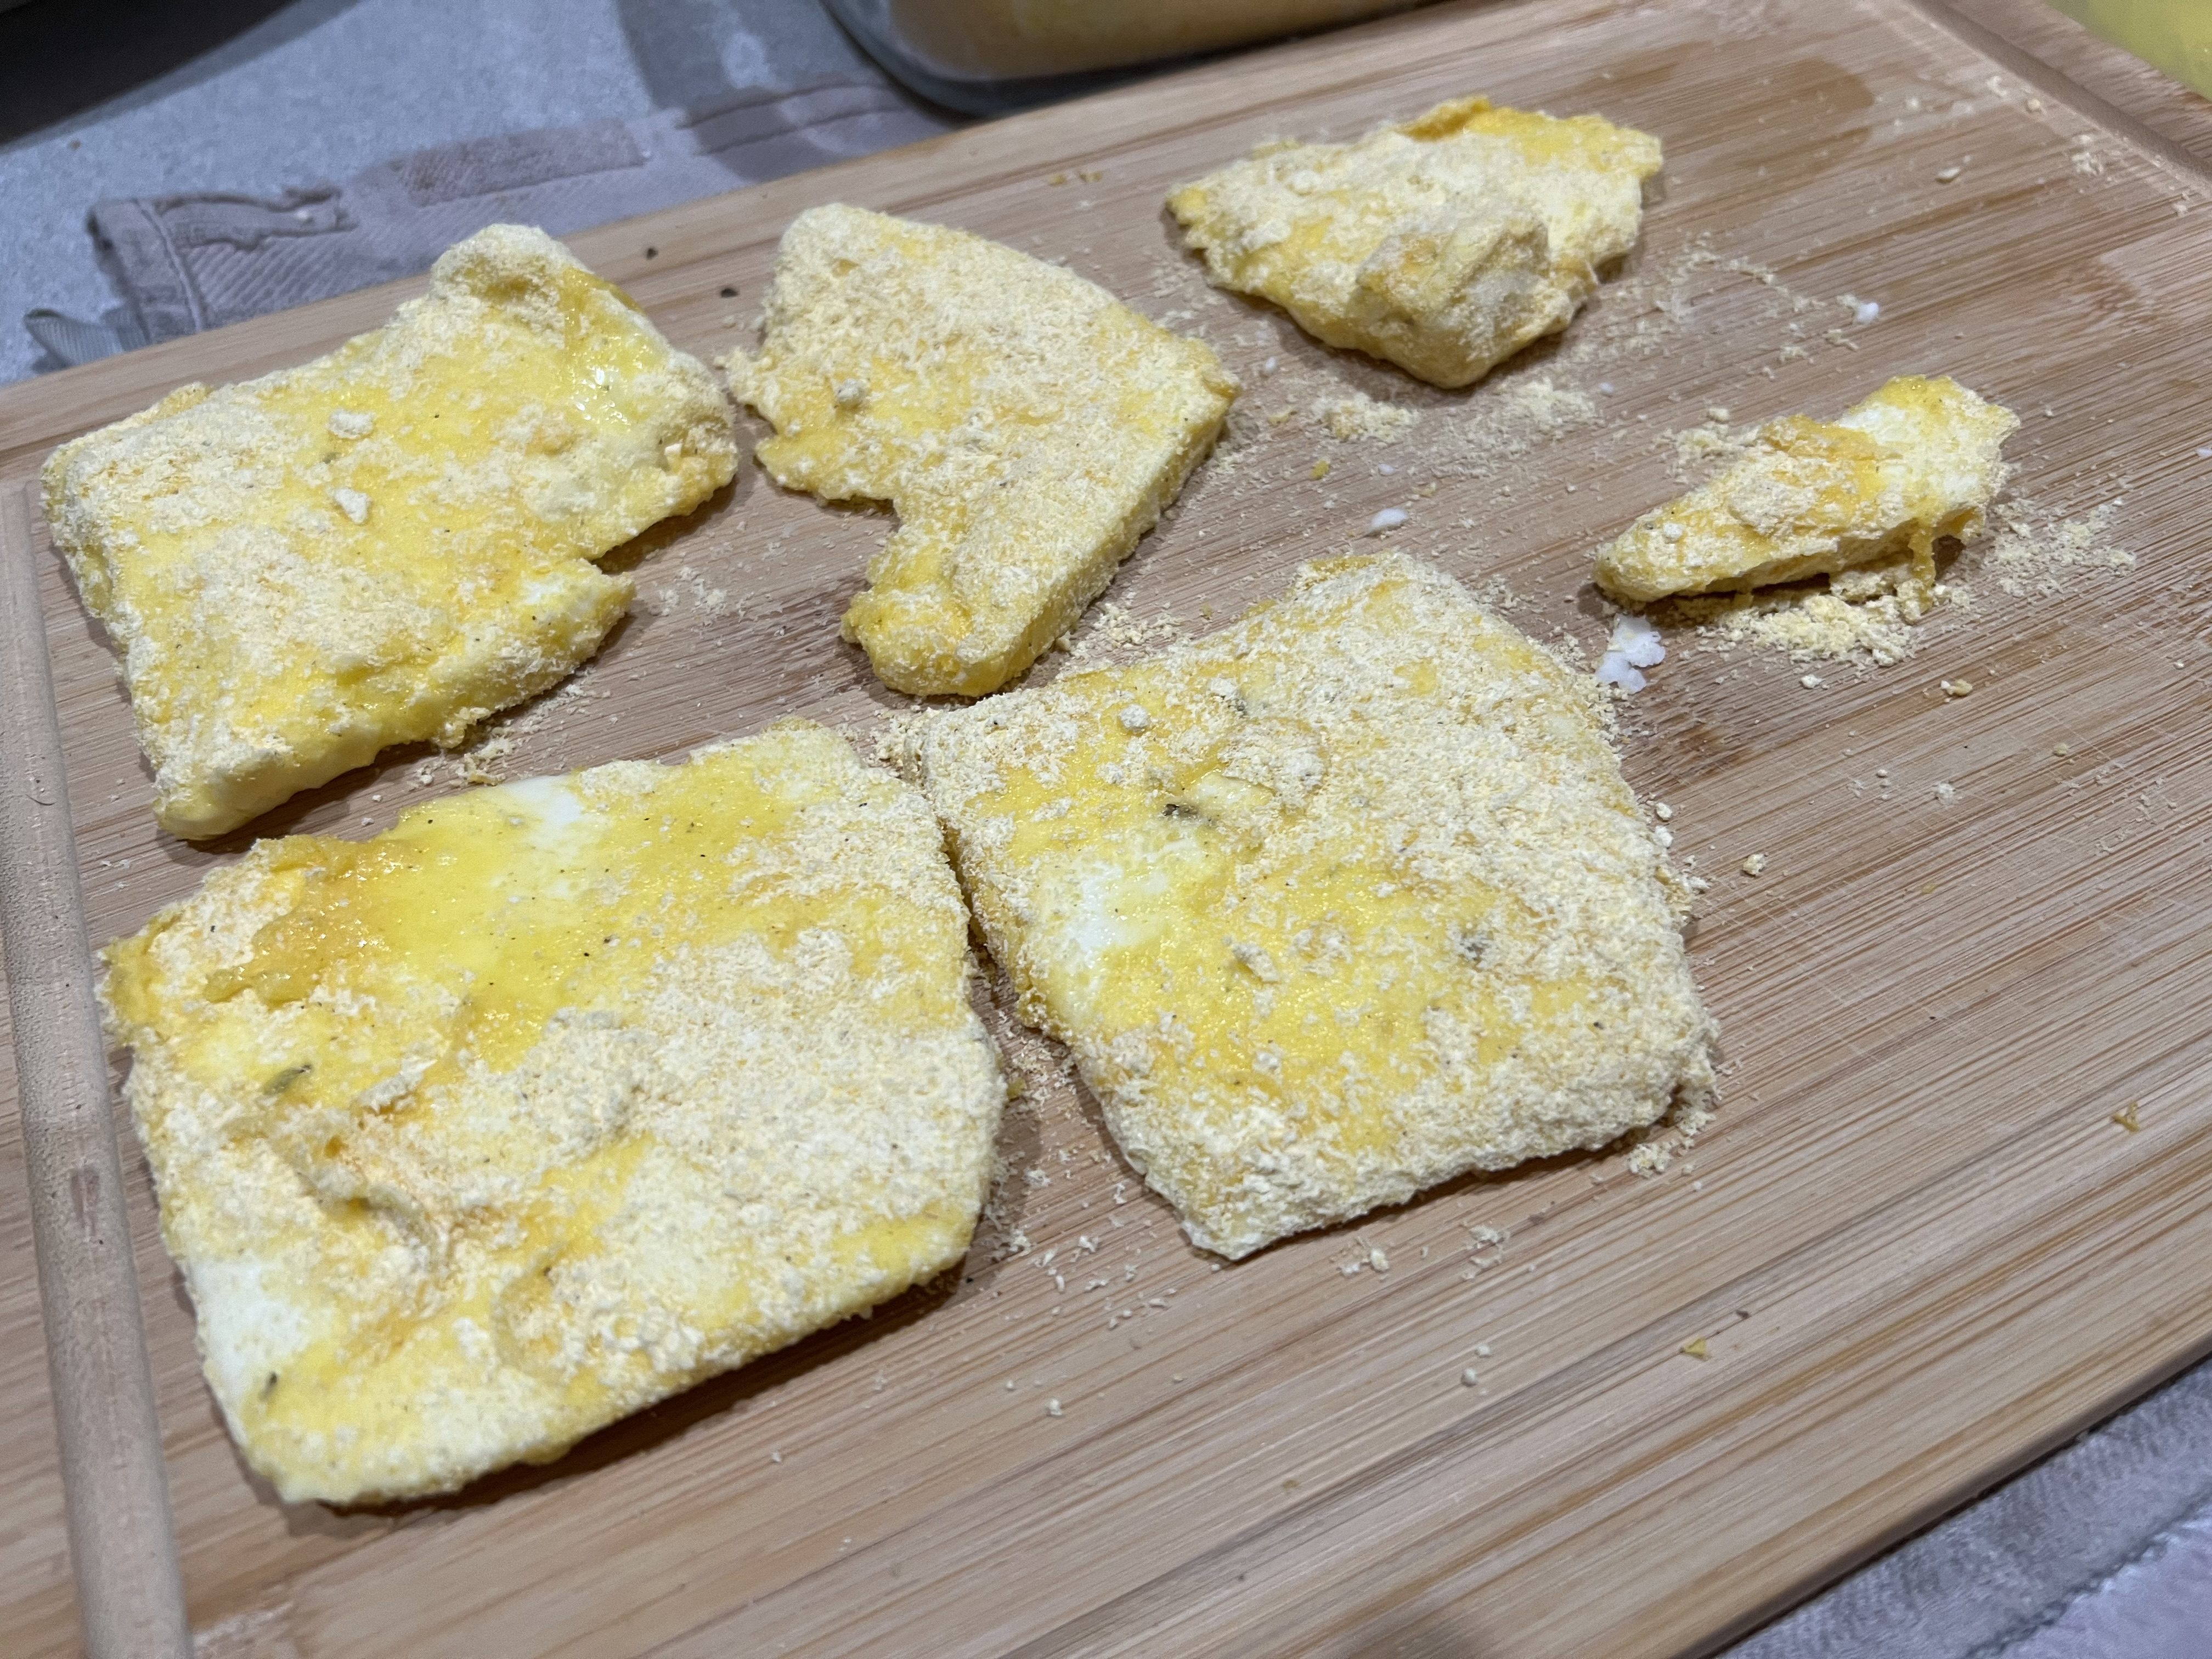
I didn’t have any semolina on hand, but I did have corn meal, so I milled it in my blender to give it a fine flour-like consistency, and placed it in a bowl, next to a bowl with an egg that I scrambled.
Dipped in egg and corn meal, and ready to go into the pan.
I dipped the cheese in a little scrambled egg, then the corn meal, shaking off any excess. I heated some grape seed oil in a pan, and placed the slices of cheese in the oil, flipping the cheese when it turned golden brown on the bottom.
Halloumi is a pretty dense cheese, so it didn’t get all gooey in the pan. I transferred it to a plate and we simply squeezed a little fresh lemon juice on it (no flames this time!) It was delicious!
I like to make tzatziki ahead of time, because I think it tastes better if the flavors are given time to mingle.
1 English cucumber, peeled 1 teaspoon Kosher salt, divided 3 garlic cloves, minced or through a garlic press 1 teaspoon white vinegar 1 tablespoon extra virgin olive oil 2 cups plain full-fat yogurt (Greek or non-Greek is OK) A handful of finely chopped fresh dill 1/4 teaspoon white pepper
I used a box grater to grate the cucumber. It releases a lot of water when you do this. I discarded the liquid. Then I added 1/2 a teaspoon of the salt to the cucumber, and let it sit in a sieve to drain for a few minutes. (The salt extracts even more moisture out of the cucumber.)
In a separate bowl, I combined all the other ingredients, including the other 1/2 teaspoon of salt.
Using a super-clean dish towel or cheese cloth, I placed the cucumber in the towel, and squeezed as much liquid out as I could. Then I added the cucumber to the rest of the ingredients in the bowl, and mixed well.
I stored the tzatziki in a covered bowl in the fridge until I was ready to use it.
I wasn’t expecting to “go Greek” when I bought the London Broil, but I made a simple marinade that worked really well.
1 tablespoon extra virgin olive oil 1 teaspoon red wine vinegar 1 teaspoon oregano 1 teaspoon Kosher salt 1/2 teaspoon fresh cracked black pepper
I place the London Broil in a baking pan. I combined the marinade ingredients and rubbed them all over the meat, letting it sit at room temperature for a couple of hours.
I preheated my oven to 400.
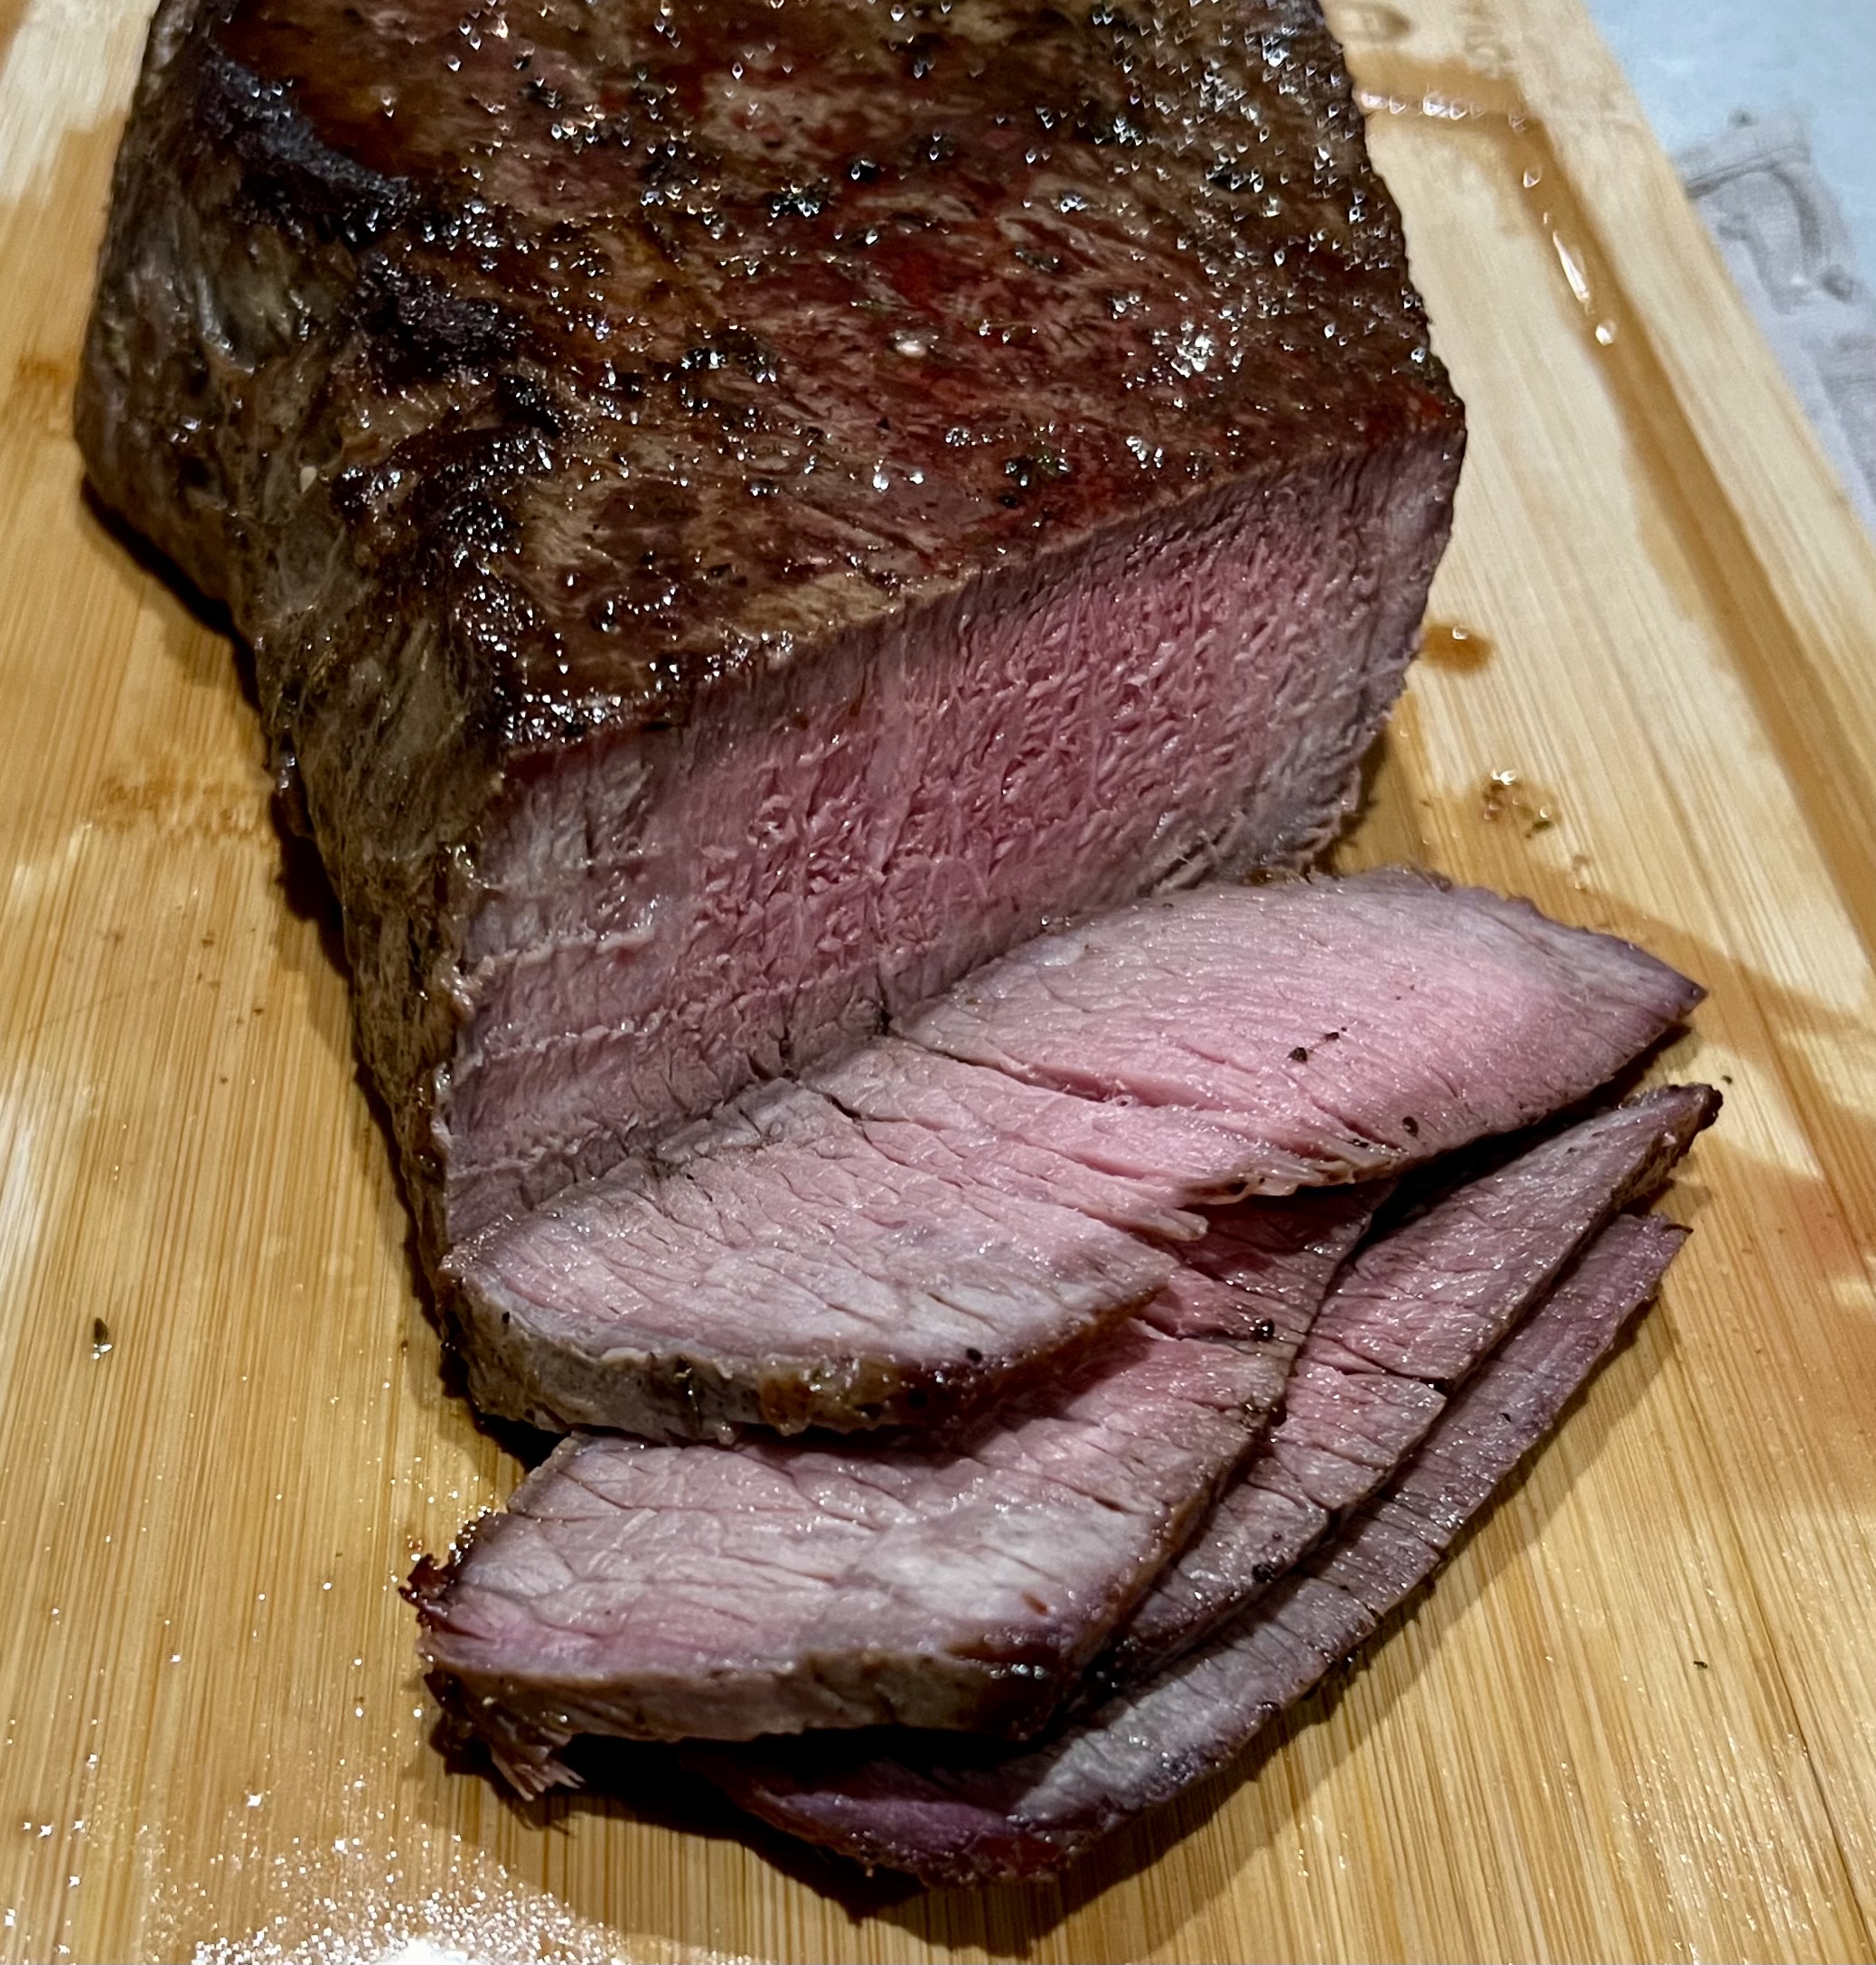
I added some fabulous pork leaf lard to a large hot carbon steel pan on the stovetop, and when the fat melted, I placed the London Broil in the pan, making sure it got a good, hard sear on all sides.
Once that was done, the pan went into the oven, and I kept an eye on it, flipping the meat once, and checking the temperature. Once the London Broil reached 120 degrees, I removed it from the oven and place it on a cutting board to rest.
Let’s not forget the potatoes! I takes about an hour form them to cook, so I back-timed it to be ready with the London Broil.
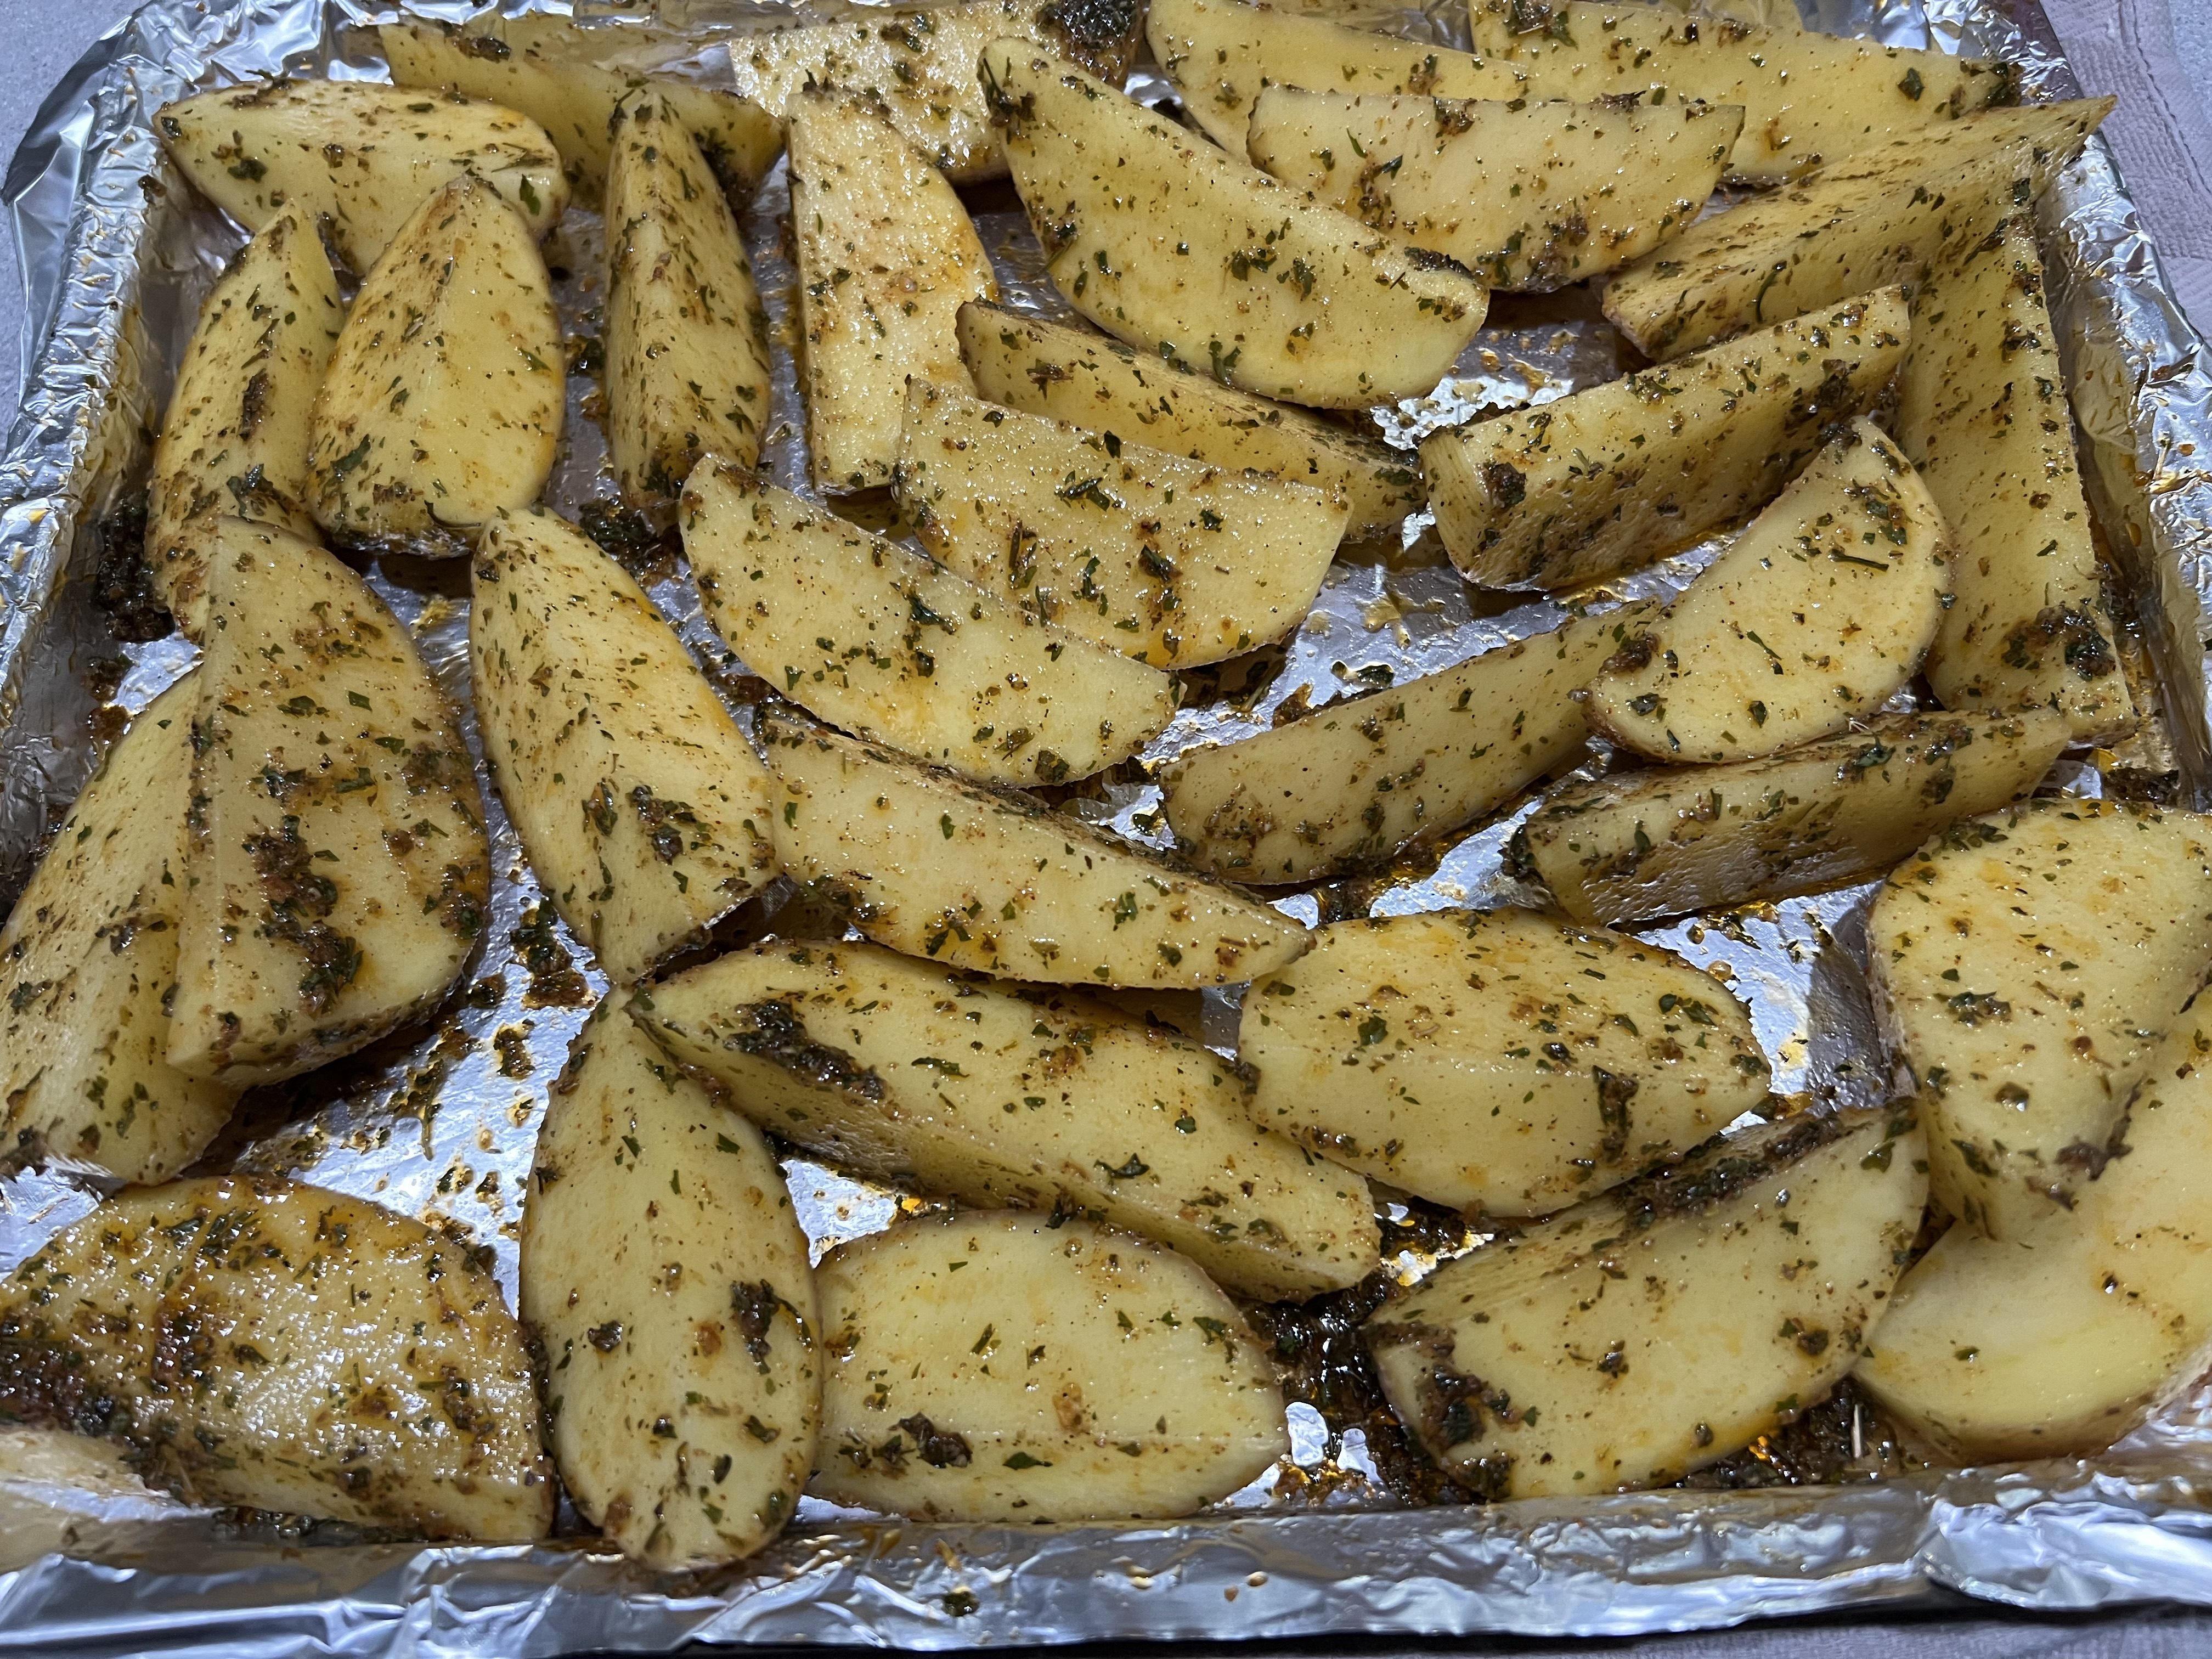
I washed the potatoes, peeling away any blemishes. Then I cut them into steak fries-size pieces and placed them in a bowl of cold water.
In a separate bowl, I combined all the other ingredients.
I preheated the oven to 375 degrees. (I used my toaster oven for this, since the big oven was being used for the London Broil.)
I drained the potatoes, then dried them with a clean towel. I placed them on a sheet pan, and added the seasoning ingredients, mixing really well with my hands. It’s messy, but you want every bit of potato to be covered with the oil and spices. Then I played the potato slices “on their backs,” sliced side up.
I baked them for 45–60 minutes, keeping an eye on them.
Had to have some veggies with this meal! I roasted a tray of cauliflower alongside the London Broil: I cut the cauliflower into bite-sized pieces and tossed them in salt, pepper, a little oil and Italian seasoning, and baked them at 400 for 30 minutes.
Sure, it’s Super Bowl Sunday, but Fat Tuesday is just 2 days away! Why not celebrate it early?
If I asked you to name a cocktail that defines New Orleans, you might say The Hurricane. After all, it’s a tourist favorite at the famous Pat O’Brien’s on Bourbon Street.
But the official cocktail of New Orleans is the Sazerac, a potent concoction that was created early in the 19th century by Antoine Amédée Peychaud, a Creole apothecary who emigrated to New Orleans from the West Indies and set up shop in the French Quarter. He was known to dispense a proprietary mix of aromatic bitters from an old family recipe, now famously known as Peychaud’s bitters.
Sazerac ingredients.
Around 1850, Sewell T. Taylor sold his New Orleans bar, the Merchants Exchange Coffee House, to become an importer of spirits, and he began to import a brand of cognac named Sazerac-de-Forge et Fils. Meanwhile, Aaron Bird assumed proprietorship of the Merchants Exchange and changed its name to Sazerac Coffee House.
Legend has it that Bird began serving the “Sazerac Cocktail,” made with Sazerac cognac imported by Taylor, and allegedly with bitters being made by the local apothecary, Antoine Amedie Peychaud. The Sazerac Coffee House subsequently changed hands several times, until around 1870, when Thomas Handy became its proprietor. It is around this time that the primary ingredient in a Sazerac changed from cognac to rye whiskey, due to the phylloxera epidemic in Europe that devastated the vineyards of France.
At some point before his death in 1889, Handy recorded the recipe for the cocktail, which made its first printed appearance in William T. Boothby’s “The World’s Drinks and How to Mix Them” in 1908, although his recipe calls for Selner bitters, not Peychaud’s. After absinthe was banned in the United States in 1912, it was replaced by various anise-flavored liqueurs, most notably the locally produced Herbsaint, which first appeared in 1934.
In March 2008, Louisiana state senator Edwin R. Murray filed Senate Bill 6 designating the Sazerac as Louisiana’s official state cocktail. The bill was defeated on April 8, 2008. But, after further debate, on June 23, 2008, the Louisiana Legislature agreed to proclaim the Sazerac as New Orleans’ official cocktail.
The Sazerac, served at the Sazerac Bar in New Orleans.It’s always more fun when someone makes your drink for you!
Peychaud’s bitters are now owned by the Buffalo Trace distillery, home of many a fine bourbon, and also the makers of Sazerac rye, a registered trademark. So the Sazerac Bar has to pay a fee to use the name. That also explains why they use Sazerac rye in their version of this classic cocktail.
But like many popular drinks, everybody has their own version of a Sazerac. In fact, if you Google the drink, you’ll find dozens of versions: with cognac, rye, or bourbon (or even a combination)…with a sugar cube or simple syrup…and with a variety of absinthes.
Note: you can buy simple syrup–I prefer it in this recipe over sugar cubes–but it’s easy to make at home. Simply combine a cup of sugar with a cup of water in a saucepan and heat it until all the sugar dissolves. I keep my simple syrup in the fridge in a sealed container.
2 oz. rye whiskey (I use Old Overholt ) 1/2 oz. simple syrup 3 dashes Peychaud’s bitters Absinthe, to rinse, about 1/4 oz. (I use Herbsaint) garnish lemon peel
Add ice to a rocks glass to chill it. (I also put it in the freezer.)
While it’s chilling, get a cocktail mixing glass, add some ice, and combine the rye, simple syrup, and the bitters, and stir. (Thirty times, according to tradition.)
Take the rocks glass out of the freezer, pour the ice out, and pour the Herbsaint into the glass, swirling it around to coat the glass, then pouring out the excess.
Strain the mix of rye, simple syrup, and bitters into the rocks glass with the Herbsaint.
Run a lemon peel around the rim of the glass and garnish with it.
For me, rye, specifically Old Overholt, is the down-and-dirty way to go. After all, this is not a kiddy drink. A few sips, and you’re feeling no pain.
A Sazerac at the Napoleon House in New Orleans.
Though sipping a Sazerac in New Orleans is an amazing experience in itself, and I’ve had it at the SazeracBar as well as the Napoleon House and other bars in NOLA…perhaps my craziest Sazerac experience happened at the famous White Horse Tavern in New York City, the Big Apple’s second oldest continuously running bar. (It opened in 1880.) I think this is where I was told to use Old Overholt in my Sazerac, and have ever since.
Dylan Thomas was a regular there, and other celebrities, like Norman Mailer, Jim Morrison, Bob Dylan, and Hunter S. Thompson also had drinks there. So it’s probably not surprising that my buddy, Lee, and I overindulged on Sazeracs at this historic tavern.
It was a very cold winter’s night in the late 1980’s–a blizzard, in fact–and we decided to go out drinking in the city, because I was back home in New York on holiday vacation from Alabama, where I was working at the time. We had more than our share of Sazeracs, when we decided we would walk to a new eatery called the Gulf Coast, located on the west side. (All we knew was that the restaurant was about 10 blocks from where we were, but after 4 Sazeracs, “where we were” was questionable, to say the least.)
Now, this was before the internet–before cell phones–before Uber–and no cabs were running (because it was a blizzard, after all)–so we decided we would walk! Not the smartest thing we’ve ever done. It only took a few blocks for us to realize, even in our drunken stupor, that we made a very bad choice! We were certain that we would be found, huddled and frozen in an alley somewhere, only after the spring thaw.
The storm was so bad, we couldn’t even find our way back to the bar. Miraculously, somehow, we did make it to the Gulf Coast, and we lived to tell the tale.
As Homer Simpson once said: “To alcohol…the cause of, and cure for, all of life’s problems!”
Sazeracs. Try your first one at home. Or take an Uber!
I’ve gotten a few requests for my chicken fried rice recipe. Not sure if it’s authentic Asian, but I use a lot of the flavors and veggies that I find in chicken fried rice when I get takeout. It’s really not a difficult thing to do, but it does take some work, chopping everything up and getting it ready.
I don’t have a wok, and I don’t think it’s necessary. As long as you have a pan that’s big enough to hold everything at the end, you’re good to go.
All the Asian ingredients can be found in any supermarket. And if you want this dish to be gluten-free, use GF soy sauce and hoisin sauce. La Choy and Kikkoman make them.
I like to start by sautéing all the veggies, then removing them from the pan, putting them in a separate bowl, and then continuing with the chicken. It seems like the best order of business for me.
They say that you should use day-old rice, so, if you plan on making this recipe, boil up some rice the day before, and put it in the fridge. I like to use jasmine rice, but use whatever rice you like.
All measurements for this recipe are approximate. Again, add more of what you like, and take away what you don’t.
Don’t be afraid to explore the international aisle in your supermarket as well as the produce section for interesting veggies that you can add to this dish. I’m not a fan of water chestnuts, but that’s one option. And if you don’t like the little corn cobs, add some frozen corn. Bok choy, mushrooms, and scallions are all great choices.
1 small onion, finely chopped 1cup of finely chopped cabbage 1/2 can of small Asian corn cobs, chopped 1 cup or more chopped broccoli 1 cup mung bean sprouts or pea shoots 1 cup frozen peas (optional)
3 cups of cooked rice 1 1/2 pounds of chicken breast, cut into small cubes 2 eggs
To make the marinade, combine the soy sauce, hoisin sauce, rice vinegar, Chinese garlic sauce, and sesame oil in a bowl.
Cut the chicken breasts into small 1/2-inch cubes and place them in a bowl. Add the marinade to the chicken, and make sure the meat is coated well. Let it marinate for a couple of hours at room temperature, or in the fridge if you need more time.
Get a large pan that will hold everything and put it on high heat. Add an oil with a high smoke point, like peanut oil, avocado oil or grapeseed oil.
Add the onions to the pan and sauté until they’re translucent. Add the cabbage, and let it wither. Add the corn cobs and sauté for a few minutes. Add the chopped broccoli, and continue to sauté. You can add the bean sprouts now, or save them for later if you want them to be very crunchy. Save the peas for later.
When the veggies have softened, pour them into a bowl and return the pan to the stove top. Add a little more oil and let it heat up.
Add the chicken pieces to the pan, pouring in all the marinade with it. Make sure the chicken is thoroughly cooked, and just starts to caramelize.
Scramble the two eggs in a small bowl and add them to the pan, constantly moving the chicken and eggs around to fully cook the eggs.
Add the rice to the pan and mix everything thoroughly. Then return the veggies and mix thoroughly again.
This is where you taste everything. Add what you think it needs. Maybe it’s some soy sauce…maybe a little hoisin…maybe salt and pepper…maybe a little sesame oil. Maybe more of everything! It’s up to your individual taste.
Toss the fried rice with the added seasonings, then add the bean sprouts and the peas, giving it one more good mix.
This chicken fried rice is great as meal in itself, and leftovers are always welcome.
I’ve had Clams Casino in many different forms. Back when I worked in Italian restaurants in New York, we would make a breadcrumb mixture, press it onto a freshly opened whole clam, and then place a small piece of bacon on top before it went into the oven. It was good, but the clam often stuck to the shell, and many people didn’t want to gulp down a whole clam like that.
Oyster knife (left) and a clam knife (right.) Different tools for different jobs.
When it was time for me to make my own recipe, I decided that I would chop the clams and mix them into the breadcrumb mix, so that every bite was the same.
2 tablespoons olive oil
1/3 cup finely chopped Vidalia or other sweet onion (about a 1/2 an onion)
2 garlic cloves, squeezed through a garlic press
1/3 cup dry white wine
1/3 cup unflavored bread crumbs
1 tablespoon fresh Italian parsley, finely chopped
1/2 teaspoon dried oregano
Freshly cracked black pepper
2 dozen medium sized clams
1/3 lb. bacon, cut in small squares to fit the clam shells
Heat the olive oil in a pan over medium heat. Add the onions, and sauté them until they’re translucent. Add the garlic, and cook for 10 seconds. Add the wine and simmer for a minute. Add the bread crumbs, and stir the mixture until it becomes thicker, like a paste. Add the parsley and oregano. Season with pepper. (There’s going to be plenty of salt in the clam juice and bacon, so no salt is needed.)
The bread crumb mixture.
Remove the pan from the heat and let it cool.
It’s time to open the clams. If you know how to do that, open them over a sieve with a bowl underneath so that the clam meats and juices are captured. Discard any broken shells, but save the good ones.
If you struggle with opening clams, this method makes it a little easier: Bring a large pot of water to boil, and drop the clams into it, about 10 at a time, for 30 seconds. Don’t let them open! Remove the clams with a slotted spoon and place them in a bowl to cool. Continue doing this in small batches until all the clams have been in the water. You’ll find this makes opening the clams much easier. Then proceed as above.
Once you’ve shucked all the clams, let the clam juice sit for a bit, so that any grit settles to the bottom of the bowl. Then pour off the clean clam juice and add it to your bread crumb mixture. (Don’t worry if it looks soggy at this point.)
Looking a little soggy, but that’s OK.
I like to hand chop the clam meats instead of using a food processor. You want tasty clam chunks, not too big, but not mush. Add the clams to the the bread crumb mix.
At this point, if the clam mix looks very soggy, simply add a little more bread crumb to dry it out.
Preheat the oven to 350 degrees.
Line a large baking sheet with foil. Separate the clam shell halves and wash them, making sure you don’t have any shell fragments left in the clam shell. Fill them with the clam mixture, mounding them slightly, and placing each one on the baking sheet.
Clams and bacon…delicious!
Cut the bacon in small squares to fit the clam shells. Place a small piece of raw bacon on the top of each clam.
Bake until the clams are just cooked through, the topping is golden, and the bacon is cooked, about 30 minutes.
This makes a great appetizer, but it’s hard to just eat a few!
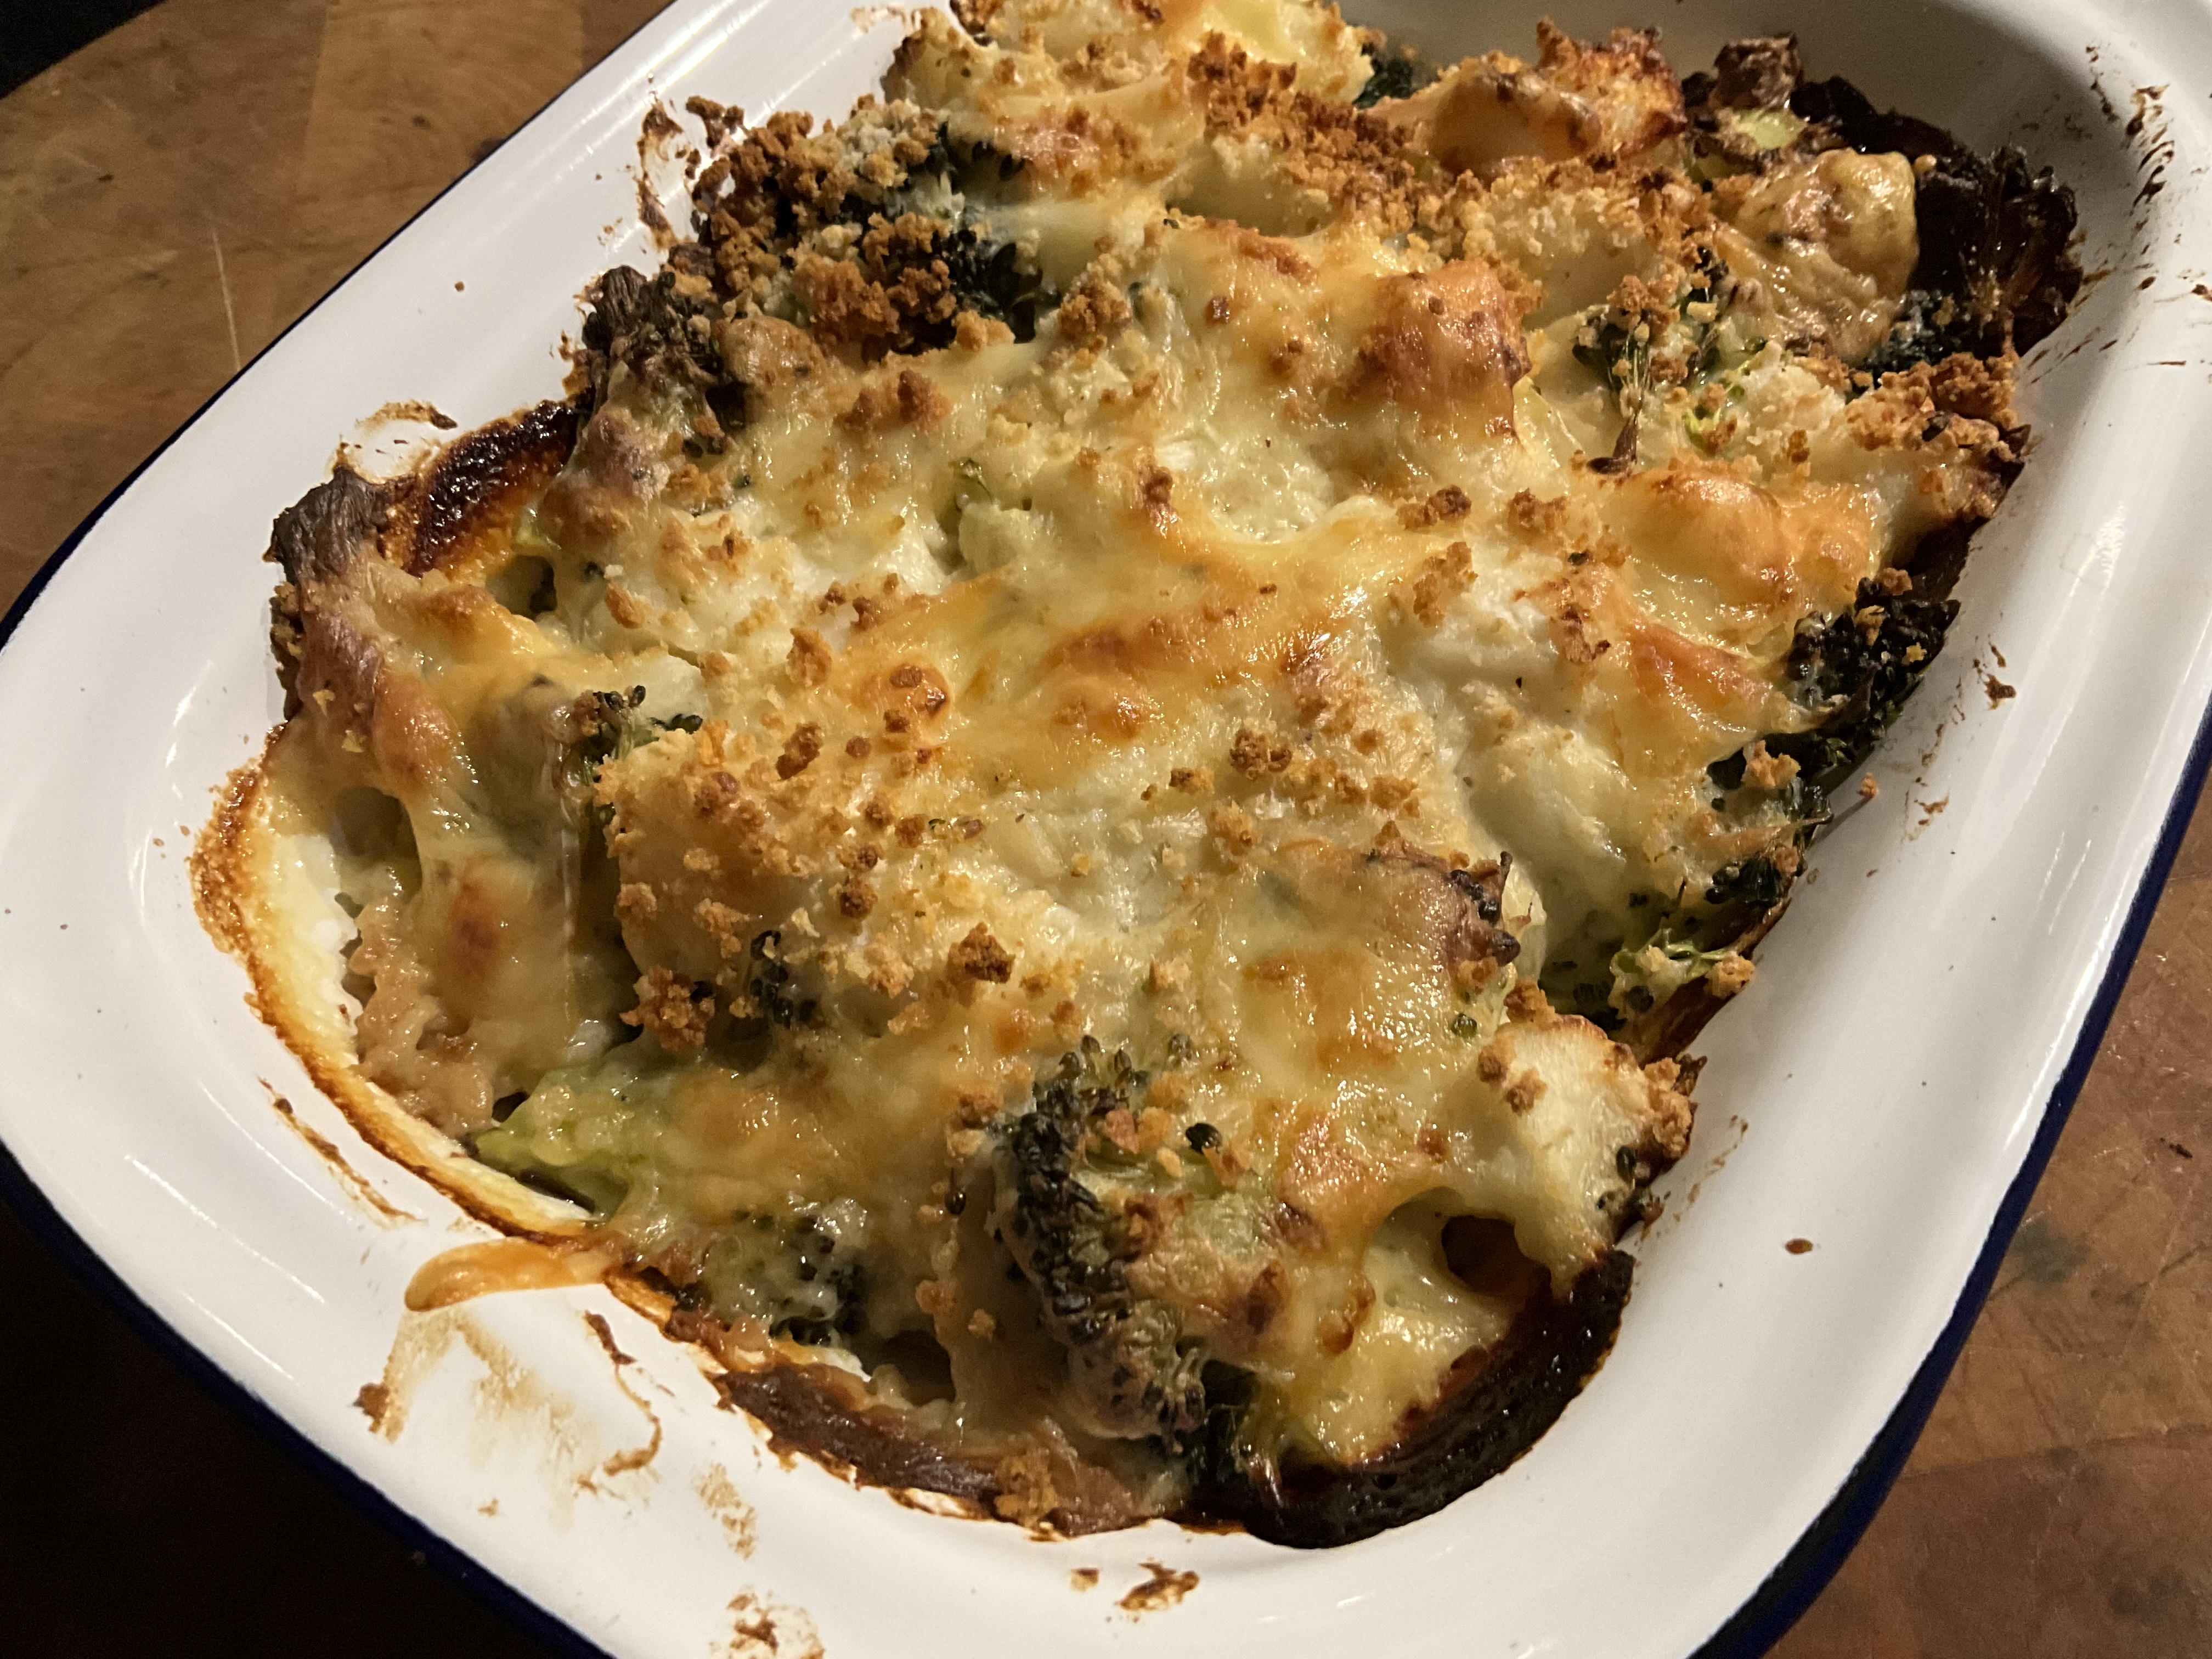
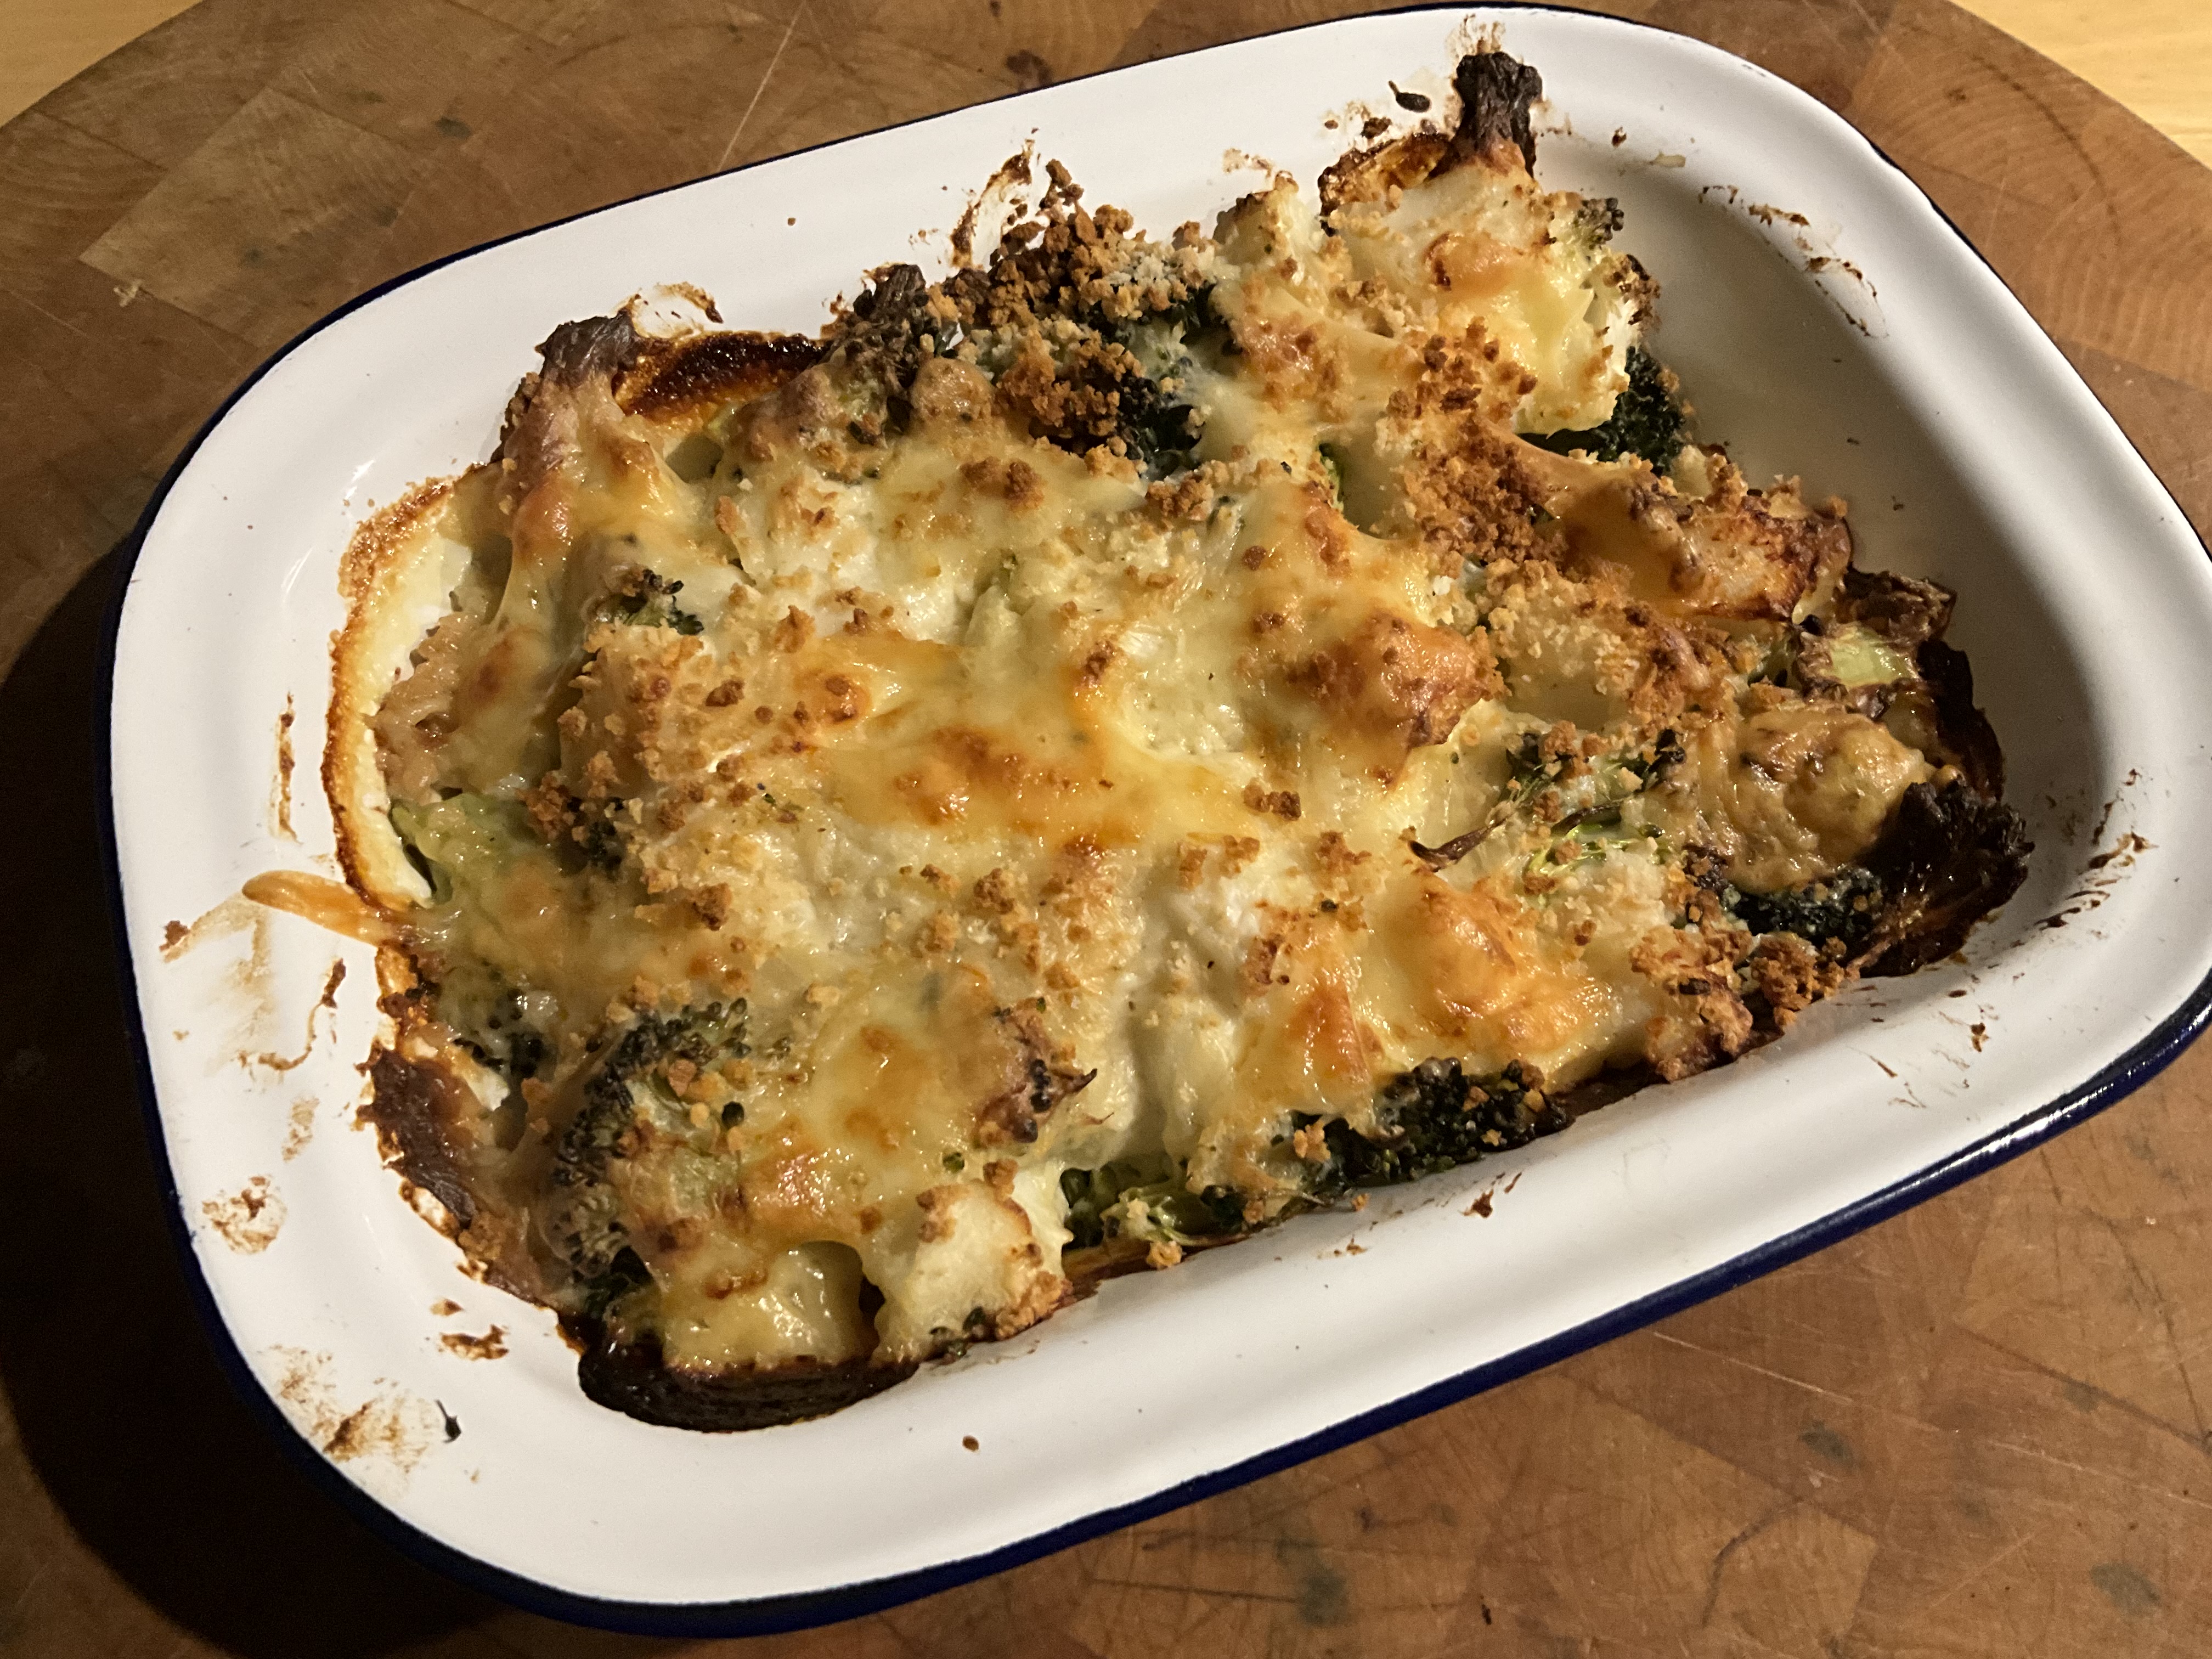
Those who say that cheese and fish don’t go together, haven’t tried shrimp scampi, a tuna melt, or even a McDonald’s filet-o-fish sandwich! Hearty and satisfying, this dish is all comfort.
As I researched this recipe, I found versions that had potatoes or pasta. I wanted a lower calorie and lower carb option, so I went with just cauliflower and broccoli. But feel free to substitute as you like. Potatoes don’t need to be pre-cooked, as long as you cut them into small cubes. Pasta needs to be cooked to the almost al dente stage—very firm—and then added to the pan.
I originally came up with this recipe when I found some tuna and salmon in my freezer, and I wanted to use them up. But this recipe works even better with any white fish, like cod or halibut.
If you use gluten-free flour and breadcrumbs (easy enough to do), this dish is gluten-free.
6 oz. cod, fresh or thawed if frozen 8 oz. mixed broccoli and cauliflower, cut into smaller pieces (you can use fresh or frozen) 1/2 small onion, finely chopped 1 tablespoon unsalted butter 1 tablespoon all-purpose flour 1/2 cup milk 2 oz. sharp cheddar cheese, grated, separated 1/4 teaspoon granulated garlic Salt and pepper 1 tablespoon breadcrumbs
Preheat the oven to 350 degrees.
Cut the fish into large chunks, removing any skin, and place it in a bowl.
Pour the broccoli and cauliflower into the bowl.
Melt the butter in a saucepan over medium heat, and add the onion, sautéing it until it’s soft but not brown. Stir in the flour and cook for a minute or two. Slowly pour in the milk, stirring constantly. Season with salt, pepper, and the granulated garlic. Add all the cheddar cheese except a tablespoon, mixing well and making sure it all melts.
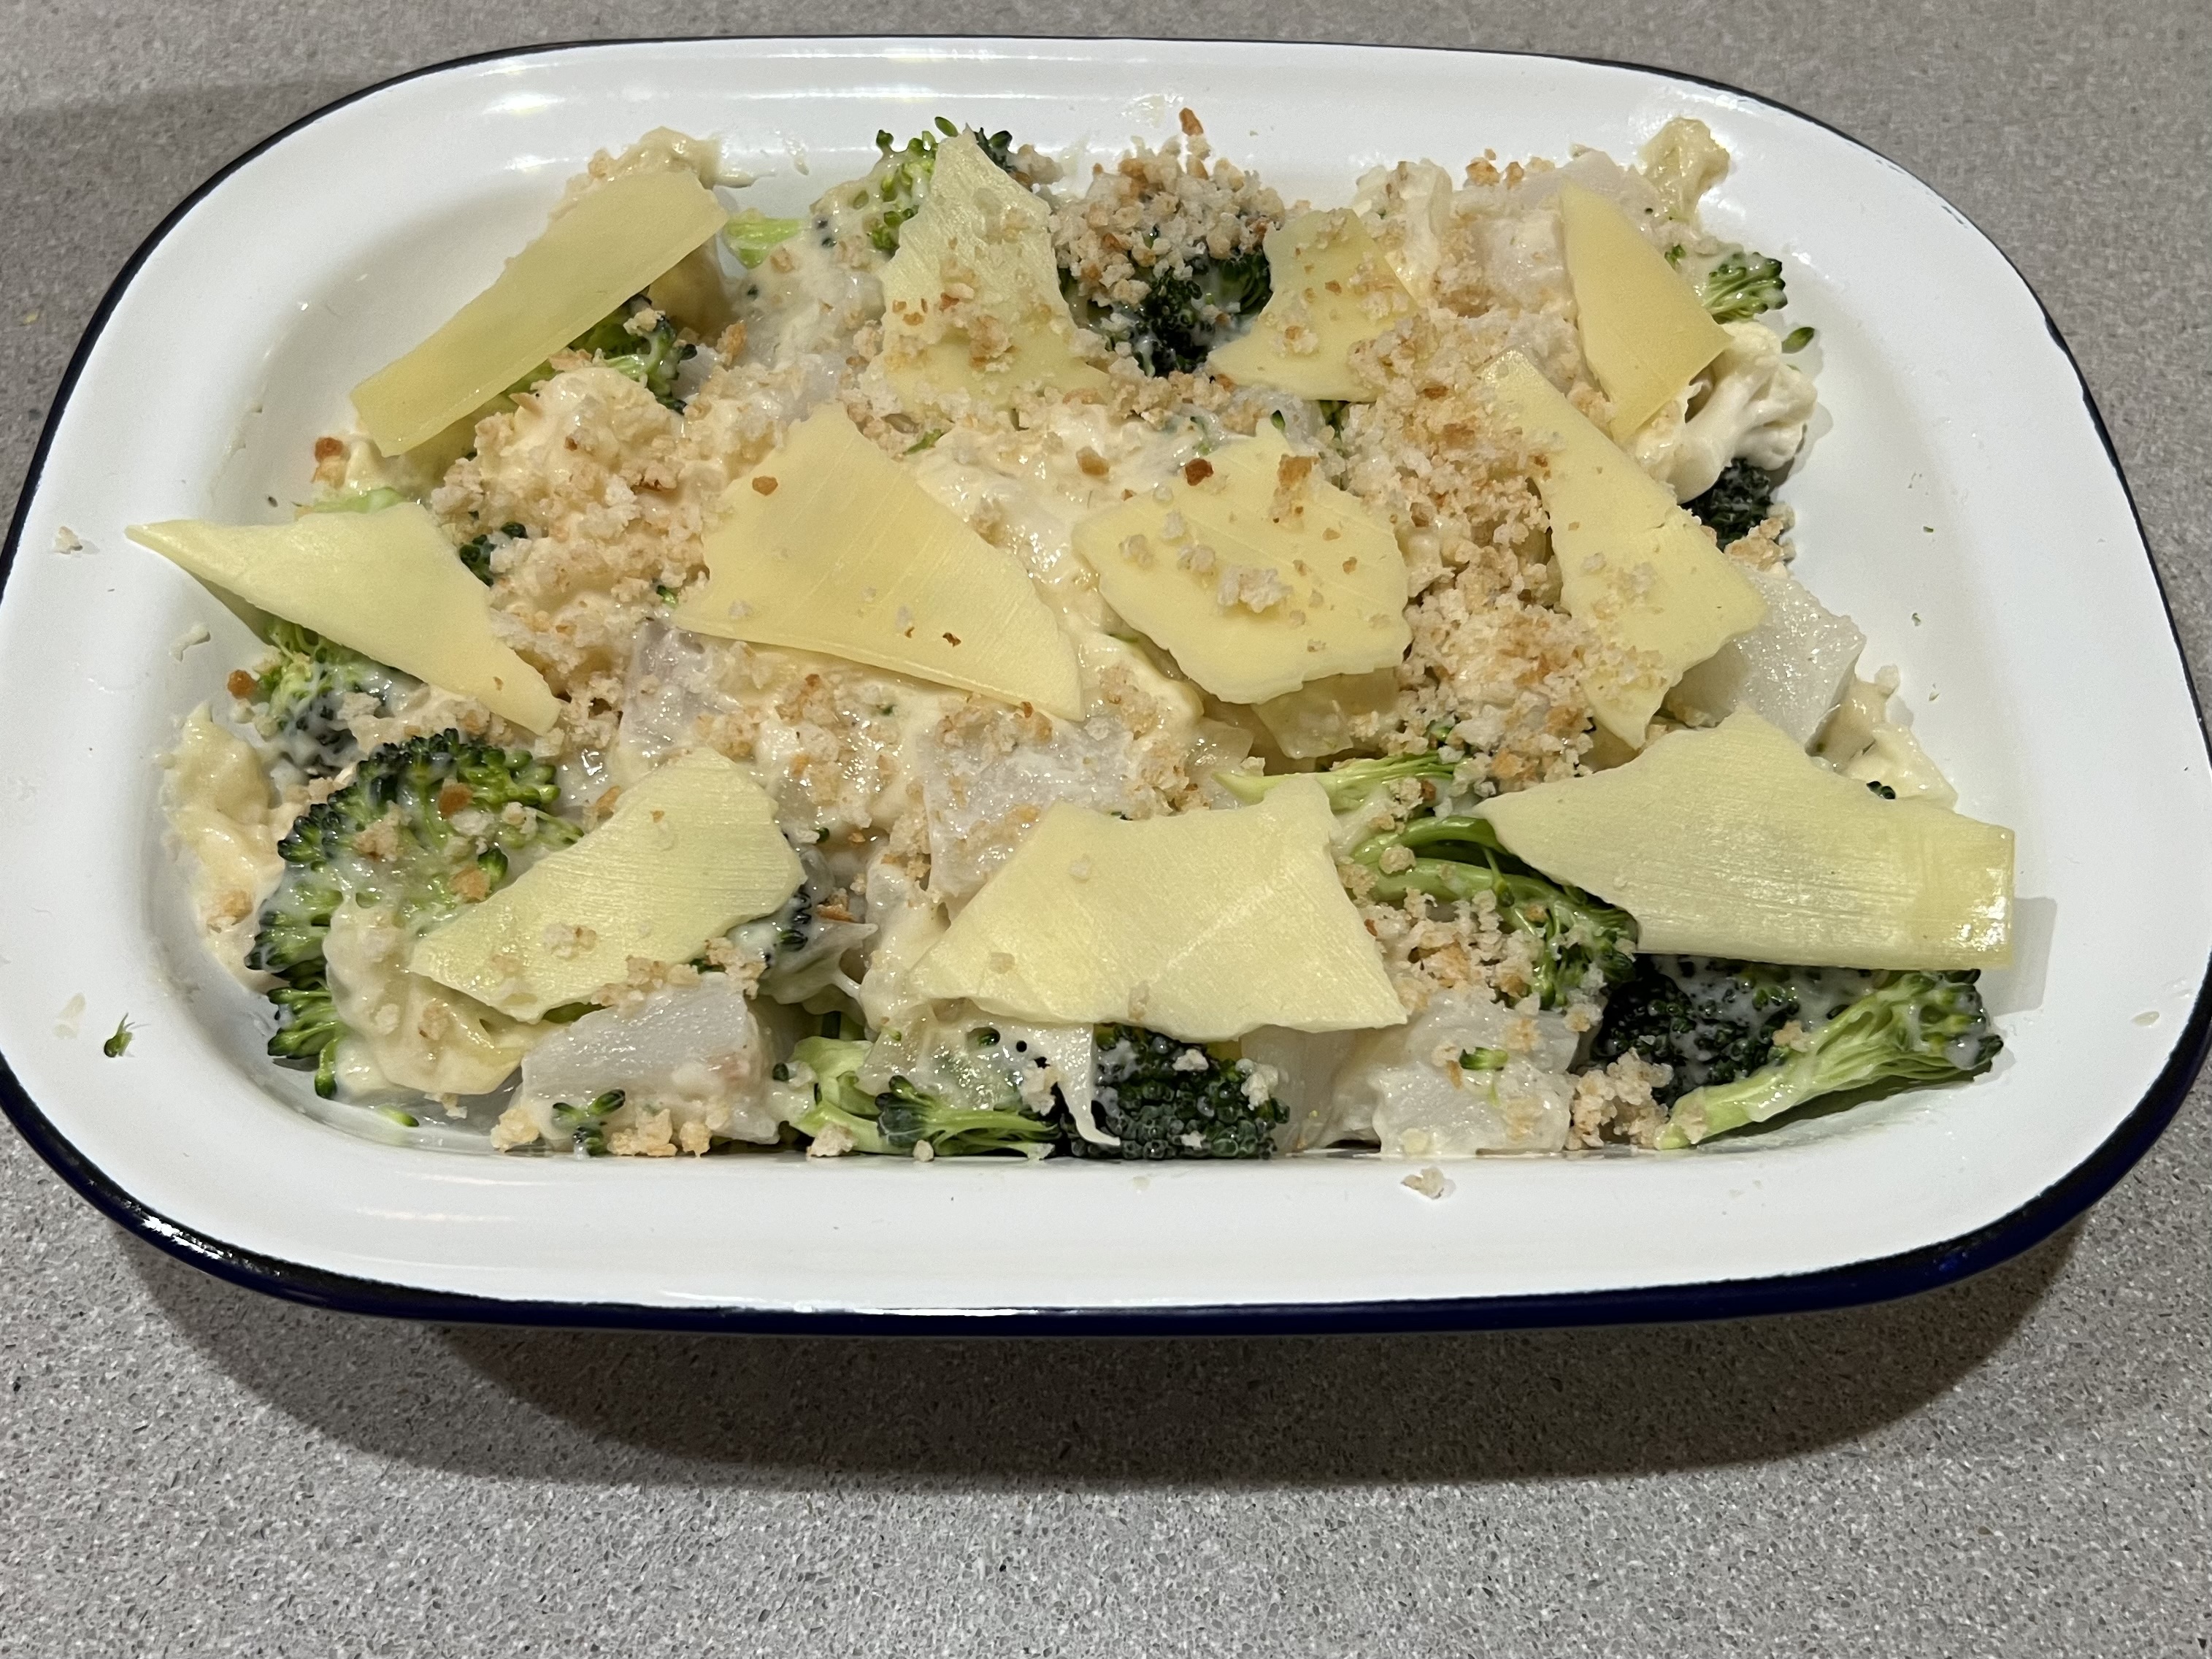
Pour the sauce into the bowl with the veggies and the fish, and mix everything gently, trying not to break the fish pieces up too much.
Pour the contents of the bowl into a baking dish just big enough to hold it all. You don’t want it spread out…you want it to have some depth so it doesn’t dry out.
Sprinkle the top with the remaining cheese and the breadcrumbs.
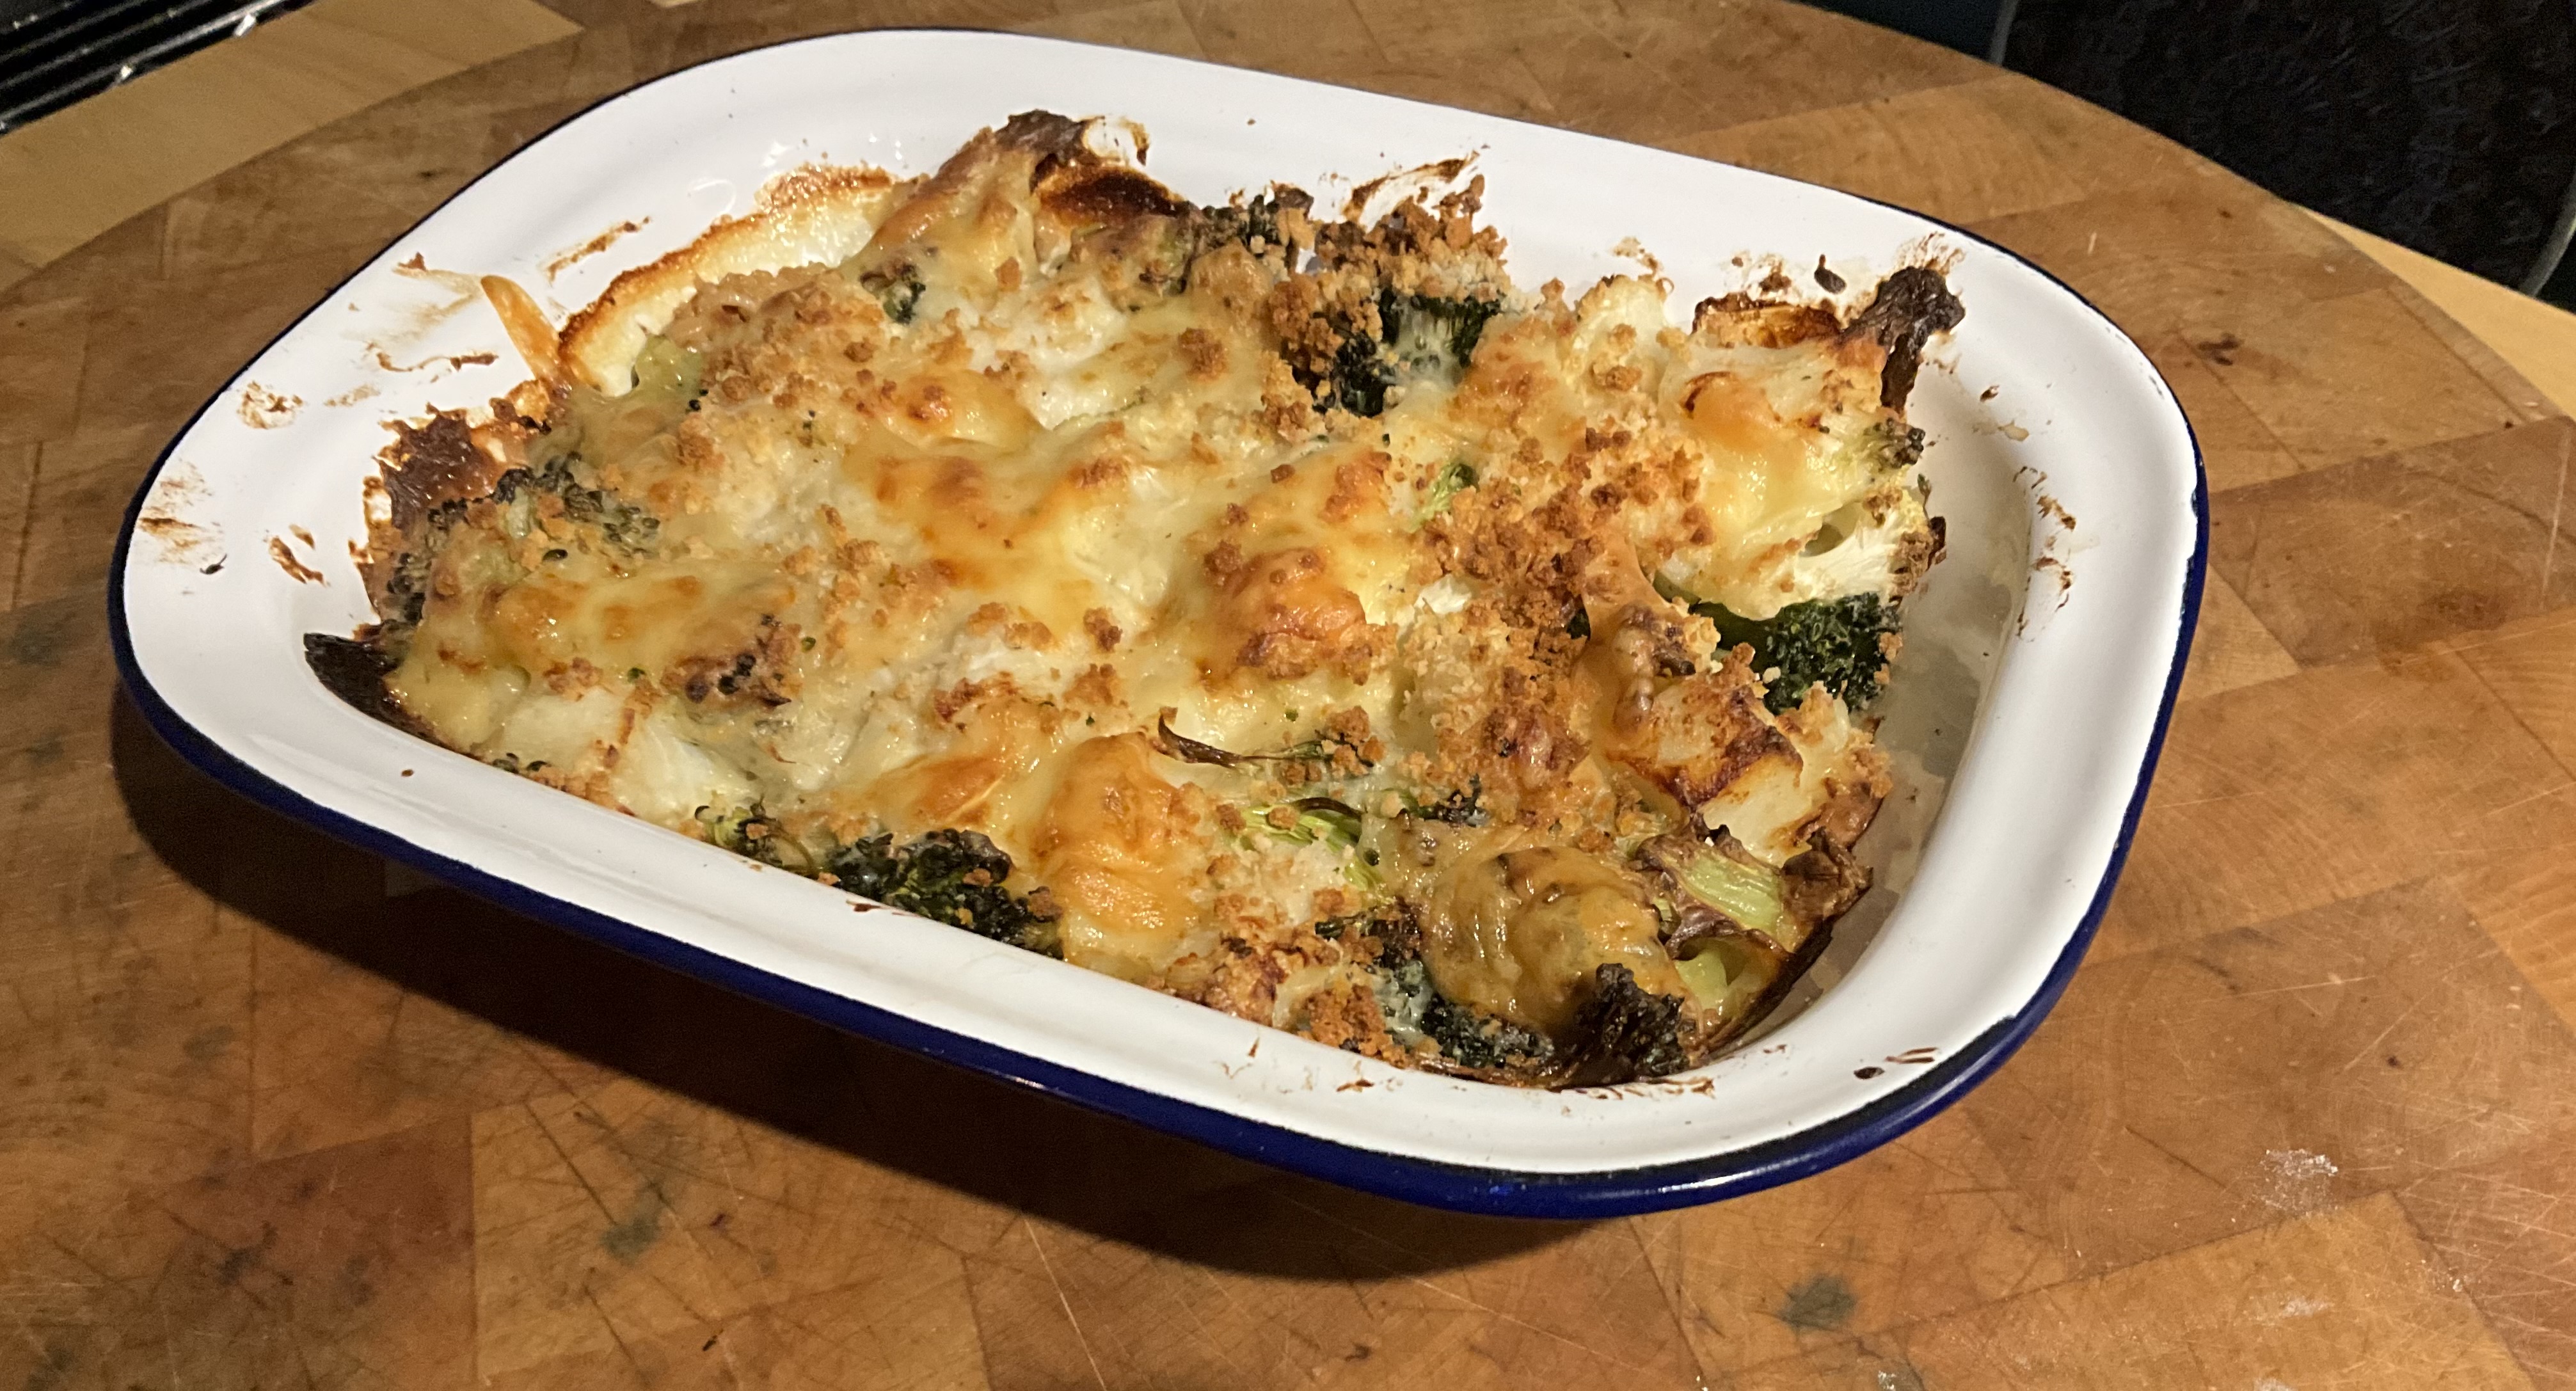
Bake for about 30 minutes, until it’s golden and bubbly.
This recipe could serve 2, but I devoured it on my own!
Homemade pasta is surprisingly easy to make, especially if you have a food processor. If you’re not crazy about spinach, just leave it out of this recipe.
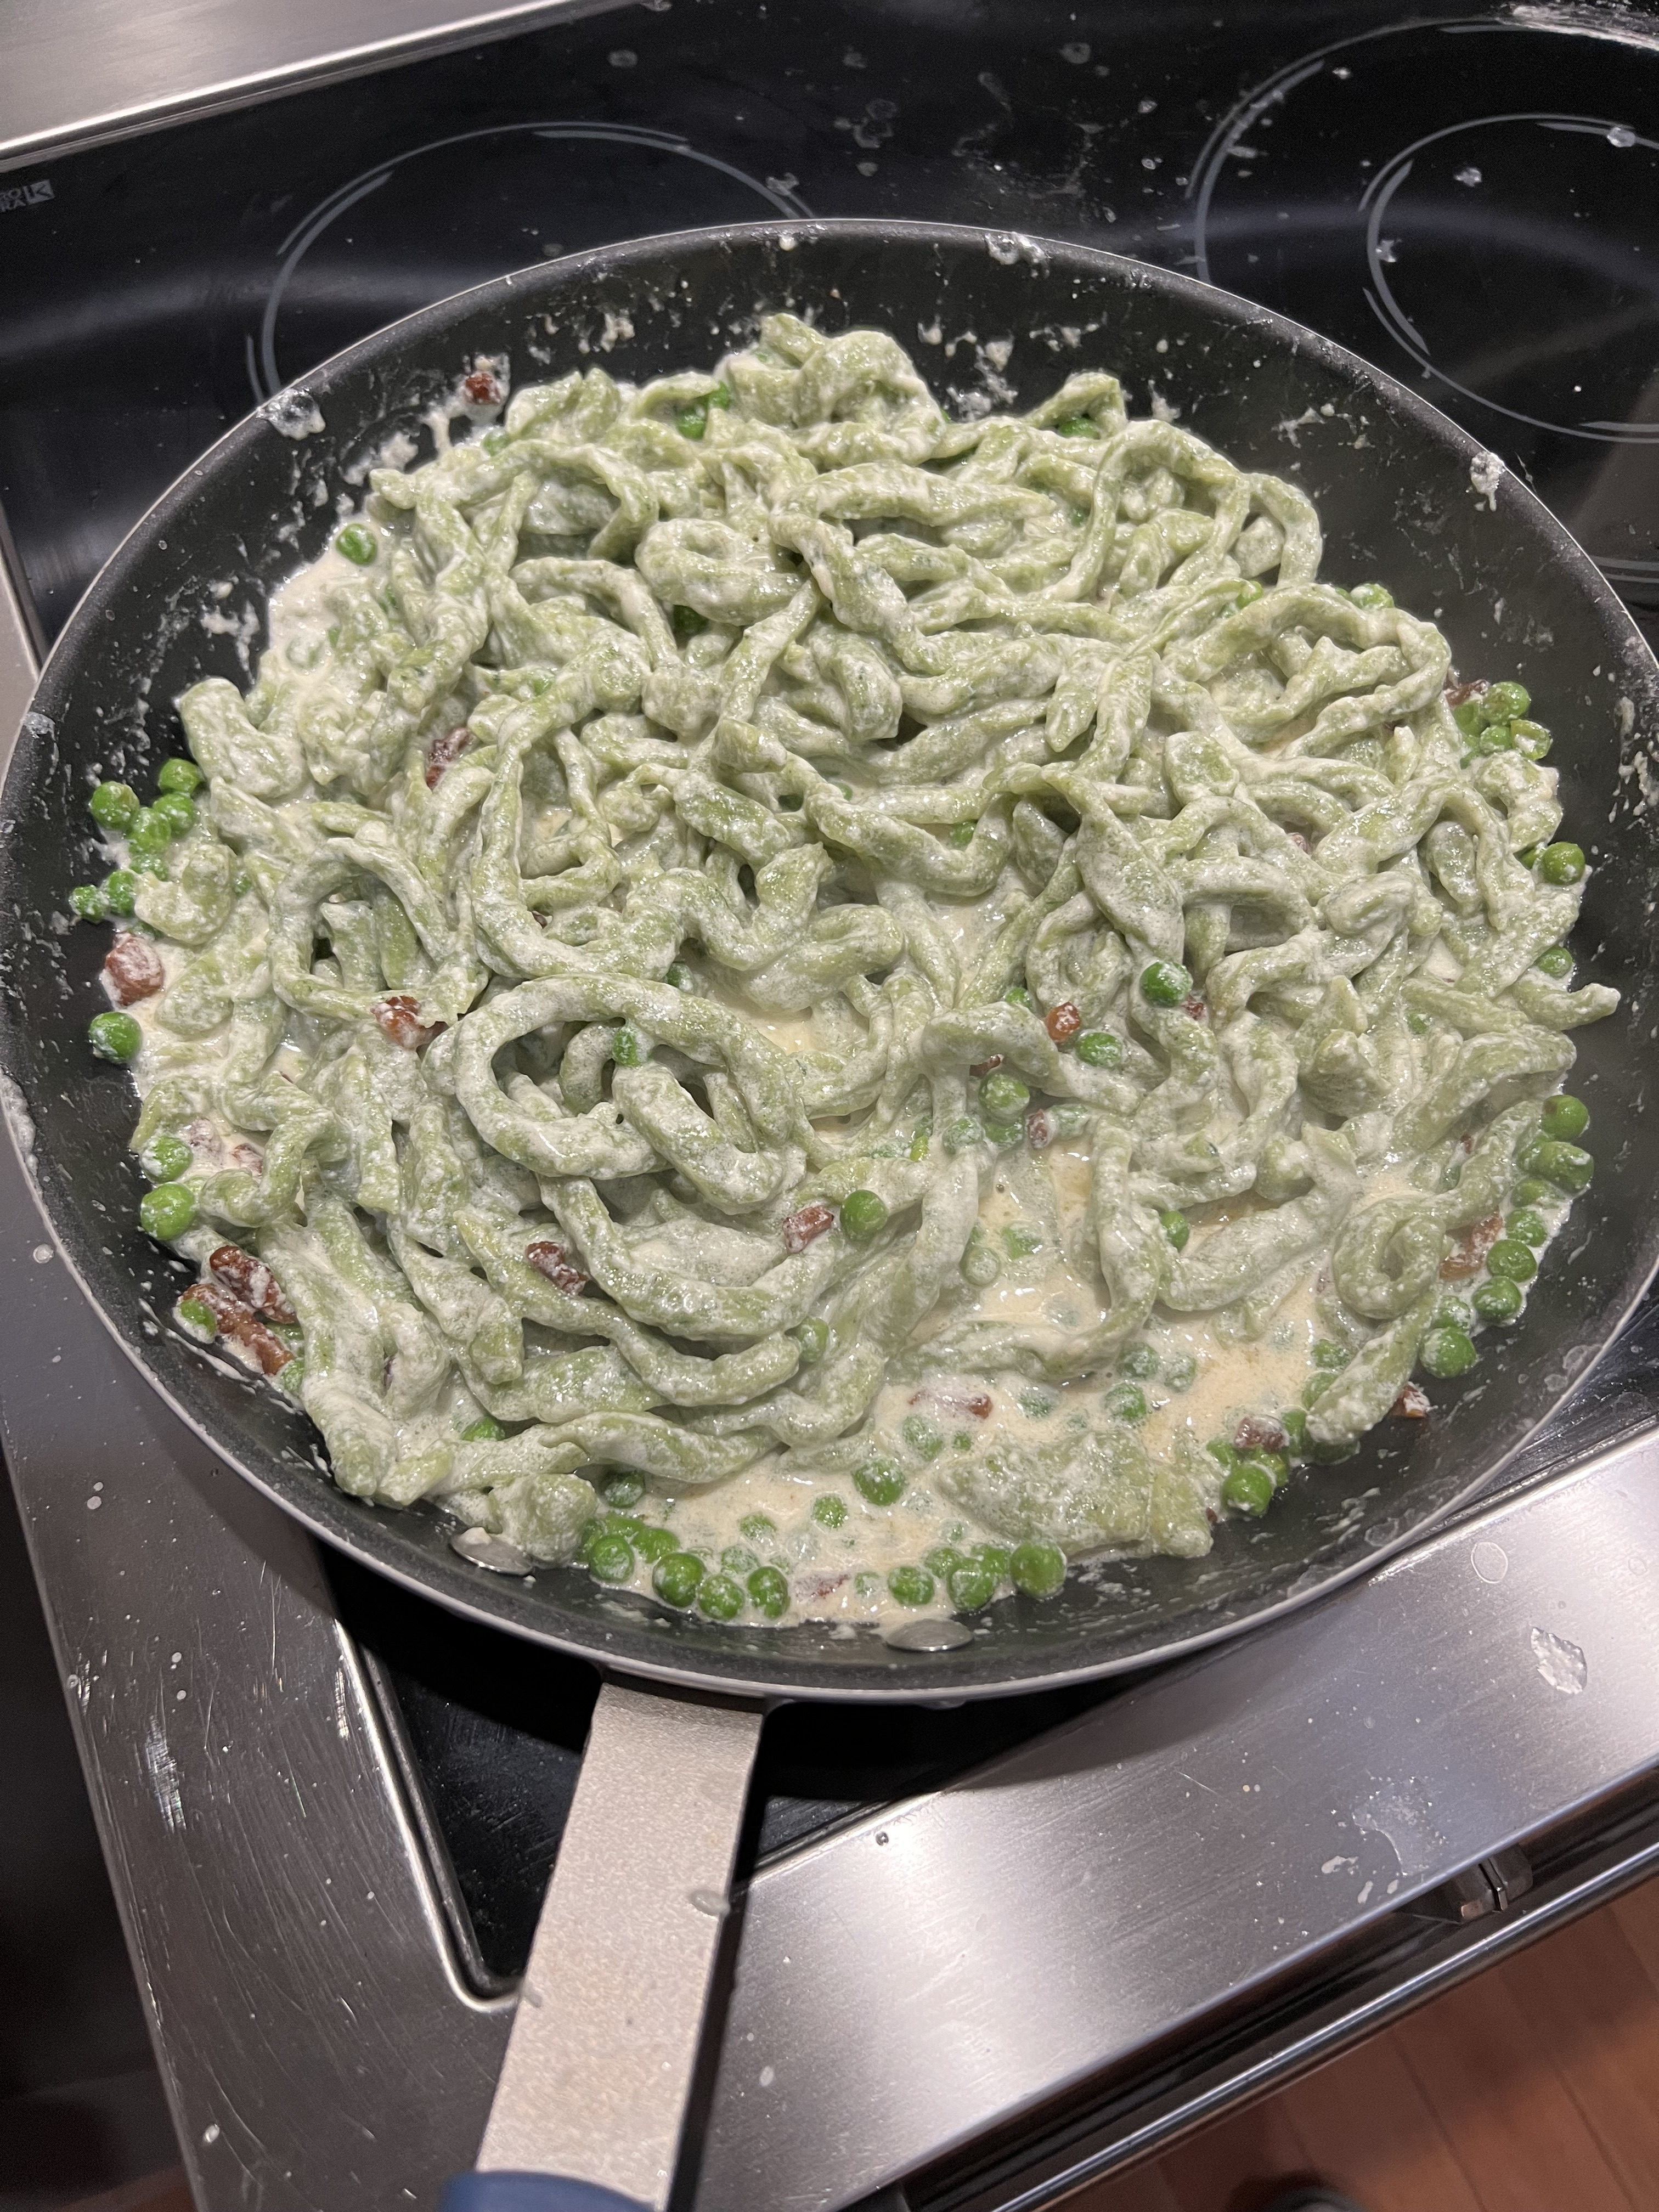
Homemade spinach pasta with Alfredo sauce, peas and guanciale.
3 oz. fresh spinach 2 large eggs 1 1/2 teaspoons extra virgin olive oil 1/2 teaspoon Kosher salt 2 cups all-purpose flour, as needed
Get a bowl and put some cold water and ice cubes in it. Set it aside.
Preheat a pan over medium heat with a little water in it. Add the spinach and cook it for no more than a minute…just until it has wilted completely and turns bright green.
Place all the spinach in the ice bath to let it cool for a few seconds. When it gets lukewarm, remove it, and squeeze out the excess moisture with a clean dish towel or cheesecloth.
In the food processor, using the regular cutting blade (not the dough blade), combine the spinach, eggs, olive oil and salt. Blend until it’s smooth.
Add the flour and blend until the dough no longer sticks to the blades. Depending on how much moisture you have, you might have to add flour…or you might need to add some cold water.
On a lightly floured surface, roll the dough into a ball, and wrap it with plastic wrap. Let it rest for 20 minutes at room temperature.
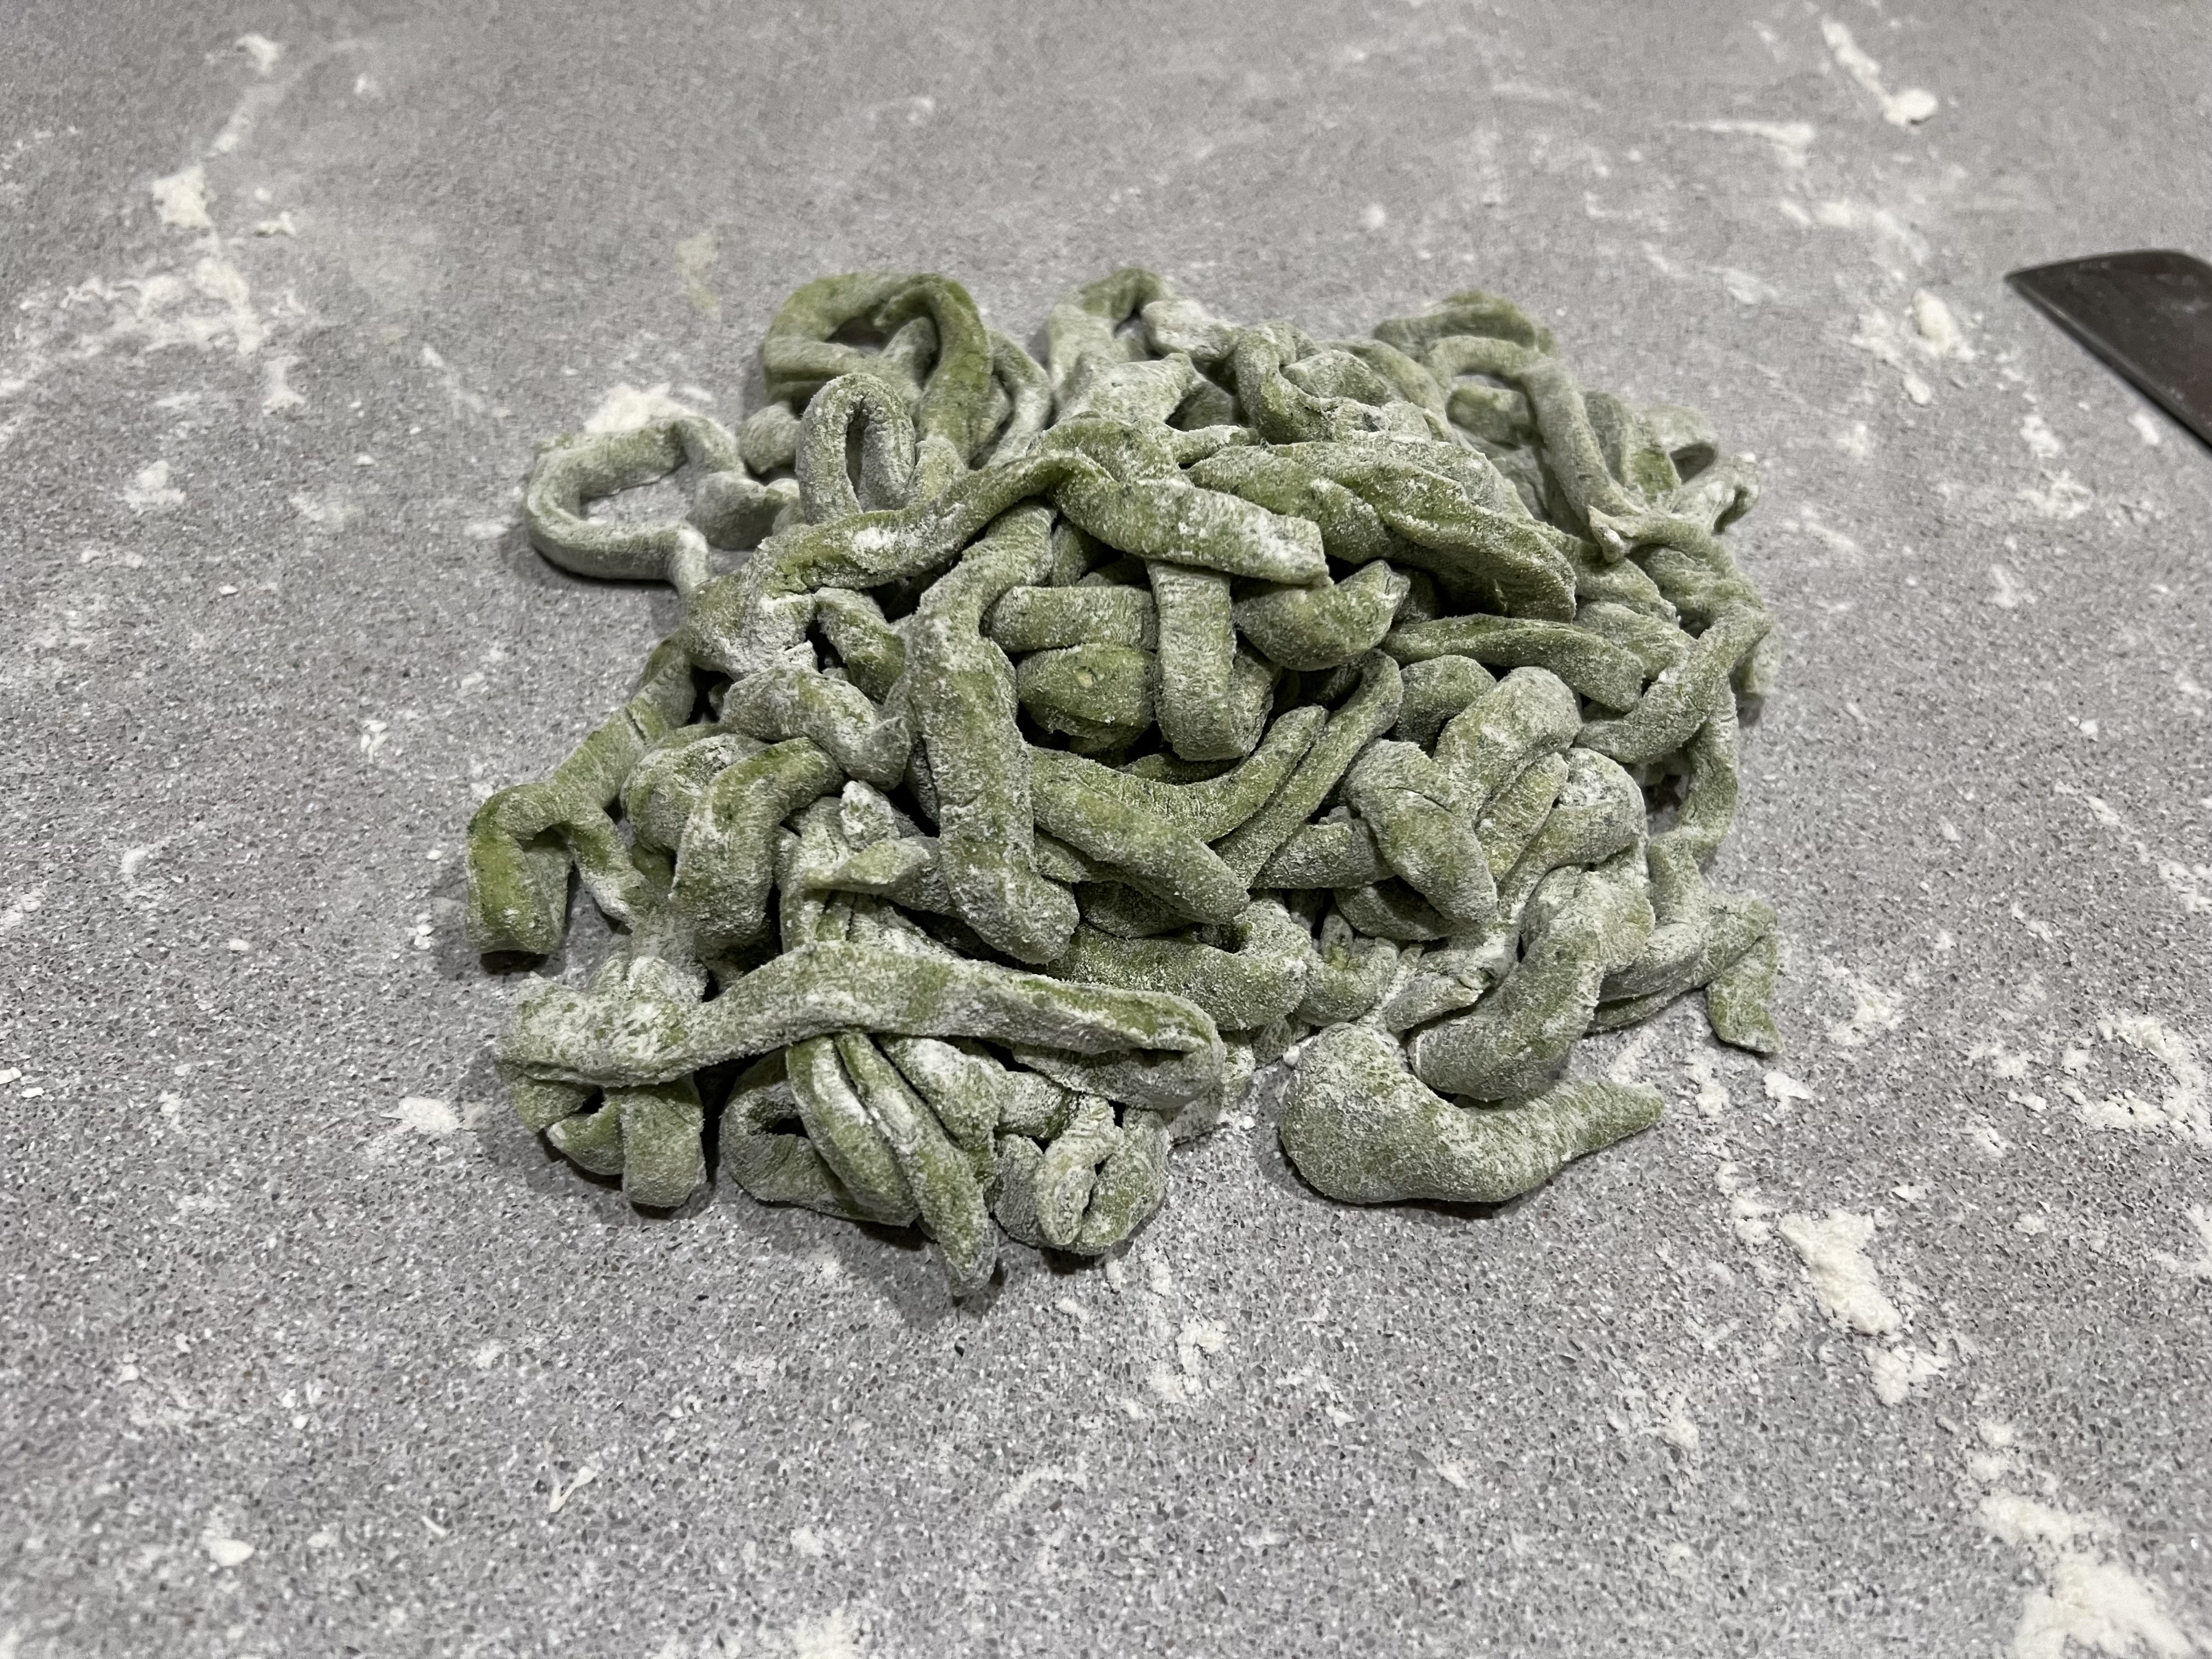
After 20 minutes, remove the dough from the plastic and, on a floured surface, cut the dough into 4 pieces.
Roll the dough out with a rolling pin into rectangles about 1/4″ in thickness if you have a pasta machine. If you’re going to be cutting it by hand, roll it as thin as you can.
If using a pasta maker, dust it with flour and run the dough rectangles through several times, starting with the widest setting, and then reducing it with each run to the desired thickness. Spinach pasta is stickier than regular pasta, so you may not get it as thin. Then change the pasta maker’s attachment to the desired noodle shape, and cut it with the pasta maker.
If you’re hand-cutting the pasta, once you’ve rolled it as thin as you like, dust it with flour and roll it into a log shape. Then cut it into pieces as wide as you like. Unroll each cut piece and place it on a floured surface so it doesn’t stick together.
Bring a large pot of salted water to a boil. Lower the pasta into the water, using a wooden spoon to keep the noodles moving so they don’t stick together. Cook until the pasta is firm but soft, 3 to 6 minutes depending on the thickness of the noodle.
Use tongs to remove the pasta from the pot. If you pour it into a strainer, the pasta will stick together.
In this case, I put the cooked pasta in a large pan with alfredo sauce , peas, and crispy bits of guanciale. I tossed it all together until the sauce was nice and creamy.
If you want to make pasta without the spinach, start with 1 3/4 cups flour and then add as needed.
A classic French beef dish, Steak au Poivre is the perfect example of delicious simplicity. If you love black pepper, you can make this wonderful dish with just a few ingredients. My personal twist was to add porcini mushrooms to the mix because…well…why not?
The classic Steak au Poivre uses a tender, lean cut of beef like filet. But I had a couple of grass-fed sirloins in the fridge, and they worked out just fine.
2 sirloin steaks, about 6 oz. each Kosher salt 2 tablespoons whole black peppercorns 2 tablespoons butter, divided 1 teaspoon olive oil 1/3 cup Cognac, plus 1 teaspoon 1 cup heavy cream dried porcini mushrooms (optional)
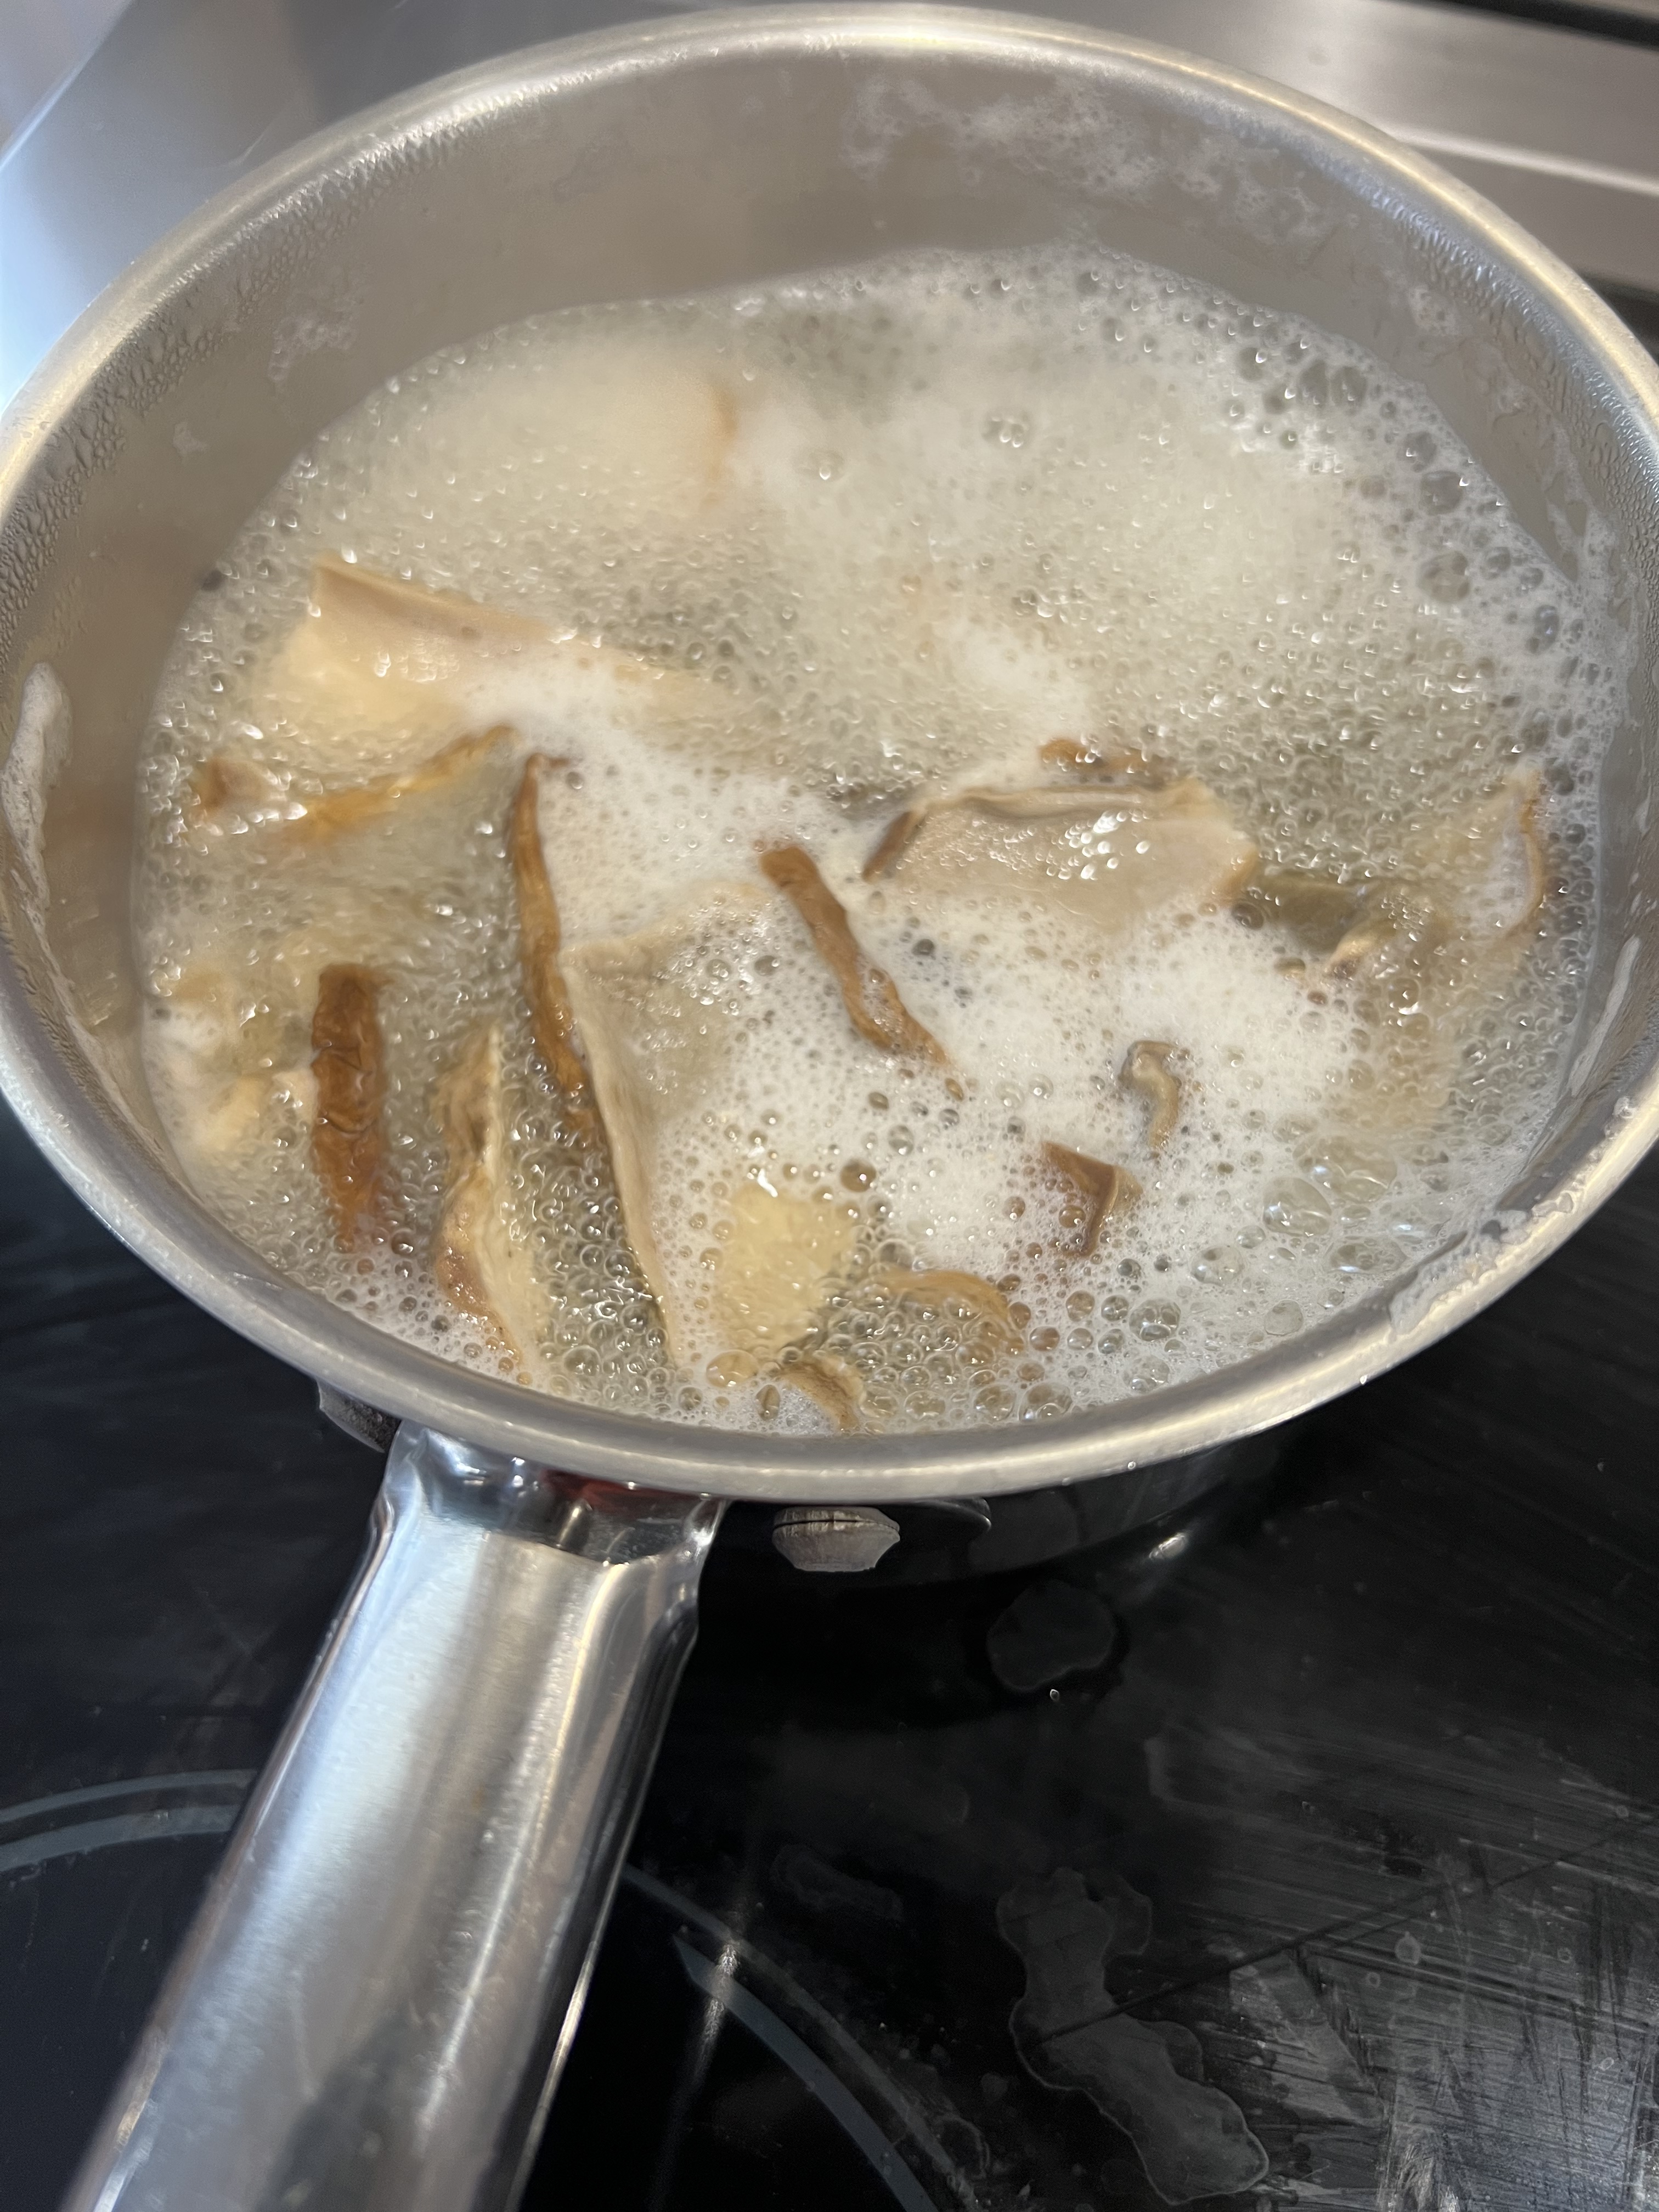
If you’re using the porcinis, place them in a sauce pan, and add water to cover them. Bring the water to a boil, set the pan aside, and let the porcinis rehydrate. Once they’ve rehydrated, remove them from the pan (save the liquid) and chop them up finely. Set them aside.
Rehydrating the porcinis.
Remove the steaks from the fridge at least 30 minutes before cooking, so they are at room temperature. Season them on all sides with the salt.
Coarsely crush the peppercorns. (I have a pepper mill that makes coarsely crushed pepper, so I used that.) Spread the peppercorns evenly on a plate, and press the sirloins, on both sides, into the pepper so that it coats the surface of the meat. Set them aside.
In a medium skillet over medium heat, melt 1 tablespoon of the butter and the olive oil. As soon as the butter and oil start to smoke, place the steaks in the pan. Cook them for about 4 minutes on each side. Once they’re done, remove the steaks, place them on a plate, and cover them with foil to keep them warm.
Pour off the excess fat from the pan, but don’t wipe the pan clean!
Back to the porcinis: in a separate skillet, add 1 tablespoon of butter and the chopped porcinis, sautéing them for a few minutes over medium heat. Slowly pour in the mushroom liquid from the sauce pan, making sure any sediment at the bottom gets left behind. Cook this liquid down with the mushrooms until it has reduced almost completely.
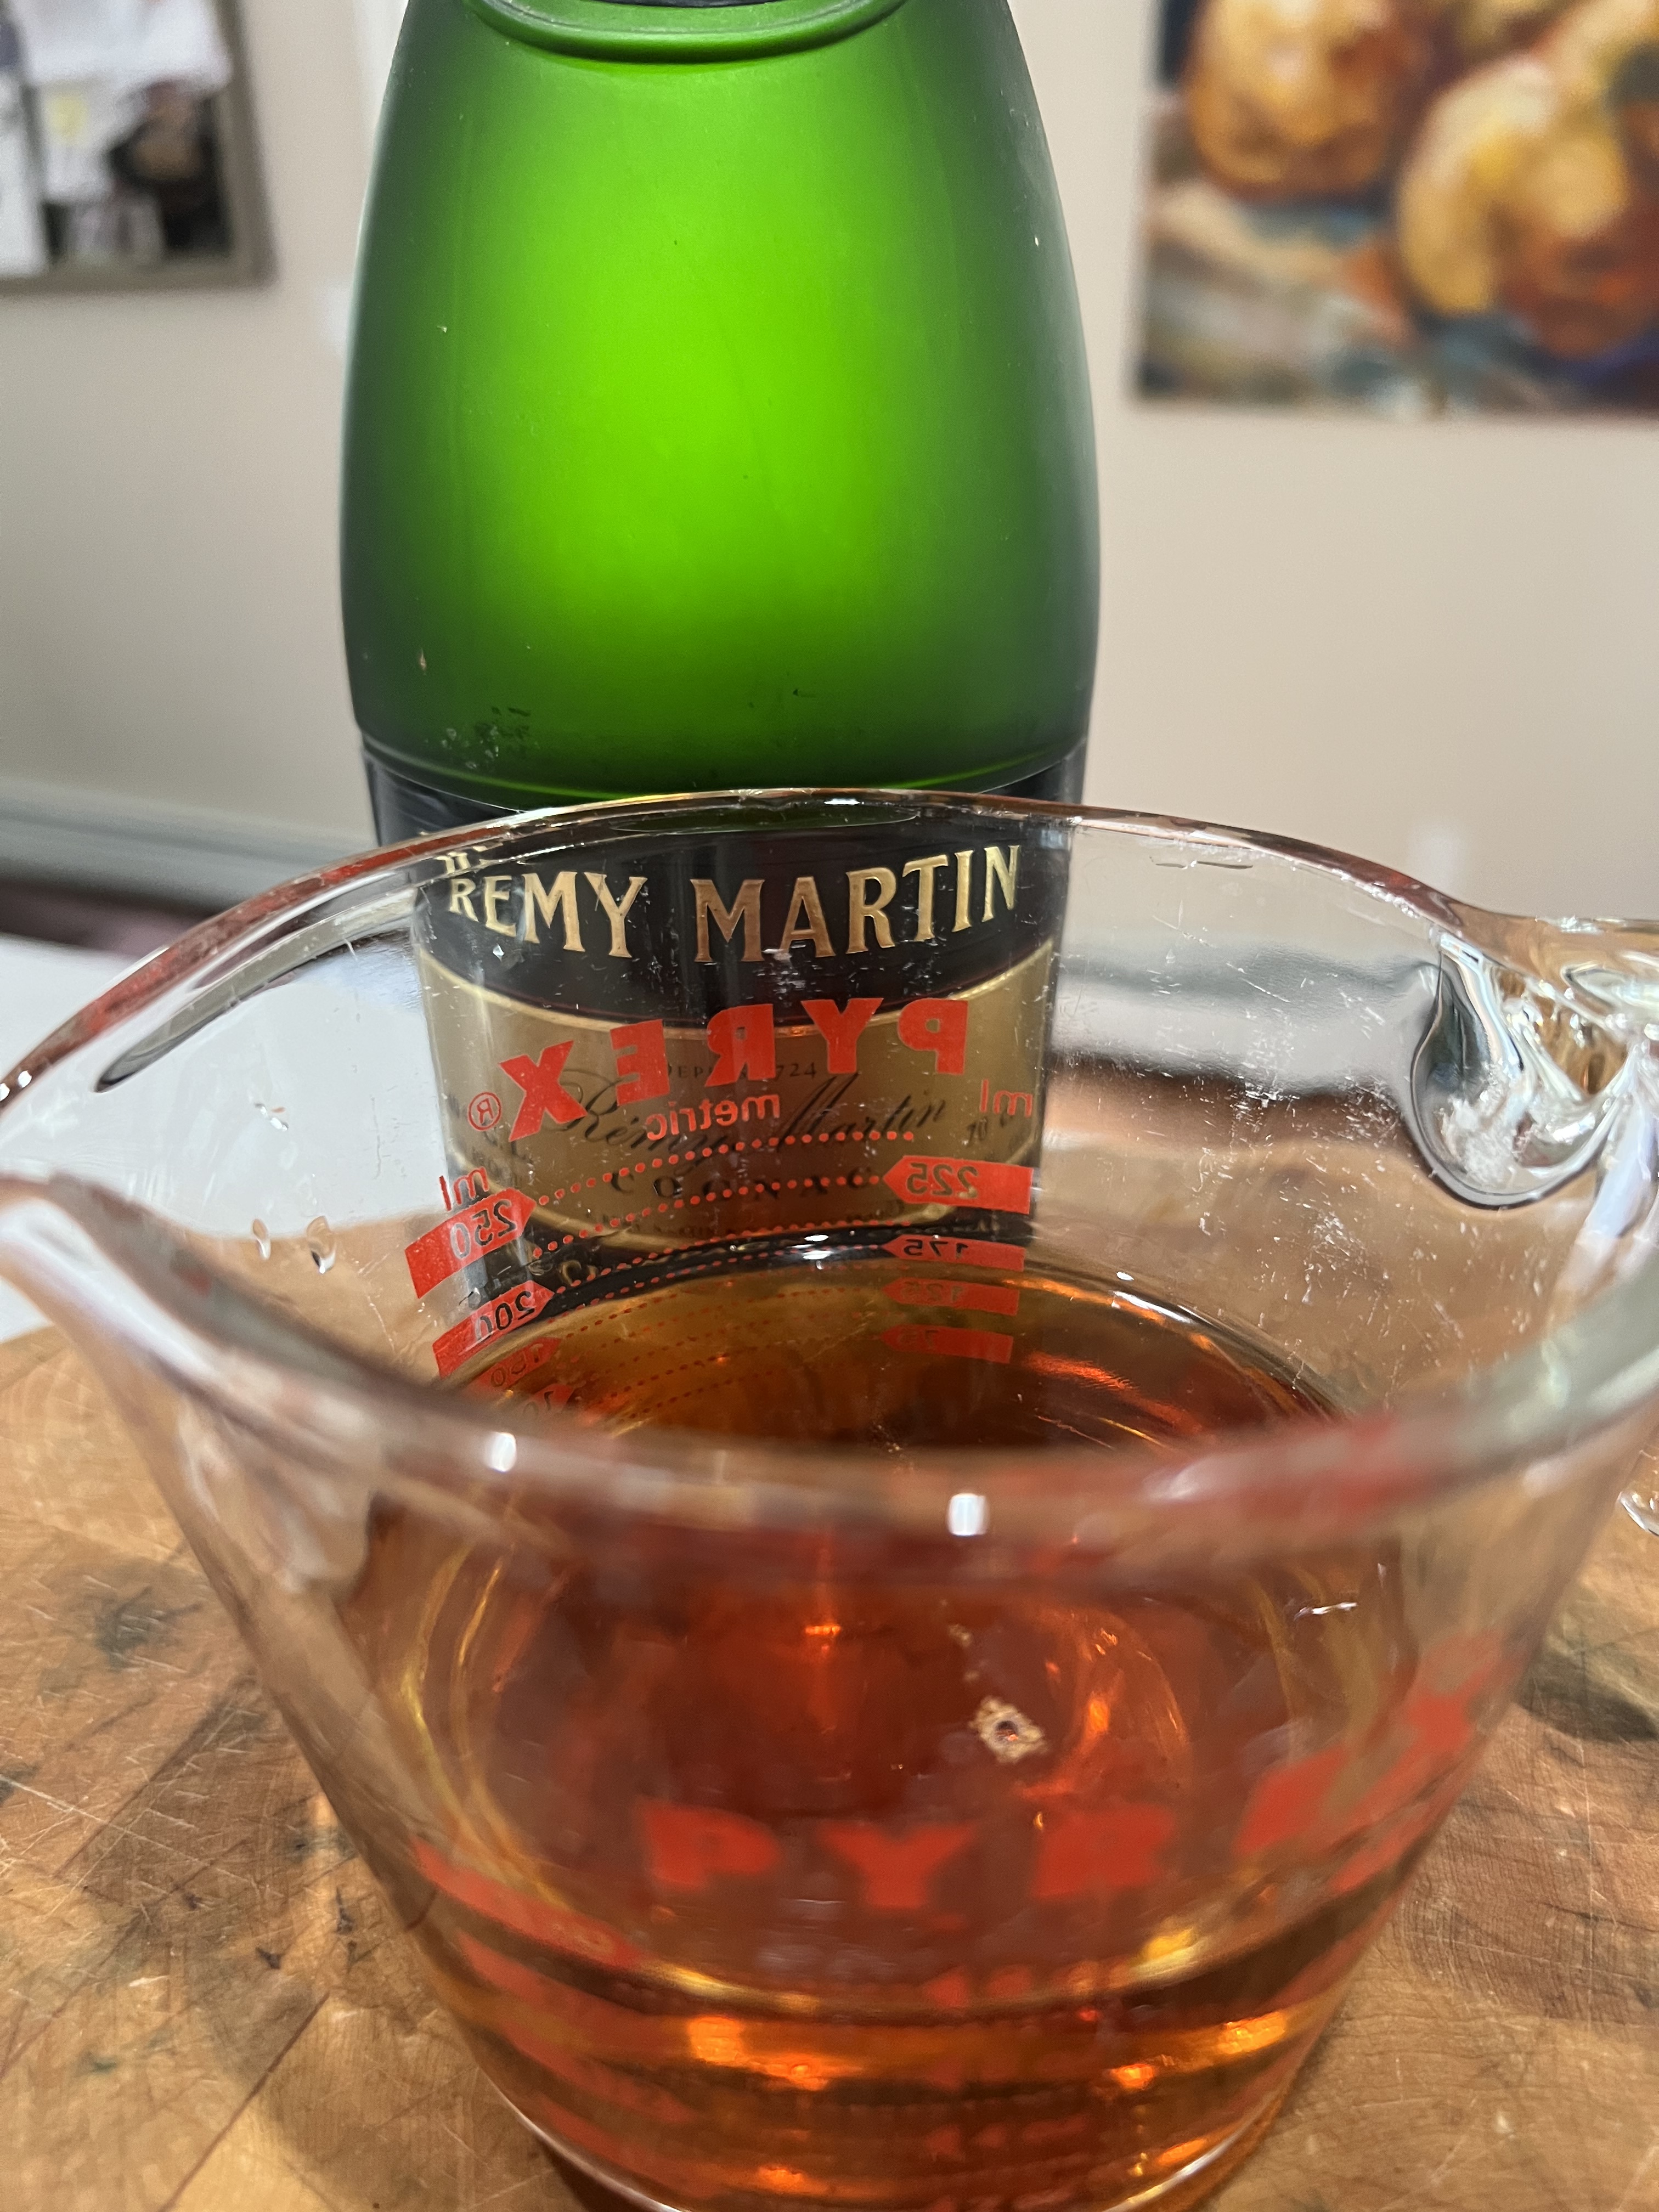
Back to the steak pan: off the heat, add 1/3 cup of Cognac to the pan and carefully ignite the alcohol with a long match or lighter.
Gently shake the pan until the flames die. Return the pan to the medium heat and add the cream. Bring the mixture to a boil and whisk it until the sauce coats the back of a spoon, about 5 minutes or so. Add the teaspoon of Cognac. (If you’re using the mushrooms, add them to the sauce at this point, stirring them in.)
Add the steaks back to the pan, spooning the sauce over the meat.























 Live the Live ™