Chicken thighs are the best: their fat content makes them perfect for the grill because they don’t dry out like chicken breasts do. And I always leave the skin on for extra crispy flavor. I bought a package of chicken thighs the other day and decided to go Asian with my flavors, baking them in the oven so that they cook evenly, and then finishing them off on the grill to get that delicious smokey flavor and char.
I marinated the chicken thighs in the sauce for several hours before cooking. If you have the opportunity to marinate them overnight in the fridge, that’s even better. Just remember that if you want to use the marinade as a dipping sauce later on, divide it in half from the very beginning. Use half to marinate the chicken, and save the other half for later. If any of the marinade touches raw chicken, you can’t use it as a dipping sauce. (Salmonella!) So keep them separated.
3/4 cup ketchup 1/2 cup soy sauce 1/2 cup hoisin sauce 1/2 cup maple syrup 1/4 cup Chinese chili garlic sauce 1/4 cup brown sugar 1 tablespoon rice vinegar 2 garlic cloves, minced
Combine all the ingredients in a bowl, mixing well. Use half of it to marinate the chicken, and save the other half for dipping sauce or brushing on to the chicken later.
The Bell & Evans chicken thighs that I bought came in a package that works perfectly for marinating. One less thing to clean up!
If you’re cooking the same day, let the chicken marinate at room temperature for three hours. If you’re marinating overnight in the fridge, let the chicken come to room temperature before cooking.
Preheat the oven to 325°.
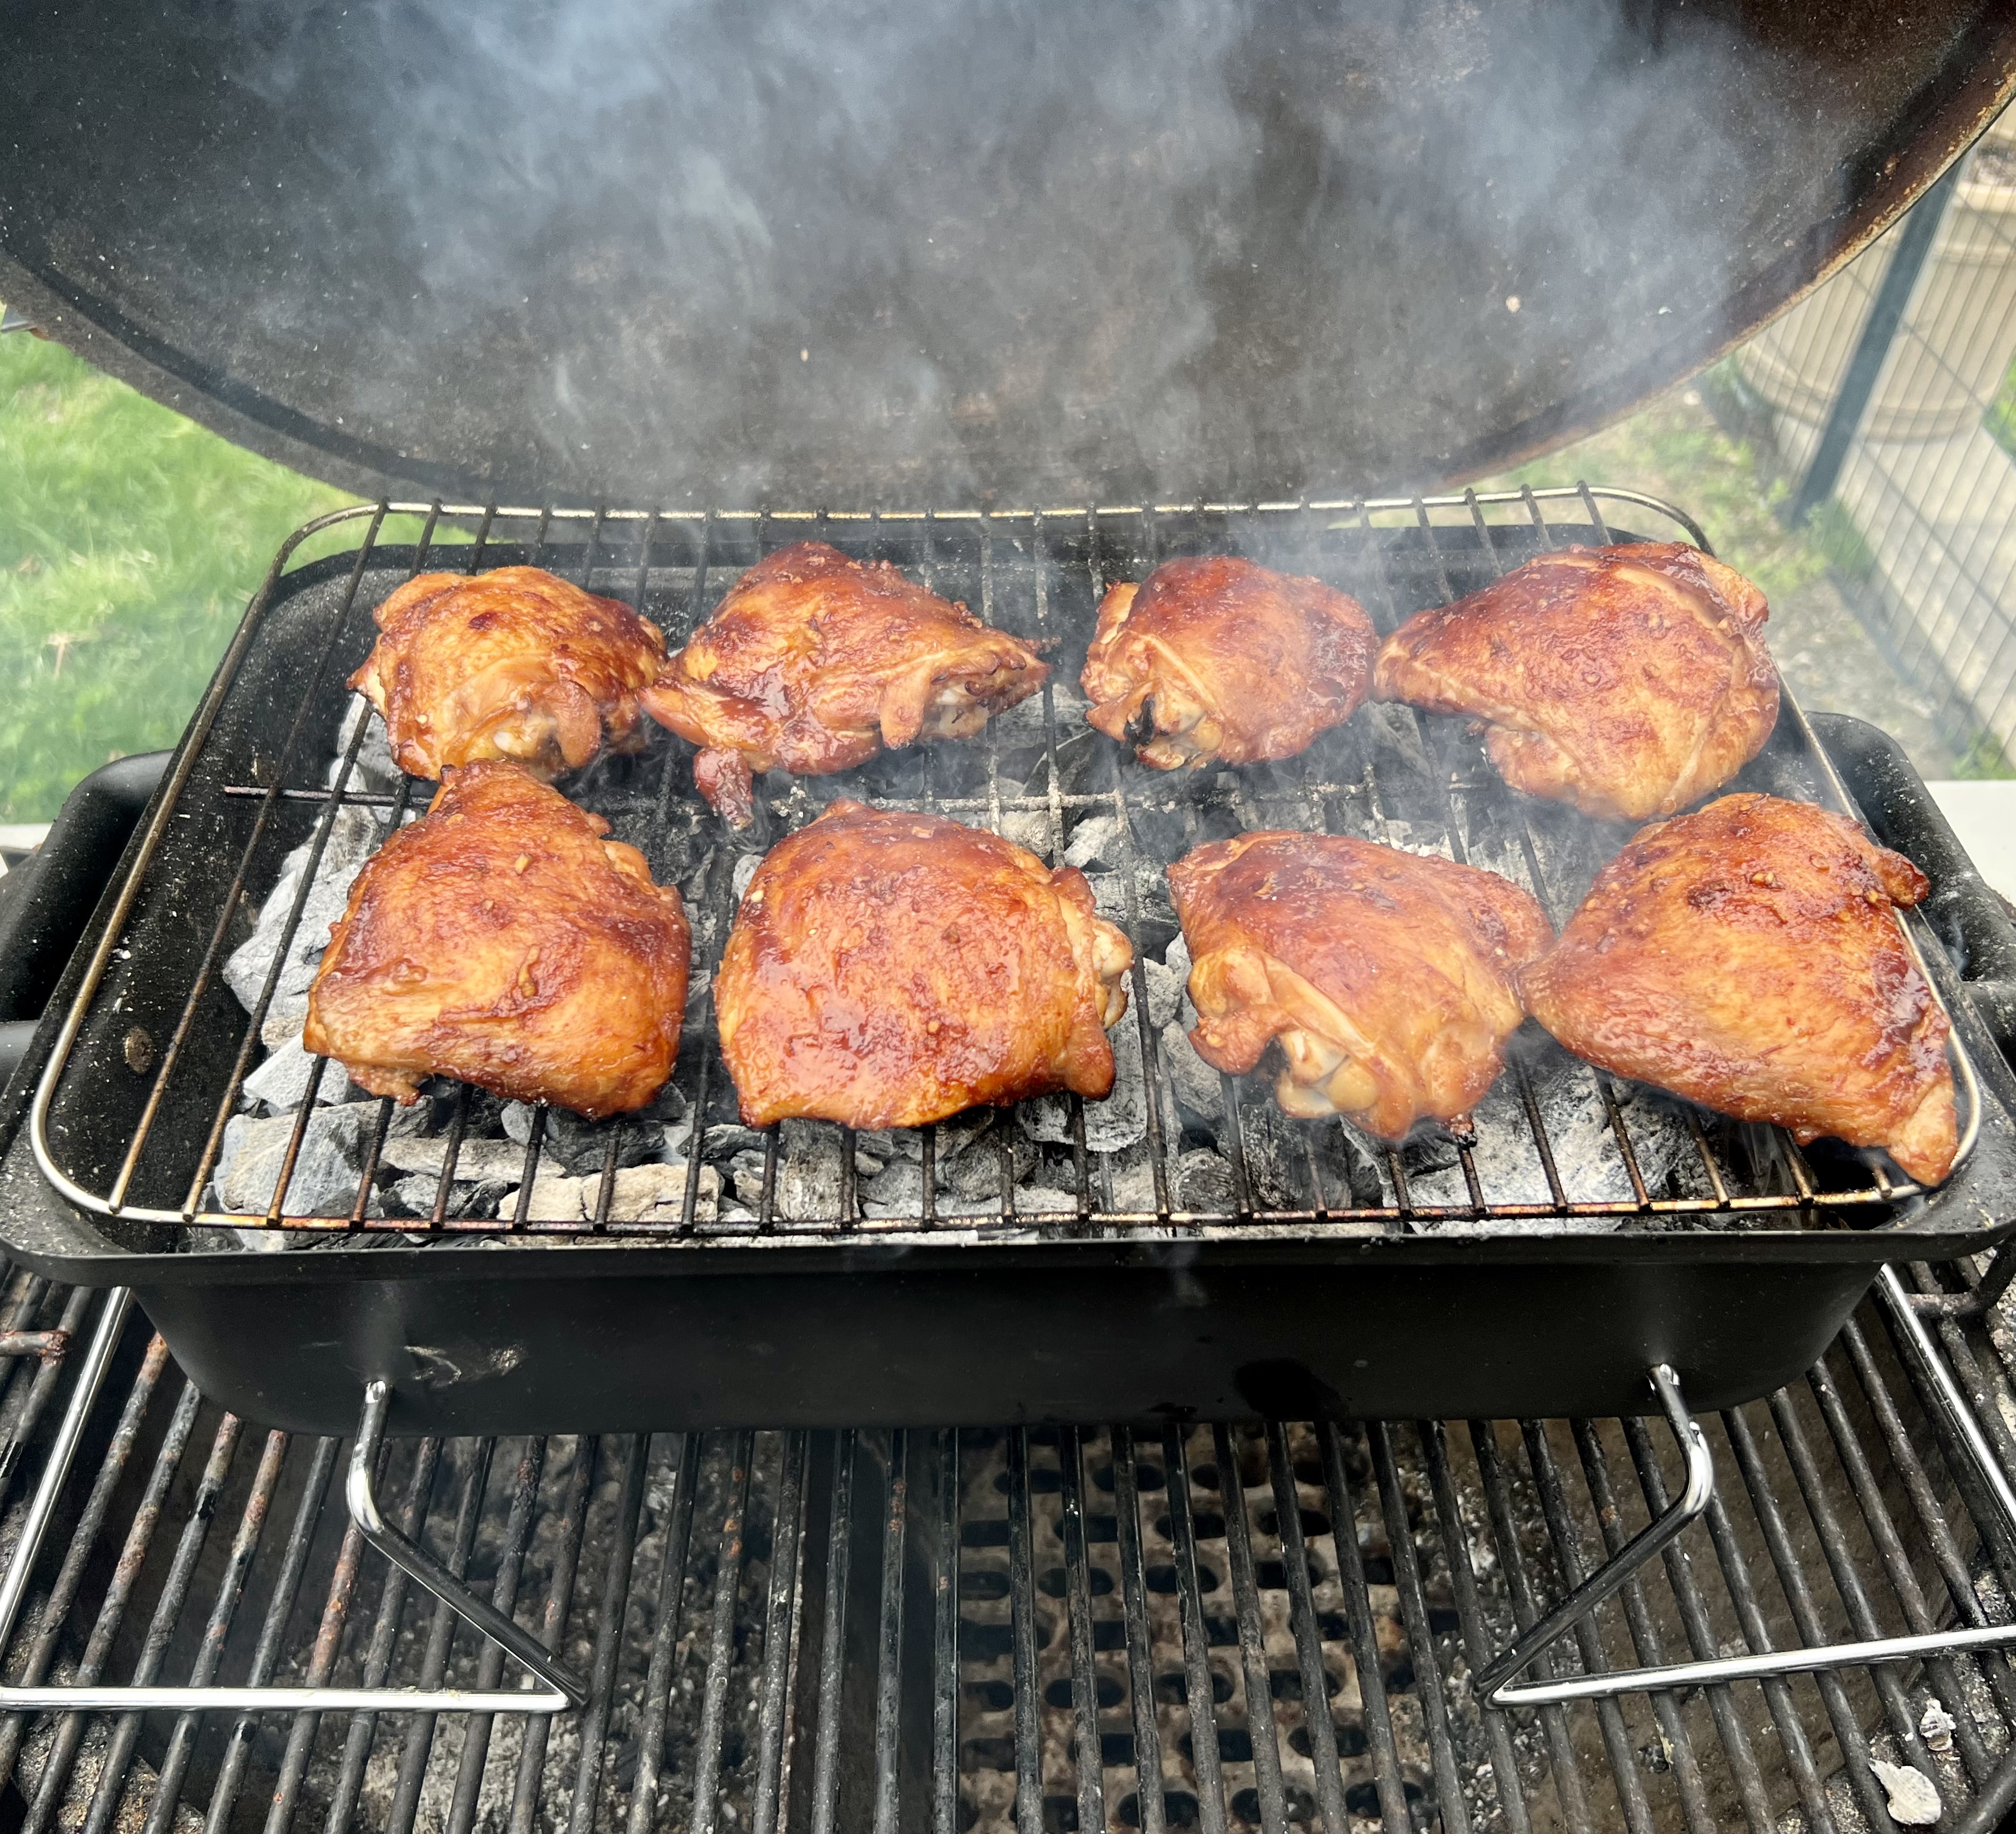
Place the chicken thighs on a sheet pan and bake until they are cooked through.…but not overcooked. If you’re not using the grill, place them under the broiler and watch them carefully, as the sugars in the marinade could burn. Give them some nice char.
If you’re using the grill, light a fire and spread the coals so that you have a medium-hot flame. Grill the chicken thighs until they have a beautiful char on them, being careful not to burn them. Brush more of the marinade on them as they cook, if you like.
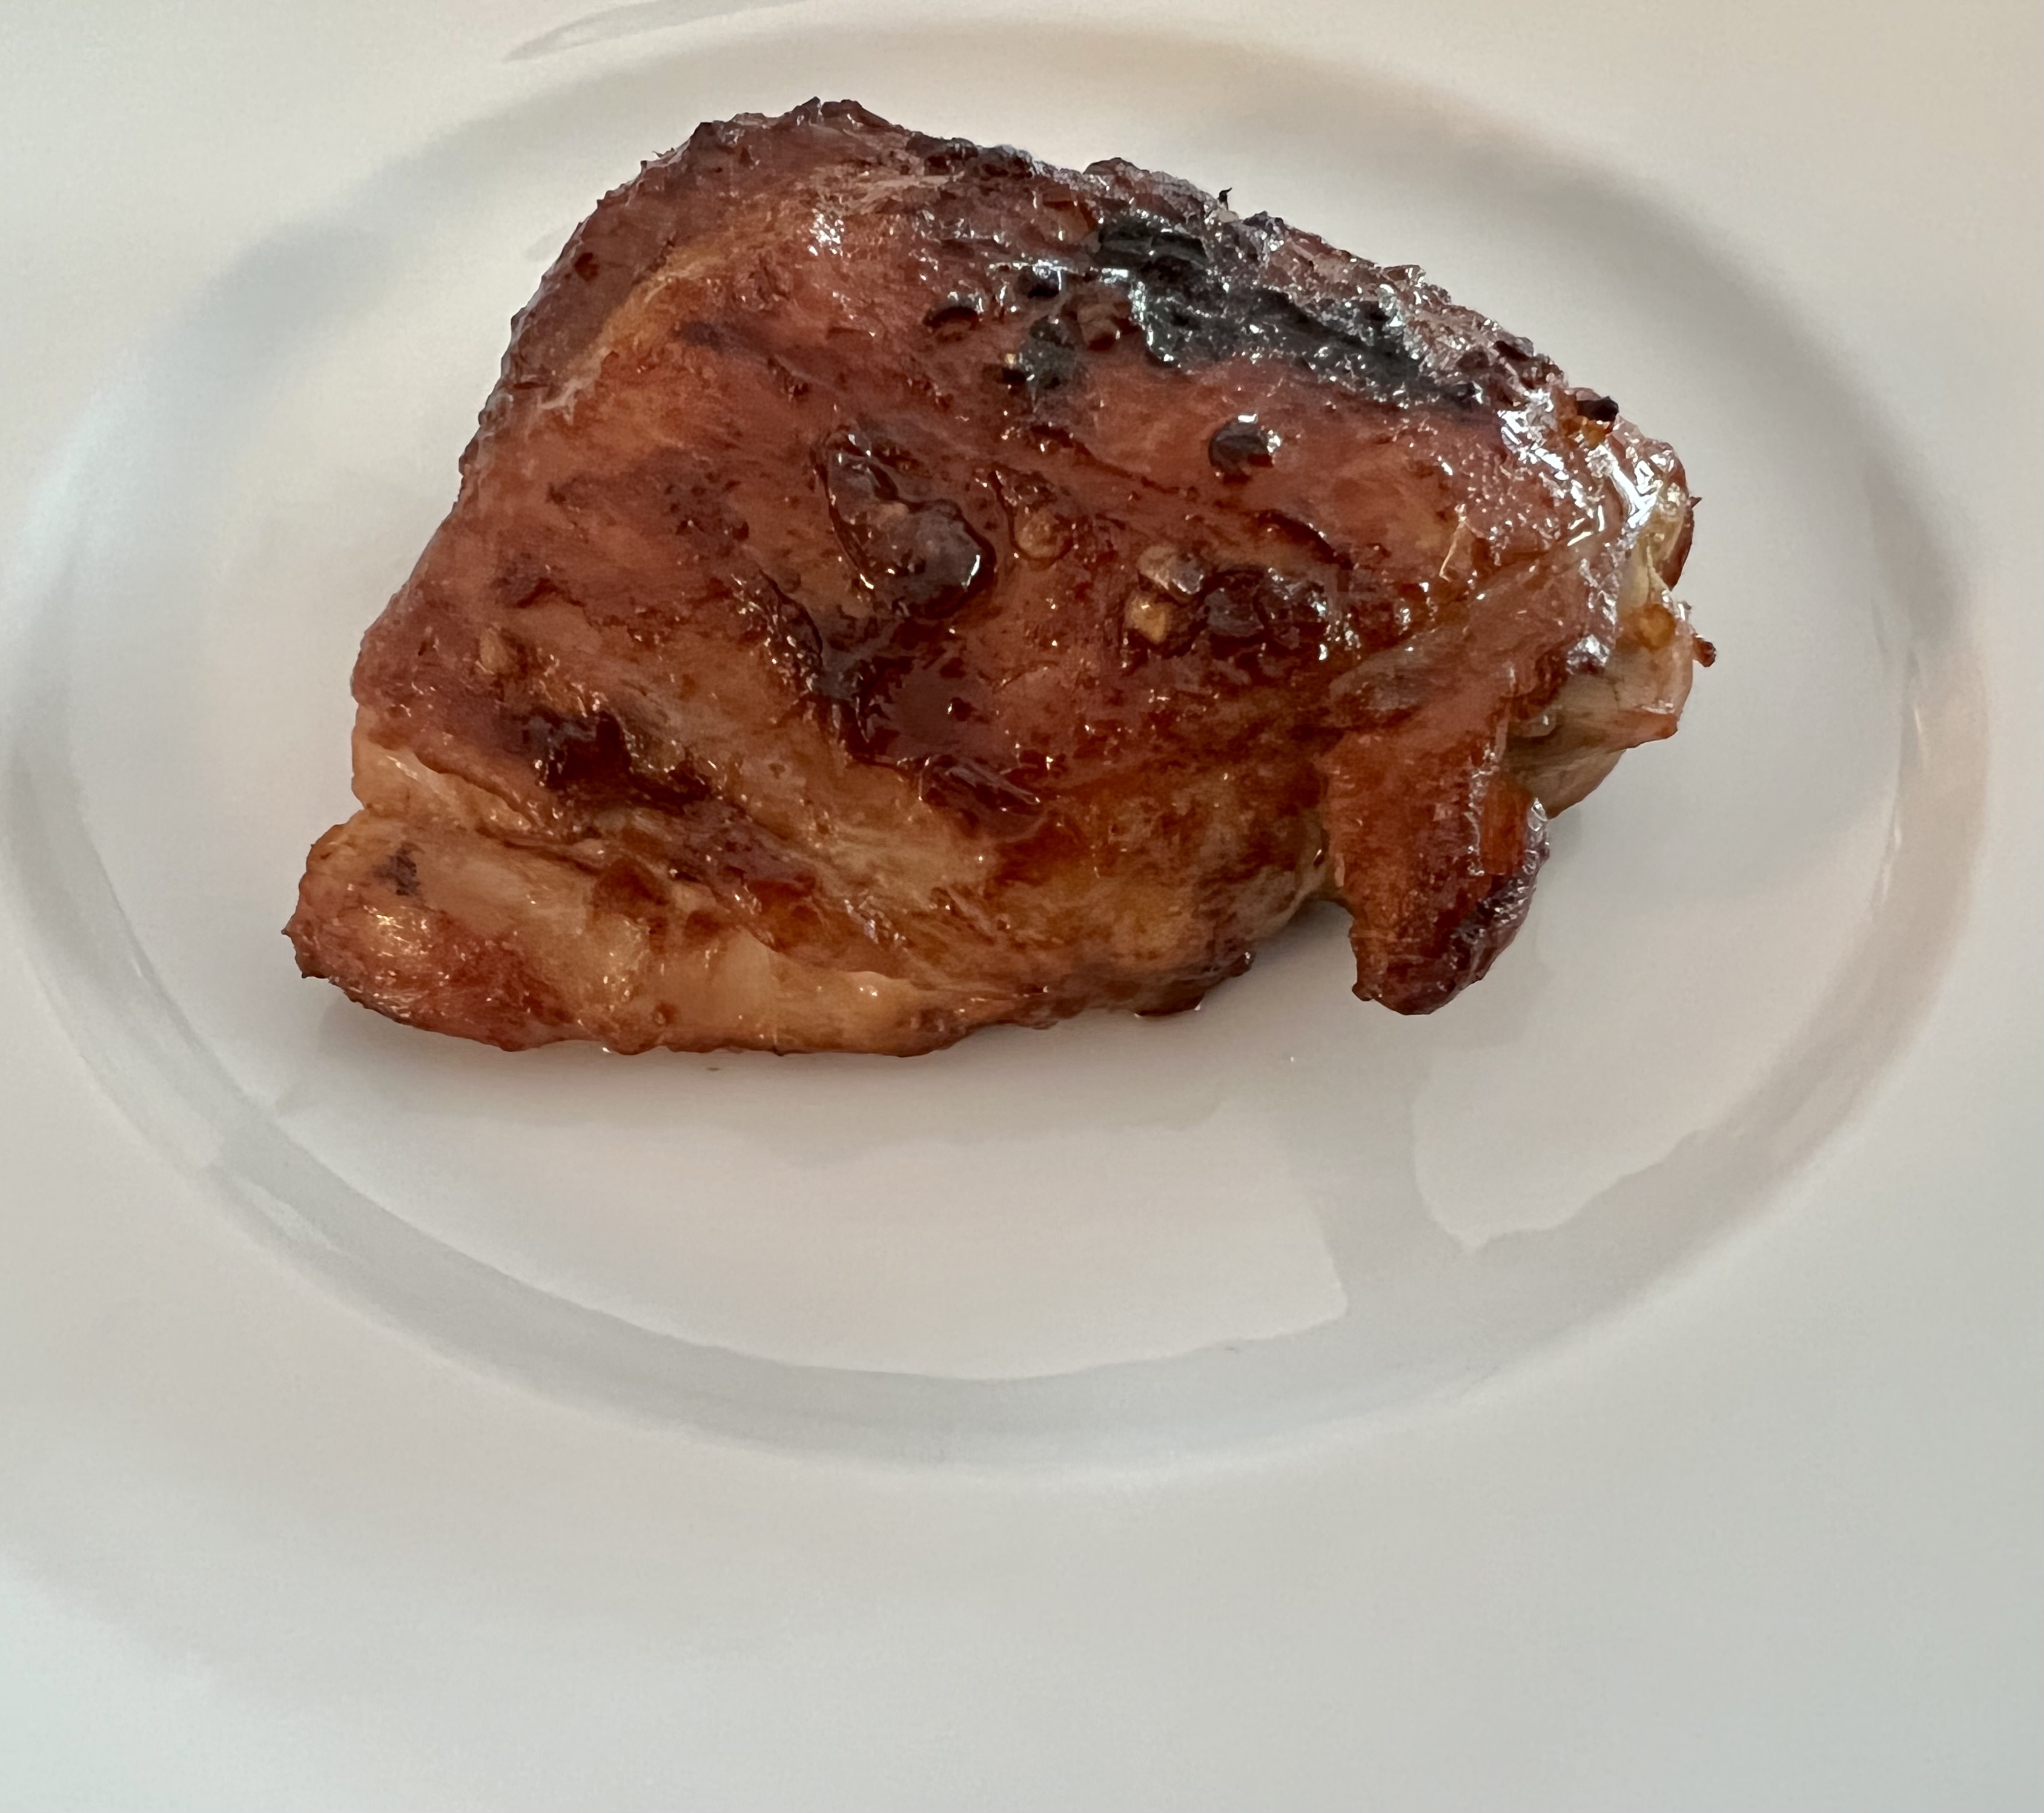
Serve the chicken thighs with the dipping sauce on the side.
The controversy over the positives and negatives of GMO’s continues, and I found an old blog from many years ago that I think is worth repeating. I think people that don’t think GMO’s are a bad deal probably don’t completely understand the situation.
My friends at FireFly Farms in Stonington, Connecticut, understood GMO’s better than most. Family owned and certified humane, they raised heritage breeds of pork, pastured chickens, and rare cattle.
Max Mule, by Kelly Milukas
This was a post from the past on FireFly owner Van Brown’s Facebook page. I’m reprinting with his permission. It’s simple and to the point.
Hi everyone.
I have been thinking about the debate on GMO’s and labeling.
A lot.
Let’s imagine a world where there are two types of pudding cups.
The Blue Pudding Cup definitely will not hurt your kid.
The corporation that makes The Red Pudding Cup states that all the negative tests about The Red Pudding Cup are wrong and they have made lots of tests themselves showing that The Red Pudding cup is okay.
You know The Blue Pudding Cup is safe. There are tests both ways, remembering that many of the tests were funded by The Red Pudding Cup Corporation, so the best you can know is The Red Pudding Cup pudding will probably not hurt your kid. At least according to The Red Pudding Cup Corporation.
Which pudding cup would you buy to feed to your child?
One last thought…
Would it be okay for The Red Pudding cup to put their pudding into a Blue Pudding Cup so no one would know which type of pudding they are feeding their children… your children?
Van
Making spinach pizza dough, as featured in a previous blog, was a fun and tasty recipe idea. But I still had some spinach left over. So I decided to add it to my Chicken Rollatini recipe, and it was delicious!
Chicken Rollatini was one of the first dishes I learned how to make back in my teenage days on Long Island, working at a local Italian restaurant called Pizza City East. (The original Pizza City was in Ozone Park, Queens.) It was a simple dish: a chicken breast rolled up with prosciutto and mozzarella, and baked in a mushroom cream sauce. My version these days substitutes ham for the prosciutto, provolone for the mozzarella, and an Alfredo-like sauce instead of the mushroom cream sauce.
This time I added the frozen spinach to the mix, and I have to say, I think I’ll always cook it this way from now on.
4 chicken breasts cut lengthwise to make 8 thin breasts, about 2 pounds
8 slices sliced ham
8 slices of provolone cheese
6 oz. frozen spinach, finely chopped
Place the chopped spinach in a bowl and add granulated garlic and oregano to taste. Set it aside.
Remove the chicken tender portion of the chicken breasts and set those aside for another day.
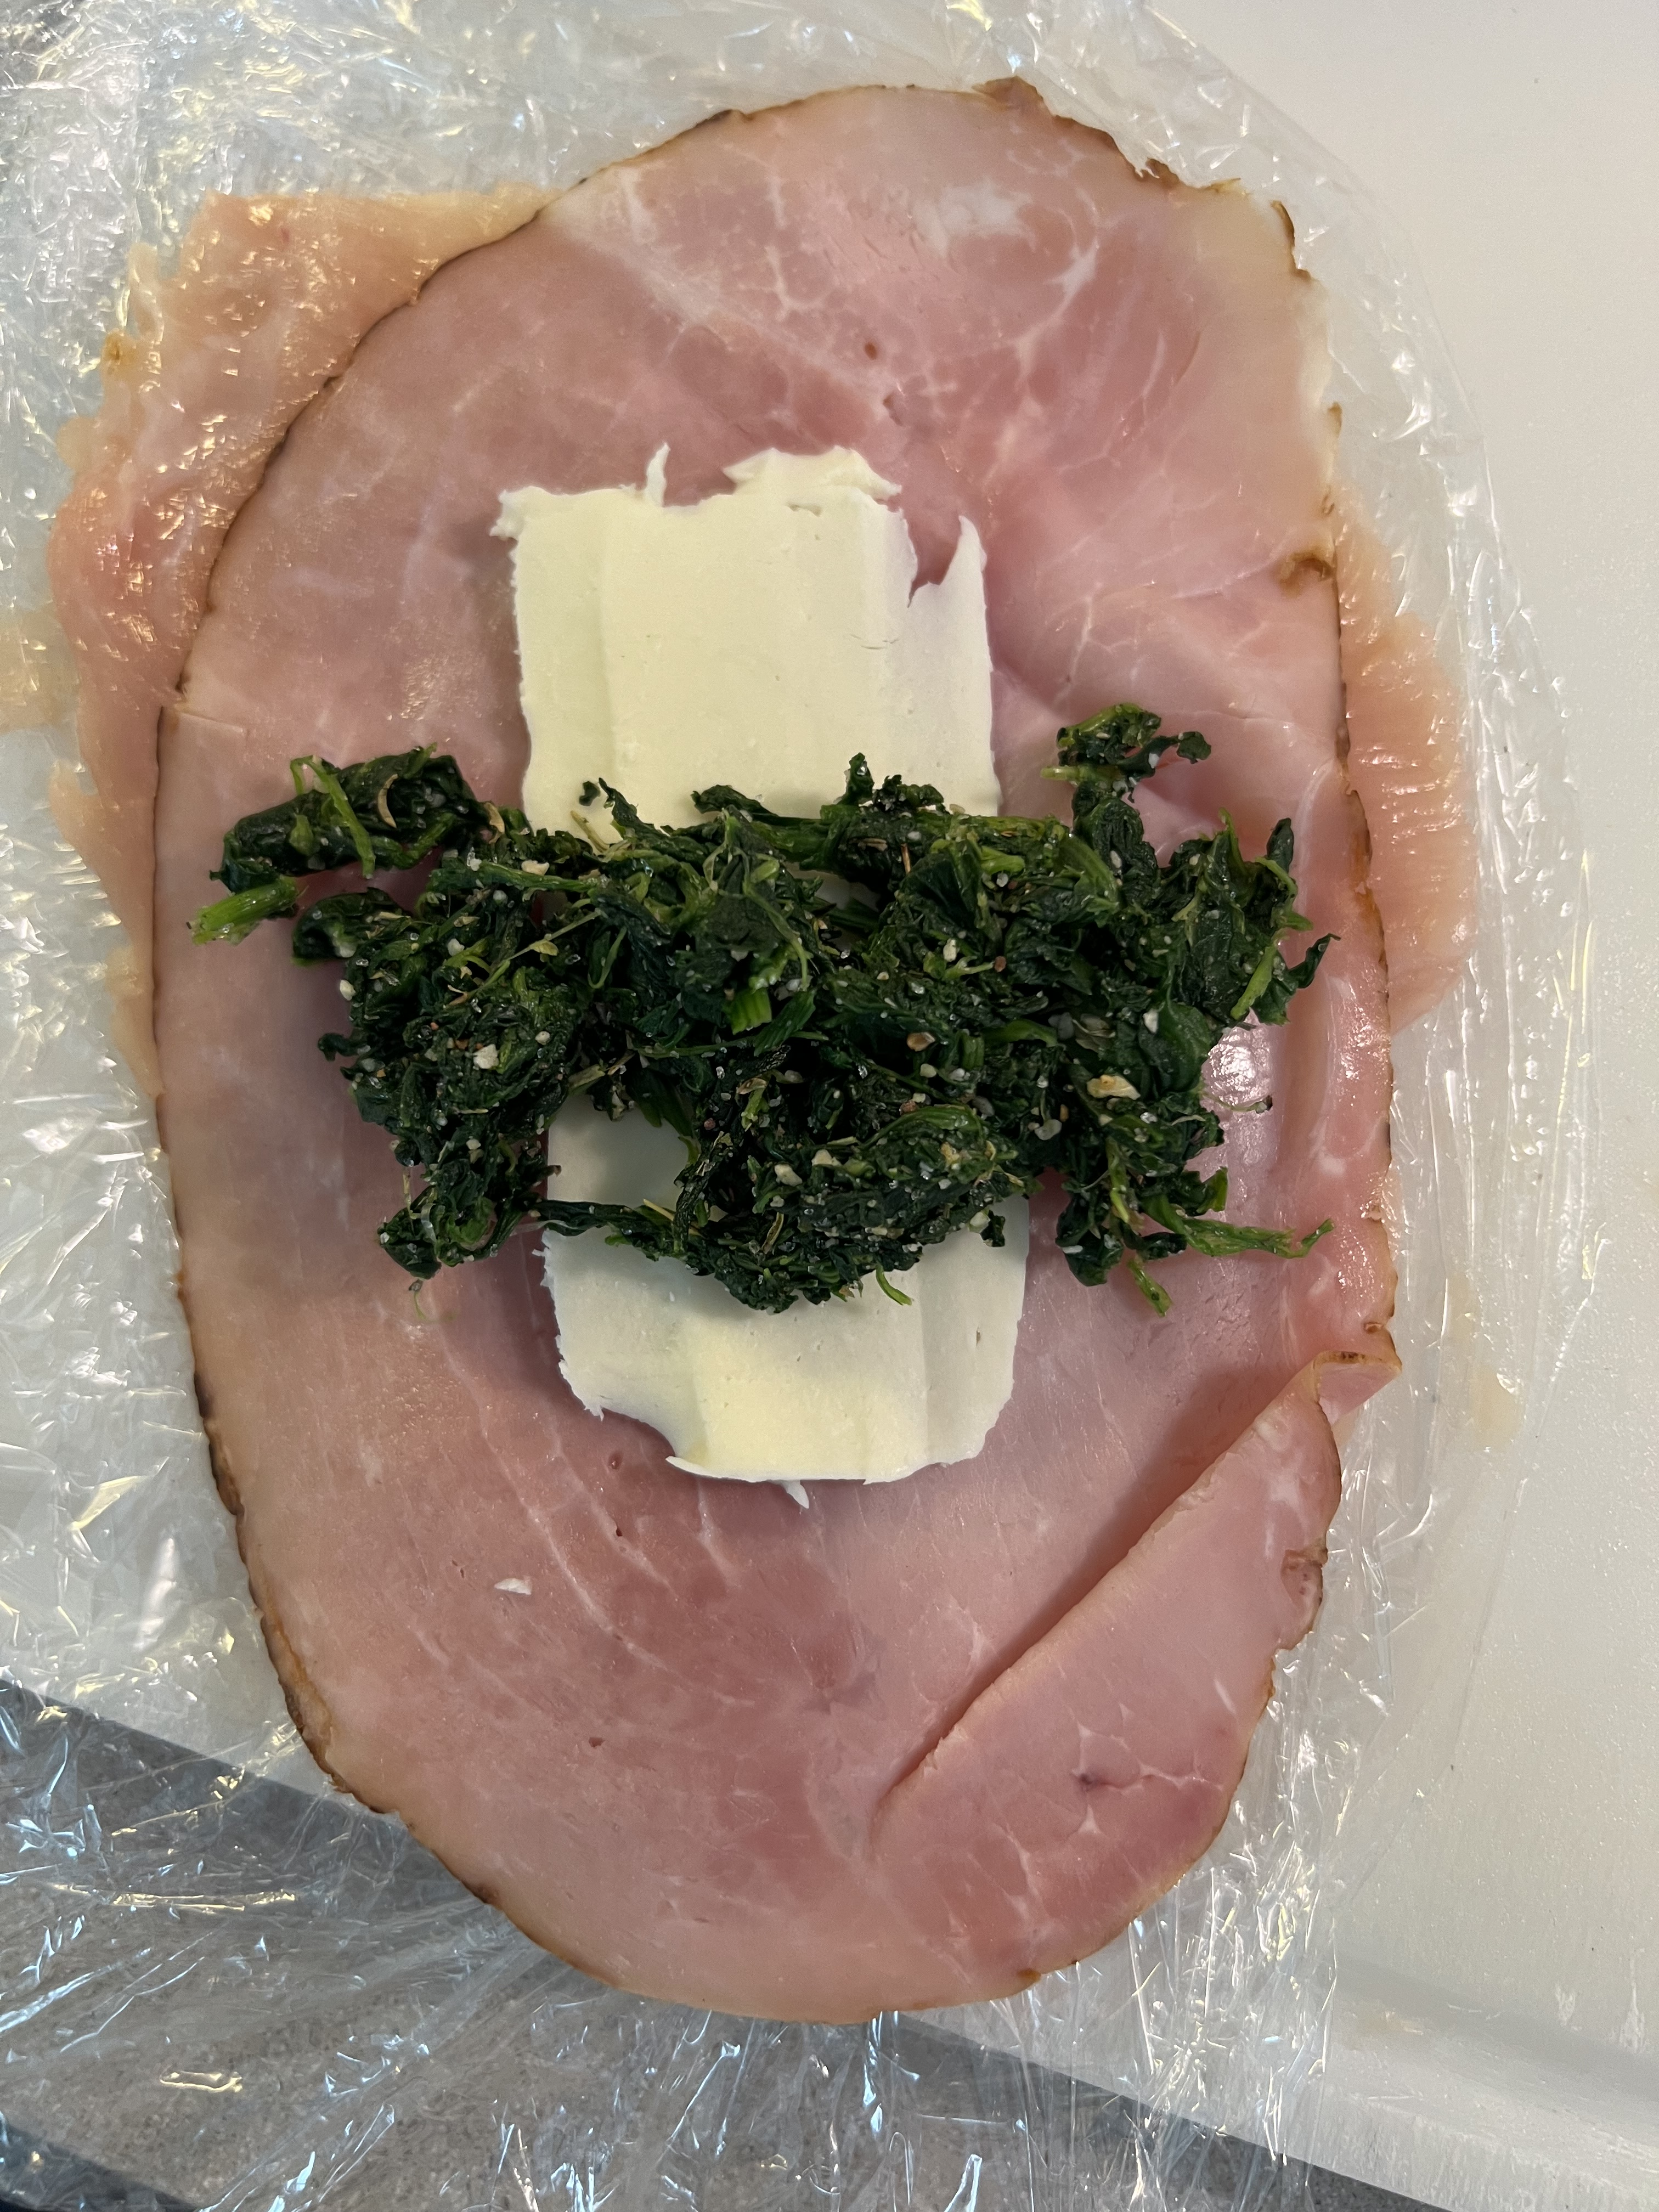
I usually don’t like to pound out my chicken breasts. I like the texture of “real meat.” So I take a large breast, and slice it lengthwise to make 2 thinner breasts. I lay the breast down on the cutting board, add a slice of ham, then a slice of provolone, (and this time, some of the spinach mix), and carefully roll it up, securing it with toothpicks, if necessary. Place the rollatinis on a baking sheet. Set aside, preferably in the fridge, until ready to cook.
The addition of spinach, this time, to the old recipe.
Combine these ingredients in a bowl. Set it aside.
2 carrots
2 celery stalks
1/2 medium onion
Olive oil
Peel and chop the carrots into quarters. Peel and chop the onion in half. Chop the celery into quarters as well. Place all the vegetables on a sheet pan and drizzle olive oil over the top, tossing them in the oil. Roast the vegetables in a 400° oven until caramelized, and the carrots are fork-tender, about 20 minutes. Remove the sheet pan from the oven and let the vegetables cool. Once the veggies have cooled, chop them finely with a knife or food processor. Set them aside.
3 cups your favorite rice, cooked
Cook the rice according to package directions. Once the rice is cooked, mix it with the chopped carrots, parsnips, celery and onion. Set it aside.
1 cup cream or half-and-half
3 tablespoons butter
1/2 cup freshly grated Parmigiano Reggiano
salt and pepper
For the Alfredo-like sauce, heat a saucepan over medium heat, melting the butter and then adding the cream or half-and-half. Once it’s warmed through, add the cheese and whisk until it has melted and the sauce is smooth. Season with salt and pepper. Set it aside, to re-warm later.
Take the pan of rollatinis out of the fridge to warm to room temperature, and reduce the heat of the oven to 350°.
Drizzle a little olive oil over the top of the rollatinis and rub it in. Sprinkle the breadcrumb mixture over the top, pressing them into the chicken, and bake them for 30-45 minutes, until the chicken has cooked through.
To serve, remove the chicken rollatinis from the pan and plate them on a bed of arugula (optional) with the rice on the side. (Be sure to remove the toothpicks.) Serve with the sauce.
Brining, the process of letting a hunk of protein soak in a salt solution for a few hours, is a great way to add flavor and moisture to any cut of meat. I brine these wings for 3 hours before using a sweet and spicy rub. They can be grilled or roasted in the oven.
The brine…
1/2 cup Kosher salt
3 tablespoons light brown sugar
1 teaspoon whole black peppercorns
1 whole bay leaf
2 quarts water
Combine all ingredients in a saucepan and heat until the sugar and salt dissolve. Remove it from the heat, and let it cool to room temperature.
The rub…
1/4 cup light brown sugar
1/4 cup granulated sugar
1/4 cup sweet paprika
1 tablespoon Kosher salt
1 tablespoon granulated onion
2 teaspoons black pepper
1 teaspoon dried thyme
1 teaspoon dry mustard
1 teaspoon ground ginger
1 teaspoon cayenne pepper
Combine all the ingredients in a bowl.
Place 3 lbs. of chicken wings in a Ziploc bag and pour the cooled brine into the bag. Place the bag in a bowl to prevent leaks and keep it at room temp for 3 hours. I wouldn’t brine it longer than that, or it will get really salty.
After 3 hours, remove the chicken from the brine and dry the wings with paper towels. Discard the brine.
Place the chicken pieces in a large bowl and sprinkle them with 1/3 cup of the rub, tossing to coat the chicken well. Place the bowl with the chicken in the fridge until you’re ready to cook.
About 30 minutes before cooking, remove the bowl from the fridge and let the chicken come to room temperature.
Pre-heat the oven to 350 or light a grill.
Toss the chicken with some more of the rub, if you like, then place the pieces on a sheet pan lined with non-stick aluminum foil.
Bake at 350 for 30 minutes or until done. Lower the oven temperature if it starts to burn.
If you’re grilling, cook the wings over medium heat, turning them frequently to prevent burning. Cook until the wings are done.
It’s been over a year since I posted this. Inspired by a recent conversation I had with a friend, I decided to share it again…
It’s never a healthy option to eat fast food. Michael Pollan said it best: “It’s not food if it arrived through the window of your car.”
A few years ago, a guy who claimed to be the nephew of Colonel Sanders, revealed the 11 secret herbs and spices that made KFC‘s original recipe chicken a worldwide success. He said he worked for his uncle for many years and had to make huge batches of the seasoning mix.
For me, KFC is like crack. Although I’m a big proponent of grass-fed this and pastured that, my kryptonite is KFC‘s original recipe chicken. There’s a KFC right next door to a local Home Depot in my area and my car literally drives itself to the pick-up window…I can’t help it. I justify the consumption of this heavenly grease by asking for no sides–no biscuit, no nothing. I get one breast and one thigh, and I drive off, steering my car with my knees as I indulge in my dirty secret, the hot grease dripping down my chin, a roll of paper towels at my side.
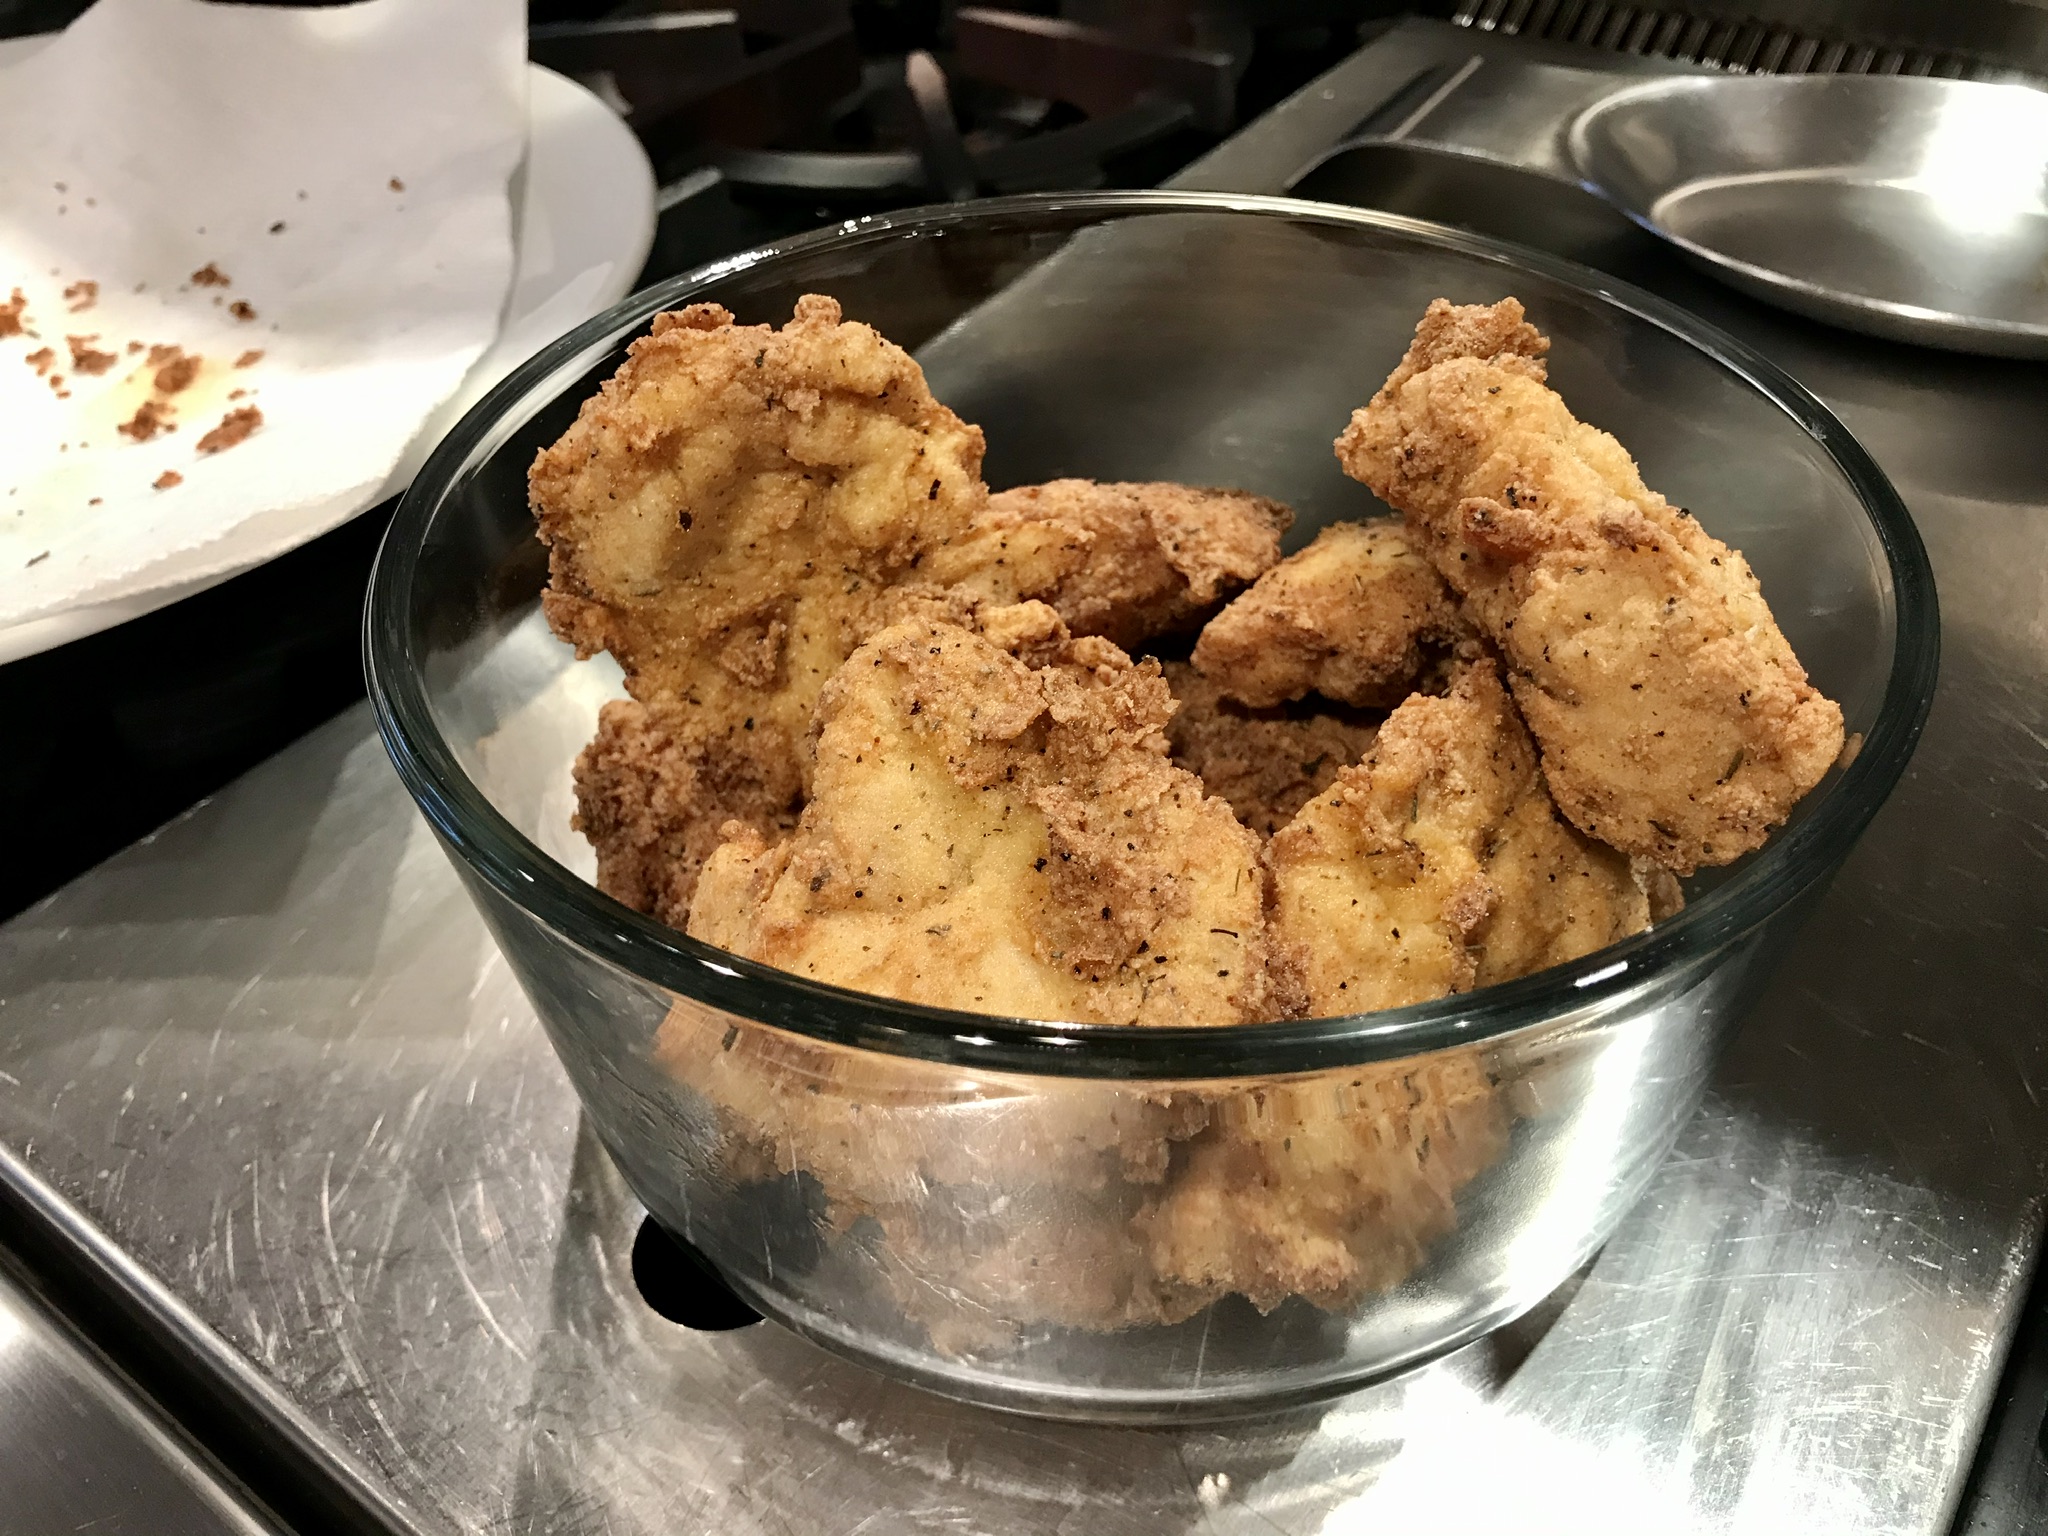
Making the KFC chicken recipe at home means I do have some control over product quality. I can use pastured or organic chicken. I can use clean oil. I don’t have the fancy pressure fryer they use at KFC, but I can use the healthier option of oven-frying. That means I fry my chicken in oil until golden brown, then finish the cooking process in the oven.
I have to say, the recipe really works! Maybe if I placed the real KFC side-by-side with my home-made chicken, I’d notice a big difference. But my brain said it was pretty damn close and absolutely delicious! If I could change one thing, I would use smaller chicken pieces next time. I used large pieces and the meat-to-breading ratio was off. Though it was mighty tasty, I was craving more breading per bite.
The recipe calls for all-purpose flour, but if you follow a gluten-free lifestyle, using Cup4Cup GF flour works just as well.
2 cups all-purpose flour
3 tablespoons paprika
1 tablespoon celery salt
1 tablespoon dried mustard
1 tablespoon garlic salt
1 tablespoon ground ginger
2 teaspoons black pepper
1/2 teaspoon white pepper
1 1/2 teaspoons thyme
1 1/2 teaspoons basil
1 1/2 teaspoons oregano
1 teaspoon salt
1 cup milk
1 egg
5 lbs. chicken pieces…your choice
oil, for frying
Combine the flour and the “11 herbs and spices” in a bowl. Mix well.
In another bowl, whisk together the milk and the egg. Add the chicken pieces to this bowl and let the chicken soak in it for 10 minutes.
Pre-heat the oven to 350 degrees.
Pour a couple of inches of the oil into a pan with high sides and heat it to 340 degrees, using a thermometer. Don’t fill it with too much oil, because oil expands when hot and it could spill over.
Take the chicken pieces out of the milk and egg mixture and coat them with the seasoning mix one at a time, making sure you coat them well. Carefully place the chicken in the hot oil. Don’t overcrowd the pan…work in small batches. Too much chicken could cause the oil to spill over the top.
Fry the chicken pieces just until golden…no need to cook them all the way through. Place the pieces on a baking sheet lined with non-stick aluminum foil. When all the chicken has been fried, place the baking sheet in the oven and cook until the chicken pieces reach an internal temperature of at least 160 degrees.
Make a lot! Leftovers are great, and they re-heat really well in the oven! (Don’t use a microwave…the oven is best.)
Fat Tuesday is coming up! This is a great recipe to cook up if you’ve got friends coming over for the Super Bowl. Let’s do some Cajun-style cookin’! Poo-yah! I garonteee!
I lived in Mobile, Alabama, back in the late 80’s, and if you asked the locals, they’d quickly tell you that Mardi Gras originated in Mobile, not New Orleans.
Joe Caine paraded through the streets of Mobile dressed in a Native American costume in 1868, and is credited for our current way of observing the Mardi Gras celebration. Of course, it’s hard not to think of New Orleans when you hear the phrase “Mardi Gras,” and I spent many a weekend on the streets and bars of the Crescent City back in the mid-80’s…actually was part of a Mardi Gras parade one year.
It was then that I fell in love with Cajun food, and needed to learn how to cook it. I bought cookbooks by two of the greats: Justin Wilson and Paul Prudhomme. I learned about layers of seasoning, and often I’d use those ideas in my own dishes.
When I moved to Rhode Island in 1990, I had yearly Mardi Gras parties at my house, and I cooked massive batches of these Cajun chicken breasts, using a spice mix I honed from my cooking experiments.
Double-dipping in the seasoned flour is a messy step, but it makes them extra crunchy and flavorful.
You can make this recipe gluten-free, simply by using a GF flour instead of the all-purpose flour.
1 cup all-purpose flour
1 tablespoon salt
1 1/2 teaspoons sweet paprika
1 teaspoon granulated onion
1 teaspoon granulated garlic
1 teaspoon basil
1/2 teaspoon black pepper
1/2 teaspoon dried thyme
1/4 teaspoon white pepper
1/4 teaspoon cayenne pepper
2 pounds boneless, skinless chicken breast
4 eggs
oil for frying (I like using a high smoke point oil like avocado or grape seed)
Cut the chicken breasts into manageable pieces, about 3″ square. If they’re too thick, slice them horizontally to make two thinner breasts. You want them about 1/4″ thick. A piece of chicken that’s too thick won’t cook all the way through. Plus, you want more crunchy crust per bite…trust me!
Combine the flour, salt, paprika, onion, garlic, basil, black pepper, thyme, white pepper, and cayenne in a bowl. Mix well.
Separate the 4 eggs, scrambling 2 eggs in each of 2 separate bowls. This keeps the first bowl “clean” and not gummed up with flour. You’ll see what I mean once you start, because it’s a bit messy. So, crack 2 eggs in the first bowl and the other 2 eggs in the second bowl. Scramble them up and put the bowls on either side of the seasoned flour bowl.
Pre-heat a pan of oil or a fryer to 350 degrees.
Dip the chicken in the first egg bowl and then the seasoned flour mixture. Shake off the excess flour and dip the chicken in the second egg bowl, making sure the flour is covered by egg. Then dip the chicken back into the flour for a second coat. I like to bread all of my chicken pieces before I start frying them so that I can get my hands clean for the next step.
Carefully place the chicken in the pan. Don’t overcrowd the pan. Work in batches. Fry the chicken until it’s cooked all the way through and golden brown. Drain on a wire rack or paper towels.
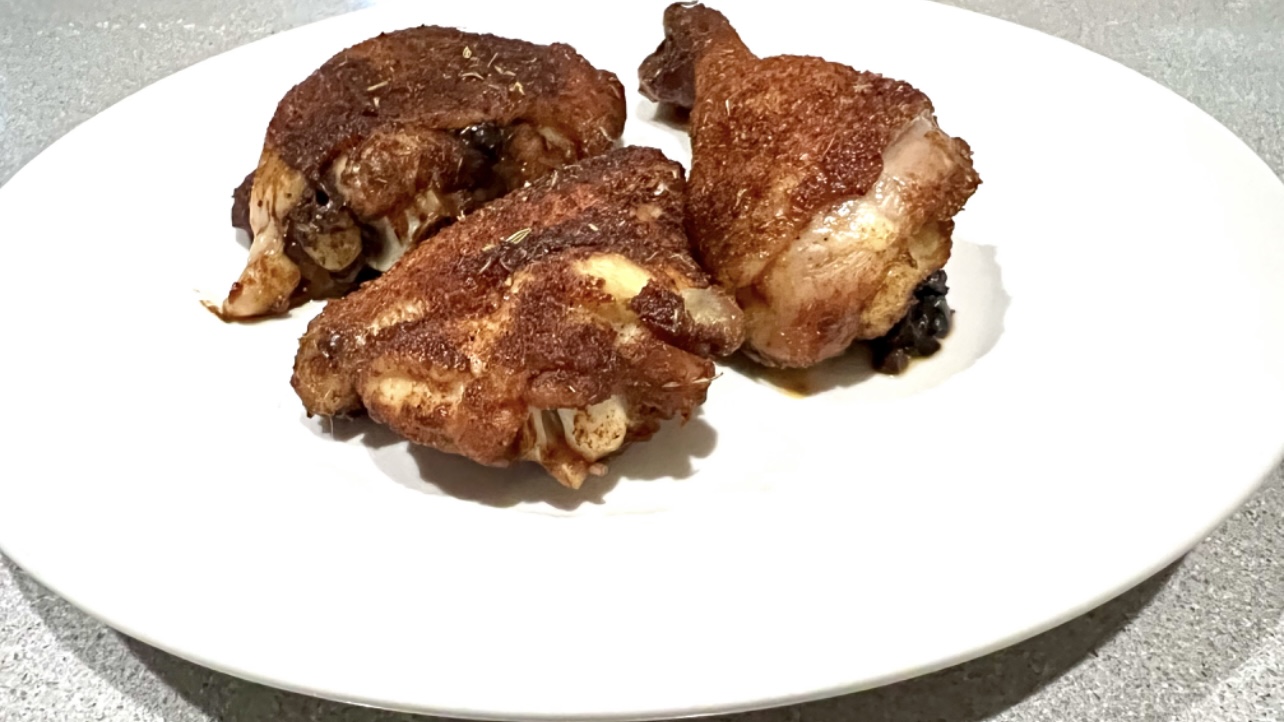
Nothing like a hot, fresh batch!
If you need to feed a crowd, just double or triple the recipe. I used to make a 10x batch for my Mardi Gras parties!
I’ve gotten a few requests for my chicken fried rice recipe. Not sure if it’s authentic Asian, but I use a lot of the flavors and veggies that I find in chicken fried rice when I get takeout. It’s really not a difficult thing to do, but it does take some work, chopping everything up and getting it ready.
I don’t have a wok, and I don’t think it’s necessary. As long as you have a pan that’s big enough to hold everything at the end, you’re good to go.
All the Asian ingredients can be found in any supermarket. And if you want this dish to be gluten-free, use GF soy sauce and hoisin sauce. La Choy and Kikkoman make them.
I like to start by sautéing all the veggies, then removing them from the pan, putting them in a separate bowl, and then continuing with the chicken. It seems like the best order of business for me.
They say that you should use day-old rice, so, if you plan on making this recipe, boil up some rice the day before, and put it in the fridge. I like to use jasmine rice, but use whatever rice you like.
All measurements for this recipe are approximate. Again, add more of what you like, and take away what you don’t.
Don’t be afraid to explore the international aisle in your supermarket as well as the produce section for interesting veggies that you can add to this dish. I’m not a fan of water chestnuts, but that’s one option. And if you don’t like the little corn cobs, add some frozen corn. Bok choy, mushrooms, and scallions are all great choices.
1 small onion, finely chopped 1cup of finely chopped cabbage 1/2 can of small Asian corn cobs, chopped 1 cup or more chopped broccoli 1 cup mung bean sprouts or pea shoots 1 cup frozen peas (optional)
3 cups of cooked rice 1 1/2 pounds of chicken breast, cut into small cubes 2 eggs
To make the marinade, combine the soy sauce, hoisin sauce, rice vinegar, Chinese garlic sauce, and sesame oil in a bowl.
Cut the chicken breasts into small 1/2-inch cubes and place them in a bowl. Add the marinade to the chicken, and make sure the meat is coated well. Let it marinate for a couple of hours at room temperature, or in the fridge if you need more time.
Get a large pan that will hold everything and put it on high heat. Add an oil with a high smoke point, like peanut oil, avocado oil or grapeseed oil.
Add the onions to the pan and sauté until they’re translucent. Add the cabbage, and let it wither. Add the corn cobs and sauté for a few minutes. Add the chopped broccoli, and continue to sauté. You can add the bean sprouts now, or save them for later if you want them to be very crunchy. Save the peas for later.
When the veggies have softened, pour them into a bowl and return the pan to the stove top. Add a little more oil and let it heat up.
Add the chicken pieces to the pan, pouring in all the marinade with it. Make sure the chicken is thoroughly cooked, and just starts to caramelize.
Scramble the two eggs in a small bowl and add them to the pan, constantly moving the chicken and eggs around to fully cook the eggs.
Add the rice to the pan and mix everything thoroughly. Then return the veggies and mix thoroughly again.
This is where you taste everything. Add what you think it needs. Maybe it’s some soy sauce…maybe a little hoisin…maybe salt and pepper…maybe a little sesame oil. Maybe more of everything! It’s up to your individual taste.
Toss the fried rice with the added seasonings, then add the bean sprouts and the peas, giving it one more good mix.
This chicken fried rice is great as meal in itself, and leftovers are always welcome.
After making a batch of this for my daughter this week, I got a bunch of requests for the recipe. So here we go!
Chicken parmigiana, much like pizza, is a bit more difficult to make than you might think. Sure, there’s plenty of crappy chicken parm out there, made with processed frozen chicken cutlets, bad sauce and cheap cheese. But to make a really fantastic, mind-blowing chicken parm, that takes a little practice!
The key to this recipe is simple: don’t skimp on the quality ingredients. And my recipe makes a lot. Trust me: you will want leftovers.
The recipes for my Italian bread crumbs and my “Don’t Call It Gravy” tomato sauce are at the bottom.
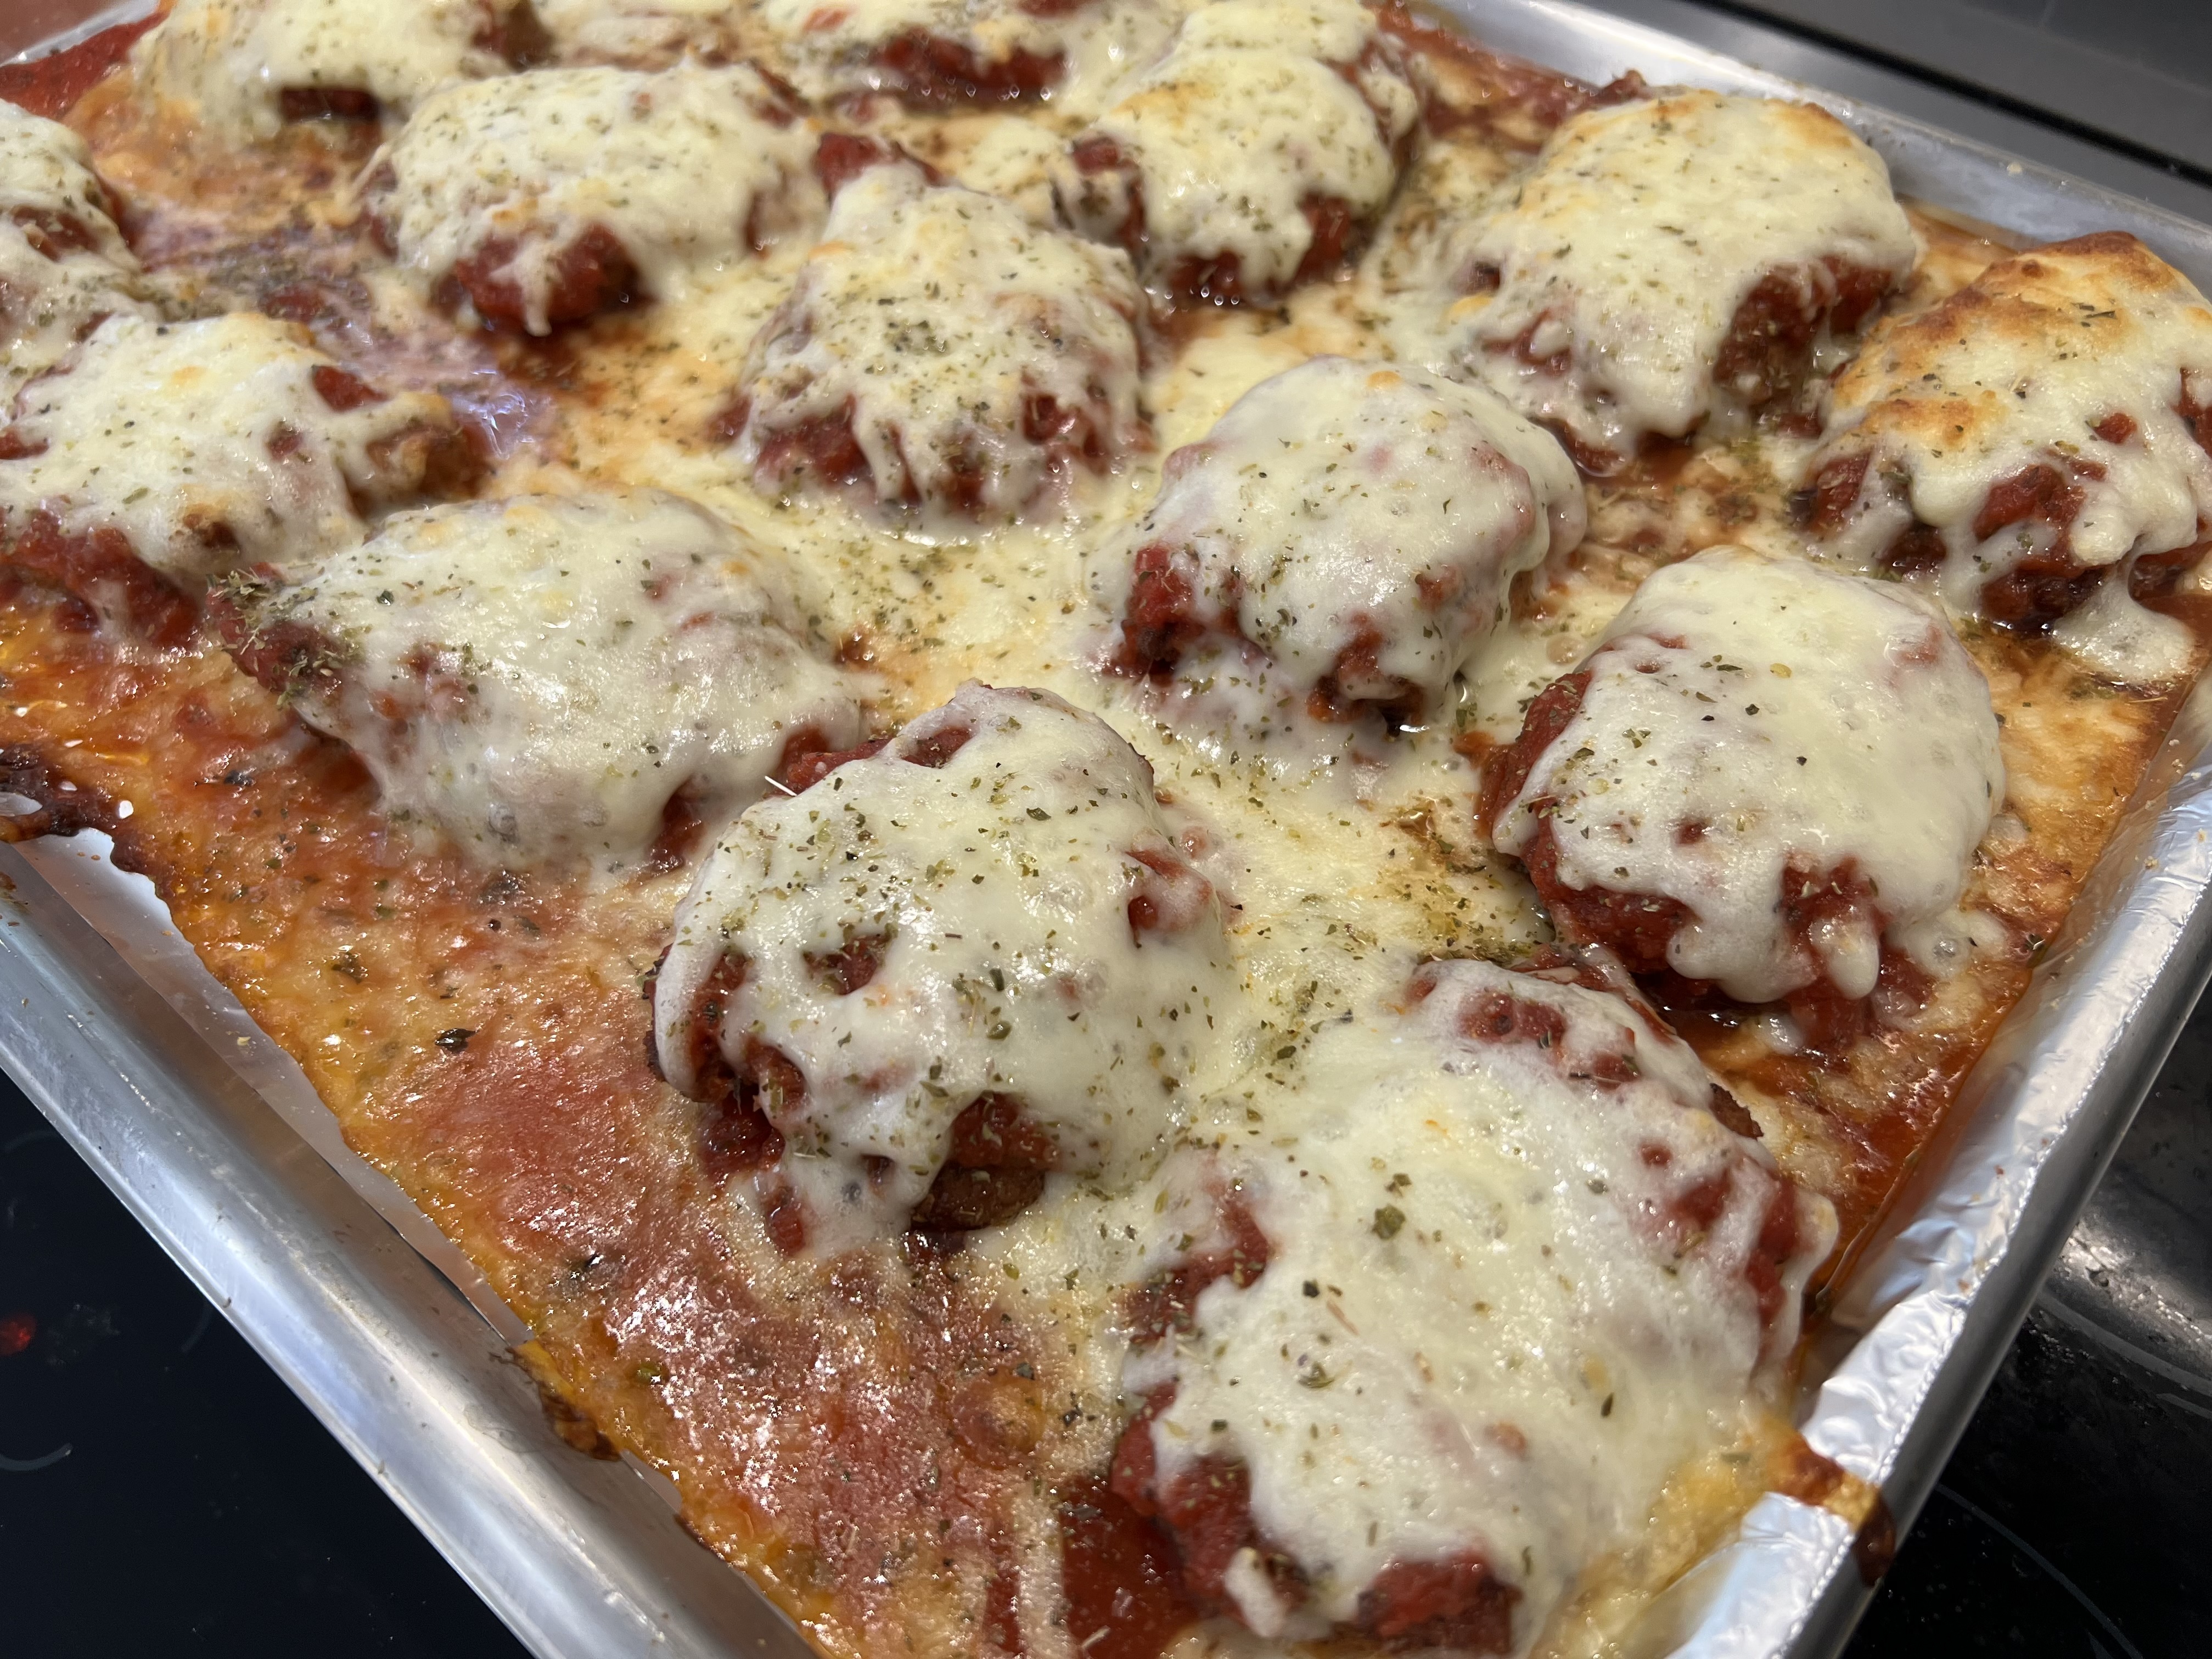
Gooey, cheesy, orgasmic.
6 Chicken breasts, the best quality you can get your hands on Italian bread crumb seasoning (see recipe below) 3 eggs vegetable oil for frying “Don’t Call It Gravy” tomato sauce (see recipe below) Fresh mozzarella cheese oregano
Thaw the chicken breasts. Lay them flat on a cutting board, and you’ll see where the chicken tender is on the side of the breast. Cut the tender off and set aside, leaving the breast which is thinner at one end and thicker at the other. Slice the breast in half lengthwise at the thicker end, keeping the knife level, so that you wind up with 2 pieces of breast meat that are the same thickness, but one will be a longer piece (the bottom) and one about half its size (the top part you sliced off.) Do this with all the breasts.
By slicing the breasts lengthwise into evenly thick pieces, it will take the same amount of time for them to cook. (I prefer not to pound the hell out of the chicken breasts until they’re flat as a pancake.)
Pour the vegetable oil into a large frying pan. (I like to use corn oil or grapeseed oil.) Next to the pan, set up two bowls: one with my Italian bread crumb seasoning (recipe below) and in the other: crack the eggs and whisk them.
Now it’s your standard breading procedure: chicken meat in the egg, then in the breadcrumbs, coating well. Shake off the excess and place carefully in the pan of olive oil when the oil comes to temperature (about 350) for frying.
Fry the chicken in the oil until it’s golden brown. You want it cooked all the way through, but not overcooked. Place the fried chicken pieces on a wire rack to drain the oil. Do this with all the chicken. The fried chicken at this point is delicious all by itself: chop it and use it in a salad, or make a chicken sandwich. (By the way, if there’s breading left over, use it on the chicken tenders you cut off, and fry them up. My daughter gets these instead of store-bought chicken tenders, and she loves them.)
Cover a baking sheet with aluminum foil. Ladle out enough sauce (recipe below) to create a thin layer on the bottom of the baking sheet. Place the fried chicken breasts on top of the sauce. Cover the breasts with more sauce, then place shredded mozzarella on top. Sprinkle the top with a little oregano.
Place the baking sheet in a pre-heated 350 degree oven and bake until the cheese has melted and just starts to brown. Serve it with pasta.
MY “DON’T CALL IT GRAVY” TOMATO SAUCE
It’s not hard to make a good tomato sauce. But it takes a little work to make an amazing tomato sauce. Honed from a recipe handed down by a friend-of-a-friend’s Italian grandma, it is one very important part in two of my favorite Italian comfort food recipes: my meatballs…and my chicken parmigiana recipe.
1 medium onion, finely chopped 2 cloves garlic, finely chopped 1/2 cup extra virgin olive oil 10 cups ground and peeled tomatoes…or 3 cans (28 oz.) tomatoes (real San Marzanos preferred) 2 teaspoons each: dried oregano, basil and parsley 3/4 teaspoon each anise seed and fennel seed 1 1/2 teaspoons salt 1/2 teaspoon black pepper 2 bay leaves 1 small can (6 oz.) tomato paste 1 teaspoon sugar, optional
Heat the olive oil in a large pot and add the onions. Cook until onions are translucent, then add the garlic. Stir for about 10 seconds.
Add the tomatoes and cook until the orange foam disappears, stirring frequently.
Add the oregano, basil, parsley, anise seed, fennel seed, salt, pepper, and bay leaves. Stir to combine. Add the tomato paste, stirring well. Let the sauce just come to a boil (which helps the paste thicken the sauce), then reduce it to a simmer, and cook uncovered for at least an hour, stirring constantly, until the sauce reaches the consistency you like.
MY ITALIAN BREAD CRUMB SEASONING
This is the one part of the recipe (other than the optional pasta) that keeps this dish from being gluten-free. So I use gluten-free breadcrumbs, even if I don’t need to. I buy a loaf of Udi’s frozen gluten-free bread, toast the slices, and them put them in a food processor. I dare you to tell the difference between these and breadcrumbs with gluten!
1 Udi’s loaf, toasted and ground into breadcrumbs 2 teaspoons dried parsley 1 teaspoon dried oregano 1 teaspoon dried basil 1 teaspoon salt 1/2 teaspoon granulated garlic 1/2 teaspoon granulated onion 1/4 teaspoon black pepper
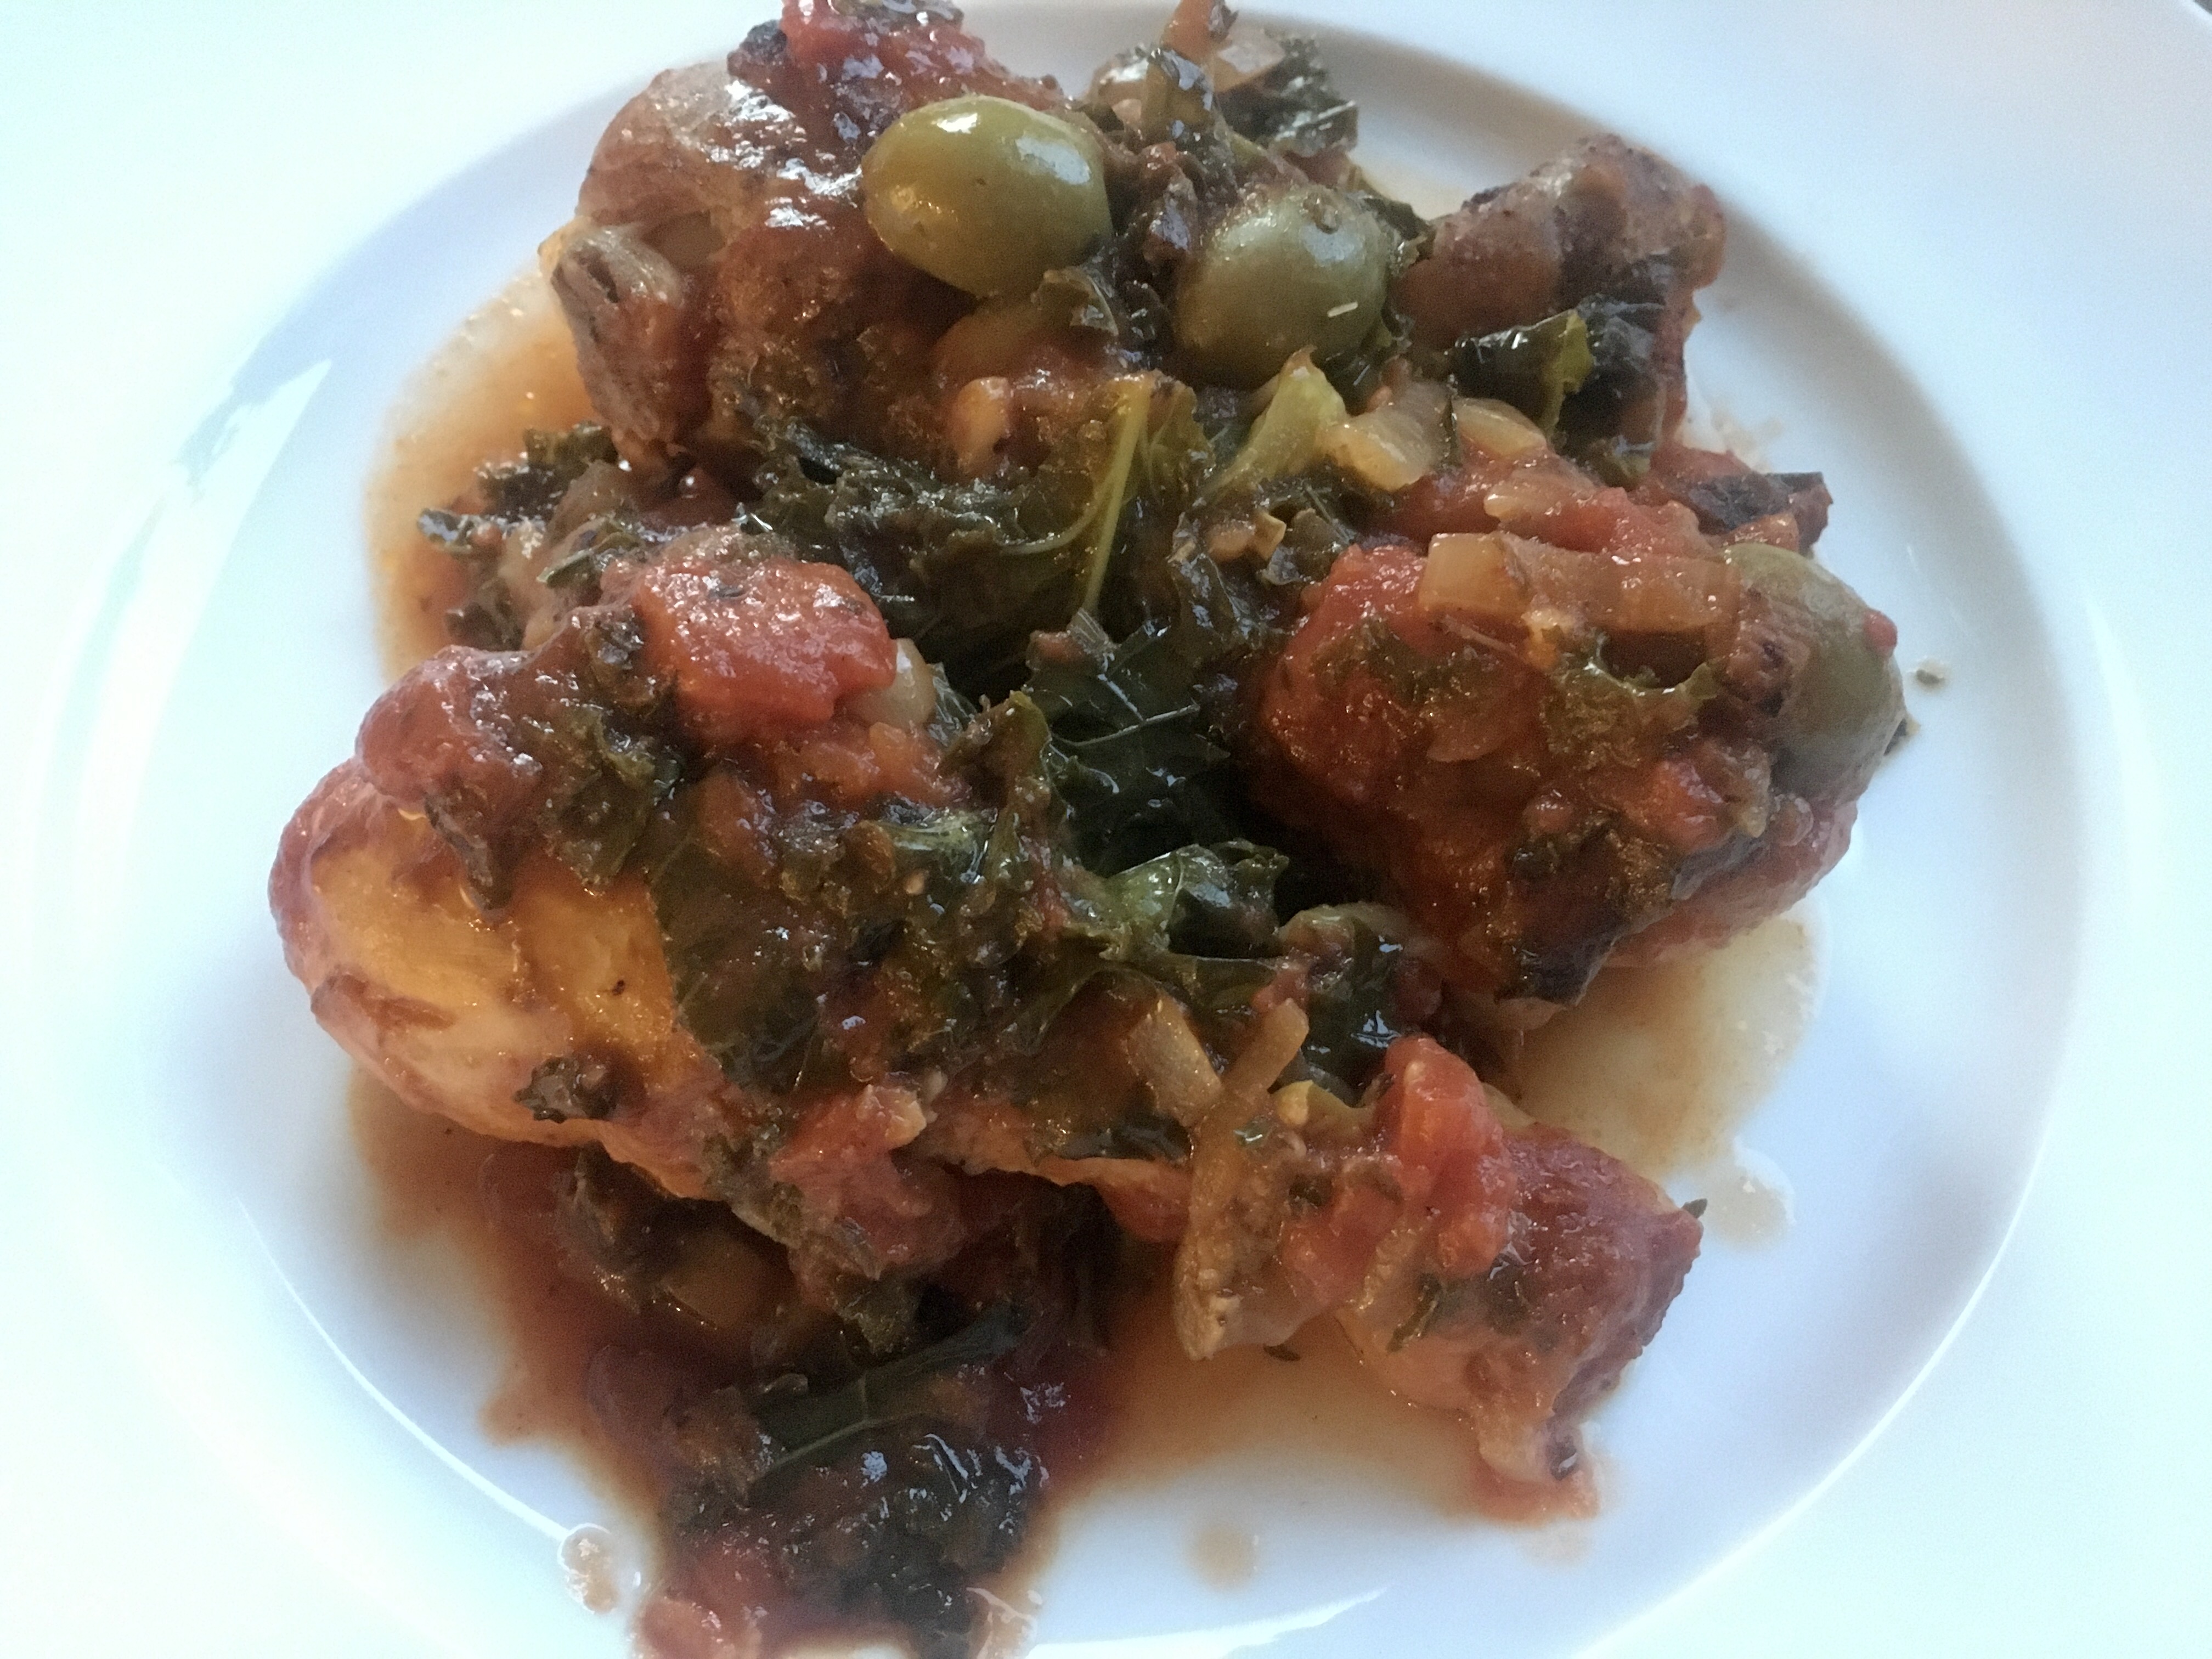
I was craving comfort food, and I didn’t want to go to the store, so I looked in the pantry and fridge for tasty ingredients, and went this route. There are many similar versions of this dish out there, using different cuts of chicken–or a whole bird cut up. I just happened to find a great deal on organic drumsticks at the store, so I went with that. But you should use any cut of chicken that is your favorite.
It takes about an hour to prepare this dish from start to finish, so it’s something you could even cook on a weeknight…and it’s certainly easy enough to double the recipe if guests are coming over.
It starts in the pan!
Traditionally, this is cooked in a large cast iron skillet, started on the stovetop, then placed in the oven. I choose to cook mine in a baking pan that fit my smaller convection oven, so I started everything on the stovetop, then made the transfer to the baking pan.
Now that the chicken has seared, we start the veggies.
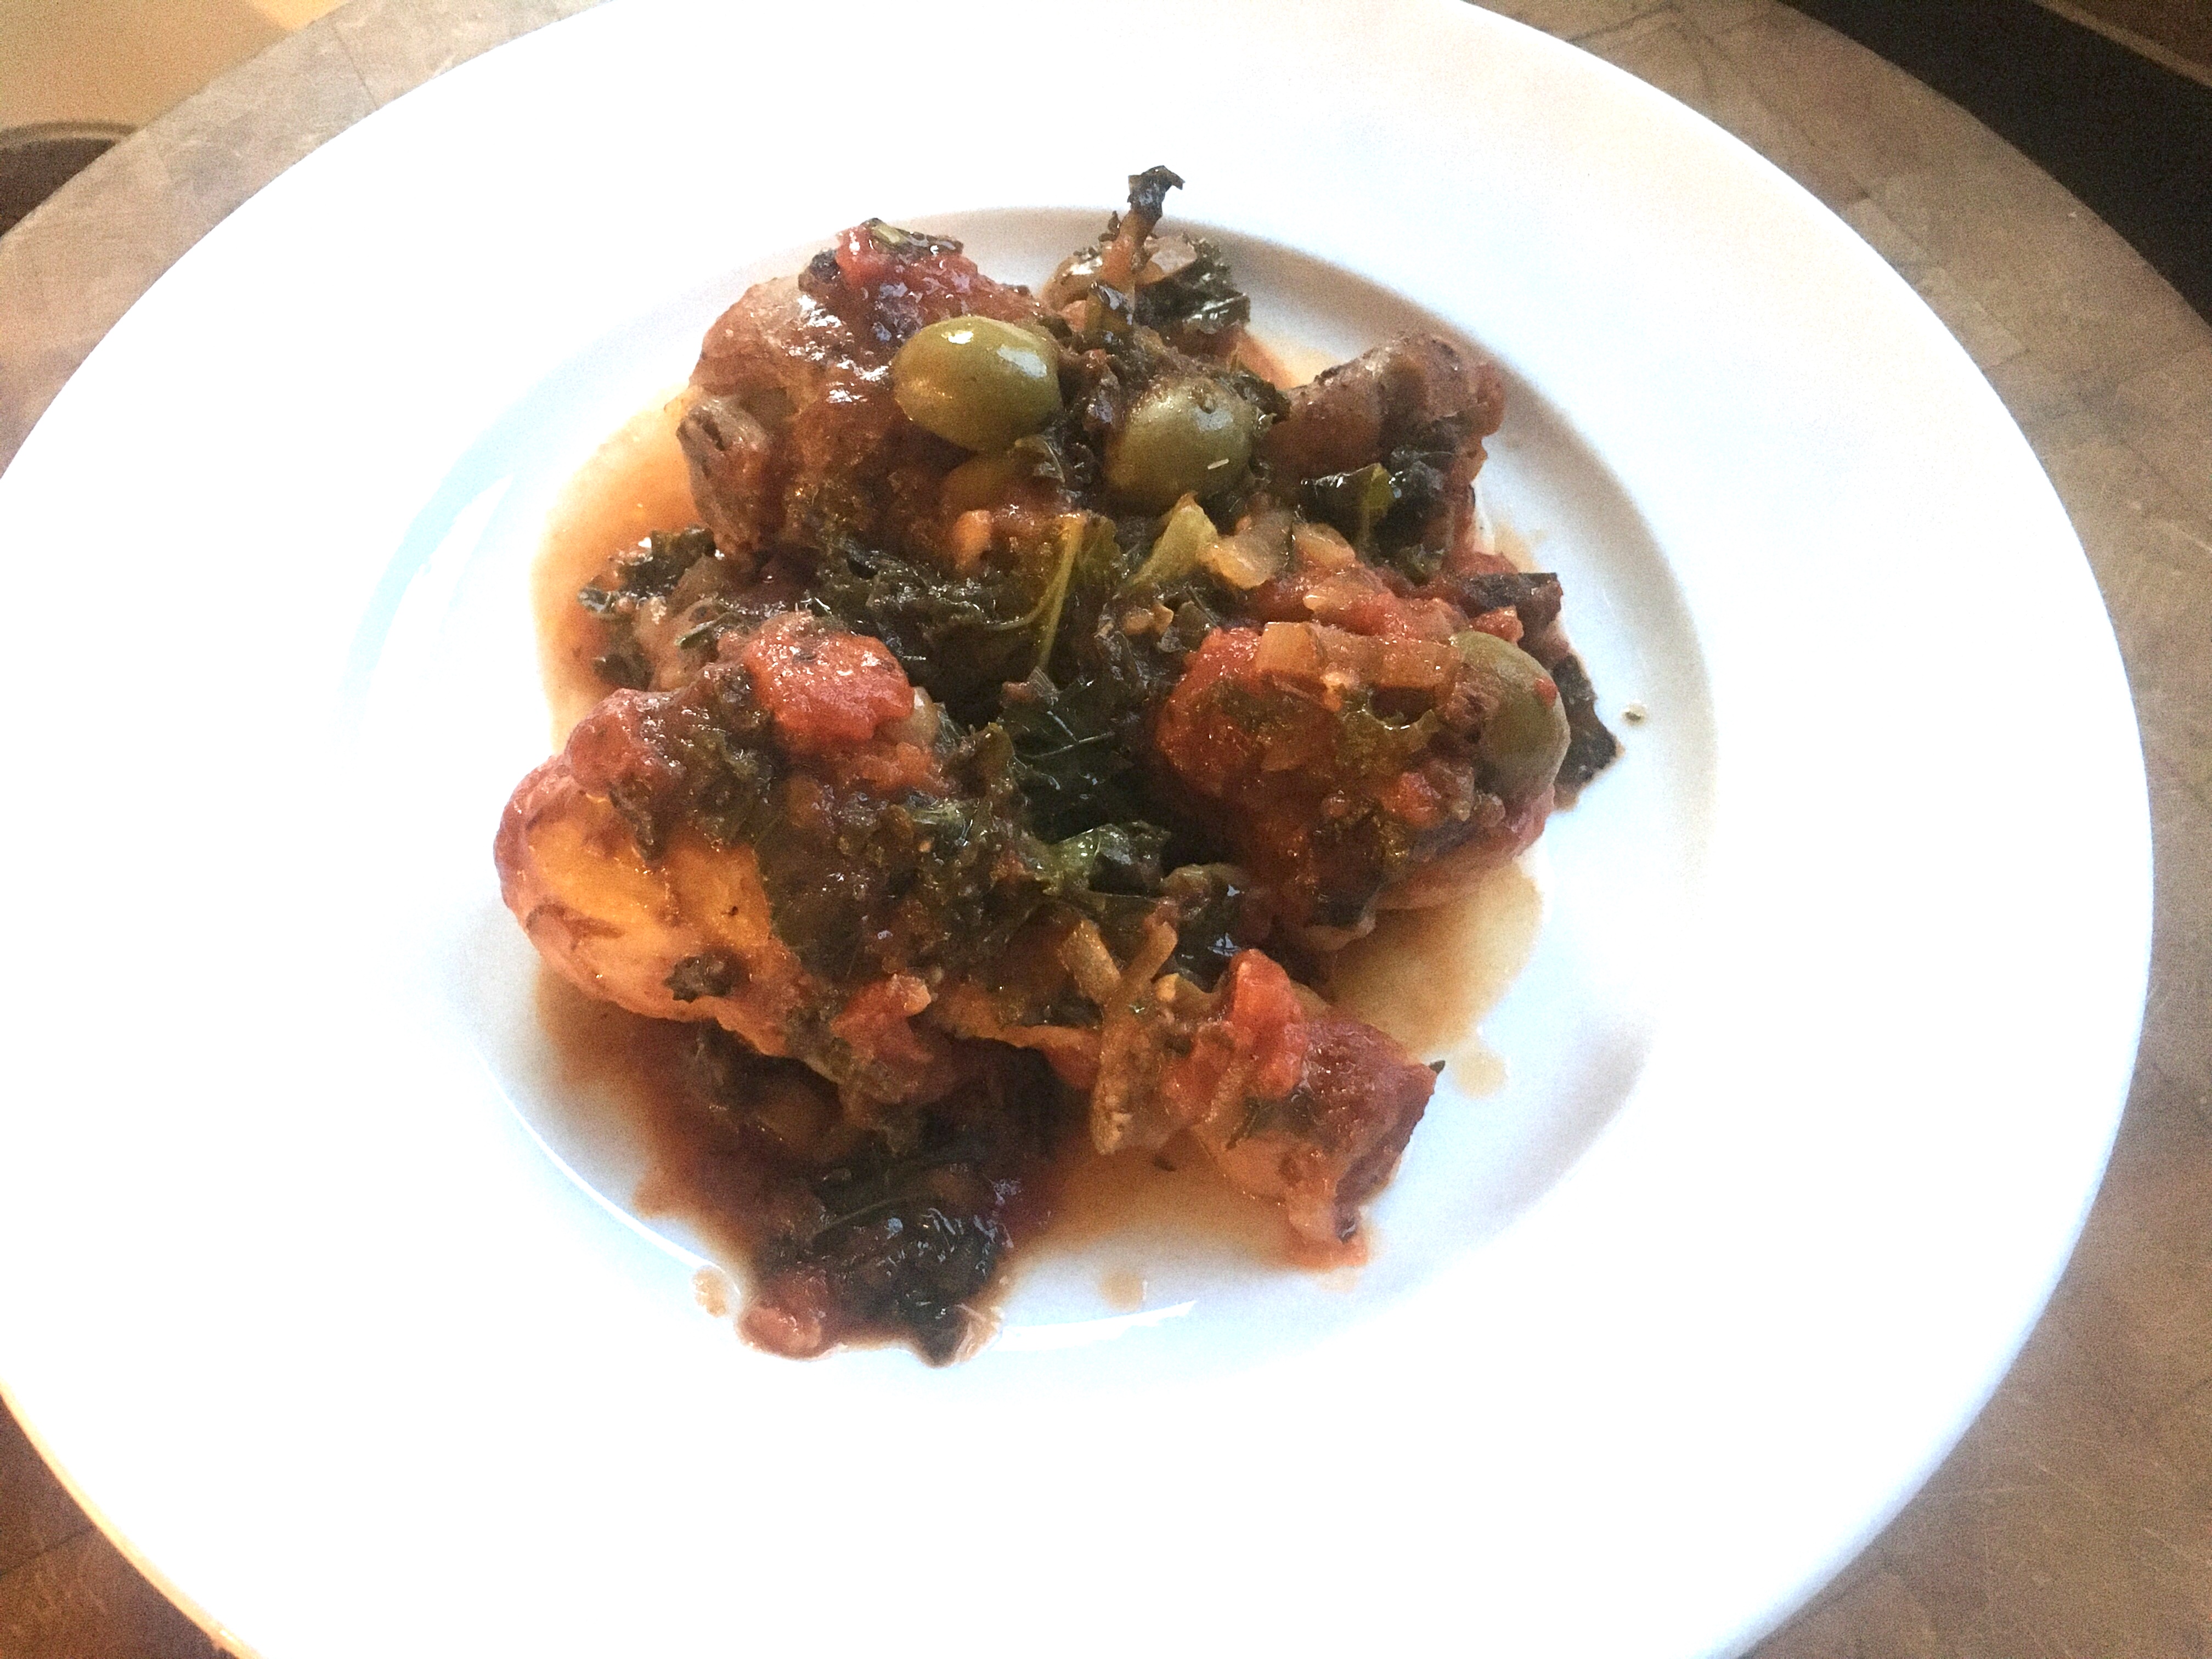
If I’m on a diet, calories matter. Chicken drumsticks aren’t all that bad in the calorie count: about 100 calories for a medium-sized drumstick (whatever medium is)…and that’s with the skin on. No need to get into exact gram weight measurements here, but the real calories come later when you add a starch to the dish. It does go really well with pasta, rice or potatoes. (My choice would be fresh Italian bread to really sop up the sauce!) But alas…I had none of those. Just a salad on the side.
I go with organic ingredients whenever possible, especially kale, which is on the “Dirty Dozen” produce list almost every year. It gets sprayed a lot.
If sodium is not a problem for you, add more olives!
2 small yellow onions, finely chopped
2 cloves garlic, squeezed through a press
1 teaspoon each: dried oregano, parsley, and thyme
1 tablespoon tomato paste
1 can (28 oz.) crushed tomatoes
1 cup chicken stock (homemade is best)
dry white wine (optional)
1/4 cup olives, sliced in half (I like green olives from Greece)
4 cups organic chopped kale (optional)
Pre-heat an oven to 350 degrees.
Season the chicken drumsticks with salt, pepper, and a bit of paprika.
Put a couple of tablespoons of olive oil in a hot pan. Add the chicken to the pan, and sear the drumsticks on all sides, getting them nice and brown. It’ll take about 10–15 minutes.
Remove the chicken pieces from the pan and add the chopped onions to the same pan. Let them cook for a few minutes until they’re translucent, then add the garlic. Let the garlic cook for about 10 seconds, then add the oregano, parsley, and thyme. Now add the tomato paste and stir it all around, cooking it for just a minute to caramelize it and give it more flavor.
Pour in the can of tomatoes and the chicken stock, stirring well. (A splash of wine is optional at this point.) Add the olives and let the sauce cook for a few minutes.
The sauce is all happy, and ready for the baking pan.
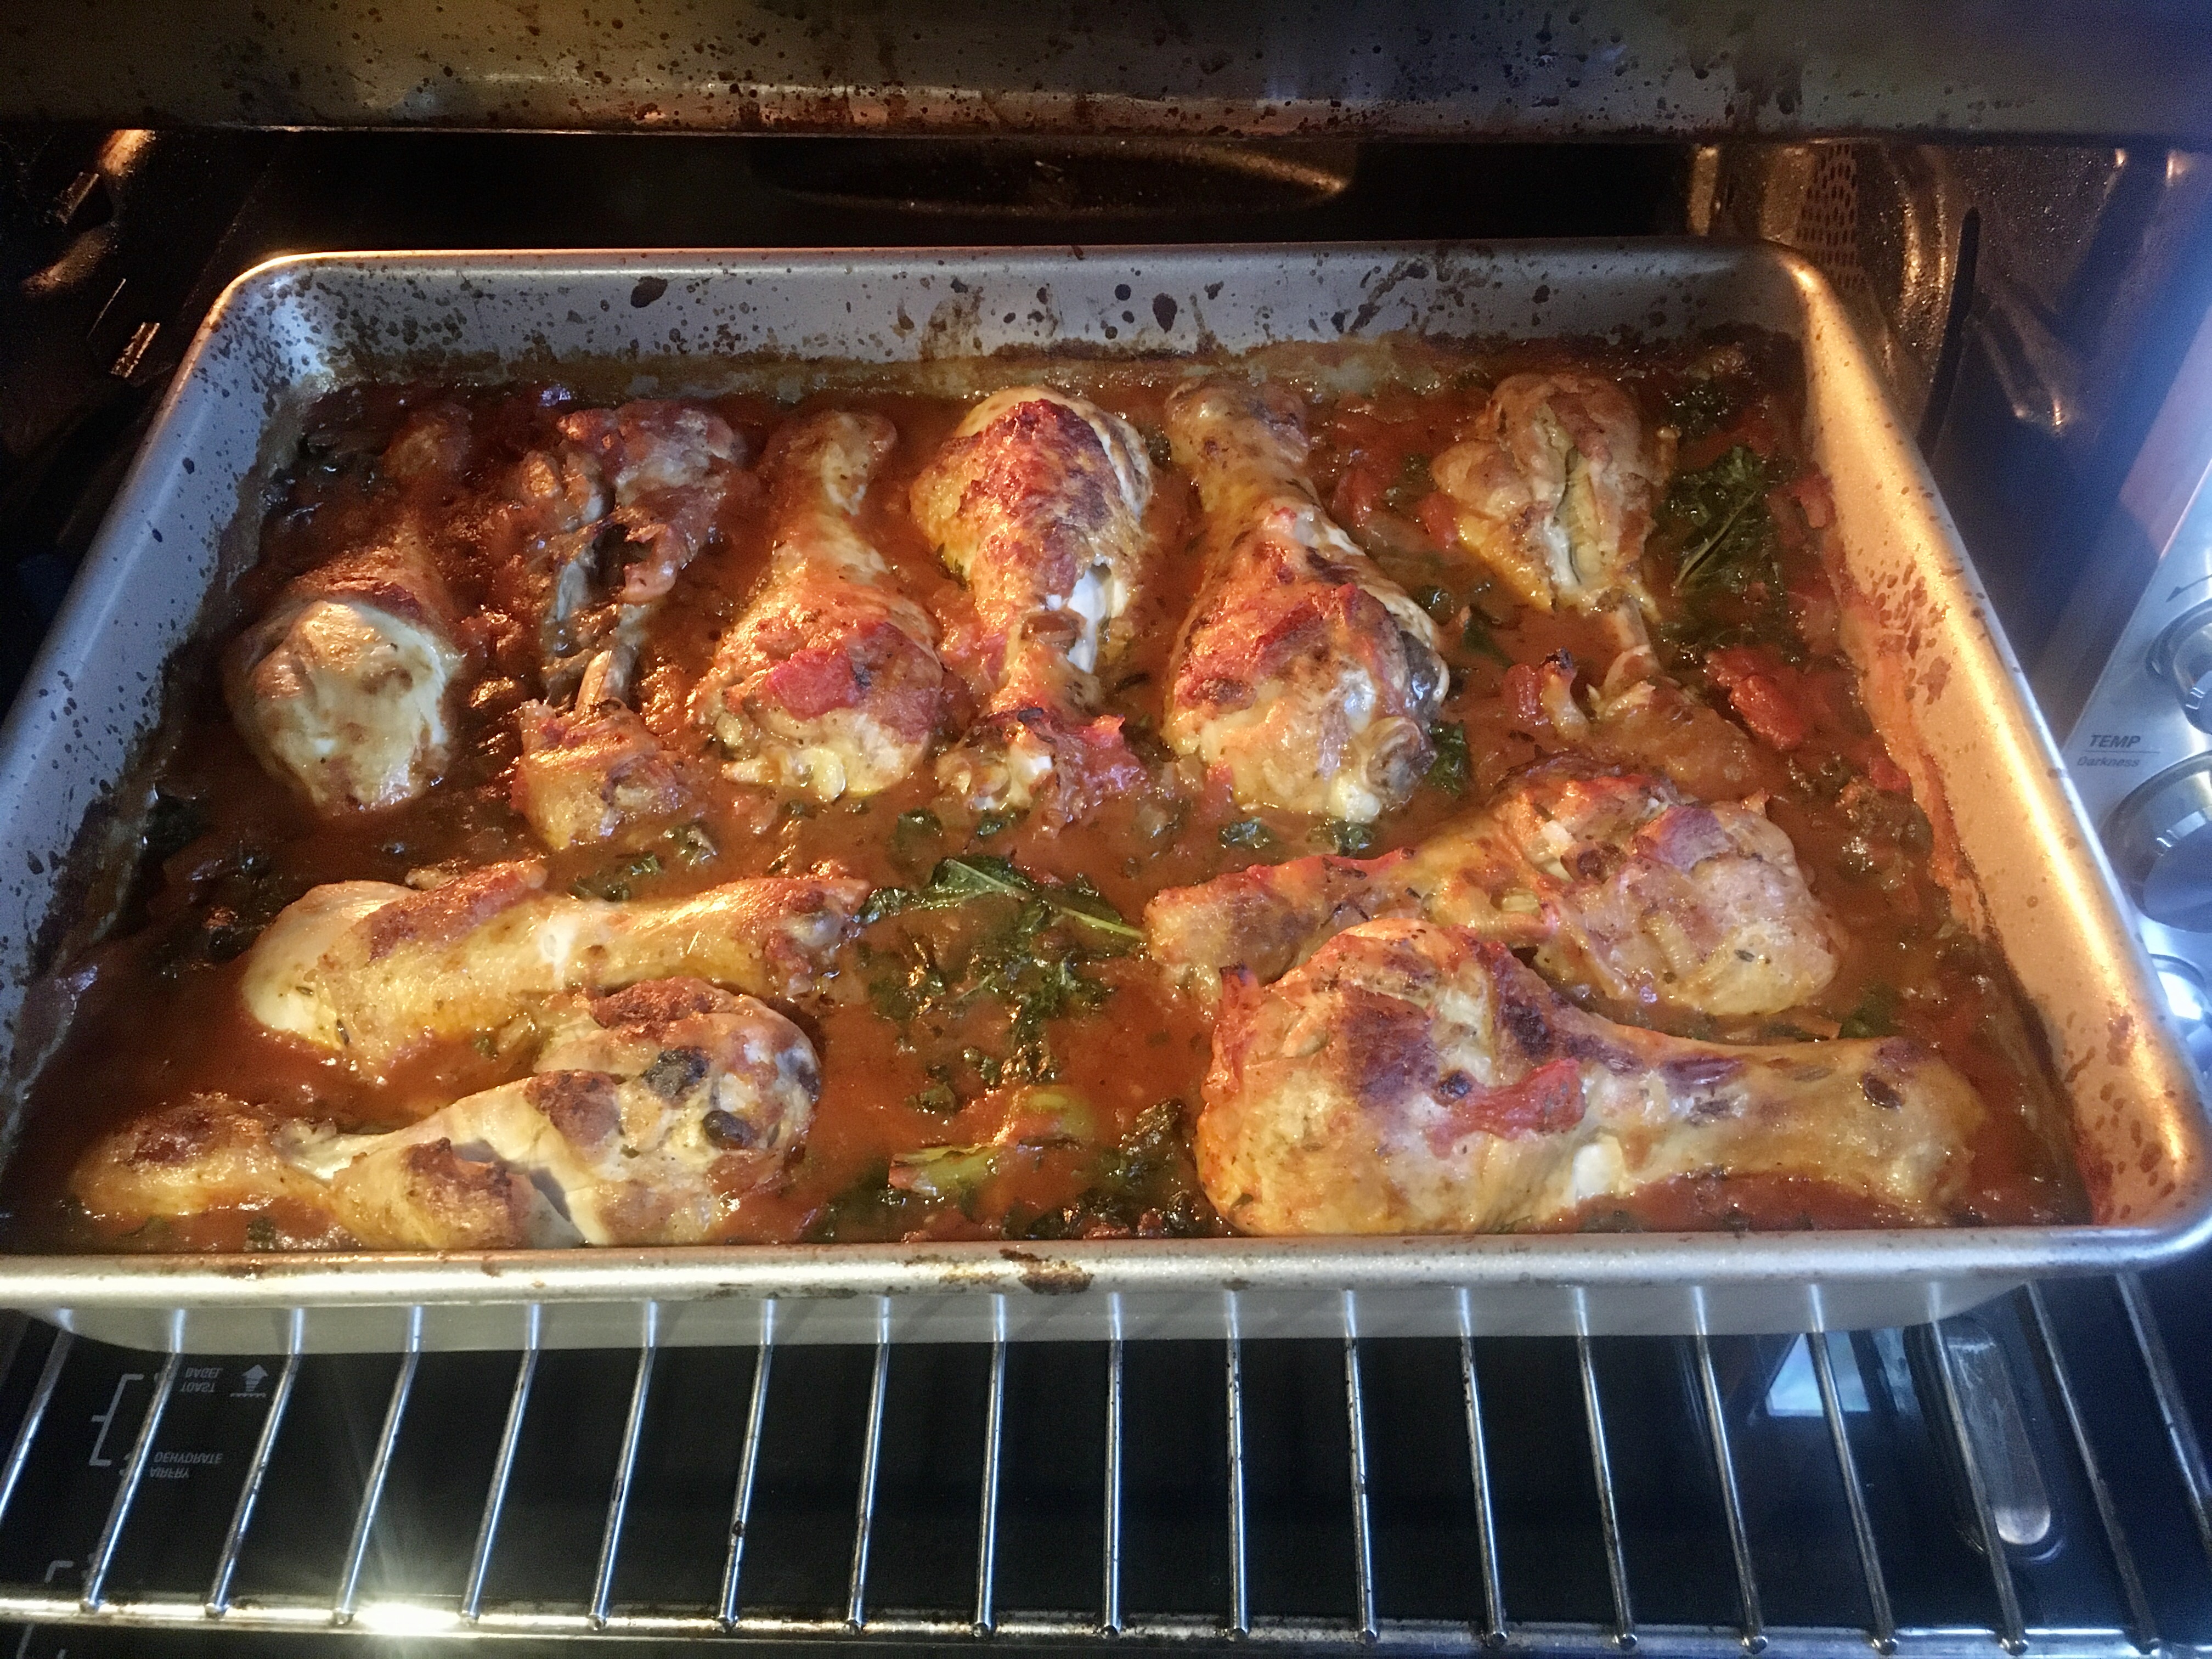
Pour the sauce into the baking pan. Add the chicken drumsticks to the pan, nestling them in the sauce. (I like to roll them around in it to cover all sides.)
Place the pan in the oven to cook.
After 30 minutes, remove the pan from the oven, and remove the drumsticks from the sauce, moving them onto a plate.
It looks like a lot of kale, but it withers down. Remember: go organic!
Take the kale and place it in the baking pan, tossing it around in the sauce. The sauce is hot, so the kale will start to wither and meld into the sauce in about a minute.
The kale’s withered down, and the chicken goes back in.
Now return the chicken drumsticks back to the baking pan, nestling them in the sauce again. Return the pan to the oven and bake for another 15 minutes. Turn the oven off and let the pan rest in the oven until you’re ready to serve.
Turn the oven off, but keep the door closed to keep the chicken warm.
If you’re trying to think of something new and interesting to bring to the Memorial Day picnic, this is it. It was a huge hit when I brought it to a neighborhood party a while ago.
Imagine the best of a deviled egg and a BBQ chicken sandwich, and you’ve got this appetizer that rocks in more ways than one….and you can make it ahead of time.
I boil the eggs and make the cole slaw the day before, then keep them in the fridge. Even the chicken can be cooked the day before and then warmed through before assembling right before you need it. Be sure to make a lot of them…they’ll go faster than the hard-boiled eggs in “Cool Hand Luke!”
This recipe is gluten-free, as long as you use GF soy sauce.
For the chicken and BBQ sauce:
3 cups ketchup
1 tablespoon apple cider vinegar
2 tablespoons soy sauce
1 teaspoon hot sauce (I use Frank’s Red Hot)
1/4 cup + 2 tablespoons brown sugar
1 lb. boneless skinless chicken breasts
6 hard-boiled eggs
1/4 cup mayonnaise
1 tablespoon mustard (I use Gulden’s)
Pre-heat the oven to 250 degrees.
Combine the ketchup, apple cider vinegar, soy sauce, hot sauce, and brown sugar in a oven-proof pot with a lid. Mix well, then add the chicken breasts, making sure they’re immersed in the sauce. Cook low and slow in the oven for about 2 hours.
When the chicken is cooked through, shred the meat with 2 forks. Set it aside, but keep it warm.
Combine all the cole slaw ingredients in a bowl, mixing well, and place them in the fridge.
For perfectly hard-boiled eggs, place the eggs in a pot of cold water, and turn the heat on high. Just before the water starts to boil, put a lid on the pot and turn the heat off. Let the eggs sit in the hot water for 15 minutes. Once cooked, keep the eggs in the fridge.
Slice the eggs in half and place the yolks in a bowl with the mayonnaise and mustard. Mix well and keep in the fridge.
To assemble, take a teaspoon of the mayo/mustard/yolk mixture and place it in the cavity of one of the egg halves. Place another teaspoon of the shredded chicken on top (I like it warm, to counter the cold of the mayo and cole slaw), drizzling a little of the BBQ sauce that you cooked the chicken with on the meat. Then place a teaspoon of the cole slaw on top of the chicken.