Posts Tagged ‘food’

For me, deep-fried turkey is just too much damn work: finding a safe spot in the yard to blast the propane-fueled fryer so that you don’t burn your house down, standing outside and freezing your ass off while it fries, and then disposing of gallons of used oil at the end of it all. And making sure the oil is at the right temperature so you don’t get a scorched turkey on the outside and raw turkey on the inside. Sure, they now have indoor turkey fryers, but I’m not crazy about that idea, either.

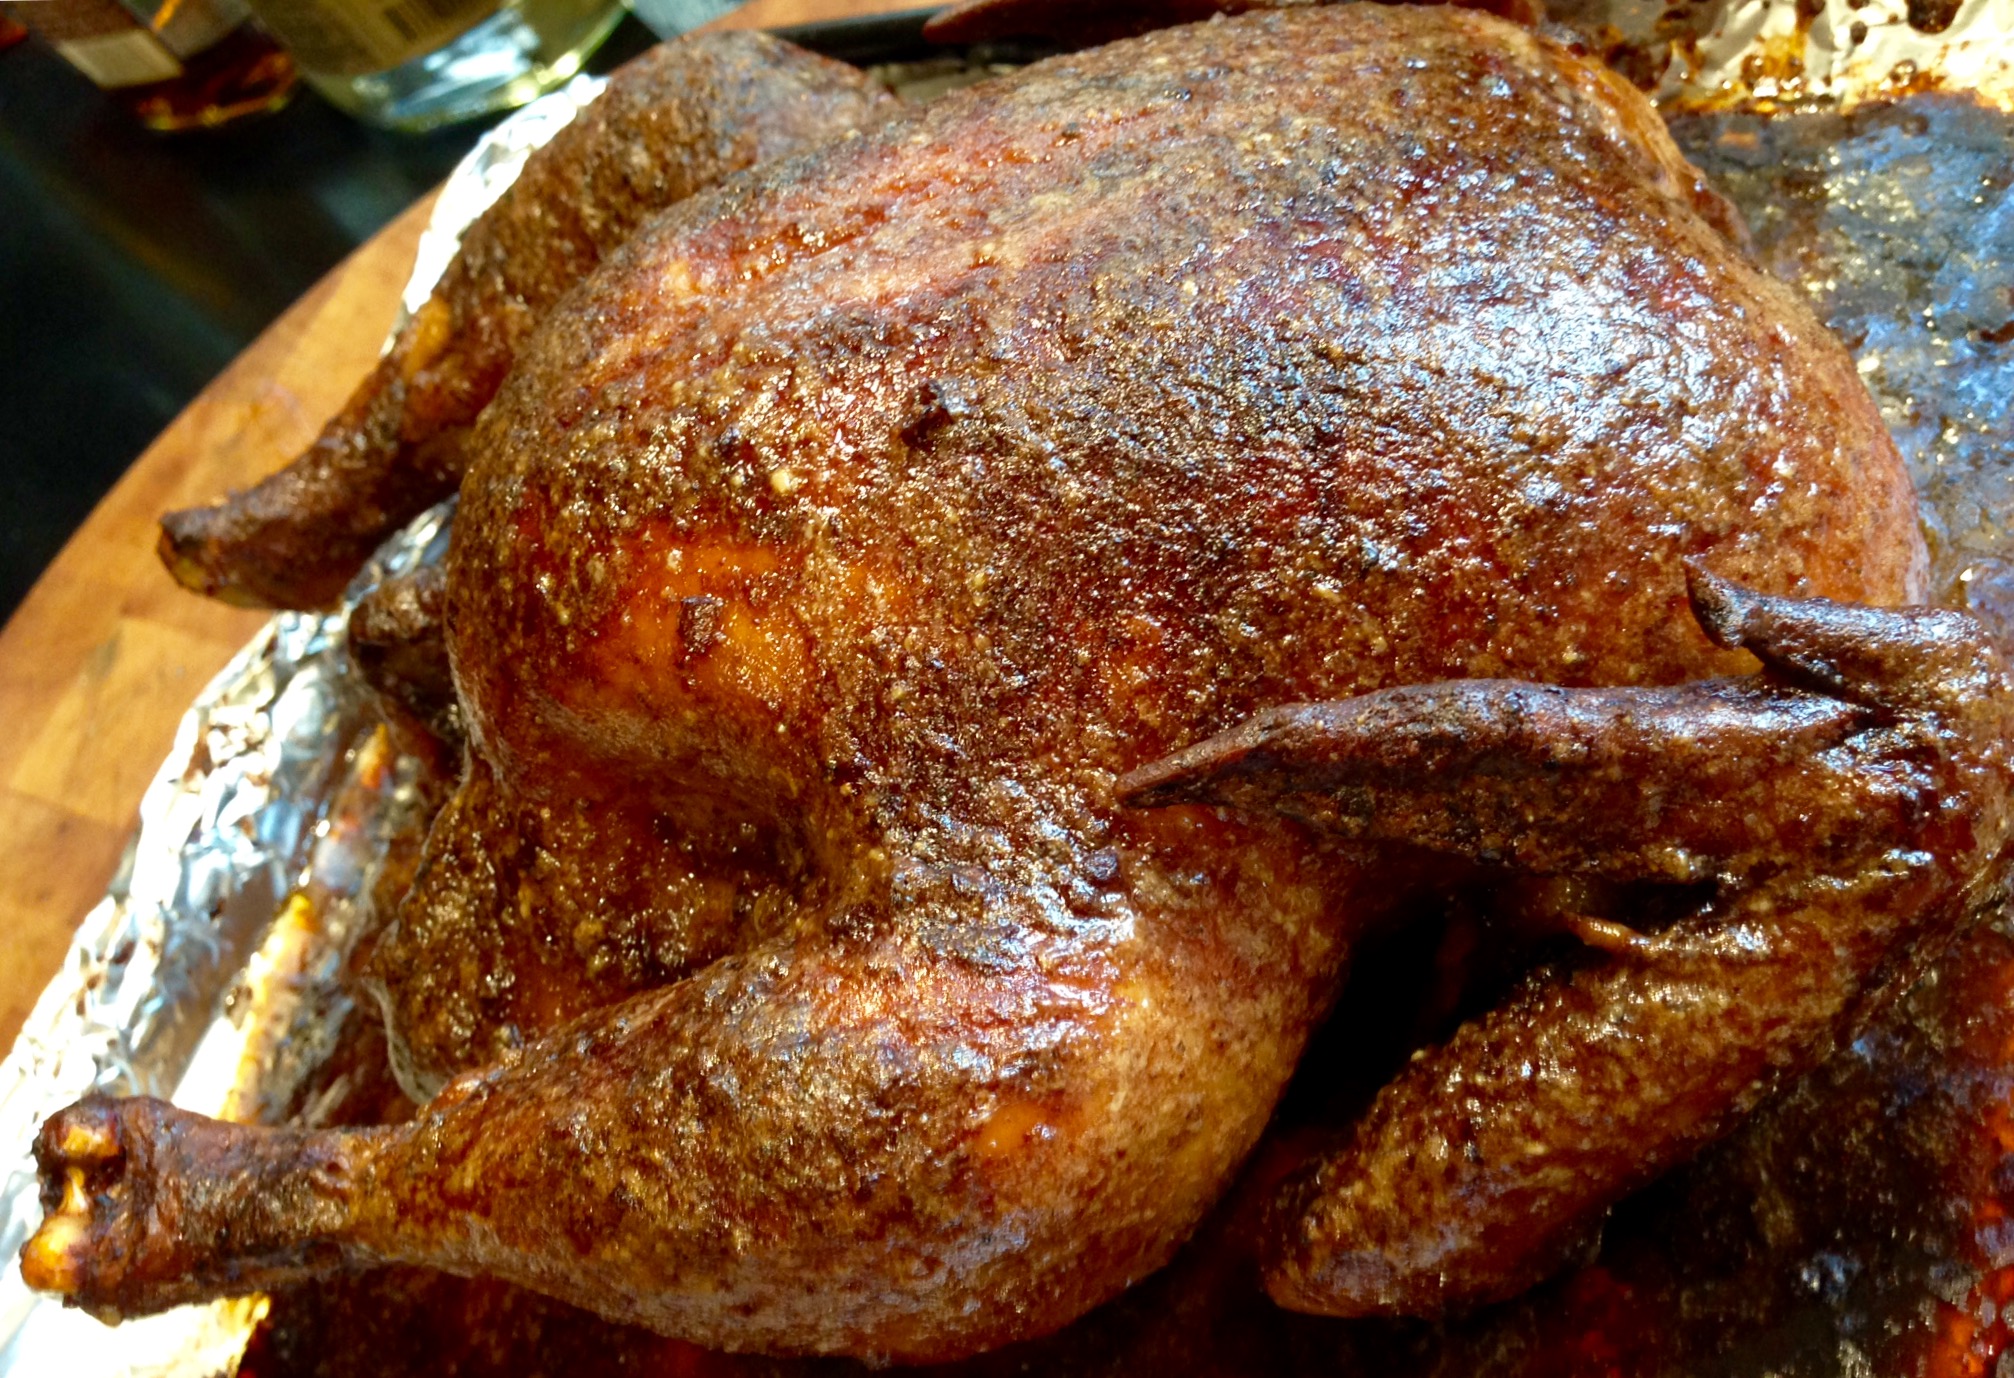
I get great results by cooking my turkey in my Weber grill. The standard Weber allows you to cook up to a 15 lb. bird–big enough for my purposes–and it comes out crispy, smokey and delicious.

The charcoal chimney with hot coals awaits.
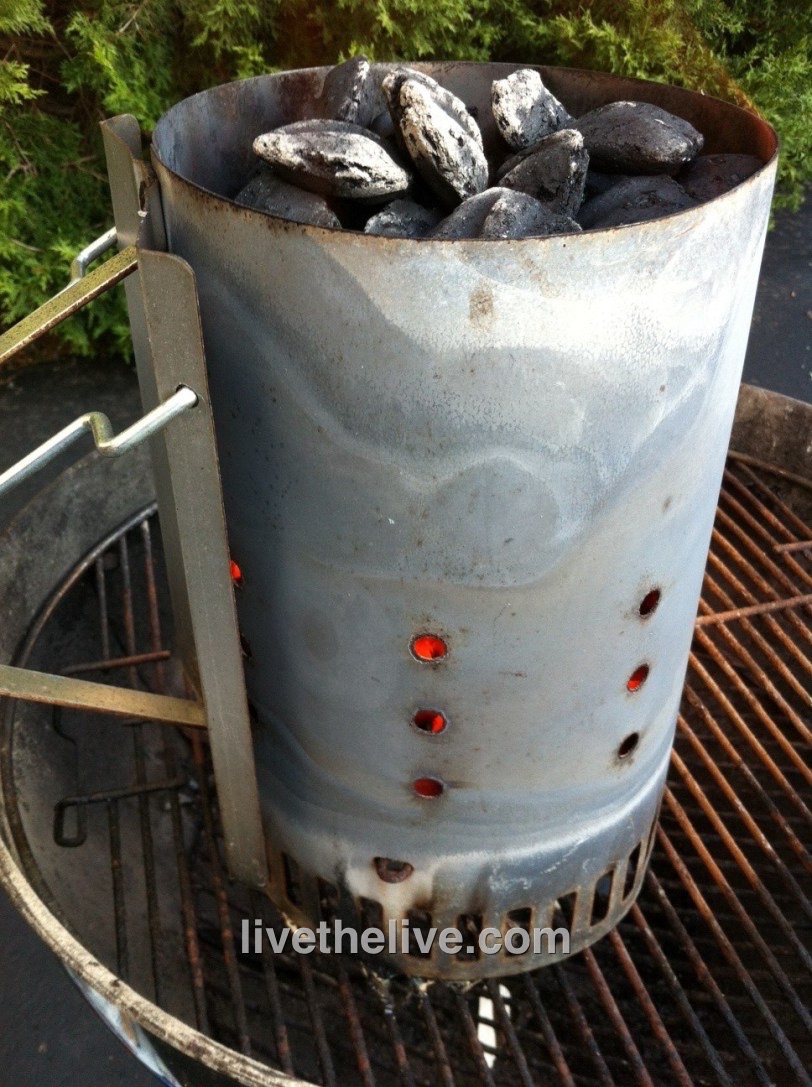
The charcoal chimney with hot coals awaits.

Although I’m a purist and always use natural hardwood charcoal, this recipe works best with Kingsford briquettes. The idea is for the coals to cook slowly and evenly. And, unless you want your turkey to taste like gasoline,  never use lighter fluid…always start your fire with a few pieces of crumbled newspaper under a charcoal chimney.


Weber grill, with the dome top
Kingsford charcoal briquettes (don’t use Match Lite or other pre-soaked briquettes)
Heavy duty aluminum pan (disposable)


Whole turkey, up to 15 lbs, thawed and brined (see my blog about brining a turkey)
Olive oil (to rub on turkey)
2 yellow onions, chopped
4 stalks of celery, chopped
½ lb (2 sticks) of unsalted butter, melted
1 tablespoon granulated garlic
1 tablespoon granulated onion
2 tablespoons salt
1 tablespoon pepper
Spreading the coals away from the center of the grill.

Spreading the coals away from the center of the grill.

If you want stuffing, make it separately and cook it separately. (A great recipe in my next blog.)

Light 8 to 10 lbs. of charcoal in the grill…depending on the size of the turkey and how cold it is outside.

Remove the giblets from the turkey. Place the bird in the aluminum pan.

In a small bowl, mix the granulated garlic, granulated onion, salt and pepper Add any other seasonings you like.

Coarsely chop the onions and celery. Place them in a another bowl. Mix with the melted butter and 1/3 of the salt/pepper/garlic powder mixture. Place a small handful of this “stuffing” mixture in the neck cavity of the turkey. Place the rest in the body cavity (where the stuffing would usually go.) You can fasten the bird with turkey skewers if you like. This “stuffing” is strictly to flavor the turkey…you don’t eat it!

The rubbed, stuffed and seasoned bird.
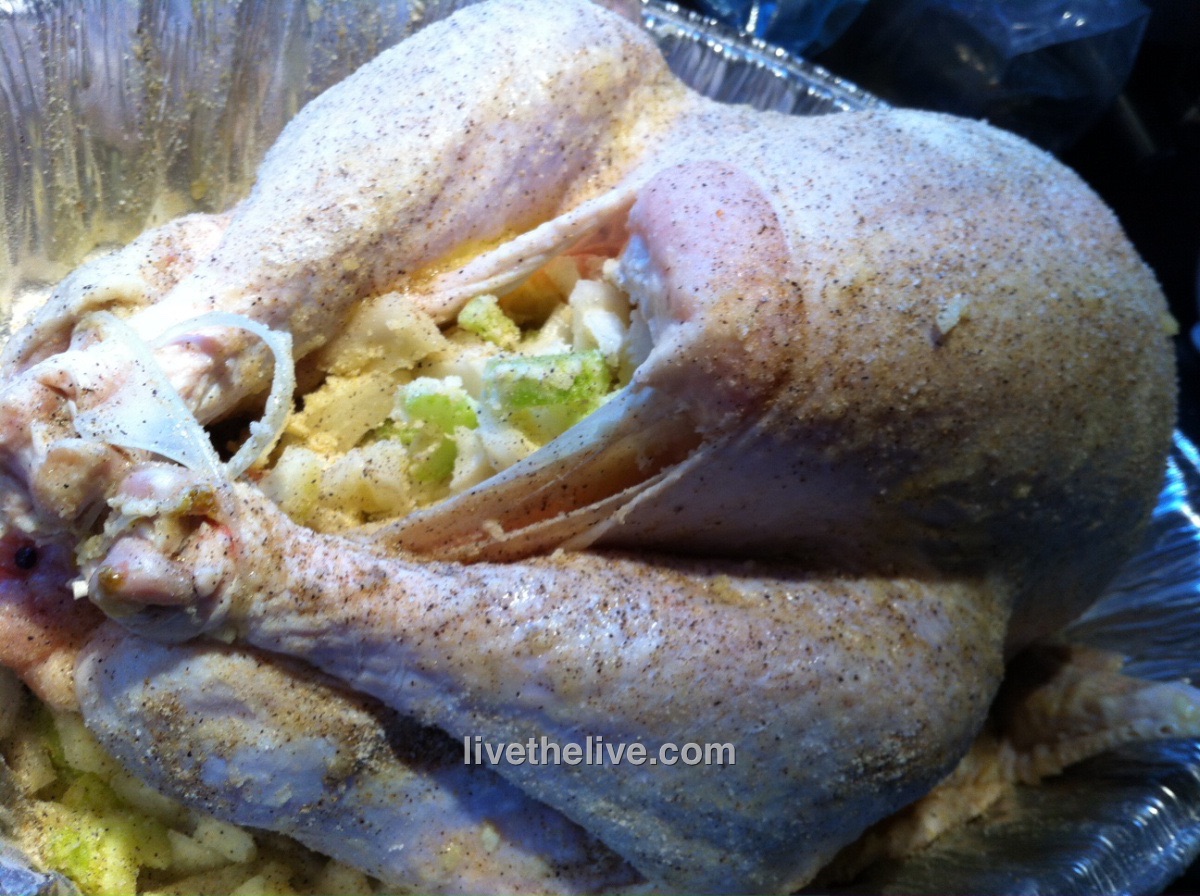
The rubbed, stuffed and seasoned bird.

Rub the outside of the entire turkey with the olive oil and sprinkle the rest of the garlic/onion/salt/pepper mixture on the outside of the bird. Make sure you get the bird on the bottom as well.

When the coals in the grill have ashed over, spread them to the outside edges of the Weber equally. Put the cooking grill rack in place. Place the aluminum pan with the turkey in the center of the grill, keeping it away from the direct heat of the coals. If you’re using a meat thermometer, insert the probe into the thickest part of the breast, being careful not to hit the bone. Place the lid on the grill. (You may need to bend your pan a bit.) Open the vents on the bottom of the Weber as well as the lid. Important to get air circulating!

My meat thermometer calls me from as far as 100 feet away! Time for a cocktail!

My meat thermometer calls me from as far as 100 feet away! Time for a cocktail!

No basting is necessary.

Now here’s the tough part: DO NOT OPEN THE GRILL TO CHECK ON THE TURKEY! (If you must look, shine a flashlight into the vent holes on the lid to take a peek at the pop-up timer, if there is one.) The whole point is to keep the heat inside the kettle. You’ll know your turkey is done when no more smoke or heat rises from the grill, and the turkey inside stops making sizzling noises.

Remove the turkey and let it rest at least 15 minutes before carving.

If you pull the turkey out too early and find that it still needs cooking, or if your coals die out too soon, simply place the bird in a 350-degree oven to finish. It will still have that wonderful smokey flavor from the grill.

Beautifully grilled, and perfectly cooked in less than 2 hours!
Beautifully grilled, and perfectly cooked in less than 2 hours!

Thanksgiving is only a couple of weeks away. Time to talk turkey! No matter what method you prefer to cook your bird, brining it beforehand will make it tastier and juicier. And it’s easy to do.

It’s basic high school science: the brine has a greater concentration of salt and water than the molecules of the protein (in this case, a turkey) that is soaking in it. By simple diffusion, the protein molecules suck up the salty water and keep it. When you cook the meat, some of the water evaporates, but the meat still has far more moisture in it than it would have without the brine soaking, and the result is a moister, more delicious bird.

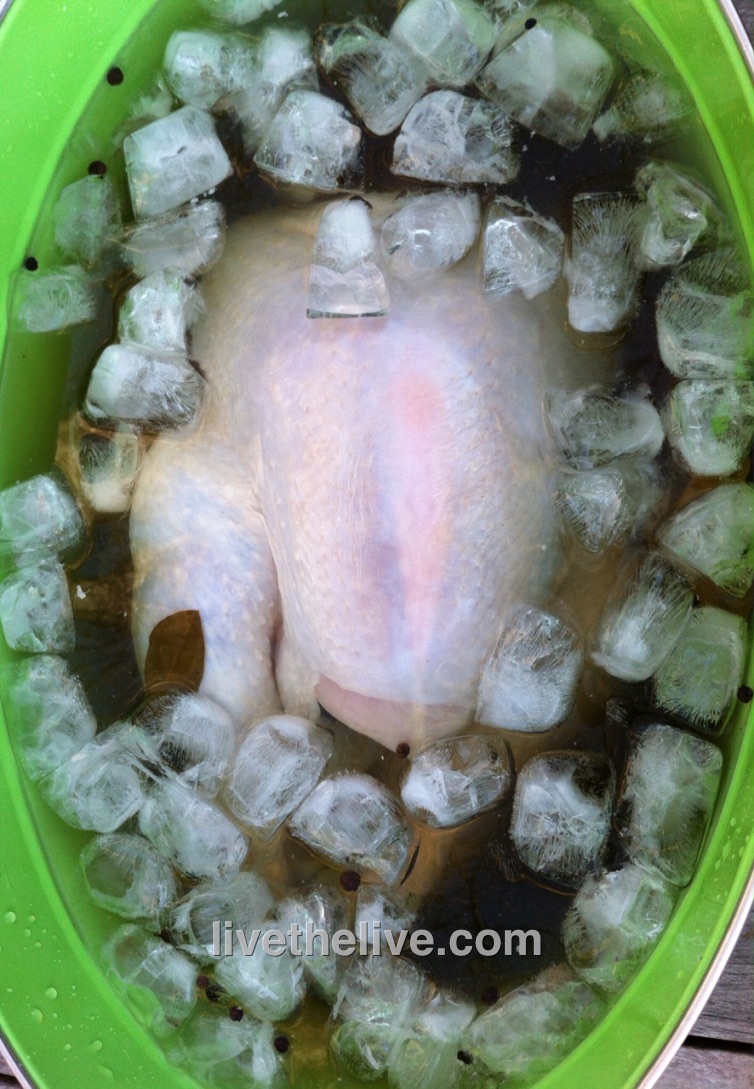
Some people use giant syringes to inject their turkeys with crazy solutions, but I think that the old way is still the best when it comes to brining. Get a big pot, fill it with the brine, and soak the bird in it. Done.

Here’s my tried-and-true turkey brining recipe. Once the brining is done, you can cook the turkey whatever way you like best. I use a method where I grill it inside a Weber grill with charcoal. It comes out smokey and absolutely amazing. I’ll have that info in the next blog.

image

1 gallon of water
2 onions
3 carrots
3 stalks celery
1 cup kosher salt
1 tablespoon black peppercorns
1/2 cup light brown sugar
1 1/2 teaspoons whole allspice
4 bay leaves
1 gallon of ice water
14–15 lb turkey, thawed

Pour the first gallon of water in a large pot. Quarter the onions, carrots and celery (no need to peel them) and add to the water. Add salt, black peppercorns, brown sugar, allspice, and bay leaves.

Let the pot come to a boil for a few minutes. Remove it from heat and let the brine cool down to room temperature.

Remove the giblets from the turkey and place the bird in a container just big enough to hold it and 2 gallons of liquid.

Pour the now-cooled brine over the turkey, then pour in the gallon of ice water.


Make sure the turkey doesn’t float up by placing a plate on top. Put the turkey container in the fridge for 4 to 6 hours, flipping the turkey over in the container halfway through.

Drain the turkey, pat it dry with paper towels, and then cook it using your favorite recipe.


November 5 is National Men Make Dinner Day. At my house, that’s every day. But soup is a great recipe for men to learn, because you can’t burn it!

When I first posted my recipe of Portuguese kale soup, I was told by many Portuguese friends that my soup wasn’t authentic so I couldn’t call it that. Fair enough. Well, my Portuguese pal, Paula, has a great soup recipe that has been passed down from her Mom. Her Mom even adds chicken feet to the stock, which Paula chooses to leave out. Like most Portuguese soup recipes I’ve seen, there’s a ton of carbs: often potatoes with pasta with a lot of beans. But damn, it’s good!

Paula’s Portuguese Soup

3 cans garbanzo beans
2 cans white cannellini beans
1 can pink beans
1 fennel bulb
Large bunch of kale
5-6 potatoes
1 cabbage
2 sticks hot chourico
Beef ribs
1 cup dry macaroni (elbows)
Red crushed pepper wet-optional

Drain and puree  3 cans of garbanzo beans in a food processor. Put the puree in a large pot with about a gallon of water.  Chop the chourico, and add it to the puree along with the ribs. Boil for 20 minutes. Chop the fennel bulb and cabbage into 2 inch squares.  Add the fennel and cabbage to soup and boil for 30 minutes.  Add the chopped kale, and boil for 30 minutes. Add the cubed potatoes and before the potatoes are done, add the remaining drained cans of beans. Add macaroni and cook for a short time at the end.

My version of the classic Portuguese kale soup.

My version of the classic Portuguese kale soup.

Here’s my version: carb-friendly, but still packs a lot of flavor.

4 cups home-made chicken or beef stock
4 cups water
1 cup lentils, rinsed in cold water
1 onion, finely chopped
1 carrot, finely chopped
2 stalks celery, finely chopped
1 clove garlic, through a press
1 lb. chourico, peeled and chopped into small cubes (I use the mild stuff: Mello’s, out of Fall River, Mass.)
1 large bunch organic kale
salt and pepper

Add the stock and water to a large pot. Heat until boiling. Add the lentils.

In a saucepan with a little olive oil, saute the onions, carrots, celery, and garlic for a few minutes. Add the chopped chourico and saute a few minutes more. Add the contents of the saute pan in the pot.

Wash and de-stem the kale, tearing the leaves into smaller pieces. Add the leaves to the pot and stir. The stems go in your compost pile. (You can also use them in a juicer.)

Cook the soup until the lentils are al dente. Taste and season for salt and pepper before serving.

Crab is so delicious, but it’s not inexpensive. So a great crab cake is like a great lobster roll: mess with its wonderful flavor as little as possible. There’s no place for bell peppers or any veggies in my crab cakes. Five simple ingredients make the best crab cake you’ve ever had. I always buy wild-caught American seafood, and it’s easy to make this gluten-free as well.
FullSizeRender (7)
1 pound crab meat
1/3 cup oyster crackers (or GF rice crackers, see below)
1 teaspoon Old Bay seasoning
1/2 cup mayo/mustard blend

To make the mayo/mustard blend, combine 1 cup mayo to 1/4 cup mustard. I use Gulden’s mustard. Set aside.

Take the oyster crackers and pulse them in a food processor until it resembles oatmeal…not too fine.

In a bowl, gently mix all the ingredients. Use a 1/2 cup measure, lightly pack the crab mix into the measure with your hands, then pop them out and place on a baking sheet lined with non-stick aluminum foil. Pop them in the fridge for at least 15 minutes to set.

Pre-heat the oven to 350. Place the tray of crab cakes in the oven and bake for 25 minutes, until done.

Any leftover mayo/mustard works great as a tartar dipping sauce. Just finely chop some pickles, add a splash of Worcestershire and/or hot sauce, and mix with the mayo/mustard.

To make this recipe gluten-free, I use GF rice crackers (similar to Saltines in texture) and pulse them in a food processor until it resembles oatmeal.


Shrimp with an orange sauce is something you see on every Chinese restaurant menu. I didn’t have oranges, but wanted a citrus kick to my sweet and spicy sauce. I went with grapefruit and I never looked back!

image


For the rice:

1 cup basmati rice (I use Texmati brown rice)
2 cups seafood stock (I use homemade shrimp and fish stock)
1/2 teaspoon salt
2 scallions, finely chopped
splash of peanut oil


For the veggies:

1/2 Vidalia onion, finely chopped
1 lb. fresh green beans, washed and cut into 1/4′ pieces
1 teaspoon soy sauce
splash of peanut oil


For the shrimp:

2 dozen thawed, peeled and de-veined wild caught USA shrimp
2 tablespoons spicy Schezuan sauce
3 tablespoons hoysin sauce
juice and zest of 1 grapefruit
splash of peanut oil


Cook the rice according to the directions on the package. I substituted seafood stock for water. Once cooked, toss in the chopped scallions. Set aside.

Add peanut oil to a hot pan and saute the onions until translucent. Add green beans  and cook until al dente. Add the soy sauce, stir, and then pour the contents of the pan into the rice. Mix well.

Using the same pan, add a little more peanut oil and sear the shrimp on both sides. Don’t overcook! Push the shrimp to the sides of the pan so that a circle remains in the middle. Add the Schezuan sauce and hoysin sauce and stir them together, then blending in the shrimp until the shrimp are covered with the sauce. Add the grapefruit zest and juice and stir until everything is combined and the sauce has thickened just a bit.

Pour the contents of the pan into the rice mix and combine. Add more soy sauce to the rice, to taste.

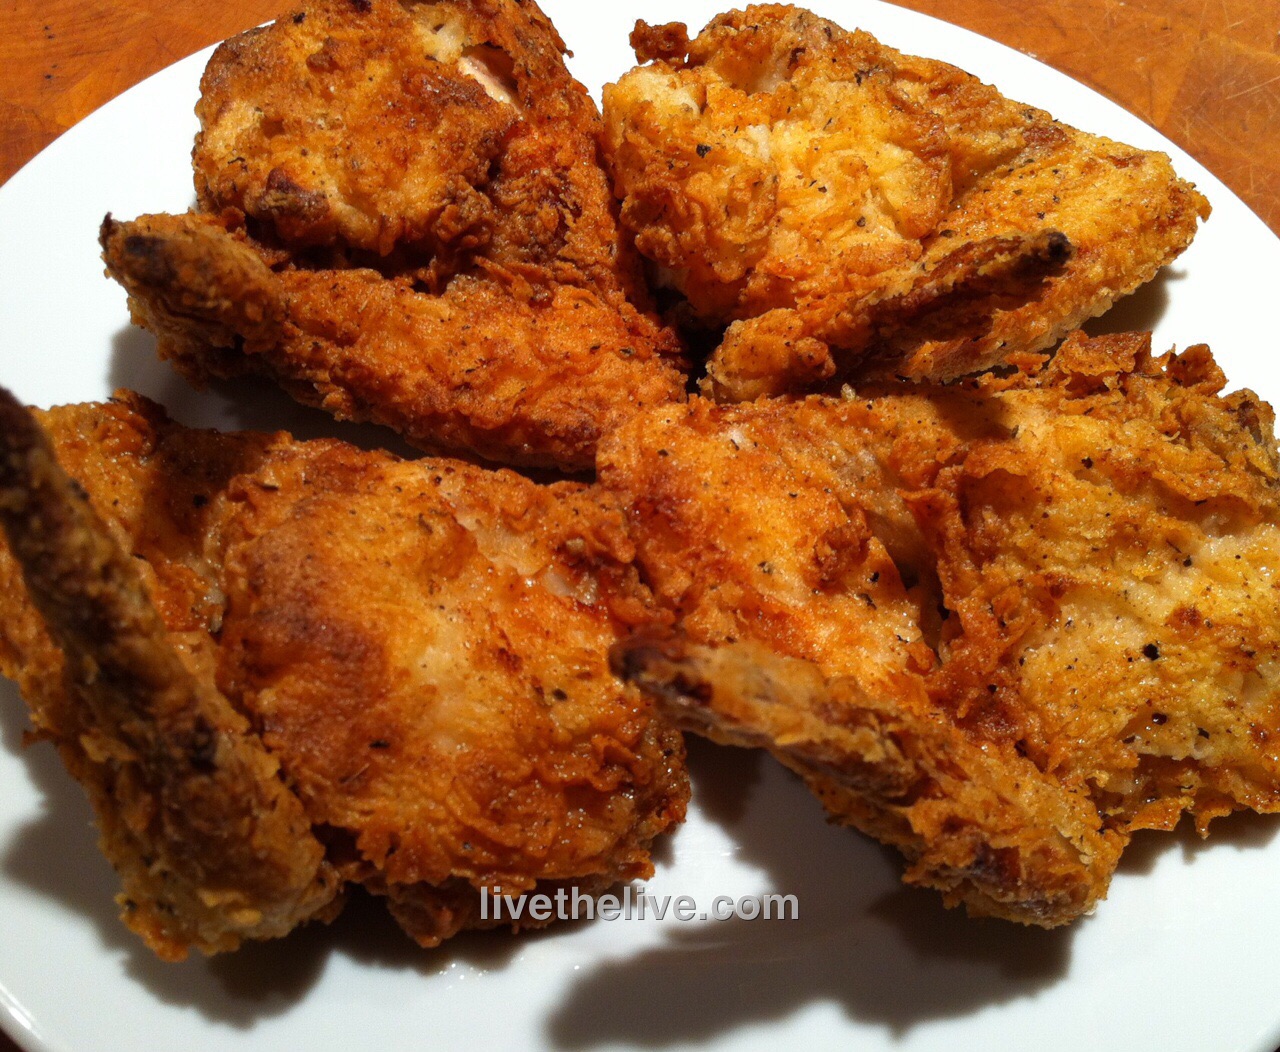
I love fried chicken. And despite what most people think, fried food is really not that bad for you if you fry it properly. I use clean avocado oil every time, sometimes adding bacon fat or pork fat if I have it. And I get the oil to the right temperature: two key factors that will result in crispy chicken that isn’t bogged down with grease. What makes this recipe great is that I get all the benefits of crispy fried chicken without all the grease and without standing watch over it the whole time.

You can use any chicken parts for this recipe. Fry the chicken until it just turns golden brown and then finish it in the oven.


10 lbs. large chicken wings or chicken pieces
Avocado oil, for frying

For soaking:

1 quart buttermilk
1 tablespoon hot sauce (I use Frank’s Red Hot)

For the seasoned flour:

2 cups all purpose flour (I use gluten-free flour)
1 tablespoon sea salt
1 teaspoon freshly ground black pepper
1 teaspoon paprika
1 teaspoon granulated garlic
1 teaspoon onion powder
1 teaspoon basil
1 teaspoon oregano

Open the bottle or carton of buttermilk and add 2 teaspoons of hot sauce. Close the container and shake to combine. Place the chicken pieces in a Ziploc bag, cover with the buttermilk, and seal the bag, letting the chicken soak in it for at least several hours. Overnight is best.

image


Pre-heat the oven to 350 degrees.

In a bowl, combine the flour, salt, pepper, paprika, granulated garlic, onion powder, basil and oregano. Mix well.

After the chicken has soaked in the buttermilk, remove the pieces one at a time, leaving the buttermilk on them as you toss the pieces into the seasoned flour. Shake off the excess flour, and then set the pieces aside on a metal baking rack placed on a sheet pan.

Pour the oil into a large heavy-bottomed stock pot to a depth of 1-inch. Heat the oil to 360 degrees on a thermometer.

image

Working in batches, place the chicken pieces in the oil, being careful not to overcrowd them. Fry the chicken until it is golden brown on both sides, then place each piece back on the metal baking rack set on the sheet pan.

Once all the chicken has been fried, place the sheet pan in the oven for 30 to 40 minutes, until it’s fully cooked and crispy.

image


Feast!

They call it fava, but it’s not the bean we usually associate with that name. Originally, broad beans were used in this dish, but quickly it changed to a type of yellow shelled lentil that is much smaller and flavorful than its American counterpart, the yellow split pea, no doubt due in part to the dry, volcanic Santorini soil it grows in. The lentil is smaller and the art of turning this simple gem into a sublime porridge is worth learning.
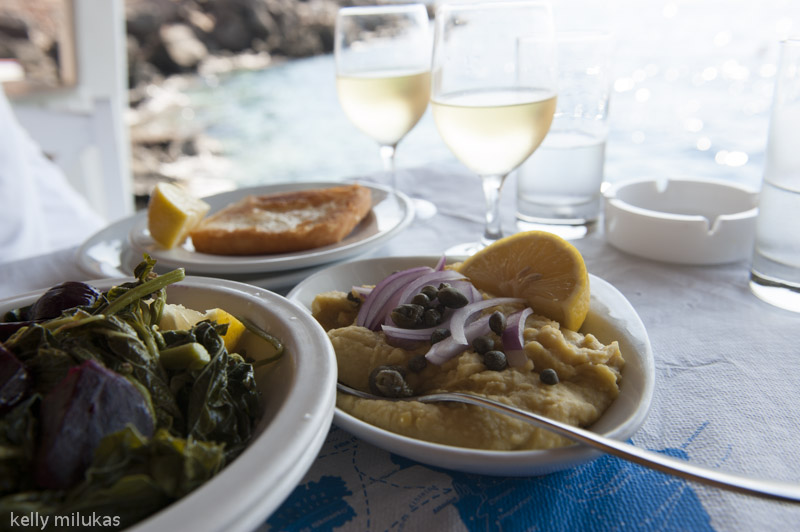
The fava at Dimitris Amoudi Taverna

The fava at Dimitris Amoudi Taverna

As common in Santorini as pasta is in Italy, grains of fava have been found in archaeological sites in the ancient city of Akrotiri (on the southern side of Santorini) dating as far back as 3500 years ago. Every taverna on the island offers their own version of fava, and though the differences are subtle, they can be significant.
Most recipes start with the dried lentils, which are washed thoroughly. They are added to a pot of fresh water and then boiled until the water reduces and the lentils slowly absorb the liquid and soften into a porridge. Often chopped onion is added to the pot of water in the very beginning, so that it completely dissolves and flavors the fava. Some recipes call for a subtle mixture of local dried herbs, similar to oregano and thyme, to be wrapped in cheesecloth and added to the pot to infuse flavor.
Like making a great Italian tomato sauce, cooking fava is a labor of love. It requires low heat and constant stirring to make it perfectly smooth. Often it is pureed in a blender at the end.
When the fava is ready to serve, the toppings can vary. Thin slices of red onion and a liberal drizzle of Greek olive oil are common. Sometimes it’s topped with locally harvested and brined caper berries or caper berry leaves, or a few kalamata olives.
Proud of his fava

Proud of his fava

On our last trip to Santorini, our most memorable fava dish was a simple, rustic version with onion, capers, olive oil and a side of lemon at Dimitris in Amoudi, and a light-as-a-cloud creamy fava topped with caper berry leaves and olive oil at Roka in Oia.
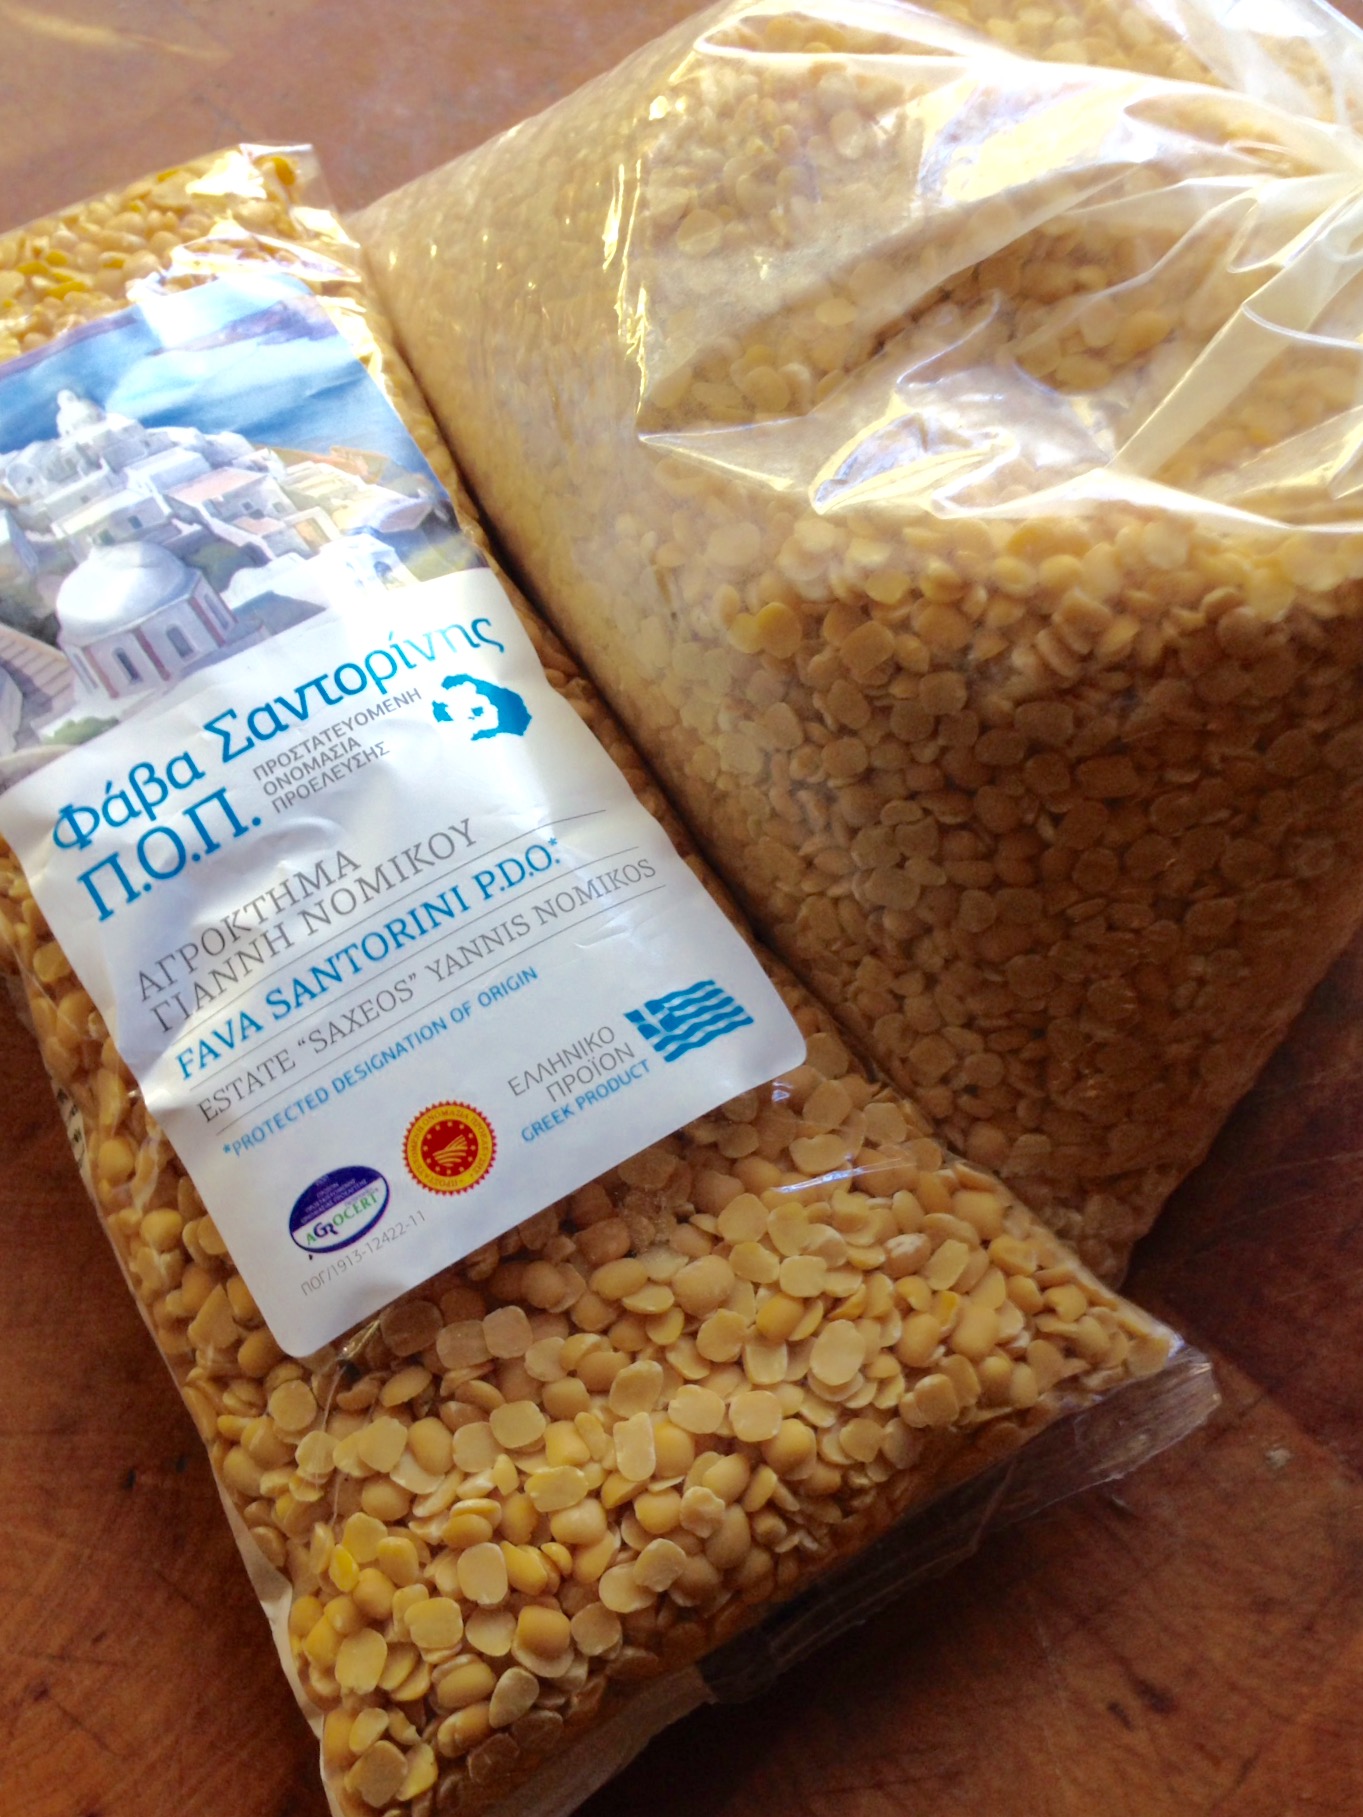
Finding real Santorini fava can be difficult and expensive on line, but it is possible. You can easily find dried yellow split peas in local US supermarkets, but it’s not quite the same.
We bring loads of Santorini fava home with us, making our already-heavy luggage even heavier. But it’s worth it to be able to enjoy this Greek comfort food at home.
Whether you use the real fava from Santorini, or yellow split peas, you’ll find it’s a great side dish to replace the usual potatoes or rice. My personal touch–no surprise here–bacon!
 image
1/2 cup olive oil
4 strips bacon, finely chopped
1/2 onion, finely chopped
4 cups water
2 cups chicken stock (I use homemade)
2 cups fava or yellow split peas, rinsed in a colander
salt and pepper
In a large saucepan over medium heat, heat the olive oil and the bacon until the fat renders and the bacon is crispy. Add the onions and cook until they’re translucent. Add the water, the chicken stock and the fava. Stir well. Season with salt and pepper.
Bring the pot to a boil, then reduce to medium. Using a large spoon, scoop off any foam that appears.
Stir often, and cook until the fava absorbs the liquid and becomes a creamy porridge. Lower the heat as you cook to prevent burning. You may need to add water while cooking if you see that it’s getting too dry.
The fava will be done when it’s creamy and smooth. (Optional: zap it in a blender to make it really creamy.) Serve with finely chopped onions, a sprinkling of capers, and a drizzle of good quality olive oil.

ASIAN CHICKEN

Posted: October 10, 2015 in Carnivore!, chicken, Food, Recipes
Tags: , , , ,

When I’m jonesing for really good Chinese food, I have to make it myself. I live in the boonies, nowhere near my favorite Chinatown restaurants of Boston or New York City. This chicken satisfies my cravings.

image

1 pastured whole chicken, about 5 lbs.
Soy sauce
Coconut oil
1 tablespoon Chinese Five Spice
1 teaspoon granulated garlic
1 teaspoon salt
1/2 teaspoon pepper
4 tablespoons soy sauce
4 teaspoons sesame oil
1 tablespoon honey
1 tablespoon peanut butter
1 tablespoon orange juice
2 teaspoons rice vinegar
1/4 teaspoon Sambal chili paste

Pre-heat oven to 325.

Rub the chicken with the soy sauce, and then rub it with the coconut oil.

In a bowl, combine the Chinese Five Spice, garlic, salt and pepper. Rub this all over the bird, placing some in the body cavity as well.

In a separate bowl, combine the glaze ingredients: soy sauce, sesame oil, honey, peanut butter, orange juice, rice vinegar and Sambal.

Cook the bird until it’s about 10 minutes before it’s done. Then brush the glaze on the bird and return it to the oven for 5 minutes. Do this twice.

Let the bird rest before carving.


My interest in food and cooking goes back to my first restaurant job as a teenager, at an Italian restaurant called Pizza City East in my hometown of Plainview, NY.  (There was also an original Pizza City on Crossbay Blvd. in Ozone Park, Queens.) It was there that I learned how to open clams by the bushel, how to make the perfect cappucino, and how to use basic restaurant kitchen equipment like the convection oven and the fryer. I peeled thousands of shrimp for scampi, washed barrels of lettuce for salads, and grated hundreds of pounds of mozzarella for pizza.

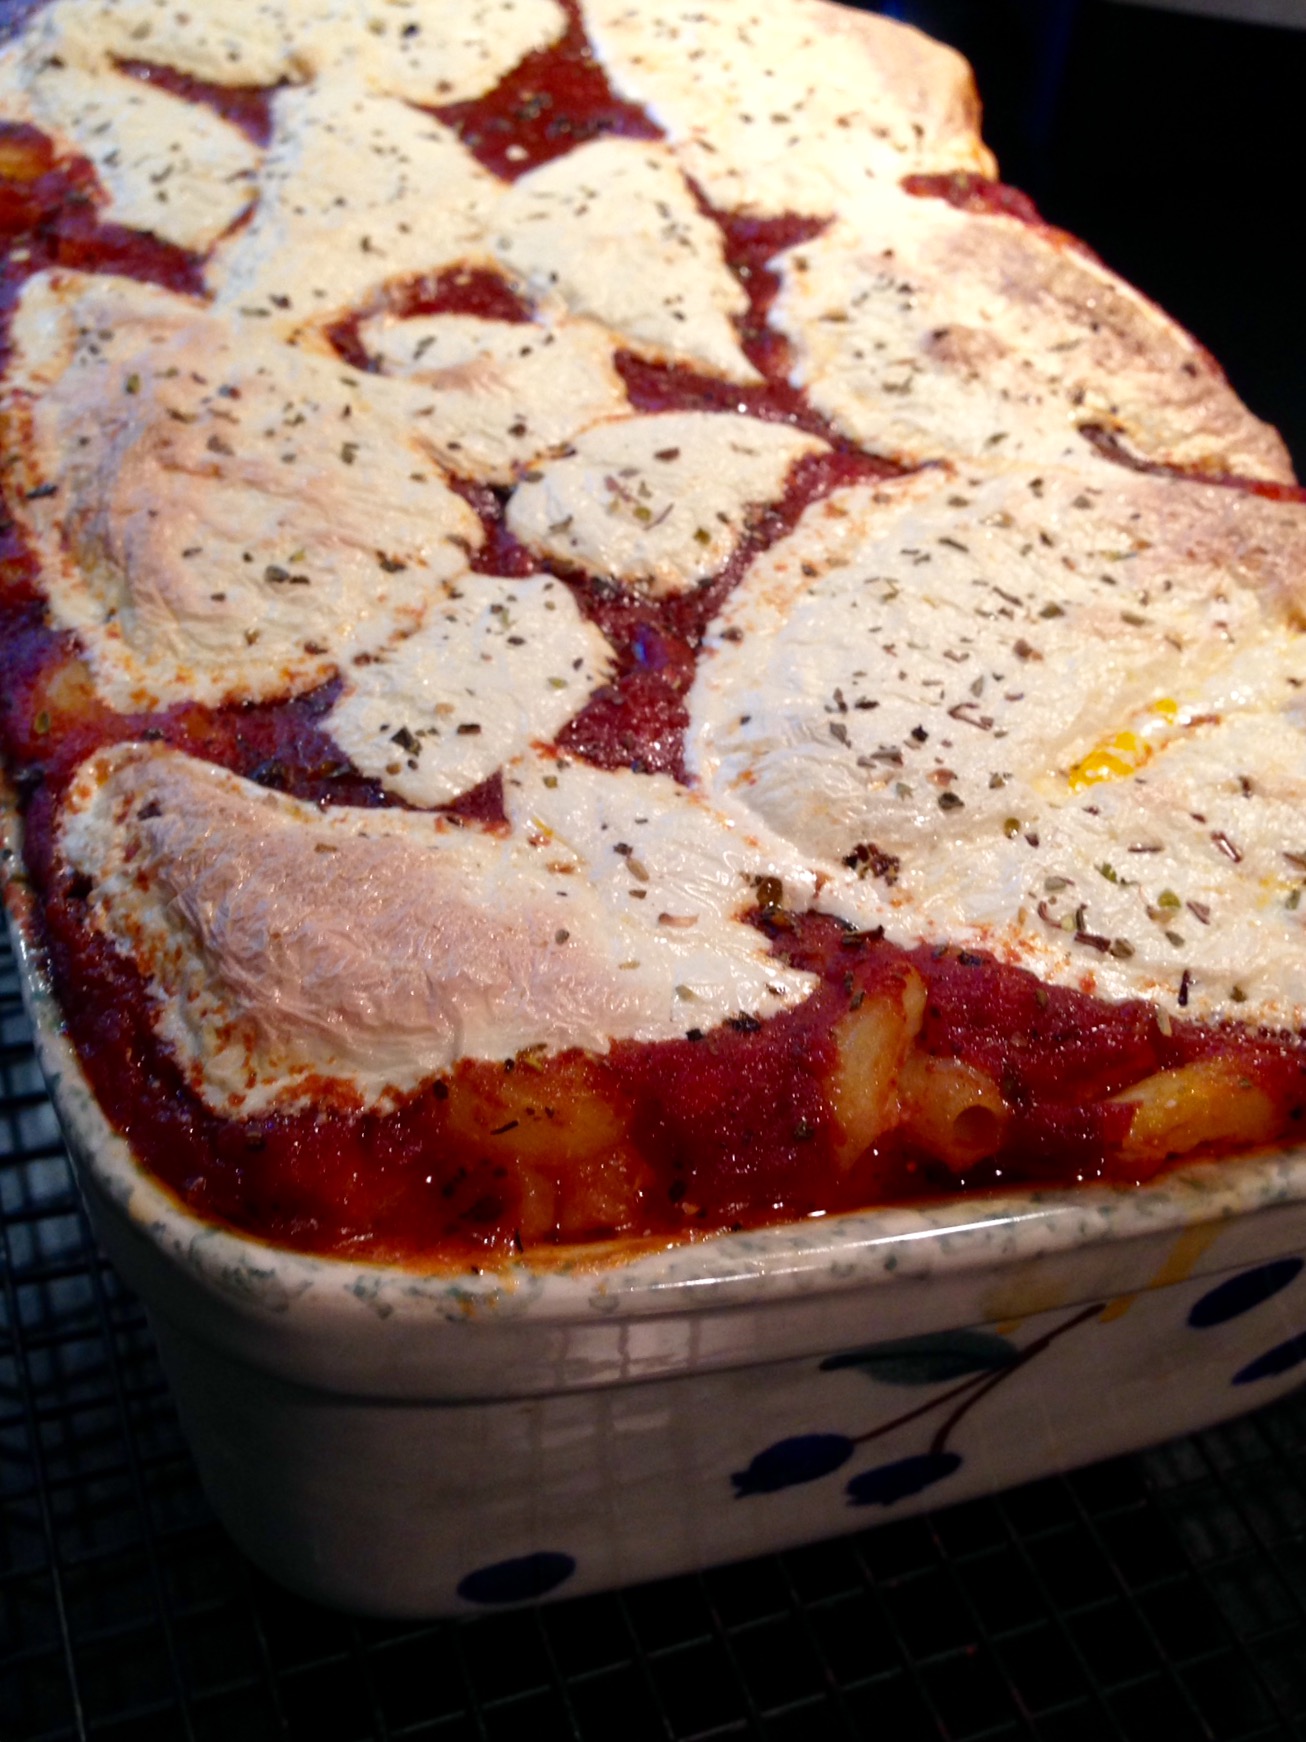
I also made baked ziti by the barrelful. It was much easier to make in large quantities than lasagna, and it basically contained all the same ingredients. No worries about making perfect layers. No pasta sheets sticking together. Just put all the ingredients in an oven-proof baking pan, mix them around and throw them in the oven. And it tasted great.

Now I make baked ziti, or shells, or elbows–whatever pasta I have on hand–at home, using gluten-free ingredients.

To make the perfect baked ziti, it's important to have a good helper.

To make the perfect baked ziti, it’s important to have a good helper.

I substitute whole milk for the usual bechamel sauce used in many lasagna recipes. Since this dish is gluten-free, I can’t use the flour required to thicken bechamel sauce, and gluten-free flour doesn’t work here.

1 lb. regular or gluten-free pasta
2 lbs. (32 oz.) ricotta cheese
1/4 cup Parmigiano Reggiano cheese
12 oz. mozzarella cheese, grated
1 cup whole milk
1 can (28 oz.) whole tomatoes
1/2 teaspoon granulated garlic
1 teaspoon salt
1 teaspoon oregano
1 teaspoon basil
1 teaspoon parsley

image


In a bowl, mix together the ricotta cheese, Parmigiano Reggiano, half of the mozzarella, and the milk.

Pour  the contents of the tomato can in a blender and blend until smooth. Add this to the bowl and combine.

Add the granulated garlic, salt, oregano, basil, and parsley to the bowl and combine again.

Cook the pasta until just before al dente. You want it to be chewy because it will still bake in the oven. Drain the pasta and place it in an ovenproof baking dish.

Add the contents of the cheese and milk blend bowl to the pasta and stir thoroughly to combine. It’s going to be mushy.

Pre-heat the oven to 350°.

Top the baking dish with the rest of the mozzarella cheese. Sprinkle a little oregano on top. Bake for 30-45 minutes, until the cheese on top has melted and it’s bubbling hot.

Let it rest for about 10 minutes before serving.


Baked elbows, this time with meatballs.

Baked elbows. This time, I added meatballs.

My original banana bread recipe blog is featured directly below. It’s awesome. But my wife’s dietary needs required that I make some changes. My gluten-free version of the recipe, at the bottom of the page, is so good, you won’t miss the wheat!


The original recipe…

What makes this banana bread special is that it uses whole wheat flour…less sugar…and no artificial extracts that make most banana breads taste like crap. It relies on very ripe bananas to give it its wonderful natural flavor.
It’s not always easy to get bananas to ripen exactly when you’re trying to make your banana bread recipe. So here’s what I do: I by a large bunch of bananas and let them get very ripe at room temperature. I then take 5 at a time (for this recipe), peel them, and place the bananas in a Ziploc bag in the freezer. When it’s time to make banana bread, I just pull one of those Ziplocs out of the freezer, let it thaw, and mash with a potato masher.


Nana bread blog


3 cups all-purpose flour
1/2 cup whole wheat flour
2 tsp baking soda
1/2 tsp salt
1 1/4 cup sugar
3/4 cup vegetable oil
2 eggs
5 medium-sized bananas, peeled and mashed
2 tsp real vanilla extract
Cooking spray

Pre-heat the oven to 350 degrees.
Combine the all-purpose flour, whole wheat flour, baking soda and salt in a medium bowl. Set aside.
Combine the sugar and oil in a mixing bowl and mix at medium speed for 2 minutes. (I use the whisk attachment.) Add the eggs, one at a time. Beat until the mixture is light and lemon colored.
With the mixer running at low speed, add the flour mixture alternately with the bananas, beginning and ending with the flour mixture. Blend well after each addition. Add the vanilla extract and blend some more to mix.
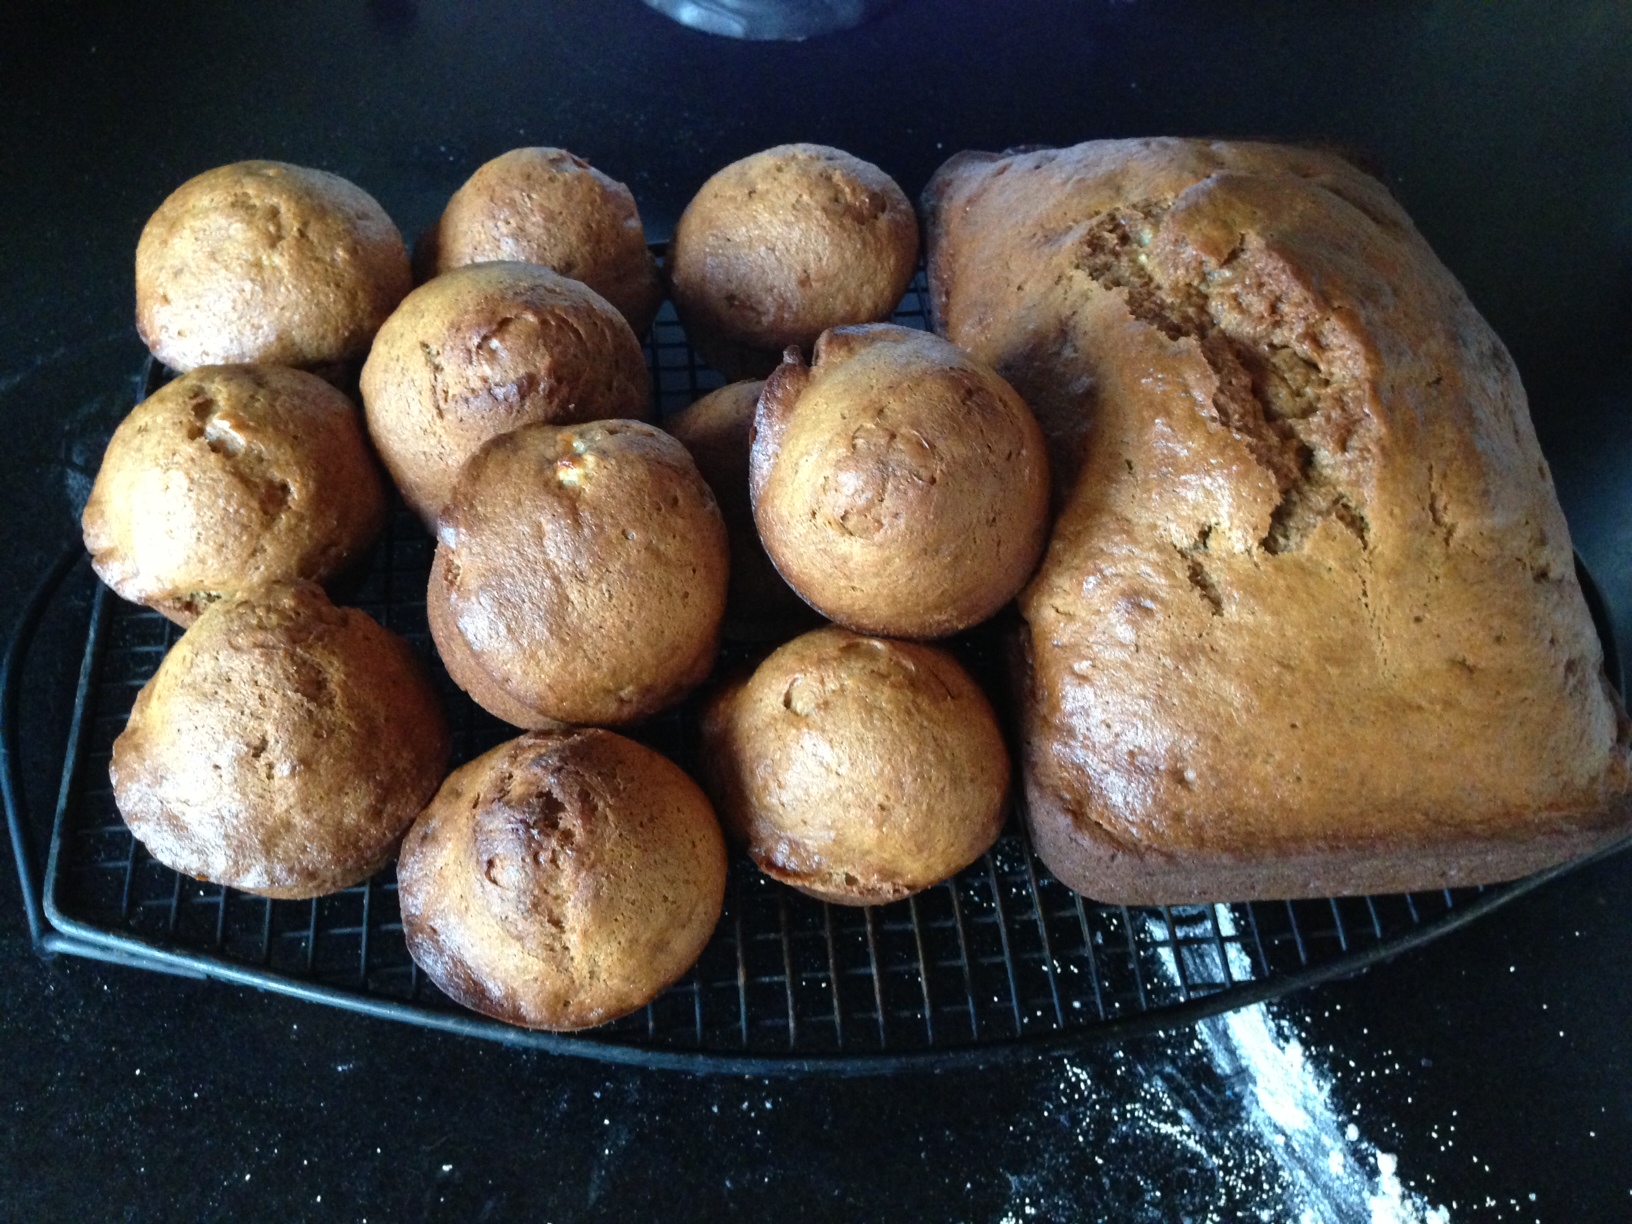
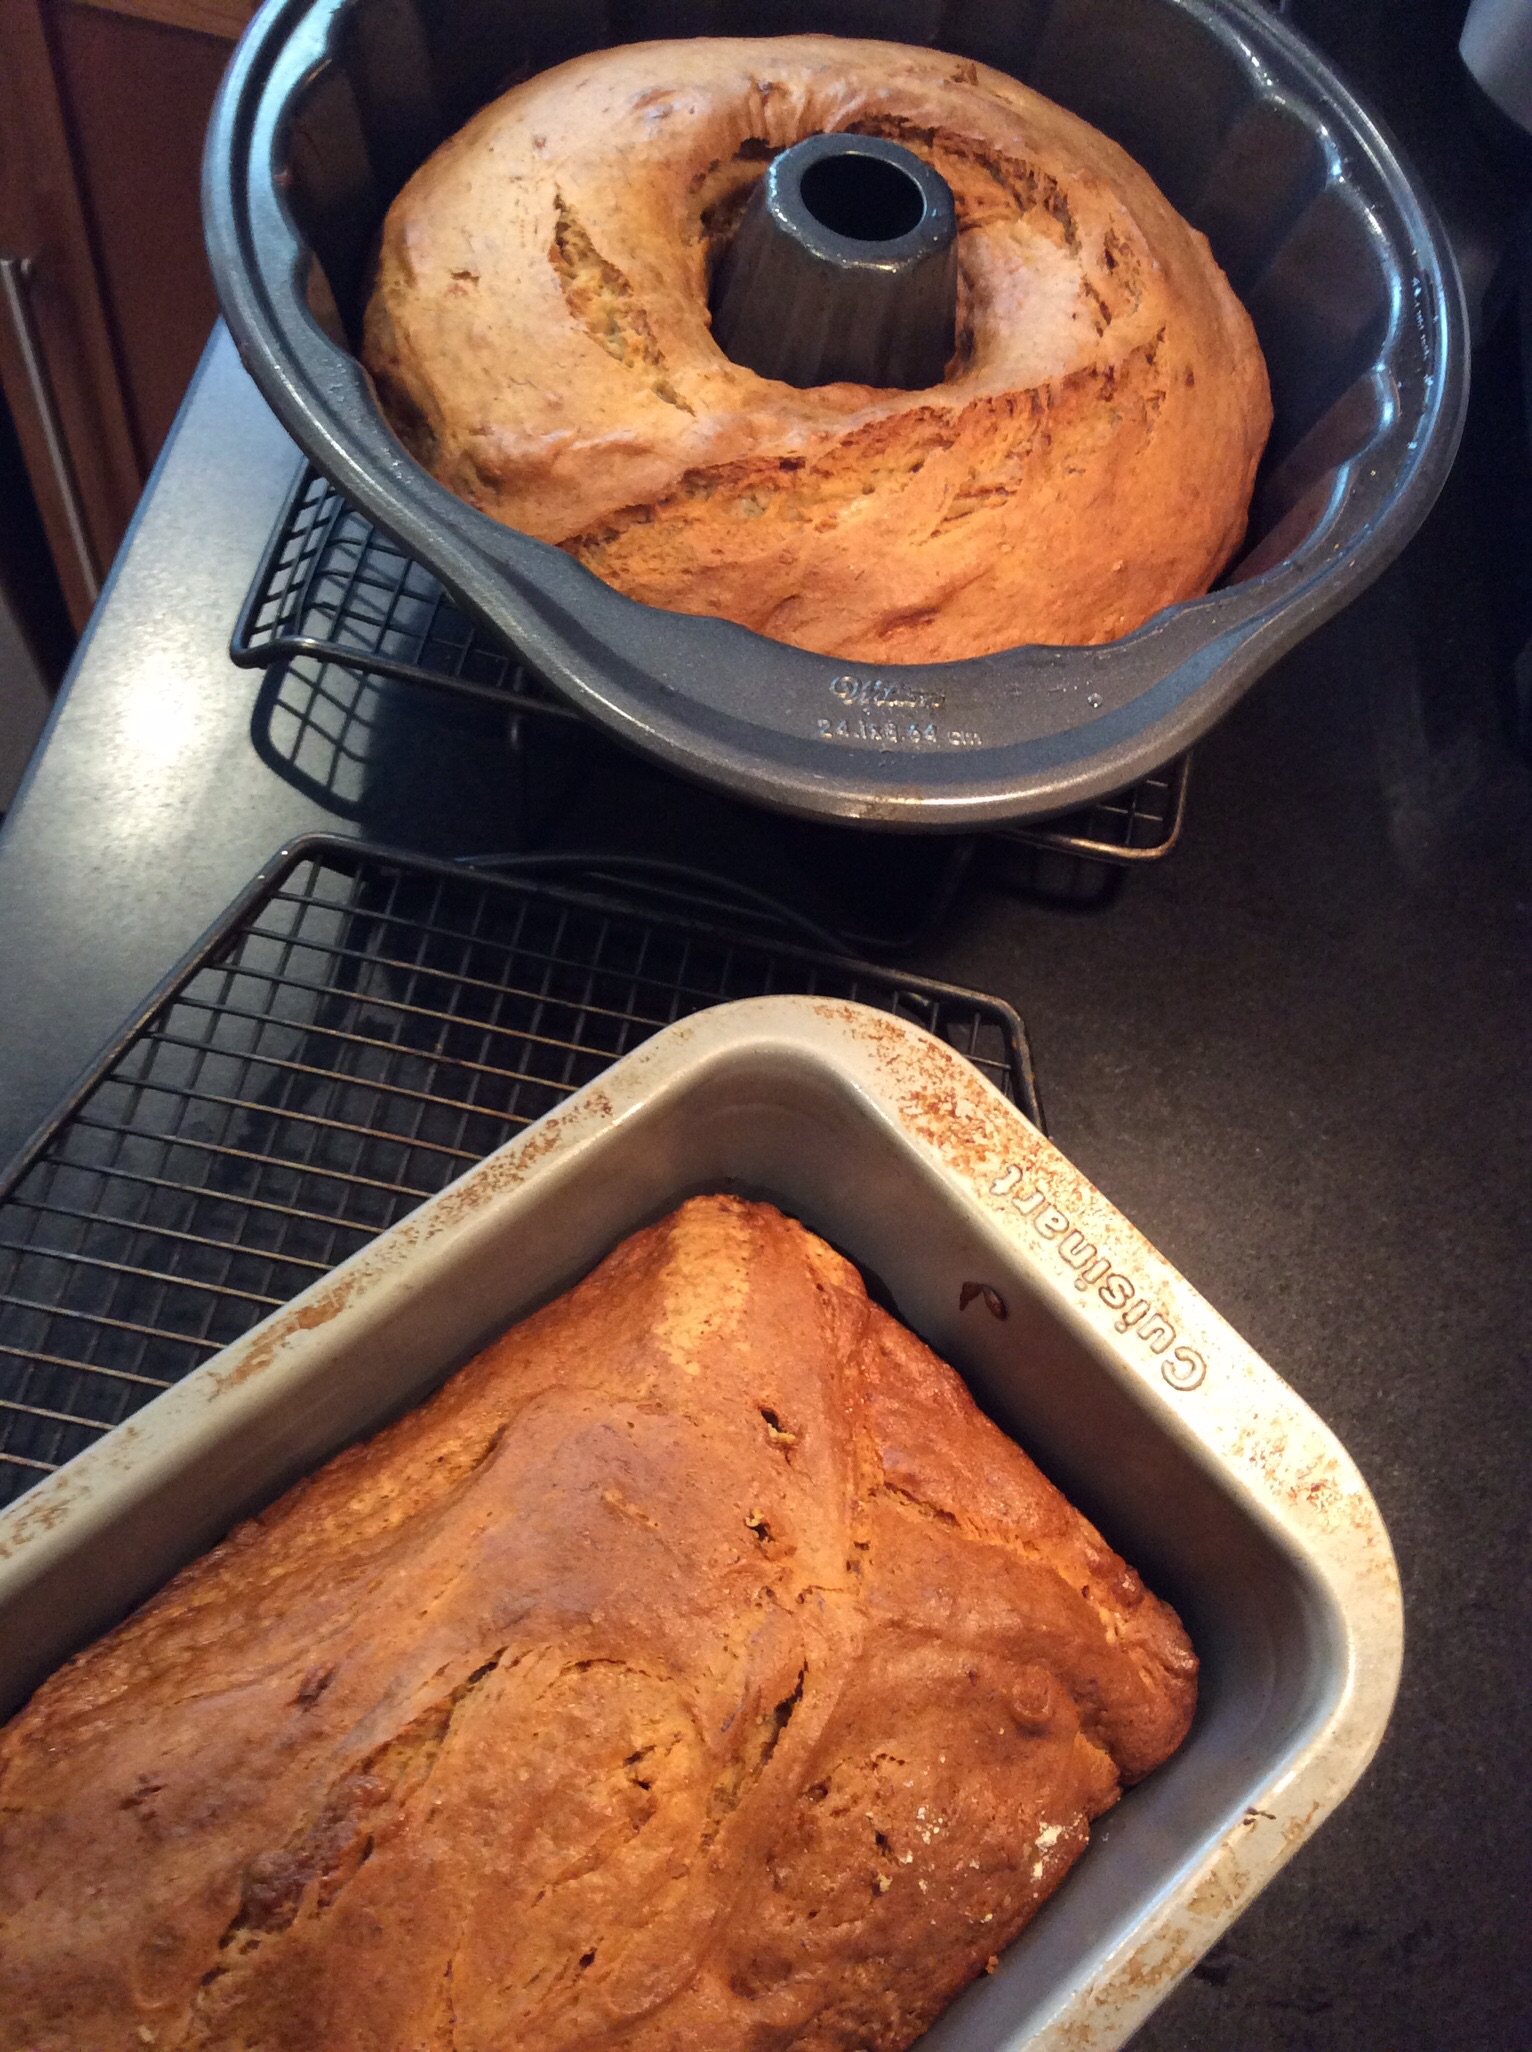
Pour the batter into 2 loaf pans that have been sprayed with cooking spray. Bake for 45 minutes or until a wooden pick inserted in the center comes out clean. Cool 15 minutes in the loaf pan on a wire rack.
Remove from the pan and let it cool completely on the wire rack before slicing.

image


The gluten-free recipe…

Wow…things have changed since I made the original recipe!  First, the flour: My go-to gluten-free flour is the brand called Cup 4 Cup. You can find it in most supermarkets. I only use this flour in this recipe.

image

If you want a slightly more “rustic” flavor, you can substitute 1/2 a cup of corn meal for 1/2 a cup of the flour. I now use organic cane sugar instead of regular sugar. I no longer use vegetable oil, especially not canola, so I use healthier avocado oil. Eggs are pastured when I can get ’em. Bananas are organic. And I rub the pans with coconut oil instead of using cooking spray.

image

4 cups gluten-free flour
2 teaspoons baking soda
1/2 teaspoon salt
1 1/4 cup organic cane sugar
3/4 cup avocado oil
2 eggs
5 medium-sized bananas, peeled and mashed
2 teaspoons real vanilla extract
coconut oil


Pre-heat the oven to 350 degrees.
Combine the flour, baking soda and salt in a bowl. Set aside.
Combine the sugar and oil in a mixing bowl and mix at medium speed for 2 minutes. (I use the whisk attachment.) Add the eggs, one at a time. Beat until the mixture is light and lemon colored.
With the mixer running at low speed, add the flour mixture alternately with the bananas, beginning and ending with the flour mixture. Blend well after each addition. Add the vanilla extract and blend some more to mix.
Pour the batter into 2 loaf pans that have been rubbed with the coconut oil. Bake for 45 minutes or until a wooden toothpick inserted in the center comes out clean. Cool 15 minutes in the loaf pan on a wire rack.
Remove from the pan and let it cool completely on the wire rack before slicing.