Posts Tagged ‘food’

As a teenager growing up on Long Island, I worked long hours at a local Italian restaurant called Pizza City East in Plainview. (The original Pizza City was in Ozone Park, Queens.) Though the pay sucked, I made some important friendships that have lasted to this day. I also learned many Italian cooking basics: how to open clams for red and white clam sauce, the secrets of great pizza dough, the art of a perfect espresso, and how to make massive quantities of baked ziti.

The basic ingredients of baked ziti are the same as lasagna, and I make one or the other depending on my mood or what I’ve got in the cupboard. I also like to make my lasagna a little dryer, where baked ziti shines in its incredible gooiness.

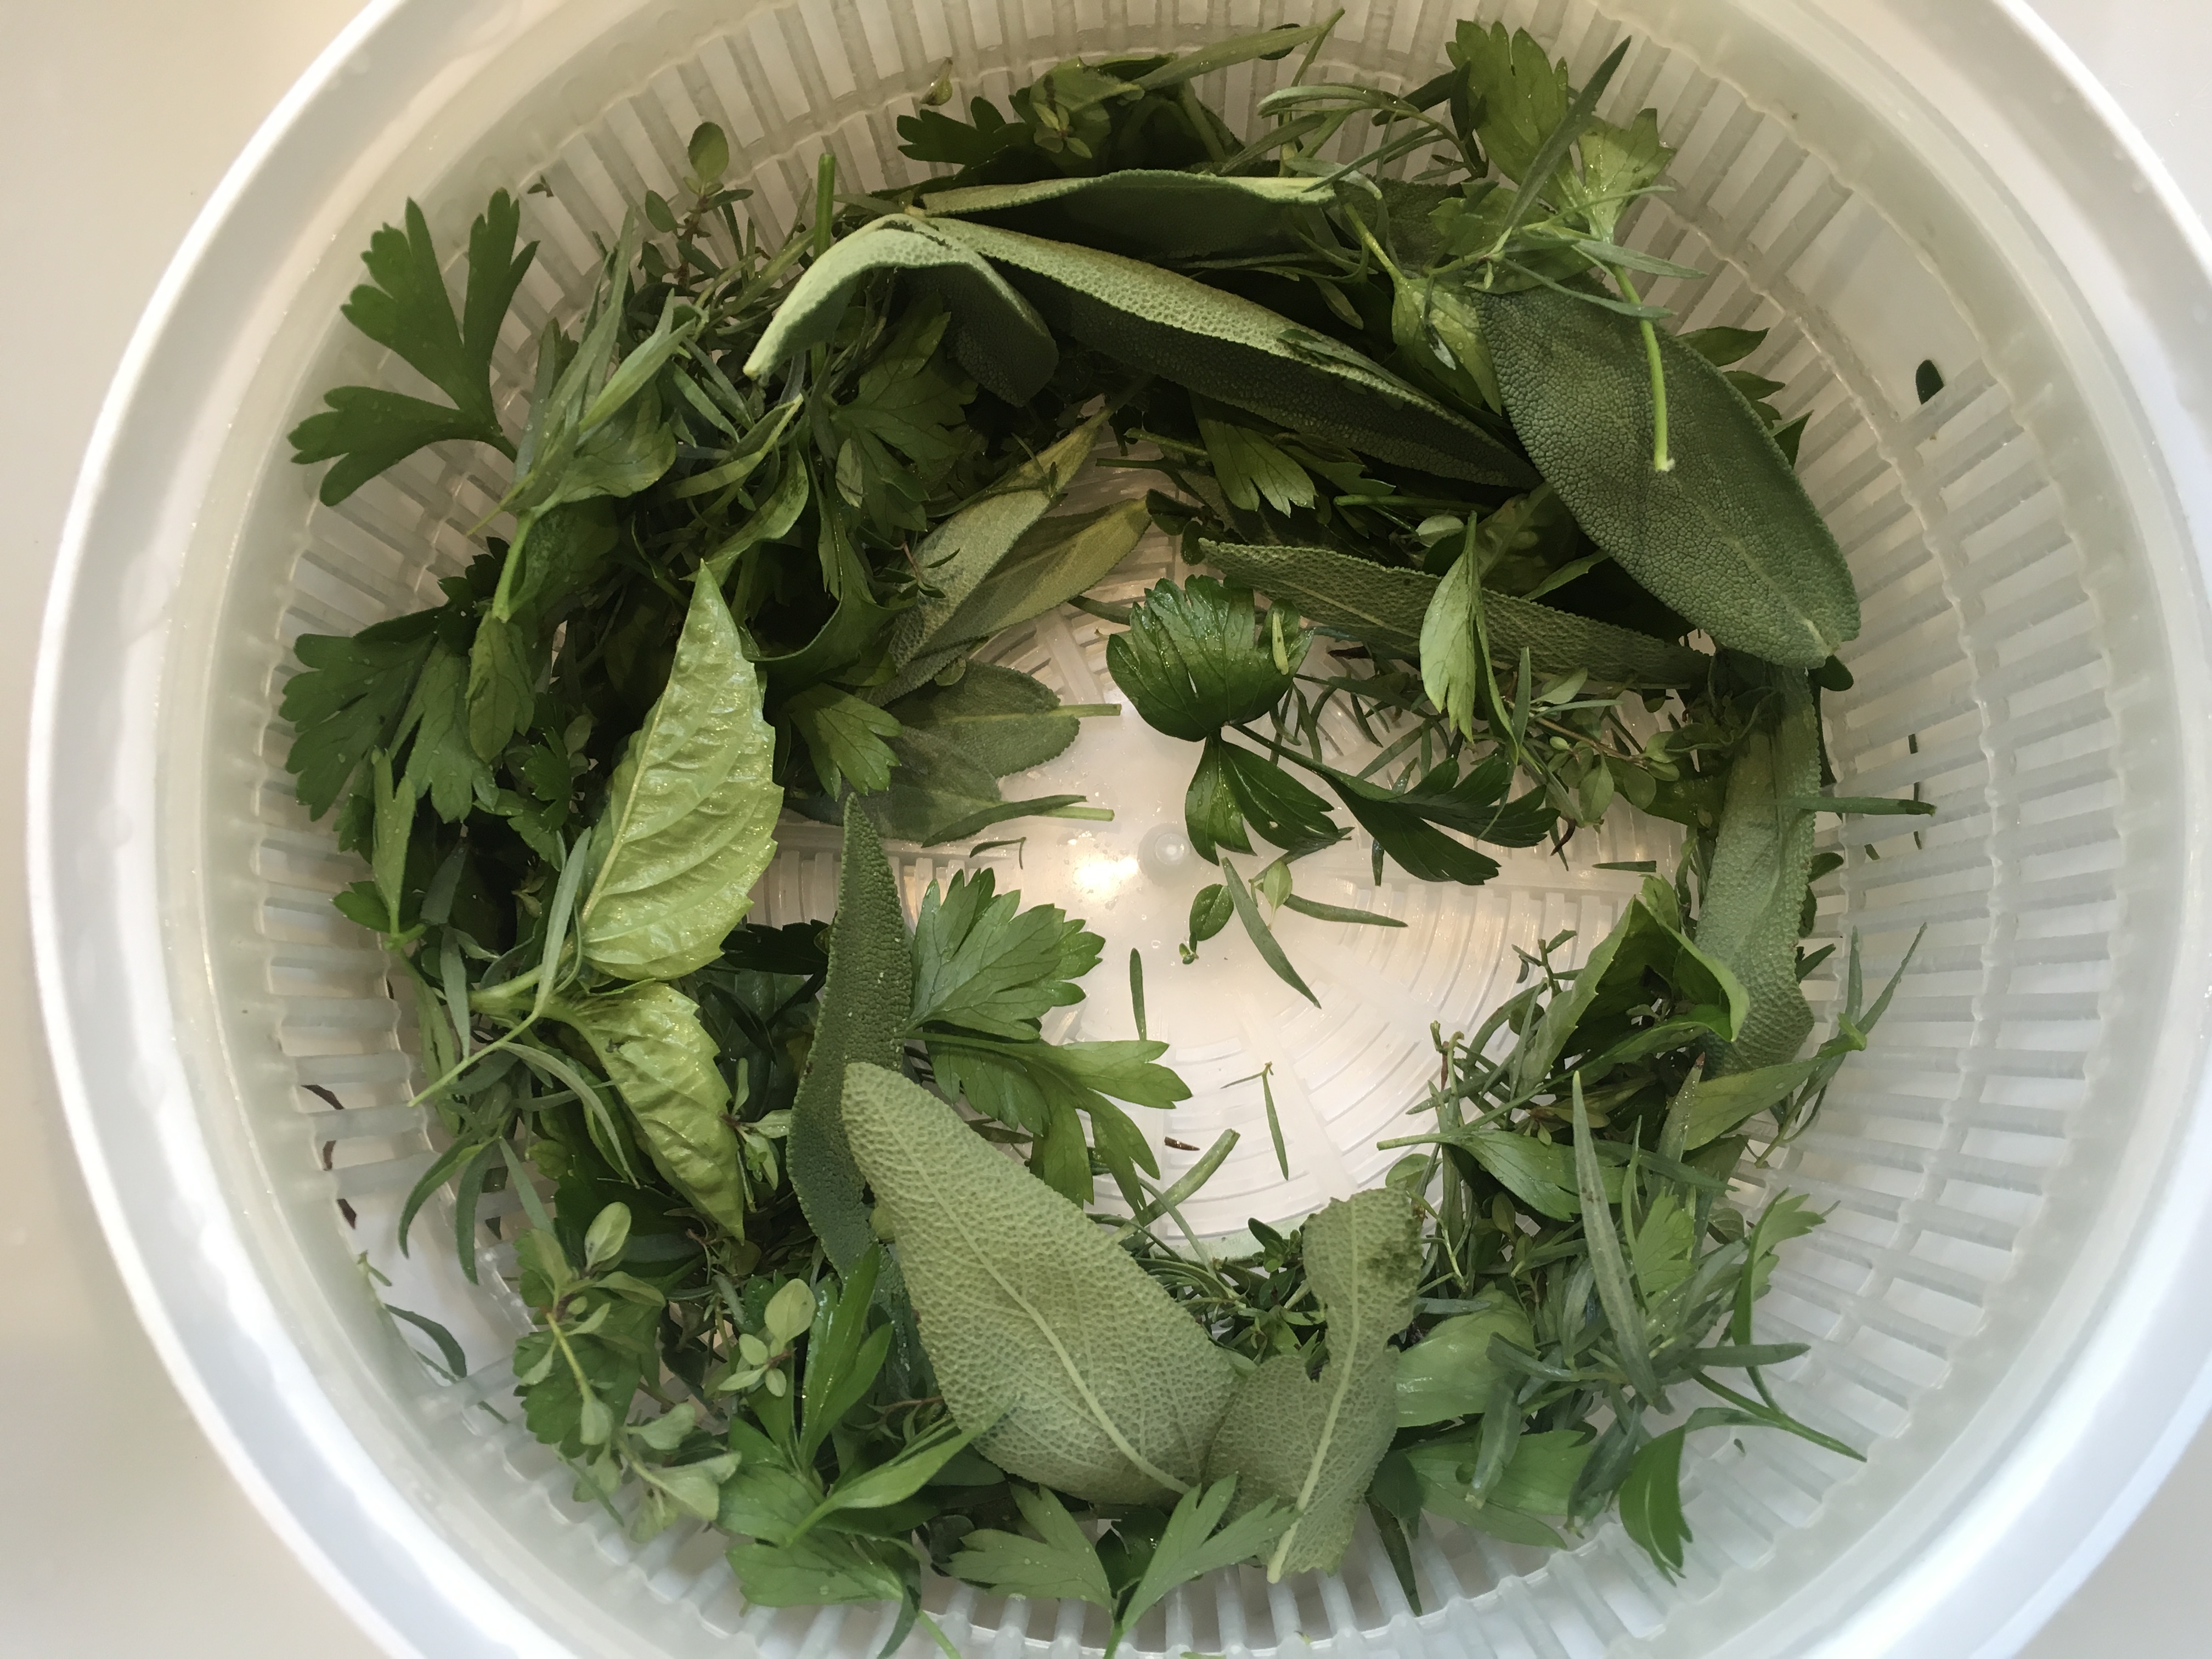
My lasagna usually consists of 2 sauces (a meat sauce and a bechamel sauce) and 4 cheeses (ricotta, mozzarella, provolone, and Parmigiano Reggiano) using pasta that is boiled much firmer than al dente. I like real pasta, not the no-boil sheets, because I think the flavor is better. I’ve tried the no-boils, and I’ve found that they don’t cook evenly. Sometimes you get a nice soft bite and other times it’s completely raw and pasty. There are plenty of great brand choices for lasagna sheets these days, and that includes gluten-free varieties.

lasagna


Meat Sauce…
1 small onion, finely chopped
1 small carrot, finely chopped
1 lb. grass-fed ground beef or pastured pork, or a combination of both
1 tablespoon dried parsley
2 teaspoons dried oregano
1 teaspoon dried basil
1 teaspoon salt
1/2 teaspoon black pepper
1 28-oz. can whole tomatoes
extra virgin olive oil for sautéing


Heat a tablespoon or 2 of olive oil in a large pan and sauté the onions until translucent. I finely chop the carrots by peeling them all the way down until there’s nothing but a pile of peeled pieces, then chopping them up so small, they almost melt into the sauce. Add the carrots and cook for 2 minutes. Add the beef (or pork) and cook the meat until it browns. Add the parsley, oregano, basil, salt and pepper and mix well.

Empty the can of tomatoes into a blender and blend it until smooth. Add this to the pan and mix well.

Cook the meat sauce for about 10 minutes, then remove it from the heat and set it aside.

Hint: I’ve found that no-boil pasta sheets suck up a lot more moisture than already-cooked pasta, so I make my sauce a bit runnier than usual when using the sheets.
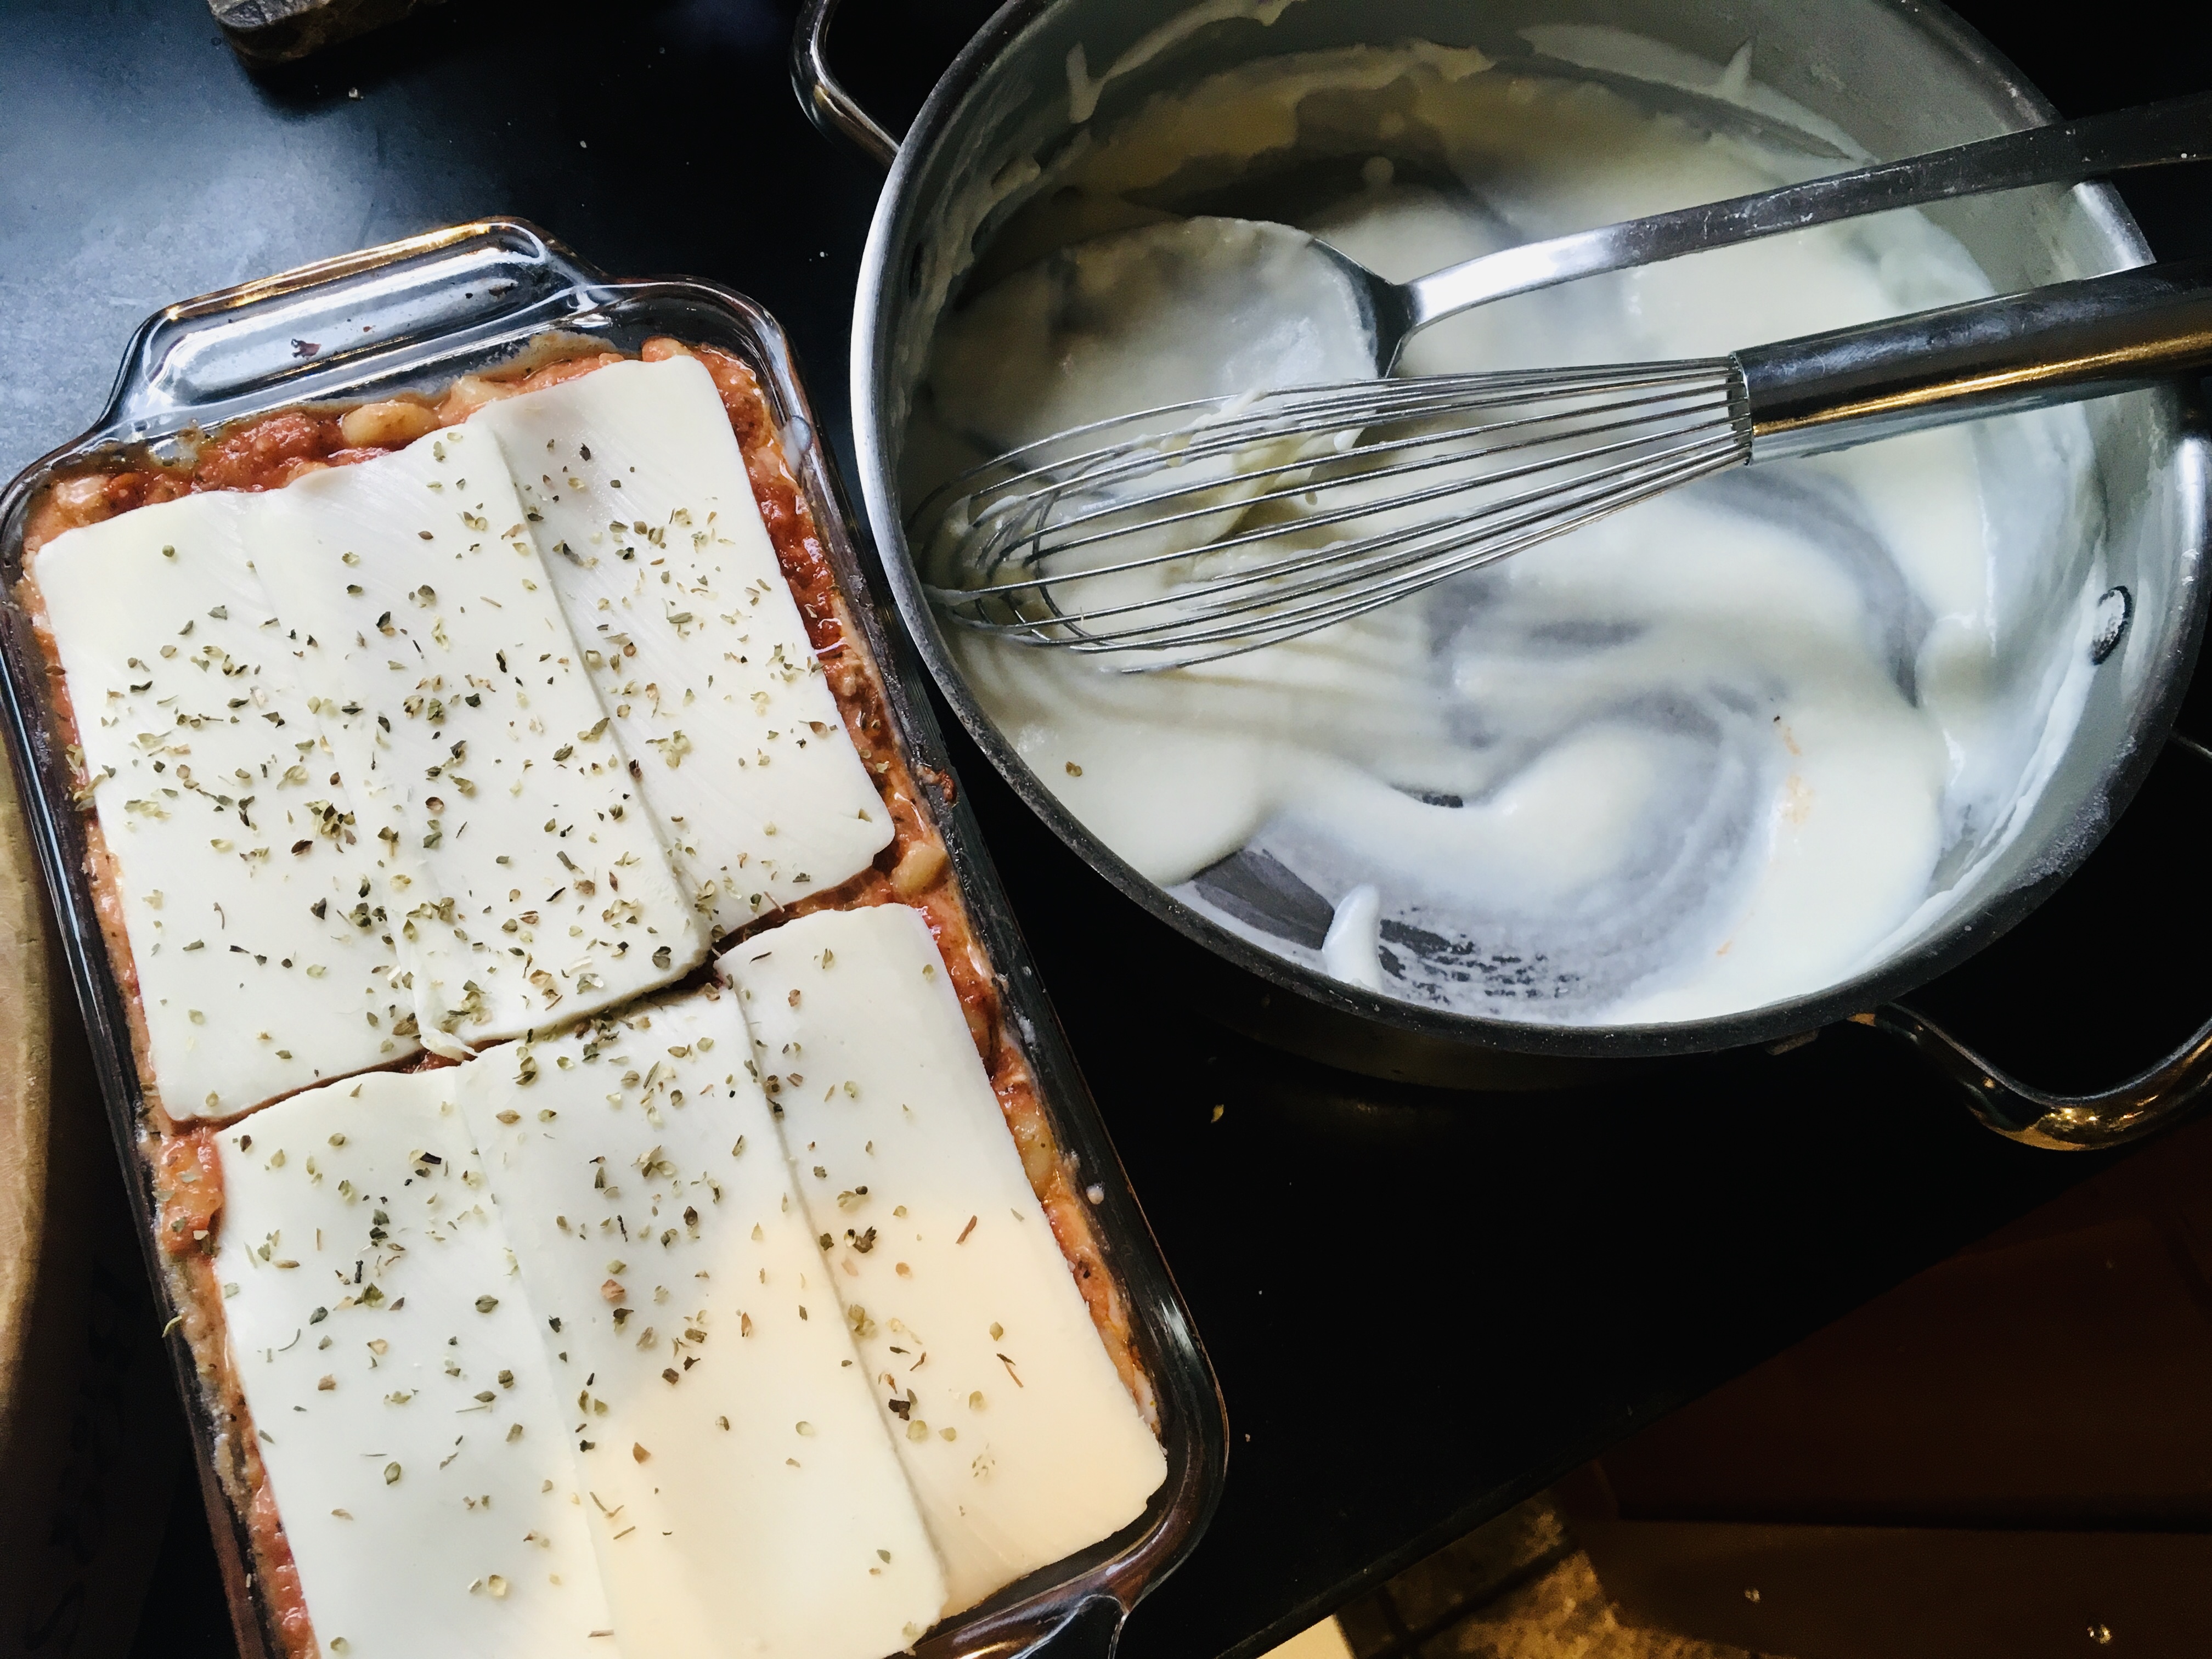
 

Bechamel sauce…
3 tablespoons butter
3 tablespoon all-purpose flour (I use Cup4Cup flour to make it gluten-free)
1/2 teaspoon salt
1/4 teaspoon black pepper
2 cups 2% milk


Bechamel is a basic white sauce. It adds a wonderful creaminess to my lasagna or baked ziti.

Melt the butter in a saucepan under medium heat. Add the flour and whisk until you’ve combined the butter and flour and have a light roux.

Add the milk, and keep whisking, making sure you don’t get any lumps in the sauce. Season with the salt and pepper.

Keep whisking until the sauce thickens. Once it does, remove it from the heat and set it aside.


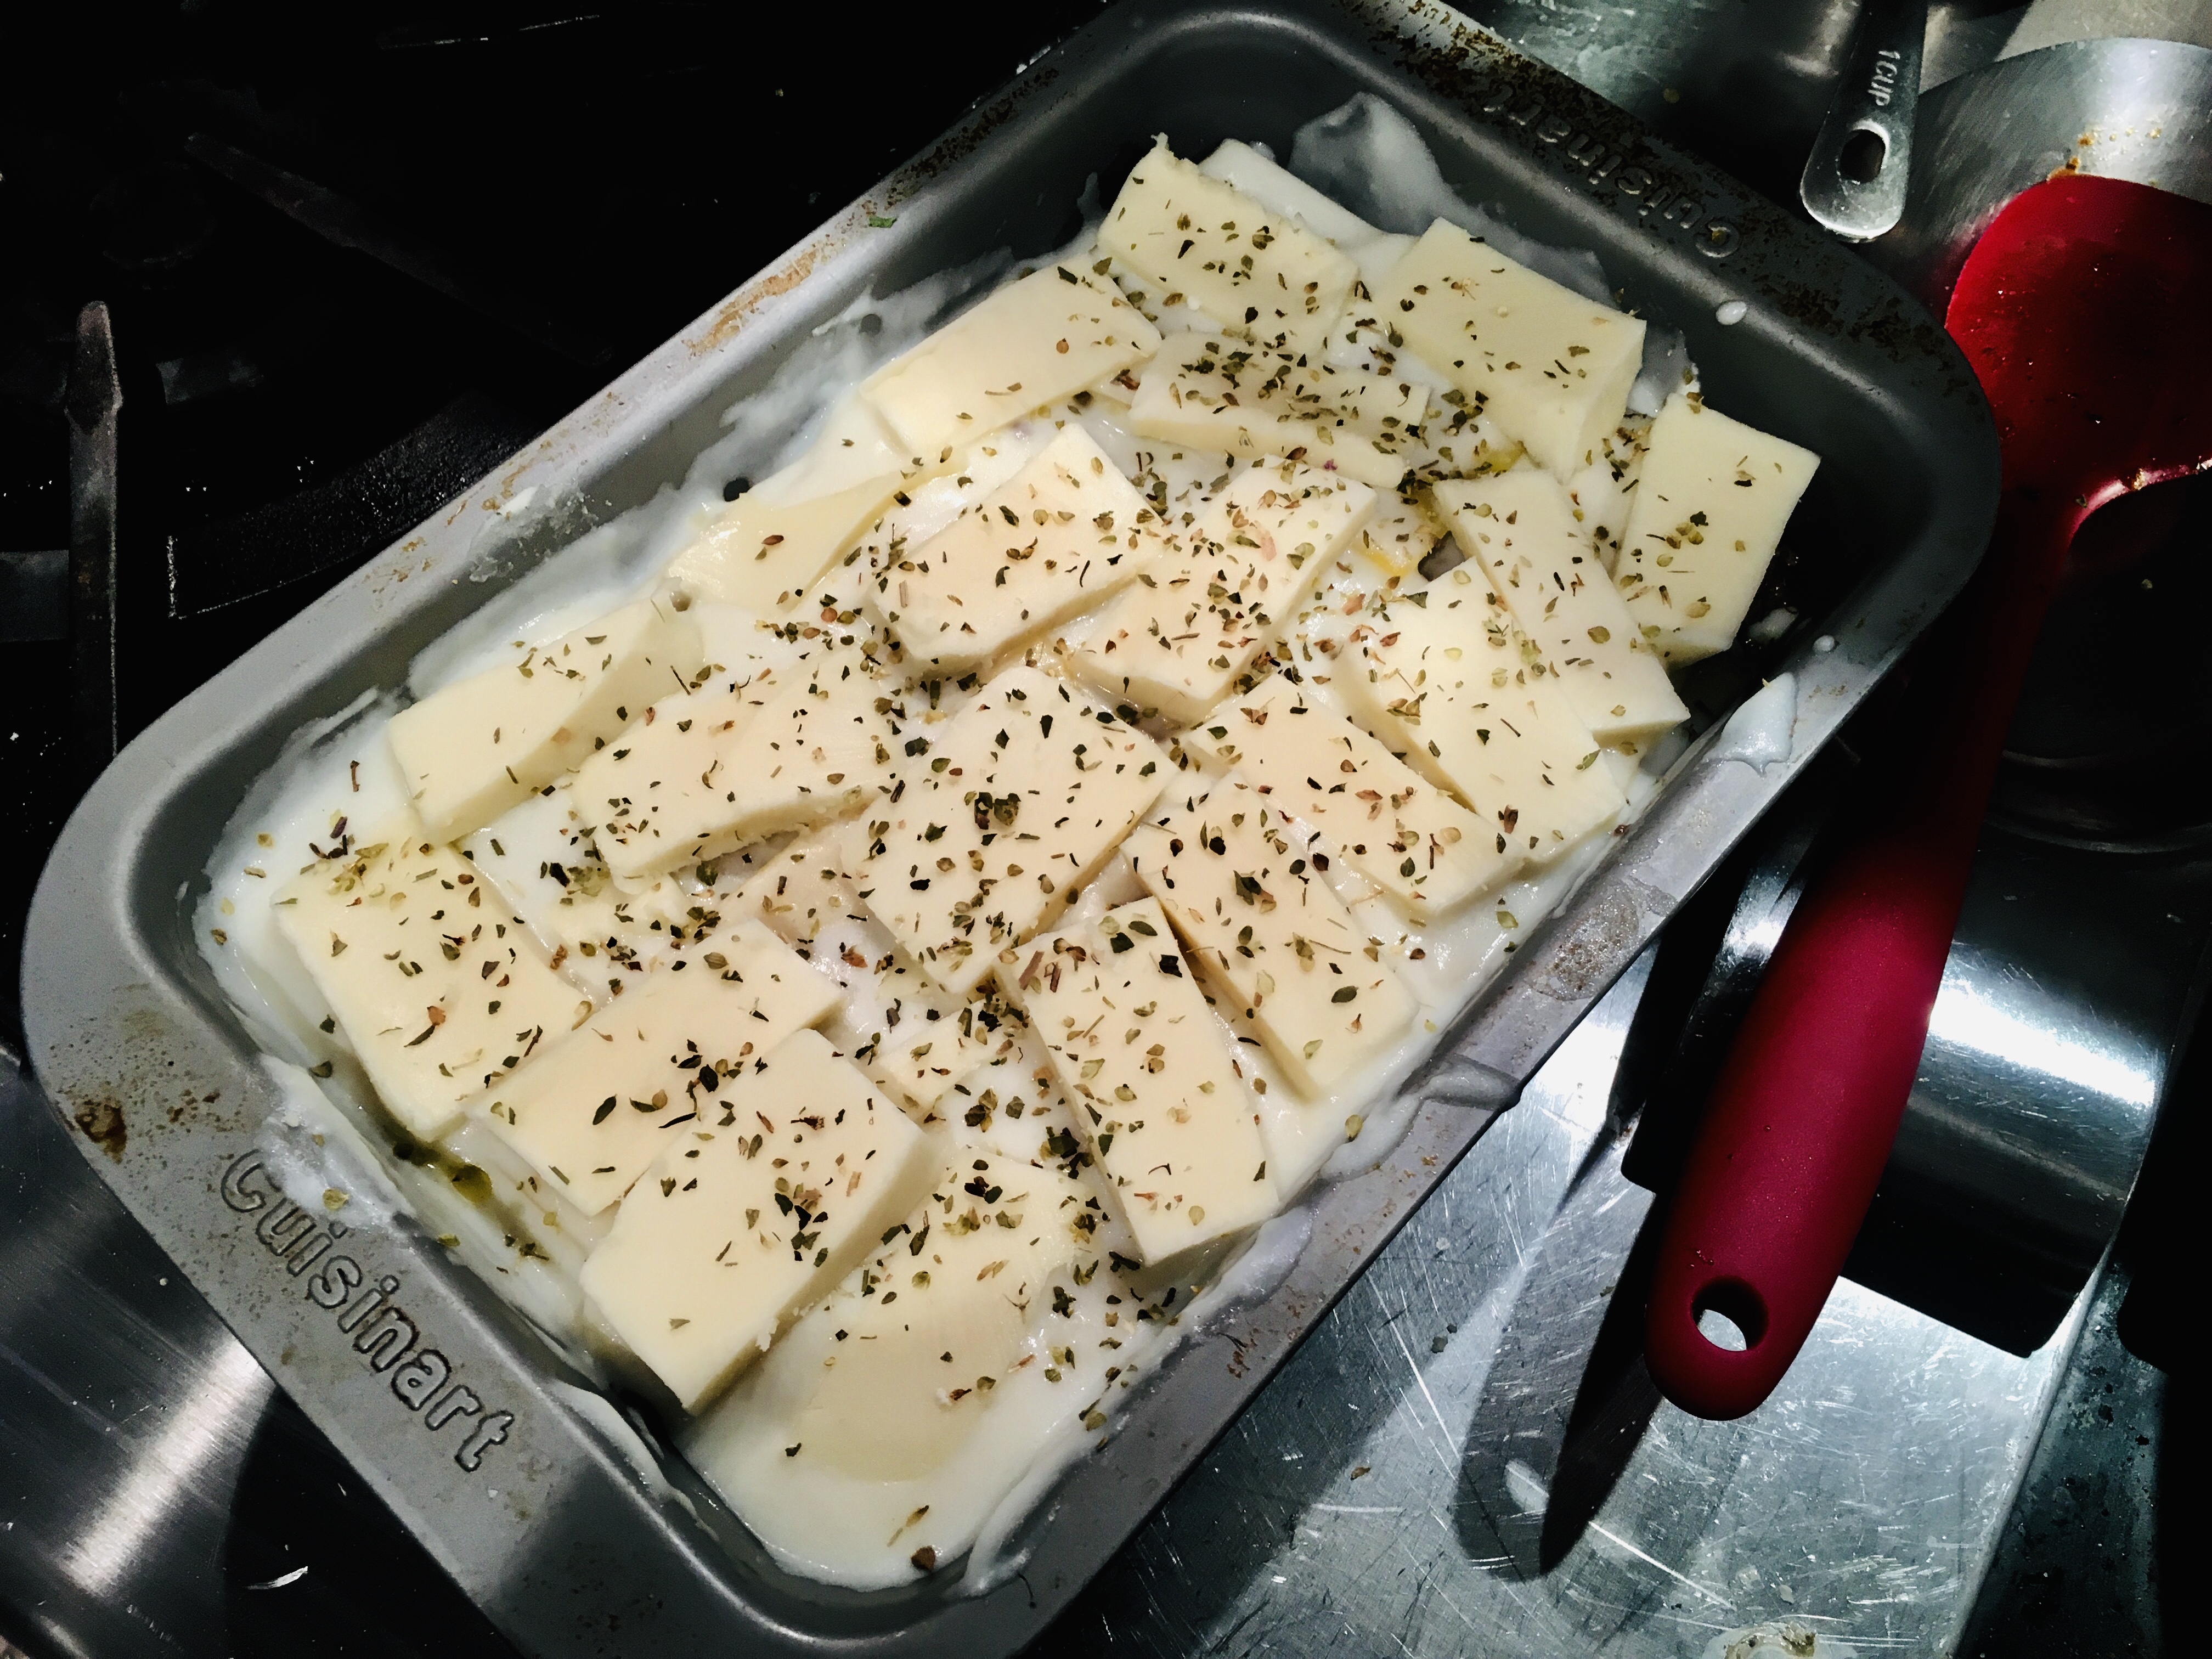
A special 4-cheese all-bechamel sauce lasagna, before cooking.


I made 2 different versions this last time. Having tomato allergies and on a gluten-free diet, my wife got a 4-cheese all-bechamel gluten-free lasagna all to herself. It baked up nicely.

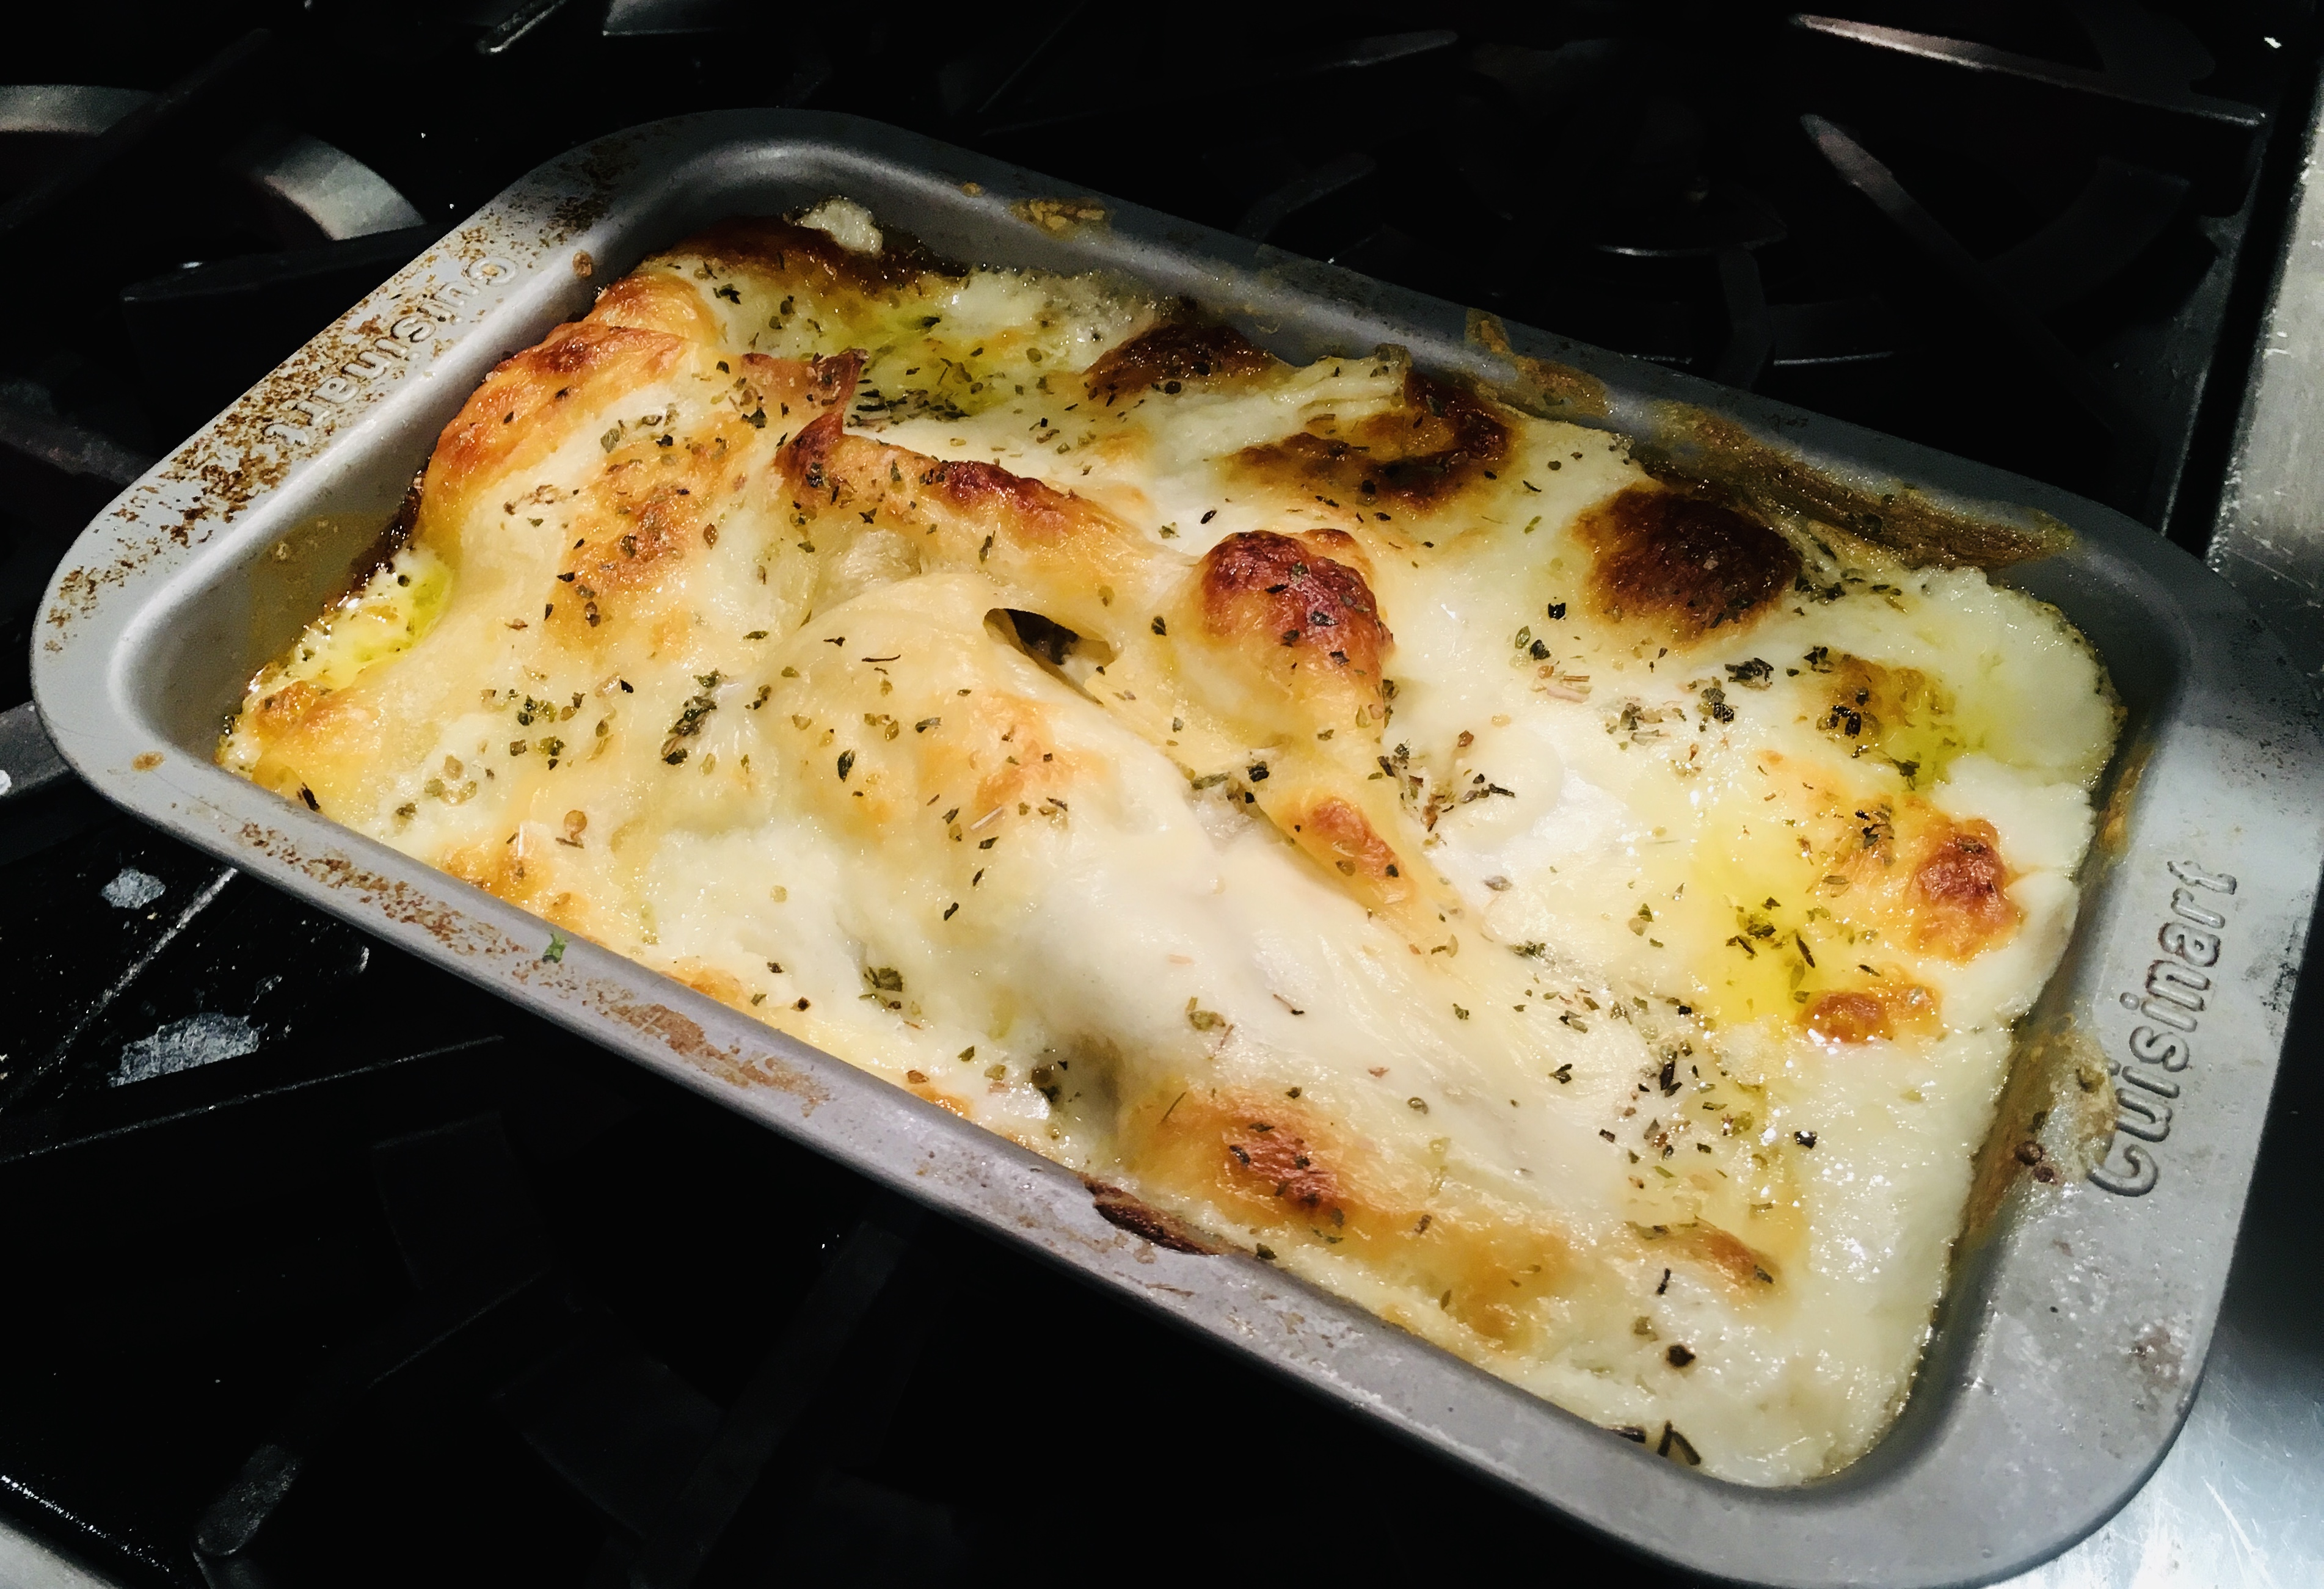
4-cheese gluten-free lasagna, after baking.


12 oz. lasagna pasta sheets (boiled or no-boil)…or 12 oz. small pasta, like ziti, elbows or penne
4 slices provolone cheese (about 4 oz.)
ricotta cheese (about 4 oz.)
mozzarella cheese, thinly sliced (about 4 oz.)
2 tablespoons freshly grated Parmigiano Reggiano


Pre-heat the oven to 350 degrees.

If you’re using regular pasta, boil the lasagna sheets in a pot of salty boiling water until very firm…firmer than al dente. Drain the pasta and run cold water over it to stop the cooking process. The pasta will want to stick to itself, so work quickly. Adding a drop of olive oil can help.

Lay a thin layer of the meat sauce at the bottom of the lasagna pan, which will keep the lasagna from sticking. Then start your layers: a layer of pasta, a thin layer of the Béchamel sauce, the 4 slices of Provolone, a layer of pasta, a layer of the meat sauce, small teaspoon-sized dollops of the ricotta, another layer of pasta (press down occasionally to remove air bubbles), another thin layer of Béchamel, the Parmigiano Reggiano, more pasta, more meat sauce, etc….

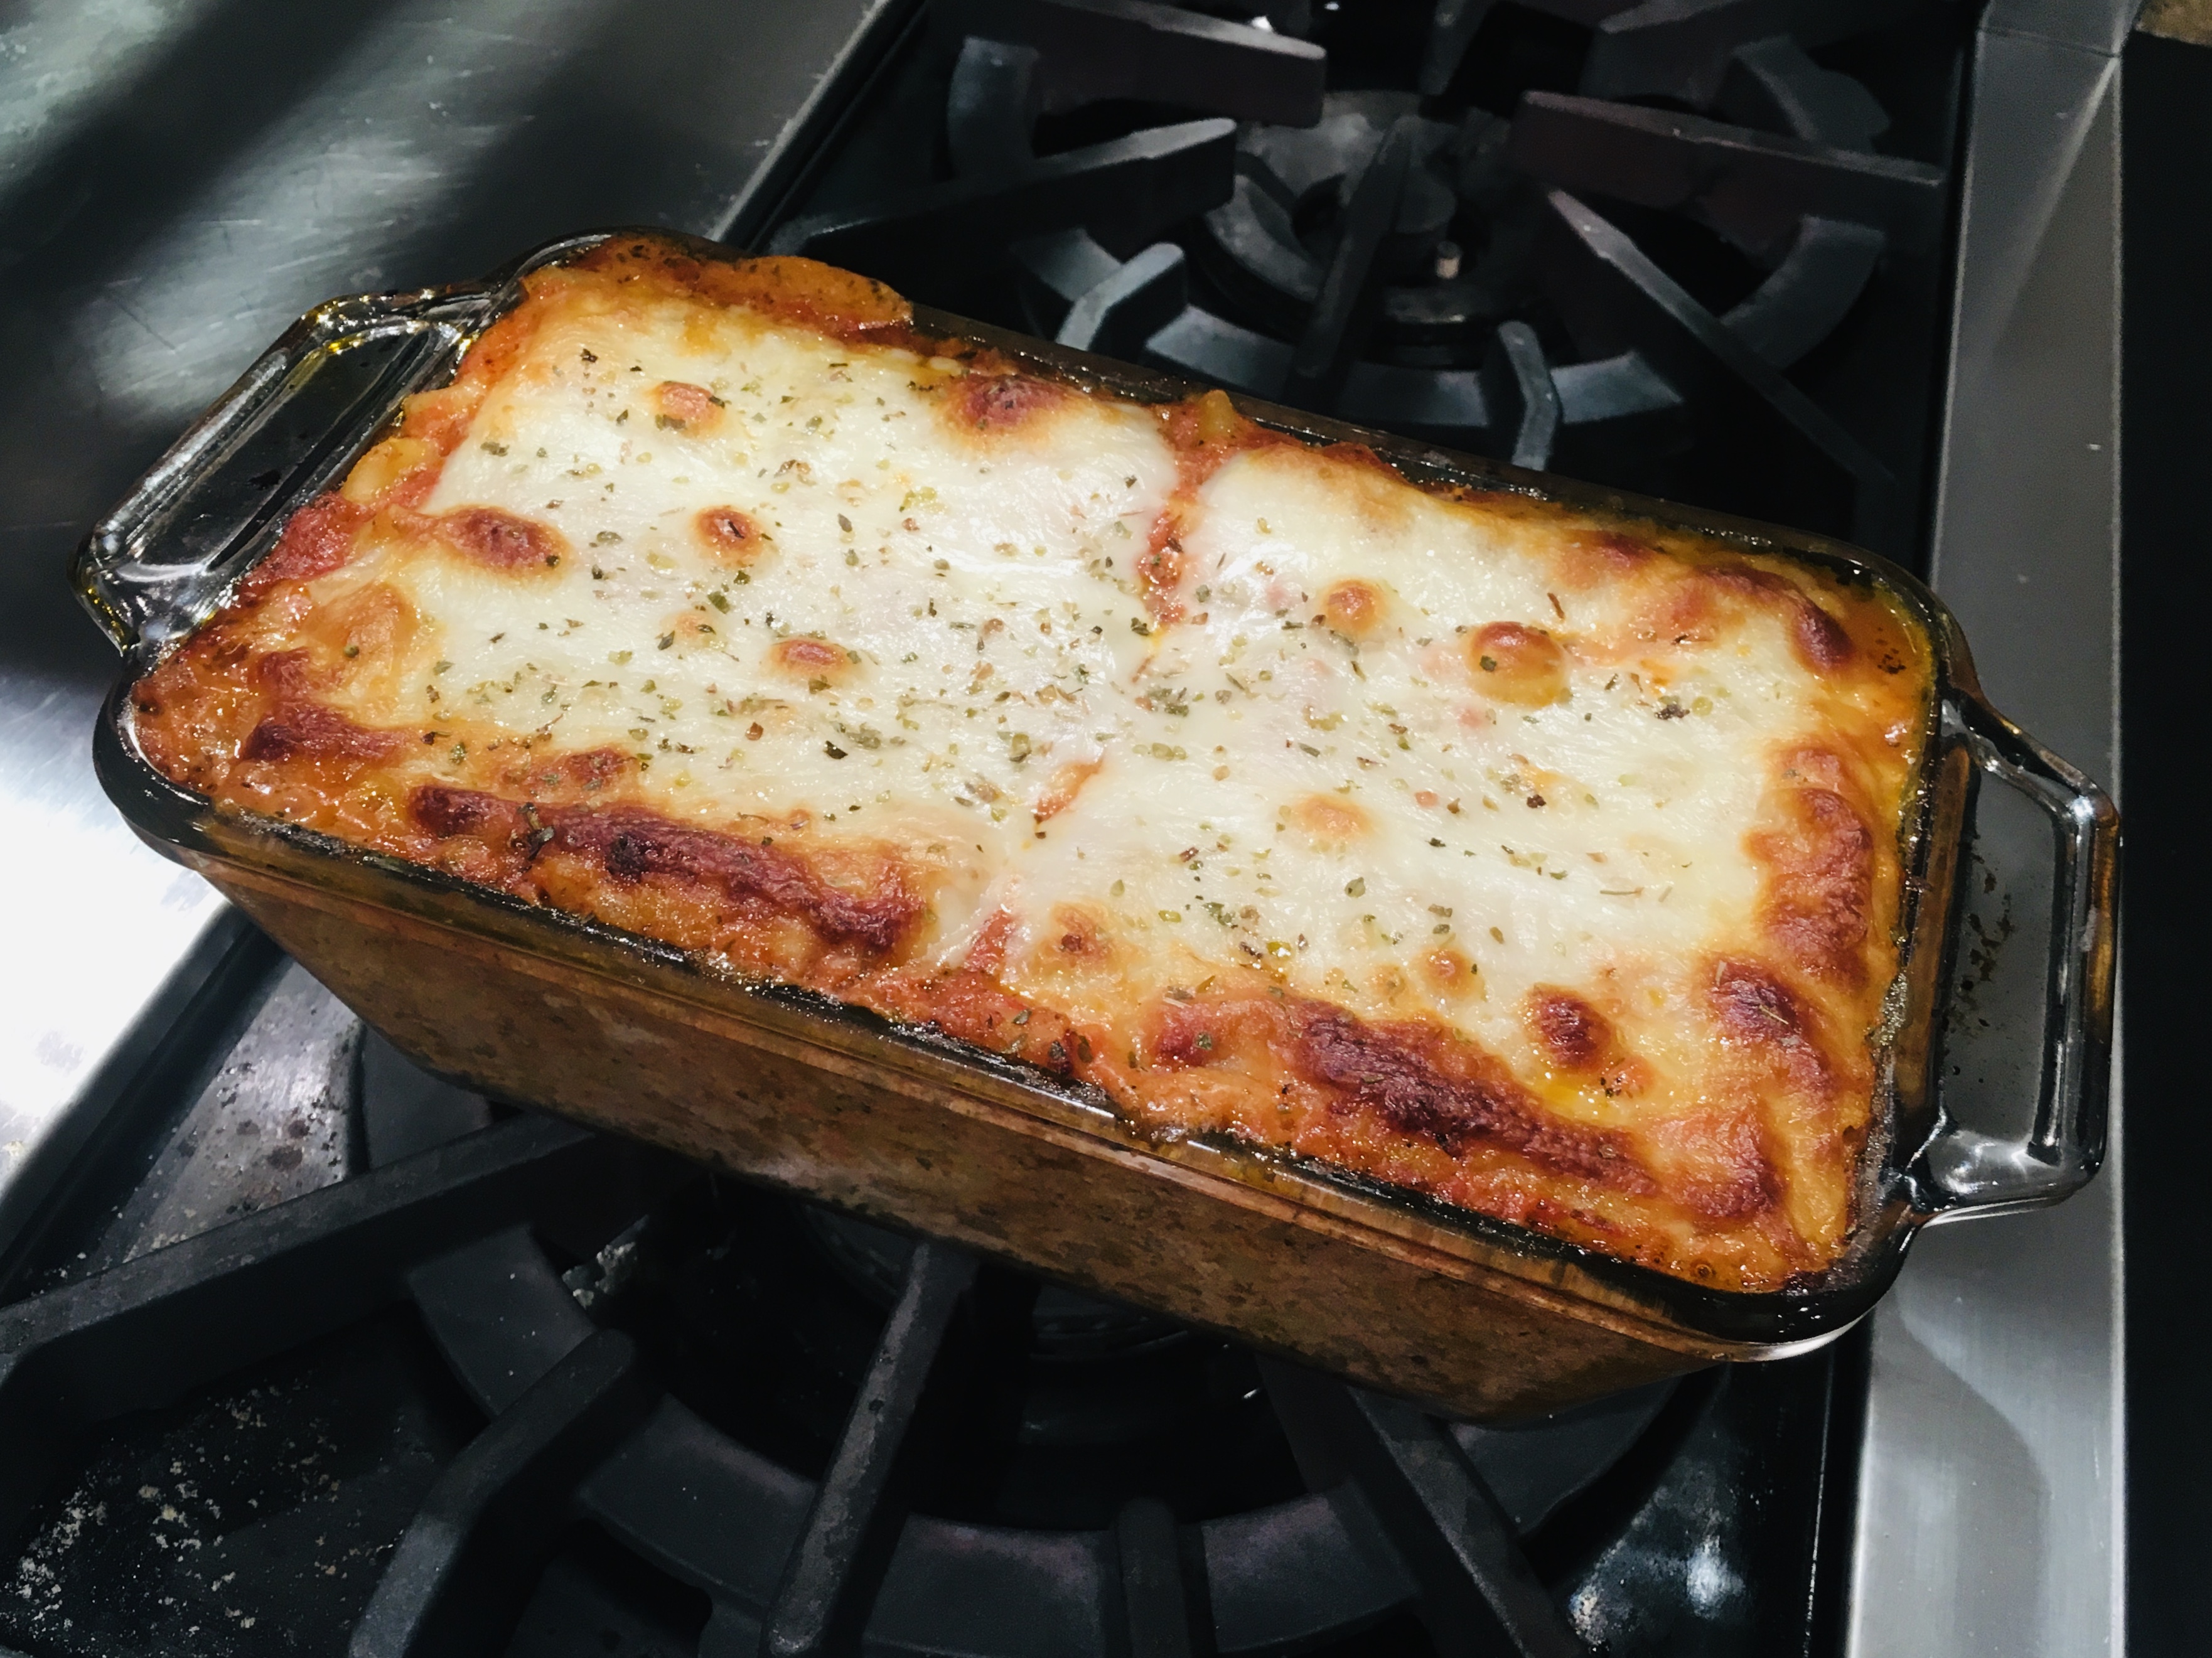
Make it as thick as you like. I like to cover the final layer of pasta with the meat sauce and then finish the dish with the mozzarella, sprinkling a touch of oregano on top.

Place the lasagna pan in the oven and bake for 30 minutes, or until bubbly. Shut the oven off, but leave the pan in for another 10 minutes, then serve.

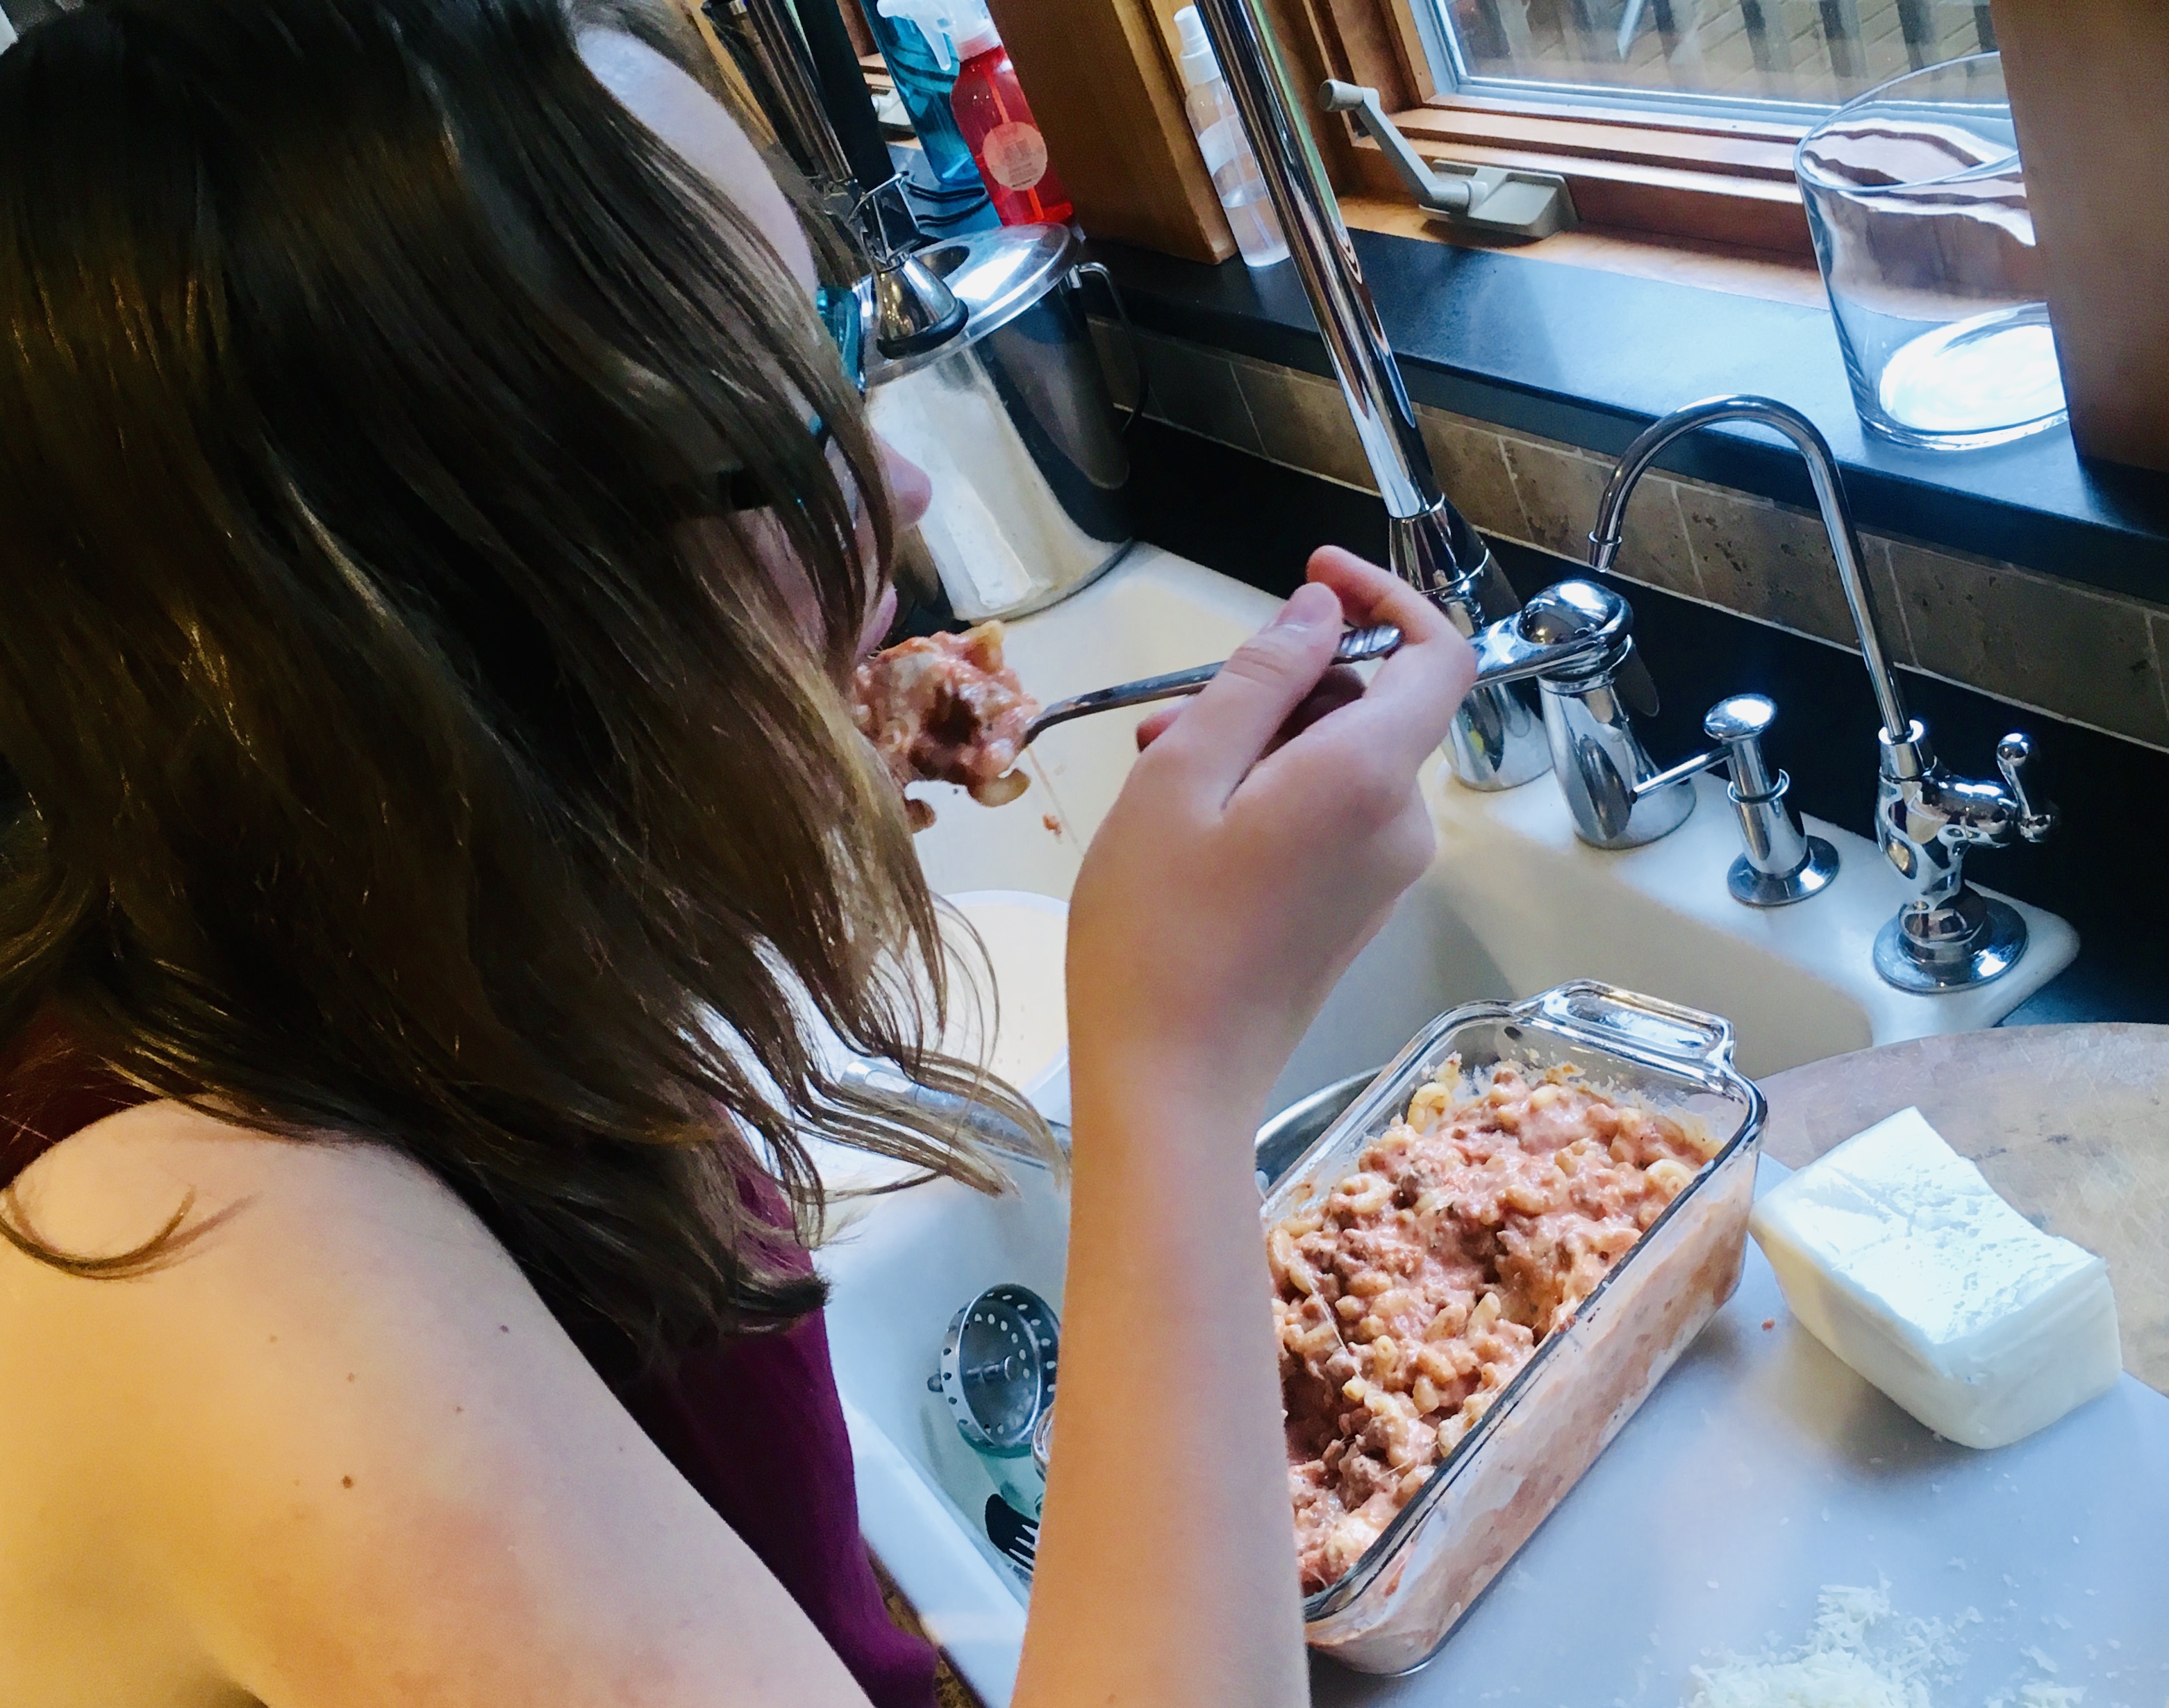
The baked ziti version, using elbow pasta this time, before baking.


If you’re making a baked ziti version, your job is a lot easier. Take the cooked, drained pasta and pour it into the pan. Add the meat sauce and some bechamel sauce. Stir in the ricotta, torn up pieces of the provolone, grated Parmigiano Reggiano, and even a few small chunks of mozzarella. Mix it well. Then place more mozzarella on the top, and bake it in the oven for about 30 minutes.

The best mac and cheese ever: the baked ziti version, substituting elbow pasta for lasagna sheets.


Of course, when you’re cooking, there’s always someone hanging around to grab a taste of the baked ziti before it goes in the oven…


Hosting a “boys’ weekend” at Saule, our rental home in Little Compton, Rhode Island  (Go to http://www.sauleri.com. We’re listing #4711871 Homeaway.com), I made this as a side dish to the piles of meats we devoured.

This is a salad you want to make now, while corn and tomatoes are still in season, but I’ve found that frozen organic corn and greenhouse tomatoes work pretty darn well.


2 lbs. fresh or frozen organic corn
1 container grape tomatoes, chopped
1 small red onion, finely chopped
6 oz. mild crumbled cheese, like cotija or feta
1 package (5 oz.) organic baby arugula
1 teaspoon Fleur de Sel
1 teaspoon black pepper
1 tablespoon capers, drained
2 teaspoons white balsamic vinegar
2 tablespoons extra virgin olive oil


If you’re using fresh corn, remove it from the ears, then pan saute it  in a little olive oil, but leave it nice and crisp. If you can roast the ears of corn over some coals, even better. If you’re using frozen corn, pan saute in a little olive oil. Set the corn aside to cool.

Mix the corn with all the other ingredients in a bowl. Cover and refrigerate.

Right before serving, taste and season it again, mixing well. I think it’s best a little cooler than room temperature.

I know many people like to dry the herbs they grow in their garden. It’s easy enough to do: you snip ’em, wash ’em, and then dry ’em, usually in a food dehydrator or on a sheet pan placed in a low-heat oven.

I prefer to freeze my herbs. Every year, I grow a wide variety: several types of basil, parsley, oregano, tarragon, thyme, rosemary, lavender, and massive quantities of sage. I snip the herbs, wash them and dry them in a salad spinner, and then place them in plastic freezer bags, squeezing all the air out before sealing. I place all those smaller bags in one larger bag, for extra protection. I like the color and flavor of the herbs better this way. I learned this method years ago, in my younger days, when preserving the potency of particular herbs was essential. (That’s all I’ll say about that!)

Freshly washed and dried sage.


The reason I grow a lot of sage is because I usually make a very large quantity of my famous stuffies (the New England stuffed clam) in the wintertime and the recipe calls for several cups of fresh sage…really expensive if you decide to buy it at the supermarket in the dead of winter. (You can find the stuffies recipe here: https://livethelive.com/2017/12/06/stuffies-a-new-england-classic-2/)

I snip the sage leaves, and before washing, I pre-measure them, usually a cup or two at a time, packing them somewhat tightly in a glass measuring cup. Once I have my measurement, I wash them, dry them in the salad spinner, and place them in plastic bags, marking the quantity on the bag. Then, when my stuffies recipe calls for 4 cups of sage, I simply grab the amount of bags I need and I’m ready to go.

Pre-measured sage, ready to go in the freezer.


But even though I do all this, I’ve still got a herb overload in my garden, and it seems like such a waste to let them simply turn into compost. Recently, I read an article in Christopher Kimball’s “Milk Street Magazine,” featuring New Orleans chef Alon Shaya. When he faces massive herb leftovers, he takes all of them–and here’s the key–it doesn’t matter what herbs they are–and tosses them in a food processor with an equal amount of kosher salt. A few seconds of processing, and he’s got a fantastic herb salt that he then uses in all kinds of dishes. (To keep the herb salt fresh, it’s a good idea to put it in a tightly sealed container in the freezer.)

My mix of garden herbs. Really: you can mix and match anything.


I thought that was a brilliant way to use up the leftover herbs I had in my garden, so I gave it a try: a tightly packed cup’s worth of fresh herbs, plus a cup of Kosher salt in the processor.

The beautiful color of herbed salt.


I went one step further. If having herbed salt is a great idea, then having herbed butter at the ready has to be even better! I simply took a stick of unsalted butter out of the fridge and let it soften. (Use unsalted butter or the result will be way too salty.) I added one teaspoon of the herbed salt to the butter and mixed it in well. Then I placed the butter on a sheet of wax paper, and rolled it into a small log, twisting the ends of the paper to seal it, placing it in a plastic bag and into the freezer.

Herb butter.


Now, when I want to amp-up the flavor of a freshly grilled steak or piece of fish (or a plate of freshly cooked  boiled or baked potatoes,) I just take the log of herbed butter out of the freezer, slice a piece off, and let it melt over the top, placing the log back for future use.


ASIAN NOODLES WITH PEANUT SAUCE

Posted: September 13, 2018 in Food, Recipes
Tags: , , , ,

There’s something about Asian noodle dishes that make them incredibly addictive. They’re great hot or cold, and easy to make at home, which is important to me because I live in the boonies, about 30 miles from my favorite Asian restaurant. I store an arsenal of basic Asian ingredients in my pantry, so slapping this together is no effort at all. And if you don’t have Asian noodles around, chances are you’ve got a box of pasta, which works just as well.

Next time you’ve got a bunch of people coming over to watch some football, cook a batch a few hours beforehand and let it come to room temperature. It’s great with anything, especially ribs. Grab a bag of frozen egg rolls or some potstickers, and you’ve got great munchies for the game.

To make this recipe gluten-free, I use GF pasta…and you can find gluten-free hoisin sauce in the Asian food section of most supermarkets.


Asian noodles


4 tablespoons creamy peanut butter
1 tablespoon hoisin sauce
2 teaspoons sesame oil
1 teaspoon Chinese chili garlic sauce (more, if you like it spicy!)
16 oz. package Chinese noodles or pasta


Combine the peanut butter, hoisin sauce, sesame oil, and chili garlic sauce in a bowl. Set it aside. I keep my peanut butter in the fridge once the jar is open, so sometimes it’s a bit thick. So I just zap it in the microwave for about 10 seconds to soften it up.

Boil the noodles or pasta until al dente. Drain it and place it in a large bowl.

Mix the noodles with the sauce.

Devour!

Sometimes a small bite can take a lot of preparation, and you just don’t appreciate it until you decide to make it yourself. That’s especially true with the classic Danish open sandwich called Smørrebrød. The ingredients can vary, but one of my favorite versions is with smoked salmon, on the brunch menu at the best restaurant in Rhode Island: Persimmon, in Providence. 

The Salmon Smørrebrød at Persimmon.


With some very special friends coming over for dinner, I decided this would be the event where I debut my own version of Salmon Smørrebrød. I had my work cut out for me…

It starts with the salmon. One of the finest sources of wild-caught Alaskan sockeye salmon is Vital Choice, a purveyor of extremely high-quality wild-caught seafood. I ordered several large fillets and had them shipped frozen to my home. I thawed a couple of the fillets in the fridge, and then cured them for several days.


Make sure you get your salmon from a reliable source, and always get wild-caught, never farmed.


The recipe for the cure mix is simple:

1 cup Kosher salt
1/2 cup cane sugar
1/2 cup brown sugar
1 tablespoon crushed black peppercorns

Combine these ingredients in a bowl. Mix well.

Use a container that will hold the fillets without bending them. It also needs to be watertight, because the salt extracts moisture from the fish, and you don’t want spills from the liquids released during the curing process.


First, the plastic. Then, a layer of the cure mix. Then the salmon fillet, skin-side-down. More cure mix on top. Then the second fillet, with more cure mix on top of that.


Lay a few sheets of plastic wrap on the bottom, allowing them to fall over the sides of the container. Sprinkle a good, even layer of the cure mix on the bottom. Lay down the first salmon fillet, skin side down, on top of the cure mix. add more cure mix on top of the fillet to cover it completely. Lay the second fillet on top of that, then cover it completely with more of the cure mix. Fold the plastic wrap tightly over the top, pressing out as much air as you can.


Finally, wrapping the whole thing up tightly in plastic.


Pressure on the salmon helps the curing process, so the cure mix makes good contact with the flesh. I weigh it down with a few cans of tomato sauce.


Even pressure on the salmon fillets helps the curing process.


Put the salmon in the fridge for at least 48 hours, until the fillets are firm to the touch.


The fillets have changed color and are firmer to the touch once cured.


Once the salmon has cured, remove it from the plastic wrap and wash it thoroughly with clean, cold water to remove as much of the salt as possible. Some of the peppercorns will imbed themselves in the fish…remove those, too. Pat the fillets dry with paper towels.


The salmon is ready to eat just like this, but…


At this point, you’ve got Gravlax, and it’s delicious just the way it is. But I chose to go one step further and smoke the salmon, so I put the fillets on a metal rack in my fridge, skin side down, and let them dry out a bit for an hour or so. When the salmon dries, the flesh gets a bit tacky. That’s called the pellicle, and the sticky surface of the fish helps the smoke molecules adhere better. It’s a good thing.


The salmon fillets, drying in the fridge.


While the salmon is drying in the fridge, I get my smoking gear ready.

I like to use charcoal briquets and hickory chips for the smoking process. I bring my small camping grill next to my larger home grill. Using my charcoal chimney, I light the briquets and let them burn until they’re ashed over. Using a small smoking box, I place some hickory chips inside, then add a couple of hot briquets to it, making sure they burn the chips and the smoking starts. I place the smoking box inside my large grill with the vents open, laying my salmon fillets (skin-side-down) next to the smoking box. I close the lid of the grill, and let the smoking begin.


Lighting briquets in the camping grill before moving them to the larger grill.


Ashed-over coals in the chimney.

This is as close to a cold-smoking process as you can get at home. There is no heat actually cooking the salmon, just a smoke-filled grill that needs to be replenished every once in a while with hot coals and more hickory chips. I smoke the salmon for a couple of hours.


Let the smoking begin!


Once the salmon has smoked, you’ve got yourself a really special treat. You must eat some at this point, just to reward yourself for a job well done! Then, wrap the rest of the salmon tightly in plastic wrap, and keep it refrigerated until you’re ready to serve it. It will stay fresh in the fridge for several days.

My research for Salmon Smørrebrød resulted in many variations, but I ultimately chose one that used a horseradish cream on the fish. Just so happened that I have a giant horseradish plant growing in my garden, so it was time to dig some of the roots up!


Digging up horseradish.

Once I dug the roots out and washed them clean, they needed to be peeled down to their white center. Then they were ready to be grated. I used the same system my grandfather did, many years ago: a simple hand grater for the job. If you thought you cry when you slice onions, you ain’t seen nuthin’ until you’ve grated horseradish! But it’s worth the effort.


Cleaned horseradish roots, before peeling and grating.


You need freshly grated horseradish, not the prepared stuff you find in the supermarket for the cream…


12 tablespoons sour cream
6 tablespoons plain Greek yogurt
4 tablespoons freshly grated horseradish
8 teaspoons freshly squeezed lemon juice
4 pinches of sugar
Kosher salt to taste

Combine these ingredients in a bowl and mix well. It keeps for at least a day, so you can make it the night before serving. This is a lot of horseradish cream, but I was making enough to serve 12 people.


The horseradish cream…delicious on a lot of things!


1 fennel bulb
2 Granny Smith apples
1 tablespoon freshly squeezed lemon juice

A few hours before serving, thinly slice a fennel bulb–paper-thin if you can–and place the slices in a bowl of ice water. Peel and core 2 Granny Smith apples and slice them as thinly as you can, placing them in the ice bath as well. After an hour, remove the fennel and apple slices from the ice water, pat them dry with paper towels, and place them in a bowl, sprinkling them with the lemon juice. Toss, mixing well, and then place the bowl in the fridge until you’re ready to use it.


Slicing the fennel as thinly as possible.


A few last ingredients…

Sliced bread
Softened unsalted butter
Fresh dill sprigs

Smørrebrød is a sandwich, so of course, I needed some bread. I chose something from my heritage: Lithuanian bread, a combination of rye and pumpernickel that I find when I go back home to New York. I keep it in the freezer until I need it, and for this recipe, I sliced it thin.


Getting the ingredients together. The Lithuanian bread is the brown bread. We also had a couple of slices of gluten-free bread.


Now we’re finally ready to build this thing!


Slicing the salmon as thinly as possible.


Rather than making all the sandwiches myself, I decided I’d teach a Master Class of Smørrebrød-making with my fabulous guests. So I brought all the ingredients out, and we started building our sandwiches as I sliced the salmon as thinly as possible.


Everyone makes their own Smørrebrød!


First, you take your slice of Lithuanian bread and spread some of the butter on it.

Then, layer the fabulous salmon on top.

Next, a healthy spread of the horseradish cream.

Top with some of the sliced fennel and apple.

Garnish with just a few fresh sprigs of dill.

And then top it all off with a friendly sprinkling of Fleur de Sel, or your favorite sea salt.


Fleur de Sel at the end makes all the difference!


And that’s my Salmon Smørrebrød…a labor of love. But that’s what you do for friends, right?


Time to eat!


Leftover ingredients make a great sandwich on an everything bagel the next day!


Before you can have great shrimp cocktail, you have to do 2 things: buy the right shrimp and cook the shrimp the right way. The right shrimp is nothing less than wild-caught American shrimp. If you’re buying shrimp from Asia, your supporting a system that uses slave labor, where shrimp are fed chemical pellets and swim in feces. If it doesn’t say wild-caught American shrimp on the package or at your local seafood store, it’s crap. Give your store owner hell for selling it.

Cooking shrimp the right way is something I learned living in the South. My wonderful friends and neighbors taught me many things about food, and the right way to cook shrimp is near the top of the list.

Shrimp was never meant to be cooked to death. It doesn’t matter if you start with fresh shrimp, store-bought shrimp, or even frozen shrimp…the same rules apply: 1) Season your water. 2) Bring it to a boil, then reduce to a simmer and let it get happy for 20 minutes. 3) Drop in the shrimp and raise the heat. 4) Remove the shrimp AS SOON AS the water returns to a boil.

The seasoning for the water, commonly called shrimp boil, makes or breaks the flavor of your shrimp. For years, I used Zatarain’s Crawfish, Shrimp and Crab Boil in a bag. And it was good. But at some point, I realized I had to get serious and make my own boil.

2 quarts water
2 cloves garlic, smashed
1/2 lemon, squeezed, then drop the lemon in
1 small onion, peeled and quartered
4 bay leaves
1 tablespoon black peppercorns
1 tablespoon salt
1 tablespoon whole allspice
1 teaspoon cayenne pepper
1 teaspoon celery seed
1 teaspoon whole cloves
1 teaspoon brown mustard seed
1 teaspoon dry thyme

Combine all the ingredients in a 4–6 quart pot. Bring it to a boil, then reduce to a simmer, put a lid on the pot, and let it simmer for 20 minutes.

After 20 minutes, remove the lid and pour in your shrimp. (I prefer unpeeled.) Stir well, bring the heat back up to high, and remove the shrimp AS SOON AS it returns to a boil! The shrimp are cooked! Done!

Strain the shrimp and place them in a bowl with crushed ice on the bottom. Add more crushed ice on top of the shrimp, and place the bowl in the fridge until you’re ready to serve.


Freshly shucked oysters and clams, or in this case, beautiful boiled wild-caught American shrimp, all call for an equally amazing cocktail sauce…and this sauce kicks butt! And it features a key ingredient that you might not expect: vodka. The small amount of vodka in the mix makes the cocktail sauce easy to scoop even when stored in the freezer. Just scoop out what you need, let it thaw, and put the rest back in the freezer until next time.

image


2 cups ketchup
4 tablespoons prepared horseradish
1 tablespoon fresh lemon juice
1 teaspoon Worcestershire sauce
1/2 teaspoon Frank’s Red Hot, or other hot pepper sauce
5 grinds of fresh black pepper
1/4 teaspoon salt
1 teaspoon good quality vodka, like Tito’s

Combine all the ingredients. Store in a tight plastic container in the freezer.

SUPER-GARLICKY CHICKEN

Posted: August 27, 2018 in Uncategorized
Tags: , , ,

I love garlic, and I spend a lot of time trying to figure out how I can up the garlic in any particular dish. Now, this piece of chicken may look pretty harmless to you, but it is a garlic bomb…and it’s delicious. I tried to think of ways I could increase the garlic quotient without simply adding more granulated  garlic to the breading…and then it came to me: add fresh garlic to the egg wash! Brilliant!


3 lbs. chicken pieces
1 cup all-purpose flour ( I use Cup4Cup GF flour if I want this dish to be gluten-free)
2 teaspoons granulated garlic (add more if you like!)
1 teaspoon granulated onion
1 teaspoon oregano
1 teaspoon parsley
1 teaspoon basil
1 teaspoon black pepper
1 teaspoon salt
2 eggs
1 tablespoon (or more) fresh finely chopped garlic
oil for frying


I use the oven-fried method for my chicken. That means I fry the pieces until golden brown, then place them on a baking sheet and finish cooking them in the oven.

Pre-heat the oven to 350 degrees. Heat the oil in the pan to 350 degrees.

In a bowl, combine the flour, granulated garlic and onion, oregano, parsley, basil, pepper and salt. Mix well and set aside.

In another bowl, whisk the eggs together. Finely chop the fresh garlic, making it into a paste either by squishing it with the side of a chef’s knife or, my preferred method, pushing it through a garlic press. Add the garlic to the egg and mix well.

Take the chicken pieces and coat them in the egg and garlic mixture. Then place them in the flour mixture, coating well and shaking off the excess. You can place them in the hot oil at this point…or…dip them back in the egg/garlic mix again, then back into the flour, for a double-coating of crunchy garlic.

Fry the chicken pieces until they’re golden brown, but not cooked all the way through. Place them on the baking sheet. When all the pieces have been fried, place the baking sheet in a 350-degree oven to finish cooking.


I recently hosted a “boys’ weekend” at Saule, our rental home in Little Compton, Rhode Island (http://www.sauleri.com. We’re listed at Homeaway.com), and when you’ve got guys coming over, you’ve got to have ribs! I like making these because they don’t require hours on the grill. They’re gooey, sweet and absolutely delicious!
 image
¾ cup soy sauce
 1/4 cup hoisin sauce
5 lbs. pork ribs
Zest and juice of 1 lemon
2 whole star anise
2 cinnamon sticks (3”)
1/2 cup honey
4 cups chicken broth
Mix the soy sauce and the hoisin in a bowl, and set aside. These are the marinade ingredients.
If the ribs are large, cut them into individual pieces. If smaller, cluster 2 or 3 ribs together. Place them in a large pot. Cover them with water and bring it to a boil. Boil for 5 minutes. Drain.
Place the ribs on a baking sheet lined with non-stick aluminum foil or with a rack and coat them with the marinade. Let them sit for 10 minutes.
Pre-heat the oven to 350 degrees. Bake the ribs on the baking sheet for 30 minutes.
While the ribs are baking, start the sauce in a large non-stick pan or pot that will hold all the ribs: combine the lemon zest and juice, star anise, cinnamon sticks, honey and chicken broth. Bring it to a boil, then reduce it to a simmer.
When the ribs have finished baking, add them to the sauce pot and simmer (covered) for at least 15 minutes or until the rib meat is tender.
Turn the heat on high, uncover the pot and cook until the sauce is reduced to a glaze that coats the ribs. Be sure to reduce the heat as the sauce thickens or the sugars in the honey will burn! When the ribs are sticky and gooey, they’re ready.
Substituting grapefruit for the lemon works really well, too!


Although my daughter and I love any foods that are heavy on the garlic, my wife can’t eat them. She also needs to maintain a gluten-free diet, so garlic bread is a special treat we make when Mom’s not around. It’s buttery, it’s garlicky, it’s carby, and it’s absolutely delicious!

I use 2 kinds of garlic in my garlic bread: fresh and granulated. I think it adds a richer flavor than either one alone. And passing the fresh garlic through a press ensures that it will cook quickly and not leave you with that raw garlic taste in your mouth.

Although I love French baguettes, they’re too thin and crisp for garlic bread. I buy that long, soft, Italian loaf you can find in just about any bakery. When it bakes, the outside edges have a crisp bite to them, while the inside of the loaf stays soft…exactly what you want! The Italian loaf is big, so not only do I cut it lengthwise, I then cut each piece in half. This will make enough for us to enjoy one evening, and still store some in the freezer for a future craving.

This recipe makes enough for 1 garlic bread, 1 cheesy garlic bread, and also the bread you’ll be putting in the freezer for another time.


The delicious final product…but I digress…


2 sticks (8 oz.) unsalted butter
2 large cloves garlic, squeezed through a press
1 teaspoon granulated garlic
1 teaspoon salt
1 teaspoon oregano
1 teaspoon parsley
grated mozzarella cheese…a few ounces


In a bowl, let the butter soften to room temperature. Once it’s soft, squeeze the fresh garlic cloves through a garlic press and add them to the butter. Then add the granulated garlic, salt, oregano and parsley. Using a fork, mix the ingredients really well until you have a beautiful garlic and herb butter. (Once it’s mixed, I find it’s easier to spread with a spatula.)

Spread the garlic butter evenly on all 4 pieces of bread you’ve cut. Use it all up! Going thin on the butter serves no purpose here!

Place one of the loaves on a baking sheet. Add the grated mozzarella to one of the other loaves, and place it on the baking sheet as well.


Regular garlic bread on the left, cheesy garlic bread on the right…ready to go into the oven.


Pre-heat the oven to 400 degrees.


With the other two pieces of bread, I simply put them together…with cheese inside or not…

…and wrap them in aluminum foil. I place that in a freezer bag and keep it frozen until we have another craving. When it’s time to cook, I pre-heat the oven to 350, and bake the loaf in the foil for about 25 minutes. I take it out of the foil at the very end and bake another 5 minutes to get it to crisp up.


Ready to be devoured!


With the oven at 400, I bake my garlic bread and cheesy garlic bread for about 10 minutes, or until the edges of the bread start to turn a golden brown and the cheese on the cheesy side starts to melt.


I cut each piece in half so my daughter and I share in the 2 breads. There’s never any leftovers!


One of our favorite restaurants in Southern New England is The Back Eddy in Westport, Massachusetts, and one of their best-selling appetizers is a simple but delicious deviled egg plate with raw tuna on top. It’s so good, it’s the only thing on the menu that my wife and I refuse to share…we always get a plate for ourselves!

We can’t always get back to the Back Eddy, so when the cravings hit, I make my version of this dish at home. Of course, my version has a lot less finesse to it…but a lot more tuna, which is what I crave! It takes a little time to make it, but it’s so worth it…


FullSizeRender (5)


6 hard-boiled eggs
1/4 cup + extra mayonnaise
8 oz. high quality raw tuna
3 tablespoons soy sauce (I use gluten-free)
1/2 teaspoon chili oil
1/4 cup finely chopped scallions
1 teaspoon sesame seeds
fish roe (optional, see below)
handful fresh spinach, or cucumbers (see below)


My favorite method of hard-boiling eggs is to put them in a pot of cold water. Turn the heat on high and bring to a boil. As soon as the water boils, turn the heat off and place a lid on the pot. Let it sit for 15 minutes. Perfect eggs every time. Remove the eggs from the water and cool them in the fridge, or in a bowl of ice water if you’re going to be serving this dish right away.

Here in Rhode Island, I can get fresh tuna right off the boat. Ideally, they say you should freeze all raw seafood before eating it. In general, killing parasites requires freezing and storing fish at a surrounding temperature of minus 4 degrees Fahrenheit or colder for seven days; or freezing at a surrounding temperature of minus 31 degrees or colder until the fish is solid and storing at the same temperature for 15 hours; or freezing at a surrounding temperature of minus 31 degrees until the fish is solid and storing at minus 4 degrees or below for 24 hours.

That’s a lot of work and worry. I find that I can get high quality tuna already frozen into convenient bricks at Whole Foods or on-line at websites like Vital Choice, one of my favorites for extremely high quality, responsibly sourced seafood.

I always try to buy responsibly sourced, fair trade seafood, like this beautiful ahi tuna.


If the tuna is frozen, let it thaw a little. If it’s fresh, place it into the freezer for about 10 minutes to firm up. That makes it easier to cube up. Slice the tuna carefully into the smallest cubes you can make. Once done, place the tuna in a bowl and put it back in the fridge to continue its slow thawing until ready to use.

In a separate small bowl, combine the soy sauce and the chili oil. Set aside.

Finely chop the scallions. Set aside.

Once the eggs have cooled, peel them and cut them in half. Scoop out the yolks and place them in a bowl, starting with 1/4 cup of the mayonnaise. Add more mayo if needed. Mix well. I use a fork or whisk to get as many of the lumps out as possible. If you want to go crazy, you can put them in a blender or food processor to make a creamy puree. You can place the puree in a piping bag and carefully squeeze it out into each egg half. I simply use a spoon.

Once all the egg halves are filled, place them on a spinach leaf-covered dish and put them back in the fridge until ready to serve. Or, instead of the bed of spinach, peel a cucumber and cut the ends off. Slice the cuke into 1/2″ thick slices. Then, using a melon baller, carefully scoop out the seeds from the center to make a “cuke donut.” Use these as little stands to hold your eggs on the plate.

When you’re ready to serve, take the tuna out of the fridge. Pour the soy sauce/chili oil mix into the bowl with the tuna and mix well. Let the tuna marinate for just 2 minutes. Pour off the excess marinade, or it’ll get too salty.

Remove the plate of eggs from the fridge and carefully put a small spoonful of tuna on top of each one. Garnish with the sesame seeds and the chopped scallions and serve immediately.


FullSizeRender