Archive for the ‘Food’ Category

When it’s done right, gazpacho is one of the most delicious summer soups you’ll ever have. The secret, of course, is using super-fresh veggies. That’s why I crave it at the first sign of a vine-ripened tomato in my garden or a local farm stand. When my tomato plants have dozens of ripening fruits on them every day, I eat some in salads…I make tomato sauce with others…but the reddest and ripest become gazpacho!


I never make this out of season, and I’m always wary of restaurants that do! Very often, they’ll try to hide the taste of older veggies by adding too much salt or lots of spice.

The consistency of gazpacho is a personal preference. I like mine a bit chewy…not chunky like salsa, but not watery like soup…somewhere in between the two is perfection.

All the work is pretty much in the slicing, peeling and chopping…so I do it carefully.


1 large Vidalia onion, peeled and roughly chopped
1 carrot, peeled and roughly chopped
5 large tomatoes, peeled, seeded, and roughly chopped
2 medium cucumbers, peeled, seeded, and roughly chopped
6 sprigs of flat-leaf parsley
1/2 cup olives, drained  (I like kalamatas)
1/2 cup good quality extra virgin olive oil
Juice of 1/2 a large lemon
3 tablespoons white vinegar
Sea salt and freshly cracked black pepper

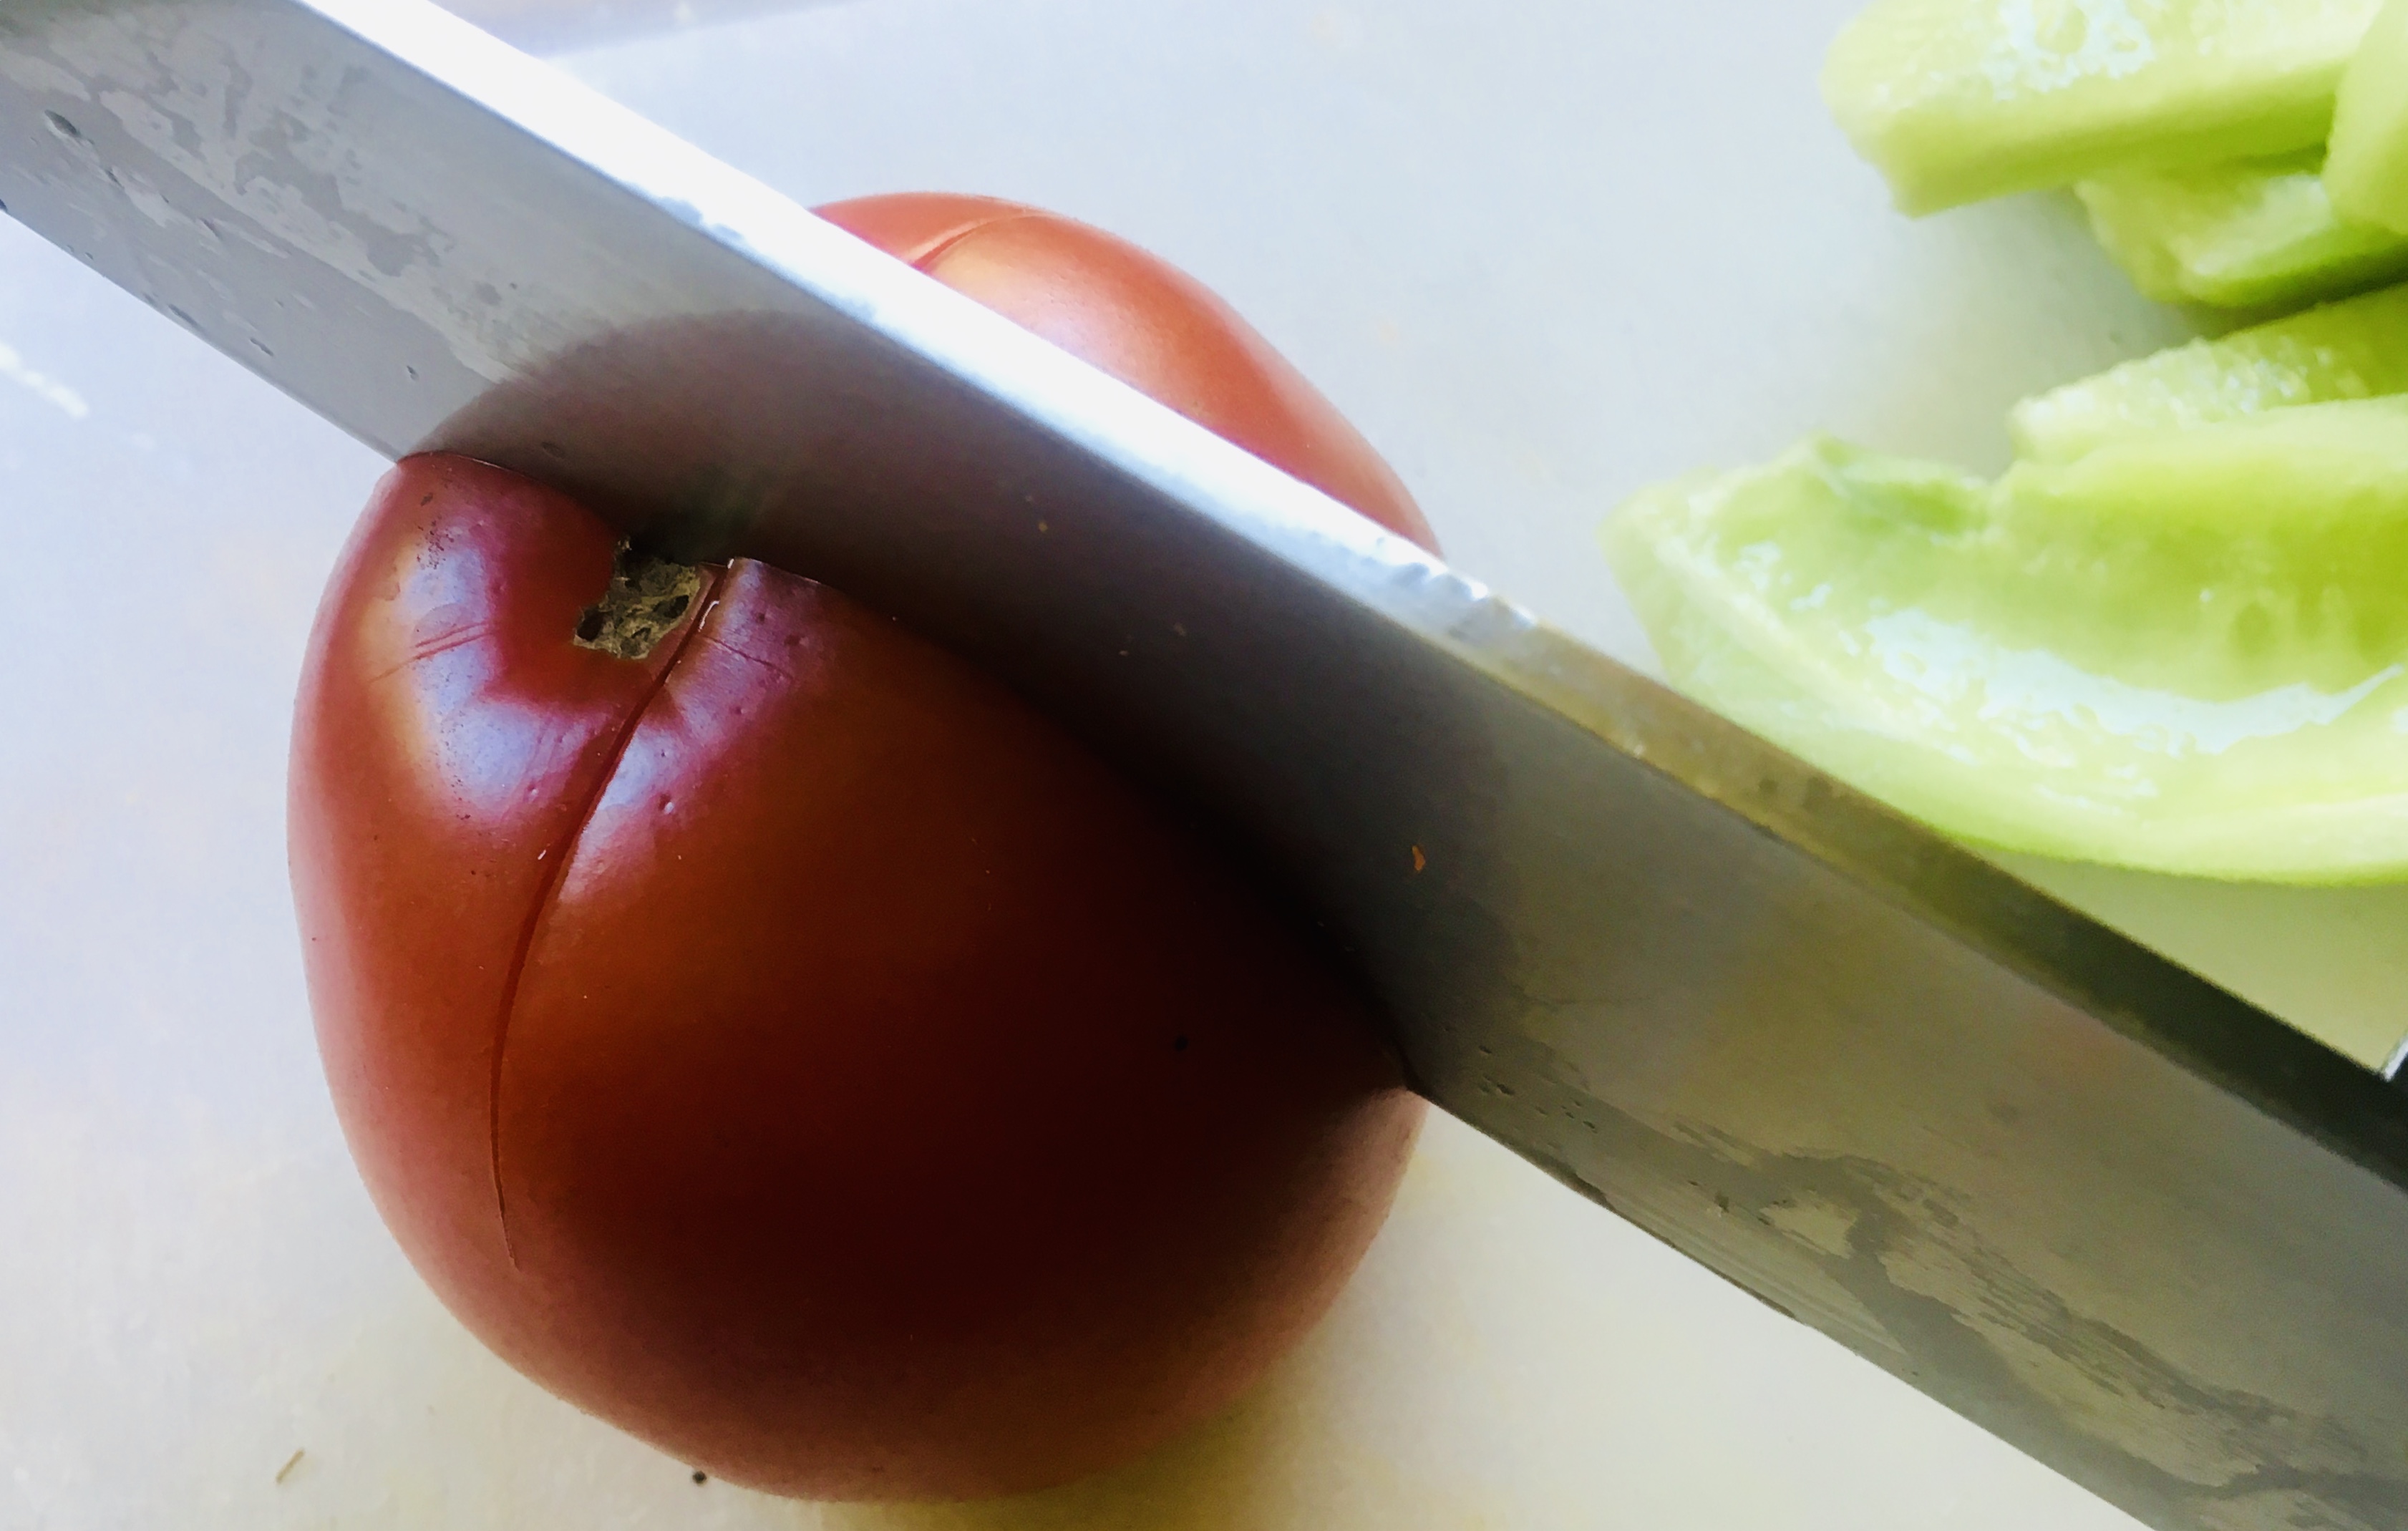
An easy way to peel tomatoes is to turn them upside down and make an X with a knife, puncturing the skin. Drop the tomatoes in boiling water for about 30 seconds, and the skin will start peeling away from the meat. Scoop the tomatoes out of the water, and immediately drop them into a bowl of ice water, letting them cool for 5 minutes. The skin will peel right off. Cut the tomatoes in half and (over the sink!) gently press your thumbs into the seed compartments, popping them out. Give the tomato a little shake to remove any last seeds, and it’s ready to be chopped.


Make an X, then drop the tomatoes in boiling water for 30 seconds.


While the tomatoes are cooling, you can peel and chop the other veggies.

Peel and roughly chop the onion and carrot, and place them in a food processor. Let it run for about 10 seconds.

Add the peeled and seeded tomatoes, the peeled and seeded cucumbers, and the sprigs of parsley and continue processing.

Add the olives, olive oil, lemon juice, vinegar, sea salt and black pepper.


Process until the veggies are finely chopped, and you’ve got a soup. Store it in the fridge for at least one hour to chill before serving.


Garnish with a sprig of parsley and a sprinkle of Fleur de Sel or other tasty finishing salt.

Stuffies, or stuffed clams, are a very personal matter here in Southern New England. There are as many stuffies recipes as there are chowder recipes, and everyone thinks they’ve got the best one. Most stuffies that I’ve had in restaurants, like most meatballs I’ve had, have too much bread and not enough of the good stuff.

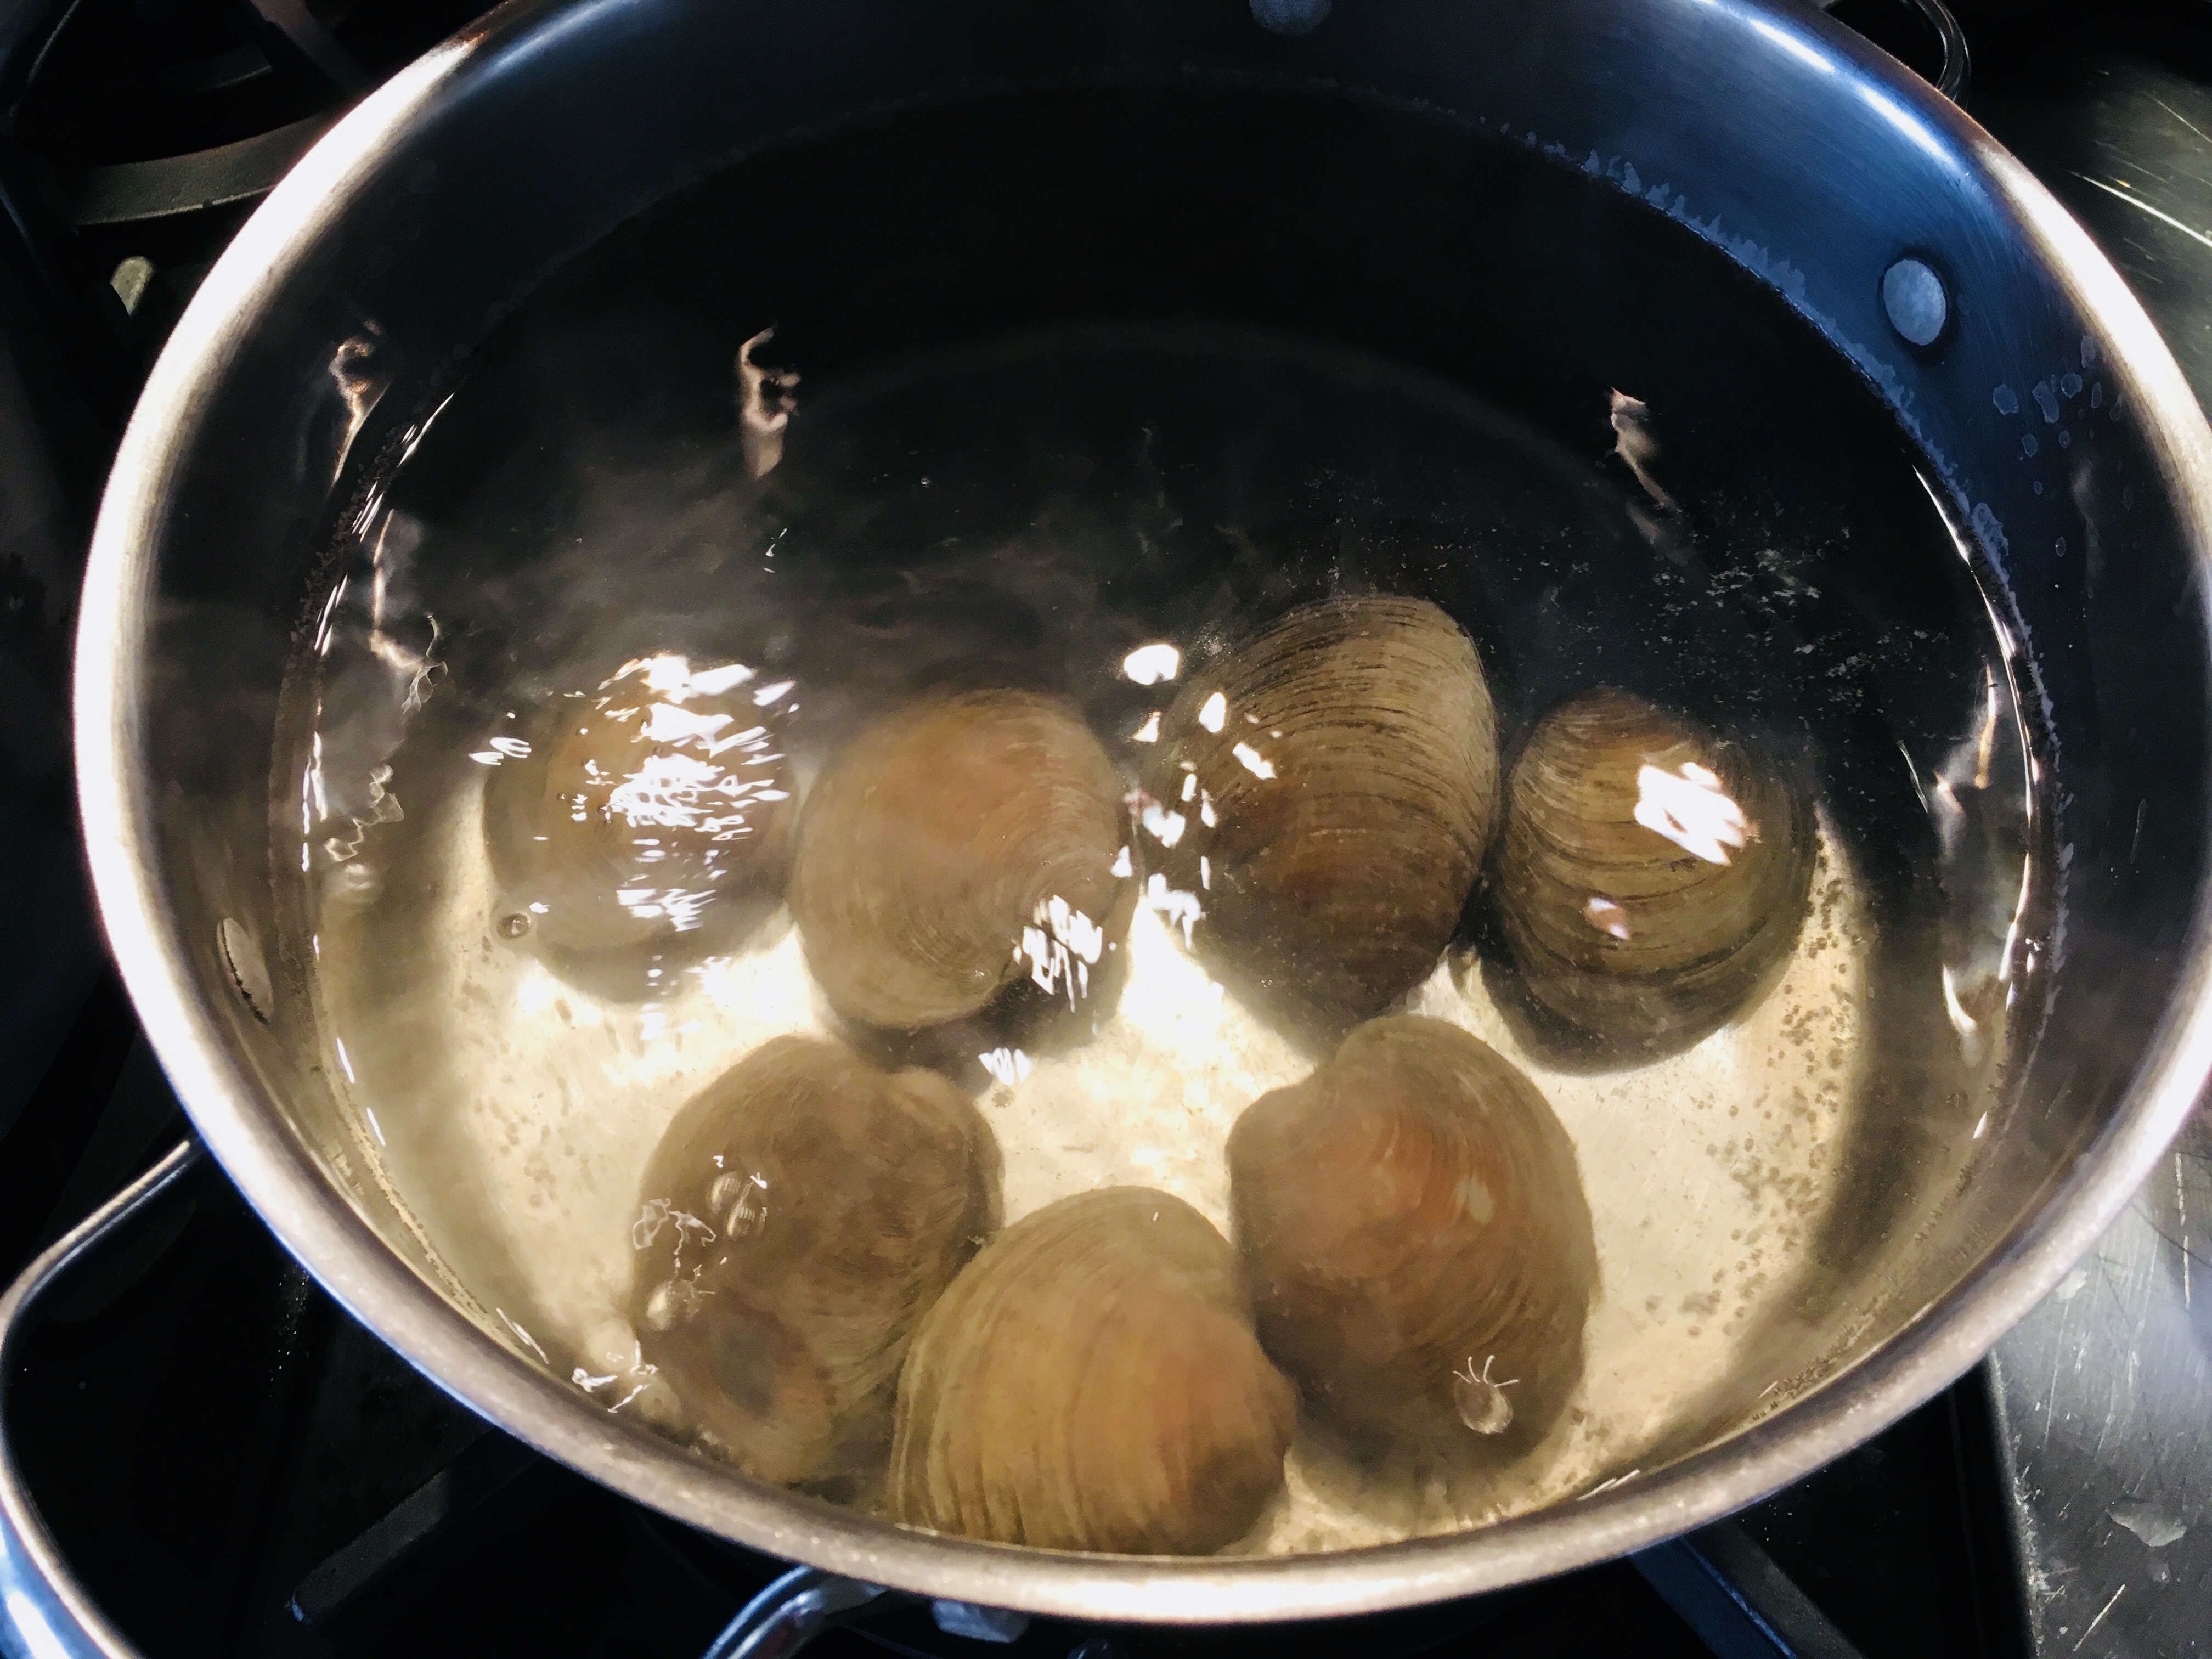
I use medium-sized clams for this recipe and not the traditional quahog, a large clam often used in chowders that I find to be too chewy. Dropping the clams in hot water in the beginning helps make opening the clams a lot easier.
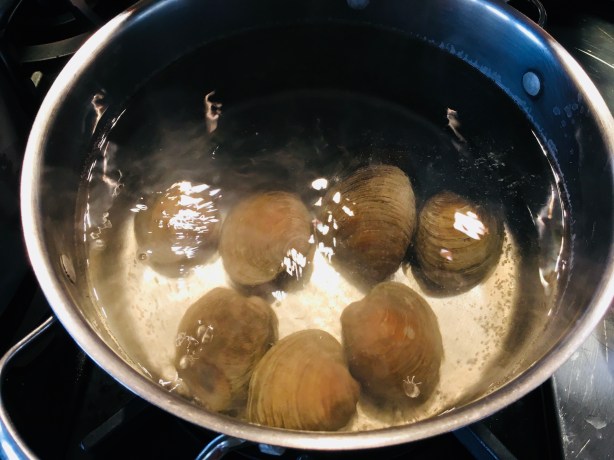
Just 30 seconds in boiling water is all it takes.

This recipe requires quite a bit of fresh sage, which can be expensive at the supermarket. So I grow sage in my garden, using it throughout the season, then snipping as much as I can at the end of the growing season to store it in freezer bags for winter use. I’ll even measure out 1 1/4 cups of fresh sage leaves (what I need for each batch of stuffies), then place that amount in the freezer bag, so I don’t need to measure later.
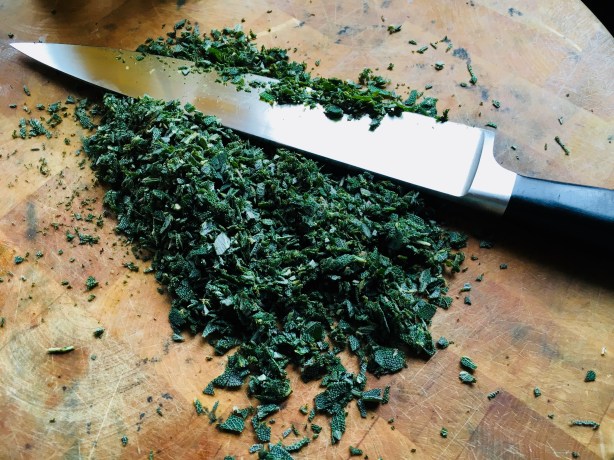
Freezing the sage makes it easier to chop finely later on.

I use Portuguese chourico (since I live near Fall River and New Bedford, Massachusetts, the Portuguese capitals of America), and I think their flavor is best.

This recipe makes a lot of stuffies, but they freeze well so you can have them when you want.

This recipe is gluten-free…and you’ll never be able to tell the difference! But if that doesn’t matter to you, use toasted Portuguese bread instead of gluten-free bread.

I don’t like peppers in my stuffies (or my crab cakes), so I leave them out. But if you do, feel free to add them to the recipe.
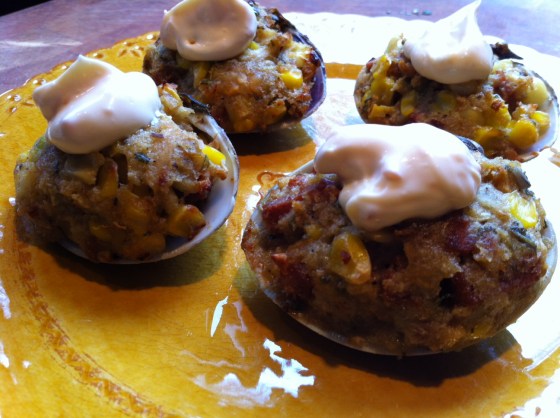
stuffies

4 dozen medium neck clams
1.5 pounds chopped chourico, skin removed (I use Mello’s from Fall River, Mass.)
3 onions, finely chopped
3 tablespoons garlic, finely chopped
3 cups frozen or fresh corn kernels
3 cups toasted and coarsely ground bread (I use Udi’s Soft & Hearty Whole Grain bread to keep it gluten-free)
3/4 cup chopped fresh oregano (or 1 tablespoon dried)
1 1/4 cups chopped fresh sage (don’t use dried)
Salt and pepper
Butter
Sambal chili paste
Mayonnaise

In a large pot of boiling water, drop the clams in, about a dozen at a time. Remove them after about 30 seconds, before they open. Place them in a bowl to cool. Do this with all the clams.

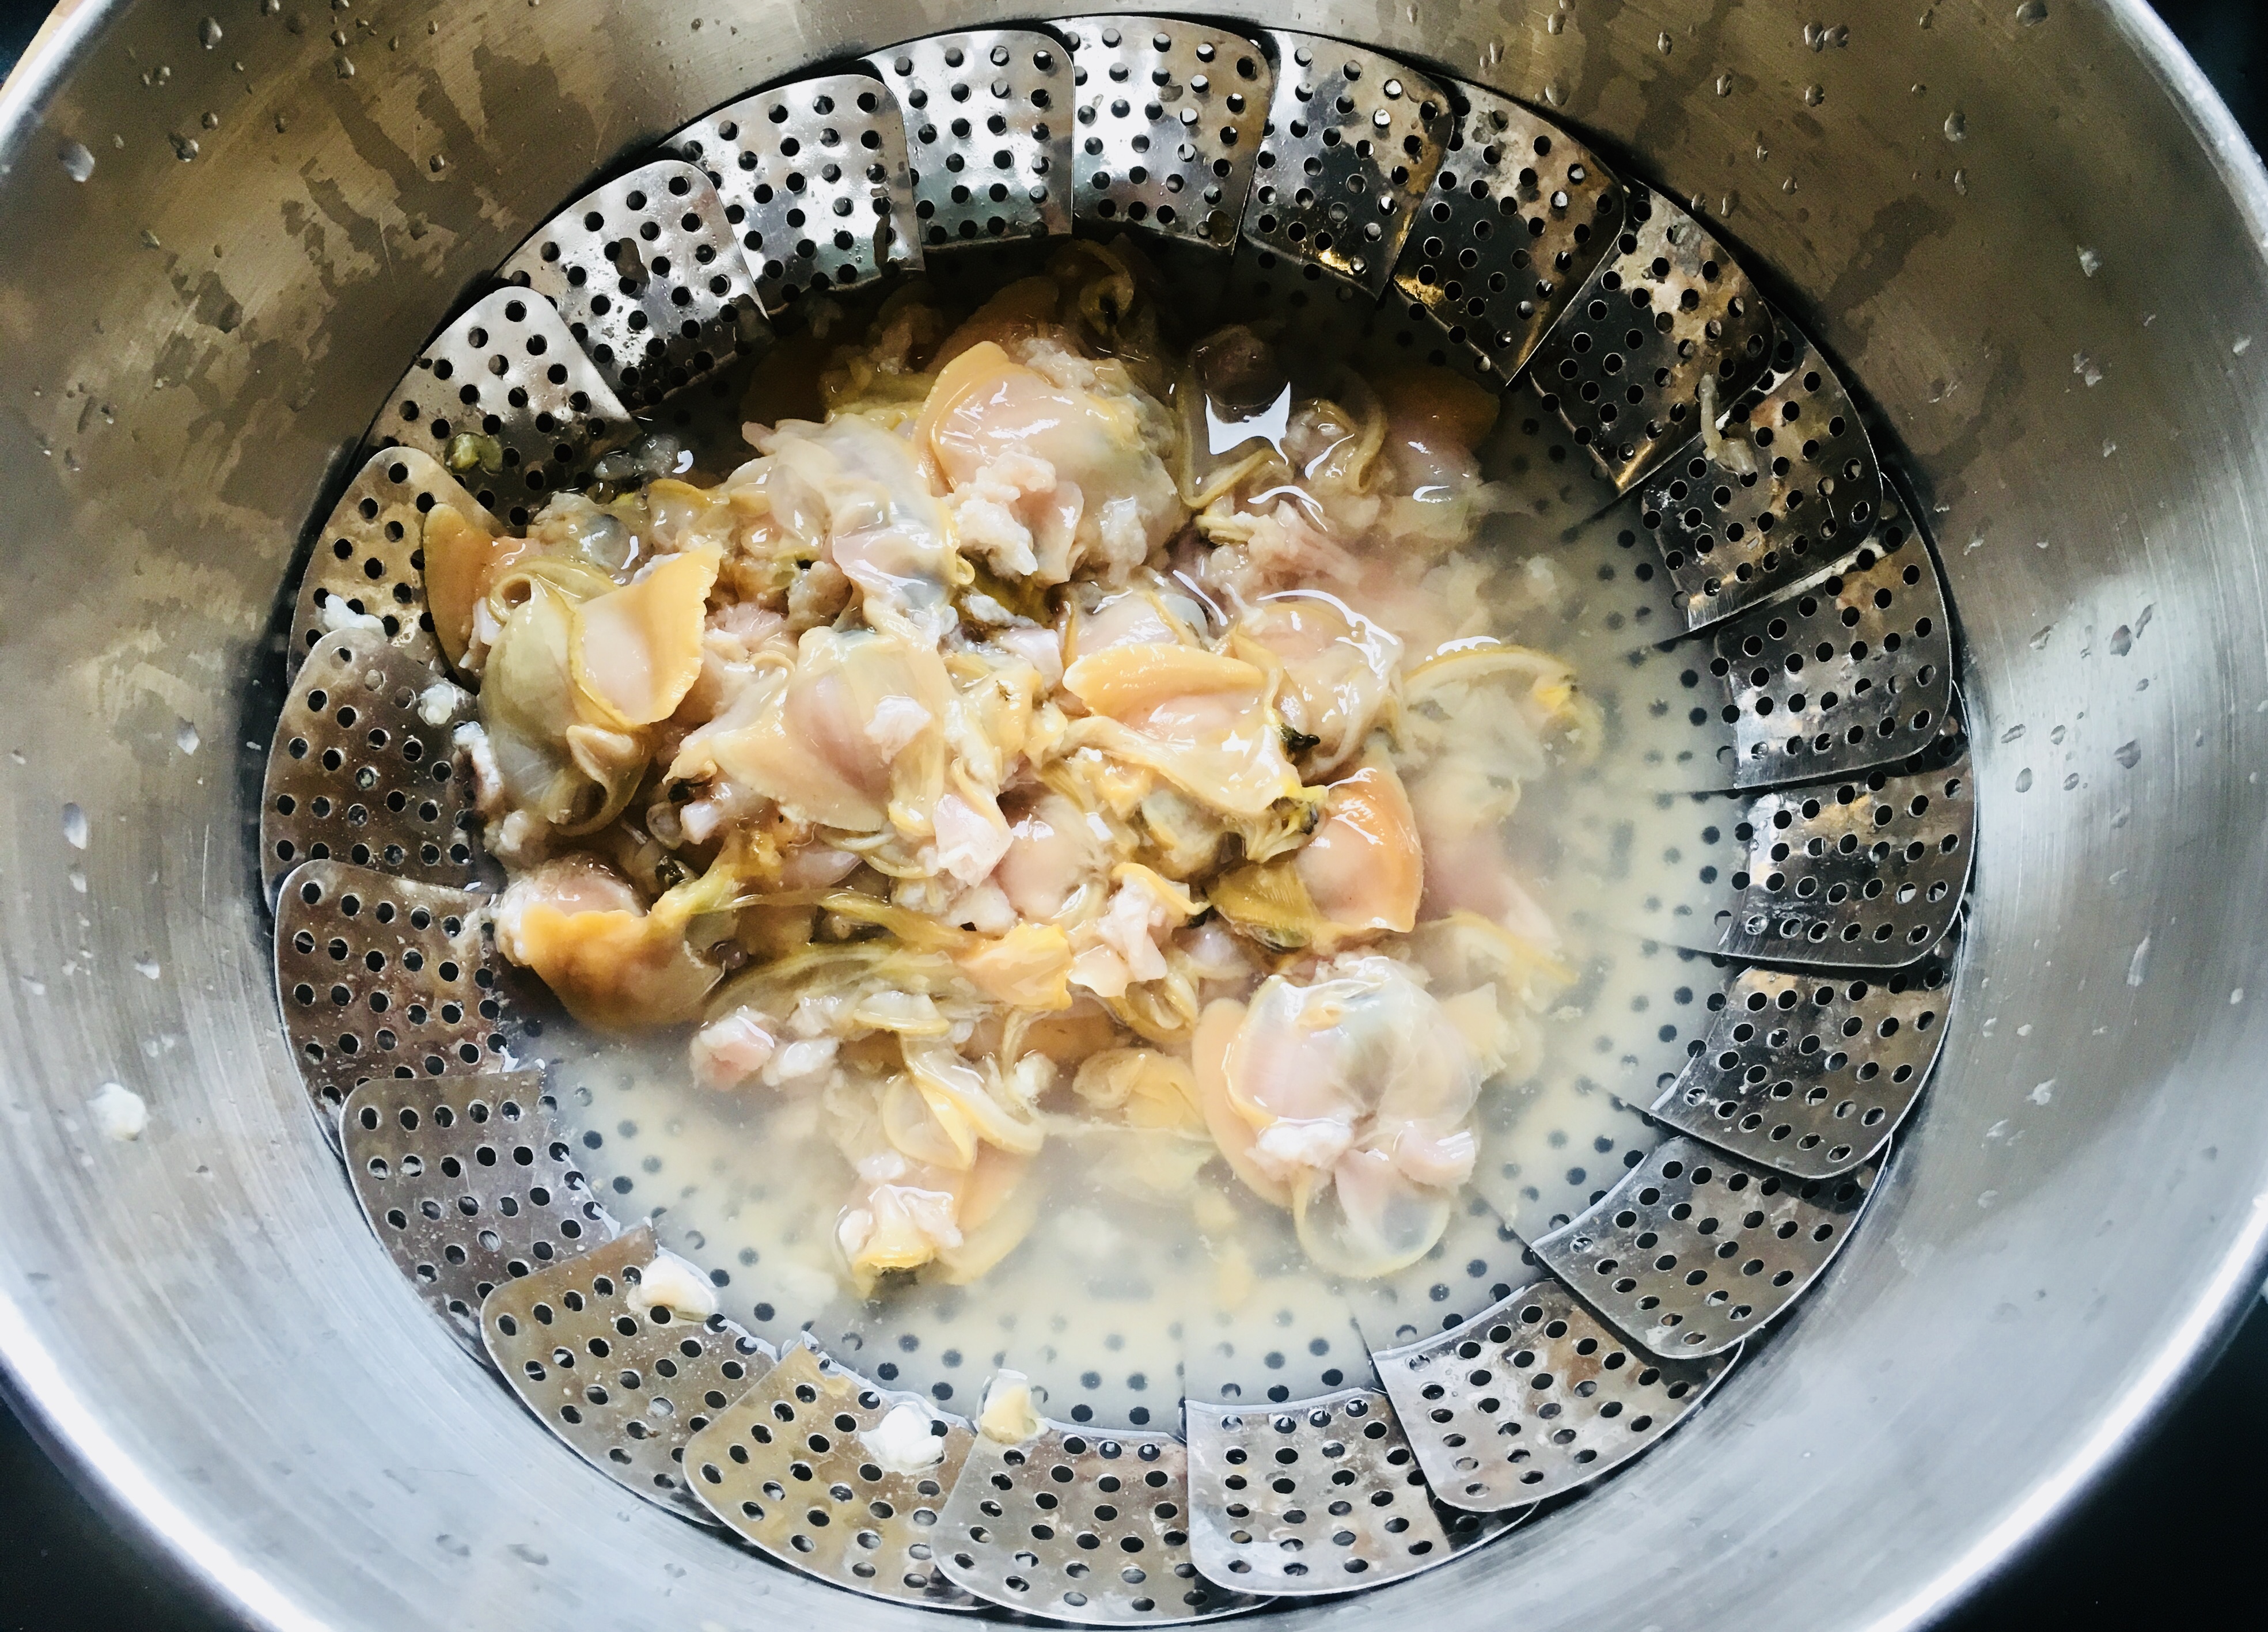
Open the clams with a clam knife over a bowl with a strainer, making sure you save all the liquid from the clams. Put the clam shells to the side. Throw away any broken shells, and wash the empty shell halves thoroughly, making sure there are no broken pieces.
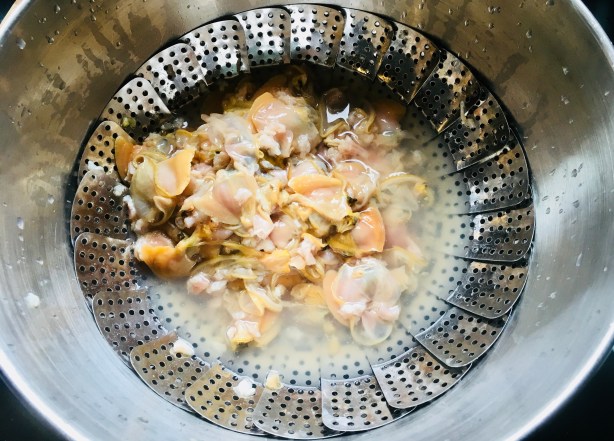
I use a strainer to keep the sediment away from the clam meats.

Take the clam meat pieces out of the strainer, leaving the clam juice behind in the bowl. Move the clam meat to a cutting board or food processor and chop them to medium-fine. Set them aside.

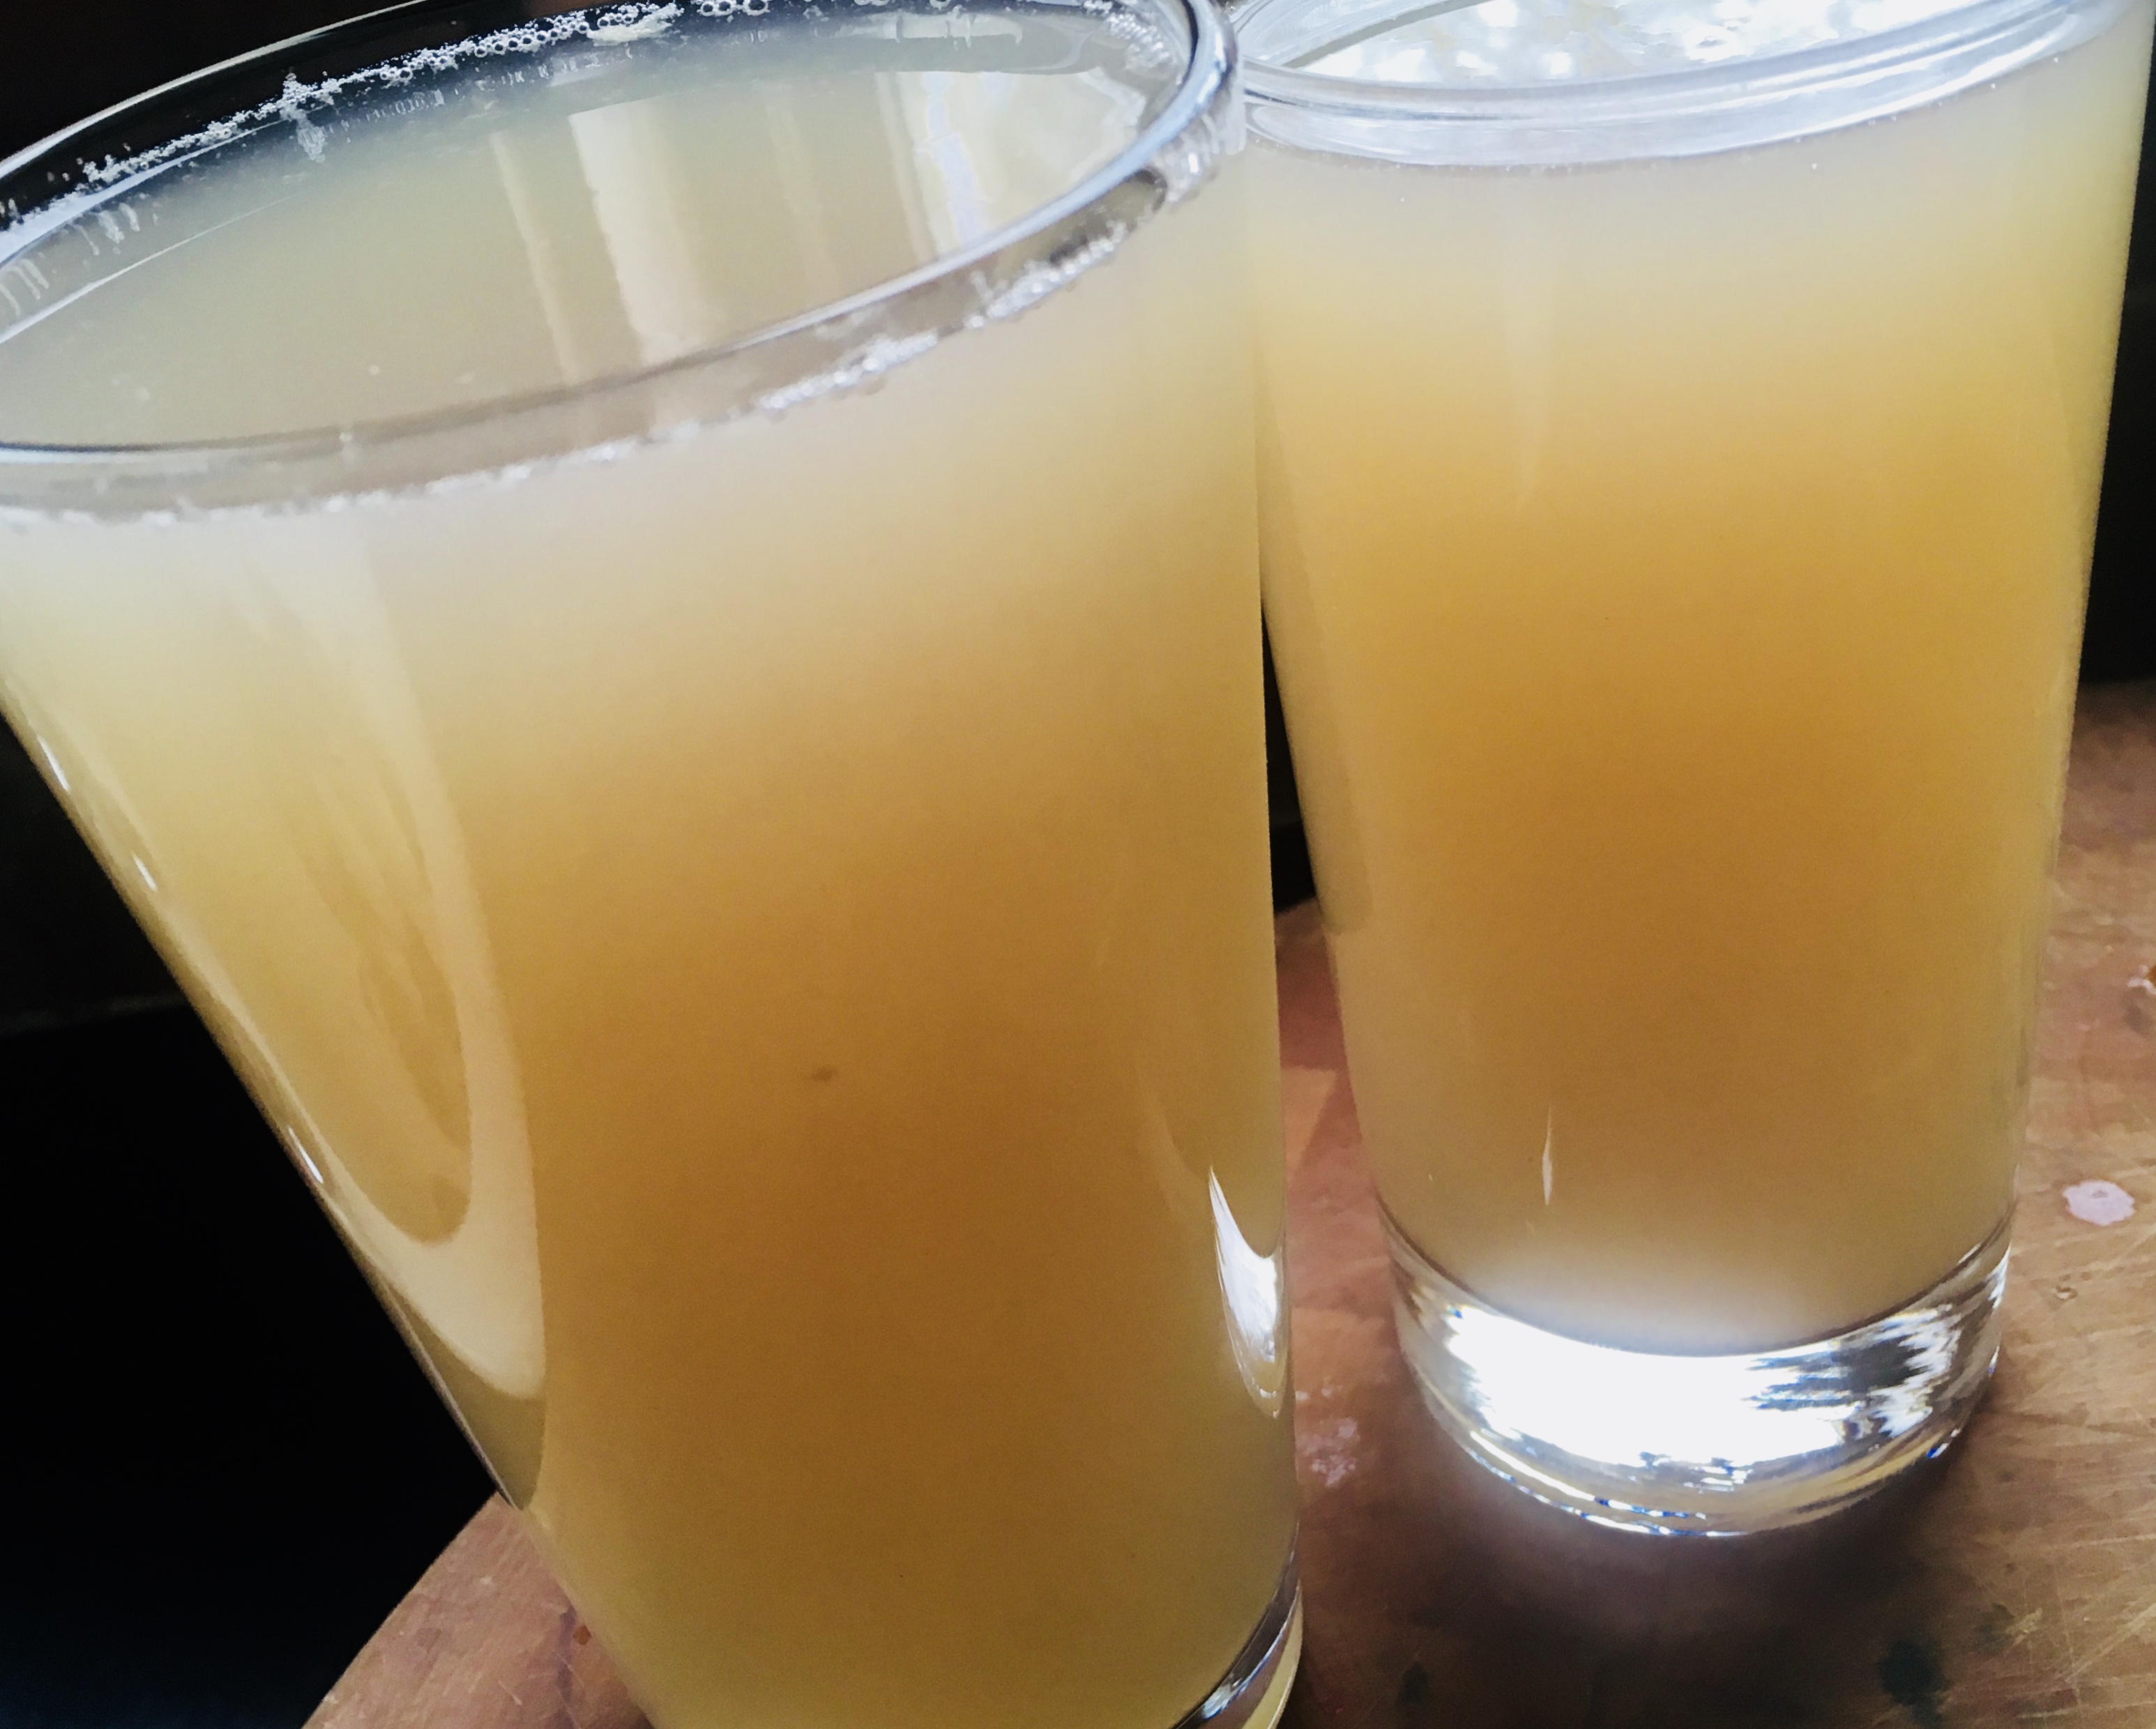
I pour the clam juices carefully from the bowl to tall drinking glasses, being careful not to let the sediment get in. Then, after some time, I pour off the clam juice from the glasses, leaving even more of the sediments behind. I find that the tall glasses make it easier to see the sediments, and maximize the amount of clam juice I get.

I let the clam juices sit in their tall glasses for a while, so that even more sediments get left behind.

In a large frying pan, add the olive oil, onions, and chourico and cook them on medium heat for a few minutes. Add the oregano and sage and cook a few more minutes. Add the corn and cook a few more minutes, a little more if the corn was frozen. Add the chopped clams and stir, cooking for a few more minutes. Add the breadcrumbs a little at a time until you have a nice balance of bread and other ingredients. Add the clam juice a little at a time as well, so that you can add all the breadcrumbs, but the mix isn’t runny. There’s lots of flavor in the clam juice, so use as much as you can! Season it all with salt and pepper.

Remove the pan from the heat and fill the empty clam shells with the stuffing.

At this point, you can freeze the clams. I put them on small sheet pans in the freezer until they harden, then I wrap them 6 at a time, and put them in freezer bags. Keep them frozen!

Ready for the freezer!

To make the aioli, mix the mayonnaise and Sambal in a bowl, to taste. Sambal is hot, so a little goes a long way. Keep it covered and refrigerated.

When you’re ready to bake, remove the clams from the freezer and place them on a sheet pan in a pre-heated 350 degree oven. Top each clam with a small ¼” square piece of butter. Bake them about 15 minutes, until the clams are sizzling and light brown. Top each with a small dab of aioli.

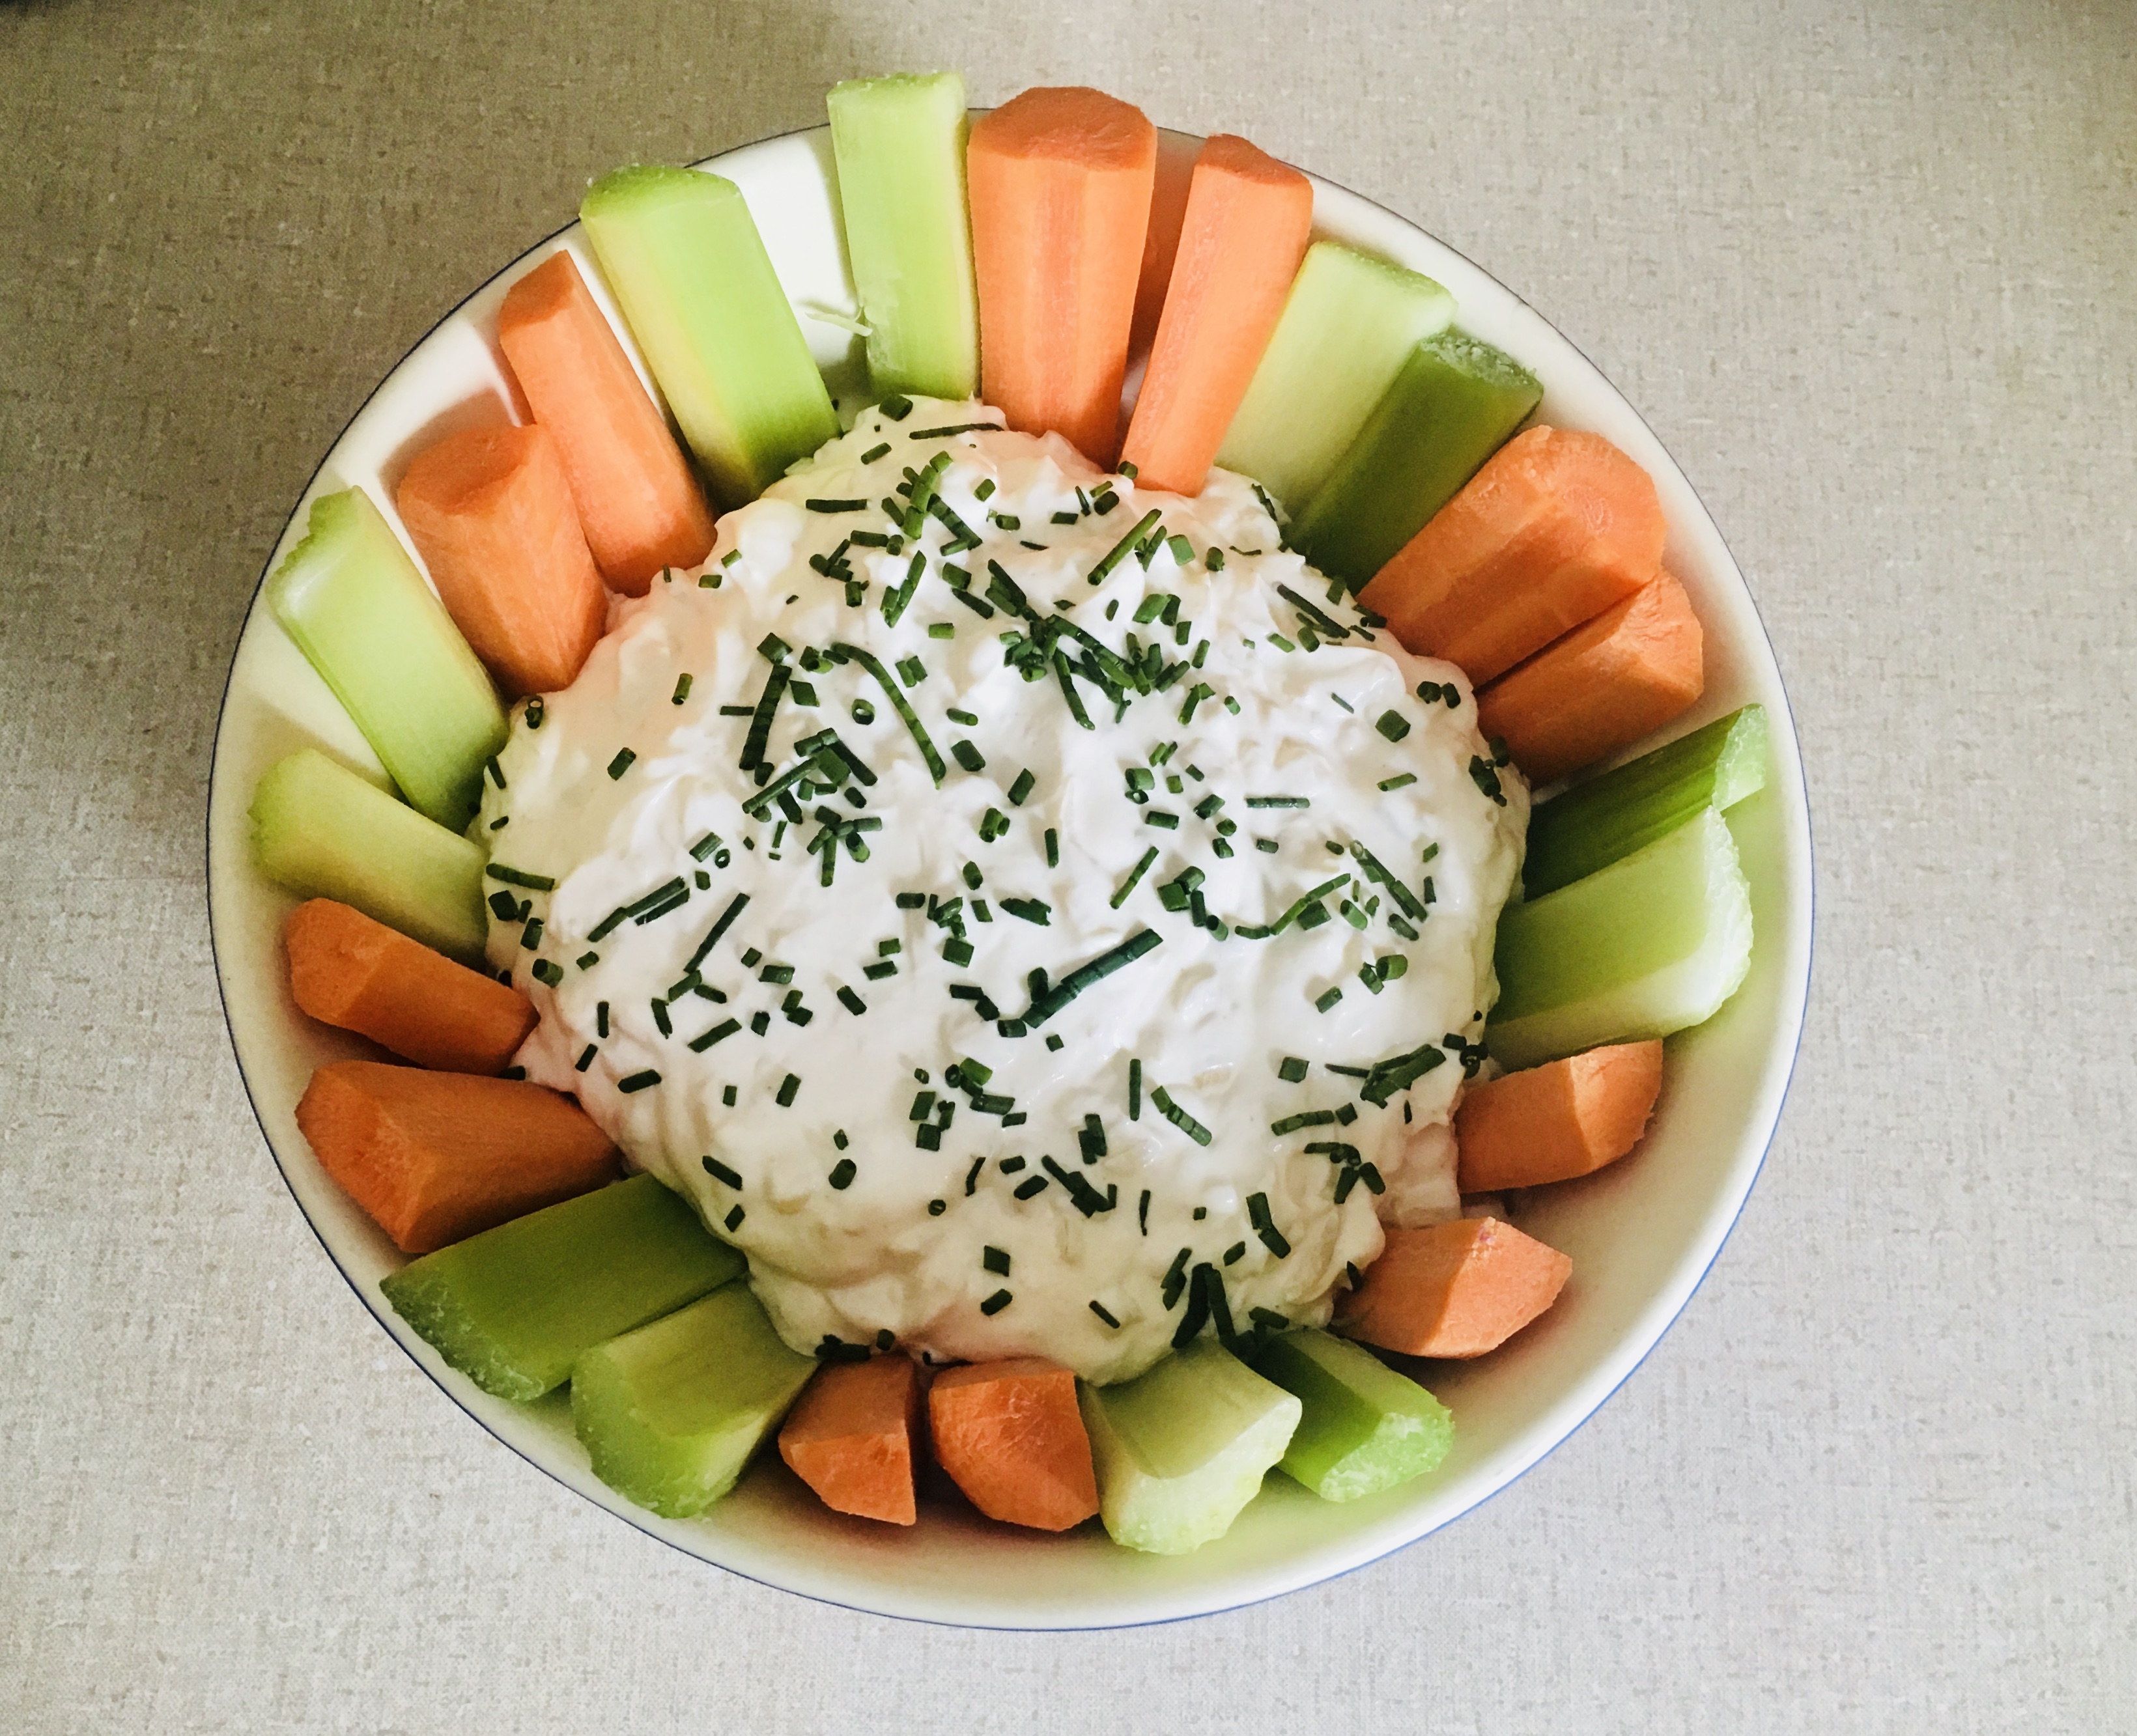
I love onion dip, and really good onion dip is hard to find…you’ve got to make it. It’s not difficult to do, and it’s worth the effort. Great with chips or veggies, it’s perfect for TV binge munching, or to bring to a barbecue.


2 tablespoons olive oil
1 1/2 cups diced sweet onions
1/4 teaspoon salt
1 1/2 cups sour cream
3/4 cup mayonnaise
1/4 teaspoon granulated garlic
1/4 teaspoon white pepper
1/2 teaspoon salt
chopped chives, to garnish

In a pan over medium heat, sauté the onions in the olive oil and salt until they are soft and barely caramelized, about 15 minutes. Remove them from the heat and set them aside to cool to room temperature.

In a bowl, combine the rest of the ingredients except the chives, then add the cooled onions and mix well.

Refrigerate the dip and stir again before serving. Sprinkle the chopped chives on top to garnish.

The heat of the summer always has me craving a cold beet soup my Mom made…

It’s interesting that an Eastern European country that is as far north as Newfoundland has one of the most refreshing cold summer soups of any country in Europe. It’s a cold beet soup called Šaltibarščiai (pronounced shul-tih barsh-chay) and it’s classic Lithuanian cooking at its best.

No summer was complete without my Mom’s Šaltibarščiai on the table, and my Dad always insisted on eating it with boiled potatoes on the side.

There are many different variations of this soup. For example, many Lithuanians today use keffir instead of buttermilk. My Mom always insisted buttermilk tastes better, and I have to agree.


securedownload


1 quart buttermilk
4 hard-boiled eggs, peeled and chopped
3 cucumbers, peeled, seeded and chopped
8 beets, cooked, peeled and chopped
1 tablespoon finely chopped fresh dill
1 scallion, finely chopped, greens only
salt
a pile of boiled potatoes (optional)


Pour the buttermilk into a large bowl. If it’s very thick, you can dilute it a bit with fresh water.

Peel and chop the eggs and toss them in the bowl. Peel, seed and chop the cukes…then into the bowl.

I love Love Beets, hermetically sealed cooked and peeled beets, ready to use, available in most supermarkets. (In the old days, my Mom would simply use canned beets.) I open a couple of packs of Love Beets, pouring the beet juice into the bowl. I chop the beets and add them as well.

Grab some fresh dill and chop it finely. Add it to the bowl. Finely chop the greens of one or two scallions and sprinkle some salt on them. Rub the salt into the scallions, mashing them a bit, softening them. Then add them to the bowl.

Stir everything together, put a lid on the bowl, and let it chill in the fridge for a few hours.

Remove it from the fridge, stir, and season with more salt if needed before serving.


Really refreshing!


Does anyone remember Art Ginsburg, also known as Mr. Food? His syndicated segments appeared on the news for almost 10 years. I met him back in 1993, and he was quite the self-promoter…but a really nice guy. Art passed away many years ago, but I still have his old cookbooks, and his simple but perfect pesto recipe has been my guide for decades.
We eat a ton of pesto at home. Most of the time, it’s simply mixed with pasta. But we stir it into tomato sauce and smear it on grilled chicken or beef as well.
Basil is the main ingredient in classic Italian pesto, and it’s growing rapidly under the summer sun in my garden right now. And that’s key to great pesto: when Mother Nature says the basil’s ready, be sure you have all the other ingredients and get to work!

Basil, ready to be picked.

Besides the fact that it simply tastes bad, the problem with store-bought pesto is that it’s expensive. Although homemade pesto isn’t cheap, you can still save a lot of money by making it yourself.
Some of my tips for saving money: buy good quality ingredients in bulk. My go-to olive oil is one from Tunisia called Terra Delyssa. It delicious, and can be found in large, affordable bottles at most supermarkets. I have one rule of thumb with olive oil: always buy a bottle from one source–one country.  Don’t go for the blends.
There’s been a rash of articles about already-grated parmesan cheese that is 50% cellulose (wood) fiber. Stay away from that junk and buy yourself a nice chunk of the real deal: Parmigiano-Reggiano. Grate it yourself and taste the difference!
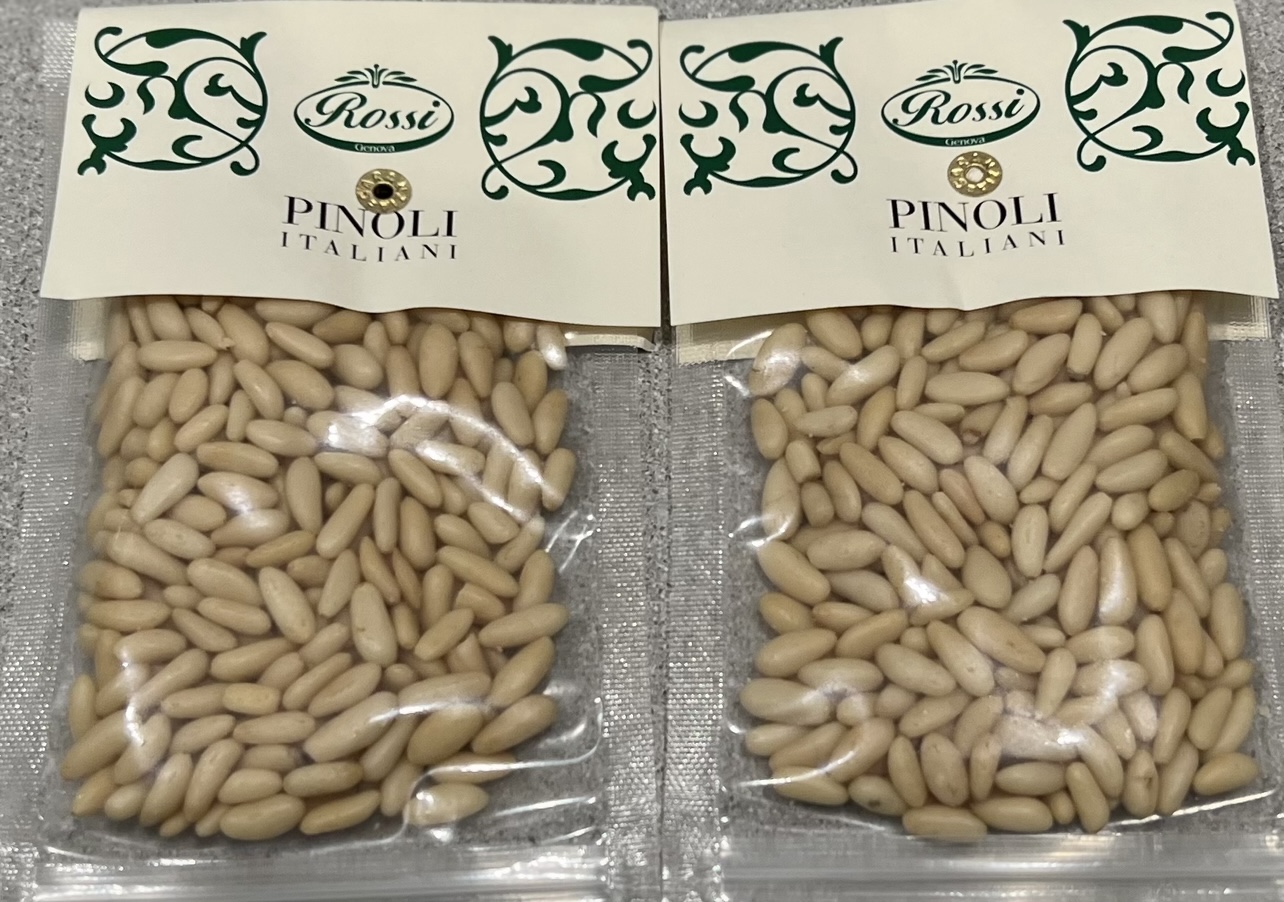
The most expensive (and questionable) ingredient in basic pesto is pine nuts. If you look on the back of the package (and you always should!) you’ll see that most pine nuts come from China. I don’t buy any food products from China…period. So sourcing “safe” pine nuts can be difficult. The Italian or Turkish pine nuts can be extremely expensive. Some from Siberia less so, but still questionable, in my mind. Sadly, it’s gotten to the point where I really had to start looking for an alternative to pine nuts.

They say they’re grown in New Mexico. I found them last year, but can’t find them anymore.

One of the reasons you want real pine nuts and not some look-alike from China is something called “pine mouth” or “pine nut mouth.” A small percentage of people experience a reaction after eating pine nuts that makes their mouth taste like metal–imagine putting a handful of pennies in your mouth–and the taste stays in their mouths for a couple of weeks, ruining their taste buds for the foods they love. (Eventually, it wears off.) Some scientists say you get “pine mouth” by eating counterfeit pine nuts–varieties like those from China that are not the same species. Others say that you can get the reaction even from real pine nuts. Research on this continues, but all the more reason not to buy any foods from China and other questionable countries.

Real Italian pine nuts. Notice the elongated shape, versus a rounder one for inferior nuts. But at $15+ per ounce, they’re crazy expensive!

There are alternatives to pine nuts, and you’ll find many pesto recipes that substitute with almonds or pistachios. I think those nuts change the taste of the pesto, plus they have a skin that leaves a gritty residue, which I don’t like. So I don’t use them. Macadamia nuts are a good substitute. They’re less expensive than pine nuts and usually come from Hawaii. But after much experimentation, I’ve found that the best and cheapest substitute for pine nuts is walnuts. They’re available everywhere, and none of my family or friends have noticed a change of the pesto’s flavor.
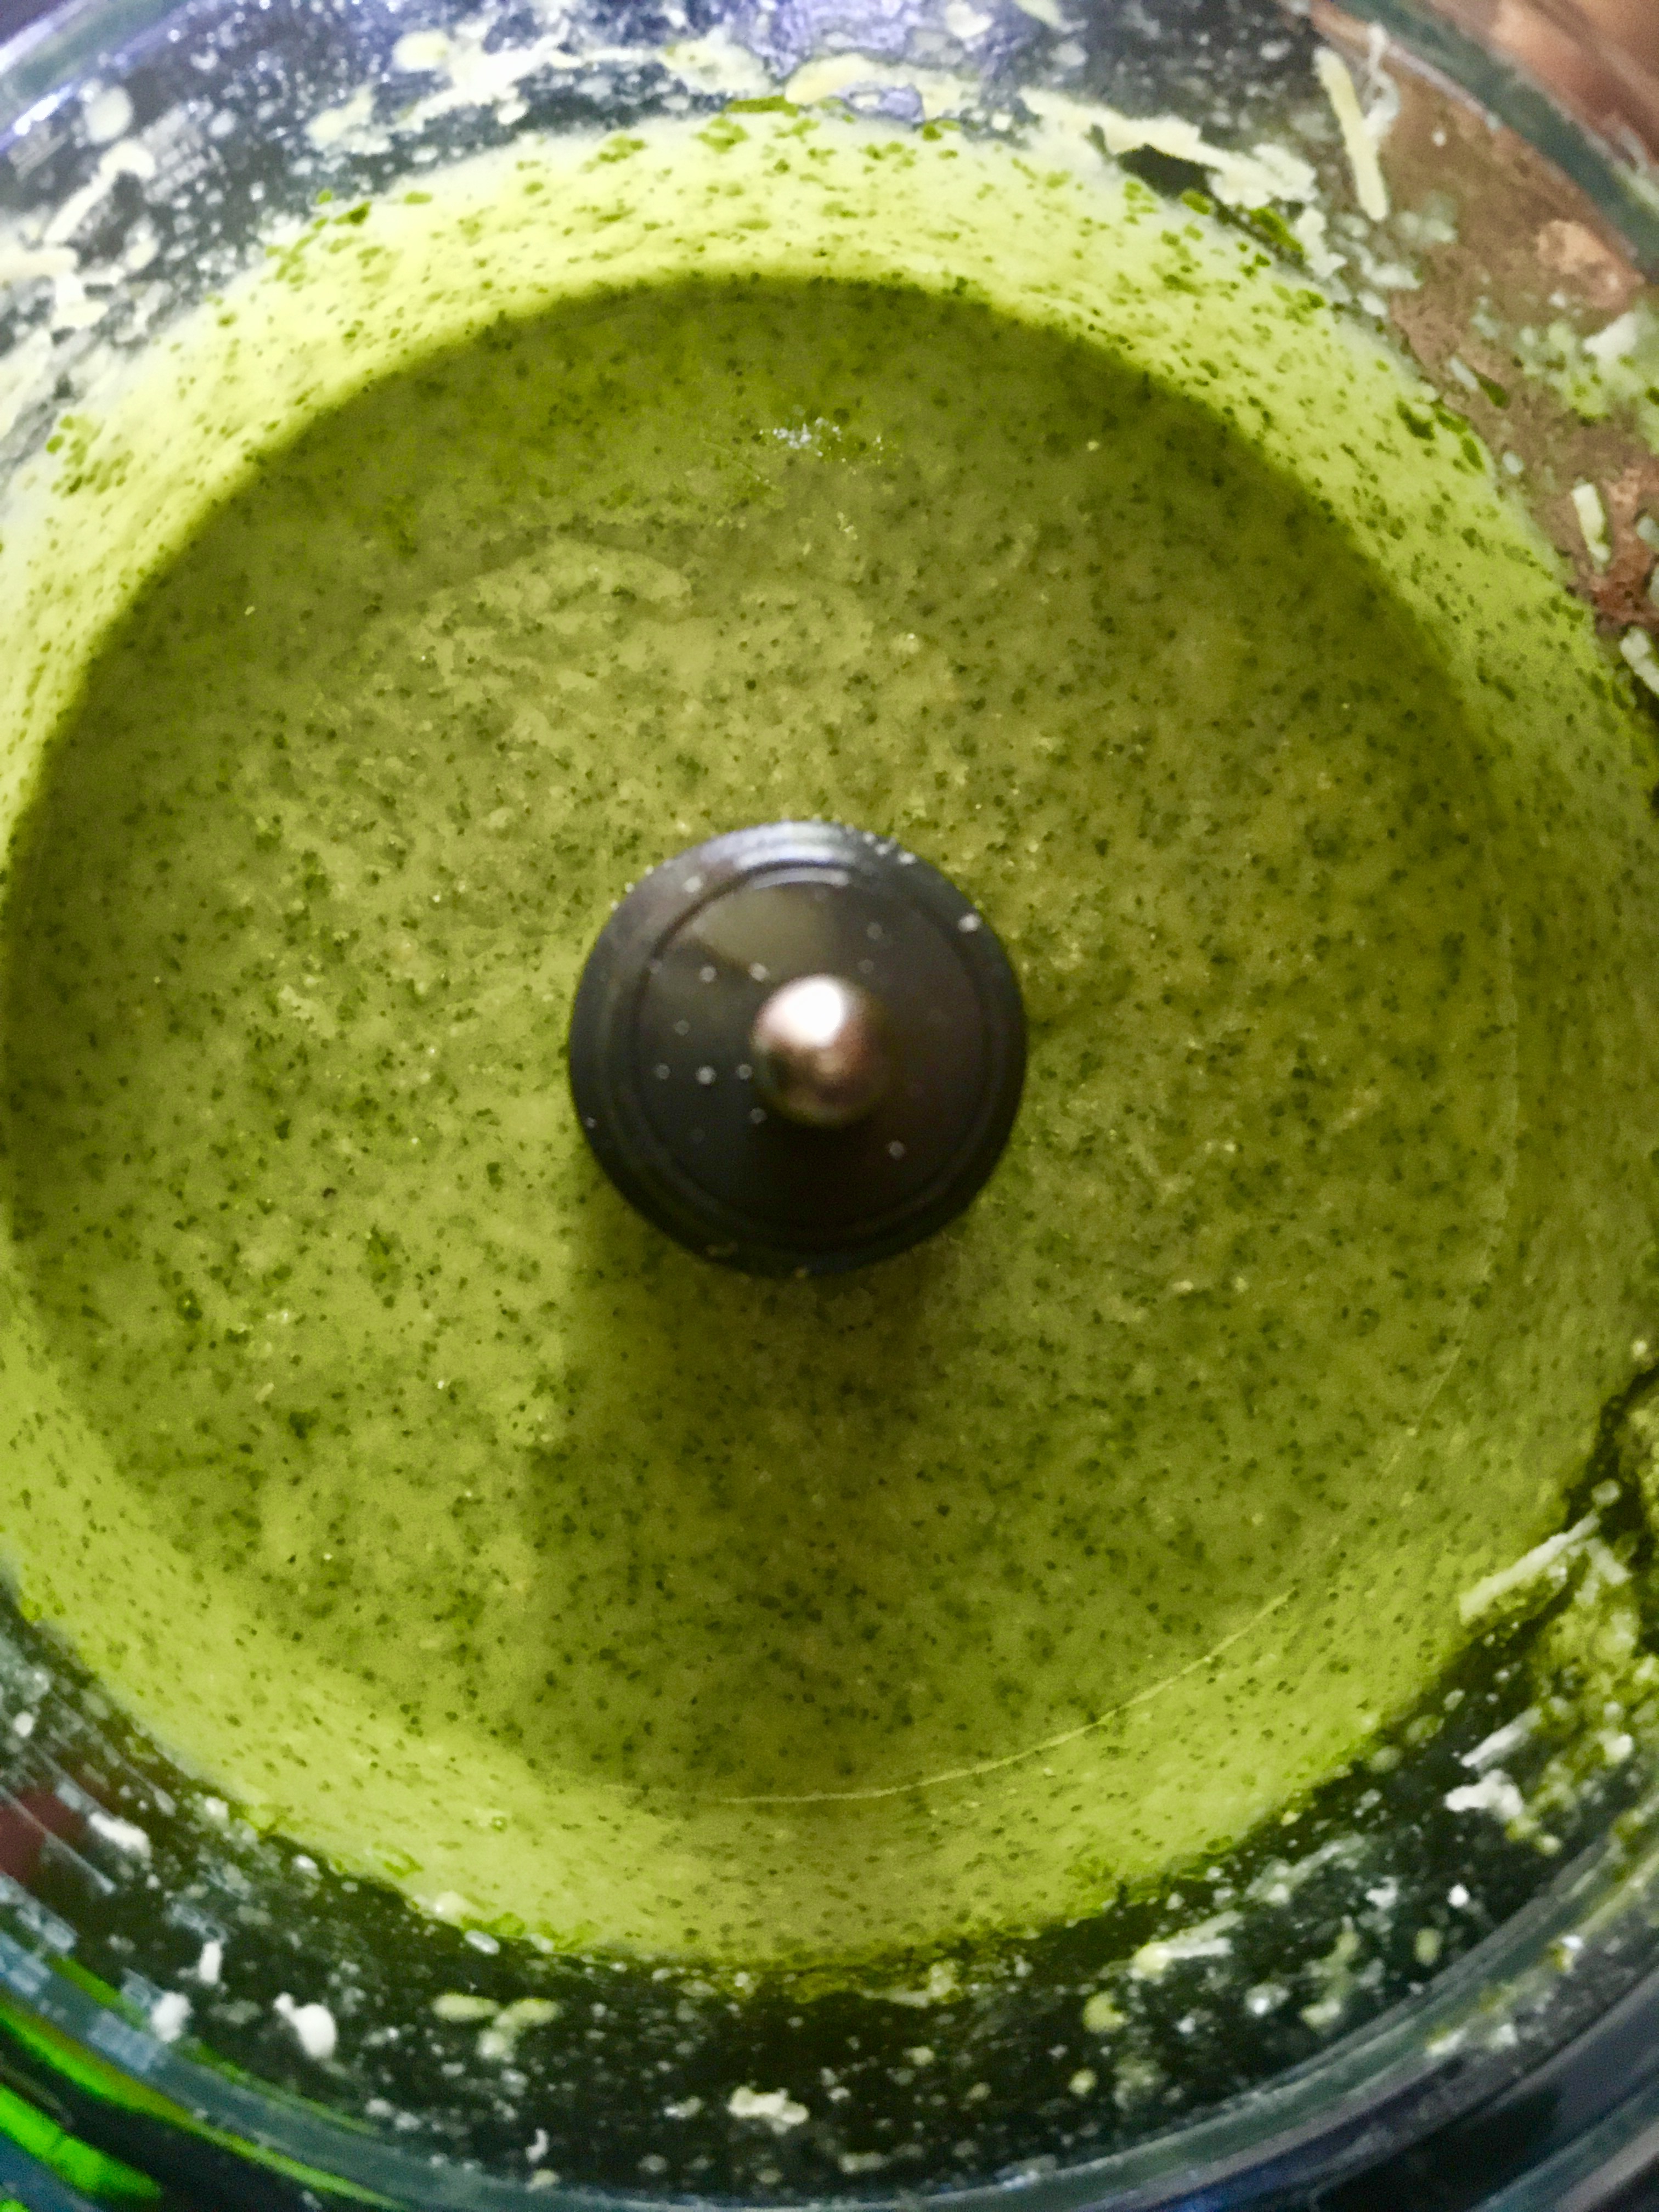
So here’s my sure-fire pesto recipe. I make massive amounts of it, store it in plastic storage containers with a tightly sealing screw-top lid, and put them in the deep freeze. They last all year, and thaw out easily.
2 cups fresh basil, packed down a little
1 cup grated Parmesan cheese (preferably Parmigiano-Reggiano)
1/2 cup real Italian pine nuts (or walnuts)
1 cup extra virgin olive oil
2 garlic cloves, crushed
1 teaspoon Kosher salt
When measuring the basil, I pick dry leaves from the garden and place them in a measuring cup, lightly packing them until I get 2 cups. (More is better than less!) Then I remove them from the measuring cup and wash them, tossing them in a salad spinner to dry. Then they go into the food processor. (If you wash them before measuring, they will pack much more tightly, and you won’t get the correct amount.)
Add the other ingredients in the food processor with the basil and let it rip!
 
The color and fragrance of freshly-made pesto is hard to beat! For me, a bowl of pasta with pesto is real comfort food.

I’ve always loved Manhattans and Negronis…two different cocktails, yet similar in certain respects. Both use sweet vermouth. Both have a touch of bitterness: Manhattans will often include a few dashes of angostura bitters, where a Negroni gets its bitterness from Campari. So when I visited Food Network chef Geoffrey Zakarian’s The Lambs Club restaurant in NYC many years ago, and tasted my first Boulevardier, I was instantly hooked.

Loosely translated, a boulevardier is a “man about town.”

The cocktail was created by Erskine Gwynne, the publisher of “Boulevardier,” a magazine for expats living in Paris in the 1920s. It’s basically a Negroni with whiskey instead of gin.

My personal preference for whiskey is bourbon, and one of my favorite bourbons to mix with is the very affordable 1792 Small Batch, though Buffalo Trace is another great choice. And for sweet vermouth, nothing beats the grandaddy of them all: Carpano’s Antica Formula.

I was just reading an interview with food blogger and cocktail expert, David Lebovitz, in the Wall Street Journal, and he mentioned the Boulevardier as one of his favorite cocktails. I hadn’t had one in ages, and started digging in my bar inventory. Bourbon is something I always have…but I also found Campari and an unopened small bottle of Antica Formula. I was all set!

Be very careful, especially with the vermouth. If you stray and buy some cheap brand, the drink will resemble nothing even close to what it could truly be!


Eagle Rare is a great choice for bourbon as well, but its prices have skyrocketed recently.

Many recipes go for the classic 1:1:1 ratio, like you’d find in a Negroni. Others boost the bourbon to 1.5 ounces. But I actually prefer a 2:1:1 ratio.

2 oz. bourbon or whiskey
1 oz. Campari
1 oz. sweet vermouth (Antica Formula preferred)


Add some ice to a cocktail shaker. Add the ingredients and stir. Strain into a rocks glass with a large cube.

Some add a twist of lemon or orange. Others, a maraschino cherry. I like it as is.


Perfection.


1792 Small Batch bourbon: Everyone has their favorite bourbon, and I really enjoy this one, because it mixes well and, at about $40 a bottle, is very affordable. Made by the Buffalo Trace distillery, who can pretty much do no wrong. (Which is why I also recommend Buffalo Trace bourbon itself.)

Campari: A liqueur, invented in 1860 by Gaspare Campari, considered an aperitif. Its alcohol content depends on the country it’s sold in. It’s unique bitter flavor is obtained from the infusion of herbs and fruit in alcohol and water.

Carpano Antica Formula: First invented in 1786 in Turin by Antonio Benedetto Carpano, it has survived in its original recipe thanks to the Fratelli Branca Distillerie. It costs more than the typical 5-buck bottle of vermouth, because it’s simply the best you can get. Buy it once and you’ll never buy another sweet vermouth again.


One of the most incredible dishes I’ve had on the beautiful island of Santorini, Greece, is lobster with pasta. It’s one of those dishes that takes time to prepare, because the lobster sauce they make is a labor of love…time consuming, but so spectacular.


Cooked lobster LTL


To try to copy that lobster sauce we had in Santorini, I start with a kick-ass lobster stock. It’s simple but flavorful:


clean, empty claws, tails and bodies from two 1-1/2 lb. lobsters (use the legs, too)
12 cups water
1/2 onion
3 celery stalks
1 carrot

Place all the ingredients in a large pot and set it on high heat. Crush the lobster shells (I use a potato masher!) Cook until the stock is reduced by half.

Strain the stock, discarding the lobster shells and veggies. Bring the stock back to the heat and reduce it until all you have left is 1 cup of intense stock.


Pasta with lobster sauce

Now that you have the stock, you can make the sauce!


1/2 onion, finely chopped
1 garlic clove, finely chopped
pinch of Italian red pepper flakes
1 teaspoon parsley
extra virgin olive oil
1/2 cup lobster stock
1/4 cup San Marzano tomato sauce (see below)
splash of white wine (I use an un-oaked Chardonnay)
salt and pepper
1/2 lb. cooked pasta (firmer than al dente)

Add some olive oil to a pan and sauté the onions until translucent. Season with salt and pepper. Add the garlic and cook for 10 seconds. Add the red pepper flakes and parsley.

Add 1/4 cup of the lobster stock and let it cook, reducing it by half. Add the other 1/4 cup of lobster stock and then the tomato sauce. Let it cook for a couple of minutes and add the white wine. Cook for a few minutes more, to cook out the alcohol.

Cook the pasta and drain it even before it reaches the al dente stage. Place the pasta in the pan with the sauce, heating and coating it thoroughly. Serve immediately, with or without the lobster meat.


For the San Marzano tomato sauce: I pour a can of San Marzano tomatoes  into a food processor or blender and blend until I get sauce. Pour it into a pan and reduce it over medium heat by half, until the sauce has thickened. Then use it in this recipe.

I was craving comfort food, and I didn’t want to go to the store, so I looked in the pantry and fridge for tasty ingredients, and went this route. There are many similar versions of this dish out there, using different cuts of chicken–or a whole bird cut up. I just happened to find a great deal on organic drumsticks at the store, so I went with that. But you should use any cut of chicken that is your favorite.


It takes about an hour to prepare this dish from start to finish, so it’s something you could even cook on a weeknight…and it’s certainly easy enough to double the recipe if guests are coming over.


It starts in the pan!


Traditionally, this is cooked in a large cast iron skillet, started on the stovetop, then placed in the oven. I choose to cook mine in a baking pan that fit my smaller convection oven, so I started everything on the stovetop, then made the transfer to the baking pan.


Now that the chicken has seared, we start the veggies.


If I’m on a diet, calories matter. Chicken drumsticks aren’t all that bad in the calorie count: about 100 calories for a medium-sized drumstick (whatever medium is)…and that’s with the skin on. No need to get into exact gram weight measurements here, but the real calories come later when you add a starch to the dish. It does go really well with pasta, rice or potatoes. (My choice would be fresh Italian bread to really sop up the sauce!) But alas…I had none of those. Just a salad on the side.

I go with organic ingredients whenever possible, especially kale, which is on the “Dirty Dozen” produce list almost every year. It gets sprayed a lot.


If sodium is not a problem for you, add more olives!


3–4 lbs. organic, pastured chicken drumsticks (about 12 medium)
salt, pepper and paprika
olive oil
2 small yellow onions, finely chopped
2 cloves garlic, squeezed through a press
1 teaspoon each: dried oregano, parsley, and thyme
1 tablespoon tomato paste
1 can (28 oz.) crushed tomatoes
1 cup chicken stock (homemade is best)
dry white wine (optional)
1/4 cup olives, sliced in half (I like green olives from Greece)
4 cups organic chopped kale (optional)

Pre-heat an oven to 350 degrees.

Season the chicken drumsticks with salt, pepper, and a bit of paprika.

Put a couple of tablespoons of olive oil in a hot pan. Add the chicken to the pan, and sear the drumsticks on all sides, getting them nice and brown. It’ll take about 10–15 minutes.

Remove the chicken pieces from the pan and add the chopped onions to the same pan. Let them cook for a few minutes until they’re translucent, then add the garlic. Let the garlic cook for about 10 seconds, then add the oregano, parsley, and thyme. Now add the tomato paste and stir it all around, cooking it for just a minute to caramelize it and give it more flavor.

Pour in the can of tomatoes and the chicken stock, stirring well. (A splash of wine is optional at this point.) Add the olives and let the sauce cook for a few minutes.


The sauce is all happy, and ready for the baking pan.


Pour the sauce into the baking pan. Add the chicken drumsticks to the pan, nestling them in the sauce. (I like to roll them around in it to cover all sides.)

Place the pan in the oven to cook.

After 30 minutes, remove the pan from the oven, and remove the drumsticks from the sauce, moving them onto a plate.


It looks like a lot of kale, but it withers down. Remember: go organic!


Take the kale and place it in the baking pan, tossing it around in the sauce. The sauce is hot, so the kale will start to wither and meld into the sauce in about a minute.


The kale’s withered down, and the chicken goes back in.

Now return the chicken drumsticks back to the baking pan, nestling them in the sauce again. Return the pan to the oven and bake for another 15 minutes. Turn the oven off and let the pan rest in the oven until you’re ready to serve.

Turn the oven off, but keep the door closed to keep the chicken warm.


Where’s that bread?…

If you’re trying to think of something new and interesting to bring to the Memorial Day picnic, this is it. It was a huge hit when I brought it to a neighborhood party a while ago.

Imagine the best of a deviled egg and a BBQ chicken sandwich, and you’ve got this appetizer that rocks in more ways than one….and you can make it ahead of time.

I boil the eggs and make the cole slaw the day before, then keep them in the fridge. Even the chicken can be cooked the day before and then warmed through before assembling right before you need it. Be sure to make a lot of them…they’ll go faster than the hard-boiled eggs in “Cool Hand Luke!”

This recipe is gluten-free, as long as you use GF soy sauce.


_DSC6511

For the chicken and BBQ sauce:
3 cups ketchup
1 tablespoon apple cider vinegar
2 tablespoons soy sauce
1 teaspoon hot sauce (I use Frank’s Red Hot)
1/4 cup + 2 tablespoons brown sugar
1 lb. boneless skinless chicken breasts
For the cole slaw:
2 tablespoons mayonnaise
1 tablespoon rice wine vinegar
1/2 teaspoon sugar
2 cups finely shredded cabbage
For the deviled eggs:
6 hard-boiled eggs
1/4 cup mayonnaise
1 tablespoon mustard (I use Gulden’s)

Pre-heat the oven to 250 degrees.

Combine the ketchup, apple cider vinegar, soy sauce, hot sauce, and brown sugar in a oven-proof pot with a lid. Mix well, then add the chicken breasts, making sure they’re immersed in the sauce. Cook low and slow in the oven for about 2 hours.

When the chicken is cooked through, shred the meat with 2 forks. Set it aside, but keep it warm.

Combine all the cole slaw ingredients in a bowl, mixing well, and place them in the fridge.

For perfectly hard-boiled eggs, place the eggs in a pot of cold water, and turn the heat on high. Just before the water starts to boil, put a lid on the pot and turn the heat off. Let the eggs sit in the hot water for 15 minutes. Once cooked, keep the eggs in the fridge.

Slice the eggs in half and place the yolks in a bowl with the mayonnaise and mustard. Mix well and keep in the fridge.

To assemble, take a teaspoon of the mayo/mustard/yolk mixture and place it in the cavity of one of the egg halves. Place another teaspoon of the shredded chicken on top (I like it warm, to counter the cold of the mayo and cole slaw), drizzling a little of the BBQ sauce that you cooked the chicken with on the meat. Then place a teaspoon of the cole slaw on top of the chicken.

Serve immediately!

Shrimp with an orange sauce is something you see on every Chinese restaurant menu. I didn’t have oranges, but wanted a citrus kick to my sweet and spicy sauce. I went with grapefruit and I never looked back!

Although I call this recipe “Asian shrimp,” I never buy my shrimp from Asia! Only wild-caught American shrimp will ever do. When you realize just how nasty Asian shrimp can be (farmed in over-crowded conditions, swimming in their own filth and fed chemical food pellets and antibiotics) you’ll never eat it again.

Green beans looked good in the produce aisle, so I used them, but feel free to substitute with broccoli, asparagus, or any veggies you like.

Chili garlic sauce and hoisin sauce can be found in most supermarkets, in the international foods section.

As long as you use gluten-free soy sauce and hoisin sauce (the brand La Choy is GF), this dish is gluten-free!


image


For the rice:

1 cup cooked basmati rice (I use Texmati brown rice)
2 cups seafood stock (I use homemade shrimp and fish stock, but vegetable stock will work)
1/2 teaspoon salt
2 scallions, finely chopped


For the veggies:

1/2 Vidalia onion, finely chopped
1 lb. fresh green beans, washed and cut into 1/4′ pieces
1 teaspoon soy sauce
splash of peanut oil


For the shrimp:

2 dozen thawed, peeled and de-veined wild-caught USA shrimp
1 tablespoon chili garlic sauce
3 tablespoons hoisin sauce
juice and zest of 1 grapefruit
splash of peanut oil


Making your own seafood stock is easy: just peel the shrimp you’re going to use in this recipe, and place the shells in a saucepan full of water. Let it boil until you’ve reduced it to 2 cups. Strain out the shells and discard them. Then use the stock to cook your rice, according to the package directions. Once the rice is cooked, toss in the chopped scallions, mix well, and set the rice aside.

Add peanut oil to a hot pan and sauté the onions until translucent. Add the green beans and cook them until they’re al dente. Add the soy sauce, stir, and then pour the contents of the pan into the rice. Mix well.

Using the same pan, add a little more peanut oil and sear the shrimp on both sides. Don’t overcook them! Push the shrimp to the sides of the pan so that a circle remains in the middle. Add the chili garlic sauce and hoysin sauce and stir them together, then blending in the shrimp until the shrimp are covered with the sauce. Add the grapefruit zest and juice and stir until everything is combined and the sauce has thickened just a bit.

Pour the contents of the pan into the rice mix and combine. Add more soy sauce to the rice, if you like.