Archive for the ‘garden’ Category

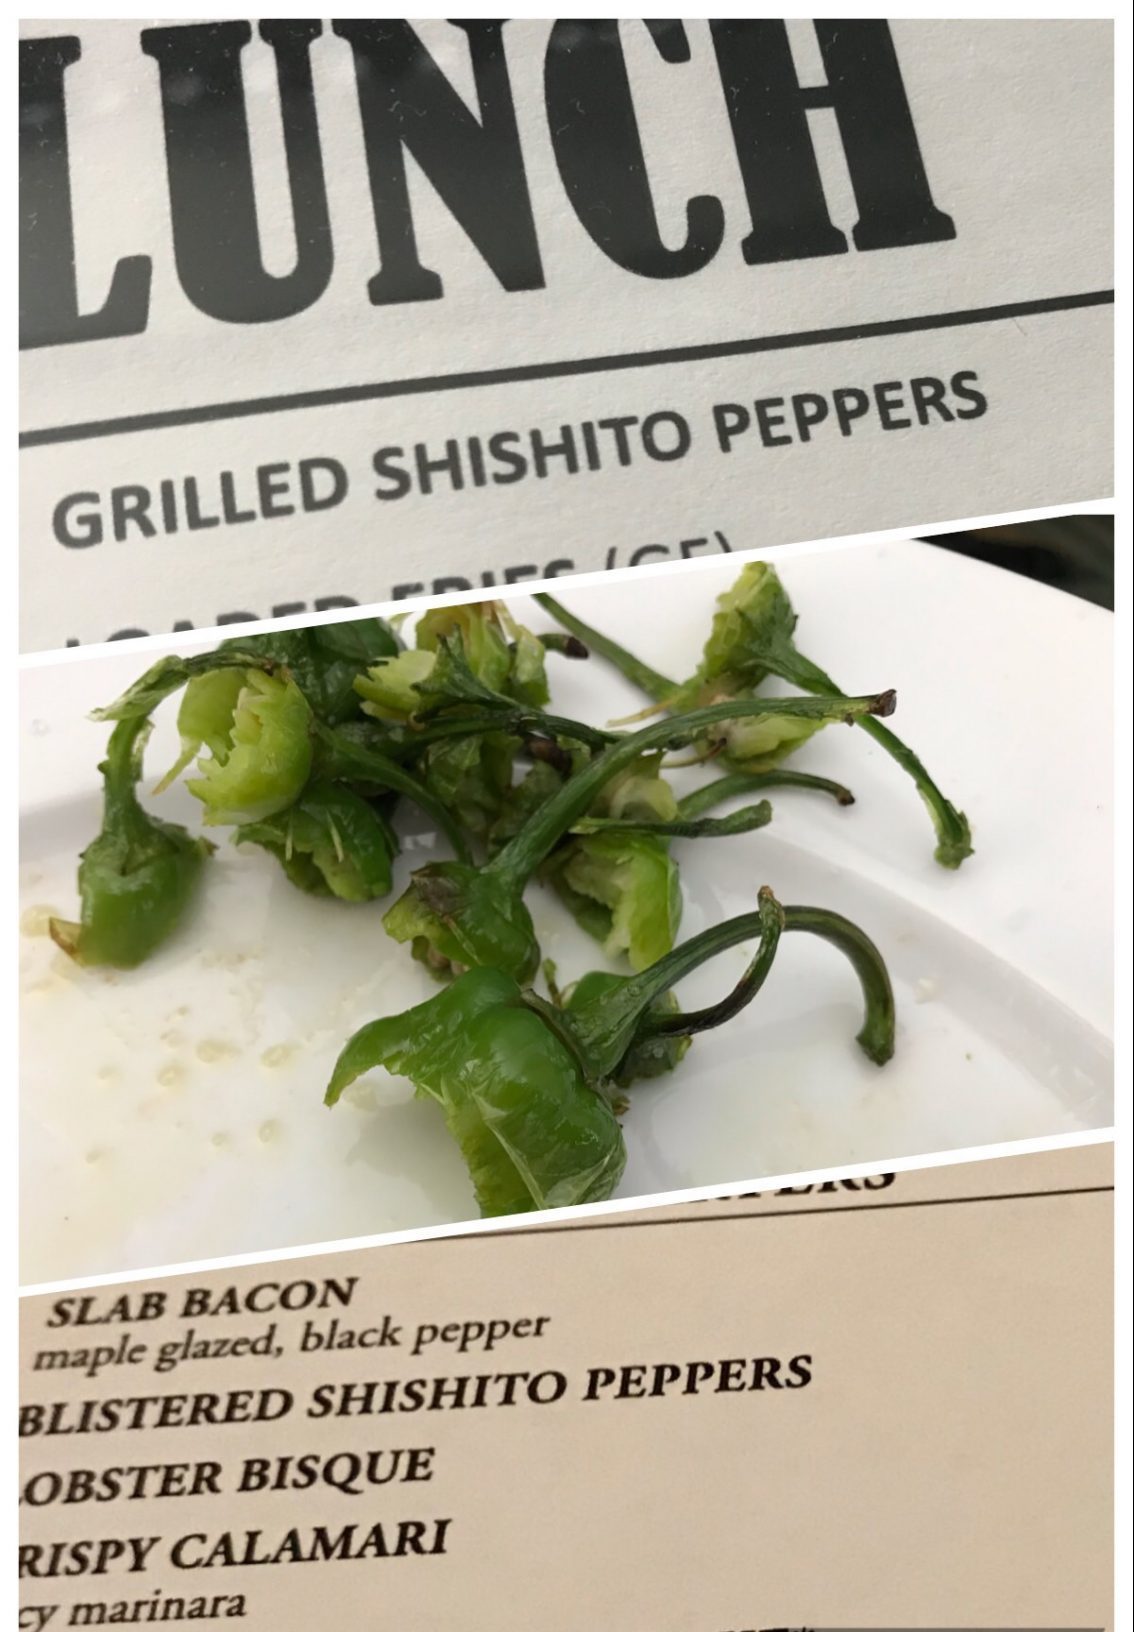
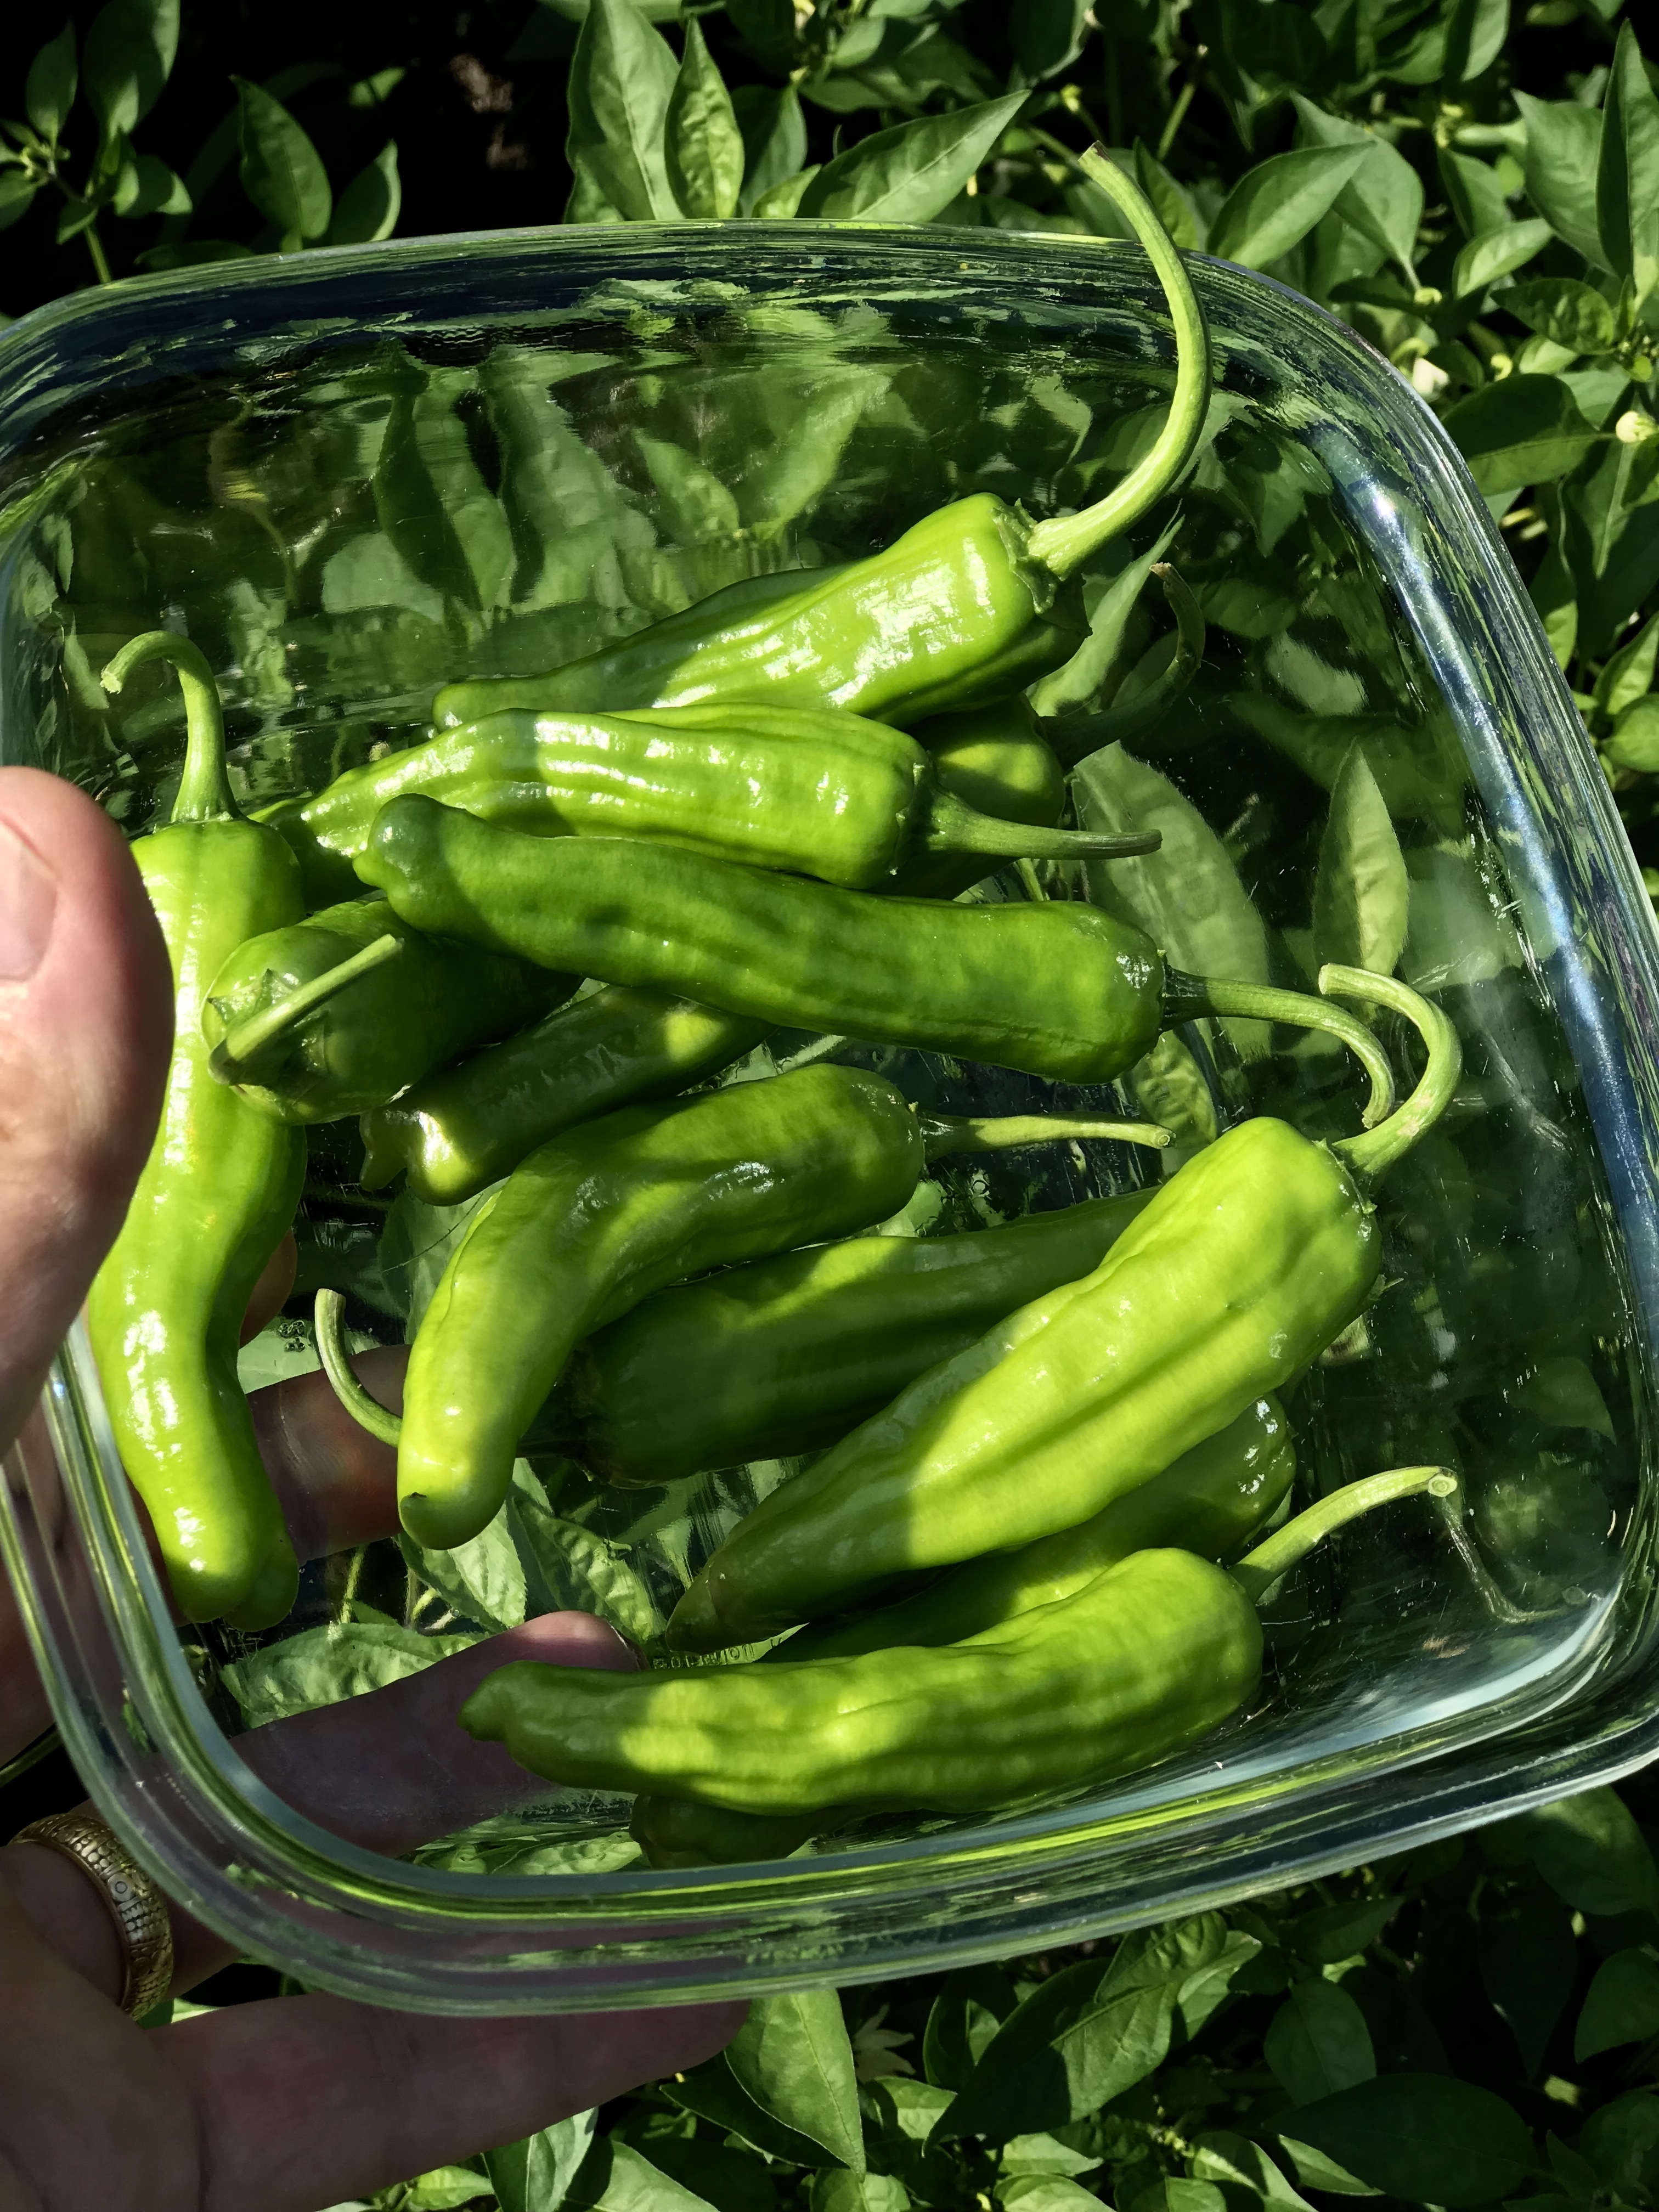
I had a ridiculous harvest of shishito peppers in my garden this year, all from a mere eight plants. They were so prolific, I ate blistered shishitos almost every day for weeks on end…and that was after I gave away pounds of them to friends.

I was at my wits’ end. The season was waining, but I had bags and bags of shishitos in my fridge. Then on Instagram, my friend Ron exclaimed: “Pickle them!”

I had no idea you could do that!


Pickling shishitos…why didn’t I think of this sooner?


So, thanks, Ron. You saved the harvest! And by the way… While the pickling brine was boiling, I blistered and ate another batch of shishitos! (Needed to do something while I was waiting… )


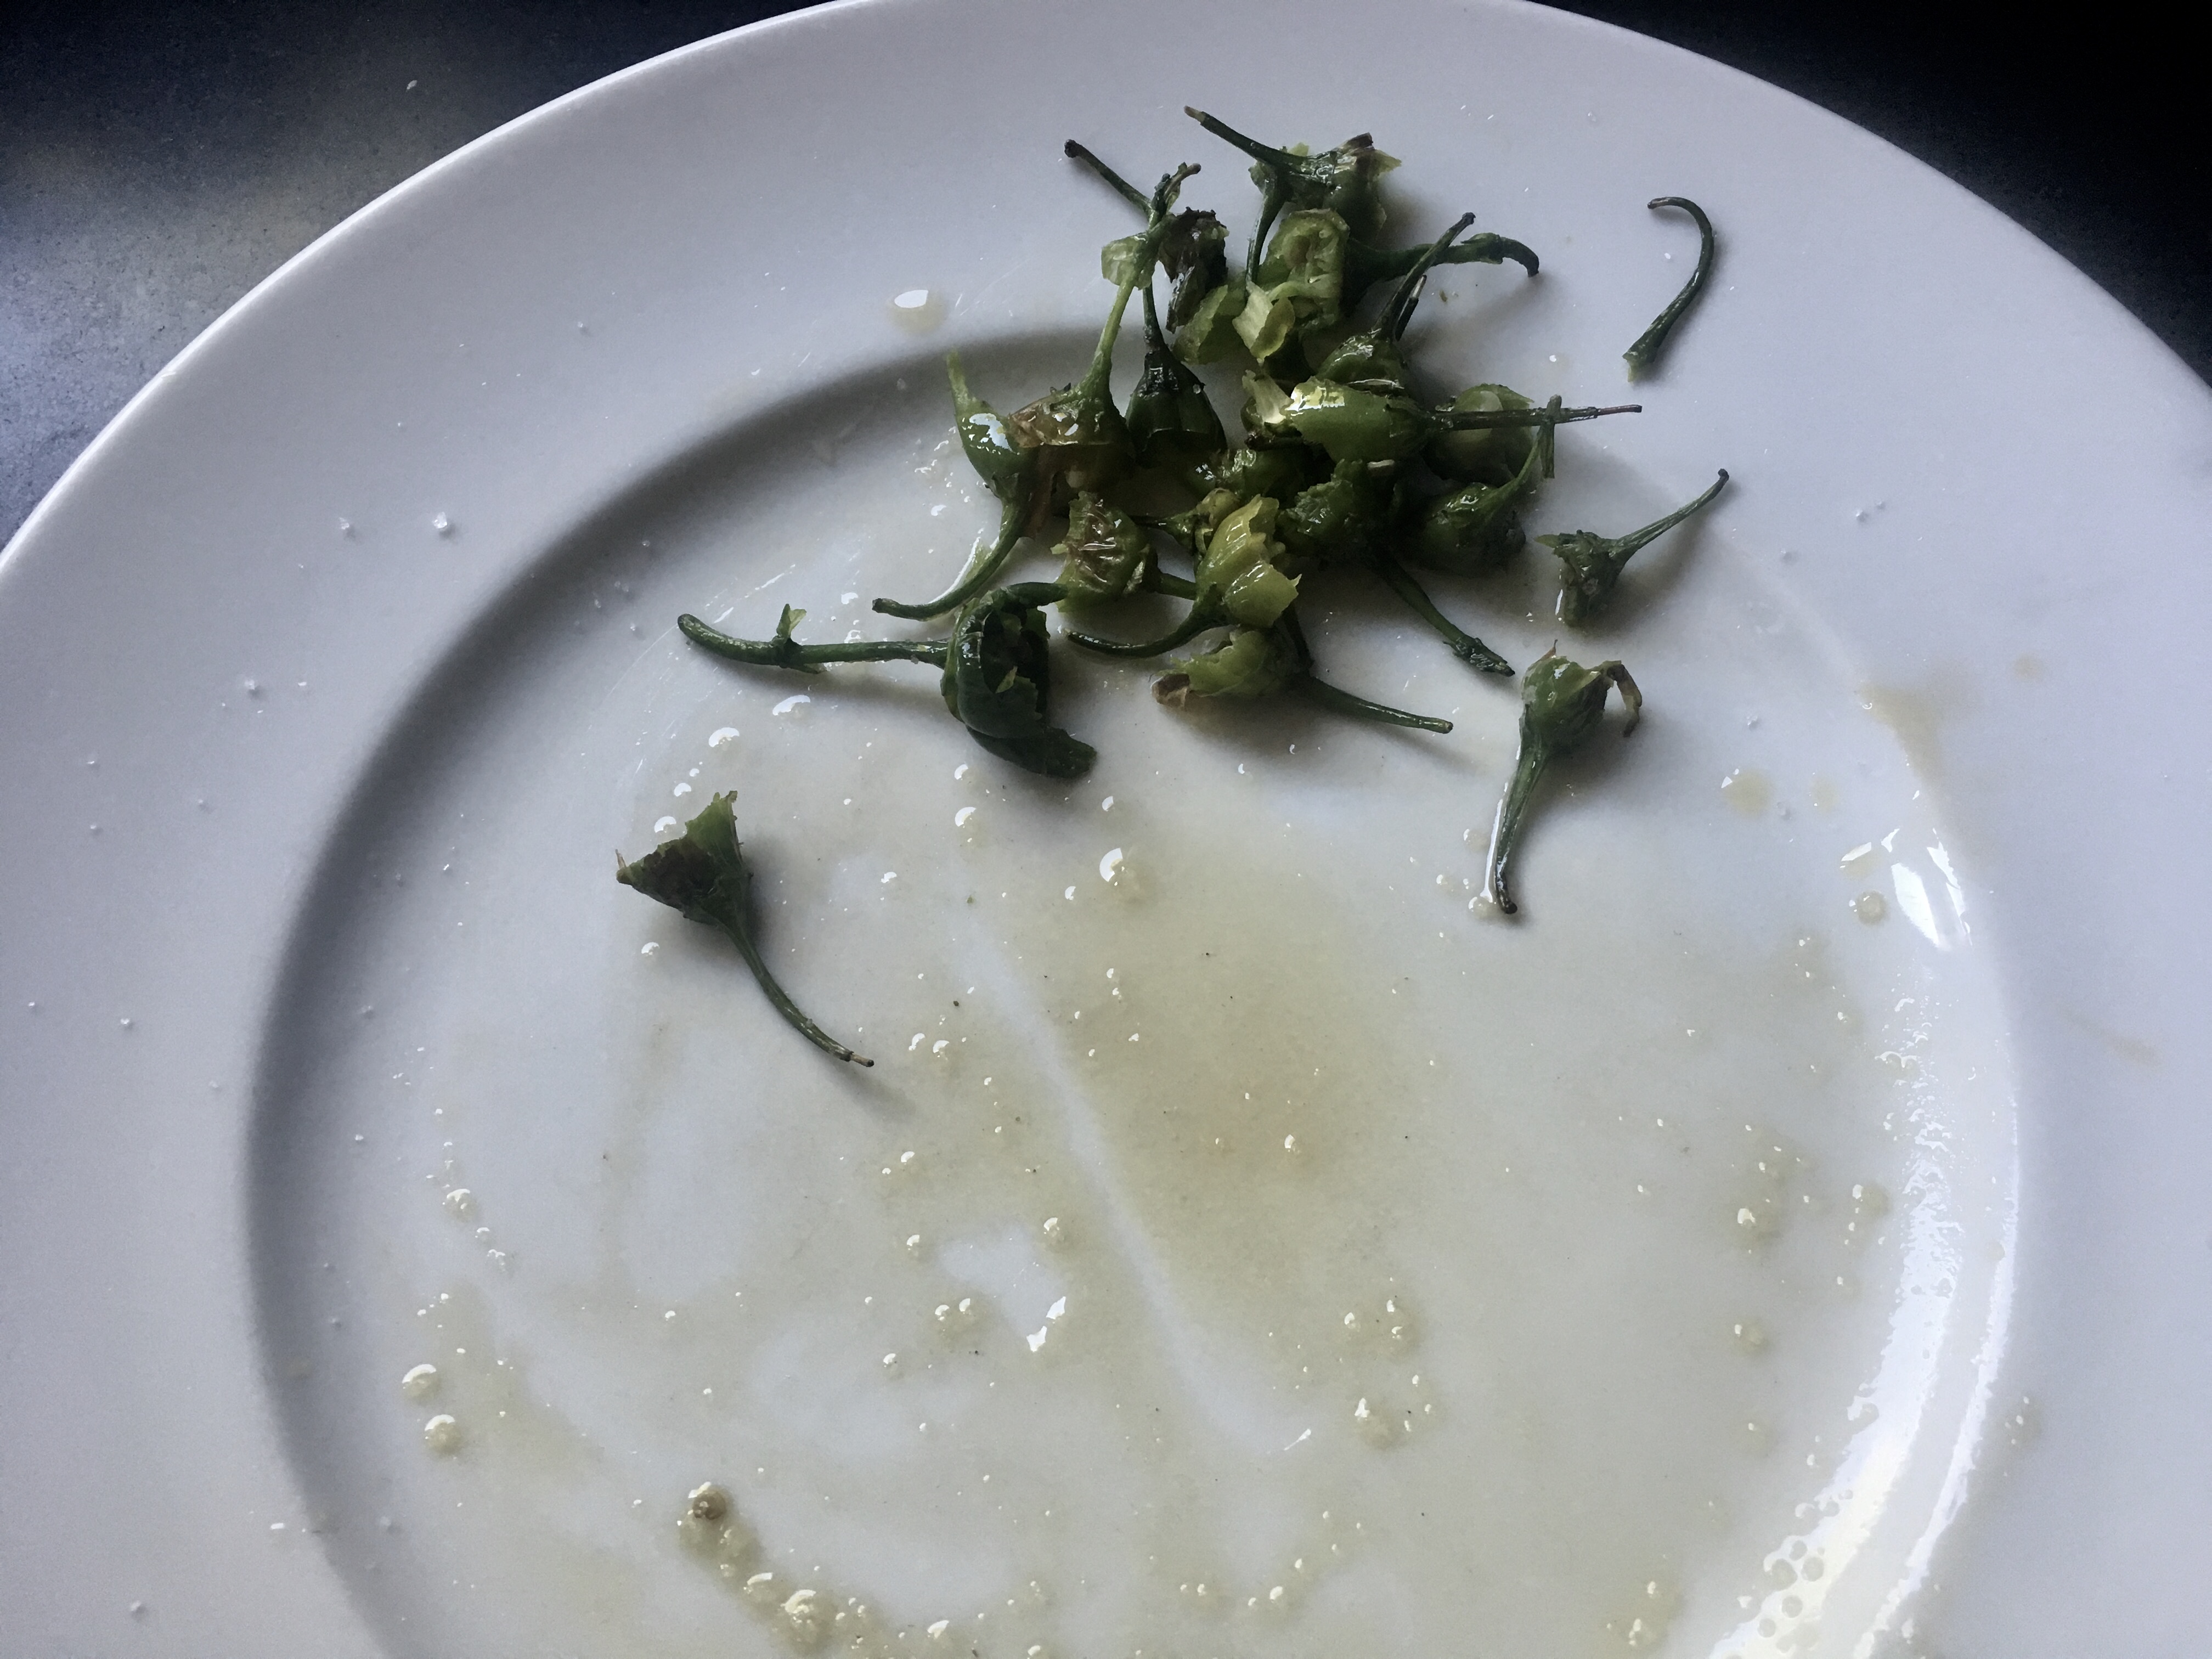
Blistered shishitos gone!


The original recipe for pickled shishitos suggested that I boil the pickling spices and then combine them with sliced shishitos. But I didn’t like the idea of having whole peppercorns and other spices getting stuck in my teeth. I wanted their flavor, but I didn’t want to bite into them whole. (If you’ve ever accidentally bitten into a peppercorn, you know what I mean.)

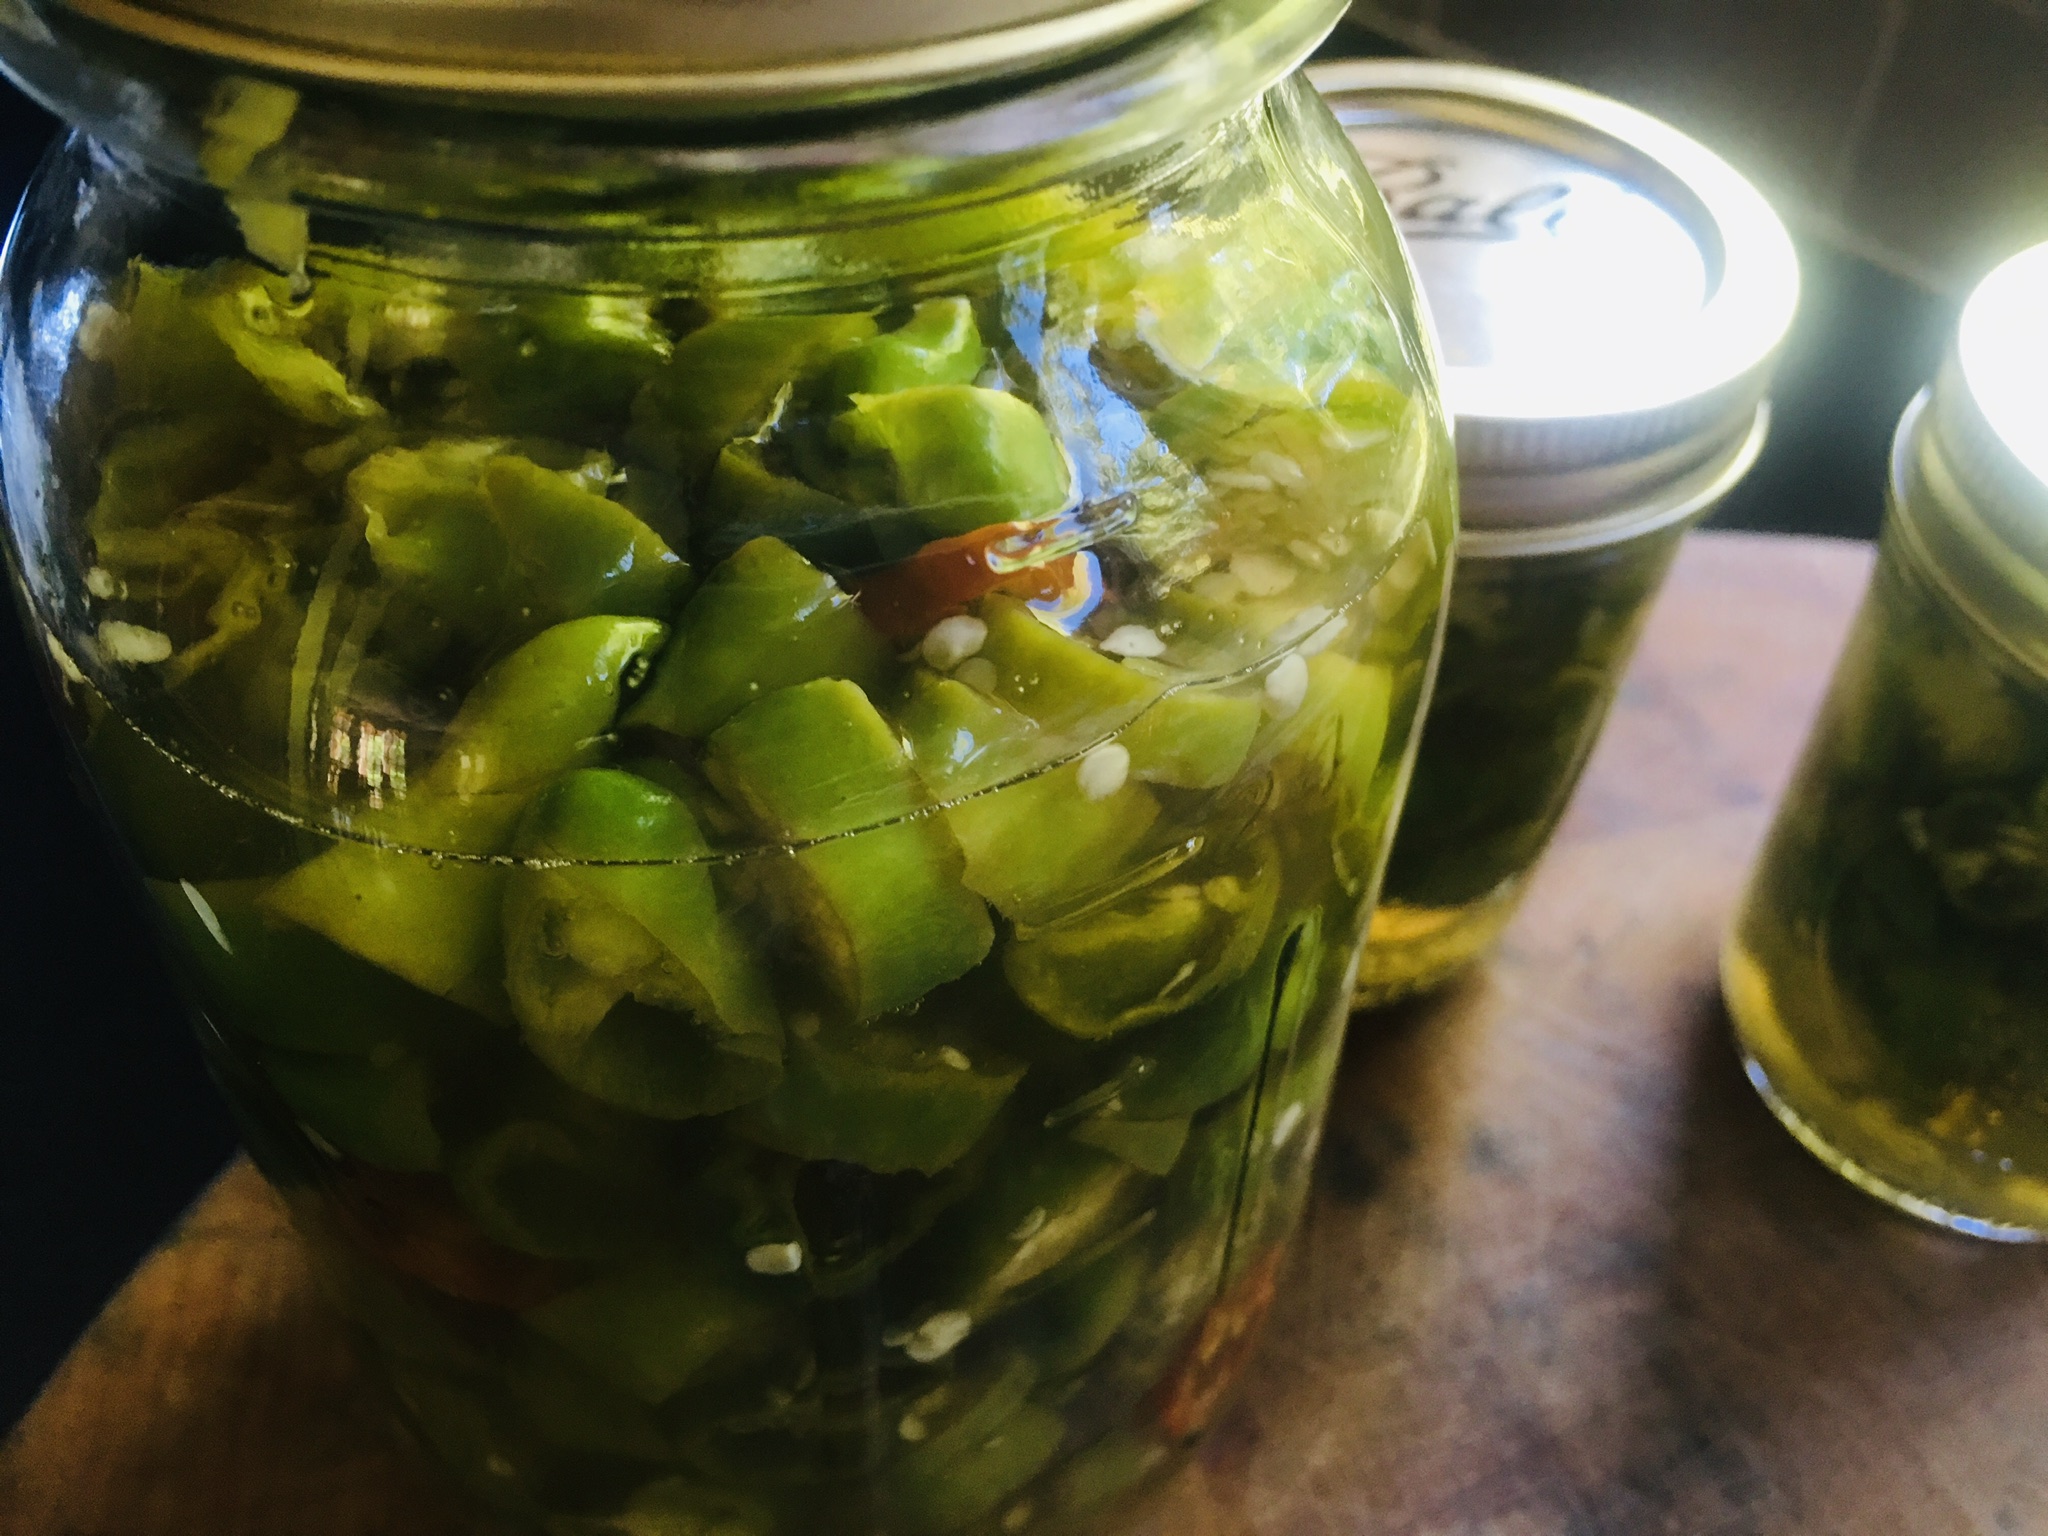
So I strained the brining liquid after boiling, and then combined it with the shishitos. I got all the flavor, and none of the grit.


I cut the stem ends off the shishitos, then sliced them into rings.


2 cups vinegar
2 cups water
4 garlic cloves
2 tablespoons sugar (I use organic cane sugar)
2 tablespoons pickling spices
1 tablespoon black peppercorns
2 teaspoons sea salt
1 pound shishito peppers, sliced into rings


Boil a couple of Mason jars in a large pot to clean them. Let them air dry completely.

In a saucepan over high heat, combine the vinegar, water, garlic cloves, sugar, pickling spices, black peppercorns, and sea salt. Bring it to a boil, then lower the heat to medium and let to boil for 5 to 8 minutes.

The take pickling liquid off the heat and strain it into a bowl. Discard the spices. Add the sliced shishitos into the pickling liquid, mixing well, and let it sit for 3 to 5 minutes.

Spoon the mixture into the Mason jars and seal them tightly. Let them cool to room temperature. (You should hear the lids of the Mason jars make a popping noise to seal properly.)

Once the peppers have cooled, place the jars in the fridge and let them sit in the fridge for a week or so until the flavors combine.


The pickled shishitos are great on salads, sandwiches, cheese platters, and anything else that needs a kick in the pants!


I don’t have the patience to boil Mason jars and lids and all that. But I love me my pickles, especially when this year’s garden cranks out so many cucumbers!

This is such an easy way to make great pickles, it’s almost unbelievable…and no water is needed! The salt extracts just enough moisture to make it work. This method works great if you want fresh pickles to eat immediately, but if you want to keep them for long periods of time, you’ll have to go back to the old tried-and-true methods.

Fortunately for me, I devour these pickles as soon as they’re ready!

I originally used a plastic bag for this, but a plastic container also works well. Use what you have.


pickles

fresh cucumbers
sea salt or Kosher salt
a handful of fresh dill
a couple of cloves of garlic, thinly sliced

Cut the ends off the cucumbers and then slice them lengthwise, in half or in quarters. Lay them neatly next to each other in one layer in a container, or on a piece of plastic wrap, skin-side down. Sprinkle the salt over the cucumbers. Sprinkle some of the chopped garlic on top. Then, tear off some fresh dill and lay it to cover the pickles.

If using a container, you should be able to get a second row of pickles on top of the first, again sprinkling with the salt, garlic, and topping with dill.


Placing the lid on the container, squeeze out as much air out of the container as you can.

If using plastic wrap, roll it up tightly and place it inside a Ziploc bag, and seal it.


Put the container or bag  in the fridge overnight. Making sure the lid is tightly sealed on the container, flip it over every few hours. (I always put a plate underneath it when it’s upside down in case it leaks a little.) 

The plastic wrapped pickles don’t need to be flipped.

The pickles will be ready to eat the next day, but they’re even better after 48 hours.


I tried this one yesterday: pickles, sliced carrots, and even small onions in the same mix. Delicious!

I grow several varieties of squash and pumpkins in my garden every year, so I’ve got an overload of blossoms. They’re delicious sweet or savory.

In my savory version, the blossoms are stuffed with ricotta cheese, lightly battered, fried and served with a delicious tomato sauce.

The sweet version is directly below.

At home, we went for a sweeter version for breakfast, using pancake mix as the base, experimenting with two fillings: raspberry preserves or strawberry cream cheese.

I simply followed the directions on the box of pancake mix, using fat-free milk instead of whole milk and a little less of the dry ingredients to make the batter thinner than I would use for regular pancakes. I use King Arthur Gluten-Free Pancake Mix, which requires adding an egg and melted butter to make a smooth, slightly sweet batter. I set that aside and let it rest for a few minutes.

Next, it’s off to the garden to snip a handful of squash blossoms. I prefer the ones that are open. They’re easier to stuff, but it’s also easier to spot the little critters that like to make themselves comfortable inside. I carefully snip the blossoms off the plant, then give them a light shake, which is enough to convince the bugs inside to fly out. It’s pretty cool to find a happy bee inside every blossom that I snip.


Other than making sure all foreign particles (and insects) have been removed from the blossoms, and pulling out the stamen, no other preparation is needed. I snip the stems right up to the blossom, and they’re ready to be stuffed.


Blossoms stuffed with strawberry cream cheese and the fantastic raspberry preserves from Briermere Farms on the North Fork of Long Island!


I heat a few inches of grapeseed oil (or any other high smoke point oil) in a pan to 325 degrees, then start the process: I stuff the blossoms, closing the flower petals around the stuffing, then carefully dip them in the pancake batter, and release them gently into the oil, flipping them as they fry, until they’re golden in color.


I drain them on paper towels, dust them with powdered sugar, and they’re ready to be enjoyed.


For the savory version, I make my own batter.

1 cup all-purpose flour
1 teaspoon baking powder
1 teaspoon salt
1/2 cup low-fat milk
2 large eggs
1 teaspoon olive oil
water, as needed

Combine the flour, baking powder, and salt in a bowl. In another bowl, whisk together the milk, eggs and olive oil.
Add the dry ingredients to the wet, and mix well. If the batter is too thick, add water until it’s smooth and looser than pancake batter. If it’s too thick, it’ll get clumpy. You want it to be thin–just enough to coat the blossoms well, without too much batter on each one.


Fresh out of the garden!


For the stuffing…

1 cup ricotta cheese
1/2 cup shredded mozzarella
pinch of salt
pinch of oregano

In a bowl, mix the stuffing ingredients well.

Add a small spoonful of the stuffing into the cleaned and prepared squash blossoms. Dip them in the batter to coat, then gently place them in a pan or deep fryer with grapeseed oil, or other high smoke point oil at 325 degrees.


Stuffed and ready to dip in the batter. (I eat the baby squashes attached as well!)


Fry them until they’re golden, placing them on a metal rack to cool and to let the oil drip off.


I prefer a deep fryer over a pan of oil.


Season with salt while they’re hot!

They’re delicious by themselves or with a little marinara sauce on the side.

It seems like the popularity of shishito peppers has exploded overnight. Once a rare treat that I could only get on the menu at one of my favorite Boston restaurants, Toro, now they’re everywhere: farmers markets, bistro and pub menus, and of course…my own garden!

Shishito peppers are mostly mild…but you can get hold of a spicy one every 10 peppers or so…kind of a Russian pepper roulette!

Shishitos straight from the garden!

Shishitos are incredibly easy to grow…just like any other pepper. They love a full day’s worth of sun, and lots of fertilizer. If you have success growing tomatoes, shishitos should be on your list. Plus, they’re really quite prolific: it’s not uncommon to find a couple dozen peppers growing on each plant!

Shishitos are also easy to prepare, and take just minutes. Ideally, if you’ve already got a charcoal grill going, you’re almost there. Simply place the shishitos in a bowl and drizzle in a little olive oil. Toss the peppers to coat, and place them directly on the ashed-over coals of the fire. Work quickly turning them over with tongs. You want them to blister, but you don’t want them to burn! They’ll pop, deflate, and get soft. That’s when they’re ready. Simply place them on a serving plate, and sprinkle some really good sea salt (I like Fleur de Sel) over them while they’re still hot.

If you don’t have the time for a charcoal grill, you can still prepare delicious shishitos by placing them in a pan. Sprinkle in a little olive oil, and toss them around to coat them. Turn the burner on high, and cook the shishitos until they’re blistered, but not burned. Cook them on all sides, carefully flipping them over with tongs. Like on the charcoal, they will pop, deflate and get soft. Transfer them to a serving plate and sprinkle immediately with salt.

To enjoy shishitos, you simply grab them by the stem and bite!

I came up with this crunchy appetizer years ago, when I needed a tasty bite for one of our summer parties. I wanted something fresh that highlighted the veggies of the season, so when I spotted these baby bell peppers in the supermarket, I got the idea. 


image

Baby bell peppers
6 ears fresh corn, removed from the cob…or organic frozen corn
1/2 Vidalia onion, peeled, quartered, grilled, chopped
1 cup mayonnaise
1 teaspoon hot pepper sauce (I use Frank’s Red Hot)
6 oz. feta cheese or Queso Fresco, crumbled
Juice of 1 lime
Pinch of white pepper
1 tablespoon fresh parsley, finely chopped


image

Cut the corn kernels from the ears, and sauté them very briefly in a little olive oil. Place them in a bowl and let them cool.

Peel and quarter the Vidalia onion, and throw it on a hot grill with a little olive oil to get some nice grill marks on it, leaving the onion still crispy, not soft. If you’re cooking indoors, throw the quartered onion in a hot pan with a little olive oil, and cook it until you get some brown marks on it. Remove it, let cool, then place it in a food processor and pulse it until the onion is chopped into small bits, just smaller than the corn kernels. Add the onions to the corn.

In a separate small bowl, combine the mayonnaise and the Frank’s Red Hot. Pour in the crumbled cheese and mix well. Pour this into the corn and onion bowl and mix well.

Add the lime juice, white pepper and parsley to the bowl and mix well again.

Cut the baby bell peppers in half lengthwise, and remove the seeds and membrane. Stuff the peppers with the corn mixture and garnish with cilantro or parsley.

If you’re preparing this ahead of time, refrigerate the stuffed peppers until you’re ready to eat, but allow some time for them to warm up to a cool, not cold, temperature.

Butter and cheese. Can anything be better?

It’s especially great when asparagus is in season, growing in my garden, like right now.

This is a great side dish with any main course like a big slab of meat, and has special meaning to me because my cousin first introduced me to asparagus with this recipe when I was just a kid. She passed away many years ago, but I think of her every time I make this simple but delicious dish.

You can use almost any grated “parmesan” cheese, but nothing beats real Parmigiano Reggiano that you freshly grate yourself. Whatever you use, please, just don’t use the junk that comes in a can.


image

1 lb. fresh asparagus spears
1 tablespoon unsalted butter
2 tablespoons extra virgin olive oil
3/4 cup grated Parmigiano Reggiano cheese
sea salt and freshly cracked black pepper


The easy way to trim an asparagus spear is to grab the thicker end between two fingers and bend it. It will snap at the point where the tough part ends and the softer, edible part begins. I toss the bottoms into my compost pile.

I heat the butter and oil together in a pan and then add the asparagus spears, cooking over medium heat for about 5 minutes, until al dente. (You don’t want them mushy.)

While the asparagus is still in the pan, I sprinkle the Parmigiano Reggiano on top, letting it melt a bit. I season with sea salt (I prefer Fleur de Sel) and freshly cracked black pepper.


Grilling makes food taste great, but sometimes you don’t want to stand out there in a cloud of smoke while your friends are at the table, sipping wine and having a good time without you.

This is a great dish for those that want to pass on the grill for a day. It’s a delicious salad that you can serve warm or cool. You can make it the day before. Wrap it in plastic, and keep it in the fridge. Then, when your guests arrive, let it warm to room temperature. Taste for seasoning before serving. If you’re not a fan of quinoa, brown basmati rice works well, too. And use what’s fresh and in season. If you can’t find asparagus, some chopped and lightly sautéed squash works just as well.


FullSizeRender (8)


1 1/3 cup dry quinoa (or 1 cup basmati rice)
Chicken stock
Juice of 1 lemon
2 lbs. wild-caught American shrimp, peeled and de-veined (16 to 18 count)
1 cup of asparagus stalks, cut into 1″ lengths
1/2 cup minced scallions, green part only
1 cup chopped fresh dill
1 cup chopped fresh flat-leaf parsley
1 English cucumber, peeled, seeded and medium-diced
1/4 cup red onion, small diced
1/2 cup seeded and chopped tomatoes
3/4 lb. good feta cheese, crumbled
Extra virgin olive oil
Salt and pepper


Prepare the quinoa according to the package directions, using chicken stock instead of water. Once it’s cooked, place it in a large bowl. (1 1/3 cups dry quinoa should give you about 3 cups of cooked quinoa.)

Place the chopped asparagus on a sheet pan, drizzle with olive oil, and sprinkle with salt and pepper. Toss them to combine and spread them out in a single layer. Roast them for just a few minutes at 350 degrees. Set them aside to cool to room temperature. (You can also simply saute the asparagus in a pan on the stove top with olive oil, salt and pepper.)

Place the shrimp on the same sheet pan, drizzle with olive oil, and sprinkle with salt and pepper. Toss them to combine and spread them out in a single layer. Roast for 5 to 6 minutes at 350 degrees, until the shrimp are cooked through. Turn them once while cooking. Don’t overcook them! (again…you can simply saute the shrimp in a pan on the stove top with olive, salt and pepper.)

Add the shrimp to the quinoa, then add the asparagus, lemon juice, scallions, dill, parsley, cucumber, onion, tomatoes, 2 teaspoons salt, and 1 teaspoon pepper. Add the feta and stir carefully.

Set it all aside at room temperature for 1 hour to allow the flavors to blend…or, if you’re not serving soon, place the bowl in the fridge. Before serving, allow it to warm almost to room temperature. Taste it and season again, if needed, before serving.


Years ago, at Le Saint-Amour, a restaurant in Quebec City, the dish I ordered had these small strange-looking root vegetables sitting next to my roasted duck entrée. They resembled tiny twisted parsnips…or caterpillars! I needed to know what these things were, and so I asked my French waiter, who came back with a piece of paper that had the word “crosne” written on it. He said: “I don’t know how they say it in English.”
Back at the hotel room, I went right to the laptop and started a search online and discovered that crosnes (pronounced crones) are also known as Chinese artichokes, and although they are somewhat common in European gardens, they’re really difficult to find in the states.

The leaves look like mint, but don't have a fragrance.

The leaves look like mint, but don’t have a fragrance.


The plant is a relative of mint (though the leaves have no aroma), a perennial, is easy to grow, spreads on its own, and has those small, convoluted and delicious root clumps (known as tubers to gardeners.) So what’s not to like? Well, apparently, it’s not the gardeners that don’t want to deal with them…it’s the chefs! The tubers are very small and need a little extra effort to make sure they’re washed clean before cooking. They don’t need to be peeled (now that would be a pain) but to many chefs, even the washing is too much of a hassle.
image
As a Master Gardener and food nerd, I found all of this pretty interesting so I searched for sources to buy crosnes plants. It took a while (most growers were in Europe or Great Britain), but I finally found a source in Oregon that sold the plants and I bought a few for my home garden.
image

Much like mint, crosnes are pretty hardy and are tough to remove once well established, so they need to be planted in an area where you don’t mind if they take over. The tubers are ready to harvest October through November, and as long as I leave some in the ground over the winter, the crosnes will be back again the next year. Seems pretty low-maintenance for such a unique and delicious treat!


image

As for preparation, a light saute in olive oil and butter (or lard), and a little salt and pepper, is all they need. They also go well with a deep, rich demi glace reduction like I had with my duck at Le Saint-Amour.

Despite gardening for almost 50 years, I sowed and harvested my first batch of fennel last season. Having received a recent shipment of heritage Berkshire pork chops, I thought it was time to get creative. This is a rustic Italian-style recipe that works great for pork and fennel…

fennelfrond


4 good quality pork chops, medium thickness
2 fennel bulbs with stems and fronds, finely chopped
2 shallots, finely chopped
1/2 cup fresh parsley, chopped
olive oil
salt and pepper
1 28 oz. can tomatoes
1 tablespoon capers
Zest of 1 lemon
1/2 cup dry white wine


pork and fennel


In a large pan, heat some olive oil. Season the pork chops on both sides with salt and pepper, then brown them on both sides in the pan with the olive oil. Remove the chops from the pan and set them aside.

Add a little more olive oil to the pan and add the chopped fennel and shallots, stirring for a few minutes. Add the white wine, and stir well to get the tasty bits of pork from the bottom of the pan. Add half of the parsley. Add the can of tomatoes, squishing the tomatoes between your fingers so that they are broken up when they hit the pan. Stir for a few minutes over medium heat.

Return the pork chops to the pan, nestling them in the sauce. Add the capers, lemon zest and remaining parsley. Stir everything together a bit, and then let the chops cook for about 10 to 15 minutes, until their internal temperature reads 145 degrees.


Inspired by a garden full of fennel and my fanatical love for all things pork, this recipe just happened. I use Berkshire heritage pork when possible, a far tastier and healthier choice over standard pork you find in a supermarket.

pork chop fennel

4 Berkshire pork chops
4 tablespoons finely chopped fennel bulb
2 teaspoons finely chopped fresh sage
3 teaspoons granulated garlic
1 teaspoon Kosher salt
1/2 teaspoon ground black pepper
3 tablespoons extra virgin olive oil
extra fennel bulb and fennel fronds
extra olive oil, salt and pepper for sauteing

Combine the chopped fennel, sage, garlic, salt, black pepper and olive oil in a bowl. Mix well and spread it all over the pork chops. Let them stand for an hour at room temperature.

Light a hot grill. Grill the pork chops until they’re done…with quality pork, that does not mean cook it to death! (An internal temperature of 160 is the way to go.)

Chop the extra fennel bulb into thin strips about an inch long. Remove the fennel fronds from their stems. Saute the bulb strips in olive oil, salt and pepper until they are almost crisp. Toss in the fennel fronds and cook until the fronds and bulb strips are crisp.

Serve the pork chops with crispy fennel and fronds on top.