Archive for the ‘grilling’ Category

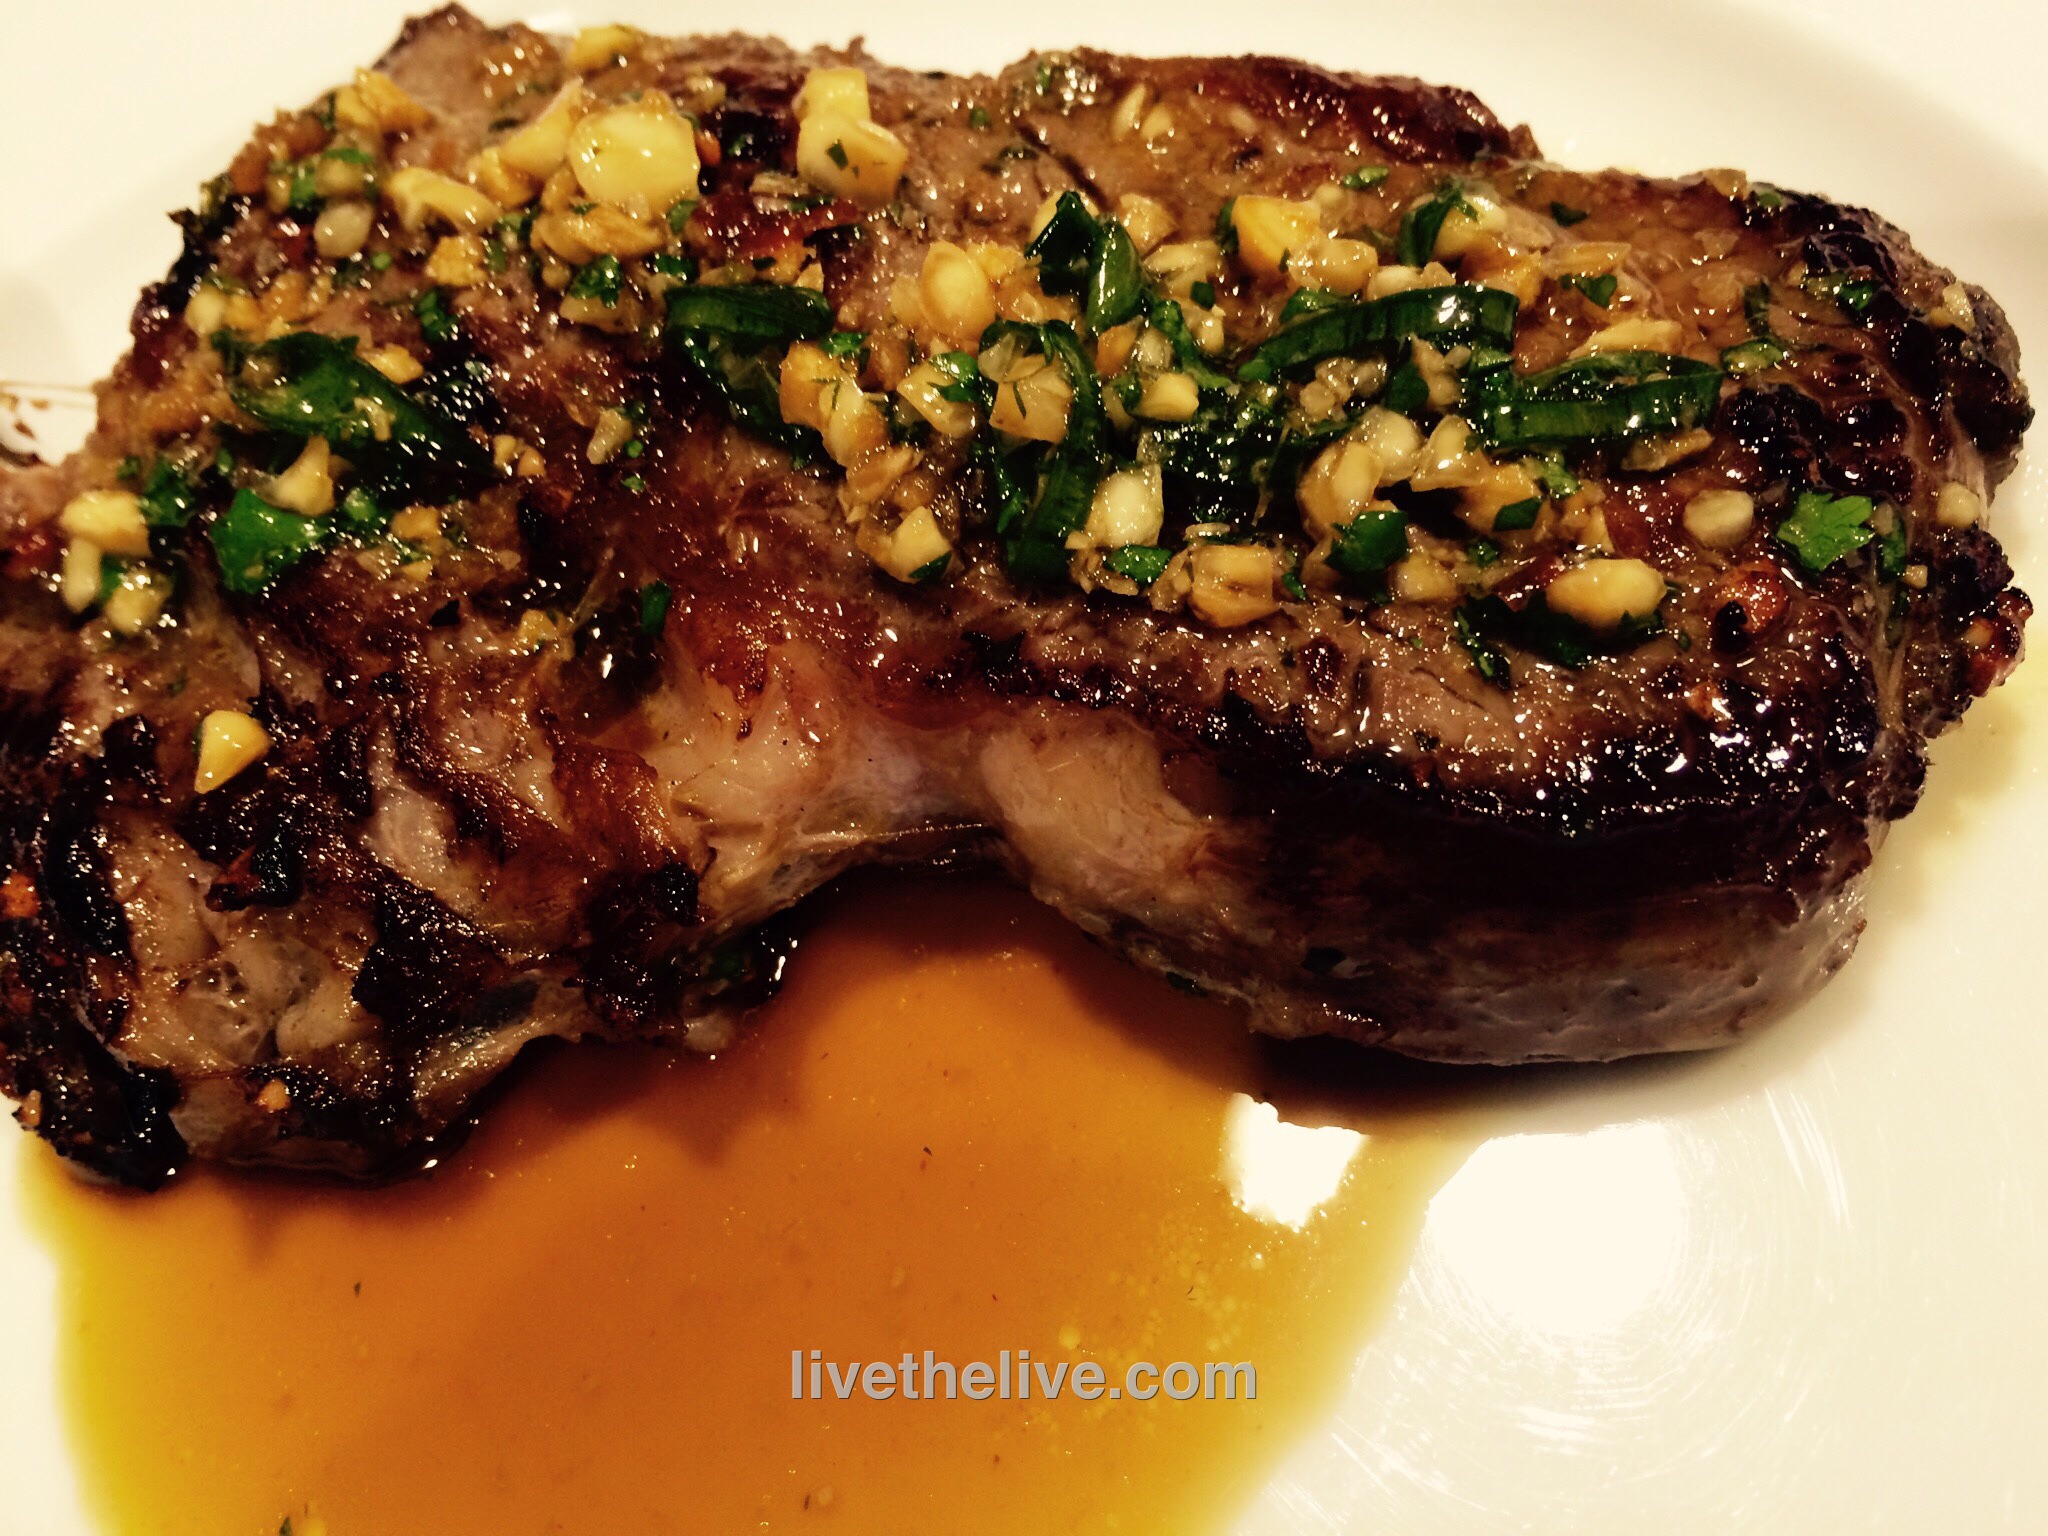
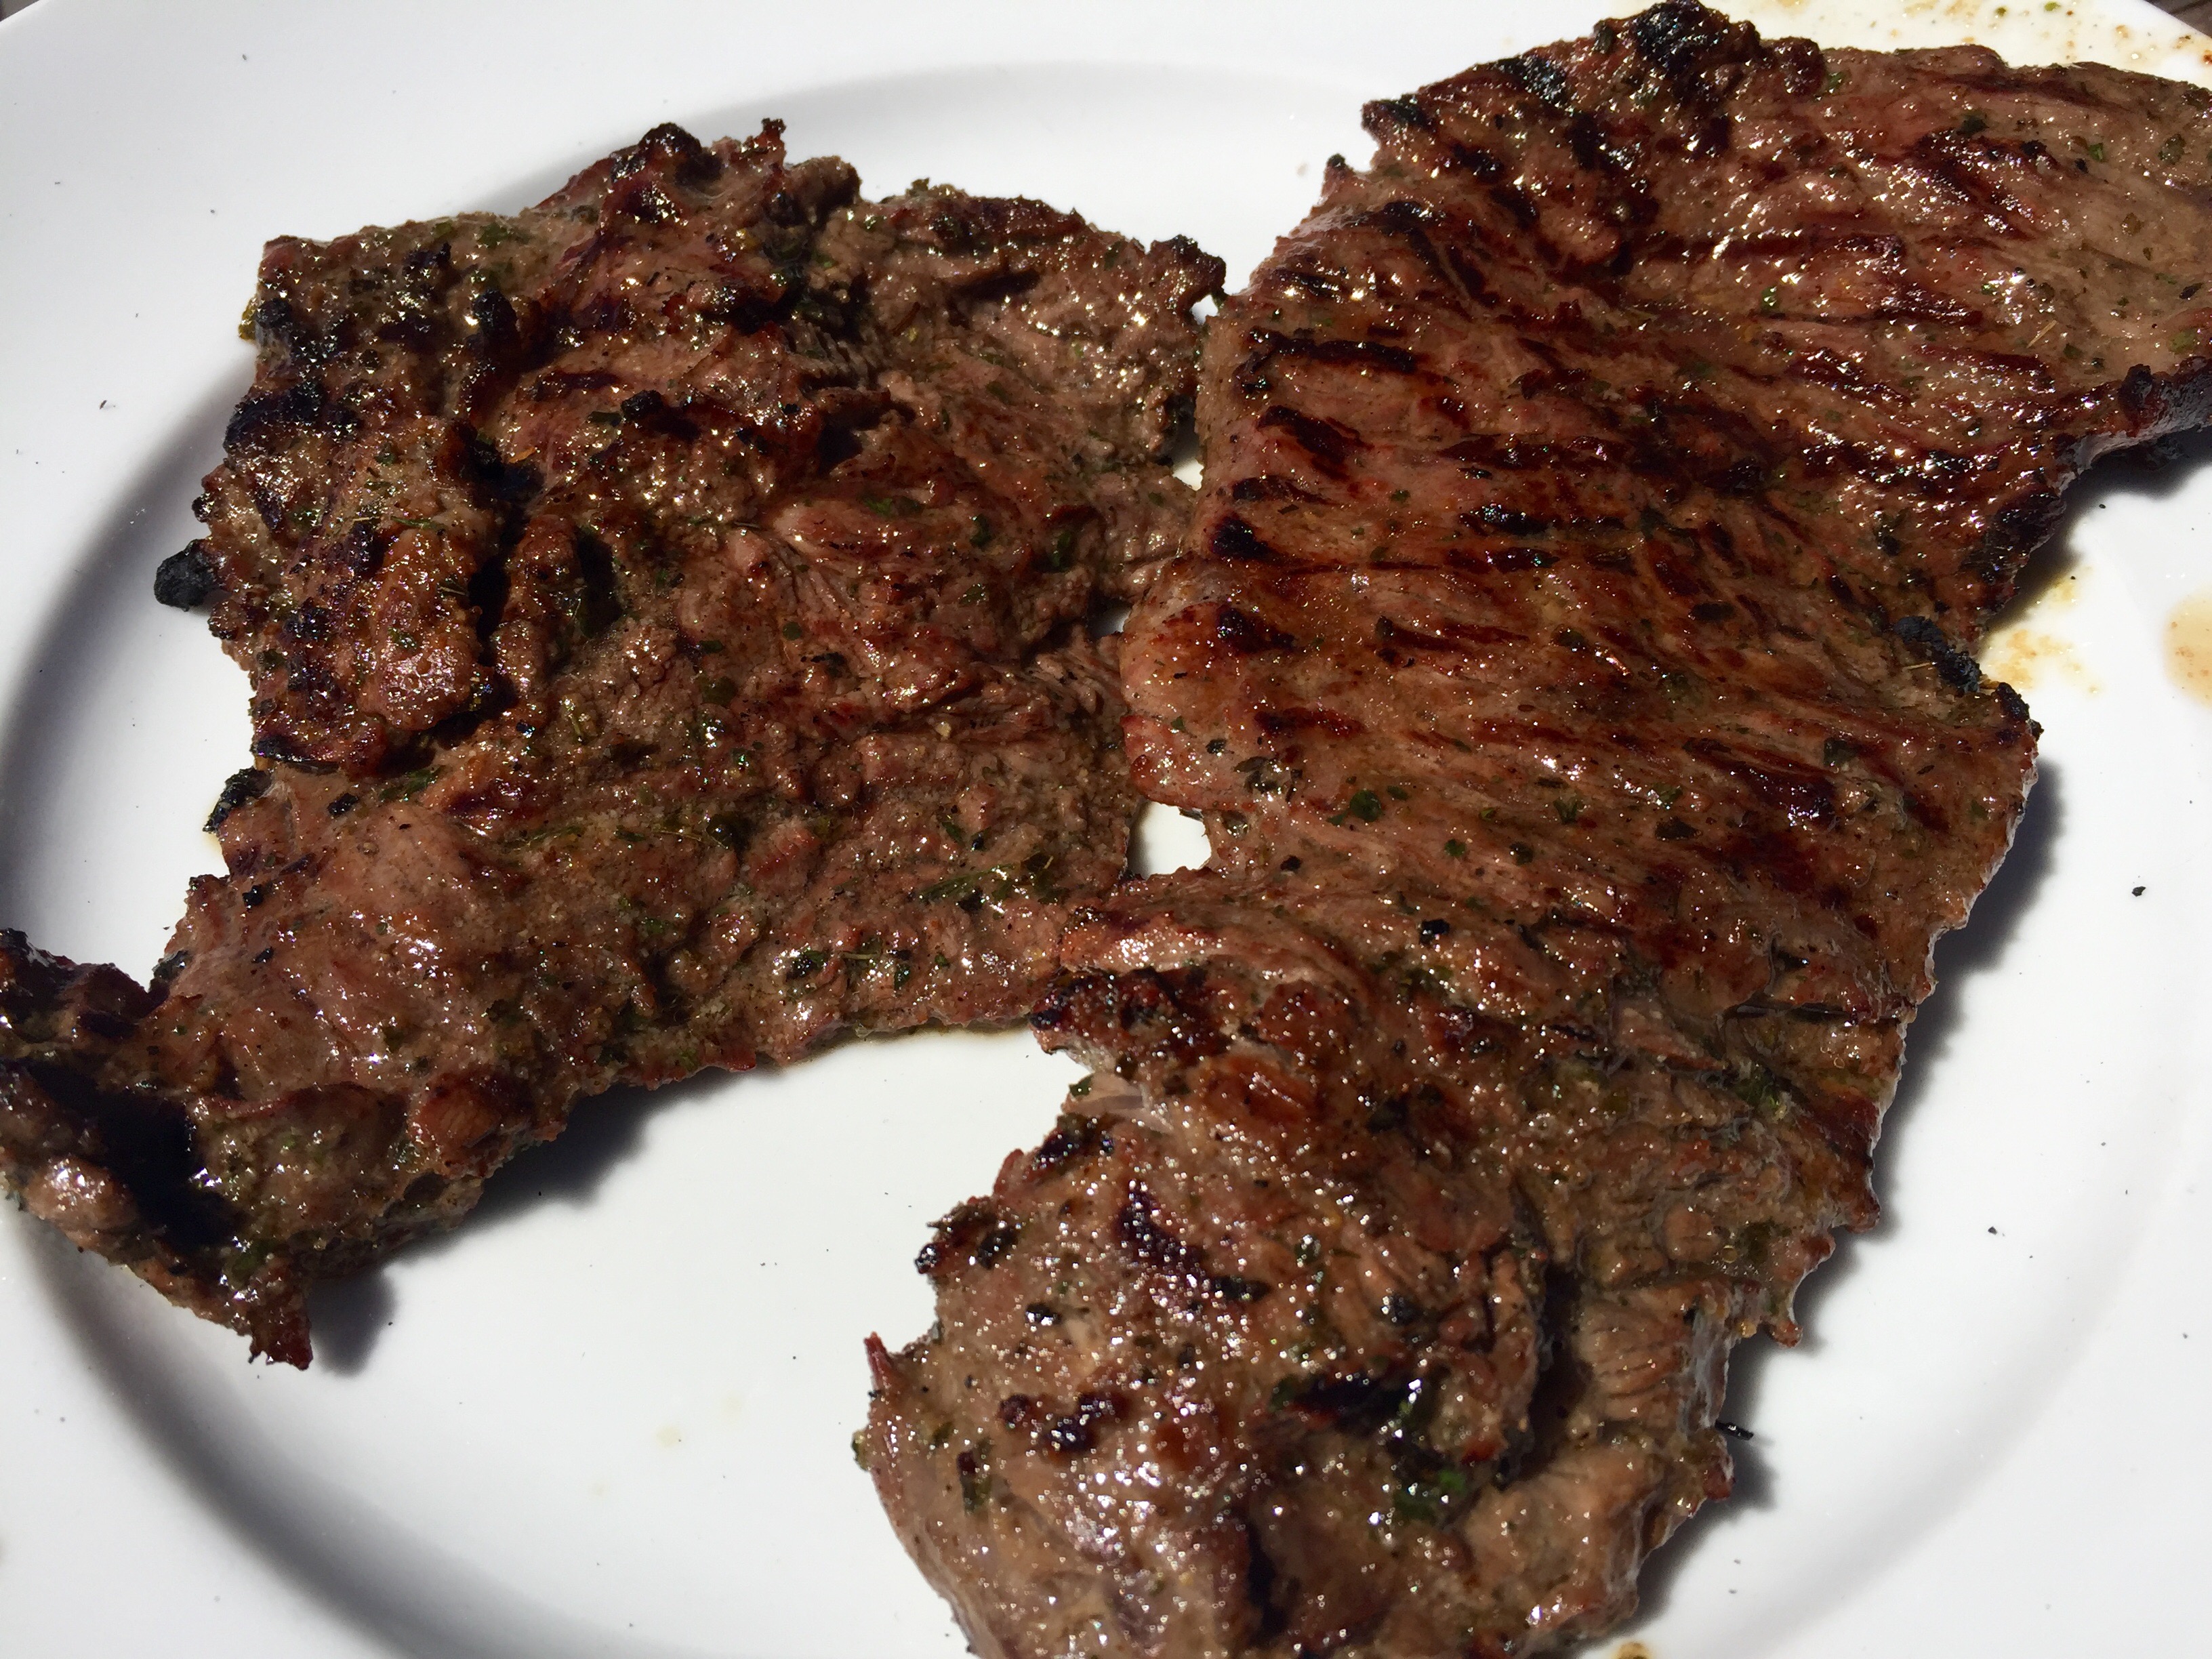
Beef sirloin tips are a bit fatty, which makes them perfect for grill because they don’t dry out, even if you leave them on a little too long. But they can be chewy, so marinating them overnight before grilling tenderizes them and gives them great flavor.

There always seems to be 2 choices when it comes to beef tips at the supermarket: the nice, clean tips that cost a lot, and the fattier, gristlier ones that come cheap. I’ve bought both, figuring I’d still save money with the cheap ones if I cleaned them up myself. Generally speaking, after cleaning up the cheap cuts of meat and tossing all the fat and gristle in the trash, I’ve found that it winds up costing about the same. So now I go for the nicest sirloin tips I can find.

I’ve made many marinades in my day, but I’ve never used the “secret ingredient” that I used this time around. I make my own Lithuanian honey liqueur called Krupnikas (I’ll write more about it in a future blog), and the combination of honey and secret spices really added to the marinade. Unless you make your own Krupnikas, you’re SOL, so I recommend honey and a little bourbon.

Gochujang is a Korean hot sauce. Feel free to substitute with your favorite.

fullsizerender-11


2 lbs. beef sirloin tips, cut into 1 1/2″ cubes
2 tablespoons La Choy Stir Fry Teriyaki sauce and marinade
2 tablespoons honey
1 tablespoon bourbon
2 teaspoons peanut oil
1 teaspoon lite soy sauce
1/2 teaspoon chili garlic sauce
1/2 teaspoon sesame oil
1/4 teaspoon gochujang


Trim off the excess fat and gristle, as well as all the silver skin off the beef, then cut into 1 1/2″ pieces. Place them in a large Ziploc bag, sitting inside a bowl. (The bowl will keep the marinade from spilling into your fridge if the bag leaks.)

In a separate bowl, combine all the other ingredients and whisk to combine thoroughly. Pour this marinade over the beef in the bag, making sure every bit of the marinade makes contact with the meat. Seal the bag tightly, squeezing all the air out of it, and place it in the fridge overnight. Be sure to squish the bag every once in a while to make sure the marinade penetrates all parts of the beef.

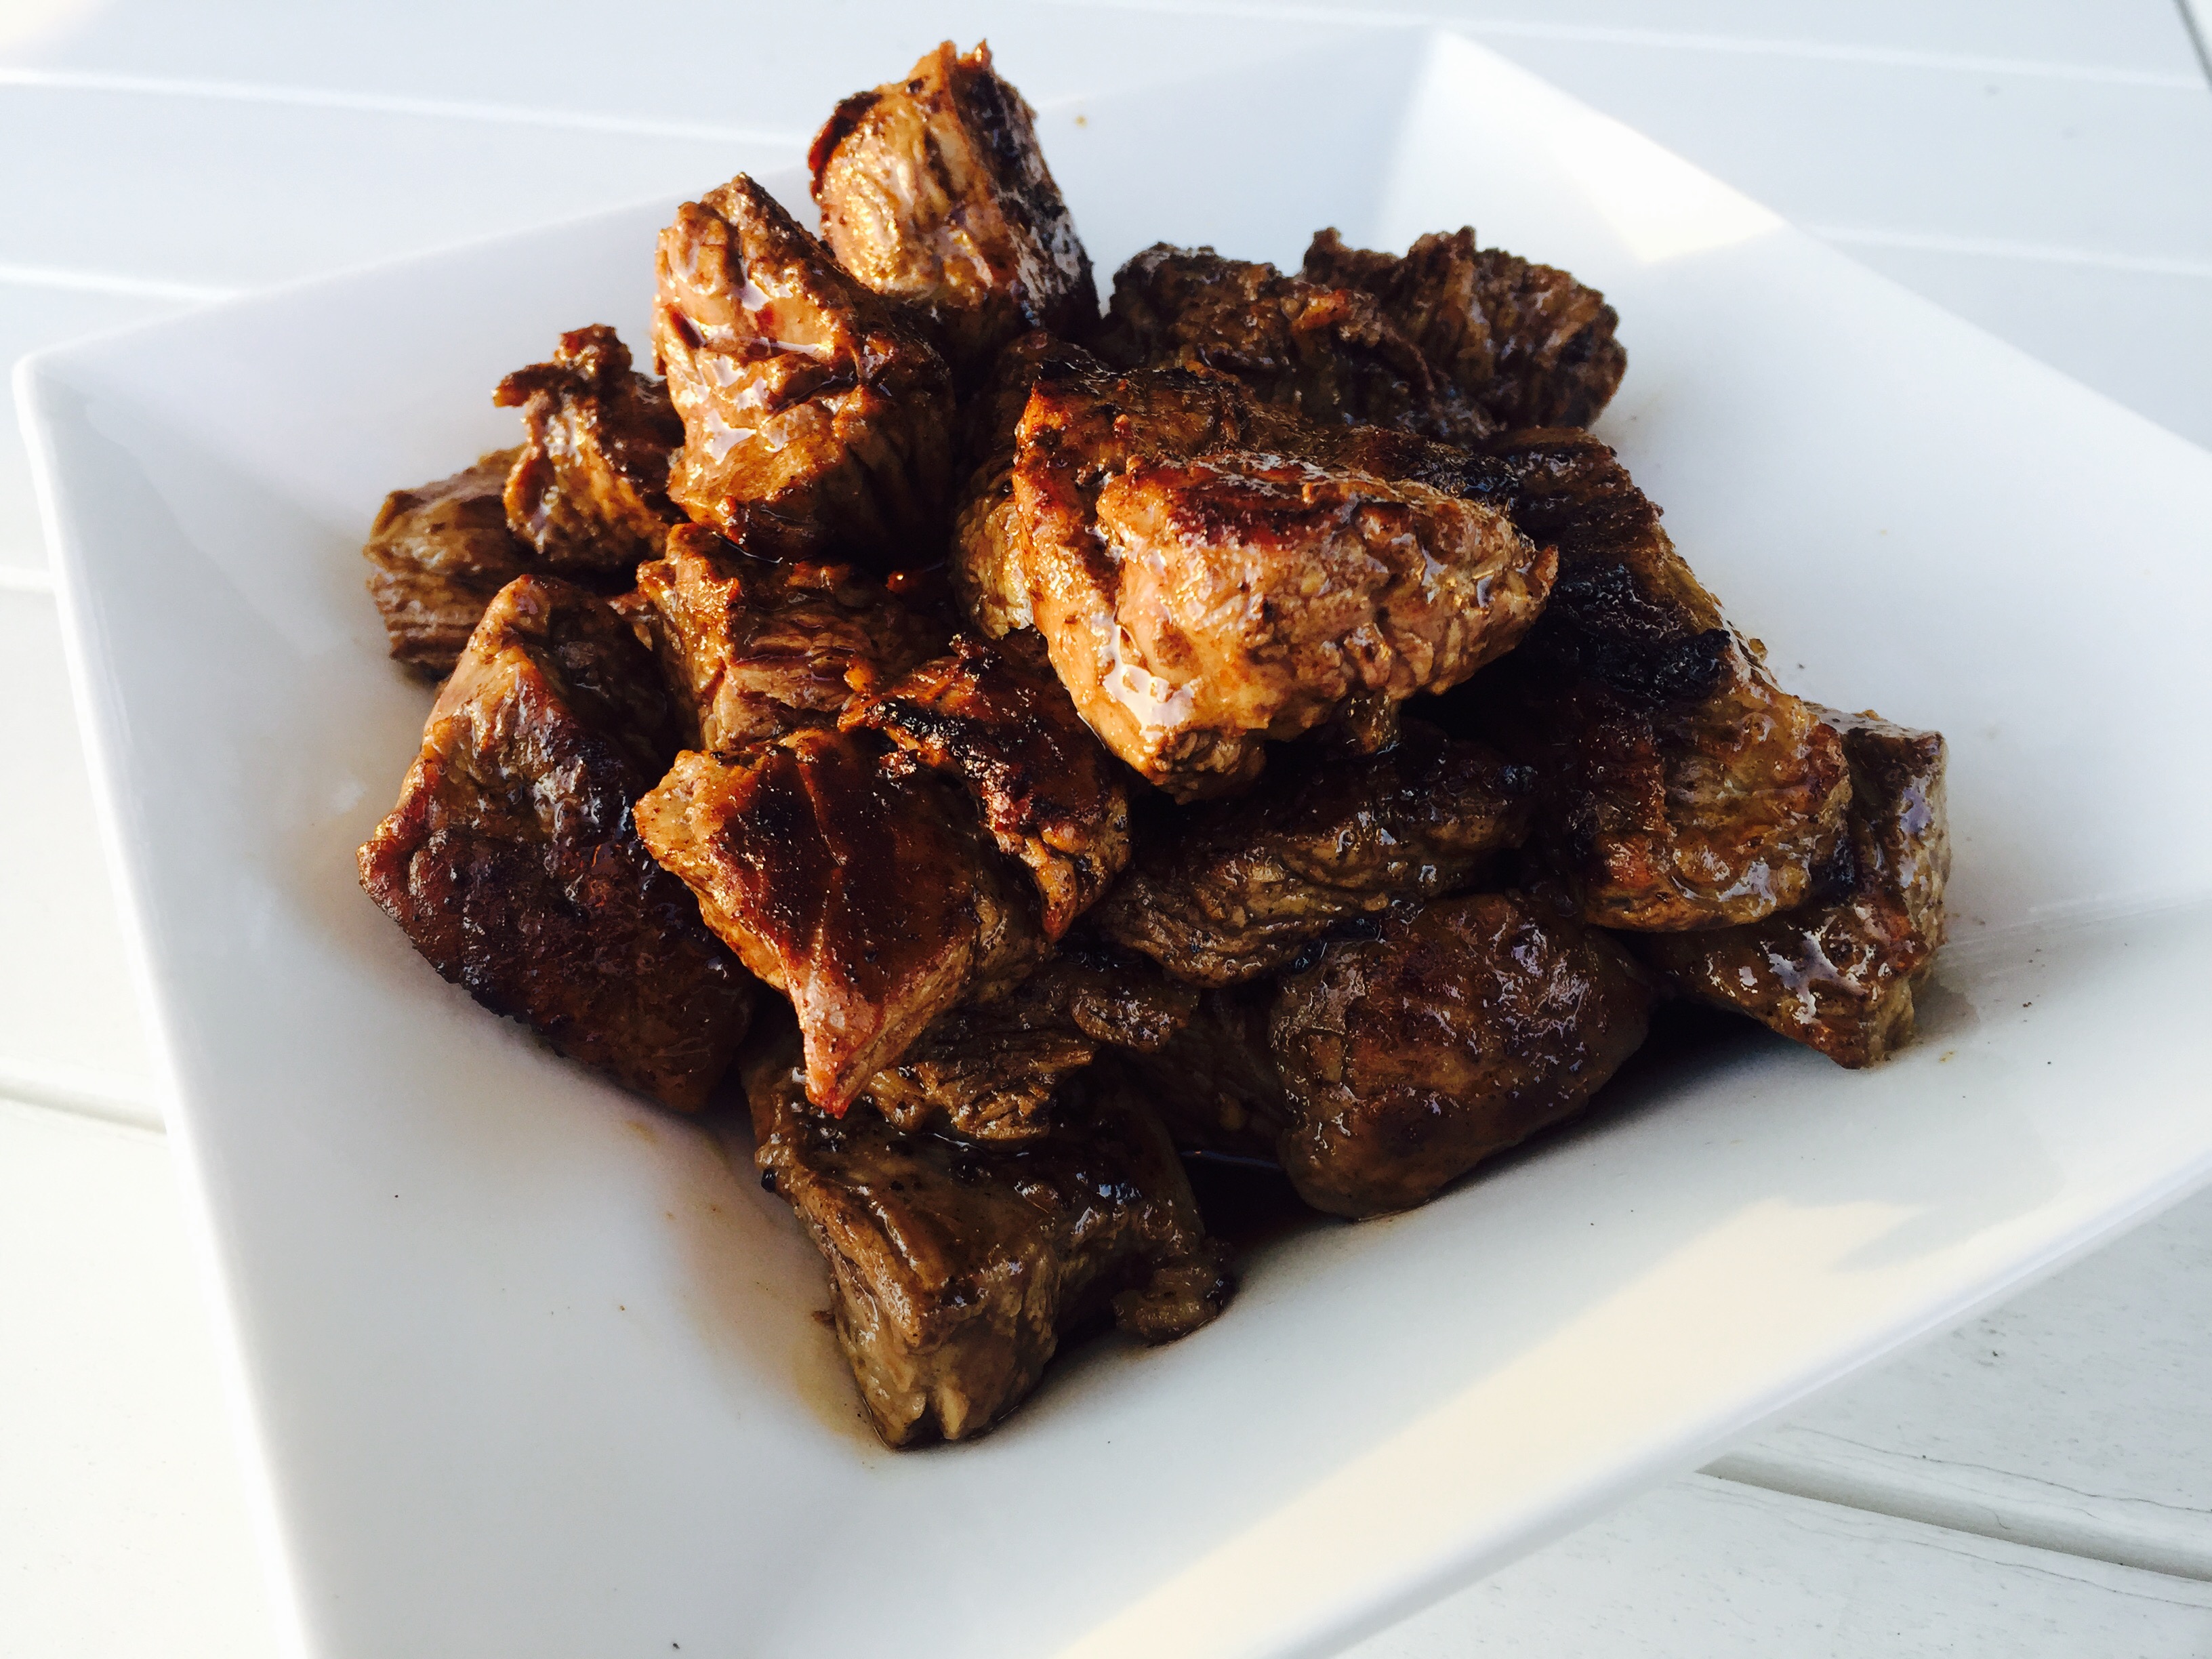
The next day, light a hot grill and cook the beef tips to desired doneness. If you’re cooking indoors, heat some pork lard in a large cast iron skillet, and sear the beef tips on all sides until done.

Let the beef rest before digging in!


Ideally, a thin cut like a skirt steak works best for this recipe. But I didn’t have any in my freezer. What I did have was a fat ribeye, so once I thawed it, I sliced it lengthwise to get two large, thin steaks which would easily suck up the marinade I was going to make. And the ribeye was nicely marbled, so it stayed juicy and tender.

image


1/4 cup toasted sesame oil
1/4 cup soy sauce
2 tablespoons each finely chopped ginger, garlic, cilantro and unsalted dry roasted peanuts
2 scallions, minced
1 tablespoon each of light brown sugar, lime juice and chile oil
2 lbs. beef ribeye
1/4 cup chicken stock

To make the marinade, whisk together the sesame oil, soy sauce, ginger, garlic, cilantro, peanuts, scallions, sugar, lime juice and chile oil in a bowl. Transfer half of it to a shallow dish.
Add the steak to the dish and turn to coat well with the marinade. Cover and refrigerate overnight. Refrigerate the remaining marinade.
The next day, light a grill. While it’s warming up, add the chicken stock to the reserved marinade. This will be the dipping sauce for the beef. (I like it at room temp.)
Take the steak out of the fridge and bring it to room temperature. Season it with salt and pepper, and grill it over high heat until medium-rare, about 5 minutes.

If it’s too cold to light a grill, heat a cast iron pan, add a few drops of avocado oil, and sear the beef on both sides before placing it in a pre-heated 375-degree oven to finish cooking.


Yesterday was National Cheeseburger Day!

My inside-out burger is not a very complex idea. I just put the stuff that’s usually on the outside, on the inside of my burgers. Why? Why not?

Instead of dealing with a package of bacon and a package of cheese and a stack of burgers, I’ve got all the ingredients conveniently inside the patties. And as the burgers cook, the fat from the bacon and the gooey cheese melt and combine with the burger meat to make a really tasty and moist burger.

I cook these on the grill, but the cast-iron skillet method, described below, works really well,  too.

I make 2 lbs. of burgers at a time, using humanely-raised local grass-fed beef, from my friends at Simmons Organic Farm in Middletown, RI.  Support your local farmers when you can!

image

2 lbs. ground grass-fed beef
1/2 cup sharp cheddar cheese, cut into 1/4″ cubes
1/2 lb. bacon, cooked crisp, cooled and crumbled
garlic salt
avocado oil or pork fat


In a bowl, combine the beef, the cheese and the bacon, mixing well so that all the ingredients are evenly incorporated.

Form the beef into 1/4 lb. patties or larger. Refrigerate them until you’re ready to cook to firm them up.

Heat a cast iron skillet and add a drop of oil or pork fat. Place the burgers in the hot skillet to sear and sprinkle with the garlic salt. When browned, flip the burgers and place the skillet in a 350-degree oven to finish cooking.

image


At a recent summer garden dinner for 12 of our friends, I wanted to serve my corn and tomato salsa that I featured here a few weeks ago.

We “smuggled” a few treats from a recent visit to Santorini Greece: capers, caper leaves and sun-dried tomatoes. Adding them to fresh corn and tomatoes gave it that salty bite that. I usually use feta cheese in this recipe, but we served a cheese plate as an appetizer, so I left the feta out. Turns out we like it even better this way…

1 dozen fresh ears of corn, lightly sautéed in olive oil
2 dozen (or more) tiny tomatoes, cut in half
1/2 small red onion, finely chopped
2 tablespoons capers
1 tablespoon caper leaves
2 tablespoons finely chopped sun-dried tomatoes
1/4 teaspoon black pepper
2 tablespoons white vinegar
1 tablespoon extra virgin olive oil (in addition to what you saute the corn with)

Slice the kernels of corn off the ears with a sharp knife. Saute them in a little olive oil, just to remove the raw taste. Don’t over cook them!

Combine the corn with all the other ingredients and place in a bowl in the fridge.

Just before serving, let it come back to cool, not cold, and check for seasoning. The capers and caper leaves are salty, so I’m careful not to over-salt.

When it’s Vidalia onion season, I find every excuse in the world to include them in my meals. I slice them thinly and use them raw in salads and saute them in any dish that hits a frying pan. But my favorite way to eat them is right off the grill.

FullSizeRender (6)

I take a couple of Vidalias and I cut the tops off them, leaving the bottom, or root, intact. That holds the onion together. I peel off the outer layer, then carefully quarter the onions, see-sawing my knife down into the bulb until I get to the root, being careful not to cut all the way through.

In a separate bowl, I mix a combination of garlic salt, pepper, paprika, and a bit of brown sugar.

FullSizeRender (4)

I take each onion, and carefully pull the quarters apart and drip some olive oil inside. Then I take some of the seasoning mix and jam it in there, as far down as I can. I coat the outside of the onion with olive oil and seasoning, too.

I light a hardwood charcoal fire and roast the onions over high heat at first to caramelize them, then I move them to a part of the grill away from direct heat, close the lid, and let them cook for a few minutes. Once they’ve cooked enough, I give them one last blast over the hot fire before serving.

FullSizeRender (7)


There’s no problem with your bird, she said to me
Just go low and slow to cook it perfectly
A few choice seasonings end up deliciously
There must be 50 ways to roast your chicken…
There’s nothing better than a whole roasted chicken. Simply season it, pop it in the oven and go low and slow. No maintenance, and you’ve got a great bird in a couple of hours. 
Once you go with humanely raised pastured chicken, you’ll never go back to supermarket chicken again. The flavor is fantastic, and you’ll devour it right down to the bones, which you can use to make the best home-made chicken stock or soup you’ve ever had. Nothing goes to waste.
I roast at least one chicken every week, so to change it up, I’ve come up with many different rubs and sauces over the years. All of the rubs are sugar and gluten-free preparations. The sauces may have one or both.
Chicken with Rosemary and Lemon
 IMG_9146
The lemon serves double-duty in this dish. You use the zest to season the outside skin, then you place the remaining cut up pieces inside the carcass to flavor from the inside out.
1 tablespoon finely chopped fresh rosemary
1 teaspoon granulated garlic
2 teaspoons salt
zest from 2 lemons, using a micro plane zester, the leftover lemons quartered
1/2 teaspoon black pepper
In a bowl, combine the rosemary, garlic, salt, lemon zest, and pepper. 
Thaw a bird, remove the giblets, and rub it all over with olive oil. Shove the quartered lemon pieces into the carcass of the bird. Season the bird inside and out with the rosemary seasoning mix.
Place the bird on a pan lined with non-stick aluminum foil in a pre-heated 450-degree oven. Cook for 10 minutes at this temperature, then reduce to 275 degrees and cook low and slow until done.
Tarragon Chicken
I love the taste of chicken seasoned with tarragon. Careful with this, or you will accidentally devour your fingers!
1 tablespoon dried tarragon, crumbled into a powder
1 teaspoon garlic salt
1 teaspoon salt
1/2 teaspoon black pepper
olive oil
In a bowl, combine the tarragon, garlic salt, salt and pepper.
Thaw a bird, remove the giblets, and rub it all over with olive oil. Season the bird inside and out with the seasoning mix.
Place the bird on a pan lined with non-stick aluminum foil in a pre-heated 450-degree oven. Cook for 10 minutes at this temperature, then reduce to 275 degrees and cook low and slow until done.
Italian Chicken
FullSizeRender
The darker color of the bird comes from rubbing it first with balsamic vinegar, then olive oil, before coating it with Italian seasonings. Don’t use the fancy, expensive balsamic. The bottles that go for about 9 bucks in the supermarket work well for this recipe.
Balsamic vinegar
Olive oil
1 tablespoon salt
1 tablespoon parsley
1 teaspoon oregano
1 teaspoon pepper
1 teaspoon granulated onion
1/2 teaspoon granulated garlic
Thaw a bird, remove the giblets, and rub it all over with the balsamic vinegar. Then rub it all over with the olive oil. Season the bird inside and out with the seasoning mix.
Place the bird on a pan lined with non-stick aluminum foil in a pre-heated 450-degree oven. Cook for 10 minutes at this temperature, then reduce to 275 degrees and cook low and slow until done.
My Grandma’s Chicken
My grandmother would cook chicken thighs low and slow all Saturday morning, knowing that I was coming over for lunch after Lithuanian school. The meat just fell off the bone, and I couldn’t stop eating it. This recipe is so simple and works just as well for a whole bird. Every time I make this, I think about those days at my grandmother’s house.
Lawry’s Seasoned salt
Olive oil
Thaw a bird, remove the giblets, and rub it all over with olive oil. Season the bird inside and out with the Lawry’s Seasoned salt.
Place the bird on a pan lined with non-stick aluminum foil in a pre-heated 450-degree oven. Cook for 10 minutes at this temperature, then reduce to 275 degrees and cook until done.
If you’re using chicken thighs, like my grandmother did, make sure they have the skin on and the bone in.

Not a very complex idea. I just put the stuff that’s usually on the outside, on the inside of my burgers. Why? Why not?

Instead of dealing with a package of bacon and a package of cheese and a stack of burgers, I’ve got all the ingredients conveniently inside the patties. And as the burgers cook, the fat from the bacon and the gooey cheese melt and combine with the burger meat to make a really tasty and moist burger.

I cook these on the grill, but the cast-iron skillet method, described below, works really well,  too.

I make 2 lbs. of burgers at a time, using humanely-raised local grass-fed beef, from my friends at Simmons Organic Farm in Middletown, RI.  Support your local farmers when you can!

image

2 lbs. ground grass-fed beef
1/2 cup sharp cheddar cheese, cut into 1/4″ cubes
1/2 lb. bacon, cooked crisp, cooled and crumbled
garlic salt
avocado oil or pork fat


In a bowl, combine the beef, the cheese and the bacon, mixing well so that all the ingredients are evenly incorporated.

Form the beef into 1/4 lb. patties or larger. Refrigerate them until you’re ready to cook to firm them up.

Heat a cast iron skillet and add a drop of oil or pork fat. Place the burgers in the hot skillet to sear and sprinkle with the garlic salt. When browned, flip the burgers and place the skillet in a 350-degree oven to finish cooking.

image


Bulgogi is the name given to the most common form of Korean barbecue. Unlike the daeji bulgogi that I cooked in my earlier blog, this one is not based on a chili sauce that can take the roof of your mouth right off.

I used chicken, though this would work with pork as well, and for the best flavor, it’s best to marinate the meat in the fridge overnight.

FullSizeRender (12)

2/3 cup soy sauce
1/2 cup chopped scallions
6 tablespoons sugar (I use organic cane sugar)
5 tablespoons fresh garlic, grated or through a garlic press
5 tablespoons sesame oil
1 tablespoon sesame seeds
1 teaspoon black pepper
5 lbs. chicken pieces (skin-on thighs work best)


Combine all the ingredients except for the chicken in a bowl and mix well.

Place the chicken pieces in a large Ziploc bag and pour the marinade in. Seal the bag well and squish it around to make sure the marinade makes contact with the chicken. Place the bag in a bowl (to prevent accidental leakage) and keep it in the fridge overnight. Squish the bag around every few hours to make sure the marinade does its job.

When ready to cook the next day, pre-heat the oven to 350 and remove the bag from the fridge and let it come to room temperature. Place the chicken on a sheet pan (discard the remaining marinade) and bake for an hour.

Light a hot grill and push the coals to one side of the grill. Place the chicken pieces on the cool side of the grill and close the lid, opening the vents. Every few minutes, turn the chicken pieces over so they get nice grill marks but don’t burn.FullSizeRender (11)

I’ve always been fascinated by Korean barbecue. Every time I see it on TV or catch a recipe on an e-mail blast, my mouth waters and I say to myself that I’ve got to experience it some day. But the painful reality is: Korean barbecue can be really spicy…and I’m a total wuss.

Korean barbecue 101: Gogigui means “meat roast” in Korean, and it refers to the method of roasting beef, pork, chicken, and other meats. Meats can be marinated or not. Bulgogi is the name of the most common Korean barbecue. Meat is marinated with soy sauce, sugar, sesame oil, garlic and pepper, and then grilled. Galbi uses beef short ribs, and adds onions to the marinade. And the hot stuff is daeji bulgogi, because the marinade isn’t soy sauce-based, but based on the hot-n-spicy Korean chili paste known as gochujang.

All of the marinades looked delicious, but the hot one with gochujang would be my biggest challenge, so I decided to start there. I found a great recipe, and quickly realized that I would have to turn the heat way down if I was actually going to try to eat it! For example, the original recipe called for 2 tablespoons of white pepper. I totally left it out. And it called for a full cup of gochujang. Not only did I cut that part in half, I doubled many of the other non-spicy ingredients.

So is it authentic Korean barbecue? Probably not. But it’s my version of it. It’s got lots a flavor and still carries a bit of heat.

For gluten-free diets: finding GF hoisin and soy sauce is easy. Look for the La Choy brand. But I haven’t been able to find gochujang that has a GF label.


image


3/4 cup ketchup
1/2 cup gochujang
1/2 cup hoisin sauce (I use gluten-free hoisin)
1/2 cup honey
1/2 cup soy sauce
1/4 cup brown sugar
2 tablespoons freshly grated ginger
1 tablespoon freshly grated garlic (I use a garlic press)
1 tablespoon unseasoned rice vinegar
4 lbs. chicken pieces


Pre-heat the oven to 500 or its top temperature.

In a bowl, mix everything but the chicken pieces. Brush the sauce onto the chicken pieces, then wrap them in aluminum foil. (I like to tear a long piece of aluminum foil and lay it on top of a sheet pan. I place the chicken pieces on the foil, brush them with sauce on all sides, then fold the foil over the chicken, making one large pouch that holds all the meat.) Leave the pouch on the sheet pan and place it in the oven. Lower the oven temp to 350.

Cook the chicken for about an hour, making sure it’s almost completely cooked. Juices should run clear, not bloody, when you poke it with a fork.

Start a hardwood fire on your grill. Push the coals to one side of the grill so you have a hot side and a cooler side with no coals underneath it. Place the chicken pieces on the cool side of the grill (if you put it on the hot side, it will stick and burn), brush with more sauce, and put the lid on the grill, making sure you have the vents open for air circulation.

image

See those 2 black bits in the foreground? That’s where the chicken stuck to the grill because I placed them over the hot coals. Don’t do that.

After a few minutes, lift the lid, flip the chicken pieces over, brush them with sauce again, and close the lid. Keep doing this until the chicken is nice and caramelized, with tasty grill marks.

If you want to serve some of the sauce on the side, it’s important to pour some of the sauce off and set it aside in the very beginning, so you’re not using the same sauce that the basting brush touched the raw chicken with.


Beef flap or flap steak is a cut from the lower sirloin. It’s a long, thin cut that resembles skirt steak or hanger steak, though they come from a different part of the animal.

You can stuff and roll a beef flap, as I did in a previous blog, but it’s really hard to beat the flavor of a slab of beef that was simply marinated and thrown on the grill.

Though the beef flap is a relatively thin piece of meat, I carefully butterfly it by slicing it lengthwise with a sharp knife, to get 2 thinner pieces that really absorb the marinade.

grill3


1 lb. (or more!) beef flap steak, sliced lengthwise
2 tablespoons balsamic vinegar (red wine vinegar works just as well)
4 tablespoons extra virgin olive oil
1 teaspoon oregano
1 teaspoon parsley
1/2 teaspoon granulated garlic
1/2 teaspoon granulated onion
salt and pepper

rill2

To make the marinade, combine everything but the beef in a bowl and whisk to mix thoroughly. Place the beef in a large Ziploc bag and add the marinade. Squeeze the bag so that the marinade reaches every part of the beef. Squeeze the air out of the bag, zip it tightly, and place it in a bowl (in case of accidental spillage) in the fridge. Let it marinate overnight, squeezing the bag every few hours to let the marinade do its job. Remove the bag from the fridge about an hour before grilling so the meat comes to room temperature.

Light a hardwood fire. When the coals are really hot, place the steak on the grill and sear each side. Then flip to sear the other side. Flip again to get those fancy diamond marks on the beef. Then flip again.

grill1

The meat has little fat, so it should be nicely seared on the outside, but still medium-rare on the inside. Let it rest before slicing. When slicing, cut the beef on an angle against the grain.