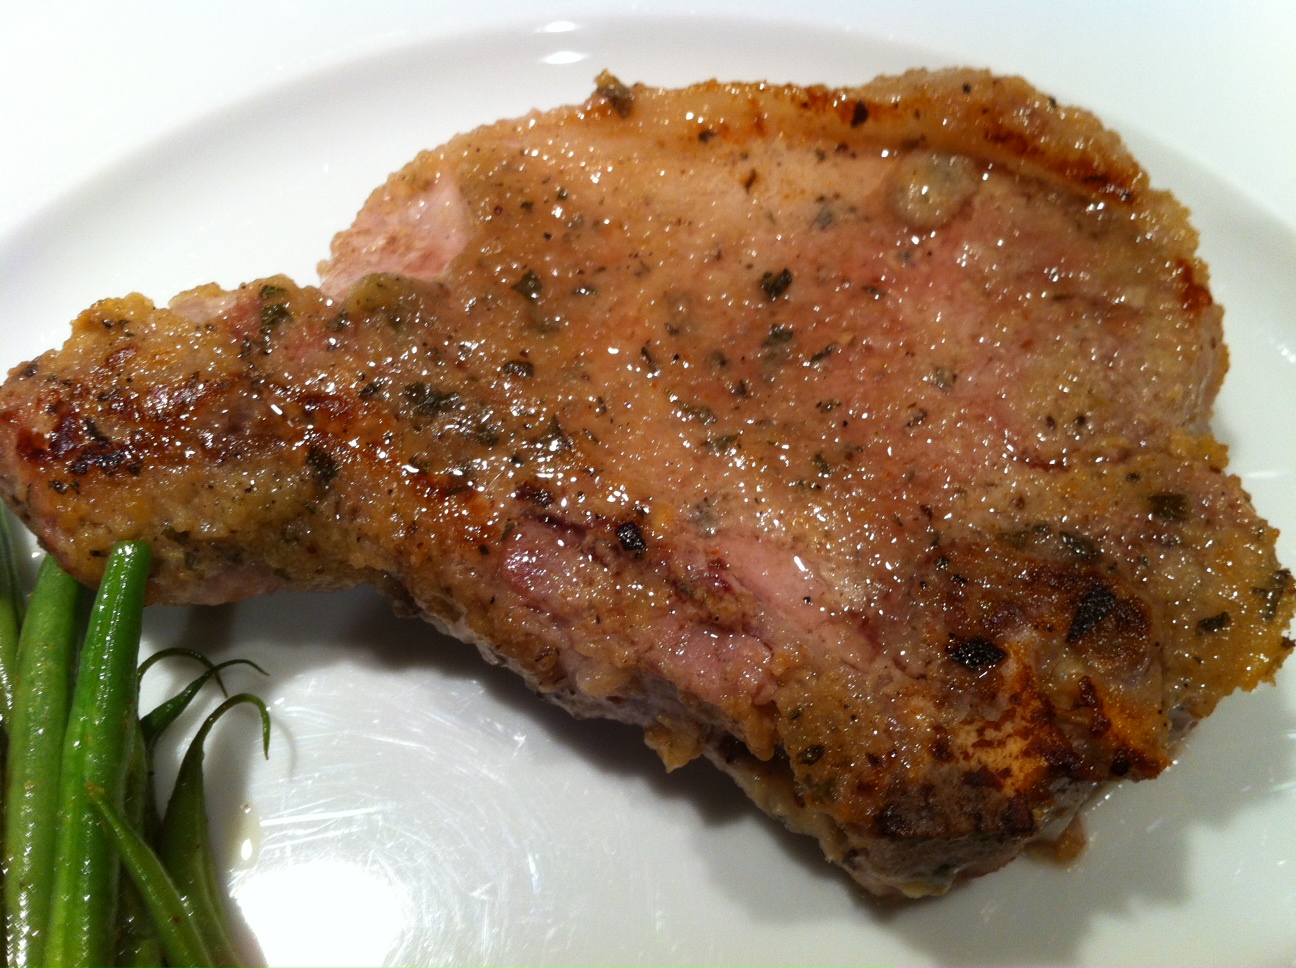
Archive for the ‘pork’ Category

When my daughter hangs out with me, I always ask her what she wants me to cook for her, and there are a few “Dad” recipes that are her favorites. This is one of them, especially when fresh asparagus is available. And as any parent will tell you, if your kid is craving a dish that has vegetables in it, count yourself lucky–and make it!!
Prepping asparagus is easy, and you don’t need a knife to cut off the woody bottoms of the stalks. Simply bend the stalks at the bottom and they will naturally snap off at the right point.
4 mild Italian sausages, sliced into pieces 1/2″ thick
1 lb. penne pasta
1/2 onion, finely chopped
1 cup chopped fresh trumpet mushrooms (white button mushrooms work, too), optional
2 cups fresh asparagus, sliced into 1-inch pieces
1 clove garlic, passed through a garlic press
1 cup homemade chicken broth
6 fresh sage leaves, finely chopped
1/2 cup freshly grated Parmigiano Reggiano cheese
extra virgin olive oil
salt and pepper
Have the pasta water salted and boiling, and add the pasta, cooking until just a bit more undercooked than al dente.
Heat a large pan, and drizzle in some olive oil. Sauté the sausage pieces until browned and cooked through, but not overcooked. Remove the sausages from the pan and place them in a separate bowl. Remove all but 2 tablespoons of the fat left behind in the pan.
Place the pan back on stove and sauté the onion until translucent. Add the garlic, and sauté for 10 seconds. Add the sage, and saute for 10 seconds, stirring. Add the chopped mushrooms and saute for a few minutes, then add the chicken broth, and simmer until almost all the liquid has evaporated. Pour the contents of the pan into the bowl with the sausages.
Return the pan to the stove, add a little more olive oil, and on medium heat, sauté the asparagus pieces. Cook them until they are al dente, not too soft. Once the asparagus has reached this stage, return all the contents of the sausage/mushroom bowl to the pan to heat through. Drain the pasta, and add it to the pan as well, combining all the ingredients. If it looks too dry, add a little pasta water to the pan. Season with salt and pepper.
Make sure you serve this hot, with grated Parmigiano Reggiano on top, and drizzle lightly over the top with extra virgin olive oil.

Sometimes the happiest of cooking accidents happen with bacon. My original plan was to make Chinese-style honey ribs for dinner. But instead of pulling a nice rack of ribs out of the freezer, I accidentally took out a slab of pork belly. I only realized my mistake after I thawed it, so I decided to use it! The results were pretty damn tasty.

I like maple syrup instead of honey, but use what you like!

image

Marinade:
¾ cup light soy sauce
6 Tablespoons hoisin sauce
5 lbs. pork belly
Zest and juice of 1 lemon
2 whole star anise
2 cinnamon sticks (3”)
1/2 cup honey or maple syrup
4 cups chicken broth (preferably homemade)
image
Pre-heat the oven to 350 degrees.
Mix the marinade ingredients. Set them aside.
Cut the pork belly into pieces that are about 2 inches square. Place them in a large pot. Cover them with water and bring the pot to a boil. Boil it for 5 minutes. Drain the water.
Place the warm pork belly pieces on a sheet pan lined with non-stick aluminum foil. Coat them with the marinade. Let them sit for 10 minutes.
Bake the pork belly pieces on the sheet pan in the oven for 30 minutes.
While the pork belly is baking, start the sauce in a large non-stick pan or pot: combine the lemon zest and juice, star anise, cinnamon sticks, maple syrup or honey, and chicken broth. Bring it to a boil, then reduce it to a simmer.
When the pork belly pieces have finished baking, add them to the sauce pot, lowering the heat to a simmer. Simmer (covered) for about 15 minutes or until meat is tender.
Turn the heat back on high, uncover the pot and cook until the sauce has reduced to a glaze that coats the meat. Reduce the heat as the sauce thickens to avoid the sugars in the syrup or honey from burning. When the pieces are sticky and gooey, they are ready!
Devour them just like that!
If you have leftovers, let the pork belly cool, then slice the pieces it to your desired thickness and fry them like regular bacon. They’re great with eggs!
image

A LOOK AT GMO’S

Posted: May 10, 2024 in beef, Carnivore!, chicken, Food, pork
Tags: , , , , ,

The controversy over the positives and negatives of GMO’s continues, and I found an old blog from many years ago that I think is worth repeating. I think people that don’t think GMO’s are a bad deal probably don’t completely understand the situation.

My friends at FireFly Farms in Stonington, Connecticut, understood GMO’s better than most. Family owned and certified humane, they raised heritage breeds of pork, pastured chickens, and rare cattle.

Max Mule, by Kelly Milukas

Max Mule, by Kelly Milukas

This was a post from the past on FireFly owner Van Brown’s Facebook page. I’m reprinting with his permission. It’s simple and to the point.

Hi everyone.

I have been thinking about the debate on GMO’s and labeling.

A lot.

Let’s imagine a world where there are two types of pudding cups.

The Blue Pudding Cup definitely will not hurt your kid.

The corporation that makes The Red Pudding Cup states that all the negative tests about The Red Pudding Cup are wrong and they have made lots of tests themselves showing that The Red Pudding cup is okay.

You know The Blue Pudding Cup is safe. There are tests both ways, remembering that many of the tests were funded by The Red Pudding Cup Corporation, so the best you can know is The Red Pudding Cup pudding will probably not hurt your kid. At least according to The Red Pudding Cup Corporation.

Which pudding cup would you buy to feed to your child?

One last thought…

Would it be okay for The Red Pudding cup to put their pudding into a Blue Pudding Cup so no one would know which type of pudding they are feeding their children… your children?
Van

Our 5th annual BOYZ weekend has just come to an end, and it’s always a big deal. Three of us live in Rhode Island, two in New Jersey, and one in Florida, so getting together is no easy task, and it seems to get tougher every year.

So we celebrate our friendship every year with excellent food and drink.

This is a rich, delicious, and unusual surf-and-turf I cooked as the featured dinner, using heritage Berkshire pork belly and beautiful sea scallops. Berkshire pork is usually only found online, so substituting a regular pork belly from your local butcher will do. But the fat and flavor of Berkshire pork is the stuff of legends! I buy my Berkshire pork from heritage pork.com, and the belly comes in an 8-lb. slab that I cut in half. I was cooking for 6 hungry dudes, and so a 4-lb. piece was needed. (The other 4-lb. piece will become amazing bacon later on.)


FullSizeRender (9)

For the pork belly…
3–4 lbs. fresh pork belly
salt and pepper
1–2 tablespoons leaf lard or olive oil
1 carrot, coarsely chopped
1 celery stalk, coarsely chopped
1 onion, roughly chopped
1 fennel bulb, quartered
2 sprigs fresh thyme
1 teaspoon black peppercorns
4 cups beef stock
1 cup hard cider or apple juice

I cook the pork belly a couple of days ahead of time.

Pre-heat the oven to 350.

Season the belly with salt and pepper. On medium-high heat, melt the leaf lard, then sear the meat on all sides in an oven-proof pot big enough to hold it in one layer. Add the carrot, celery, onion, fennel, thyme and peppercorns and continue cooking for another 5 minutes, until caramelized.

Add the beef stock and the cider. Cover the pot with a lid or seal it with aluminum foil, and braise the belly in the oven for 3 hours, until tender.

Remove the pot from the oven, carefully remove the pork belly, and put it on a plate. Cover it with foil, ;eating it cool. When it has cooled completely, wrap it well in plastic and place it in the fridge.

Strain the leftover braising liquid from the pot and discard the vegetables and thyme. Place the liquid in a container in the fridge. The fat will float to the top and harden, making it easier to remove. (I save the fat and use it for cooking later–not only for this dish, but others, as well. Berkshire pork fat is too valuable to just throw away!)

But now that the fat has been removed, the braising liquid is all flavor, and no fat.


FullSizeRender (8)

For the glaze…
braising liquid, strained
1 tablespoon espresso
1 tablespoon honey

When you’re ready to cook for your guests, reduce the brazing liquid by half in a small saucepan, then add the espresso and honey. (Feel free to substitute maple syrup for the honey. This time around, I used some shagbark hickory syrup that I bought in Vermont earlier in the year.) Cook a few more minutes until the sauce thickens. When it coats the back of a spoon, it’s ready. Set it aside.

For the scallops…
Fresh scallops
salt and pepper

About an hour before cooking the scallops, remove the pork belly from the fridge to let it come to room temperature.

When you’re ready to serve, heat a large pan on high heat, using leaf lard or the fat from the braising liquid. Cut the belly into equal pieces and sear them on all sides for about a minute, making sure it’s warmed through. Place the scallops in the same pan, seasoning with salt and pepper, and sear them on both sides, being careful not to overcook them.

To serve, place the belly on a plate. Top it with a scallop or two. Drizzle the glaze over the top. Season with Fleur de Sel or other finishing salt and serve it immediately.


The boyz were happy!


I love these ribs. They’re one of the the first recipes I ever tried, and still one of my favorites. I’ll be making them again this weekend!
 
I like making these because you don’t need a grill or a smoker. They’re gooey, sweet and absolutely delicious!
 
 
 image
 
¾ cup soy sauce
 1/4 cup hoisin sauce
5 lbs. pork ribs
Zest and juice of 1 lemon
2 whole star anise
2 cinnamon sticks (3”)
1/2 cup honey
4 cups chicken broth
 
Mix the soy sauce and the hoisin in a bowl, and set it aside. These are the marinade ingredients.
 
If the ribs are large, cut them into individual pieces. If they’re smaller, cluster 2 or 3 ribs together. Place them in a large pot. Cover them with water and bring it to a boil. Boil for 5 minutes. Drain the water.
 
Place the warm ribs on a baking sheet lined with non-stick aluminum foil or with a rack and brush them with the marinade. Let them sit for 10 minutes.
 
Pre-heat the oven to 350 degrees. Bake the ribs on the baking sheet for 30 minutes.
 
While the ribs are baking, start the sauce in a large non-stick pan or pot that will hold all the ribs: combine the lemon zest and juice, star anise, cinnamon sticks, honey and chicken broth. Bring it to a boil, then reduce it to a simmer.
 
When the ribs have finished baking, add them to the sauce pot and simmer on low (covered) for at least 15 minutes or until the rib meat is tender.
 
Turn the heat on high, uncover the pot and cook until the sauce is reduced to a glaze that coats the ribs. Be sure to reduce the heat as the sauce thickens or the sugars in the honey will burn! When the ribs are sticky and gooey, they’re ready.
 
Substituting grapefruit for the lemon works really well. And I like to switch the honey for maple syrup! 


Few dishes scream out “comfort food” like meatloaf. My Mom’s meatloaf was awesome, and she’d cut a huge slab of it onto my plate, with fantastic butter-loaded Pennsylvania Dutch egg noodles on the side. I couldn’t stop eating it.

I never thought of making meatloaf when I moved away, because it gave my Mom something special to make for me when I came home to visit. She was thrilled that there was a dish she could make that I would devour every time, without hesitation. (The others were her roasted lamb and Lithuanian pierogis called koldūnai (kol-doon-ay).

But Mom has passed away years ago, so I’ve taken meatloaf matters into my own hands. I never got my Mom’s exact recipe. But I had an idea of what went into it, so I gave it a shot.

The standard mix for my Mom’s meatloaf was one-third each ground beef, pork and veal. I go 2/3’s beef and 1/3 pork instead, unless I can get my hands on humanely-raised veal from a farm down the road. My Mom used Lipton onion soup mix in her meatloaf. I chose to stay away from packaged ingredients which have chemicals and preservatives. And instead of layering slices of bacon on top as many people do, I fry and chop the bacon and mix it into the meat, giving my meatloaf delicious smokey bacon goodness in every bite!

To keep this dish gluten-free, I use GF breadcrumbs. I buy loaves of Udi’s frozen gluten-free bread, toast the bread slices, then put them in a food processor to make great-tasting bread crumbs that have all the flavor of regular bread crumbs, without the gluten.

image

4 strips bacon, fried and chopped
1 yellow onion, minced
1 teaspoon salt
1/2 teaspoon pepper
1/2 teaspoon granulated garlic
pork fat or olive oil
2 lbs. ground beef
1 lb. ground pork
1 cup breadcrumbs
1/2 cup ketchup
2 eggs

Fry the strips of bacon until crisp. Remove the bacon from the pan and chop it fine. Set it aside.

Keeping the rendered bacon fat in the pan, sauté the onion with it until translucent. Add the salt, pepper and garlic. Set the pan aside, letting it cool to room temperature.

In a bowl, combine the meat, bread crumbs, ketchup, bacon, eggs, and the sautéed onion mixture. Form it into a loaf and place it in a loaf pan. Bake at 350 for about an hour.

Delicious, caramelized meatloaf. Leftovers are always welcome!

This was my most popular blog post from a decade ago. Thought I’d re-run it…

Food magazines and cooking shows are pretty obvious places to be inspired by new recipes from common ingredients. But I’ve found inspiration from some strange places, including old TV sitcoms. I had some nice thick pork chops thawed, and I was trying to think of something new to do with them. The classic “pork chops and applesauce” episode of The Brady Bunch was on TV that afternoon. I looked in the pantry, found a small container of my daughter’s applesauce, and came up with this recipe.

The applesauce and honey create a tasty crust.

pork chop 2

2 nice, thick cut pastured pork chops
1 small tub (4oz.) unsweetened apple sauce
1 tablespoon fresh sage, finely chopped
A few sprigs of fresh thyme–leaves only–finely chopped
1 teaspoon honey
1 teaspoon salt
1/2 teaspoon granulated garlic
1/4 teaspoon fresh cracked black pepper

In a small bowl, combine everything but the pork chops.

Smear this applesauce mix all over the pork chops, place them in a non-reactive covered container in the fridge, and let them marinate overnight.

The next day, make sure all the gooey applesauce mix gets re-smeared on the chops. You want it nice and thick on the meat.

Pre-heat the oven to 350 degrees.

On the stove top, heat an oven-proof pan on medium. Use a little olive oil. Place the chops in the pan gooey side down, then re-smear with any leftover applesauce on what is now the top side. Let the first side sear to a golden brown before flipping the chops over. Be careful not to let them burn from the sugars in the applesauce and honey.

Once you’ve flipped the chops, place the pan in the oven. Cook the pork chops until just pink. (It’s no longer necessary to cook pork to death like our parents used to do. The safe temp is 145 degrees.)

It’s National Bacon Day!

Let’s face it: there are few foods as magical as bacon. Add bacon to just about any dish you’re preparing, and it elevates it to incredible new heights of flavor. The BLT is possibly the greatest food combination ever invented: just a few simple, fresh ingredients, when placed together, transforming into one of the greatest sandwiches on planet Earth.

BLT wraps: home-cured and smoked bacon, local farmstead romaine, home garden tomatoes, always Hellman’s mayo.

If I’m buying bacon, I go on-line to Burger’s Smokehouse, a family run business in Missouri that has made great bacon for decades. The prices are good, and they include shipping. (www.smokehouse.com) I buy in quantity and freeze what I don’t need right away. My favorite is the thick-sliced country bacon “steaks.”

But nothings beats making your own.

Bacon comes from the pork belly, and they’re easy to find in any good butcher shop. But to get something a notch above, I’ll buy a heritage breed, like Berkshire pork, from Heritage Pork International. (www.heritagepork.com)  I follow the simple curing techniques outlined in “Charcuterie,” a great book written by Michael Ruhlman and Brian Polcyn.

To cure bacon, all you really need is salt and sugar, and what they in the curing biz call “pink salt,” which is not to be confused with salt that happens to be pink, like Himalayan salt you would find in a gourmet store. Pink salt is bright pink to let you know that it’s a special salt that should only be used in small quantities for curing. The reason is: nitrites. Nitrites delay the spoilage of the meat, and help keep the flavors of spices and smoke. They also keep the meat nice and pink instead of an unappetizing gray. That’s good. However, nitrites can break down into nitrosamines, which have been known to cause cancer in lab animals. But let’s face it: you would need to eat a ton of cured meat to really worry about this. (I buy uncured deli meats and hot dogs at the supermarket, because processed meats are a different story. But since I know exactly what goes into my own bacon, I’m not worried about the level of nitrites.)

To make the basic dry cure:

1/2 lb. kosher salt (I use Diamond Crystal Kosher salt)
1/2 cup light brown sugar or turbinado sugar
1 oz. pink curing salt

Mix the ingredients well. An important note: all salts do not all weigh the same, so go by the weight and not a cup measurement. (Morton’s Kosher salt, for example, is heavier than Diamond Crystal.) I keep this basic dry cure stored in my pantry, ready to use when I need it.

When it’s time to be makin’ the bacon, I combine this dry cure with other ingredients to make my bacon rub.

My bacon rub:

1/2 cup basic dry cure
1/2 cup brown sugar or turbinado sugar
1 tablespoon fresh cracked black pepper
1 tablespoon granulated garlic
1 tablespoon granulated onion

Mix these ingredients well (yes, there’s quite a bit of sugar there, but I like my bacon a little sweet!) Rub it generously all over the pork belly.

I have a large plastic container with a lid that fits one slab of pork belly perfectly. I place the belly inside it, put the lid on, and place the container in the fridge. The pork belly stays there for at least a couple of weeks, maybe three. I flip the belly every few days. You’ll see that the salt will draw moisture out of the meat and form a gooey brine. This brine will continue to cure your pork belly, so leave it in there. Just flip it, put the lid back on the container, and back in the fridge.

In two or three weeks, you’ll be able to tell the pork belly has cured because it feels firm. Wash the brine off the meat well with cold water, and pat it dry with paper towels. Place the belly in the fridge for an hour or so and it will develop a tackiness to the touch. This is a thin layer of proteins known as a pelicle, and it helps the smoke stick to the meat.

Now it’s time to cook. You can simply cook the pork belly (without smoking it) at 200 degrees for about 2 hours, until the internal temperature reaches 160 degrees. But this isn’t bacon…it’s pancetta.

I place the pork belly in my digital smoker, which allows me to set an exact temperature. I smoke it at 250 degrees for 2 hours, using hickory chips. Now it’s bacon.

Bellies in the smoker

Bellies in the smoker.

Smoked bacon

Beautiful bacon!

That’s it. You have achieved bacon!

The reward is so worth the effort. Just remember that you still need to slice the bacon and fry it. Don’t eat it straight out of the smoker. That first slice you cut off your bacon and toss in a pan to lightly fry for a few moments will be the best bite you’ve ever had in your life!
And if you’re making one slab of bacon, why not make it three or four? It freezes well. And…you will eat it. You know you will!

Frying in the pan!

Frying in the pan!

This is a rich, delicious, and unusual surf-and-turf, using wild Texas boar (I got it as a gift from my buddy, Dr. Chezwick!) and locally caught Rhode Island scallops. Wild boar is an ingredient usually only found online, so substituting pork belly, which you can find at your local butcher shop, is a great alternative.


FullSizeRender (9)

For the pork belly…
3 lbs. fresh pork belly
salt and pepper
1–2 tablespoons leaf lard or olive oil
1 carrot, coarsely chopped
1 celery stalk, coarsely chopped
1 onion, roughly chopped
1 fennel bulb, quartered
2 sprigs fresh thyme
1 teaspoon black peppercorns
4 cups beef stock
1 cup hard cider or apple juice

Pre-heat the oven to 350.

Season the belly with salt and pepper. On medium-high heat, melt the leaf lard, then sear the meat on all sides in an oven-proof pot big enough to hold it in one layer. Add the carrot, celery, onion, fennel, thyme and peppercorns and continue cooking for another 5 minutes, until caramelized.

Add the beef stock and the cider. Cover the pot with a lid or seal it with aluminum foil, and braise the belly in the oven for 3 hours, until tender.

Remove the pot from the oven, carefully remove the pork belly, and put it on a plate. Cover it with foil. If you’re cooking earlier in the day, you can place the belly in the fridge at this point.

Strain the leftover braising liquid from the pot and discard the vegetables and thyme. Skim off the excess fat. If you’re starting this dish earlier in the day, you can put this liquid in the fridge and the fat will harden, making it easier to remove.


FullSizeRender (8)

For the glaze…
braising liquid, strained
1 tablespoon espresso
1 tablespoon honey

In a small saucepan, reduce the brazing liquid by half, then add the espresso and honey. Cook a few more minutes until the sauce thickens. When it coats the back of a spoon, it’s ready. Set it aside.

For the scallops…
Fresh scallops
salt and pepper

When you’re ready to serve, heat a pan on high heat with a little more leaf lard. Cut the belly into equal pieces and sear them on all sides for about a minute. Place the scallops in the same pan, seasoning with salt and pepper, and sear them on both sides, being careful not to overcook them.

To serve, place the belly on a plate. Top it with a scallop or two. Drizzle the glaze over the top. Season with Fleur de Sel or other finishing salt and serve it immediately.

Despite gardening for almost 50 years, I sowed and harvested my first batch of fennel last season. Having received a recent shipment of heritage Berkshire pork chops, I thought it was time to get creative. This is a rustic Italian-style recipe that works great for pork and fennel…

fennelfrond


4 good quality pork chops, medium thickness
2 fennel bulbs with stems and fronds, finely chopped
2 shallots, finely chopped
1/2 cup fresh parsley, chopped
olive oil
salt and pepper
1 28 oz. can tomatoes
1 tablespoon capers
Zest of 1 lemon
1/2 cup dry white wine


pork and fennel


In a large pan, heat some olive oil. Season the pork chops on both sides with salt and pepper, then brown them on both sides in the pan with the olive oil. Remove the chops from the pan and set them aside.

Add a little more olive oil to the pan and add the chopped fennel and shallots, stirring for a few minutes. Add the white wine, and stir well to get the tasty bits of pork from the bottom of the pan. Add half of the parsley. Add the can of tomatoes, squishing the tomatoes between your fingers so that they are broken up when they hit the pan. Stir for a few minutes over medium heat.

Return the pork chops to the pan, nestling them in the sauce. Add the capers, lemon zest and remaining parsley. Stir everything together a bit, and then let the chops cook for about 10 to 15 minutes, until their internal temperature reads 145 degrees.