Archive for the ‘pork’ Category

Few dishes scream out “comfort food” like meatloaf. My Mom’s meatloaf was awesome, and she’d cut a huge slab of it onto my plate, with fantastic butter-loaded Pennsylvania Dutch egg noodles on the side. I couldn’t stop eating it.

I never thought of making meatloaf when I moved away, because it gave my Mom something special to make for me when I came home to visit. She was thrilled that there was a dish she could make that I would devour every time, without hesitation. (The others were her roasted lamb and Lithuanian pierogis called koldūnai (kol-doon-ay).

But Mom has passed away years ago, so I’ve taken meatloaf matters into my own hands. I never got my Mom’s exact recipe. But I had an idea of what went into it, so I gave it a shot.

The standard mix for my Mom’s meatloaf was one-third each ground beef, pork and veal. I go 2/3’s beef and 1/3 pork instead, unless I can get my hands on humanely-raised veal from a farm down the road. My Mom used Lipton onion soup mix in her meatloaf. I chose to stay away from packaged ingredients which have chemicals and preservatives. And instead of layering slices of bacon on top as many people do, I fry and chop the bacon and mix it into the meat, giving my meatloaf delicious smokey bacon goodness in every bite!

To keep this dish gluten-free, I use GF breadcrumbs. I buy loaves of Udi’s frozen gluten-free bread, toast the bread slices, then put them in a food processor to make great-tasting bread crumbs that have all the flavor of regular bread crumbs, without the gluten.

image

4 strips bacon, fried and chopped
1 yellow onion, minced
1 teaspoon salt
1/2 teaspoon pepper
1/2 teaspoon granulated garlic
pork fat or olive oil
2 lbs. ground beef
1 lb. ground pork
1 cup breadcrumbs
1/2 cup ketchup
2 eggs

Fry the strips of bacon until crisp. Remove the bacon from the pan and chop it fine. Set it aside.

Keeping the rendered bacon fat in the pan, sauté the onion with it until translucent. Add the salt, pepper and garlic. Set the pan aside, letting it cool to room temperature.

In a bowl, combine the meat, bread crumbs, ketchup, bacon, eggs, and the sautéed onion mixture. Form it into a loaf and place it in a loaf pan. Bake at 350 for about an hour.

Delicious, caramelized meatloaf. Leftovers are always welcome!

This was my most popular blog post from a decade ago. Thought I’d re-run it…

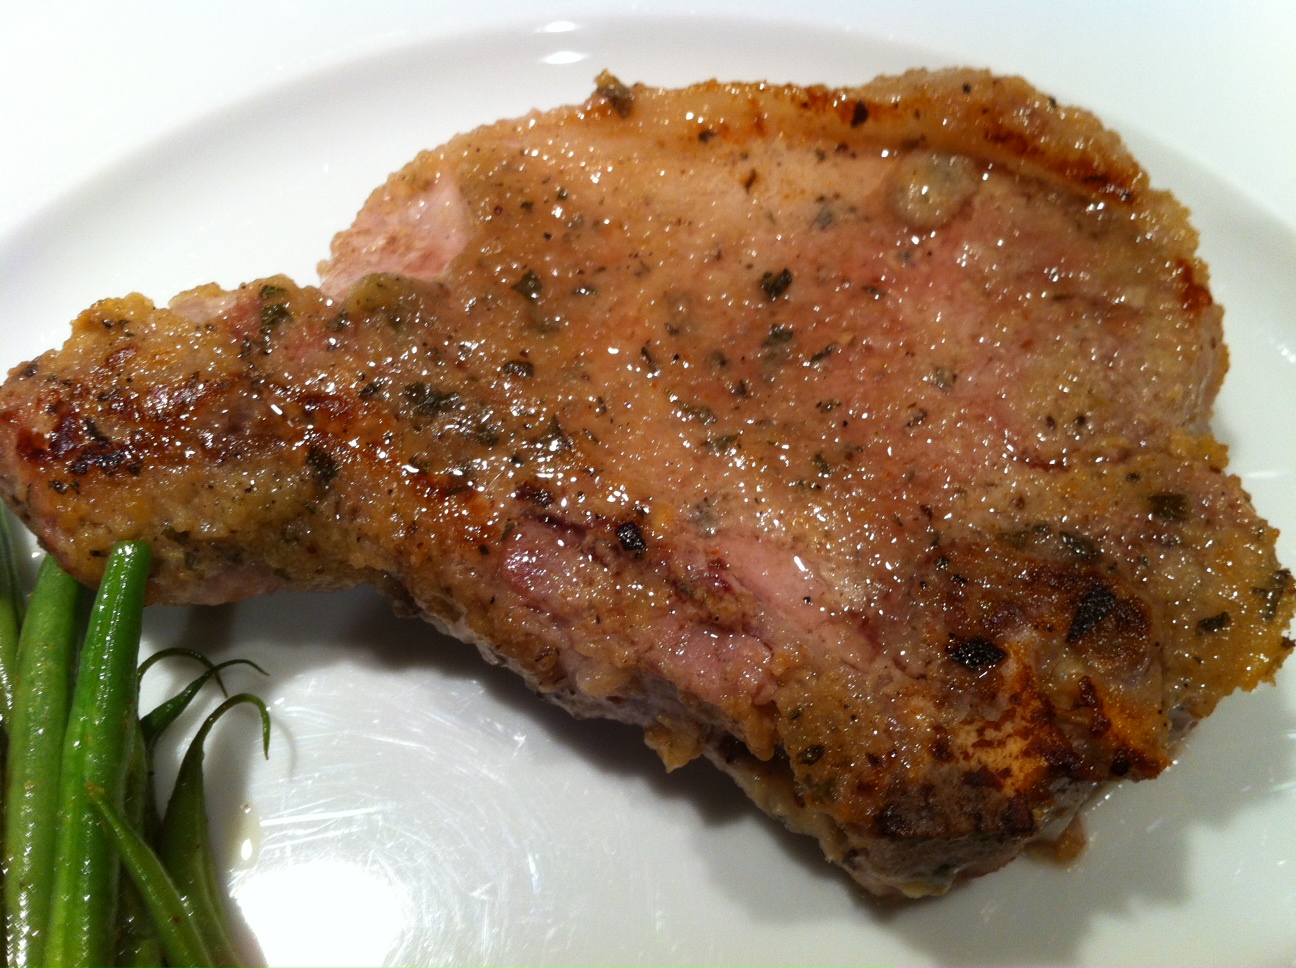
Food magazines and cooking shows are pretty obvious places to be inspired by new recipes from common ingredients. But I’ve found inspiration from some strange places, including old TV sitcoms. I had some nice thick pork chops thawed, and I was trying to think of something new to do with them. The classic “pork chops and applesauce” episode of The Brady Bunch was on TV that afternoon. I looked in the pantry, found a small container of my daughter’s applesauce, and came up with this recipe.

The applesauce and honey create a tasty crust.

pork chop 2

2 nice, thick cut pastured pork chops
1 small tub (4oz.) unsweetened apple sauce
1 tablespoon fresh sage, finely chopped
A few sprigs of fresh thyme–leaves only–finely chopped
1 teaspoon honey
1 teaspoon salt
1/2 teaspoon granulated garlic
1/4 teaspoon fresh cracked black pepper

In a small bowl, combine everything but the pork chops.

Smear this applesauce mix all over the pork chops, place them in a non-reactive covered container in the fridge, and let them marinate overnight.

The next day, make sure all the gooey applesauce mix gets re-smeared on the chops. You want it nice and thick on the meat.

Pre-heat the oven to 350 degrees.

On the stove top, heat an oven-proof pan on medium. Use a little olive oil. Place the chops in the pan gooey side down, then re-smear with any leftover applesauce on what is now the top side. Let the first side sear to a golden brown before flipping the chops over. Be careful not to let them burn from the sugars in the applesauce and honey.

Once you’ve flipped the chops, place the pan in the oven. Cook the pork chops until just pink. (It’s no longer necessary to cook pork to death like our parents used to do. The safe temp is 145 degrees.)

It’s National Bacon Day!

Let’s face it: there are few foods as magical as bacon. Add bacon to just about any dish you’re preparing, and it elevates it to incredible new heights of flavor. The BLT is possibly the greatest food combination ever invented: just a few simple, fresh ingredients, when placed together, transforming into one of the greatest sandwiches on planet Earth.

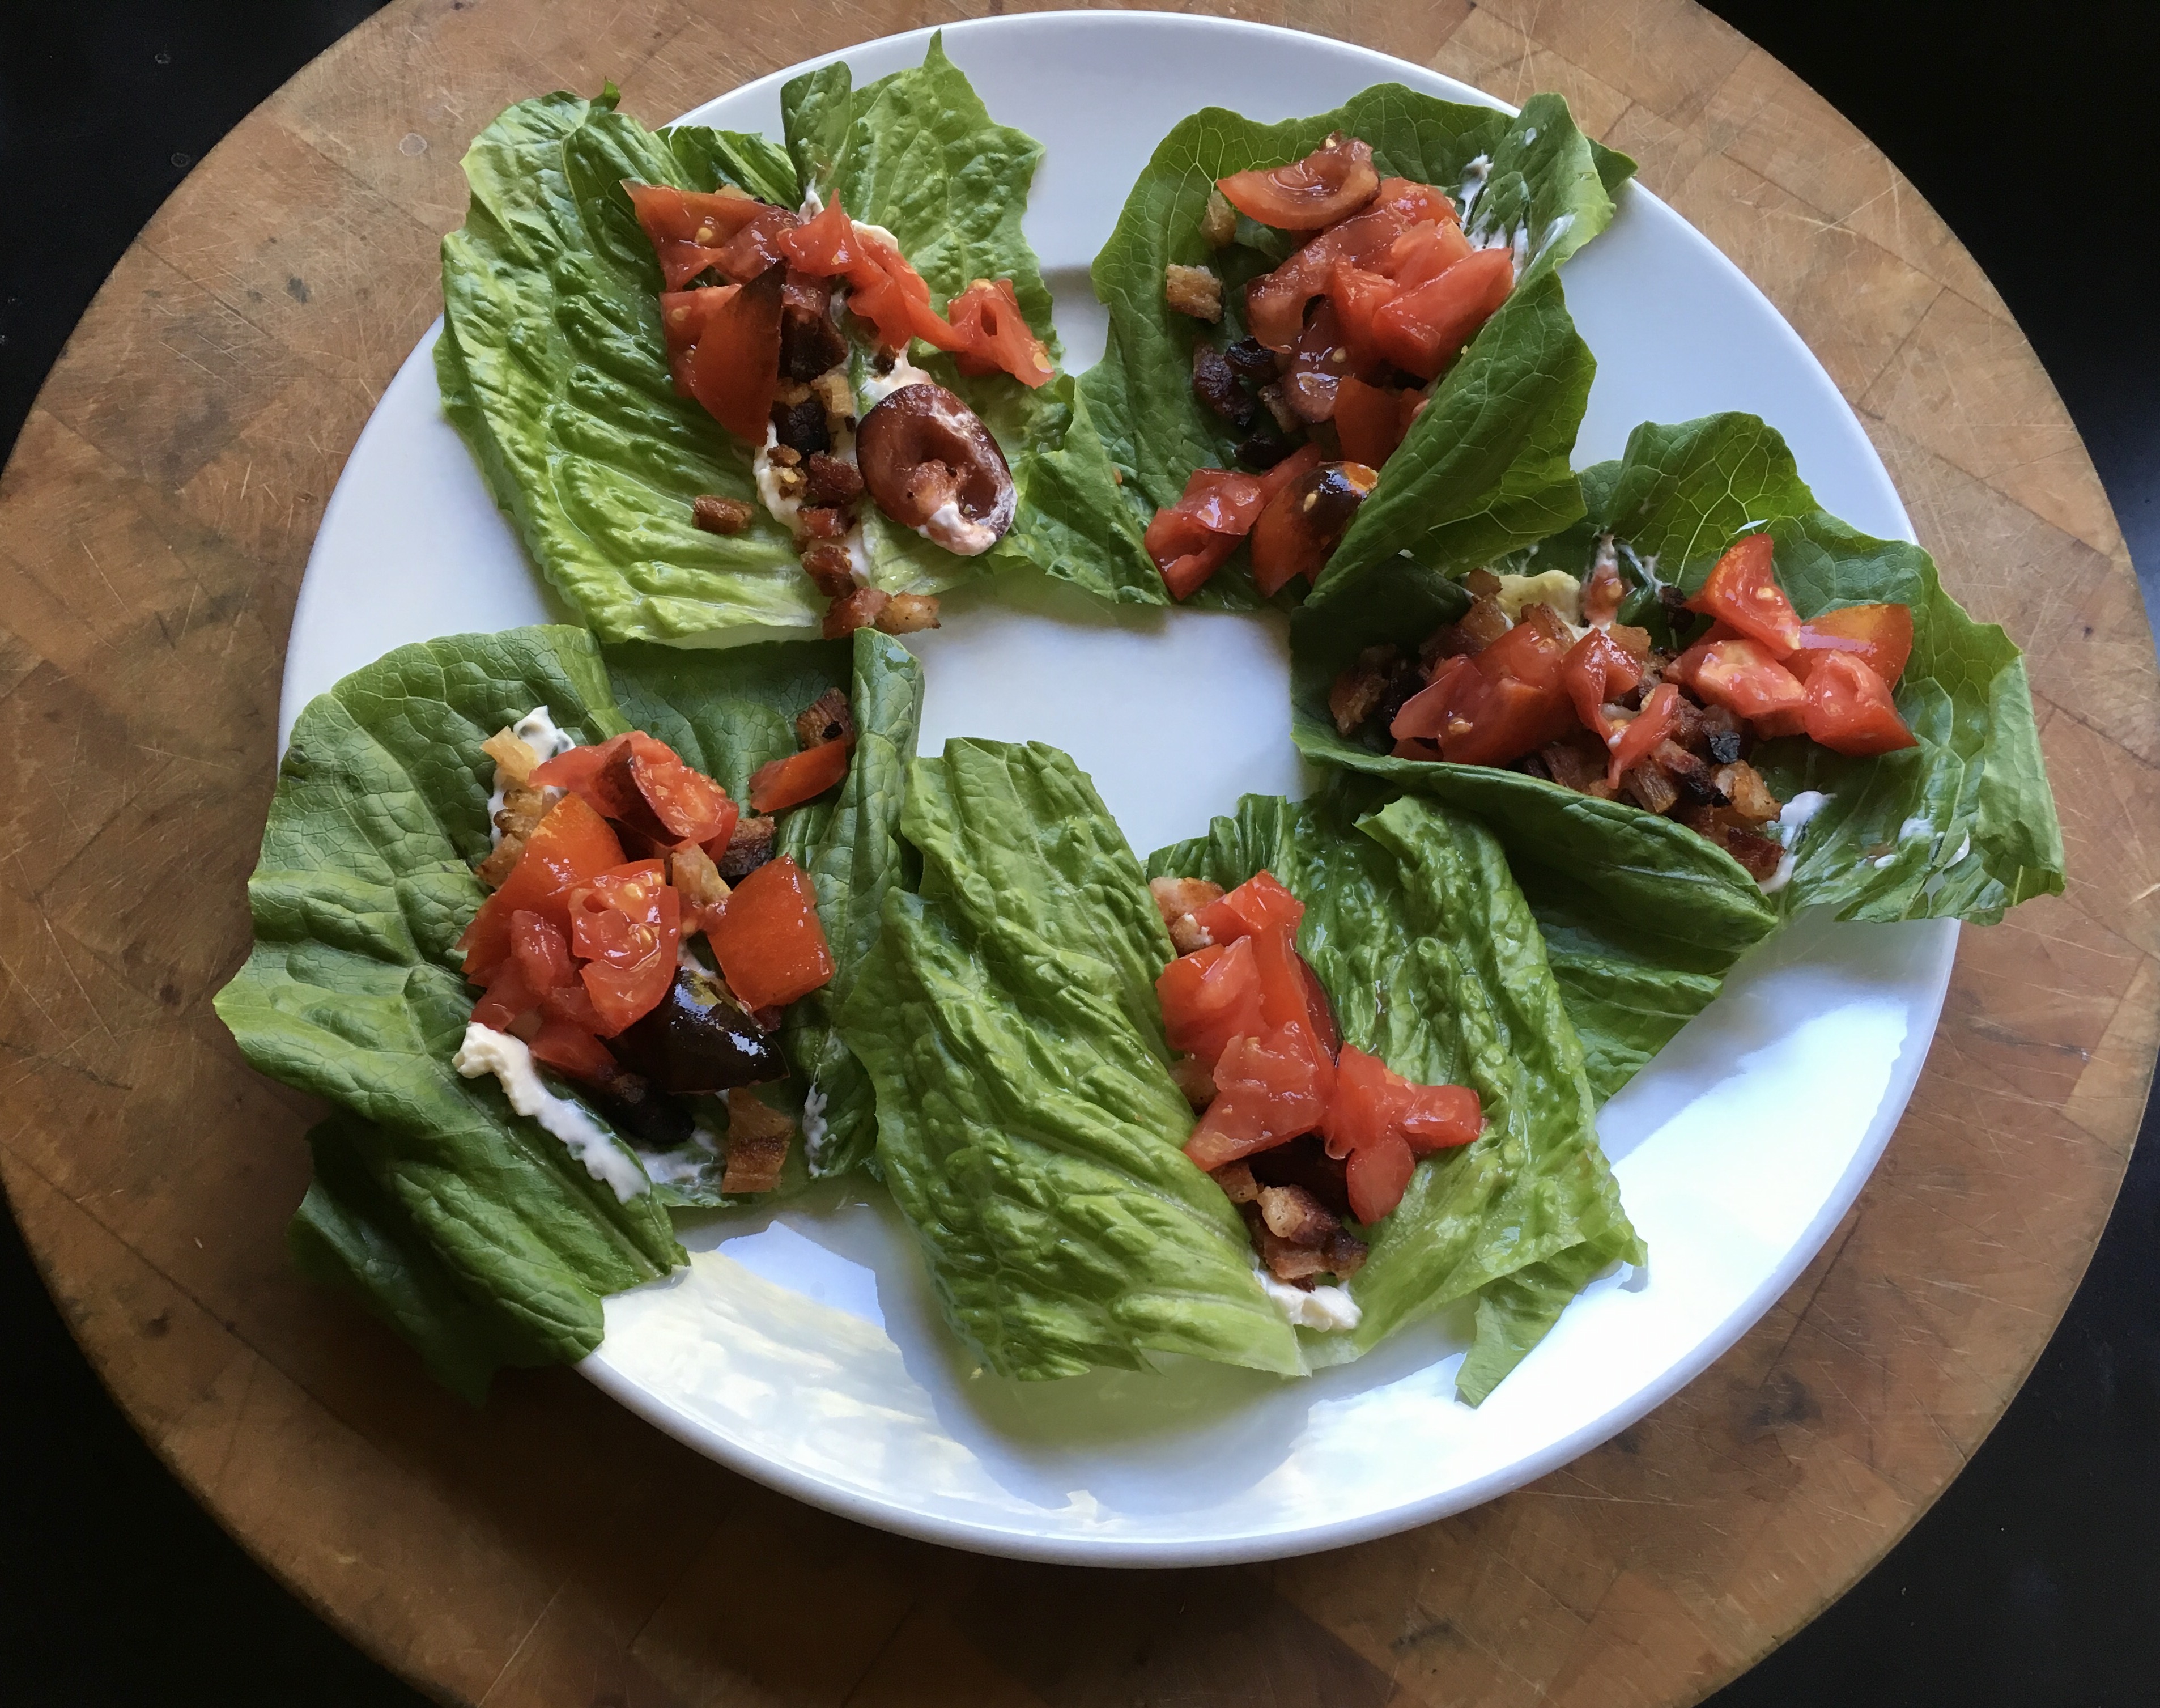
BLT wraps: home-cured and smoked bacon, local farmstead romaine, home garden tomatoes, always Hellman’s mayo.

If I’m buying bacon, I go on-line to Burger’s Smokehouse, a family run business in Missouri that has made great bacon for decades. The prices are good, and they include shipping. (www.smokehouse.com) I buy in quantity and freeze what I don’t need right away. My favorite is the thick-sliced country bacon “steaks.”

But nothings beats making your own.

Bacon comes from the pork belly, and they’re easy to find in any good butcher shop. But to get something a notch above, I’ll buy a heritage breed, like Berkshire pork, from Heritage Pork International. (www.heritagepork.com)  I follow the simple curing techniques outlined in “Charcuterie,” a great book written by Michael Ruhlman and Brian Polcyn.

To cure bacon, all you really need is salt and sugar, and what they in the curing biz call “pink salt,” which is not to be confused with salt that happens to be pink, like Himalayan salt you would find in a gourmet store. Pink salt is bright pink to let you know that it’s a special salt that should only be used in small quantities for curing. The reason is: nitrites. Nitrites delay the spoilage of the meat, and help keep the flavors of spices and smoke. They also keep the meat nice and pink instead of an unappetizing gray. That’s good. However, nitrites can break down into nitrosamines, which have been known to cause cancer in lab animals. But let’s face it: you would need to eat a ton of cured meat to really worry about this. (I buy uncured deli meats and hot dogs at the supermarket, because processed meats are a different story. But since I know exactly what goes into my own bacon, I’m not worried about the level of nitrites.)

To make the basic dry cure:

1/2 lb. kosher salt (I use Diamond Crystal Kosher salt)
1/2 cup light brown sugar or turbinado sugar
1 oz. pink curing salt

Mix the ingredients well. An important note: all salts do not all weigh the same, so go by the weight and not a cup measurement. (Morton’s Kosher salt, for example, is heavier than Diamond Crystal.) I keep this basic dry cure stored in my pantry, ready to use when I need it.

When it’s time to be makin’ the bacon, I combine this dry cure with other ingredients to make my bacon rub.

My bacon rub:

1/2 cup basic dry cure
1/2 cup brown sugar or turbinado sugar
1 tablespoon fresh cracked black pepper
1 tablespoon granulated garlic
1 tablespoon granulated onion

Mix these ingredients well (yes, there’s quite a bit of sugar there, but I like my bacon a little sweet!) Rub it generously all over the pork belly.

I have a large plastic container with a lid that fits one slab of pork belly perfectly. I place the belly inside it, put the lid on, and place the container in the fridge. The pork belly stays there for at least a couple of weeks, maybe three. I flip the belly every few days. You’ll see that the salt will draw moisture out of the meat and form a gooey brine. This brine will continue to cure your pork belly, so leave it in there. Just flip it, put the lid back on the container, and back in the fridge.

In two or three weeks, you’ll be able to tell the pork belly has cured because it feels firm. Wash the brine off the meat well with cold water, and pat it dry with paper towels. Place the belly in the fridge for an hour or so and it will develop a tackiness to the touch. This is a thin layer of proteins known as a pelicle, and it helps the smoke stick to the meat.

Now it’s time to cook. You can simply cook the pork belly (without smoking it) at 200 degrees for about 2 hours, until the internal temperature reaches 160 degrees. But this isn’t bacon…it’s pancetta.

I place the pork belly in my digital smoker, which allows me to set an exact temperature. I smoke it at 250 degrees for 2 hours, using hickory chips. Now it’s bacon.

Bellies in the smoker

Bellies in the smoker.

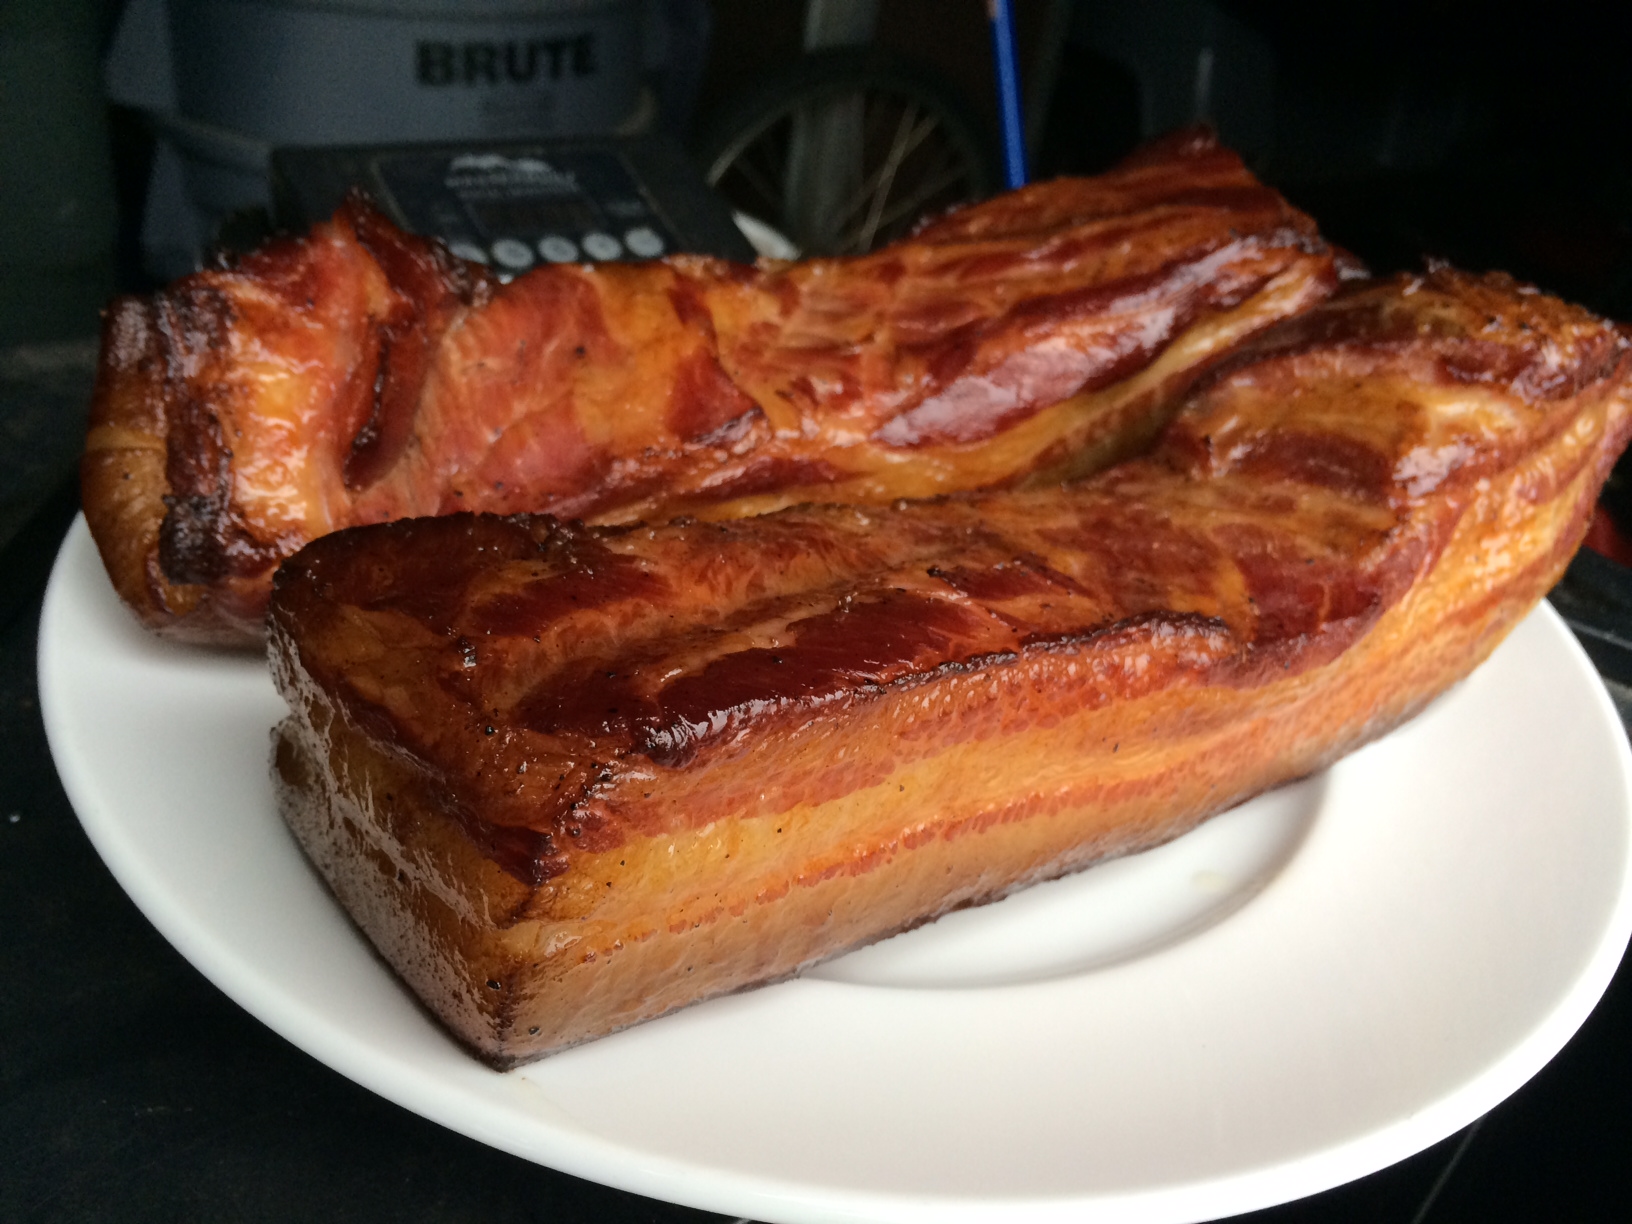
Smoked bacon

Beautiful bacon!

That’s it. You have achieved bacon!

The reward is so worth the effort. Just remember that you still need to slice the bacon and fry it. Don’t eat it straight out of the smoker. That first slice you cut off your bacon and toss in a pan to lightly fry for a few moments will be the best bite you’ve ever had in your life!
And if you’re making one slab of bacon, why not make it three or four? It freezes well. And…you will eat it. You know you will!

Frying in the pan!

Frying in the pan!

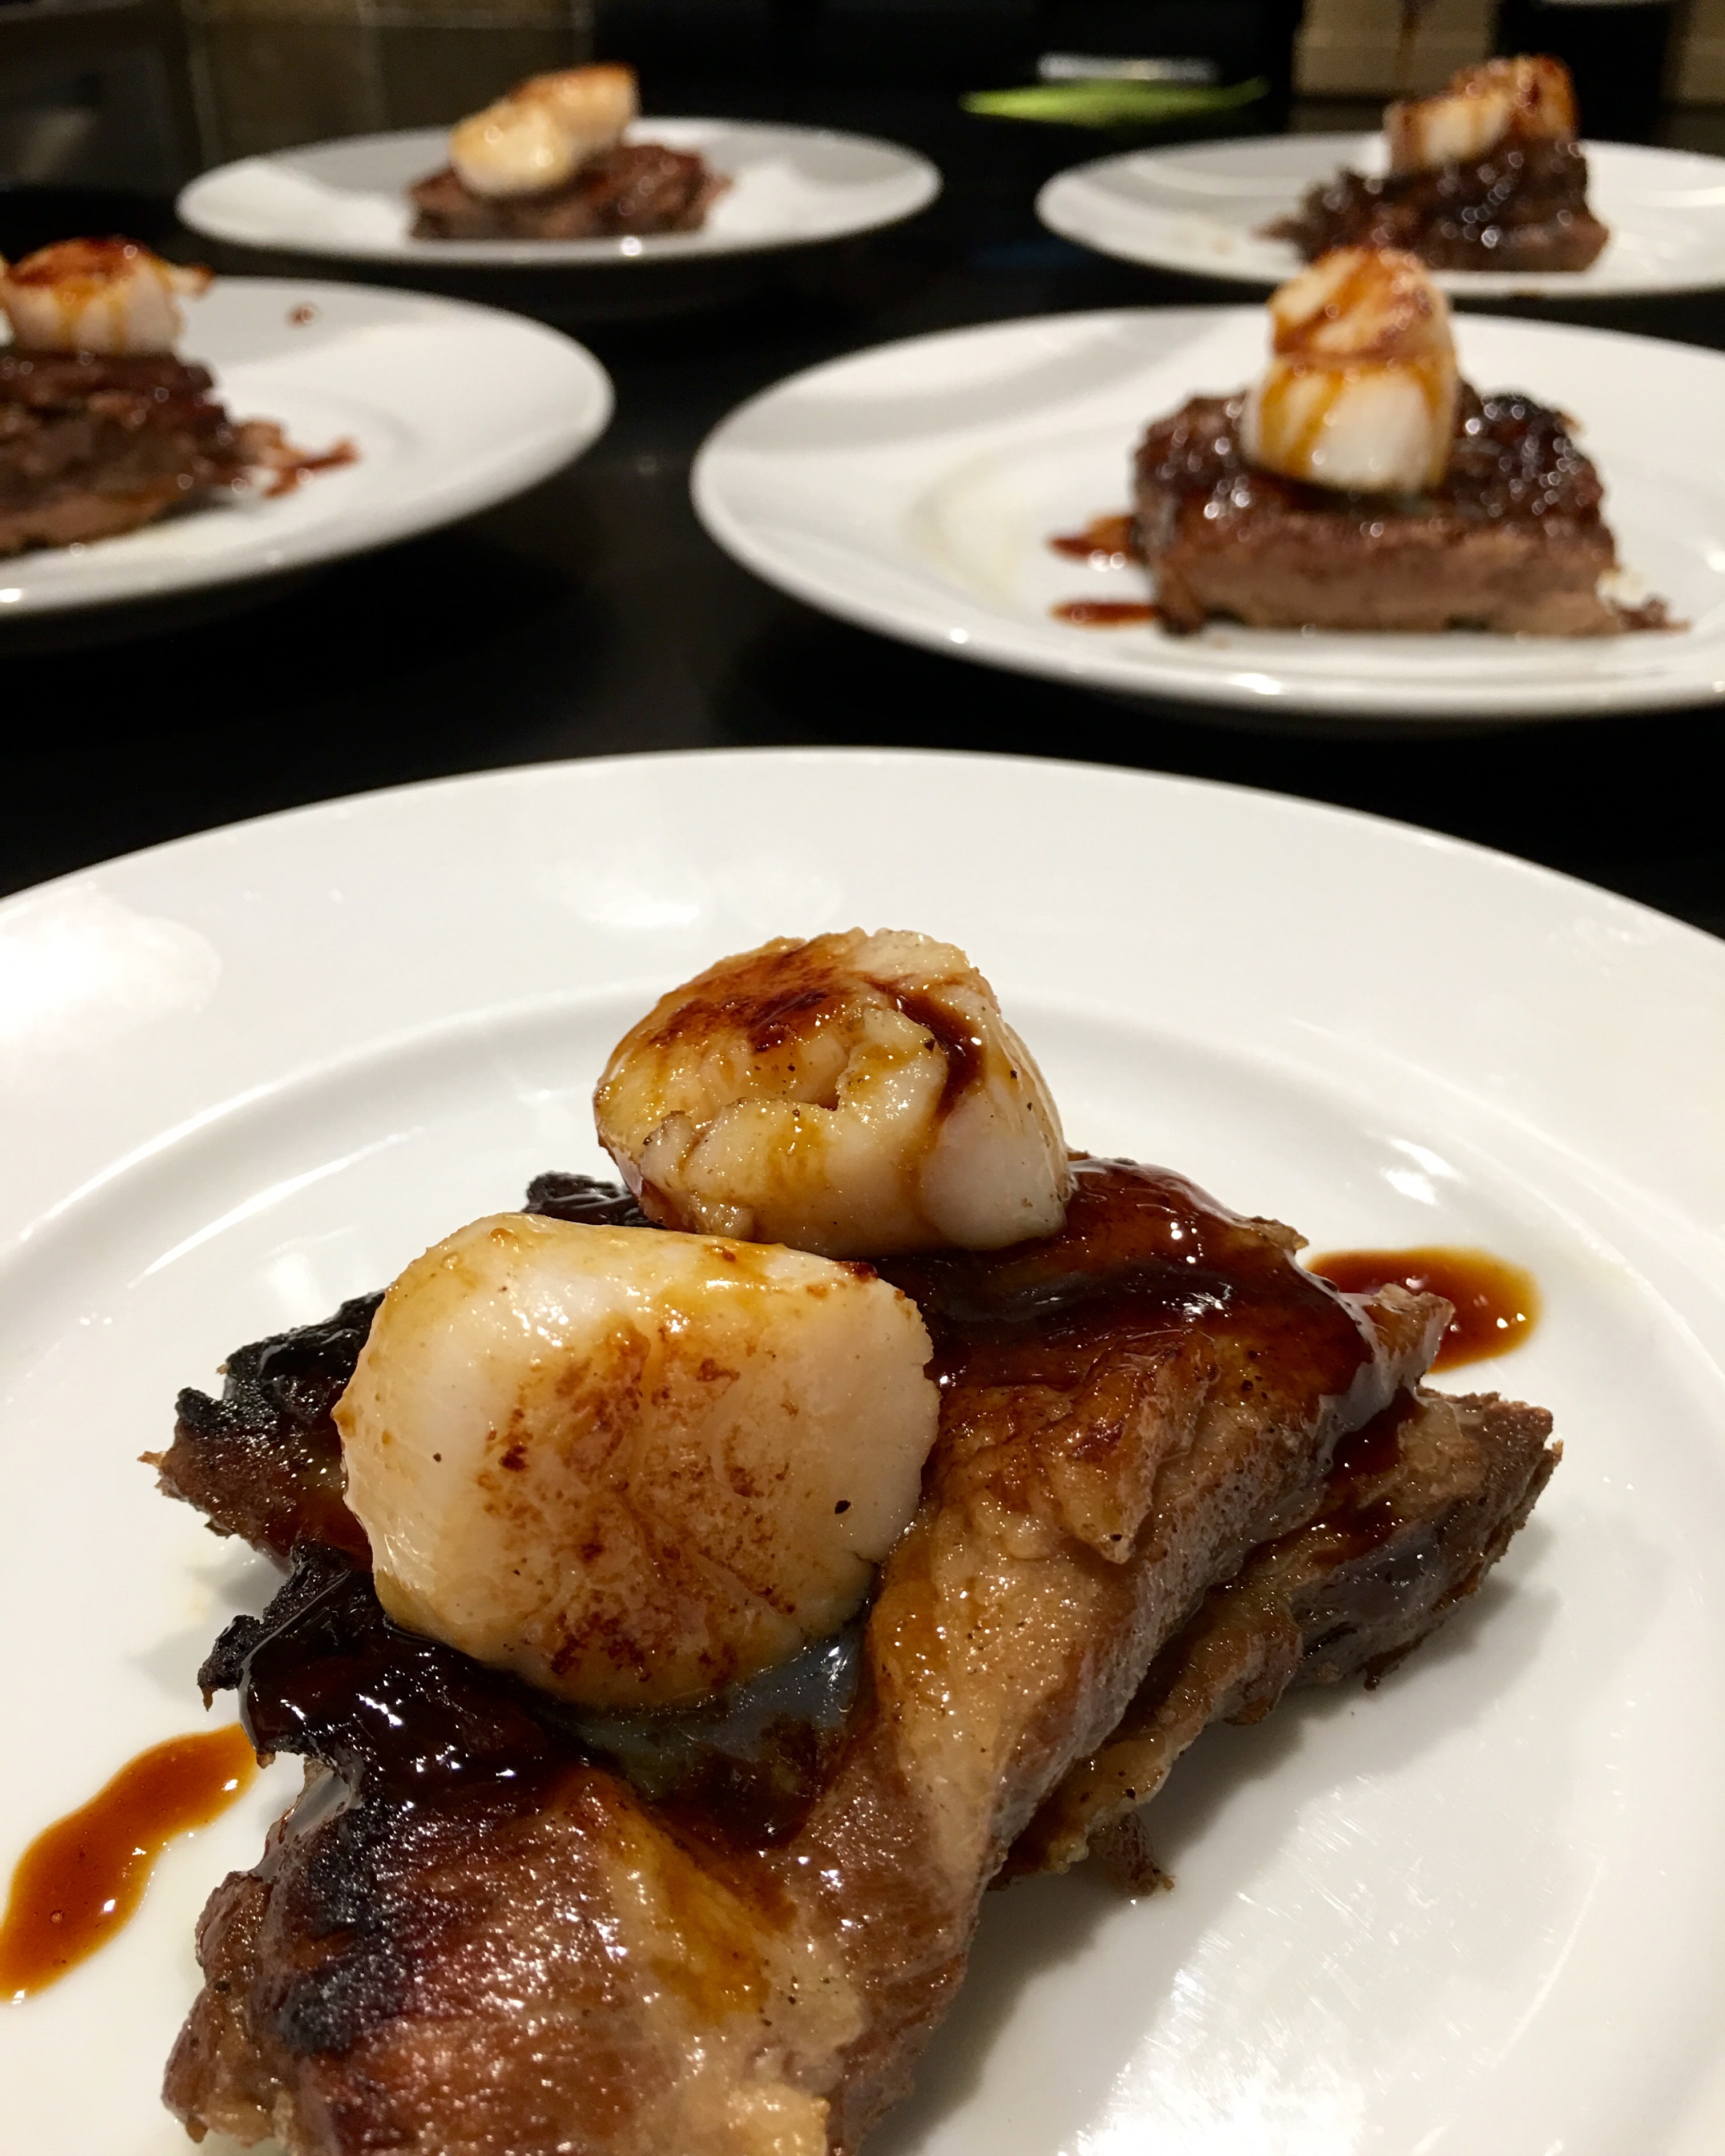
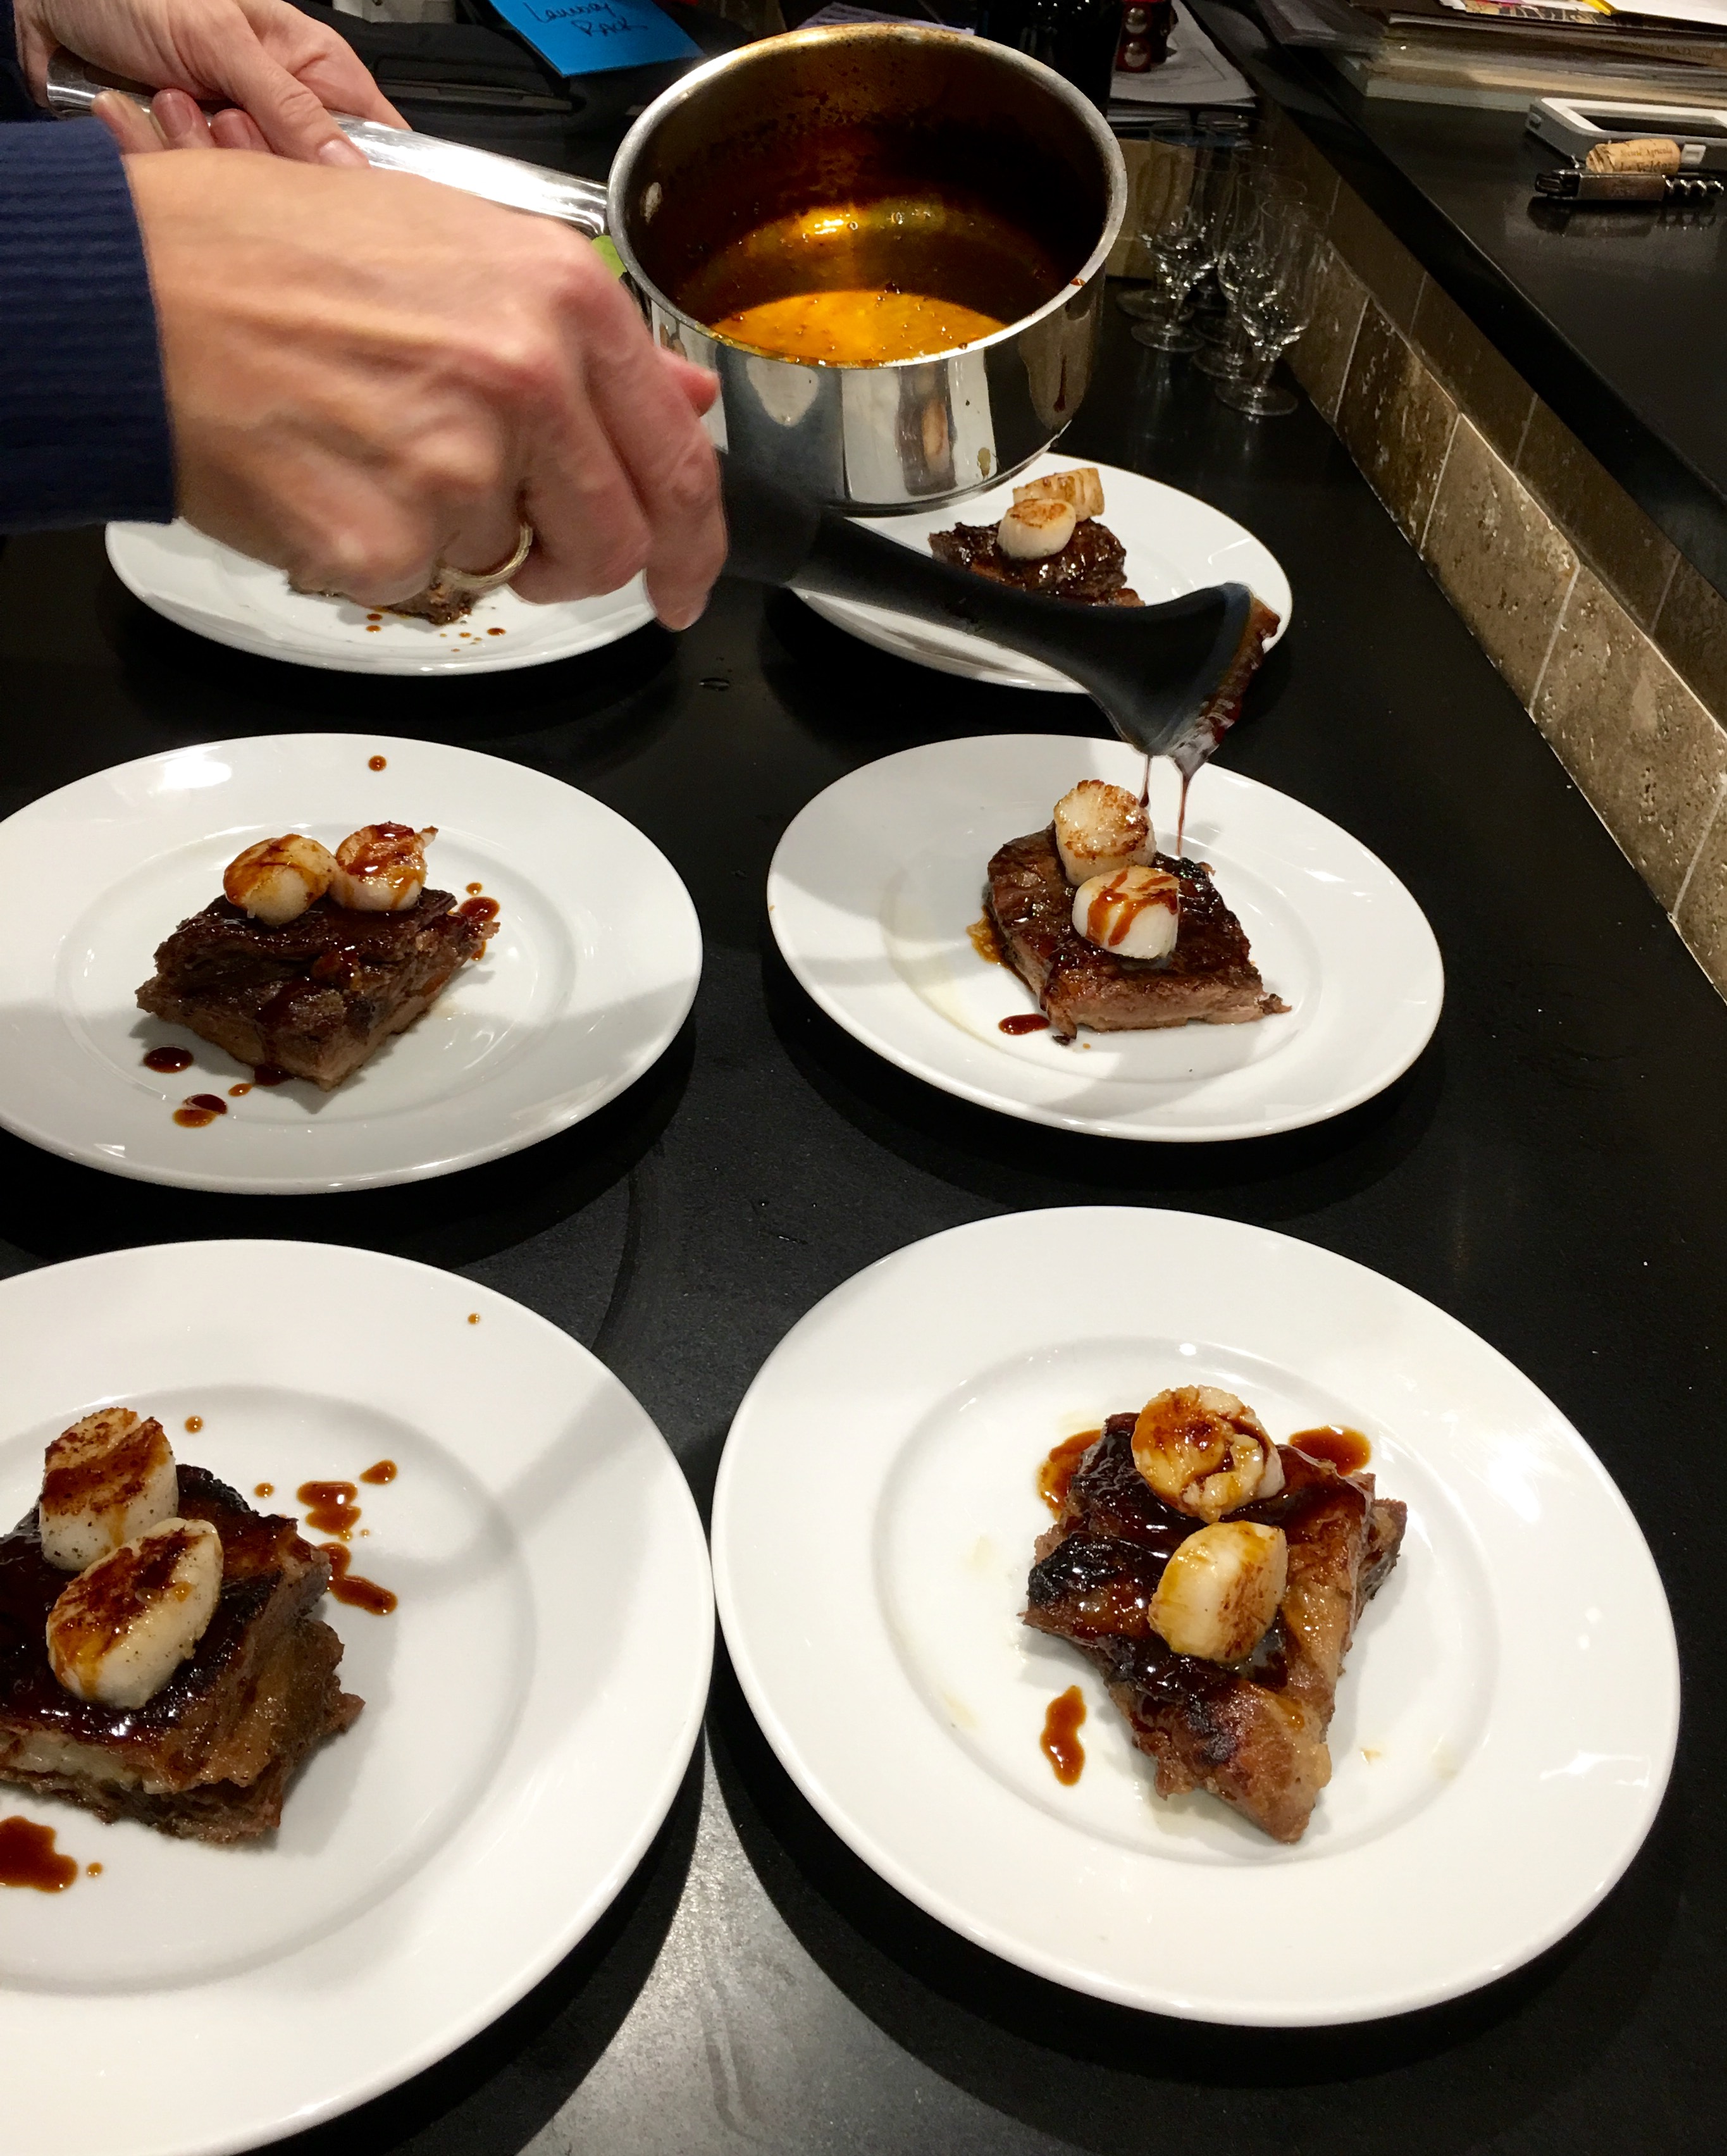
This is a rich, delicious, and unusual surf-and-turf, using wild Texas boar (I got it as a gift from my buddy, Dr. Chezwick!) and locally caught Rhode Island scallops. Wild boar is an ingredient usually only found online, so substituting pork belly, which you can find at your local butcher shop, is a great alternative.


FullSizeRender (9)

For the pork belly…
3 lbs. fresh pork belly
salt and pepper
1–2 tablespoons leaf lard or olive oil
1 carrot, coarsely chopped
1 celery stalk, coarsely chopped
1 onion, roughly chopped
1 fennel bulb, quartered
2 sprigs fresh thyme
1 teaspoon black peppercorns
4 cups beef stock
1 cup hard cider or apple juice

Pre-heat the oven to 350.

Season the belly with salt and pepper. On medium-high heat, melt the leaf lard, then sear the meat on all sides in an oven-proof pot big enough to hold it in one layer. Add the carrot, celery, onion, fennel, thyme and peppercorns and continue cooking for another 5 minutes, until caramelized.

Add the beef stock and the cider. Cover the pot with a lid or seal it with aluminum foil, and braise the belly in the oven for 3 hours, until tender.

Remove the pot from the oven, carefully remove the pork belly, and put it on a plate. Cover it with foil. If you’re cooking earlier in the day, you can place the belly in the fridge at this point.

Strain the leftover braising liquid from the pot and discard the vegetables and thyme. Skim off the excess fat. If you’re starting this dish earlier in the day, you can put this liquid in the fridge and the fat will harden, making it easier to remove.


FullSizeRender (8)

For the glaze…
braising liquid, strained
1 tablespoon espresso
1 tablespoon honey

In a small saucepan, reduce the brazing liquid by half, then add the espresso and honey. Cook a few more minutes until the sauce thickens. When it coats the back of a spoon, it’s ready. Set it aside.

For the scallops…
Fresh scallops
salt and pepper

When you’re ready to serve, heat a pan on high heat with a little more leaf lard. Cut the belly into equal pieces and sear them on all sides for about a minute. Place the scallops in the same pan, seasoning with salt and pepper, and sear them on both sides, being careful not to overcook them.

To serve, place the belly on a plate. Top it with a scallop or two. Drizzle the glaze over the top. Season with Fleur de Sel or other finishing salt and serve it immediately.

Despite gardening for almost 50 years, I sowed and harvested my first batch of fennel last season. Having received a recent shipment of heritage Berkshire pork chops, I thought it was time to get creative. This is a rustic Italian-style recipe that works great for pork and fennel…

fennelfrond


4 good quality pork chops, medium thickness
2 fennel bulbs with stems and fronds, finely chopped
2 shallots, finely chopped
1/2 cup fresh parsley, chopped
olive oil
salt and pepper
1 28 oz. can tomatoes
1 tablespoon capers
Zest of 1 lemon
1/2 cup dry white wine


pork and fennel


In a large pan, heat some olive oil. Season the pork chops on both sides with salt and pepper, then brown them on both sides in the pan with the olive oil. Remove the chops from the pan and set them aside.

Add a little more olive oil to the pan and add the chopped fennel and shallots, stirring for a few minutes. Add the white wine, and stir well to get the tasty bits of pork from the bottom of the pan. Add half of the parsley. Add the can of tomatoes, squishing the tomatoes between your fingers so that they are broken up when they hit the pan. Stir for a few minutes over medium heat.

Return the pork chops to the pan, nestling them in the sauce. Add the capers, lemon zest and remaining parsley. Stir everything together a bit, and then let the chops cook for about 10 to 15 minutes, until their internal temperature reads 145 degrees.


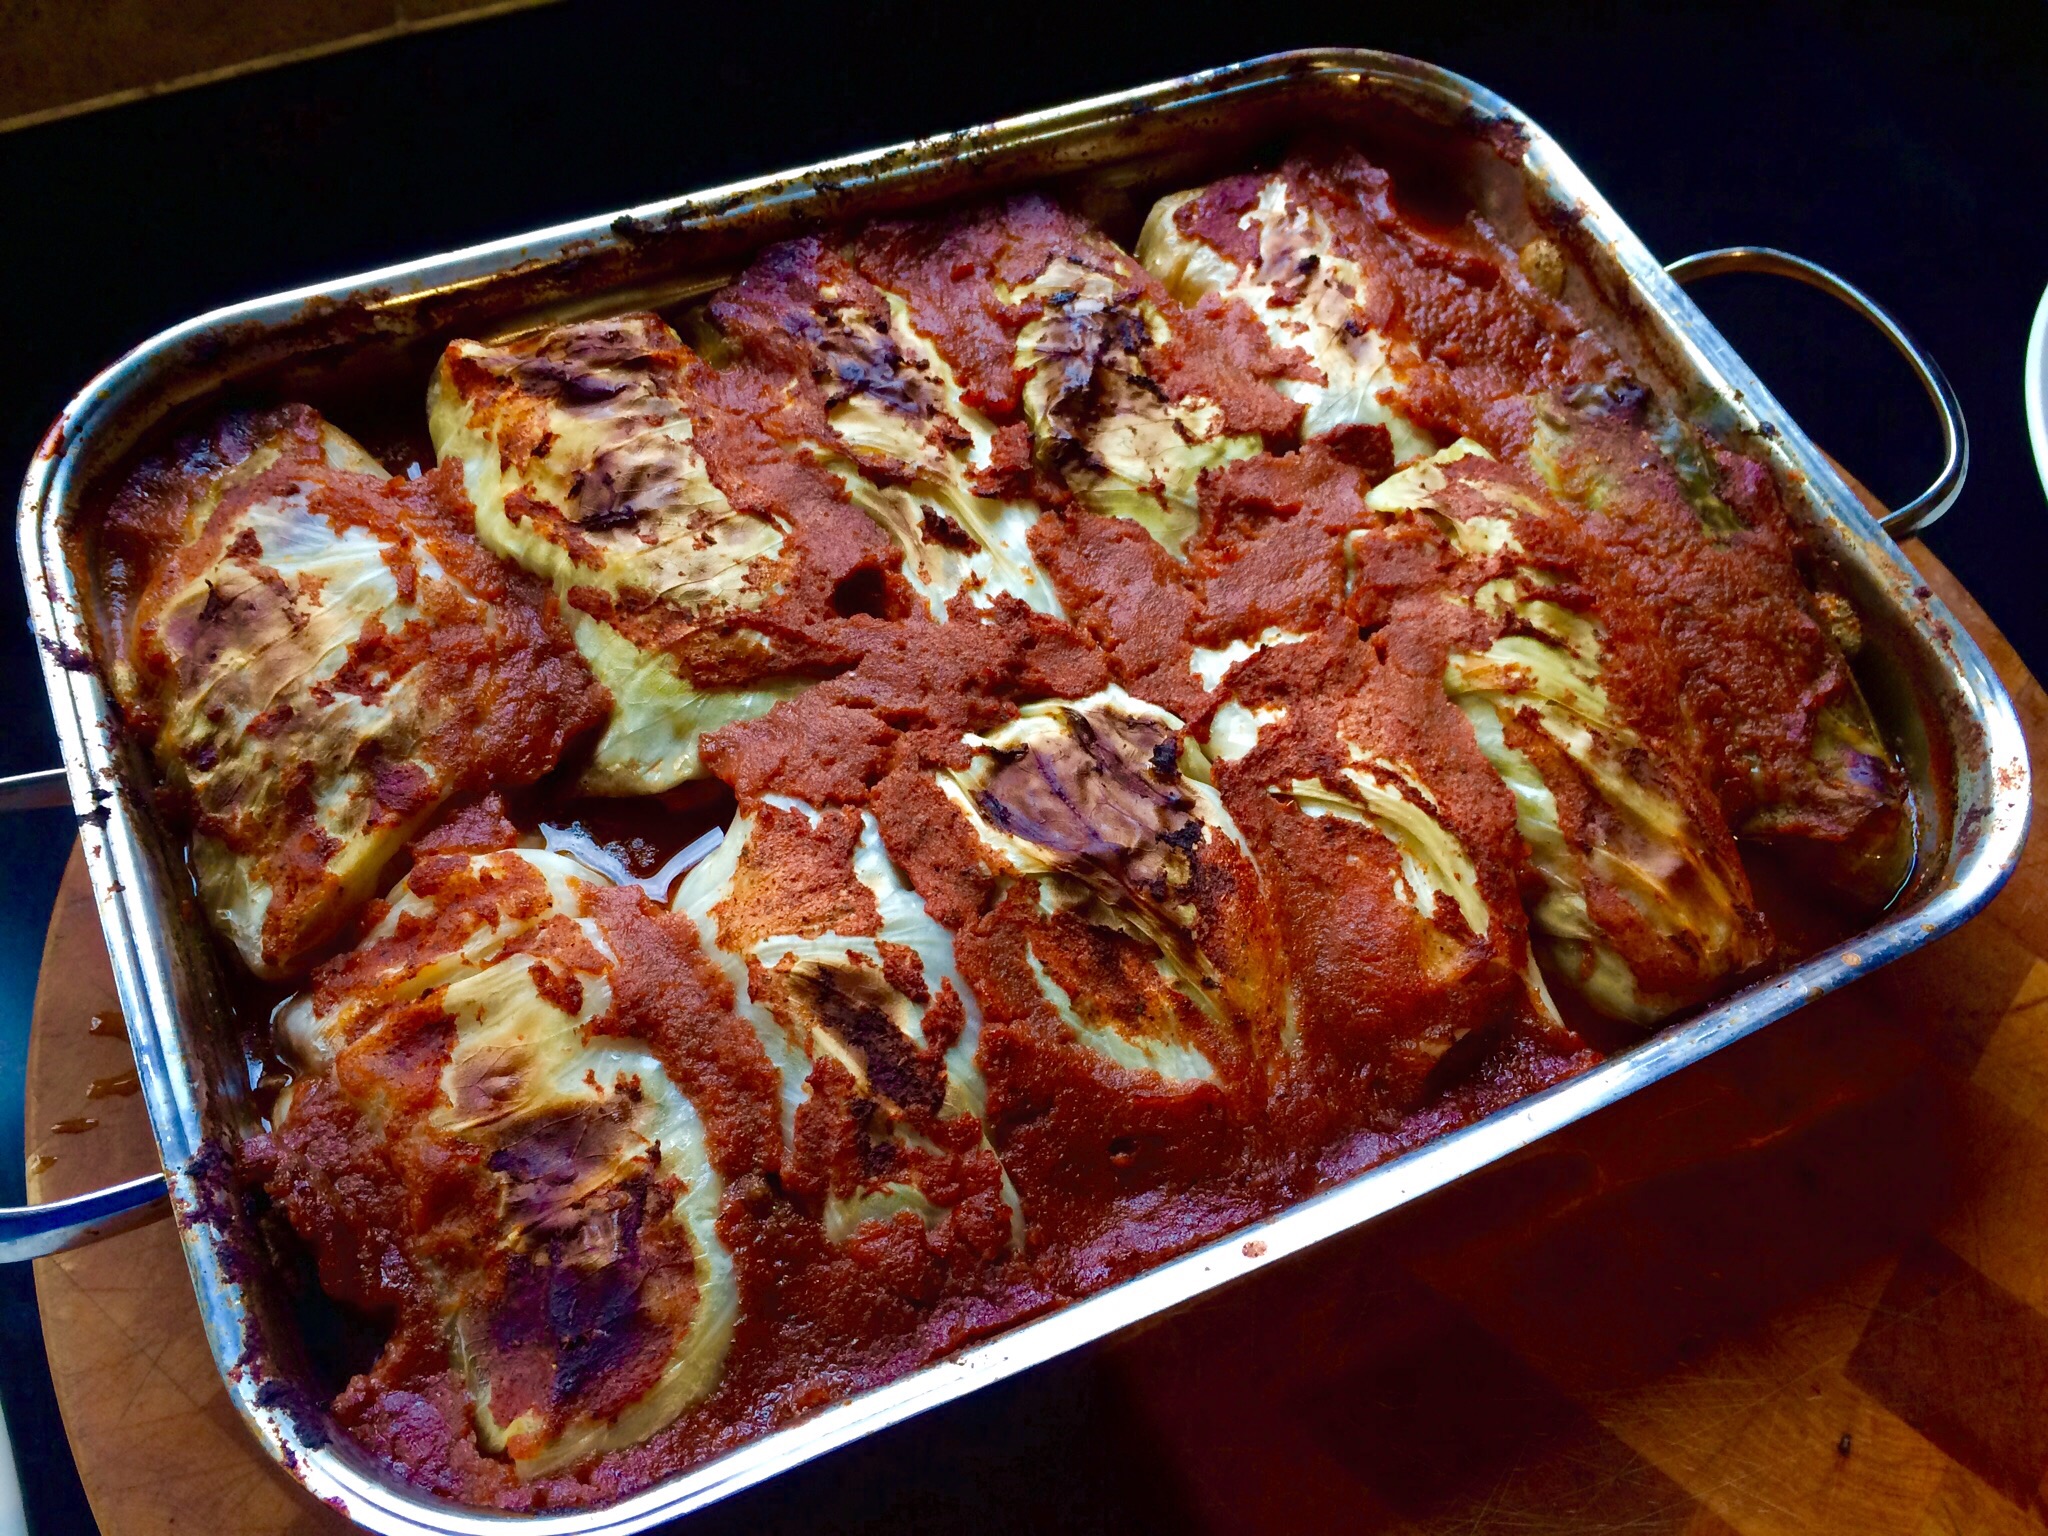
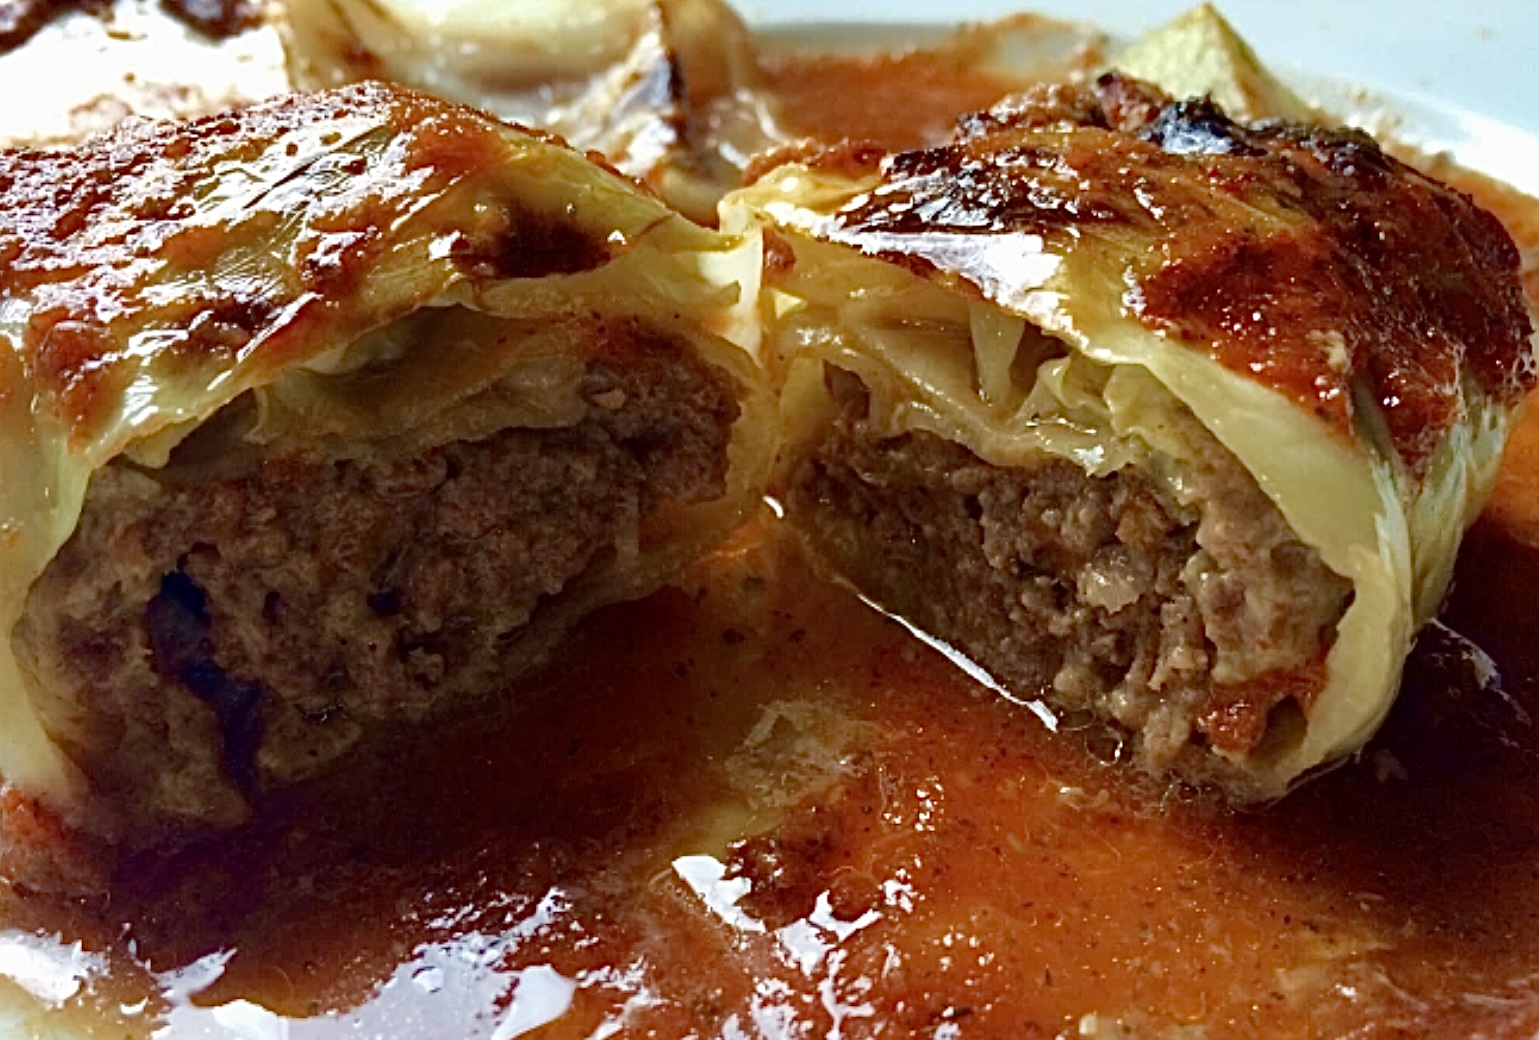
My Mom’s birthday is coming up next month, and even though she’s not with us anymore, I think a lot about the family favorites she used to cook. If there’s one dish that my Mom made all the time but I didn’t appreciate until I got older, this is it. Stuffed cabbage, cabbage rolls, or balandėliai, as we say in Lithuanian, was a staple in our home and one of my Dad’s favorites. 

I had seen my Mom make these beauties so often in my childhood, I didn’t even need to check online recipes out for guidance. That doesn’t mean I make them exactly like Mom, but my version came out pretty good. I think she would’ve been proud.


image

2 full strips of bacon, chopped
1 yellow onion, finely chopped
1 teaspoon salt
1/2 teaspoon pepper
1/2 teaspoon granulated garlic
1 lb. ground grass-fed beef
1 lb. ground pastured pork
1/2 cup breadcrumbs
2 eggs
1 large head cabbage
1 pint homemade chicken, beef or veal stock
750 g diced tomatoes (1 Pomi container)
1 teaspoon thyme
1 teaspoon salt
1/2 teaspoon pepper
1/4 teaspoon granulated garlic
1/4 teaspoon granulated onion

Chop the bacon into small pieces and fry them until crisp. Finely chop the onion, and add it to the bacon and rendered fat in the pan, cooking until the onions are translucent. Add the salt, pepper and garlic. Mix well, and remove it from the heat. Let it cool to room temperature.

In a large bowl, combine the beef, pork, breadcrumbs, eggs, and cooled bacon and onion mixture. Place it in the fridge to firm up.

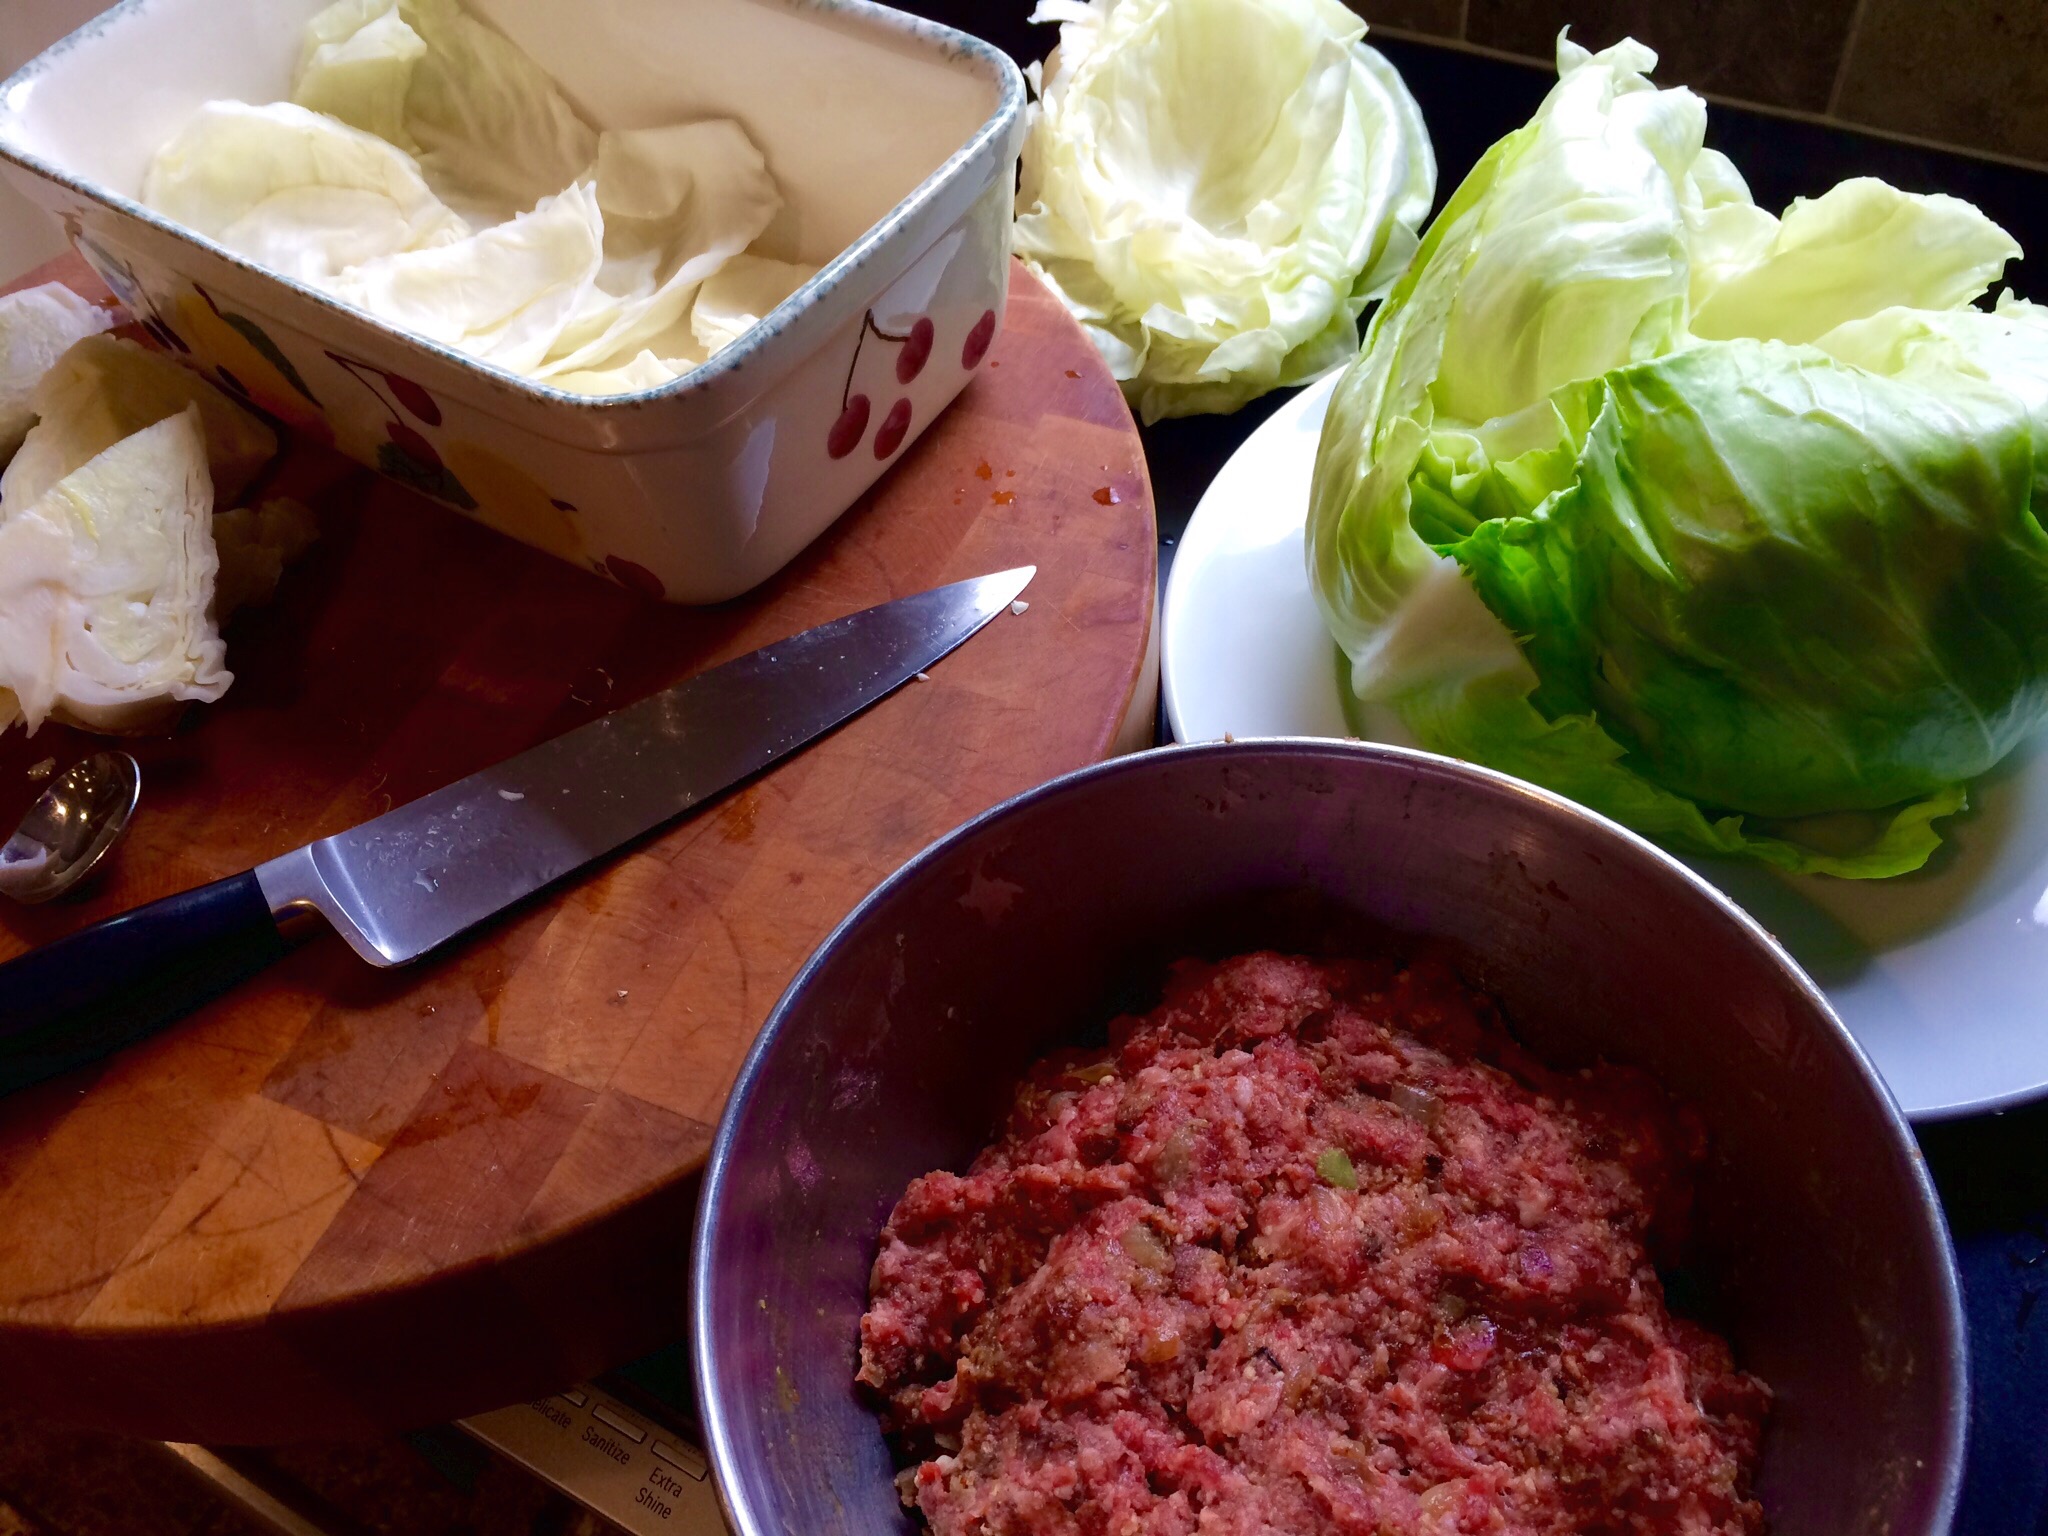
Let a large pot of water come to a boil. Core the cabbage, leaving the leaves whole, and carefully immerse the head of cabbage into the hot water. (I use two sets of tongs to handle the cabbage.)

Little by little, the outermost leaves of the cabbage will come off the head, and you can remove them, setting them aside to cool. Continue doing this until you can no longer remove leaves from the remaining head of cabbage.

Remove the remaining head of cabbage from the hot water, and using your hands or a knife, break it into flat pieces. Line the bottom of a roasting pan with the pieces. These will keep the stuffed cabbage from burning and sticking to the bottom. If you need more to line the pan, use the smaller or torn pieces of cabbage.

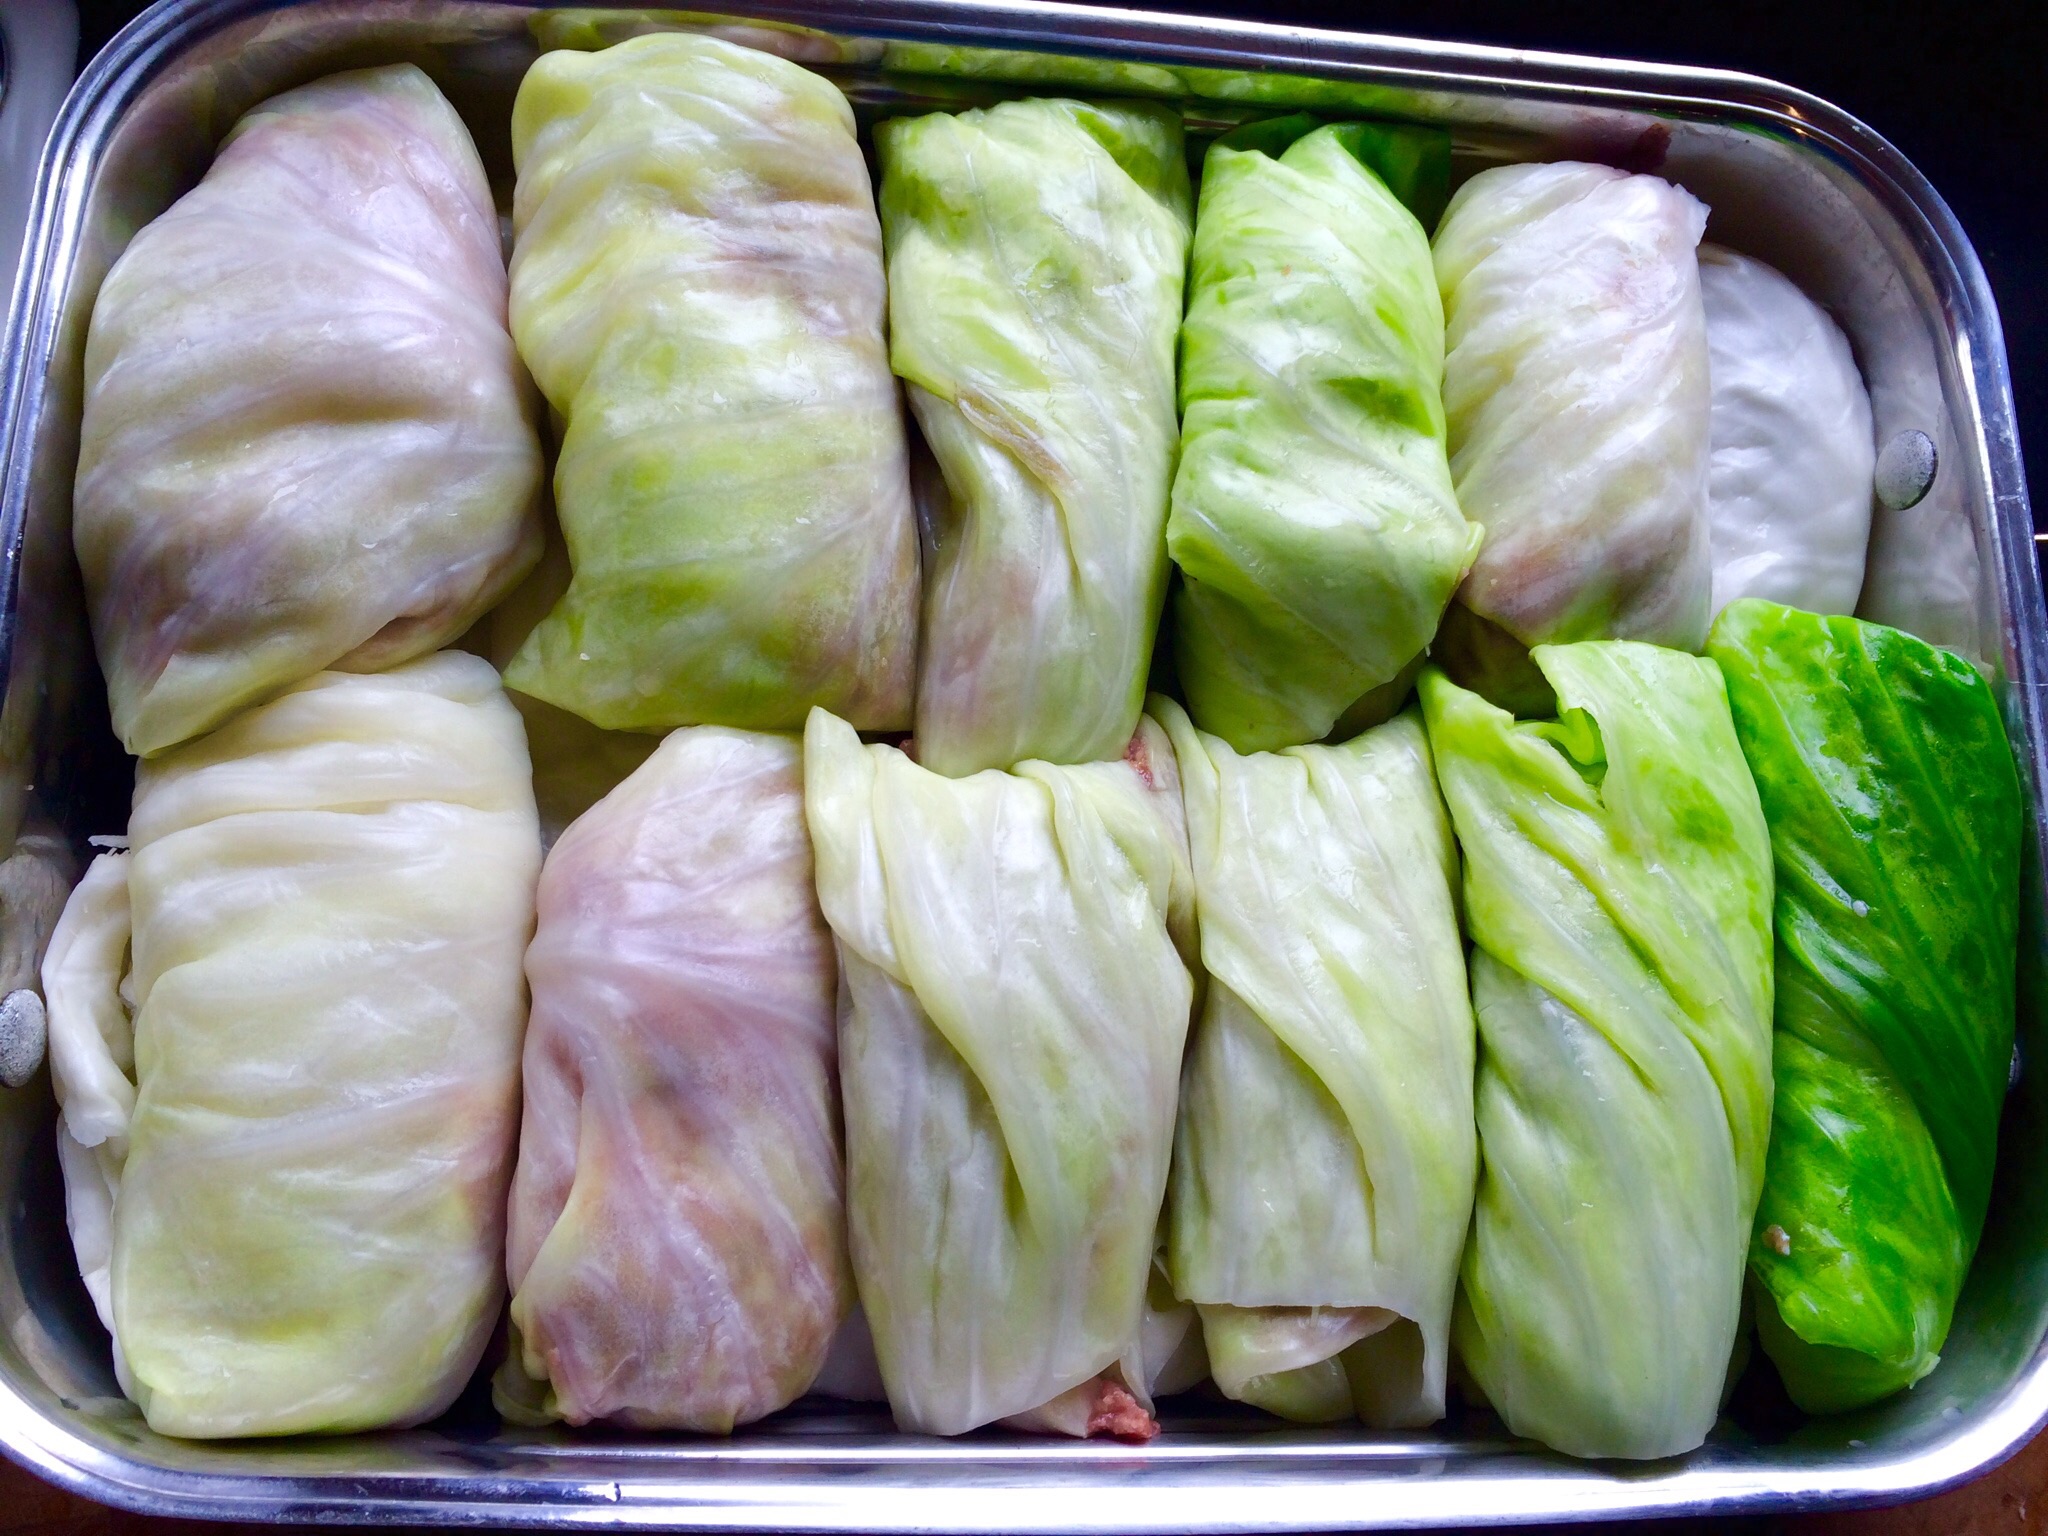
Time to roll the stuffed cabbage. Take the meat out of the fridge. Lay a cabbage leaf flat on the counter, and add some of the meat mixture (about 1/4 cup, depending on the size of the cabbage leaf) inside. Roll the cabbage around the meat, folding the sides in as you go, much like a burrito. You might need to slice away the thickest part of the leaf stem to make rolling easier. Lay the stuffed cabbage in the roasting pan on top of the leftover cabbage pieces. (Unlike Mom, I don’t use toothpicks to hold the stuffed cabbage rolls together.)


Continue stuffing and rolling the cabbage leaves until you’ve got a pan full of them, shoulder-to-shoulder.

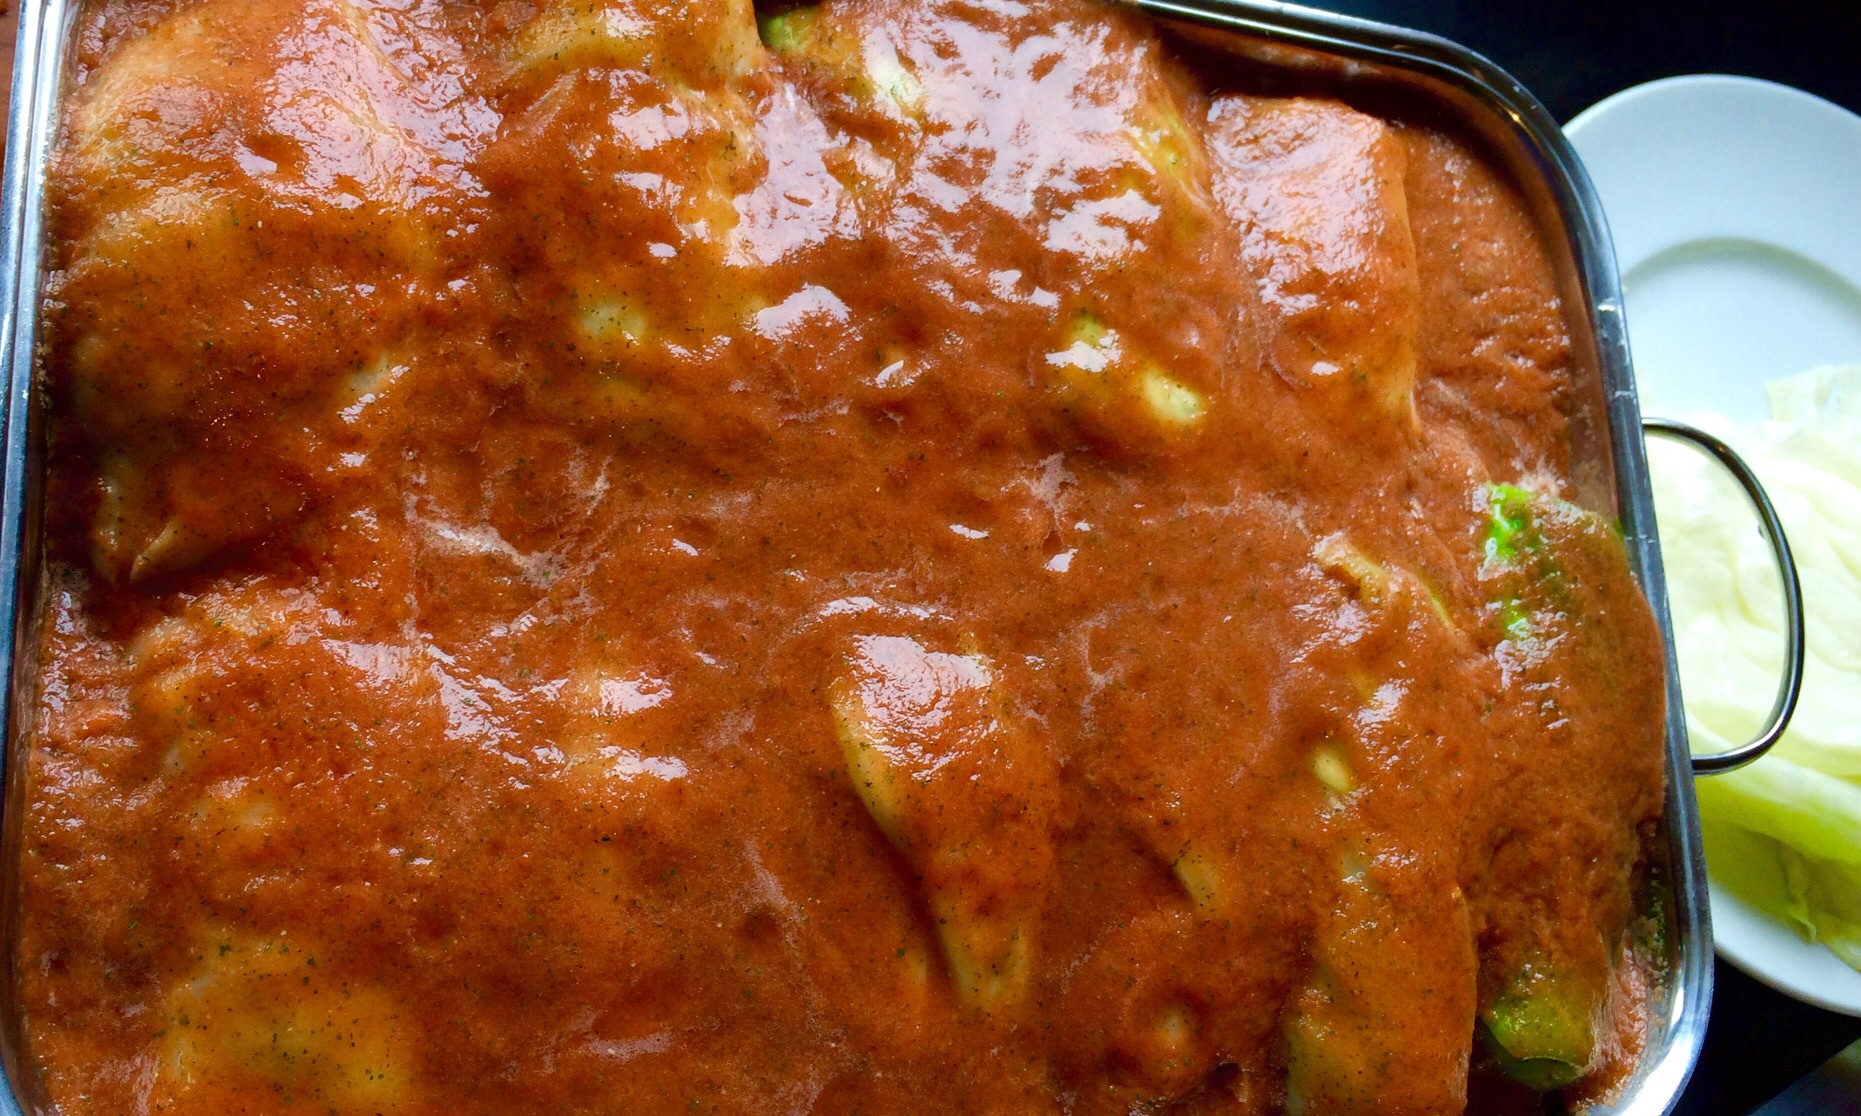
In a blender, food processor, or whisked in a bowl, combine the stock, diced tomatoes, thyme, salt, pepper, garlic and onion. Pour this mixture over the top of the cabbage rolls in the roasting pan, covering them.


If you have leftover cabbage, you can place another layer of them on top. Otherwise, cover the roasting pan with foil and place in a pre-heated 350 degree oven. Cook for an hour.


After an hour, remove the foil and cook further for another 45–60 minutes.


Really delicious and an instant flashback to great memories of dinner at home….thanks to Mom.

October is National Pork Month, and we still have a few days left…

Pork chops were a favorite of mine growing up, but my Mom cooked them only one way: breaded and fried in a pan full of oil. They were good, but they were greasy, and my Mom was not big on seasonings. And she cooked the hell out of it. It was time to improve on the original.

Using the best quality pork I can get, like heritage Berkshire pork, makes a real difference in flavor. It also matters to me that the animals are humanely treated while they’re on the farm. No factory-farmed meats.


chop 1


2 Berkshire pork chops
1 egg
1/2 cup plain bread crumbs (gluten-free works, too)
1 teaspoon salt
1/4 teaspoon pepper
1 teaspoon dried oregano
1 teaspoon dried parsley
1/2 teaspoon granulated garlic
1/2 teaspoon granulated onion
olive oil


Pre-heat the oven to 350 degrees.

Set up 2 bowls. In one, crack and scramble the egg. In the other, combine the bread crumbs, salt, pepper, oregano, parsley, granulated garlic and granulated onion.

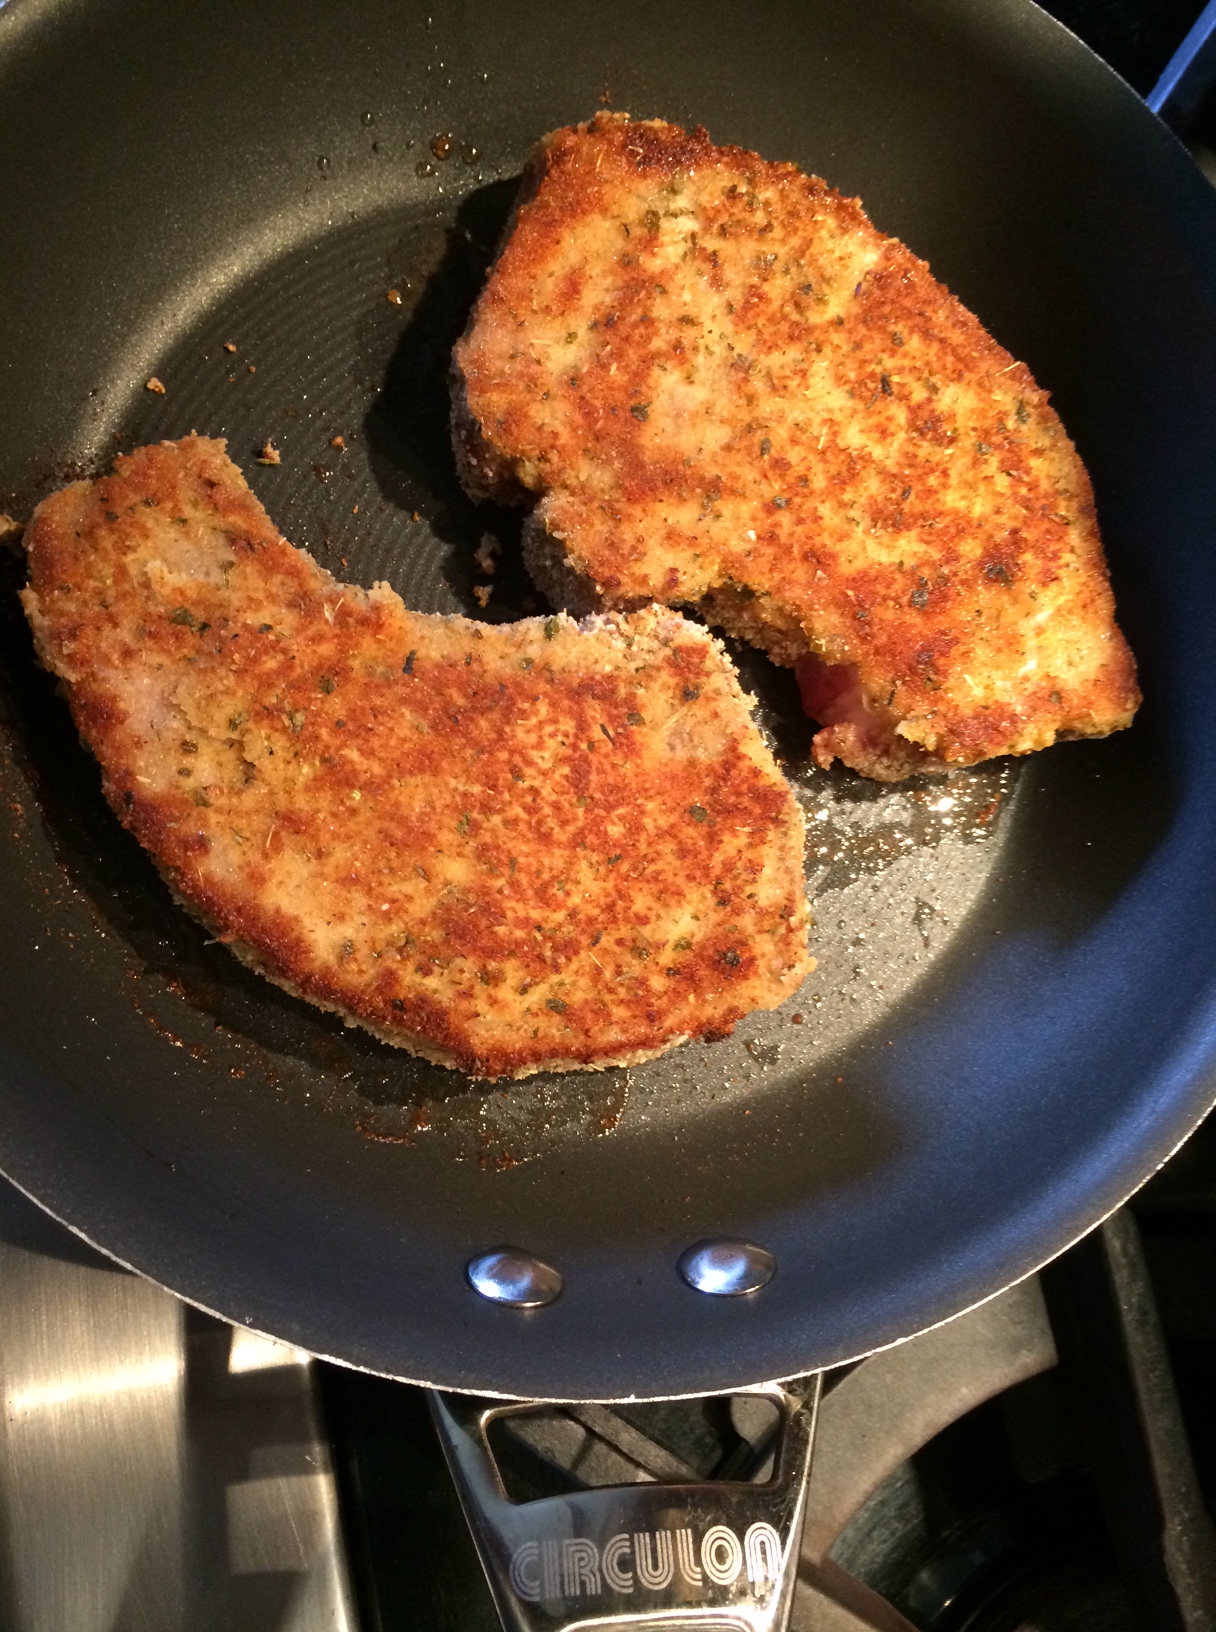
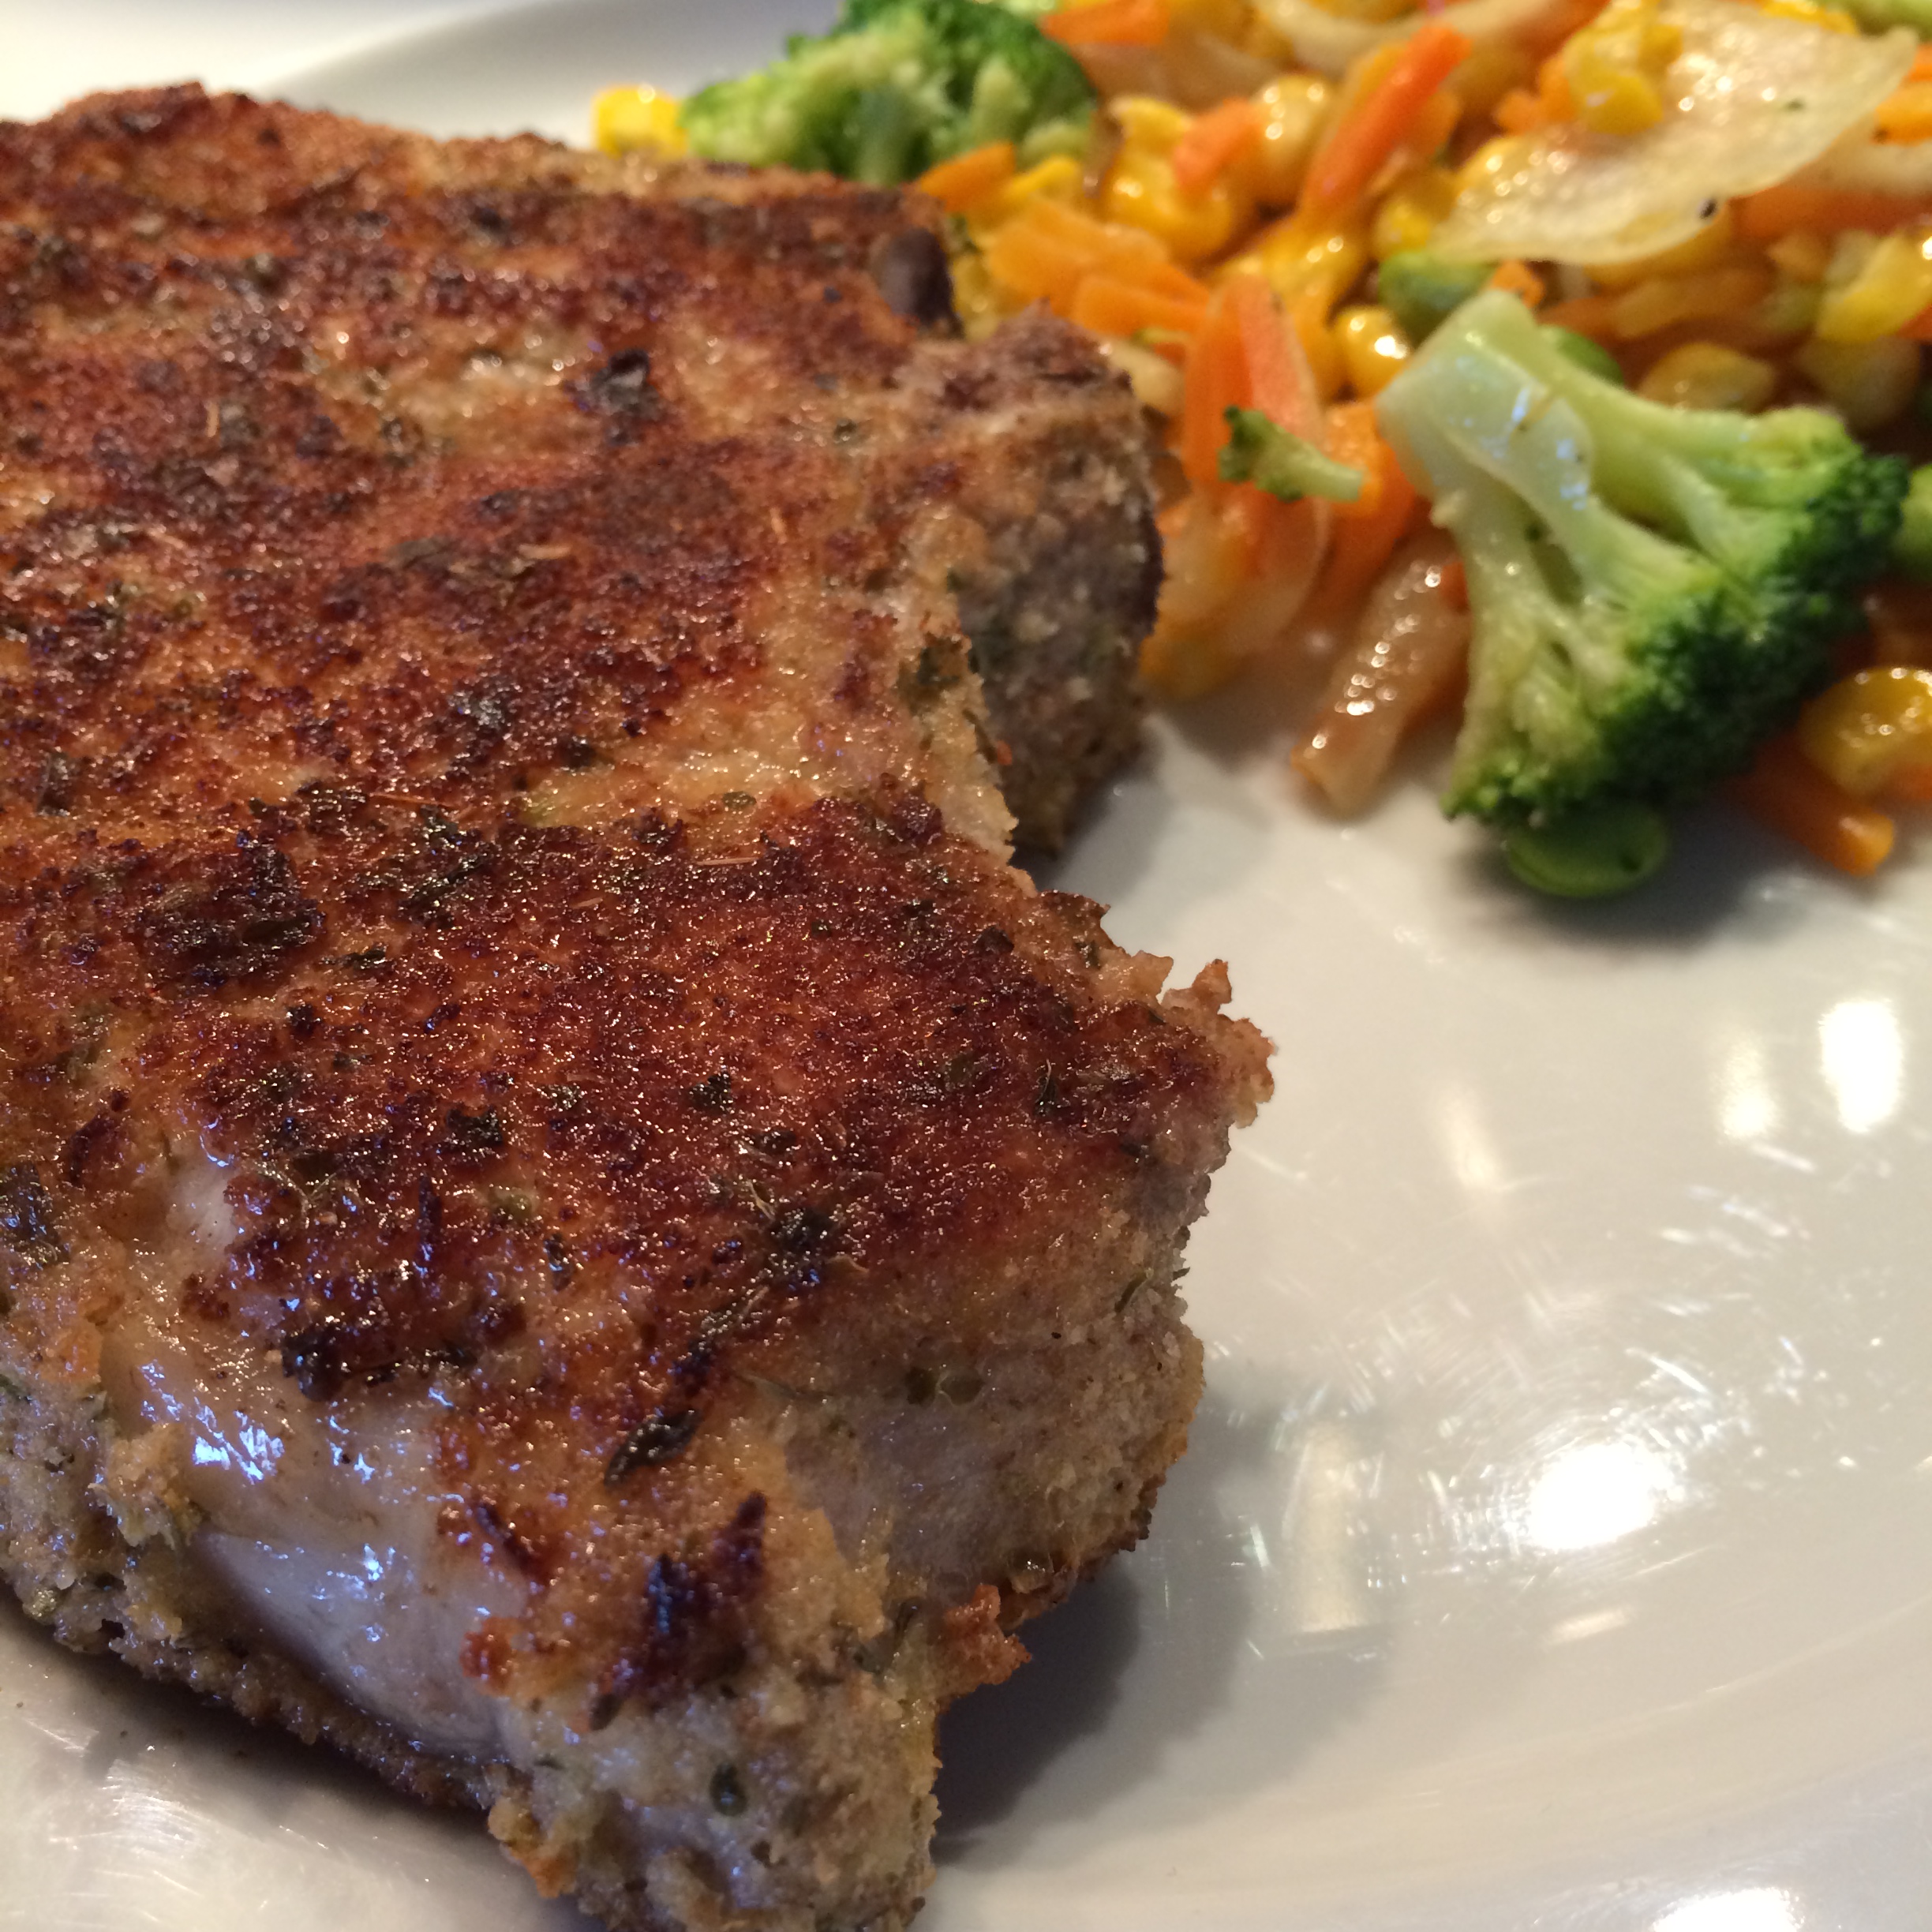
Place an oven-proof pan on medium-high heat and add a little olive oil. Once the oil is hot, coat the pork chops in the egg wash and then coat them with the bread crumb mixture. Place the chops in the hot pan to brown and sear on one side. After a few minutes, flip the chops over in the pan and place the pan in the oven to finish cooking.


chop 2

Remember, good pork does not need to be cooked to death! A light pink to the meat is OK. You want to cook the meat to about 145 degrees, letting it rest for at least 3 minutes before serving.


Inspired by a garden full of fennel and my fanatical love for all things pork, this recipe just happened. I use Berkshire heritage pork when possible, a far tastier and healthier choice over standard pork you find in a supermarket.

pork chop fennel

4 Berkshire pork chops
4 tablespoons finely chopped fennel bulb
2 teaspoons finely chopped fresh sage
3 teaspoons granulated garlic
1 teaspoon Kosher salt
1/2 teaspoon ground black pepper
3 tablespoons extra virgin olive oil
extra fennel bulb and fennel fronds
extra olive oil, salt and pepper for sauteing

Combine the chopped fennel, sage, garlic, salt, black pepper and olive oil in a bowl. Mix well and spread it all over the pork chops. Let them stand for an hour at room temperature.

Light a hot grill. Grill the pork chops until they’re done…with quality pork, that does not mean cook it to death! (An internal temperature of 160 is the way to go.)

Chop the extra fennel bulb into thin strips about an inch long. Remove the fennel fronds from their stems. Saute the bulb strips in olive oil, salt and pepper until they are almost crisp. Toss in the fennel fronds and cook until the fronds and bulb strips are crisp.

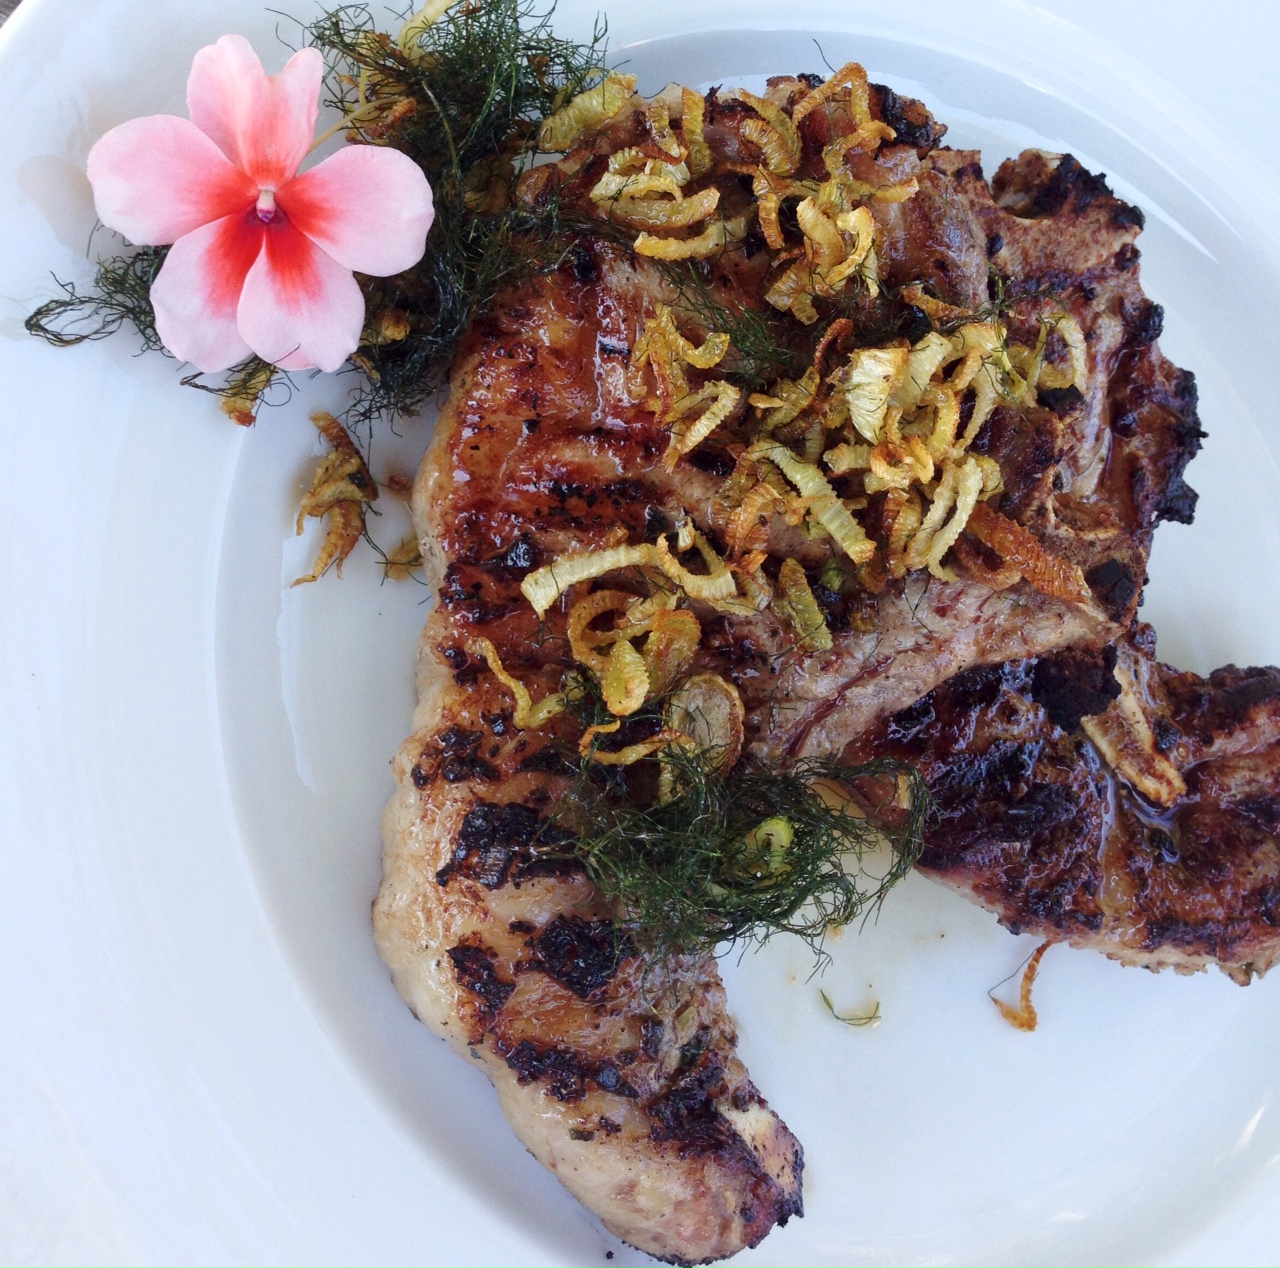
Serve the pork chops with crispy fennel and fronds on top.

It’s #NationalPorkMonth! Time to get piggish!

Few slabs of meat are as amazing as a pork butt or shoulder, rubbed with a special dry rub, then slow-smoked for 8 hours (or more), pulled and slathered with amazing barbecue sauce. It takes time, but it’s not really that hard to do.
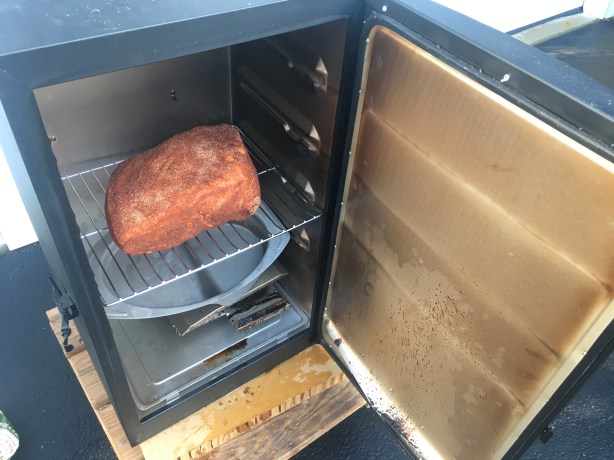
 

My electric smoker allows me to set the time and temp and walk away.

Here’s how I do it…

First, I get a hunka pork. The kind of pig I get matters to me, so I buy a heritage breed, like Berkshire (also known as Kurobuta), from a farm that raises them humanely. I’m willing to pay the extra bucks.

But going to a supermarket or butcher shop for pork is what most people do. The names of the cuts of meat can be a bit confusing. Despite its name, pork butt is not from the back-end of the pig.  (The term “butt” referred to the barrel the meat was stored in when the only method of preservation was salting the meat and storing it in barrels.)

The pork butt is actually the shoulder of the pig. The pork shoulder picnic is a lower cut of the same area. These cuts can also go by the names: Boston shoulder roast, Boston butt, Boston roast, shoulder butt, pork shoulder picnic, and shoulder-blade roast. Whatever the name, these are all nicely marbled hunks of meat that usually weigh in anywhere from 6 to 8 lbs, are easy to find, and are rather inexpensive. Barbecue fanatics claim the bone-in pork butt is more flavorful, but if boneless is all you can find, that’ll work, too.

Once I’ve got my slab of pork, I remove the skin if it has any. I want my pork rub to make contact directly with the meat, so I always remove the tough skin. No skin? No problem. But leave the fat on!

Now I need to season it. I’ve found that a simple rub is the best way to go for the sauce I’m going to use later.
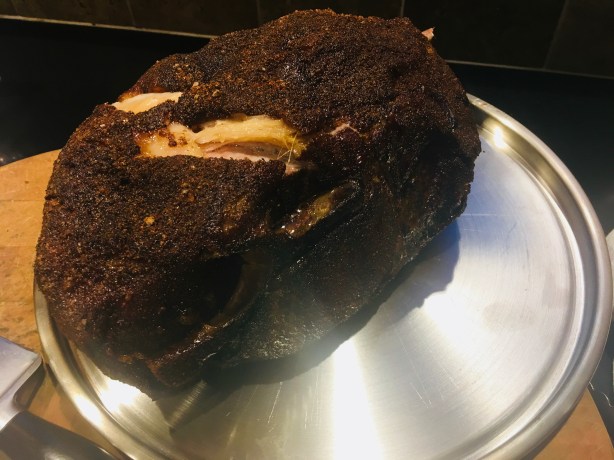
 

After 8 hours in the smoker, the rub makes a crust on the meat that is just fantastic!


BASIC DRY RUB

1/4 cup kosher salt
1/4 cup black pepper (freshly ground is best)
1/4 cup paprika
1/4 cup brown sugar
2 tablespoons granulated garlic
2 tablespoons granulated onion

Place all the ingredients in a jar with a lid and shake it up to blend.

Once I’ve made the rub, I generously sprinkle it all over the pork, and rub it in really well. Ideally, I let the pork shoulder sit in the fridge for 24 hours before smoking, bringing it out an hour beforehand to have it come up to room temperature.

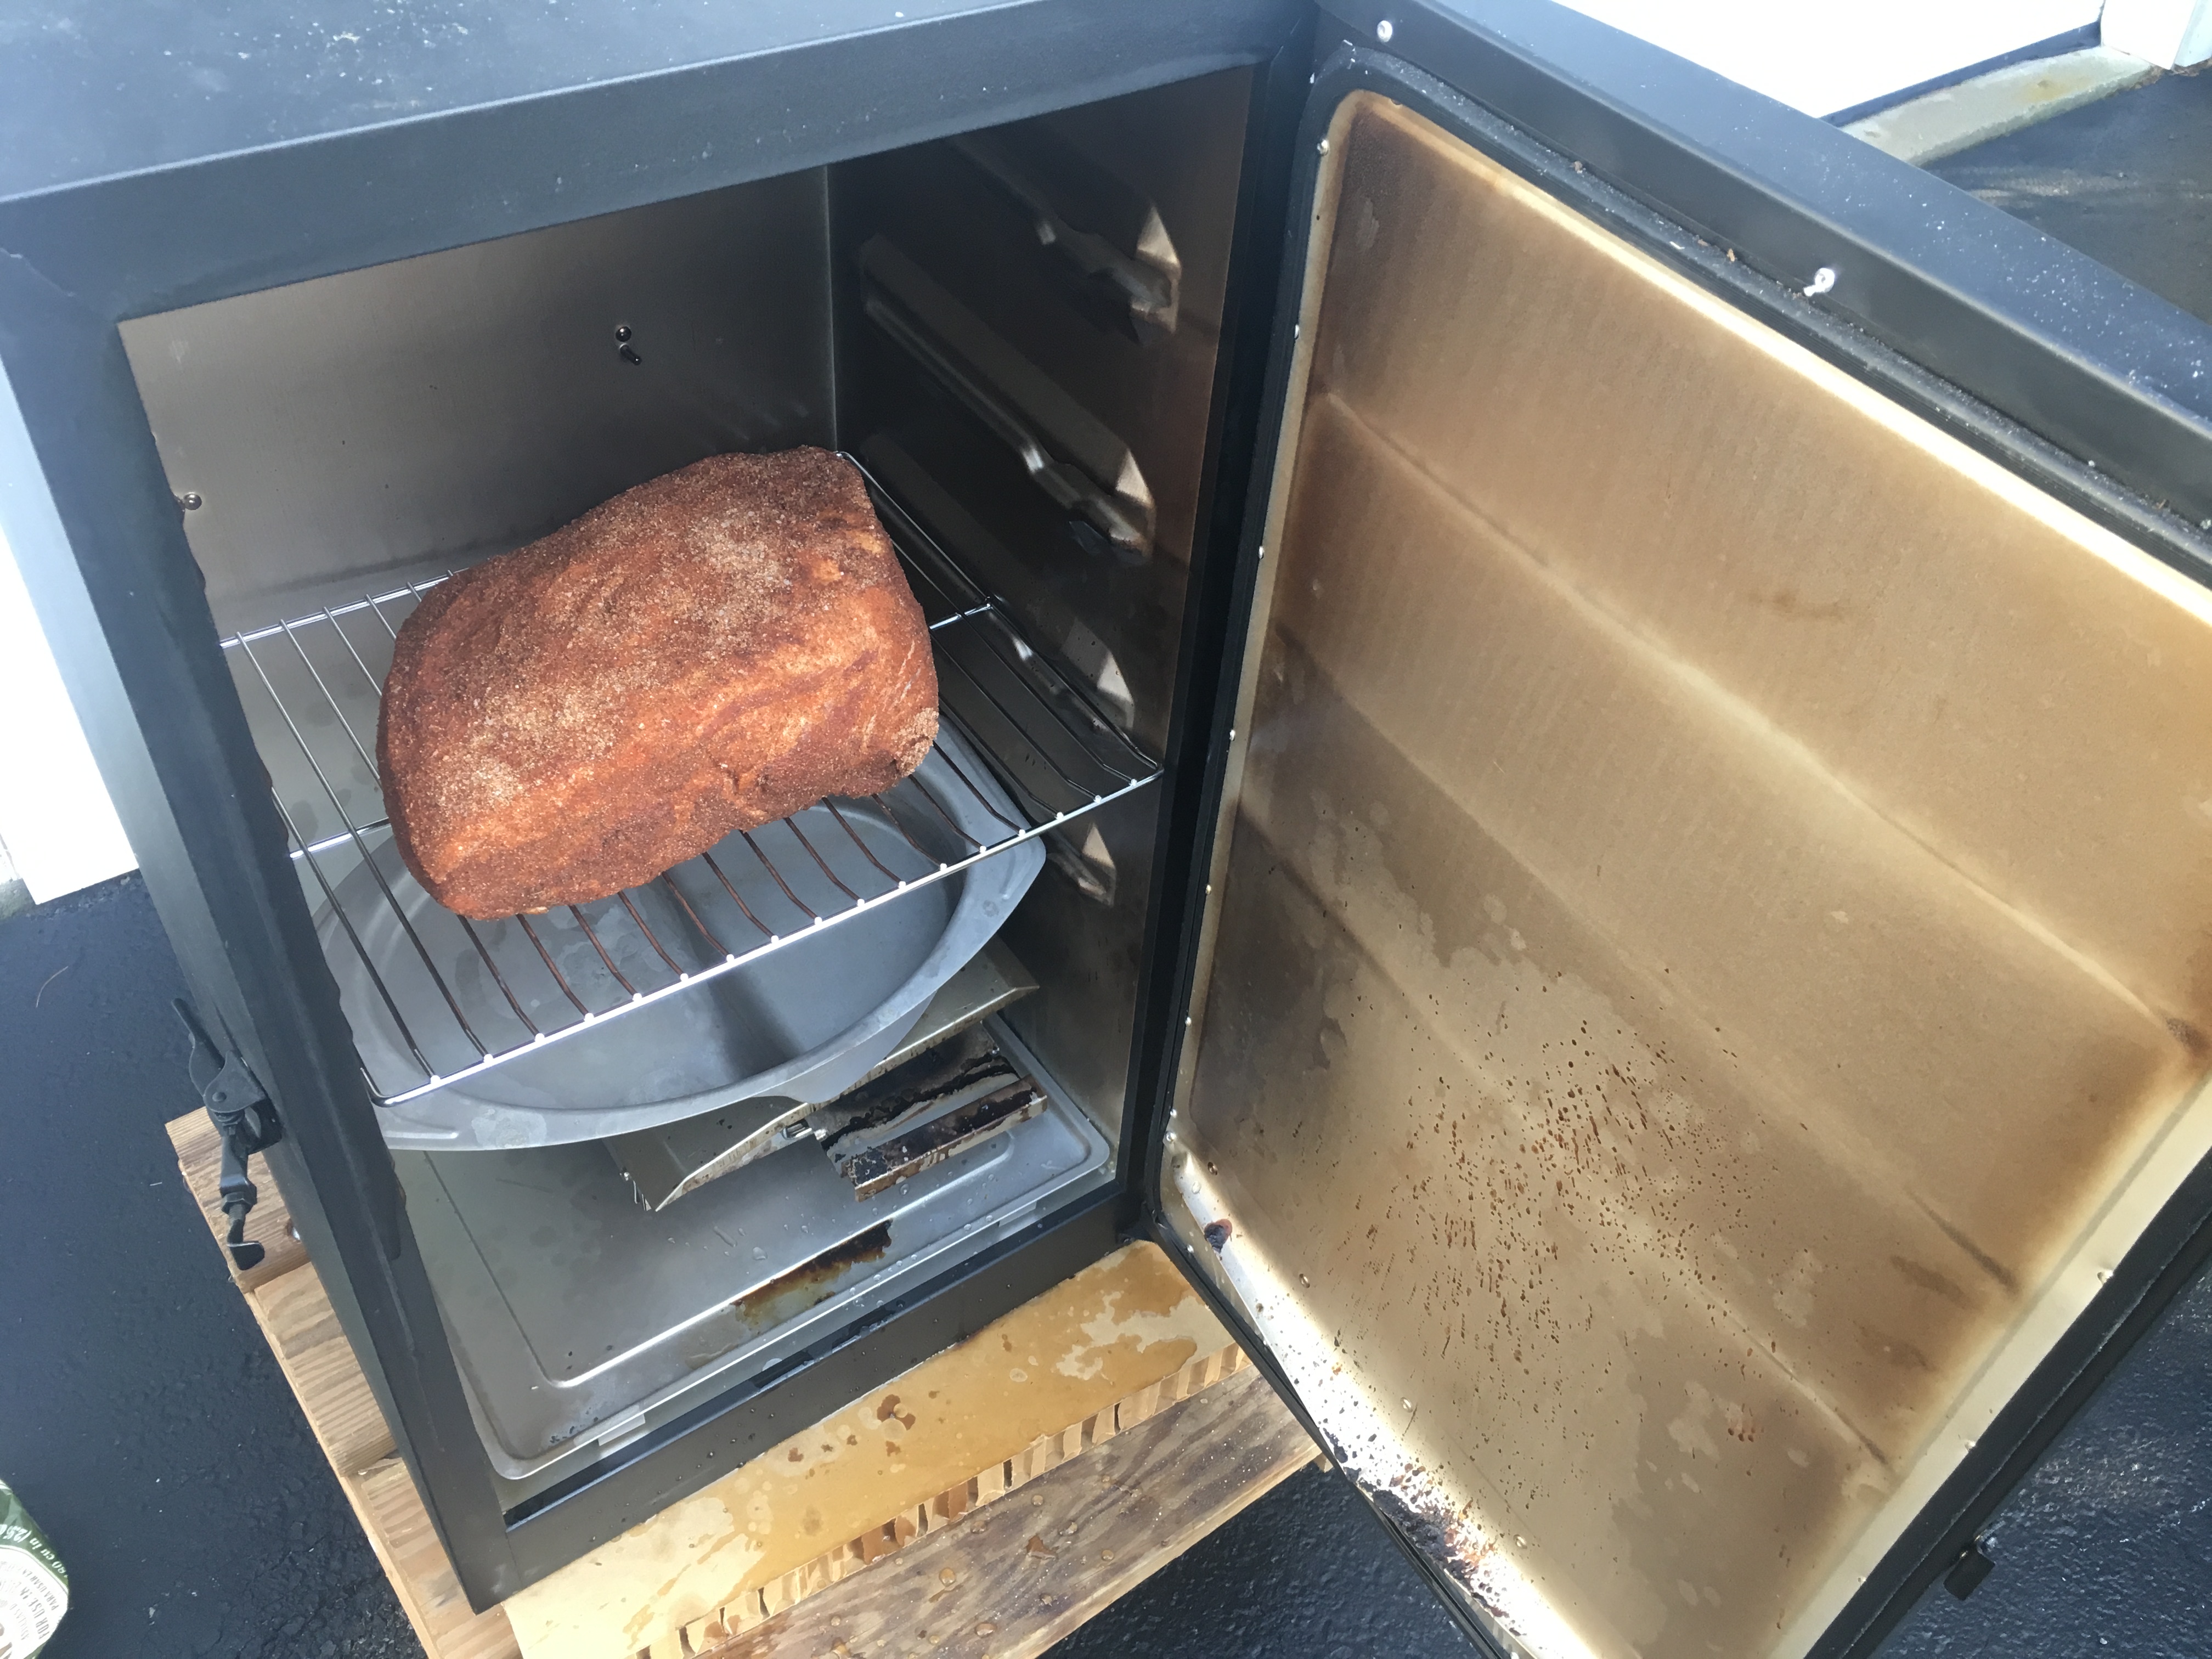
I have a digital smoker at home, which allows me to set the temperature to cook and smoke my pork butt. I place the pork butt on a rack, put a drip pan with water underneath it to catch the grease, and set the smoker for 250 degrees. I cook the pork at 250 for 8 to 10 hours, depending on the size of the meat, adding hickory chips to the smoker every few hours. The marbled fat in the pork butt slowly melts over time and the pork becomes incredibly tender and flavorful.

I remove the pork butt from the smoker and let it rest, covered with aluminum foil, for at least 20 minutes before pulling it apart with a couple of forks, or chopping it up with a cleaver.

While the pork is cooking and smoking, there’s plenty of time to make two other very important parts of this recipe: a vinegar-based barbecue sauce, and the cole slaw.
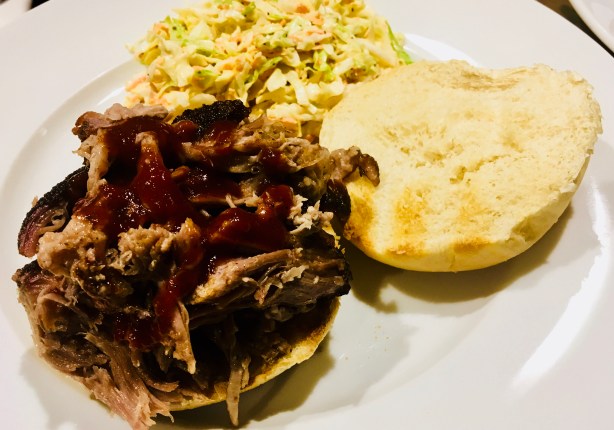
 

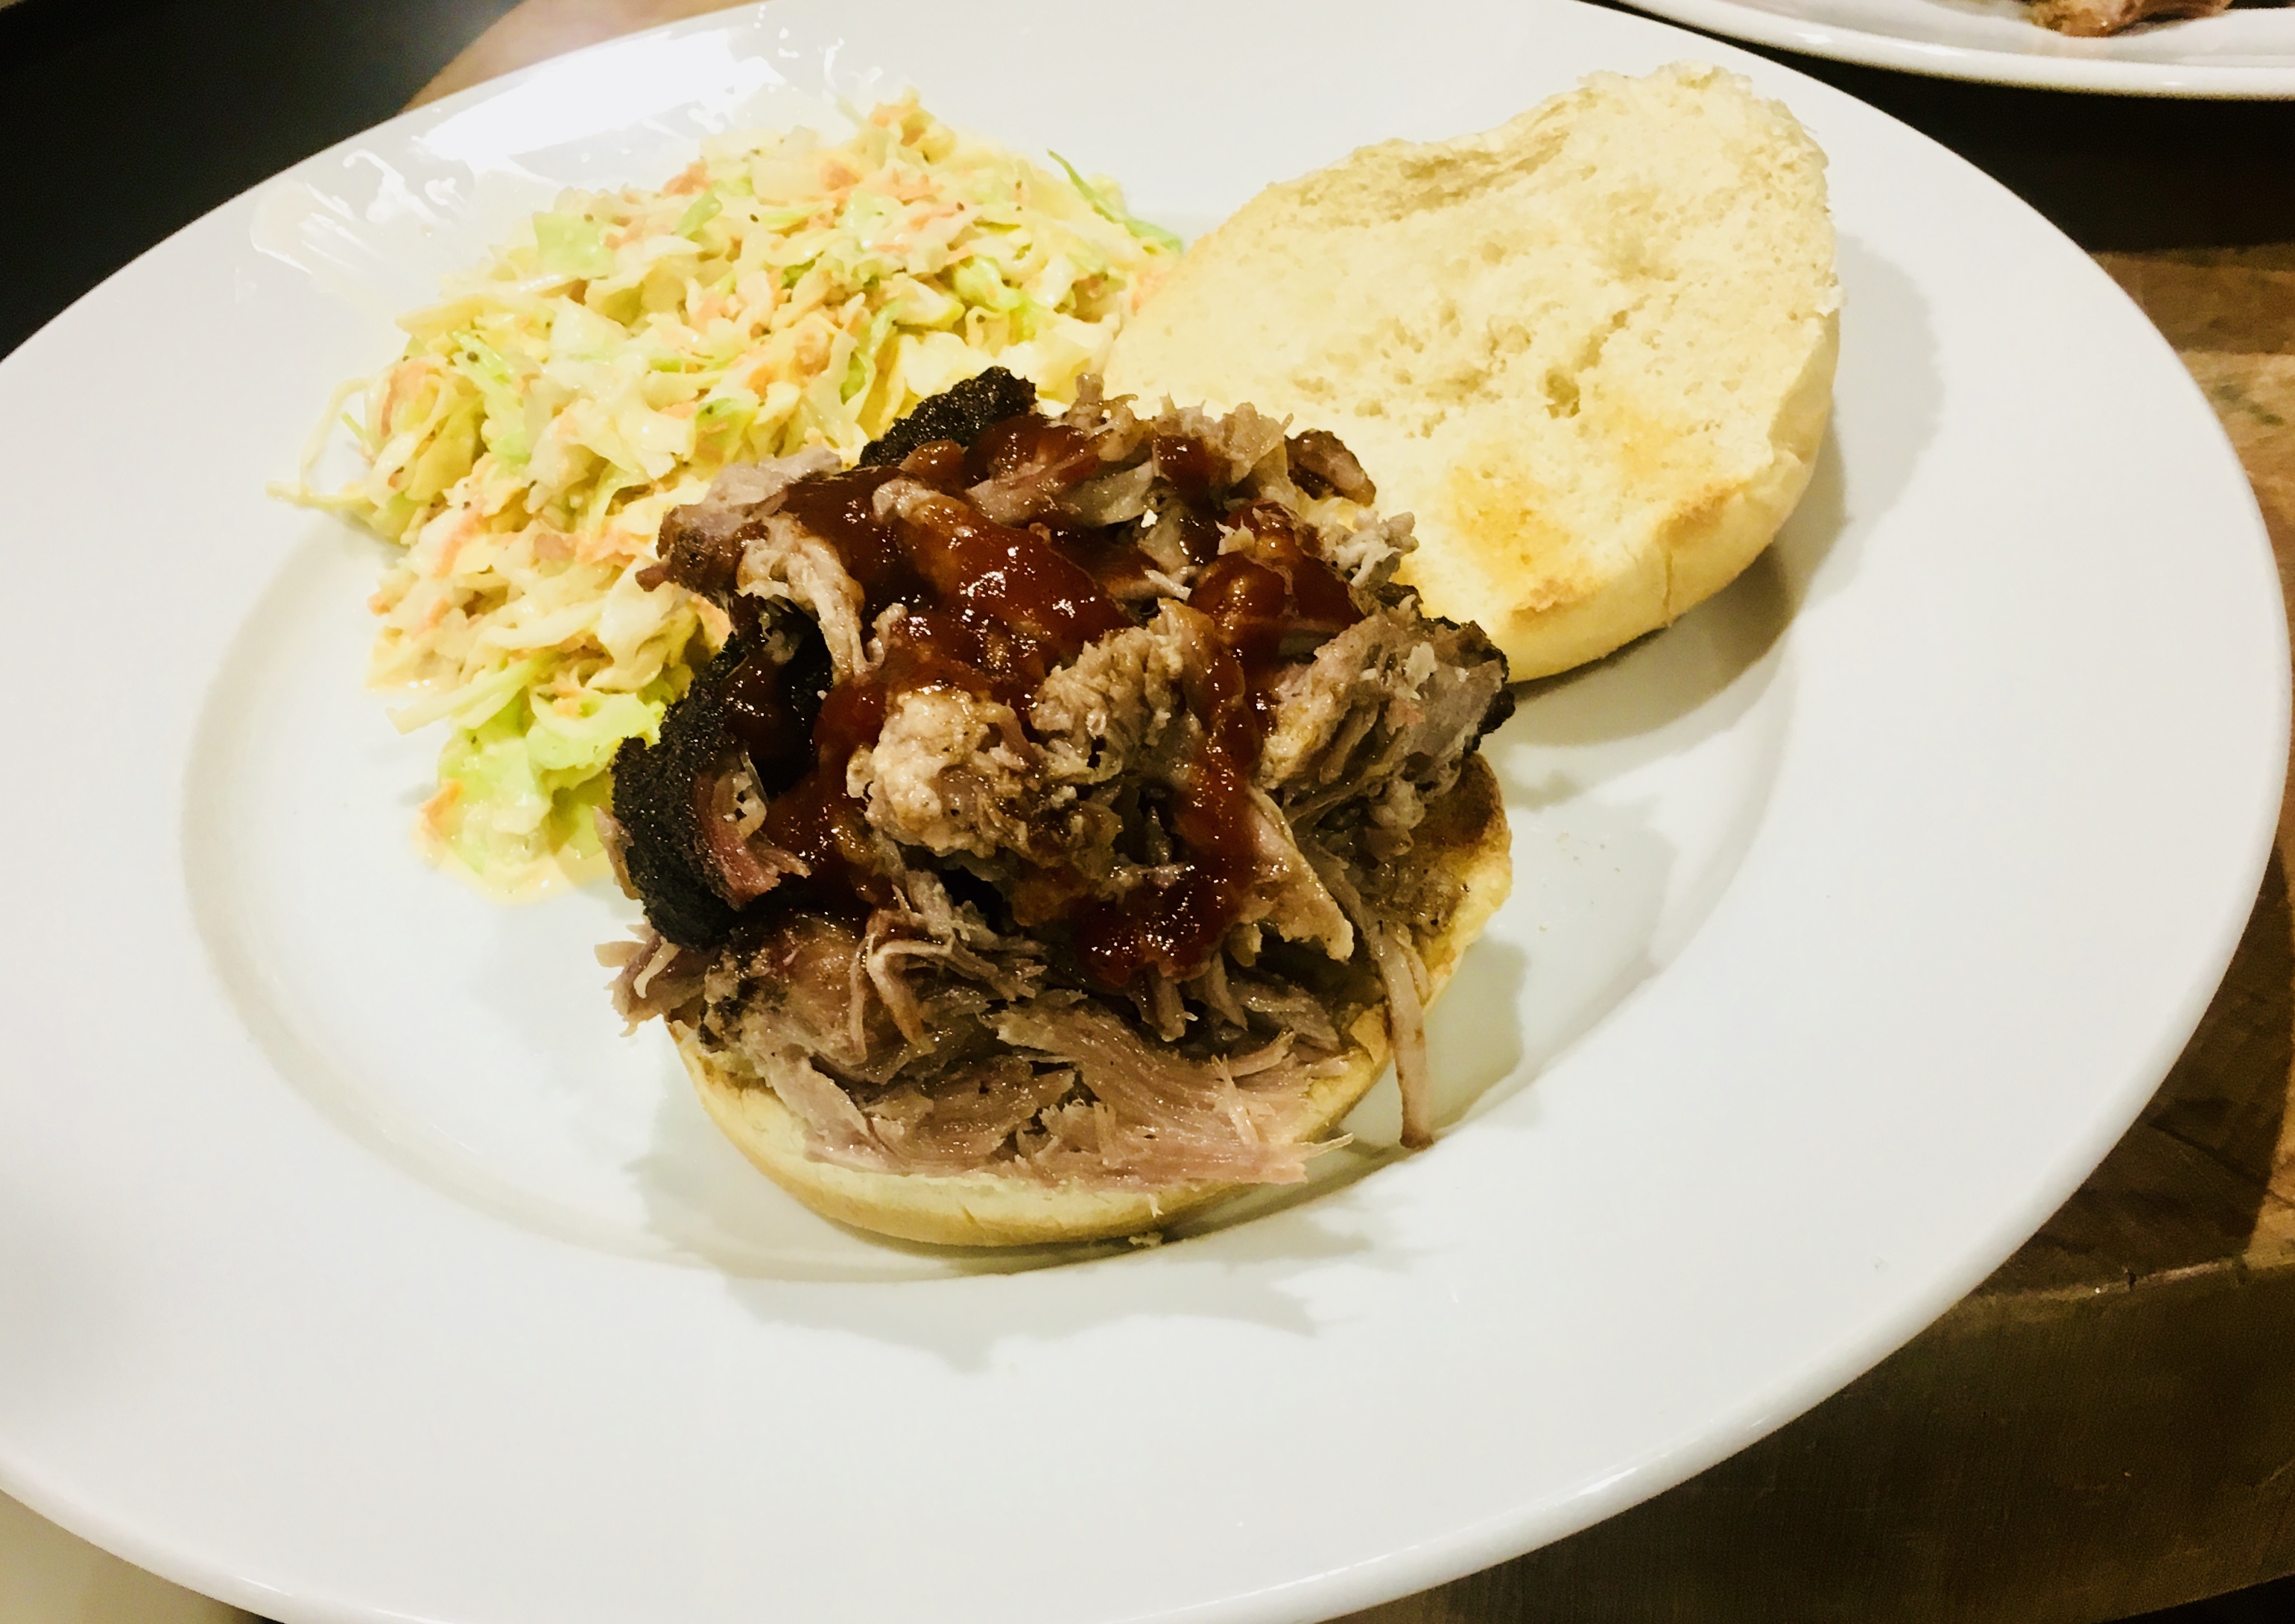
Slaw on the side or on the sandwich…up to you!


BARBECUE SAUCE

2 cups ketchup
3/4 cup water
6 tablespoons cider vinegar
6 tablespoons white vinegar
6 tablespoons brown sugar
3 tablespoons Worcestershire sauce
1 tablespoon chili powder
2 teaspoons salt
2 teaspoons black pepper
2 teaspoons cumin

Mix all the ingredients in a saucepan and simmer until the flavors have blended, about 20 minutes. Remove from the heat and cool it to room temp. If you store it in an airtight container in the fridge, it’ll stay good for several weeks.


COLE SLAW

My unusual cole slaw recipe uses an interesting ingredient: pickle juice! Just a splash of juice from your favorite jar of pickles is all you need.

1 package of cole slaw veggies
splash of pickle juice
1/4 cup mayonnaise (more to taste)
teaspoon celery seed (not salt)
salt and pepper

There are no real specific measurements for cole slaw, because I’ve found that some people like it dry, others wet…some peppery, some not. Play around with it and make it your own. I prefer a more mayonnaise-y cole slaw, and usually err on the wet side.

In a bowl, combine all the ingredients. Cover it with plastic wrap and chill. When ready to use, re-mix it, and taste for seasoning before using. Letting it sit overnight before serving is best.


OK…time to make that sandwich!

You can either go Carolina style and place the cole slaw right on top of the pulled pork in the bun, or simply serve the slaw on the side. No rules!

Whether you go through all these steps yourself or not, it’s nice to appreciate a labor of love that is worth every bit of time and trouble invested in it.

As I’ve mentioned previously, I love the Kona-crusted NY strip at the Capital Grille, so much so that it inspired me to make a coffee rub of my own. I’ve been using it on steaks and burgers for years. But recently, I used it on a slow-smoked pork shoulder for the first time, and it was fantastic!

I used a smaller pork shoulder, about 6 lbs., and smoked it for about 12 hours. Obviously, if you use a larger hunka meat, you’ll need more time. I prefer a bone-in shoulder over boneless. I think it gives greater flavor.

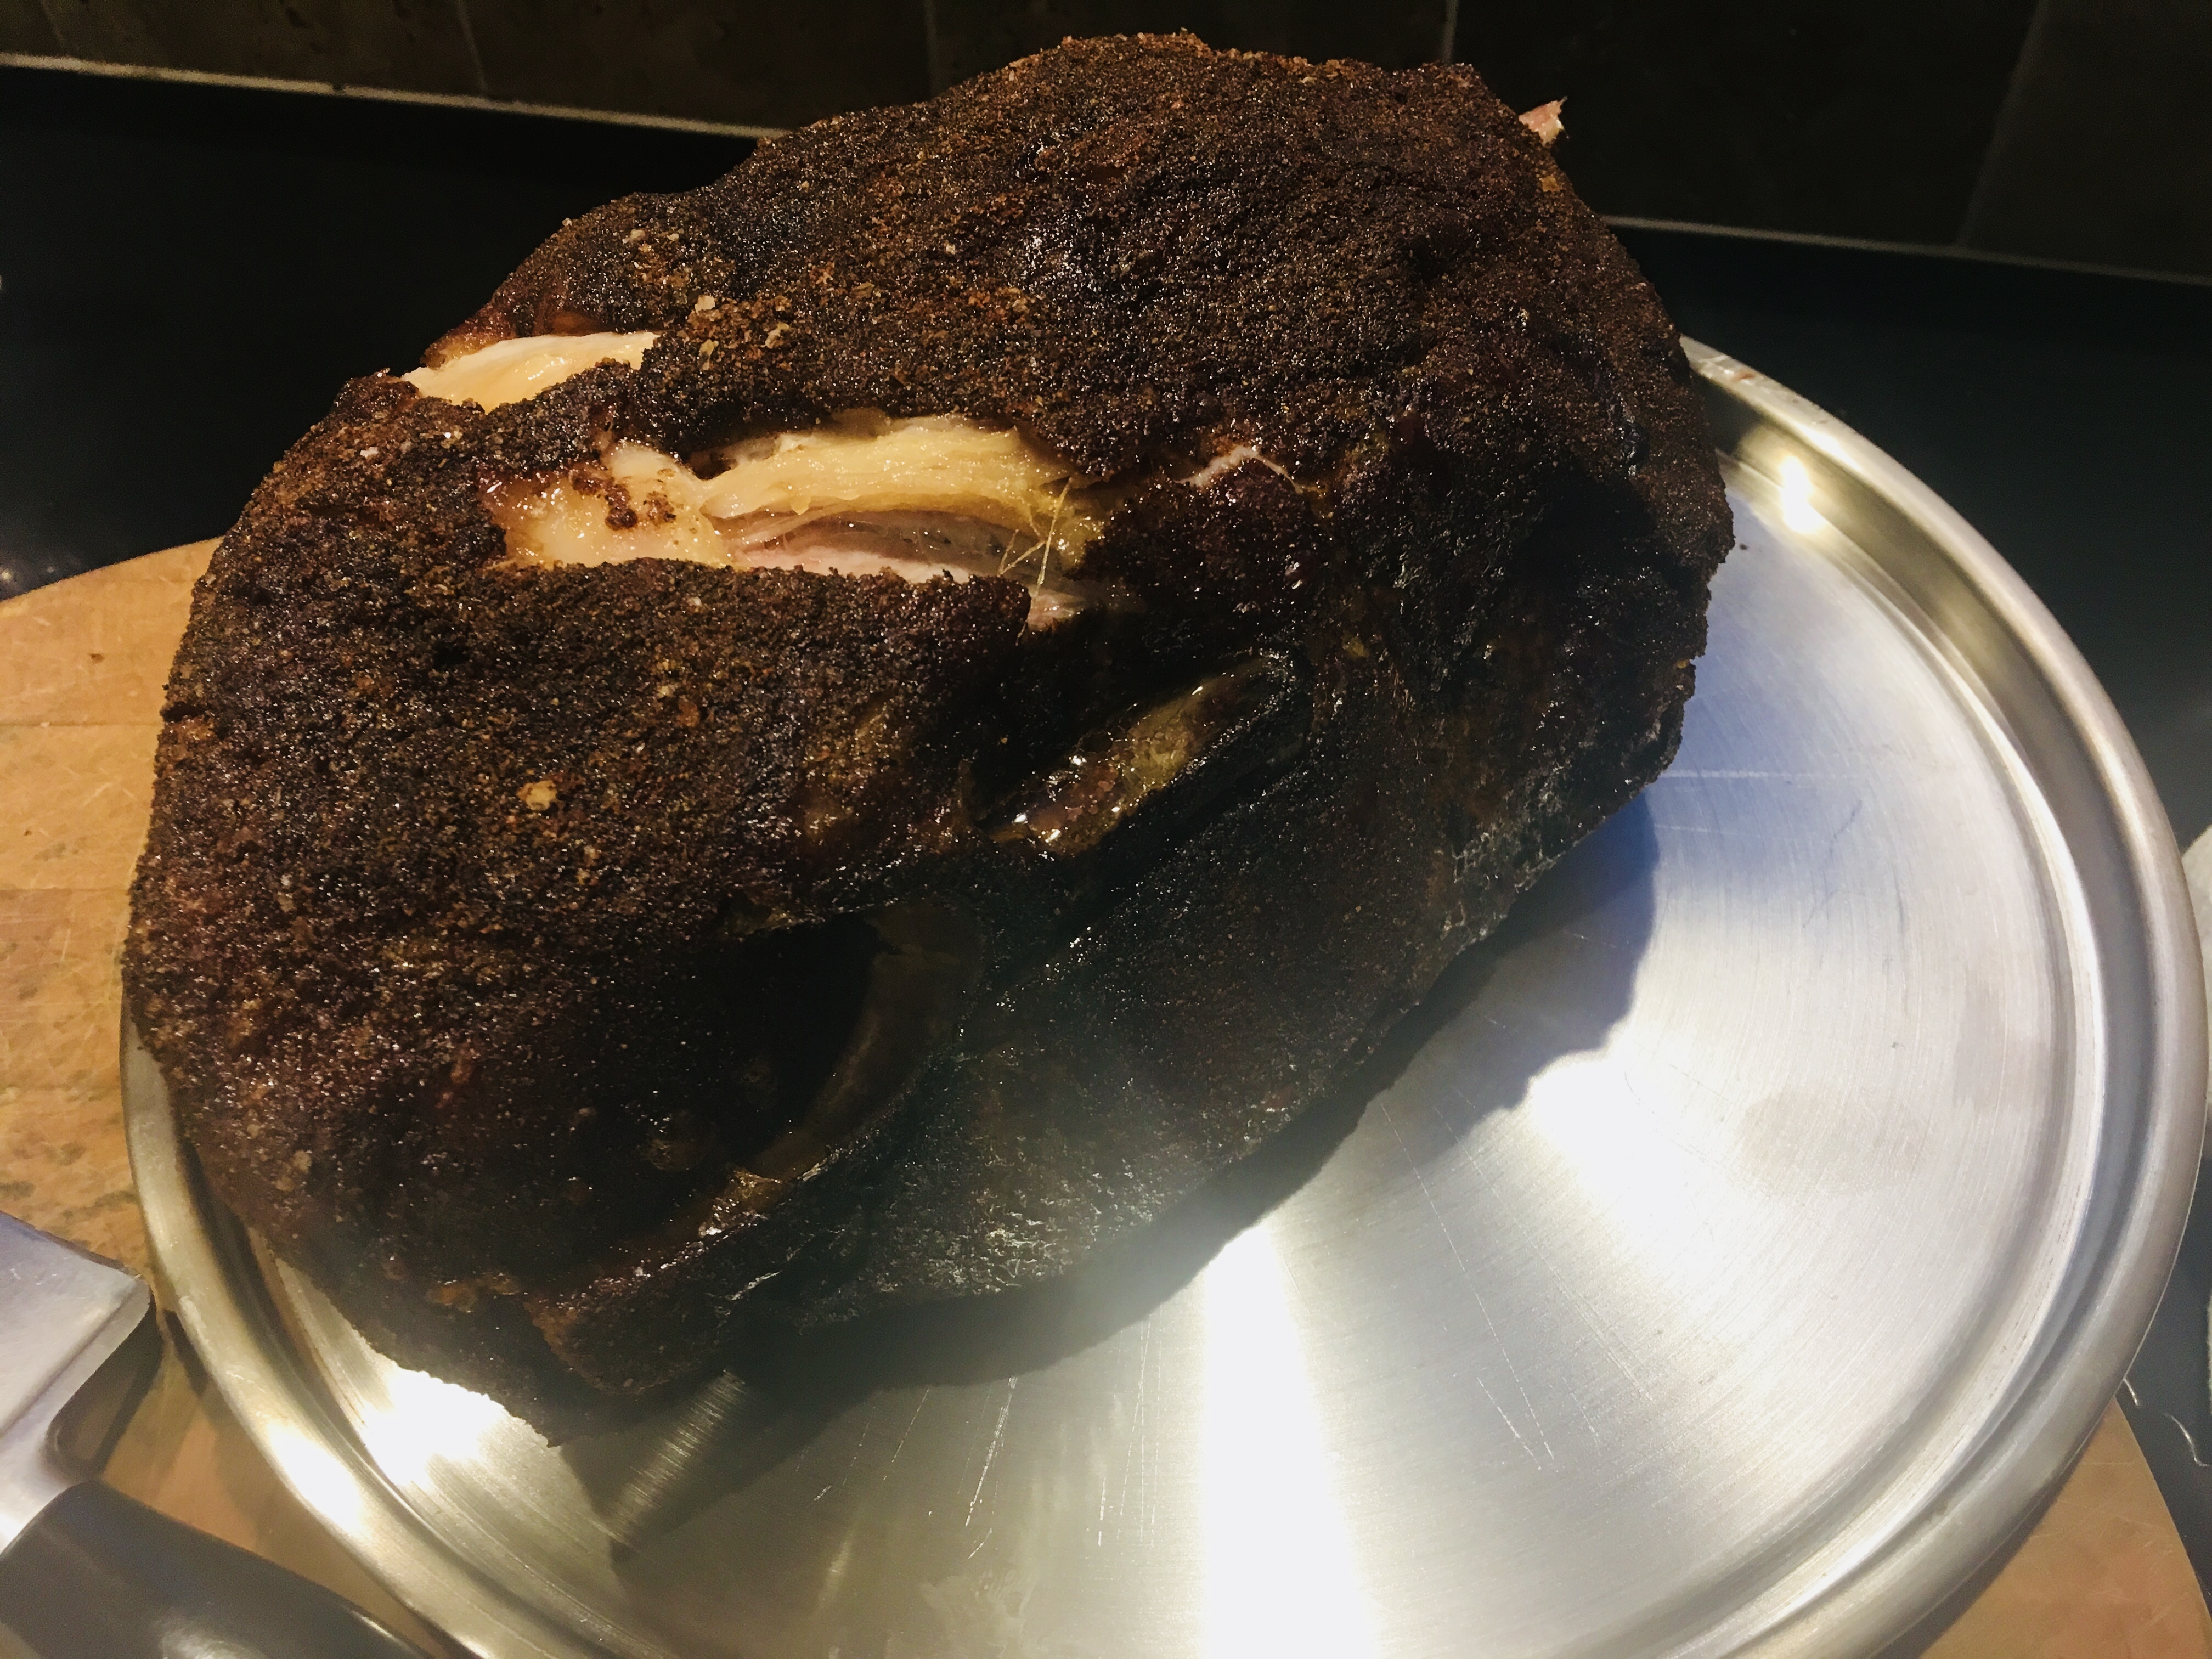
Rubbed and ready to smoke!

My coffee rub is easy to make, and I usually make a lot of it at once, since it stores well.

3 tablespoons brown sugar
1 tablespoon Kosher salt
1 tablespoon ground coffee (use your favorite)
1 teaspoon granulated garlic
1 teaspoon granulated onion
1 teaspoon unsweetened cocoa powder

I mix all the ingredients well, then rub generously on the pork shoulder before placing it a 250-degree smoker for about 12 hours. I use an electric smoker, which allows me to set the temperature and forget it, with the exception of occasionally adding hickory chips. I love just a hint of smokiness…I don’t want the rub to be overpowered by the smoke.

Perfectly smoked, with the bone easily sliding out of the shoulder.

The brown sugar in the coffee rub creates a beautiful crust on the meat, which goes really well with the pork and the barbecue sauce I make.

The barbecue sauce uses much-needed vinegar. It cuts through the rich fattiness of the pork, and is absolutely delicious.

2 cups ketchup
3/4 cup water
6 tablespoons cider vinegar
6 tablespoons white vinegar
6 tablespoons brown sugar
3 tablespoons Worcestershire sauce
1 tablespoon chili powder
2 teaspoons salt
2 teaspoons black pepper
1 1/2 teaspoons cumin

Mix all the ingredients in a saucepan and simmer until the flavors have blended, about 20 minutes. Remove from heat and cool to room temp. If you store it in an airtight container in the fridge, it’ll stay good for a few months.

A beautifully smoked pork shoulder, amazing barbecue sauce…what more do you need for an amazing pulled pork sandwich except a toasted brioche bun and perhaps some of my world-famous home fries on the side?

The home fries? That recipe is for another blog!