Archive for the ‘Recipes’ Category

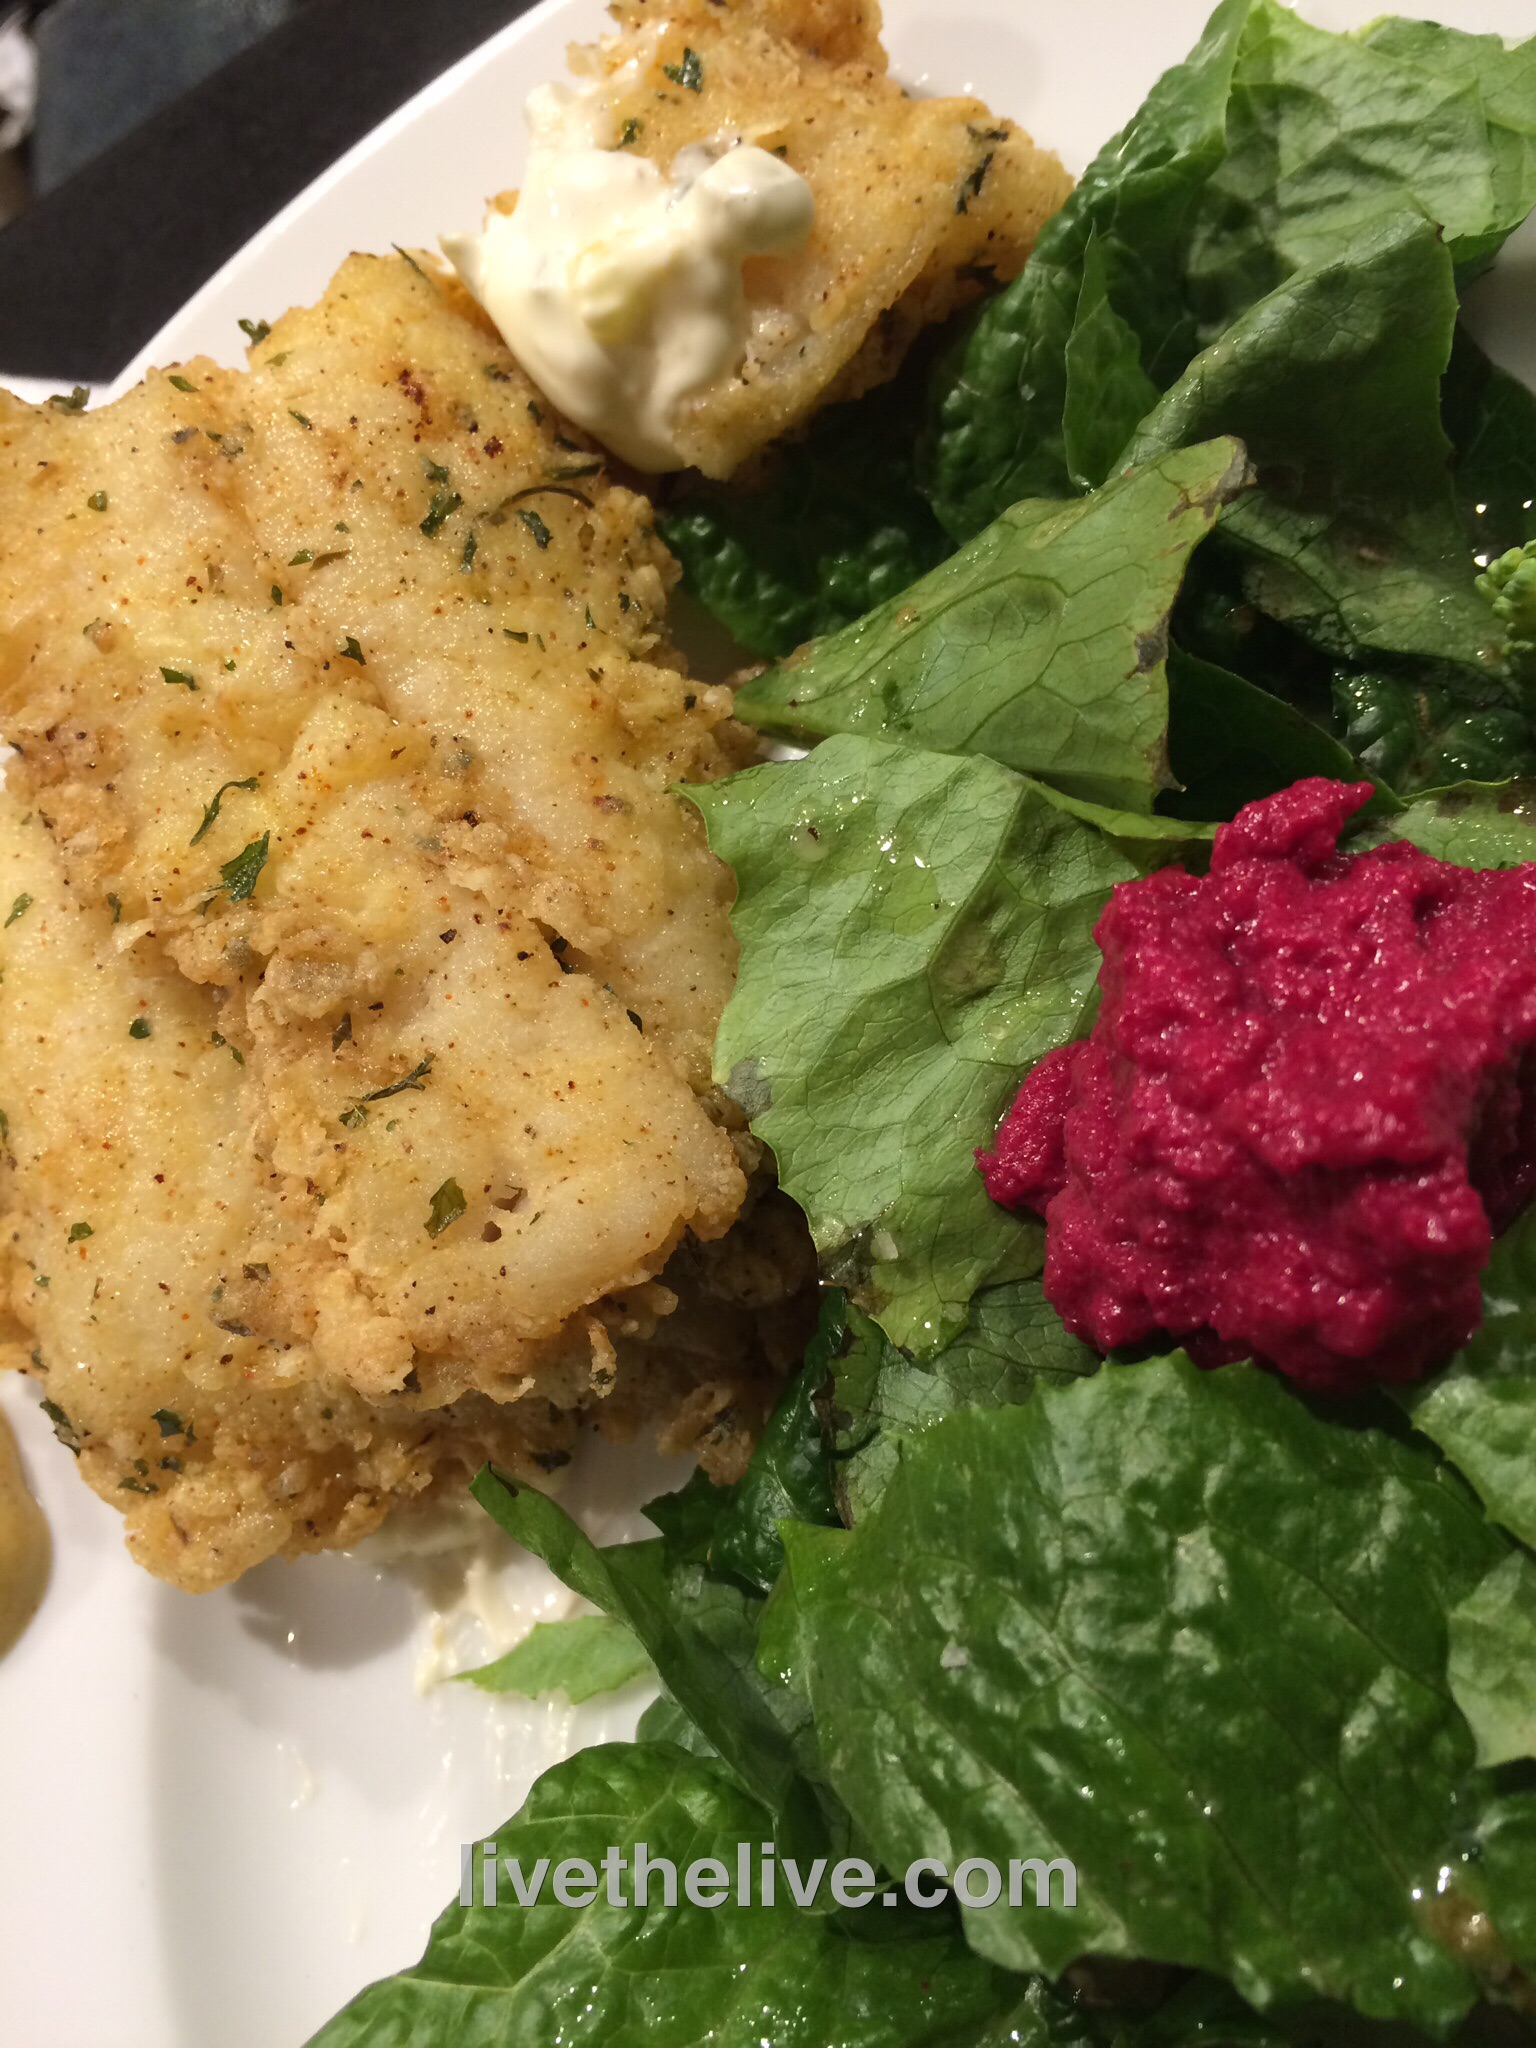
It’s always a challenge when you’re watching your calories. Fish is a great source of protein, and I love it sautéed in a little butter and olive oil with Paul Prudhomme’s Seafood Magic seasoning on it. But let’s face it, that gets old after a while, and we all know there’s nothing tastier than fried fish.

Rather than using a heavy beer batter like I used to do, I came up with a very light gluten-free-flour-based seasoning that gave the fresh-caught local fish I bought incredible flavor and crunch without a carb overload and without gluten. (I’m not on a gluten-free diet, but most GF flour is made from rice, and rice flour that gives you a lighter, crispy texture.)

There are many gluten-free flours out there now. My favorites are King Arthur and Cup 4 Cup, but use whatever GF flour you prefer. (Just make sure that rice flour is a key ingredient in it.)


image

1 cup flour (all-purpose or gluten-free)
1 tablespoon dried parsley
2 teaspoons salt
1 teaspoon oregano
1 teaspoon granulated onion
1 teaspoon paprika
1/2 teaspoon pepper
1/2 teaspoon granulated garlic
2 eggs
fresh locally caught fish fillets of your choice (I used fluke and ocean perch)
avocado oil for frying

In a flat bowl you will use to dredge the fish fillets, combine the flour, parsley, salt, oregano, onion, paprika, pepper and garlic.

In a separate flat bowl, scramble the 2 eggs.

Pour about 1/2″ of the oil in a pan and heat to medium-high heat, about 325° measured with a thermometer.

Dip the fish fillets first in the eggs, coating well. Then dredge them in the flour mixture, pressing down on both sides, so the flour mixture really sticks to the fish. Then shake the fillets lightly to remove the excess flour and gently lay the them in the hot oil. Fry them until they’re golden. (Fresh fish doesn’t take a long time.)

I made a quick and delicious tartare sauce using Hellman’s mayonnaise, dill pickle relish and Maille sauterne mustard.

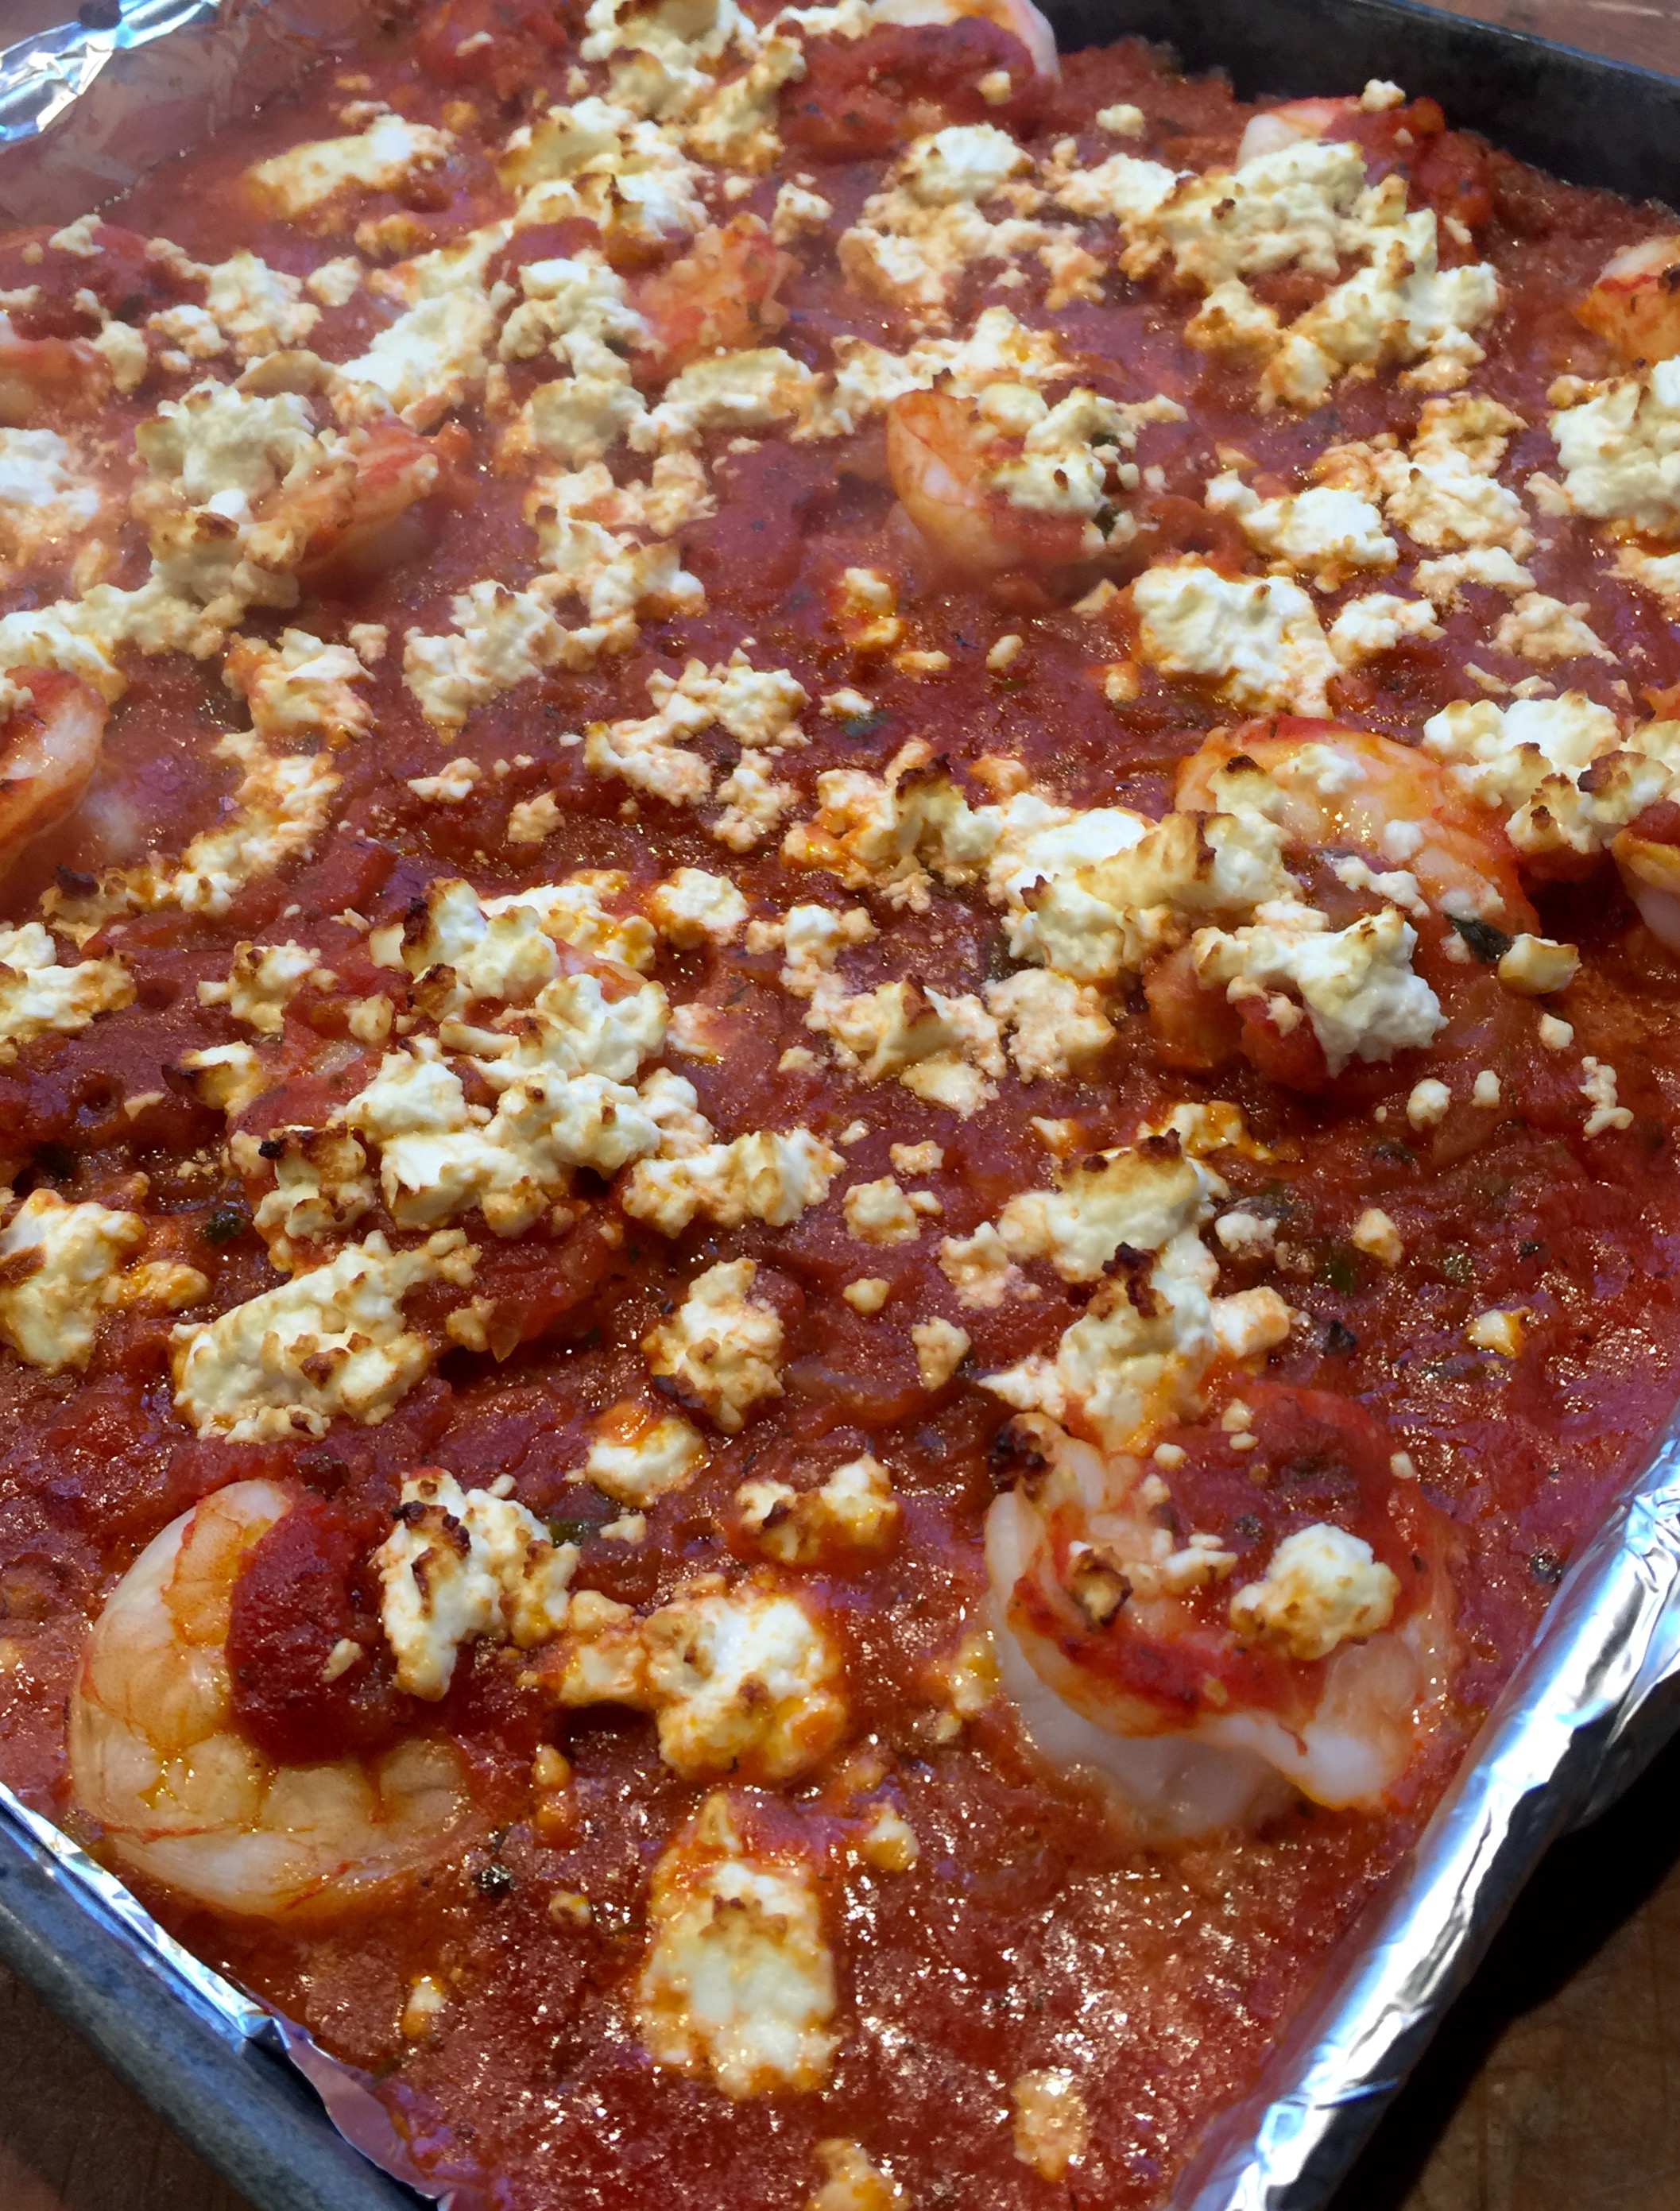
I love the combination of tomato sauce and feta, and this dish, served over some pasta, will have you licking the plate.


FullSizeRender (7)

8 oz. (or more!) feta cheese
1 can (28 oz.) whole tomatoes, ground into sauce
1 lb. (about 24) medium-sized wild-caught American shrimp, peeled and deveined
1 medium onion, chopped
juice of 1/2 lemon
2 tablespoons olive oil
2 cloves garlic, through a press
pinch red pepper flakes
1 teaspoon fresh dill
1 teaspoon oregano
1 tablespoon Ouzo
salt and pepper

Peel and devein the shrimp. Place them in a bowl and squeeze the lemon juice over them and toss them to mix. Open the can of tomatoes and pureé it in a food processor.

In a saucepan, heat the olive oil. Sauté the onions until they’re translucent and then add the garlic. Sauté the garlic for 10 seconds, until fragrant, then add the red pepper flakes, dill and oregano. Add the tomato sauce, and cook over medium heat until the sauce has reduced a bit and isn’t watery. Add the Ouzo carefully–keep it away from open flame! Add salt and pepper to taste.

Line a sheet pan with foil and pour a thin layer of the tomato sauce on the bottom. Lay the shrimp down in one layer on the sauce, and then cover the shrimp with the rest of the sauce. Crumble the feta cheese with your fingers and sprinkle it all over the top.

Bake in a pre-heated 350° oven until the shrimp has cooked through and it’s nice and bubbly. Serve over pasta or with a side of your favorite veggies.

A snowy day in New England today. It’s time to make some meatloaf!

Few dishes scream out “comfort food” like meatloaf. My Mom’s meatloaf was awesome, and she’d cut a huge slab of it onto my plate, with fantastic butter-loaded Pennsylvania Dutch egg noodles on the side. I couldn’t stop eating it.

I never thought of making meatloaf when I moved away, because it gave my Mom something special to make for me when I came home to visit. She was thrilled that there was a dish she could make that I would devour every time, without hesitation. (The others were her roasted lamb and Lithuanian pierogis called koldūnai (kol-doon-ay).

But Mom passed away years ago, so I’ve taken meatloaf matters into my own hands. I never got my Mom’s exact recipe. But I had an idea of what went into it, so I gave it a shot.

The standard mix for my Mom’s meatloaf was one-third each ground beef, pork and veal. I go 2/3’s beef and 1/3 pork instead, unless I can get my hands on humanely-raised veal from a farm down the road. My Mom used Lipton onion soup mix in her meatloaf. I chose to stay away from packaged ingredients which have chemicals and preservatives. And instead of layering slices of bacon on top as many people do, I fry and chop the bacon and mix it into the meat, giving my meatloaf delicious smokey bacon goodness in every bite!

To keep this dish gluten-free, just use GF breadcrumbs. I buy loaves of Udi’s frozen gluten-free bread, toast the bread slices, then put them in a food processor to make great-tasting bread crumbs that have all the flavor of regular bread crumbs, without the gluten. You’d never know the difference.


image

4 strips bacon, fried and chopped
1 yellow onion, minced
1 teaspoon salt
1/2 teaspoon pepper
1/2 teaspoon granulated garlic
pork fat or olive oil
2 lbs. ground beef
1 lb. ground pork
1 cup breadcrumbs
1/2 cup ketchup
2 eggs

Fry the strips of bacon until crisp. Remove the bacon from the pan and chop it fine. Set it aside.

Keeping the rendered bacon fat in the pan, sauté the onion with it until translucent. Add the salt, pepper and garlic. Set the pan aside, letting it cool to room temperature.


In a bowl, combine the meat, bread crumbs, ketchup, bacon, eggs, and the sautéed onion mixture. Form it into a loaf and place it in a loaf pan. Bake at 350° for about an hour.


Delicious, caramelized meatloaf. Leftovers are always welcome!


Years ago, I sampled a negroni-inspired cocktail in Cleveland, Ohio, dining at chef Jonathon Sawyer’s The Greenhouse Tavern. (Sadly, it’s no longer there.) The dishes were deliciously creative, and I had this mind-blowing cocktail that inspired me to buy a small oak barrel and start cask-aging everything I could get my hands on at home. The OYO Stone Fruit Vodka, a key component, was not available here in New England for years, but I recently spotted a bottle at Yankee Spirits in Swansea, Massachusetts!


OYO STONE FRUIT “NEGROSKI”

1 oz. OYO Stone Fruit Vodka
1 oz. Campari
1 oz. Cocchi Vermouth di Torino

If you’re doing it The Greenhouse Tavern way, combine large quantities of these ingredients in equal parts and pour them into an oak cask, then let it age! Experience tells you that newer and smaller oak casks will mellow flavors faster than larger, older ones. But it’s all about experimentation. Having a taste every once in a while is must, because you don’t want to over-age it, either.

If you don’t have an oak cask lying around at home, it’s still delicious without it.

Combine all the ingredients in a rocks glass with ice. Stir gently, adding a splash of soda, and garnish with an orange peel.

OYO Stone Fruit Vodka gets its wonderful flavors from stone fruits: cherries, peaches, apricots and almonds. Terrific on its own, but amazing in this recipe.

Campari is a world-famous aperitif and bitters, and a must in any decent home bar.

Cocchi Vermouth di Torino is a sweet vermouth, made in Italy from the Moscato grape. Choosing your own favorite sweet vermouth is, of course, optional.

PAN PIZZA, TWO WAYS

Posted: January 26, 2025 in Food, pizza, Recipes, restaurants
Tags: , , ,


I got my first restaurant job when I was 17, working at Pizza City East, just down the street from my childhood home in Plainview, NY. It wasn’t a great job, but I learned an awful lot about food preparation. It’s where I opened and tasted my first clam on the half shell. It’s where I had my first sip of espresso and cappuccino. And it’s where I learned a lot about how to make really good pizza. My buddy, Mel, and I worked the counter. Mel made the pies and I did the rest: sandwiches, espressos, clams, and eventually even cooked in the kitchen. We were 2 hard-working slobs in high school, but we bonded in a way that kept us friends to this very day, over 40 years later.

So you could say pizza was in my blood. For me, the true test of a great pie is a simple slice with only sauce and cheese. It’s not easy to get that right, despite how easy it may look.

And for me, there was no other pizza than New York style Neapolitan pizza, the classic round pie with thin crust. I have no doubt that it would be my choice for the classic question: “If you were stuck on a desert island, and you could only have one food, what would it be?”

But then I discovered Sicilian pizza: it was thicker, square, and was baked on a large sheet pan. The crust was crisp on the bottom, and light and airy inside. I thought: OK, I have room for 2 favorite pizzas. And then, believe it or not, I went to Uno’s…(Pizzeria Uno back in the day)…and I had my first pan pizza. It was thick like Sicilian, but somehow different, and heavier on the sauce. But absolutely delicious. I finally settled on 3 favorite pizzas.

Despite having 3 favorite styles of pizza, I always cooked a Neapolitan pie when I made pizza at home. Perhaps it was a bit easier, or perhaps I just never felt I really made the perfect pizza, and I needed to keep trying. In either case, it meant that after 40 years of making my own pizza, I finally made a pan pizza for the first time a couple of years ago. And it was good…really good.

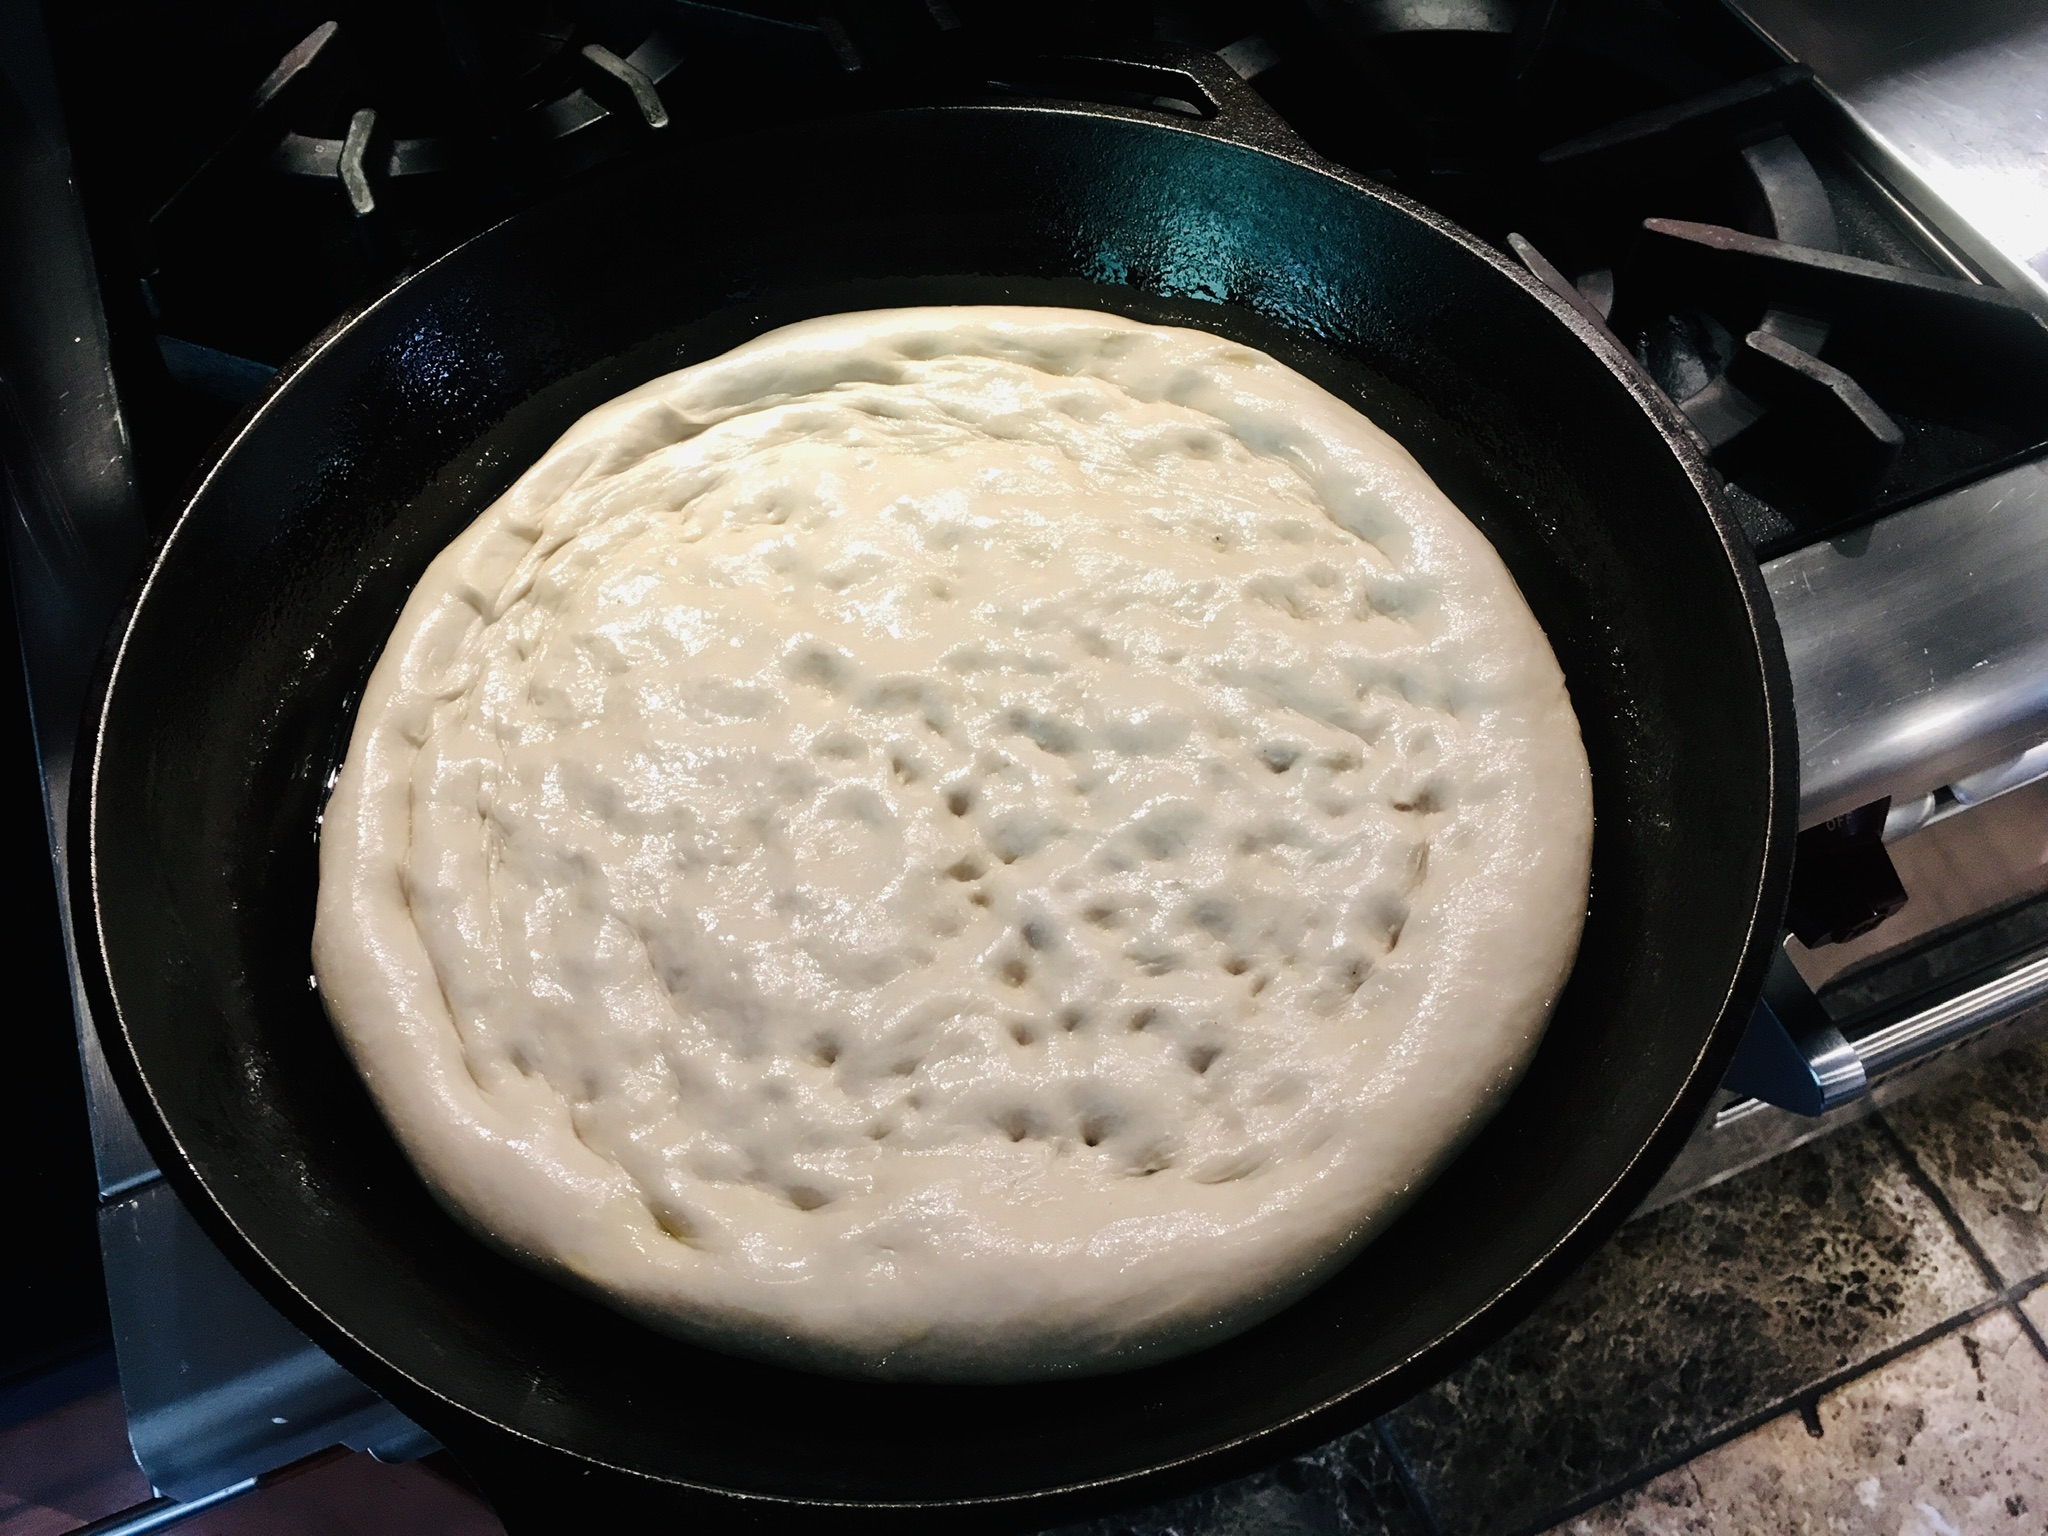
The dough is stretched out and ready to accept whatever tasty toppings you like!

The dough…

The key ingredient is 00 flour, and it can be found in specialty stores, or online. Using ready-made store-bought dough saves a lot of work, and it’s great, too. Ratios for my dough recipe depend on the humidity in my kitchen on any given day, but my basic pizza dough recipe is as follows:

4–5 cups 00 flour
1 cup warm water (about 110 degrees)
1 tablespoon salt
1 packet Italian pizza yeast or regular dry yeast (about 2 1/4 teaspoons)
a squirt of extra virgin olive oil

I mix all the dry ingredients in the bowl of a stand mixer, then slowly add the water as it mixes. After the ingredients are well mixed, and the dough pulls from the side of the bowl, I remove it to a floured board, where I knead the dough by hand for another 5 minutes, until it is smooth and elastic, shaping it into a ball. I rub a little olive oil over the ball of dough, place it in a bowl covered with plastic wrap, and let it rise for 2 hours, punching it down after that. I roll it back into a ball, cover it, and let it rise another 2 hours again.

Let’s talk pans. For me, nothing beats a real heavy duty cast iron pan for this recipe…and I’ve got a large one. I brush olive oil generously all over the inside of the pan–even on the sides–and then place the dough in the center. Slowly, using my fingertips, I spread and flatten the dough out from the center evenly all the way around. I keep spreading and stretching until the dough just starts to come up the sides of the pan. I cover the pan with a clean towel, and turn the oven on to 450 degrees to pre-heat.

I use a pizza stone for standard pizzas, but there’s no need for it when making deep-dish pizzas.

Leaving the pan on the stove top while the oven pre-heats will help the dough rise again. Meanwhile, I get my ingredients ready for my pizza.

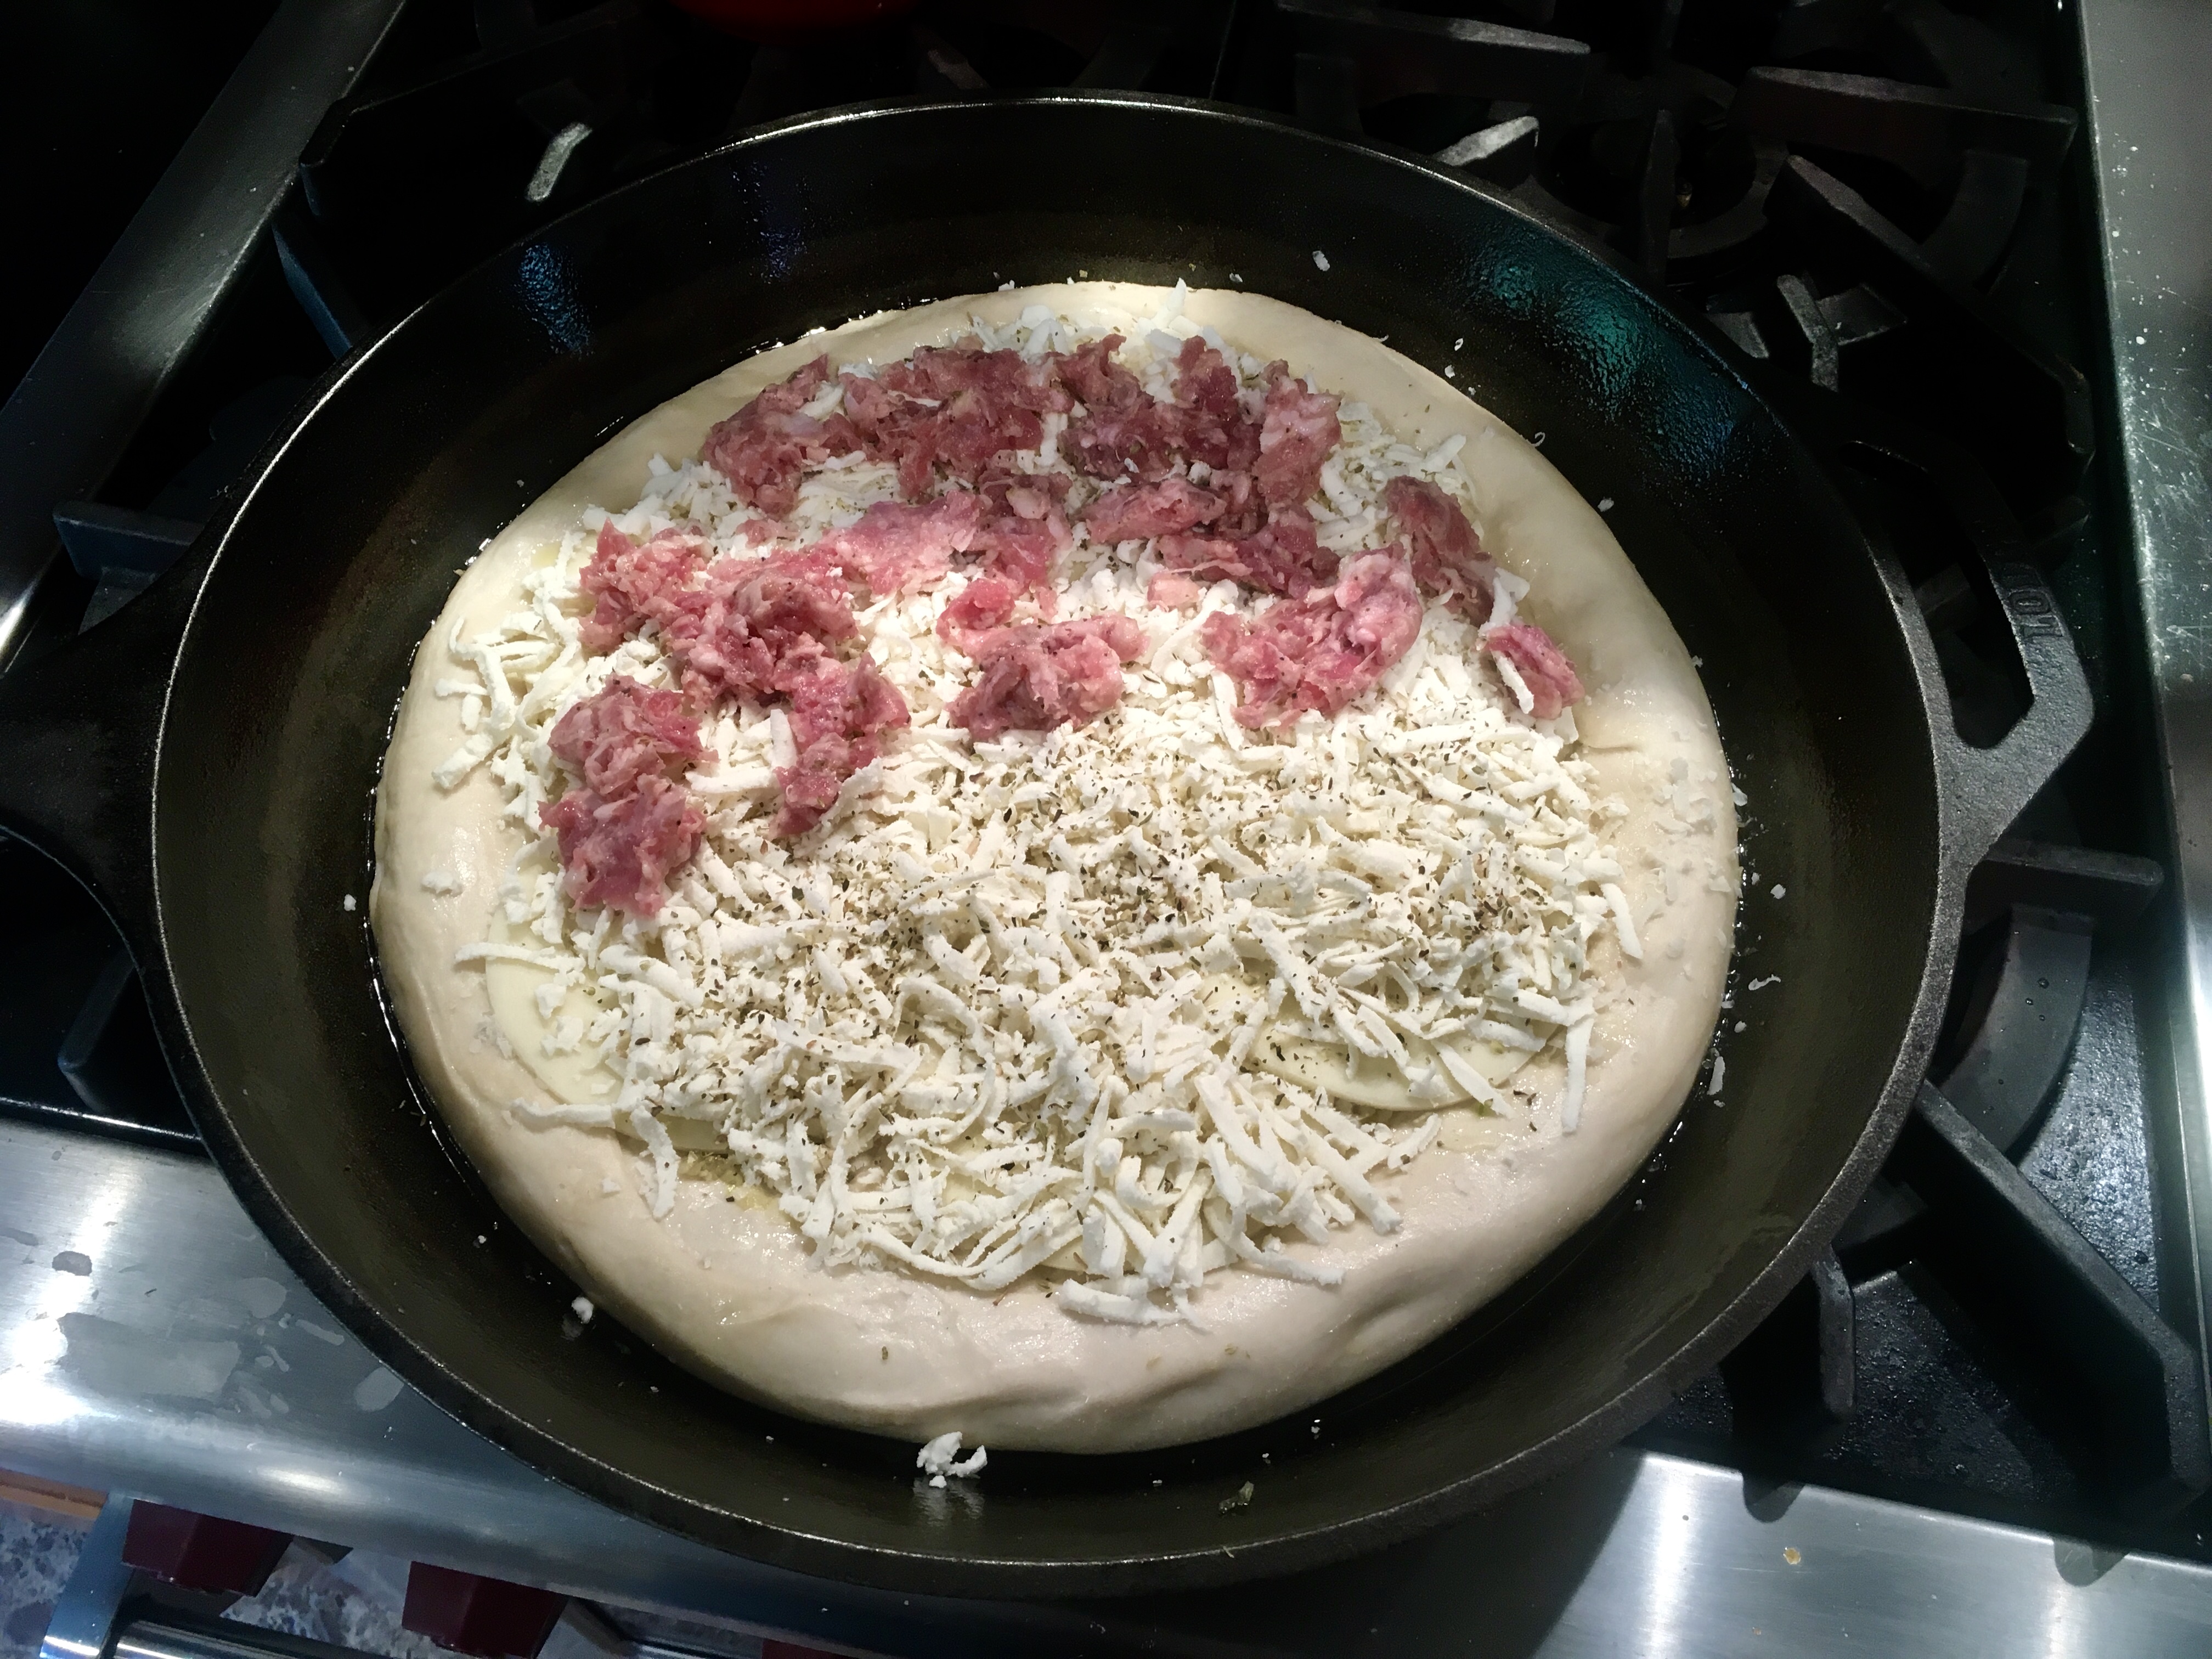
Crumbled sausage on top of the pizza.

White pizza…

3 cloves garlic, minced
olive oil
mozzarella
Parmigiano Reggiano
Provolone cheese
dried oregano
crumbled Italian sweet sausage

The first time I made a pan pizza, my daughter requested a white pizza. I minced a bunch of garlic and lightly sautéed it in olive oil, being sure not to burn it. I set that aside.

I grated mozzarella cheese and Parmigiano Reggiano, setting them aside. I also use sliced provolone.

And this time, my daughter asked for sausage on the pizza, so I got a few mild Italian sausages, cut open the casings, and crumbled the meat in a bowl, setting it aside.

I gave the oven at least a half-hour to pre-heat. I removed the towel covering the pizza dough, and stretched it out a bit more. Using a spoon, I spread the garlic and oil mixture evenly on the dough. I placed 5 or 6 slices of provolone down first. I then sprinkled the Parmigiano Reggiano on top, followed by the mozzarella. I crumbled the sausage meat over half the pie (I like my side plain), and then I finally gave the pizza a sprinkling of oregano.

The pizza went into the oven for 15 to 20 minutes. I kept an eye on it to make sure it didn’t burn.

My first pan pizza: half sausage white pizza.

My second pan pizza was a classic tomato sauce recipe…

I use canned crushed tomatoes for my tomato sauce pizza.

Tomato sauce pizza

1 cup crushed organic tomatoes
1 teaspoon sugar
mozzarella
peperoni, sliced thin
dried oregano

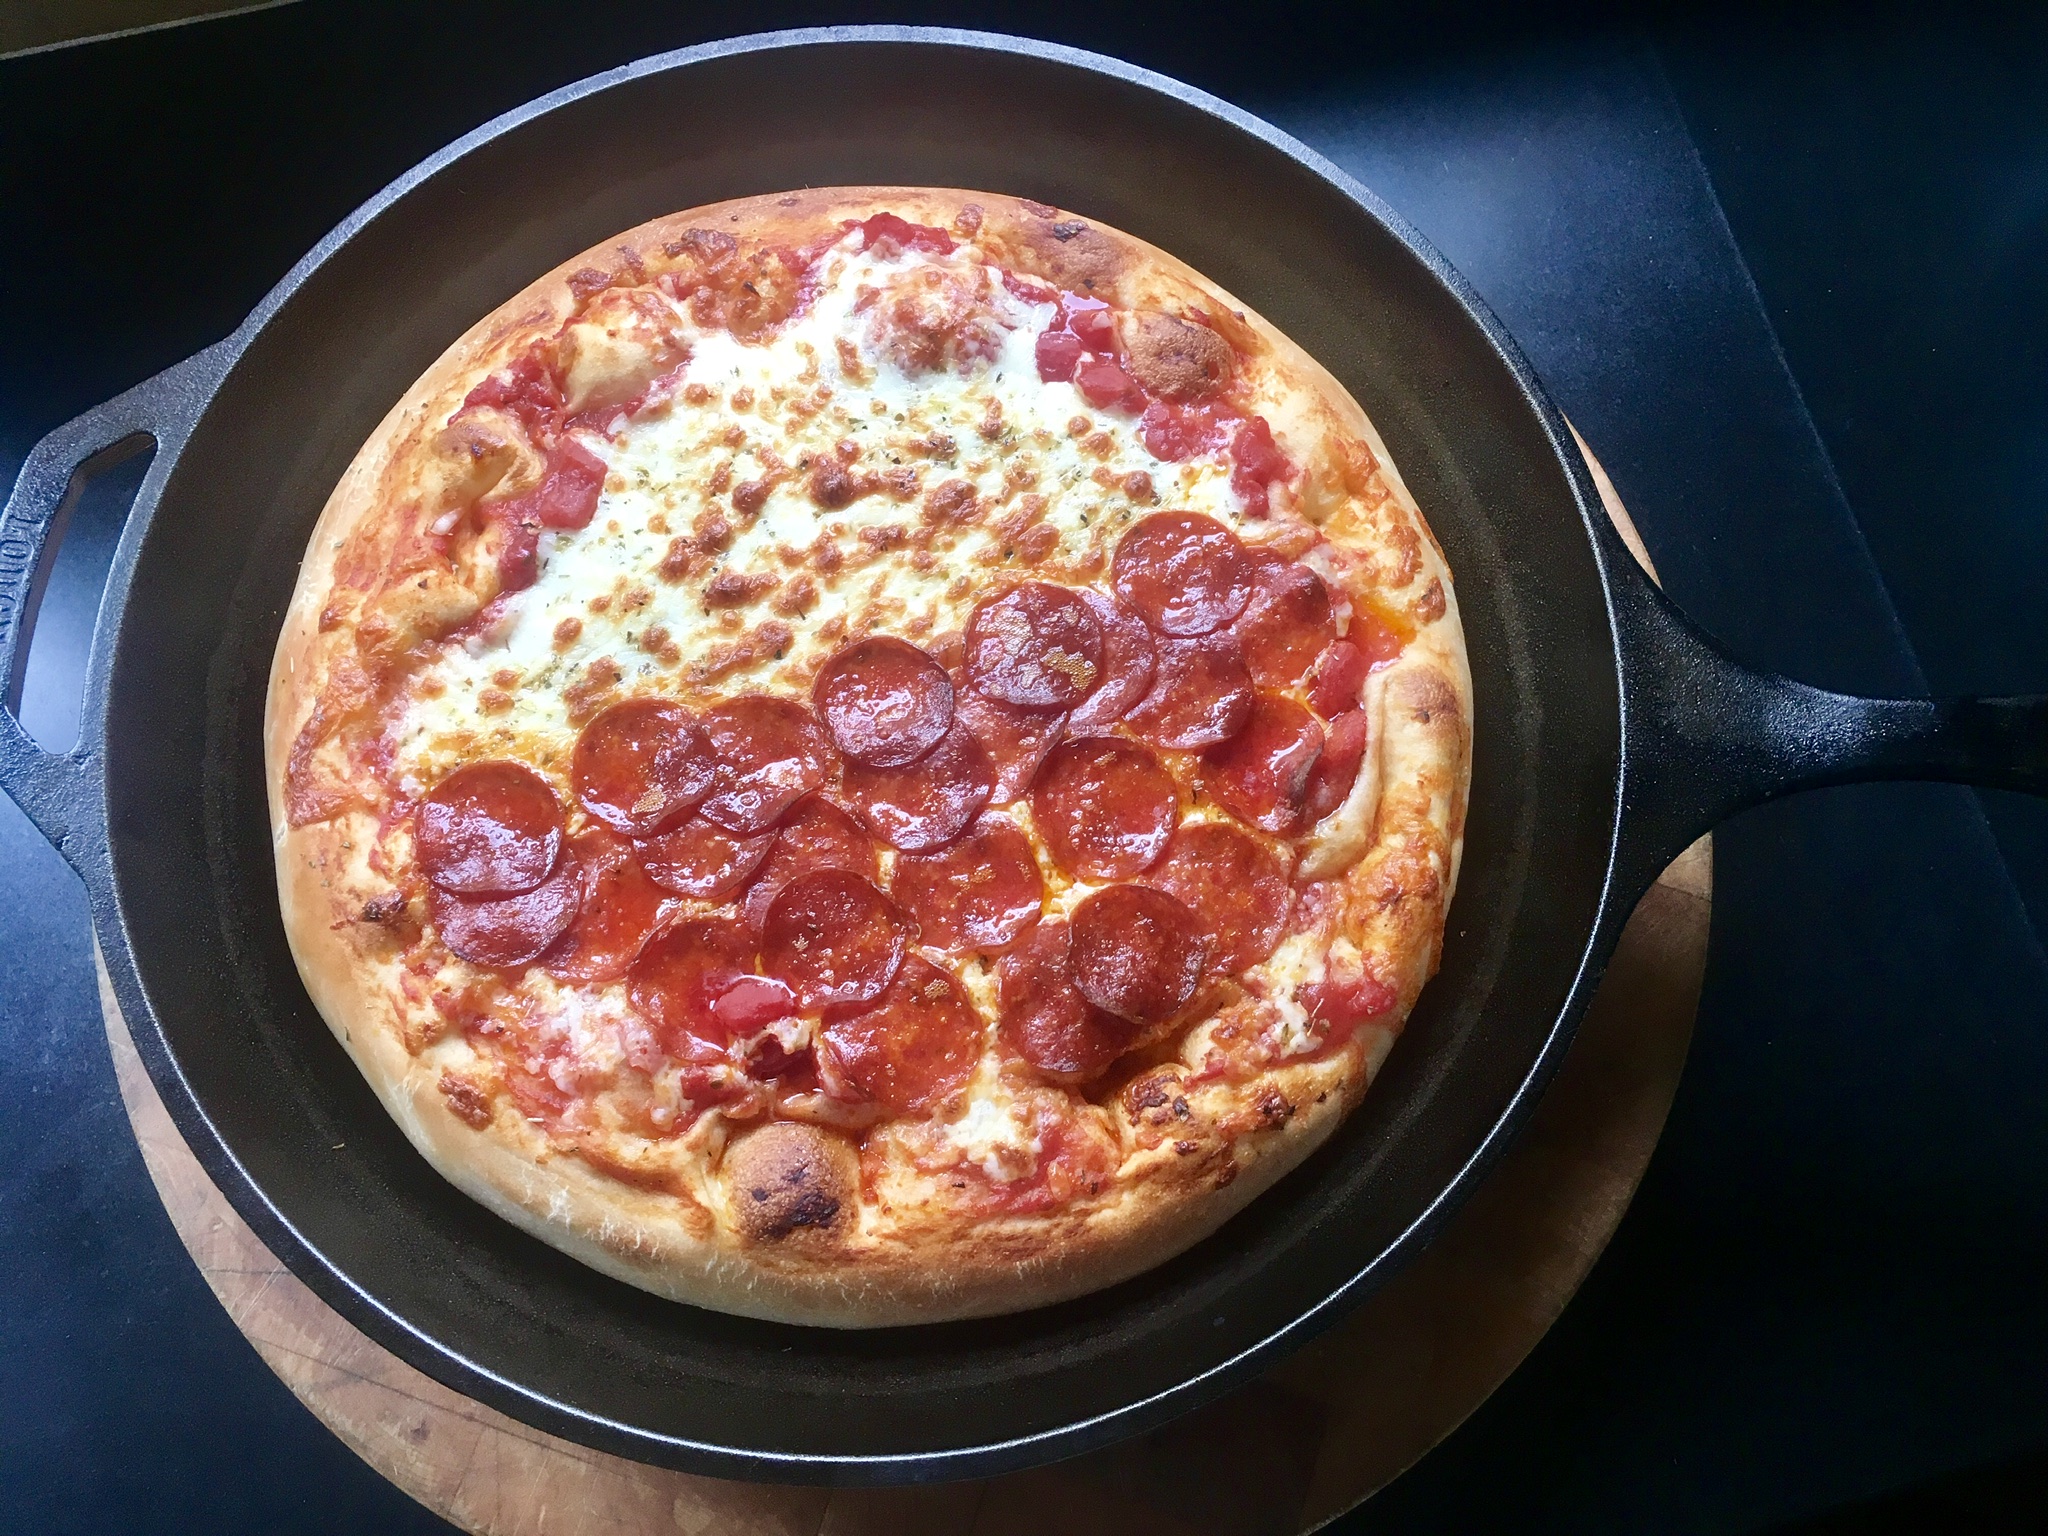
I like my tomato sauce to be a little chunky for my pan pizza, so I bought a can of crushed organic tomatoes. I placed about a cup of the crushed tomatoes in a bowl and added a teaspoon of sugar, mixing it well. This cuts the acidity of the tomatoes, and makes the pizza even better! I spooned out the tomatoes onto the the pizza dough. I sprinkled the mozzarella over the sauce. I put slices of pepperoni on half the pizza (like I said, I like my side plain!), and I gave it a sprinkling of oregano.

Don’t skimp on the pepperoni!

The final product!

Delicious! Crispy crust on the outside, soft on the inside.

I’ve had a lot of pizza in my life. But truly great pizza? I can probably count that on one hand: Sicilian at Ben’s in the Village in NYC…Pizza Montanara at Pizzarte on W 55th in NYC…a coal-fired oven-baked clam pizza at Frank Pepe’s in New Haven, CT…Sicilian at La Piazza in my hometown of Plainview, NY…and now…my house!
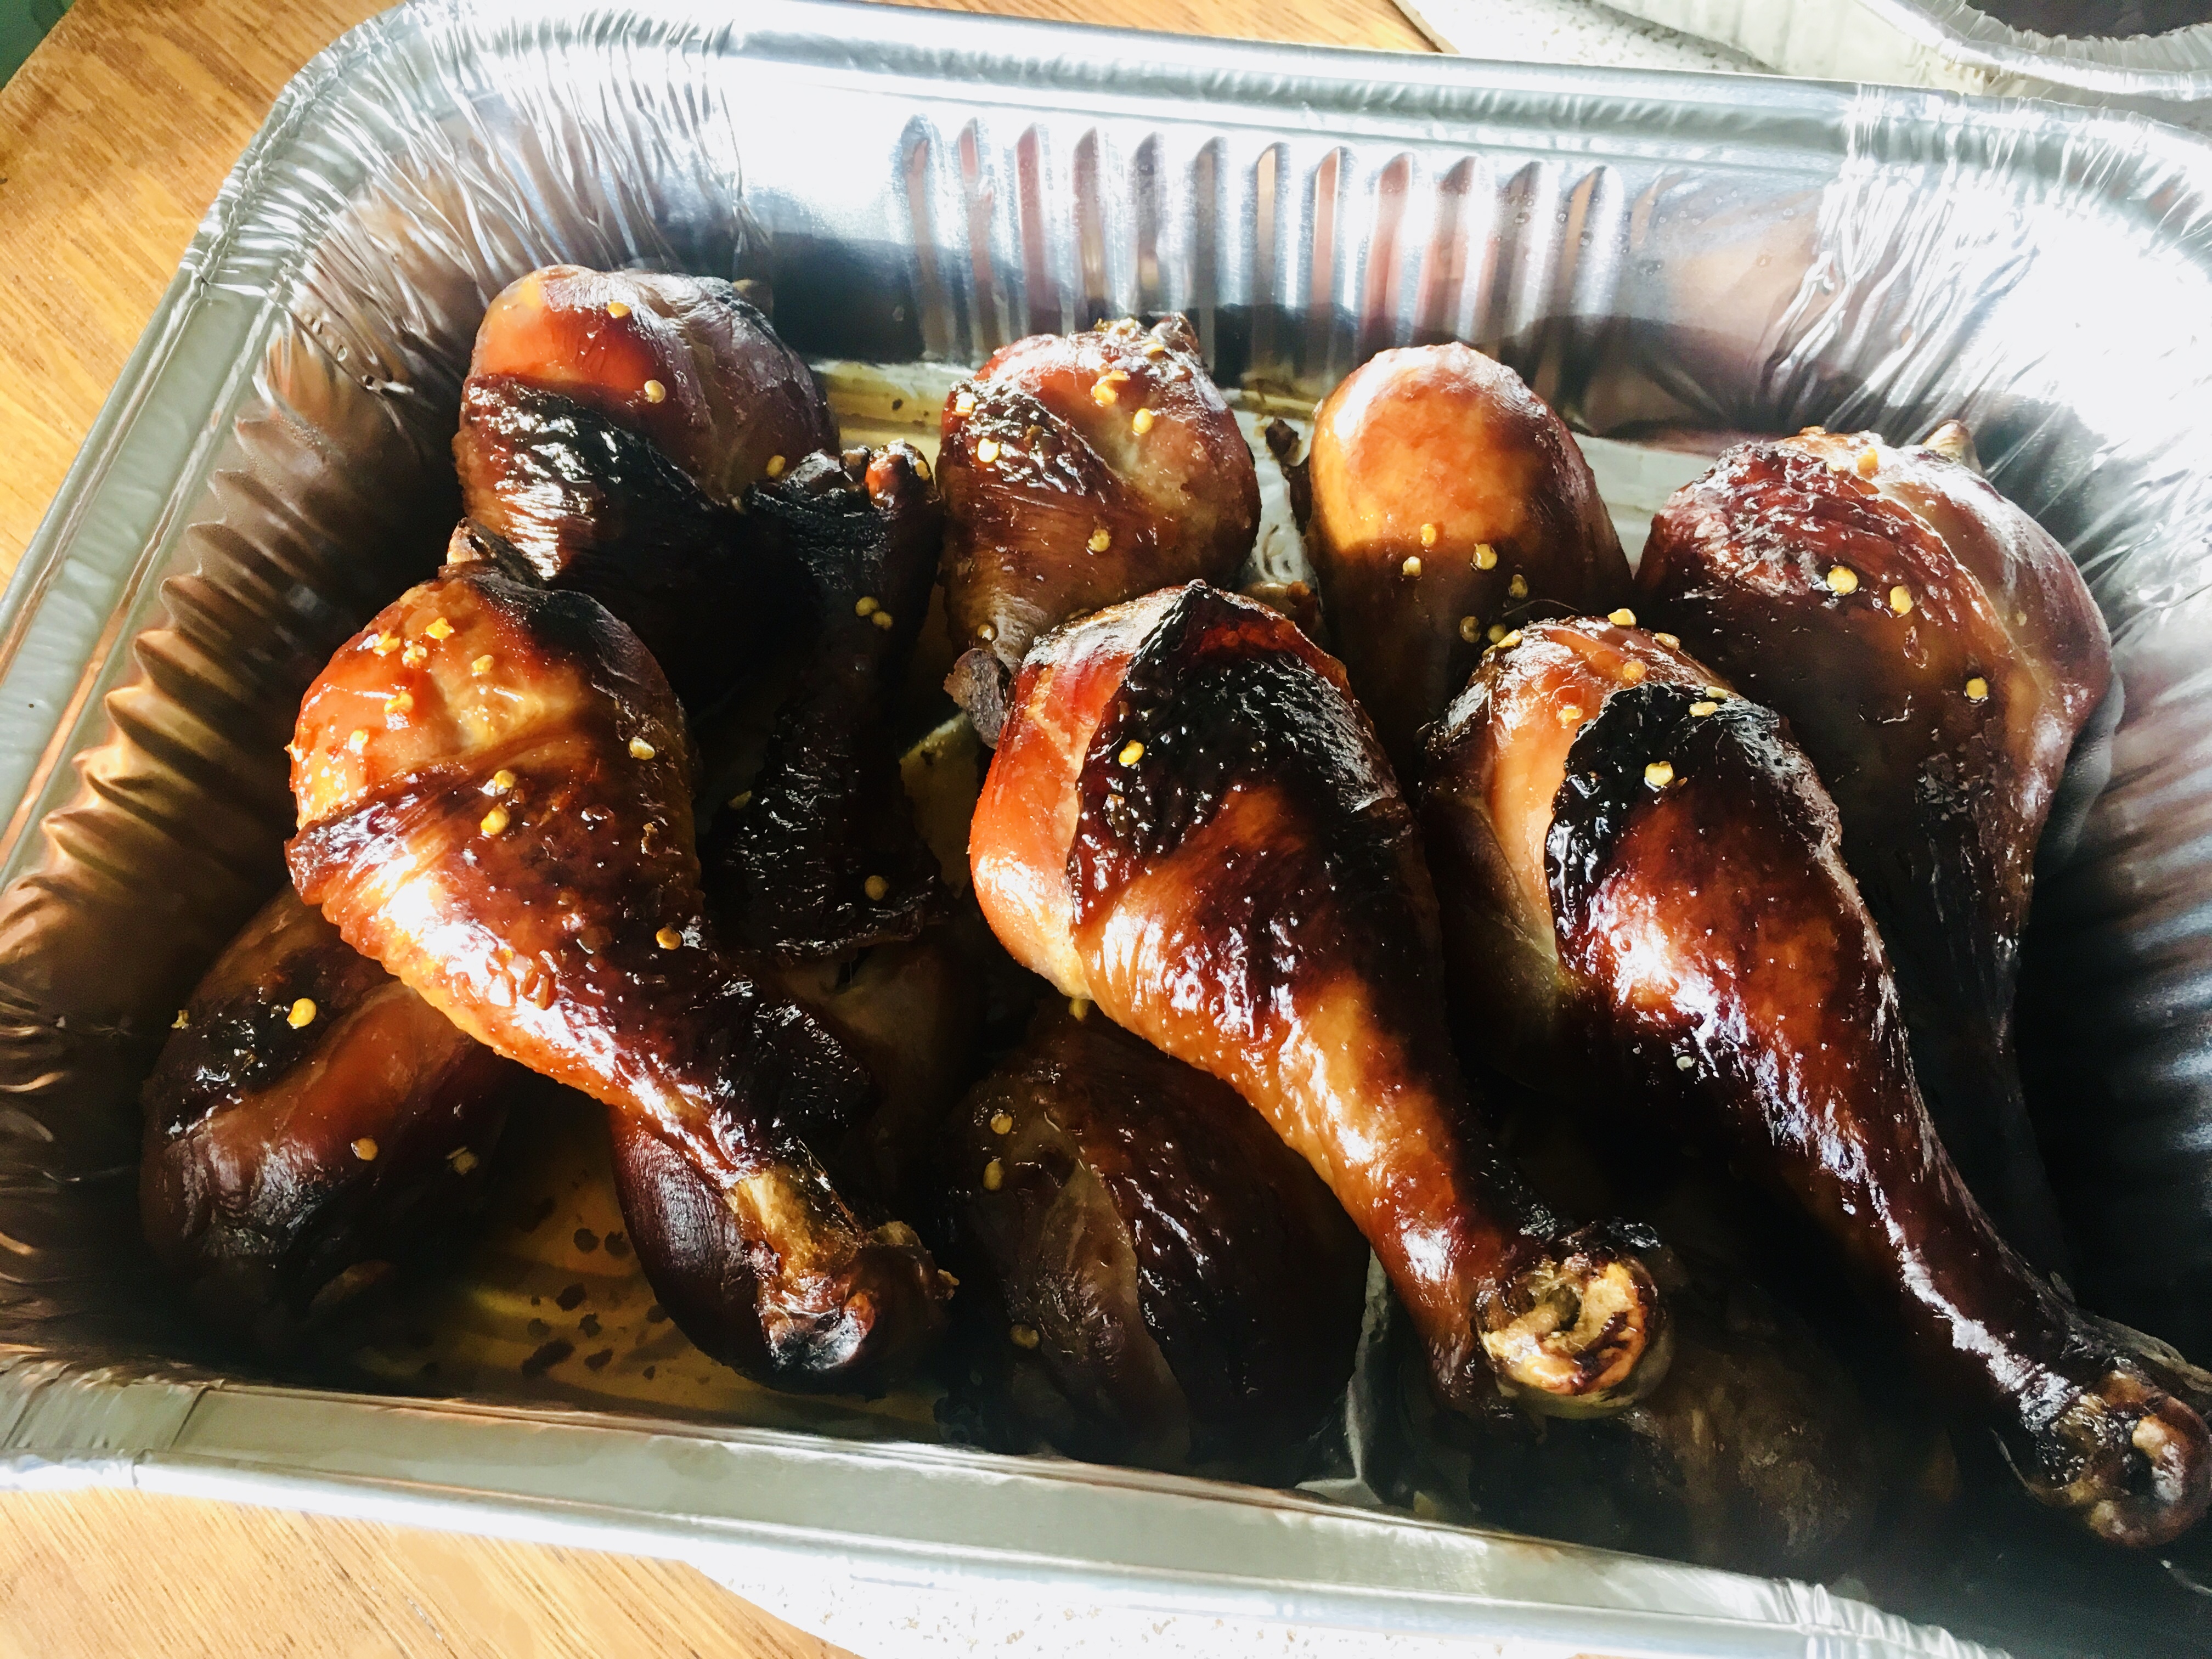
I love chicken because it reheats really well for leftovers. When I make this recipe, I make a good amount to last me through the week. These sweet, spicy and sticky Thai-inspired chicken wings and drumsticks are just delicious!


6 lbs. chicken pieces
1 1/3 cups soy sauce
1 cup fresh cilantro
4 tablespoons canola or peanut oil
5 garlic cloves, roughly chopped
1 teaspoon white pepper
1 cup sugar
1/2 cup white vinegar
2 teaspoons red pepper flakes or crushed dried chiles
2 teaspoons salt

For the marinade, combine the soy sauce, cilantro, canola oil, garlic and white pepper in a food processor and let it run. Place the chicken pieces in a Ziploc bag and pour half of the marinade in. Save the other half for basting later. Seal the bag and let the chicken marinate in the fridge overnight, or at least a few hours at room temperature, squishing the bag around so that all the chicken gets marinated.

For the sauce: In a saucepan, combine the sugar, white vinegar, pepper flakes and salt. Bring it to a boil and make sure the sugar dissolves. Remove it from the heat and let it cool to room temperature.

After marinating, discard the used marinade in the Ziploc bag. Place the chicken pieces over a hot hardwood fire or bake them in an oven at 350, basting them with the leftover marinade until fully cooked. If the coal fire gets too hot, move the chicken to a cooler part of the grill to prevent burning. If using the oven, switch to the broiler at the end to give the chicken a nice char.

Serve the chicken pieces with the sweet pepper sauce drizzled on top.

thai chicken LTL

Despite gardening for almost 50 years, I sowed and harvested my first batch of fennel last season. Having received a recent shipment of heritage Berkshire pork chops, I thought it was time to get creative. This is a rustic Italian-style recipe that works great for pork and fennel…

fennelfrond


4 good quality pork chops, medium thickness
2 fennel bulbs with stems and fronds, finely chopped
2 shallots, finely chopped
1/2 cup fresh parsley, chopped
olive oil
salt and pepper
1 28 oz. can tomatoes
1 tablespoon capers
Zest of 1 lemon
1/2 cup dry white wine


pork and fennel


In a large pan, heat some olive oil. Season the pork chops on both sides with salt and pepper, then brown them on both sides in the pan with the olive oil. Remove the chops from the pan and set them aside.

Add a little more olive oil to the pan and add the chopped fennel and shallots, stirring for a few minutes. Add the white wine, and stir well to get the tasty bits of pork from the bottom of the pan. Add half of the parsley. Add the can of tomatoes, squishing the tomatoes between your fingers so that they are broken up when they hit the pan. Stir for a few minutes over medium heat.

Return the pork chops to the pan, nestling them in the sauce. Add the capers, lemon zest and remaining parsley. Stir everything together a bit, and then let the chops cook for about 10 to 15 minutes, until their internal temperature reads 145 degrees.


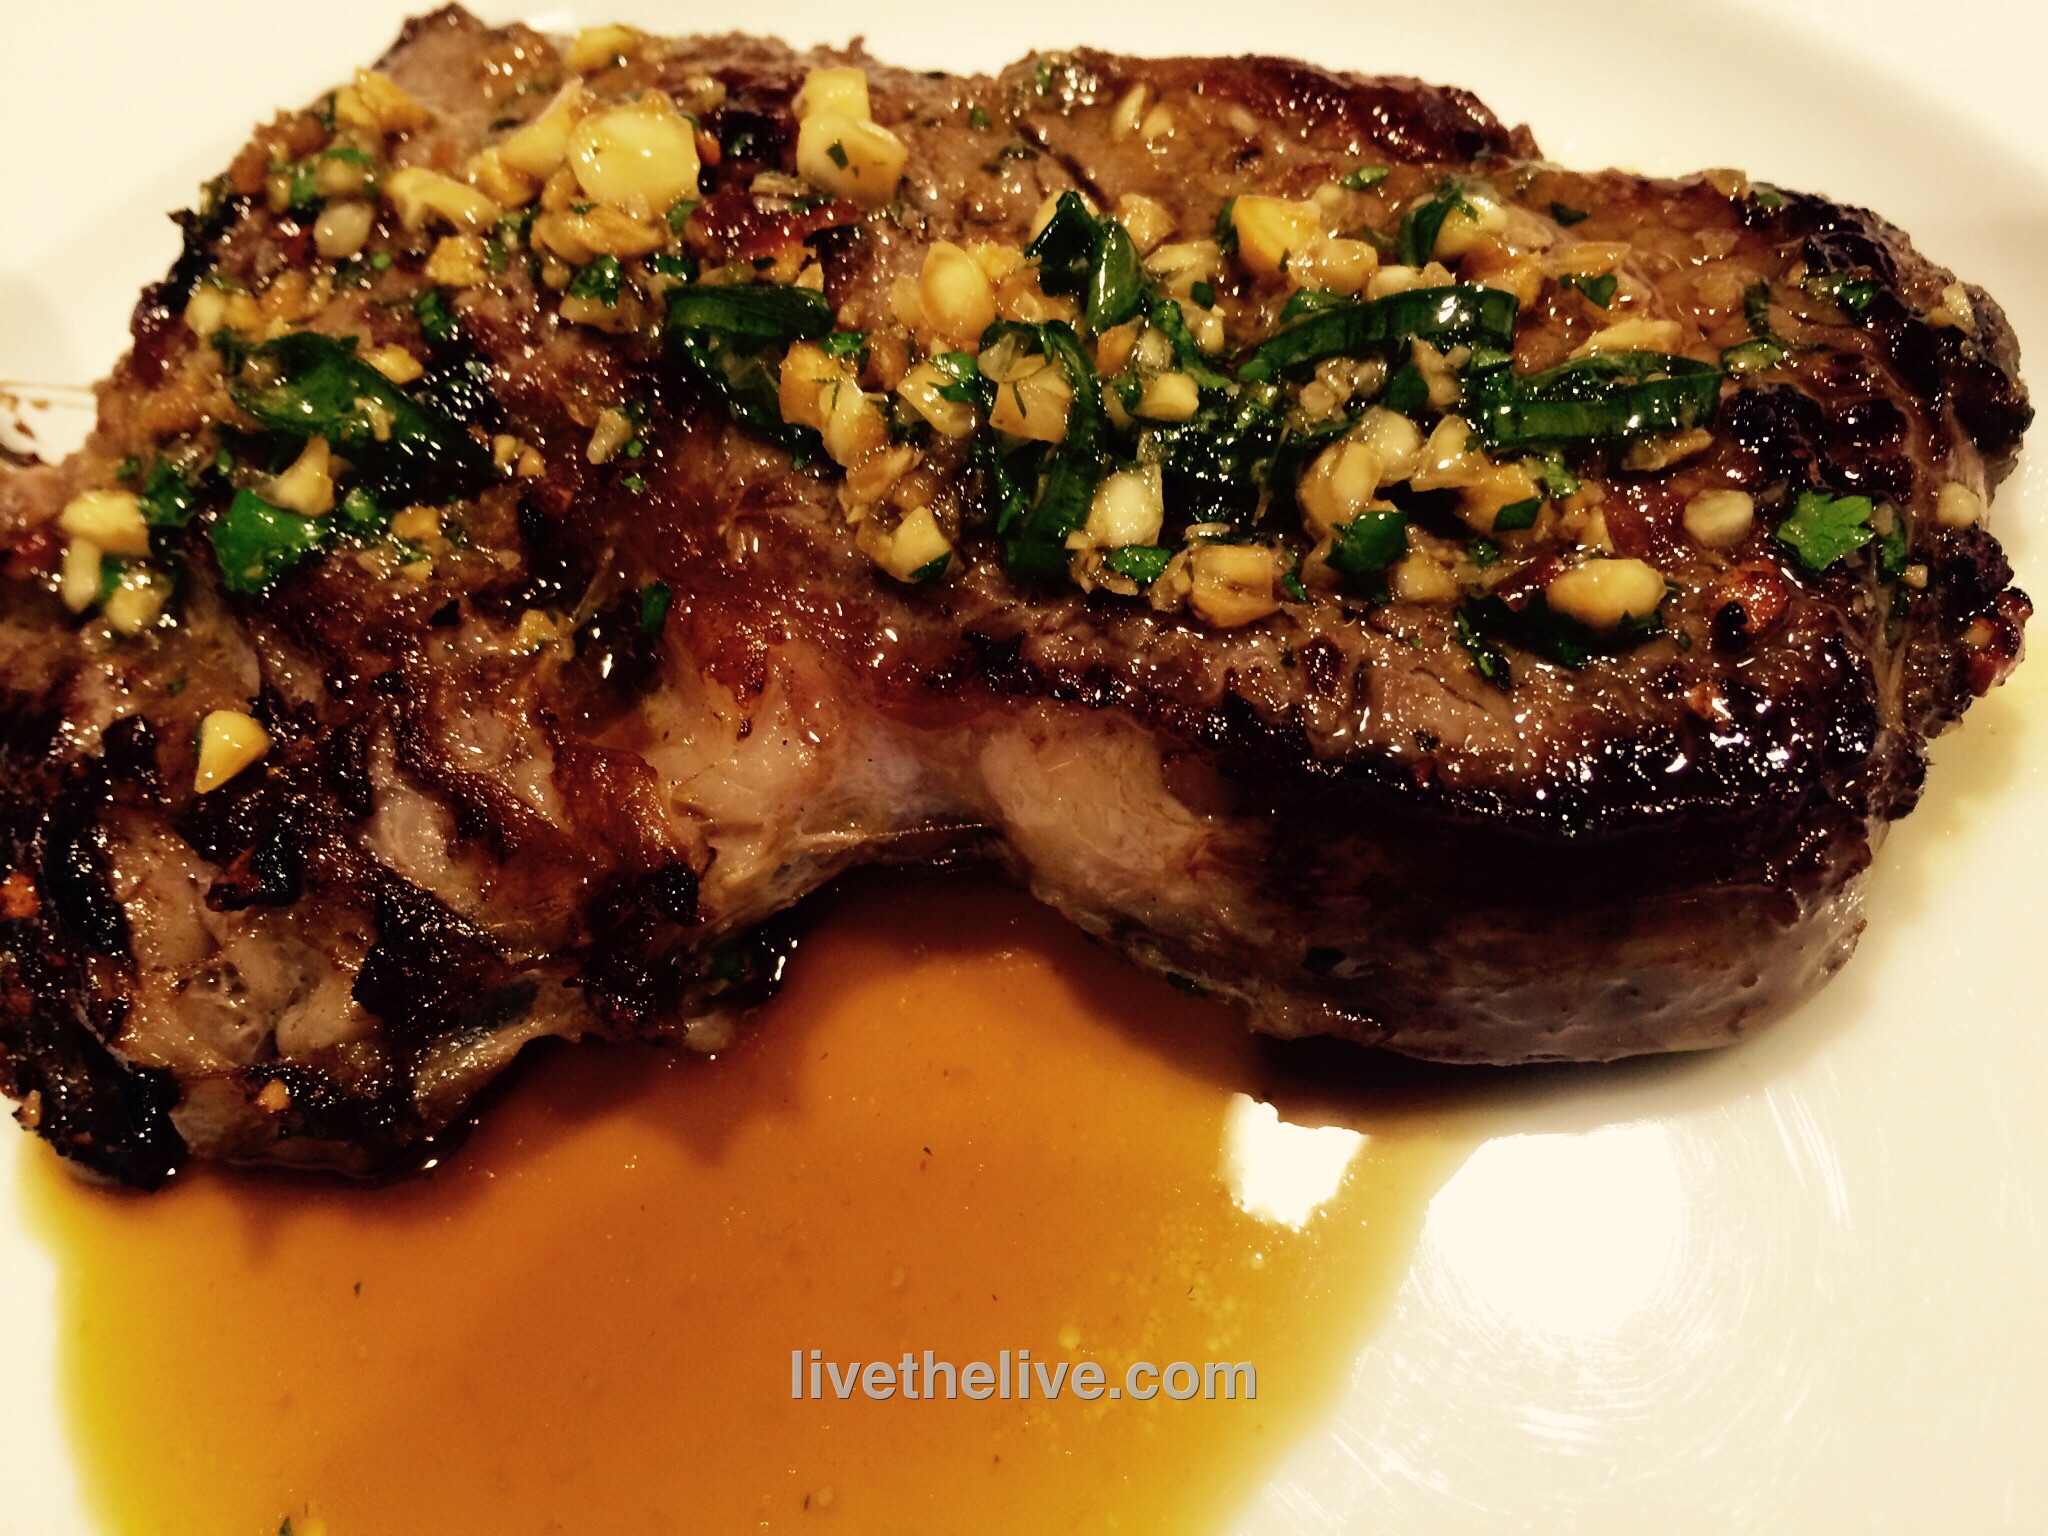
This is a really delicious grilled steak full of wonderful Thai flavors. You do need to marinate it overnight, so keep that in mind. The overnight marinating is key to the intense and unbelievable flavor of the beef.

The original recipe called for skirt steak, but I didn’t have any in my freezer. I did have a fat ribeye, though, so once I thawed it, I sliced it lengthwise to get two large, thin steaks which would easily suck up the marinade I was going to make. And the ribeye was nicely marbled, so it stayed juicy and tender. Beef flap or flank steak are cuts is that would work well with this recipe.


image

1/4 cup toasted sesame oil
1/4 cup soy sauce
2 tablespoons grated ginger
2 tablespoons finely chopped garlic
2 tablespoons finely chopped cilantro
2 tablespoons chopped dry roasted unsalted peanuts
2 scallions, minced
1 tablespoon light brown sugar
1 tablespoon fresh squeezed lime juice
1 tablespoon chile oil
2 lbs. beef ribeye (or skirt steak or beef flap)
1/4 cup chicken stock (homemade is best)

In a bowl, whisk together the sesame oil, soy sauce, ginger, garlic, cilantro, peanuts, scallions, sugar, lime juice and chile oil. Transfer half of it to a shallow dish.

Add the steak to the dish and turn the meat to coat it well. Cover and refrigerate the beef overnight. Refrigerate the other half of the marinade in a separate container.

The next day, light a grill. While it’s warming up, get out a sauce pan and pour the chicken stock in along with the reserved marinade. Heat it to combine it well, but not letting it reach a boil. Remove it from the heat and let it come to room temperature. This will be the dipping sauce for the beef.

About 30 minutes before cooking, take the marinated steak out of the fridge and let it come to room temperature. Season it with salt and pepper, and grill it over high heat until it’s medium-rare, about 5 minutes.

If it’s too cold to light a grill, or if you just want to use the oven, heat a cast iron pan on the stovetop, add a few drops of avocado oil or pork fat, and sear the beef on both sides before placing it in a pre-heated 375° oven to finish cooking.

Devour the beef with the dipping sauce!

CANTONESE DUCK

Posted: January 3, 2025 in Carnivore!, Food, Recipes
Tags: , , , , ,

This recipe can be used on either bird. I based it on s basically my love of Peking duck.

Last week, I went home to Long Island, and I stopped by one of the great food stores of my life: Miloski’s Poultry Farm in Calverton, NY.

Miloski’s only takes cash, and I had $75 on me. I think I did pretty well!

I’ve been coming to Miloski’s since I was a kid. My Dad would buy his ducks there and Grandpa Miloski, the guy that started it all, would serve us. Over the years, grandpa made way for his son, and now the son is retired and the grandson has taken over the business. All along the way, one thing hasn’t changed: the excellent quality of their product.

My uncle, Antanas, passed away years ago, but when it came to being a true foodie, this guy put all others to shame. Besides being the only hunter in our family (my first taste of venison was at his table) he had several huge freezers in the basement of his Richmond Hill, Queens, home. He would drive to Miloski’s and buy dozens of ducks at a time, and bring them home to freeze. Very often, after I finished Lithuanian school on a Saturday, my uncle would invite our family over for dinner, and we’d all sit around a massive table where several ducks would be cooked and served, along with all the fixings. That’s just a taste of my Miloski memories.

I try to stop at Miloski’s every time I pass through. I bring cash, because Miloski’s doesn’t take credit cards! I have a long ride home, first on the Cross Sound Ferry from Orient Point to New London, CT…and then an hour-and-a-half on the highway from there. I always bring a cooler and I buy a bag of ice along the way.

Miloski’s sells all kinds of exotic meats, like wild boar and ostrich. But I go for their delicious chicken, kielbasa, pierogis, and, of course, duck!

1 whole duck, thawed, about 5 lbs.
1 tablespoon soy sauce
1 tablespoon peanut oil
4 teaspoons Chinese five spice powder
2 teaspoons granulated garlic
2 teaspoons granulated onion
2 teaspoons salt
1/2 teaspoon black pepper
6 tablespoons hoisin sauce
2 teaspoons sesame oil

Remove any giblets from the bird and cook them up for your dog, like I used to do for my boy, Fellow. (Leave out anything with bones, of course.)

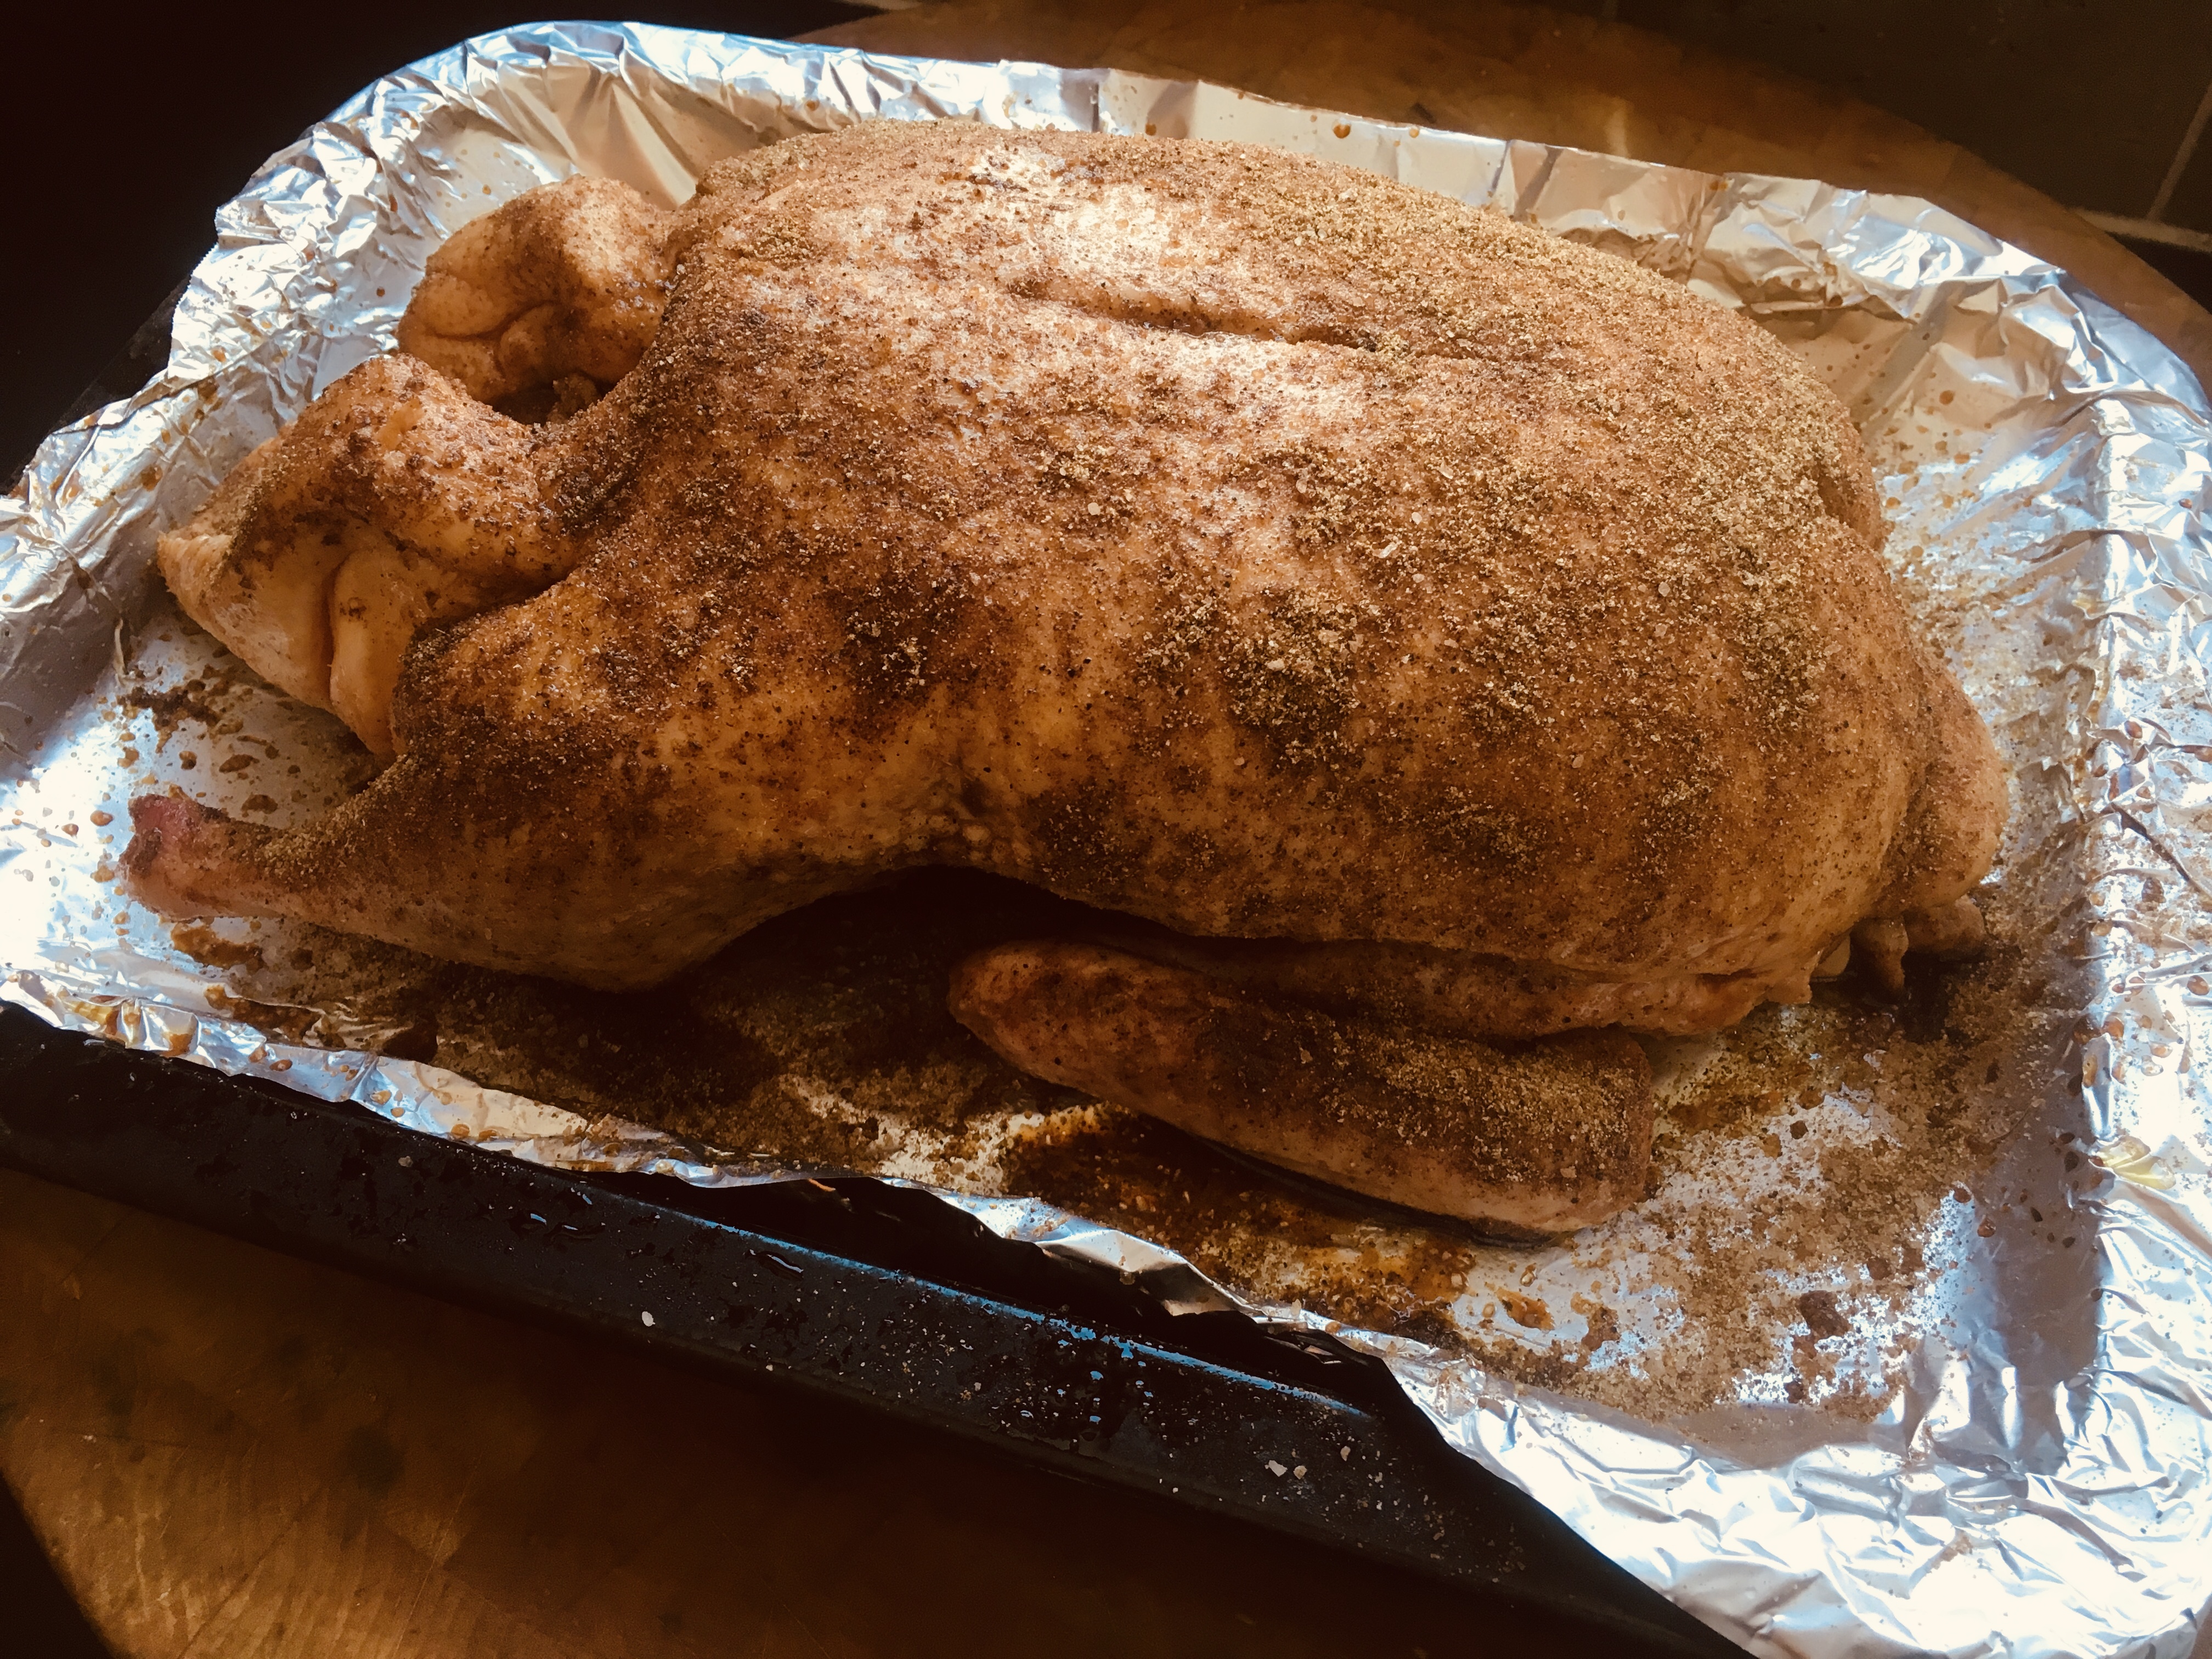
Rub the soy sauce first all over the duck. (It will absorb the flavors better if you do it before you rub the bird with the oil.) Then rub the peanut oil all over the duck.

Rubbed and ready to go in the oven!

Combine the Chinese five spice, garlic, onion, salt and pepper in a bowl. Season the entire bird, including inside the cavity, with this mixture.

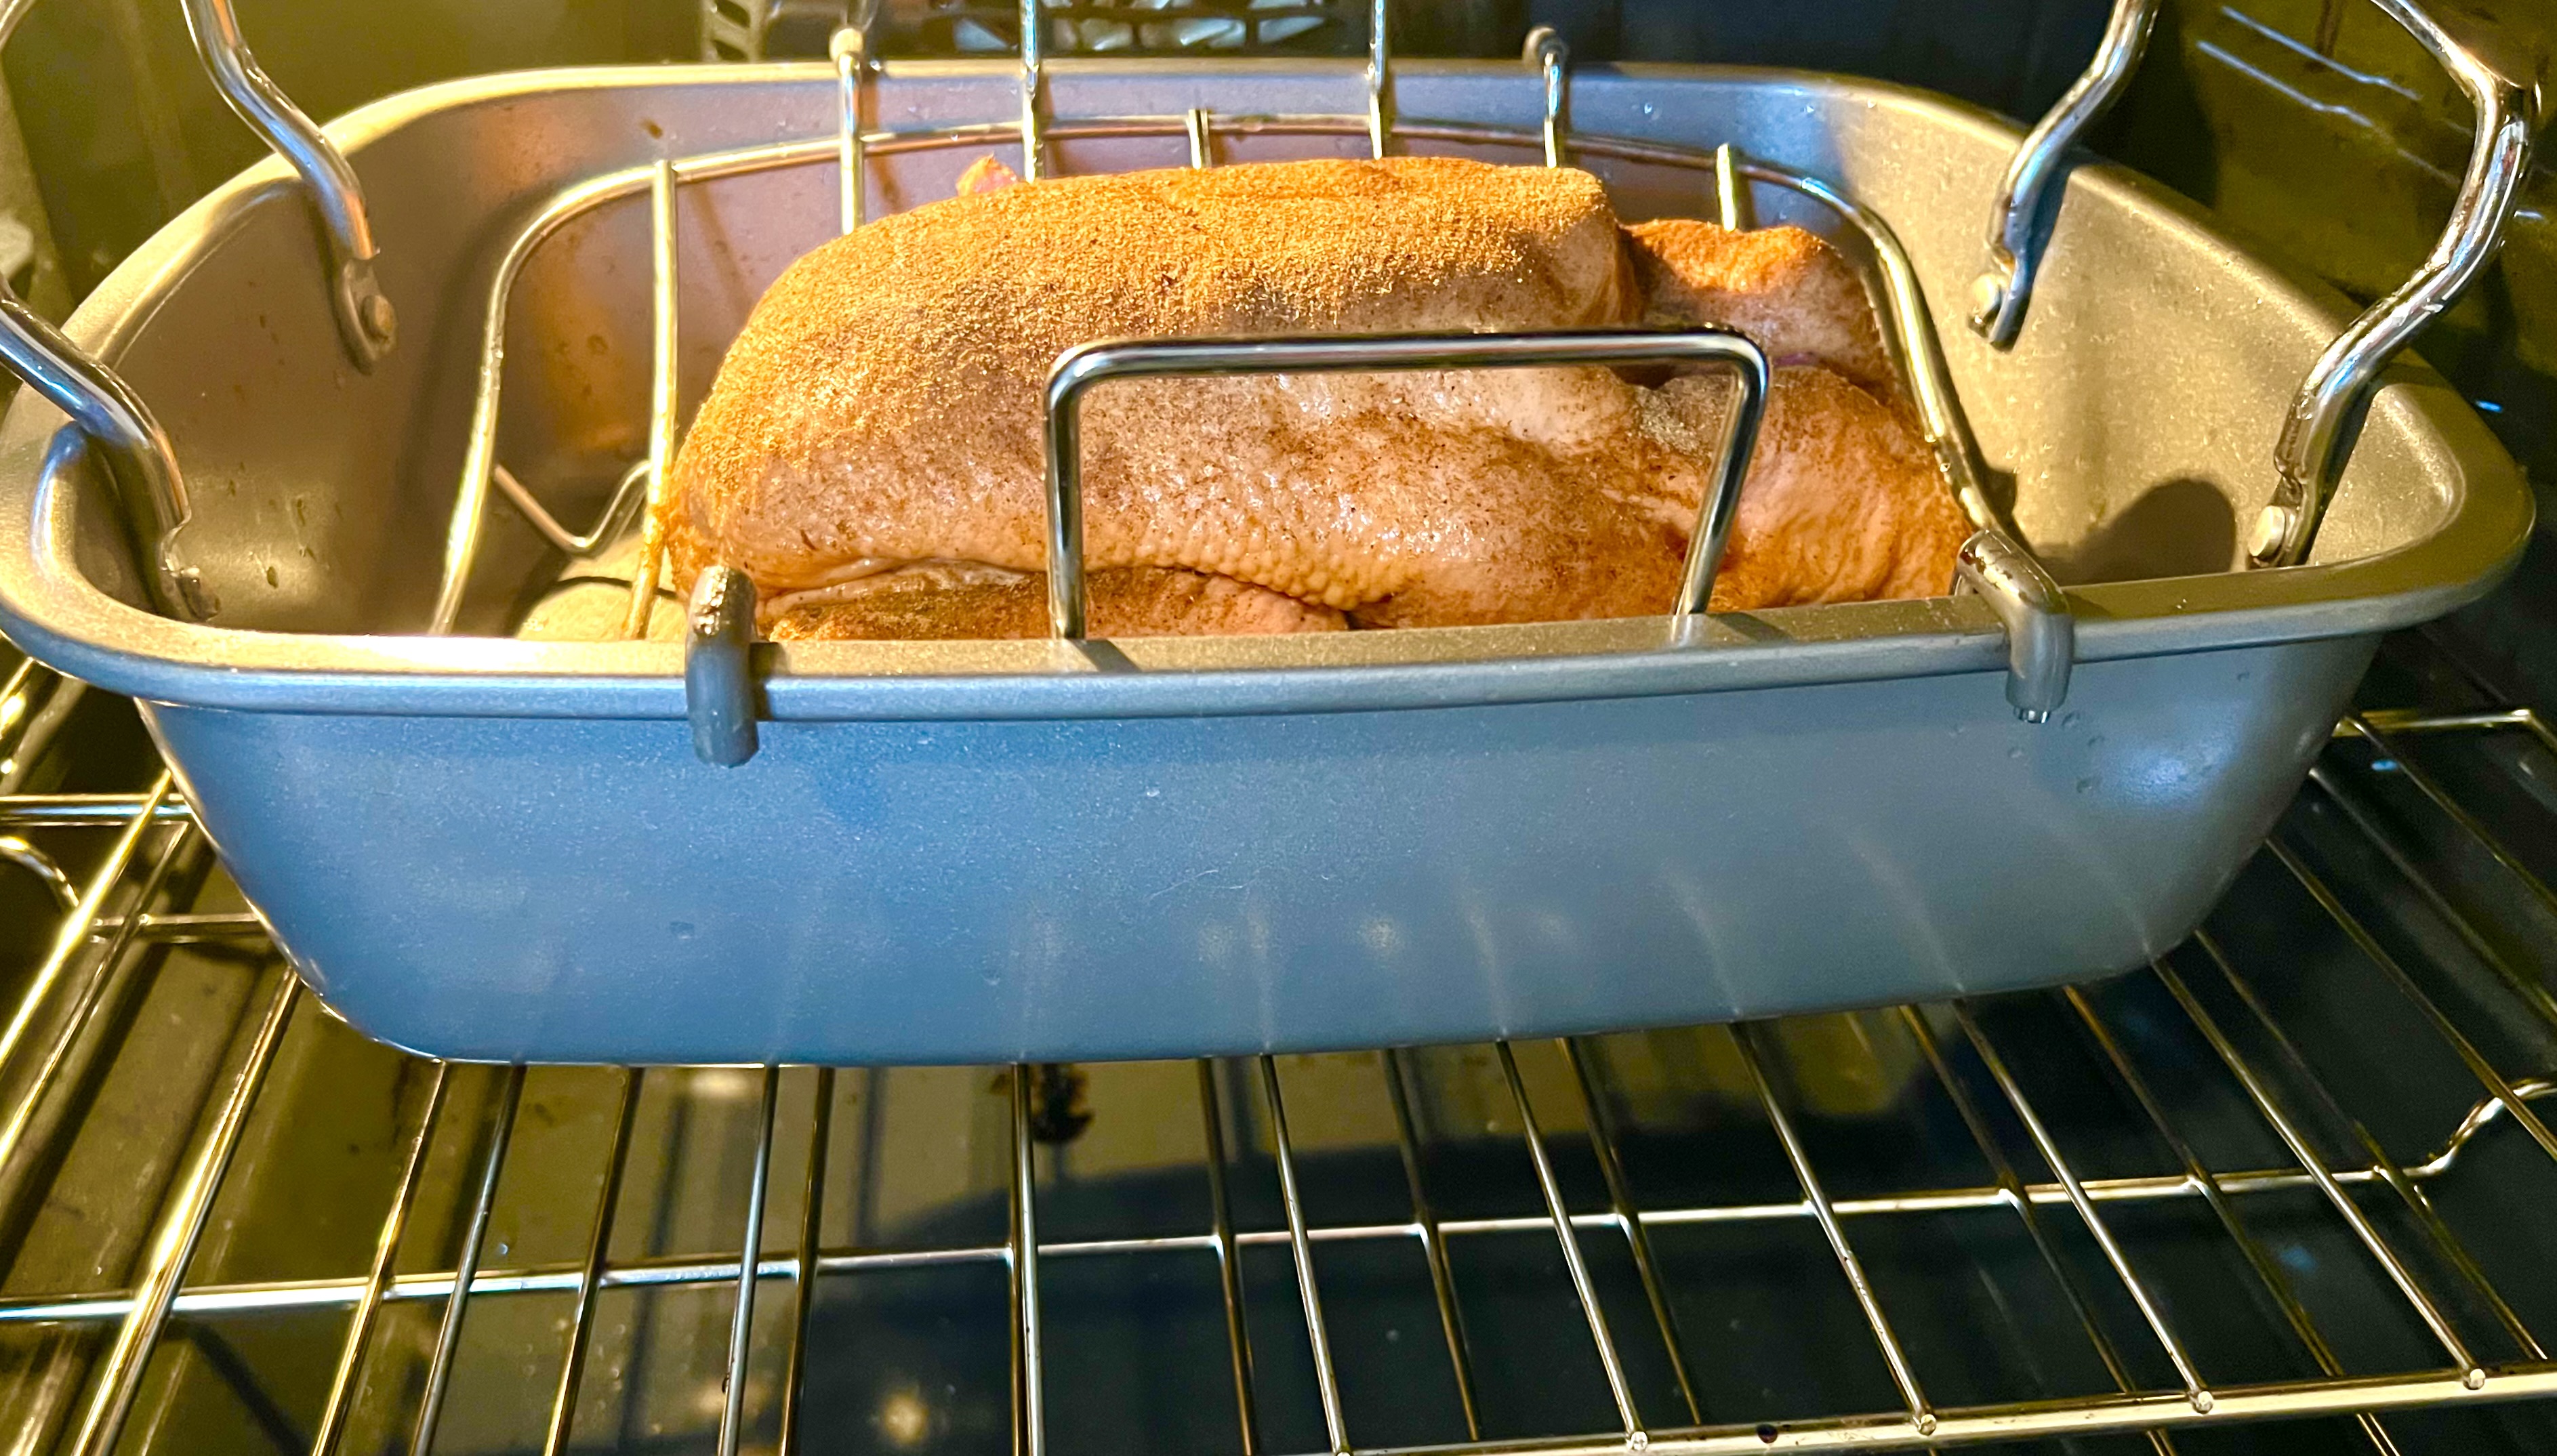
Pre-heat the oven to 400°. Place the duck in a pan lined with aluminum foil (cleanup will be easier.)

I used a roasting pan this time, which elevated the bird off the fat that collected below.

Reduce the oven temperature to 250° once you put the duck in the oven, and then cook it low and slow. You want that fat to melt away, leaving delicious tender duck meat behind, with a crispy skin. (And by all means, save the precious duck fat for future recipes. It’ll have that Cantonese flavor from the drippings, but that’s alright!) You might need to pour off some duck fat while cooking, if your tray isn’t very deep.

At what temperature is the duck ready to eat? That depends on you. Unlike chicken, duck is often served still pink at many restaurants. I personally prefer to cook it to a nice medium. At that temperature, it’s still moist. But the breasts cook faster and dry out quicker than the thighs and legs, so I take the duck out of the oven at around 160°.

Meanwhile, combine the hoisin sauce and sesame oil in a small bowl. When the duck is about 15 minutes away from being done (skin is crisp, juices run clear), brush it with the hoisin/sesame oil mixture. Cook it another 15 minutes until the bird has a nice dark glaze.

Let the duck rest about 15 minutes before carving.

I served it with my own version of Chinese fried rice on the side.

Can you get salmonella from duck? In a word: depends! It used to be that salmonella was only found in the intestinal tracts of chickens. But because ducks are often raised in areas where chickens live, cross-contamination is very possible. Even if the birds live totally separate lives, cross-contamination can also happen in slaughterhouses. So…despite the fact that many say you can eat duck meat that’s pink, I prefer not to. Since there’s quite a bit of fat in an average duck, even if you cook the bird to medium-well, it will be delicious and juicy….and the skin will be fantastically crispy. Be safe and stay ion your comfort zone!

OVERNIGHT OATS

Posted: December 27, 2024 in breakfast, Food, Recipes
Tags: , , , , , ,

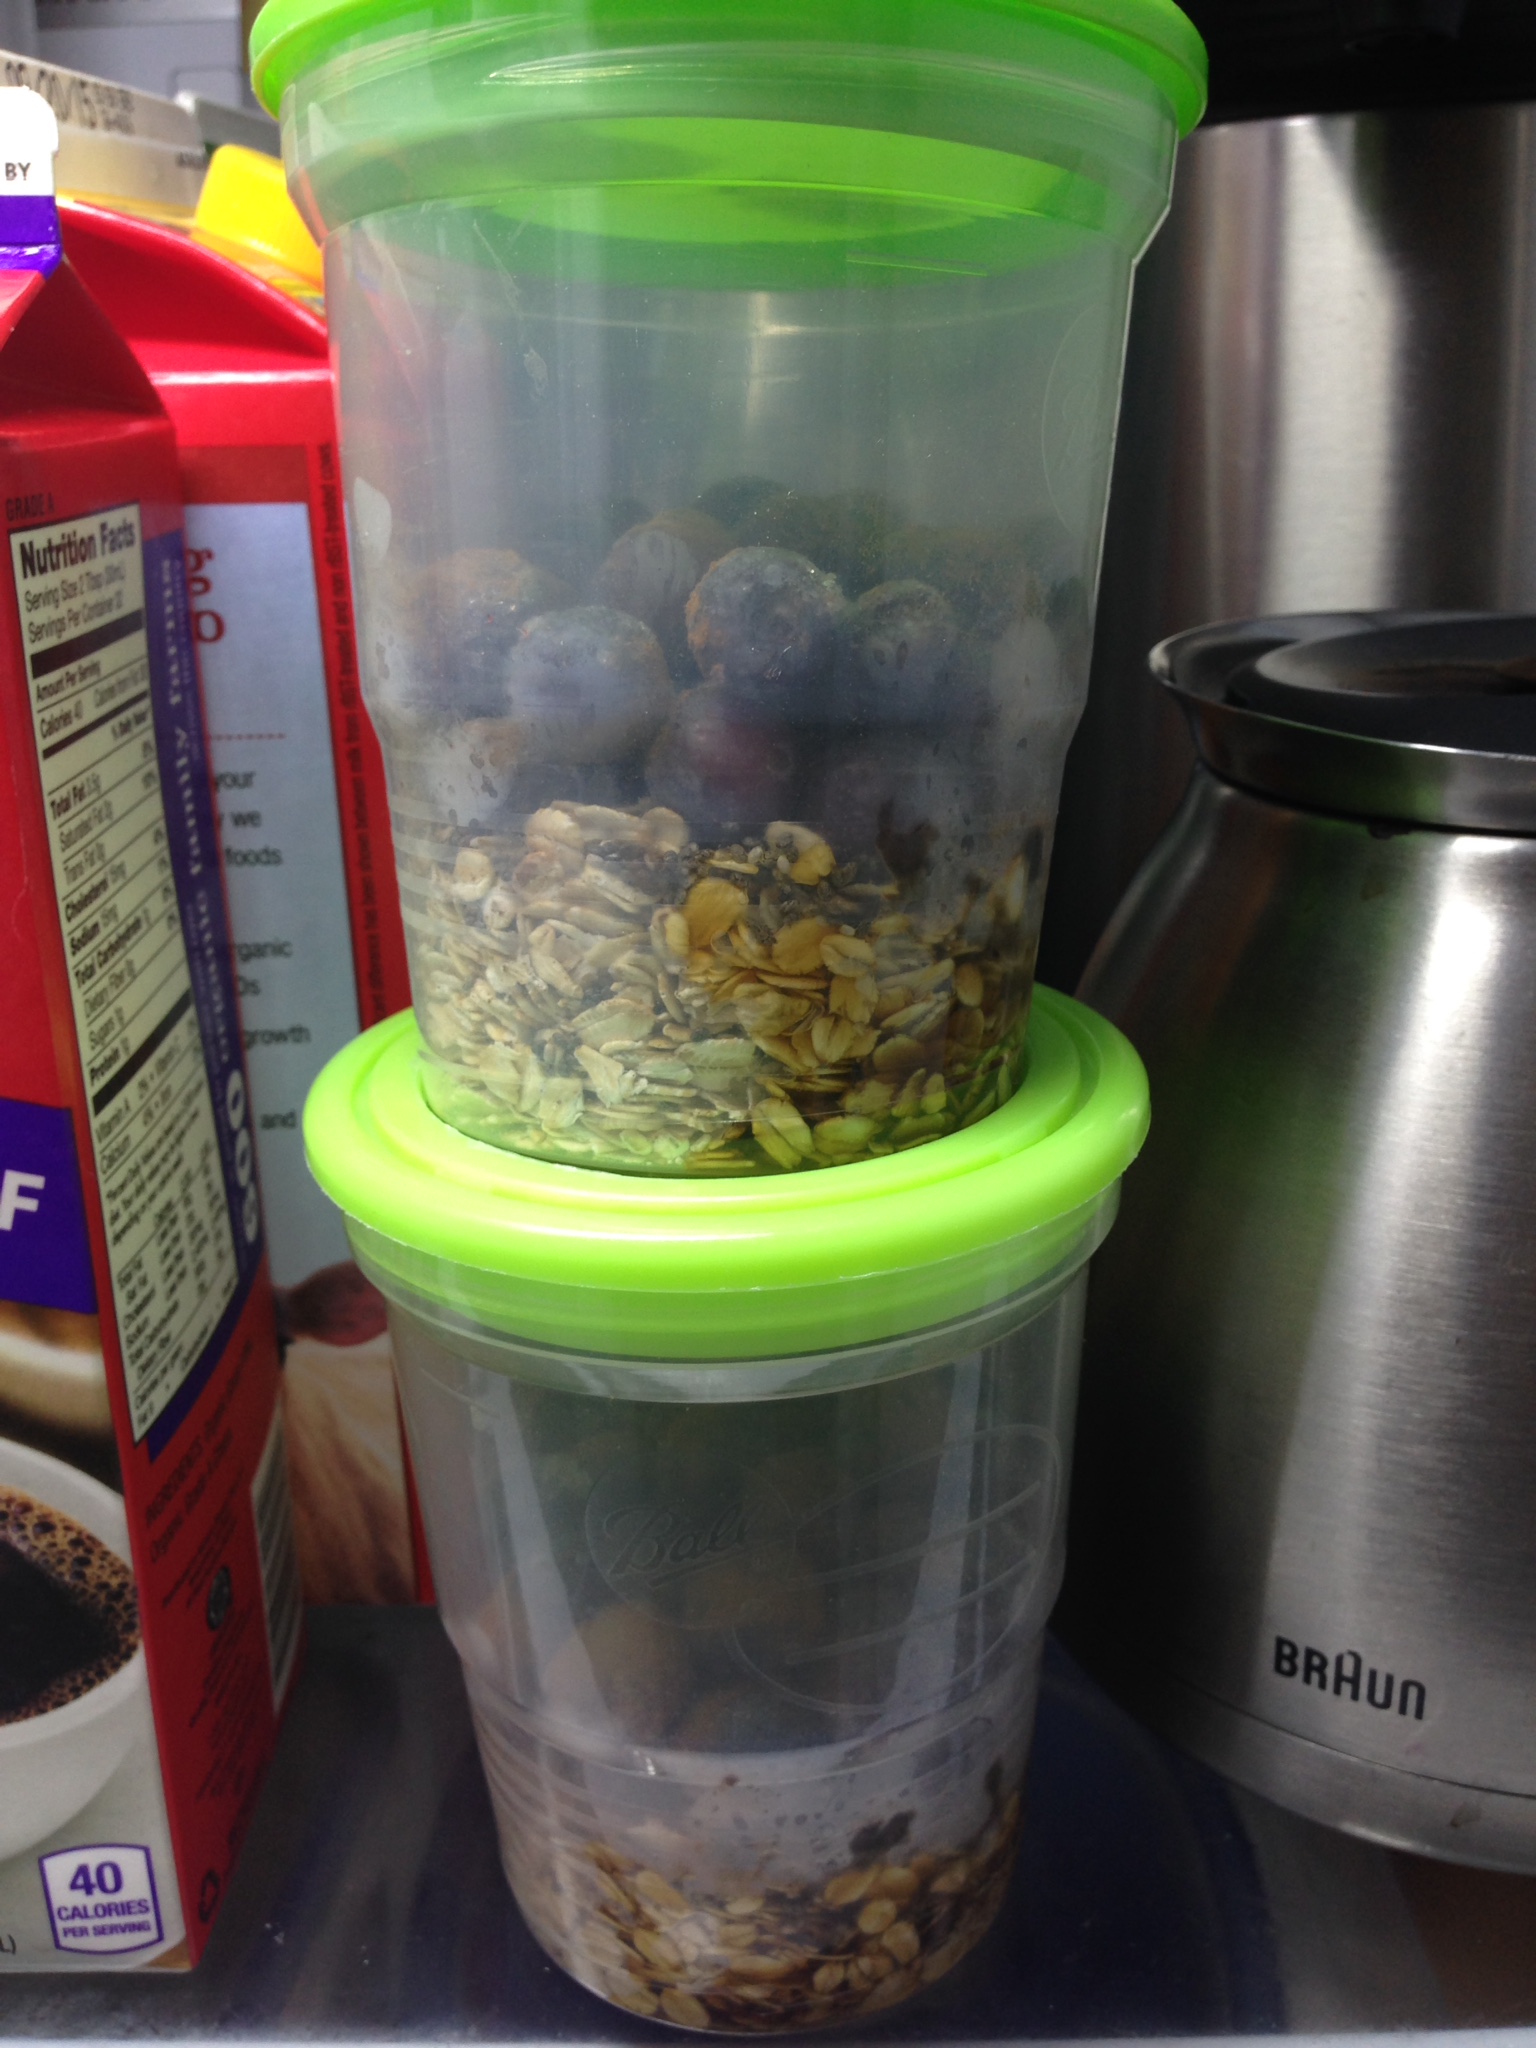
The popularity of overnight oats seems to come and go. Now I’m finding more and more articles about it again. I suppose cooler weather makes us think of oatmeal, but to be honest, I’m not a fan of hot cereals. I wake up at 4AM for work every day, so to have something tasty and healthy already waiting for me, next to my carafe of iced coffee in my fridge, is awesome. This is my favorite way to get my oat fiber, and it’s absolutely delicious and simple to make.

Doing some research, I noticed that many overnight oats recipes contained almond milk, which some people think is a healthy alternative to regular milk. The reality of it is: it’s not…unless you make it yourself. (See how at the bottom of this blog.) Store-bought almond milk has little or no nutritional value–or almonds, for that matter. The same goes for soy milk: non-organic soy is often grown with Monsanto’s Roundup-ready products. And oat milk isn’t any better.

I happened to grow up as a kid that loved, and still loves, dairy, so I go for organic grass-fed milk. (The amount of fat in the milk is up to you. I use whole milk and add some water to it.) The chia seeds in the recipe add anti-oxidants and omega-3’s, but they’re optional if you don’t like their slippery texture. Cinnamon has some health benefits, too, but it’s mainly here for flavor. And I use frozen organic blueberries in this recipe, but any frozen or fresh organic berries (or sliced organic apples!) will work.


IMG_7103


1/2 cup rolled organic oats
1/2 cup organic blueberries, apples or other fruit
3/4 cup organic grass-fed milk (I use 1/2 cup whole milk and 1/4 cup water)
1 teaspoon chia seeds
2 teaspoons maple syrup (because…yum)
1/4 teaspoon cinnamon

Combine the ingredients in a container that seals tightly. Give it a good shake and refrigerate it overnight. Eat it the next morning.


How to make your own almond milk…

Start with raw, organic almonds. Take 1 cup of the almonds and place them in a Mason jar (no lid). Cover the almonds with water and let them soak overnight.

The next day, pour the water off, and place the almonds in a food processor. Add 2 cups fresh water and process the almonds on high for 2 minutes.

Strain the liquid through some cheese cloth, squeezing out as much liquid as you can, and you’ve got real almond milk! (Throw the solids into your compost pile.) Sweeten it, if you like.

It doesn’t keep for a long time, so make small batches, and keep them sealed in the fridge.