Archive for the ‘Recipes’ Category

I grill year-round. I’ll stand in 3 feet of snow to get smoked ribs just right, if I have to. Through years of tireless experimentation, I’ve come up with a barbecue sauce that I can be proud of. I prefer a slightly sweet and tangy barbecue sauce,  and it works really well with pork or chicken.

What makes this sauce special is the citrus. I originally used lemon juice for this recipe and it was good. Lime juice was better. Adding lime zest: even better than that. I tried orange juice and zest, even Meyer lemon. But the Big Daddy of ’em all was grapefruit. I was craving my barbecue sauce one day and only had a grapefruit in the fridge. I thought: how bad could this be? Turned out to be the perfect foil to the sweetness of the brown sugar and ketchup.

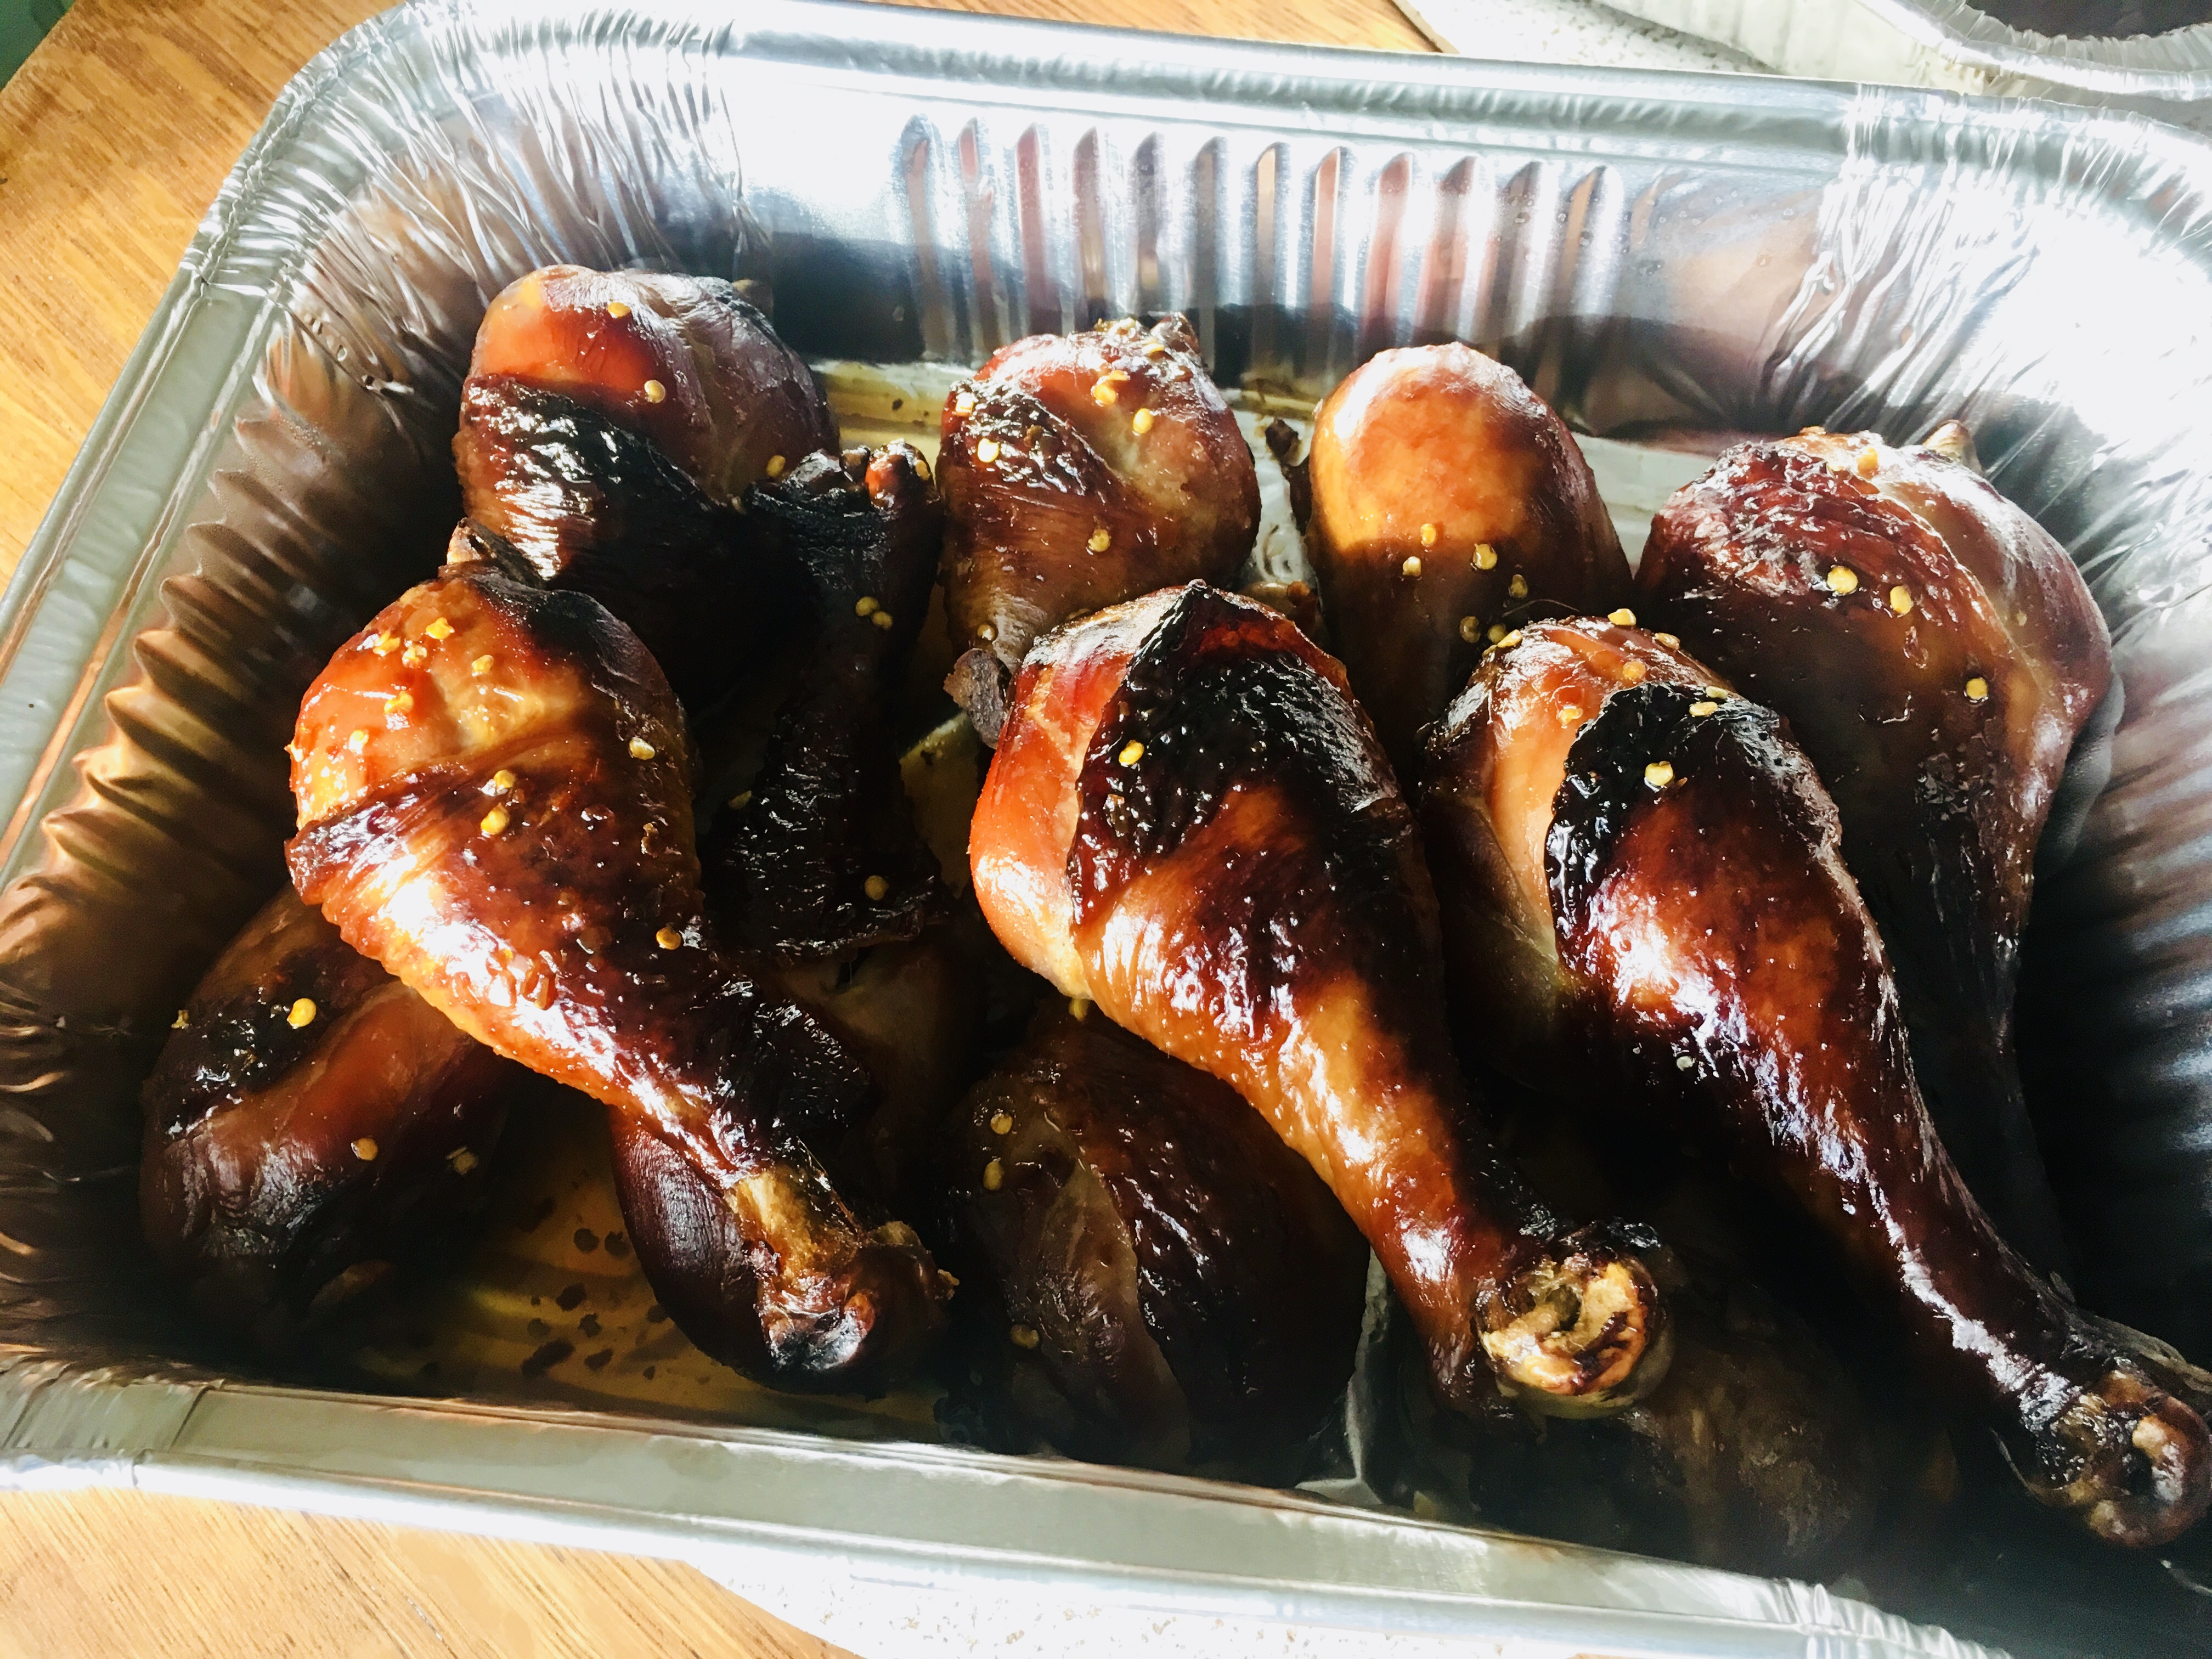
Try this sauce on your next batch of chicken wings or even a whole bird. Cook the bird almost all the way through, brushing the sauce on for the last 20 minutes so that the sugars don’t burn. Then just try to stop eating it!

Chix BBQ


GRAPEFRUIT BARBECUE SAUCE
1 cup ketchup
1/2 cup firmly packed brown sugar
Juice and zest of 1 grapefruit
3 tablespoons unsalted butter
1/4 cup dried onion flakes
1 teaspoon cayenne pepper sauce, like Frank’s Red Hot
1 teaspoon Worcestershire sauce
1 teaspoon granulated garlic
1/4 teaspoon black pepper
(no salt)

Combine all ingredients in a sauce pan. Bring to a boil and then simmer for about 20 minutes on low, until slightly thickened.


saucey

If you like a less sweet, more vinegary style to your barbecue sauce, this is the one. How could a sauce that’s inspired by what most people claim to be the best barbecue joint in the USA, Franklin’s Barbecue in Austin, Texas, be bad? People line up early in the morning and wait as much as four hours for a slab of brisket from this place. I’ll get there one day. In the meantime, I have the sauce…


2 cups ketchup
3/4 cup water
6 tablespoons cider vinegar
6 tablespoons white vinegar
6 tablespoons brown sugar
3 tablespoons Worcestershire sauce
1 tablespoon chili powder
2 teaspoons salt
2 teaspoons black pepper
1 1/2 teaspoons cumin


Mix all the ingredients in a saucepan and simmer until the flavors have blended, about 20 minutes. Remove from heat and cool to room temp. If you store it in an airtight container in the fridge, it’ll stay good for a few months.


Recently, I received a couple of pounds of ground venison from my buddy, Bruce, an avid hunter here in my town. I started thinking about what I could make with it…


I didn’t want to go with a venison burger right out of the gate. After all, venison is very lean, containing half the fat of beef, but with more protein. In fact, venison even challenges chicken in the protein department. But being really lean, it would dry out as a burger. And it can be gamey tasting, so I wanted to mix it with a few other ingredients. I decided to go with the safer option of making a taco with it.

Well, somewhere in the process of taco making, I thought of pork and beans and said: “Yeah, what if I made something like venison pork and beans? How bad could that be?”

Well, venison and beans can almost be called chili (depending on what rules you have about beans in chili), and I thought: “But I don’t really like chili.” But then I thought: “It’s not chili if I don’t call it chili.” Problem solved!


I used small red beans, but you can use what you like.


What I finally came up with is a venison pork-and-bean chili taco…or something like that.

Whatever…it tastes pretty good!

And obviously, if you don’t have venison, or just don’t want to use it, you can use lean (like 93%) beef for this recipe.


1 tablespoon avocado oil
1 small onion, finely chopped
4 strips (about 40g) pre-cooked bacon, finely chopped
1 lb. ground venison
Taco seasoning (see the recipe below)
20 grape tomatoes (100g), chopped
1/2 cup ketchup
2 tablespoons spicy brown mustard (I like Gulden’s)
2 tablespoons Worcestershire sauce (Only Lea & Perrins will do)
4 tablespoons brown sugar
2 cans (15.5 oz. each) of small red beans, not drained


Pre-heat your oven to 350 degrees.

Spray a baking pan with oil spray (I use avocado) and set aside.

In a large pan, heat the avocado oil and add the chopped onion. Sauté the onion until it’s translucent.

Add the chopped bacon, and sauté until some of the fat starts rendering out of it.

Add the pound of venison, and cook until the meat has browned nicely, adding the taco seasoning to the meat as it cooks, little by little, until you’ve used all the taco seasoning up.

Add the chopped grape tomatoes, and stirring after each addition, add the ketchup, mustard, Worcestershire, and brown sugar.

Pour in the two cans of beans, liquid and all, and stir gently, letting it all come to a boil.


Pour the contents of the sauté pan into the baking pan, cover it with foil, and place it in the 350-degree oven to cook for 40 minutes.

After 40 minutes, remove the foil off the pan and cook another 10 minutes.


The Taco Seasoning…
2 teaspoons cumin
1 teaspoon salt
1 teaspoon black pepper
1 teaspoon oregano
1 teaspoon granulated garlic
1 teaspoon granulated onion
1 teaspoon paprika

Combine all the ingredients in a bowl, and set it aside.


Once the venison pork-and-bean chili taco meat has finished cooking, I like to use it in a flour tortilla, with shredded lettuce and a little shredded cheese on top.


Shredded lettuce, grated cheddar cheese, some raw Vidalia onion, and a touch of 1000 Island dressing!


When it comes to grilling, lamb is often overlooked. Some folks think it tastes too gamey, which can be true with grass-fed lamb that comes from New Zealand or Australia. Although you can’t beat their strict quality standards, the flavor can be intense.

I don’t mind that intense lamb flavor in a chop, but when I make lamburgers, I like to mix ground beef with ground
lamb to give it a milder flavor. And when I cook them over hardwood charcoal, the flavor is outstanding! Even seared in a cast iron skillet and finished in the oven, these burgers are awesome.

1 lb. ground lamb
1 lb. ground beef
2 tablespoons
1/2 onion, minced
1 tablespoon Dijon mustard
1 teaspoon each fresh parsley, mint, and dill, finely chopped
1 teaspoon dried Greek oregano
1/2 teaspoon cumin
1 large clove garlic, squeezed through a garlic press
1 scallion, finely chopped, green part only
1/2 cup breadcrumbs
1 egg
1 teaspoon salt
1/2 teaspoon black pepper

Fresh herbs make the difference!

Heat the olive oil in a skillet over medium heat. Add the onion. Cook it until it’s translucent, about 6 minutes. Transfer the onion to a plate to cool.

In a bowl, mix the cooled onion, mustard, parsley, mint, dill, oregano, cumin, garlic, scallion, and salt and pepper.

In another bowl, combine the lamb with the beef, so they are mixed well. Then add the onion mix bowl to the meat and make sure all the ingredients are combined. Add the breadcrumbs and mix again. Then add the egg and mix one more time.

Form the meat into patties. Place them on a baking sheet covered with non-stick foil, and place the baking sheet in the fridge.

The indentation in the center of the patty keeps it from swelling up while cooking.

Don’t let the lamburgers get too cold in the fridge…just enough to firm the meat up a bit. If it gets too cold, give it a few minutes at room temp to warm up again.  Grill the burgers over hardwood charcoal until they are cooked to medium.

If you’re cooking indoors, heat some avocado oil in an oven-proof pan, preferably cast iron. Sear the burgers well on both sides, then place the pan in a 350-degree oven to finish cooking.

Extra meat is great for meatballs! Just freeze them for another time.

Place the burgers on buns, and smear the bun with the feta cheese dressing.

If the food is good, someone’s always watching!

My recipe for feta cheese dressing works really well with lamburgers. But it’s also great on a salad.

3/4 cup plain Greek yogurt
1  cup mayo
1 teaspoon Worcestershire sauce
1/2 teaspoon cayenne pepper sauce, like Franks Red Hot
1 teaspoon Dijon mustard
1/2 teaspoon granulated garlic
1/2 teaspoon salt
1/2 teaspoon ground black pepper
4–5 oz. crumbled feta cheese

Combine all the ingredients in a bowl. Mix well. Cover and refrigerate. If you can wait a day, it’s even better.

FullSizeRender (14)

Some people don’t like cooking with veal because of the way the animals are treated, and I completely understand because I’m one of those. But…I’m fortunate that I can buy my veal from a nearby dairy farm, Sweet & Salty Farm in Little Compton, RI, where the animals are grass-fed and raised humanely. That makes for happier animals and incredibly flavorful meat…and no guilt about using it.

If you can’t get humanely raised veal, pork and beef work, too.

I also buy veal bones from Sweet & Salty Farm, roasting them on a sheet pan in a 400-degree oven for 30 minutes, then placing them in a large pot of water. I take some chopped carrots, onions, and celery, toss them in a little olive oil, and place them on a sheet pan, roasting them in the oven until they’ve caramelized, then add them to the pot with the veal bones. The secret to a great veal bone broth is to boil the bones and veggies for as long a time as possible. Restaurants will do this for days, replacing the water in the pot as needed. At home, I’ll start the broth in the morning and finish it by evening, straining out the veggies and bones at the very end of the cooking time.

The subtle flavor of veal can get lost with heavy seasonings, so I keep it simple. The addition of veal bone broth amplifies the flavor and keeps the meatballs from drying out.

img_0245

1 lb. ground veal
1 cup toasted breadcrumbs (I use Udi’s bread to make it gluten-free)
2 teaspoons parsley
1 teaspoon oregano
1/2 teaspoon basil
1 teaspoon salt
1/2 teaspoon black pepper
1/2 teaspoon granulated garlic
1/2 teaspoon granulated onion
1 egg
extra virgin olive oil
1 lb. pasta, cooked firmer than al dente
2 cups veal bone broth or beef stock
salt and pepper for seasoning
2 tablespoons half-and-half
2 tablespoons butter
1 cup of frozen organic peas

Pre-heat the oven to 350 degrees.

Make the meatballs: In a bowl, combine the veal, breadcrumbs, parsley, oregano, basil, salt, pepper, garlic, onion and egg, mixing the ingredients thoroughly. Don’t over-mix.

Form the meatballs one by one, about golf ball size, and place them in an ovenproof pan. I line the pan with non-stick aluminum foil for easy clean up. Cook the meatballs for about 10 minutes. Don’t overcook them! (Even if you’re using pork, 10 minutes is OK because you will be cooking them longer. )

In a saucepan, heat the veal bone broth or beef broth. Once the meatballs have cooked in the oven, transfer them to the pot of broth and cover it with a lid, keeping the heat on low. If the broth doesn’t cover the meatballs, turn them every once in a while to keep them moist on all sides. Simmer the meatballs in the broth for about 30 minutes, then transfer them to a large sauté pan.

Turn the saucepan with the veal broth on high and reduce it to about 1/2 cup. Season it with salt and pepper.

In a large pot, cook the pasta to a bit firmer than al dente in well-salted water. Drain it and set it aside.

In the large sauté pan with the meatballs, add the butter and the half-and-half. Add the reduced veal broth, the pasta, and the peas.

Gently mix the ingredients in the pan until the peas have warmed through and the sauce clings to the pasta. Serve immediately.

I love onion dip, and really good onion dip is hard to find…you’ve got to make it. It’s not difficult to do, and it’s worth the effort. Great with chips or veggies, it’s perfect for TV binge munching.


2 tablespoons olive oil
1 1/2 cups diced sweet onions
1/4 teaspoon salt
1 1/2 cups sour cream
3/4 cup mayonnaise
1/4 teaspoon granulated garlic
1/4 teaspoon white pepper
1/2 teaspoon salt
chopped chives, to garnish

In a pan over medium heat, sauté the onions in the olive oil and salt until they are soft and barely caramelized, about 15 minutes. Remove them from the heat and set them aside to cool to room temperature.

In a bowl, combine the rest of the ingredients except the chives, then add the cooled onions and mix well.

Refrigerate the dip and stir again before serving. Sprinkle the chopped chives on top to garnish.

Though it may sound Japanese, the word “saganaki” refers to a small frying pan used in Greek cooking. The most famous of these dishes, simply called saganaki, is a fried cheese, often flamed at the end with a little ouzo.

Shrimp saganaki is one of my favorite Greek dishes, and it usually involves cooking shrimp in a tomato-based sauce with plenty of feta cheese sprinkled in. It’s simple yet fantastic if the ingredients are fresh. Doesn’t hurt to be sitting in a taverna on the beautiful island of Santorini while eating it, either!


You can find Graviera cheese in most supermarkets.


I found a slab of Graviera cheese at a local supermarket, and decided to recreate shrimp saganaki using that instead of feta. It was pretty darn amazing.

I like using peeled and deveined 24–30 shrimp, because larger shrimp don’t always cook through. These smaller shrimp will be bite-sized and delicious.


Melty, gooey, delicious!

Melty, gooey, delicious!


200g package (7 oz.) grated Graviera cheese
1 can (28 oz.) whole tomatoes
1 lb. (about 24) shrimp, thawed, peeled and deveined
1 medium onion, chopped
juice of 1/2 lemon
1/4 cup olive oil
2 cloves garlic, through a press
pinch red pepper flakes
1 1/2 tablespoons fresh dill, finely chopped
1 tablespoon fresh oregano, finely chopped
1 1/2 tablespoons Ouzo
salt and pepper


Peel and devein the shrimp (or you can buy them that way already.) Place them in a bowl. Squeeze the juice of  1/2 of a lemon on to the shrimp and toss. Set them aside.

In a large pan, sauté the onions in the olive oil until translucent. Add the garlic and cook for a few seconds more.

Crush or puree the tomatoes and add them to the pan. Add the red pepper flakes, dill and oregano, and salt and pepper. Add the Ouzo.

Let this sauce cook down for a bit until all the flavors have blended together.

Pour a layer of the sauce on the bottom of a metal broiler-proof pan. Lay the raw shrimp in a single layer into the sauce. Cover the shrimp with the rest of the sauce and sprinkle the grated Graviera on top.

Place the pan in a pre-heated 350-degree oven and bake until the cheese is golden brown and bubbly and the shrimp have cooked through. I like to finish it under the broiler for a few minutes to get the cheese brown and melty.


shrimp saganaki


A few years ago, we were invited to a very cool retro summer party: cocktails and appetizers from the 60’s, and everyone contributed to the music by bringing in their favorite songs on vinyl.

We were also asked to contribute to the apps, so I brought waffle chips with clam dip.


image

2 8-oz. packages cream cheese, softened
3 6-oz. cans of chopped clams, drained, liquid reserved from one can
1 tablespoon fresh lemon juice
2 teaspoons Worcestershire sauce
1/2 teaspoon salt
1/4 teaspoon black pepper

Combine all the ingredients, except the clam liquid, in a bowl and mix them well with a fork.

Add 1 tablespoon of the clam liquid and mix well. Keep adding the clam liquid until the dip reaches a consistency you like.

Serve with the potato chips.


image

I love chicken because it reheats really well for leftovers. When I make this recipe, I make a good amount to last me through the week. These sweet, spicy and sticky Thai-inspired chicken wings and drumsticks are just delicious!


6 lbs. chicken pieces
1 1/3 cups soy sauce
1 cup fresh cilantro
4 tablespoons canola or peanut oil
5 garlic cloves, roughly chopped
1 teaspoon white pepper
1 cup sugar
1/2 cup white vinegar
2 teaspoons red pepper flakes or crushed dried chiles
2 teaspoons salt

For the marinade, combine the soy sauce, cilantro, canola oil, garlic and white pepper in a food processor and let it run. Place the chicken pieces in a Ziploc bag and pour half of the marinade in. Save the other half for basting later. Seal the bag and let the chicken marinate in the fridge overnight, or at least a few hours at room temperature, squishing the bag around so that all the chicken gets marinated.

For the sauce: In a saucepan, combine the sugar, white vinegar, pepper flakes and salt. Bring it to a boil and make sure the sugar dissolves. Remove it from the heat and let it cool to room temperature.

After marinating, discard the used marinade in the Ziploc bag. Place the chicken pieces over a hot hardwood fire or bake them in an oven at 350, basting them with the leftover marinade until fully cooked. If the coal fire gets too hot, move the chicken to a cooler part of the grill to prevent burning. If using the oven, switch to the broiler at the end to give the chicken a nice char.

Serve the chicken pieces with the sweet pepper sauce drizzled on top.

thai chicken LTL

This is a story about my Mom’s dad, my grandfather. Born in Lithuania, he came here during WWII. He was a short man, barely 5’5″ tall, but he was the strongest man I ever knew. As a kid, I watched him crush walnuts, and even hazelnuts, in his bare hands. He would go out into the water at Rockaway Beach, and the waves would hit him head-on, but never knock him down. He had little or no formal education, but he could fix or build anything, from concrete driveways to dog houses. And no matter what chore he took on, he wore a white shirt and tie with a vest while he did it. He never became a US citizen because he had a hard time with the English language, but he maintained his legal alien status, and spoke enough English to work in the kitchens of several high-end restaurants in Queens, NY.

My maternal grandfather, Vaclovas Lukosevicius. A helluva name and a helluva guy. Now I know where I got my receding hairline!

I smoked my first cigarette with him when I was 12, and we had a good talk about it after my face returned to a lighter shade of blue-green. We would walk to his favorite bar on Jamaica Avenue in Richmond Hill, the Triangle Hofbrau (it’s still there) and they let me sit at the bar, snacking on pretzels with a 7-Up while he enjoyed a beer. My Mom was an only child, so I was the only grandson, and nobody made me feel more special than he did.

One of my grandfather’s passions was horseradish…homegrown, homemade horseradish.

It’s been 50 years since I watched my grandfather dig the long, dirty, gnarled horseradish roots out of his garden with a sharp spade, lunging at the ground with all of his strength to cut through the thick fibers of the plant.

After harvesting a large piece, he would wash the dirt from it and then peel it, leaving behind a beautifully smooth white root.

He had a large bowl set under a grater, and he would hand grate the horseradish root with incredible speed. But no matter how fast he went, the potent vapors released by the root would make their way to his eyes, and he was forced to stop several times to wipe the tears away with his old handkerchief and regain his composure before returning to grate the root again.

Onions were child’s play compared to horseradish, and I understood why he did all the preparation just outside of the kitchen door of his Queens, NY home.

Once grated, he would add some water, vinegar, and salt, and his prepared horseradish was complete. He’d store it in tightly sealed glass jars in the fridge, and when it was time to sample the goods, he would carefully open a jar, poke his knife in, and spread the prepared horseradish over beef, beets, twice-smoked bacon, or anything else he desired.
I’d watch his face slowly turn red, small beads of perspiration developing on his forehead, and he’d turn and smile at me and tell me in Lithuanian: “Labai skanu!” (Very tasty!)

At the age of 10, I couldn’t figure out what he saw in horseradish, but it didn’t take long before I was hooked myself, as it was a staple at every family dinner table.

Opting for the stuff that came in a jar in the supermarket, I never made my own prepared horseradish until almost 50 years later.

I’ve had a huge horseradish plant growing in my garden for years, and I just never got around to doing anything with it. But one night, as I was preparing my cocktail sauce recipe and I realized that I was out of prepared horseradish, it became clear that the time of reckoning had arrived. It was time, in the finest tradition of my grandfather, to make my own prepared horseradish.

Freshly harvested horseradish roots

I went out to the yard with a sharp shovel and lunged at the horseradish plant, splitting a few roots off of the main crown. I pulled them out of the ground, detached the long leaves, and headed back to the kitchen.
Today’s kitchen technology gave me a distinct advantage over my grandfather, and after washing and peeling the root, I chopped it into smaller pieces and tossed them into a food processor. No hand grating necessary!
The processor pulverized the root in no time, and I added water, vinegar and salt as my grandfather did, being very careful not to stick my face too close to the opening of the processor where the vapors were their most powerful.
A small taste on my tongue just about had my eyeballs shoot out of my head, and I muttered silently to myself: “Labai skanu!”

My grandfather would be proud.

Horseradish is a member of the Brassicaceae family, which includes mustard, cabbage, wasabi, and broccoli. The horseradish root itself hardly has any aroma. But when you crush it, enzymes from the broken plant cells produce mustard oil, which irritates the mucous membranes of the sinuses and eyes. To keep the horseradish from losing its pungency and freshness, vinegar must be added immediately.

Prepared Horseradish

6 oz. fresh horseradish root, peeled
6 tablespoons water
3 tablespoons white vinegar
3 pinches of salt

Chop the horseradish root into small pieces and add water, vinegar and salt. Process until proper consistency is reached.
Careful! Use proper ventilation or the vapors will blow your eyeballs and sinuses out!

It’s that time of year when friends are coming over, and you want to make one drink you can serve everyone, rather than playing bartender all night. This one hits the spot.

There’s only one thing better than a freshly made mojito…and that’s a pitcher of freshly made mojitos! Organic raspberries and blueberries are in the markets right now, and my mint plants are taking over the yard! All the ingredients for a great mojito!

Very often, I’ll use raspberries alone, but mojitos are even better when you combine the raspberries with blueberries. I stock up on organic berries, rinsing them and placing them in plastic bags that go in the freezer until I’m ready to make my mojitos. I always go organic with berries. Pesticides should never be a cocktail ingredient!  Pay a little extra and get the good stuff…it makes a difference!

Once you make mojitos by the pitcher, you’ll never have them any other way. (Even if you’re drinking alone!)


The ingredients


Make ahead of time…
1 1/2 cups fresh squeezed lime juice
1 1/3 cups turbinado sugar (Sugar in the Raw is a common brand)

Mix both ingredients together, letting it stand at room temperature for a few minutes. I like to combine them in a Mason jar, then shake really hard until the sugar has dissolved. I keep it in the fridge, and it’s good for up to 3 weeks…ready to use any time. Shake it well again before using.


mojito pitcher

For the Mojitos…
1 cup sugar/lime mixture
1 cup mint leaves, packed
1/2 pint blueberries (fresh or frozen)
1/2 pint raspberries (fresh or frozen)
3 or 4 cups white rum (I use Don Q Cristal rum)
3 or 4 cups club soda or seltzer

Combine the mint leaves and 1/2 cup of the sugar/lime mixture in bottom of a pitcher. Muddle the mint up very well to release mint oils. Add the blueberries and continue to muddle.

Add the remaining sugar/lime mixture, rum and raspberries. Mix well. Just before serving, add the club soda and ice. Stir. Pour into tall glasses.

Or…for drinks one at a time, I put in a shot of the sugar/lime mixture into a tall glass. I throw in about 8 mint leaves and muddle them for a minute. Then I add 2 shots of rum, and a few raspberries and blueberries. I muddle again.  I add ice, and I top it with the club soda, stirring well. An option is to pour it all into another tall glass. Garnish with a mint leaf.


Cheers!

Cheers!