Archive for the ‘Recipes’ Category

Even the "breaded" pork chop makes this meal gluten-free. See below...

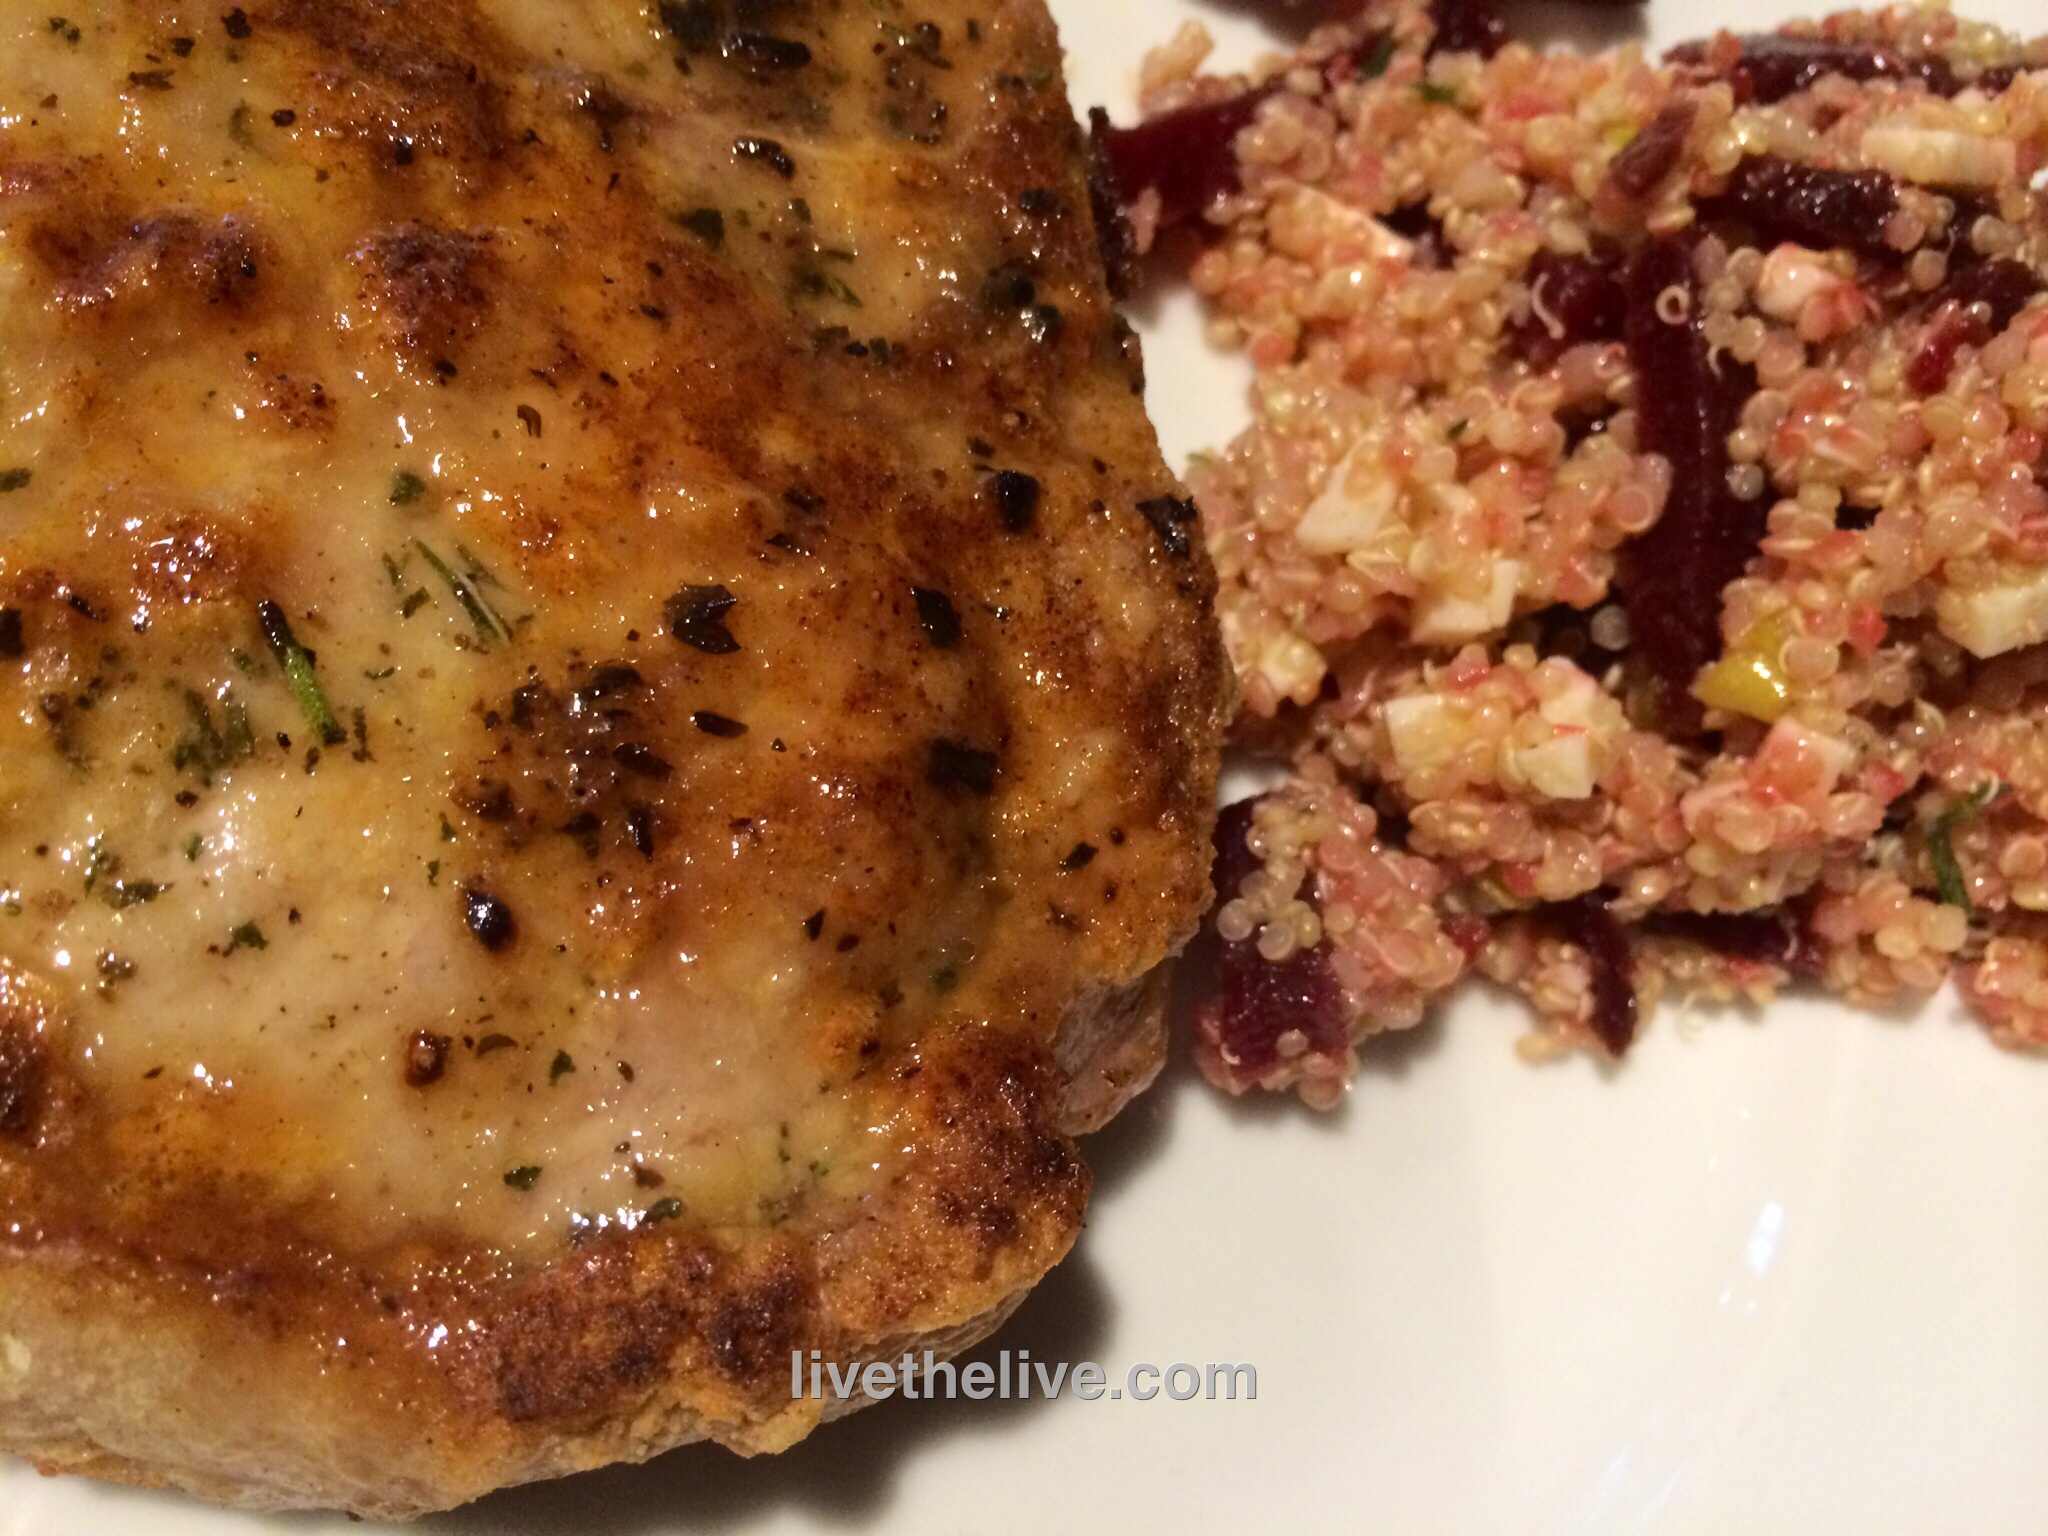
Even the “breaded” pork chop makes this meal gluten-free. See below…

Beet season is in full swing right now. They’re healthy and delicious…and they also store really well, so you can enjoy them all winter long. Combining them with quinoa, cheese and arugula makes a great salad that goes well with this pastured heritage pork chop.

To keep the meal gluten-free, I used all-purpose gluten-free flour to dust the chop after I dipped it in egg. Then I seasoned it with garlic salt, pepper, and some freshly minced sage and rosemary. I seared it in a hot pan with organic canola oil, then finished cooking it in a 350-degree oven.


Ingredients for the beet salad:

1/2 lb beets, cooked and sliced
2 cups cooked quinoa
1/2 cup extra virgin olive oil
1/2 cup red wine vinegar
1 teaspoon sugar
1/2 clove garlic, through a press
1/2 teaspoon salt
1/4 teaspoon ground black pepper
1 scallion, finely minced
2 cups baby arugula
5 ounces feta cheese, crumbled

Prepare quinoa according to package instructions. I like to substitute half of the water with homemade chicken stock.

While the quinoa is cooking, combine olive oil, vinegar, sugar, garlic, salt and pepper in a separate bowl.

Once the quinoa has cooked, place it in a bowl and add half of the dressing, mixing gently with a fork to fluff up the quinoa. Place in the fridge to cool completely.

I like to use the product LoveMyBeets, where they come fully cooked and peeled, ready to slice. Slice the beets and place them in the bowl of quinoa. Add the scallions, arugula and cheese. Mix well.

When the mixture has cooled down, taste and add more of the dressing if needed.

You don’t have to stand by your smoker and cook for hours to have amazing ribs. As the glaze cooks down, it gets sticky, gooey and delicious…but use a non-stick pot if you can or you’ll be scrubbing when you should be eating!
 image
 Ingredients:
Marinade: ¾ cup light soy sauce
                     6 Tablespoons hoisin sauce
5 lbs pork ribs
Zest and juice of 1 lemon
2 whole star anise
2 cinnamon sticks (3”)
1/2 cup honey
4 cups chicken broth
Mix marinade ingredients. Set aside.
If the ribs are large, cut them into pieces. If smaller, cluster 2 or 3 ribs together. Place in a large pot. Cover with water and bring to a boil. Boil for 5 minutes. Drain.
Place ribs on a sheet pan with a rack and coat with marinade. Let sit for 10 minutes.
Pre-heat oven to 350 degrees. Bake ribs in sheet pan with rack for 30 minutes.
While the ribs are baking, start sauce in a large non-stick pan or pot: combine lemon zest and juice, star anise, cinnamon sticks, honey and chicken broth. Bring to a boil, then reduce to a simmer.
When ribs have finished baking, add them to the sauce pot and simmer (covered) for at least 15 minutes or until rib meat is tender.
Turn heat on high, uncover pot and cook until the sauce is reduced to a glaze that coats the ribs. Reduce heat as sauce thickens to avoid sugars in honey from burning. When the ribs are sticky and gooey, they are ready!


I came up with this crunchy tasty appetizer a few years ago, when I needed a tasty bite for one of our famous summer parties. I wanted something fresh that highlighted the veggies of the season, so when I spotted these baby bell peppers in the supermarket, I came up with this tasty, crunchy appetizer.

image


Ingredients:


Baby bell peppers

6 ears fresh corn, removed from the cob…or organic frozen corn

1/2 Vidalia onion, peeled, quartered, grilled, chopped

1 cup mayonnaise

1 teaspoon hot pepper sauce (I use Frank’s Red Hot)

6 oz feta cheese, or  Queso Fresco, crumbled

Juice of 1 lime

Pinch of white pepper

1 tablespoon fresh parsley, finely chopped


image


Cut corn from ears, and saute very briefly in a little olive oil. Place in a bowl and let cool.

Peel and quarter the Vidalia onion, and throw it on a hot grill with a little olive oil to get some nice grill marks on it, leaving the onion still crispy, not soft. If indoors, throw the quartered onion in a hot pan with a little olive oil, and cook until you get some brown marks on it. Remove, let cool, then place in a food processor and pulse until the onion is chopped into small bits, just smaller than the corn kernels. Add onions to corn.

In a separate small bowl, combine mayonnaise and Frank’s Red Hot. Pour in crumbled cheese and mix well. Pour into corn and onion bowl and mix well.

Add lime juice, white pepper and parsley to the bowl and mix well again.

Cut the baby bell peppers in half lengthwise, and remove the seeds and membrane. Stuff the peppers with the corn mixture and garnish with cilantro or parsley.


If preparing ahead of time, refrigerate until ready to eat, but allow some time for them to warm up to room temp a bit.


Re-posting this on National Cheeseburger Day!

When it comes to grilling, lamb is often overlooked. Yet it’s a wonderful, flavorful meat that makes a great burger. The taste of lamb can be a bit strong, however, so I mix 1 lb of ground lamb with 1 lb of ground grass-fed beef.

Ingredients:

1 lb ground lamb
1 lb ground beef
2 Tablespoons + 2 teaspoons extra Virgin olive oil
4 Tablespoons minced Spanish onion
2.5 teaspoons whole grain Dijon mustard
1 teaspoon each fresh parsley, mint, and dill, finely chopped
1 teaspoon dried Greek oregano
.5 teaspoon cumin
1 large clove garlic, squeezed through a garlic press
1 scallion, finely chopped, green part only
1 teaspoon salt
.5 teaspoon black pepper

Heat 2 Tablespoons olive oil in a skillet over high heat. Add onions. Cook until browned, about 6 minutes. Transfer onions to a plate. Let cool.
In a bowl, mix onions, lamb, pork, mustard, herbs, spices, garlic, scallions, salt and pepper.
Form meat into slider-sized patties. Place on baking sheet covered with non-stick foil, and place in fridge.
Prepare a medium-hot charcoal fire.

lamburger

To keep the Greek flavors going, I came up with this feta cheese dressing that works great with the lamburgers.

Ingredients:
3/4 cup plain Greek yogurt
1  cup mayo
1 teaspoon Worcestershire sauce
1/2 teaspoon cayenne pepper sauce, like Franks Red Hot
1 teaspoon Dijon mustard
1/2 teaspoon granulated garlic
1/2 teaspoon salt
1/2 teaspoon ground black pepper
4–5 ounces crumbled feta cheese

Combine all ingredients in a bowl. Mix well. Cover and refrigerate. Best the next day.

Don’t let the lamburgers get too cold in the fridge…just enough to firm the meat up a bit. If it gets too cold, give it a few minutes at room temp to warm up again.  Grill burgers until cooked to medium. Place on slider buns with lettuce and tomato, and smear the bun with the feta cheese dressing.

Well, that’s what I call it. Sometimes the most interesting creations happen by accident, and this is one of them.

My plan was to make my Chinese Style Honey Ribs (http://wp.me/p1c1Nl-i7) for dinner. But I accidentally took a slab of pork belly out of the freezer instead. I only realized my mistake when I thawed it and started cooking it, so I decided to continue the process with the pork belly instead. The results were pretty damn tasty.

image


 Ingredients:
Marinade: ¾ cup light soy sauce
                     6 Tablespoons hoisin sauce
5 lbs pork belly
Zest and juice of 1 lemon
2 whole star anise
2 cinnamon sticks (3”)
1/2 cup honey
4 cups chicken broth
image
Mix marinade ingredients. Set aside.
Cut the pork belly into pieces that are about 3 inches square. Place in a large pot. Cover with water and bring to a boil. Boil for 5 minutes. Drain.
Place pork belly on a sheet pan with a rack and coat with marinade. Let sit for 10 minutes.
Pre-heat oven to 350 degrees. Bake pork belly pieces on foil-lined sheet pan for 30 minutes.
While the pork belly is baking, start sauce in a large non-stick pan or pot: combine lemon zest and juice, star anise, cinnamon sticks, honey and chicken broth. Bring to a boil, then reduce to a simmer.
When the pork belly pieces have finished baking, add them to the sauce pot and simmer (covered) for at least 15 minutes or until meat is tender.
Turn heat on high, uncover pot and cook until the sauce is reduced to a glaze that coats the ribs. Reduce heat as sauce thickens to avoid sugars in honey from burning. When the pieces are sticky and gooey, they are ready!
Let a piece of pork belly cool…then slice to desired thickness and fry like regular bacon. Makes an amazing omelet!
image

The key to great tuna tartare is super fresh tuna. I was lucky: I got a phone call from friends who had an overload of just-caught tuna delivered to their door! I gladly accepted whatever they wanted to give me, and made this dish…

image


Ingredients:


1 lb. super-fresh tuna

1/4 cup olive oil

zest of 1 lime

1/4 cup fresh lime juice

1/2 teaspoon wasabi powder

1 1/2 teaspoons soy sauce

1/2 teaspoon hot pepper sauce (I use Frank’s)

1/2 teaspoon sea salt

1/2 teaspoon black pepper

1/4 cup scallions, minced (white and green parts)

1 avocado, chopped into 1/4″ cubes

1 1/2 teaspoons toasted sesame seeds (optional)


Chop the tuna into 1/4″ cubes or smaller. Place in a large bowl and keep in the fridge.

In another bowl, combine olive oil, lime zest and juice, wasabi powder, soy sauce, hot pepper sauce, salt and pepper, scallions, and chopped avocado. Mix gently so you don’t mash the avocado.

Add this mixture to the bowl of tuna and combine gently. Let it sit in the fridge for at least an hour for the flavors to combine. Before serving, take the bowl out of the fridge and let it warm just slightly. Taste for seasoning. Top with optional sesame seeds.

Here in New England, the best brand of chicken salad you can buy is called Willow Tree. It’s been here for over 50 years, and people crave it like crack. But I don’t like anything whose ingredients are a well-kept secret, so my task was to make something that was a reasonable Willow Tree facsimile. I got close enough. As always, I use pastured chicken and organic veggies when possible.

image


Ingredients:


1.5 lbs boneless skinless chicken breasts

4 pints salt-free chicken stock, preferably home made

1/2 cup mayonnaise, preferably Hellman’s

1/4 cup finely chopped celery

2 tablespoons finely chopped Vidalia onion

1 teaspoon light brown sugar

1/8 teaspoon granulated garlic

1/2 teaspoon salt

1/8 teaspoon black pepper


Heat the chicken stock in a large pot. Bring to a boil and add the chicken breasts. Bring to a boil again, then simmer uncovered for about 7 minutes. Turn the heat off, cover the pot with a lid, and let the breasts sit in the pot for at least 30 minutes. After 30 minutes, remove the breasts to a cutting board and allow them to cool.

Meanwhile, in a large bowl, combine mayonnaise, celery, onion, brown sugar, granulated garlic, salt and pepper. Mix thoroughly to combine.

When the chicken has cooled, shred the breast meat into bite-sized pieces and then transfer into the bowl with the mayonnaise mixture. Mix thoroughly and chill before serving.

I love my chicken salad on a Martin’s Long Roll.


BONUS: There’s a lot of tasty chicken stock left over in the pot. I don’t waste it! I chop some carrots, celery and onion and throw it in there. I reserve some of the chicken breast meat–just a bit–and throw it in there, too. I add a little salt and pepper, and a pinch of dried Bouquet Garni. I bring it to a boil, then reduce the heat to a simmer and cook until the veggies are al dente.

Makes an awesome chicken soup!


By now, I’m sure you’ve seen those videos where the person takes corn still in the husk, pops it in the microwave, and then slips out a perfect ear of corn without any silk minutes later. If you haven’t, here’s one of them…

There are 2 problems with this method: 1) It takes forever to do a dozen ears…and 2) It ruins the damn corn!

corn1

Here in New England, people lose their minds over fresh corn. They rush to farm stands first thing in the morning, and knock each other over to grab the largest, freshest ears they can find. Much to the chagrin of farmers, they peel the stalk off the top of a dozen ears before they find the one they want to keep. It’s an embarrassing scene usually reserved for morons fighting over sale items at Wal*Mart.

So why, then, if you’re that passionate about fresh corn, do you stick it in a microwave and nuke the living hell out of it? Fresh corn needs a minimalist approach. It should be eaten practically raw…not bombarded with gamma rays and dehydrated in to shriveled kernels.

I love my corn right off the cob…and I still stick to the tried-and-true method of putting it in a pot of water and boiling it for a very short time. Do I get a few strands of silk? Sure. That’s part of the deal. Real corn has silk…just like real fish has bones. Get over it.

My wife and daughter like their corn off the cob. In that case, I shuck the corn, stand the ear up in a bowl while it’s still raw, and slice down with a knife to remove the kernels. I then lightly saute the corn in a pan with unsalted organic butter and a pinch of Fleur de Sel. Those pieces that have several rows of kernels, across and down, are the favorites.

corn2


One other way I’ve cooked corn is the “cooler corn” method, which is great when you have a large crowd to feed. Get your favorite cooler and make sure it’s clean inside. Shuck your corn and place the ears in the cooler. Boil a large pot of water on the stove and then pour the hot water over the corn. Close the cooler lid tightly and let it sit for about 30 minutes. You will have perfect corn every time.

Lastly, although it’s probably tough to find these days, go for organic non-GMO corn when possible. If your local farmer doesn’t grow it, give him a rash of crap!


One of my favorite ways to enjoy clams…and without the clam knife! When you’ve got to feed a crowd, this is a delicious way to do it. Cooking clams on the grill is one of the tastiest ways to enjoy these awesome mollusks. I used sugar maple hardwood charcoal to get that true smokey flavor.

Although I live on the other side of the state, I love visiting my friends at American Mussel Harvesters in North Kingstown, RI. The quality of their seafood is second to none, which is why they supply so many area restaurants with their products. They feature “restaurant ready” mussels, meaning they’ve been cleaned and de-bearded. And their “restaurant-ready” clams mean they’ve been purged to perfection! (www.americanmussel.com) I use ’em whenever I can.

clams on the grill

Ingredients:

A couple of dozen (or more) little neck clams, washed and purged

1 stick (8 oz) of unsalted butter

1/4 cup extra virgin olive oil

1/4 cup chopped parsley

1 teaspoon dried oregano

1/2 teaspoon dried basil

1 teaspoon minced garlic

1/2 teaspoon sea salt


Clams should be stored cold and dry in a fridge until ready to use…not in water, not on ice.

Because my clams have already been purged, I don’t have to do it at home. But here’s what to do if they haven’t been purged: Fill a large bowl with cold water, add sea salt and some corn meal to it, and mix it around. Add the clams to this bowl and let them purge in this liquid for at least an hour. They will suck up the corn meal and spit out sand and grit. After an hour, pour off the water/salt/meal/grit mix, and thoroughly wash the clams.

Start your hardwood charcoal grill and divide it in half: coals on one side, no coals on the other.

While the coals are heating up, grab a disposable aluminum foil tray and place it on a burner on your stove over medium heat. Add the butter, olive oil, parsley, oregano, basil, garlic and salt, and stir to combine. Once the butter has melted and everything has blended, bring the tray over to the charcoal grill and place on the side of the grill without coals. It will stay warm.

Once the coals are hot, just place the clams directly on the grill. (Use tongs, unless you want to remove all of your knuckle hair.) When they start to open, carefully flip them over, trying not to lose any of the precious juices inside the clam. Cook them for as long as you like, from raw, to more thoroughly cooked. As each one reaches its desired doneness, place it in the aluminum tray, making sure it gets swished around in the butter and herb mix.

When all the clams have been cooked and are in the tray, serve with a fresh baguette or even over pasta. A glass of great white wine is a must.

I love me my Mojitos, and they’re even better when I have fresh organic blueberries and raspberries to add to the mix. Frozen fruit works well, too. Make it by the pitcher and you’ll never make it any other way again!

The ingredients

The ingredients

Ingredients:

Make ahead of time…
1 1/2 cups fresh squeezed lime juice
1 1/3 cups turbinado sugar (Sugar in the Raw)

Mix both ingredients together and let stand at room temp. Shake until dissolved. The mixture can be covered and refrigerated for several weeks and ready to use any time. Shake well before using.

mojito pitcher

For the Mojitos…

1 cup sugar/lime mixture
1 cup mint leaves, packed
1/2 pint blueberries (fresh or frozen)
1/2 pint raspberries (fresh or frozen)
3 or 4 cups white rum, preferably Don Q Cristal rum
3 or 4 cups club soda

Combine mint leaves and 1/2 cup of sugar/lime mixture in bottom of a pitcher. Muddle mint up very well to release mint oils. Add blueberries and continue to muddle.

Add remaining sugar/lime mixture, rum and raspberries. Mix well. Just before serving, add club soda and ice. Stir. Pour into glasses.

Or…for drinks one at a time, fill a tall glass with ice. Fill one-third to halfway with club soda. Top with Mojito mix. Garnish with mint leaf.


Cheers!

Cheers!